Showing 1036 items
matching pottery
-
 Flagstaff Hill Maritime Museum and Village
Ceramic - Floor Tile, circa 1878
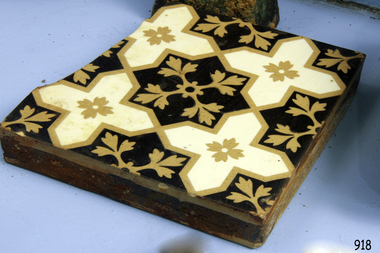
This Minton floor tile is from the wreck of the Loch Ard and is currently on display in the Great Circle Gallery at Flagstaff Hill. The iron hulled clipper ship from the Loch Line was heading for Port Phillip from London, when it ran into the cliffs of Mutton Bird Island near Port Campbell. The Loch Ard was laden with a high value cargo including luxury goods intended for display at the Melbourne International Exhibition in 1880. One notable survivor from the ship’s freight manifest was the well packed Minton porcelain peacock, a two meter high ceramic masterpiece of vivid glazed colours. (This is also on display in the Great Circle Gallery). The almost total loss of life and property from the Loch Ard registered as a shocking tragedy for the Colony of Victoria, at a time when social confidence and economic optimism were otherwise high. Wealth generated from Gold and Wool was increasingly being spent on grandiose private residences and imposing public buildings. The demand for quality furnishings and fittings was therefore strong. Among the products consigned to burgeoning colonial markets by the Milton pottery at Stoke upon Trent, were their new range of colourfully patterned but very durable floor tiles ideal for the high-traffic spaces in the large civic buildings then being constructed in Australia and America. These new floor tiles were “encaustic”, meaning that their designs and colours were encased “within” the depth of the tile. Rather than their decorative patterns being glazed onto the surface of the tile, their inlaid designs were created during the manufacturing process, as “coloured slips” (or liquid clay) were poured into a deep pre-molded casting. When fired, the resulting tile was colours-fast and design-fast. The Minton floor tile is significant for its hard-wearing yet attractive design. The shipwreck of the Loch Ard is of significance for Victoria and is registered on the Victorian Heritage Register ( S 417). Flagstaff Hill has a varied collection of artefacts from Loch Ard and its collection is significant for being one of the largest accumulations of artefacts from this notable Victorian shipwreck of which the subject items are a small part. The collections of objects give us a snapshot of how we can interpret the story of this tragic event. The collection is also archaeologically significant as it represents aspects of Victoria's shipping history that allows us to interpret Victoria's social and historical themes of the time. Through is associated with the worst and best-known shipwreck in Victoria's history. A square Minton floor tile with a dark brown, beige and white pattern. The tile has a piece broken off along one side and some chipping along the edges. This ‘encaustic’ floor tile was recovered from the shipwreck of the LOCH ARD. Branded "... MINTON&CO Patent ..."flagstaff hill, warrnambool, flagstaff hill maritime museum, shipwreck coast, flagstaff hill maritime village, great ocean road, loch line, loch ard, captain gibbs, eva carmichael, tom pearce, glenample station, mutton bird island, minton floor tile, encaustic tile, melbourne international exhibition, floor tile -
 Flagstaff Hill Maritime Museum and Village
Ceramic - Floor Tile, circa 1878
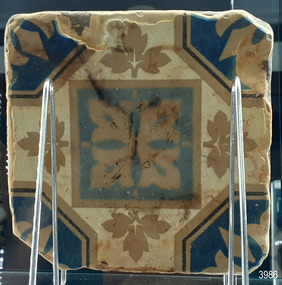
This Minton floor tile is from the wreck of the Loch Ard. The iron-hulled clipper ship from the Loch Line was heading for Port Phillip from London, when it ran into the cliffs of Mutton Bird Island near Port Campbell. The Loch Ard was laden with high-value cargo including luxury goods intended for display at the Melbourne International Exhibition in 1880. One notable survivor from the ship’s freight manifest was the well-packed Minton porcelain peacock, a two-meter high ceramic masterpiece of vivid glazed colours. (This is also on display in the Great Circle Gallery). The almost total loss of life and property from the Loch Ard registered as a shocking tragedy for the Colony of Victoria, at a time when social confidence and economic optimism were otherwise high. The wealth generated from Gold and Wool was increasingly being spent on grandiose private residences and imposing public buildings. The demand for quality furnishings and fittings was therefore strong. Among the products consigned to burgeoning colonial markets by the Milton Pottery at Stoke upon Trent, were their new range of colourfully patterned but very durable floor tiles ideal for the high-traffic spaces in the large civic buildings then being constructed in Australia and America. These floor tiles were “encaustic”, meaning that their designs and colours were encased “within” the depth of the tile. Rather than their decorative patterns being glazed onto the surface of the tile, their inlaid designs were created during the manufacturing process, as “coloured slips” (or liquid clay) were poured into a deep pre-moulded casting. When fired, the resulting tile was colour-fast and design-fast. The Minton floor tile is significant for its hard-wearing yet attractive design. The shipwreck of the Loch Ard is of significance for Victoria and is registered on the Victorian Heritage Register ( S 417). Flagstaff Hill has a varied collection of artefacts from Loch Ard and its collection is significant for being one of the largest accumulations of artefacts from this notable Victorian shipwreck of which the subject items are a small part. The collections of objects give us a snapshot of how we can interpret the story of this tragic event. The collection is also archaeologically significant as it represents aspects of Victoria's shipping history that allows us to interpret Victoria's social and historical themes of the time. Through is associated with the worst and best-known shipwreck in Victoria's history. A square Minton floor tile with a white background, and beige, dark blue, light blue and black geometric pattern as well as leaves in the design. The tile has corner broken off and some chipping along the edges. The reverse has five rows of five evenly spaced holes. The back of the tile has inscriptions. Made by Minton & Co. at Stoke upon Trent. This encaustic floor tile was recovered from the shipwreck of the LOCH ARD. Branded "... MINTON&CO / PATENT / STOKE UPON TRENT"flagstaff hill, warrnambool, flagstaff hill maritime museum, shipwreck coast, flagstaff hill maritime village, great ocean road, loch line, loch ard, captain gibbs, eva carmichael, tom pearce, glenample station, mutton bird island, minton floor tile, encaustic tile, melbourne international exhibition, floor tile, minton tile, minton & co., stoke upon trent -
 Federation University Art Collection
Ceramic, John Dermer, Salt Glazed Stoneware Pot by John Dermer, 1977
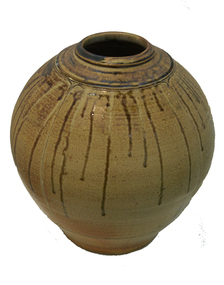
John DERMER (1949- ) Born Melbourne, Victoria John Dermer studied Ceramics at the Royal Melbourne Institute of Technology and Hawthorne State College (Diploma of Education), before working in potteries in England. Upon his return to Australia he established "Kirby's Flat Pottery" studio at Yackandandah, Victoria in 1974. John is proudly a product of the Leach/Hamada movement in ceramics. He sees this as a tradition that for him represents the essence of working with clay. The lines are pure and balanced while the forms are honest, proud and passionate. Yars of research and experience in salt glazing were rewarded in 2006 when John Dermerwon the highly prestigious Saltzbrand Keramik International Award in Koblenz, Germany. Another avenue of ceramics for which John is renowned is in the field of terra sigillata. This passion had its foundation back in 1987 when he received a major commission from Romaldo Giurgola and Pamille Berg for the new Parliament House in Canberra. During the completion of these massive pieces for the Prime Minister’s suite and Cabinet entry he had to invent and develop methods for decorating and firing the pots successfully. The completed pieces are still regarded by John as some of his finest works. John Dermer was a visiting lecturer to the Gippsland Centre of Art and Design (GCAD). This work is part of the Jan Feder Memorial Ceramics Collection. Jan Feder was an alumna of the Gippsland Campus who studied ceramics on the campus. She passed away in the mid 1980s. Her student peers raised funds to buy ceramic works in her memory. They bought works from visiting lecturers who became leading ceramic artists around the world, as well as from many of the staff who taught there.Salt glazed stoneware pot This work is part of the Jan Feder Memorial Ceramics Collection. Jan Feder was an alumna of the Gippsland Campus who studied ceramics on the campus. She passed away in the mid 1980s. Her student peers raised funds to buy ceramic works in her memory. They bought works from visiting lecturers who became leading ceramic artists around the world, as well as from many of the staff who taught there.Signed on base 'John Dermer'john dermer, ceramics, artwork, artists, gippsland campus, jan feder memorial ceramics collection, salt glaze, kirby's flat pottery, stoneware -
 Vision Australia
Letter - Text, Letter to The Trustees, Clubhouse, Recreation grounds for the Blind, 16/5/1957
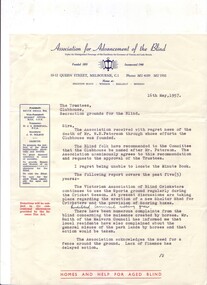
Letter to the Trustees outlining the outcomes of a recent meeting, as the minute book was unable to be located. Below is a summary of the letter. The death of W.H. Paterson is mentioned and the recommendation to the Committee that the clubhouse by named in his honour was unanimously accepted, however requires the agreement of the Trustees. The remainder of the letter covers the past five years. The Victorian Association of Blind Cricketers are requesting the erection of a shelter shed and scoring boxes. Complaints have been received about horses using the park, which have been passed to Malvern Council who advise they have also received similar complaints from the general public. A fence is required but a lack of finance has delayed this action. The Clubhouse is being used for more activities including a dance class, indoor bowling club, pottery and craft work, therefore a new switchboard and rewiring were completed. In October 1955, the State Government offered funding through local councils, however despite a representation to the Minister, the Malvern Council were not willing to expend funds to the Association as they had committed to build an Elderly Citizens Club. A large signboard was repainted and a new signboard erected at the front entrance, along with a light controlled by a clock. The Clubhouse has also been used one night per month by the local branch of the RSL and occasional use by the Teachers College for inter College sports. There has been cooperation with the L.T.A.V. (Lawn Tennis Association of Victoria) during tennis championships, and although the Committee recognise the need to do more with the area, the impending homes been built at Ballarat and Bendigo have been a limited factor. Signed by J.W. Wilson3 pages of type letter on letterheadAssociation for the Advancement of the Blind, Under the Distinguished Patronage of His Excellency the Governor of Victoria and Lady Brooks Founded 1895 (image of shining lantern) Incorporated 1944 10-12 Queen Street, Melbourne, C.1. Phone: MU 4189 MU 1955 Homes at: Brighton Beach Windsor Ballarat Bendigo On the left hand side of the page: President: Bruce Small, Esq. Vice President: Hubert Opperman, O.B.E. Treasurer: W.J.S. Horsfall, F.C.A. Secretary: J.W. Wilson Objects: To promote the welfare of the Blind intellectually, physically and socially. To grant financial assistance in cases of necessity. To provide Homes and Hostels of an undenominational character for the Blind. To visit the Blind. To care for the adult Blind, especially the aged and infirm. Donations will be subject to the concessional allowances provided by the Income Tax Act. At the base of the page: Homes and help for aged blindassociation for the advancement of the blind, john wilson, kooyong club house -
 Eltham District Historical Society Inc
Book, Miegunyah Press, Memoirs of a Young Bastard: the diaries of Tim Burstall compiled by Hilary McPhee, 2012
Diaries of Tim Burstall November 1953 to December 1954. Tim Burstall lived in Eltham. Tim Burstall, the celebrated director of Stork, Alvin Purple and numerous other definitive 'ocker' comedies, is credited with shaking the moribund Australian film industry out of its torpor. But long before that, in the early 1950s, he began keeping a diary to record the world of the group of 'arties' and 'intellectuals' he was living among in Eltham, then a rural area outside Melbourne, where cheap land was available for mudbrick houses and studios, and where suburban rigidities could be mercilessly flouted. Burstall was in his mid-twenties, with two young sons and an open marriage with his wife, Betty. Eager to become a writer, to go against the grain, he kept a record almost daily-of the parties and the talk in pubs and studios, about art and politics and sex, of Communist Party branch meetings and film societies, of political rallies and the first Herald Outdoor Art Show. Somehow, while holding down a public relations job in the Antarctic Division and juggling his love affairs and obsession with the beautiful, brainy Fay, he wrote 500 words almost every day. Betty, according to the diaries, kept the show on the road, feeding friends after the pub, milking goats and working in her pottery making bowls and mugs, which Tim sometimes decorated at weekends. These Memoirs of a Young Bastard, as Burstall dubbed himself and them, are among the most evocative Australian diaries of modern times. Burstall can write. He has an eye for the telling detail, an unerring ear for cant and pomposity and, most endearingly, an ability to mock himself-always from the perspective of a bloke of his generation. Source: Publisherxxiv, 343 p., [18] p. of plates : ill., maps, ports., facsims. ; 27 cm.ISBN 9780522858143diary, motion picture director, film director, author -
 Bendigo Historical Society Inc.
Magazine - LYDIA CHANCELLOR COLLECTION; 'THE CONNOISSEUR'
A box containing four 'The Connoisseur' magazines - dated December 1948, March 1949, June 1949 and September 1949. Published quarterly 28 & 30 Grosvenor Gardens London, S.W.1 : NewYork offices 572 Maddison Avenue.Connoisseur 1949 March-June Sep.-Dec.magazine, organization, antiques, lydia chancellor, collection, artwork, collectables, glass ware, victoriana, pottery, ceramics, antiques, porcelain, furniture, clocks, ornaments, heritage, history, sculpture, trades, silver, magazine, 'the connoisseur' -
 Flagstaff Hill Maritime Museum and Village
Decorative object - Ornament, ca. 19th century
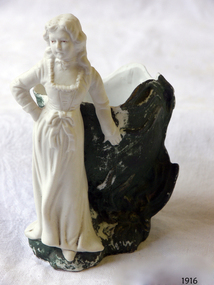
This fine white unglazed porcelain figurine is one of six donated together. The bisque material was easy to carve and allowed fine detail. Figurine ornaments were popular for table decorations between the mid-18th to early 19th centuries. This ornament was made in Germany, and German manufacturers began to use bisque material to make realistic faces for dolls in the 1850s.The set of six bisque figurines is representative of popular table decorations during the 19th and early 20th centuries.Fine unglazed white porcelain ornament, carved to represent a boy holding a basket on his back. One of a pair, the other being a girl holding a basket on her back. The hollow basket is a vase. It was made in Germany. No 0847. Marked "0847" "GERMANY GASP"flagstaff hill, flagstaff hill maritime museum and village, warrnambool, maritime museum, maritime village, great ocean road, shipwreck coast, bisque, china ornament, white china ornament, german, porcelain, unglazed porcelain, 19th century, 18th century, european ornament, pottery, unglazed pottery, domestic ornament, decoration, table decoration, germany, boy with basket, vase -
 Flagstaff Hill Maritime Museum and Village
Decorative object - Ornament, 19th century
This fine white unglazed porcelain figurine is one of six donated together. The bisque material was easy to carve and allowed fine detail. Figurine ornaments were popular for table decorations between the mid-18th to early 19th centuries. This ornament was most likely made in Germany, and German manufacturers began to use bisque material to make realistic faces for dolls in the 1850s.The set of six bisque figurines is representative of popular table decorations during the 19th and early 20th centuries.Ornament, fine unglazed white porcelain, carved to represent a woman standing in front of a green vase. flagstaff hill, flagstaff hill maritime museum and village, warrnambool, maritime museum, maritime village, great ocean road, shipwreck coast, bisque, china ornament, white china ornament, german, porcelain, unglazed porcelain, 19th century, 18th century, european ornament, pottery, unglazed pottery, domestic ornament, decoration, table decoration, vase, woman with vase, germany -
 Flagstaff Hill Maritime Museum and Village
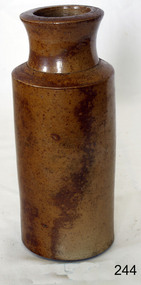
Container - Ink Bottle, Prior to 1878
This design of ink bottle was commonly referred to as a ‘penny ink well’ because it was very inexpensive to produce. It is also known as a dwarf ink bottle. Pen and ink has been in use for hand writing from about the seventh century up until the mid-20th century up until around the mid-19th century a quill pen made from a bird’s feather was used. In the 1850s the steel point pen was invented and could be manufactured on machines in large quantities. In the 1880s a successful portable fountain pen was designed, giving a smooth flowing ink and ease of use replacing the quill or dip pen. History of the Loch Ard: The Loch Ard got its name from "Loch Ard" a loch that lies to the west of Aberfoyle, and the east of Loch Lomond. It means "high lake" in Scottish Gaelic. The vessel belonged to the famous Loch Line which sailed many vessels from England to Australia. The Loch Ard was built in Glasgow by Barclay, Curle & Co. in 1873, the vessel was a three-masted square-rigged iron sailing ship that measured 79.87 meters in length, 11.58 m in width, and 7 m in depth with a gross tonnage of 1693 tons with a mainmast that measured a massive 45.7 m in height. Loch Ard made three trips to Australia and one trip to Calcutta before its fateful voyage. Loch Ard left England on March 2, 1878, under the command of 29-year-old Captain Gibbs, who was newly married. The ship was bound for Melbourne with a crew of 37, plus 17 passengers. The general cargo reflected the affluence of Melbourne at the time. Onboard were straw hats, umbrellas, perfumes, clay pipes, pianos, clocks, confectionery, linen, and candles, as well as a heavier load of railway irons, cement, lead, and copper. There were other items included that were intended for display in the Melbourne International Exhibition of 1880. The voyage to Port Phillip was long but uneventful. Then at 3 am on June 1, 1878, Captain Gibbs was expecting to see land. But the Loch Ard was running into a fog which greatly reduced visibility. Captain Gibbs was becoming anxious as there was no sign of land or the Cape Otway lighthouse. At 4 am the fog lifted and a lookout aloft announced that he could see breakers. The sheer cliffs of Victoria's west coast came into view, and Captain Gibbs realised that the ship was much closer to them than expected. He ordered as much sail to be set as time would permit and then attempted to steer the vessel out to sea. On coming head-on into the wind, the ship lost momentum, the sails fell limp and Loch Ard's bow swung back towards land. Gibbs then ordered the anchors to be released in an attempt to hold their position. The anchors sank some 50 fathoms - but did not hold. By this time the ship was among the breakers and the tall cliffs of Mutton Bird Island rose behind. Just half a mile from the coast, the ship's bow was suddenly pulled around by the anchor. The captain tried to tack out to sea, but the ship struck a reef at the base of Mutton Bird Island, near Port Campbell. Waves subsequently broke over the ship and the top deck became loosened from the hull. The masts and rigging came crashing down knocking passengers and crew overboard. When a lifeboat was finally launched, it crashed into the side of Loch Ard and capsized. Tom Pearce, who had launched the boat, managed to cling to its overturned hull and shelter beneath it. He drifted out to sea and then on the flood tide came into what is now known as Loch Ard Gorge. He swam to shore, bruised and dazed, and found a cave in which to shelter. Some of the crew stayed below deck to shelter from the falling rigging but drowned when the ship slipped off the reef into deeper water. Eva Carmichael a passenger had raced onto the deck to find out what was happening only to be confronted by towering cliffs looming above the stricken ship. In all the chaos, Captain Gibbs grabbed Eva and said, "If you are saved Eva, let my dear wife know that I died like a sailor". That was the last Eva Carmichael saw of the captain. She was swept off the ship by a huge wave. Eva saw Tom Pearce on a small rocky beach and yelled to attract his attention. He dived in and swam to the exhausted woman and dragged her to shore. He took her to the cave and broke the open case of brandy that had washed up on the beach. He opened a bottle to revive the unconscious woman. A few hours later Tom scaled a cliff in search of help. He followed hoof prints and came by chance upon two men from nearby Glenample Station three and a half miles away. In a complete state of exhaustion, he told the men of the tragedy. Tom then returned to the gorge while the two men rode back to the station to get help. By the time they reached Loch Ard Gorge, it was cold and dark. The two shipwreck survivors were taken to Glenample Station to recover. Eva stayed at the station for six weeks before returning to Ireland by steamship. In Melbourne, Tom Pearce received a hero's welcome. He was presented with the first gold medal of the Royal Humane Society of Victoria and a £1000 cheque from the Victorian Government. Concerts were performed to honour the young man's bravery and to raise money for those who lost families in the disaster. Of the 54 crew members and passengers on board, only two survived: the apprentice, Tom Pearce, and the young woman passenger, Eva Carmichael, who lost her family in the tragedy. Ten days after the Loch Ard tragedy, salvage rights to the wreck were sold at auction for £2,120. Cargo valued at £3,000 was salvaged and placed on the beach, but most washed back into the sea when another storm developed. The wreck of Loch Ard still lies at the base of Mutton Bird Island. Much of the cargo has now been salvaged and some items were washed up into Loch Ard Gorge. Cargo and artefact's have also been illegally salvaged over many years before protective legislation was introduced in March 1982. One of the most unlikely pieces of cargo to have survived the shipwreck was a Minton majolica peacock- one of only nine in the world. The peacock was destined for the Melbourne 1880 International Exhibition. It had been well packed, which gave it adequate protection during the violent storm. Today the Minton peacock can be seen at the Flagstaff Hill Maritime Museum in Warrnambool. From Australia's most dramatic shipwreck it has now become Australia's most valuable shipwreck artefact and is one of very few 'objects' on the Victorian State Heritage Register.This ink bottle is historically significant as it represents methods of hand written communication that were still common up until the mid-20th century, when fountain pens and ballpoint pens took over in popularity and convenience. The shipwreck of the Loch Ard is of significance for Victoria and is registered on the Victorian Heritage Register ( S 417). Flagstaff Hill has a varied collection of artefact's from Loch Ard and its collection is significant for being one of the largest accumulation of artefact's from this notable Victorian shipwreck of which the subject items are a small part. The collection's objects give us a snapshot of how we can interpret the story of this tragic event. The collection is also archaeologically significant as it represents aspects of Victoria's shipping history that allows us to interpret Victoria's social and historical themes of the time. Through is associated with the worst and best-known shipwreck in Victoria's history.Stoneware penny ink bottle; ironstone salt-glazed stoneware, cylindrical shape with small mouth and squat neck, broad shoulders, brown colour. Bottle still has cork in neck. Dark encrustations on body and base.Sticker "L/62"flagstaff hill, warrnambool, flagstaff hill maritime museum, shipwreck coast, flagstaff hill maritime village, great ocean road, loch line, loch ard, penny ink well, writing equipment, domestic, stoneware, clay, ceramic, pottery, ink well, inkwell, ink bottle, dip pen, ink, hand writing, business, vintage, dwarf ink -
 Eltham District Historical Society Inc
Document - Property Binder, 559 Main Road, Eltham
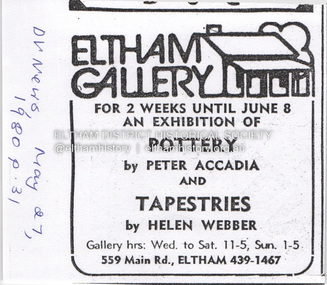
Newspaper advertisement: Diamond Valley News, 27 May 1980, Exhibition, Peter Accadia, pottery, and Helen Webber, tapestries. Newspaper article: Five for the price of one, Diamond Valley News, Tuesday, July 8, 1986, p27; exhibition of five artists at Eltham Gallery. On reverse, numerous advertisements for food and entertainment Newspaper advertisement: The Age ,17 June 1989, Exhibition, Donald Ramsay "Watching the river flow". Newspaper article: Landmark gallery says goodbye, Diamond Valley Leader, 24 November 2004, Gallery site sold to Sentinel Equities, present tenant Julie Skate, quotes from former part-owner Val Murray. Newspaper article: Rift over gallery plans, Diamond Valley Leader, 21 February 2007, purchasers Jethro Tull and Suzanne Still plan to build offices, gallery and cafe; Eltham Gateway Action Group objected while supporting need for a gallery elsewhere. Newspaper article: New try for gallery-cafe ready soon, Diamond Valley Leader, 18 April 2007, purchaser Jethro Tull to have a new plan ready in two weeks for gallery and cafe. Newspaper article: Gateway for artists, Diamond Valley Leader, 25 May 2007, Jenni Mitchell opened a new gallery pending decision by Nillumbik Council. Newspaper article: Art gallery proposal rejected, Diamond Valley Leader, 30 May 2007, Nillumbik Council against planned new building. Newspaper article: Artful win for gallery, Diamond Valley Leader, 30 January 2008, VCAT approved mudbrick art gallery. Newspaper article: Rocky road to create a landmark, Diamond Valley Leader, 13 February 2008, VCAT approved Robert Marshall's design, artists's impression, Eltham Gateway Action Group opposed.main road, property, businesses, eltham gallery, wiregrass gallery, eltham gateway action group, robert marshall, mud brick building, eltham (vic), 559 main road eltham, artists, bernhard rust, bob smith, jan neil, john adams, marian sussex, michael wilson, tony dopheide, 47-55 main street diamond creek, 50 were street montmorency, 55 rattray road montmorency, 410 main road lower plenty, abbey of diamond creek, adams north riding restaurant, advertising, eltham barrel, montmorency, mustard seed restaurant, peking house restaurant, st andrews, tamara's -
 Eltham District Historical Society Inc
Document - Series Listing, Fraser Faithfull et al, Series 61: Shire Scenes / Activities / Staff, negatives, 2000
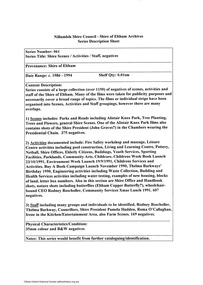
Series consists of a large collection (over 1150) of negatives of scenes, activities and staff of the Shire of Eltham. Many of the films were taken for publicity purposes and necessarily cover a broad range of topics. The films or individual strips have been organised into Scenes, Activities and Staff groupings, however there are many overlaps. 1) Scenes includes: Parks and Roads including Alistair Knox Park, Tree Planting, Trees and Flowers, general Shire Scenes. One of the Alistair Knox Park films also contains shots of the Shire President (John Graves?) in the Chambers wearing the Presidential Chain. 375 negatives. 2) Activities documented include: Fire Safety workshop and massage, Leisure Centre activities including pool construction, Living and Learning Centre, Pottery, Netball, Shire Offices, Elderly Citizens, Buildings, Youth Services, Sporting Facilities, Parklands, Community Arts, Childca re, Childrens Week Book Launch 23/ 10/1991 , Environment Week Launch 19/9/1991 , Childrens Services and Activities, Buy A Book Campaign Launch November 1990, Thelma Barkways' Birthday 1990, Engineering activities including Waste Collection, Building and Health Services activities including water testing, examples of new housing, blocks of land, letter box numbers. Also in this section are Shire Office and Handbook shots, nature shots including butterflies (Eltham Copper Butterfly?), wheelchairbound CEO Rodney Roscholler, Community Services Xmas Lunch 1991. 607 negatives. 3) Staff including many groups and individuals to be identified, Rodney Roscholler, Thelma Barkway, Councillors, Shire President Pamela Sladden, Roma O'Callaghan, Irene in the Kitchen/Entertainment Area, also Farm Scenes. 169 negatives.shire of eltham archives, series listing -
 Flagstaff Hill Maritime Museum and Village
Ceramic - Stoneware Container, 1900 to 1940
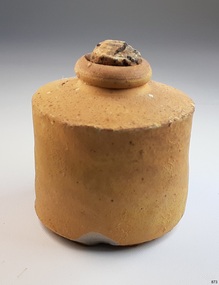
Stoneware is a rather broad term for pottery or other ceramics that is fired at a relatively high temperature. A modern technical definition is a vitreous or semi-vitreous ceramic made primarily from stoneware clay or non-refractory fire clay. Whether vitrified or not, it is non-porous, it may or may not be glazed. Historically, across the world, it has been developed after earthenware and before porcelain and has often been used for high-quality as well as utilitarian wares. As a rough guide, modern earthen wares are normally fired in a kiln at temperatures in the range of about 1,000°C (1,830 °F) to 1,200 °C (2,190 °F); stoneware's at between about 1,100 °C (2,010 °F) to 1,300 °C (2,370 °F); and porcelains at between about 1,200 °C (2,190 °F) to 1,400 °C (2,550 °F). Historically, reaching high temperatures was a long-lasting challenge, and temperatures somewhat below these were used for a long time. Earthenware can be fired effectively as low as 600°C, achievable in primitive pit firing, but 800 °C was more typical. Stoneware also needs certain types of clays, more specific than those able to make earthenware, but can be made from a much wider range than porcelain. A domestic item used to store food products as glazing makes the container non-porous, often used for pickling. Or larger containers for kitchen flour. Items age is difficult to determine given the same techniques for making stoneware are in use today. Stoneware containers were made by many potteries in Australia and England. They were in common domestic use before plastics were invented around 1940 to store goods so this subject item is probably from around 1900 to the 1940s. Item's significance is difficult to determine given it is not associated with a place, person, historic event, or manufacturer. Its significance lies with its use as a domestic object giving today a view into our social past.Stoneware circular container with wide opening, brown top and off white base glazed finish Marked "1" on brown glazed rimflagstaff hill, warrnambool, shipwrecked coast, flagstaff hill maritime museum, shipwreck coast, flagstaff hill maritime village, great ocean road, container, stoneware container, kitchen storage, kitchen ware -
 Flagstaff Hill Maritime Museum and Village
Ceramic - Stoneware Bottle, 1890-1940
Stoneware is a rather broad term for pottery or other ceramics that is fired at a relatively high temperature. A modern technical definition is a vitreous or semi-vitreous ceramic made primarily from stoneware clay or non-refractory fire clay. Whether vitrified or not, it is non-porous, it may or may not be glazed. Historically, across the world, it has been developed after earthenware and before porcelain and has often been used for high-quality as well as utilitarian wares. As a rough guide, modern earthen wares are normally fired in a kiln at temperatures in the range of about 1,000°C (1,830 °F) to 1,200 °C (2,190 °F); stoneware's at between about 1,100 °C (2,010 °F) to 1,300 °C (2,370 °F); and porcelains at between about 1,200 °C (2,190 °F) to 1,400 °C (2,550 °F). Historically, reaching high temperatures was a long-lasting challenge, and temperatures somewhat below these were used for a long time. Earthenware can be fired effectively as low as 600°C, achievable in primitive pit firing, but 800 °C was more typical. Stoneware also needs certain types of clays, more specific than those able to make earthenware, but can be made from a much wider range than porcelain. A domestic item used to store food products as glazing makes the container non-porous, often used for pickling. Or larger containers for kitchen flour. Items age is difficult to determine given the same techniques for making stoneware are in use today. Stoneware containers were made by many potteries in Australia and England. They were in common domestic use before plastics were invented around 1940 to store goods so this subject item is probably from around 1900 to the 1940s.Item's significance is difficult to determine given it is not associated with a place, person, historic event, or manufacturer. Its significance lies with its use as a domestic object giving today a view into our social past.Brown salt glaze stoneware bottle None (possibly made by Royal Doulton UK)flagstaff hill, warrnambool, flagstaff hill maritime museum, maritime museum, flagstaff hill maritime village, great ocean road, bottle, stoneware bottle, storage, kitchen ware, salt glazed, stoneware, shipwreck coast -
 Flagstaff Hill Maritime Museum and Village
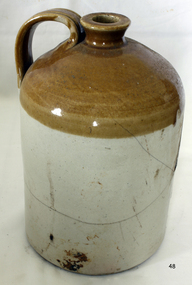
Ceramic - Jug, 1900 - 1940
Stoneware is a rather broad term for pottery or other ceramics that is fired at a relatively high temperature. A modern technical definition is a vitreous or semi-vitreous ceramic made primarily from stoneware clay or non-refractory fire clay. Whether vitrified or not, it is non-porous, it may or may not be glazed. Historically, across the world, it has been developed after earthenware and before porcelain and has often been used for high-quality as well as utilitarian wares. As a rough guide, modern earthen wares are normally fired in a kiln at temperatures in the range of about 1,000°C (1,830 °F) to 1,200 °C (2,190 °F); stoneware's at between about 1,100 °C (2,010 °F) to 1,300 °C (2,370 °F); and porcelains at between about 1,200 °C (2,190 °F) to 1,400 °C (2,550 °F). Historically, reaching high temperatures was a long-lasting challenge, and temperatures somewhat below these were used for a long time. Earthenware can be fired effectively as low as 600°C, achievable in primitive pit firing, but 800 °C was more typical. Stoneware also needs certain types of clays, more specific than those able to make earthenware, but can be made from a much wider range than porcelain. A domestic item used to store food products as glazing makes the container non-porous, often used for pickling. Or larger containers for kitchen flour. Items age is difficult to determine given the same techniques for making stoneware are in use today. Stoneware containers were made by many potteries in Australia and England. They were in common domestic use before plastics were invented around 1940 to store goods so this subject item is probably from around 1900 to the 1940s.Item's significance and origin of manufacture is difficult to determine given it is not associated with a place, person, historic event, or manufacturer. Its significance lies with its use as a domestic object giving today a view into our social past. Stoneware jug badly cracked and repaired with handle and short neckNoneflagstaff hill, warrnambool, shipwrecked coast, flagstaff hill maritime museum, maritime museum, shipwreck coast, flagstaff hill maritime village, great ocean road, jug, stoneware jug, earthenware jug, kitchen storage -
 Flagstaff Hill Maritime Museum and Village
Ceramic - Jug, 1920-1940
Stoneware is a rather broad term for pottery or other ceramics that is fired at a relatively high temperature. A modern technical definition is a vitreous or semi-vitreous ceramic made primarily from stoneware clay or non-refractory fire clay. Whether vitrified or not, it is non-porous, it may or may not be glazed. Historically, across the world, it has been developed after earthenware and before porcelain and has often been used for high-quality as well as utilitarian wares. As a rough guide, modern earthenwares are normally fired in a kiln at temperatures in the range of about 1,000°C (1,830 °F) to 1,200 °C (2,190 °F); stoneware's at between about 1,100 °C (2,010 °F) to 1,300 °C (2,370 °F); and porcelains at between about 1,200 °C (2,190 °F) to 1,400 °C (2,550 °F). Historically, reaching high temperatures was a long-lasting challenge, and temperatures somewhat below these were used for a long time. Earthenware can be fired effectively as low as 600°C, achievable in primitive pit firing, but 800 °C was more typical. Stoneware also needs certain types of clays, more specific than those able to make earthenware, but can be made from a much wider range than porcelain. A domestic item used to store food products as glazing makes the container non-porous, often used for pickling. Or larger containers for kitchen flour. Items age is difficult to determine given the same techniques for making stoneware are in use today. Stoneware containers were made by many potteries in Australia and England. They were in common domestic use before plastics were invented around 1940 to store goods so this subject item is probably from around 1900 to the 1940s. Item's significance is difficult to determine given it is not associated with a place, person, historic event, or manufacturer. Its significance lies with its use as a domestic object giving today a view into our social past.Brown Stoneware jug with short neckThe number "1" under neck flagstaff hill, warrnambool, shipwrecked coast, flagstaff hill maritime museum, shipwreck coast, flagstaff hill maritime village, great ocean road, jug, stoneware jug, salt glaze -
 Flagstaff Hill Maritime Museum and Village
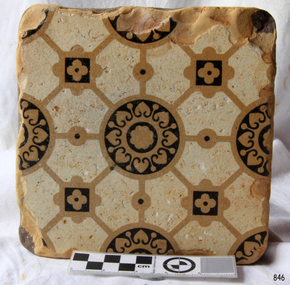
Ceramic - Tile, circa 1878
This Minton floor tile is from the wreck of the LOCH ARD. Other examples of this manufacture have been recovered from the wreck site and form part of the collection at Flagstaff Hill. The iron-hulled clipper ship from the Loch Line was heading for Port Phillip from London when it ran into the cliffs of Mutton Bird Island near Port Campbell and was wrecked on the early morning of June 1, 1878. The LOCH ARD was laden with high-value cargo including luxury goods intended for display at the Melbourne International Exhibition in 1880. One notable survivor from the ship’s freight manifest was the well-packed Minton porcelain peacock, a two-metre-high ceramic masterpiece of vivid glazed colours. The almost total loss of life and property from the LOCH ARD registered as a shocking tragedy for the Colony of Victoria, at a time when social confidence and economic optimism were otherwise high. The wealth generated from gold and wool was increasingly being spent on magnificent private residences and imposing public buildings. The demand for quality furnishings and fittings was therefore strong. Among the products consigned to burgeoning colonial markets by the Milton Pottery at Stoke upon Trent were their new range of colourfully patterned but very durable floor tiles – ideal for the high-traffic spaces in the large civic buildings then being constructed in Australia and America. These new floor tiles were “encaustic”, meaning that their designs and colours were encased within the depth of the tile. Rather than their decorative patterns being glazed onto the surface of the tile, their inlaid designs were created during the manufacturing process, as “coloured slips” (or liquid clay) that were poured into a deep pre-moulded casting. When fired, the resulting tile was colour-fast and design-fast.The Minton encaustic floor tile is significant for its method of manufacture which makes it durable as well as decorative. The shipwreck of the LOCH ARD is of State significance. Victorian Heritage Register S417. Flagstaff Hill’s collection of artefacts from LOCH ARD is significant for being one of the largest collections of artefacts from this shipwreck in Victoria. It is significant for its association with the shipwreck, which is on the Victorian Heritage Register (VHR S417). The collection is significant because of the relationship between the objects, as together they have a high potential to interpret the story of the LOCH ARD. The LOCH ARD collection is archaeologically significant as the remains of a large international passenger and cargo ship. The LOCH ARD collection is historically significant for representing aspects of Victoria’s shipping history and its potential to interpret sub-theme 1.5 of Victoria’s Framework of Historical Themes (living with natural processes). The collection is also historically significant for its association with the LOCH ARD, which was one of the worst and best-known shipwrecks in Victoria’s history.A square Minton floor tile with a black and beige pattern against a white base. This encaustic floor tile was recovered from the shipwreck of the LOCH ARD. On the back, or base, of the tile is inscribed the number “46” and the letters “Minton & Co Patent Stoke upon Trent”.flagstaff hill, warrnambool, shipwrecked coast, flagstaff hill maritime museum, maritime museum, shipwreck coast, flagstaff hill maritime village, great ocean road, loch line, loch ard, mutton bird island, loch ard gorge, minton floor tile, encaustic tile, melbourne international exhibition, floor tile -
 Flagstaff Hill Maritime Museum and Village
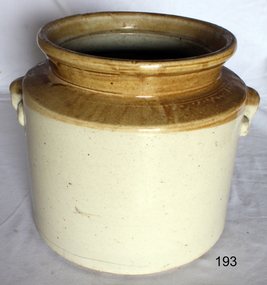
Ceramic - Stoneware Container, 1900 to 1940
Stoneware is a rather broad term for pottery or other ceramics that is fired at a relatively high temperature. A modern technical definition is a vitreous or semi-vitreous ceramic made primarily from stoneware clay or non-refractory fire clay. Whether vitrified or not, it is non-porous, it may or may not be glazed. Historically, across the world, it has been developed after earthenware and before porcelain and has often been used for high-quality as well as utilitarian wares. As a rough guide, modern earthen wares are normally fired in a kiln at temperatures in the range of about 1,000°C (1,830 °F) to 1,200 °C (2,190 °F); stoneware's at between about 1,100 °C (2,010 °F) to 1,300 °C (2,370 °F); and porcelains at between about 1,200 °C (2,190 °F) to 1,400 °C (2,550 °F). Historically, reaching high temperatures was a long-lasting challenge, and temperatures somewhat below these were used for a long time. Earthenware can be fired effectively as low as 600°C, achievable in primitive pit firing, but 800 °C was more typical. Stoneware also needs certain types of clays, more specific than those able to make earthenware, but can be made from a much wider range than porcelain. A domestic item used to store food products as glazing makes the container non-porous, often used for pickling. Or larger containers for kitchen flour. Items age is difficult to determine given the same techniques for making stoneware are in use today. Stoneware containers were made by many potteries in Australia and England. They were in common domestic use before plastics were invented around 1940 to store goods so this subject item is probably from around 1900 to the 1940s. Item's significance is difficult to determine given it is not associated with a place, person, historic event, or manufacturer. Its significance lies with its use as a domestic object giving today a view into our social past.Stoneware circular container with wide opening, brown top and off white base. Handholds moulded on each side glazed finish, cracks in base.Noneflagstaff hill, warrnambool, shipwrecked coast, flagstaff hill maritime museum, shipwreck coast, flagstaff hill maritime village, great ocean road, container, stoneware container, kitchen storage, kitchen ware -
 Flagstaff Hill Maritime Museum and Village
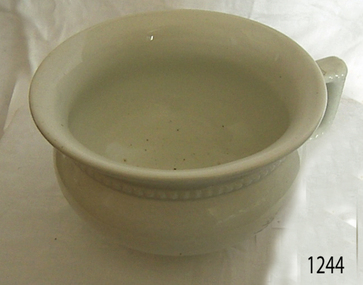
Ceramic - Chamber Pot, J & G Meakin, Early to mid 20th century
In the 19th and early 20th centuries, J. & G. Meakin were important, large-scale producers of good quality, ironstone tableware (‘White Granite’ ware) that met a ready market in the United States, South America, Australia, and other traditional British markets. By the 1890s the company was one of the world’s largest earthenware manufacturers. Although export teaware and tableware was the factory’s staple commodity, Meakin also manufactured toilet ware, kitchenware and a wide range of fancy earthenware. The company was amongst the first British pottery firms to experiment with modernist designs associated with the art deco period. The Moderne' range was introduced in 1929 consisting of an angular shape decorated design with geometric patterns and often highlighted with silver or gold. This range remained in production through the 1930s. Post 1945 the company introduced the streamlined Studio shape (1953) and Horizon shape (1955) both heavily influenced by the Russell Wright ‘American Modern’ tableware. In 1964 a new Studio shape was released with tall streamlined coffee pots used as the background for many contemporary patterns now associated with the 1950s and 1960s. Designs by Jessie Tate and Eve Midwinter, some originally found on Midwinter shapes, also appear on 1970s Studio ware. The Studio range was one of Meakin’s most successful and continued in production until the late-1970s. The enormous range of floral, geometric, and abstract designs make Studio Ware collectible in its own right. In the 1970s and 1980s as part of the Wedgwood Group Meakin produced contemporary products under the 'Bull in a China Shop' and 'Creative Tableware' names. 'Sol' (c.1912-1963), 'Studio' (1953 on) and 'Royal Staffordshire' (post-1968) were important J. & G. Meakin Ltd trade names. Meakin marks are numerous, but all include the J. & G. Meakin name. The significance of this item and pottery generally is that often earthenware is portrayed as being a landmark in the evolution of humanity. This is because these items are the few things from the past that have survived in a tangible form. Pottery is an important functional part of society and it has a critical role to play as it helps archaeologists to date other artefacts of the same time period. Also, the decorations on pottery have told much about the beliefs, lifestyles and lives of the people who bought them and used them. In other words it gives us today a snapshot of society from the past and how people used these items in their daily lives, their likes as well as societal and design trends. Chamber pot ceramic white with handle at side and decoration around top. Unclearwarrnambool, shipwrecked-coast, flagstaff-hill, flagstaff-hill-maritime-museum, shipwreck-coast, flagstaff-hill-maritime-village, champer pot, personal hygiene, personal item, ceramic pot, domestic object -
 Federation University Historical Collection
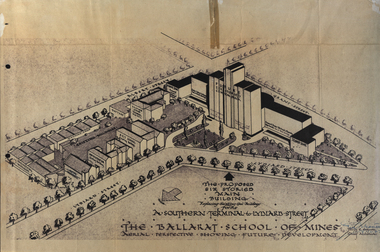
Plan, Ballarat School of Mines Future Development: A Southern Terminal to Lydiard Street, 1947, 09/12/1947
In 1947 Percy Everett, Chief Architect for the Victorian Government, drew up plans to accomodate the growth in student numbers on the Ballarat School of Mines site. It was an era of government buildings surrounding the Ballarat School of Mines campus either being transfered to the school or foreshadowed for transfer. In 1947 two Red Cross huts were transferred from Victoria Park to the western side of the former Ballarat Supreme Court (later Courthouse Theatre) for use by Wool Classing and Motor Mechanics. In the same year additional facilities were provided for Pottery due to the increase in enrolments and a large brick classroom was built at the rear of the Ballarat Junior Technical School Building. In the annual report of 1947 the President said: "These transfers are, however, only temporary expedients and indicate the pressing need for more buildings of a permanent nature". By the end of the year the School Council decided to request the Education Department of Victoria to proceed with the implementation of the School's long-range plan whch had received approval earlier and to treat it as an urgent post-war requirement. After much communication a plan for a six-storied building, flanked by two three storied buildings was planned to be built on the site of the Ballarat Gaol was developed. The plan was sent to the Education Department for the Minister's Approval. It is not know if approval was granted, but the building did not proceed, possibly becausse the Ballarat Gaol was still very miuch in use. When a tertiary division of the Ballarat School of Mines was being developed in 1967 it corresponded with the closure of the Ballarat Gaol. It was determined that the Lydiard Street South site had no room for future growth so a new campus was sought. The new campus was purchased at Mt Helen, and was initially known as the Ballarat Insittute of Advanced Education. In 1976, when the Ballarat Teachers' College merged into the structure, the campus became known as the Ballarat College of Advanced Education and it was no longer a part of the Ballarat School of Mines. Plans for a proposed building to replace the Ballarat Gaol buildings. The proposed building was never built, the concept being replaced by a new teritary facility at Mt Helen. buildings, percy everett, ballarat school of mines battery, ballarat technical art school, engineering workshops, machine shop, ballarat junior technical school, architectural plans, ballarat school of mines, smb campus -
 Flagstaff Hill Maritime Museum and Village
Decorative object - Ornament, ca. 19th century
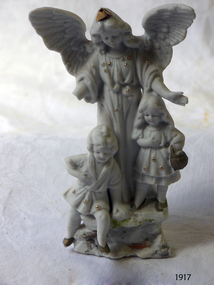
This fine white unglazed porcelain figurine is one of six donated together. The bisque material was easy to carve and allowed fine detail. Figurine ornaments were popular for table decorations between the mid-18th to early 19th centuries. This ornament was likely made in Germany, and German manufacturers began to use bisque material to make realistic faces for dolls in the 1850s.The set of six bisque figurines is representative of popular table decorations during the 19th and early 20th centuries.Figurine; unglazed white porcelain ornament, hollow inside. It is carved to represent an angel with two children, a boy and a girl. The surface is decorated with tiny gold balls and the angel wears a gold tiara. There are remnants of gold, orange, green and brown paint. No 1914. "1914"flagstaff hill, flagstaff hill maritime museum and village, warrnambool, maritime museum, maritime village, great ocean road, shipwreck coast, bisque, china ornament, white china ornament, german, porcelain, unglazed porcelain, 19th century, 18th century, european ornament, pottery, unglazed pottery, domestic ornament, decoration, table decoration, figurine, angel figurine, germany, angel with children -
 Flagstaff Hill Maritime Museum and Village
Decorative object - Ornament, ca. 19th century
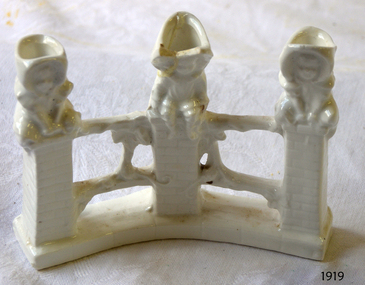
This fine white glazed porcelain figurine is one of six donated together. The bisque material was easy to carve and allowed fine detail. Figurine ornaments were popular for table decorations between the mid-18th to early 19th centuries. This ornament was likely made in Germany, and German manufacturers began to use bisque material to make realistic faces for dolls in the 1850s.The set of six bisque figurines is representative of popular table decorations during the 19th and early 20th centuries.Fine glazed white porcelain ornament, carved to represent three children sitting on three brick fence pillars. There are gold highlights on the surface. The hats on the children are vases. An inscription is on the base of the centre pillar."6946"flagstaff hill, flagstaff hill maritime museum and village, warrnambool, maritime museum, maritime village, great ocean road, shipwreck coast, bisque, china ornament, white china ornament, german, germany, porcelain, unglazed porcelain, 19th century, 18th century, european ornament, pottery, unglazed pottery, domestic ornament, decoration, table decoration, children on a fence, vase, candle holder -
 Bendigo Historical Society Inc.
Container - LYDIA CHANCELLOR COLLECTION: OLA COHN NEWSPAPER CLIPPINGS
A box covered in Christmas paper containing items related to the Cohn family. (i) A yellow folder titled 'Press cuttings and articles of Ola Cohn.' Items of interest include articles relating to Ola Cohn, her work and her home and the Cohn family and their drink company Cohns Pty. Ltd. Sources are 'The Age,' 'The Sun,' 'The Australian Home Beautiful,' 'The Herald' and 'The Bendigo Advertiser.' Dated between 1932 and 1968. (ii) A book written by Ola Cohn titled ''Mostly Cats,'' written in 1964.Ola Cohnperson, family, ola cohn, lydia chancellor, collection, cohn family, cohn bros. pty. ltd., manufacturing, ola cohn, women, pottery, ceramics, art, art work, book, literature, female, person, sculpture, famous people, fairy tree, mostly cats, animals, pets, cats -
 National Wool Museum
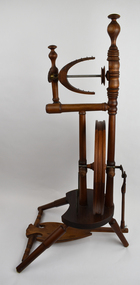
Functional object - Spinning Wheel, Philip Elford, 1976-7
Jackie Kerin's (donor's) story. In 1973, I was in my late teens and while I’d moved to Sydney from Melbourne, to begin my first year of drama studies at the National Institute of Dramatic Art. My parents had moved to Lake Bunga, a few kilometers north of Lakes Entrance (Victoria). On my first holiday visit to Bunga, I called into the Jolly Jumbuck Country Craft Centre in Bairnsdale http://jumbukwool.com.au/history. I was entranced by the place and spent the following weeks learning to spin lumpy wool on an Ashford Wheel. By the end of the holidays, I had my own Ashford and it travelled with me back to Sydney. After graduation, I returned to Melbourne and the hippy “back to nature” movement was in full swing; there were many shops and galleries selling handmade woollen items and pottery etc. So I found an outlet for my pieces. Sometime in 1976-77, I met a spinner and weaver of Swiss origin (I think) – her name was Ingeborg Guber (not sure of the spelling). She had a small gallery/shop at Brighton Beach where she worked, with her pet duck for company. Ingeborg had an upright Philip Elford wheel; an Australian wheel crafted from Acacia melanoxylon (blackwood). I was smitten and ordered one. I have a memory of Philip driving to Hampton from Ballarat to make the delivery. I used this wheel for years but as time and enthusiasm for spinning waned, the wheel became a decorative item in the house. Then in the 90s, and with my drama training, I set myself up travelling to schools and festivals, museums and galleries as a storyteller. The spinning wheel had a new life accompanying me on my adventures. For many children, familiar with references to spinning in fairy tales, seeing the little Philip Elford upright was magical. The wheel was donated to the National Wool Museum in 2021.Vertical tripod leg spinning wheel. 6 spoke wheel with three bobbins. Inscription “Philip Elford Ballart” can be read in gold text stamped to the base of the wheel. Wording, stamped, gold. Philip / Elford / Ballartspinning wheel, textile production, hobby textiles, aciacia melanoxylon (blackwood) -
 Eltham District Historical Society Inc
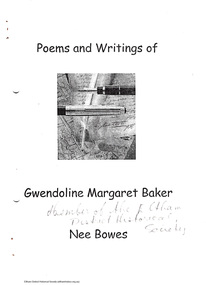
Document - Folder, Poems and writings of Gwendoline Margaret Baker, nee Bowes, 1997
Various short pieces of writing, some dated, earliest 1971, latest in 1997. Gwen Baker (1928-2005) was a foundation member of EDHS. See Also Newsleter 162, May 2005 GWENDOLINE MARGARET BAKER NEE BOWES 1928- 2005 Gwen Baker as we knew her, often used her full name in her writings and even acknowledged her maiden family name as a means of reinforcing her own personal identity. Gwen died on 28 Februrary 2005 and has been buried at Arthurs Creek Cemetery in accordance with her wishes. It is typical of her humour that after visiting the site she wrote: "I have seen the Cemetery, so if I wake in sleep it has a nice view" Gwen was a foundation member of our Society. We remember her mainly for her contribution to our meetings, her witty comments or questions to our speakers and, of course, her collection of plants that she contributed to help the finances of our Society. Her friends in the Society also remember her cards and brief letters on a wide range of subjects. Gwen's wide range of interests included pottery, poetry and of course her gardening. She was an active member of many organizations including the Red Cross, Catholic Church, Nillumbik Garden Club and the former Eltham Arts Council. Her small self- published booklet of poems and writings starts with tins item written at 2am on Easter Sunday 1975. THOUGHT The seeming steady stillness of this quiet night has varied sound to one who sits and thinks of life. Of times of your of pleasant things and if the future has in store a place to be - a reason to exist. One hears a bird upon the roof scratching at his mate while in the distance a car goes by returning home quite late. A neighbours dog goes forth and bark! then stillness once again, like sunshine after rain. and so the thinker having heard and thought, carefully turns out the light and goes to bed. 41 pages (20 A4 pages cut in half). Folder 76 from Harry Gilham Collectionpoetry, creative writing, gwen baker -
 Flagstaff Hill Maritime Museum and Village
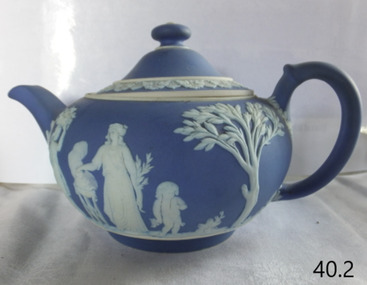
Ceramic - Teapot, Josiah Wedgwood & Sons Ltd, 1890
Josiah Wedgwood (1730–95), came from an established family of potters and trained with his elder brother. He was in partnership with the leading potter Thomas Whieldon from 1754 until 1759 when a new green ceramic glaze he had developed encouraged him to start a new business on his own. Relatives leased him the Ivy House in Burslem, Stoke-on-Trent, and his marriage to Sarah Wedgwood, a distant cousin with a sizeable dowry, helped him launch his new venture. After an extensive and systematic program of experiment Wedgwood in 1765 created a new variety of creamware, a fine glazed earthenware, which was the main body used for his table wares thereafter. After he supplied Queen Charlotte with a tea set for twelve the same year, she gave official permission to call it "Queen's Ware" (from 1767). This new form, perfected as white pearlware (from 1780), sold extremely well across Europe, and to America. It had the additional advantage of being relatively light, saving on transport costs and import tariffs in foreign markets. Wedgwood developed several further industrial innovations for his company, notably a way of measuring kiln temperatures accurately, and several new ceramic bodies including the "dry-body" Stoneware, "black basalt" (by 1769), cane ware, and jasperware (the 1770s), all designed to be sold unglazed, like "biscuit porcelain". In the later 19th century the company returned to being a leader in the design and technical innovation, as well as continuing to make many of the older styles. Despite increasing local competition in its export markets, the business continued to flourish in the 19th and early 20th centuries, remaining in the hands of the Wedgwood family, but after World War II it began to contract, along with the rest of the English pottery industry. After buying several other Staffordshire ceramics companies, in 1987 Wedgwood merged with Waterford Crystal to create Waterford Wedgwood plc, an Ireland-based luxury brands group. After a 2009 purchase by KPS Capital Partners, a New York-based private equity firm. Wedgwood has always been associated with fine china, porcelain, and luxury accessories, the entrepreneur Josiah Wedgwood rapidly became successful and was soon one of the largest manufacturers of Staffordshire pottery. Wedgwood is a significant pottery manufacturer as the company is especially associated with the "dry-bodied" (unglazed) stoneware Jasperware in contrasting colours, and in particular that in "Wedgwood blue" and white that has become a trademark. Teapot and lid, Wedgwood blue Jasperware with white patternImpressed name Wedgewood and date letter "S" = 1890flagstaff hill, warrnambool, flagstaff hill maritime museum, maritime museum, shipwreck coast, flagstaff hill maritime village, great ocean road, teapot, wedgewood blue, wedgewood teapot, tea pot, kitchen ware, josiah wedgwood, staffordshire potteries -
 Flagstaff Hill Maritime Museum and Village
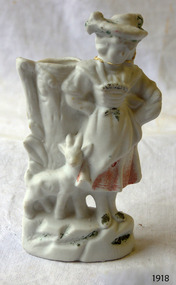
Decorative object - Ornament, ca. 19th century
This fine white unglazed porcelain figurine is one of six donated together. The bisque material was easy to carve and allowed fine detail. Figurine ornaments were popular for table decorations between the mid-18th to early 19th centuries. This ornament was likely made in Germany, and German manufacturers began to use bisque material to make realistic faces for dolls in the 1850s.The set of six bisque figurines is representative of popular table decorations during the 19th and early 20th centuries.Fine unglazed white porcelain ornament, hollow inside. It is carved to represent a peasant girl and goat with a vase shaped like a tree stump in the background. The ornament has remnants of gold, red, brown and green paint. There is an inscription on the base."3943:warrnambool, shipwrecked-coast, flagstaff-hill-maritime-museum, maritime-museum, shipwreck-coast, ornament, flagstaff hill, flagstaff hill maritime museum and village, maritime museum, maritime village, great ocean road, shipwreck coast, bisque, china ornament, white china ornament, german, germany, porcelain, unglazed porcelain, 19th century, 18th century, european ornament, pottery, unglazed pottery, domestic ornament, decoration, table decoration, girl and goat, vase -
 Flagstaff Hill Maritime Museum and Village
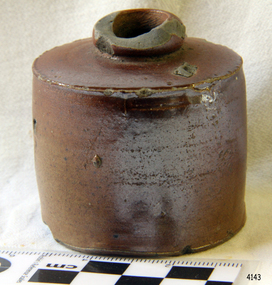
Container - Ink Bottle, Prior to 1878
This design of ink bottle was commonly referred to as a ‘penny ink well’ because it was very inexpensive to produce. It is also known as a dwarf ink bottle. Pen and ink has been in use for hand writing from about the seventh century up until the mid-20th century up until around the mid-19th century a quill pen made from a bird’s feather was used. In the 1850s the steel point pen was invented and could be manufactured on machines in large quantities. In the 1880s a successful portable fountain pen was designed, giving a smooth flowing ink and ease of use replacing the quill or dip pen. History of the Loch Ard: The Loch Ard got its name from "Loch Ard" a loch that lies to the west of Aberfoyle, and the east of Loch Lomond. It means "high lake" in Scottish Gaelic. The vessel belonged to the famous Loch Line which sailed many vessels from England to Australia. The Loch Ard was built in Glasgow by Barclay, Curle & Co. in 1873, the vessel was a three-masted square-rigged iron sailing ship that measured 79.87 meters in length, 11.58 m in width, and 7 m in depth with a gross tonnage of 1693 tons with a mainmast that measured a massive 45.7 m in height. Loch Ard made three trips to Australia and one trip to Calcutta before its fateful voyage. Loch Ard left England on March 2, 1878, under the command of 29-year-old Captain Gibbs, who was newly married. The ship was bound for Melbourne with a crew of 37, plus 17 passengers. The general cargo reflected the affluence of Melbourne at the time. Onboard were straw hats, umbrellas, perfumes, clay pipes, pianos, clocks, confectionery, linen, and candles, as well as a heavier load of railway irons, cement, lead, and copper. There were other items included that were intended for display in the Melbourne International Exhibition of 1880. The voyage to Port Phillip was long but uneventful. Then at 3 am on June 1, 1878, Captain Gibbs was expecting to see land. But the Loch Ard was running into a fog which greatly reduced visibility. Captain Gibbs was becoming anxious as there was no sign of land or the Cape Otway lighthouse. At 4 am the fog lifted and a lookout aloft announced that he could see breakers. The sheer cliffs of Victoria's west coast came into view, and Captain Gibbs realised that the ship was much closer to them than expected. He ordered as much sail to be set as time would permit and then attempted to steer the vessel out to sea. On coming head-on into the wind, the ship lost momentum, the sails fell limp and Loch Ard's bow swung back towards land. Gibbs then ordered the anchors to be released in an attempt to hold their position. The anchors sank some 50 fathoms - but did not hold. By this time the ship was among the breakers and the tall cliffs of Mutton Bird Island rose behind. Just half a mile from the coast, the ship's bow was suddenly pulled around by the anchor. The captain tried to tack out to sea, but the ship struck a reef at the base of Mutton Bird Island, near Port Campbell. Waves subsequently broke over the ship and the top deck became loosened from the hull. The masts and rigging came crashing down knocking passengers and crew overboard. When a lifeboat was finally launched, it crashed into the side of Loch Ard and capsized. Tom Pearce, who had launched the boat, managed to cling to its overturned hull and shelter beneath it. He drifted out to sea and then on the flood tide came into what is now known as Lochard Gorge. He swam to shore, bruised and dazed, and found a cave in which to shelter. Some of the crew stayed below deck to shelter from the falling rigging but drowned when the ship slipped off the reef into deeper water. Eva Carmichael a passenger had raced onto the deck to find out what was happening only to be confronted by towering cliffs looming above the stricken ship. In all the chaos, Captain Gibbs grabbed Eva and said, "If you are saved Eva, let my dear wife know that I died like a sailor". That was the last Eva Carmichael saw of the captain. She was swept off the ship by a huge wave. Eva saw Tom Pearce on a small rocky beach and yelled to attract his attention. He dived in and swam to the exhausted woman and dragged her to shore. He took her to the cave and broke the open case of brandy that had washed up on the beach. He opened a bottle to revive the unconscious woman. A few hours later Tom scaled a cliff in search of help. He followed hoof prints and came by chance upon two men from nearby Glenample Station three and a half miles away. In a complete state of exhaustion, he told the men of the tragedy. Tom then returned to the gorge while the two men rode back to the station to get help. By the time they reached Loch Ard Gorge, it was cold and dark. The two shipwreck survivors were taken to Glenample Station to recover. Eva stayed at the station for six weeks before returning to Ireland by steamship. In Melbourne, Tom Pearce received a hero's welcome. He was presented with the first gold medal of the Royal Humane Society of Victoria and a £1000 cheque from the Victorian Government. Concerts were performed to honour the young man's bravery and to raise money for those who lost families in the disaster. Of the 54 crew members and passengers on board, only two survived: the apprentice, Tom Pearce, and the young woman passenger, Eva Carmichael, who lost her family in the tragedy. Ten days after the Lochard tragedy, salvage rights to the wreck were sold at auction for £2,120. Cargo valued at £3,000 was salvaged and placed on the beach, but most washed back into the sea when another storm developed. The wreck of Lochard still lies at the base of Mutton Bird Island. Much of the cargo has now been salvaged and some items were washed up into Lochard Gorge. Cargo and artefact's have also been illegally salvaged over many years before protective legislation was introduced in March 1982. One of the most unlikely pieces of cargo to have survived the shipwreck was a Minton majolica peacock- one of only nine in the world. The peacock was destined for the Melbourne 1880 International Exhibition. It had been well packed, which gave it adequate protection during the violent storm. Today the Minton peacock can be seen at the Flagstaff Hill Maritime Museum in Warrnambool. From Australia's most dramatic shipwreck it has now become Australia's most valuable shipwreck artifact and is one of very few 'objects' on the Victorian State Heritage Register.This ink well is historically significant as it represents methods of hand written communication that were still common up until the mid-20th century, when fountain pens and ballpoint pens took over in popularity and convenience. The shipwreck of the Loch Ard is of significance for Victoria and is registered on the Victorian Heritage Register ( S 417). Flagstaff Hill has a varied collection of artefact's from Loch Ard and its collection is significant for being one of the largest accumulation of artefact's from this notable Victorian shipwreck of which the subject items are a small part. The collection's objects give us a snapshot of how we can interpret the story of this tragic event. The collection is also archaeologically significant as it represents aspects of Victoria's shipping history that allows us to interpret Victoria's social and historical themes of the time. Through is associated with the worst and best-known shipwreck in Victoria's history.Stoneware penny Ink bottle ironstone salt-glazed, stoneware cylindrical shape with small mouth and squat neck, broad shoulders brown colour, . with light coloured encrustation spots.flagstaff hill, warrnambool, flagstaff hill maritime museum, shipwreck coast, flagstaff hill maritime village, great ocean road, loch line, loch ard, captain gibbs, eva carmichael, tom pearce, glenample station, mutton bird island, loch ard gorge, penny ink well, writing equipment, domestic, stoneware, clay, ceramic, pottery, ink well, inkwell, ink bottle, dip pen, ink, hand writing, business, vintage, dwarf ink -
 Flagstaff Hill Maritime Museum and Village
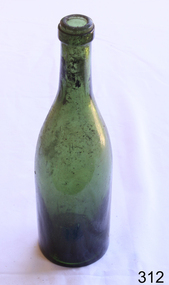
Container - Bottle, Late 19th century or early 20th century
Glass manufacturing has evolved over thousands of years. Glass making has been traced back to 3500 BC in Mesopotamia. The earliest known glass objects were beads, perhaps made by accident while working with metal. In the late Bronze Age, several civilizations discovered how to make vessels and glass bottles by wrapping threads of melted glass around cores of sand or clay. Later, moulds were used to form dishes and table wares. Around the 1st century BC, glassblowing was discovered. This made glass containers less expensive than pottery. Mould-blown glass, the process of blowing a piece of molten glass into a wooden or metal mould, was invented during the 1st century AD. This technique was faster with more consistent results. It paved the way for mass production. It wasn’t until the late 1800s that the production process to become more efficient. In 1887, a company in England created a semi-automatic process that could produce up to 200 bottles an hour. This process has been refined to the point where modern machines can yield more than 600 containers per minute. Blown vs. Manufactured Glass Bottles Nowadays, glass bottles, jars, and cups are usually manufactured on a bigger scale than is found in individual glassblowing studios. If we still depended on hand-blown glass for all of our glass containers, we would see some major differences in the process of creating bottles and jars. First, there's the time. Hand blowing glass takes a significant amount of time, even for one simple container. In contrast, hundreds of jars per minute can be made using modern technology. This leads to the second advantage: price. Because of the automated and streamlined process, the price for manufactured containers is much lower than that of hand-blown glass. Third, manufactured bottles will be much more consistently uniform than bottles blown by hand. Automated glass manufacturing produces nearly identical batches of jars. Glass blowing is awesome for unique, beautiful pieces of art. But for lots of lower priced and uniformly shaped containers, automatic manufacturing is the preferred method to create glass bottles and jars. https://www.containerandpackaging.com/resources/glass-bottles-brief-history The invention and development of glass for domestic items including bottles, has been nothing short of revolutionary. The use of glass bottles, that could be easily washed, led to improved hygiene, and mass manufacturing of drinks of all types, including milk, cordial and alcoholic beverages.Green Glass Bottle Possibly a ginger beer bottle.Concave indentation at the base. Also on base are two raised lumps. flagstaff hill, warrnambool, shipwrecked-coast, flagstaff-hill, flagstaff-hill-maritime-museum, maritime-museum, shipwreck-coast, flagstaff-hill-maritime-village, glass -
 Flagstaff Hill Maritime Museum and Village
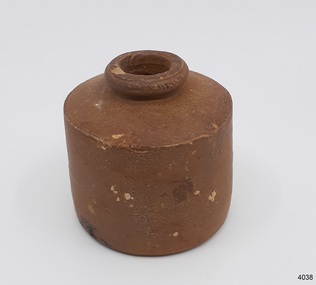
Container - Ink Bottle, 19th to early-20th century
This design of ink bottle or ink well was commonly referred to as a ‘penny ink well’ because it was very inexpensive to produce. It is also known as a dwarf bottle. Pen and ink has been in use for hand writing from about the seventh century up until the mid-20th century. Up until around the mid-19th century a quill pen made from a bird’s feather was used. In the 1850s the steel point pen was invented and could be manufactured on machines in large quantities. In the 1880s a successful portable fountain pen was designed, giving a smooth flowing ink and ease of use. Ink wells, used with steel nib dip pens, were commonly used up until the mid-20th century. The pens only held a small amount of ink so users had to frequently dip the nib of the pen into an ink well for more ink. Hand writing with pen and ink left wet writing on the paper, so blotting paper was carefully used to absorb the excess ink and prevent smudging. Ink could be purchased, ready to use, or in the powdered form, which needed to be mixed with water. After the invention of fountain pens, which had a reservoir of ink, and then ballpoint pens, which also had ink that flowed freely, the dip pen was slowly replaced. However, artisans continue to use nib pens to create beautiful calligraphy.This ink well is historically significant as it represents methods of hand written communication that were still common up until the mid-20th century, when fountain pens and ballpoint pens took over in popularity and convenience.Ink bottle or ink well, sometimes called a Penny Ink Well. Cylindrical body, salt-glazed, brown ceramic stoneware bottle, handmade. Stoneware bottle. flagstaff hill, warrnambool, shipwreck coast, flagstaff hill maritime museum, flagstaff hill maritime village, maritime museum, great ocean road, shipwreck artefact, writing equipment, writing accessory, office equipment, stationery, domestic, stoneware, clay, ceramic, pottery, ink well, inkwell, ink bottle, penny ink well, nib pen, dip pen, ink, hand writing, record keeping, household, business, vintage, blotting paper, dwarf bottle -
 City of Moorabbin Historical Society (Operating the Box Cottage Museum)
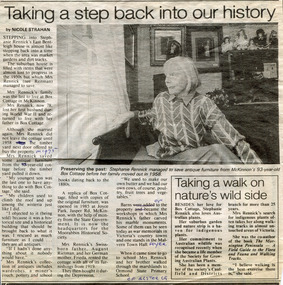
Photograph, B/W Stefanie Rennick nee Rietman c1999; Newspaper clipping 1996, 1996, 1999
August Rietmann (1877-1951) of Lustdorf ,Switzerland, married Maria Frieda Oesschlager (1878-1942) of Baden Baden, in Germany on 6/8/1910 8/8/1915 August and his wife Frieda migrated to Melbourne, Victoria, Australia sailing on the Steam Ship ‘Osterley’ from Marseilles to Melbourne They leased Box Cottage, Ormond in 1917 and raised two children, Stefanie (1918 -2006) and William (1920- 1997). 1935 August purchased the property and the family used the Cottage during the day and slept in the Front House. August was a monumental mason, potter and sculptor, and was employed at Corbens Ltd Clifton Hill, to carve war memorials in Victoria post WW1 c 1915-1922. During the 1920's August set up his own business in pressed cement making pot plants, columns,paving slabs and lampstands. His son William joined the business and and the family continued to use the site after August died in 1951. Rietmann Landscaping Ltd moved to Bay Road Highett in 1953 and later to Carrum. The land, containing the Box Cottage, was sold to Lewis Timber Pty Ltd in 1970 and Mr Lewis proposed that Moorabbin City Council should preserve the heritage Cottage. Stefanie Rietman, grew up living in Box Cottage until 1935 when she began a Teaching career. Stefanie married Alan Francis 1941 but he was killed in WW2 Air operations over Germany 1944. Two sons were born 1942, 1944. Stefanie returned to live at the cottage until 1958. She married Herbert Rennick 1946 and two sons were born 1947, 1952. Stefanie also established a native grasses garden in Joyce Park, and designed and made resin jewellery. Stefanie died 2006 In 1984 the Cottage was dismantled and reconstructed in the adjacent Joyce Park. The Rietman family is an example of the diverse nationalities that lived and worked productively in Moorabbin Shire 1871–1933 , the City of Moorabbin 1934-1994 and continues today in the Cities of Glen Eira, Kingston, Bayside, and Monash. Stefanie was a talented artist , school teacher, and jewellery designer and raised 4 sons. August, a sculptor and stone mason, was employed by Corben Pty Ltd Clifton Hill to carve WW1 Memorials before establishing his own successful masonry business in the Box Cottage during the latter 1920s. After becoming interested in pressed cement casting, he took on apprentices (1930s Depression) and among his products were garden furniture, pots and also street lamp standards, some of which were installed in St Kilda Road. After August’s death in 1951, his family continued the business ‘Rietman’s Landscaping Ltd.’, at Highett and a) Newspaper clipping, Moorabbin Standard 17/9/1996 Stefanie Rennick ( nee Rietman) by N. Strahan b) Photograph Black & White, Stefanie Rennick ( nee Rietman) 1999a) printed article b) handwritten informationresin jewellery, australian native grasses, schools, education, craftwork, pottery, ceramics, ormond state school, rietmann august, rietman august, rietmann frieda, rietman frieda, stonnington city town hall, war memorials, world war 1 1914-1918, rietman stefanie, rennick stefanie, francis stefanie, rietman william, rietman ray, montford paul, malvern city town hall, box cottage museum ormond, box william, box elizabeth, joyce park ormond, rietman's landscaping pty ltd, bay road highett, macrobertson pty ltd, coleraine soldier memorial 1921, box cottage ormond