Showing 1304 items
matching t white
-
 International House, The University of Melbourne
Photograph (Item), Hugh Fisher, International House volleyball team, 1969
... volleyball team dressed in white shorts and t-shirts. ... dressed in white shorts and t-shirts. International House ...sport, volleyball, students -
 Old Castlemaine Schoolboys Association Inc.
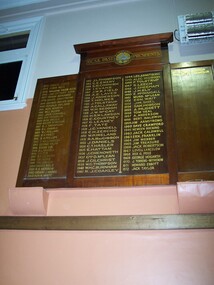
Honour Board, Past Presidents
1912 – J. L. Thompson 1913 – G. E. Emery 1914 – S.M. Cornish 1915 – 1916 – I. Evans 1917 – J. W. B. Field 1918 – A. E. Laver 1919 – J. Anderson 1920 – T. Holmes 1921 – J. Tolstrup 1922 – A. Callaway 1923 – W. H. Seddon 1924 – J. W. McCay 1925 – H.S.W. Lawson 1926 – C. Courtney 1927 – G. Leaney 1928 – F. Tate 1929 – J.G. Yandell 1930 – C.H. Zercho 1931 – W.P. Ireland 1932 – R.A. MacGibbon 1933 – J. Daniels 1934 – A.T. Hasler 1935 – E. Hattam 1936 – J. Chenoweth 1937 – George D. McLean 1938 – J. Gilchrist 1939 – W.G. Thompson 1940 – W.H.C. Burnham 1941 – R. J. Coakley 1942 – 1943 – 1944 – Les Armstrong 1945 – Alec McGibbon 1946 – F. Tolstrup 1947 – S. Leech 1948 – J. Sheehan 1949 – J.H. Ely 1950 – E. McDougall 1951 – Murd McLean 1952 – Ern. Wait 1953 – Jim Shiel 1954 – Sam Hobson 1955 – A Mussett 1956 – Tom Veal 1957 – A. Anderson 1958 – Bert Baldwin 1959 – Jim Armstrong 1960 – Dave Crawford 1961 – Newlyn Hocking 1962 – Jack Caldwell 1963 – Ern. Franklin 1964 – Jim Webber 1965 – Jim Treasure 1966 – Jack Robertson 1967 – Lovell Langslow 1968 – Rex G. Peile 1969 – George Hogarth 1970 – J. Torrens-Witherow 1971 – Howard Ebbott 1972 – Jack Taylor 1973 – Samuel Leech 1974 – Edwin Rees 1975 – William Webb B.E.M. 1976 – Jim Ottery Q.P.M. 1977 – Frank Edwards 1978 – Geoff. Armstrong 1979 – George Archer M.B.E 1980 – Donald Ireland 1981 – Ken Martin 1982 – Bill Blume 1983 – Jack Connell 1984 – Ian Franklin 1985 – Bob Welch 1986 – Kelvin McMeekin 1987 – Edwin J Thompson 1988 – Don. L. Gamble 1989 – V.J. Pollard 1990 – B.N. Priest 1991 – R.A. Phillips 1992 – T. Williamson 1993 – George Ralph 1994 – Edgar Cue 1995 – A. L. Hassell 1996 – J.K. Cue 1997 – Richard P. Desmond 1998 – Cec. Kuhle 1999 – Trevor Cue 2000 – David A. Bailie 2001 – R.A. Morrow 2002 – Gregory J. Hughes 2003 – Ron. N. White 2004 – Terry Robinson 2005 – Peter J. Thompson 2006 – M. J. Murphy 2007 – Alan Paull 2008 – D. W. Burgess 2009 – K. F. McShanag 2010 – Steven Norris 2011 – Len Weston 2012 – Jim Chaplin 2013 – Dennis Green 2014 – Neville Cooper 2015 – Peter Cole 2016 – William Sikora -
 Ballarat Heritage Services
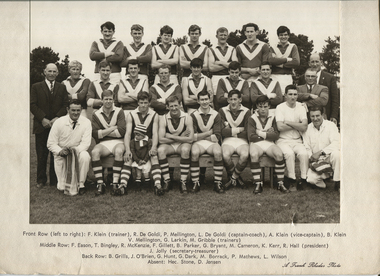
Photograph - Photograph - Black and White, Rokewood-Corindhap Football Club Premiers, 1867, 1967
Rokewoord Corindhap won the premiership in 1967 with Garry Dark winning the Brunn Trophy for Best and Fairest in the League.Large black and white photograph with names typed underneath - in cover.Front Row (left to right): F. Klein (trainer), R. De Goldi, P. Mellington, L. De Goldi (captain-coach), A. Klein (vice-captain), B. Klein, V. Mellington, G. Larkin, M. Gribble (trainers) Middle Row: F. Eason, T. Bingley, R. McKenzie, F. Gillett, B. Parker, G. Bryant, M. Cameron, K. Kerr, R. Hall (president) J. Jolly (secretary-treasurer) Back Row: B. Grills, J. O'Brien, G. Hunt, G. Dark, M. Borrack, P. Mathews, L. Wilson. Absent: Hec Stone, D. Jensen A Frank Rhodes Photorokewood, corindhap,, afl, football, garry dark -
 Ballarat Heritage Services
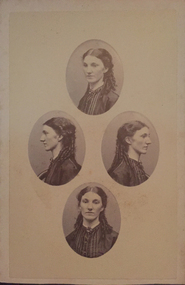
Photograph - Photograph - Black and White, J. Watson, Portrait of a Woman
TPhotographic portrait of a woman.fullarton, j. watson, woman -
 Ballarat Heritage Services
Photograph - Photograph - Colour, Kooroocheang State School World War One Honour Board, 06/10/2013
... State School World War One Honour Board - A.H. White, C.H. White ...The following names were on the Kooroocheang State School World War One Honour Board - A.H. White, C.H. White, L.C. White, H.E. White, G. Croucher, P. LaFranchi. L. LaFranchi, T. LaFranchi, W. Pickering, H. Pickering, J. McMahon, R. Hull, J. Neale, D. Williams, W. Risk, J. Waddingham, R. Waddingham, G.A. Heron, W.F. Heron, D. Dunstan.Photograph of the Kooroocheang State School World War One Honour Board on display in the Smeaton Primary School in 2013.world war one, kooroocheang state school, kooroocheang state school honour board, la franchi, kooroocheang, a.h. smith, smith, l.c. white, croucher, p. lafranchi, t. lafranchi, pickering, mcmahon, hull, kneale, risk, g. waddington, waddingham, heron, dunstan, williams, peter lafranchi -
 Lakes Entrance Regional Historical Society (operating as Lakes Entrance History Centre & Museum)
Photograph, Bergin T, 1904
The date on the photo 1.11.1904, appears to identify this as the 'Hero' aground October 1904 when her cables parted while sheltering from a gale near Cape Woolamai, Victoria. Reference 'Wrecks along the Gippsland Coast', 8th Edition p84, Jack Loney.Black and white photograph mounted on card, of auxiliary ketch Hero on rocks as seen from the water. Two men on boat, one man and dog on rocks. Lakes Entrance VictoriaThe Hero in trouble as seen from the water. (Snapshot by T Bergin) 1.11.1904boats and boating, shipwrecks, coast -
 Hume City Civic Collection
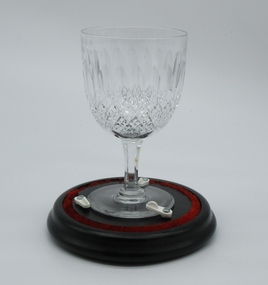
Crystal Goblet, c1915
This crystal goblet was presented to Mrs. T. O'Brien (Margaret O'Brien nee Leyden) on 26 January 1915 when the Starkie Memorial was unvieled by the then Shire President Cr. O'Brien. The memorial was erected in recognition of Cr. Joseph David Starkie's efforts in bringing the water supply to Sunbury.Engraved crystal goblet with diamond cut decoration on bowl of goblet. Stem and base plain. A black round wood base with three white clips for holding goblet. A clear glass dome shaped cover that is used to enclose the goblet on wood base.around rim - "PRESENTED TO MRS. T.O'BRIEN..."o'brien, margaret, 1910s, sunbury, starkie memorial fountain, starkie, joseph david, george evans collection -
 Hume City Civic Collection
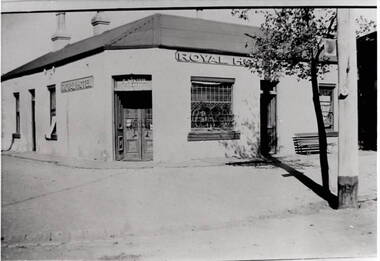
Photograph, Royal Hotel
This is an image of the original single storey Royal Hotel building which was on the corner of Brook and Evans Streets. In the 1930s the single storey structure was demolished after a fire and replaced with a double storey Art Deco red brick building, which still stands on the same site.At one stage there were four hotels in Evans Street between Station Street and Brook Street. At some stage the Millett family owned them. The Royal and the Olive Tree (formerly the Railway) hotels remain on their original site but not in their original appearance.A black and white photograph with a cream border of a single storey hotel building with a headlight window on the RHS of the corner entry doorway, which also has lead light windows. A young tree and power pole are seen on the RHS of the image. hotels, royal hotel, s.winter, t. millett -
 Lakes Entrance Regional Historical Society (operating as Lakes Entrance History Centre & Museum)
Photograph, Thomas Lockheart Lindenow, 1906 c
Also identical photograph size 10 x 15 cm 04480.1 plus an enlarged paper copyBlack and white photograph of sixteen members of the Mossiface Brass Band, B Kleintz, T Greenwood, C Curtis, G Ah Chow, D E Timmins, W J Terrill, centre L Greenwood with triangle, Charles Shepherd, with bass drum, G Curtis bandmaster, W Fiedler G Croft, A Curtis, Front E Warren, G. Warren, R Greenwood and Bern Kleinitz, Mossiface Victoriawaterways -
Lakes Entrance Regional Historical Society (operating as Lakes Entrance History Centre & Museum)
Photograph, 1930 c
Black and white photograph of front of Dwyers Garage with thirteen men and boy standing out front, behind them is a small dray on left and a new car 1930 A Ford picture of T Ford truck on window left of front door Bairnsdale Victoriabusinesses -
 Lakes Entrance Regional Historical Society (operating as Lakes Entrance History Centre & Museum)
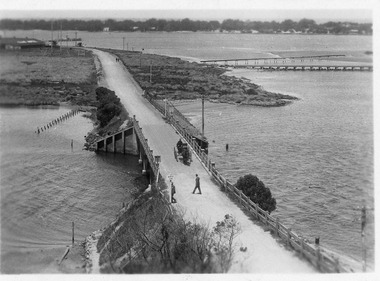
Postcard, 1917c
Also sepia toned photographic print 10cmx15cm, good condition old cat No 310 or 318? (Club Hotel and Hummocks area cropped from top) also Black and white photographic print 12.5cmx18cm, good condition- 2 copies 'Original T-Beam bridge opened Sept 1917 on reverse P01151-3.Black and white photographic miniature postcard showing the concrete bridge over the North Arm, showing the extended abutments, and shortened bridge length compared to previous bridge, causing restriction of waterway. Two walkers and horse drawn vehicle, buggy, on bridge. Remaining piles of wooden bridge upstream of bridge, telegraph poles upstream of bridge and across mudflats. Bridge to Bullock Island from mudflat, Club Hotel, Cunninghame Arm, and sand hummocks in distance. Lakes Entrance Victoriabridges, waterways, coast, transport, hotels -
Lakes Entrance Regional Historical Society (operating as Lakes Entrance History Centre & Museum)
Photograph, 1/11/1959 12:00:00 AM
Black and white photograph taken at the opening of A Trevaskis, D Tham, D Hardwidge, C Answer, W Davies, J Appleby, J Thom, J Henderson, C McMahan, T Hardwidge the men who were involved in the building of the community hall at Wairewa Victoriacemeteries, settlers -
 Lakes Entrance Regional Historical Society (operating as Lakes Entrance History Centre & Museum)
Photograph
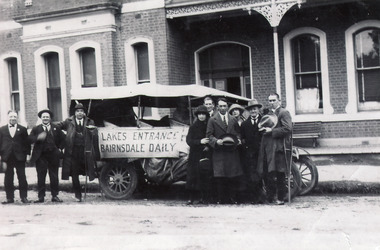
Black and white photograph of seven men and two women standing beside R.J. Inglis passenger bus Ford Model T chassis, 30 cwt charabane body to carry 15 outside the Orient Hotel Bairnsdale Victoriaclothing, genealogy -
 Ballarat RSL Sub-Branch Inc.
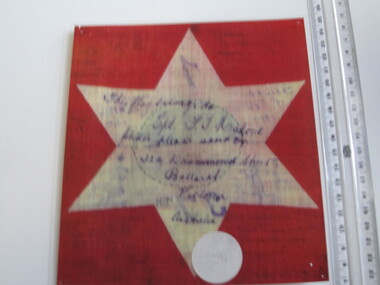
Flag - Segment Red with White Star laminated
6 pointed star (white star, red back ground) " this flag belong to Cpl. F. T Malone finder please send on to 324 Drummond Street Ballarat Victoria Australia"first world war (ww1), 1914 - 1918, flags, ballarat rsl, ballarat -
 Ballarat RSL Sub-Branch Inc.
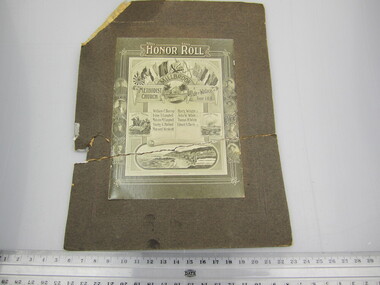
Photograph - Millbrook Methodist Church & Pride of Wallace Tent I.O.R. Honour Roll
With portraits and names of - William C BURRUP Irvine T CAMPBELL Malcolm M CAMPBELL Stanley G HALFORD Maynard WESTCOTT Harry WRIGHT KIA John W WHITE KIA Thomas H WHITE KIA Edward A HARRIS KIAphoto/pictures, ballarat rsl, ballarat -
 Ambulance Victoria Museum
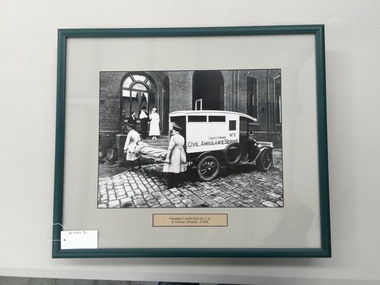
Photograph, framed, Unloading T Model Ford no.3, at St Vincent's Hospital circa 1920
Black and white photograph (Print) with mountboard surround, enclosed in a timber frame (painted green) with Perspex glazing. Hanging string attached at back.model t ford, model t ford no.3, st vincent's hospital -
 Ambulance Victoria Museum
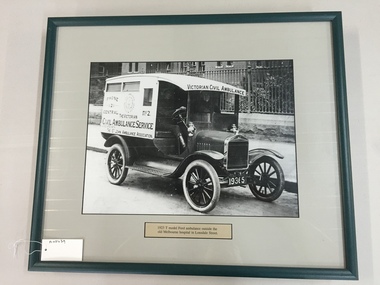
Photograph, framed, 1923 T Model Ford outside the old Melbourne Hospital in Lonsdale Street
Black and white photograph (Print) with mountboard surround, enclosed in a timber frame (painted green) with Perspex glazing. Hanging string attached at back.lonsdale street, t model ford, melbourne hospital, ambulance, victorian civil ambulance service -
 Ambulance Victoria Museum
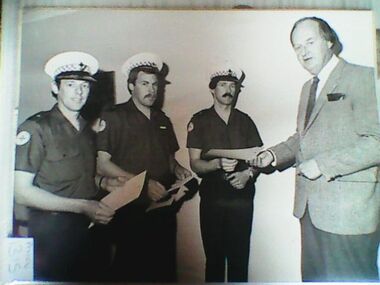
Photograph, Ambulance Staff, 16September 1982
presentation of certificates of applied science (ambulance) to T (?) O'Loughlan, K (?) Robinson and D. Smith. These were the first ambulance officers to graduate from the new ambulance officers training course. Mr R. W. Purnell, president of the ambulance service, makes the presentation. Source inscription on photograph.Black and white photograph. Three ambulance officers being presented certificates by man in suit.o'loughlan, robinson, d. smith -
 Ambulance Victoria Museum
Photograph, Ambulance Officers Training Centre Course 180, A.O. III 1976, 1976
Front Row L to R: T. Lee, B. Pratt, A. Dales, G. Davies, C. Chapman, T. Cuddily, L. Ryan. Middle Row L to R: C. Price, J. Spanwick, I. Neilsen, J. Satori, D. Murfett, J.Dicker, P. Murphy. Back Row L to R: T. Austin, I. Scott, G. Pitt, W. Jenkins.Black and White photograph of ambulance officer traineesambulance officers training centre -
 Ambulance Victoria Museum
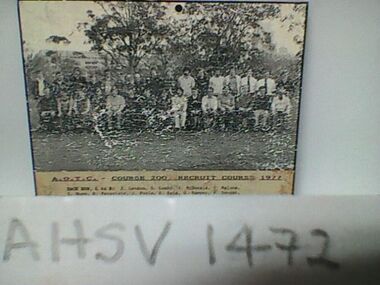
Photograph, Ambulance Officers Training Centre Course 200, Recruit Course, 1977, 1977
Front Row L to R: J. Brereton, d. Catteral, M. Chilton, L. Cooke, P. Crew, K Crowle, J. Engledow, K. Filcock, K. Ford, R. Green, K. Holt, M. Hunting, C. Linke, S. Lamb, J. Lee. Back Row L to R: J. Lennon, D. Lumby. J. McDonald, P. Malone, T. Nunn, R. Paravinic, J. Poole, R. Reid, W. Sampey, P. Sanger, E. Schanssema, K Struthers, P. Turner, N. White, R. Williams, P. Williams. P. Worboys.Black and White photograph of ambulance officer recruitsambulance officers training centre, recruits -
 Old Colonists' Association of Ballarat Inc.
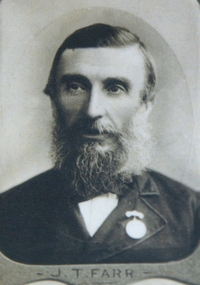
Photograph - Photograph - Black and White, J.T. Farr
Mr. J. T. Farr died in September 1092,Portrait of J.T Farr, foundation member of the Old Colonists' Association of Ballarat. old colonists' association, ballarat, j.t. farr, medal -
 Old Colonists' Association of Ballarat Inc.
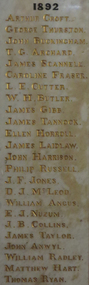
Photograph - Photograph - Colour, Marble Honour Boards listing benefactors to the Ballarat Old Colonists' Associations
The Old Colonists' Hall opened in 1887.Marble Honour Boards listing benefactors to the Ballarat Old Colonists' Associations. The name was added to the boards the year of the donors death. 1892 Arthur Croft George Thurston John Buckingham T.G. Archard James Scannele Caroline Fraser L.E. Cutter W.H. Butler James Gibb James Tannock Ellen Horroll James Laidlaw John Harrison Philip Russell J.F Jones D.J. McLeod William Angus E.J. Nuzum J.B. Collins James Taylor John Anwyl William Radley Matthew Hart Thomas Ryan 1897 William Taylor Joseph Langfon W.C. Phillips Henry Dobson Peter Brose Edwin Parr John Magor Natale D'Angri Lawson Ure James Malcolm Robert Sim W.J. Clarke F.N. Martin William Kelly Edward Hrose Francis Edwards William Kay James Simpson J.R. Hopkins W. Booth 1898 John Peart J.J. Cahir Joseph Betts Thomas Rowlands George Brown Rudolph Stephens James Houston John McPhee Alban Atwood David Fitzpatrick L.H. Kopke Henry Morrison William Bones Henry Morris 1899 Alexander Miller David McNaught C.W. Langtree John Twentyman Nathaniel Trench Adam Bennett James Gay C.B. Retallack James Richardson Thomas Hawkins John Taylor D.F. Stalker William Laplau John Jarvie J.E. Morris James Harrison J.S. Paterson Henry Leggo W.J. Seeley Charles Stewart James Vigar J.J. Cahir Joseph Betts Thomas Rowlands George Brown Rudolph Stephens James Houston John McPhee Alban Atwood David Fitzpatrick L.H. Kopke Henry Morrison William Bones Henry Morris 1900 Peter Le Page W.H. Barnard George Perry George Eason James Ivey 1903 James Miller Matthew Morgan William Norman G.G. Graham John Griffiths Richard Ince John Wallace John Blight J.W. Mills C.E. Jones John Noble Wilson David Mitchell William Walner David Munroe John English David McDonald William Saunders William Dougall A.T. Morrison Thomas Wilson M.C. Donnelly James Fry John Haworth Edward Newman E.F. McElroy J.H. Reed Helen Trounson E.A. Miller Alexander Ross Alexander Taylor H.A. Comber 1909 John Blyth Charles Tunbridge Henry Gore Walter Owen Charles Rowsell Edward Elliott Charles Robinson T.J. Wills R.S. Hager Henry Fields T. Paterson William Woodridge A. Morrah Adam Scott J.C. Shepherd J. Holland J. Cochran G. Lovitt J. Haig G. Sharp J. Dulfer R. Davidson E. Lillingston T. Raw 1911 W.H. Uren John Paterson H.J. Summerscales James Oddie W.H. Malyon T.E. Gill Agnes D. McIntosh John Wright Andrew Byrne Thomas Greenwood H.W. Morrow James Lambert E.E. Eberhard John Reid T.W. Purdue H.J. Symons John Lynch 1915 William Bell D.B. Wheeler Richard Baker M.L.C. W.B. Bradshaw Betsy F. Graham A.J. Hare C.V. Day J.P. Smart Lieutenant Colonel A.H. White Dr R.C. Lindsay Andrew Cant T.C. Coates E. Goodwin Thomas Lyle 1916 James Long John King Junior G.A. Brown C.E. House G.T. Jones Hon. R.T. Vale J.G. Tucker H. Baber J. Lammin D. Lillingstone George Becher Laurence Clark William Brazenor A. Clinton William Little W.B. Bannerman J.H Peady James Lamb 1917 J.C. Charles Joseph Fields John McPhail John Lombard Thomas Lyle H.L. Pobjoy E.E. Llewellyn E.C. Dermer John M. Bickett Hon. J.Y. McDonald Capt. J.W. Pearce. M.C. Joseph Pounder 1918 Lieutenant E.S. Holgate Grace Valkins J.C. Brough Thomas Mitchell George Buchanan J.H. Ward T. Davey A.B. Berry Corporal L.J. Malin G.H. Abrams James Tyler 1919 T.C. Anderson Agnes Murray G. Donaghy F. Opie Thomas Bodycomb Harry D. Davies John Clarke R.L. Medwell G.N. Robinson Isaiah Pearce A.R. Tunbridge H.C. Handford F.G. Fraser F. Carver J.S. Douglas Hon. Alfred Deakin T.J. McConnellarthur croft, george thurston, john buckingham, t.g. archard, james scannele, caroline fraser, l.e. cutter, w.h. butler, james gibb, james tannock, ellen horroll, james laidlaw, john harrison, philip russell, j.f jones, d.j. mcleod, william angus, e.j. nuzum, j.b. collins, james taylor, john anwyl, william radley, matthew hart, thomas ryan, william taylor, joseph langfon, w.c. phillips, henry dobson, peter brose, edwin parr, john magor, natale d'angri, lawson ure, james malcolm, robert sim, w.j. clarke, f.n. martin, william kelly, edward hrose, francis edwards, william kay, james simpson, j.r. hopkins, w. booth, john peart, j.j. cahir, joseph betts, thomas rowlands, george brown, rudolph stephens, james houston, john mcphee, alban atwood, david fitzpatrick, l.h. kopke, henry morrison, william bones, henry morris, alexander miller, david mcnaught, c.w. langtree, john twentyman, nathaniel trench, adam bennett, james gay, c.b. retallack, james richardson, thomas hawkins, john taylor, d.f. stalker, william laplau, john jarvie, j.e. morris, james harrison, j.s. paterson, henry leggo, w.j. seeley, charles stewart, james vigar, j.j. cahir, joseph betts, thomas rowlands, george brown, rudolph stephens, james houston, john mcphee, alban atwood, david fitzpatrick, l.h. kopke, henry morrison, william bones, henry morris, 1900, peter le page, w.h. barnard, george perry, george eason, james ivey, james miller, matthew morgan, william norman, g.g. graham, john griffiths, richard ince, john wallace, john blight, j.w. mills, c.e. jones, john noble wilson, david mitchell, william walner, david munroe, john english, david mcdonald, william saunders, william dougall, a.t. morrison, thomas wilson, m.c. donnelly, james fry, john haworth, edward newman, e.f. mcelroy, j.h. reed, helen trounson, e.a. miller, alexander ross, alexander taylor, h.a. comber, john blyth, charles tunbridge, henry gore, walter owen, charles rowsell, edward elliott, charles robinson, t.j. wills, r.s. hager, henry fields, t. paterson, william woodridge, a. morrah, adam scott, j.c. shepherd, j. holland, j. cochran, g. lovitt, j. haig, g. sharp, j. dulfer, r. davidson, e. lillingston, t. raw, w.h. uren, john paterson, h.j. summerscales, james oddie, w.h. malyon, t.e. gill, agnes d. mcintosh, john wright, andrew byrne, thomas greenwood, h.w. morrow, james lambert, e.e. eberhard, john reid, t.w. purdue, h.j. symons, john lynch, william bell, d.b. wheeler, richard baker m.l.c., w.b. bradshaw, betsy f. graham, a.j. hare, c.v. day, j.p. smart, lieutenant colonel a.h. white, dr r.c. lindsay, andrew cant, t.c. coates, e. goodwin, thomas lyle, james long, john king junior, g.a. brown, c.e. house, g.t. jones, hon. r.t. vale, j.g. tucker, h. baber, j. lammin, d. lillingstone, george becher, laurence clark, william brazenor, a. clinton, william little, w.b. bannerman, j.h peady, james lamb, 1917, j.c. charles, joseph fields, john mcphail, john lombard, thomas lyle, h.l. pobjoy, e.e. llewellyn, e.c. dermer, john m. bickett, hon. j.y. mcdonald, capt. j.w. pearce. m.c., joseph pounder, lieutenant e.s. holgate, grace valkins, j.c. brough, thomas mitchell, george buchanan, j.h. ward, t. davey, a.b. berry, corporal l.j. malin, g.h. abrams, james tyler, t.c. anderson, agnes murray, g. donaghy, f. opie, thomas bodycomb, harry d. davies, john clarke, r.l. medwell, g.n. robinson, isaiah pearce, a.r. tunbridge, h.c. handford, f.g. fraser, f. carver, j.s. douglas, hon. alfred deakin, t.j. mcconnell -
 Mt Dandenong & District Historical Society Inc.
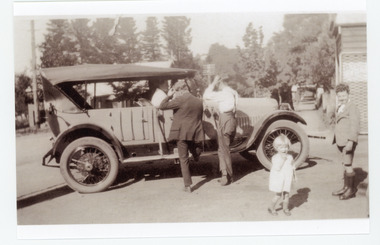
Photograph, Car in Sassafras Main Street
Two men looking closely at a car in Main Street of Sassafras. Probably during the visit of Edward, Prince of Wales in 1920.Copy of a black and white photo showing two men and two children standing near a car. The men looking at the car, the children looking t the ca,era.sassafras, car -
 8th/13th Victorian Mounted Rifles Regimental Collection
Photograph, 1950 circa
... Black and white photograph of T-model Ford utility vehicle... Cunningham Driver" Black and white photograph of T-model Ford utility ...The 8th/13th Victorian Mounted Rifles was raised as a regiment of the Royal Australian Armoured Corps on 1 May 1948 with Headquarters in Melbourne and squadrons in Sale, Benalla/Wangaratta and Albury. In 1955 Regimental Headquarters moved to Wangaratta and a second squadron was located at Albury. The Sale squadron transferred to 4th/19th Prince of Wales’s Light Horse. In 1977 8/13 VMR Regiment was reduced to an independent squadron A Squadron 8th/13th Victorian Mounted Rifles and in 1991 was linked with 4th/19th Prince of Wales’s Light Horse forming the VMR Squadron of that regiment. Alan Cunningham joined the regiment as a trooper in 1948 and went on to command the regiment as a Lieutenant Colonel 1962-65. The use of civilian vehicles was not uncommon inn early days of the regiment especially for activities such as radio training.Unique collection of photographs showing the first years of an armoured regiment of the post-Second World War era Citizen Military Forces showing equipment, uniforms, training and social activity and some personalities.Black and white photograph of T-model Ford utility vehicle and two soldiers. One of a collection of photographs of 8th/13th Victorian Mounted Rifles Regiment between 1948 and 1951." Alan Cunningham's Staff Car - Ron Braddy Bonnet, Alan Cunningham Driver"8th/13th victorian mounted rifles, cunningham alan lieutenant ciolonel, braddy ronald -
 8th/13th Victorian Mounted Rifles Regimental Collection
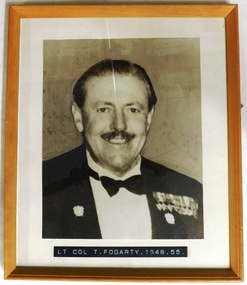
Photograph - Lt Col Fogarty
The 8th/13th Victorian Mounted Rifles was raised as a regiment of the Royal Australian Armoured Corps on 1 May 1948 with Headquarters in Melbourne and squadrons in Sale, Benalla/Wangaratta and Albury. In 1955 Regimental Headquarters moved to Wangaratta and a second squadron was located at Albury. The Sale squadron transferred to 4th/19th Prince of Wales’s Light Horse. In 1977 8/13 VMR Regiment was reduced to an independent squadron A Squadron 8th/13th Victorian Mounted Rifles and in 1991 was linked with 4th/19th Prince of Wales’s Light Horse forming the VMR Squadron of that regiment.One of a collection of photographic portraits of Commanding Officers and Officers Commanding of the regiment/independent squadron from its inception in 1947 to its linking with 4th/19th Prince of Wales’s Light Horse in 1991. Framed black and white photograph of gentleman in Mess jacket with lapel badges. Inscription on lower frame. " Lt. Col. T. Fogarty 1948 - 1955 "military, fogarty, officer -
 8th/13th Victorian Mounted Rifles Regimental Collection
Photograph
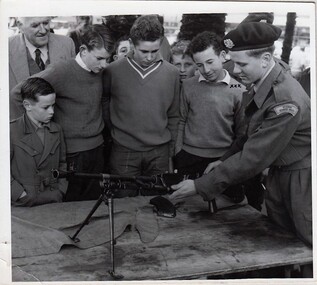
In 1965, 8th/13th Victorian Mounted Rifles held a sustained Recruiting Drive. It was the responsibility of individual CMF units to do their own recruiting and training.Collection of photographs showing an armoured regiment of the Citizen Forces in the 1960s as it transitioned from wheeled armoured vehicles to tanks to M113 armoured personal carriers.Black and white photograph of soldier in Battledress uniform, black beret and 8/13 VMR hat badge demonstrating a Bren Light Machine Gun to a group of young men as part of a Recruiting Display." Trooper T. Terhaar, later WO 2 . A Bren Gun to a group of youths in Dean Square. XXX later Trooper Jackson -
 8th/13th Victorian Mounted Rifles Regimental Collection
Photograph
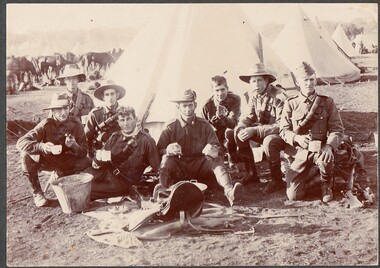
Probably soldiers of 8th Light Horse Regiment The 8th Light Horse Regiment AIF was raised at Broadmeadows Victoria in September 1914 under the command of Lieutenant Colonel Alexander White and formed part of the 3rd Light Horse Brigade. The regiment served at Gallipoli where in a courageous but ill-fated charge at the Nek on 7 August 1915 it suffered horrendous casualties including Lieutenant Colonel White. Rebuilt in Egypt under the command of Lieutenant Colonel Leslie Maygar VC the regiment went on the serve throughout the Middle East Campaign. Colonel Maygar died of wounds at Beersheba when the regiment was attacked by enemy aircraft while waiting to follow up the successful charge of the 4th LH Brigade on 30 October 1917. The 8th Light Horse AIF was disbanded in 1919, but soon after re-raised as the 8th (Indi) Light Horse in the Citizen Military Forces, superseding 16th (Indi) Light Horse. It had its headquarters at Benalla with sub-units throughout the Upper Murray and Northeast Victoria. In December 1941, the regiment converted from horse to mechanised, initially as 8th Reconnaissance Battalion then in July 1942 it became 8th Cavalry Regiment and served in Northern Territory. As Japanese threat to the mainland declined the regiment was disbanded.Black and white photograph of 8 soldiers seated in front of a bell tent and horse lines at Broadmeadows Camp 1915. Soldiers have been drinking tea after cleaning saddles, set out before them. Some wearing slouch hats, one wearing forage cap. Photo mounted on card backing." T. Colquhoun Photo: Broadmeadows Camp 1915: 1 Donald street Prahran." -
 8th/13th Victorian Mounted Rifles Regimental Collection
Photograph
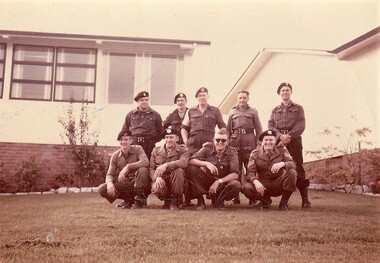
Szabolics, Coward, and Haydon were members of Light Aid Detachment, attached to 8/13 VMR to carry out vehicle repairs.Black and white photograph of nine soldiers 0f 8/13 Victorian Mounted Rifles posed casually outside a building. Left to right, back row: S/Sgt L. Szabolics, unknown,WO2 E Roberts, WO 2 L. Coward, WO 2 R Haydon. Front row: Sgt T TerHaar, Lt J Horsley, Capt D Short , Sgt G. Cole. -
 8th/13th Victorian Mounted Rifles Regimental Collection
photograph
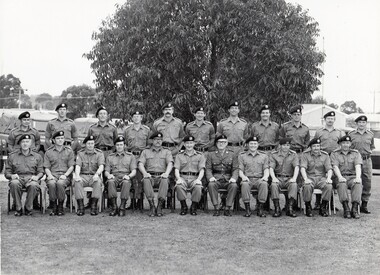
The 8th/13th Victorian Mounted Rifles was raised as a regiment of the Royal Australian Armoured Corps on 1 May 1948 with Headquarters in Melbourne and squadrons in Sale, Benalla/Wangaratta and Albury. In 1955 Regimental Headquarters moved to Wangaratta and a second squadron was located at Albury. The Sale squadron transferred to 4th/19th Prince of Wales’s Light Horse. In 1977 8/13 VMR Regiment was reduced to an independent squadron A Squadron 8th/13th Victorian Mounted Rifles and in 1991 was linked with 4th/19th Prince of Wales’s Light Horse forming the VMR Squadron of that regiment.Black and white photograph of officers of 8/13 Victorian Mounted Rifles at Annual camp Puckapunyal 1974.Back Row l to r: Lieuts J Clay, L Trapnell, T Ireland, Goodson,S. whitehead, R Griffiths, J boyce, Mentliskowsky,Wallman, K Courtis, J Mclean; Front Row: Major N whitehead MC, LieutsL Shefford, I Docking, Capt B Rowley, Major D Short, Lt Col J Neale, Colonel LG coleman ( Honrary Colonel ), Capt G Cole Lieuts J baines, L Jackel, J Horsley. -
 8th/13th Victorian Mounted Rifles Regimental Collection
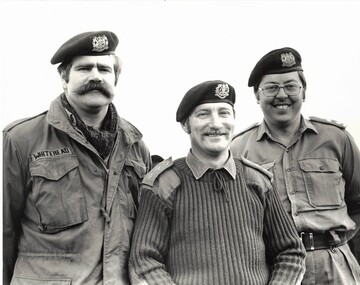
Photograph - Pistol shooting team
Shooting competition was held annually for all units of the 3rd Division.Good study of Victorian citizen soldier officers at skill at arms activity.Black and white photograph of three 8/13 Victorian Mounted Rifles officers, winners of the pistol shoot at the 3rd Division annual shooting competition, c.1979. From left: Lieutenant S Whitehead, Captain J McLean, Lieutena t G Malloy.3rd division, shooting, mclean, whitehead, malloy, pistol, military