Showing 13727 items
matching no 7
-
 Bendigo Military Museum
Photograph - Bones Day – Army Survey Regiment Verses RAAF School of Radio at Laverton, Victoria, 1985
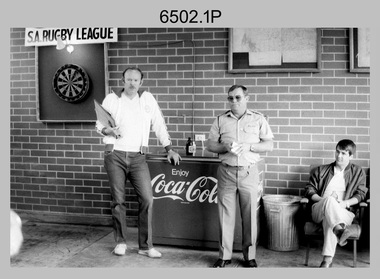
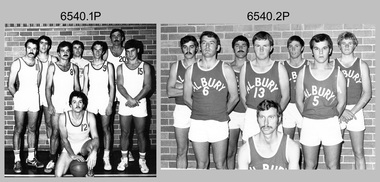
The 10 photographs were taken at Bones Day, an annual sports competition between the Army Survey Regiment and the RAAF School of Radio, at Laverton on the 13th of November 1985. The two units took turns each year to host the event. The day competition usually comprised basketball, cricket, cross country, golf, sailing, pistol shooting, squash, rifle shooting, softball, tennis, touch football, tug-of-war and volleyball. The “big bone” trophy comprising a large bone from a beast housed inside a wooden framed glass case, was awarded to the winner of the day competition. The “O.H.A.R.A Rock” was awarded to the shooter with the lowest score in rifle shooting. The evening competition often included darts, carpet bowls, hookey, quoits and billiards/snooker. The “little bone” (a mounted chicken bone) was the consolation trophy awarded to the winner of the evening competition. The 3-hour bus trip for the visiting unit on their return was typically very raucous. The history of the Bones Day competition is best described in the booklet titled - Bones of Contention Souvenir Program. 1965. Refer to Item 6267. This item comprises the cover of a program booklet and a set of 10 photographs taken at Bones Day, an annual sports competition between the Army Survey Regiment and the RAAF School of Radio, held at Laverton on the 13th of November 1985. The photographs were printed on photographic paper and are part of the Army Survey Regiment’s Collection. The colour A4 booklet cover and black and white photographs were scanned at 300 dpi. .1) – A4 size program booklet titled ‘The Bones of Contention’, buff card cover and colour graphics, internal text and cartoon graphics printed in purple. 32 pages dated 1985. .2) - Photo, black & white, 1985. Basketball teams. Back row L to R: unidentified (x2), Bob Croxton, unidentified, Danny Galbraith, unidentified, Steve Burke. Middle row L to R: Rob Jones, unidentified (x2), Sherri (Dally) Burke, unidentified, Evan Allanson, unidentified. Front row L to R: unidentified (x2), Brenton McDonald, unidentified, Max Shaw. .3) - Photo, black & white, 1985. Cricket teams. Back row L to R: unidentified, Bill Griggs, unidentified, Mick Hogan, unidentified, Jim Ash, Dave Wright, Bob Thrower. Middle row L to R: PTE Hudson, unidentified, Brett McAllister, unidentified (x5). Front row L to R: PTE Wigg, unidentified, Brian Partridge, unidentified, Graham Hales, unidentified (x3). .4) - Photo, black & white, 1985. Cross Country teams. Back row L to R: unidentified (x3), Peter Barrett unidentified (x2), Paul Davis, unidentified. Front row L to R: unidentified, Jeff Rudd, unidentified, Greg Rowe, unidentified (x2), Steve Winner, unidentified. .5) - Photo, black & white, 1985. Golf teams. Back row L to R: unidentified (x2), Brian Johnson, unidentified (x2). Front row L to R: Doug Arman, unidentified, Graeme Dowd, unidentified, Peter Imeson, unidentified (x2). .6) - Photo, black & white, 1985. Pistol Shooting teams. Back row L to R: unidentified, Doug Home, unidentified, Tony Clark, Ben Lucas. Front row L to R: unidentified (x2), Daryl Hockings CSM, unidentified, Max Colletti. .7) - Photo, black & white, 1985. Pistol Shooting teams. Back row L to R: unidentified, Greg Sulman, unidentified, Bob Bright, Tom Bloxham, Bob Hopper, unidentified, Bob Garritty. Front row L to R: unidentified (x2), Dan Cirsky, unidentified (x3), Brad Peppler, unidentified. .8) - Photo, black & white, 1985. Softball teams. Back row L to R: Scheryl Delforce, unidentified, Le-Anne (Smallshaw) Shirley, unidentified, Raelene (Munting) Brodie, Carmel (Butler) Fauth, Gill Park. Middle row L to R: unidentified (x2), Viv (Hawkins) Doherty, unidentified, Avril (Bray) Lloyd, unidentified (x6). Front row L to R: Wendy (Leitinger) McCarthy, unidentified, Leah (Hoffman) Peppler, unidentified, Lorraine (Daly) Talbot-Smith, unidentified, Chris Gordon, unidentified. .9) - Photo, black & white, 1985. Tennis teams. Back row L to R: Damien Killeen, unidentified, Ozzie Slade, unidentified, Dennis Learmonth, unidentified. Middle row L to R: Carol Dunstan, unidentified, Ginny (Turner) Rowe, unidentified (x2), Steve Coulson. Front row L to R: unidentified (x4), Col McInness, Peter Ball. .10) - Photo, black & white, 1985. Touch Football teams. Back row L to R: unidentified, Paul Baker, Jeff Willey, Per Andersen, unidentified (x4). Middle row L to R: John ’Junior’ Whaling, Simon ‘Andy’ Capp, Daryl South, Ken Talbot-Smith, unidentified (x4). Front row L to R: Frank Downie, Peter ‘Spoon’ Lefel, Roy Hicks, Greg Oaten, unidentified (x4). .11) - Photo, black & white, 1985. Tug-of-War teams. Back row L to R: unidentified (x2), Steve Burke, unidentified (x3). Middle row L to R: unidentified (x2), JB Zahra, unidentified, Mal Paterson, Geunther Ebenwaldner, unidentified, Peter ‘Spoon’ Lefel. Front row L to R: Kerron South, unidentified, Barry Hogan, unidentified (x2), Brett McAllister. .1 - 'The Bones of Contention' title on booklet cover. Photos .2P to .11P – 'Bones Day 1985' annotated on cover sleeve.royal australian survey corps, rasvy, army survey regiment, army svy regt, fortuna, bones day -
 Federation University Historical Collection
Document, Zelda Martin, Central Victorian Goldmining towns - Boom Towns or Ghost Towns?, c1996
Zelda Martin was a PhD candidate at the University of Melbourne.[.1] 4th item in light blue display book titled Research Approach/Overview of Chapters/Confirmation of Canditure/Chapters1,2,3&4 of proposed thesis. *Twenty-seven page article on Victorian goldfields towns titled: Central Victorian Goldmining Towns - Boom Towns or Ghost Towns. The article was written during the author's PhD study. It outlines the context methodology, and resources and the chapters of the proposed thesis: (1) Central Victorian Goldmining Towns - The Context (2) Contemporary Views of the Factors Necessary for Town Growth (3) Outward Manifestations of Town Growth (4) The Trappings of Government (5-9) The Main Towns and Their Hinterland. [.2] 5th item in Light Blue display book as above item. *Chapter 1 of proposed thesis titled 'Pick, Shovel and Tin Dish Mining.' Covers in Section A: Central Victoria - Pre 1851: Aborigines in Central Victoria, Squatters, and Government. Section B: The years 1851-1854: The Early Gold Rushes, Government Reaction, Township Surveys, Legislation, Town Development, Local Government and Early Settlement. [.3] 6th item in Light Blue display book as above item. *2A of proposed thesis titled 'Contemporary Views of the Factors Necessary for Town Growth'. Similar information to Chapter 1 plus extra re towns and maps. Sections: Introduction, Context of Place - Geographical Towns Listed, The Context of Time - Pre1851 Aborigines, Governance of Port Phillip, The Squatters, The Villages of Central Victorian Highlands, Conclusion, Condensed Version of Chapter2B. [.4] 7th item in Light Blue display book as above item. *Chapter2B of proposed thesis. Sections: Area of Research, Schools, Banks, Newspapers, Progress Association, Town Development - Sandhurst (Bendigo), Ballarat, Castlemaine,, Maryborough, Ararat and Stawell. [.5] 8th item in Light Blue display book as above item. *Chapter 3 of proposed thesis titled 'Outward Manifestations of Town Growth'. Sections: Introduction, Contemporary Writing, Educationalists, The Bankers, The Townsfolk, Current Theory, General Theories of Urban Development, and Conclusion. [.6] 9th item in Light Blue display book as above item. *Chapter 4 of proposed thesis titled 'Trappings of Government' Sections: Introduction, Early Government Attitudes to Mining and Town Development, Law and Order, Township Surveys, Legislation, Local Government, Transport and Communication, The People and Lobbyists. [.7] 10th item in Light Blue display book as above item. *'The Rise and Fall of Central Victorian Goldmining Towns'. Includes a map showing main Goldfields, a table showing towns and villages at two points in time - 1857 and 1871; a Bibliography of Primary and Secondary Sources. [.8] Resource No1. Black display book titled Local Towns 1 : Alma: *Brief history *Directory *Maps Amphitheatre / Mountain Hut: *Brief History Post Office Directory Ararat: *Brief History *Post Office Directory 1869 - Alphabetical Listing by Occupation *Ararat - Prominent Citizens of 1858 *Langi-Morgala Museum Avoca: *Brief History *Excerpts from 'Avoca The Early Years', Margery and Betty Beavis; pg1 - Beginnings; pg11 - The Midas Touch; pg25 - Local Gold Escorts; pg27 - A Town is Born; pg51- The Administration of Justice; pg53 - The Ways of the Law; pg61 - News of the Day; pg65 - A Time to Play; pg72 - Land Ownership *Post Office Directory (Bailliere's) 1869 *Tourism Map and Information of area *Historic Avoca - A 5.5km Tour *Avoca & the Pyrenees Region - information pamphlet Ballarat: *Early History of Ballarat - Ballarat Historical Society, Publication No.1: origin of the name; Ballaarat - the Beginning; Fabulous Yields from the Ballaarat Goldfield; *Streetscape Lydiard Street. *Hand drawn map showing Leigh River, Old Portland Bay Road, plaque on road to Colac; etc. *Newspaper article re 'The Theatre Royal' ( which stood in the vicinity of the current Owen Williams store) - 'The News'15/04/1998 *Article - 'Ballarat's Mechanics' Institute Lives On' Ballarat Courier, 14/09/1985 *Article - Standing the Test of Time' The News 17/11/1993 re The Mechanics Institute & picture of the Reading Room *'Ballarat a Study of a City, Phyllis Reichl, pub. Nelson, 1968; no.3 place, time and people field studies series *Investigator Vol.33 No.2, 1998 Geelong Historical Society. Article on pg75 describes Ballarat in 1861 *Folded poster - 'Ballarat 100' a history of telegraph communication, pub. Telecom. Beaufort (Fiery Creek): *Brief history *Post Office Directory [.9] Resource No.2 Black Folder Titled Towns cont.No2 Bendigo (Sandhurst): *'Family & Local History at the Bendigo Library - 1851-2001 150 years of gold'. *Bendigo Government Camp in 1853 illustration; key to sketch and names of Government officers stationed there *Excerpts from 'Bendigo and Vicinity' Adolph Haman *The Bendigo Goldfield Registry - pgs 1-7 Introduction *Excerpt: 'Breaking the Grip' *Excerpt: The Most Go-Ahead Place *Excerpts from 'History of Bendigo' - anti license agitation; laying out of town; proposed railway; gold calls and dividends; the Sandhurst Municipality; journalism *Bibliography Blackwood: *Excerpts from 'Aspects of Early Blackwood - The Goldfield, the Landmarks, the Pioneers' Alan J Buckingham and Margaret F Hitchcock, JG Publishing,1980 Buninyong: *A Brief History *Investigator Vol1 No.2 Feb 1966 Geelong Historical Society. Pg3 - Article re gold escort route - Mt Alexander to Adelaide - (see a simple monument on the Western Highway a few miles out of Horsham. Pg 15 - Ballarat Excursion - re the finding of gold. *Three articles published by Buninyong and District Historical Society Inc: (Magpie Exploration; Finding Gold In The Green Hills; Magpie Exploration; Burnt Bridge to Cargarie to Mt Mercer) *Copies of newspaper articles/items *Buninyong Street Directory Carisbrook: *In the Beginning There Was Carisbrook *The History of the Carisbrook Racecourse Carngham / Snake Valley: *Brief History *Directory Castlemaine: *Directory 1865-1866 - Alphabetical and Street *Poster - Castlemaine A Contemporary Guide "The Great Centre" 1866 - A Contemporary Guide to the Fascinating Past *Pamphlet - Castlemaine District Community Hospital *Map - Castlemaine, Maldon & Surrounding Districts *Map and Information - The Dry Diggings Track - a 55kl walk among historic goldfields relics ( Castlemaine Fryerstown Vaughan Mt Franklin Hepburn Daylesford) *Postcard - Former Court House *Directory 1867 - Alphabetical, Trade [.10] Resource No.3 Grey folder Titled Towns 3 Creswick to Maryborough Creswick: *Brief History *Booklet - "Creswick Cemetery Walk" *Booklet - The Buried Rivers of Gold Heritage Trail Creswick *Creswick Historical Museum Information Sheet *Chronological History of Creswick *Alphabetical Directory of the Borough of Creswick *Creswick's Creek Directory 1856 *Historic Creswick Walking Tour *A Brief Account of the Schools of Creswick - Past and Present *100 Years of Railway Travel in Creswick *The Berry Deep Leads *The Spence Home at Jackass Gully in the Creswick State Forest ( William Guthrie Spence - Pioneer) *The New Australian Mine and the 1882 Disaster *Creswick District News, Issue 7, July August 1999 *The Creswick Miners Walk - Information and Map *Maps Chewton: *Brief History *Directory Clunes: *Brief History *Clunes Street Directory Daylesford: *Brief History *Notable Bushfires in Daylesford District Over More Than a Century - "Black Thursday" 1851; 1862; 1899; the Disastrous Hepburn Fire of 1906; 1939; 1944; 1969. *Post Office Directory -Daylesford and Hepburn Dunolly / Inkerman: *Brief History *Directory *Pamphlet - Goldfields Historical Museum *Pamphlet - Historic Dunolly - Victoria's Best Kept Secret *Map of Gold Workings at Dunolly Area - showing where the main gold rushes occurred *Brief History - Inglewood *Directory - Inglewood - Name Occupation, Dwelling Kingower: *Brief History *Directory - Name / Ocupation / Dwelling Linton / Happy Valley / Piggoreet: *Brief History *Directory - Lintons McIvor: *"A History of the Shire and the Township of Heathcote" by J.O. Randell Majorca: *Brief History *Official Post Office Directory 1869 - Name / Occupation/ Address Maldon (Tarrangower): *Brief History Part 1 *Brief History Part 2 *Post Office Directory *List - Alphabetical Order by Names plus Business and Trade (Tarrangower Times Oct/1858) *List - Alphabetical Order by Trade plus Name and Business *Directory - Name / Occupation / Dwelling Maryborough: *Worsley Cottage - built by Arthur Worsley, a contractor in stonework in 1894 [.11] Resource No. 4 Blue Display Book titled Towns 4 Moliagul to Stawell Moliagul: *Brief History *Moligul Legislative Assembly (Voting?) List - Names and Occupations *Moliagul Victorian Post Office Directory 1868 - Name / Ocupation / Address / Comments *"The Welcome Stranger" gold nugget *The Sunday School *The Welcome Stranger Discovery Walk - information and map Moonambel (Mountain Creek) Redbank *Brief History *List of names extracted from advertisments of the Pioneer and Mountain Creek Advertiser 16/02/1861. *Bailliere's Directory 1869 - Alphabetical List of Name / Occupation / Place St Arnaud: *Brief History Sebastapol: *Brief History *Directory 1869 - Alphabetical by Name; plus occupation and address. Browns and Scarsdale: *Brief History *Browns Street Directory - Name and Occupation Smythesdale: *Brief Description *Smythesdale Street Directory -Name and Occupation Stawell (Pleasant Creek) *Brief History *Victorian Official Post Office Directory - Name /Occupation / Dwelling *Chronology - 1841-1920 *Production of gold statistics - 1879 - 1900 *Big Hill *Extracts from "The Golden Years of Stawell". Chapt 1 - Stawell's Coming Out. Capt. 2 - The Gold Rush. Caapt.3 - Cradle of Democracy. Chapt.4 - The Reefs Becomes Stawell. Chapt. 5 - Rushing In. Chapt.6 - The Pioneers. Chapt 7 - The Decade of Optimism. [.12] Resource No. 5: Blue Display Book titled 'Towns Steiglitz to the The Golden Triangle. Steiglitz: Brief History Victorian Post Office Directory 1869 *Map of Steiglitz *List of maps relevant to Steiglitz history *Information 6 tables of data from "Reports of Mining Surveyors Talbot (Back Creek) Brief History Taradale: Post office Directory 1869 - Name/Occupation/Street. Also list in alphabetical order by Occupation Taradale *Chronological Reference to Taradale Mines *Water - The Coliban System of Waterworks *Joseph Brady *The Syphon Tarnagulla (Sandy Creek) *Brief History *Tarnagulla Businessmen Cameos to give depth to advertisments in 'The Tarnagulla Courier' various issues 1864-1871 *Directory - Name/Occupation /Address *List - Name/Business/Trade Wedderburn (Koorong) *Brief History *List - Name/Occupation The Golden Triangle: *The Early Rushes - Wedderburn / Moliagul / Sandy Creek - Tarnagulla / Jones Creek - Waanyarra / Kingower / Dunolly - Goldsborough / Inglweood *Census of 1857 - Population / Occupations *1858-1871 - A Time of Consolidation- Wedderburn / Moliagul / Sandy Creek- Tarnagulla / Arnold *Census 1871 - Population *Information gleaned from the census data - Demographics / Population / Occupations / marital / Birthplace / Religion / Literacy/ Occupation and Housing Cameos *Graphs - Birthplace of settlers /Male-Female Ratio / Married males / Children under 15 as Percentage of Population / Religion *Census 1857 - Statistical data *Maps *Bibliography [.13] Resource No. 6 - Black Display Book Information and Research in Central Victoria including: *Banking - Research from ANZ Bank Archives *Institutions - also includes articles listed from the Ballarat Times Newspaper *Australian mining History Association - A.M.H.A. Bibliography *Australia's Mining History * Bibliography - Land Surveys Victoria - *1853 Administration (Statistics and Other) includes: schools / ministers of religion / police / military / local administration / licences for sale of spirits / distances between various Victorian gold fields. * Victoria Government Gazette (Copy) - N0. 116, 12/12/1854 includes: Gold Felds Commission of Enquiry & No. 85, 15/09/1854 - Addresses presented to the Lieutenant Governor (Sir Charles Hotham) during his tour through the Gold Fields of Victoria,1854. Addresses on behalf of : the people of Bendigo; Members of the Church of England, Bendigo; Members of the Wesleyan Church on the Bendigo Gold Fields; Bendigo Gold District General Hospital; the Bendigo Prospecting Association; Committee of the Bendigo Local Exhibition; Bendigo District Medical Association; Coloured Americans Resident at Bendigo; German Inhabitants of Bendigo; Landowners, Inhabitants, and Miners of Castlemaine; Inhabitants of Forest Creek; Inhabitants of Heathcote and Gold Miners of McIvor; Residents and landholders of the District of Bacchus Marsh; Inhabitants of Kilmore and Vicinity. *Gold Fields Correspondence 1853: letter from Lieutenant Colonel Valiant, (Officer commanding the Troops in Victoria) to the Lieutenant Governor re threatened disturbance at Sandhurst (Bendigo) regarding the Gold License Fee. * Extracts from a book "Victoria" re Gold Fields Commission of Enquiry involving mainly Ballarat and Castlemaine and a chapter titled 'A Tour to the Victorian Gold-Fields' *Lists of central Victorian newspapers - listed by date published 1851to 1874; by first date available to State Library. *A list of cities and towns showing County, population in 1861 &1871, and municipal status. [.14] Resource no.7. Black display book. *Reference: Papers presented to Parliament Victoria - 1859-1860 4 volumes - relevant sections copied. Contains information on Branches of Government. General / Finance / Gold / Gazette / Commission and Warrant / Statistic. *Gold Fields Act. In accordance with the Act the gold fields are divided into six districts - Ballaarat, Castlemaine , Sandhurst, Avoca, Ararat, and Beechworth.. Official staff in each gold district consists of a Resident Warden, Wardens, Wardens' Clerks, Bailiffs, Chinese Protectors, Chinese Interpreters, and Mining Surveyors. *Gold Receiver *Gaols *Police magistrates and Clerks of Petty Sessions, etc. *Field Branch *Immigration and Emigration Overland - Chinese - 1859 *Population on the Goldfields *The Geological Survey - The Government Geologist is assisited by staff from four branches - the office Branch; the Publishing Branch; the Field Branch and the Museum Branch. *Commission to Enquire Into Sludge dated 10/02/1859 (Some sections copied) - Report to the Honorable Chief Commissioner of Public Works, Melbourne re the mode of carrying the sludge from the puddling mills in Sandhurst without interfering with the drainage of the town and the roads in the neighbourhood. [.15] Resource No.8: Camel display book titled Resource No. 8. Aborigines *Lists of book titles - +"Readings in Victorian prehistory" +"The Aborigines of Port Phillip" +Aboriginal languages and clans" +"A History of the Port Phillip District" +"Langi Ghiran 1: Aboriginal Rock...." +"Koorie History: sources for aboriginal studies in the State Library of Victoria", ed. Tom Griffiths, Melb. Friends of the State Library, 1989 +"The Public Lands of Australia Felix"; settlement and land appraisal in Victoria1834-91 with special reference to the Western Plains", J.M.Powell, Melb. Oxford University Press 1970 +*Bibliography of the Victorian Aborigines' from the earliest manuscripts to 31st December 1970, Massoa, Aldo, Melb. Hawthorn Press, 1971 +"Aborigines in Colonial Victoria, 1836-1886", M.F. Christie, Sydney University Press, 1979 +"Urban and Industrial Australia: readings in Human Geography" ed J.M. Powell, Melb. Sorrett Pub. 1974 *Extracts: -Processes of Pioneer Settlement - The Squatting Occupation of Victoria, 1834-60. J.M. Powell -Areal Variations in the Class Structure of the Central-Place Hierarchy. P. Scott - Volume1 and Volume 2: Notes Relating to the Habits of the Natives of Other Parts of Australia and Tasmania. Compiled from various sources for the Government of Victoria by R Brough Smyth. John Curry, O'Neil, Melb. 1st pub. Melb. 1876. p31-45 - Numbers and Distribution of the Aborigines in Victoria -Victorian Aborigines 1835-1901 - A Resource Guide to the Holdings of the Public Record Office, Victoria; published by the Government Information Centre 1984. *History of the Aboriginal Artefacts Displayed in the Daylesford Museum. F. G. Powell (4 page pamphlet) *Letter to Zelda Martin from Peter Lovett, Cultural Officer, Ballarat & District Aboriginal Co- Operative, 05/02/1997 *Map: Ian Clarke Victorian Tribunal Boundary Map - Clans of Central Victoria. *Victorian Rock Art and Mythology - Article about Mount Langhi Ghiran and myths of the Tjapwarong people. *Two Aboriginal myths relating to the Grampians - 'The Monster Emu' / 'The Aquisition of Fire', by the Aborigines in the Grampians Areas *Article titled (chapter 8) Ballarat - information re camping sites in the region. Lake Wendouree / Lake Burrumbeet (includes a myth) / Mt Bunninyong / Lal Lal / Pitfield / Mount Elephant / Mount Egerton / Meredith / Lake Goldsmith / Lake Learmonth / Ercildoune *Notes on the Aborigines of the Wider Ballarat Region plus European names=Aboriginal names. John Morris 26/07/1995 *Role of Aborigines in Town Development in Central Victoria. Mentions Native Police Force est. in Port Phillip 1842 and Central Board for Aborigines est. 1860 *The Grave of King Billy. (Frank Wilson) Pamphlet. *Camping Places in Central and Northern Victoria. Article re Lake Burrumbeet site. *Programme for the Unveiling of Memorial Cairn for Edward Stone Parker 1802-1865. Note portrait not accurate. Accurate portrait is available in the book "A Successful Failure A Trilogy The Aborigines and Early Settlers", Edgar Morrison, Graffiti Publications, 2002. * Large envelope addressed to Mr G Netherway containing newspaper cuttings regarding the life of Edward Stone Parker, the unveiling of the Memorial Cairn as mentioned above, articles titled 'Episodes from Our Early Days' (Edgar Morrison, Yandoit)- The Black's School, A School At Last and The Final years. Also a typed page titled 'Historical Background to E.S.Parker's Career. Includes an interesting tale titled 'When the cat lay doggo' re laying power leads for the unveiling ceremony at the memorial site. [.16] green display folder titled 'Research Aids' *List of references to Commissioners' & W'ardens' Reports (formerly held at La Trobe Library Archives, now at Public Records Office [PRO]). Indicates town referred to / date of report / name of camp if different to town. * Archive information re Anglican Records *Movement around the Goldfields - Miners and Storekeepers - usefulness of newspapers in providing information - areas covered - Castlemaine, Maldon, Ararat, Stawell, Tarnagulla, Dunolly. *Port Phillip /Victoria Directories 1839/1867 - Chronological list of Directories included in this series. *"Notes on the History of Local Government in Victoria" A.W. Greig Melb. University Press 1925 - Photo-copied extract p5-p40. (Source - Deakin University Library) - Introduction by W.Harrison Moore. Section 1 - Development in New South Wales Before Separation. Section 2 - Development in Victoria After Its Separation from New South Wales. Hand written notations: 'roads, markets, and local government 1855 on' ;'opportunity of squatters in parliament' and 'opportunities of matters in parliament p33' * Notes on the Establishment of Surveyor General's Department 1851and Commissioner of Crown Lands and Survey. * Newspaper articles from The Argus, 1849, re the discovery of gold in the Pyrenees region. * Excerpt - a report on schools - A.B.Orlebar, Inspector; re the need for permanent school buildings rather than tents. *Excerpt from - 'Approaches to Urban History', Sean Glynn: The Case for Caution * Except from - 'The Urban Sprinkle', Weston Bate: Country Towns and Australian Regional History *Reference- 'The History of Land Tenure in the Colony of Victoria', John Quick. References the Haines Land Bill, land tenure and Land Leagues. [.17] Light blue envelope folder titled 'Birtchnell's Ballarat, etc. Directory 1862 *Contains various directories for Smythesdale, Buninyong, Clunes, Brown's and Creswick. [.18] Red envelope folder no.2 titled Victorian Gazetteer *Selected pages from 1869 Victorian Gazetteer on A4 paper (with a handwritten note questioning if some pages are from 1868 Victorian Gazetteer as appears to be different sizes - A3 pages.) Information includes locations and descriptions of towns, hotels, banks, communications and populations. (Does not include names, residences and occupations) [.19] Red Envelope folder titled Bailliere's Official Post Office Directory 1868 (or1869 or a mixture of both?) *Preface *Contains a selection of pages of towns highlighted in yellow in the the index *Work on this directory was commenced in 1867. *Information includes: Municipalities - mayors and councilors; lists of towns naming male inhabitants and their occupations. [.20]Yellow manila folder titled Post Grad Seminar Presentation 1996 *Gives some background to Zelda Martin's proposed thesis and why she chose the topic Gold Mining Towns Boom or Bust [.21] A3 display book - No. 1A * A list of 'Relevant Newspapers collected: The Tarrangower Times and Maldon Advertiser (first published 1858) Includes dates 1858-1867. The Mount Alexander Mail. Includes dates 1854-1866 The Tarnagulla Courier. Includes dates from1864-1871 Dunolly and Burnt Creek Express. Includes dates from 1862-1871 * Selection of newspaper pages from The Mount Alexander Mail 1854 to 1856, mostly showing advertisements for businesses and services provided to that community. [.22] A3 display book - No. 1B * Selection of newspaper pages from The Mount Alexander Mail 1857 to 1866, mostly showing advertisements for businesses and services provided to that community. [.23] A3 display book -No. 2 * Selection of newspaper pages from The Tarnagulla Courier 1864 to 1871, mostly showing advertisements for businesses and services provided to that community. [.24] A3 display book - No. 3 *Selection of newspaper pages from The Tarrangower Times (and Maldon and Newstead) Advertiser 1858 to1867, mostly showing advertisements for businesses and services provided to that community. [.25] A3 display book - No.4 * Selection of newspaper pages from The Dunolly and Burnt Creek Express; and The Dunolly and Betbetshire Express 1862 to 1871, mostly showing advertisements for businesses and services provided for that community. [.26] A3 display book - No.5 Includes: * Bryce Ross's Diggings Directory. Includes instructions for using this directory. This directory was used by "all persons having connexion or desiring to communicate with 'working parties, private friends, or Stores at the Diggings." As a directory for each area wwas completed it was published in each month's issue of Bonwick's "Digger's Magazine." Years c1852/1853. This Directory commences first at the head of Forest Creek. Includes a directory for Bendigo and Ballarat. Of interest at the end of the Bendigo and Ballarat directory is a list of the number of storekeepers, butchers, doctors, smiths, eating houses, lemonade sellers and chapels. * The Castlemaine Directory and Book of General Information Comprehending Glass's Model Calendar for the Two Years 1862 and1863. "zelda martin, victorian goldfield towns, bendigo, castlemaine, ballarat, maldon, stawell, ararat, maryborough, creswick, avoca, heathcote, banks, bank of australasia, union bank of australia, government camp, sandhurst, water supply, tarnagulla, talbot, back creek, mountain creek, police court, carisbrook, dunolly, thompson's foundry, charles clacy, anthony trollope, robert cecil, mount alexander, urbanisation, national schools, education, govenrment, industry, railway, transport, settlement, land settlement in central victoria, steiglitz, joseph brady, the new australian mine, berry deep leads, william guthrie spence, creswick state forest, arthur worsley, worsley cottage, the welcome stranger, moliagul, moonambel, redbank, st arnaud, sebastapol, brown's, scarsdale, clunes, chewton, daylesford, bushfires, inkerman, inglewood, kingower, lintons, happy valley, piggoreet, mcivor, majorca, tarrangower, taradale, the coliban system, the syphon, sandy creek, wedderburn, koorong, arnold, jones creek, waanyarra, the golden triangle, census 1857, blackwood, buninyong, durham lead, magpie, carngham, snake valley, alma, amherst, daisy hill, amphitheatre, mountain hut, beaufort, fiery creek, counties, population, gold fields commission of enquiry1854, william westgarth, gold license fee, lieutenant colonel valiant, administration of the victorian gold fields, commission to enquire into sludge 1859, e.s. parker, edward stone parker, edgar morrison, mount franklin protectorate, dja dja wurrung, memorial cairn, franklinford, mt franklin memorial cairn, jajowurrong, dja dja wurung, tjaowarong, wothowurong, assistant protectors, daylesford museum, buluk, rock art - grampians, aboriginal mythology - grampians, aborigines, first nations people, mount franklin, aboriginal artifacts, lake burrumbeet, native police force, central board of aborigines, yandoit, commissioners' reports, wardens' reports, port phillip/victoria directories 1839-1867, local government - victoria 1853/1854, surveyor general's department - 1850's, victorian schools 1850's, a.b.orlebar, haines land bill, william charles haines, wilson gray, land tenure, land leagues, victorian gazetteer, the tarrangower times and maldon advertiser - 1858-1867, the mount alexander mail 1854-1866, the tarnagulla courier 1864, dunolly and burnt creek express 1862-1871, bryce rose's diggings directory, the castlemaine directory 1862-1863 -
 Melton City Libraries
Newspaper, Oral History Day, 1992
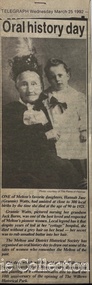
Mary Tolhurst M&DHS - March 29th Dunvegan Willows Park Melton 1992 Ladies Oral History Day Graham Minns President Ray Radford MC Sound recording transfer to CD 2011 by Tom Wood Edited typescript by Wendy Barrie 2013 I was born in Rockbank, and when I was five years old moved to Toolern Vale and started and finished school there. Toolern Vale only consisted of the Store, Post Office and shop, where you could buy your fodder, and pollard supplies, the Hall, the little Church and the bluestone School. The School changed shape three times from the 1800s[1869] til the time I went there. There was four generations of my family that went there and it was destroyed by fire in 1965. Marjorie nee Myers Butler. Yes, I remember along with it your lovely Ronisch piano. Mary, quite true! Marj what you say about the Ronisch piano. When I came the age to learn music my mum and dad couldn’t really afford it, but still what parents do for their children. They had Marj go along with them and pick this lovely Ronisch piano. It was known round the district. Everyone commented about the loss that lovely piano. After leaving school it was war time, 1939, then it was work, When I was 7 year old I was put out into the cow yard. In 1940 when the soldiers were going away our milk was confiscated it had to go to Bacchus Marsh. It used to go the Sunbury to be brine cooled and then go to Melbourne. Then they took it then to the Lifeguard Milk Factory at Bacchus Marsh. It had to go as condensed milk to the soldiers. This year is 50 years of the Land Army. I was an unofficial Land Army but they still kept check on me. I went onto married life and I followed the cows right through [howls of laughter] and we went on until the 1965 fire. That’s when we got out of the cows. Marjorie asks, was Granny Watts your grandmother or great grandmother? Mary: She was my great grandmother, the midwife of Melton. The 1965 fire started ¾ of a mile above our place, Frank Ryan’s sheds were burnt and his house was saved, then it wiped the School out, the Hall, the Church the Post Office and Store and little house that was Charlie Charlton’s in the early days. Mrs Wilson’s place was saved by the Fire Brigade by pulling boards off the side, and from there it went over the hill and it was stopped at the Rockbank Railway Station. If it had of got over the railway they said it would have gone into Werribee. A lot was burnt out in that strip. Mary nee Nixon Collins: 18 houses burnt that day. Audience question, did Melton get burnt that day? Ray: No. It came down through the Toolern Vale road and cut across about a mile and a half from the cross roads at Toolern Vale from north westerly to the south east and cut through over the Keilor road. Mary: It came in across the creek at Funstons in Toolern, then through Jim Minns. Dorothy was it your place then [nee Knox Beaty] to Ken Beatty’s and from there it went through to Doug McIntosh’s and to Cockbills and the wind changed and it came across to the railway line, and that is where they stopped it. [the cause of the fire was controversial, they had been burning off the night before and there was some talk of someone starting it. It was very hot and very strong wind, it was a terrible day] Ray: When the fire went through McIntosh’s they had a haystack on the north side of their house and the haystack got caught and the fire burnt a hole through the side of the house and the boys pyjamas on the bed. The house was saved. It came through like and express train roaring at you, I was at McIntosh’s when it went roaring past. You couldn’t see, dust and ash and tremendous heat. The fire started about 12 o’clock Jack [husband] said to me, fire, I said where, where? Just up the road, what have I got to do? and he went out and he had gone to the fire and left me. I tried to get the animals and I put out buckets of water, putting the buckets of water out saved my life. Chas Jones and another friend of his came in and they picked up the buckets of water, I thought I had better get out because the fire was on the haystack up the paddock and when I went to go out through the north side of the house and couldn’t get out, I’ll go through the front gate so I went around the other side of the house. I got caught there and Chassy Jones and his friend came round carrying the bucket of water and I panicked. He threw the bucket of water over me. Well that is what saved my life because I was damp, whenever we tried to leave the ball of fire came over me and over my shoulder and my hair was scorched. Chassy Jones lost his truck and Keith Watt his big truck because he had the water tank on it and they couldn’t get out of the yard. Granny Watt’s house, the first private hospital had condemned and Jack and I pulled it down and had it moved up to Toolern and had it in the yard a fortnight and it was all burnt and we didn’t get the shed we wanted. Every 13 years right up until Ash Wednesday fires, there has always been fire close at hand. The 1952 fire went down the back of the house, the 1965 fire took the house, and the house that I live in now, it is the third house that has been on that spot. When the Hunters owned it, Mrs Hunter was nearly burnt in her bed. They had a 13 roomed house. In 1924 the house burnt down, and there was another house was built there and that was the one that burnt down. Edna: So Mary built a brick veneer house. Marjorie: like the three little pigs [laughter] Collins - Mary M &DHS - March 29th 1992 Ladies oral history day at Dunvegan, Willows Park Melton. Graham Minns President Ray Radford MC Sound recording transferred to CD 2011 Edited typescript by Wendy Barrie 2013 Mary Collins nee Nixon born in Terang 1907 down in the Western District and we shifted to Melton when I was 5 and a half then I started school here in Melton, and spent all my school life at Melton State School, next to the Church of England, it’s called the Primary School now. I got my Qualifying and Merit Certificate then I left School because there wasn’t a High School. When I was 16 I got and job in the Melton Post Office and I worked there, I was the first girl in Melton to deliver the mail, and worked on the telephone and the Bank business. Mrs Ross and myself behind the counter, there were about 500 – 600 people in the Shire at that time and now when I go into the new Post Office there is 36,000 here there’s still 2 people behind the counter [laughter from the audience] and wait in a queue right out to the door. Times haven’t changed much have they! There was a manual telephone and you had to ring the handle, and there were eight subscribers when I went there and when I left there were 46 I had coaxed that number to join the telephone, even the police station didn’t have the phone on. The two Hotels and the two Chaff mills and Mr Ernie Barrie, Parkers the butcher, the Shire Office was No 8, and the Police house was next to the Courthouse on the corner. They were number 9. I can remember a lot of the numbers still. The Post Office was the Agency for the Commonwealth Bank [comment from audience member] I used to do the Bank business too, I left after four years there, mother wasn’t very well. The Inspector who used to come up to the Post Office asked me if I would take up casual Post Mistress and to go around the different districts but I refused and when Mrs Ross’s holidays were due I was the replacement. I wasn’t 21. I loved my work meeting everybody and most people had horse and jinkers and when the elderly would come in there would be Mr Tom Morrow, he only had one arm and Mrs Dunn came from Bulman’s road in their horse and jinker. They were elderly I would see them pull up out the front and quickly get their mail and run out to them because they didn’t have to get out of the jinker to tie up their horse. If someone had a baby in arms I would tear out and hold the baby while they got down. Mrs Ross was very very strict. I had to sweep the Post Office, she had a couple of mats and there would be a threepence or a sixpence under the mats show she knew whether I lifted the mat, I was whether I was honest or not. Graham: How much were your wages? I got 27/7 pence a week for a 52 hour week. I had to work every holiday except Good Friday and Christmas Day and even when it was Monday holiday I always had to go to work from 9am - !0 am, the Post Office was always open. In the winter I had to wait until twenty past six in case there were any telegrams to deliver. I delivered them on a push bike. One time Tom Barrie told me this years afterwards. I used to go home for lunch. We lived on the Keilor road and I used to ride my bike home. On the hot days the boys used to go and swim in the swimming pool down near a turn in the creek there was a hole where the boys would swim in the nude, they didn’t have any bathers and they didn’t have any watches in those days. Tom Barrie said they always used to watched for me as I was always about 3 minutes past 1, my lunch hour was from 1-2. One particular day they missed seeing me and swam on, and of course they were all late for school when they got back and were all kept in a night. I did get a fortnight holiday. I loved my work and I knew everyone in the district right from Toolern Vale to the Marsh and everybody at Melton South. Did you listen into conversations on the Switchboard? Oh no. [laughter] Melton did not have electricity then. I had to fill the lamps everyday with kerosene. The Staughton Memorial was outside the Post Office. It had four posts with the chain looped around it, and that’s where the people used to tie up their horses. Marjorie nee Myers Butler comments about sitting and swinging on the chains. Mr Fred Coburn lit the acetylene gas light in the Memorial. It was the only streetlight in Melton. There was no electricity until 1939. Ray Radford comments about another gas street light which was on the corner of Station road. [later] Mary passes around her school photos. Mary mentions the names of those who have passed away, Maisie McDonald, ,Marian Wraith, Hilda McCreey, and Valda McDonald. I have written the names on the back. Marjorie comments about Marie Jongebloed and Greta are the only two girls left out of big family of ten I think there were [hesitates] 4 or 5 girls and the rest were boys. Mary. Flora Woodley, Dorrie Flynn and Margaret McDonald are still alive. They are my age we were all born about 1907. Marjorie points out herself in a later photo [1921 and 1922 School ] Mary mentions the name Walsh and identyfies following names, the Parker boys, Ken Beaty, Malc and Linda Cameron, Maisie Mc Donald, Ted Radford, George Nixon, Norman Minns, he was later the Shire Secretary of Werribee. One of the Woodley girls. [Maisie Arthur] Marjorie: Rosie Shearwood, June Whiting Mary. Lily Mc Donald, she has passed away. Isabel Harrison nee Tinkler, she lives at Werribee, Doreen Rogers, Marjorie Walker, Jess McIntosh, Mary Gillespie. Mr Malone was the Junior teacher Mr Roe and Miss Cooke. Fred Myers, my sister [Elizabeth] and the year was 1921. Myers (Barrie) School Photo Collection. Many of the names were identified at the 1970 Centenary of Melton State School No. 430. Edna Barrie organised, compiled and typed the lists to accompany these photos for the year 1921. The 1922 photo shows the higher grades. Ladies Oral History Day event held by Melton and District Historical Society, article featured in the Telegraphlocal identities, local special interest groups -
 Bendigo Military Museum
Photograph - Visit by the Minister for Defence to the Army Survey Regiment, Fortuna, Bendigo, c1984
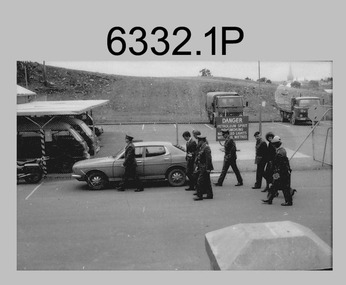
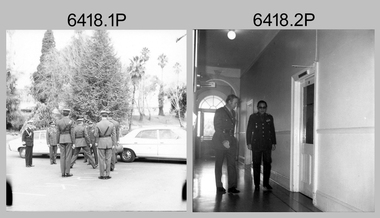
This collection of 22 photos was most likely taken in 1984. Mr Gordon Scholes AO was the Minister for Defence in the Hawke Government from 1983 to 1984. It’s evident in these photos he was taken on a tour through the production areas. Mr John Brumby AO at this time was the Federal Member for Bendigo. He later moved on to Victorian state politics, serving as Treasurer from 2000 to 2007 and Premier from 2007 to 2010. Key Army Survey Regiment personnel identified include COL Alex Laing, the Director of Survey from 1983 to 1988 and CO LTCOL Jorge Gruszka who led the unit from 1982 to 1985. The rank of the senior officer is not known, however would have been a Major-General or above, due to the presence of the aide-de-camp (female captain). This is a set of 22 photographs of a visit to the Army Survey Regiment, Bendigo circa 1984, by Mr Gordon Scholes AO, who was the Minister for Defence. The photographs were printed on photographic paper and are part of the Army Survey Regiment’s Collection. Photographs .1P to .11P, .14P to .17P and .19P to .22P were scanned at 600 dpi. Photographs .12P to .13P and .18P were scanned at 300 dpi. .1) - Photo, black and white, c1984. L to R: unidentified, Mr John Brumby AO, Mr Gordon Scholes AO CO LTCOL Jorge Gruszka, unidentified, D-SVY COL Alex Laing, unidentified (x3). .2) - Photo, black and white, c1984. L to R: unidentified, CO LTCOL Jorge Gruszka AO, Mr John Brumby AO, Mr Gordon Scholes AO, unidentified (x4), D-SVY COL Alex Laing. .3) - Photo, black and white, c1984. L to R: unidentified (x2), Mr John Brumby, unidentified, CO LTCOL Jorge Gruszka AO, Mr Gordon Scholes AO, CAPT Danny Galbraith. .4) - Photo, black and white, c1984. L to R: unidentified, CO LTCOL Jorge Gruszka AO, Mr Gordon Scholes AO Mr John Brumby AO, unidentified. .5) - Photo, black and white, c1984. L to R: unidentified, Mr Gordon Scholes AO, unidentified, CO LTCOL Jorge Gruszka AO Mr John Brumby AO, unidentified. .6) - Photo, black and white, c1984. L to R: MAJ Daryl Hockings CSM, unidentified (x2). .7) - Photo, black and white, c1984. L to R: CAPT Danny Galbraith, unidentified (x2), Mr John Brumby AO, unidentified, CO LTCOL Jorge Gruszka AO, Mr Gordon Scholes AO, unidentified (x2). .8) - Photo, black and white, c1984. L to R: unidentified, Mr Gordon Scholes AO, CO LTCOL Jorge Gruszka AO, MAJ Daryl Hockings CSM, D-SVY COL Alex Laing, unidentified. .9) - Photo, black and white, c1984. L to R: unidentified, Mr John Brumby AO, CAPT Bob John, CO LTCOL Jorge Gruszka, Mr Gordon Scholes AO, unidentified (x2), MAJ Graham Baker, unidentified, MAJ Daryl Hockings CSM. .10) - Photo, black and white, c1984. L to R: Mr John Brumby AO, CAPT Bob John, Mr Gordon Scholes AO, unidentified (x2), MAJ Graham Baker, unidentified, MAJ Daryl Hockings CSM. .11) - Photo, black and white, c1984. L to R: unidentified, CO LTCOL Jorge Gruszka, Mr Gordon Scholes AO, unidentified (x2), MAJ Graham Baker, unidentified (x2). .12) - Photo, black and white, c1984. L to R: unidentified, CO LTCOL Jorge Gruszka, Mr Gordon Scholes AO. .13) - Photo, black and white, c1984. L to R: unidentified, Mr John Brumby AO, Mr Gordon Scholes AO, D-SVY COL Alex Laing, CO LTCOL Jorge Gruszka. .14) - Photo, black and white, c1984. L to R: unidentified, Mr Gordon Scholes AO, unidentified media, D-SVY COL Alex Laing, unidentified, CO LTCOL Jorge Gruszka, unidentified media (x2). .15) - Photo, black and white, c1984. L to R: unidentified, D-SVY COL Alex Laing, unidentified (x2), Mr Gordon Scholes AO, unidentified media (x3). .16) - Photo, black and white, c1984. L to R: unidentified (x5), CO LTCOL Jorge Gruszka, Mr Gordon Scholes AO. .17) - Photo, black and white, c1984. L to R: unidentified (x2), D-SVY COL Alex Laing, unidentified (x3), CO LTCOL Jorge Gruszka, Mr Gordon Scholes AO, Mr John Brumby AO. .18) - Photo, black and white, c1984. L to R: unidentified, CO LTCOL Jorge Gruszka, Mr Gordon Scholes AO. .19) - Photo, black and white, c1984. L to R: unidentified, CO LTCOL Jorge Gruszka, Mr John Brumby AO, D-SVY COL Alex Laing, unidentified, Mr Gordon Scholes AO, unidentified (x2). .20) - Photo, black and white, c1984. L to R: D-SVY COL Alex Laing, unidentified (x2). .21) - Photo, black and white, c1984. L to R: Mr John Brumby AO, unidentified, D-SVY COL Alex Laing, unidentified. .22) - Photo, black and white, c1984. L to R: unidentified (x3), Mr Gordon Scholes AO, Mr John Brumby AO, CO LTCOL Jorge Gruszka. .1P to .22P – no annotationsroyal australian survey corps, rasvy, army survey regiment, army svy regt, fortuna, asr -
 Bendigo Military Museum
Photograph - Army Survey Regiment – CO’s Parade and Defence Force Service Medal Presentations, c1987
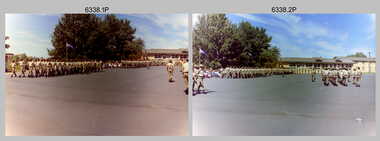
These 34 photographs were taken at a CO’s parade at the Army Survey Regiment, Bendigo in c1987. The Colonel Commandant (honorary appointment) of the Survey Corps - COL Clem Sargent (Retd), presented the Defence Force Service Medal to four personnel in recognition of 15 years of efficient remunerated service, or the Clasp for 5 years of additional service. Recipients were WO1 Neville Stone and three unidentified support staff from the Australian Army Catering Corps, Royal Australian Electrical and Mechanical Engineers and the Royal Australian Corps of Transport. This is a set of 34 photographs of a CO’s parade and the presentation of the Defence Force Service Medal, at the Army Survey Regiment, Bendigo in c1987. The colour photographs are on 35mm negative film and are part of the Army Survey Regiment’s Collection. The photographs were scanned at 96 dpi. .1) to 2) - Photo, colour, c1987. Squadrons marching on parade ground. .3) to .4) - Photo, colour, c1987. Squadrons formed up on parade ground. RSM WO1 Jeff Lynch delivering orders. .5) - Photo, colour, c1987. Officers at ease in readiness to take posts. .6) - Photo, colour, c1987. Squadrons formed up on parade ground. RSM WO1 Jeff Lynch delivering orders. .7) - Photo, colour, c1987. RSM WO1 Jeff Lynch handing over to 2IC MAJ Terry Edwards. .8) - Photo, colour, c1987. Officers marching on to take posts. .9) - Photo, colour, c1987. L to R: CPL Paul Richards, SPR Todd Reynolds, SPR Eric Nicholson, MAJ Roger Rix, CPL Steve Hill, unidentified, CPL Russ Mollenhauer, remainder. .10) - Photo, colour, c1987. Guest of Honour - COL COMDT COL Clem Sargent arrives on parade ground, remainder unidentified. .11) - Photo, colour, c1987. Army Survey Regiment ready to salute Guest of Honour - COL COMDT COL Clem Sargent. .12) - Photo, colour, c1987, Guest of Honour - COL COMDT COL Clem Sargent returns salute. .13) - Photo, colour, c1987, L to R: 2IC MAJ Terry Edwards, SPR Eric Nicholson, COL COMDT COL Clem Sargent, SGT John ‘Stormy’ Tempest, unidentified (x2), SGT Mal Paterson, SGT Kevin Boehm, SSGT Peter Mustart, CPL Trevor Poll, SGT Terry Danger. .14) - Photo, colour, c1987, In left foreground MAJ Bob McHenry, unidentified personnel, unidentified officer, 2IC MAJ Terry Edwards, COL COMDT COL Clem Sargent, 3rd from right CAPT Graeme Wastell, CPL John Martin, SGT Martin Evans. .15) - Photo, colour, c1987, L to R: unidentified personnel, unidentified officer, 2IC MAJ Terry Edwards, COL COMDT COL Clem Sargent, SSGT Rick Van der Bom, CPL Paul Hunter, unidentified personnel, CAPT Graeme Wastell, SGT Paul Leskovec CSM, CPL John Martin, SGT Paul Cheater, SGT Martin Evans. .16) - Photo, colour, c1987, L to R: SGT Martin Evans. 2IC MAJ Terry Edwards, unidentified officer, COL COMDT COL Clem Sargent, unidentified personnel, SGT Paul Leskovec CSM, SGT Paul Cheater, SSGT Brian Collings, SSGT Ian ‘Rock’ Thistleton, WO1 Stevo Hinic. .17) - Photo, colour, c1987, L to R: unidentified personnel, 2IC MAJ Terry Edwards, COL COMDT COL Clem Sargent, SGT Roger Rees, unidentified female officer, SGT Phil Smalley, CPL Steve Coulsen, SPR Toni Wright, SGT Steve Gloster, SSGT Ken Talbot-Smith, CPL Darren Wilkinson, unidentified, SGT Paul Hopes. .18) - Photo, colour, c1987, L to R: unidentified female officer, COL COMDT COL Clem Sargent, unidentified, SGT Phil Smalley, CPL Steve Coulsen, SPR Toni Wright, CPL Steve Gloster, SSGT Ken Talbot-Smith, CPL Darren Wilkinson, SGT Paul Hopes. .19) - Photo, colour, c1987, L to R: unidentified personnel, CPL Peter ‘Jack’ Elverd, 2IC MAJ Terry Edwards, COL COMDT COL Clem Sargent, unidentified, SGT Stuart Hibbert, unidentified, Ted Burgess. .20) - Photo, colour, c1987, L to R: unidentified officer, COL COMDT COL Clem Sargent, 2IC MAJ Terry Edwards. .21) - Photo, colour, c1987, L to R: unidentified (x3), WO1 Neville Stone, COL COMDT COL Clem Sargent, SSGT Greg Anderson, unidentified officer, CAPT Graeme Wastell. .22) to .24) - Photo, colour, c1987, L to R: unidentified (x3), WO1 Neville Stone, COL COMDT COL Clem Sargent, SSGT Greg Anderson, unidentified officer. .25) to .26) - Photo, colour, c1987, L to R: unidentified, WO1 Neville Stone, unidentified, COL COMDT COL Clem Sargent, SSGT Greg Anderson, unidentified officer. .26) to 30) - Photo, colour, c1987, L to R: unidentified (x2), WO1 Neville Stone, COL COMDT COL Clem Sargent, SSGT Greg Anderson, unidentified officer. .31) to .34) - Photo, colour, c1987, L to R: unidentified, WO1 Neville Stone, COL COMDT COL Clem Sargent, unidentified officer..1P to .34P – There are no personnel identified.royal australian survey corps, rasvy, army survey regiment, army svy regt, fortuna, asr -
 Bendigo Military Museum
Album - ALBUM, LETTERS WW2, C.WW2
Herbert Trangmar Allan, refer Cat No 2755.4 for his extensive service records and awards.Pink, hard cover photo album used as a holder to display letters. .1) Letter from C in C Gen HQ Melbourne, 17.4.1942. From Gen BLAMEY to Major H T ALLAN 2/17 AIF. .2) MID Certificate dated 30.12.1941. Major H T ALLAN M C. .3) Letter dated 24.12.1944 from HQ 1Aust Corps to 'Blue' from 'Morshead'. .4) Letter dated 18.4.1946 from OIC NSW Echelon & Records to Mrs G M ALLAN, Bellevue, NSW, notifying her of Award of Mention in Despatches. It refers to NX12229 Lt Col Herbert Trangmar ALLAN HQ 5 Base Sub Area. .5) Letter dated 14.4.1945 from OIC NSW Echelon & Records to Mrs G M ALLAN notifying her of Award of Mention in Despatches. It refers to NX12229 Major T/Col Herbert Trangmar ALLAN, Finschhafen Base Sub Area. .6) Newspaper cutting titled Many NSW Men Receive Bravery Awards. Up to 31.3.1944. Marked down near bottom of the cutting is MID for T/LT Colonel H T ALLAN OBE MC ED. .7) Memo dated 11.1944 from 5 Aust Base Sub Area. Cover note for Record of Service for NX12229 Lt/Col H T ALLAN 5 Aust Base Sub Area. .8) Letter dated 2.8.1942 from NSW L of C Area Sydney to Mrs G M ALLAN Bellevue, NSW, notifying her of MID for Maj H T ALLAN MC NX12229 for his services 2.1941 - 7.1941. Signed by Lt Col H J Bennett. .9) Letter dated 14.4.1945 from OIC NSW Echelon & Records, Sydney to NX12229 Lt Col H T ALLAN HQ 5 Aust Base Sub Area. Aust Honours & Awards. MID. .10) Letter 7.12.1950 from HQ Eastern Command Vic Barracks Paddington to Col H T ALLAN OBE MC ED R of O. Watsons Bay re Change of address to 2MD. .11) Memo dated 28.12.1944 from HQ 1st Army AIF to 5 Aust Base Sub Area re Confirmation of Promotion of NX12229 Major H T ALLAN to Lt Colonel. .12) MID Certificate dated 15.3.1945 for Maj CT / LT Col H T ALLAN OBE MC ED Finschhafen Base Sub Area. .13) MID Certificate dated 19.7.1945 for Major CT / LT Col H T ALLAN OBE MC ED, Finschhafen Base Sub Area. .14) MID Certificate dated 21.2.1946 for LT Col H T ALLAN OBE MC ED, HQ 5 Aust Base Sub Area. .15) Letter. Letterhead is of Parliament of the Commonwealth Federal Members Rooms, Sydney, dated 1.12.1941. To: Dear Mr Allan. From: W M Hughes. Handwritten on 3 sheets of paper using 4 sides. Subject matters such as fighting, AIF, loss of HMAS Sydney, the Russian front. .16) Letter & envelope. Letter: Dated 18.4.? Letterhead: Guards Club Brook St W1. To: Dear ALLAN From: BIRDWOOD of ANZAC. Subject: Their friendship - then they have to deal with 'loathsome Japs & Germans'. Envelope. OHMS, 2-1/2 penny stamp. To: Major H T ALLAN MC & OBE AMF. C/o Defence Dept Melb, Australia. On the bottom is signature of BIRDWOOD M. Readdressed to C/o 9th Div HQ Abroad. Envelope rear is franked: PO 3D JE 42. .17) Memo dated 18.6.1946. From: HQ 8MB. To: H/Col H T ALLAN ANG PcB Rabaul. Releaes of NX12229 Lt Col (T/Col) H T ALLAN OBE MC. Posted to Retired list 7.5.1946. .18) Memo dated 6.11.1946. From: OIC, 2nn Echelon AHQ. AMF. To: Lt Col H T ALLAN OBE MC ED. C/- Mrs G M ALLAN, Queens Club, King St. Sydney NSW. .19) Letter dated 8.8.1941. Letterhead of Minister for the Navy. To: Dear Major ALLAN. From: W HUGHES. Subject: All facets of WWII to date & prospective war with Japan. .20) Memo dated 31.8.1945. From: AMF OIC NSW Echelon & Records. To: Mrs E M ALLAN, King St Sydney. Re: MID for NX12229 Maj (T / LT Col) Herbert Trangmar ALLAN OBE MC ED Finschhafen Base Sub Area.letters, albums, certificates, awards -
 Bendigo Military Museum
Administrative record - FOLDER AND RECORDS
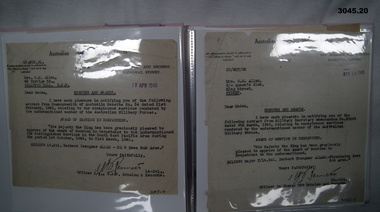
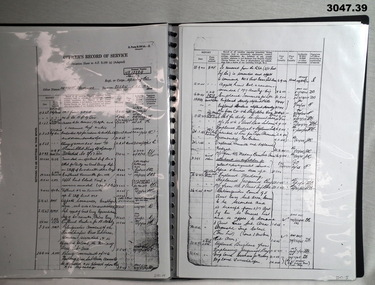
For historical information refer to notes attached to Cat No 2755.4 See attached sheets for the remainder of pages.Black plastic folder, ring binding with 20 clear plastic sleeves. .1) Photocopy of cover for personnel documents for Herbert Trangmar ALLAN, MC, NX12229, N60005, Captain 2nd Garrison Battalion. A4 page size. .2) Photocopy of WWII attestation form dated 2.5.1940 for NX12229, Herbert Trangmar ALLAN. .3) Photocopy of Medical Exam Section. .4) Photocopy of Medical Exam Section with black & white ID photo. .5) Enlarged photocopy of ID photos of Herbert Trangmar ALLAN. .6) Photocopy of Mobilization attestation form dated 6.10.39 for Herbert Trangmar ALLAN. .7) Photocopy of Termination of Officer's Appointment dated 2.4.1946 for Herbert Trangmar ALLAN, OBE, NX12229. .8) Photocopy of Officers Record of Service for Herbert Trangmar ALLAN. Address at time was Wali, New Guinea .9) Photocopy of Officers Record of Suc for Herbert Trangmar ALLAN OBE MC ED NX12229. Address at time was Wali, New Guinea. First entry: 16.6.1914. Last entry: 1.11.1945. .10) Photocopy of Officers Record of Service, dated 29.8.1950. For NX12229 Herbert Trangmar ALLAN MC OBE ED. Last address Watsons Bay NSW. .11) Photocopy of Determination of Demobilization Priority for NX12229 Herbert Trangmar ALLAN. Dated 5.10.1945. .12) Photocopy of sheet showing service early WWII for Herbert Trangmar ALLAN. .13) Photocopy of sheet showing early WWII service of N60005, Herbert Trangmar ALLAN. .14) Photocopy of Officer's Record of Service sheet for Herbert Trangmar ALLAN OBE MC NX12229. First entry: 17/2/1943. Last entry: 24.8.1944. .15) Photocopy of Record of Service sheet. First entry: 28.9.1944. Last entry: 25.5.1945. .16) Photocopy of Officer's Record of Service for Herbert Trangmar ALLAN OBE MC NX12229. First entry: 1.6.1945. Last entry: 14.3.1946. .17) Photocopy of Record of Service sheet. Mentions MID in SWPA & rank changes. First entry: 21.3.1946. Last entry: 30.9.1950. .18) Photocopy of Officer's Record of Service sheet for NX12229 Herbert Trangmar ALLAN 2nd Garrison Battalion. First entry: 6.9.1944. Last entry: 7.5.1946 .19) Photocopy of Recommendation for an OBE for NX12229 Herbert Trangmar ALLAN MC Major. Tobruk period April / October 1941. .20) Photocopy of a sheet showing medals & awards for N60005 NX12229 Herbert Trangmar ALLAN OBE MC ED MID. .21) Photocopy of a letter to Deputy Commissioner - Repatriation on AIF letterhead. Re: Captain ALLAN H T 17 Battalion. .22) Photocopy of an AIF letterhead Canberra dated 1.5.1950. To Secretary HQ Repat Commission. Re: Capt ALLAN H T 17 Battalion. .23) Photocopy of a sheet showing telephone note re awards, dated 2.7.1955. Re: ALLAN H T. Address Mullaway, Woolgoolga, NSW. .24) Photocopy of ranks & dates for ALLAN H T NX12229. DOB 5.1.1895. Served in 14-18 Yes. First entry: 16.6.1914. Last entry: 29.1.1944. .25) Photocopy of ranks & dates for above. First entry: 13.2.1942. Last entry: 1.4.1945. .26) Photocopy of ranks & dates for ALLAN H T NX12229. DOB 5.1.1895. OBE MC. First entry: 23.7.1945. Last entry: 15.8.1951. .27) Photocopy of a note showing Colonel H T ALLAN, address Mullaway, Woolgoolga, NSW. Written on a note pad with British Aluminium stamped on it. .28) Typed sheet showing a brief (biography) story of the life of Herbert Trangmar ALLAN (Blue). .29) Colour top view photo on A4 paper showing a huge pair of Japanese binoculars mounted on a tripod. .30) Colour R side view photo on A4 paper of Japanese binoculars. .31) Colour rear view photo of huge Japanese binoculars. .32) Colour front view photo on A4 paper of huge Japanese binoculars mounted on a tripod. .33) Colour L side view photo of huge Japanese binoculars. .34) Colour photo of tripod with timber legs & brace to suit binoculars above. .35) Black & white photo of a manufacturers plate featuring Japanese writing & numbers. .36) Colour photo on A4 paper showing manufacturers plate on rear of support brace on the tripod head. .37) Copy of WM Collection photo number 058101 showing an Australian soldier looking into the binoculars, Finschafen New Guinea .38) Menu card. TobrukDay Dinner 2/17th Sgts Mess. Dated Wed 19.11.1941. .39) Christmas card with red ribbon in its fold. Shows a signpost Syria - Australia - & a Rising Sun, a kangaroo with smoke & fire, a laughing kookaburra on a sign post. Stamp. HQ 20 Aust Inf Bde AIF. .38) On rear: Two autographs. .39) Inside: “Best wishes for year 1942-1943 from Brig W (T) V Windeyer and staff”recorrds, certificcats, folders -
Federation University Historical Collection
Document, Dianne Campbell, Ballarat Lawyers 1853-1895 Research Folders, c2000-2021
Folders of research notes on Ballarat Lawyers, including newspaper clippings, website information, etc. .1) Ballarat Lawyers - A (Australian Law Firm histories, Jamaican in Australia, History of the Court System, University of Melbourne Law Students c1870s, Melanie Senior, Cinque Oakley Senior Lawyers, 19th Century Castlemaine Police Courts, New Victorian County Court, Scots and the Law in Scotland, Solicitor online encyclopedia, Alfred Akehurst, Artur Akehurst, J.T. Ansdell, Butler Cole Aspinall, Alfred James Bailey, Henry Stephen Bailey, Matthew Baird, Hugh Sutherland Barrett, William Field Barrett, Redmond Barry, George Elliott Barton, George Frederick Bartrop, John Bell, Thomas Bellas, George Booker) .2) Ballarat Lawyers B (Hugh Sunderland Barrett, Peter Beckford, William Beckford, John T.F. Bowker, William Box, George Boyd, William Boykett, B. Browne, Richard Archer Burton, Alfred Butler) .3) Ballarat Lawyers C-E (Thomas B.S. Carwithen, J.B. Cathcart, John Alfred Chalk, David Clarke, John Collins, Matthew Combe, Thomas Spemcer Cope, Richard. Crouch, Charles Curwan-Walker, Frank H. Cole, John Rowland Davies, Charles J. Dawson, Christopher John Dease, J.E. Dixon, Robert Willian Dobson, Roy Dobson, Edward Doward, Charles R. Doward, Edgar R. Doward,) .4) Ballarat Lawyers F-G (Charles B. Finlayson, Peter T. Finn, John Findlay, John Fitzgerald, John Olsen Foss, Alexander Fraser, J.A. Doane, Andrew Garran, George Garrard, David Gaunson, William Gaunt, MAry Gaunt, F.T. Gell) .5) Ballarat Lawyers H-J: (Frederick Ham, Jeremy Harper, John H. Harris, solicitors, Amelia Harris, J. Henry Harris, Peter Blake, Henry Plomer, Arthur Plomer, Ballarat Chamber of Commerce, Freemasons, White Flat Drainage and Mining Company, Henry R. Nicholls, Francis Ham, Richard T. Harvey, Edward Heady, Peter Heinz, T.t. Hollway. Thomas tuke hollway, William Higgins, James V.M. Hitchins, frederick Hitchins, James Hitchins, Edward Hockley, Robert W. Holmes, Catherine Kain, JOhn Ireland, Richard D. Ireland, Peter Jacobs) .6) T.C. Williams, John Kidahl, Arthur W. King, Pendrell family, M.A. Lazarus, Edward Lewis, W.H. McCormick, Soho Foundry, Henry S, Ochiltree, James V. McCormick, McDonnell, Townsend MacDermott, Morgan McDOnnell, Percy McDonnell, Cyprian McDonnell, John McFarland, Samuel W, McGowan, Bill McGregor, David Madden, Charles Holthouse, J. Madden, Samuel Mann, Samuel F. Mann, Tobias Furneaux, Samuel Mann, Agar Wynne, thomas Mann, Henry MacDermott, Archibald Midnie, Arthur Nevett, Arthur H. Nevett, Alfred Mitchell, William Mitchell, H.W. Morrow, William Mitchell, Norman P. Must, George F. Oakley.) .7) Ballarat Lawyer Q-R (Henry S. Ochiltree, W.B. Ochiltree, Edward G. Ochiltree, J.J.P. O'Dee, Bernard O'Dowd, John Ogier, Cornish Lawyers in Central Victoria Q-R, John Bateman Paynter, J.B. Pearson, Mondle Emmanuel Phillips, Robert King Piers, Robert King Piers, Pinkerton, Frank Pinkerton, Martha Pinkerton, Charles Purcell, R.H. Ramsay, Henry Randall, James Randall, Thomas Randall, John Warrington Rogers, John M. S. Rodd, George Rutler) .8) Lawyers in Central Victoria S-W (Charles Salter, H. Holmes, George Staveley, Charles Salter, George T. Boyd, Edward Sandford, Henry G. Shaw, Thomas W. Snape, Thomas S. Standish, Charles Snape, Frederick C. Standish, Edith Snape, James Snape, Thomas Snape, Philip Snape, George Staveley, John G. Stoker, William Stone, Henry Sturt, Matthew W. Taylor, Bread and Cheese Club, R.D. Thompson, Roger D. Thompson, R.H. Ramsay, R.G. Turner, F.H. Tuthill, W.M.K. Vale, William Vale, May Vale, William L. Vardy, Gordon Vardy, William S. Vardy, Charles Von Ende) .9) Lawyers in Central Victoria W-Z (Henry Walker, Andrew Wallace, John Wellesley, Brereton Watson, C.G.M. Watson, James Watson, George Armytage, Thomas Watson, Patricius Welsh, John Westmore, Theodore Whipham, Arthur Whipham, Thomas H. Whipham, Frances Whipham, Thomas Bellas, James L. Willoughby, John Noble Williams, James Wisewould, Horace Wright, H.M. Wright, William Wright, Henry J. Wrixon, Agar Wynne, Samuel Young) . ballarat lawyers, ballarat, dianne campbell goldfields lawyers collection -
University of Melbourne, Burnley Campus Archives
Album - Black and white and colour prints, Staff Photographs, c. 1990
Collection of 110 photographs and some negatives, mostly colour. Some ID photographs, some at functions or taking classses. Identified by Ala Shtrauser, Ross Payne, Andrew Smith. Found in James Pearson's former office 2015 by Ross Payne. (1) Peter McSweeney, Kevin Blaze, Ross Payne, Ed Smart, Phil Kenyon, Paula Cave, John Delpratt, Peter May, Ian Winstone. (2) Geoff Olive, Ian Winstone, John Brereton, John Delpratt, Ross Hall. (3) Peter McSweeney, Nick Bailey, Phil Kenyon, Brian Shields, Geoff Olive, Ian Winstone, John Brereton, John Delpratt, Ross Hall, James Hitchmough, David Aldous. (4) Geoff Connelan, Jamie Pearson, Ross Payne, Ed Smart, Peter May, James Hitchmough, Nick Bailey, Ross Hall, Catherine Jaggs. (5) James Will, Bata Thomas. (6) John Delpratt, John Rayner. (7) Phil Mayle, James MacIntyre (student), James Will, Jayne Lindholm. (8,19) David Aldous, Eric Littlejohn. (9) John Rayner. (10) Nick Bailey. (11) Alex Campbell. (12,13) Ala Hires (Shtrauser). (14) Michael Green. (15) Ross Hall, Peter McSweeney, James Hitchmough, Kevin Blaze. (16,44) Brian Shields. (17,18) Kylie Cannon, Karen Geyeregger, Nick Osborne, Jim Pleasance. (20) John Delpratt. (21) Ian Winstone and student working on Student Gardens. (22) Geoff Olive, Ed Smart. (23) Robina Duggan, Michèle Adler. (24) Catherine Jaggs, Peter May. (25,26) Mark MacNamara, Kelvin McKenzie, Ruth Beilin, Ed Smart. (27) Rosemary McConell, Elizabeth Hill. (28) Fred Taylor, Mike Nechwatal. (29) Claire Scott, Nick Bailey, Ross Hall. (30,66) John Brereton. (31) Rosemary McConell, Mark MacNamara. (32) Mike Nechwatel, Bata Thomas, Graham Sterry. (33) Geoff Olive, Phil Tulk. (34) Ed Smart, Ruth Beilin, Ian Winstone. (35) James Will with students. (36,37) Peter McSweeney. (38) Alex Campbell, Jamie Pearson, Ross Payne. (39) Geoff Connellan. (40) Richard Green, Darryl Gibbs. (41) John Rayner, Karen Geyeregger. (442) Ross Payne. (43) Jamie Pearson, Jim Pleasance. (45-49) Claire Scott. (50-54) Ian Winstone. (55) Michelle Dall, Kylie Cannon, James Will, Catherine Jaggs, Nick Bailey, Jamie Pearson, John Brereton, Peter May, Rosemary McConell, Ed Smart, Greg Moore, Ian Winstone, David Aldous, Brian Shields "Sept 1990". (56) Brian Shields, Peter May, Kelvin McKenzie, Fred Taylor, Phil Tulk, Richard Green, Graham Sterry, Ross Payne "Sept 1990". (57,58) James Will, Jill Kellow 1987/88 on Grampians excursion with Associate Diploma students staying in Shearers' quarters. (59,60) James Will, John Delpratt. (61,62) Denise Johnstone. (63-65) Michèle Adler, Ian Winstone, Greg Moore, Jenny Leereveld, Geoff Connellan, Catherine Jaggs, Rod McMillan, Peter Esdale, Peter Sheppard, Nick Bailey, James Hitchmough, Rosemary McConnell, David Aldous, Ruth Beilin, Clive Sorrell, Tony Westmore, Peter May, Ivo Dean, Kevin Blaze, James Will, Ross Hall, Peter McSweeney, Ed Smart, Phil Kenyon, John Delpratt, John Brereton, Geoff Olive, Darryl Gibbs. (67) David Aldous, Greg Moore, Brian Shields, Peter May. (68,69) Preparing Landscape Shed 1990's. (70) Building Quad 6. (71) Leigh Stone. (72) Pruning Day. (73,74) Staff Group , Jim Davis, Principal. (75) Peter Esdale. (76) Tess Hernan. (77) Ruth Beilin. (78) Alex Campbell. (79) Ala Hires (Shtrauser). (80) Karen Geyeregger. (81) Catherine Jaggs. (82) Mark MacNamara. (83) Peter McSweeney. (84) David Aldous. (85) Cassandra McLean. (86) Barry Dimelow. (87) Phil Tulk. (88) Corinne Leadbeatter. (89) Cinnamon Evans. (90) Martin Stevens. (91) Ian Winstone. (92) Tony Westmore. (93) Robyn Middleton. (94) Alan Shanks. (95) Robin Haylett. (96) Mike Wilson. (97) Gail Murphy. (98) Tanuja Ali. (100) Julie Cocksedge. (101) Sheh-Mae Ho,. (102) Kerry Pantzopolous. (103) Michele Dall. (104-107) James Pearson. (108) Ross Payne. (109) Robina Duggan. (110) Meg Probin, Michèle Adler, Graham Sterry. Found in Jamie Pearson's former office 2015.functions, classses, ala shtrauser, ross payne, andrew smith, james pearson, peter mcsweeney, kevin blaze, ross payne, ed smart, phil kenyon, paula cave, john delpratt, peter may, ian winstone, geoff olive, ian winstone, john brereton, john delpratt, ross hall, nick bailey, phil kenyon, brian shields, james hitchmough, david aldous, geoff connelan, catherine jaggs, james will, bata thomas, john rayner, phil mayle, james macintyre, jayne lindholm, eric littlejohn, alex campbell, ala hires, michael green, peter mcsweeney, kylie cannon, karen geyeregger, nick osborne, jim pleasance, students, robina duggan, michèle adler, mark macnamara, kelvin mckenzie, ruth beilin, rosemary mcconell, elizabeth hill, fred taylor, mike nechwatal, claire scott, graham sterry, geoff connellan, richard green, darryl gibbs, michelle dall, catherine jaggs, greg moore -
 Bendigo Military Museum
Photograph - Visit by Thailand’s Director of Education to the Army Survey Regiment, Fortuna, Bendigo, c1977-1979
This is a set of 28 photographs of a visit to the Army Survey Regiment, Bendigo circa 1977-1979 by LT GEN Bulrit, who was Thailand’s Director of Education. It’s evident in these photos he was taken on a tour through the production areas of the Army Survey Regiment. The escorting Australian General is unidentified. LTCOL Bob Skitch was the CO of the Army Survey Regiment from 1976 to 1980.This is a set of 28 photographs of a visit to the Army Survey Regiment, Bendigo circa 1977-1979 by LT GEN Bulrit, who was Thailand’s Director of Education. The photographs were printed on photographic paper and are part of the Army Survey Regiment’s Collection. Photographs .1P to .26P are on three photo proof sheets and were scanned at 400 dpi. Photographs .27P and .28P were scanned at 300 dpi. .1) - Photo, black and white, c1977-1979. L to R: unidentified (x3), back of CO LTCOL Bob Skitch, unidentified, LT GEN Bulrit Thai Army, back of RSM WO1 Aub Harvey, unidentified. CO LTCOL Jorge Gruszka, unidentified, D-SVY COL Alex Laing, unidentified (x3). .2) to .4) - Photo, black and white, c1977-1979. L to R: CO LTCOL Bob Skitch, LT GEN Bulrit Thai Army. .5) to .6) - Photo, black and white, c1977-1979. L to R: MAJ Peter Eddy, LTCOL Bob Skitch, LT GEN Bulrit Thai Army. .7) - Photo, black and white, c1977-1979. L to R: unidentified (x2), MAJ Peter Eddy, LT GEN Bulrit Thai Army, unidentified. .8) - Photo, black and white, c1977-1979. L to R: unidentified Australian General, unidentified (x3), LT GEN Bulrit Thai Army, MAJ Peter Eddy. .9) - Photo, black and white, c1977-1979. L to R: unidentified (x4), LT GEN Bulrit Thai Army, unidentified Australian General. .10) - Photo, black and white, c1977-1979. L to R: unidentified (x2), LT GEN Bulrit Thai Army, MAJ Peter Eddy. .11) - Photo, black and white, c1977-1979. L to R: CAPT Bob Roche, unidentified, LT GEN Bulrit Thai Army. .12) - Photo, black and white, c1977-1979. L to R: CAPT Bob Roche, unidentified (x2), LT GEN Bulrit Thai Army. .13) - Photo, black and white, c1977-1979. L to R: unidentified Australian General, CO LTCOL Bob Skitch, LT GEN Bulrit Thai Army, unidentified (x2). .14) - Photo, black and white, c1977-1979. L to R: CAPT Bob Roche, LT GEN Bulrit Thai Army, unidentified. .15) - Photo, black and white, c1977-1979. L to R: LT GEN Bulrit Thai Army, MAJ Peter Eddy. .16) - Photo, black and white, c1977-1979. L to R: MAJ Peter Eddy, LT GEN Bulrit Thai Army, unidentified Australian General, unidentified. .17) - Photo, black and white, c1977-1979. L to R: MAJ Peter Eddy, LT GEN Bulrit Thai Army, unidentified Australian General. .18) - Photo, black and white, c1977-1979. L to R: LT GEN Bulrit Thai Army, unidentified, Mr M. Frazer, unidentified, CAPT Bob Roche, unidentified Australian General, unidentified. .19) - Photo, black and white, c1977-1979. L to R: LT GEN Bulrit Thai Army, unidentified Australian General, Miss Pochana, CO LTCOL Bob Skitch. .20) - Photo, black and white, c1977-1979. L to R: LT GEN Bulrit Thai Army, MAJ Sam Schwartz EXCH-US. .21) - Photo, black and white, c1977-1979. L to R: Miss Pochana, unidentified, MAJ Sam Schwartz EXCH-US, LT GEN Bulrit Thai Army. .22) - Photo, black and white, c1977-1979. L to R: LT GEN Bulrit Thai Army, MAJ Sam Schwartz EXCH-US, unidentified Australian General, CO LTCOL Bob Skitch, unidentified. .23) - Photo, black and white, c1977-1979. L to R: LT GEN Bulrit Thai Army, MAJ Sam Schwartz EXCH-US, unidentified (x2), unidentified Australian General, CAPT Terry Edwards, unidentified. .24) - Photo, black and white, c1977-1979. L to R: LT GEN Bulrit Thai Army, MAJ Sam Schwartz EXCH-US, unidentified (x3), unidentified Australian General. .25) - Photo, black and white, c1977-1979. LT GEN Bulrit Thai Army. .26) - Photo, black and white, c1977-1979. L to R: unidentified, LT GEN Bulrit Thai Army, MAJ Sam Schwartz EXCH-US. .27) - Photo, black and white, c1977-1979. L to R: unidentified, LT GEN Bulrit Thai Army, CAPT Bob Roche, unidentified Australian General, Miss Pochana, CO LTCOL Bob Skitch, SSGT Dick Manley. .28) - Photo, black and white, c1977-1979. L to R: CO LTCOL Bob Skitch, LT GEN Bulrit Thai Army, Miss Pochana, Mr M. Frazer..1P to .27P – no annotations .28P – ‘Lt. Gen Bulrit Director of Education THAI ARMY is greeted by MISS POTCHANA a ROTARY EXCHANGE student accompanied by MR M FRAZER’royal australian survey corps, rasvy, army survey regiment, army svy regt, fortuna, asr -
 Bendigo Military Museum
Photograph - 4th Field Survey Squadron – MAJ Don Taylor Farewell, Keswick Barracks, Adelaide SA, 1986
This is a set of 21 photographs of a 4th Field Survey Squadron function held in 1986 to farewell its OC MAJ Don Taylor. MAJ Taylor served 27 years in the Australian Regular Army from 1960 to 1987.This is a set of 21 photographs of a 4th Field Survey Squadron function to farewell its OC MAJ Don Taylor, at Keswick Barracks, Adelaide SA in 1986. The black & white photographs are on 35mm negative film and are part of the Army Survey Regiment’s Collection. The photographs were scanned at 96 dpi. .1) - Photo, black & white, 1986. L to R: SSM WO1 Bill Griggs, OC MAJ Don Taylor, unidentified. .2) - Photo, black & white, 1986. Back row L to R: SGT Wally Chilcott, unidentified (x2), CPL Peter McCurdy, unidentified. Front row L to R: LT Greg Oaten CSC, LT Malcolm Hentschel, SPR Steve Nokes. At front L to R: CPL John Ratcliffe, OC MAJ Don Taylor, SSM WO1 Bill Griggs. .3) - Photo, black & white, 1986. L to R: SSM WO1 Bill Griggs, CPL John Ratcliffe, OC MAJ Don Taylor, George Ricketts, unidentified (x2). .4) - Photo, black & white, 1986. L to R: LT Malcolm Hentschel, unidentified (x2), CPL John Ratcliffe, CPL Peter Hardy, SSM WO1 Bill Griggs, OC MAJ Don Taylor. .5) - Photo, black & white, 1986. L to R: LT Greg Oaten CSC, LT Malcolm Hentschel, unidentified (x2), CPL John Ratcliffe, CPL Peter Hardy, SSM WO1 Bill Griggs, OC MAJ Don Taylor. .6) - Photo, black & white, 1986. L to R: SGT Bill Tewson, SGT Bob Croxton, CPL Dave Irving, WO2 Bob Rogister, unidentified (x3), SSGT Cam Chapman, Chris Hills, CPL Roger Graf. .7) - Photo, black & white, 1986. L to R: SSM WO1 Bill Griggs, LT Malcolm Hentschel, OC MAJ Don Taylor, SGT Mick Hogan. .8) - Photo, black & white, 1986. L to R: unidentified, LT Malcolm Hentschel, SSM WO1 Bill Griggs, Mick Hogan’s daughter? OC MAJ Don Taylor, SGT Mick Hogan. .9) - Photo, black & white, 1986. L to R: unidentified, SSM WO1 Bill Griggs, unidentified, SGT Bill Tewson, OC MAJ Don Taylor. .10) - Photo, black & white, 1986. L to R: unidentified, SGT Bill Tewson, SSM WO1 Bill Griggs, OC MAJ Don Taylor, SGT Mick Hogan and his wife. .11) - Photo, black & white, 1986. L to R: CAPT Steve Cooper, SSM WO1 Bill Griggs, OC MAJ Don Taylor. .12) - Photo, black & white, 1986. L to R: unidentified, CAPT Steve Cooper, SSM WO1 Bill Griggs, OC MAJ Don Taylor, SGT Mick Hogan. .13) - Photo, black & white, 1986. L to R: unidentified, CPL Peter McCurdy, SGT Bill Tewson, CAPT Steve Cooper, OC MAJ Don Taylor, SSM WO1 Bill Griggs. .14) - Photo, black & white, 1986. L to R: OC MAJ Don Taylor, unidentified (x5), CPL Chris ‘Charlie’ Brown, unidentified (seated), SPR Damian Killeen, remainder unidentified. .15) - Photo, black & white, 1986. L to R: unidentified, LT Malcolm Hentschel, SPR Steve Ellis, unidentified (x5), CPL Roger Graf. .16) - Photo, black & white, 1986. Unidentified personnel. SPR Richard Cocker takes aim at the dart board. 4 Fd Svy Sqn Farewell 1986. .20) - L to R: unidentified, CPL Peter Hardy, CPL Tracey (Beckwith) Phillips, unidentified (x4), CAPT Steve Cooper, Ken Jeffery, remainder unidentified. .21) - L to R: CPL C. Rimmington, SGT H. Young. .17) - Photo, black & white, 1986. L to R: SPR Steve Nokes, LT Greg Oaten CSC, SPR Simon Reynolds, Chris Hills, LT Malcolm Hentschel, SGT Wally Chilcott. .18) - Photo, black & white, 1986. L to R: unidentified, SPR Richard Cocker, CPL Peter McCurdy, LT Greg Oaten CSC, SPR Simon Reynolds, SGT Bob Croxton. .19) - Photo, black & white, 1986. L to R: CPL Chris ‘Charlie’ Brown, Mrs Kath Rogister, WO2 Bob Rogister, SSGT Cam Chapman, CAPT Terry Lord, unidentified. .20) - Photo, black & white, 1986. L to R: unidentified, CPL Peter Hardy, CPL Tracey (Beckwith) Phillips, unidentified (x4), CAPT Steve Cooper, Ken Jeffery, remainder unidentified. .21) - Photo, black & white, 1986. L to R: CPL C. Rimmington, SGT H. ’Jock’ Young..1P to .21P – There are no personnel identified. ‘MAJ Don Taylor’s SQN Farewell. 1986’ annotated on negatives sleeve.royal australian survey corps, rasvy, 4 fd svy sqn -
 Bendigo Military Museum
Photograph - Annual Sport Competition: Flag Day - Army Survey Regiment Verses School of Military Survey, Bendigo, 1977
This set of 33 photographs of sports action was taken on Flag Day, an annual sports competition between the Army Survey Regiment (ASR) and the School of Military Survey (SMS), at Bendigo on the 13th of May 1977. Softball was held at Beischer Park Strathdale, sailing was most likely held at Lake Eppalock, rifle shooting at Wellsford Rifle Range and tug-of-war at Fortuna. The venues for basketball, golf, squash and volleyball are unknown. The two RA Svy units took turns each year to host the event. Personnel from the ASR’s Detachment located at Bonegilla were part of the SMS’s teams. The day competition usually comprised basketball, cross country, golf, sailing, squash softball, tennis, rifle shooting, touch football, tug-of-war and volleyball. The evening competition often included darts, carpet bowls, hookey, quoits and snooker. See items 6025.15P for photo proofs of sports action and 6326.25P for softball action and taken on the day. There are numerous duplicates previously published from these photo proofs; however they are inferior in quality.This is a set of 33 photographs of sports action was taken on Flag Day, Army Survey Regiment (ASR) versus the School of Military Survey (SMS), at Bendigo on the 13th of May 1977. The photographs were printed on photographic paper and are part of the Army Survey Regiment’s Collection. The black and white photographs were scanned at 300 dpi. .1) - Photo, black & white, 1977, Basketball. ASR Team Back row L to R: unidentified, Stuart Symonds, Bruce Gordon. Front row L to R: unidentified (x2), Bill Jones, unidentified. Sitting: unidentified. .2) - Photo, black & white, 1977, Basketball. SMS Team Back row L to R: Duncan Burns, Stuart Thaxter, unidentified (x2). Front row L to R: Owen Moss, unidentified, Steve Hansen. Sitting: unidentified. .3) to .5) - Photo, black & white, 1977. Basketball action. .6) - Photo, black & white, 1977, Golf - L to R: Kevin ‘Chuck’ Berry, George Austen, unidentified, Roy Morgan. .7) - Photo, black & white, 1977, Golf - L to R: Stan Vote, Gordon Lowery, Peter Warwick, John ‘JB’ Barrie. .8) & .9) - Photo, black & white, 1977, ASR Golf Team – Back row L to R: Peter Warwick, unidentified, Graeme Jeffers, John Sinclair. Front row L to R: Stan Vote, Roy Morgan, George Austen, Len Thirlwell. .10) & .11) - Photo, black & white, 1977, SMS Golf Team - Back row L to R: Kevin ‘Chuck’ Berry, unidentified, Gordon Lowery. Front row L to R: unidentified, Peter Hardy, unidentified, John ‘JB’ Barrie. .12) & .13) - Photo, black & white, 1977, Golf. Teeing off – unidentified. .14) - Photo, black & white, 1977, Golf. Teeing off – John Sinclair. .15) - Photo, black & white, 1977, Golf. Putting – Stan Vote. .16) - Photo, black & white, 1977, Golf. Putting - Peter Warwick. .17) - Photo, black & white, 1977, Golf. Putting – Roy Morgan. .18) - Photo, black & white, 1977, ASR Rifle Shooting Team - Back row L to R: Paul Davis, unidentified (x2), Max Neil, Rhys De Laine. Front row L to R: Tony Lawler, Rene van den Tol, unidentified, Warren ‘Waldo’ Shirley. .19) - Photo, black & white, 1977, ASR Rifle Shooting Team – L to R: unidentified (x4), 2nd back right: Tony Lawler, unidentified. .20) - Photo, black & white, 1977, SMS Rifle Shooting Team - Back row L to R: John Ashby, unidentified (x3). Front row L to R: Dave Murphy, Wolfgang Thun, John ‘Stormy’ Tempest, unidentified. .21) - Photo, black & white, 1977, Softball – L to R: Jenny Haddow, Debbie Brown, unidentified umpire. .22) - Photo, black & white, 1977, ASR & SMS Sailing Teams – Back row L to R: Chris Osborne, Josh De Groot, unidentified (x2), Greg Francis-Wright, Peter Breukel. 3rd row L to R: Marrianne (Van De Zee) De Groot, unidentified, Kim Reynolds, Alex Cairney, unidentified, Sam Chambers. 2nd row L to R: Les Dixon, Jim Macdonald, unidentified, George Graham, Ted ‘FOT’ Burgess. Front row L to R: Doug Carswell, Alan Adsett, Peter Mustart, Tony Waldon, Dave Miles. .23) - Photo, black & white, 1977, Sailing on Lake Eppalock, Victoria. .24) - Photo, black & white, 1977, SMS Squash Team – Back row L to R: Graham Squire, Peter Constantine AM, Peter Colwell, Bill Boyd OAM, Front row L to R: unidentified, Dick Barwald, Colin Darch, unidentified. .25) - Photo, black & white, 1977, ASR Squash Team – Back row L to R: Andy Wilson, Terry Danger, Errol Fletcher, Dennis Puniard. Front row L to R: Lynn Johnson, Kerry Browne. .26) - Photo, black & white, 1977, ASR Tug-of-War Team: Back row L to R: Russ Mollenhauer, Neville Stone, Jim Cook, Jeff Willey, unidentified (x3). Front row L to R: unidentified, John ‘Flash’ Anderson, Mick ‘Buddha’ Ellis, Ken ‘Sluggo’ Slater, Rob ‘Boges’ Bogumil, Frank Lenane, unidentified. .27) - Photo, black & white, 1977, SMS Tug-of-War Team: Back row L to R: unidentified, Stuart Thaxter, Steve Hansen, unidentified (x2). Front row L to R: Kim Lenson, unidentified (x4), Jamie ‘Fish’ McRae. .28) & .29) - Photo, black & white, 1977, ASR Tug-of-War Team in action. .30) - Photo, black & white, 1977, Volleyball action. .31) - Photo, black & white, 1977, Volleyball action. Chris Edwards blocking. .32) & .33) - Photo, black & white, 1977, Volleyball action..1P to .33P –No personnel are identified. ‘Regiment v School 13 May 1977’ annotated on cover sleeve.royal australian survey corps, rasvy, army survey regiment, army svy regt, fortuna, asr, school of military survey, flag day -
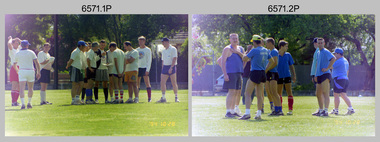 Bendigo Military Museum
Photograph - 4th Field Survey Squadron Soccer Match. Adelaide, SA, 1994
This is a selection of 30 photographs of 4th Field Survey Squadron personnel participating in a soccer game, between the Other Ranks (ORs) and Officers/Warrant Officers/Senior Non-Commissioned Officers (OFFR/SNCOs), at an unknown location in Adelaide, South Australia on the 28th of October 1994.This is a selection of 30 photographs of 4th Field Survey Squadron personnel participating in a soccer game at an unknown location in Adelaide, South Australia on the 28th of October 1994. The colour photographs are part of a set of 72 photographs on 35mm negative film and are part of the Army Survey Regiment’s Collection. The photographs were scanned at 96 dpi. .1) - Photo, colour, 1994. OFFR/SNCOs L to R: SSGT A. Simcock. WO2 Peter Hammer, SGT Peter Hardy, unidentified, SSGT Brian Collings, unidentified, WO2 Simon ‘Andy’ Capp, SGT H. Evertz, OC MAJ Peter Demaine, unidentified, CAPT Chris Topovsek. .2) - Photo, colour, 1994. ORs L to R: unidentified (x3), CPL Steve Wegener, CPL Dick Crawford, unidentified, LCPL Mitch Oake, unidentified. .3) - Photo, colour, 1994. L to R: CAPT Chris Topovsek, SGT Steve McGuiness, LCPL Mitch Oake, WO2 Simon ‘Andy’ Capp, unidentified. .4) - Photo, colour, 1994. L to R: unidentified, CPL Steve Wegener. .5) - Photo, colour, 1994. L to R: WO2 Simon ‘Andy’ Capp, SSGT Pat ‘Fuji’ Drover, unidentified. .6) - Photo, colour, 1994. L to R: unidentified (x2). .7) - Photo, colour, 1994. L to R: SSGT A. Simcock, SPR Mark Linwood, SPR Mark McInerney, unidentified, CPL Dick Crawford. .8) - Photo, colour, 1994. CPL Dick Crawford. .9) - Photo, colour, 1994. L to R: unidentified, SGT Steve McGuiness, SPR Mark Linwood, SPR Mark McInerney, SSGT A. Simcock. .10) - Photo, colour, 1994. CPL Dick Crawford taking an indirect penalty. The wall L to R: SGT H. Evertz, WO2 Simon ‘Andy’ Capp, SSGT Pat ‘Fuji’ Drover, SGT Dave Longbottom. .11) - Photo, colour, 1994. OFFR/SNCOs half time L to R: OC MAJ Peter Demaine, unidentified, SGT Dave Longbottom, SSGT A. Simcock, unidentified, SGT Steve McGuiness, unidentified, WO2 Peter Hammer. .12) - Photo, colour, 1994. ORs half time L to R: unidentified, SPR Mark Linwood, CPL Peter Ball, CPL Steve Wegener, unidentified. .13) - Photo, colour, 1994. L to R: unidentified (x2), SPR Fran Calvert. .14) - Photo, colour, 1994. L to R: Unidentified, SPR Fran Calvert. .15) - Photo, colour, 1994. L to R: CPL Phuc ‘Charlie’ Tran, SPR Fran Calvert. .16) - Photo, colour, 1994. L to R: unidentified, SPR Mark Linwood, CPL Peter Ball. .17) & .18) - Photo, colour, 1994. Attempted goal. .19) - Photo, colour, 1994. L to R: unidentified, (x2), CPL Peter Ball, LT Andrew Caudle, SGT Steve McGuiness, CPL Dick Crawford, SSGT Pat ‘Fuji’ Drover. .20) - Photo, colour, 1994. SPR Fran Calvert tackled from behind. .21) - Photo, colour, 1994. Attempted goal. L to R: CPL Phuc ‘Charlie’ Tran, SPR Fran Calvert, remainder unidentified. .22) - Photo, colour, 1994. Goal celebration. L to R: CPL Phuc ‘Charlie’ Tran, SPR Fran Calvert, remainder unidentified. .23) - Photo, colour, 1994. Attempted goal. L to R: SGT Steve McGuiness, CPL Phuc ‘Charlie’ Tran, CPL Peter Ball, SGT Dave Longbottom. .24) - Photo, colour, 1994. Attempted goal. Keeper CPL Steve Wegener under pressure. .25) - Photo, colour, 1994. Goal scored. L to R: CPL Dick Crawford, remainder unidentified. .26) - Photo, colour, 1994. Keeper clearance L to R: SGT Steve McGuiness, CPL Dick Crawford, SGT Dave Longbottom. .27) - Photo, colour, 1994. L to R: SGT Steve McGuiness, OC MAJ Peter Demaine, SGT H. Evertz, CPL Peter Ball, CPL Phuc ‘Charlie’ Tran (eyes not on the ball), SGT Dave Longbottom. .28) - Photo, colour, 1994. Keeper saves extreme pressure L to R: unidentified, (x2), Dick Crawford, SGT Dave Longbottom, CPL Steve Wegener, unidentified. In foreground: unidentified (x2). .29) - Photo, colour, 1994. Skilled footwork L to R: SSGT Brian Collings, SPR Fran Calvert, WO2 Simon ‘Andy’ Capp. In background: unidentified, SSGT Pat ‘Fuji’ Drover. .30) - Photo, colour, 1994. L to R: unidentified, CPL Dick Crawford, OC MAJ Peter Demaine, SGT Dave Longbottom..1P to .30P – There are no personnel identified. ‘1994 OCT SOCCER MATCH ORs v OFFR/SNCOs’ annotated on negatives sleeve.royal australian survey corps, rasvy, 4 fd svy sqn -
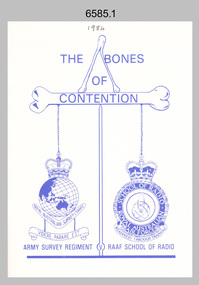 Bendigo Military Museum
Photograph - Bones Day – Army Survey Regiment Verses RAAF School of Radio at Bendigo, Victoria, 1984
These 41 photographs were taken at Bones Day, an annual sports competition between the Army Survey Regiment and the RAAF School of Radio, at Bendigo on the 14th of November 1984. The two units took turns each year to host the event. The day competition usually comprised basketball, cricket, cross country, golf, pistol shooting, sailing, squash, rifle shooting, softball, tennis, touch football, tug-of-war and volleyball. The “big bone” trophy comprising a large bone from a beast housed inside a wooden framed glass case, was awarded to the winner of the day competition. The “O.H.A.R.A Rock” seen on the table in photo 6585.10P was awarded to the shooter with the lowest score in rifle shooting. The evening competition often included darts, carpet bowls, hookey, quoits and billiards/snooker. The “little bone” (a mounted chicken bone) was the consolation trophy awarded to the winner of the evening competition. The 3-hour bus trip for the visiting unit on their return was typically very raucous. The history of the Bones Day competition is best described in the booklet titled - Bones of Contention Souvenir Program. 1965. Refer to Item 6267. Photo 6585.41P is also published with Item 6276.5P.This item comprises the cover of a program booklet and a set of 40 photographs from Bones Day, an annual sports competition between the Army Survey Regiment and the RAAF School of Radio, held at Bendigo on the 14th of November 1984. The photographs were printed on photographic paper and are part of the Army Survey Regiment’s Collection. The colour A4 booklet cover and black and white photographs were scanned at 300 dpi. .1) – A5 size program booklet titled ‘The Bones of Contention’, buff card cover, graphics and internal text printed in purple. 32 pages dated 1984. .2) to .4) - Photo, black & white, 1984. Basketball. Army in darker tops, RAAF in white. .5) - Photo, black & white, 1984. Basketball. Unidentified participants from RAAF. .6) - Photo, black & white, 1984. Rifle Shooting. L to R: CPL Graham Johnston, unidentified. .7) & .8) - Photo, black & white, 1984. Rifle Shooting. Unidentified participants. .9) - Photo, black & white, 1984. Rifle Shooting. Unidentified officials at Range Control. .10) - Photo, black & white, 1984. Rifle Shooting. Unidentified participants from RAAF. The “O.H.A.R.A Rock” awarded to the shooter with the lowest score in rifle shooting is seen on the table. .11) - Photo, black & white, 1984. Pistol Shooting. Army CO LTCOL Jorge Gruszka. .12) - Photo, black & white, 1984. Pistol Shooting. L to R: Army CO LTCOL Jorge Gruszka, CPL Doug Home. .13) - Photo, black & white, 1984. Pistol Shooting. Army CO LTCOL Jorge Gruszka. .14) - Photo, black & white, 1984. Pistol Shooting. RAAF’s participants L to R: unidentified, CO WGCDR McCarthy, remainder unidentified. .15) - Photo, black & white, 1984. Pistol Shooting. ARMY’s participants L to R: CPL Doug Home, SSGT Davidson, SPR Andy Godden, CO LTCOL Jorge Gruszka. .16) & .17) - Photo, black & white, 1984. Pistol Shooting. ARMY and RAAF participants Back row L to R: CPL Doug Home, SSGT Davidson, unidentified RAAF participants (x2). Front row L to R: SPR Andy Godden, RAAF CO WGCDR McCarthy, Army CO LTCOL Jorge Gruszka. .18) to .25) - Photo, black & white, 1984. Softball. Unidentified ARMY & RAAF participants. .26) - Photo, black & white, 1984. Tennis. L to R: ARMY’s CPL John ‘Stormy’ Tempest, SPR Steve Coulson. .27) - Photo, black & white, 1984. Tennis. Unidentified participant. .28) - Photo, black & white, 1984. Tennis. CPL Ginny (Turner) Rowe, unidentified in background. .29) to .31) - Photo, black & white, 1984. Tennis. Unidentified participants. .32) - Photo, black & white, 1984. Tug-of-War. Army team lines up L to R: SPR Kerron South, CPL Leon Jackson, SPR Brett McAllister, CPL Jamie ‘Fish’ McRae, unidentified, CPL Roger Graf, CPL Peter Lefel. .33) - Photo, black & white, 1984. Tug-of-War. Army team pulling hard L to R: unidentified, CPL Jamie ‘Fish’ McRae, SPR Brett McAllister, CPL Leon Jackson, SPR Kerron South. .34) - Photo, black & white, 1984. Tug-of-War. Army and RAAF spectators. Centre foreground L to R: MAJ Bob Roche, Army CO LTCOL Jorge Gruszka, RAAF CO WGCDR McCarthy. .35) - Photo, black & white, 1984. Tug-of-War. RAAF team taking the strain on the rope. Unidentified participants. .36) - Photo, black & white, 1984. Tug-of-War. Army and RAAF teams shake hands after Army’s victory. .37) - Photo, black & white, 1984. Volleyball. Army’s team (light shirts) prepare to receive RAAF’s serve. L to R: CPL Rod Skidmore, CPL Ian Nichols, CPL Dan Cirsky, CPL Terry ‘TJ’ Wicker. .38) - Photo, black & white, 1984. Volleyball. Army’s CPL Rod Skidmore (light shirt) attempts to block a RAAF spike. Unidentified RAAF participants at left. Army team L to R: CPL Terry ‘TJ’ Wicker CPL Robin Marshall, CPL Dan Cirsky. .39) - Photo, black & white, Trophy presentation. L to R: RAAF CO WGCDR McCarthy presents ‘the Big Bone’ to Army’s CO LTCOL Jorge Gruszka. .40) - Photo, black & white, Trophy presentation. L to R: RAAF CO WGCDR McCarthy presents ‘the Little Bone’ to Army’s CO LTCOL Jorge Gruszka. .41) - Photo, black & white, Trophy presentation. L to R: RAAF CO WGCDR McCarthy presents an unidentified trophy to Army’s CO LTCOL Jorge Gruszka..1 - 'The Bones of Contention' title on booklet cover. '1984' hand written on top of cover Photos .2P to .41P – 'Bones Day 1984' annotated on cover sleeve.royal australian survey corps, rasvy, army survey regiment, army svy regt, fortuna, bones day -
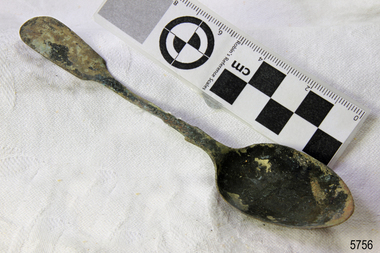 Flagstaff Hill Maritime Museum and Village
Domestic object - Spoon, c. 1878
Unrestored tea spoon from the wreck of the LOCH ARD. The spoon design has a flattened fiddle-back handle, with a thin stem or shank, flared collar, and elongated bowl. The spoons metallic composition is a thin layer of brass alloy which has partially corroded back to a nickel-silver base metal. HISTORY OF THE LOCH ARD The LOCH ARD belonged to the famous Loch Line which sailed many ships from England to Australia. Built in Glasgow by Barclay, Curdle and Co. in 1873, the LOCH ARD was a three-masted square rigged iron sailing ship. The ship measured 262ft 7" (79.87m) in length, 38ft (11.58m) in width, 23ft (7m) in depth and had a gross tonnage of 1693 tons. The LOCH ARD's main mast measured a massive 150ft (45.7m) in height. LOCH ARD made three trips to Australia and one trip to Calcutta before its final voyage. LOCH ARD left England on March 2, 1878, under the command of Captain Gibbs, a newly married, 29 year old. She was bound for Melbourne with a crew of 37, plus 17 passengers and a load of cargo. The general cargo reflected the affluence of Melbourne at the time. On board were straw hats, umbrella, perfumes, clay pipes, pianos, clocks, confectionary, linen and candles, as well as a heavier load of railway irons, cement, lead and copper. There were items included that intended for display in the Melbourne International Exhibition in 1880. The voyage to Port Phillip was long but uneventful. At 3am on June 1, 1878, Captain Gibbs was expecting to see land and the passengers were becoming excited as they prepared to view their new homeland in the early morning. But LOCH ARD was running into a fog which greatly reduced visibility. Captain Gibbs was becoming anxious as there was no sign of land or the Cape Otway lighthouse. At 4am the fog lifted. A man aloft announced that he could see breakers. The sheer cliffs of Victoria's west coast came into view, and Captain Gibbs realised that the ship was much closer to them than expected. He ordered as much sail to be set as time would permit and then attempted to steer the vessel out to sea. On coming head on into the wind, the ship lost momentum, the sails fell limp and LOCH ARD's bow swung back. Gibbs then ordered the anchors to be released in an attempt to hold its position. The anchors sank some 50 fathoms - but did not hold. By this time LOCH ARD was among the breakers and the tall cliffs of Mutton Bird Island rose behind the ship. Just half a mile from the coast, the ship's bow was suddenly pulled around by the anchor. The captain tried to tack out to sea, but the ship struck a reef at the base of Mutton Bird Island, near Port Campbell. Waves broke over the ship and the top deck was loosened from the hull. The masts and rigging came crashing down knocking passengers and crew overboard. When a lifeboat was finally launched, it crashed into the side of LOCH ARD and capsized. Tom Pearce, who had launched the boat, managed to cling to its overturned hull and shelter beneath it. He drifted out to sea and then on the flood tide came into what is now known as LOCH ARD Gorge. He swam to shore, bruised and dazed, and found a cave in which to shelter. Some of the crew stayed below deck to shelter from the falling rigging but drowned when the ship slipped off the reef into deeper water. Eva Carmichael had raced onto deck to find out what was happening only to be confronted by towering cliffs looming above the stricken ship. In all the chaos, Captain Gibbs grabbed Eva and said, "If you are saved Eva, let my dear wife know that I died like a sailor". That was the last Eva Carmichael saw of the captain. She was swept off the ship by a huge wave. Eva saw Tom Pearce on a small rocky beach and yelled to attract his attention. He dived in and swam to the exhausted woman and dragged her to shore. He took her to the cave and broke open case of brandy which had washed up on the beach. He opened a bottle to revive the unconscious woman. A few hours later Tom scaled a cliff in search of help. He followed hoof prints and came by chance upon two men from nearby Glenample Station three and a half miles away. In a state of exhaustion, he told the men of the tragedy. Tom returned to the gorge while the two men rode back to the station to get help. By the time they reached LOCH ARD Gorge, it was cold and dark. The two shipwreck survivors were taken to Glenample Station to recover. Eva stayed at the station for six weeks before returning to Ireland, this time by steamship. In Melbourne, Tom Pearce received a hero's welcome. He was presented with the first gold medal of the Royal Humane Society of Victoria and a £1000 cheque from the Victorian Government. Concerts were performed to honour the young man's bravery and to raise money for those who lost family in the LOCH ARD disaster. Of the 54 crew members and passengers on board, only two survived: the apprentice, Tom Pearce and the young woman passenger, Eva Carmichael, who lost all of her family in the tragedy. Ten days after the LOCH ARD tragedy, salvage rights to the wreck were sold at auction for £2,120. Cargo valued at £3,000 was salvaged and placed on the beach, but most washed back into the sea when another storm developed. The wreck of LOCH ARD still lies at the base of Mutton Bird Island. Much of the cargo has now been salvaged and some was washed up into what is now known as LOCH ARD Gorge. Cargo and artefacts have also been illegally salvaged over many years before protective legislation was introduced. One of the most unlikely pieces of cargo to have survived the shipwreck was a Minton porcelain peacock - one of only seven in the world. The peacock was destined for the Melbourne International Exhibition in 1880. It had been well packed, which gave it adequate protection during the violent storm. Today, the Minton peacock can be seen at the Flagstaff Hill Maritime Museum in Warrnambool. From Australia's most dramatic shipwreck it has now become Australia's most valuable shipwreck artefact and is one of very few 'objects' on the Victorian State Heritage Register. The LOCH ARD shipwreck is of State significance – Victorian Heritage Register S 417. Flagstaff Hill’s collection of artefacts from LOCH ARD is significant for being one of the largest collections of artefacts from this shipwreck in Victoria. It is significant for its association with the shipwreck, which is on the Victorian Heritage Register (VHR S417). The collection is significant because of the relationship between the objects, as together they have a high potential to interpret the story of the LOCH ARD. The LOCH ARD collection is archaeologically significant as the remains of a large international passenger and cargo ship. The LOCH ARD collection is historically significant for representing aspects of Victoria’s shipping history and its potential to interpret sub-theme 1.5 of Victoria’s Framework of Historical Themes (living with natural processes). The collection is also historically significant for its association with the LOCH ARD, which was one of the worst and best known shipwrecks in Victoria’s history. Unrestored tea spoon from the wreck of the LOCH ARD. The spoon design has a flattened fiddle-back handle, with a thin stem or shank, flared collar, and elongated bowl. The spoons metallic composition is a thin layer of brass alloy which has partially corroded back to a nickel-silver base metal. Approximately 35% of original electroplating remains, with some verdigris. Outlines of three makers marks are visible on the lower rear of handle (Circle, Circle, Diamond) and details of one are legible (Maltese Cross).flagstaff hill maritime museum, shipwreck coast, great ocean road, loch line, loch ard, mutton bird island, electroplated cutlery, loch ard shipwreck, nickel silver, william page & co, birmingham, brass plating, makers marks -
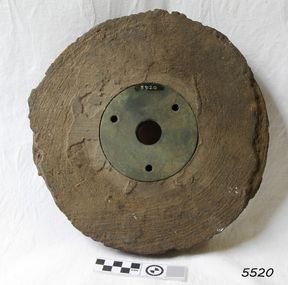 Flagstaff Hill Maritime Museum and Village
Functional object - Pulley Sheave, 1873
A sheave is a pulley with a grooved wheel for holding a belt, wire rope, or rope. The grooved wheel spins on an axle or bearing inside the frame of the block. This allows the wire or rope to move freely minimizing friction and wear on the cable. Sheaves can be used to redirect a cable or rope, lift loads, and transmit power. The words sheave and pulley are sometimes used interchangeably. The sheave was recovered at the time of the discovery of the Loch Ard wreck site in the 1970s. History of the Loch Ard: The Loch Ard got its name from ”Loch Ard” a loch that lies to the west of Aberfoyle, and the east of Loch Lomond. It means "high lake" in Scottish Gaelic. The vessel belonged to the famous Loch Line which sailed many vessels from England to Australia. The Loch Ard was built in Glasgow by Barclay, Curdle and Co. in 1873, the vessel was a three-masted square-rigged iron sailing ship that measured 79.87 meters in length, 11.58 m in width, and 7 m in depth with a gross tonnage of 1693 tons with a mainmast that measured a massive 45.7 m in height. Loch Ard made three trips to Australia and one trip to Calcutta before its fateful voyage. Loch Ard left England on March 2, 1878, under the command of 29-year-old Captain Gibbs, who was newly married. The ship was bound for Melbourne with a crew of 37, plus 17 passengers. The general cargo reflected the affluence of Melbourne at the time. Onboard were straw hats, umbrellas, perfumes, clay pipes, pianos, clocks, confectionery, linen and candles, as well as a heavier load of railway irons, cement, lead and copper. There were other items included that were intended for display in the Melbourne International Exhibition of 1880. The voyage to Port Phillip was long but uneventful. Then at 3 am on June 1, 1878, Captain Gibbs was expecting to see land. But the Loch Ard was running into a fog which greatly reduced visibility. Captain Gibbs was becoming anxious as there was no sign of land or the Cape Otway lighthouse. At 4 am the fog lifted and a lookout aloft announced that he could see breakers. The sheer cliffs of Victoria's west coast came into view, and Captain Gibbs realised that the ship was much closer to them than expected. He ordered as much sail to be set as time would permit and then attempted to steer the vessel out to sea. On coming head-on into the wind, the ship lost momentum, the sails fell limp and Loch Ard's bow swung back towards land. Gibbs then ordered the anchors to be released in an attempt to hold their position. The anchors sank some 50 fathoms - but did not hold. By this time the ship was among the breakers and the tall cliffs of Mutton Bird Island rose behind. Just half a mile from the coast, the ship's bow was suddenly pulled around by the anchor. The captain tried to tack out to sea, but the ship struck a reef at the base of Mutton Bird Island, near Port Campbell. Waves subsequently broke over the ship and the top deck became loosened from the hull. The masts and rigging came crashing down knocking passengers and crew overboard. When a lifeboat was finally launched, it crashed into the side of Loch Ard and capsized. Tom Pearce, who had launched the boat, managed to cling to its overturned hull and shelter beneath it. He drifted out to sea and then on the flood tide came into what is now known as Loch Ard Gorge. He swam to shore, bruised and dazed, and found a cave in which to shelter. Some of the crew stayed below deck to shelter from the falling rigging but drowned when the ship slipped off the reef into deeper water. Eva Carmichael a passenger had raced onto the deck to find out what was happening only to be confronted by towering cliffs looming above the stricken ship. In all the chaos, Captain Gibbs grabbed Eva and said, "If you are saved Eva, let my dear wife know that I died like a sailor". That was the last Eva Carmichael saw of the captain. She was swept off the ship by a huge wave. Eva saw Tom Pearce on a small rocky beach and yelled to attract his attention. He dived in and swam to the exhausted woman and dragged her to shore. He took her to the cave and broke the open case of brandy which had washed up on the beach. He opened a bottle to revive the unconscious woman. A few hours later Tom scaled a cliff in search of help. He followed hoof prints and came by chance upon two men from nearby Glenample Station three and a half miles away. In a complete state of exhaustion, he told the men of the tragedy. Tom then returned to the gorge while the two men rode back to the station to get help. By the time they reached Loch Ard Gorge, it was cold and dark. The two shipwreck survivors were taken to Glenample Station to recover. Eva stayed at the station for six weeks before returning to Ireland by steamship. In Melbourne, Tom Pearce received a hero's welcome. He was presented with the first gold medal of the Royal Humane Society of Victoria and a £1000 cheque from the Victorian Government. Concerts were performed to honour the young man's bravery and to raise money for those who lost family in the disaster. Of the 54 crew members and passengers on board, only two survived: the apprentice, Tom Pearce and the young woman passenger, Eva Carmichael, who lost her family in the tragedy. Ten days after the Loch Ard tragedy, salvage rights to the wreck were sold at auction for £2,120. Cargo valued at £3,000 was salvaged and placed on the beach, but most washed back into the sea when another storm developed. The wreck of Loch Ard still lies at the base of Mutton Bird Island. Much of the cargo has now been salvaged and some items were washed up into Loch Ard Gorge. Cargo and artefacts have also been illegally salvaged over many years before protective legislation was introduced in March 1982. One of the most unlikely pieces of cargo to have survived the shipwreck was a Minton majolica peacock- one of only nine in the world. The peacock was destined for the Melbourne 1880 International Exhibition. It had been well packed, which gave it adequate protection during the violent storm. Today the Minton peacock can be seen at the Flagstaff Hill Maritime Museum in Warrnambool. From Australia's most dramatic shipwreck it has now become Australia's most valuable shipwreck artifact and is one of very few 'objects' on the Victorian State Heritage Register. The shipwreck of the Loch Ard is of significance for Victoria and is registered on the Victorian Heritage Register ( S 417). Flagstaff Hill has a varied collection of artefacts from Loch Ard and its collection is significant for being one of the largest accumulation of artefacts from this notable Victorian shipwreck. The collections object is to also give us a snapshot into history so we can interpret the story of this tragic event. The collection is also archaeologically significant as it represents aspects of Victoria's shipping history that allows us to interpret Victoria's social and historical themes of the time. The collections historically significance is that it is associated unfortunately with the worst and best-known shipwreck in Victoria's history. Pulley sheave; round wooden block with metal disc in centre. Metal disc has large central machined hole and three equidistant small holes closer to the edge. Part of the rope groove is uneven. Recovered from the wreck of the Loch Ard. Noneflagstaff hill, warrnambool, shipwrecked coast, flagstaff hill maritime museum, maritime museum, shipwreck coast, flagstaff hill maritime village, great ocean road, loch line, loch ard, captain gibbs, eva carmichael, tom pearce, glenample station, mutton bird island, loch ard gorge, pulley sheave, pulley, ship rigging -
 Federation University Historical Collection
Photograph - Photograph - Colour, Social Distancing Signs during the Covid-19 Pandemic, 2020, 06/04/2020
On 12 January, the World Health Organization (WHO) confirmed that a novel coronavirus was the cause of a respiratory illness in a cluster of people in Wuhan City, Hubei Province, China, who had initially come to the attention of the WHO on 31 December 2019. On 3 March, the Reserve Bank of Australia became the first central bank to cut interest rates in response to the outbreak. Official interest rates were cut by 0.25% (25 base points) to a record low of 0.5%. On 12 March, the Federal Government announced a A$17.6 billion stimulus package, the first since the 2008 GFC. he package consists of multiple parts, a one-off A$750 payment to around 6.5 million welfare recipients as early as 31 March 2020, small business assistance with 700,000 grants up to $25,000 and a 50% wage subsidy for 120,000 apprenticies or trainees for up to 9 months, 1 billion to support economically impacted sectors, regions and communities, and $700 million to increase tax write off and $3.2 billion to support short-term small and medium-sized business investment. On 16 March, Premier Dan Andrews and Minister for Health Jenny Mikakos declared a state of emergency for Victoria for at least four weeks. On 19 March, the Reserve Bank again cut interest rates by a further 0.25% to 0.25%, the lowest in Australian history. On 22 March, the government announced a second stimulus package of A$66bn, increasing the amount of total financial package offered to A$89bn. This included several new measures like doubling income support for individuals on Jobseeker's allowance, granting A$100,000 to small and medium-sized businesses and A$715 million to Australian airports and airlines. It also allowed individuals affected by the outbreak to access up to A$10,000 of their superannuation during 2019–2020 and also being able to take an additional same amount for the next year. on the same day Victorian Premier Daniel Andrews announced on 22 March that the state will bring the school holiday forwards to 24 March from 27 March. On 30 March, the Australian Federal Government announced a $130 billion "JobKeeper" wage subsidy program offering to pay employers up to $1500 a fortnight per full-time, part-time or casual employee that has worked for that business for over a year. For a business to be eligible, they must have lost 30% of turnover after 1 March of annual revenue up to and including $1 billion. For businesses with a revenue of over $1 billion, turnover must have decreased by 50%. Businesses are then required by law to pay the subsidy to their staff, in lieu of their usual wages. This response came after the enormous job losses seen just a week prior when an estimated 1 million Australians lost their jobs. This massive loss in jobs caused the myGov website to crash and lines out of Centrelink offices to run hundreds of metres long.The program was backdated to 1 March, to aim at reemploying the many people who had just lost their jobs in the weeks before. Businesses would receive the JobKeeper subsidy for six months. Victoria's "Second Wave" from Ballarat Courier, 05 August 2020 Wednesday, August 5: 725 cases, 15 deaths. A record figure reached yet again. Tuesday, August 4: 439 cases, 11 deaths. New fines introduced for COVID-infected people who aren't home. Monday, August 3: 429 cases, 13 deaths. Premier details mass industry shutdowns in Melbourne. Sunday, August 2: 671 cases, seven deaths as harsh new statewide lockdowns are announced Saturday, August 1: 397 new cases, three deaths Friday, July 31: 627 new cases, eight deaths. Premier says one in four Covid cases not home when checked. Thursday July 30: 723 cases, 13 deaths. Just when it was looking promising, alarming new record set. Wednesday July 29: 295 new cases, nine deaths as new cases drop below 300 for first time in nine days Tuesday July 28: 380 new cases, six deaths as aged care outbreaks continue to climb Monday July 27: 532 new cases as daily cases hits 500 for first time, six deaths Sunday July 26: 459 new cases as double-digit death toll is recorded for first time with 10 deaths Saturday July 25: 357 new cases, five new deaths Friday July 24: 300 cases, six deaths, ADF role expanded to help with contact tracing. Thursday July 23 - 403 cases, five deaths, worst day for fatalities in any state, masks now mandatory Wednesday July 22 - 484 cases, two deaths Tuesday July 21 - 374 cases, three deaths Monday July 20 - 275 cases, one death Sunday July 19 - 363 cases, three deaths, notice that masks will become mandatory in lockdown areas Saturday July 18 - 217 cases, three deaths, final Melbourne public housing tower released from hard lockdown Friday July 17 - 428 cases, three deaths Thursday July 16 - 317 cases, two deaths Wednesday July 15 - 238 cases, one death Tuesday July 14 - 270 cases, two deaths Monday July 13 - 177 cases Sunday July 12 - 273 cases, one death Saturday July 11 - 216 cases, one death Friday July 10 - 288 cases, a national daily record at the time Thursday July 9 - 165 cases, eight of nine Melbourne public housing towers released from hard lockdown Wednesday July 8 - 134 cases, new stage-three restrictions announced for metropolitan Melbourne and Mitchell Shire Tuesday July 7 - 191 cases Monday July 6 - 127 cases, two deaths, NSW border closed Sunday July 5 - 74 cases Saturday July 4 - 108 cases, immediate hard lockdown of nine Melbourne public housing towers Friday July 3 - 66 cases Thursday July 2 - 77 cases Wednesday July 1 - 73 casesColour photographs of social distancing signs during the Covid-19 Pandemic, on Chemist Warehouse in Sebastopol. On 06 April 2020 a maximum of 75 people were allowed in the chemist at one time, and those with syptoms of Covid-19 (fever, cough, shortness of breath) were asked to not enter without phone contact. Upon entering customers were directed to use hand sanitizer, and 1.5 metre markings were placed on the floor to enable legal social distancing.covid-19, corona virus, pandemic, chemist's warehouse, sebastopol, social distancing -
Federation University Historical Collection
Poster, Victorian Department of Health and Human Services, A number of Covid-19 Posters Produced by the Victorian Departent of Health and Human Services, 2021, 11/06/2021
On 12 January, the World Health Organization (WHO) confirmed that a novel coronavirus was the cause of a respiratory illness in a cluster of people in Wuhan City, Hubei Province, China, who had initially come to the attention of the WHO on 31 December 2019. On 3 March, the Reserve Bank of Australia became the first central bank to cut interest rates in response to the outbreak. Official interest rates were cut by 0.25% (25 base points) to a record low of 0.5%. On 12 March, the Federal Government announced a A$17.6 billion stimulus package, the first since the 2008 GFC. he package consists of multiple parts, a one-off A$750 payment to around 6.5 million welfare recipients as early as 31 March 2020, small business assistance with 700,000 grants up to $25,000 and a 50% wage subsidy for 120,000 apprenticies or trainees for up to 9 months, 1 billion to support economically impacted sectors, regions and communities, and $700 million to increase tax write off and $3.2 billion to support short-term small and medium-sized business investment. On 16 March, Premier Dan Andrews and Minister for Health Jenny Mikakos declared a state of emergency for Victoria for at least four weeks. On 19 March, the Reserve Bank again cut interest rates by a further 0.25% to 0.25%, the lowest in Australian history. On 22 March, the government announced a second stimulus package of A$66bn, increasing the amount of total financial package offered to A$89bn. This included several new measures like doubling income support for individuals on Jobseeker's allowance, granting A$100,000 to small and medium-sized businesses and A$715 million to Australian airports and airlines. It also allowed individuals affected by the outbreak to access up to A$10,000 of their superannuation during 2019–2020 and also being able to take an additional same amount for the next year. on the same day Victorian Premier Daniel Andrews announced on 22 March that the state will bring the school holiday forwards to 24 March from 27 March. On 30 March, the Australian Federal Government announced a $130 billion "JobKeeper" wage subsidy program offering to pay employers up to $1500 a fortnight per full-time, part-time or casual employee that has worked for that business for over a year. For a business to be eligible, they must have lost 30% of turnover after 1 March of annual revenue up to and including $1 billion. For businesses with a revenue of over $1 billion, turnover must have decreased by 50%. Businesses are then required by law to pay the subsidy to their staff, in lieu of their usual wages. This response came after the enormous job losses seen just a week prior when an estimated 1 million Australians lost their jobs. This massive loss in jobs caused the myGov website to crash and lines out of Centrelink offices to run hundreds of metres long.The program was backdated to 1 March, to aim at reemploying the many people who had just lost their jobs in the weeks before. Businesses would receive the JobKeeper subsidy for six months. Victoria's "Second Wave" from Ballarat Courier, 05 August 2020 Wednesday, August 5: 725 cases, 15 deaths. A record figure reached yet again. Tuesday, August 4: 439 cases, 11 deaths. New fines introduced for COVID-infected people who aren't home. Monday, August 3: 429 cases, 13 deaths. Premier details mass industry shutdowns in Melbourne. Sunday, August 2: 671 cases, seven deaths as harsh new statewide lockdowns are announced Saturday, August 1: 397 new cases, three deaths Friday, July 31: 627 new cases, eight deaths. Premier says one in four Covid cases not home when checked. Thursday July 30: 723 cases, 13 deaths. Just when it was looking promising, alarming new record set. Wednesday July 29: 295 new cases, nine deaths as new cases drop below 300 for first time in nine days Tuesday July 28: 380 new cases, six deaths as aged care outbreaks continue to climb Monday July 27: 532 new cases as daily cases hits 500 for first time, six deaths Sunday July 26: 459 new cases as double-digit death toll is recorded for first time with 10 deaths Saturday July 25: 357 new cases, five new deaths Friday July 24: 300 cases, six deaths, ADF role expanded to help with contact tracing. Thursday July 23 - 403 cases, five deaths, worst day for fatalities in any state, masks now mandatory Wednesday July 22 - 484 cases, two deaths Tuesday July 21 - 374 cases, three deaths Monday July 20 - 275 cases, one death Sunday July 19 - 363 cases, three deaths, notice that masks will become mandatory in lockdown areas Saturday July 18 - 217 cases, three deaths, final Melbourne public housing tower released from hard lockdown Friday July 17 - 428 cases, three deaths Thursday July 16 - 317 cases, two deaths Wednesday July 15 - 238 cases, one death Tuesday July 14 - 270 cases, two deaths Monday July 13 - 177 cases Sunday July 12 - 273 cases, one death Saturday July 11 - 216 cases, one death Friday July 10 - 288 cases, a national daily record at the time Thursday July 9 - 165 cases, eight of nine Melbourne public housing towers released from hard lockdown Wednesday July 8 - 134 cases, new stage-three restrictions announced for metropolitan Melbourne and Mitchell Shire Tuesday July 7 - 191 cases Monday July 6 - 127 cases, two deaths, NSW border closed Sunday July 5 - 74 cases Saturday July 4 - 108 cases, immediate hard lockdown of nine Melbourne public housing towers Friday July 3 - 66 cases Thursday July 2 - 77 cases Wednesday July 1 - 73 casesColour posters advising on safety measures for Victorian during the 2020-2021 Covid-19 Pandemic. The posters were made available by the Department of Health and Human Services and have been saved as PDFs, and printed off onot A4 paper.covid-19, corona virus, pandemic, posters, department of health and human services -
 Flagstaff Hill Maritime Museum and Village
Clothing - Riding Habit, Jodhpurs, 1920s
The Manifolds were a significant pioneering pastoral family in Western Victoria. The donated riding jodhpurs originally belonged to Mrs Edward Manifold, formally Beatrice Mary Synnot Anderson. Beatrice was Edward Manifold’s cousin once removed whom he married in 1900. Edward, the son of John Manifold, was born on 15 November 1868 and educated at Geelong and Melbourne Grammar schools and at Trinity Hall, Cambridge (B.A., 1891). He chose the Danedite portion of land at Purrumbete, and on the death of his bachelor brother Thomas Peter (1863-1895), after a hunting accident, he took over his allocation, Wiridgil. He also owned Boortkoi, near Hexham and on these properties, he ran merino sheep, a Lincoln stud which dated back to 1870, and Shorthorn cattle. 3000 acres were also leased to dairy farmers. Edward was a member of Hampden Shire Council in 1909-31 and three times president at Camperdown. The town was largely bordered by Manifold land and partly dependent upon the local pastoral dynasties, which benefited the local area from the families’ various business interests. Though an offer to build public baths to commemorate the Queen Victoria Jubilee in 1897 was not proceeded with, the town acquired a hospital, a reserve on Mount Leura, a clock tower and a cricket pavilion, as well as notable donations from the Manifolds to St Paul's Church and the grammar school. Edward was a keen polo player and racing man. He was also a successful owner of steeplechasers and a committeeman of the Victoria Racing Club for many years. He was also a member of many Western District racing clubs. On the 16 July 1900, Edward had married his sixteen-year-old cousin Beatrice Mary Synnot Anderson by whom he had three sons Thomas Peter, Andrew and Robert Edward Manifold. Edwards's estate at his death was valued for probate at nearly £500,000. Edward died following an operation on 14 February 1931 at a private hospital in Yarra Vale Melbourne. Beatrice passed away in 1954, aged 79 in Ballarat where she was born in 1874. Contextual historic Family background: The Manifold brothers Thomas (1809-1875), John (1811-1877) and Peter (1817-1885) were the fourth, fifth and sixth sons of William Manifold and Mary, nee Barnes, of Courthouse Farm, Bromborough, Cheshire, England. The family had decided to emigrate to Van Diemen's Land. Thomas was sent ahead, arriving in Hobart Town on 23rd January 1828 with £1500 and a letter of recommendation from the Colonial Office. Thomas acquired 1280 acres on the west bank of the Tamar River. John and Peter, with their parents and three sisters, arrived on 8th July 1831. Land grants by then had finished but William brought ninety acres next to his son Thomas’ land and on the combined properties the family built Kelso House. The Manifolds’ properties were comparatively poor and when news of the Port Phillip District, in Victoria reached Thomas, he lost no time in coming to see for himself in February 1836. He was impressed with what he saw and hurried back to Tasmania to buy lambs and ewes. With one of his brothers, on July 9th he landed his stores at Point Henry and proceeded to occupy both sides of the Moorabool River. Thomas, at the end of the year, returned to Tasmania and left Peter and John to run the new property. Thomas, however, returned to Victoria for several visits and on one of these visits he, along with his brothers, examined the country near Ballarat. In December 1838 they managed to penetrate the Stony Rises, and Peter and John reached Lake Purrumbete and the Mount Leura country. During this time, on 4th July 1838, Thomas married Jane Elizabeth, eldest daughter of Captain Walter Synnot, formerly of Ballinate, County Armagh, Ireland, and then of Van Diemen's Land. Thomas joined his brothers, and they occupied the Purrumbete run in January 1839. On the journey to Purrumbete they could not take their stock and drays through the Stony Rises, so went north of Lake Corangamite, to the neck of land between it and Lake Gnarpurt. By April the move from Moorabool area was complete. As yet they had no hut and were working day and night, but their delight in their new run was unbounded. John wrote to his mother: “We are at last got to the land we wished for it is a beautiful place, and cannot be surpassed by any I have ever seen”. The three brothers occupied Purrumbete together, breeding both sheep and cattle until Thomas went to Grassmere run on the Merri River near Warrnambool in 1844. John and Peter soon gave up breeding sheep but retained the well-known '3M' brand for the cattle. These were Shorthorns, derived from four bulls originally imported by the Boldon brothers and later improved by further importations, and were renowned for size and quality. By the time of the gold rush in 1851, John and Peter were breeding over 1000 head a year, as well as fattening stores. The diggings at this time had disorganised Grassmere by drawing away Thomas's men, and his wife decided to take her two sons and two daughters to Europe for their education. Thomas gave up the property next year, went to England to join his family, and eventually brought the family back to live in Melbourne. At Purrumbete things were different. The brothers, John and Peter, preferred black stockmen to white, so the discovery of gold upset them very little while providing the very market they required. John was on his second visit to England when the rush started, and Peter went in his turn soon after John returned. On 2 September 1856 John married Marion Thomson, at Cormiston, Van Diemen's Land. They had four daughters and five sons, from three of whom, William Thomson, James Chester and Edward, the later generations of the family descend. Through the years the brothers had to contend with the scab, fluke and footrot, depression, rabbits, bush fires and pleuro-pneumonia. In 1861 they appointed as manager Henry Manifold Matson, their nephew, who had already been with them for five years. Thomas died in Melbourne on 7 November 1875, John at Purrumbete on 3 January 1877 and Peter at Purrumbete on 31 July 1885. Devout members of the Church of England, John and Peter, during their lives, gave generously towards building St Paul's Church, Camperdown, and guaranteed part of the vicar's stipend. Peter was a member of the Hampden and Heytesbury Roads Board from 1859 and carried on into the Hampden Shire Council when it was formed in 1864. However, it was not for public works that they were known, but for their personal example. In a new land where speculators and adventurers were all too common, the Manifold brothers were among those who intended it to be their home and their children's home. Industrious, unpretentious and hospitable, they were respected in their community as men of the highest integrity. This riding habit is a characteristic example of the type and style of riding clothes that well-dressed ladies wore in the 1920s. It highlights the changes that were beginning in society for women. Prior to 1918 ladies still had to ride side-saddle with skirts over Jodhpurs. Society of the time regarded women riding astride as unseemly and just not done. This riding habit is particularly significant on a number of levels, it shows the beginnings of change in society's attitudes through women's fashion after the First World War. A change that was to bring a start to a more liberating societal attitude towards women after the successful establishment of the Representation of People Act 1918 that gave women the right to vote. This garments provenance is linked to one of Victoria's important pioneering families the Manifolds, one of the first families that came from Van Diemen's land to settle the Western District of Victoria in 1844. Originally the garment belonged to the wife of the great-grandson of pioneer William Manifold, Edward Manifold who married Beatrice May Synnot Anderson, Edwards Cousin in 1900. The garment was made by the Mayfair tailors J. Busvine & Co. in the early to mid-1920s (estimate) who at the turn of the century were tailors to the Courts of Europe. Their clothing is highly collectible today and examples can be found in a number of significant museum collections around the world, notably the Metropolitan Museum of Art in New York and the FIDM in Los Angeles. Jodhpurs, part of a three-piece, side saddle riding habit tailored for Mrs Edward Manifold, with four buttons to the front material black woolen twill the legs are cuffed below the knee with 8 buttons holes which are reinforced to the inside with fabric. Cream Satin waistband and removable chamois lining to the seat makers label Busvines Co. tailored for Mrs Edward Manifold.Embroidered in blue on a Satin Cream label to Jodhpurs "Busvine Ltd / 4, Brook St, London. W. No." Hand written in black ink script "523/ Mrs Edward Manifold"flagstaff hill, warrnambool, shipwrecked coast, flagstaff hill maritime museum, maritime museum, side saddle riding habit, side saddle riding outfit, breeches, mrs edward manifold, beatrice manifold, shipwreck coast, flagstaff hill maritime village, great ocean road -
 Flagstaff Hill Maritime Museum and Village
Clothing - Riding Habit, jacket, Early 20th Century
The Manifolds were a significant pioneering pastoral family in Western Victoria. The donated riding jacket originally belonged to Mrs Edward Manifold, formally Beatrice Mary Synnot Anderson. Beatrice was Edward Manifold’s cousin once removed whom he married in 1900. Edward, the son of John Manifold, was born on 15 November 1868 and educated at Geelong and Melbourne Grammar schools and at Trinity Hall, Cambridge (B.A., 1891). He chose the Danedite portion of land at Purrumbete, and on the death of his bachelor brother Thomas Peter (1863-1895), after a hunting accident, he took over his allocation, Wiridgil. He also owned Boortkoi, near Hexham and on these properties, he ran merino sheep, a Lincoln stud which dated back to 1870, and Shorthorn cattle. 3000 acres were also leased to dairy farmers. Edward was a member of Hampden Shire Council in 1909-31 and three times president at Camperdown. The town was largely bordered by Manifold land and partly dependent upon the local pastoral dynasties, which benefited the local area from the families’ various business interests. Though an offer to build public baths to commemorate the Queen Victoria Jubilee in 1897 was not proceeded with, the town acquired a hospital, a reserve on Mount Leura, a clock tower and a cricket pavilion, as well as notable donations from the Manifolds to St Paul's Church and the grammar school. Edward was a keen polo player and racing man. He was also a successful owner of steeplechasers and a committeeman of the Victoria Racing Club for many years. He was also a member of many Western District racing clubs. On the 16 July 1900, Edward had married his sixteen-year-old cousin Beatrice Mary Synnot Anderson by whom he had three sons Thomas Peter, Andrew and Robert Edward Manifold. Edwards's estate at his death was valued for probate at nearly £500,000. Edward died following an operation on 14 February 1931 at a private hospital in Yarra Vale Melbourne. Beatrice passed away in 1954, aged 79 in Ballarat where she was born in 1874. Contextual historic Family background: The Manifold brothers Thomas (1809-1875), John (1811-1877) and Peter (1817-1885) were the fourth, fifth and sixth sons of William Manifold and Mary, nee Barnes, of Courthouse Farm, Bromborough, Cheshire, England. The family had decided to emigrate to Van Diemen's Land. Thomas was sent ahead, arriving in Hobart Town on 23rd January 1828 with £1500 and a letter of recommendation from the Colonial Office. Thomas acquired 1280 acres on the west bank of the Tamar River. John and Peter, with their parents and three sisters, arrived on 8th July 1831. Land grants by then had finished but William brought ninety acres next to his son Thomas’ land and on the combined properties the family built Kelso House. The Manifolds’ properties were comparatively poor and when news of the Port Phillip District, in Victoria reached Thomas, he lost no time in coming to see for himself in February 1836. He was impressed with what he saw and hurried back to Tasmania to buy lambs and ewes. With one of his brothers, on July 9th he landed his stores at Point Henry and proceeded to occupy both sides of the Moorabool River. Thomas, at the end of the year, returned to Tasmania and left Peter and John to run the new property. Thomas, however, returned to Victoria for several visits and on one of these visits he, along with his brothers, examined the country near Ballarat. In December 1838 they managed to penetrate the Stony Rises, and Peter and John reached Lake Purrumbete and the Mount Leura country. During this time, on 4th July 1838, Thomas married Jane Elizabeth, eldest daughter of Captain Walter Synnot, formerly of Ballinate, County Armagh, Ireland, and then of Van Diemen's Land. Thomas joined his brothers, and they occupied the Purrumbete run in January 1839. On the journey to Purrumbete they could not take their stock and drays through the Stony Rises, so went north of Lake Corangamite, to the neck of land between it and Lake Gnarpurt. By April the move from Moorabool area was complete. As yet they had no hut and were working day and night, but their delight in their new run was unbounded. John wrote to his mother: “We are at last got to the land we wished for it is a beautiful place, and cannot be surpassed by any I have ever seen”. The three brothers occupied Purrumbete together, breeding both sheep and cattle until Thomas went to Grassmere run on the Merri River near Warrnambool in 1844. John and Peter soon gave up breeding sheep but retained the well-known '3M' brand for the cattle. These were Shorthorns, derived from four bulls originally imported by the Boldon brothers and later improved by further importations, and were renowned for size and quality. By the time of the gold rush in 1851, John and Peter were breeding over 1000 head a year, as well as fattening stores. The diggings at this time had disorganised Grassmere by drawing away Thomas's men, and his wife decided to take her two sons and two daughters to Europe for their education. Thomas gave up the property next year, went to England to join his family, and eventually brought the family back to live in Melbourne. At Purrumbete things were different. The brothers, John and Peter, preferred black stockmen to white, so the discovery of gold upset them very little while providing the very market they required. John was on his second visit to England when the rush started, and Peter went in his turn soon after John returned. On 2 September 1856 John married Marion Thomson, at Cormiston, Van Diemen's Land. They had four daughters and five sons, from three of whom, William Thomson, James Chester and Edward, the later generations of the family descend. Through the years the brothers had to contend with the scab, fluke and footrot, depression, rabbits, bush fires and pleuro-pneumonia. In 1861 they appointed as manager Henry Manifold Matson, their nephew, who had already been with them for five years. Thomas died in Melbourne on 7 November 1875, John at Purrumbete on 3 January 1877 and Peter at Purrumbete on 31 July 1885. Devout members of the Church of England, John and Peter, during their lives, gave generously towards building St Paul's Church, Camperdown, and guaranteed part of the vicar's stipend. Peter was a member of the Hampden and Heytesbury Roads Board from 1859 and carried on into the Hampden Shire Council when it was formed in 1864. However, it was not for public works that they were known, but for their personal example. In a new land where speculators and adventurers were all too common, the Manifold brothers were among those who intended it to be their home and their children's home. Industrious, unpretentious and hospitable, they were respected in their community as men of the highest integrity. This riding habit is a characteristic example of the type and style of riding clothes that well-dressed ladies wore in the 1920s. It highlights the changes that were beginning in society for women. Prior to 1918 ladies still had to ride side-saddle with skirts over Jodhpurs. Society of the time regarded women riding astride as unseemly and just not done. This riding habit is particularly significant on a number of levels, it shows the beginnings of change in society's attitudes through women's fashion after the First World War. A change that was to bring a start to a more liberating societal attitude towards women after the successful establishment of the Representation of People Act 1918 that gave women the right to vote. This garments provenance is linked to one of Victoria's important pioneering families the Manifolds, one of the first families that came from Van Diemen's land to settle the Western District of Victoria in 1844. Originally the garment belonged to the wife of the great-grandson of pioneer William Manifold, Edward Manifold who married Beatrice May Synnot Anderson, Edwards Cousin in 1900. The garment was made by the Mayfair tailors J. Busvine & Co. in the early to mid-1920s (estimate) who at the turn of the century were tailors to the Courts of Europe. Their clothing is highly collectible today and examples can be found in a number of significant museum collections around the world, notably the Metropolitan Museum of Art in New York and the FIDM in Los Angeles. A riding jacket, part of a three-piece, side saddle riding habit tailored for Mrs Edward Manifold. Knee length English woolen jacket black in colour, seamed and fitted to the female client's figure, fastening from the waist with three bone buttons to rather high lapels. The sleeves are long with closely fitted cuffs and one button and lined with cream satin. The jacket is fitted to the waist and flared to below the hips with a 35 cm vent to the back. Lower back to the jacket is reinforced with removable fabric and the jacket is lined with black twill cotton, there is a cream satin label, with makers' emblem Busvine. Circa 1920s Label to Jacket Embroidered in gold with a Royal logo on a Cream Satin label “By Special /Appointment” “To Her Majesty/The Queen”, “Busvine / Ltd / London 4 Brook St. W. / No” “hand written in purple ink 315 / Mrs Edward Manifold”flagstaff hill, warrnambool, shipwrecked coast, flagstaff hill maritime museum, maritime museum, side saddle riding habit, mrs edward manifold, edward manifold, busvines, shipwreck coast, flagstaff hill maritime village, great ocean road -
 Flagstaff Hill Maritime Museum and Village
Clothing - Riding Habit, Skirt, 1920s
The Manifolds were a significant pioneering pastoral family in Western Victoria. The donated riding skirt originally belonged to Mrs Edward Manifold, formally Beatrice Mary Synnot Anderson. Beatrice was Edward Manifold’s cousin once removed whom he married in 1900. Edward, the son of John Manifold, was born on 15 November 1868 and educated at Geelong and Melbourne Grammar schools and at Trinity Hall, Cambridge (B.A., 1891). He chose the Danedite portion of land at Purrumbete, and on the death of his bachelor brother Thomas Peter (1863-1895), after a hunting accident, he took over his allocation, Wiridgil. He also owned Boortkoi, near Hexham and on these properties, he ran merino sheep, a Lincoln stud which dated back to 1870, and Shorthorn cattle. 3000 acres were also leased to dairy farmers. Edward was a member of Hampden Shire Council in 1909-31 and three times president at Camperdown. The town was largely bordered by Manifold land and partly dependent upon the local pastoral dynasties, which benefited the local area from the families’ various business interests. Though an offer to build public baths to commemorate the Queen Victoria Jubilee in 1897 was not proceeded with, the town acquired a hospital, a reserve on Mount Leura, a clock tower and a cricket pavilion, as well as notable donations from the Manifolds to St Paul's Church and the grammar school. Edward was a keen polo player and racing man. He was also a successful owner of steeplechasers and a committeeman of the Victoria Racing Club for many years. He was also a member of many Western District racing clubs. On the 16 July 1900, Edward had married his sixteen-year-old cousin Beatrice Mary Synnot Anderson by whom he had three sons Thomas Peter, Andrew and Robert Edward Manifold. Edwards's estate at his death was valued for probate at nearly £500,000. Edward died following an operation on 14 February 1931 at a private hospital in Yarra Vale Melbourne. Beatrice passed away in 1954, aged 79 in Ballarat where she was born in 1874. Contextual historic Family background: The Manifold brothers Thomas (1809-1875), John (1811-1877) and Peter (1817-1885) were the fourth, fifth and sixth sons of William Manifold and Mary, nee Barnes, of Courthouse Farm, Bromborough, Cheshire, England. The family had decided to emigrate to Van Diemen's Land. Thomas was sent ahead, arriving in Hobart Town on 23rd January 1828 with £1500 and a letter of recommendation from the Colonial Office. Thomas acquired 1280 acres on the west bank of the Tamar River. John and Peter, with their parents and three sisters, arrived on 8th July 1831. Land grants by then had finished but William brought ninety acres next to his son Thomas’ land and on the combined properties the family built Kelso House. The Manifolds’ properties were comparatively poor and when news of the Port Phillip District, in Victoria reached Thomas, he lost no time in coming to see for himself in February 1836. He was impressed with what he saw and hurried back to Tasmania to buy lambs and ewes. With one of his brothers, on July 9th he landed his stores at Point Henry and proceeded to occupy both sides of the Moorabool River. Thomas, at the end of the year, returned to Tasmania and left Peter and John to run the new property. Thomas, however, returned to Victoria for several visits and on one of these visits he, along with his brothers, examined the country near Ballarat. In December 1838 they managed to penetrate the Stony Rises, and Peter and John reached Lake Purrumbete and the Mount Leura country. During this time, on 4th July 1838, Thomas married Jane Elizabeth, eldest daughter of Captain Walter Synnot, formerly of Ballinate, County Armagh, Ireland, and then of Van Diemen's Land. Thomas joined his brothers, and they occupied the Purrumbete run in January 1839. On the journey to Purrumbete they could not take their stock and drays through the Stony Rises, so went north of Lake Corangamite, to the neck of land between it and Lake Gnarpurt. By April the move from Moorabool area was complete. As yet they had no hut and were working day and night, but their delight in their new run was unbounded. John wrote to his mother: “We are at last got to the land we wished for it is a beautiful place, and cannot be surpassed by any I have ever seen”. The three brothers occupied Purrumbete together, breeding both sheep and cattle until Thomas went to Grassmere run on the Merri River near Warrnambool in 1844. John and Peter soon gave up breeding sheep but retained the well-known '3M' brand for the cattle. These were Shorthorns, derived from four bulls originally imported by the Boldon brothers and later improved by further importations, and were renowned for size and quality. By the time of the gold rush in 1851, John and Peter were breeding over 1000 head a year, as well as fattening stores. The diggings at this time had disorganised Grassmere by drawing away Thomas's men, and his wife decided to take her two sons and two daughters to Europe for their education. Thomas gave up the property next year, went to England to join his family, and eventually brought the family back to live in Melbourne. At Purrumbete things were different. The brothers, John and Peter, preferred black stockmen to white, so the discovery of gold upset them very little while providing the very market they required. John was on his second visit to England when the rush started, and Peter went in his turn soon after John returned. On 2 September 1856 John married Marion Thomson, at Cormiston, Van Diemen's Land. They had four daughters and five sons, from three of whom, William Thomson, James Chester and Edward, the later generations of the family descend. Through the years the brothers had to contend with the scab, fluke and footrot, depression, rabbits, bush fires and pleuro-pneumonia. In 1861 they appointed as manager Henry Manifold Matson, their nephew, who had already been with them for five years. Thomas died in Melbourne on 7 November 1875, John at Purrumbete on 3 January 1877 and Peter at Purrumbete on 31 July 1885. Devout members of the Church of England, John and Peter, during their lives, gave generously towards building St Paul's Church, Camperdown, and guaranteed part of the vicar's stipend. Peter was a member of the Hampden and Heytesbury Roads Board from 1859 and carried on into the Hampden Shire Council when it was formed in 1864. However, it was not for public works that they were known, but for their personal example. In a new land where speculators and adventurers were all too common, the Manifold brothers were among those who intended it to be their home and their children's home. Industrious, unpretentious and hospitable, they were respected in their community as men of the highest integrity. This riding habit is a characteristic example of the type and style of riding clothes that well-dressed ladies wore in the 1920s. It highlights the changes that were beginning in society for women. Prior to 1918 ladies still had to ride side-saddle with skirts over Jodhpurs. Society of the time regarded women riding astride as unseemly and just not done. This riding habit is particularly significant on a number of levels, it shows the beginnings of change in society's attitudes through women's fashion after the First World War. A change that was to bring a start to a more liberating societal attitude towards women after the successful establishment of the Representation of People Act 1918 that gave women the right to vote. This garments provenance is linked to one of Victoria's important pioneering families the Manifolds, one of the first families that came from Van Diemen's land to settle the Western District of Victoria in 1844. Originally the garment belonged to the wife of the great-grandson of pioneer William Manifold, Edward Manifold who married Beatrice May Synnot Anderson, Edwards Cousin in 1900. The garment was made by the Mayfair tailors J. Busvine & Co. in the early to mid-1920s (estimate) who at the turn of the century were tailors to the Courts of Europe. Their clothing is highly collectible today and examples can be found in a number of significant museum collections around the world, notably the Metropolitan Museum of Art in New York and the FIDM in Los Angeles. Safety skirt/apron, part of a three-piece, side saddle riding habit tailored for Mrs Edward Manifold. This side saddle skirt is made from black woolen material fixing at the waist with two metal hooks and three buttons to the front opening. One internal concealed pocket lining to the top part of the apron made of cotton the seat is shaped for side saddle riding and the skirt wraps around the body the longer side draped over the leg that is in the stirrup. flagstaff hill, warrnambool, shipwrecked coast, flagstaff hill maritime museum, maritime museum, side saddle riding habit, side saddle safety skirt, side saddle apron, mrs edward manifold, beatrice manifold, female riding habit 1920s, shipwreck coast, flagstaff hill maritime village, great ocean road -
 Flagstaff Hill Maritime Museum and Village
Container - Ink Bottle, Prior to 1878
This design of ink bottle was commonly referred to as a ‘penny ink well’ because it was very inexpensive to produce. It is also known as a dwarf ink bottle. Pen and ink has been in use for hand writing from about the seventh century up until the mid-20th century up until around the mid-19th century a quill pen made from a bird’s feather was used. In the 1850s the steel point pen was invented and could be manufactured on machines in large quantities. In the 1880s a successful portable fountain pen was designed, giving a smooth flowing ink and ease of use replacing the quill or dip pen. History of the Loch Ard: The Loch Ard got its name from "Loch Ard" a loch that lies to the west of Aberfoyle, and the east of Loch Lomond. It means "high lake" in Scottish Gaelic. The vessel belonged to the famous Loch Line which sailed many vessels from England to Australia. The Loch Ard was built in Glasgow by Barclay, Curle & Co. in 1873, the vessel was a three-masted square-rigged iron sailing ship that measured 79.87 meters in length, 11.58 m in width, and 7 m in depth with a gross tonnage of 1693 tons with a mainmast that measured a massive 45.7 m in height. Loch Ard made three trips to Australia and one trip to Calcutta before its fateful voyage. Loch Ard left England on March 2, 1878, under the command of 29-year-old Captain Gibbs, who was newly married. The ship was bound for Melbourne with a crew of 37, plus 17 passengers. The general cargo reflected the affluence of Melbourne at the time. Onboard were straw hats, umbrellas, perfumes, clay pipes, pianos, clocks, confectionery, linen, and candles, as well as a heavier load of railway irons, cement, lead, and copper. There were other items included that were intended for display in the Melbourne International Exhibition of 1880. The voyage to Port Phillip was long but uneventful. Then at 3 am on June 1, 1878, Captain Gibbs was expecting to see land. But the Loch Ard was running into a fog which greatly reduced visibility. Captain Gibbs was becoming anxious as there was no sign of land or the Cape Otway lighthouse. At 4 am the fog lifted and a lookout aloft announced that he could see breakers. The sheer cliffs of Victoria's west coast came into view, and Captain Gibbs realised that the ship was much closer to them than expected. He ordered as much sail to be set as time would permit and then attempted to steer the vessel out to sea. On coming head-on into the wind, the ship lost momentum, the sails fell limp and Loch Ard's bow swung back towards land. Gibbs then ordered the anchors to be released in an attempt to hold their position. The anchors sank some 50 fathoms - but did not hold. By this time the ship was among the breakers and the tall cliffs of Mutton Bird Island rose behind. Just half a mile from the coast, the ship's bow was suddenly pulled around by the anchor. The captain tried to tack out to sea, but the ship struck a reef at the base of Mutton Bird Island, near Port Campbell. Waves subsequently broke over the ship and the top deck became loosened from the hull. The masts and rigging came crashing down knocking passengers and crew overboard. When a lifeboat was finally launched, it crashed into the side of Loch Ard and capsized. Tom Pearce, who had launched the boat, managed to cling to its overturned hull and shelter beneath it. He drifted out to sea and then on the flood tide came into what is now known as Lochard Gorge. He swam to shore, bruised and dazed, and found a cave in which to shelter. Some of the crew stayed below deck to shelter from the falling rigging but drowned when the ship slipped off the reef into deeper water. Eva Carmichael a passenger had raced onto the deck to find out what was happening only to be confronted by towering cliffs looming above the stricken ship. In all the chaos, Captain Gibbs grabbed Eva and said, "If you are saved Eva, let my dear wife know that I died like a sailor". That was the last Eva Carmichael saw of the captain. She was swept off the ship by a huge wave. Eva saw Tom Pearce on a small rocky beach and yelled to attract his attention. He dived in and swam to the exhausted woman and dragged her to shore. He took her to the cave and broke the open case of brandy that had washed up on the beach. He opened a bottle to revive the unconscious woman. A few hours later Tom scaled a cliff in search of help. He followed hoof prints and came by chance upon two men from nearby Glenample Station three and a half miles away. In a complete state of exhaustion, he told the men of the tragedy. Tom then returned to the gorge while the two men rode back to the station to get help. By the time they reached Loch Ard Gorge, it was cold and dark. The two shipwreck survivors were taken to Glenample Station to recover. Eva stayed at the station for six weeks before returning to Ireland by steamship. In Melbourne, Tom Pearce received a hero's welcome. He was presented with the first gold medal of the Royal Humane Society of Victoria and a £1000 cheque from the Victorian Government. Concerts were performed to honour the young man's bravery and to raise money for those who lost families in the disaster. Of the 54 crew members and passengers on board, only two survived: the apprentice, Tom Pearce, and the young woman passenger, Eva Carmichael, who lost her family in the tragedy. Ten days after the Lochard tragedy, salvage rights to the wreck were sold at auction for £2,120. Cargo valued at £3,000 was salvaged and placed on the beach, but most washed back into the sea when another storm developed. The wreck of Lochard still lies at the base of Mutton Bird Island. Much of the cargo has now been salvaged and some items were washed up into Lochard Gorge. Cargo and artefact's have also been illegally salvaged over many years before protective legislation was introduced in March 1982. One of the most unlikely pieces of cargo to have survived the shipwreck was a Minton majolica peacock- one of only nine in the world. The peacock was destined for the Melbourne 1880 International Exhibition. It had been well packed, which gave it adequate protection during the violent storm. Today the Minton peacock can be seen at the Flagstaff Hill Maritime Museum in Warrnambool. From Australia's most dramatic shipwreck it has now become Australia's most valuable shipwreck artifact and is one of very few 'objects' on the Victorian State Heritage Register.This ink well is historically significant as it represents methods of hand written communication that were still common up until the mid-20th century, when fountain pens and ballpoint pens took over in popularity and convenience. The shipwreck of the Loch Ard is of significance for Victoria and is registered on the Victorian Heritage Register ( S 417). Flagstaff Hill has a varied collection of artefact's from Loch Ard and its collection is significant for being one of the largest accumulation of artefact's from this notable Victorian shipwreck of which the subject items are a small part. The collection's objects give us a snapshot of how we can interpret the story of this tragic event. The collection is also archaeologically significant as it represents aspects of Victoria's shipping history that allows us to interpret Victoria's social and historical themes of the time. Through is associated with the worst and best-known shipwreck in Victoria's history.Stoneware penny Ink bottle ironstone salt-glazed, stoneware cylindrical shape with small mouth and squat neck, broad shoulders brown colour, . with light coloured encrustation spots.flagstaff hill, warrnambool, flagstaff hill maritime museum, shipwreck coast, flagstaff hill maritime village, great ocean road, loch line, loch ard, captain gibbs, eva carmichael, tom pearce, glenample station, mutton bird island, loch ard gorge, penny ink well, writing equipment, domestic, stoneware, clay, ceramic, pottery, ink well, inkwell, ink bottle, dip pen, ink, hand writing, business, vintage, dwarf ink -
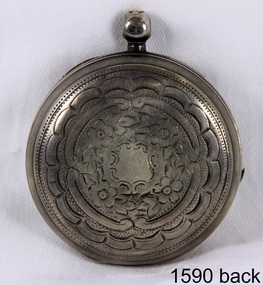 Flagstaff Hill Maritime Museum and Village
Instrument - Fob watch, 1882
The watch was given to William James Robe by the captain of the barque Fiji as a token for helping to save his life and that of the crew on September 6th 1891 when the steel barque Fiji had foundered off “wreck beach" near Moonlight Head Warrnambool during a voyage from Hamburg to Melbourne. William or Bill as he was called was the one who had hauled out the last man, the captain, after he had become tangled in the kelp. William along with many other onlookers on the beach at the time had taken it in turns to go into the surf and drag half-drowned seamen to safety. These rescuers along with William James Robe, included Edwin Vinge, Hugh Cameron, Fenelon Mott, Arthur Wilkinson and Peter Carmody. Years later Bill passed the watch on to his brother-in-law Gilbert Hulands as payment of a debt. The grandson of Gilbert Hulands, John Hulands, has donated this watch to Flagstaff Hill Maritime Museum. The Fiji Wreck: The three-masted iron barque Fiji had been built in Belfast, Ireland, in 1875 by Harland and Wolfe for a Liverpool based shipping company. The ship departed Hamburg on 22nd May 1891 bound for Melbourne, under the command of Captain William Vickers with a crew of 25. On September 5th, one hundred days out from Hamburg in squally and boisterous south-west winds the Cape Otway light was sighted on a bearing differing from Captain Vickers' calculation of his position. At about 2:30 am, Sunday 6th September 1891 land was reported 4-5 miles off the port bow. The captain tried to put the ship on the other tack, but she would not respond. He then tried to turn her the other way but just as the manoeuvre was being completed Fiji struck rock only 274 metres from shore. The place is known as Wreck Bay, Moonlight Head. Blue lights were burned and rockets fired whilst an effort was made to lower boats but all capsized or swamped and smashed to pieces. Two of the younger crewmen volunteered to swim for the shore, taking a line. One, a Russian named Daniel Carkland, drowned after he was swept away when the line broke. The other, 17-year-old able seaman Julius Gebauhr, a German, reached shore safely on his second attempt but without the line, which he had cut loose with his sheath-knife when it becomes tangled in kelp. He rested on the beach a while then climbed the cliffs in search of help. At about 10 am on Sunday a party of land selectors - including F. J. Stanmore, Leslie Dickson (or Dixon) and Mott - found Gebauhr. They were near Ryans Den, on their travels on horseback from Princetown towards Moonlight Head, and about 5km from the wreck. They found Gebauhr lying in scrub and a poor state, bleeding and scantly dressed and with a sheath-knife. At first, they were concerned about his appearance and gibberish speech, taking him to be an escaped lunatic. They were reassured after Gebauhr threw his knife away realising he was speaking half-English, half-German. They gave him food and brandy and some clothing and were then able to gain information about the wreck. Some of the men took him to Rivernook, a nearby guest house owned by John Evans, where he was cared for. Stansmore and Dickson rode off to try and summon help. Others went down to the site of the wreck. Messages for rescuing the rest of the crew were sent both to Port Campbell for the rocket rescue crew and to Warrnambool for the lifeboat. The S.S. Casino sailed from Portland towards the scene. After travelling the 25 miles to the scene, half of the Port Campbell rocket crew and equipment arrived and set up the rocket tripod on the beach below the cliffs. By this time the crew of Fiji had been clinging to the jib-boom for almost 15 hours, calling frantically for help. Mr Tregear from the Rocket Crew fired the line. The light line broke and the rocket was carried away. A second line was successfully fired across the ship and made fast. The anxious sailors then attempted to come ashore along the line but, with as many as five at a time, the line sagged considerably and some were washed off. Others, nearly exhausted, had to then make their way through masses of seaweed and were often smothered by waves. Only 14 of the 24 who had remained on the ship made it to shore. Many onlookers on the beach took it in turns to go into the surf and drag half-drowned seamen to safety. One of the rescuers Arthur Wilkinson, a 29-year-old land selector, swam out to the aid of one of the ship's crewmen, a carpenter named John Plunken who was attempting to swim to shore. Two or three times both men almost reached the shore but were washed back to the wreck, a line was thrown to them. It was thought that Wilkinson had struck his head on the anchor during the rescue and had remained unconscious, the carpenter survived this ordeal but Wilkinson died and his body was washed up the next day. The wreck of Fiji smashed apart within 20 minutes of the captain being brought ashore, and it finally settling in 6m of water. Of the 26 men on Fiji, 11 in total lost their lives. The remains of 7 bodies were washed onto the beach. They were buried on the clifftop above the wreck. Captain Vickers was severely reprimanded for his mishandling of the ship and his is Masters Certificate was suspended for 12 months. At the time there was also a great deal of public criticism at the slow and disorganised rescue attempt to save those on board. The important canvas ‘breech buoy’ or ‘bucket chair’ and the heavy line from the Rocket Rescue was in the half of the rocket outfit that didn’t make it in time for the rescue: they had been delayed at the Gellibrand River ferry. Communications to Warrnambool were down so the call for help didn’t get through on time and the two or three boats that had been notified of the wreck failed to reach it in time. Much looting occurred of the cargo that washed up on the shore, with nearly every visitor leaving the beach with bulky pockets. One looter was caught with a small load of red and white rubber balls, which were duly confiscated and he was 'detained' for 14 days. The essence of peppermint mysteriously turned up in many settlers homes. Sailcloth was salvaged and used for horse rugs and tent flies. Soon after the wreck "Fiji tobacco" was being advertised around Victoria. A Customs officer, trying to prevent some of the looting, was assaulted by looters and thrown over a cliff. He managed to cling to a bush lower down until rescued. Seaman Julius Gebauhr later gave his knife, in its hand crafted leather sheath, to F. J. Stansmore for caring for him when he came ashore. Flagstaff Hill’s Fiji collection is of historical significance at a State level because of its association with the wreck Fiji, which is on the Victorian Heritage Register (S 259). The collection also represents key aspects of Victoria’s shipping history and its items offer the potential to interpret maritime historical events and social history of the time. Along with the potential to yield information that will contribute to an understanding of Victoria’s cultural history.Sterling silver fob watch Fusee movement face has a white background with black Roman numerals on it. The minute hand is gold coloured with a leaf shape. Seconds dial is inset at position 6, with Arabic numerals around it. Watch has machine engraving flower pattern front and back. The spherical winder has a number and a symbol on the upper face and a hole through the centre, the ring for the chain is missing. Back of a the watch opens to reveal a concave cover with a winding hole, which has a border of overlapping crescent-shapes. Inside cover a diamond with initials “JR”(John Rotherham) inside, a date letter “G” (1882) with a Lion Passant (Sterling Silver) also 3 numbers “8 1 9“embossed beside each other. The clock face has “Rotherhams / London” printed on it. The winder is also marked with a maker and sterling silver mark. “Y” and numbers “688” “3 CI A” “3309” “819” “555 A” and other numbers including a set engraved around the edge possibly jewelers marks who did repairs or maintenance on the item over the years.1891, shipwrecked coast, flagstaff hill, flagstaff hill maritime museum, maritime museum, shipwrecked artefact, flagstaff hill maritime village, shipwreck coast, warrnambool, fiji, pocket watch, william vickers, william robe, bill robe, fiji watch -
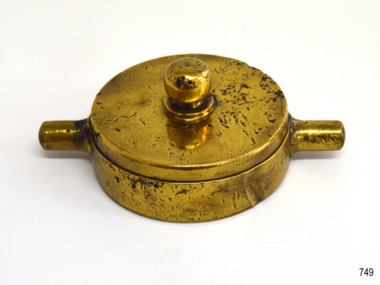 Flagstaff Hill Maritime Museum and Village
Functional object - Hydrant water Cover, Circa. 1873
The artefact is an impressively solid brass hydrant cap and was recovered from the wreck of the Loch Ard. It is believed to have been associated with the ship’s fresh water supply. Its polished appearance suggests it was also on display in a public part of the vessel, viewed by first and second class passengers as well as operated by the crew. The Loch Ard got its name from ”Loch Ard” a loch which lies to the west of Aberfoyle, and the east of Loch Lomond. It means "high lake" in Scottish Gaelic. The vessel belonged to the famous Loch Line which sailed many vessels from England to Australia. The Loch Ard was built in Glasgow by Barclay, Curdle and Co. in 1873, the vessel was a three-masted square-rigged iron sailing ship that measured 79.87 meters in length, 11.58 m in width, and 7 m in depth with a gross tonnage of 1693 tons with a mainmast that measured a massive 45.7 m in height. Loch Ard made three trips to Australia and one trip to Calcutta before its fateful voyage. Loch Ard left England on March 2, 1878, under the command of 29-year-old Captain Gibbs, who was newly married. The ship was bound for Melbourne with a crew of 37, plus 17 passengers. The general cargo reflected the affluence of Melbourne at the time. Onboard were straw hats, umbrella, perfumes, clay pipes, pianos, clocks, confectionery, linen and candles, as well as a heavier load of railway irons, cement, lead and copper. There were other items included that were intended for display in the Melbourne International Exhibition of 1880. The voyage to Port Phillip was long but uneventful. Then at 3 am on June 1, 1878, Captain Gibbs was expecting to see land. But the Loch Ard was running into a fog which greatly reduced visibility. Captain Gibbs was becoming anxious as there was no sign of land or the Cape Otway lighthouse. At 4 am the fog lifted and a lookout aloft announced that he could see breakers. The sheer cliffs of Victoria's west coast came into view, and Captain Gibbs realised that the ship was much closer to them than expected. He ordered as much sail to be set as time would permit and then attempted to steer the vessel out to sea. On coming head-on into the wind, the ship lost momentum, the sails fell limp and Loch Ard's bow swung back towards land. Gibbs then ordered the anchors to be released in an attempt to hold its position. The anchors sank some 50 fathoms - but did not hold. By this time the ship was among the breakers and the tall cliffs of Mutton Bird Island rose behind. Just half a mile from the coast, the ship's bow was suddenly pulled around by the anchor. The captain tried to tack out to sea, but the ship struck a reef at the base of Mutton Bird Island, near Port Campbell. Waves subsequently broke over the ship and the top deck became loosened from the hull. The masts and rigging came crashing down knocking passengers and crew overboard. When a lifeboat was finally launched, it crashed into the side of Loch Ard and capsized. Tom Pearce, who had launched the boat, managed to cling to its overturned hull and shelter beneath it. He drifted out to sea and then on the flood tide came into what is now known as Loch Ard Gorge. He swam to shore, bruised and dazed, and found a cave in which to shelter. Some of the crew stayed below deck to shelter from the falling rigging but drowned when the ship slipped off the reef into deeper water. Eva Carmichael a passenger had raced onto the deck to find out what was happening only to be confronted by towering cliffs looming above the stricken ship. In all the chaos, Captain Gibbs grabbed Eva and said, "If you are saved Eva, let my dear wife know that I died like a sailor". That was the last Eva Carmichael saw of the captain. She was swept off the ship by a huge wave. Eva saw Tom Pearce on a small rocky beach and yelled to attract his attention. He dived in and swam to the exhausted woman and dragged her to shore. He took her to the cave and broke the open case of brandy which had washed up on the beach. He opened a bottle to revive the unconscious woman. A few hours later Tom scaled a cliff in search of help. He followed hoof prints and came by chance upon two men from nearby Glenample Station three and a half miles away. In a complete state of exhaustion, he told the men of the tragedy. Tom then returned to the gorge while the two men rode back to the station to get help. By the time they reached Loch Ard Gorge, it was cold and dark. The two shipwreck survivors were taken to Glenample Station to recover. Eva stayed at the station for six weeks before returning to Ireland by steamship. In Melbourne, Tom Pearce received a hero's welcome. He was presented with the first gold medal of the Royal Humane Society of Victoria and a £1000 cheque from the Victorian Government. Concerts were performed to honour the young man's bravery and to raise money for those who lost family in the disaster. Of the 54 crew members and passengers on board, only two survived: the apprentice, Tom Pearce and the young woman passenger, Eva Carmichael, who lost her family in the tragedy. Ten days after the Loch Ard tragedy, salvage rights to the wreck were sold at auction for £2,120. Cargo valued at £3,000 was salvaged and placed on the beach, but most washed back into the sea when another storm developed. The wreck of Loch Ard still lies at the base of Mutton Bird Island. Much of the cargo has now been salvaged and some items were washed up into Loch Ard Gorge. Cargo and artefacts have also been illegally salvaged over many years before protective legislation was introduced in March 1982. One of the most unlikely pieces of cargo to have survived the shipwreck was a Minton majolica peacock- one of only nine in the world. The peacock was destined for the Melbourne 1880 International Exhibition in. It had been well packed, which gave it adequate protection during the violent storm. Today the Minton peacock can be seen at the Flagstaff Hill Maritime Museum in Warrnambool. From Australia's most dramatic shipwreck it has now become Australia's most valuable shipwreck artefact and is one of very few 'objects' on the Victorian State Heritage Register.The shipwreck of the Loch Ard is of significance for Victoria and is registered on the Victorian Heritage Register ( S 417). Flagstaff Hill has a varied collection of artefacts from Loch Ard and its collection is significant for being one of the largest accumulation of artefacts from this notable Victorian shipwreck. The collections object is to also give us a snapshot into history so we can interpret the story of this tragic event. The collection is also archaeologically significant as it represents aspects of Victoria's shipping history that allows us to interpret Victoria's social and historical themes of the time. The collections historically significance is that it is associated unfortunately with the worst and best-known shipwreck in Victoria's history. A brass water hydrant cover (or cap); round with a a central knob and two side stanchions for screwing on and off a pipe. the underside has a screw thread. the object was recovered from the wreck of the Loch Ard. Noneflagstaff hill, warrnambool, flagstaff hill maritime museum, shipwreck coast, flagstaff hill maritime village, great ocean road, loch line, loch ard, captain gibbs, eva carmichael, tom pearce, glenample station, mutton bird island, loch ard gorge, hydrant cap, hydrant cover, brass fitting -
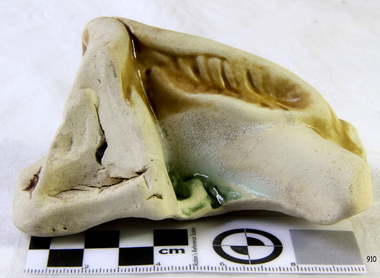 Flagstaff Hill Maritime Museum and Village
Ceramic - Ceramic Piece, Minton Potteries, ca. 1877
The ceramic piece is one of four porcelain fragments washed up from the Loch Ard wreck near Port Campbell Victoria. These shards resemble the foot and leg of a large bird and legend has it that another bird had drifted ashore at the same time the Loch Ard peacock. This figurine is on display at Flagstaff Hill Maritime Museum and regarded as the most valuable shipwreck relic. It is believed that all four fragments could belong to another peacock or a Minton porcelain stork that had been photographed in a Home Beautiful magazine in 1928. This stork appeared to be missing a leg and foot and experts have hypothesized that the four fragments could belong to this stork, the whereabouts of which are currently unknown. History of the Loch Ard: The Loch Ard got its name from ”Loch Ard” a loch which lies to the west of Aberfoyle, and the east of Loch Lomond. It means "high lake" in Scottish Gaelic. The vessel belonged to the famous Loch Line which sailed many vessels from England to Australia. The Loch Ard was built in Glasgow by Barclay, Curdle and Co. in 1873, the vessel was a three-masted square-rigged iron sailing ship that measured 79.87 meters in length, 11.58 m in width, and 7 m in depth with a gross tonnage of 1693 tons with a mainmast that measured a massive 45.7 m in height. Loch Ard made three trips to Australia and one trip to Calcutta before its fateful voyage. Loch Ard left England on March 2, 1878, under the command of 29-year-old Captain Gibbs, who was newly married. The ship was bound for Melbourne with a crew of 37, plus 17 passengers. The general cargo reflected the affluence of Melbourne at the time. Onboard were straw hats, umbrella, perfumes, clay pipes, pianos, clocks, confectionery, linen and candles, as well as a heavier load of railway irons, cement, lead and copper. There were other items included that were intended for display in the Melbourne International Exhibition of 1880. The voyage to Port Phillip was long but uneventful. Then at 3 am on June 1, 1878, Captain Gibbs was expecting to see land. But the Loch Ard was running into a fog which greatly reduced visibility. Captain Gibbs was becoming anxious as there was no sign of land or the Cape Otway lighthouse. At 4 am the fog lifted and a lookout aloft announced that he could see breakers. The sheer cliffs of Victoria's west coast came into view, and Captain Gibbs realised that the ship was much closer to them than expected. He ordered as much sail to be set as time would permit and then attempted to steer the vessel out to sea. On coming head-on into the wind, the ship lost momentum, the sails fell limp and Loch Ard's bow swung back towards land. Gibbs then ordered the anchors to be released in an attempt to hold its position. The anchors sank some 50 fathoms - but did not hold. By this time the ship was among the breakers and the tall cliffs of Mutton Bird Island rose behind. Just half a mile from the coast, the ship's bow was suddenly pulled around by the anchor. The captain tried to tack out to sea, but the ship struck a reef at the base of Mutton Bird Island, near Port Campbell. Waves subsequently broke over the ship and the top deck became loosened from the hull. The masts and rigging came crashing down knocking passengers and crew overboard. When a lifeboat was finally launched, it crashed into the side of Loch Ard and capsized. Tom Pearce, who had launched the boat, managed to cling to its overturned hull and shelter beneath it. He drifted out to sea and then on the flood tide came into what is now known as Loch Ard Gorge. He swam to shore, bruised and dazed, and found a cave in which to shelter. Some of the crew stayed below deck to shelter from the falling rigging but drowned when the ship slipped off the reef into deeper water. Eva Carmichael a passenger had raced onto the deck to find out what was happening only to be confronted by towering cliffs looming above the stricken ship. In all the chaos, Captain Gibbs grabbed Eva and said, "If you are saved Eva, let my dear wife know that I died like a sailor". That was the last Eva Carmichael saw of the captain. She was swept off the ship by a huge wave. Eva saw Tom Pearce on a small rocky beach and yelled to attract his attention. He dived in and swam to the exhausted woman and dragged her to shore. He took her to the cave and broke the open case of brandy which had washed up on the beach. He opened a bottle to revive the unconscious woman. A few hours later Tom scaled a cliff in search of help. He followed hoof prints and came by chance upon two men from nearby Glenample Station three and a half miles away. In a complete state of exhaustion, he told the men of the tragedy. Tom then returned to the gorge while the two men rode back to the station to get help. By the time they reached Loch Ard Gorge, it was cold and dark. The two shipwreck survivors were taken to Glenample Station to recover. Eva stayed at the station for six weeks before returning to Ireland by steamship. In Melbourne, Tom Pearce received a hero's welcome. He was presented with the first gold medal of the Royal Humane Society of Victoria and a £1000 cheque from the Victorian Government. Concerts were performed to honour the young man's bravery and to raise money for those who lost family in the disaster. Of the 54 crew members and passengers on board, only two survived: the apprentice, Tom Pearce and the young woman passenger, Eva Carmichael, who lost her family in the tragedy. Ten days after the Loch Ard tragedy, salvage rights to the wreck were sold at auction for £2,120. Cargo valued at £3,000 was salvaged and placed on the beach, but most washed back into the sea when another storm developed. The wreck of Loch Ard still lies at the base of Mutton Bird Island. Much of the cargo has now been salvaged and some items were washed up into Loch Ard Gorge. Cargo and artefacts have also been illegally salvaged over many years before protective legislation was introduced in March 1982. One of the most unlikely pieces of cargo to have survived the shipwreck was a Minton majolica peacock- one of only nine in the world. The peacock was destined for the Melbourne 1880 International Exhibition in. It had been well packed, which gave it adequate protection during the violent storm. Today the Minton peacock can be seen at the Flagstaff Hill Maritime Museum in Warrnambool. From Australia's most dramatic shipwreck it has now become Australia's most valuable shipwreck artefact and is one of very few 'objects' on the Victorian State Heritage Register.The shipwreck of the Loch Ard is of significance for Victoria and is registered on the Victorian Heritage Register ( S 417). Flagstaff Hill has a varied collection of artefacts from Loch Ard and its collection is significant for being one of the largest accumulation of artefacts from this notable Victorian shipwreck. The collections object is to also give us a snapshot into history so we can interpret the story of this tragic event. The collection is also archaeologically significant as it represents aspects of Victoria's shipping history that allows us to interpret Victoria's social and historical themes of the time. The collections historically significance is that it is associated unfortunately with the worst and best-known shipwreck in Victoria's history.Ceramic shard, broken piece of pottery with some diagonally carved features. It is possibly a peacock leg section and green foliage. The ceramic piece has remnants of a coloured glaze.flagstaff hill, flagstaff hill maritime museum and village, warrnambool, maritime museum, maritime village, great ocean road, shipwreck coast, ceramic, porcelain, piece, fragment, ceramic bird, loch ard, shipwreck, salvage, recover, 1877, 1878, minton, shard -
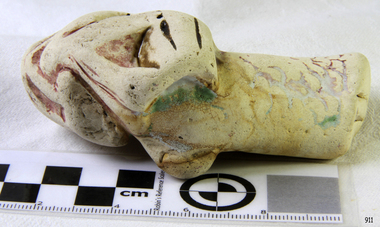 Flagstaff Hill Maritime Museum and Village
Ceramic - Ceramic Piece, Minton Potteries, ca 1877
The ceramic piece is one of four porcelain fragments washed up from the Loch Ard wreck near Port Campbell Victoria. These fragments resemble the foot and leg of a large bird and legend has it that another bird had drifted ashore at the same time the Loch Ard peacock. This figurine is on display at Flagstaff Hill Maritime Museum and regarded as the most valuable shipwreck relic. It is believed that all four fragments could belong to another peacock or a Minton porcelain stork that had been photographed in a Home Beautiful magazine in 1928. This stork appeared to be missing a leg and foot and experts have hypothesized that the four fragments could belong to this stork, the whereabouts of which are currently unknown. History of the Loch Ard: The Loch Ard got its name from ”Loch Ard” a loch which lies to the west of Aberfoyle, and the east of Loch Lomond. It means "high lake" in Scottish Gaelic. The vessel belonged to the famous Loch Line which sailed many vessels from England to Australia. The Loch Ard was built in Glasgow by Barclay, Curdle and Co. in 1873, the vessel was a three-masted square-rigged iron sailing ship that measured 79.87 meters in length, 11.58 m in width, and 7 m in depth with a gross tonnage of 1693 tons with a mainmast that measured a massive 45.7 m in height. Loch Ard made three trips to Australia and one trip to Calcutta before its fateful voyage. Loch Ard left England on March 2, 1878, under the command of 29-year-old Captain Gibbs, who was newly married. The ship was bound for Melbourne with a crew of 37, plus 17 passengers. The general cargo reflected the affluence of Melbourne at the time. Onboard were straw hats, umbrella, perfumes, clay pipes, pianos, clocks, confectionery, linen and candles, as well as a heavier load of railway irons, cement, lead and copper. There were other items included that were intended for display in the Melbourne International Exhibition of 1880. The voyage to Port Phillip was long but uneventful. Then at 3 am on June 1, 1878, Captain Gibbs was expecting to see land. But the Loch Ard was running into a fog which greatly reduced visibility. Captain Gibbs was becoming anxious as there was no sign of land or the Cape Otway lighthouse. At 4 am the fog lifted and a lookout aloft announced that he could see breakers. The sheer cliffs of Victoria's west coast came into view, and Captain Gibbs realised that the ship was much closer to them than expected. He ordered as much sail to be set as time would permit and then attempted to steer the vessel out to sea. On coming head-on into the wind, the ship lost momentum, the sails fell limp and Loch Ard's bow swung back towards land. Gibbs then ordered the anchors to be released in an attempt to hold its position. The anchors sank some 50 fathoms - but did not hold. By this time the ship was among the breakers and the tall cliffs of Mutton Bird Island rose behind. Just half a mile from the coast, the ship's bow was suddenly pulled around by the anchor. The captain tried to tack out to sea, but the ship struck a reef at the base of Mutton Bird Island, near Port Campbell. Waves subsequently broke over the ship and the top deck became loosened from the hull. The masts and rigging came crashing down knocking passengers and crew overboard. When a lifeboat was finally launched, it crashed into the side of Loch Ard and capsized. Tom Pearce, who had launched the boat, managed to cling to its overturned hull and shelter beneath it. He drifted out to sea and then on the flood tide came into what is now known as Loch Ard Gorge. He swam to shore, bruised and dazed, and found a cave in which to shelter. Some of the crew stayed below deck to shelter from the falling rigging but drowned when the ship slipped off the reef into deeper water. Eva Carmichael a passenger had raced onto the deck to find out what was happening only to be confronted by towering cliffs looming above the stricken ship. In all the chaos, Captain Gibbs grabbed Eva and said, "If you are saved Eva, let my dear wife know that I died like a sailor". That was the last Eva Carmichael saw of the captain. She was swept off the ship by a huge wave. Eva saw Tom Pearce on a small rocky beach and yelled to attract his attention. He dived in and swam to the exhausted woman and dragged her to shore. He took her to the cave and broke the open case of brandy which had washed up on the beach. He opened a bottle to revive the unconscious woman. A few hours later Tom scaled a cliff in search of help. He followed hoof prints and came by chance upon two men from nearby Glenample Station three and a half miles away. In a complete state of exhaustion, he told the men of the tragedy. Tom then returned to the gorge while the two men rode back to the station to get help. By the time they reached Loch Ard Gorge, it was cold and dark. The two shipwreck survivors were taken to Glenample Station to recover. Eva stayed at the station for six weeks before returning to Ireland by steamship. In Melbourne, Tom Pearce received a hero's welcome. He was presented with the first gold medal of the Royal Humane Society of Victoria and a £1000 cheque from the Victorian Government. Concerts were performed to honour the young man's bravery and to raise money for those who lost family in the disaster. Of the 54 crew members and passengers on board, only two survived: the apprentice, Tom Pearce and the young woman passenger, Eva Carmichael, who lost her family in the tragedy. Ten days after the Loch Ard tragedy, salvage rights to the wreck were sold at auction for £2,120. Cargo valued at £3,000 was salvaged and placed on the beach, but most washed back into the sea when another storm developed. The wreck of Loch Ard still lies at the base of Mutton Bird Island. Much of the cargo has now been salvaged and some items were washed up into Loch Ard Gorge. Cargo and artefacts have also been illegally salvaged over many years before protective legislation was introduced in March 1982. One of the most unlikely pieces of cargo to have survived the shipwreck was a Minton majolica peacock- one of only nine in the world. The peacock was destined for the Melbourne 1880 International Exhibition in. It had been well packed, which gave it adequate protection during the violent storm. Today the Minton peacock can be seen at the Flagstaff Hill Maritime Museum in Warrnambool. From Australia's most dramatic shipwreck it has now become Australia's most valuable shipwreck artifact and is one of very few 'objects' on the Victorian State Heritage Register.The shipwreck of the Loch Ard is of significance for Victoria and is registered on the Victorian Heritage Register ( S 417). Flagstaff Hill has a varied collection of artefacts from Loch Ard and its collection is significant for being one of the largest accumulation of artefacts from this notable Victorian shipwreck. The collections object is to also give us a snapshot into history so we can interpret the story of this tragic event. The collection is also archaeologically significant as it represents aspects of Victoria's shipping history that allows us to interpret Victoria's social and historical themes of the time. The collections historically significance is that it is associated unfortunately with the worst and best-known shipwreck in Victoria's history.Ceramic piece, broken, with remnants of burgundy, green and yellow glaze. The piece has been shaped. It could be a peacock leg section with green foliage with glaze. Noneflagstaff hill, flagstaff hill maritime museum and village, warrnambool, maritime museum, maritime village, great ocean road, shipwreck coast, ceramic, porcelain, piece, fragment, ceramic bird, loch ard, shipwreck, salvage, recover, 1877, 1878, minton, shard -
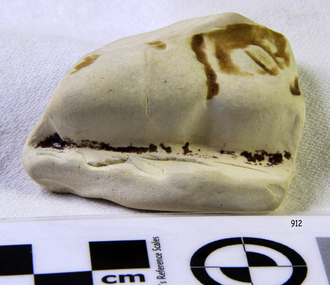 Flagstaff Hill Maritime Museum and Village
Ceramic - Ceramic Piece, Minton Potteries, ca 1877
The ceramic piece is one of four porcelain fragments washed up from the Loch Ard wreck near Port Campbell Victoria. These fragments resemble the foot and leg of a large bird and legend has it that another bird had drifted ashore at the same time the Loch Ard peacock. This figurine is on display at Flagstaff Hill Maritime Museum and regarded as the most valuable shipwreck relic. It is believed that all four fragments could belong to another peacock or a Minton porcelain stork that had been photographed in a Home Beautiful magazine in 1928. This stork appeared to be missing a leg and foot and experts have hypothesized that the four fragments could belong to this stork, the whereabouts of which are currently unknown. History of the Loch Ard: The Loch Ard got its name from ”Loch Ard” a loch which lies to the west of Aberfoyle, and the east of Loch Lomond. It means "high lake" in Scottish Gaelic. The vessel belonged to the famous Loch Line which sailed many vessels from England to Australia. The Loch Ard was built in Glasgow by Barclay, Curdle and Co. in 1873, the vessel was a three-masted square-rigged iron sailing ship that measured 79.87 meters in length, 11.58 m in width, and 7 m in depth with a gross tonnage of 1693 tons with a mainmast that measured a massive 45.7 m in height. Loch Ard made three trips to Australia and one trip to Calcutta before its fateful voyage. Loch Ard left England on March 2, 1878, under the command of 29-year-old Captain Gibbs, who was newly married. The ship was bound for Melbourne with a crew of 37, plus 17 passengers. The general cargo reflected the affluence of Melbourne at the time. Onboard were straw hats, umbrella, perfumes, clay pipes, pianos, clocks, confectionery, linen and candles, as well as a heavier load of railway irons, cement, lead and copper. There were other items included that were intended for display in the Melbourne International Exhibition of 1880. The voyage to Port Phillip was long but uneventful. Then at 3 am on June 1, 1878, Captain Gibbs was expecting to see land. But the Loch Ard was running into a fog which greatly reduced visibility. Captain Gibbs was becoming anxious as there was no sign of land or the Cape Otway lighthouse. At 4 am the fog lifted and a lookout aloft announced that he could see breakers. The sheer cliffs of Victoria's west coast came into view, and Captain Gibbs realised that the ship was much closer to them than expected. He ordered as much sail to be set as time would permit and then attempted to steer the vessel out to sea. On coming head-on into the wind, the ship lost momentum, the sails fell limp and Loch Ard's bow swung back towards land. Gibbs then ordered the anchors to be released in an attempt to hold its position. The anchors sank some 50 fathoms - but did not hold. By this time the ship was among the breakers and the tall cliffs of Mutton Bird Island rose behind. Just half a mile from the coast, the ship's bow was suddenly pulled around by the anchor. The captain tried to tack out to sea, but the ship struck a reef at the base of Mutton Bird Island, near Port Campbell. Waves subsequently broke over the ship and the top deck became loosened from the hull. The masts and rigging came crashing down knocking passengers and crew overboard. When a lifeboat was finally launched, it crashed into the side of Loch Ard and capsized. Tom Pearce, who had launched the boat, managed to cling to its overturned hull and shelter beneath it. He drifted out to sea and then on the flood tide came into what is now known as Loch Ard Gorge. He swam to shore, bruised and dazed, and found a cave in which to shelter. Some of the crew stayed below deck to shelter from the falling rigging but drowned when the ship slipped off the reef into deeper water. Eva Carmichael a passenger had raced onto the deck to find out what was happening only to be confronted by towering cliffs looming above the stricken ship. In all the chaos, Captain Gibbs grabbed Eva and said, "If you are saved Eva, let my dear wife know that I died like a sailor". That was the last Eva Carmichael saw of the captain. She was swept off the ship by a huge wave. Eva saw Tom Pearce on a small rocky beach and yelled to attract his attention. He dived in and swam to the exhausted woman and dragged her to shore. He took her to the cave and broke the open case of brandy which had washed up on the beach. He opened a bottle to revive the unconscious woman. A few hours later Tom scaled a cliff in search of help. He followed hoof prints and came by chance upon two men from nearby Glenample Station three and a half miles away. In a complete state of exhaustion, he told the men of the tragedy. Tom then returned to the gorge while the two men rode back to the station to get help. By the time they reached Loch Ard Gorge, it was cold and dark. The two shipwreck survivors were taken to Glenample Station to recover. Eva stayed at the station for six weeks before returning to Ireland by steamship. In Melbourne, Tom Pearce received a hero's welcome. He was presented with the first gold medal of the Royal Humane Society of Victoria and a £1000 cheque from the Victorian Government. Concerts were performed to honour the young man's bravery and to raise money for those who lost family in the disaster. Of the 54 crew members and passengers on board, only two survived: the apprentice, Tom Pearce and the young woman passenger, Eva Carmichael, who lost her family in the tragedy. Ten days after the Loch Ard tragedy, salvage rights to the wreck were sold at auction for £2,120. Cargo valued at £3,000 was salvaged and placed on the beach, but most washed back into the sea when another storm developed. The wreck of Loch Ard still lies at the base of Mutton Bird Island. Much of the cargo has now been salvaged and some items were washed up into Loch Ard Gorge. Cargo and artefacts have also been illegally salvaged over many years before protective legislation was introduced in March 1982. One of the most unlikely pieces of cargo to have survived the shipwreck was a Minton majolica peacock- one of only nine in the world. The peacock was destined for the Melbourne 1880 International Exhibition in. It had been well packed, which gave it adequate protection during the violent storm. Today the Minton peacock can be seen at the Flagstaff Hill Maritime Museum in Warrnambool. From Australia's most dramatic shipwreck it has now become Australia's most valuable shipwreck artifact and is one of very few 'objects' on the Victorian State Heritage Register.The shipwreck of the Loch Ard is of significance for Victoria and is registered on the Victorian Heritage Register ( S 417). Flagstaff Hill has a varied collection of artefacts from Loch Ard and its collection is significant for being one of the largest accumulation of artefacts from this notable Victorian shipwreck. The collections object is to also give us a snapshot into history so we can interpret the story of this tragic event. The collection is also archaeologically significant as it represents aspects of Victoria's shipping history that allows us to interpret Victoria's social and historical themes of the time. The collections historically significance is that it is associated unfortunately with the worst and best-known shipwreck in Victoria's history.Ceramic piece, broken with remnants of glaze. It has been shaped. It may be from a peacock leg section.Noneflagstaff hill, flagstaff hill maritime museum and village, warrnambool, maritime museum, maritime village, great ocean road, shipwreck coast, ceramic, porcelain, piece, fragment, ceramic bird, loch ard, shipwreck, salvage, recover, 1877, 1878, minton, shard -
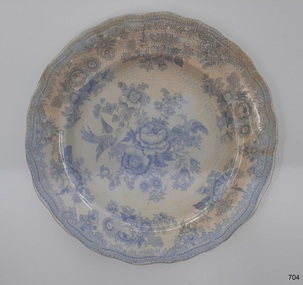 Flagstaff Hill Maritime Museum and Village
Domestic object - Dinner plate, William Adams, before 1863-1875
The Asiatic Pheasant pattern is a transfer design and was the most popular design of the 18th & 19th centuries and is still being produced today. The design was produced as high quality, decorative dinnerware by the potters in the Staffordshire area of England, from the late 1830’s, but no-one is sure exactly who the original designer was. This particular example was made by William Adams of Tunstall, Stoke-on-Trent, Staffordshire at the Greengates Potteries probably after or around 1863 and is believed to have been part of a passengers goods. The Adams family have a long line of making pottery since 1584 until 1966 when they were acquired by the Wedgewood group of companies. But this items pattern is attributed to the Adams potteries. History of the Loch Ard: The Loch Ard got its name from ”Loch Ard” a loch which lies to the west of Aberfoyle, and the east of Loch Lomond. It means "high lake" in Scottish Gaelic. The vessel belonged to the famous Loch Line which sailed many vessels from England to Australia. The Loch Ard was built in Glasgow by Barclay, Curle & Co. in 1873, the vessel was a three-masted square-rigged iron sailing ship that measured 79.87 meters in length, 11.58 m in width, and 7 m in depth with a gross tonnage of 1693 tons with a mainmast that measured a massive 45.7 m in height. Loch Ard made three trips to Australia and one trip to Calcutta before its fateful voyage. Loch Ard left England on March 2, 1878, under the command of 29-year-old Captain Gibbs, who was newly married. The ship was bound for Melbourne with a crew of 37, plus 17 passengers. The general cargo reflected the affluence of Melbourne at the time. Onboard were straw hats, umbrella, perfumes, clay pipes, pianos, clocks, confectionery, linen and candles, as well as a heavier load of railway irons, cement, lead and copper. There were other items included that were intended for display in the Melbourne International Exhibition of 1880. The voyage to Port Phillip was long but uneventful. Then at 3 am on June 1, 1878, Captain Gibbs was expecting to see land. But the Loch Ard was running into a fog which greatly reduced visibility. Captain Gibbs was becoming anxious as there was no sign of land or the Cape Otway lighthouse. At 4 am the fog lifted and a lookout aloft announced that he could see breakers. The sheer cliffs of Victoria's west coast came into view, and Captain Gibbs realised that the ship was much closer to them than expected. He ordered as much sail to be set as time would permit and then attempted to steer the vessel out to sea. On coming head-on into the wind, the ship lost momentum, the sails fell limp and Loch Ard's bow swung back towards land. Gibbs then ordered the anchors to be released in an attempt to hold its position. The anchors sank some 50 fathoms - but did not hold. By this time the ship was among the breakers and the tall cliffs of Mutton Bird Island rose behind. Just half a mile from the coast, the ship's bow was suddenly pulled around by the anchor. The captain tried to tack out to sea, but the ship struck a reef at the base of Mutton Bird Island, near Port Campbell. Waves subsequently broke over the ship and the top deck became loosened from the hull. The masts and rigging came crashing down knocking passengers and crew overboard. When a lifeboat was finally launched, it crashed into the side of Loch Ard and capsized. Tom Pearce, who had launched the boat, managed to cling to its overturned hull and shelter beneath it. He drifted out to sea and then on the flood tide came into what is now known as Lochard Gorge. He swam to shore, bruised and dazed, and found a cave in which to shelter. Some of the crew stayed below deck to shelter from the falling rigging but drowned when the ship slipped off the reef into deeper water. Eva Carmichael a passenger had raced onto the deck to find out what was happening only to be confronted by towering cliffs looming above the stricken ship. In all the chaos, Captain Gibbs grabbed Eva and said, "If you are saved Eva, let my dear wife know that I died like a sailor". That was the last Eva Carmichael saw of the captain. She was swept off the ship by a huge wave. Eva saw Tom Pearce on a small rocky beach and yelled to attract his attention. He dived in and swam to the exhausted woman and dragged her to shore. He took her to the cave and broke the open case of brandy which had washed up on the beach. He opened a bottle to revive the unconscious woman. A few hours later Tom scaled a cliff in search of help. He followed hoof prints and came by chance upon two men from nearby Glenample Station three and a half miles away. In a complete state of exhaustion, he told the men of the tragedy. Tom then returned to the gorge while the two men rode back to the station to get help. By the time they reached Loch Ard Gorge, it was cold and dark. The two shipwreck survivors were taken to Glenample Station to recover. Eva stayed at the station for six weeks before returning to Ireland by steamship. In Melbourne, Tom Pearce received a hero's welcome. He was presented with the first gold medal of the Royal Humane Society of Victoria and a £1000 cheque from the Victorian Government. Concerts were performed to honour the young man's bravery and to raise money for those who lost family in the disaster. Of the 54 crew members and passengers on board, only two survived: the apprentice, Tom Pearce and the young woman passenger, Eva Carmichael, who lost her family in the tragedy. Ten days after the Lochard tragedy, salvage rights to the wreck were sold at auction for £2,120. Cargo valued at £3,000 was salvaged and placed on the beach, but most washed back into the sea when another storm developed. The wreck of Lochard still lies at the base of Mutton Bird Island. Much of the cargo has now been salvaged and some items were washed up into Lochard Gorge. Cargo and artefacts have also been illegally salvaged over many years before protective legislation was introduced in March 1982. One of the most unlikely pieces of cargo to have survived the shipwreck was a Minton majolica peacock- one of only nine in the world. The peacock was destined for the Melbourne 1880 International Exhibition in. It had been well packed, which gave it adequate protection during the violent storm. Today the Minton peacock can be seen at the Flagstaff Hill Maritime Museum in Warrnambool. From Australia's most dramatic shipwreck it has now become Australia's most valuable shipwreck artifact and is one of very few 'objects' on the Victorian State Heritage Register. The shipwreck of the Loch Ard is of significance for Victoria and is registered on the Victorian Heritage Register ( S 417). Flagstaff Hill has a varied collection of artefacts from Loch Ard and its collection is significant for being one of the largest accumulation of artefacts from this notable Victorian shipwreck of which the subject items are a small part. The collections objects give us a snapshot of how we can interpret the story of this tragic event. The collection is also archaeologically significant as it represents aspects of Victoria's shipping history that allows us to interpret Victoria's social and historical themes of the time. Through is associated with the worst and best-known shipwreck in Victoria's history. Plate recovered from the wreck of the Loch Ard. Earthenware dinner plate with blue and white transfer design (Asiatic Pheasant) with a clear over-glaze. The outer rim is scalloped. Stickers with inscriptions "Rec 373 A" "L 102" "From Loch Ard Wreck (1878) - - -" Design logo [Floral wreath with ribbon and text "Asiatic Pheasant" and text below "- - - -"}flagstaff hill, warrnambool, flagstaff hill maritime museum, shipwreck coast, flagstaff hill maritime village, great ocean road, loch line, loch ard, captain gibbs, eva carmichael, tom pearce, glenample station, mutton bird island, loch ard gorge, asiatic pheasant, china dinner plate, earthenware plate, w adams potteries -
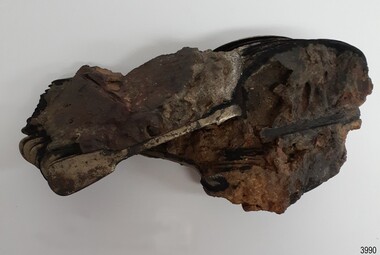 Flagstaff Hill Maritime Museum and Village
Domestic object - Spoons, Prior to 1878
These desert spoons are from the wreck of the Loch Ard, that sailed from Gravesend, London. The manifest listed an array of manufactured goods being exported to the Colony of Victoria. Included in the cargo manifest was a large number of hardware and cutlery items. These spoons are representative of similar items of silver electro-plated cutlery salvaged from the Loch Ard wreck site, comprising nickel silver electroplated spoons and forks of various sizes but all sharing the same general shape and design. History of the Loch Ard: - The Loch Ard got its name from ”Loch Ard” a loch that lies to the west of Aberfoyle, and the east of Loch Lomond. It means "high lake" in Scottish Gaelic. The vessel belonged to the famous Loch Line which sailed many vessels from England to Australia. The Loch Ard was built in Glasgow by Barclay, Curdle and Co. in 1873, the vessel was a three-masted square-rigged iron sailing ship that measured 79.87 meters in length, 11.58 m in width, and 7 m in depth with a gross tonnage of 1693 tons with a mainmast that measured a massive 45.7 m in height. Loch Ard made three trips to Australia and one trip to Calcutta before its fateful voyage. Loch Ard left England on March 2, 1878, under the command of 29-year-old Captain Gibbs, who was newly married. The ship was bound for Melbourne with a crew of 37, plus 17 passengers. The general cargo reflected the affluence of Melbourne at the time. Onboard were straw hats, umbrellas, perfumes, clay pipes, pianos, clocks, confectionery, linen and candles, as well as a heavier load of railway irons, cement, lead and copper. There were other items included that were intended for display in the Melbourne International Exhibition of 1880. The voyage to Port Phillip was long but uneventful. Then at 3 am on June 1, 1878, Captain Gibbs was expecting to see land. But the Loch Ard was running into a fog which greatly reduced visibility. Captain Gibbs was becoming anxious as there was no sign of land or the Cape Otway lighthouse. At 4 am the fog lifted and a lookout aloft announced that he could see breakers. The sheer cliffs of Victoria's west coast came into view, and Captain Gibbs realised that the ship was much closer to them than expected. He ordered as much sail to be set as time would permit and then attempted to steer the vessel out to sea. On coming head-on into the wind, the ship lost momentum, the sails fell limp and Loch Ard's bow swung back towards land. Gibbs then ordered the anchors to be released in an attempt to hold their position. The anchors sank some 50 fathoms - but did not hold. By this time the ship was among the breakers and the tall cliffs of Mutton Bird Island rose behind. Just half a mile from the coast, the ship's bow was suddenly pulled around by the anchor. The captain tried to tack out to sea, but the ship struck a reef at the base of Mutton Bird Island, near Port Campbell. Waves subsequently broke over the ship and the top deck became loosened from the hull. The masts and rigging came crashing down knocking passengers and crew overboard. When a lifeboat was finally launched, it crashed into the side of Loch Ard and capsized. Tom Pearce, who had launched the boat, managed to cling to its overturned hull and shelter beneath it. He drifted out to sea and then on the flood tide came into what is now known as Loch Ard Gorge. He swam to shore, bruised and dazed, and found a cave in which to shelter. Some of the crew stayed below deck to shelter from the falling rigging but drowned when the ship slipped off the reef into deeper water. Eva Carmichael a passenger had raced onto the deck to find out what was happening only to be confronted by towering cliffs looming above the stricken ship. In all the chaos, Captain Gibbs grabbed Eva and said, "If you are saved Eva, let my dear wife know that I died like a sailor". That was the last Eva Carmichael saw of the captain. She was swept off the ship by a huge wave. Eva saw Tom Pearce on a small rocky beach and yelled to attract his attention. He dived in and swam to the exhausted woman and dragged her to shore. He took her to the cave and broke the open case of brandy which had washed up on the beach. He opened a bottle to revive the unconscious woman. A few hours later Tom scaled a cliff in search of help. He followed hoof prints and came by chance upon two men from nearby Glenample Station three and a half miles away. In a complete state of exhaustion, he told the men of the tragedy. Tom then returned to the gorge while the two men rode back to the station to get help. By the time they reached Loch Ard Gorge, it was cold and dark. The two shipwreck survivors were taken to Glenample Station to recover. Eva stayed at the station for six weeks before returning to Ireland by steamship. In Melbourne, Tom Pearce received a hero's welcome. He was presented with the first gold medal of the Royal Humane Society of Victoria and a £1000 cheque from the Victorian Government. Concerts were performed to honour the young man's bravery and to raise money for those who lost family in the disaster. Of the 54 crew members and passengers on board, only two survived: the apprentice, Tom Pearce and the young woman passenger, Eva Carmichael, who lost her family in the tragedy. Ten days after the Loch Ard tragedy, salvage rights to the wreck were sold at auction for £2,120. Cargo valued at £3,000 was salvaged and placed on the beach, but most washed back into the sea when another storm developed. The wreck of Loch Ard still lies at the base of Mutton Bird Island. Much of the cargo has now been salvaged and some items were washed up into Loch Ard Gorge. Cargo and artefacts have also been illegally salvaged over many years before protective legislation was introduced in March 1982. One of the most unlikely pieces of cargo to have survived the shipwreck was a Minton majolica peacock- one of only nine in the world. The peacock was destined for the Melbourne 1880 International Exhibition. It had been well packed, which gave it adequate protection during the violent storm. Today the Minton peacock can be seen at the Flagstaff Hill Maritime Museum in Warrnambool. From Australia's most dramatic shipwreck, it has now become Australia's most valuable shipwreck artifact and is one of very few 'objects' on the Victorian State Heritage Register.The shipwreck of the Loch Ard is of significance for Victoria and is registered on the Victorian Heritage Register ( S 417). Flagstaff Hill has a varied collection of artefacts from Loch Ard and its collection is significant for being one of the largest accumulation of artefacts from this notable Victorian shipwreck. The collections object is to also give us a snapshot into history so we can interpret the story of this tragic event. The collection is also archaeologically significant as it represents aspects of Victoria's shipping history that allows us to interpret Victoria's social and historical themes of the time. The collections historically significance is that it is associated unfortunately with the worst and best-known shipwreck in Victoria's history. Large conglomerated group of nickel silver plated spoons with fiddle-back design handle, narrow stem with flared collar and elongated bowl; twenty parts of spoons are visible. The spoons were recovered from the wreck of the Loch Ard.flagstaff hill, warrnambool, shipwrecked coast, flagstaff hill maritime museum, maritime museum, shipwreck coast, flagstaff hill maritime village, great ocean road, loch line, loch ard, captain gibbs, eva carmichael, tom pearce, glenample station, mutton bird island, loch ard gorge, dessert spoon, petrified timber, conglomerated cutlery, silverware, dining utensil, spoons, conglomeration of spoons -
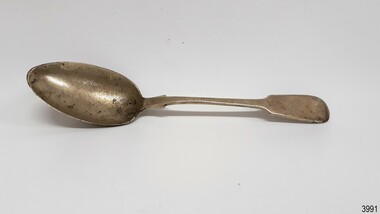 Flagstaff Hill Maritime Museum and Village
Domestic object - Spoon, Prior to 1878
This tablespoon was recovered from the wreck of the Loch Ard that sailed from Gravesend, London. The manifest listed an array of manufactured goods being exported to the Colony of Victoria. Included in the cargo manifest was a large number of hardware and cutlery items. These spoons are representative of similar items of silver electro-plated cutlery salvaged from the Loch Ard wreck site, comprising nickel silver electroplated spoons and forks of various sizes but all sharing the same general shape and design. History of the Loch Ard: - The Loch Ard got its name from ”Loch Ard” a loch that lies to the west of Aberfoyle, and the east of Loch Lomond. It means "high lake" in Scottish Gaelic. The vessel belonged to the famous Loch Line which sailed many vessels from England to Australia. The Loch Ard was built in Glasgow by Barclay, Curdle and Co. in 1873, the vessel was a three-masted square-rigged iron sailing ship that measured 79.87 meters in length, 11.58 m in width, and 7 m in depth with a gross tonnage of 1693 tons with a mainmast that measured a massive 45.7 m in height. Loch Ard made three trips to Australia and one trip to Calcutta before its fateful voyage. Loch Ard left England on March 2, 1878, under the command of 29-year-old Captain Gibbs, who was newly married. The ship was bound for Melbourne with a crew of 37, plus 17 passengers. The general cargo reflected the affluence of Melbourne at the time. Onboard were straw hats, umbrellas, perfumes, clay pipes, pianos, clocks, confectionery, linen and candles, as well as a heavier load of railway irons, cement, lead and copper. There were other items included that were intended for display in the Melbourne International Exhibition of 1880. The voyage to Port Phillip was long but uneventful. Then at 3 am on June 1, 1878, Captain Gibbs was expecting to see land. But the Loch Ard was running into a fog which greatly reduced visibility. Captain Gibbs was becoming anxious as there was no sign of land or the Cape Otway lighthouse. At 4 am the fog lifted and a lookout aloft announced that he could see breakers. The sheer cliffs of Victoria's west coast came into view, and Captain Gibbs realised that the ship was much closer to them than expected. He ordered as much sail to be set as time would permit and then attempted to steer the vessel out to sea. On coming head-on into the wind, the ship lost momentum, the sails fell limp and Loch Ard's bow swung back towards land. Gibbs then ordered the anchors to be released in an attempt to hold their position. The anchors sank some 50 fathoms - but did not hold. By this time the ship was among the breakers and the tall cliffs of Mutton Bird Island rose behind. Just half a mile from the coast, the ship's bow was suddenly pulled around by the anchor. The captain tried to tack out to sea, but the ship struck a reef at the base of Mutton Bird Island, near Port Campbell. Waves subsequently broke over the ship and the top deck became loosened from the hull. The masts and rigging came crashing down knocking passengers and crew overboard. When a lifeboat was finally launched, it crashed into the side of Loch Ard and capsized. Tom Pearce, who had launched the boat, managed to cling to its overturned hull and shelter beneath it. He drifted out to sea and then on the flood tide came into what is now known as Loch Ard Gorge. He swam to shore, bruised and dazed, and found a cave in which to shelter. Some of the crew stayed below deck to shelter from the falling rigging but drowned when the ship slipped off the reef into deeper water. Eva Carmichael a passenger had raced onto the deck to find out what was happening only to be confronted by towering cliffs looming above the stricken ship. In all the chaos, Captain Gibbs grabbed Eva and said, "If you are saved Eva, let my dear wife know that I died like a sailor". That was the last Eva Carmichael saw of the captain. She was swept off the ship by a huge wave. Eva saw Tom Pearce on a small rocky beach and yelled to attract his attention. He dived in and swam to the exhausted woman and dragged her to shore. He took her to the cave and broke the open case of brandy which had washed up on the beach. He opened a bottle to revive the unconscious woman. A few hours later Tom scaled a cliff in search of help. He followed hoof prints and came by chance upon two men from nearby Glenample Station three and a half miles away. In a complete state of exhaustion, he told the men of the tragedy. Tom then returned to the gorge while the two men rode back to the station to get help. By the time they reached Loch Ard Gorge, it was cold and dark. The two shipwreck survivors were taken to Glenample Station to recover. Eva stayed at the station for six weeks before returning to Ireland by steamship. In Melbourne, Tom Pearce received a hero's welcome. He was presented with the first gold medal of the Royal Humane Society of Victoria and a £1000 cheque from the Victorian Government. Concerts were performed to honour the young man's bravery and to raise money for those who lost family in the disaster. Of the 54 crew members and passengers on board, only two survived: the apprentice, Tom Pearce and the young woman passenger, Eva Carmichael, who lost her family in the tragedy. Ten days after the Loch Ard tragedy, salvage rights to the wreck were sold at auction for £2,120. Cargo valued at £3,000 was salvaged and placed on the beach, but most washed back into the sea when another storm developed. The wreck of Loch Ard still lies at the base of Mutton Bird Island. Much of the cargo has now been salvaged and some items were washed up into Loch Ard Gorge. Cargo and artefacts have also been illegally salvaged over many years before protective legislation was introduced in March 1982. One of the most unlikely pieces of cargo to have survived the shipwreck was a Minton majolica peacock- one of only nine in the world. The peacock was destined for the Melbourne 1880 International Exhibition. It had been well packed, which gave it adequate protection during the violent storm. Today the Minton peacock can be seen at the Flagstaff Hill Maritime Museum in Warrnambool. From Australia's most dramatic shipwreck, it has now become Australia's most valuable shipwreck artifact and is one of very few 'objects' on the Victorian State Heritage Register.The shipwreck of the Loch Ard is of significance for Victoria and is registered on the Victorian Heritage Register ( S 417). Flagstaff Hill has a varied collection of artefacts from Loch Ard and its collection is significant for being one of the largest accumulation of artefacts from this notable Victorian shipwreck. The collections object is to also give us a snapshot into history so we can interpret the story of this tragic event. The collection is also archaeologically significant as it represents aspects of Victoria's shipping history that allows us to interpret Victoria's social and historical themes of the time. The collections historically significance is that it is associated unfortunately with the worst and best-known shipwreck in Victoria's history. Spoon, tablespoon; nickel silver plated spoon with fiddle-back design handle, narrow stem with flared collar and elongated bowl. Marker's marks are impressed on the back of the handle. It was recovered from the wreck of the Loch Ard.Crown with diamond with W P inside Oval with anchor or key Square with cut corners with fancy cross inside Circle with lion Diamond with "P"flagstaff hill, warrnambool, shipwrecked coast, flagstaff hill maritime museum, maritime museum, shipwreck coast, flagstaff hill maritime village, great ocean road, loch line, loch ard, captain gibbs, eva carmichael, tom pearce, glenample station, mutton bird island, loch ard gorge, dessert spoon, petrified timber, conglomerated cutlery, silverware, dining utensil, spoons, conglomeration of spoons, spoon, tablespoon, cutlery