Showing 16088 items matching "wall-art"
-
 Eltham District Historical Society Inc
Photograph - Digital Photograph, Alan King, Kangaroo Ground General Store, Eltham-Yarra Glen Road, 28 December 2007
The present store was built circa 1900 to replace another which had been destroyed by fire in 1898, which had replaced a predecessor on the opposite side of the road in 1865. The store was also used as a post office until early 2000s. The general store is historically significant because it has a long association with Kangaroo Ground and has been an important centre of community life for more than 120 years - Council meetings used to be conducted in the front room of the store at a time when Kangaroo Ground rivalled Eltham as the major centre of the Shire. The general store is historically and aesthetically significant as one of a group of three well preserved public buildings in the Kangaroo Ground hamlet and as a major heritage component of Kangaroo Ground which was one of the earliest settled areas of the Shire and which has the character of an English village rather than an Australian settlement. Covered under Heritage Overlay, Nillumbik Planning Scheme. Published: Nillumbik Now and Then / Marguerite Marshall 2008; photographs Alan King with Marguerite Marshall.; p77 Today the general store is an uncommon form of trade but the one at Kangaroo Ground continues a long tradition of friendliness and service. For more than 100 years it has been a centre of community life. In the settlement’s early days a previous general store, on the same site, was the meeting place for the Eltham District Road Board, precursor to the Eltham Shire Council. For years Kangaroo Ground rivalled Eltham as the shire’s major centre. It developed very differently from the rest of the shire as its rich soil attracted prosperous Presbyterian Scots who had large agricultural properties.1 The present store was built to replace another one, which had burnt down in 1898, after replacing a predecessor on the other side of the road in 1865. The store retains its outward character and its cellar, although inside it has changed considerably. It now includes a café and offers local produce, milk bar products, grocery items, gas and other fuel. Until early this century the store was also used as a post office. Kangaroo Ground’s first postmaster was Andrew Ross, who first operated from the school opposite, then from his hotel next to the present tennis court site. The first postmaster at this store was Edward Weller, followed in 1868 by James Anderson. At that time a mail coach ran three times a week between Eltham and Woods Point through Kangaroo Ground, Yarra Flats, Healesville, Fernshaw, Marysville and Matlock. Some early postmasters were Rodger, McLaughlin, Greenway and Burns.2 Burns was the only postmaster operating from the store. The others operated from Andrew Ross’s hotel. The mail service improved in 1892 when coaches ran from Melbourne to Queenstown (now known as St Andrews) and changed horses at Kangaroo Ground twice daily. The only telegraph office in the district at that time was at the Kangaroo Ground Post Office. Telegrams to outlying areas such as Queenstown and Kinglake had to be sent by hand. A local resident in the early 1900s often rode his pony to deliver telegrams and was paid one shilling a mile porterage. The store has also contributed to the lighter side of Kangaroo Ground life. During the years that Con Wraight owned the store, between 1906 and 1946, a new piano was needed for the Kangaroo Ground Hall, so monthly dances were held to raise money. When the piano was bought, a grand ball was held in the Kangaroo Ground Hall to celebrate the occasion and supper followed at Mr Wraight’s barn, cleaned especially for the occasion. Every New Year’s Eve, a Scottish piper would set off from between the store and the schoolhouse, playing his pipes, and march to Cameron’s Pigeon Bank homestead on the Kangaroo Ground-Warrandyte Road. Between 1914 and 1922, the store was a station for the Kangaroo Ground Bush Fire Brigade’s tanker. It consisted of a wooden barrel on a cart, fitted with a hand-pump, and stood on the side of the road outside the store. Joy Ness, who belonged to an early Kangaroo Ground family, moved here in 1940 and recalled her impressions of the store at that time: ‘It was a very dark shop stained in a dark colour and on the walls just below the ceiling hung hurricane lamps, ropes, kitchen utensils and other goods for sale. ‘Goods were weighed on a brass scale with weights, on which mothers also weighed their babies, because the nearest Infant Welfare Centre was at Greensborough. The bacon was cut with a hand slicer and later a pot-bellied stove warmed the store. Farmers and other locals used to gossip around it as they collected their daily mail. In those days the butter and cheese were kept in the cellar as no ice was delivered for cooling.’This collection of almost 130 photos about places and people within the Shire of Nillumbik, an urban and rural municipality in Melbourne's north, contributes to an understanding of the history of the Shire. Published in 2008 immediately prior to the Black Saturday bushfires of February 7, 2009, it documents sites that were impacted, and in some cases destroyed by the fires. It includes photographs taken especially for the publication, creating a unique time capsule representing the Shire in the early 21st century. It remains the most recent comprehenesive publication devoted to the Shire's history connecting local residents to the past. nillumbik now and then (marshall-king) collection, eltham-yarra glen road, kangaroo ground general store -
 Eltham District Historical Society Inc
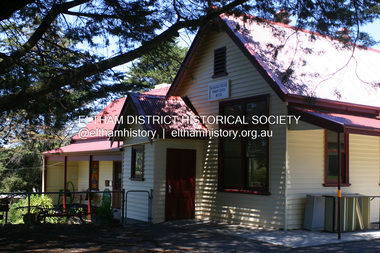
Photograph - Digital Photograph, Alan King, Original Kangaroo Ground Primary School No. 2105 building, Eltham-Yarra Glen Road, Kangaroo Ground, 28 December 2007
Kangaroo Ground's first school began in 1851 with 22 pupils from the district's ten families. It was a single room school located further south on the site, which also served as a Presbyterian church. The first teacher was Andrew Ross. The school building was used as a Post Office between 1854 and 1858 and during 1857 also served as a Court of Petty Sessions. With a growing farming community, a new building was warranted and the original Sate School No. 352 was closed and a new building, State School No. 2105 was oipened October 1, 1878. A residence for Head Teacher Henry Wallace School was erected in 1879 attached to the left of the school building. That residence is now home to the Andrew Ross Museum, which opened in 1993. Covered under Heritage Overlay, Nillumbik Planning Scheme. Published: Nillumbik Now and Then / Marguerite Marshall 2008; photographs Alan King with Marguerite Marshall.; p35 In a corner of the Kangaroo Ground Primary School playground stands an old weatherboard building. This structure, attached to the former teacher’s weatherboard residence facing Main Road, first served as a school in 1878. The former residence, built in 1879, houses the Andrew Ross Museum, which opened in 1993. It is named after the school’s first teacher,1 who also founded The Evelyn Observer newspaper, which began on the site in 1873. Later the printing presses were moved to brick newspaper offices by the Kangaroo Ground Hotel, which became the Shire of Eltham offices. However Kangaroo Ground’s first school began in 1851 for 22 pupils from the district’s ten families, in a slab building further south on this site. Andrew Harkness and other settlers campaigned for the building, which was built on half an acre (0.2ha) donated by local farmer, James Donaldson. Builder was Samuel Furphy, father of the novelist Joseph.2 The single room measuring 30 feet x 18 feet (9m x 5.5m), was unlined and the green slabs shrank, allowing the wind and rain entry through cracks except when they were stuffed with paper.3 The building served as a Presbyterian church as well as a school, where fees were 18 pence a week for education. Young men also attended evening classes there in winter. At one stage, a corner of the room was curtained off for the schoolmaster’s living space, and the platform, which was used for sleeping, was also the pulpit during church services. Teacher Andrew Ross also took church services when the minister was unable to attend, which happened frequently as he had long distances to travel on the bad roads. In 1857 the school building was also used as the Court of Petty Sessions, and from 1854 until 1858, it served as a post office. During the gold rush fossickers on their way to the Caledonia Diggings at Queenstown (now St Andrews) prospected the district, but did not remain long, as the fields were not rich in gold. But the farming community grew, until by 1878 the population warranted the building of State School No 2105 – the present one-roomed tongue-and-groove lined building measuring 49 feet x 18 feet (15m x 5.5m), to accommodate 60 children. The old school, No 352, was closed, and the new one opened on October 1, with Henry Wallace as head teacher, assisted by work mistress Annie Johnston. Early teachers included Messrs Smith, Hamilton and Prosser, with sewing teachers Misses Sweeney, Limerock and Oliver. In the early 1920s a small room was built on the front veranda of the teacher’s residence, and used as a State Savings Bank agency until about 1934. In 1928 the schoolroom’s three-tiered floor was replaced by a flat floor and teacher’s platform (which has since been removed). A half-glassed partition wall then divided the large room into two rooms in which the old style form-type desks were replaced with dual desks. The small playground, surrounded by pine trees and a picket fence, was extended in 1931 with an additional acre or so (0.4 ha) of land. During World War Two the school faced closure because of a fall to seven in the enrolment, but by 1946 it had increased again to 45. Mr Eric Morgan was head teacher and Mrs Margaret Banks was assistant head teacher, a position she held for ten years. In 1955, under the head teacher Mr V Gardiner, who taught there for 13 years, the school won a prize for the best-kept garden and school ground in the inspectorate. A district subdivision increased the enrolment in 1968 to 65 and a bus service was established. After the hall which had been used for lessons was demolished late that year, the pupils met in the original fire brigade meeting room (now the tennis club, diagonally opposite the general store). The new school building with a storeroom and staffroom was built in 1974.This collection of almost 130 photos about places and people within the Shire of Nillumbik, an urban and rural municipality in Melbourne's north, contributes to an understanding of the history of the Shire. Published in 2008 immediately prior to the Black Saturday bushfires of February 7, 2009, it documents sites that were impacted, and in some cases destroyed by the fires. It includes photographs taken especially for the publication, creating a unique time capsule representing the Shire in the early 21st century. It remains the most recent comprehenesive publication devoted to the Shire's history connecting local residents to the past. nillumbik now and then (marshall-king) collection, kangaroo ground, andrew ross museum, eltham-yarra glen road, kangaroo ground primary school no. 2105, kangaroo ground state school, state school no. 2105 -
 Eltham District Historical Society Inc
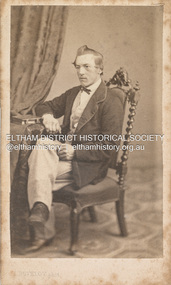
Photograph, Louis Buvelot, Possibly Phillip Shillinglaw, 1865
Famous Swiss landcape painter Louis Buvelot came to Melbourne in 1864 and set up a portrait photography studio which he operated for one year only in 1865. This photograph is believed to be the oldest photo in the Shillinglaw Family Album collection. It is believed that the subject is a young Phillip Shillinglaw, without beard, at age 22 or 23. Phillip Shillinglaw was born Melbourne, August 7, 1842. He married Sarah Ann Kidd in Heidelberg, Victoria, February 28, 1872. In 1881 Phillip and Sarah and their small family moved to Eltham and made home in what was later to become known as Shillinglaw Cottage but which Phillip named 'Wattle Brae'. Shillinglaw Cottage is significant to Eltham’s local history. It is one of the earliest known buildings still in existence. Records suggest that the cottage was built circa 1859 by a man named Cochrane, believed to be Thomas Cochrane, in conjunction with George Stebbings though it is not known what Stebbings’s contribution was. It is believed Stebbings owned the cottage between 1874 and 1888. According to Margaret Ball’s (2017) book Shillinglaw Family of Eltham 1660-2007, Thomas Cochrane and family lived there from 1867 to 1874 however this is contrary to the records of assessable rates levied by the Eltham District Road Board, established in 1858, which shows Cochrane was the owner occupier (in Little Eltham) of approximately 25 acres of cultivated land and 25 acres of pastureland upon which a hut was sited in 1860. It is suspected that George Stebbings may have acquired the property from Cochrane in 1874 as it is noted that he had a tenant for a period, James Rossiter, who was the editor for the Evelyn Observer in Kangaroo Ground in 1874 (LATE SHIRE OFFICE AT KANGAROO GROUND (1934, February 16). Advertiser (Hurstbridge, Vic. : 1922 - 1939), p. 5. Retrieved February 25, 2022, from http://nla.gov.au/nla.news-article56743657). In 1881 Phillip Shillinglaw became the ratepayer for the cottage though Stebbings retained ownership until 1888 at which time it was transferred to Shillinglaw. Photographer: Louis Buvelot Swiss landscape painter and portrait photographer, settled in Melbourne in 1864, admired by the artists from the Heidelberg area such as Tom Roberts and Arthur Streeton who bestowed him with the accolade of 'Father of Australian painting’. In the 1870s, his work increasingly drew elements from Australian landscape such as the bush land in works like Lilydale (1878) and Bush Track. "Louis Buvelot :: biography at :: at Design and Art Australia Online." Daao https://www.daao.org.au/bio/louis-buvelot/biography/. Accessed 9 Mar. 2023. On arriving in Melbourne in February 1865 Buvelot bought a photographer's studio at 92 Bourke Street East and took portraits for a year. In 1866 he moved to 88 La Trobe Street East and resumed his painting while Caroline-Julie gave French lessons to help Buvelot to establish himself as an artist in Melbourne. "Biography - Abram-Louis Buvelot." Australian Dictionary of Biography https://adb.anu.edu.au/biography/buvelot-abramlouis-3132. Accessed 2 Dec. 2022. CARTE-DE-VISITE (cdv) 1857-1890 Cartes-de-visite (cdv's) are the most common form of photograph from the nineteenth century, generally measuring two and a half inches by four and an eighth inches (6.3 x 10.5 cm) when mounted, sepia toned, mounted on a card which was generally printed with the photographer's name and address on the back or beneath the portrait. - Frost, Lenore; Dating Family Photos 1850-1920; Valiant Press Pty. Ltd., Berwick, Victoria 1991marg ball collection, shillinglaw family photo album 1, 1865, l. buvelot photographer, louis buvelot, phillip shillinglaw (1842-1914), unknown -
 Flagstaff Hill Maritime Museum and Village
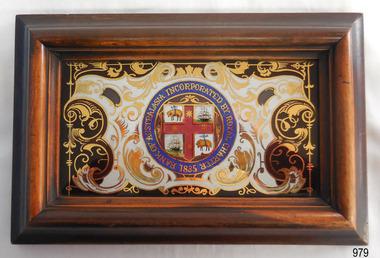
Plaque - Insignia, Bank of Australasia, 19th Century
This decorative plaque displays the insignia of the Bank of Australasia, which was incorporated by the Royal Charter of England in March 1834. The bank began in Australia on 14th December 1835, opening in Sydney. The Acting Superintendent of the bank at that time was David Charters McArthur. He was Superintendent from 1867-to 1876. The Melbourne branch opened on 28th August 1838 in a two-roomed brick cottage on the north side of Little Collins Street, where two huge mastiff dogs were used at night to guard the bank. The government also provided an armed military sentinel. Due to the bank's rapid growth, a new building for the Melbourne branch was opened in 1840 at 75 Collins Street West. By 1879 the bank had been upgraded to a magnificent two-storey building on the corners of Collins and Queens Streets, with the entry on Collins Street. In 1951 the Bank of Australasia amalgamated with the Union Bank to form the Australia and New Zealand Bank, now known as the ANZ. Then in 1970, the ANZ merged with both the ES&A and the London Bank of Australia to form the ANZ Banking Group Limited. The ANZ Banking Group Ltd kindly donated a variety of historic items from the Bank of Australasia. BANK of AUSTRALASIA, WARRNAMBOOL – In 1854 Warrnambool had two banks, the Union Bank and the Bank of Australasia. Later, completely different bank businesses opened; in 1867 the National Bank of Australasia, then in 1875 the Colonial Bank of Australasia. The original Warrnambool branch of the Bank of Australasia was established in July 1854, and operated from a leased cottage on Merri Street, close to Liebig Street. The bank later bought a stone building previously erected by drapers Cramond & Dickson on the corner of Timor and Gibson Streets. Samuel Hannaford was a teller and then Manager at the Warrnambool branch from 1855 to 1856 and the Warrnambool Council chose that bank for its dealings during 1856-57. In 1859 Roberts & Co. was awarded the contract to build the new Bank of Australasia branch for the sum of £3,000. The land was on a sand hill on the northeast corner of Timor and Kepler Streets and had been bought in 1855 from investor James Cust. The new building opened on May 21, 1860. The bank continued to operate there until 1951 when it merged with the Union Bank to form the ANZ Bank, which continued operating from its Liebig Street building. Warrnambool City Council purchased the former Bank of Australasia building in 1971 and renovated it, then on 3rd December 1973 it was officially opened as the Art Gallery by Cr. Harold Stephenson and Gallery Director John Welsh. The Gallery transferred to the purpose-built building in Liebig Street in 1986 and the old bank building is now the Gallery club. Staff at the Bank of Australasia in Warrnambool included the following men but others were also involved: Samuel Hannaford, Teller then Manager from 1855-1856; W H Palmer, Manager from January 1857 until November 1869 when the Teller Basil Spence was promoted to Manager; H B Chomley, Manager from April 1873 and still there in 1886; A Butt, Manager in 1895-1904; J R McCleary Accountant and Acting Manager for 12 months, until 1900; A Kirk, Manager 1904; J Moore, staff until his transfer to Bendigo in December 1908; J S Bath was Manager until 1915; C C Cox, Manager until April 1923; Richard C Stanley, Manager 1923 to April 1928. The plaque has historical significance as it belonged to the Bank of Australasia which was established in Australia in 1835 by Royal Charter. The plaque is significant for its association with the Bank of Australasia in Warrnambool, the first bank in Warrnambool, established in 1854. The bank continued to operate until its merger in 1951 when it became the ANZ Bank, which is still in operation today. The Bank was an integral part of the establishment and growth of commerce in Colonial Warrnambool and throughout Australia.Plaque with insignia on glass in a rectangular varnished wooden frame. Insignia of the Bank of Australasia has been painted onto the glass in a mirror-like fashion. Insignia depicts a heraldic shield with sheep hung up by their waists and ships in full sail. Inscription on insignia. Stamp and handwritten inscription on the rectangular label with a blue border on the reverse.Insignia: "BANK OF AUSTRALASIA INCORPORATED BY ROYAL CHARTER 1835" Label's red oval stamp with "AUSTRALIA AND NEW ZEALAND BANK UNITED ARCHIVES" Label's handwritten black letters "AM1" flagstaff hill, warrnambool, shipwrecked coast, flagstaff hill maritime museum, maritime museum, shipwreck coast, flagstaff hill maritime village, great ocean road, commerce, banking, plaque, insignia, bank of australasia, insignia on glass, union bank, australia & new zealand bank, anz bank, david charters mcarthur, d c mcarthur, sydney, new south wales, currency, banknote, legal tender -
 Federation University Historical Collection
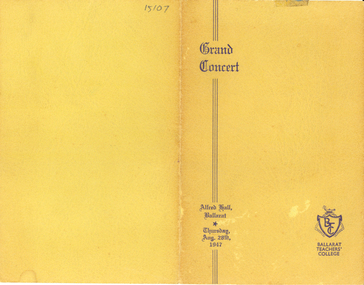
Programme, Ballarat Teachers' College, Ballarat Teachers' College Grand Concert, 1947, 1947
Ellwood was the Principal of the Ballarat Teachers' College. Ballarat Teachers’ College was opened on 04 May 1926, at S.S. 33 Dana Street, with an enrolment of 61 students. Its original staff consisted of the Principal, Mr W.H. Ellwood, M.A., M.Ed. (Chairman of the Teachers’ Tribunal from its inception in 1946 until 1954), Miss A. Bouchier, B.A., and Mr A.B. Jones, BA., (lecturers). In 1927 Miss P.A. Hamano joined the staff. In 1927 the college moved to the old Ballarat East Town Hall (remodelled for their use) in Barkly Street. During 1927 the numbers in the College were augmented by 26 Manual Arts students, who had formerly received their training at Ballarat High School. Manual Art students continued till 1930 when, on grounds of economy, their training was concentrated at Melbourne Teachers’ College. During the four succeeding years, approximately 60 students annually entered the primary course. Inclusive of Manual Arts students, and private fee-paying students, exactly 400 trainees passed through the College in its brief span of life (1926-1931). Five per cent of each year’s students were granted an extension of their studentship to enable them to proceed to Melbourne Teachers’ College, and to take the first year’s course for a University degree. With the advent of the economic depression of the ‘thirties, Ballarat Teachers' College closed its doors in December, 1931. Fourteen years were to pass before the College opened again on February 2nd, 1946. The college re-commenced at SS Dana Street, under the guidance of Mr W.F. Lord, M.C., M.M., B.A., Dip. Ed., (acting, later Principal 1946-1950) and a staff consisting of Miss E.B. Hughes, B.A., Dip. Ed., Mr C.B. Bryan, B.A., B. Com., Dip. Ed., Miss Monica H. Miller, L.Mus.A., and Miss G. Kentish, Dip. Phys. Ed. The opening ceremony was performed by the Minister of Education at that time, the Hon. F. Field, M.L.A., accompanied by the Hon. T.T. Hollway, M.L.A., and the then Director of Education, Mr J.A. Seitz. It was originally intended to cater for women students only but, at the last moment, men resident in Ballarat were also accepted. A co-educational college was thus set up instead, and it has continued as such. 1951 saw the introduction of the two-year course, successful students being presented with the Trained Primary Teacher’s Certificate at the final College Assembly each year. In December 1955, College held its first Graduation Ceremony, with its own Graduation Hymn, the words of which were written by Miss C.M. (Mavis) Canty of the staff. Lord remained as principal until 1951 when he transferred to establish a teachers' college at Toorak. Tom William Turner was Lord's successor. A highlight of his term was the construction of new college buildings at Gillies Street with the students commencing their lessons there in February 1958. Turner retired in 1970, having overseen a period of substantial growth in the institution. In that year alone more than one hundred and forty students completed their primary teaching qualification to meet a severe shortage of teachers. Doug Watson commenced as principal in 1971. In 1973 Ballarat Teachers' College became the State College of Victoria at Ballarat. Three years later Ballarat College of Advanced Education was formed and the teacher education students moved to the Mount Helen Campus. In 1990 Ballarat College of Advanced Education became Ballarat University College, an affiliated college with the University of Melbourne. The University of Ballarat was formed in January 1994.Yellow folded card programme for the Ballarat Teachers' College Grand Concert held at Alfred Hall Ballarat on Thursday 28 August 1947. Student Teachers from the 1947 class performed, including Jessie Batson, Ruth Tozer, Joy Love, N. Kerr, Arthur Lelean, D. Cooper, John Collins, Ann McKinnnon, Peg Purdue, Lindsay Harley.ballarat teachers' college, education, alfred hall -
 Federation University Historical Collection
Programme, Ballarat Teachers' College Reunion Programme, 1934, 1934
Ellwood was the Principal of the Ballarat Teachers' College. Ballarat Teachers’ College was opened on 04 May 1926, at S.S. 33 Dana Street, with an enrolment of 61 students. Its original staff consisted of the Principal, Mr W.H. Ellwood, M.A., M.Ed. (Chairman of the Teachers’ Tribunal from its inception in 1946 until 1954), Miss A. Bouchier, B.A., and Mr A.B. Jones, BA., (lecturers). In 1927 Miss P.A. Hamano joined the staff. In 1927 the college moved to the old Ballarat East Town Hall (remodelled for their use) in Barkly Street. During 1927 the numbers in the College were augmented by 26 Manual Arts students, who had formerly received their training at Ballarat High School. Manual Art students continued till 1930 when, on grounds of economy, their training was concentrated at Melbourne Teachers’ College. During the four succeeding years, approximately 60 students annually entered the primary course. Inclusive of Manual Arts students, and private fee-paying students, exactly 400 trainees passed through the College in its brief span of life (1926-1931). Five per cent of each year’s students were granted an extension of their studentship to enable them to proceed to Melbourne Teachers’ College, and to take the first year’s course for a University degree. With the advent of the economic depression of the ‘thirties, Ballarat Teachers' College closed its doors in December, 1931. Fourteen years were to pass before the College opened again on February 2nd, 1946. The college re-commenced at SS Dana Street, under the guidance of Mr W.F. Lord, M.C., M.M., B.A., Dip. Ed., (acting, later Principal 1946-1950) and a staff consisting of Miss E.B. Hughes, B.A., Dip. Ed., Mr C.B. Bryan, B.A., B. Com., Dip. Ed., Miss Monica H. Miller, L.Mus.A., and Miss G. Kentish, Dip. Phys. Ed. The opening ceremony was performed by the Minister of Education at that time, the Hon. F. Field, M.L.A., accompanied by the Hon. T.T. Hollway, M.L.A., and the then Director of Education, Mr J.A. Seitz. It was originally intended to cater for women students only but, at the last moment, men resident in Ballarat were also accepted. A co-educational college was thus set up instead, and it has continued as such. 1951 saw the introduction of the two-year course, successful students being presented with the Trained Primary Teacher’s Certificate at the final College Assembly each year. In December 1955, College held its first Graduation Ceremony, with its own Graduation Hymn, the words of which were written by Miss C.M. (Mavis) Canty of the staff. Lord remained as principal until 1951 when he transferred to establish a teachers' college at Toorak. Tom William Turner was Lord's successor. A highlight of his term was the construction of new college buildings at Gillies Street with the students commencing their lessons there in February 1958. Turner retired in 1970, having overseen a period of substantial growth in the institution. In that year alone more than one hundred and forty students completed their primary teaching qualification to meet a severe shortage of teachers. Doug Watson commenced as principal in 1971. In 1973 Ballarat Teachers' College became the State College of Victoria at Ballarat. Three years later Ballarat College of Advanced Education was formed and the teacher education students moved to the Mount Helen Campus. In 1990 Ballarat College of Advanced Education became Ballarat University College, an affiliated college with the University of Melbourne. The University of Ballarat was formed in January 1994. Programme for the 1934 Ballarat Teachers' College Reunion run by the Ballarat teachers' College ex- Students Association. Inside the programme is an image of W.H. Ellwood and copy of his 14 points. ballarat teachers' college, ellwood, reunion, w.h. elwood, elwood's fourteen points -
 Flagstaff Hill Maritime Museum and Village
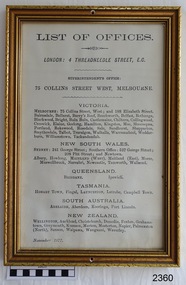
Document - Bank notice, List of Offices, ca Nov. 1877
The addresses given on the List for the London and Melbourne offices have connected the document to the Bank of Australasia. The List is dated November 1877 and shows the number and the location of all of the branches of the Bank at that point in time., a total of 77. - Victoria 35, New South Wales 14, Queensland 2, Tasmania 5, South Australia 5, New Zealand 16 Copies of the notice would have been displayed in all branches of the bank in both Australia and New Zealand to inform customers and perhaps impress them too with a large number of locations and the reference to the bank's connection with London. This document gives information on all bank offices throughout Australia and New Zealand. It refers to the Superintendent's Office address at 75 Collins Street West, Melbourne and is dated November 1877. This places the document at the time just before the new Melbourne office opened on the corner of Collins Street and Queen's Street in 1879. The Bank of Australasia was incorporated by Royal Charter of England in March 1834. It came to Australia on 14th December 1835, opening in Sydney. The Acting Superintendent of the Bank of Australasia in Sydney at that time was David Charters McArthur. He was Superintendent from 1867-to 1876. The Melbourne branch of the Bank of Australasia opened on 28th August 1838 in a two-roomed brick cottage on the north side of Little Collins Street. Two huge mastiff dogs were kept in the backyard and let loose at night to guard the bank. The government also provided an armed military sentinel. Due to the bank's rapid growth, a new building for the Melbourne branch was opened in 1840 at 75 Collins Street West. By 1879 the bank had been upgraded to a magnificent two-storey building on the corners of Collins and Queens Streets, with the entry on Collins Street. In 1951 the Bank of Australasia amalgamated with the Union Bank to form the Australia and New Zealand Bank, now known as the ANZ. Then in 1970, the ANZ merged with both the ES&A and the London Bank of Australia to form the ANZ Banking Group Limited. The ANZ Banking Group Ltd kindly donated a variety of historic items from the Bank of Australasia. BANK of AUSTRALASIA, WARRNAMBOOL – In 1854 Warrnambool had two banks, the Union Back and the Bank of Australasia. Later, completely different bank businesses opened; in 1867 the National Bank of Australasia, then in 1875 the Colonial Bank of Australasia. The original Bank of Australasia was established in Warrnambool in July 1854, and operated from a leased cottage on Merri Street, close to Liebig Street. The bank bought a stone building previously erected by drapers Cramond & Dickson on the corner of Timor and Gibson Streets. Samuel Hannaford was a teller and then Manager at the Warrnambool branch from 1855 to 1856. Warrnambool’s Council chose the Bank of Australasia as its bank 1856-57. In 1859 Roberts & Co. was awarded the contract to build the new Bank of Australasia branch for the sum of £3,000. The land was on a sand hill on the northeast corner of Timor and Kepler Streets and had been bought in 1855 from investor James Cust. The new building opened on May 21, 1860. The bank continued to operate there until 1951 when it merged with the Union Bank to form the ANZ Bank, which continued operating from its Liebig Street building. Warrnambool City Council purchased the former Bank of Australasia building in 1971 and renovated it, then on 3rd December 1973 it was officially opened as the Art Gallery by Cr. Harold Stephenson and Gallery Director John Welsh. The Gallery transferred to the purpose-built building in Liebig Street in 1986 and the old bank building is now the Gallery club. The List of Offices of the Bank of Australasia has early Australian historical significance through its association with the Bank, which was established in 1834 by Royal Charter and opened in Sydney, Australia, in Sydney in 1835. The List is significant for showing the number and location of all of the Offices of the Bank of Australia in November 1877. This shows that Victoria had 45 percent of all Offices. The framed document is locally significant for its association with the Bank of Australasia, Warrnambool's first bank, established in 1854. The bank continued to operate until the organisation's merger in 1951. It became the ANZ Bank, which is still in operation today. The Bank was an integral part of the establishment and growth of commerce in Colonial Warrnambool and throughout Australia.Document in a decorative gilt frame. Titled List of Bank Offices and dated November 1877, facsimile. Offices include London, and a variety of offices in Victoria, New South Wales, Queensland, Tasmania, South Australia and New Zealand. Round holes in the centre top and bottom of the frame. Text includes: "LONDON: 4 THREADNEEDLE STREET, E.C." "SUPERINTENDENT'S OFFICE: / 75 COLLINS STREET WEST, MELBOURNE" "Warrnambool" " November 1877" flagstaff hill, warrnambool, bank of australasia 1877, branches of bank of australasia 1877, banks in australia 1877, commerce 1877, shipwreck-coast, document, bank document, flagstaff hill maritime museum & village, bank of australasia, 1877, branches in australia, bank of london, offices in australia, offices in new zealand, commerce, banking, finance, shipwrecked coast, flagstaff hill maritime museum, maritime museum, shipwreck coast, flagstaff hill maritime village, great ocean road, boa, union bank, australia & new zealand bank, anz bank, david charters mcarthur, d c mcarthur, sydney, new south wales, currency, banknote, legal tender, list of bank offices -
 Flagstaff Hill Maritime Museum and Village
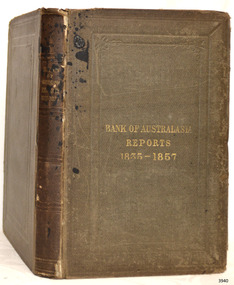
Book - Financial Reports, Bank of Australasia, Bank of Australasia Reports 1835-1857, 1857
This book contains the Reports of the Bank of Australasia from 1835-1857 and was published in the Bank's head office in London in the year of the last report within the book. The Reports date from the incorporation of the Bank. The Bank of Australasia was incorporated by the Royal Charter of England in March 1834. The bank began in Australia on 14th December 1835, opening in Sydney. The Acting Superintendent of the bank at that time was David Charters McArthur. He was Superintendent from 1867-to 1876. The Melbourne branch opened on 28th August 1838 in a two-roomed brick cottage on the north side of Little Collins Street, where two huge mastiff dogs were used at night to guard the bank. The government also provided an armed military sentinel. Due to the bank's rapid growth, a new building for the Melbourne branch was opened in 1840 at 75 Collins Street West. By 1879 the bank had been upgraded to a magnificent two-storey building on the corners of Collins and Queens Streets, with the entry on Collins Street. In 1951 the Bank of Australasia amalgamated with the Union Bank to form the Australia and New Zealand Bank, now known as the ANZ. Then in 1970, the ANZ merged with both the ES&A and the London Bank of Australia to form the ANZ Banking Group Limited. The ANZ Banking Group Ltd kindly donated a variety of historic items from the Bank of Australasia. BANK of AUSTRALASIA, WARRNAMBOOL – In 1854 Warrnambool had two banks, the Union Bank and the Bank of Australasia. Later, completely different bank businesses opened; in 1867 the National Bank of Australasia, then in 1875 the Colonial Bank of Australasia. The original Warrnambool branch of the Bank of Australasia was established in July 1854, and operated from a leased cottage on Merri Street, close to Liebig Street. The bank later bought a stone building previously erected by drapers Cramond & Dickson on the corner of Timor and Gibson Streets. Samuel Hannaford was a teller and then Manager at the Warrnambool branch from 1855 to 1856 and the Warrnambool Council chose that bank for its dealings during 1856-57. In 1859 Roberts & Co. was awarded the contract to build the new Bank of Australasia branch for the sum of £3,000. The land was on a sand hill on the northeast corner of Timor and Kepler Streets and had been bought in 1855 from investor James Cust. The new building opened on May 21, 1860. The bank continued to operate there until 1951 when it merged with the Union Bank to form the ANZ Bank, which continued operating from its Liebig Street building. Warrnambool City Council purchased the former Bank of Australasia building in 1971 and renovated it, then on 3rd December 1973 it was officially opened as the Art Gallery by Cr. Harold Stephenson and Gallery Director John Welsh. The Gallery transferred to the purpose-built building in Liebig Street in 1986 and the old bank building is now the Gallery club. Staff at the Bank of Australasia in Warrnambool included the following men but others were also involved: Samuel Hannaford, Teller then Manager from 1855-1856; W H Palmer, Manager from January 1857 until November 1869 when the Teller Basil Spence was promoted to Manager; H B Chomley, Manager from April 1873 and still there in 1886; A Butt, Manager in 1895-1904; J R McCleary Accountant and Acting Manager for 12 months, until 1900; A Kirk, Manager 1904; J Moore, staff until his transfer to Bendigo in December 1908; J S Bath was Manager until 1915; C C Cox, Manager until April 1923; Richard C Stanley, Manager 1923 to April 1928. The book has historical significance as it is connected to the Bank of Australasia which was established in Australia in 1835 by Royal Charter during the early Colonial period of Australia's history. The reports within the book begin from the time the bank was established and include the time that the Warrnambool branch was in operation. The book is significant for its association with the Bank of Australasia in Warrnambool, the first bank in Warrnambool, established in 1854. The bank continued to operate until its merger in 1951 when it became the ANZ Bank, which is still in operation today. The Bank was an integral part of the establishment and growth of commerce in Colonial Warrnambool and throughout Australia.Book, brown fabric covered board covers with embossed borders front and back. The titles on the front and spine are embossed and gilt. The fly page includes the insignia of the Bank of Australasia. The book contains reports of the Bank of Australasia from 1835-1857. It was published by the Bank at its London address in 1857. Inscription in pencil. Date: 1857 Published by the Bank of Australasia."BANK OF AUSTRALASIA / REPORTS / 1835-1857" "NO. 4, THREADNEEDLE STREET, LONDON. / 1857." Pencil, handwritten "L32"flagstaff hill, warrnambool, shipwrecked coast, flagstaff hill maritime museum, maritime museum, shipwreck coast, flagstaff hill maritime village, great ocean road, commerce, banking, bank of australasia, anz bank, david charters mcarthur, d c mcarthur, australia, bank reports, 1835-1857, financial reports, financial record -
 Flagstaff Hill Maritime Museum and Village
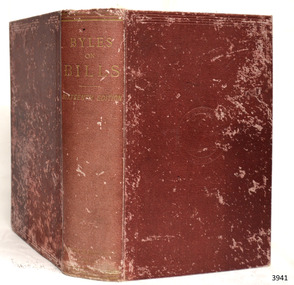
Book - Legal reference, Sweet & Maxwell Limited, Law Publishers, Bills of Exchange, Promissory Notes, Bank-Notes and Cheques, 1899
This book is a legal reference book used by the Bank of Australasia after 1899. The Bank of Australasia was incorporated by the Royal Charter of England in March 1834. The bank began in Australia on 14th December 1835, opening in Sydney. The Acting Superintendent of the bank at that time was David Charters McArthur. He was Superintendent from 1867-to 1876. The Melbourne branch opened on 28th August 1838 in a two-roomed brick cottage on the north side of Little Collins Street, where two huge mastiff dogs were used at night to guard the bank. The government also provided an armed military sentinel. Due to the bank's rapid growth, a new building for the Melbourne branch was opened in 1840 at 75 Collins Street West. By 1879 the bank had been upgraded to a magnificent two-storey building on the corners of Collins and Queens Streets, with the entry on Collins Street. In 1951 the Bank of Australasia amalgamated with the Union Bank to form the Australia and New Zealand Bank, now known as the ANZ. Then in 1970, the ANZ merged with both the ES&A and the London Bank of Australia to form the ANZ Banking Group Limited. The ANZ Banking Group Ltd kindly donated a variety of historic items from the Bank of Australasia. BANK of AUSTRALASIA, WARRNAMBOOL – In 1854 Warrnambool had two banks, the Union Bank and the Bank of Australasia. Later, completely different bank businesses opened; in 1867 the National Bank of Australasia, then in 1875 the Colonial Bank of Australasia. The original Warrnambool branch of the Bank of Australasia was established in July 1854, and operated from a leased cottage on Merri Street, close to Liebig Street. The bank later bought a stone building previously erected by drapers Cramond & Dickson on the corner of Timor and Gibson Streets. Samuel Hannaford was a teller and then Manager at the Warrnambool branch from 1855 to 1856 and the Warrnambool Council chose that bank for its dealings during 1856-57. In 1859 Roberts & Co. was awarded the contract to build the new Bank of Australasia branch for the sum of £3,000. The land was on a sand hill on the northeast corner of Timor and Kepler Streets and had been bought in 1855 from investor James Cust. The new building opened on May 21, 1860. The bank continued to operate there until 1951 when it merged with the Union Bank to form the ANZ Bank, which continued operating from its Liebig Street building. Warrnambool City Council purchased the former Bank of Australasia building in 1971 and renovated it, then on 3rd December 1973 it was officially opened as the Art Gallery by Cr. Harold Stephenson and Gallery Director John Welsh. The Gallery transferred to the purpose-built building in Liebig Street in 1986 and the old bank building is now the Gallery club. Staff at the Bank of Australasia in Warrnambool included the following men but others were also involved: Samuel Hannaford, Teller then Manager from 1855-1856; W H Palmer, Manager from January 1857 until November 1869 when the Teller Basil Spence was promoted to Manager; H B Chomley, Manager from April 1873 and still there in 1886; A Butt, Manager in 1895-1904; J R McCleary Accountant and Acting Manager for 12 months, until 1900; A Kirk, Manager 1904; J Moore, staff until his transfer to Bendigo in December 1908; J S Bath was Manager until 1915; C C Cox, Manager until April 1923; Richard C Stanley, Manager 1923 to April 1928. The book has historical significance as it is connected to the Bank of Australasia which was established in Australia in 1835 by Royal Charter during the early Colonial period of Australia's history. The book was used as a reference to financial law by the Bank. The book is significant for its association with the Bank of Australasia in Warrnambool, the first bank in Warrnambool, established in 1854. The bank continued to operate until its merger in 1951 when it became the ANZ Bank, which is still in operation today. The Bank was an integral part of the establishment and growth of commerce in Colonial Warrnambool and throughout Australia.Book, red board covers with embossed borders on front and back and embossed insignia on front cover. The title on the spine is embossed and gilt. Title: A Treatise of the Law of Bills of Exchange, Promissory Notes, Bank-Notes and Cheques. Author: The Right Honourable Sir John Barnard Byles, late One of the Judges of Her Majesty's Court of Common Pleas, Edition: Sixteenth Edition by Maurice Barnard Byles, Esq., and Walter John Barnard Byles, Esq., of the Inner Temple, Barristers-at-Law. Publisher: Sweet & Maxwell, Limited, 3, Chancery Lane, London, Law Publishers, 1899 Inscription in pencil.Pencil, handwritten "L34"flagstaff hill, warrnambool, shipwrecked coast, flagstaff hill maritime museum, maritime museum, shipwreck coast, flagstaff hill maritime village, great ocean road, commerce, banking, bank of australasia, australia, financial law, legal reference, banking law, bank law, bills of exchange, promisory notes, bank notes, cheques, currency, legal tender, financial trading, sir john barnard byles, maurice barnard byles, walter john barnard byles, sweet & maxwell -
 Flagstaff Hill Maritime Museum and Village
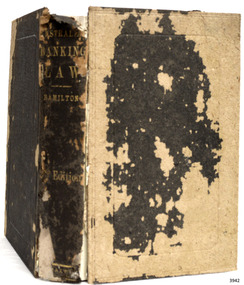
Book - Legal reference, Charles E Maxwell (G Partridge & Co.), Low booksellers and publishers, The Law and Practice of Banking in Australia and New Zealand, 1900
This book is a legal reference book used by the Bank of Australasia after 1900. The Bank of Australasia was incorporated by the Royal Charter of England in March 1834. The bank began in Australia on 14th December 1835, opening in Sydney. The Acting Superintendent of the bank at that time was David Charters McArthur. He was Superintendent from 1867-to 1876. The Melbourne branch opened on 28th August 1838 in a two-roomed brick cottage on the north side of Little Collins Street, where two huge mastiff dogs were used at night to guard the bank. The government also provided an armed military sentinel. Due to the bank's rapid growth, a new building for the Melbourne branch was opened in 1840 at 75 Collins Street West. By 1879 the bank had been upgraded to a magnificent two-storey building on the corners of Collins and Queens Streets, with the entry on Collins Street. In 1951 the Bank of Australasia amalgamated with the Union Bank to form the Australia and New Zealand Bank, now known as the ANZ. Then in 1970, the ANZ merged with both the ES&A and the London Bank of Australia to form the ANZ Banking Group Limited. The ANZ Banking Group Ltd kindly donated a variety of historic items from the Bank of Australasia. BANK of AUSTRALASIA, WARRNAMBOOL – In 1854 Warrnambool had two banks, the Union Bank and the Bank of Australasia. Later, completely different bank businesses opened; in 1867 the National Bank of Australasia, then in 1875 the Colonial Bank of Australasia. The original Warrnambool branch of the Bank of Australasia was established in July 1854, and operated from a leased cottage on Merri Street, close to Liebig Street. The bank later bought a stone building previously erected by drapers Cramond & Dickson on the corner of Timor and Gibson Streets. Samuel Hannaford was a teller and then Manager at the Warrnambool branch from 1855 to 1856 and the Warrnambool Council chose that bank for its dealings during 1856-57. In 1859 Roberts & Co. was awarded the contract to build the new Bank of Australasia branch for the sum of £3,000. The land was on a sand hill on the northeast corner of Timor and Kepler Streets and had been bought in 1855 from investor James Cust. The new building opened on May 21, 1860. The bank continued to operate there until 1951 when it merged with the Union Bank to form the ANZ Bank, which continued operating from its Liebig Street building. Warrnambool City Council purchased the former Bank of Australasia building in 1971 and renovated it, then on 3rd December 1973 it was officially opened as the Art Gallery by Cr. Harold Stephenson and Gallery Director John Welsh. The Gallery transferred to the purpose-built building in Liebig Street in 1986 and the old bank building is now the Gallery club. Staff at the Bank of Australasia in Warrnambool included the following men but others were also involved: Samuel Hannaford, Teller then Manager from 1855-1856; W H Palmer, Manager from January 1857 until November 1869 when the Teller Basil Spence was promoted to Manager; H B Chomley, Manager from April 1873 and still there in 1886; A Butt, Manager in 1895-1904; J R McCleary Accountant and Acting Manager for 12 months, until 1900; A Kirk, Manager 1904; J Moore, staff until his transfer to Bendigo in December 1908; J S Bath was Manager until 1915; C C Cox, Manager until April 1923; Richard C Stanley, Manager 1923 to April 1928. The book has historical significance as it is connected to the Bank of Australasia which was established in Australia in 1835 by Royal Charter during the early Colonial period of Australia's history. The book was used as a reference to financial law by the Bank. The book is significant for its association with the Bank of Australasia in Warrnambool, the first bank in Warrnambool, established in 1854. The bank continued to operate until its merger in 1951 when it became the ANZ Bank, which is still in operation today. The Bank was an integral part of the establishment and growth of commerce in Colonial Warrnambool and throughout Australia.Book, dark brown, hard-covers with embossed borders front and back. The title on the spine is embossed and gilt. Title: The Law and Practice of Banking in Australia and New Zealand Author: Edward B. Hamilton, B.A., Judge of County Courts, Victoria, assisted by J.G. Eagleson, B.A., LL.B, Barrister-at-Law Edition: Second Edition Publisher: Charles E. Maxwell, (G. Partridge & Co.), 458, Chancery Lane, London, Law Booksellers and Publishers, 1900. Published in Melbourne. Marked with purple oval stamp and pencil inscription.Text within oval stamp "THE BANK OF AUSTRALASIA LIMITED" Pencil, handwritten "L35"flagstaff hill, warrnambool, shipwrecked coast, flagstaff hill maritime museum, maritime museum, shipwreck coast, flagstaff hill maritime village, great ocean road, commerce, banking, bank of australasia, australia, financial law, legal reference, banking law, bank law, legal practice, edward b. hamilton, charles e. maxwell, banking practice, g. partridge & co -
 Flagstaff Hill Maritime Museum and Village
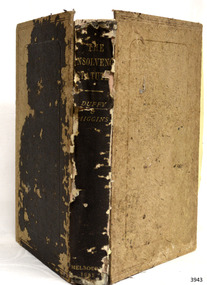
Book - Legal reference, McCarron, Bird & Co, The Insolvency Statute 1871, after 1882
This book is a legal reference book used by the Bank of Australasia after 1882. The Bank of Australasia was incorporated by the Royal Charter of England in March 1834. The bank began in Australia on 14th December 1835, opening in Sydney. The Acting Superintendent of the bank at that time was David Charters McArthur. He was Superintendent from 1867-to 1876. The Melbourne branch opened on 28th August 1838 in a two-roomed brick cottage on the north side of Little Collins Street, where two huge mastiff dogs were used at night to guard the bank. The government also provided an armed military sentinel. Due to the bank's rapid growth, a new building for the Melbourne branch was opened in 1840 at 75 Collins Street West. By 1879 the bank had been upgraded to a magnificent two-storey building on the corners of Collins and Queens Streets, with the entry on Collins Street. In 1951 the Bank of Australasia amalgamated with the Union Bank to form the Australia and New Zealand Bank, now known as the ANZ. Then in 1970, the ANZ merged with both the ES&A and the London Bank of Australia to form the ANZ Banking Group Limited. The ANZ Banking Group Ltd kindly donated a variety of historic items from the Bank of Australasia. BANK of AUSTRALASIA, WARRNAMBOOL – In 1854 Warrnambool had two banks, the Union Bank and the Bank of Australasia. Later, completely different bank businesses opened; in 1867 the National Bank of Australasia, then in 1875 the Colonial Bank of Australasia. The original Warrnambool branch of the Bank of Australasia was established in July 1854, and operated from a leased cottage on Merri Street, close to Liebig Street. The bank later bought a stone building previously erected by drapers Cramond & Dickson on the corner of Timor and Gibson Streets. Samuel Hannaford was a teller and then Manager at the Warrnambool branch from 1855 to 1856 and the Warrnambool Council chose that bank for its dealings during 1856-57. In 1859 Roberts & Co. was awarded the contract to build the new Bank of Australasia branch for the sum of £3,000. The land was on a sand hill on the northeast corner of Timor and Kepler Streets and had been bought in 1855 from investor James Cust. The new building opened on May 21, 1860. The bank continued to operate there until 1951 when it merged with the Union Bank to form the ANZ Bank, which continued operating from its Liebig Street building. Warrnambool City Council purchased the former Bank of Australasia building in 1971 and renovated it, then on 3rd December 1973 it was officially opened as the Art Gallery by Cr. Harold Stephenson and Gallery Director John Welsh. The Gallery transferred to the purpose-built building in Liebig Street in 1986 and the old bank building is now the Gallery club. Staff at the Bank of Australasia in Warrnambool included the following men but others were also involved: Samuel Hannaford, Teller then Manager from 1855-1856; W H Palmer, Manager from January 1857 until November 1869 when the Teller Basil Spence was promoted to Manager; H B Chomley, Manager from April 1873 and still there in 1886; A Butt, Manager in 1895-1904; J R McCleary Accountant and Acting Manager for 12 months, until 1900; A Kirk, Manager 1904; J Moore, staff until his transfer to Bendigo in December 1908; J S Bath was Manager until 1915; C C Cox, Manager until April 1923; Richard C Stanley, Manager 1923 to April 1928. The book has historical significance as it is connected to the Bank of Australasia which was established in Australia in 1835 by Royal Charter during the early Colonial period of Australia's history. The book was used as a reference to financial law by the Bank. The book is significant for its association with the Bank of Australasia in Warrnambool, the first bank in Warrnambool, established in 1854. The bank continued to operate until its merger in 1951 when it became the ANZ Bank, which is still in operation today. The Bank was an integral part of the establishment and growth of commerce in Colonial Warrnambool and throughout Australia.Book, dark brown, hard-covers with embossed borders front and back. The title on the spine is embossed and gilt. Title: The Insolvency Statute 1871 and the Amending Statute (No. 411), with rules, notes and index Author: Frank Gaven Duffy, M.A., LL.B. and Henrey Bournes Higgins, M.A., LL.B., Barristers-in-Law Edition: 1882 Publisher: McCarron, Bird & Co., 37 Flinders Lane West, Melbourne Pencil inscription.Pencil, handwritten "L36"flagstaff hill, warrnambool, shipwrecked coast, flagstaff hill maritime museum, maritime museum, shipwreck coast, flagstaff hill maritime village, great ocean road, commerce, banking, bank of australasia, australia, financial law, legal reference, banking law, bank law, insolvency statute, insolvency law, 1871, amending statute (no. 411), insolvency, frank gaven duffy, henrey bournes higgins, mccarron bird & co -
 Flagstaff Hill Maritime Museum and Village
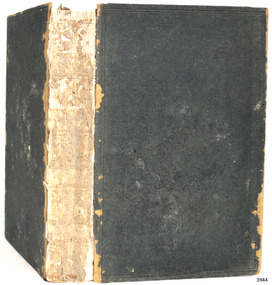
Book - Legal reference, The Law Book Co. of Australasia Ltd, The Law relating to Banker and Customer in Australia, 1907
This book is a legal reference book used by the Bank of Australasia after 1907. The Bank of Australasia was incorporated by the Royal Charter of England in March 1834. The bank began in Australia on 14th December 1835, opening in Sydney. The Acting Superintendent of the bank at that time was David Charters McArthur. He was Superintendent from 1867-to 1876. The Melbourne branch opened on 28th August 1838 in a two-roomed brick cottage on the north side of Little Collins Street, where two huge mastiff dogs were used at night to guard the bank. The government also provided an armed military sentinel. Due to the bank's rapid growth, a new building for the Melbourne branch was opened in 1840 at 75 Collins Street West. By 1879 the bank had been upgraded to a magnificent two-storey building on the corners of Collins and Queens Streets, with the entry on Collins Street. In 1951 the Bank of Australasia amalgamated with the Union Bank to form the Australia and New Zealand Bank, now known as the ANZ. Then in 1970, the ANZ merged with both the ES&A and the London Bank of Australia to form the ANZ Banking Group Limited. The ANZ Banking Group Ltd kindly donated a variety of historic items from the Bank of Australasia. BANK of AUSTRALASIA, WARRNAMBOOL – In 1854 Warrnambool had two banks, the Union Bank and the Bank of Australasia. Later, completely different bank businesses opened; in 1867 the National Bank of Australasia, then in 1875 the Colonial Bank of Australasia. The original Warrnambool branch of the Bank of Australasia was established in July 1854, and operated from a leased cottage on Merri Street, close to Liebig Street. The bank later bought a stone building previously erected by drapers Cramond & Dickson on the corner of Timor and Gibson Streets. Samuel Hannaford was a teller and then Manager at the Warrnambool branch from 1855 to 1856 and the Warrnambool Council chose that bank for its dealings during 1856-57. In 1859 Roberts & Co. was awarded the contract to build the new Bank of Australasia branch for the sum of £3,000. The land was on a sand hill on the northeast corner of Timor and Kepler Streets and had been bought in 1855 from investor James Cust. The new building opened on May 21, 1860. The bank continued to operate there until 1951 when it merged with the Union Bank to form the ANZ Bank, which continued operating from its Liebig Street building. Warrnambool City Council purchased the former Bank of Australasia building in 1971 and renovated it, then on 3rd December 1973 it was officially opened as the Art Gallery by Cr. Harold Stephenson and Gallery Director John Welsh. The Gallery transferred to the purpose-built building in Liebig Street in 1986 and the old bank building is now the Gallery club. Staff at the Bank of Australasia in Warrnambool included the following men but others were also involved: Samuel Hannaford, Teller then Manager from 1855-1856; W H Palmer, Manager from January 1857 until November 1869 when the Teller Basil Spence was promoted to Manager; H B Chomley, Manager from April 1873 and still there in 1886; A Butt, Manager in 1895-1904; J R McCleary Accountant and Acting Manager for 12 months, until 1900; A Kirk, Manager 1904; J Moore, staff until his transfer to Bendigo in December 1908; J S Bath was Manager until 1915; C C Cox, Manager until April 1923; Richard C Stanley, Manager 1923 to April 1928. The book has historical significance as it is connected to the Bank of Australasia which was established in Australia in 1835 by Royal Charter during the early Colonial period of Australia's history. The book was used as a reference to financial law by the Bank. The book is significant for its association with the Bank of Australasia in Warrnambool, the first bank in Warrnambool, established in 1854. The bank continued to operate until its merger in 1951 when it became the ANZ Bank, which is still in operation today. The Bank was an integral part of the establishment and growth of commerce in Colonial Warrnambool and throughout Australia.Book, with black, hardcovers and embossed borders front and back. Title: The Law relating to Banker and Customer in Australia Author: F. A A Russell, M.A., Sydney, Barrister-in-law Edition: 1907 Publisher: The Law Book Co. of Australasia Ltd., 72 Castlereagh Street, Sydney Printer: Websdale, Shoosmith & Co., Sydney Pencil inscription.Pencil, handwritten "L37"flagstaff hill, warrnambool, shipwrecked coast, flagstaff hill maritime museum, maritime museum, shipwreck coast, flagstaff hill maritime village, great ocean road, commerce, banking, bank of australasia, australia, financial law, legal reference, banking law, bank law, legal practice, f. a a russell, 1907, the law book co. of australasia ltd, websdale, shoosmith & co. -
 Flagstaff Hill Maritime Museum and Village
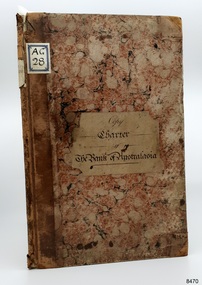
Legal record - Charter, Copy of Charter of Bank of Australasia, 01-10-1867
This Copy of the Charter of the Bank of Australasia originated from the Bank of Australasia. The bank of Australasia was incorporated by Royal Charter of England in March 1834. It had its Australian beginning on 14th December 1835, opening in Sydney. The Acting Superintendent of the bank at that time was David Charters McArthur. He was Superintendent from 1867-to 1876. The Melbourne branch opened on 28th August 1838 in a two-roomed brick cottage on the north side of Little Collins Street, where two huge mastiff dogs were used at night to guard the bank. The government also provided an armed military sentinel. Due to the bank's rapid growth, a new building for the Melbourne branch was opened in 1840 at 75 Collins Street West. By 1879 the bank had been upgraded to a magnificent two-storey building on the corners of Collins and Queens Streets, with the entry on Collins Street. In 1951 the Bank of Australasia amalgamated with the Union Bank to form the Australia and New Zealand Bank, now known as the ANZ. Then in 1970, the ANZ merged with both the ES&A and the London Bank of Australia to form the ANZ Banking Group Limited. The ANZ Banking Group Ltd kindly donated a variety of historic items from the Bank of Australasia. BANK of AUSTRALASIA, WARRNAMBOOL – In 1854 Warrnambool had two banks, the Union Bank and the Bank of Australasia. Later, completely different bank businesses opened; in 1867 the National Bank of Australasia, then in 1875 the Colonial Bank of Australasia. The original Warrnambool branch of the Bank of Australasia was established in July 1854, and operated from a leased cottage on Merri Street, close to Liebig Street. The bank next bought a stone building previously erected by drapers Cramond & Dickson on the corner of Timor and Gibson Streets. Samuel Hannaford was a teller and then Manager at the Warrnambool branch from 1855 to 1856 and the Warrnambool Council chose that bank for its dealings during 1856-57. In 1859 Roberts & Co. was awarded the contract to build the new Bank of Australasia branch for the sum of £3,000; the firm built the Warrnambool Post Office in 1856 and purchased land in Timor Street in 1858. The land was on a sand hill on the northeast corner of Timor and Kepler Streets and had been bought in 1855 from investor James Cust. The new building opened on May 21, 1860. The bank continued to operate there until 1951 when it merged with the Union Bank to form the ANZ Bank, which continued operating from its Liebig Street building. Warrnambool City Council purchased the former Bank of Australasia building in 1971 and renovated it, then on 3rd December 1973 it was officially opened as the Art Gallery by Cr. Harold Stephenson and Gallery Director John Welsh. The Gallery transferred to the purpose-built building in Liebig Street in 1986 and the old bank building is now the Gallery club. Staff at the Bank of Australasia in Warrnambool included the following men but others were also involved: Samuel Hannaford, Teller then Manager from 1855-1856; Hawkins, Manager in 1856, W H Palmer, Manager from January 1857 until November 1869 when the Teller Basil Spence was promoted to Manager; H B Chomley, Manager from April 1873 and still there in 1886; A Butt, Manager in 1895-1904; J R McCleary Accountant and Acting Manager for 12 months, until 1900; A Kirk, Manager 1904; J Moore, staff until his transfer to Bendigo in December 1908; J S Bath was Manager until 1915; C C Cox, Manager until April 1923; Richard C Stanley, Manager 1923 to April 1928. The Copy of the Charter of the Bank of Australasia has significance through its association with the Bank of Australasia. The early Australian bank was established in 1834 by Royal Charter and opened in Sydney, Australia, in Sydney in 1835. The bank had many Australian offices in November 1877, particularly on the east and south coasts. Victoria had 45 per cent of all Offices. The Charter is locally significant for its association with the Warrnambool Bank of Australasia, which was established in 1854. It was Warrnambool Council’s first bank. The bank continued to operate until the organisation's merger in 1951 when it became the ANZ Bank Group today. The Bank was an integral part of the growth of local commerce and the community. Record book, hard cover, tan black and beige pebble-pattern on front and back, and tan reinforced strip on spine with decorative embossing. Handwritten title on cream paper is attached in centre of front cover. Cream paper pages are lined and have watermarks on each one. Pages are numbered up to the last written page, number 35. The last page is sealed in red with an official stamp and dated 1st October 1867. Inscriptions are on three labels. and on front end page, and red oval stamp inside front cover. It is an official copy of the Charter of the Bank of Australasia.Label with title, handwritten in pen "Copy / Charter / of / The Bank of Australasia" Label on spine, typewritten "COPY / CHARTER" Label on front cover, handwritten in pen "A G / 28" Front inside cover, red oval stamp "AUSTRALIA AND NEW ZEALAND BANK LIMITED - ARCHIVES - " and in the oval, in pen "A G / 28" Front end page, handwritten in pencil "Normal Copy 5 Dec No. 74" Front end page, in pencil "L 28"flagstaff hill, warrnambool, shipwrecked coast, flagstaff hill maritime museum, maritime museum, shipwreck coast, flagstaff hill maritime village, great ocean road, bank of australasia, boa, union bank, australia & new zealand bank, anz bank, david charters mcarthur, d c mcarthur, sydney, new south wales, currency, banknote, legal tender, commerce, banking, roberts & co., james cust, heraldic shield, insignia, samuel hannaford, w h palmer, basil spence, h b chomley, a butt, j r mccleary, a kirk, j moore, j s bath, c c cox, richard c stanley, charter of the bank of australasia -
 Melbourne Tram Museum
Magazine, Melbourne & Metropolitan Tramways Board (MMTB), "MMTB News", 1966
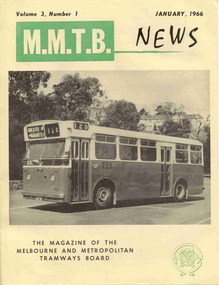
Eight issues of "MMTB News" - The Magazine of the Melbourne and Metropolitan Tramways Board. Two copies of each issue held. All issues printed with an cream colour paper cover with the rest of the magazine white glass paper. 1723.1 - Vol. 3, No. 1 - 16 pages, January 1966, with a photo of the Mark VI bus No. 702 on the front cover, notes on Traffic Congestion, motor cars and supermarkets, depot masters, engineering, bus maintenance, sports and social club news. On rear cover includes a photo of a Christmas function with past senior employees - left to right - H. R. Steains (architect), H. S. McComb (Chief Surveyor), Mr. Aird, Mr. P. M. Ireland (Rolling stock engineer), J Fisher (Civil Engineer) and H. A. Warner (Secretary) 1723.2 - Vol. 3, No. 2 - 16 pages, February 1966, with a photo of counting decimal coins, Tribute to the W2 class tram written by Norm Cross, (with photo), Hawthorn Clothing Depot, retirement of Harry Munroe, introduction of decimal currency, donation of 1B bogies to SPER, tramways band, death of Neil Olsen, sports and social club news. See btm2720i9.jpg for image of the Norm Cross photograph. 1723.3 - Vol. 3, No. 3 - 12 pages, March - April 1966, with a photo of Tramways Bowl Tournament presentation on the front cover, Recent developments in public transport in North America, Vera Cruz Mexico, cable cars at Rushworth, sports and social club news and photo of the Melbourne bogies under Sydney tram. 1723.4 - Vol. 3, No. 4 - 16 pages, May 1966, with a photo of W2 321being overhauled at Preston Workshops, change over to decimal currency for accounting machines, "Tram Driver Salutes the L class tram" - written by A. Bailey, Melbourne's New Trams, retirement of Gordon Wilson, sports and social club news. 1723.5 - Vol. 3, No. 5 - 16 pages, June 1966, with a photo of the track relaying in Camberwell Rd with Camberwell fire station in background, Melbourne cable tram routes, opening and closing dates, retirement of G. H. Box, visit of SPER members to Melbourne, memories of Malvern Depot, sports and social club news. Death of A L Robertson, rostering, sports, Sydney trams, Safety and excuses for accidents. Full pdf copy added 28/8/2019 1723.6 - Vol. 3, No. 6 - 16 pages, July - August 1966 with a photo of the view from the St Kilda Junction signal box, more trams for Russia, retirements of 31 Employees, a contest to win an old W2, St Kilda Road Junction box - and how it works - signalling and interlocking, closure of Port Melbourne bus depot, sports and social club news. 1723.7 - Vol. 3, No. 7 - 16 pages, September - October 1966 with a photo of 610 on the Maribyrnong River Bridge, during the SPER tour, "Public Transport in Big Cities" - R. Risson - with photo - see image i10, MMTB Ambulance division, new trams, trams or buses, death of Harry Hood, Chas Samuels, retirement of Jack Ferguson, Reg Maxwell, manufacture of trackwork, cable tram working, sports and social club news. 1723.8 - Vol. 3, No. 8 - 16 pages, November - December 1966 with a photo of a wedding party on a tram (Richards / Fuller), apprenticeship training, Christmas message from the Chairman, tramway canteens, art of rostering by R. Drummond, Wattle Park Chalet, clock and instrument shop at North Fitzroy, tramways band, sports and social club news.trams, tramways, mmtb, carlton control, buses, pcc 980, ballarat, new trams, are, tmsv -
 Melbourne Tram Museum
Magazine, Metropolitan Transit Authority (MTA), "Met Lines", 1986
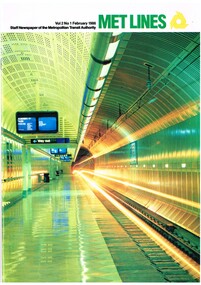
Magazine, published by the Metropolitan Transit Authority of Victoria "Met Lines" (Metlines) - A4, printed on white gloss paper, with the MTA logo or symbol. Issued under the name of Kevin Shea as Chairman. References to Minister Tom Roper. Continues from Reg Item 1059 "Met Lines" - printed in an A4 version. Major tram and bus items listed. Tramway and bus names only listed, not railway. .1 - Vol 2 No. 1 - Feb. 1986 - front cover - Flagstaff station, St Kilda/Port Melbourne light rail system announced, police at Hawthorn learning about trams, Chinese delegation looking at Melbourne's trams, Elwood depot article with photos by Lloyd Rogers at time of Elwood depot coming part of The Met, promotional posters for tramcars, Tram cards, tram power supply upgraded (photo of Z129) - Brown Boveri equipment to Kew and Ascot Vale, memoirs of a tram conductress Nancy Scutt, item with photo of Conductor Jeff Harvey, employment notes, Preston Workshops Christmas party and presentation to Essendon depot tramway soccer champs by Norm Maddock. .2 - Vol 2, No. 2 - March 1986 - Jolimont workshops, modal interchange at Bundoora, Transport Information Centre, memoirs of a tram conductress continued, tram cricket matches, tramway bowls - photos and players listed, Harris trains to be phased out. .3 - Vol 2, No. 3 - April 1986 - front cover of a Met Tram overhead maintenance, linesmen training, new super scheme (old gratuity scheme), visit from ATMOEA NSW visit, Elwood bus depot 12 months with The Met, flying flags on trams, tramway bowls, cricket. .4 - Vol 2, No. 4, May 1986 - 20 pages - Met Information Centre - "Dreams of trams become a reality - driver Peter Gamble", tram tour for American visitors to the zoo, Harris trains, article and photos on Camberwell depot, pantographs on trams, face lift for trams (758) and new buses (182). .5 - Vol 2, No. 5, June/July 1986 - 40 pages - Clock shop, materials testing, lost property, chemical analysis - Preston Workshops, Bus Driving School, Munitions bus 301 at Hawthorn, AVM on trams (223), tram track repairs, relaying Preston workshops entrance for LRV's, new type of safety zones (967 and 871), Preston Workshops redevelopment for LRV's, tram shelters, transporting arts - new series, Michael Leunig, mentions Clifton Pugh tram 504, federal funding for trams, fitting air conditioners to trams. .6 - Vol 2, No. 6, August 1986 - 20 pages - front cover - rotary converter at Carlton, Doncaster bus depot celebrates 25 years, the day the rains came - Ray Marsh - 1972 floods, substations power tram network, Carlton, tram art of a different kind, launch of Leunig's tram. Doncaster party. .7 - Vol 2, No. 7, October 1986, 20 pages, artic buses start rolling (articulated), vandals, Robert Jacks tram launched, Peace tram 829,. .8 - Vol 2, No. 8, November 1986, 20 pages, MTA Annual report, Debbie Bateman Conductor thanked by passengers, Papal tour planning, MTA Ball, Frankston Neighbourhood launched, Essendon depot Soccer report. .9 - Vol. 2, No. 9, December 1986, 20 pages, Christmas issue, (has a $1.50 sticker on it), Met Lines year in review, Federal funding for more A class trams, Bundoora - La Trobe Uni bus interchanged opened, Domain Interchange opened, For next year 1987 - see Reg Item 1141 - Announced in December issue, Met Lines quarterly next year.trams, tramways, mta, the met, elwood depot, light rail, posters, power supply, kew, ascot vale, conductresses, sports, essendon depot, bundoora, jolimont workshops, tower truck, overhead, superannuation, flags, camberwell depot, drivers, trolley poles, pantographs, clocks, buses, avm, automatic vehicle monitoring, shelters, flooding, substation, carlton, transporting art, federal funding, a class, domain interchange, tram 2001, tram 129, tram 234, tram 50, tram 504, tram 871, tram 967, tram 223, tram 758 -
 Ringwood and District Historical Society
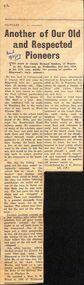
Newspaper, The Mail, Obituary - Joseph Richard Sanders - Old and Respected Pioneer Ringwood 1959 from the Ringwood Mail, 1959
The article was contributed by J.K.McCaskill, JP. a mayor of Ringwood in the years between 1924-1951.The Sanders family came from England and are mentioned in the book "Ringwood a Place of Many Eagles" by Hugh AndersonObituary from The Ringwood Mail of Joseph Richard Sanders of 18, Wantirna Road, Ringwood, aged 87 years. He came from a family who were early pioneers of Ringwood. he was born in Collingwood but schooled in Ringwood, married and brought up his family in Ringwood. He lived at 18, Wantirna Road .The article was contributed by J.K.McCaskill, JP. a mayor of Ringwood in the years between 1924-1951.Transcript: "The death occurred of Joseph Richard Sanders, 18 Wantirna Rd, Ringwood, on Wednesday, 21st October 1959, in his 87th year, marks the passing of another of Ringwood’s early pioneers. He was born in Collingwood in August 1873 and came to Ringwood with his parents when 15 months old. They made their home on land on what is now known as Jubilee Park (Fuller particulars of this Park will appear in ‘The Mail’ at a later date, also reference will be made to Wantirna Rd, in the early days it was known as West Prussia Rd). Joe went to the school held in the old homestead and orchard of Mr. Mills, just through the Heatherdale Road railway gates. He remembered many of the scholars, some of the boys and girls had to walk three and four miles to school through rough scrub paddocks in all kinds of weather. During the lunch hour a few of the boys generally went to the creek to fish for eels and would be late in getting back to school, greatly to the annoyance of the teacher. One day the fishing was good, and the boys rather reluctantly returned to the school late as usual. The teacher was furious and made them stand in front of the class but before inflicting punishment she called out to one of the boys to throw out that dirty bag he was holding. The lad gave the bag a shake and out wriggled a snake. There was immediately a general stampede from the classroom, led by the teacher. The school was closed for the rest of the afternoon. Another incident related to a few tramps who after the scholars had all gone home, generally camped for the night in an old back room in the homestead. One of the boys put a little gunpowder in this old fireplace and when the tramps lit the fire to boil their billies the old chimney and part of the old wall just collapsed. Joe, after leaving school, worked around the district for some time and later left Ringwood to live in other suburbs. He at one time was employed at the Aust Glass Works, and later as a carpenter worked on building the dome of the Railway Station at Flinders St. He married a Miss E. M. Wood in 1901 at Richmond and a few years afterwards returned to Ringwood and resided at No. 18 Wantirna Rd., where he reared a family' of three girls (Alice, Ethel, Joyce) and two boys (Robert and Joe). Joe recalled many interesting events of earlier years, such as the duplication of the railway line, and the cutting back of the embankment at the Goods Shed, the earth being used to heighten up the railway bridge over Wantirna Rd. The brickworks at Ringwood East and reference to early land surveys, the using of the heavy chain links before the use of the theodolite became general, and the many neighbours and friends whom he knew. He was interested in local public affairs and was fond of fishing. He proved himself a good citizen and was highly respected and esteemed throughout the district, and so another old pioneer passes on." (Contributed by J. K. McCaskill, J.P.) RM 19 Nov 1959 -
 Ballarat Tramway Museum
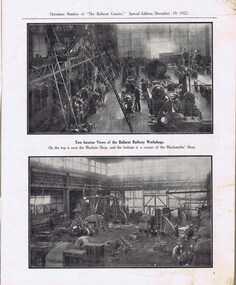
Newspaper, The Courier Ballarat, The Courier, Christmas Number, 1922, Special Issue, Dec. 1922
Yields information about Ballarat, it businesses, identifies and its locations or environs through photos and advertisements and articles.The body of the "Christmas Number of the Ballarat Courier, Special Edition - December 1922" = coves missing. See attached listing with worksheet for summary of contents. Contains many advertisement for local business houses, photos and fiction and articles , pages 3 - 94 still existing, stapled. Notes on contents of Christmas Number of The Ballarat Courier Special edition, December 19, 1922. Photos Ballarat Association Cricket Team, winners Country championship - 1922 and photo of dinner at Sth Melb. Town Hall by VCA. - p83 Ballarat Golf club, Arch of Victoria and Club House - p63, 65 Ballarat Imperial Football club - league premier- 1922 - p19 Ballarat Miners Turf Club - showing stands and office bearers - p43 Ballarat North Golf Club - p67 Ballarat Town hall - p87 Ballarat Turf Club Office bearers and race finish - p45 Ballarat Yacht club - opening day and yacht race - p89 Black Hill Progress Association, - members and scenes - p33 Eureka Monument - p79 Finish of a race at Miners RC - p45 Head of the Lake and St. Patrick's the winning crew - p47 1.ake Wendouree - boating on (Gardens side - p] 1 Lake Wendouree, rowing and club houses - p28 Lal Lal waterfalls - p61 Lydiard St. View - Railway Station, Cemetery gates, Mining Exchange, Post Office and Banks - p71 National Federation Conference - 1922 - p39 South city Football club, Ballarat Assoc. Premiers 1922 - p25 Sturt and Lydiard St - top photo Town Hall and T&G building, with ESCo tram (pencil note "Tram No- 3 - Peckham Truck" written in - p75. Bottom photo, looking south from Town Hall. The Western Oval during a football match - p23 Victorian Farmers Union Conference, Ballarat 1922 - p37 Victorian Railway photos of various scenes around Victoria: Pages 3, 5, 7, 55, 59 Views of Victoria Park - p91 VR Ballarat Railway Workshops - p9 Advertisements on even numbered pages, featuring in particular: Ballarat Motor Garage - with photos - p88 C.A.V. Willard - storage battery service Stn - p76 with photo. CA Mitaxa - Builder - includes photos of new homes - p38 Coles & Pullham - stock sales - with photos - p86 ESCo - p70 Geo E. Dibble, machinery merchant - includes photos - p26 Geo. Waller - asphalt and carrier - photos of work and buildings Hanrahan's of Ballarat - Garage and stables - p30 J.L.Ridings - dentists, - photos of surgery p14 Longhurst's Bakeries - Mair and Yuille St. Includes Photos. - P84 Preston Motors, Melbourne - The Maxwell Sep Morse - Motor and Carriage builders - photo - p78 St. Patrick's College - photos of students and buildings - p46 State Savings Bank of Vic. - p20 T-J. Brown house remover and general carrier, photo of traction engines - p90 T.J.Haymes - Wallpaper etc. - p33 The Ballarat Co-Op Distribution Society - includes photos - p44 The Hupmobile - McLean Richards Motors - p22 Wallace Butter Factor - p82 Articles Black Hill Progress Association - p35 Damaged pages - cut outs clippings etc. Page 17/18 - top half bottom 1/3 of page 21/22 Pages: 9, 70, 71, 75, 87 and 90 imaged. Record reviewed and images of some of the pages added 10-9-2013p74. Note re tram 33.trams, tramways, ballarat, commerce, ballarat business, sports, science, esco -
 Flagstaff Hill Maritime Museum and Village
Domestic object - Bowl, Late 19th or early 20th Century
The Process of Making Pottery Decorating, Firing, Glazing, Making, Technical There is a rhythm and flow to clay. It can’t be done all at once! Even the making process! It can take weeks to get everything done, especially if you can only work on your pottery once a week! Even though we have three hour classes, it’s often just not enough time! Here is an overview of some of the processes so you have a bit more grasp on some of the technical stuff! Step One – Design There are SO many ideas out there for making stuff in clay! From delicate porcelain jewellery, through to heavy sculptural work and everything in between. Deciding your direction is sometimes not that easy – when you first start, try everything, you will naturally gravitate to the style that you enjoy! The options and variations are endless and can get a wee bit overwhelming too! Check in with me before you start to ensure your ideas will work, what order you might do things, how you could achieve the look you are seeking and any other technical data required! Step Two – Making Clay is thixotropic. This means that as you work with it, the clay first gets sloppier and wetter, before is begins to dry in the atmosphere. For most things, you simply can’t do all parts of the project at once. An example of work order might look like: Get last weeks work out from the shelves Prepare clay for today’s work – roll your clay, prepare balls for throwing, make the first stage of a pinch pot) Clean up last week’s work and put it on the shelf for bisque firing Check that you have any glazing to do – and do enough of it that you will have time to finish your main project Do the next step of your next project – there might be a further step that can’t be complete immediately, in that case, wrap your work well and put onto the shelves. Letting your work rest for a while can really help keep your work clean and professional looking. Many things require bagging under plastic to keep it ready for work the next week – put your name on the outside of the bag so you can find your work easily. We have stickers and markers. Consider how you want to decorate your work – coloured slip can be applied at a fairly wet stage (remembering that it will make your work even wetter!). Trying to apply slip to dry clay won’t work! If you want to do sgraffito – you will need to keep the work leather hard (a state of dryness where you can still work the clay with a little effort and a little water and care). Step Three – Drying Most of the time your work can go into the rack uncovered to let it dry out for the following week. If you want to continue forming or shaping you will need to double bag your work – put your work on a suitable sized bat and put the bat in a bag so the base of the bag is under the bat, then put another bag over the top of the work and tuck the top of the bag under the bat. If you want to trim (or turn) your thrown work the following week, it should also be double bagged. If your work is large, delicate, or of uneven thicknesses, you should lightly cover your work for drying. When considering the drying process, bare in mind the weather, humidity and wind! The hotter and dryer, the faster things dry and work can dry unevenly in the shelves – this can lead to cracking – another time to lightly cover your work for drying. Step Four – Trimming and Cleaning Up Your work is dry! It is called greenware now and it is at it’s most fragile! Handle everything with two hands. I often refer to soft hands – keep everything gentle and with your fingers spread as much as possible. Try to not pick up things like plates too much, and always with both hands! Before your work can be bisque fired it should be “cleaned up”. You work won’t go into the kiln if it has sharp edges – when glazed, sharp edges turn into razor blades! Use a piece of fly wire to rub the work all over – this will scratch a little so be light handed. Use a knife or metal kidney to scrape any areas that require a bit more dynamic treatment than the fly wire offers! Finally, a very light wipe over with a slightly damp sponge can help soften and soothe all of your edges and dags! Trimming thrown work: If you are planning to trim (or turn) your thrown work (and you should be), make sure you bag it well – your work should be leather hard to almost dry for easiest trimming. Use this step to finish the work completely – use a metal kidney to polish the surface, or a slightly damp sponge to give a freshly thrown look. Wipe the sponge around the rim after trimming, and check the inside of the pot for dags! Trimming slip cast work: Usually I will trim the rims of your work on the wheel the following day to make that stage easier, however you will still need to check your work for lumps and bumps. Last but not least – check that your name is still clearly on the bottom of your work. Step Five – Bisque Firing When the work is completely dry it can go into the bisque kiln. The bisque kiln is fired to 1000°C. This process burns off the water in the clay as well as some of the chemically bound water. The structure of the clay is not altered that much at this temperature. Inside the bisque kiln, the work is stacked a little, small bowl inside a larger bowl and onto a heavy plate. Smaller items like decorations or drink coasters might get stacked several high. Consideration is paid to the weight of the stack and shape of the work. A bisque kiln can fire about one and a half times the amount of work that the glaze kiln can fire. The firing takes about 10 hours to complete the cycle and about two days to cool down. Once it has been emptied the work is placed in the glaze room ready for you to decorate! Step Six – Glazing Decorating your work with colour can be a lot of fun – and time consuming! There are three main options for surface treatment at this stage: Oxide Washes Underglazes Glazes Washes and underglazes do not “glaze” the work – It will still need a layer of glaze to fully seal the clay (washes don’t need glaze on surfaces not designed for food or liquid as they can gloss up a little on their own). Underglazes are stable colourants that turn out pretty much how they look in the jar. They can be mixed with each other to form other colours and can be used like water colours to paint onto your work. Mostly they should have a clear glaze on top to seal them. Oxides are a different species – the pink oxide (cobalt) wash turns out bright blue for instance. They don’t always need a glaze on top, and some glazes can change the colour of the wash! The glazes need no other “glaze” on top! Be careful of unknown glaze interactions – you can put any combination of glaze in a bowl or on a plate, but only a single glaze on the outside of any vertical surface! Glazes are a chemical reaction under heat. We don’t know the exact chemicals in the Mayco glazes we use. I can guess by the way they interact with each other, however, on the whole, you need to test every idea you have, and not run the test on a vertical surface! Simply put, glaze is a layer of glass like substance that bonds with the clay underneath. Clay is made of silica, alumina and water. Glaze is made of mostly silica. Silica has a melting point of 1700°C and we fire to 1240°C. The silica requires a “flux” to help it melt at the lower temperature. Fluxes can be all sorts of chemicals – a common one is calcium – calcium has a melting point of 2500°C, however, together they both melt at a much lower temperature! Colourants are metal oxides like cobalt (blue), chrome (green through black), copper (green, blue, even red!), manganese (black, purple and pink) iron (red brown), etc. Different chemicals in the glaze can have dramatic effects. for example, barium carbonate (which we don’t use) turns manganese bright pink! Other elements can turn manganese dioxide brown, blue, purple and reddish brown. Manganese dioxide is a flux in and of itself as well. So, glazes that get their black and purple colours, often interact with other glazes and RUN! Our mirror black is a good example – it mixes really well with many glazes because it fluxes them – causes them to melt faster. It will also bring out many beautiful colours in the glazes because it’s black colouring most definitely comes from manganese dioxide! Glaze chemistry is a whole subject on it’s own! We use commercial Mayco glazes on purpose – for their huge range of colour possibilities, stability, cool interactions, artistic freedom with the ability to easily brush the glazes on and ease of use. We currently have almost 50 glazes on hand! A major project is to test the interactions of all glazes with each other. That is 2,500 test tiles!!!! I’m going to make the wall behind the wheels the feature wall of pretty colours! Step Seven – Glaze (Gloss or sometimes called “Glost”) Firing Most of the time this is the final stage of making your creation (but not always!) The glaze kiln goes to 1240°C. This is called cone 6, or midrange. It is the low end of stoneware temperatures. Stoneware clays and glazes are typically fired at cone 8 – 10, that is 1260 – 1290°C. The energy requirement to go from 1240°C to 1280°C is almost a 30% more! Our clay is formulated to vitrify (mature, turn “glass-like”) at 1240°, as are our glazes. A glaze kiln take around 12 hours to reach temperature and two to three days to cool down. Sometimes a third firing process is required – this is for decoration that is added to work after the glaze firing. For example – adding precious metals and lustres. this firing temperature is usually around 600 – 800°C depending upon the techniques being used. There are many students interested in gold and silver trims – we will be doing this third type of firing soon! After firing your work will be in the student finished work shelves. Remember to pay for it before you head out the door! There is a small extra charge for using porcelain clay (it’s more than twice the price of regular clay), and for any third firing process! Once your work has been fired it can not turn back into clay for millennia – so don’t fire it if you don’t like it! Put it in the bucket for recycling. https://firebirdstudios.com.au/the-process-of-making-pottery/ The bowl is an example of kitchenware used in the 19th century and still in use today.Bowl white ceramic. Crack on side. Badly stained.Backstamp very faint and unable to be read.flagstaff hill, warrnambool, shipwrecked-coast, flagstaff-hill, flagstaff-hill-maritime-museum, maritime-museum, shipwreck-coast, flagstaff-hill-maritime-village, mixing bowl, food preparation, kitchen equipment, ceramic -
 Flagstaff Hill Maritime Museum and Village
Domestic object - Bowl
The Process of Making Pottery Decorating, Firing, Glazing, Making, Technical There is a rhythm and flow to clay. It can’t be done all at once! Even the making process! It can take weeks to get everything done, especially if you can only work on your pottery once a week! Even though we have three hour classes, it’s often just not enough time! Here is an overview of some of the processes so you have a bit more grasp on some of the technical stuff! Step One – Design There are SO many ideas out there for making stuff in clay! From delicate porcelain jewellery, through to heavy sculptural work and everything in between. Deciding your direction is sometimes not that easy – when you first start, try everything, you will naturally gravitate to the style that you enjoy! The options and variations are endless and can get a wee bit overwhelming too! Check in with me before you start to ensure your ideas will work, what order you might do things, how you could achieve the look you are seeking and any other technical data required! Step Two – Making Clay is thixotropic. This means that as you work with it, the clay first gets sloppier and wetter, before is begins to dry in the atmosphere. For most things, you simply can’t do all parts of the project at once. An example of work order might look like: Get last weeks work out from the shelves Prepare clay for today’s work – roll your clay, prepare balls for throwing, make the first stage of a pinch pot) Clean up last week’s work and put it on the shelf for bisque firing Check that you have any glazing to do – and do enough of it that you will have time to finish your main project Do the next step of your next project – there might be a further step that can’t be complete immediately, in that case, wrap your work well and put onto the shelves. Letting your work rest for a while can really help keep your work clean and professional looking. Many things require bagging under plastic to keep it ready for work the next week – put your name on the outside of the bag so you can find your work easily. We have stickers and markers. Consider how you want to decorate your work – coloured slip can be applied at a fairly wet stage (remembering that it will make your work even wetter!). Trying to apply slip to dry clay won’t work! If you want to do sgraffito – you will need to keep the work leather hard (a state of dryness where you can still work the clay with a little effort and a little water and care). Step Three – Drying Most of the time your work can go into the rack uncovered to let it dry out for the following week. If you want to continue forming or shaping you will need to double bag your work – put your work on a suitable sized bat and put the bat in a bag so the base of the bag is under the bat, then put another bag over the top of the work and tuck the top of the bag under the bat. If you want to trim (or turn) your thrown work the following week, it should also be double bagged. If your work is large, delicate, or of uneven thicknesses, you should lightly cover your work for drying. When considering the drying process, bare in mind the weather, humidity and wind! The hotter and dryer, the faster things dry and work can dry unevenly in the shelves – this can lead to cracking – another time to lightly cover your work for drying. Step Four – Trimming and Cleaning Up Your work is dry! It is called greenware now and it is at it’s most fragile! Handle everything with two hands. I often refer to soft hands – keep everything gentle and with your fingers spread as much as possible. Try to not pick up things like plates too much, and always with both hands! Before your work can be bisque fired it should be “cleaned up”. You work won’t go into the kiln if it has sharp edges – when glazed, sharp edges turn into razor blades! Use a piece of fly wire to rub the work all over – this will scratch a little so be light handed. Use a knife or metal kidney to scrape any areas that require a bit more dynamic treatment than the fly wire offers! Finally, a very light wipe over with a slightly damp sponge can help soften and soothe all of your edges and dags! Trimming thrown work: If you are planning to trim (or turn) your thrown work (and you should be), make sure you bag it well – your work should be leather hard to almost dry for easiest trimming. Use this step to finish the work completely – use a metal kidney to polish the surface, or a slightly damp sponge to give a freshly thrown look. Wipe the sponge around the rim after trimming, and check the inside of the pot for dags! Trimming slip cast work: Usually I will trim the rims of your work on the wheel the following day to make that stage easier, however you will still need to check your work for lumps and bumps. Last but not least – check that your name is still clearly on the bottom of your work. Step Five – Bisque Firing When the work is completely dry it can go into the bisque kiln. The bisque kiln is fired to 1000°C. This process burns off the water in the clay as well as some of the chemically bound water. The structure of the clay is not altered that much at this temperature. Inside the bisque kiln, the work is stacked a little, small bowl inside a larger bowl and onto a heavy plate. Smaller items like decorations or drink coasters might get stacked several high. Consideration is paid to the weight of the stack and shape of the work. A bisque kiln can fire about one and a half times the amount of work that the glaze kiln can fire. The firing takes about 10 hours to complete the cycle and about two days to cool down. Once it has been emptied the work is placed in the glaze room ready for you to decorate! Step Six – Glazing Decorating your work with colour can be a lot of fun – and time consuming! There are three main options for surface treatment at this stage: Oxide Washes Underglazes Glazes Washes and underglazes do not “glaze” the work – It will still need a layer of glaze to fully seal the clay (washes don’t need glaze on surfaces not designed for food or liquid as they can gloss up a little on their own). Underglazes are stable colourants that turn out pretty much how they look in the jar. They can be mixed with each other to form other colours and can be used like water colours to paint onto your work. Mostly they should have a clear glaze on top to seal them. Oxides are a different species – the pink oxide (cobalt) wash turns out bright blue for instance. They don’t always need a glaze on top, and some glazes can change the colour of the wash! The glazes need no other “glaze” on top! Be careful of unknown glaze interactions – you can put any combination of glaze in a bowl or on a plate, but only a single glaze on the outside of any vertical surface! Glazes are a chemical reaction under heat. We don’t know the exact chemicals in the Mayco glazes we use. I can guess by the way they interact with each other, however, on the whole, you need to test every idea you have, and not run the test on a vertical surface! Simply put, glaze is a layer of glass like substance that bonds with the clay underneath. Clay is made of silica, alumina and water. Glaze is made of mostly silica. Silica has a melting point of 1700°C and we fire to 1240°C. The silica requires a “flux” to help it melt at the lower temperature. Fluxes can be all sorts of chemicals – a common one is calcium – calcium has a melting point of 2500°C, however, together they both melt at a much lower temperature! Colourants are metal oxides like cobalt (blue), chrome (green through black), copper (green, blue, even red!), manganese (black, purple and pink) iron (red brown), etc. Different chemicals in the glaze can have dramatic effects. for example, barium carbonate (which we don’t use) turns manganese bright pink! Other elements can turn manganese dioxide brown, blue, purple and reddish brown. Manganese dioxide is a flux in and of itself as well. So, glazes that get their black and purple colours, often interact with other glazes and RUN! Our mirror black is a good example – it mixes really well with many glazes because it fluxes them – causes them to melt faster. It will also bring out many beautiful colours in the glazes because it’s black colouring most definitely comes from manganese dioxide! Glaze chemistry is a whole subject on it’s own! We use commercial Mayco glazes on purpose – for their huge range of colour possibilities, stability, cool interactions, artistic freedom with the ability to easily brush the glazes on and ease of use. We currently have almost 50 glazes on hand! A major project is to test the interactions of all glazes with each other. That is 2,500 test tiles!!!! I’m going to make the wall behind the wheels the feature wall of pretty colours! Step Seven – Glaze (Gloss or sometimes called “Glost”) Firing Most of the time this is the final stage of making your creation (but not always!) The glaze kiln goes to 1240°C. This is called cone 6, or midrange. It is the low end of stoneware temperatures. Stoneware clays and glazes are typically fired at cone 8 – 10, that is 1260 – 1290°C. The energy requirement to go from 1240°C to 1280°C is almost a 30% more! Our clay is formulated to vitrify (mature, turn “glass-like”) at 1240°, as are our glazes. A glaze kiln take around 12 hours to reach temperature and two to three days to cool down. Sometimes a third firing process is required – this is for decoration that is added to work after the glaze firing. For example – adding precious metals and lustres. this firing temperature is usually around 600 – 800°C depending upon the techniques being used. There are many students interested in gold and silver trims – we will be doing this third type of firing soon! After firing your work will be in the student finished work shelves. Remember to pay for it before you head out the door! There is a small extra charge for using porcelain clay (it’s more than twice the price of regular clay), and for any third firing process! Once your work has been fired it can not turn back into clay for millennia – so don’t fire it if you don’t like it! Put it in the bucket for recycling. https://firebirdstudios.com.au/the-process-of-making-pottery/ This bowl is an example of kitchenware used in the 19th century and still in use today.Bowl white ceramic plain that has two sets of edging around lip. Inside bowl has plaster designed to look like cooking mixture.flagstaff hill, warrnambool, shipwrecked-coast, flagstaff-hill, flagstaff-hill-maritime-museum, maritime-museum, shipwreck-coast, flagstaff-hill-maritime-village, kitchen equipment, ceramic -
 Flagstaff Hill Maritime Museum and Village
Domestic object - Bowl, J & G Meakin, Late 19th or early 20th Century
The Process of Making Pottery Decorating, Firing, Glazing, Making, Technical There is a rhythm and flow to clay. It can’t be done all at once! Even the making process! It can take weeks to get everything done, especially if you can only work on your pottery once a week! Even though we have three hour classes, it’s often just not enough time! Here is an overview of some of the processes so you have a bit more grasp on some of the technical stuff! Step One – Design There are SO many ideas out there for making stuff in clay! From delicate porcelain jewellery, through to heavy sculptural work and everything in between. Deciding your direction is sometimes not that easy – when you first start, try everything, you will naturally gravitate to the style that you enjoy! The options and variations are endless and can get a wee bit overwhelming too! Check in with me before you start to ensure your ideas will work, what order you might do things, how you could achieve the look you are seeking and any other technical data required! Step Two – Making Clay is thixotropic. This means that as you work with it, the clay first gets sloppier and wetter, before is begins to dry in the atmosphere. For most things, you simply can’t do all parts of the project at once. An example of work order might look like: Get last weeks work out from the shelves Prepare clay for today’s work – roll your clay, prepare balls for throwing, make the first stage of a pinch pot) Clean up last week’s work and put it on the shelf for bisque firing Check that you have any glazing to do – and do enough of it that you will have time to finish your main project Do the next step of your next project – there might be a further step that can’t be complete immediately, in that case, wrap your work well and put onto the shelves. Letting your work rest for a while can really help keep your work clean and professional looking. Many things require bagging under plastic to keep it ready for work the next week – put your name on the outside of the bag so you can find your work easily. We have stickers and markers. Consider how you want to decorate your work – coloured slip can be applied at a fairly wet stage (remembering that it will make your work even wetter!). Trying to apply slip to dry clay won’t work! If you want to do sgraffito – you will need to keep the work leather hard (a state of dryness where you can still work the clay with a little effort and a little water and care). Step Three – Drying Most of the time your work can go into the rack uncovered to let it dry out for the following week. If you want to continue forming or shaping you will need to double bag your work – put your work on a suitable sized bat and put the bat in a bag so the base of the bag is under the bat, then put another bag over the top of the work and tuck the top of the bag under the bat. If you want to trim (or turn) your thrown work the following week, it should also be double bagged. If your work is large, delicate, or of uneven thicknesses, you should lightly cover your work for drying. When considering the drying process, bare in mind the weather, humidity and wind! The hotter and dryer, the faster things dry and work can dry unevenly in the shelves – this can lead to cracking – another time to lightly cover your work for drying. Step Four – Trimming and Cleaning Up Your work is dry! It is called greenware now and it is at it’s most fragile! Handle everything with two hands. I often refer to soft hands – keep everything gentle and with your fingers spread as much as possible. Try to not pick up things like plates too much, and always with both hands! Before your work can be bisque fired it should be “cleaned up”. You work won’t go into the kiln if it has sharp edges – when glazed, sharp edges turn into razor blades! Use a piece of fly wire to rub the work all over – this will scratch a little so be light handed. Use a knife or metal kidney to scrape any areas that require a bit more dynamic treatment than the fly wire offers! Finally, a very light wipe over with a slightly damp sponge can help soften and soothe all of your edges and dags! Trimming thrown work: If you are planning to trim (or turn) your thrown work (and you should be), make sure you bag it well – your work should be leather hard to almost dry for easiest trimming. Use this step to finish the work completely – use a metal kidney to polish the surface, or a slightly damp sponge to give a freshly thrown look. Wipe the sponge around the rim after trimming, and check the inside of the pot for dags! Trimming slip cast work: Usually I will trim the rims of your work on the wheel the following day to make that stage easier, however you will still need to check your work for lumps and bumps. Last but not least – check that your name is still clearly on the bottom of your work. Step Five – Bisque Firing When the work is completely dry it can go into the bisque kiln. The bisque kiln is fired to 1000°C. This process burns off the water in the clay as well as some of the chemically bound water. The structure of the clay is not altered that much at this temperature. Inside the bisque kiln, the work is stacked a little, small bowl inside a larger bowl and onto a heavy plate. Smaller items like decorations or drink coasters might get stacked several high. Consideration is paid to the weight of the stack and shape of the work. A bisque kiln can fire about one and a half times the amount of work that the glaze kiln can fire. The firing takes about 10 hours to complete the cycle and about two days to cool down. Once it has been emptied the work is placed in the glaze room ready for you to decorate! Step Six – Glazing Decorating your work with colour can be a lot of fun – and time consuming! There are three main options for surface treatment at this stage: Oxide Washes Underglazes Glazes Washes and underglazes do not “glaze” the work – It will still need a layer of glaze to fully seal the clay (washes don’t need glaze on surfaces not designed for food or liquid as they can gloss up a little on their own). Underglazes are stable colourants that turn out pretty much how they look in the jar. They can be mixed with each other to form other colours and can be used like water colours to paint onto your work. Mostly they should have a clear glaze on top to seal them. Oxides are a different species – the pink oxide (cobalt) wash turns out bright blue for instance. They don’t always need a glaze on top, and some glazes can change the colour of the wash! The glazes need no other “glaze” on top! Be careful of unknown glaze interactions – you can put any combination of glaze in a bowl or on a plate, but only a single glaze on the outside of any vertical surface! Glazes are a chemical reaction under heat. We don’t know the exact chemicals in the Mayco glazes we use. I can guess by the way they interact with each other, however, on the whole, you need to test every idea you have, and not run the test on a vertical surface! Simply put, glaze is a layer of glass like substance that bonds with the clay underneath. Clay is made of silica, alumina and water. Glaze is made of mostly silica. Silica has a melting point of 1700°C and we fire to 1240°C. The silica requires a “flux” to help it melt at the lower temperature. Fluxes can be all sorts of chemicals – a common one is calcium – calcium has a melting point of 2500°C, however, together they both melt at a much lower temperature! Colourants are metal oxides like cobalt (blue), chrome (green through black), copper (green, blue, even red!), manganese (black, purple and pink) iron (red brown), etc. Different chemicals in the glaze can have dramatic effects. for example, barium carbonate (which we don’t use) turns manganese bright pink! Other elements can turn manganese dioxide brown, blue, purple and reddish brown. Manganese dioxide is a flux in and of itself as well. So, glazes that get their black and purple colours, often interact with other glazes and RUN! Our mirror black is a good example – it mixes really well with many glazes because it fluxes them – causes them to melt faster. It will also bring out many beautiful colours in the glazes because it’s black colouring most definitely comes from manganese dioxide! Glaze chemistry is a whole subject on it’s own! We use commercial Mayco glazes on purpose – for their huge range of colour possibilities, stability, cool interactions, artistic freedom with the ability to easily brush the glazes on and ease of use. We currently have almost 50 glazes on hand! A major project is to test the interactions of all glazes with each other. That is 2,500 test tiles!!!! I’m going to make the wall behind the wheels the feature wall of pretty colours! Step Seven – Glaze (Gloss or sometimes called “Glost”) Firing Most of the time this is the final stage of making your creation (but not always!) The glaze kiln goes to 1240°C. This is called cone 6, or midrange. It is the low end of stoneware temperatures. Stoneware clays and glazes are typically fired at cone 8 – 10, that is 1260 – 1290°C. The energy requirement to go from 1240°C to 1280°C is almost a 30% more! Our clay is formulated to vitrify (mature, turn “glass-like”) at 1240°, as are our glazes. A glaze kiln take around 12 hours to reach temperature and two to three days to cool down. Sometimes a third firing process is required – this is for decoration that is added to work after the glaze firing. For example – adding precious metals and lustres. this firing temperature is usually around 600 – 800°C depending upon the techniques being used. There are many students interested in gold and silver trims – we will be doing this third type of firing soon! After firing your work will be in the student finished work shelves. Remember to pay for it before you head out the door! There is a small extra charge for using porcelain clay (it’s more than twice the price of regular clay), and for any third firing process! Once your work has been fired it can not turn back into clay for millennia – so don’t fire it if you don’t like it! Put it in the bucket for recycling. https://firebirdstudios.com.au/the-process-of-making-pottery/This bowl was made by renowned pottery company J & G Meakin of England. The firm was established in the mid-1800's. The bowl is an example of kitchenware used in the 19th century and still in use today.Bowl; white ceramic, round and tapering inwards towards base. Made by J and G Meakin England.On base, 'Ironstone China Reg SOL 391413' with symbolflagstaff hill, flagstaff hill maritime museum and village, warrnambool, maritime museum, maritime village, great ocean road, shipwreck coast, mixing bowl, food preparation, j & g meakin, pottery, stoke-on-trent, kitchen equipment, ceramic -
 Flagstaff Hill Maritime Museum and Village
Domestic object - Plate
The Process of Making Pottery Decorating, Firing, Glazing, Making, Technical There is a rhythm and flow to clay. It can’t be done all at once! Even the making process! It can take weeks to get everything done, especially if you can only work on your pottery once a week! Even though we have three hour classes, it’s often just not enough time! Here is an overview of some of the processes so you have a bit more grasp on some of the technical stuff! Step One – Design There are SO many ideas out there for making stuff in clay! From delicate porcelain jewellery, through to heavy sculptural work and everything in between. Deciding your direction is sometimes not that easy – when you first start, try everything, you will naturally gravitate to the style that you enjoy! The options and variations are endless and can get a wee bit overwhelming too! Check in with me before you start to ensure your ideas will work, what order you might do things, how you could achieve the look you are seeking and any other technical data required! Step Two – Making Clay is thixotropic. This means that as you work with it, the clay first gets sloppier and wetter, before is begins to dry in the atmosphere. For most things, you simply can’t do all parts of the project at once. An example of work order might look like: Get last weeks work out from the shelves Prepare clay for today’s work – roll your clay, prepare balls for throwing, make the first stage of a pinch pot) Clean up last week’s work and put it on the shelf for bisque firing Check that you have any glazing to do – and do enough of it that you will have time to finish your main project Do the next step of your next project – there might be a further step that can’t be complete immediately, in that case, wrap your work well and put onto the shelves. Letting your work rest for a while can really help keep your work clean and professional looking. Many things require bagging under plastic to keep it ready for work the next week – put your name on the outside of the bag so you can find your work easily. We have stickers and markers. Consider how you want to decorate your work – coloured slip can be applied at a fairly wet stage (remembering that it will make your work even wetter!). Trying to apply slip to dry clay won’t work! If you want to do sgraffito – you will need to keep the work leather hard (a state of dryness where you can still work the clay with a little effort and a little water and care). Step Three – Drying Most of the time your work can go into the rack uncovered to let it dry out for the following week. If you want to continue forming or shaping you will need to double bag your work – put your work on a suitable sized bat and put the bat in a bag so the base of the bag is under the bat, then put another bag over the top of the work and tuck the top of the bag under the bat. If you want to trim (or turn) your thrown work the following week, it should also be double bagged. If your work is large, delicate, or of uneven thicknesses, you should lightly cover your work for drying. When considering the drying process, bare in mind the weather, humidity and wind! The hotter and dryer, the faster things dry and work can dry unevenly in the shelves – this can lead to cracking – another time to lightly cover your work for drying. Step Four – Trimming and Cleaning Up Your work is dry! It is called greenware now and it is at it’s most fragile! Handle everything with two hands. I often refer to soft hands – keep everything gentle and with your fingers spread as much as possible. Try to not pick up things like plates too much, and always with both hands! Before your work can be bisque fired it should be “cleaned up”. You work won’t go into the kiln if it has sharp edges – when glazed, sharp edges turn into razor blades! Use a piece of fly wire to rub the work all over – this will scratch a little so be light handed. Use a knife or metal kidney to scrape any areas that require a bit more dynamic treatment than the fly wire offers! Finally, a very light wipe over with a slightly damp sponge can help soften and soothe all of your edges and dags! Trimming thrown work: If you are planning to trim (or turn) your thrown work (and you should be), make sure you bag it well – your work should be leather hard to almost dry for easiest trimming. Use this step to finish the work completely – use a metal kidney to polish the surface, or a slightly damp sponge to give a freshly thrown look. Wipe the sponge around the rim after trimming, and check the inside of the pot for dags! Trimming slip cast work: Usually I will trim the rims of your work on the wheel the following day to make that stage easier, however you will still need to check your work for lumps and bumps. Last but not least – check that your name is still clearly on the bottom of your work. Step Five – Bisque Firing When the work is completely dry it can go into the bisque kiln. The bisque kiln is fired to 1000°C. This process burns off the water in the clay as well as some of the chemically bound water. The structure of the clay is not altered that much at this temperature. Inside the bisque kiln, the work is stacked a little, small bowl inside a larger bowl and onto a heavy plate. Smaller items like decorations or drink coasters might get stacked several high. Consideration is paid to the weight of the stack and shape of the work. A bisque kiln can fire about one and a half times the amount of work that the glaze kiln can fire. The firing takes about 10 hours to complete the cycle and about two days to cool down. Once it has been emptied the work is placed in the glaze room ready for you to decorate! Step Six – Glazing Decorating your work with colour can be a lot of fun – and time consuming! There are three main options for surface treatment at this stage: Oxide Washes Underglazes Glazes Washes and underglazes do not “glaze” the work – It will still need a layer of glaze to fully seal the clay (washes don’t need glaze on surfaces not designed for food or liquid as they can gloss up a little on their own). Underglazes are stable colourants that turn out pretty much how they look in the jar. They can be mixed with each other to form other colours and can be used like water colours to paint onto your work. Mostly they should have a clear glaze on top to seal them. Oxides are a different species – the pink oxide (cobalt) wash turns out bright blue for instance. They don’t always need a glaze on top, and some glazes can change the colour of the wash! The glazes need no other “glaze” on top! Be careful of unknown glaze interactions – you can put any combination of glaze in a bowl or on a plate, but only a single glaze on the outside of any vertical surface! Glazes are a chemical reaction under heat. We don’t know the exact chemicals in the Mayco glazes we use. I can guess by the way they interact with each other, however, on the whole, you need to test every idea you have, and not run the test on a vertical surface! Simply put, glaze is a layer of glass like substance that bonds with the clay underneath. Clay is made of silica, alumina and water. Glaze is made of mostly silica. Silica has a melting point of 1700°C and we fire to 1240°C. The silica requires a “flux” to help it melt at the lower temperature. Fluxes can be all sorts of chemicals – a common one is calcium – calcium has a melting point of 2500°C, however, together they both melt at a much lower temperature! Colourants are metal oxides like cobalt (blue), chrome (green through black), copper (green, blue, even red!), manganese (black, purple and pink) iron (red brown), etc. Different chemicals in the glaze can have dramatic effects. for example, barium carbonate (which we don’t use) turns manganese bright pink! Other elements can turn manganese dioxide brown, blue, purple and reddish brown. Manganese dioxide is a flux in and of itself as well. So, glazes that get their black and purple colours, often interact with other glazes and RUN! Our mirror black is a good example – it mixes really well with many glazes because it fluxes them – causes them to melt faster. It will also bring out many beautiful colours in the glazes because it’s black colouring most definitely comes from manganese dioxide! Glaze chemistry is a whole subject on it’s own! We use commercial Mayco glazes on purpose – for their huge range of colour possibilities, stability, cool interactions, artistic freedom with the ability to easily brush the glazes on and ease of use. We currently have almost 50 glazes on hand! A major project is to test the interactions of all glazes with each other. That is 2,500 test tiles!!!! I’m going to make the wall behind the wheels the feature wall of pretty colours! Step Seven – Glaze (Gloss or sometimes called “Glost”) Firing Most of the time this is the final stage of making your creation (but not always!) The glaze kiln goes to 1240°C. This is called cone 6, or midrange. It is the low end of stoneware temperatures. Stoneware clays and glazes are typically fired at cone 8 – 10, that is 1260 – 1290°C. The energy requirement to go from 1240°C to 1280°C is almost a 30% more! Our clay is formulated to vitrify (mature, turn “glass-like”) at 1240°, as are our glazes. A glaze kiln take around 12 hours to reach temperature and two to three days to cool down. Sometimes a third firing process is required – this is for decoration that is added to work after the glaze firing. For example – adding precious metals and lustres. this firing temperature is usually around 600 – 800°C depending upon the techniques being used. There are many students interested in gold and silver trims – we will be doing this third type of firing soon! After firing your work will be in the student finished work shelves. Remember to pay for it before you head out the door! There is a small extra charge for using porcelain clay (it’s more than twice the price of regular clay), and for any third firing process! Once your work has been fired it can not turn back into clay for millennia – so don’t fire it if you don’t like it! Put it in the bucket for recycling. https://firebirdstudios.com.au/the-process-of-making-pottery/Ceramics have evolved over thousands of years.White earthenware dinner plate. Crazing evident all over.Backstamped ‘Made in England S LTD’flagstaff hill, warrnambool, shipwrecked-coast, flagstaff-hill, flagstaff-hill-maritime-museum, maritime-museum, shipwreck-coast, flagstaff-hill-maritime-village, ceramics, tableware -
 Flagstaff Hill Maritime Museum and Village
Domestic object - Plate, Johnson Bros
The Process of Making Pottery Decorating, Firing, Glazing, Making, Technical There is a rhythm and flow to clay. It can’t be done all at once! Even the making process! It can take weeks to get everything done, especially if you can only work on your pottery once a week! Even though we have three hour classes, it’s often just not enough time! Here is an overview of some of the processes so you have a bit more grasp on some of the technical stuff! Step One – Design There are SO many ideas out there for making stuff in clay! From delicate porcelain jewellery, through to heavy sculptural work and everything in between. Deciding your direction is sometimes not that easy – when you first start, try everything, you will naturally gravitate to the style that you enjoy! The options and variations are endless and can get a wee bit overwhelming too! Check in with me before you start to ensure your ideas will work, what order you might do things, how you could achieve the look you are seeking and any other technical data required! Step Two – Making Clay is thixotropic. This means that as you work with it, the clay first gets sloppier and wetter, before is begins to dry in the atmosphere. For most things, you simply can’t do all parts of the project at once. An example of work order might look like: Get last weeks work out from the shelves Prepare clay for today’s work – roll your clay, prepare balls for throwing, make the first stage of a pinch pot) Clean up last week’s work and put it on the shelf for bisque firing Check that you have any glazing to do – and do enough of it that you will have time to finish your main project Do the next step of your next project – there might be a further step that can’t be complete immediately, in that case, wrap your work well and put onto the shelves. Letting your work rest for a while can really help keep your work clean and professional looking. Many things require bagging under plastic to keep it ready for work the next week – put your name on the outside of the bag so you can find your work easily. We have stickers and markers. Consider how you want to decorate your work – coloured slip can be applied at a fairly wet stage (remembering that it will make your work even wetter!). Trying to apply slip to dry clay won’t work! If you want to do sgraffito – you will need to keep the work leather hard (a state of dryness where you can still work the clay with a little effort and a little water and care). Step Three – Drying Most of the time your work can go into the rack uncovered to let it dry out for the following week. If you want to continue forming or shaping you will need to double bag your work – put your work on a suitable sized bat and put the bat in a bag so the base of the bag is under the bat, then put another bag over the top of the work and tuck the top of the bag under the bat. If you want to trim (or turn) your thrown work the following week, it should also be double bagged. If your work is large, delicate, or of uneven thicknesses, you should lightly cover your work for drying. When considering the drying process, bare in mind the weather, humidity and wind! The hotter and dryer, the faster things dry and work can dry unevenly in the shelves – this can lead to cracking – another time to lightly cover your work for drying. Step Four – Trimming and Cleaning Up Your work is dry! It is called greenware now and it is at it’s most fragile! Handle everything with two hands. I often refer to soft hands – keep everything gentle and with your fingers spread as much as possible. Try to not pick up things like plates too much, and always with both hands! Before your work can be bisque fired it should be “cleaned up”. You work won’t go into the kiln if it has sharp edges – when glazed, sharp edges turn into razor blades! Use a piece of fly wire to rub the work all over – this will scratch a little so be light handed. Use a knife or metal kidney to scrape any areas that require a bit more dynamic treatment than the fly wire offers! Finally, a very light wipe over with a slightly damp sponge can help soften and soothe all of your edges and dags! Trimming thrown work: If you are planning to trim (or turn) your thrown work (and you should be), make sure you bag it well – your work should be leather hard to almost dry for easiest trimming. Use this step to finish the work completely – use a metal kidney to polish the surface, or a slightly damp sponge to give a freshly thrown look. Wipe the sponge around the rim after trimming, and check the inside of the pot for dags! Trimming slip cast work: Usually I will trim the rims of your work on the wheel the following day to make that stage easier, however you will still need to check your work for lumps and bumps. Last but not least – check that your name is still clearly on the bottom of your work. Step Five – Bisque Firing When the work is completely dry it can go into the bisque kiln. The bisque kiln is fired to 1000°C. This process burns off the water in the clay as well as some of the chemically bound water. The structure of the clay is not altered that much at this temperature. Inside the bisque kiln, the work is stacked a little, small bowl inside a larger bowl and onto a heavy plate. Smaller items like decorations or drink coasters might get stacked several high. Consideration is paid to the weight of the stack and shape of the work. A bisque kiln can fire about one and a half times the amount of work that the glaze kiln can fire. The firing takes about 10 hours to complete the cycle and about two days to cool down. Once it has been emptied the work is placed in the glaze room ready for you to decorate! Step Six – Glazing Decorating your work with colour can be a lot of fun – and time consuming! There are three main options for surface treatment at this stage: Oxide Washes Underglazes Glazes Washes and underglazes do not “glaze” the work – It will still need a layer of glaze to fully seal the clay (washes don’t need glaze on surfaces not designed for food or liquid as they can gloss up a little on their own). Underglazes are stable colourants that turn out pretty much how they look in the jar. They can be mixed with each other to form other colours and can be used like water colours to paint onto your work. Mostly they should have a clear glaze on top to seal them. Oxides are a different species – the pink oxide (cobalt) wash turns out bright blue for instance. They don’t always need a glaze on top, and some glazes can change the colour of the wash! The glazes need no other “glaze” on top! Be careful of unknown glaze interactions – you can put any combination of glaze in a bowl or on a plate, but only a single glaze on the outside of any vertical surface! Glazes are a chemical reaction under heat. We don’t know the exact chemicals in the Mayco glazes we use. I can guess by the way they interact with each other, however, on the whole, you need to test every idea you have, and not run the test on a vertical surface! Simply put, glaze is a layer of glass like substance that bonds with the clay underneath. Clay is made of silica, alumina and water. Glaze is made of mostly silica. Silica has a melting point of 1700°C and we fire to 1240°C. The silica requires a “flux” to help it melt at the lower temperature. Fluxes can be all sorts of chemicals – a common one is calcium – calcium has a melting point of 2500°C, however, together they both melt at a much lower temperature! Colourants are metal oxides like cobalt (blue), chrome (green through black), copper (green, blue, even red!), manganese (black, purple and pink) iron (red brown), etc. Different chemicals in the glaze can have dramatic effects. for example, barium carbonate (which we don’t use) turns manganese bright pink! Other elements can turn manganese dioxide brown, blue, purple and reddish brown. Manganese dioxide is a flux in and of itself as well. So, glazes that get their black and purple colours, often interact with other glazes and RUN! Our mirror black is a good example – it mixes really well with many glazes because it fluxes them – causes them to melt faster. It will also bring out many beautiful colours in the glazes because it’s black colouring most definitely comes from manganese dioxide! Glaze chemistry is a whole subject on it’s own! We use commercial Mayco glazes on purpose – for their huge range of colour possibilities, stability, cool interactions, artistic freedom with the ability to easily brush the glazes on and ease of use. We currently have almost 50 glazes on hand! A major project is to test the interactions of all glazes with each other. That is 2,500 test tiles!!!! I’m going to make the wall behind the wheels the feature wall of pretty colours! Step Seven – Glaze (Gloss or sometimes called “Glost”) Firing Most of the time this is the final stage of making your creation (but not always!) The glaze kiln goes to 1240°C. This is called cone 6, or midrange. It is the low end of stoneware temperatures. Stoneware clays and glazes are typically fired at cone 8 – 10, that is 1260 – 1290°C. The energy requirement to go from 1240°C to 1280°C is almost a 30% more! Our clay is formulated to vitrify (mature, turn “glass-like”) at 1240°, as are our glazes. A glaze kiln take around 12 hours to reach temperature and two to three days to cool down. Sometimes a third firing process is required – this is for decoration that is added to work after the glaze firing. For example – adding precious metals and lustres. this firing temperature is usually around 600 – 800°C depending upon the techniques being used. There are many students interested in gold and silver trims – we will be doing this third type of firing soon! After firing your work will be in the student finished work shelves. Remember to pay for it before you head out the door! There is a small extra charge for using porcelain clay (it’s more than twice the price of regular clay), and for any third firing process! Once your work has been fired it can not turn back into clay for millennia – so don’t fire it if you don’t like it! Put it in the bucket for recycling. https://firebirdstudios.com.au/the-process-of-making-pottery/Ceramics have evolved over thousands of years.A white earthenware side plate with a gadroon edge. Has water marks and chips on front.‘Johnson Bros England Reg No 15587’flagstaff hill, warrnambool, shipwrecked-coast, flagstaff-hill, flagstaff-hill-maritime-museum, maritime-museum, shipwreck-coast, flagstaff-hill-maritime-village, johnson bros, ceramics, tableware -
 Flagstaff Hill Maritime Museum and Village
Domestic object - Plate, Alfred Meakin
The Process of Making Pottery Decorating, Firing, Glazing, Making, Technical There is a rhythm and flow to clay. It can’t be done all at once! Even the making process! It can take weeks to get everything done, especially if you can only work on your pottery once a week! Even though we have three hour classes, it’s often just not enough time! Here is an overview of some of the processes so you have a bit more grasp on some of the technical stuff! Step One – Design There are SO many ideas out there for making stuff in clay! From delicate porcelain jewellery, through to heavy sculptural work and everything in between. Deciding your direction is sometimes not that easy – when you first start, try everything, you will naturally gravitate to the style that you enjoy! The options and variations are endless and can get a wee bit overwhelming too! Check in with me before you start to ensure your ideas will work, what order you might do things, how you could achieve the look you are seeking and any other technical data required! Step Two – Making Clay is thixotropic. This means that as you work with it, the clay first gets sloppier and wetter, before is begins to dry in the atmosphere. For most things, you simply can’t do all parts of the project at once. An example of work order might look like: Get last weeks work out from the shelves Prepare clay for today’s work – roll your clay, prepare balls for throwing, make the first stage of a pinch pot) Clean up last week’s work and put it on the shelf for bisque firing Check that you have any glazing to do – and do enough of it that you will have time to finish your main project Do the next step of your next project – there might be a further step that can’t be complete immediately, in that case, wrap your work well and put onto the shelves. Letting your work rest for a while can really help keep your work clean and professional looking. Many things require bagging under plastic to keep it ready for work the next week – put your name on the outside of the bag so you can find your work easily. We have stickers and markers. Consider how you want to decorate your work – coloured slip can be applied at a fairly wet stage (remembering that it will make your work even wetter!). Trying to apply slip to dry clay won’t work! If you want to do sgraffito – you will need to keep the work leather hard (a state of dryness where you can still work the clay with a little effort and a little water and care). Step Three – Drying Most of the time your work can go into the rack uncovered to let it dry out for the following week. If you want to continue forming or shaping you will need to double bag your work – put your work on a suitable sized bat and put the bat in a bag so the base of the bag is under the bat, then put another bag over the top of the work and tuck the top of the bag under the bat. If you want to trim (or turn) your thrown work the following week, it should also be double bagged. If your work is large, delicate, or of uneven thicknesses, you should lightly cover your work for drying. When considering the drying process, bare in mind the weather, humidity and wind! The hotter and dryer, the faster things dry and work can dry unevenly in the shelves – this can lead to cracking – another time to lightly cover your work for drying. Step Four – Trimming and Cleaning Up Your work is dry! It is called greenware now and it is at it’s most fragile! Handle everything with two hands. I often refer to soft hands – keep everything gentle and with your fingers spread as much as possible. Try to not pick up things like plates too much, and always with both hands! Before your work can be bisque fired it should be “cleaned up”. You work won’t go into the kiln if it has sharp edges – when glazed, sharp edges turn into razor blades! Use a piece of fly wire to rub the work all over – this will scratch a little so be light handed. Use a knife or metal kidney to scrape any areas that require a bit more dynamic treatment than the fly wire offers! Finally, a very light wipe over with a slightly damp sponge can help soften and soothe all of your edges and dags! Trimming thrown work: If you are planning to trim (or turn) your thrown work (and you should be), make sure you bag it well – your work should be leather hard to almost dry for easiest trimming. Use this step to finish the work completely – use a metal kidney to polish the surface, or a slightly damp sponge to give a freshly thrown look. Wipe the sponge around the rim after trimming, and check the inside of the pot for dags! Trimming slip cast work: Usually I will trim the rims of your work on the wheel the following day to make that stage easier, however you will still need to check your work for lumps and bumps. Last but not least – check that your name is still clearly on the bottom of your work. Step Five – Bisque Firing When the work is completely dry it can go into the bisque kiln. The bisque kiln is fired to 1000°C. This process burns off the water in the clay as well as some of the chemically bound water. The structure of the clay is not altered that much at this temperature. Inside the bisque kiln, the work is stacked a little, small bowl inside a larger bowl and onto a heavy plate. Smaller items like decorations or drink coasters might get stacked several high. Consideration is paid to the weight of the stack and shape of the work. A bisque kiln can fire about one and a half times the amount of work that the glaze kiln can fire. The firing takes about 10 hours to complete the cycle and about two days to cool down. Once it has been emptied the work is placed in the glaze room ready for you to decorate! Step Six – Glazing Decorating your work with colour can be a lot of fun – and time consuming! There are three main options for surface treatment at this stage: Oxide Washes Underglazes Glazes Washes and underglazes do not “glaze” the work – It will still need a layer of glaze to fully seal the clay (washes don’t need glaze on surfaces not designed for food or liquid as they can gloss up a little on their own). Underglazes are stable colourants that turn out pretty much how they look in the jar. They can be mixed with each other to form other colours and can be used like water colours to paint onto your work. Mostly they should have a clear glaze on top to seal them. Oxides are a different species – the pink oxide (cobalt) wash turns out bright blue for instance. They don’t always need a glaze on top, and some glazes can change the colour of the wash! The glazes need no other “glaze” on top! Be careful of unknown glaze interactions – you can put any combination of glaze in a bowl or on a plate, but only a single glaze on the outside of any vertical surface! Glazes are a chemical reaction under heat. We don’t know the exact chemicals in the Mayco glazes we use. I can guess by the way they interact with each other, however, on the whole, you need to test every idea you have, and not run the test on a vertical surface! Simply put, glaze is a layer of glass like substance that bonds with the clay underneath. Clay is made of silica, alumina and water. Glaze is made of mostly silica. Silica has a melting point of 1700°C and we fire to 1240°C. The silica requires a “flux” to help it melt at the lower temperature. Fluxes can be all sorts of chemicals – a common one is calcium – calcium has a melting point of 2500°C, however, together they both melt at a much lower temperature! Colourants are metal oxides like cobalt (blue), chrome (green through black), copper (green, blue, even red!), manganese (black, purple and pink) iron (red brown), etc. Different chemicals in the glaze can have dramatic effects. for example, barium carbonate (which we don’t use) turns manganese bright pink! Other elements can turn manganese dioxide brown, blue, purple and reddish brown. Manganese dioxide is a flux in and of itself as well. So, glazes that get their black and purple colours, often interact with other glazes and RUN! Our mirror black is a good example – it mixes really well with many glazes because it fluxes them – causes them to melt faster. It will also bring out many beautiful colours in the glazes because it’s black colouring most definitely comes from manganese dioxide! Glaze chemistry is a whole subject on it’s own! We use commercial Mayco glazes on purpose – for their huge range of colour possibilities, stability, cool interactions, artistic freedom with the ability to easily brush the glazes on and ease of use. We currently have almost 50 glazes on hand! A major project is to test the interactions of all glazes with each other. That is 2,500 test tiles!!!! I’m going to make the wall behind the wheels the feature wall of pretty colours! Step Seven – Glaze (Gloss or sometimes called “Glost”) Firing Most of the time this is the final stage of making your creation (but not always!) The glaze kiln goes to 1240°C. This is called cone 6, or midrange. It is the low end of stoneware temperatures. Stoneware clays and glazes are typically fired at cone 8 – 10, that is 1260 – 1290°C. The energy requirement to go from 1240°C to 1280°C is almost a 30% more! Our clay is formulated to vitrify (mature, turn “glass-like”) at 1240°, as are our glazes. A glaze kiln take around 12 hours to reach temperature and two to three days to cool down. Sometimes a third firing process is required – this is for decoration that is added to work after the glaze firing. For example – adding precious metals and lustres. this firing temperature is usually around 600 – 800°C depending upon the techniques being used. There are many students interested in gold and silver trims – we will be doing this third type of firing soon! After firing your work will be in the student finished work shelves. Remember to pay for it before you head out the door! There is a small extra charge for using porcelain clay (it’s more than twice the price of regular clay), and for any third firing process! Once your work has been fired it can not turn back into clay for millennia – so don’t fire it if you don’t like it! Put it in the bucket for recycling. https://firebirdstudios.com.au/the-process-of-making-pottery/Ceramics have evolved over thousands of years.Earthenware dessert plate, cream colour. Made by Alfred Meakin, England. Backstamped ‘Alfred Meakin England’. flagstaff hill, warrnambool, shipwrecked-coast, flagstaff-hill, flagstaff-hill-maritime-museum, maritime-museum, shipwreck-coast, flagstaff-hill-maritime-village, alfred meakin, ceramics, earthenware, kitchenware -
 Flagstaff Hill Maritime Museum and Village
Domestic object - Jug
The Process of Making Pottery Decorating, Firing, Glazing, Making, Technical There is a rhythm and flow to clay. It can’t be done all at once! Even the making process! It can take weeks to get everything done, especially if you can only work on your pottery once a week! Even though we have three hour classes, it’s often just not enough time! Here is an overview of some of the processes so you have a bit more grasp on some of the technical stuff! Step One – Design There are SO many ideas out there for making stuff in clay! From delicate porcelain jewellery, through to heavy sculptural work and everything in between. Deciding your direction is sometimes not that easy – when you first start, try everything, you will naturally gravitate to the style that you enjoy! The options and variations are endless and can get a wee bit overwhelming too! Check in with me before you start to ensure your ideas will work, what order you might do things, how you could achieve the look you are seeking and any other technical data required! Step Two – Making Clay is thixotropic. This means that as you work with it, the clay first gets sloppier and wetter, before is begins to dry in the atmosphere. For most things, you simply can’t do all parts of the project at once. An example of work order might look like: Get last weeks work out from the shelves Prepare clay for today’s work – roll your clay, prepare balls for throwing, make the first stage of a pinch pot) Clean up last week’s work and put it on the shelf for bisque firing Check that you have any glazing to do – and do enough of it that you will have time to finish your main project Do the next step of your next project – there might be a further step that can’t be complete immediately, in that case, wrap your work well and put onto the shelves. Letting your work rest for a while can really help keep your work clean and professional looking. Many things require bagging under plastic to keep it ready for work the next week – put your name on the outside of the bag so you can find your work easily. We have stickers and markers. Consider how you want to decorate your work – coloured slip can be applied at a fairly wet stage (remembering that it will make your work even wetter!). Trying to apply slip to dry clay won’t work! If you want to do sgraffito – you will need to keep the work leather hard (a state of dryness where you can still work the clay with a little effort and a little water and care). Step Three – Drying Most of the time your work can go into the rack uncovered to let it dry out for the following week. If you want to continue forming or shaping you will need to double bag your work – put your work on a suitable sized bat and put the bat in a bag so the base of the bag is under the bat, then put another bag over the top of the work and tuck the top of the bag under the bat. If you want to trim (or turn) your thrown work the following week, it should also be double bagged. If your work is large, delicate, or of uneven thicknesses, you should lightly cover your work for drying. When considering the drying process, bare in mind the weather, humidity and wind! The hotter and dryer, the faster things dry and work can dry unevenly in the shelves – this can lead to cracking – another time to lightly cover your work for drying. Step Four – Trimming and Cleaning Up Your work is dry! It is called greenware now and it is at it’s most fragile! Handle everything with two hands. I often refer to soft hands – keep everything gentle and with your fingers spread as much as possible. Try to not pick up things like plates too much, and always with both hands! Before your work can be bisque fired it should be “cleaned up”. You work won’t go into the kiln if it has sharp edges – when glazed, sharp edges turn into razor blades! Use a piece of fly wire to rub the work all over – this will scratch a little so be light handed. Use a knife or metal kidney to scrape any areas that require a bit more dynamic treatment than the fly wire offers! Finally, a very light wipe over with a slightly damp sponge can help soften and soothe all of your edges and dags! Trimming thrown work: If you are planning to trim (or turn) your thrown work (and you should be), make sure you bag it well – your work should be leather hard to almost dry for easiest trimming. Use this step to finish the work completely – use a metal kidney to polish the surface, or a slightly damp sponge to give a freshly thrown look. Wipe the sponge around the rim after trimming, and check the inside of the pot for dags! Trimming slip cast work: Usually I will trim the rims of your work on the wheel the following day to make that stage easier, however you will still need to check your work for lumps and bumps. Last but not least – check that your name is still clearly on the bottom of your work. Step Five – Bisque Firing When the work is completely dry it can go into the bisque kiln. The bisque kiln is fired to 1000°C. This process burns off the water in the clay as well as some of the chemically bound water. The structure of the clay is not altered that much at this temperature. Inside the bisque kiln, the work is stacked a little, small bowl inside a larger bowl and onto a heavy plate. Smaller items like decorations or drink coasters might get stacked several high. Consideration is paid to the weight of the stack and shape of the work. A bisque kiln can fire about one and a half times the amount of work that the glaze kiln can fire. The firing takes about 10 hours to complete the cycle and about two days to cool down. Once it has been emptied the work is placed in the glaze room ready for you to decorate! Step Six – Glazing Decorating your work with colour can be a lot of fun – and time consuming! There are three main options for surface treatment at this stage: Oxide Washes Underglazes Glazes Washes and underglazes do not “glaze” the work – It will still need a layer of glaze to fully seal the clay (washes don’t need glaze on surfaces not designed for food or liquid as they can gloss up a little on their own). Underglazes are stable colourants that turn out pretty much how they look in the jar. They can be mixed with each other to form other colours and can be used like water colours to paint onto your work. Mostly they should have a clear glaze on top to seal them. Oxides are a different species – the pink oxide (cobalt) wash turns out bright blue for instance. They don’t always need a glaze on top, and some glazes can change the colour of the wash! The glazes need no other “glaze” on top! Be careful of unknown glaze interactions – you can put any combination of glaze in a bowl or on a plate, but only a single glaze on the outside of any vertical surface! Glazes are a chemical reaction under heat. We don’t know the exact chemicals in the Mayco glazes we use. I can guess by the way they interact with each other, however, on the whole, you need to test every idea you have, and not run the test on a vertical surface! Simply put, glaze is a layer of glass like substance that bonds with the clay underneath. Clay is made of silica, alumina and water. Glaze is made of mostly silica. Silica has a melting point of 1700°C and we fire to 1240°C. The silica requires a “flux” to help it melt at the lower temperature. Fluxes can be all sorts of chemicals – a common one is calcium – calcium has a melting point of 2500°C, however, together they both melt at a much lower temperature! Colourants are metal oxides like cobalt (blue), chrome (green through black), copper (green, blue, even red!), manganese (black, purple and pink) iron (red brown), etc. Different chemicals in the glaze can have dramatic effects. for example, barium carbonate (which we don’t use) turns manganese bright pink! Other elements can turn manganese dioxide brown, blue, purple and reddish brown. Manganese dioxide is a flux in and of itself as well. So, glazes that get their black and purple colours, often interact with other glazes and RUN! Our mirror black is a good example – it mixes really well with many glazes because it fluxes them – causes them to melt faster. It will also bring out many beautiful colours in the glazes because it’s black colouring most definitely comes from manganese dioxide! Glaze chemistry is a whole subject on it’s own! We use commercial Mayco glazes on purpose – for their huge range of colour possibilities, stability, cool interactions, artistic freedom with the ability to easily brush the glazes on and ease of use. We currently have almost 50 glazes on hand! A major project is to test the interactions of all glazes with each other. That is 2,500 test tiles!!!! I’m going to make the wall behind the wheels the feature wall of pretty colours! Step Seven – Glaze (Gloss or sometimes called “Glost”) Firing Most of the time this is the final stage of making your creation (but not always!) The glaze kiln goes to 1240°C. This is called cone 6, or midrange. It is the low end of stoneware temperatures. Stoneware clays and glazes are typically fired at cone 8 – 10, that is 1260 – 1290°C. The energy requirement to go from 1240°C to 1280°C is almost a 30% more! Our clay is formulated to vitrify (mature, turn “glass-like”) at 1240°, as are our glazes. A glaze kiln take around 12 hours to reach temperature and two to three days to cool down. Sometimes a third firing process is required – this is for decoration that is added to work after the glaze firing. For example – adding precious metals and lustres. this firing temperature is usually around 600 – 800°C depending upon the techniques being used. There are many students interested in gold and silver trims – we will be doing this third type of firing soon! After firing your work will be in the student finished work shelves. Remember to pay for it before you head out the door! There is a small extra charge for using porcelain clay (it’s more than twice the price of regular clay), and for any third firing process! Once your work has been fired it can not turn back into clay for millennia – so don’t fire it if you don’t like it! Put it in the bucket for recycling. https://firebirdstudios.com.au/the-process-of-making-pottery/The form of the jug has been in use for many centuries.Stoneware jug. Two tone brown glaze with pierced lip behind spout. Spout chipped.None.flagstaff hill, warrnambool, shipwrecked-coast, flagstaff-hill, flagstaff-hill-maritime-museum, maritime-museum, shipwreck-coast, flagstaff-hill-maritime-village, jug, ceramic jug -
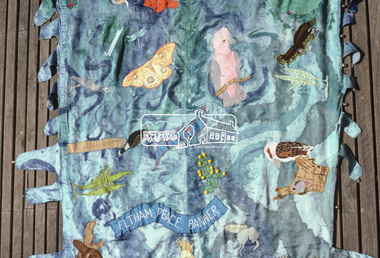 Eltham District Historical Society Inc
Photograph, "As we are" Community Banner Project, c.Oct. 1986
River of Life and Hiroshima Day Banners The River of Life and Hiroshima Day banners were specific peace projects initiated by the CAO and taken up by Eltham Living & Learning Centre and funded by the Victorian Peace Secretariat for IYP. The project was transferred from the Centre to Tracey as part of her artist in the community portfolio. Tracey, as CAO, employed Jacky Talbot, who was not familiar with Eltham but was an experienced community arts worker personally interested in textiles and peace. The project was publicised and a peace banner group formed. Only two of the women knew each other. They had come together from a need to do something for peace, rather than to learn about textiles. Jacky Talbot shared Elizabeth Savage's approach to the banner. She was not 'a peace-expert' and did not want to be seen as such by the group. Like Elizabeth Savage she wanted to encourage an expression of peace as it was perceived by the group. Jacky showed slides of peace images and peace banners. Textile workshops were interspersed with discussions about peace, one of which was led by a local People for Nuclear Disarmament member. The idea for the banner occurred during one of these discussions. One of the women began to talk about feeling like a drop of water lost in the river of life - yet rivers were made of countless droplets which, when joined together, became the powerful force of the river. This group quickly established a commitment, not only to peace, but to the group itself, and this has continued beyond the project. The women, as is the case with many of the groups in the Banner Project, were really surprised at their increasing textile skills and self-confidence. But they were more concerned with their commitment to peace. Each is continuing to find ways in which she can continue to work for peace, and activities are undertaken on a group basis as well. The decision to participate in the group based activities is up to each woman as the time arises. The banner and some members of the group have now participated in the Peace Boogie at the World Trade Centre, the Peace Arts Conference organised by Art Action for Peace, Melbourne City Council's Peace Vigil weekend, Women's Precious Things for Peace Day exhibition and the banner was ' hung at the Footscray Community Arts Centre when the other textile peace mural Jacky co-ordinated was opened. One woman wrote a poem about the project and peace; others have sent telegrams and letters to politicians about peace. A great deal of information about peace and other activities, articles, books, media programs were circulated amongst the group. The Hiroshima Day Banner was made by Jacky Talbot as part of the project. The women wanted to do something for Hiroshima Day and suggested that a workshop be set aside to make a banner. The artist was concerned about the remaining time scheduled for the project and spent several days "whipping" up the banner herself. For the artist this banner was to prove quite significant. The women hung it at the Community Notice Board on Hiroshima Day and were photographed by the local newspaper publicising the group and drawing wider community attention to the remembrance of the day. Although no new members joined the group from this activity, the artist felt that she was more fully accepted by the group afterwards. This banner has initiated a small group of women committed to peace. The artist has also continued to liaise and meet with the women as time permits. Future group plans include: making kimonos to wear when carrying the banner, participating in the Palm Sunday March, an observance of Hiroshima Day activity, which is yet to be decided, establishing contact with a sister-town in USA and USSR and supporting Eltham Council's stance as a Nuclear Free Zone. (Source: The banner habits of the Eltham tribes : Eltham Shire "as we are" Community Banner Project report / by Jacky Talbot, Shire of Eltham, Feb. 1987, pp43-46)35mm colour positive transparency (1 of 2) Mount - Kodak KodachromeProcess Date OCT 86Mbanner project, community banner project, tracey naughton, eltham living and learning centre, eltham peace banner, jacky talbot, river of life banner -
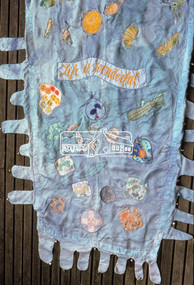 Eltham District Historical Society Inc
Photograph, "As we are" Community Banner Project, c.Oct. 1986
River of Life and Hiroshima Day Banners The River of Life and Hiroshima Day banners were specific peace projects initiated by the CAO and taken up by Eltham Living & Learning Centre and funded by the Victorian Peace Secretariat for IYP. The project was transferred from the Centre to Tracey as part of her artist in the community portfolio. Tracey, as CAO, employed Jacky Talbot, who was not familiar with Eltham but was an experienced community arts worker personally interested in textiles and peace. The project was publicised and a peace banner group formed. Only two of the women knew each other. They had come together from a need to do something for peace, rather than to learn about textiles. Jacky Talbot shared Elizabeth Savage's approach to the banner. She was not 'a peace-expert' and did not want to be seen as such by the group. Like Elizabeth Savage she wanted to encourage an expression of peace as it was perceived by the group. Jacky showed slides of peace images and peace banners. Textile workshops were interspersed with discussions about peace, one of which was led by a local People for Nuclear Disarmament member. The idea for the banner occurred during one of these discussions. One of the women began to talk about feeling like a drop of water lost in the river of life - yet rivers were made of countless droplets which, when joined together, became the powerful force of the river. This group quickly established a commitment, not only to peace, but to the group itself, and this has continued beyond the project. The women, as is the case with many of the groups in the Banner Project, were really surprised at their increasing textile skills and self-confidence. But they were more concerned with their commitment to peace. Each is continuing to find ways in which she can continue to work for peace, and activities are undertaken on a group basis as well. The decision to participate in the group based activities is up to each woman as the time arises. The banner and some members of the group have now participated in the Peace Boogie at the World Trade Centre, the Peace Arts Conference organised by Art Action for Peace, Melbourne City Council's Peace Vigil weekend, Women's Precious Things for Peace Day exhibition and the banner was ' hung at the Footscray Community Arts Centre when the other textile peace mural Jacky co-ordinated was opened. One woman wrote a poem about the project and peace; others have sent telegrams and letters to politicians about peace. A great deal of information about peace and other activities, articles, books, media programs were circulated amongst the group. The Hiroshima Day Banner was made by Jacky Talbot as part of the project. The women wanted to do something for Hiroshima Day and suggested that a workshop be set aside to make a banner. The artist was concerned about the remaining time scheduled for the project and spent several days "whipping" up the banner herself. For the artist this banner was to prove quite significant. The women hung it at the Community Notice Board on Hiroshima Day and were photographed by the local newspaper publicising the group and drawing wider community attention to the remembrance of the day. Although no new members joined the group from this activity, the artist felt that she was more fully accepted by the group afterwards. This banner has initiated a small group of women committed to peace. The artist has also continued to liaise and meet with the women as time permits. Future group plans include: making kimonos to wear when carrying the banner, participating in the Palm Sunday March, an observance of Hiroshima Day activity, which is yet to be decided, establishing contact with a sister-town in USA and USSR and supporting Eltham Council's stance as a Nuclear Free Zone. (Source: The banner habits of the Eltham tribes : Eltham Shire "as we are" Community Banner Project report / by Jacky Talbot, Shire of Eltham, Feb. 1987, pp43-46)35mm colour positive transparency Mount - Black and Whitebanner project, community banner project, tracey naughton, eltham living and learning centre, eltham peace banner, jacky talbot, river of life banner -
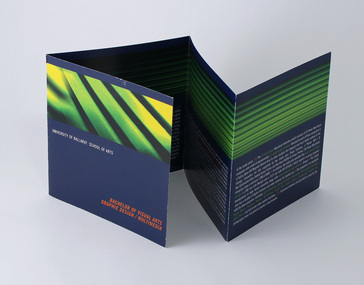 Federation University Historical Collection
Pamphlet - Promotional brochure, Bachelor of Visual Arts, Graphic Design/Multimedia, c1999
Promoting the Graphic Design/Multimedia program being offered by the University of Ballarat at the Mt Helen Campus. Promoted course as "one of the smallest and arguably the best three year programs of its kind in Australia and the South Pacific region." The brochure lists student awards received including Platinum and Gold in the AGFA International Young Designer Contest, 1999; two meritorious awards in The Art Directors Club Student Awards, New York, USA 1999; Graphis New Talent 1999; two Gold in Souther Cross Packaging Awards, 1998. At time of publication, the School of Arts, Visual Arts reportedly had 210 students with majors in Graphic Design/Multimedia, Ceramics/3D, Painting, Drawing, and Multidiscipline. Minors studies included Printmaking, Photography, 3D, 2D, and Graphic Communication. ___ Course aimed to train "independent, flexible thinkers". The course promised to "Promote creativity, originality and imaginative thinking; Develop self-directed learners, displaying initiative in the formation of ideas and the confidence to construct personal responses; Develop appropriate conceptual, technical and professional skills; Develop the student's critical process: ability to undertake research, and to make informed decisions; Clarify thinking, concepts and understanding and deep knowledge, attitudes and skills enabling the designer to respond to community needs." Studio and working environment described as "one open space with working facilities for approximately 75 students across 3 year levels. The area is divided up into work stations where 1st, 2nd and 3rd year students intermix, allowing a natural interaction. These workstations are configurations of six, consisting of two students from each year level. This reinforces the area's ongoing development with an open ethos and cross-level delivery and learning. This maximises the use of information in order for it to be applied throughout all levels of the learning process, whilst allowing a natural mentor arrangment to be developed for all first year students, " "The open ethos approach also encourages students and staff to freely express their opinions in relation to design via cross-level critiques, whilst allowing for a liberal arts approach and structure to the development of the creative process." "Emphasis is placed on experimentation, innovation, expression and the development of the individual's design philosophies, concepts and style." Also notes the 24 hour access Macintosh laboratory, with 34 Power Macintosh computers, ratio of one for every 2.5 students. Each with a Fujitsu Dyna Magneto Optical drive for file storage and transport. Two Sharp scanners, Phaser Dye-Sublimation Extra Tabloid colour printer and Ricoh A3 colour printer. Two large format printers. Digital and video cameras. Software: Adobe Photoshop, Illustrator, Acrobat; QuarkXpress; Macromedia Freehand; Pagemaker; Premier; Director; 3D Extreme; Sound Eidt, Shockwave, Infinite 3D and After Effects. Approx 4.5 staff, "all of whom are practicing designers. They have a full understanding of industry requirements and trends which assists in the development of industrial contacts when specialists are required." Prospective students interviewed in late Nov/ early Dec, face to face. Present a "comprehensive folio of work", academic records, references. "Selection is determined by the perceived potential of the student, their motivation and reason for study within the field as well as their previous experience in the Visual Arts. Folio work should be representative of the individual's ideas and abilities. Qualities of importance are: originality, innovation, imagination, experimentation and a competent display of the basic skills associated with visual arts [evidence of drawing skills should be included]." Demonstration of GD/MM computer skills an advantage. Students also asked to bring sketch books. Promotional brochure for prospective students. 8pp Double fold brochureuniversity of ballarat, federation university, graphic design, multimedia, bachelor, degree -
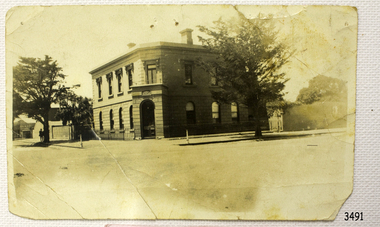 Flagstaff Hill Maritime Museum and Village
Photograph - Building, Bank of Australasia Warrnambool, ca. 1860
This sepia coloured photograph show the image of the former Bank of Australasia in Warrnambool. The two-storey building was built for the bank on the corner of Timor and Kepler Streets and opened there for business in 1860. It is now one of the City's Historic Buildings. The Bank of Australasia was incorporated by Royal Charter of England in March 1834. It came to Australia on 14th December 1835, opening in Sydney. The Acting Superintendent of the Bank of Australasia in Sydney at that time was David Charters McArthur. He was Superintendent from 1867-to 1876. The Melbourne branch of the Bank of Australasia opened on 28th August 1838 in a two-roomed brick cottage on the north side of Little Collins Street. Two huge mastiff dogs were kept in the backyard and let loose at night to guard the bank. The government also provided an armed military sentinel. Due to the bank's rapid growth, a new building for the Melbourne branch was opened in 1840 at 75 Collins Street West. By 1879 the bank had been upgraded to a magnificent two-storey building on the corners of Collins and Queens Streets, with the entry on Collins Street. In 1951 the Bank of Australasia amalgamated with the Union Bank to form the Australia and New Zealand Bank, now known as the ANZ. Then in 1970, the ANZ merged with both the ES&A and the London Bank of Australia to form the ANZ Banking Group Limited. The ANZ Banking Group Ltd kindly donated a variety of historic items from the Bank of Australasia. BANK of AUSTRALASIA, WARRNAMBOOL – In 1854 Warrnambool had two banks, the Union Back and the Bank of Australasia. Later, completely different bank businesses opened; in 1867 the National Bank of Australasia, then in 1875 the Colonial Bank of Australasia. The original Warrnambool branch of the Bank of Australasia was established in July 1854, and operated from a leased cottage on Merri Street, close to Liebig Street. The bank later bought a stone building previously erected by drapers Cramond & Dickson on the corner of Timor and Gibson Streets. Samuel Hannaford was a teller and then Manager at the Warrnambool branch from 1855 to 1856 and the Warrnambool Council chose that bank for its dealings during 1856-57. In 1859 Roberts & Co. was awarded the contract to build the new Bank of Australasia branch for the sum of £3,000. The land was on a sand hill on the northeast corner of Timor and Kepler Streets and had been bought in 1855 from investor James Cust. The new building opened on May 21, 1860. The bank continued to operate there until 1951 when it merged with the Union Bank to form the ANZ Bank, which continued operating from its Liebig Street building. Warrnambool City Council purchased the former Bank of Australasia building in 1971 and renovated it, then on 3rd December 1973 it was officially opened as the Art Gallery by Cr. Harold Stephenson and Gallery Director John Welsh. The Gallery transferred to the purpose-built building in Liebig Street in 1986 and the old bank building is now the Gallery club. Staff at the Bank of Australasia in Warrnambool included the following men but others were also involved: Samuel Hannaford, Teller then Manager from 1855-1856; W H Palmer, Manager from January 1857 until November 1869 when the Teller Basil Spence was promoted to Manager; H B Chomley, Manager from April 1873 and still there in 1886; A Butt, Manager in 1895-1904; J R McCleary Accountant and Acting Manager for 12 months, until 1900; A Kirk, Manager 1904; J Moore, staff until his transfer to Bendigo in December 1908; J S Bath was Manager until 1915; C C Cox, Manager until April 1923; Richard C Stanley, Manager 1923 to April 1928. The photograph is significant historically for its connection with the Bank of Australasia. The early Australian bank was established in 1834 by Royal Charter and opened in Sydney, Australia, in Sydney in 1835. The bank had many Australian offices in November 1877, particularly on the east and south coasts. Victoria had 45 percent of all Offices. The photograph has local historical significance for its association with the Warrnambool Bank of Australasia, which was established early in Warrnambool's history. It was Warrnambool Council’s first bank. The bank continued to operate until the organisation's merger in 1951 when it became the ANZ Bank Group of today. The Bank was an integral part of the growth of local commerce and the community.Black and white (or sepia) rectangular photograph, landscape orientation. Image of a two-storey building on a street corner. It is the former Bank of Australasia, Warrnambool, on the corner of Timor and Kepler Streets that was built in 1860. The reverse has a round, serrated-edged red label with an inscription, covered in opaque tape, plus four lines of handwritten text. There are several pin holes through the photograph.Label with: "AH2 2 / W.BOOL" Writing in pen: "D. K. Frew / --- / ---- / ----"flagstaff hill, warrnambool, shipwrecked coast, flagstaff hill maritime museum, maritime museum, shipwreck coast, flagstaff hill maritime village, great ocean road, bank of australasia, boa, union bank, australia & new zealand bank, anz bank, david charters mcarthur, d c mcarthur, commerce, banking, samuel hannaford, w h palmer, basil spence, h b chomley, a butt, j r mccleary, a kirk, j moore, j s bath, c c cox, richard c stanley, historic building, roberts & co., james cust, bank of australasia warrnambool -
 Flagstaff Hill Maritime Museum and Village
Plaque - Insignia, Bank of Australasia, 16-10-1980
This plaque displays the Bank of Australia's Coat of Arms and is significant because is ts the symbol printed on the Bank Notes of the Bank of Australasia. The bank of Australasia was incorporated by Royal Charter of England in March 1834. It had its Australian beginning on 14th December 1835, opening in Sydney. The Acting Superintendent of the bank at that time was David Charters McArthur. He was Superintendent from 1867-to 1876. The Melbourne branch opened on 28th August 1838 in a two-roomed brick cottage on the north side of Little Collins Street, where two huge mastiff dogs were used at night to guard the bank. The government also provided an armed military sentinel. Due to the bank's rapid growth, a new building for the Melbourne branch was opened in 1840 at 75 Collins Street West. By 1879 the bank had been upgraded to a magnificent two-storey building on the corners of Collins and Queens Streets, with the entry on Collins Street. In 1951 the Bank of Australasia amalgamated with the Union Bank to form the Australia and New Zealand Bank, now known as the ANZ. Then in 1970, the ANZ merged with both the ES&A and the London Bank of Australia to form the ANZ Banking Group Limited. The ANZ Banking Group Ltd kindly donated a variety of historic items from the Bank of Australasia. BANK of AUSTRALASIA, WARRNAMBOOL – In 1854 Warrnambool had two banks, the Union Bank and the Bank of Australasia. Later, completely different bank businesses opened; in 1867 the National Bank of Australasia, then in 1875 the Colonial Bank of Australasia. The original Warrnambool branch of the Bank of Australasia was established in July 1854, and operated from a leased cottage on Merri Street, close to Liebig Street. The bank next bought a stone building previously erected by drapers Cramond & Dickson on the corner of Timor and Gibson Streets. Samuel Hannaford was a teller and then Manager at the Warrnambool branch from 1855 to 1856 and the Warrnambool Council chose that bank for its dealings during 1856-57. In 1859 Roberts & Co. was awarded the contract to build the new Bank of Australasia branch for the sum of £3,000; the firm built the Warrnambool Post Office in 1856 and purchased land in Timor Street in 1858. The land was on a sand hill on the northeast corner of Timor and Kepler Streets and had been bought in 1855 from investor James Cust. The new building opened on May 21, 1860. The bank continued to operate there until 1951 when it merged with the Union Bank to form the ANZ Bank, which continued operating from its Liebig Street building. Warrnambool City Council purchased the former Bank of Australasia building in 1971 and renovated it, then on 3rd December 1973 it was officially opened as the Art Gallery by Cr. Harold Stephenson and Gallery Director John Welsh. The Gallery transferred to the purpose-built building in Liebig Street in 1986 and the old bank building is now the Gallery club. Staff at the Bank of Australasia in Warrnambool included the following men but others were also involved: Samuel Hannaford, Teller then Manager from 1855-1856; Hawkins, Manager in 1856, W H Palmer, Manager from January 1857 until November 1869 when the Teller Basil Spence was promoted to Manager; H B Chomley, Manager from April 1873 and still there in 1886; A Butt, Manager in 1895-1904; J R McCleary Accountant and Acting Manager for 12 months, until 1900; A Kirk, Manager 1904; J Moore, staff until his transfer to Bendigo in December 1908; J S Bath was Manager until 1915; C C Cox, Manager until April 1923; Richard C Stanley, Manager 1923 to April 1928. The plaque with the insignia has significance through its association with the Bank of Australasia. The early Australian bank was established in 1834 by Royal Charter and opened in Sydney, Australia, in Sydney in 1835. The bank had many Australian offices in November 1877, particularly on the east and south coasts. Victoria had 45 per cent of all Offices. The plaque is locally significant for its association with the Warrnambool Bank of Australasia, which was established in 1854. It was Warrnambool Council’s first bank. The bank continued to operate until the organisation's merger in 1951 when it became the ANZ Bank Group today. The Bank was an integral part of the growth of local commerce and the community.Insignia of the Bank of Australasia. Cast metal coat of arms within a gold, shield-shaped border, painted gold and red, with blue, black and white details. Decals in each corner; upper left and lower right have a white sheep suspended by a blue ribbon, upper right and lower left have a 3-masted, square-rigged sailing ship with a black hull and red flags flying on each mast, sailing on waves with storm clouds in the sky. Between the emblems are gold stars.Decals; ships, sheep, starsflagstaff hill, warrnambool, shipwrecked coast, flagstaff hill maritime museum, maritime museum, shipwreck coast, flagstaff hill maritime village, great ocean road, bank of australasia, boa, union bank, australia & new zealand bank, anz bank, david charters mcarthur, d c mcarthur, currency, banknote, commerce, banking, heraldic shield, insignia, samuel hannaford -
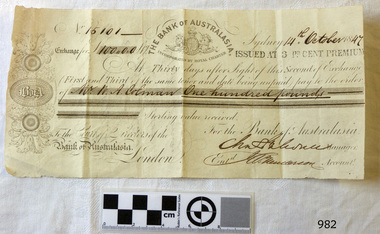 Flagstaff Hill Maritime Museum and Village
Currency - Bank exchange note, Perkins, Bacon and Perch, 14-10--1847
This exchange note was issued by the Bank of Australasia to Mr N A Coleman for one hundred pounds paid n 14th October 1847 at the Sydney branch. The interest rate was three per cent. This exchange note displays the insignia of the Bank of Australasia, which was incorporated by Royal Charter of England in March 1834. The bank began in Australia on 14th December 1835, opening in Sydney. The Acting Superintendent of the bank at that time was David Charters McArthur. He was Superintendent from 1867-to 1876. The Melbourne branch opened on 28th August 1838 in a two-roomed brick cottage on the north side of Little Collins Street, where two huge mastiff dogs were used at night to guard the bank. The government also provided an armed military sentinel. Due to the bank's rapid growth, a new building for the Melbourne branch was opened in 1840 at 75 Collins Street West. By 1879 the bank had been upgraded to a magnificent two-storey building on the corners of Collins and Queens Streets, with the entry on Collins Street. In 1951 the Bank of Australasia amalgamated with the Union Bank to form the Australia and New Zealand Bank, now known as the ANZ. Then in 1970, the ANZ merged with both the ES&A and the London Bank of Australia to form the ANZ Banking Group Limited. The ANZ Banking Group Ltd kindly donated a variety of historic items from the Bank of Australasia. BANK of AUSTRALASIA, WARRNAMBOOL – In 1854 Warrnambool had two banks, the Union Bank and the Bank of Australasia. Later, completely different bank businesses opened; in 1867 the National Bank of Australasia, then in 1875 the Colonial Bank of Australasia. The original Warrnambool branch of the Bank of Australasia was established in July 1854, and operated from a leased cottage on Merri Street, close to Liebig Street. The bank next bought a stone building previously erected by drapers Cramond & Dickson on the corner of Timor and Gibson Streets. Samuel Hannaford was a teller and then Manager at the Warrnambool branch from 1855 to 1856 and the Warrnambool Council chose that bank for its dealings during 1856-57. In 1859 Roberts & Co. was awarded the contract to build the new Bank of Australasia branch for the sum of £3,000. The land was on a sand hill on the northeast corner of Timor and Kepler Streets and had been bought in 1855 from investor James Cust. The new building opened on May 21, 1860. The bank continued to operate there until 1951 when it merged with the Union Bank to form the ANZ Bank, which continued operating from its Liebig Street building. Warrnambool City Council purchased the former Bank of Australasia building in 1971 and renovated it, then on 3rd December 1973 it was officially opened as the Art Gallery by Cr. Harold Stephenson and Gallery Director John Welsh. The Gallery transferred to the purpose-built building in Liebig Street in 1986 and the old bank building is now the Gallery club. Staff at the Bank of Australasia in Warrnambool included the following men but others were also involved: Samuel Hannaford, Teller then Manager from 1855-1856; W H Palmer, Manager from January 1857 until November 1869 when the Teller Basil Spence was promoted to Manager; H B Chomley, Manager from April 1873 and still there in 1886; A Butt, Manager in 1895-1904; J R McCleary Accountant and Acting Manager for 12 months, until 1900; A Kirk, Manager 1904; J Moore, staff until his transfer to Bendigo in December 1908; J S Bath was Manager until 1915; C C Cox, Manager until April 1923; Richard C Stanley, Manager 1923 to April 1928. The bank exchange note has significance through its association with the Bank of Australasia. The early Australian bank was established in 1834 by Royal Charter and opened in Sydney, Australia, in Sydney in 1835. The bank had many Australian offices in November 1877, particularly on the east and south coasts. Victoria had 45 percent of all Offices. The object is locally significant for its association with the Warrnambool Bank of Australasia, which was established in 1854. It was Warrnambool Council’s first bank. The bank continued to operate until the organisation's merger in 1951 when it became the ANZ Bank Group today. The Bank was an integral part of the growth of local commerce and the community.Bank exchange note for the Bank of Australasia, Sydney, manufactured by Perkins, Bacon and Perch, printed in brown. Insignia depicts a heraldic shield with a lion and unicorn on either side and another insignia with "B of A". Exchange note paid on 14th October 1847. Issued for one hundred pounds and paid to Mr N A Coleman.. Inscriptions include the document number, the date, the amount paid, the receiving person, signatures and a stamp with the interest rate.Handwritten number "15101" "One hundred pounds" "14th October [18] 47" "Mr N A Coleman" Black stamp "ISSUED AT 3 PR CENT PREMIUM" Signatures of [Manager] and [Accountant].flagstaff hill, warrnambool, shipwrecked-coast, flagstaff-hill, flagstaff-hill-maritime-museum, maritime-museum, shipwreck-coast, flagstaff-hill-maritime-village, banknote, currency, exchange note, commerce, banking, finances, bank of australasia, n a coleman, 1847, shipwrecked coast, flagstaff hill maritime museum, maritime museum, shipwreck coast, flagstaff hill maritime village, great ocean road, boa, union bank, australia & new zealand bank, anz bank, david charters mcarthur, d c mcarthur, sydney, new south wales, legal tender