Showing 2386 items
matching annotations%20on%20the%20epistles%20vol%202
-
 Flagstaff Hill Maritime Museum and Village
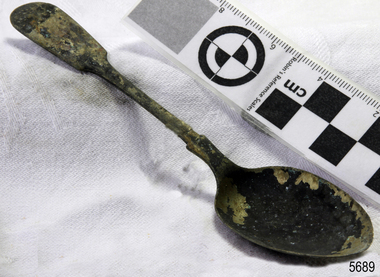
Spoon, circa 1878
This tea spoon is from the wreck of the LOCH ARD, a Loch Line ship of 1,693 tons which sailed from Gravesend, London, on 2 March 1878 with 17 passengers and a crew of 36 under Captain George Gibbs. “The intention was to discharge cargo in Melbourne, before returning to London via the Horn with wool and wheat”. Instead, on 1 June 1878, after 90 days at sea, she struck the sandstone cliffs of Mutton Bird Island on the south west coast of Victoria, and sank with the loss of 52 lives and all her cargo. The manifest of the LOCH ARD listed an array of manufactured goods and bulk metals being exported to the Colony of Victoria, with a declared value of £53,700. (202 bills of lading show an actual invoice value of £68, 456, with insurance underwriting to £30,000 of all cargo). Included in the manifest is the item of “Tin hardware & cutlery £7,530”. This teaspoon is one of 482 similar items of electro-plated cutlery from the LOCH ARD site, comprising spoons and forks of various sizes but all sharing the same general shape or design and metallic composition. 49 of these pieces display a legible makers’ mark — the initials “W” and “P” placed within a raised diamond outline, which is in turn contained within a sunken crown shape — identifying the manufacturer as William Page & Co of Birmingham. An electroplater’s makers’ marks, unlike sterling silver hallmarks, are not consistent identifiers of quality or date and place of manufacture. A similar line of five impressions was usually made to impress the consumer with an implication of industry standards, but what each one actually signified was not regulated and so they varied according to the whim of the individual foundry. In this case, the maker’s marks are often obscured by sedimentary accretion or removed by corrosion after a century of submersion in the ocean. However sufficient detail has survived to indicate that these samples of electro-plated cutlery probably originated from the same consignment in the LOCH ARD’s cargo. The following descriptions of maker’s marks are drawn from 255 tea spoons, 125 dessert spoons, and 99 table forks. These marks are clearly visible in 66 instances, while the same sequence of general outlines, or depression shapes, is discernible in another 166 examples. 1. A recessed Crown containing a raised Diamond outline and the initials “W” and “P” (the recognised trademark of William Page & Co) 2. An impressed Ellipse containing a raised, pivoted, Triangle in its lower part and bearing a Resurrection Cross on its upper section (a possible dissenting church symbol reflecting religious affiliation); OR a rounded Square impression containing a raised, ‘lazy’, letter “B” (possibly mimicking sterling silver hallmark signifying city of manufacture i.e. Birmingham) 3. An impressed rounded Square filled with a raised Maltese Cross (the base metal composite of nickel silver was also known as ‘German silver’ after its Berlin inventors in 1823) 4. A recessed Circle containing a Crab or Scarab Beetle image; OR a recessed Circle containing a rotated ‘fleur de lys’ or ‘fasces’ design 5. A depressed Diamond shape enclosing a large raised letter “R” and a small raised letter “D” (mimicking the U.K. Patent Office stamp which abbreviated the term ‘registered’ to “RD”, but also included date and class of patent) Suggested trade names for William Page & Co’s particular blend of brass plating are ‘roman silver’ or ‘silverite’. This copper alloy polishes to a lustrous gold when new, discolouring to a murky grey with greenish hue when neglected. HISTORY OF THE LOCH ARD The LOCH ARD belonged to the famous Loch Line which sailed many ships from England to Australia. Built in Glasgow by Barclay, Curdle and Co. in 1873, the LOCH ARD was a three-masted square rigged iron sailing ship. The ship measured 262ft 7" (79.87m) in length, 38ft (11.58m) in width, 23ft (7m) in depth and had a gross tonnage of 1693 tons. The LOCH ARD's main mast measured a massive 150ft (45.7m) in height. LOCH ARD made three trips to Australia and one trip to Calcutta before its final voyage. LOCH ARD left England on March 2, 1878, under the command of Captain Gibbs, a newly married, 29 year old. She was bound for Melbourne with a crew of 37, plus 17 passengers and a load of cargo. The general cargo reflected the affluence of Melbourne at the time. On board were straw hats, umbrella, perfumes, clay pipes, pianos, clocks, confectionary, linen and candles, as well as a heavier load of railway irons, cement, lead and copper. There were items included that intended for display in the Melbourne International Exhibition in 1880. The voyage to Port Phillip was long but uneventful. At 3am on June 1, 1878, Captain Gibbs was expecting to see land and the passengers were becoming excited as they prepared to view their new homeland in the early morning. But LOCH ARD was running into a fog which greatly reduced visibility. Captain Gibbs was becoming anxious as there was no sign of land or the Cape Otway lighthouse. At 4am the fog lifted. A man aloft announced that he could see breakers. The sheer cliffs of Victoria's west coast came into view, and Captain Gibbs realised that the ship was much closer to them than expected. He ordered as much sail to be set as time would permit and then attempted to steer the vessel out to sea. On coming head on into the wind, the ship lost momentum, the sails fell limp and LOCH ARD's bow swung back. Gibbs then ordered the anchors to be released in an attempt to hold its position. The anchors sank some 50 fathoms - but did not hold. By this time LOCH ARD was among the breakers and the tall cliffs of Mutton Bird Island rose behind the ship. Just half a mile from the coast, the ship's bow was suddenly pulled around by the anchor. The captain tried to tack out to sea, but the ship struck a reef at the base of Mutton Bird Island, near Port Campbell. Waves broke over the ship and the top deck was loosened from the hull. The masts and rigging came crashing down knocking passengers and crew overboard. When a lifeboat was finally launched, it crashed into the side of LOCH ARD and capsized. Tom Pearce, who had launched the boat, managed to cling to its overturned hull and shelter beneath it. He drifted out to sea and then on the flood tide came into what is now known as LOCH ARD Gorge. He swam to shore, bruised and dazed, and found a cave in which to shelter. Some of the crew stayed below deck to shelter from the falling rigging but drowned when the ship slipped off the reef into deeper water. Eva Carmichael had raced onto deck to find out what was happening only to be confronted by towering cliffs looming above the stricken ship. In all the chaos, Captain Gibbs grabbed Eva and said, "If you are saved Eva, let my dear wife know that I died like a sailor". That was the last Eva Carmichael saw of the captain. She was swept off the ship by a huge wave. Eva saw Tom Pearce on a small rocky beach and yelled to attract his attention. He dived in and swam to the exhausted woman and dragged her to shore. He took her to the cave and broke open case of brandy which had washed up on the beach. He opened a bottle to revive the unconscious woman. A few hours later Tom scaled a cliff in search of help. He followed hoof prints and came by chance upon two men from nearby Glenample Station three and a half miles away. In a state of exhaustion, he told the men of the tragedy. Tom returned to the gorge while the two men rode back to the station to get help. By the time they reached LOCH ARD Gorge, it was cold and dark. The two shipwreck survivors were taken to Glenample Station to recover. Eva stayed at the station for six weeks before returning to Ireland, this time by steamship. In Melbourne, Tom Pearce received a hero's welcome. He was presented with the first gold medal of the Royal Humane Society of Victoria and a £1000 cheque from the Victorian Government. Concerts were performed to honour the young man's bravery and to raise money for those who lost family in the LOCH ARD disaster. Of the 54 crew members and passengers on board, only two survived: the apprentice, Tom Pearce and the young woman passenger, Eva Carmichael, who lost all of her family in the tragedy. Ten days after the LOCH ARD tragedy, salvage rights to the wreck were sold at auction for £2,120. Cargo valued at £3,000 was salvaged and placed on the beach, but most washed back into the sea when another storm developed. The wreck of LOCH ARD still lies at the base of Mutton Bird Island. Much of the cargo has now been salvaged and some was washed up into what is now known as LOCH ARD Gorge. Cargo and artefacts have also been illegally salvaged over many years before protective legislation was introduced. One of the most unlikely pieces of cargo to have survived the shipwreck was a Minton porcelain peacock - one of only seven in the world. The peacock was destined for the Melbourne International Exhibition in 1880. It had been well packed, which gave it adequate protection during the violent storm. Today, the Minton peacock can be seen at the Flagstaff Hill Maritime Museum in Warrnambool. From Australia's most dramatic shipwreck it has now become Australia's most valuable shipwreck artefact and is one of very few 'objects' on the Victorian State Heritage Register. The LOCH ARD shipwreck is of State significance – Victorian Heritage Register S 417. Flagstaff Hill’s collection of artefacts from LOCH ARD is significant for being one of the largest collections of artefacts from this shipwreck in Victoria. It is significant for its association with the shipwreck, which is on the Victorian Heritage Register (VHR S417). The collection is significant because of the relationship between the objects, as together they have a high potential to interpret the story of the LOCH ARD. The LOCH ARD collection is archaeologically significant as the remains of a large international passenger and cargo ship. The LOCH ARD collection is historically significant for representing aspects of Victoria’s shipping history and its potential to interpret sub-theme 1.5 of Victoria’s Framework of Historical Themes (living with natural processes). The collection is also historically significant for its association with the LOCH ARD, which was one of the worst and best known shipwrecks in Victoria’s history. Unrestored tea spoon from the wreck of the LOCH ARD. The spoon design has a flattened fiddle-back handle, with a thin stem or shank, flared collar, and elongated bowl. The spoons metallic composition is a thin layer of brass alloy which has partially corroded back to a nickel-silver base metal. 50% of original electroplating remains. Two of five makers marks are legible: (1) Trade Mark (4) Crab Designflagstaff hill, warrnambool, shipwrecked coast, flagstaff hill maritime museum, maritime museum, shipwreck coast, flagstaff hill maritime village, great ocean road, loch line, loch ard, captain gibbs, eva carmichael, tom pearce, glenample station, mutton bird island, loch ard gorge, electroplated cutlery, loch ard shipwreck, nickel silver, william page & co, birmingham, brass plating, makers marks -
 Flagstaff Hill Maritime Museum and Village
Container - Medical container, Late 19th century or early 20th century
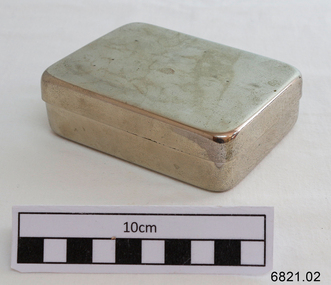
THE DISCOVERY OF STAINLESS STEEL Harry Brearley Since the dawn of man colonies have raced against each other to uncover new technologies, to be the first to stamp their names on a discovery, and although we’ve evolved over millions of years, the urge to be the first remains at the very core of our nature. This sense of passion and pride can lead some of the more unscrupulous humans to claim others discoveries as their own. Of course many breakthroughs are genuinely made in tandem, or are simultaneously occurring, but unless you can categorically prove that you were the pioneer of these incredible findings, then the other party involved will always dispute the fact. And so we come to stainless steel. The first point to note is that ‘inventor’ is a very ambiguous term. Is this the first person to think, to document, to patent, or to produce? The second point is that stainless steel wasn’t truly defined until 1911, so are we to cast aside those chromium-iron alloys that don’t quite meet the minimum requirement of 10.5% chromium? It seems like anyone and everyone has a different claim to being labelled the ‘inventor’ of stainless steel; from Britain, Germany, France, Poland, the U.S.A., and even Sweden. The cogs were set in motion by Englishmen Stoddart and Faraday circa 1820 and Frenchman Pierre Berthier in 1821. These scientists, among others, noted that iron-chromium alloys were more resistant to attack by certain acids, but tests were only carried out on low chromium content alloys. Attempts to produce higher chromium alloys failed primarily because of scientists not understanding the importance of low carbon content. In 1872 another pair of Englishmen, Woods and Clark, filed for patent of an acid and weather resistant iron alloy containing 30-35% chromium and 2% tungsten, effectively the first ever patent on what would now be considered a stainless steel. However, the real development came in 1875 when a Frenchman named Brustlein detailed the importance of low carbon content in successfully making stainless steel. Brustlein pointed out that in order to create an alloy with a high percentage of chromium, the carbon content must remain below around 0.15%. Thus ensued two decades of stagnation for the development of stainless steel, and while many scientists attempted to create a low carbon stainless steel, none succeeded. Hans Goldschmidt It wasn’t until 1895, when Hans Goldschmidt of Germany developed the aluminothermic reduction process for producing carbon-free chromium, that development of stainless steels became a reality. In 1904 French Scientist Leon Guillet undertook extensive research on many iron-chromium alloys. Guillet’s work included studies on the composition of what would now be known as 410, 420, 442, 446 and 440-C. In 1906 Guillet went on to analyse iron-nickel-chrome alloys, which would now be considered the basics of the 300 series. However, while noting the chemical composition of his alloys, Guillet failed to acknowledge the potential corrosion resistance of his materials. Albert Portevin In 1909 Englishman Giesen published an in-depth work regarding chromium-nickel steels, while the French national, Portevin, studied what is now regarded as 430 stainless steel. However, it wasn’t until 1911 that the importance of a minimum chromium content was discovered by Germans P. Monnartz and W. Borchers. Monnartz and Borchers discovered the correlation between chromium content and corrosion resistance, stating that there was a significant boost in corrosion resistance when at least 10.5% chromium was present. The pair also published detailed works on the effects of molybdenum on corrosion resistance. It is at this point we introduce Harry Brearley, born in Sheffield, England in 1871, he was appointed lead researcher at Brown Firth Laboratories in 1908. In 1912 Brearley was given a task by a small arms manufacturer who wished to prolong the life of their gun barrels which were eroding away too quickly. Brearley set out to create an erosion resistant steel, not a corrosion resistant one, and began experimenting with steel alloys containing chromium. During these experiments Brearley made several variations of his alloys, ranging from 6% to 15% chromium with differing levels of carbon. On the 13th August 1913 Brearley created a steel with 12.8% chromium and 0.24% carbon, argued to be the first ever stainless steel. The circumstances in which Brearley discovered stainless steel are covered in myth; some enchanted tales of Brearley recite him tossing his steel into the rubbish, only to notice later that the steel hadn’t rusted to the extent of its counterparts, much like Alexander Fleming’s experience 15 years later. Other more plausible, (but less attractive), accounts claim it was necessary for Brearley to etch his steels with nitric acid and examine them under a microscope in order to analyse their potential resistance to chemical attack. Brearley found that his new steel resisted these chemical attacks and proceeded to test the sample with other agents, including lemon juice and vinegar. Brearley was astounded to find that his alloys were still highly resistant, and immediately recognised the potential for his steel within the cutlery industry. The Half Moon Brearley struggled to win the support of his employers, instead choosing to produce his new steel at local cutler R. F. Mosley. He found difficulty producing knife blades in the new steel that did not rust or stain and turned to his old school friend, Ernest Stuart, Cutlery Manager at Mosley’s Portland Works, for help. Within 3 weeks, Stuart had perfected the hardening process for knives. Brearley had initially decided to name his invention ‘Rustless Steel’, but Stuart, dubbed it ‘Stainless Steel’ after testing the material in a vinegar solution, and the name stuck. And that’s how Harry Brearley discovered stainless steel…. well, not quite… During the 5 year period between 1908 and Brearley’s discovery in 1913 many other scientists and metallurgists have potential claims to Brearley’s title. In 1908 the Germans entered the fray, the Krupp Iron Works in Germany produced a chrome-nickel steel for the hull of the Germania yacht. The Half Moon, as the yacht is now known, has a rich history and currently lies on the seabed off the east coast of Florida. Whether the steel contains the minimum 10.5% chromium content remains inconclusive. Employees of the Krupp works, Eduard Maurer and Benno Strauss, also worked from 1912-1914 on developing austenitic steels using <1% carbon, <20% nickel and 15-40% chromium. Not happy with Europe hogging the glory, the USA got in on the act. Firstly, Elwood Haynes, after becoming disenchanted at his rusty razor, set out to create a corrosion resistant steel, which he supposedly succeeded in doing during 1911. Two other Americans, Becket and Dantsizen, worked on ferritic stainless steels, containing 14-16% chromium and 0.07-0.15% carbon, in the years 1911-1914. Elwood Haynes During 1912 Max Mauermann of Poland is rumoured to have created the first stainless steel, which he later presented to the public during the Adria exhibition in Vienna, 1913. Finally, a recently discovered article, which was published in a Swedish hunting and fishing magazine in 1913, discusses a steel used for gun barrels, (sound familiar?), which seems to resemble stainless steel. Although this is purely speculation, the Swedes have still made an audacious claim that they were in fact responsible for the first practical application for stainless steel. That concludes the shambolic discovery of stainless steel! Although there is much mystery and speculation behind the discovery of this wonderful material, there is no question that without the combined effort of all the above scientists and metallurgists, (and all the many more that were not mentioned), we would not have such a rich and versatile metal at our fingertips. https://bssa.org.uk/bssa_articles/the-discovery-of-stainless-steel/#:~:text=On%20the%2013th%20August%201913,the%20first%20ever%20stainless%20steel. This stainless steel container was donated to Flagstaff Hill Maritime Village by the family of Doctor William Roy Angus, Surgeon and Oculist. It is part of the “W.R. Angus Collection” that includes historical medical equipment, surgical instruments and material once belonging to Dr Edward Ryan and Dr Thomas Francis Ryan, (both of Nhill, Victoria) as well as Dr Angus’ own belongings. The Collection’s history spans the medical practices of the two Doctors Ryan, from 1885-1926 plus that of Dr Angus, up until 1969. ABOUT THE “W.R.ANGUS COLLECTION” Doctor William Roy Angus M.B., B.S., Adel., 1923, F.R.C.S. Edin.,1928 (also known as Dr Roy Angus) was born in Murrumbeena, Victoria in 1901 and lived until 1970. He qualified as a doctor in 1923 at University of Adelaide, was Resident Medical Officer at the Royal Adelaide Hospital in 1924 and for a period was house surgeon to Sir (then Mr.) Henry Simpson Newland. Dr Angus was briefly an Assistant to Dr Riddell of Kapunda, then commenced private practice at Curramulka, Yorke Peninsula, SA, where he was physician, surgeon and chemist. In 1926, he was appointed as new Medical Assistant to Dr Thomas Francis Ryan (T.F. Ryan, or Tom), in Nhill, Victoria, where his experiences included radiology and pharmacy. In 1927 he was Acting House Surgeon in Dr Tom Ryan’s absence. Dr Angus had become engaged to Gladys Forsyth and they decided he would take time to further his studies overseas in the UK in 1927. He studied at London University College Hospital and at Edinburgh Royal Infirmary and in 1928, was awarded FRCS (Fellow from the Royal College of Surgeons), Edinburgh. He worked his passage back to Australia as a Ship’s Surgeon on the on the Australian Commonwealth Line’s T.S.S. Largs Bay. Dr Angus married Gladys in 1929, in Ballarat. (They went on to have one son (Graham 1932, born in SA) and two daughters (Helen (died 12/07/1996) and Berenice (Berry), both born at Mira, Nhill ) Dr Angus was a ‘flying doctor’ for the A.I.M. (Australian Inland Ministry) Aerial Medical Service in 1928 . The organisation began in South Australia through the Presbyterian Church in that year, with its first station being in the remote town of Oodnadatta, where Dr Angus was stationed. He was locum tenens there on North-South Railway at 21 Mile Camp. He took up this ‘flying doctor’ position in response to a call from Dr John Flynn; the organisation was later known as the Flying Doctor Service, then the Royal Flying Doctor Service. A lot of his work during this time involved dental surgery also. Between 1928-1932 he was surgeon at the Curramulka Hospital, Yorke Peninsula, South Australia. In 1933 Dr Angus returned to Nhill where he’d previously worked as Medical Assistant and purchased a share of the Nelson Street practice and Mira hospital from Dr Les Middleton one of the Middleton Brothers, the current owners of what was once Dr Tom Ryan’s practice. Dr L Middleton was House Surgeon to the Nhill Hospital 1926-1933, when he resigned. [Dr Tom Ryan’s practice had originally belonged to his older brother Dr Edward Ryan, who came to Nhill in 1885. Dr Edward saw patients at his rooms, firstly in Victoria Street and in 1886 in Nelson Street, until 1901. The Nelson Street practice also had a 2 bed ward, called Mira Private Hospital ). Dr Edward Ryan was House Surgeon at the Nhill Hospital 1884-1902 . He also had occasions where he successfully performed veterinary surgery for the local farmers too. Dr Tom Ryan then purchased the practice from his brother in 1901. Both Dr Edward and Dr Tom Ryan work as surgeons included eye surgery. Dr Tom Ryan performed many of his operations in the Mira private hospital on his premises. He too was House Surgeon at the Nhill Hospital 1902-1926. Dr Tom Ryan had one of the only two pieces of radiology equipment in Victoria during his practicing years – The Royal Melbourne Hospital had the other one. Over the years Dr Tom Ryan gradually set up what was effectively a training school for country general-practitioner-surgeons. Each patient was carefully examined, including using the X-ray machine, and any surgery was discussed and planned with Dr Ryan’s assistants several days in advance. Dr Angus gained experience in using the X-ray machine there during his time as assistant to Dr Ryan. Dr Tom Ryan moved from Nhill in 1926. He became a Fellow of the Royal Australasian College of Surgeons in 1927, soon after its formation, a rare accolade for a doctor outside any of the major cities. He remained a bachelor and died suddenly on 7th Dec 1955, aged 91, at his home in Ararat. Scholarships and prizes are still awarded to medical students in the honour of Dr T.F. Ryan and his father, Dr Michael Ryan, and brother, John Patrick Ryan. ] When Dr Angus bought into the Nelson Street premises in Nhill he was also appointed as the Nhill Hospital’s Honorary House Surgeon 1933-1938. His practitioner’s plate from his Nhill surgery states “HOURS Daily, except Tuesdays, Fridays and Saturday afternoons, 9-10am, 2-4pm, 7-8pm. Sundays by appointment”. This plate is now mounted on the doorway to the Port Medical Office at Flagstaff Hill Maritime Village, Warrnambool. Dr Edward Ryan and Dr Tom Ryan had an extensive collection of historical medical equipment and materials spanning 1884-1926 and when Dr Angus took up practice in their old premises he obtained this collection, a large part of which is now on display at the Port Medical Office at Flagstaff Hill Maritime Village in Warrnambool. During his time in Nhill Dr Angus was involved in the merging of the Mira Hospital and Nhill Public Hospital into one public hospital and the property titles passed on to Nhill Hospital in 1939. In 1939 Dr Angus and his family moved to Warrnambool where he purchased “Birchwood,” the 1852 home and medical practice of Dr John Hunter Henderson, at 214 Koroit Street. (This property was sold in1965 to the State Government and is now the site of the Warrnambool Police Station. ). The Angus family was able to afford gardeners, cooks and maids; their home was a popular place for visiting dignitaries to stay whilst visiting Warrnambool. Dr Angus had his own silk worm farm at home in a Mulberry tree. His young daughter used his centrifuge for spinning the silk. Dr Angus was appointed on a part-time basis as Port Medical Officer (Health Officer) in Warrnambool and held this position until the 1940’s when the government no longer required the service of a Port Medical Officer in Warrnambool; he was thus Warrnambool’s last serving Port Medical Officer. (The duties of a Port Medical Officer were outlined by the Colonial Secretary on 21st June, 1839 under the terms of the Quarantine Act. Masters of immigrant ships arriving in port reported incidents of diseases, illness and death and the Port Medical Officer made a decision on whether the ship required Quarantine and for how long, in this way preventing contagious illness from spreading from new immigrants to the residents already in the colony.) Dr Angus was a member of the Australian Medical Association, for 35 years and surgeon at the Warrnambool Base Hospital 1939-1942, He served as a Surgeon Captain during WWII1942-45, in Ballarat, Victoria, and in Bonegilla, N.S.W., completing his service just before the end of the war due to suffering from a heart attack. During his convalescence he carved an intricate and ‘most artistic’ chess set from the material that dentures were made from. He then studied ophthalmology at the Royal Melbourne Eye and Ear Hospital and created cosmetically superior artificial eyes by pioneering using the intrascleral cartilage. Angus received accolades from the Ophthalmological Society of Australasia for this work. He returned to Warrnambool to commence practice as an ophthalmologist, pioneering in artificial eye improvements. He was Honorary Consultant Ophthalmologist to Warrnambool Base Hospital for 31 years. He made monthly visits to Portland as a visiting surgeon, to perform eye surgery. He represented the Victorian South-West subdivision of the Australian Medical Association as its secretary between 1949 and 1956 and as chairman from 1956 to 1958. In 1968 Dr Angus was elected member of Spain’s Barraquer Institute of Barcelona after his research work in Intrasclearal cartilage grafting, becoming one of the few Australian ophthalmologists to receive this honour, and in the following year presented his final paper on Living Intrasclearal Cartilage Implants at the Inaugural Meeting of the Australian College of Ophthalmologists in Melbourne In his personal life Dr Angus was a Presbyterian and treated Sunday as a Sabbath, a day of rest. He would visit 3 or 4 country patients on a Sunday, taking his children along ‘for the ride’ and to visit with him. Sunday evenings he would play the pianola and sing Scottish songs to his family. One of Dr Angus’ patients was Margaret MacKenzie, author of a book on local shipwrecks that she’d seen as an eye witness from the late 1880’s in Peterborough, Victoria. In the early 1950’s Dr Angus, painted a picture of a shipwreck for the cover jacket of Margaret’s book, Shipwrecks and More Shipwrecks. She was blind in later life and her daughter wrote the actual book for her. Dr Angus and his wife Gladys were very involved in Warrnambool’s society with a strong interest in civic affairs. Their interests included organisations such as Red Cross, Rostrum, Warrnambool and District Historical Society (founding members), Wine and Food Society, Steering Committee for Tertiary Education in Warrnambool, Local National Trust, Good Neighbour Council, Housing Commission Advisory Board, United Services Institute, Legion of Ex-Servicemen, Olympic Pool Committee, Food for Britain Organisation, Warrnambool Hospital, Anti-Cancer Council, Boys’ Club, Charitable Council, National Fitness Council and Air Raid Precautions Group. He was also a member of the Steam Preservation Society and derived much pleasure from a steam traction engine on his farm. He had an interest in people and the community He and his wife Gladys were both involved in the creation of Flagstaff Hill, including the layout of the gardens. After his death (28th March 1970) his family requested his practitioner’s plate, medical instruments and some personal belongings be displayed in the Port Medical Office surgery at Flagstaff Hill Maritime Village, and be called the “W. R. Angus Collection”. The W.R. Angus Collection is significant for still being located at the site it is connected with, Doctor Angus being the last Port Medical Officer in Warrnambool. The collection of medical instruments and other equipment is culturally significant, being an historical example of medicine from late 19th to mid-20th century. Dr Angus assisted Dr Tom Ryan, a pioneer in the use of X-rays and in ocular surgery. Medical box; rectangular stainless steel base and separate lid, from the W.R. Angus Collection.warrnambool, flagstaff hill maritime museum, great ocean road, dr w r angus, dr ryan, surgical instrument, t.s.s. largs bay, warrnambool base hospital, nhill base hospital, mira hospital, flying doctor, medical treatment, stainless steel medical container, medical container, stainless steel -
 Flagstaff Hill Maritime Museum and Village
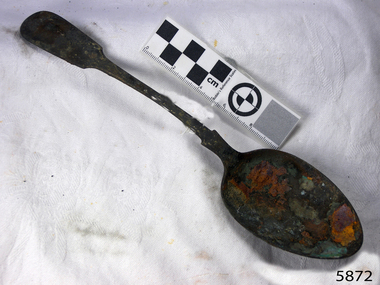
Domestic object - Spoon, circa 1878
This table spoon is from the wreck of the LOCH ARD, a Loch Line ship of 1,693 tons which sailed from Gravesend, London, on 2 March 1878 with 17 passengers and a crew of 36 under Captain George Gibbs. “The intention was to discharge cargo in Melbourne, before returning to London via the Horn with wool and wheat”. Instead, on 1 June 1878, after 90 days at sea, she struck the sandstone cliffs of Mutton Bird Island on the south west coast of Victoria, and sank with the loss of 52 lives and all her cargo. The manifest of the LOCH ARD listed an array of manufactured goods and bulk metals being exported to the Colony of Victoria, with a declared value of £53,700. (202 bills of lading show an actual invoice value of £68, 456, with insurance underwriting to £30,000 of all cargo). Included in the manifest is the item of “Tin hardware & cutlery £7,530”. This table spoon is one of 482 similar items of electro-plated cutlery from the LOCH ARD site, comprising spoons and forks of various sizes but all sharing the same general shape or design and metallic composition. 49 of these pieces display a legible makers’ mark — the initials “W” and “P” placed within a raised diamond outline, which is in turn contained within a sunken crown shape — identifying the manufacturer as William Page & Co of Birmingham. An electroplater’s makers’ marks, unlike sterling silver hallmarks, are not consistent identifiers of quality or date and place of manufacture. A similar line of five impressions was usually made to impress the consumer with an implication of industry standards, but what each one actually signified was not regulated and so they varied according to the whim of the individual foundry. In this case, the maker’s marks are often obscured by sedimentary accretion or removed by corrosion after a century of submersion in the ocean. However sufficient detail has survived to indicate that these samples of electro-plated cutlery probably originated from the same consignment in the LOCH ARD’s cargo. The generally common range of marks are drawn from 255 tea spoons, 125 dessert spoons, and 99 table forks. These marks are clearly visible in 66 instances, while the same sequence of general outlines, or depression shapes, is discernible in another 166 examples. Suggested trade names for William Page & Co’s particular blend of brass plating are ‘roman silver’ or ‘silverite’. This copper alloy polishes to a lustrous gold when new, discolouring to a murky grey with greenish hue when neglected. HISTORY OF THE LOCH ARD The LOCH ARD belonged to the famous Loch Line which sailed many ships from England to Australia. Built in Glasgow by Barclay, Curdle and Co. in 1873, the LOCH ARD was a three-masted square rigged iron sailing ship. The ship measured 262ft 7" (79.87m) in length, 38ft (11.58m) in width, 23ft (7m) in depth and had a gross tonnage of 1693 tons. The LOCH ARD's main mast measured a massive 150ft (45.7m) in height. LOCH ARD made three trips to Australia and one trip to Calcutta before its final voyage. LOCH ARD left England on March 2, 1878, under the command of Captain Gibbs, a newly married, 29 year old. She was bound for Melbourne with a crew of 37, plus 17 passengers and a load of cargo. The general cargo reflected the affluence of Melbourne at the time. On board were straw hats, umbrella, perfumes, clay pipes, pianos, clocks, confectionary, linen and candles, as well as a heavier load of railway irons, cement, lead and copper. There were items included that intended for display in the Melbourne International Exhibition in 1880. The voyage to Port Phillip was long but uneventful. At 3am on June 1, 1878, Captain Gibbs was expecting to see land and the passengers were becoming excited as they prepared to view their new homeland in the early morning. But LOCH ARD was running into a fog which greatly reduced visibility. Captain Gibbs was becoming anxious as there was no sign of land or the Cape Otway lighthouse. At 4am the fog lifted. A man aloft announced that he could see breakers. The sheer cliffs of Victoria's west coast came into view, and Captain Gibbs realised that the ship was much closer to them than expected. He ordered as much sail to be set as time would permit and then attempted to steer the vessel out to sea. On coming head on into the wind, the ship lost momentum, the sails fell limp and LOCH ARD's bow swung back. Gibbs then ordered the anchors to be released in an attempt to hold its position. The anchors sank some 50 fathoms - but did not hold. By this time LOCH ARD was among the breakers and the tall cliffs of Mutton Bird Island rose behind the ship. Just half a mile from the coast, the ship's bow was suddenly pulled around by the anchor. The captain tried to tack out to sea, but the ship struck a reef at the base of Mutton Bird Island, near Port Campbell. Waves broke over the ship and the top deck was loosened from the hull. The masts and rigging came crashing down knocking passengers and crew overboard. When a lifeboat was finally launched, it crashed into the side of LOCH ARD and capsized. Tom Pearce, who had launched the boat, managed to cling to its overturned hull and shelter beneath it. He drifted out to sea and then on the flood tide came into what is now known as LOCH ARD Gorge. He swam to shore, bruised and dazed, and found a cave in which to shelter. Some of the crew stayed below deck to shelter from the falling rigging but drowned when the ship slipped off the reef into deeper water. Eva Carmichael had raced onto deck to find out what was happening only to be confronted by towering cliffs looming above the stricken ship. In all the chaos, Captain Gibbs grabbed Eva and said, "If you are saved Eva, let my dear wife know that I died like a sailor". That was the last Eva Carmichael saw of the captain. She was swept off the ship by a huge wave. Eva saw Tom Pearce on a small rocky beach and yelled to attract his attention. He dived in and swam to the exhausted woman and dragged her to shore. He took her to the cave and broke open case of brandy which had washed up on the beach. He opened a bottle to revive the unconscious woman. A few hours later Tom scaled a cliff in search of help. He followed hoof prints and came by chance upon two men from nearby Glenample Station three and a half miles away. In a state of exhaustion, he told the men of the tragedy. Tom returned to the gorge while the two men rode back to the station to get help. By the time they reached LOCH ARD Gorge, it was cold and dark. The two shipwreck survivors were taken to Glenample Station to recover. Eva stayed at the station for six weeks before returning to Ireland, this time by steamship. In Melbourne, Tom Pearce received a hero's welcome. He was presented with the first gold medal of the Royal Humane Society of Victoria and a £1000 cheque from the Victorian Government. Concerts were performed to honour the young man's bravery and to raise money for those who lost family in the LOCH ARD disaster. Of the 54 crew members and passengers on board, only two survived: the apprentice, Tom Pearce and the young woman passenger, Eva Carmichael, who lost all of her family in the tragedy. Ten days after the LOCH ARD tragedy, salvage rights to the wreck were sold at auction for £2,120. Cargo valued at £3,000 was salvaged and placed on the beach, but most washed back into the sea when another storm developed. The wreck of LOCH ARD still lies at the base of Mutton Bird Island. Much of the cargo has now been salvaged and some was washed up into what is now known as LOCH ARD Gorge. Cargo and artefacts have also been illegally salvaged over many years before protective legislation was introduced. One of the most unlikely pieces of cargo to have survived the shipwreck was a Minton porcelain peacock - one of only seven in the world. The peacock was destined for the Melbourne International Exhibition in 1880. It had been well packed, which gave it adequate protection during the violent storm. Today, the Minton peacock can be seen at the Flagstaff Hill Maritime Museum in Warrnambool. From Australia's most dramatic shipwreck it has now become Australia's shipwreck artefact and is one of very few 'objects' on the Victorian State Heritage Register most valuable. HISTORY OF THE LOCH ARD The LOCH ARD belonged to the famous Loch Line which sailed many ships from England to Australia. Built in Glasgow by Barclay, Curdle and Co. in 1873, the LOCH ARD was a three-masted square rigged iron sailing ship. The ship measured 262ft 7" (79.87m) in length, 38ft (11.58m) in width, 23ft (7m) in depth and had a gross tonnage of 1693 tons. The LOCH ARD's main mast measured a massive 150ft (45.7m) in height. LOCH ARD made three trips to Australia and one trip to Calcutta before its final voyage. LOCH ARD left England on March 2, 1878, under the command of Captain Gibbs, a newly married, 29 year old. She was bound for Melbourne with a crew of 37, plus 17 passengers and a load of cargo. The general cargo reflected the affluence of Melbourne at the time. On board were straw hats, umbrella, perfumes, clay pipes, pianos, clocks, confectionary, linen and candles, as well as a heavier load of railway irons, cement, lead and copper. There were items included that intended for display in the Melbourne International Exhibition in 1880. The voyage to Port Phillip was long but uneventful. At 3am on June 1, 1878, Captain Gibbs was expecting to see land and the passengers were becoming excited as they prepared to view their new homeland in the early morning. But LOCH ARD was running into a fog which greatly reduced visibility. Captain Gibbs was becoming anxious as there was no sign of land or the Cape Otway lighthouse. At 4am the fog lifted. A man aloft announced that he could see breakers. The sheer cliffs of Victoria's west coast came into view, and Captain Gibbs realised that the ship was much closer to them than expected. He ordered as much sail to be set as time would permit and then attempted to steer the vessel out to sea. On coming head on into the wind, the ship lost momentum, the sails fell limp and LOCH ARD's bow swung back. Gibbs then ordered the anchors to be released in an attempt to hold its position. The anchors sank some 50 fathoms - but did not hold. By this time LOCH ARD was among the breakers and the tall cliffs of Mutton Bird Island rose behind the ship. Just half a mile from the coast, the ship's bow was suddenly pulled around by the anchor. The captain tried to tack out to sea, but the ship struck a reef at the base of Mutton Bird Island, near Port Campbell. Waves broke over the ship and the top deck was loosened from the hull. The masts and rigging came crashing down knocking passengers and crew overboard. When a lifeboat was finally launched, it crashed into the side of LOCH ARD and capsized. Tom Pearce, who had launched the boat, managed to cling to its overturned hull and shelter beneath it. He drifted out to sea and then on the flood tide came into what is now known as LOCH ARD Gorge. He swam to shore, bruised and dazed, and found a cave in which to shelter. Some of the crew stayed below deck to shelter from the falling rigging but drowned when the ship slipped off the reef into deeper water. Eva Carmichael had raced onto deck to find out what was happening only to be confronted by towering cliffs looming above the stricken ship. In all the chaos, Captain Gibbs grabbed Eva and said, "If you are saved Eva, let my dear wife know that I died like a sailor". That was the last Eva Carmichael saw of the captain. She was swept off the ship by a huge wave. Eva saw Tom Pearce on a small rocky beach and yelled to attract his attention. He dived in and swam to the exhausted woman and dragged her to shore. He took her to the cave and broke open case of brandy which had washed up on the beach. He opened a bottle to revive the unconscious woman. A few hours later Tom scaled a cliff in search of help. He followed hoof prints and came by chance upon two men from nearby Glenample Station three and a half miles away. In a state of exhaustion, he told the men of the tragedy. Tom returned to the gorge while the two men rode back to the station to get help. By the time they reached LOCH ARD Gorge, it was cold and dark. The two shipwreck survivors were taken to Glenample Station to recover. Eva stayed at the station for six weeks before returning to Ireland, this time by steamship. In Melbourne, Tom Pearce received a hero's welcome. He was presented with the first gold medal of the Royal Humane Society of Victoria and a £1000 cheque from the Victorian Government. Concerts were performed to honour the young man's bravery and to raise money for those who lost family in the LOCH ARD disaster. Of the 54 crew members and passengers on board, only two survived: the apprentice, Tom Pearce and the young woman passenger, Eva Carmichael, who lost all of her family in the tragedy. Ten days after the LOCH ARD tragedy, salvage rights to the wreck were sold at auction for £2,120. Cargo valued at £3,000 was salvaged and placed on the beach, but most washed back into the sea when another storm developed. The wreck of LOCH ARD still lies at the base of Mutton Bird Island. Much of the cargo has now been salvaged and some was washed up into what is now known as LOCH ARD Gorge. Cargo and artefacts have also been illegally salvaged over many years before protective legislation was introduced. One of the most unlikely pieces of cargo to have survived the shipwreck was a Minton porcelain peacock - one of only seven in the world. The peacock was destined for the Melbourne International Exhibition in 1880. It had been well packed, which gave it adequate protection during the violent storm. Today, the Minton peacock can be seen at the Flagstaff Hill Maritime Museum in Warrnambool. From Australia's most dramatic shipwreck it has now become Australia's shipwreck artefact and is one of very few 'objects' on the Victorian State Heritage Register most valuable. The LOCH ARD shipwreck is of State significance – Victorian Heritage Register S 417. Flagstaff Hill’s collection of artefacts from LOCH ARD is significant for being one of the largest collections of artefacts from this shipwreck in Victoria. It is significant for its association with the shipwreck, which is on the Victorian Heritage Register (VHR S417). The collection is significant because of the relationship between the objects, as together they have a high potential to interpret the story of the LOCH ARD. The LOCH ARD collection is archaeologically significant as the remains of a large international passenger and cargo ship. The LOCH ARD collection is historically significant for representing aspects of Victoria’s shipping history and its potential to interpret sub-theme 1.5 of Victoria’s Framework of Historical Themes (living with natural processes). The collection is also historically significant for its association with the LOCH ARD, which was one of the worst and best known shipwrecks in Victoria’s history. Unrestored table spoon from the wreck of the LOCH ARD. The spoon design has a flattened fiddle-back handle, with a thin stem or shank, flared collar, and a shallow rounded bowl. The spoons metallic composition is a thin layer of brass alloy which has partially corroded back to a nickel-silver base metal. Minimal original plate remains. Some verdigris (15%) and concretion (40%) on front and back of spoon. Spoon is bent and balance is covered in Silver Oxide.flagstaff hill maritime museum, shipwreck coast, great ocean road, loch line, loch ard, mutton bird island, loch ard gorge, electroplated cutlery, loch ard shipwreck, william page and co, birmingham brass plating, table spoons -
 4th/19th Prince of Wales's Light Horse Regiment Unit History Room
Photo Albums - set of two, c. 1919
Memorabilia of 908 Dvr Thomas Edward Whyte, 3rd Light Horse Field Ambulance, World War 1 READ THIS. During the last war I sent these pictures home through devious channels. When I lobbed back I found them all pasted in these albums by my young brother Billy. He was only a kid then! Nowadays he is serving up North. Went away with the original 9th Battn. Was in the Blitz on England and served in Libya, Tobruk, Greece, Crete and Palestine and was twice knocked. It's not long since the last upheaval 1914-18 and I wonder if these boys think as we did. This will be the last war? I sincerely hope so. TWSet of two photo albums. Photos pasted into albums with captions in white ink. Photo captions - Vol 1. (? = not legible) 1. Prisoners from ES SALT 2. Dust scene at AUJA FORD. 4th LH BDE 3. ? ? CHEOPS PYRAMID 4. Houses and domain WASSA battle 5 .Pontoon at SERAPELAI 6. SPINX (sic) & PYRAMID 7. The Nile floods occur once yearly and all irrigation centres are alternatively flooded 8. Pontoon bridge over SUEZ Canal at SERAPEUM . Constructed by Aust Engineers 9. The arrival of newspapers and mail 10. Lake IIMSAH-ISMALIA 11. Camp outside Jerusalem. Walls of old city easily discernible 12. Roman walls on beach at MONTAZEH 13. ? ? These boats are used for conveying between steamer & shore 14. Interest shown in the new issue. Through the scarcity of horses Batmen/Grooms and drivers ? allotted donkeys ? ? 15. DAMASCUS GATE JERUSALEM 16. Trumpeter ? 17 Indians making ? for railroad 18. 'SPELLO' Sinai Country 19. Police searching Egyptian labourer 20. Cavalry ?? SHA? 21. Entering ? WADI ? 22. Bedouins at ? 23 No caption 24 No caption 25 Bolar trees EZBEKIEH Gardens CAIRO 26 .Flamingos at NOUZEH Gardens ALEXANDRIA 27 BARAGE 28 KASR-ELNILL Bridge 29 NOUZEH GARDENS 30 AMGS on beach at ? 31 NOUZEH GARDENS - ALEX 32 Mascot of 7th M.V.G. 3RD ALHR 33 Printing on walls inside St Mary's Church. Depicting the Flight from Herod. (Corner torn off photo) 34 Inside Virgin Mary's Church at MATARA 35 ? painting in Church ?? 36 SUEZ Canal. Finish of Arab pony race. ZAL-A-ZIA 37 Admiralty offices at PORT SAID 38 A corner of CHEOP"s PYRAMID 39 The Spinx (sic). Nose was blown off by a shell from one of Napoleon's guns. 40 Monastry on the MT of TEMPTATION 41 Mess orderlies. Foodstuffs in locker given to troops by the AIF 42 Mid day meal on treck 43 Ambulance sand carts for conveying wounded and sick over desert sand 44 3rd ALHB 45 Kaisers Church JERUSALEM. Inside is a large painting figuring the Kaiser & Kaiserine holding a model church. 46 Bedouin women drawing water from well at EL-ARISH 47 2nd ALH BGDE doing route march on JERUSALEM-JERICHO ROAD 48 GEN HODSON GOC Anzac Mounted Divn presenting decorations & investitures on the sands at SHEIKS-ZOWAID 49 Armoured Car 50 Snow at the CEEDERS (sic) on Mt LEBANON 51 Compulsory phenyle bath for all troops in front line area 52 Austrian guns taken at point of bayonet by NZ & 2nd BGDE at GAZA 53 CACHOLETS for carrying wounded 54 The boys found some timber and made a spring board on SUEZ Canal 55 Bedouin wedding. The Bride travels in state amongst rubbish on top of camel. Her father leads conveyance. 56 Australian graves at SHALLAL 57 Camel Transport Company bring rations along beach 58 Billy the mascot holds an offensive & checks advancement 59 Exercising horses at HELMIEH Egypt 60 PONT-DE-QUOBBA Egypt. A suburb of well-to-do Egyptian merchants 61 Demolition stunt at ASLU. Bridge destroyed by Australian Engineers 62 Swimming horses in Great Bitter Lakes Egypt 63 On the move along Wadi 64 On the shores of the Bitter Lakes EL-EGYTE 65 A leave party waiting for the pontoon to swing into position 66 Carting grain 67 Egyptian Brass Band 68 French warboat (sic) in Canal 69 Russian Troops from Mesopotamia passing through SUEZ Canal 70 Prisoners coming in under escort. Turkish & German officers in lead mounted on ponies 71 Turkish prisoners 72 T.B.D in Canal 73 Old trenches on SUEZ CANAL near BITTER LAKES on W Bank 74 Monitor in Canal 75 Block house, trenches & entanglements near Post 62 76 A halt in an Egyptian village EL-MARO' 77 Mobile wireless plant 78 On the road from Canal to Railhead 79 Old Turkish guns in ancient fort at ALEXANDRIA 80 Francenia steaming through Canal 81 After MAGHDABA stunt. Convoy taking wounded form EL-ARISH to railway at 139 82 Indian Camelry 83 Virgin Mary's Church 84 Sluice gate at BARAGE Egypt 85 Hospital at lower W bank of Canal 86 Virgin Mary's tree 87 Sweetwater Canal at ISMAILIA Egypt 88 Halt and Feed. The A.M.C. attached to flying column. 89 Bringing stores ashore at JAFFA 90 H Videon & J Britton astride donks. Horses became scarce through casualties etc and units had donkeys issued to them 91 RAMLEH. The traditional burial place of St John the patron saint of England (sic). 92 Jewish Synagogue at RISHON-COUR-LE-LION (Richard the Lion Hearted) 93 Water tower at HELIOPOLIS 94 Portion of camp on HELIOPOLIS Racecourse 95 Arrival of papers 96 Sand sleigh 97 Boring plant & prisoners taken on the JIFF-JAFFA stunt. Two Austrian officers and party of Turks taken whilst building a concrete gun emplacement 98 The obelisk at MATARIA 99 In an avenue of Australian gums at ZEITOUA 100 Mountain battery gun 101 The 3rd ALH BGDE camped at HELIOPOLIS Racecourse 102 Captured Turkish guns 103 Turkish and Austrian prisoners. JORDAN VALLEY 104 The MT of Temptation Monastery built over spot where Christ spent his 40 days 105 Refugees from ES-SALT at JERICHO 106 3rd LHFA and 8th LH REGT at HELIOPOLIS 107 Fig trees at Roman Wells JIFF JAFFA 108 Inside the Blue Mosque CAIRO 109 Lagoon that was destroyed on JIFF JAFFA stunt 110 Section race at Brigade sports 111 Another tombstone at ALEX 112 Innoculating female date palm 113 Bronze tombstone in a cemetary at ALEXANDRIA 114 Luna Park at HELIOPOLIS 115 Egyptian water buffalo. Used by natives for ploughing etc 116 Russian church. Some call it the "Church of St Mary Magdelene" 117 At pyramids GIZA. Billingsley lost leg & McMullin KIA 118 Pontoon bridge over Suez Canal 119 DURBAN 120 Rescue work 121 Paddy Hanly 122 Motor train for conveying rations between Canal and Railhead. 123 At MUCKSHUBE ? 124 British ??? 125 Bedouins bringing in their harvest from the fields of ABBASSAN-EL-KEBIR Palestine 126 German HD QTRS BEERSHEBA 127 Date ? SINAI 128 Military railroad running through ? at EL-ARISH 129 Street scene at KHAN-YUNIS Palestine. Samson often called at this place to visit his girl. Napoleon narrowly escaped capture here during his ? in 1799 130 Date palms bearing fruit. These do not ? they are ?? 131 Motor ambulance convoy 132 Turkish hospital BEERSHEBA 133 MT CALVARY 134 Town Hall BEERSHEBA 135 Railway station BEERSHEBA 136 ASLUJ 137 Turkish depot MAGDABA 138 DURAN 139 3rd ALAB Hospital 140 Main Street PORT SAID 141 Stock Exchange ALEXANDRIA 142 The "Bull Ring" 14th AGH 143 (Double exposure) 144 Jewish School at DURAN Palestine 145 Damascus Gate JERUSALEM 146 Roller used for grinding clay for making bricks 147 The Harbour at ALEXANDRIA 148 Part of Napoleons Road along sea shore opposite BEELAH 149 Hotel at ALEX. Barred to the troops of course. 150 HELIOPOLIS 151 -153 ALEXANDRIA 154 Ambulance treck 155 Cacholets at the casually clearing station 156 Refugees from ES-SALT entering the Jordan Valley. Mts of MOAB in background 157 Cameliers bring in prisoners 158 The "Niagara". Casualties were from the front line by all descriptions of transport and passed through several field hospitals until they eventually reached the railway. They were sent to KANTARA by train. Despatched from there to PORT SAID by this boat 159 JERICHO 160 Turkish prisoners in JORDAN VALLEY 161 Bedouin nippers of SINAI 162 Bridge destroyed by ALH at ASLUJ 163 Railway sheds at BEERSHEBA. Portion was set afire by retreating Turks 164 ASLUJ Station 165 German Hospice 166 at ASLUJ 167 Suez Canal offices PORT SAID 168 MENA Village from top of Cheops. White lines at left are roads made by Australian troop. First Aust Contingent camped here. 169 A felukeh passing through gate at BARAGE 170 Military railway terminal EL ARISH 171 (No caption) 172 Egyptian family waiting for a train 173 Turkish prisoners and captured material coming in 174 Turkish wounded at BEERSHEBA awaiting removal 175 Two hospital ships at ALEXANDRIA 176 Some of the Bd boys 177 Race meeting 3rd ALHB at TRIPOLI- SYRIA 178 The blacksmith and Rodney Thomas swimming horse in SUEZ CANAL 179 Natives grinding grain 180 Thoroughbred 181 MUKATTAM HILLS 182 Trenches at JIFF JAFFA 183 MacBoyd as a Padre 184 Egyptian Syce having shave by travelling barber 185 The creek outside ALMINA 186 Cameliers 187 Clearing Station on beach at EL-ARISH 188 Wadi at TALLAT-EL-DUMM 189 Motor transport park 190 Some of the boys 191 Pompeys Pillar 192 at MAGHDABA 193 Hospital at JERUSALEM 194 Cheop's Pyramid 195 Golden Gate JERUSALEM 196 Hustling Turks through BEERSHEBA 197 Holy City 198 Mosque of Omar Jerusalem 199 Railway bridge destroyed by ALH at ASLUJ 200 Enemy material captured at SHERIA BEERSHEBA 201-3 These Mosques built with alabaster taken from pyramids at GIZA 204 Pontoon bridge built by our Engineers over RIVER JORDAN 205 3rd Bgde in Koil at MASAID 206 Billy McGhie throwing the weight 207 Nirazeh ? Gardens 208 Motor Ambulance Park 209 Bedouin women in Palestine village 210 ALEXANDRIA 211 Junction Stn 212 Indian Lancers 213 Motor convoy at ESSANI 214 A & B Sections 215 JERUSALEM. Once known as the 'City of Palms' and presented to Cleopatra by Anthony 216 Monastery on the Mount of Temptation. Situated on the Hills of Solomon on E side of Jordan Valley just behind JERICHO 217 DURAN A Jewish village in Palestine 218 One of our planes meets with a mishap on landing 219 Bedouin flocks around NABLUS 220 ES-SALT Road just above Jordan River 221 Halt! Action Front! Getting guns into action from pack 222 Village well 223 Gun inspection 224 WADI GHUZZEE Bridge 225-6 At GIZA Zoo Egypt 227 Syrians gathering olives 228 Smashed plane 229 MacBoyd 230 Bridge across Jordan at GORRONHOER 231 Competitors for Gretna Green. 3rd Bgde sports at TRIPOLIA 232 EL ARISH 233 Main street JAFFA 234 The beach at MARI-KHEB 235 Scene of old Cairo 236 Bedouin market 237 Bridge built over Wadi EL-ARISH. The biblical "River of Egypt". 238 Old water reservoir in native village 239 A "spello" on the track 240 Plane going out on reconnaissance 241 Bomb attached to carrier on a plane 242 Ancient Turkish gun at forts in TRIPOLI - SYRIA 243 Gun inspection 3rd AMGS 244 Old Turkish trenches outside GAZA 245 Wadi KHUZEL Bridge at SHALLA 246 BEERSHEBA 247 Street scene ZAG-A-ZIG 248 Spinx (sic) & Pyramid - GIZA 249 Egyptian Coastguards at ALEXANDRIA 250 A Palestine camp E Troop 3rd MG Sqn 251 B class horses killed in Syria 252 Scene from summit of Pyramid 253 Bert Richmond & an old Turkish Howitzer on MONTAZEH 254 LION'S WELL 255 Australian trenches outside Ferry's Post near Hill 70 256 A street scene in HELIO{PLIS 257 Electric trams at ALEXANDRIA 258 Cleaning harness 259 Swinging pontoon bridge into position at SERAPEUM 260 British Monitor in Suez Canal 261-2 Scenes of Turkish buildings at MAGHDABA. Taken by the ALH The first time in history mounted troops have attacked and taken entrenched positions 263 Aussies at Egypt's ancient monuments 264 Scenes of old CAIRO from MOKATTAM Hils 265 Bridge across canal at BARAGE, 16 miles outside CAIRO 266 Curly and Vic Norton 267 Stumpy McIntyre & Long Pikington 268 In Wadi GHUZZEL near TELL-EL-JEMM 269 Digging post holes for stables 270 Cameliers bring in prisoner. Austrian Officer in black 271 White washing mess shed 272 F Troop 3rd AMGS Sqn 273 Jews at Recruiting Depot at JERUSALEM, forming Jewish Battalion 274 In Jordan Valley, 3rd Machine Gunners have 8 horses killed by an aerial torpedo 275 Turkish prisoners 276 Cocos Island 277 Snow on the Lebanon Ranges 278 Egyptian Hotel 279 Gordon Wake. Note intruders 280 Electric trams at HELIOPOLIS Egypt. Heliopolis built by Belgian firm in 7 years 281 Sweetwater Canal at SERAPEUM 282 The ? wells at JIFF-JAFFA 283 Virgin Mary's well at MATARIA. Boyd, Simpkin & Crowley 284 Cricket for convalescents at MONTAREH 285 Indians working at cutting for military railway 286 Australian Hospital BEERSHEBA 287 Removing wrecked ambulance car from rail road 288 Engineers depot in ? at EL-ARISH 289 Water preservation scheme at SHALLAL 290 German Princes Palace at HELIOPOLOLIS 291 Some of the boys 292 Aussie aerodrome BEELAH 293 EL-JALLAH outside BETHLEHEM 294 Some of the gunners 295 Trying camels in gun carriages. Note sand caterpillar 296 Street outside old city JERUSALEM 297 D.H QRS In EL-ARISH. Hod 298 Cairo Museum 299 Wadi bridge built by Army Engineers 300 A two storied building at GALM used as German HQrs until reached by our guns 301-2 No caption 303 Ambulance with Flying Column 304 Jack Pegg 3 AMGS 305 KHAN YUNIS 306 In the Jewish village of "Rischon le Lion" 307 Wet Canteen BEELAH 308 Motor Transport LATRON 309 Gen Chauvel OC Desert Mounted Column 310 10th LH - Inverness Battery "Railhead" 311 3rd LHFA "SERAPIUM" 312 ESBEKIEN Gardens "LE CAIRE" 313 Camel training and wireless station Hill 60 314 ZAG-A-ZIG Rly Stn 315 One of the Irrigation Canal locks "HELOUAN" 316 Indian Camel Corps 317 Base at Hill 60 318 Aussie transport arriving "ALEXANDRIA" 319 3 ALHB at AL MINA 320 Main entry to city of JAFFA 321 Mosque at DAMASCUS 322 A Turk brought to earth by one of our patrols 323 Brigade boxing contrst 324 Ostrich farm ZEITOUN 325 MATERIA 326 No caption 327 Mail day 328 3rd LHFA entering HELIOPOLIS from MENA 329 M Boyd, L Simpkins, S Crowley 330 Stretcher bearers 331 French Hosp JERUSALEM 332 SERAPIUM 333 Gippo crushing wheel 334 On the move - bully and biscuits 335 V Morton, F Stokes, L Simpkins & Hanley 336 Turkish prisoners - SHERIA 337 Getting used to the mask J Antonio MM 338 Sand carts 339 Model house - MONTAZA Hospital 340 "Abdul" 341 Wood Depot "ESDUD" 342 On troop ship - from Syria 343 Turkish prisoners "JULIUS" 344 TRIPOLI 345 3rd AMGS cook house "BEELAH" 346 Breaking camp "ZEITOUN" 347 Turkish prisoners "GAZA" 348 One of our tanks. About nine were blown out of action at GAZA 349 Camp in HOD-EL-ARISH 350 German HQRS BEERSHEBA 351 Race Course TRIPOLI 352 A Locke & P Leeming 353 Sea planing in Suez Canal 354 MOASCR detail camp 355 KANTARE Suez Canal 356 Four boys of MG Sqn at cards while convalescing . Marked X was a prisoner of war for three days. Got him back with us when we countered. 357 Signal station at CANA 358 H Videon in german rig 359 ROD-EL-FARAC 360 Sweetwater Canal ZAG-A-ZOG 361 Hospital train on beach EL-ARISH 362 Jerusalem Road 363 Bedouin camel and young'un 364 Admiralty Offices, PORT SAID 365 Suez Canal PORT SAID 366 Taking wounded to clearing station 367 Hills of 10-60 MALHA 368 Junction Station 369 EL ARISH 370 Wine Distillery LATRON 371 White figures how entrance to Pyramid 372 RAPC Wireless Station 373 Sports in Canal. ANZAC Day 1916. Prince of Wales is aboard white launch. 374-5 Captured Austrian boat. 40,000 cases of benzine aboard. She was brought into Canal at Port Said. Spies set her afire. She burnt for some considerable time and eventually blew up. 376 Pumping water from Wadi on Muckshabee stunt 377 On trenches 378 Bringing in disabled battle plane 379 Giving a motor transport a lift 380 Old Turkish howitzer. MONTAZZA 381 Jerusalem country 382 Palm Hod in SINAI. Trees do not bear dates until 14 years old. No bees here. Palms innoculated by Bedouin. 383 Camel cacolets for conveying wounded 384 ESKBEKIEL Gardens Cairo 385 LAKE TIMBAH 386 Xmas dinner 1916 387 Gift billies from ACF 388 Section competition 389 In big marquees HELIOPOLIS 390 HM Landships 391 Capt Aberdeen inspecting horses 392 Football. Black vs White 393 The game 394 Old Napoleon fort. 10 mile along coast from ALEX 395 Jewish Cemetery AKRON 396 Ration fatigue 397 Blowing bottom out of Turkish Reservoir to allow soakage 398 Tilley & Farley - 14th AGH 399 At GIZA Zoo. Note height of giraffe 400 On this stunt we destroyed Turkish reservoir of 2 1/2 million gallons 401 Demolition party at wells MUCK-SHUBE 402 3rd ALH Bde HELIOPOLIS Race course 403 HMLS "Lady Wingate" 404 Turks blew out our tanks at GAZA 405 One of our aviators captured by German. Note German wearing Iron Cross. Snapped behind Turkish lines. Original of this snap was dropped at Aust aerodrome to let them know Aussie airman was alright and not killed in capture. Chivalry 406 Sausage observation balloon 407 READY 408 Bomb on carrier 409 Testing 410 B Richmond, Wireless Operator RAFC 411 Loading Bomb 412 Crash in desert 413 Bomb in YMCA at MAZRAR 414 No caption 415 LW Simpkin - Late 3LHFA 416 LEMNOS 417 Shelling the MARSDEN 418 Pontoon across Jordan River 419 Shells on Walkers Ridge 420 Sweetwater Canal 421 LAKE ISMAILIA 422 Indian Lancers on Canal 423 CAIRO Railway Station 424 Destroying Turkish water supplies. Explosives used for breaking clay at bottom of lagoon, help to absorb water 425 Exercising horses at ZEITOUN Egypt 426 In Wadi on MUG-SHUBEE stunt 427 Tractor drawing 60 lb gun towards front line 428 Sultan's mother's place at HELIOPOLIS = City of the Sun 429 Camped on the sands outside RAILHEAD, Jump off for SINAI campaign 430 G Turner & A Lockwood out for a camel ride. 431 GAZA and Nile floods from top of Pyramid 432 Baby refuses to carry his harness and his pal wears an astonished look 433 No caption 434 Turkish Officers 435 Regt HQRS at IBEETA 436 No caption 437 3rd Machine Gun Squadron 3rd ALH Bgde (my unit) 438 Camel Corps at dinner 439 KHEFREN Pyramid snapped from top of Cheops 440 CHEOPS 441 Pyramids 442 MENA from top of Pyramids 443 Snap from Pyramid showing MENA-CAIRO road running through Nile floods 444 MENA village from Pyramid 445 Band of British West Indies Regt 446 Gippo Band 447 Swimming on Med Sea 102 KmA 448 H Maddocks 449 Bedouin and Egyptians utilise any animals for their fields 450 Captured Turkish train - BEERSHEBA 451 Gardens ISMAILIA 452 Gippos used for horse lines etc 453 Canteens at HELIOPOLIS 454 3 ALHB watering in Wadi on ESSANI stunt 454 JAFFA 455 ALEX, Napoleon relics 456 Egyptian water wheel 457 SUEZ 458 WADI GHUZZEE 459 On Reconnaissance at 10-60 460 Goats and sheep captured from hostile Bedouins 461 Pontoon SERAPIUM 462 Aust trenches - Suez Canal. Turks attacked FEB 1916 463 Camel transport 464 3 ALHB Wireless Station. Col Scott 9 LH got DSO on this stunt (MUCK SHUBE) 465 ALEXANDRIA 466 Canal Hospital Ships 467 Ambulance - Sand cart 468 At old Cairo 469 No 1 Casualty Clearing Station 470 3rd Brigade on move 471 3rd LHFB- Making camp SERAPIUM 472 Watering horses 473 Moving up wadi 474 The wells at Wadi GHUZZEE 475 Camel transport SINAI 476 Turkish reservoir destroyed by ALH 477 Wall in a Luxor tomb 478 Entrance to "Temple of Bulls" 479 Bob White 480 Bedouin crops 481 Harem of Montazza, Turkish prince 482 Jack Holmes, Billy McGhee 483 MUDERIA, B Troop post 484 JIFF JAFFA 485 Natives on railroad construction 486 Aust graves SHALLAL 487 The Stumpy Mirror 488 R Nile at MANSUREH 489 Aust graves - BEELAH 490 NOUZEH Gardens - ALEXANDRIA 491 On issue from QMS. Take what comes. Fit does not matter 492 MATARA 493 German Yacht Club - ALEX 494 Old Turkish Howitzer and cannon ball 495 Field hospital 496 Gardens at BARAGE 497 A dispute's ending 498 Snow. MT LEBANON 499 Bedouin sheep 500 Combat in the air 501 no caption 502 Old Napoleon gun 503 Gordon Wake HQ car 504-5 Burying the dead at GAZA 506 Water Polo 507 Brigade boxing comp 508 Field cooker 509 Bridge on Jerusalem road, Blown up by Turks 510 Teaching horses to lay quiet. For protective purposes 511 "Major" and "Bitsy" 512 Bedouin Scarabs 513 Convalescent 514 1. W Billings. Returned to Aust 2. W McMahon KIA 515 Hospital 516 Coming good 517 1st day up - 14th AGH PORT SAID 518 Back again in Regt 519 Billy and Taffy 520 Stew 521 KHAN YUNIS 522 MENA 523 Casualties PORT SAID 524 Washing 525 Mail 526 Gun from the "Emden" mounted in Syney 527 MARSURES 528 Desert bivouac 529 HASSED 530 3RD ALH Bde. Good camp (Extra) All conv's 531 New issue 532 On to another camp (8 LH Regt) 533 Shore - JAFFA on MED SEA Photo Captions Volume 2 (Illegible = ?) 1 The Cedars on Mt Lebanon, according to tradition originated from the staves of the 12 Apostles 2000 years ago. 2 TIBERIUS taken 27th Sept '18 3 NAZARETH taken 20th Sept. German officer and Arab pony 4 TIBERIUS fell on 27th Sep. Von Saunders was the GOC of Turkish Forces in Palestine 5 Jordan Valley & Plains of Jericho run between Mts of Moab & Hills of Solomon. Distance across valley from foot of each range of hills abt 13 miles, looks ? 6 Storm on Sea of Galilee 7 DAMASCUS fell on 1st October. German vehicle park. 8 German funeral near Jerusalem 9 JENIN. German Headquarters. Fell 20th Sept. German field bakery 10 Three pages back will be seen a storm on GALILEE. Note now calm here. This photo taken near spot from which the previous one was taken. German motor launch on Galilee. 11 Captured intact on 20th Sept. German workshops JENIN 12 Turkish aerodrome captured here. Hostile aircraft landed whilst it was in our hands. Aviators greatly surprised and even indignant. Motor smash near EL FULE. 13 German Orderly Room (Ammunition box full of gold), DAMASCUS. All this gold Turkish coin secured by our troops. 14 German artillery on the way to the front near KENETRA. The ALH swooped down on the artillery around this vicinity & captured many field guns. 15 German Despatch Rider on the road to ES SALT. Unsuccessful raids carried out on ES SALT on 30th April & 4th May. This country was hard on men and horses. Goat tracks were used at times but horse were led most of the time. Stunt lasted 14 days in wet weather & horses were only unsaddled for about 2 hours during stunt. 16 Strand, ? , Tiberius, Gallilee 17 German workshop. Captured by ALH 18 One of the dead lying outside GAZA. Killed 19th April 17. We could not bury them before November 19 Some of the boys that fell in the charge at BEERSHEBA. Tibby Cotter 20 Collecting our dead for burial. They were K in A on the 19th April at GAZA. Buried seven months later, 23,000 casualties in one day 21 German U-Boat 22 Page of postage stamps and money - Struck to commemorate Gallipoli victory - Turkish war postage stamps - War duty - Turkish war bank notes 23 Pamphlet. With paper badges affixed These badges were worn by young Egyptian students. Arabic translation means "Egypt for Egyptians Long Live Egypt" This pamphlet was printed under German influence & distributed around ZAG-A-ZIG, the chief centre of hostilities during the recent Egyptian riots. The Young Egyptian Students influenced the Natives to oppose British Administration, what they called Tyranny. They professed to have sufficient competent educated men to govern their own affairs, but our Heads would not hear of it. Consequently the riots. Many ? and soldiers killed. All railways and communications disorganised. It took several months to bring things to their normal ? Pictures of medals 1. In honour of General Falkenhaugh GOC Turkish Forces 2. The Victorious Emperors of Germany, Austria and Turkey 3. Egypt Awakening 24 Those large photographs I sent you were procured for me by a pal who knew the chap that owned the negatives. The owner of these snaps belongs to the 5th Regiment of the 2nd Brigade, and he took the camera from a Turkish Officer. It had only 6 snaps of a spool of 10, and the BIll Jim finished off the spool by taking 4 of the special entry into Jerusalem. The cross indicates those taken by the Australian, the remainder were taken by the Jackos in the vicinity of BEERSHEBA and SHERIA Turkish field bakery 25 Cavalry going up to support their own line. However never had much action against the Turkish horsemen 26 Turkish Electricians in the field. I have an idea that this photo was taken to get the centre figure. He looks dinkum Australian. Note Australian leggings on Turk on the right 27 Turkish machine gunners ready for action. This is very much like the Beersheba country. Turkish officers on the right, and along side him is the range taker with his Barand Stroud. We use these instruments in the Sqn and they cost about 83 (Pound) 28 Turkish General Head Quarters just beyond SHERIA. Note hard rocky country 29 Turkish Cavalry watching a fight and getting ready to go into action. This is at SHERIA, and the heavy fighting lasted several days. Plenty of water and the Jacko's tried their hardest to hold on to this pozzie. Often our chaps met the gamer Turks in the dead of night, because both sides were on the same game, crawling down for water. This stunt is known as the Junction Fight. 30 Official entry Dec 11th. The official entry into Jerusalem. Sir G Allenby in the lead with his staff officers of the French and Italian troops accompanying him. Guard represents New Zealand, Australia, England Wales Scotland Ireland and India entering theJaffa Gate 31 Sir Ronald Storrs made Governor of JERU. Captured 9th Dec 17. Reading the Proclamation, General Allenby wearing white breeches. Troops of other nations were present, and the notables of Jerusalem. It was read from the foot of the Tower of David, a place that has been standing since the time of Christ 32 The first of the British troops entering Jerusalem. A few Turkish officers may b seen walking at the head of the column. Populace in a bad plight, very poor and no tucker, and all were greatly overjoyed at the ?? of the British Hundreds and kiddies ill treated ?? (Part of caption missing) 33 10th LH Regt first to enter JERUSALEM. Mounted officer on the right supposed to be the CO of the first troops to enter Jerusalem. Note mud on the horses. Had very wet and muddy weather 34 Dead Jacko 35 Turkish machine gun and crew 36 Hanging Armenian doctors who refused to join Turkish Army 37 Outside Damascus Gate Jerusalem 38 Turkish patrol lying outside trench at EL BUAJ 39 Burying Aussies at DAMASCUS 40 1. Djemel Pasha 2. General Limon Von Saunders GOC Turkish Forces in Palestine 41 One execution in Egypt. Executing an Egyptian offender 42 Turkish atrocities DAMASCUS 43 Turks occupying trenches outside JERICHO 44 On ASLUJ demolition stunt. Feeding and spelling. Arrived at Rendezvous too early 45 Turkish saw bayonet 46 Captured guns taken at BEERSHEBA & SHERIA 47 Our gunners obtained a direct hit on ammunition train 48 The large and small of the game. At GAZA. 74th CCS in background 49 Around JULIOUS. These Turkish shell dumps were very numerous around this vicinity 50 Captured Turkish Cavalry 51 Cavalry leaders 52 Turkish machine gun & crew 53 Enemy officers. One on left is wearing Iron Cross ribbon 54 Captured Austrian boat afire, Suez Canal Port Said. 40,000 cases of benzine aboard. Fire a mysterious outbreak 55 ? Hotchkiss gunners and enemy aircraft over ? TELL-EL-FARA 56 Types of enemy officers. One of our bikes in their possession. Recaptured later. The five pointed medals worn by these officers is called the Gallipoli Star. Issued to commemorate the Turkish victory at Gallipoli 57 Our batteries put in some good shooting amongst Turkish transport 58 Showing compactness of Turkish trenches 59 Desert homes. The only time we had cover in SINAI was when we camped near a Hod. Then we could use date palm leaves 60 JIFF JAFFA 61 ZAITZOUN 62 10th Regt MGS amongst hills outside JERUSALEM 63 Jews wailing place JERUSALEM 64-5 German post card characters 66 Post Card PHYLAE The Kiosk 67 Post Card Vue du Canal de Suez 68 Post Card No 93 Queen Street, Fort, Colombo 69 Snipers at NALIN Sth Syria. Lousy country for richochets. Nast wounds. (Aust War Memorial Melbourne) 70 Myself on Ginger. This little neddie is boshter jumper 71 Magazine cutting - Lt C H Vautin & German airman G Felmy 72 9th Regt 3rd LHB Judean Hills outside JERUSALEM. (Aust War memorial Melbourne) 73 Sand hills SINAI ? Desert (Aust War Memorial Melbourne) 74 3rd LHB spelling at GALILEE (AWM Melbourne) 75 Jordan Valley outside JERICHO (AWM Melbourne) - lovely Jordan Valley, dust and heat, 1280 ft below sea level 76 Copy of no 69 77 Watering at MATARIA 78 A desert grave - Tpr H R Olver MM 6th LH MGS Beneath this simple cross there lies a comrade true and tried He fought as fights a soldier And like a soldier died 79 B Section. When they first took our Stetsons and issued cumbersome helmets 80 Palestine types of Turkish and German officers 81 Some of the gunners amongst the snows in MT LEBANON 82 The country around JERUSALEM 83 JERUSALEM 84 Fishing ? ? at GALLILEE 85 Jerusalem taken Dec 9th. Official entry on the 11th. Jerusalem (showing) Holy City and Mosque of Omar 86 Turkish shell hits old tomb at ZERNUKAH. Capt Hurley official photographer - AWM Melbourne 87 14th AGH at PORT SAID 88 Human bones at Dead City ABBASSIA 89 3rd ALH Bde at HELIOPOLIS 90 Men wearing gloves 91 Wireless station in course of erection at MATARIA - 28 masts 92 Old slave market at ABBRASSIA. Many excavations performed on projecting wooden frame at corners 93 3rd guns on the move. The beautiful scenery between LATRON & JERUSALEM 94 Bedouin agents 95 Collecting captured enemy material 96 Captured double-engined plane 97 On the march. Country at Eastern SINAI 98 Anzac mosaic found at SHALLAL whilst trench digging now covered with gun etc ready for removal. Was sent to Canberra. 99 A Troop watering. A rotten job at a small well when horses are thirsty 100 The new Jericho road. Running through Hills of Solomon Valley in distance 101 Gun inspection 102 Draining pools at WADI AUJA. Keeping down Malaria carrying mosquitos 103 8th Regt and 3rd AMGS at BEELAH 104 A rendezvous in the Jordan Valley 105 2nd ALHB camped outside JERUSALEM 106 WADI AUJA in the Jordan Valley 107 Hospital train on the beach at EL -ARISH 108 Jacko's 109 Jerries 110 Stables of Turkish Headquarters SHALLAL 111 Early training. Every man to throw and quieten his horse for purpose of taking cover 112 A Troop 3rd Guns at TAALAT-EL-DUMM 113 Watering at WADI GHUZZEE 114 J Rushden KIA at ES-SALT 115 J Carling F Troop 3rd AMGS. Taken prisoner at EL-BURJ. Repatriated after Armistace 116 Captured enemy plane 117 Jacko gun 118 Brig-Gen Galloping Jack Royston. OC 3rd ALH Bde 119 Cleaning ammunition belts in the Hod at MASAID 120 Bringing up the fodder at ABBASSAN-EL-KEBIA 121 Some of the boys amongst the snow on MT LEBANON 122 Turkish barley crops at SHALLAL in Southern Palestine 123 The crops a few weeks after our horses had been in this vicinity 124 Clearing up after a stunt 125 On the move. 5 minute spells for the horses 126 In Jordan Valley. An airial torpedo lobbed amongst 3rd MG Transport horses & killed 28 127 Camel ration convoy coming along beach 128 Field Hospital at ET MALER 129 Desert graves at ROMANI 130 A day on the beach. Wash self, horse and clothing 131 Watering on the beach at BEELAH. Note how close fresh water is to the seashore 132 A patrol caught by a shell 133 Spello 134 Crossing the Wadi 135 Halt! Weights off and feed 136 Gas instruction 137 F Troop at TELL-EL-FARI 138 Xmas Dinner at MASAID 1916-17. Arrived back at this camp Xmas Eve after 5 nights & 4 days in saddle & the capture of MAGHDABA 139 Exercising along the beach at MARA-KHEB 140 Watering at a Bedouin well 141 At Sheikh's ZOWAID 142 3rd Gun Squadron at ABBASSAN-EL-KEBIR 143 Captured plane on its way to Australian Aerodrome 144 One of our planes about to pass over Hod 145 E & F Troop horse lines and horses 146 Sun set on Med Sea 147 Beach scene at EL-ARISH 148 Turkish transport. Small animals but they can pull big loads and they possess large hearts 149 The dressing station JIFF JAFFA ? 150-8 Types of Egyptian women - Nubian - Fellaheen - Sudanese - Low class Gippo - Egyptian - Middle Class -Egyptian Aristocracy - Turkish 159 French girls on beach at PORT SAID 160 Bedouin girls drawing water 161 Egyptian flappers at ALEXANDRIA 162 Post Card- Dame Turque 163 Post Card - Jeunne Fille Arabe 164 Graves of New Zealanders at RISCHON 165 Graves of Australians at DEIR-EL-BELAH 166 Race day. The saddling paddock 167 Bivouacs 168 3rd ALH Brigade at TRIPOLI 169 Advance party putting down horse lines at KHAN YURIS 170 Breaking the desert monotony 171 WADI QUELT. Taken from one of its precipitous banks 172 Turkish stores on N shore of DEAD SEA 173 Watering at Solomon's Pools 174 Waiting for action at - ES DUN (AWM Melbourne) 175 Camel Corps in action SINAI (AWM Melbourne) 176 ALH Time to Camp (part missing) (AWM Melbourne) 177 3rd Machine Gun Squadron IBU-HARITH, Lieut Breed, McLeod, Guppy, Whyte 178 Cartoon sketch - "A Digger" 179 Turkish Cavalry 180 Gun crew of No 2 Sub F Troop, 3rd Gun Sqdn 181 Operating base of JIFF JAFFA stunt 182 One of the British war boats that cooperated with the Land Force 183 Military railway line passing through a Hod in SINAI 184 AL-MINAH The sea port of Tripoli, Syria 185 NAZARETH Taken on 20 Sep 18 186 The Monastery on the Mt of Temptation, Taken from a cave on opposite hill. 187 JAFFA From the beach 188 In Monastery on the Mt of Temptation Rock on which Christ spent his 40 days 189 Cross indicates Garden of Gethsemane. Arrow at Russian Church of St Magdalene. MT of Olives on left 190 The Roman Bath at MONTAZAH. Hewn out of solid rock 191 Mine sweeper ashore near SHEIK'S ZOWAIL 192 Throwing "Chester" for an operation 193 The swimming pozzie at LAKE TIMSAH, ISMAILIA. Half a mile from MOASCAR, the Aust Training Depot 194 The remains of Napoleon's road. Portions can be seen running between BEELAH & GAZA 195 Camels utilised for ambulance work 196 TULKERAM taken on 19th Sep. This stunt started the previous night and this position fell to us the first day. About 60 miles from starting point 197 German officer at mess, JERUSALEM 198 German Headquarters SEMAK 199 TIBERIAS 200 Water preservation scheme at SHALLAL 201 A dip in the Jordan River. Crossed river on night 21-22 April 18 202 Watering and a wash up 203 JERICHO Taken on 21 Feb 18 204 Turkish graves 205 KHAN YUNIS. Southern Palestine, Note how sand ridges from the beach meet vegetation area. Fertile land 20 miles in width. the beginning of PHILISTIA 206 TAUBE-OVER 207 Drawing drinking water in Wadi GHUZZEE 208 The swimming pozzie in JORON 209 Landing stores at EL-ARISH 210 A camp near the wadi 211 Railway line and bridge crossing wadi above SHALLAL 212 The mid-day halt 213 Turks and Aussies at Dressing Station on beach 214 Washing day 215 Bringing supplies ashore 216 Trying mules in a 60 pounder 217 The desert winds have blown away and left this piece standing 218 Pontoons used by the Turks in their attempt to cross Suez Canal Feb 15 219 "HASSEIN" 220 "GIPPO" Mascot of 3rd AMG Sqdn 221 "Biddy" 222 Railhead camp 223 Typical Bedouin 224 Motor Submarine chaser dvr whyte, photos, ww1, light horse field ambulance -
 Warrnambool RSL Sub Branch
SOUVENIRED GERMAN EPAULETTES with the regiment numbers 59, 84, 137 and 202 in red
Probably souvenired by Bob Snape after hostilities from Australia Corps HQ Intelligence archives.snape collection -
 City of Moorabbin Historical Society (Operating the Box Cottage Museum)
Book, Mordialloc Writers' Group, Kingston my city : an anthology of personal essays, 2015
Annotation. A collection of essays, short stories and poetry about the writers and their relationship living, working or visiting the suburbs of Kingston Victoria.non-fictionAnnotation. A collection of essays, short stories and poetry about the writers and their relationship living, working or visiting the suburbs of Kingston Victoria.australian poetry, short stories, kingston -
Moorabbin Air Museum
Document (Item) - Functional Test Condition or completenesss For Hydraulic Quanity Measuring Fuse Waterman 831, Uap 4480, D45-202-20
Description: Date: 1974 Publisher: Department of Supply Pages: 84 Binding: Permanent/Soft Keywords: 1974 Parliamentary Paper No. 116 Level of Importance: National. -
 Robin Boyd Foundation
Document - Manuscript, Robin Boyd, Canberra, 1967
Boyd outlines the history of Canberra's design and construction. He argues that Canberra's strength is its planning and axially-based landscaping, but that it lacks the buildings which make the Le Corbusier's Chandigarh interesting. Boyd is highly critical of Chandigarh as an urban environment and concludes that for non-architects, planning and connection to nature is more important than buildings.Original manuscript published as 'Canberra Master Plan: Walter Burley Griffin' in World Architecture 4, John Donat (ed.), Viking Press 1967, pp 202-205.Typewritten (p/copy), quarto, 6 pageswalter burley griffin, canberra, john overall, lake burley griffin, oscar niemeyer, le corbusier, chandigarh, city beautiful, garden city, urban planning, robin boyd, manuscript -
 Robin Boyd Foundation
Document - Manuscript, Robin Boyd, The Functional Riddle
As the title suggests, Boyd explores the concept of Functionalism and questions the decline in popularity of the movement when Functionalism is still intertwined in contemporary design. Boyd challenges R.A.I.A.'s publication 'Australia Outrange' (a book that captures the unaesthetic aspects of Functionalism)The annotations indicate this was a lecture with slides.Typewritten, pencil edits / notes, quarto, 5 pages"Lewis?" Mitchell penciled on top left corner of first page, pencil notes on the left marginfunctionalism, r.a.i.a., australian outrage, max harris, robin boyd, manuscript -
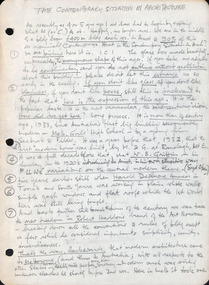 Robin Boyd Foundation
Document - Manuscript, Robin Boyd, The Contemporary Situation in Architecture
Boyd quickly surveys the first generation of modern architecture. The talk then concentrates on where modern architecture turned next: "the search for new richness on the surface and a search for new excitement in form". Boyd focuses on the second generation of modern architects: Edward Stone (surface search) and Eero Saarinen (excitiement search). Several of their influential buildings are critiqued by Boyd. This document includes the whole of the typed manuscript titled "The Crisis in Architecture" (item D522, with edits), and includes two handwritten pages at the start and ends with a handwritten statement about "architectural poetry". The text and annotations indicate this was a lecture with slides.Typewritten and handwritten sections, an amalgamation of documents, quarto, 18 pagesUnderlinings, pencil additions, indications for slidesinternational style, mies van der rohe, frank lloyd wright, edward stone, eero saarinen, le courbuier, felix candela, matthew novicki, eduardo catalano, hugh stubbins, raymond and rado, jorn utzon, toro-ferrer -
Koorie Heritage Trust
Book, Library Council of Victoria, Trespassers and intruders : the Port Phillip Association and the founding of Melbourne, 1982
Catalogue for an exhibition held at the State Library of Victoria in 1982 presenting the documents (housed in the La Trobe Library) which led to the founding of Melbourne. Scattered references to Aboriginal people. Deals with early settlement and the founding of Melbourne. Brief descriptions of personalities involved at that time, detailed annotations.[26] p. : ill., facsims. ; 25 cm. Catalogue for an exhibition held at the State Library of Victoria in 1982 presenting the documents (housed in the La Trobe Library) which led to the founding of Melbourne. Scattered references to Aboriginal people. Deals with early settlement and the founding of Melbourne. Brief descriptions of personalities involved at that time, detailed annotations.la trobe library -- catalogs. | port phillip association. | libraries. melbourne. la trobe library. stock: documents associated with port phillip association | land settlement -- victoria -- melbourne -- bibliography -- catalogs. | land settlement -- victoria -- melbourne -- bibliography. | land settlement -- victoria -- melbourne -- exhibitions. -
Moorabbin Air Museum
Document (Item) - Copy of Technical manual 55 1510 202 10, Packet 32 US Birddog plane
-
Moorabbin Air Museum
Booklet (Item) - Australia's Aircraft Industry History Keith Meggs annotations 1944, Australia's Aircraft Industry
-
Moorabbin Air Museum
Administrative record (item) - RAAF Wirraway Aircraft Servicing And Maintenance Form E/E.77 Travel Copy - A20-202, Royal Australian Air Force, Travel Copy: Aeroplane Maintenance Form E/E. 77, 15/12/1954
Contains daily inspection and test flight records. Maintenance carried out by 23 Technical Flight. -
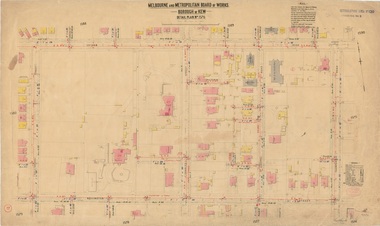 Kew Historical Society Inc
Plan, Melbourne & Metropolitan Board of Works : Borough of Kew : Detail Plan No.1576, 1904
The Melbourne and Metropolitan Board of Works (MMBW) plans were produced from the 1890s to the 1950s. They were crucial to the design and development of Melbourne's sewerage and drainage system. The plans, at a scale of 40 feet to 1 inch (1:480), provide a detailed historical record of Melbourne streetscapes and environmental features. Each plan covers one or two street blocks (roughly six streets), showing details of buildings, including garden layouts and ownership boundaries, and features such as laneways, drains, bridges, parks, municipal boundaries and other prominent landmarks as they existed at the time each plan was produced. (Source: State Library of Victoria)This plan forms part of a large group of MMBW plans and maps that was donated to the Society by the Mr Poulter, City Engineer of the City of Kew in 1989. Within this collection, thirty-five hand-coloured plans, backed with linen, are of statewide significance as they include annotations that provide details of construction materials used in buildings in the first decade of the 20th century as well as additional information about land ownership and usage. The copies in the Public Record Office Victoria and the State Library of Victoria are monochrome versions which do not denote building materials so that the maps in this collection are invaluable and unique tools for researchers and heritage consultants. A number of the plans are not held in the collection of the State Library of Victoria so they have the additional attribute of rarity.Original survey plan, issued by the MMBW to a contractor with responsibility for constructing sewers in the area identified on the plan within the Borough of Kew. The plan was at some stage hand-coloured, possibly by the contractor, but more likely by officers working in the Engineering Department of the Borough and later Town, then City of Kew. The hand-coloured sections of buildings on the plan were used to denote masonry or brick constructions (pink), weatherboard constructions (yellow), and public buildings (grey). Development in the 20th century has irreparably altered that part of Kew represented in this plan. In the block bounded by Cotham Road, Charles Street, Wellington Street and Gellibrand; just one house standing in 1903 remains. This block included two of the most historic houses in Kew: ‘Ordsall’ (later ‘Southesk’) and ‘Madford’ (previously ‘Elm Lodge’). Ordsall was the home of the second chairman of Kew, John Halfey. It contained some of the most significant interior murals in Kew, created for Halfey by artists working for Cullen & Co. It was demolished in 1960 to make way for the Kew Civic Centre. Elm Lodge had been built for William Siddeley in ca. 1864. Arthur Septimus King purchased it in 1874. The lower paddocks of Madford were sold in 1905 by his wife to the Borough of Kew and, after landscaping by George and Thomas Pockett, opened as the Alexandra Gardens in 1908. Elm Lodge/Madford was in 1922 to become St. Anthony’s Home for Little Children before its subsequent demolition in the 1980s.melbourne and metropolitan board of works, detail plans, maps - borough of kew, mmbw 1576, cartography -
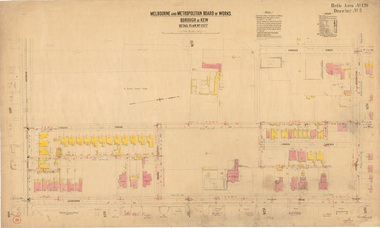 Kew Historical Society Inc
Plan, Borough of Kew Detail Plan No.1577, 1904
The Melbourne and Metropolitan Board of Works (MMBW) plans were produced from the 1890s to the 1950s. They were crucial to the design and development of Melbourne's sewerage and drainage system. The plans, at a scale of 40 feet to 1 inch (1:480), provide a detailed historical record of Melbourne streetscapes and environmental features. Each plan covers one or two street blocks (roughly six streets), showing details of buildings, including garden layouts and ownership boundaries, and features such as laneways, drains, bridges, parks, municipal boundaries and other prominent landmarks as they existed at the time each plan was produced. (Source: State Library of Victoria)This plan forms part of a large group of MMBW plans and maps that was donated to the Society by the Mr Poulter, City Engineer of the City of Kew in 1989. Within this collection, thirty-five hand-coloured plans, backed with linen, are of statewide significance as they include annotations that provide details of construction materials used in buildings in the first decade of the 20th century as well as additional information about land ownership and usage. The copies in the Public Record Office Victoria and the State Library of Victoria are monochrome versions which do not denote building materials so that the maps in this collection are invaluable and unique tools for researchers and heritage consultants. A number of the plans are not held in the collection of the State Library of Victoria so they have the additional attribute of rarity.Original survey plan, issued by the MMBW to a contractor with responsibility for constructing sewers in the area identified on the plan within the Borough of Kew. The plan was at some stage hand-coloured, possibly by the contractor, but more likely by officers working in the Engineering Department of the Borough and later Town, then City of Kew. The hand-coloured sections of buildings on the plan were used to denote masonry or brick constructions (pink), weatherboard constructions (yellow), and public buildings (grey). MMBW Plan No.1577 includes some of the most significant houses in Kew: Herbert Henty’s ‘Roxeth’ (now part of Trinity Grammar), ‘Butleigh Wooton’, ‘Bokara’ and ‘Harrow’. It also includes the streets that have since changed their names. That part of College Parade linked to Glenferrie Road is now named College Place, College Parade now extends further north, and Charles Street did not yet reach Barkers Road. Roxeth is one of a number of Henty houses in Kew. Herbert Henty made his home here and was elected a member of Kew Municipal Council in 1864 and mayor in 1868-69. Walter Henry Serle, of Harrow served in the First World War. He was awarded the Military Medal ‘’For conspicuous bravery and devotion to duty. On 29th September near BELLICOURT he showed the greatest bravery and determination when his platoon was attacked by enemy bombing parties. It was due largely to his personal efforts that all the attacks were repulsed. Until wounded, his utter disregard of personal safety and boldness in dealing with the attacks were the means of saving the situation and were an inspiring example to his men.’melbourne and metropolitan board of works, detail plans, maps - borough of kew, mmbw 1577, cartography -
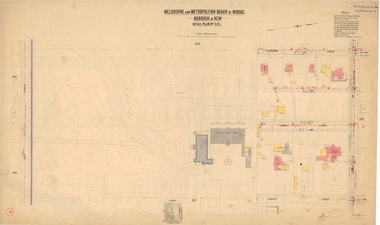 Kew Historical Society Inc
Plan, Melbourne & Metropolitan Board of Works : Borough of Kew : Detail Plan No.1578, 1904
The Melbourne and Metropolitan Board of Works (MMBW) plans were produced from the 1890s to the 1950s. They were crucial to the design and development of Melbourne's sewerage and drainage system. The plans, at a scale of 40 feet to 1 inch (1:480), provide a detailed historical record of Melbourne streetscapes and environmental features. Each plan covers one or two street blocks (roughly six streets), showing details of buildings, including garden layouts and ownership boundaries, and features such as laneways, drains, bridges, parks, municipal boundaries and other prominent landmarks as they existed at the time each plan was produced. (Source: State Library of Victoria). This plan forms part of a large group of MMBW plans and maps that was donated to the Society by the Mr Poulter, City Engineer of the City of Kew in 1989. Within this collection, thirty-five hand-coloured plans, backed with linen, are of statewide significance as they include annotations that provide details of construction materials used in buildings in the first decade of the 20th century as well as additional information about land ownership and usage. The copies in the Public Record Office Victoria and the State Library of Victoria are monochrome versions which do not denote building materials so that the maps in this collection are invaluable and unique tools for researchers and heritage consultants. A number of the plans are not held in the collection of the State Library of Victoria so they have the additional attribute of rarity.Original survey plan, issued by the MMBW to a contractor with responsibility for constructing sewers in the area identified on the plan within the Borough of Kew. The plan was at some stage hand-coloured, possibly by the contractor, but more likely by officers working in the Engineering Department of the Borough and later Town, then City of Kew. The hand-coloured sections of buildings on the plan were used to denote masonry or brick constructions (pink), weatherboard constructions (yellow), and public buildings (grey). MMBW Plan No.1578 is significant in that it defines the extent of two private schools: Xavier College and Kew High School (now part of Trinity Grammar) by 1904. In relation to the latter, the plan clarifies which buildings the High School operated from behind the mansion ‘Molina’. Established in 1902, Trinity Grammar was to later lease and subsequently buy Molina (now ‘Merritt House’) and ‘Elsinore’ (now ‘Roberts House’). Xavier College had been established in 1872. This 1904 plan delineates the West Wing and the Great Hall (built in 1890).melbourne and metropolitan board of works, detail plans, maps - borough of kew, mmbw 1578, cartography -
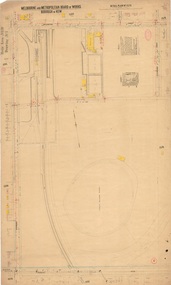 Kew Historical Society Inc
Plan, Melbourne & Metropolitan Board of Works. Borough of Kew Detail Plan No.1579, 1904
The Melbourne and Metropolitan Board of Works (MMBW) plans were produced from the 1890s to the 1950s. They were crucial to the design and development of Melbourne's sewerage and drainage system. The plans, at a scale of 40 feet to 1 inch (1:480), provide a detailed historical record of Melbourne streetscapes and environmental features. Each plan covers one or two street blocks (roughly six streets), showing details of buildings, including garden layouts and ownership boundaries, and features such as laneways, drains, bridges, parks, municipal boundaries and other prominent landmarks as they existed at the time each plan was produced. (Source: State Library of Victoria). This plan forms part of a large group of MMBW plans and maps that was donated to the Society by the Mr Poulter, City Engineer of the City of Kew in 1989. Within this collection, thirty-five hand-coloured plans, backed with linen, are of statewide significance as they include annotations that provide details of construction materials used in buildings in the first decade of the 20th century as well as additional information about land ownership and usage. The copies in the Public Record Office Victoria and the State Library of Victoria are monochrome versions which do not denote building materials so that the maps in this collection are invaluable and unique tools for researchers and heritage consultants. A number of the plans are not held in the collection of the State Library of Victoria so they have the additional attribute of rarity.Original survey plan, issued by the MMBW to a contractor with responsibility for constructing sewers in the area identified on the plan within the Borough of Kew. The plan was at some stage hand-coloured, possibly by the contractor, but more likely by officers working in the Engineering Department of the Borough and later Town, then City of Kew. The hand-coloured sections of buildings on the plan were used to denote masonry or brick constructions (pink), weatherboard constructions (yellow), and public buildings (grey). While MMBW Plan No.1579 does not include many buildings, those that it does show are significant to Kew’s history. These include the ‘Kew [Railway] Station’ in Denmark Street and the ‘Recreation Hall’ and rear courts off Wellington Street. The plan shows the outline of the Recreation Hall, constructed in 1880, at the rear of which is listed a bowling green, two tennis courts, a ‘skittle alley’ and a pavilion. When the Hall was first built, the Kew Cricket Club occupied an adjacent ground, however in 1885 this was acquired by the State Government as the future location of the Kew Railway Station. The Plan also shows a single oval at Xavier College. This oval was completed in 1883. One of the current ovals conforms to this oval’s original shape and position in the school grounds.melbourne and metropolitan board of works, detail plans, maps - borough of kew, mmbw 1579, cartography -
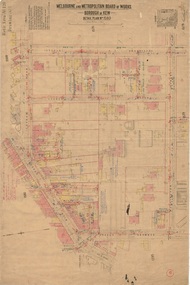 Kew Historical Society Inc
Plan, Melbourne and Metropolitan Board of Works, Borough of Kew : Detail Plan No.1580, 1904
The Melbourne and Metropolitan Board of Works (MMBW) plans were produced from the 1890s to the 1950s. They were crucial to the design and development of Melbourne's sewerage and drainage system. The plans, at a scale of 40 feet to 1 inch (1:480), provide a detailed historical record of Melbourne streetscapes and environmental features. Each plan covers one or two street blocks (roughly six streets), showing details of buildings, including garden layouts and ownership boundaries, and features such as laneways, drains, bridges, parks, municipal boundaries and other prominent landmarks as they existed at the time each plan was produced. (Source: State Library of Victoria)This plan forms part of a large group of MMBW plans and maps that was donated to the Society by the Mr Poulter, City Engineer of the City of Kew in 1989. Within this collection, thirty-five hand-coloured plans, backed with linen, are of statewide significance as they include annotations that provide details of construction materials used in buildings in the first decade of the 20th century as well as additional information about land ownership and usage. The copies in the Public Record Office Victoria and the State Library of Victoria are monochrome versions which do not denote building materials so that the maps in this collection are invaluable and unique tools for researchers and heritage consultants. A number of the plans are not held in the collection of the State Library of Victoria so they have the additional attribute of rarity.Original survey plan, issued by the MMBW to a contractor with responsibility for constructing sewers in the area identified on the plan within the Borough of Kew. The plan was at some stage hand-coloured, possibly by the contractor, but more likely by officers working in the Engineering Department of the Borough and later Town, then City of Kew. The hand-coloured sections of buildings on the plan were used to denote masonry or brick constructions (pink), weatherboard constructions (yellow), and public buildings (grey). The area represented in this detail plan has undergone significant change during the 20th century. The widening of High Street in the 1930s and 1950s involved the shops on the south side of High Street being demolished and later rebuilt to fit the widened street. Another significant loss was the mansion ‘Drayton’ fronting Wellington Street, owned at this stage by Susannah Fenton. Her family name would later to be given to Fenton Way, which was to be built over the grounds of the house following its demolition. The plan of the garden is particularly interesting, containing a batten dome fronting Wellington Street, an ornamental pond, a fountain and a brick and glass conservatory. The notes by the plumbing contractor on this plan are particularly detailed. Pink borders delineate the ownership of the varying parcels of land. Some of the better known owners listed include the real estate agent Cr. Henry de Castres Kellett (bt) and John Padbury, the funeral director. This particular plan provides a clear view of the configuration of the Kew Junction in 1903 and the commercial buildings that surrounded it.melbourne and metropolitan board of works, detail plans, maps - borough of kew, mmbw 1580, cartography -
 Kew Historical Society Inc
Plan, Melbourne & Metropolitan Board of Works : Borough of Kew : Detail Plan No.1581, 1904
The Melbourne and Metropolitan Board of Works (MMBW) plans were produced from the 1890s to the 1950s. They were crucial to the design and development of Melbourne's sewerage and drainage system. The plans, at a scale of 40 feet to 1 inch (1:480), provide a detailed historical record of Melbourne streetscapes and environmental features. Each plan covers one or two street blocks (roughly six streets), showing details of buildings, including garden layouts and ownership boundaries, and features such as laneways, drains, bridges, parks, municipal boundaries and other prominent landmarks as they existed at the time each plan was produced. (Source: State Library of Victoria)This plan forms part of a large group of MMBW plans and maps that was donated to the Society by the Mr Poulter, City Engineer of the City of Kew in 1989. Within this collection, thirty-five hand-coloured plans, backed with linen, are of statewide significance as they include annotations that provide details of construction materials used in buildings in the first decade of the 20th century as well as additional information about land ownership and usage. The copies in the Public Record Office Victoria and the State Library of Victoria are monochrome versions which do not denote building materials so that the maps in this collection are invaluable and unique tools for researchers and heritage consultants. A number of the plans are not held in the collection of the State Library of Victoria so they have the additional attribute of rarity.Original survey plan, issued by the MMBW to a contractor with responsibility for constructing sewers in the area identified on the plan within the Borough of Kew. The plan was at some stage hand-coloured, possibly by the contractor, but more likely by officers working in the Engineering Department of the Borough and later Town, then City of Kew. The hand-coloured sections of buildings on the plan were used to denote masonry or brick constructions (pink), weatherboard constructions (yellow), and public buildings (grey). The streets and built structures in this plan were surveyed in 1903 and released to contractors in 1904. In addition to the designation of building types by colour, the plan includes detailed descriptions of land use and ownership. While many buildings remain from this period, a number of the buildings represented have been demolished including the original Kew Town Hall, and the Congregational and Roman Catholic churches in Walpole Street. While the mansion ‘Illapa’ in Princess Street is still extant – now part of ‘Rylands’ – the neighbouring mansion ‘Elsmere’ was demolished some decades ago. Rivalling Illapa and Elsmere in size were two mansions in Walpole Street, one named on the plan as ‘Gnarlbine’. Over time, Kew Junction and the south side of High Street have been reconfigured and widened, so that the commercial buildings on the corner of Princess and High Street no longer exist. A surprising feature of this part of central Kew to the northwest of Kew Junction is the amount of vacant land. In a number of cases, this land is noted by the contractor as used for vegetable gardens.melbourne and metropolitan board of works, detail plans, maps - borough of kew, mmbw 1581, cartography -
 Kew Historical Society Inc
Plan, Melbourne & Metropolitan Board of Works : Borough of Kew : Detail Plan No.1582, 1904
The Melbourne and Metropolitan Board of Works (MMBW) plans were produced from the 1890s to the 1950s. They were crucial to the design and development of Melbourne's sewerage and drainage system. The plans, at a scale of 40 feet to 1 inch (1:480), provide a detailed historical record of Melbourne streetscapes and environmental features. Each plan covers one or two street blocks (roughly six streets), showing details of buildings, including garden layouts and ownership boundaries, and features such as laneways, drains, bridges, parks, municipal boundaries and other prominent landmarks as they existed at the time each plan was produced. (Source: State Library of Victoria)This plan forms part of a large group of MMBW plans and maps that was donated to the Society by the Mr Poulter, City Engineer of the City of Kew in 1989. Within this collection, thirty-five hand-coloured plans, backed with linen, are of statewide significance as they include annotations that provide details of construction materials used in buildings in the first decade of the 20th century as well as additional information about land ownership and usage. The copies in the Public Record Office Victoria and the State Library of Victoria are monochrome versions which do not denote building materials so that the maps in this collection are invaluable and unique tools for researchers and heritage consultants. A number of the plans are not held in the collection of the State Library of Victoria so they have the additional attribute of rarity.Original survey plan, issued by the MMBW to a contractor with responsibility for constructing sewers in the area identified on the plan within the Borough of Kew. The plan was at some stage hand-coloured, possibly by the contractor, but more likely by officers working in the Engineering Department of the Borough and later Town, then City of Kew. The hand-coloured sections of buildings on the plan were used to denote masonry or brick constructions (pink), weatherboard constructions (yellow), and public buildings (grey). Public buildings, coloured grey on the Plan 1582 include the police station and post office, churches and schools. The earliest church school, Common School No.356 was located at the rear of the Congregational Church in Peel Street. It was constructed in 1859. The first buildings of Kew Primary School No.1075 on the other side of Peel Street were constructed in 1871. The school in 1903 only occupied a small fraction of its current site. In 1903, where the rear playground is now located, were two weatherboard and one brick villa. Trinity Grammar School was founded in 1902 and opened in the Parish Hall at the rear of Holy Trinity Anglican Church. It was not to move to its current site until 1906. The outline of the building housing the Kew Fire Brigade in the centre of the north side of Walton Street is shown but not named on the plan. Further down Pakington Street stood the two-storey Italianate mansion ‘Overton’. The home of Stanford Chapman, it was to be featured in the Imperial Institute series of bromide photographs of Victoria, Vol. 1: Homes and scenery. It was later to become a boarding house before it was later demolished.melbourne and metropolitan board of works, detail plans, maps - borough of kew, mmbw 1582, cartography -
 Kew Historical Society Inc
Plan, Melbourne & Metropolitan Board of Works : Borough of Kew : Detail Plan No.1585, 1904
The Melbourne and Metropolitan Board of Works (MMBW) plans were produced from the 1890s to the 1950s. They were crucial to the design and development of Melbourne's sewerage and drainage system. The plans, at a scale of 40 feet to 1 inch (1:480), provide a detailed historical record of Melbourne streetscapes and environmental features. Each plan covers one or two street blocks (roughly six streets), showing details of buildings, including garden layouts and ownership boundaries, and features such as laneways, drains, bridges, parks, municipal boundaries and other prominent landmarks as they existed at the time each plan was produced. (Source: State Library of Victoria)This plan forms part of a large group of MMBW plans and maps that was donated to the Society by the Mr Poulter, City Engineer of the City of Kew in 1989. Within this collection, thirty-five hand-coloured plans, backed with linen, are of statewide significance as they include annotations that provide details of construction materials used in buildings in the first decade of the 20th century as well as additional information about land ownership and usage. The copies in the Public Record Office Victoria and the State Library of Victoria are monochrome versions which do not denote building materials so that the maps in this collection are invaluable and unique tools for researchers and heritage consultants. A number of the plans are not held in the collection of the State Library of Victoria so they have the additional attribute of rarity.Original survey plan, issued by the MMBW to a contractor with responsibility for constructing sewers in the area identified on the plan within the Borough of Kew. The plan was at some stage hand-coloured, possibly by the contractor, but more likely by officers working in the Engineering Department of the Borough and later Town, then City of Kew. The hand-coloured sections of buildings on the plan were used to denote masonry or brick constructions (pink), weatherboard constructions (yellow), and public buildings (grey). This plan, which covers parts of High Street, Pakington Street and Derby Street is dominated by two historic Kew mansions: ‘Konetta’ and ‘Ramornie’. Ramornie was constructed in 1890 for James Maitland Campbell, three times Mayor of Kew. Sold in 1940, it became a boarding house known as ‘The Towers’. Now a private residence again, it has only one of its three balconies remaining. The location of the missing two balconies can be seen on the plan. In 1903, the grounds of Ramornie included a large tennis court fronting Pakington Street. The rear of the property is shown as extending to Cobden Street. One of Kew’s oldest hotels, the Prospect Hill Hotel on the corner of High and Cobden Street was established in 1858. The outline of the hotel shown on the plan represents the second building on the site. During the 19th century it was often used for electoral meetings. The Prospect Hill Hotel was to be redeveloped again in 1928, by the local architect Robert McIntyre. Since the 1980s, the hotel has been a live music venue, the home of the Melbourne Jazz Club, a restaurant and a liquor outlet.melbourne and metropolitan board of works, detail plans, maps - borough of kew, mmbw 1585, cartography -
 Kew Historical Society Inc
Plan, Melbourne & Metropolitan Board of Works : Borough of Kew : Detail Plan No.1588, 1904
The Melbourne and Metropolitan Board of Works (MMBW) plans were produced from the 1890s to the 1950s. They were crucial to the design and development of Melbourne's sewerage and drainage system. The plans, at a scale of 40 feet to 1 inch (1:480), provide a detailed historical record of Melbourne streetscapes and environmental features. Each plan covers one or two street blocks (roughly six streets), showing details of buildings, including garden layouts and ownership boundaries, and features such as laneways, drains, bridges, parks, municipal boundaries and other prominent landmarks as they existed at the time each plan was produced. (Source: State Library of Victoria)This plan forms part of a large group of MMBW plans and maps that was donated to the Society by the Mr Poulter, City Engineer of the City of Kew in 1989. Within this collection, thirty-five hand-coloured plans, backed with linen, are of statewide significance as they include annotations that provide details of construction materials used in buildings in the first decade of the 20th century as well as additional information about land ownership and usage. The copies in the Public Record Office Victoria and the State Library of Victoria are monochrome versions which do not denote building materials so that the maps in this collection are invaluable and unique tools for researchers and heritage consultants. A number of the plans are not held in the collection of the State Library of Victoria so they have the additional attribute of rarity.Original survey plan, issued by the MMBW to a contractor with responsibility for constructing sewers in the area identified on the plan within the Borough of Kew. The plan was at some stage hand-coloured, possibly by the contractor, but more likely by officers working in the Engineering Department of the Borough and later Town, then City of Kew. The hand-coloured sections of buildings on the plan were used to denote masonry or brick constructions (pink), weatherboard constructions (yellow), and public buildings (grey). This plan shows the original configuration of the Kew Post Office, Court House and Police Station, which had opened in 1888. This configuration was to essentially remain until the purchase of the Court House and Police Station by the City of Boroondara in 2007 and its subsequent renovation. Interestingly, the MMBW surveyors incorrectly labelled parts of the complex. In the triangle in front of the Post Office, before the erection of the Kew Cenotaph in 1925, was located a lawn and the Queen Victoria Jubilee Fountain. While many of the shops on the south side of High street had been constructed by 1903 a number of sites were still used as vegetable gardens. Further along High Street, on the corner of Charles Street, the Salvation Army Barracks can be seen on the plan. These Barracks predate the later Citadel and ‘Young People’s Hall’ that were opened in 1919. At 22 Charles Street can be seen the house of James Venn Morgan. Hailed as the ‘father of Kew’, Morgan arrived in Melbourne in 1840. He was first engaged as a bookmaker, but a fortunate venture on the goldfields enabled him to purchase land in Kew. He conducted a market garden and dairy in Kew for many years.melbourne and metropolitan board of works, detail plans, maps - borough of kew, mmbw 1588, cartography -
 Kew Historical Society Inc
Plan, Melbourne & Metropolitan Board of Works : Borough of Kew : Detail Plan No.1590, 1905
The Melbourne and Metropolitan Board of Works (MMBW) plans were produced from the 1890s to the 1950s. They were crucial to the design and development of Melbourne's sewerage and drainage system. The plans, at a scale of 40 feet to 1 inch (1:480), provide a detailed historical record of Melbourne streetscapes and environmental features. Each plan covers one or two street blocks (roughly six streets), showing details of buildings, including garden layouts and ownership boundaries, and features such as laneways, drains, bridges, parks, municipal boundaries and other prominent landmarks as they existed at the time each plan was produced. (Source: State Library of Victoria)This plan forms part of a large group of MMBW plans and maps that was donated to the Society by the Mr Poulter, City Engineer of the City of Kew in 1989. Within this collection, thirty-five hand-coloured plans, backed with linen, are of statewide significance as they include annotations that provide details of construction materials used in buildings in the first decade of the 20th century as well as additional information about land ownership and usage. The copies in the Public Record Office Victoria and the State Library of Victoria are monochrome versions which do not denote building materials so that the maps in this collection are invaluable and unique tools for researchers and heritage consultants. A number of the plans are not held in the collection of the State Library of Victoria so they have the additional attribute of rarity.Original survey plan, issued by the MMBW to a contractor with responsibility for constructing sewers in the area identified on the plan within the Borough of Kew. The plan was at some stage hand-coloured, possibly by the contractor, but more likely by officers working in the Engineering Department of the Borough and later Town, then City of Kew. The hand-coloured sections of buildings on the plan were used to denote masonry or brick constructions (pink), weatherboard constructions (yellow), and public buildings (grey). Surveyed by the Board of Works in 1903 and published in 1904, Plan No.1590 shows development north of Cotham Road. While this plan includes built structures in Mary Street, Cotham Road, High Street, Park Hill Road, Kent Street, Ridgeway Avenue, and Ermington Lane (now Ermington Place), only part of this section was notated and coloured in this contractor’s copy. Numerous houses, large and small are named on the plan: ‘Cholula’, ‘Belper’, ‘The Uplands’, ‘Spring Grove’ facing Cotham Road; ‘Marion’ facing Kent Street; and ‘Kia Ora’ facing Ridgeway Avenue.melbourne and metropolitan board of works, detail plans, mmbw 1590, survey plans - borough of kew, cartography -
 Kew Historical Society Inc
Plan, Melbourne & Metropolitan Board of Works : Borough of Kew : Detail Plan No.1591, 1905
The Melbourne and Metropolitan Board of Works (MMBW) plans were produced from the 1890s to the 1950s. They were crucial to the design and development of Melbourne's sewerage and drainage system. The plans, at a scale of 40 feet to 1 inch (1:480), provide a detailed historical record of Melbourne streetscapes and environmental features. Each plan covers one or two street blocks (roughly six streets), showing details of buildings, including garden layouts and ownership boundaries, and features such as laneways, drains, bridges, parks, municipal boundaries and other prominent landmarks as they existed at the time each plan was produced. (Source: State Library of Victoria)This plan forms part of a large group of MMBW plans and maps that was donated to the Society by the Mr Poulter, City Engineer of the City of Kew in 1989. Within this collection, thirty-five hand-coloured plans, backed with linen, are of statewide significance as they include annotations that provide details of construction materials used in buildings in the first decade of the 20th century as well as additional information about land ownership and usage. The copies in the Public Record Office Victoria and the State Library of Victoria are monochrome versions which do not denote building materials so that the maps in this collection are invaluable and unique tools for researchers and heritage consultants. A number of the plans are not held in the collection of the State Library of Victoria so they have the additional attribute of rarity.Original survey plan, issued by the MMBW to a contractor with responsibility for constructing sewers in the area identified on the plan within the Borough of Kew. The plan was at some stage hand-coloured, possibly by the contractor, but more likely by officers working in the Engineering Department of the Borough and later Town, then City of Kew. The hand-coloured sections of buildings on the plan were used to denote masonry or brick constructions (pink), weatherboard constructions (yellow), and public buildings (grey). That area of Kew bordered by Cotham Road, Park Hill Road, Ermington Lane (now Ermington Place), and Belmont Avenue contained some of the significant homes owned by Kew pioneers. Chief among these was ‘Park Hill’ on an enormous lot facing Park Hill Road. The Jubilee History of 1910 noted, six years after this plan was drawn, that: ‘Park Hill Road, forming the southern boundary of the cemetery, takes its name from Park Hill, the residence of Mr. Thomas Judd, who has resided there since December, 1852.’ Other named houses on the plan include ‘Ferndale’ facing Cotham Road; ‘Ermington’ adjacent to Judd’s Park Hill, facing Park Hill Road; and ‘Gilden’ and ‘Mont Belmont’ facing Belmont Avenue. Mont Belmont was designed by the architectural firm of Reed, Henderson and Smart for William George Lilley in 1887 and was completed in 1888. Lilley was Mayor of Kew in 1887-88, a Justice of the Peace and a member of the first Board of Guardians of Kew’s St. Hilary’s Church of England.melbourne and metropolitan board of works, detail plans, survey plans - borough of kew, mmbw 1591, cartography -
 Kew Historical Society Inc
Plan, Melbourne & Metropolitan Board of Works : Borough of Kew : Detail Plan No.1592, 1905
The Melbourne and Metropolitan Board of Works (MMBW) plans were produced from the 1890s to the 1950s. They were crucial to the design and development of Melbourne's sewerage and drainage system. The plans, at a scale of 40 feet to 1 inch (1:480), provide a detailed historical record of Melbourne streetscapes and environmental features. Each plan covers one or two street blocks (roughly six streets), showing details of buildings, including garden layouts and ownership boundaries, and features such as laneways, drains, bridges, parks, municipal boundaries and other prominent landmarks as they existed at the time each plan was produced. (Source: State Library of Victoria). This plan forms part of a large group of MMBW plans and maps that was donated to the Society by the Mr Poulter, City Engineer of the City of Kew in 1989. Within this collection, thirty-five hand-coloured plans, backed with linen, are of statewide significance as they include annotations that provide details of construction materials used in buildings in the first decade of the 20th century as well as additional information about land ownership and usage. The copies in the Public Record Office Victoria and the State Library of Victoria are monochrome versions which do not denote building materials so that the maps in this collection are invaluable and unique tools for researchers and heritage consultants. A number of the plans are not held in the collection of the State Library of Victoria so they have the additional attribute of rarity.Original survey plan, issued by the MMBW to a contractor with responsibility for constructing sewers in the area identified on the plan within the Borough of Kew. The plan was at some stage hand-coloured, possibly by the contractor, but more likely by officers working in the Engineering Department of the Borough and later Town, then City of Kew. The hand-coloured sections of buildings on the plan were used to denote masonry or brick constructions (pink), weatherboard constructions (yellow), and public buildings (grey). In MMBW Plan No.1592, the pink line indicates that area of the plan for which the contracting engineer was responsible. Included in the Plan are a number of primarily brick villas in a section of Belmont Avenue off Cotham Road. The house ‘Uvadale’ north of Belmont Avenue, and facing Cotham Road is also included in the contract. Excluded from the contract but shown on the Plan are ‘Glendonald’, ‘Mont Belmont’ and ‘Gilden’.melbourne and metropolitan board of works, detail plans, survey plans - borough of kew, mmbw 1592, cartography -
 Kew Historical Society Inc
Plan, Melbourne & Metropolitan Board of Works / Borough of Kew, Detail Plan No.1593, 1905
The Melbourne and Metropolitan Board of Works (MMBW) plans were produced from the 1890s to the 1950s. They were crucial to the design and development of Melbourne's sewerage and drainage system. The plans, at a scale of 40 feet to 1 inch (1:480), provide a detailed historical record of Melbourne streetscapes and environmental features. Each plan covers one or two street blocks (roughly six streets), showing details of buildings, including garden layouts and ownership boundaries, and features such as laneways, drains, bridges, parks, municipal boundaries and other prominent landmarks as they existed at the time each plan was produced. (Source: State Library of Victoria)This plan forms part of a large group of MMBW plans and maps that was donated to the Society by the Mr Poulter, City Engineer of the City of Kew in 1989. Within this collection, thirty-five hand-coloured plans, backed with linen, are of statewide significance as they include annotations that provide details of construction materials used in buildings in the first decade of the 20th century as well as additional information about land ownership and usage. The copies in the Public Record Office Victoria and the State Library of Victoria are monochrome versions which do not denote building materials so that the maps in this collection are invaluable and unique tools for researchers and heritage consultants. A number of the plans are not held in the collection of the State Library of Victoria so they have the additional attribute of rarity.Original survey plan, issued by the MMBW to a contractor with responsibility for constructing sewers in the area identified on the plan within the Borough of Kew. The plan was at some stage hand-coloured, possibly by the contractor, but more likely by officers working in the Engineering Department of the Borough and later Town, then City of Kew. The hand-coloured sections of buildings on the plan were used to denote masonry or brick constructions (pink), weatherboard constructions (yellow), and public buildings (grey). The laborious task of hand-tinting these Board of Works plans was not without hazards as is evidenced by Plan No. 1593. On the Plan, the original colourist spilt black and green ink, partially obscuring some parts. The most obvious casualty is ‘Clifton’ located on the corner of Cotham Road and Park Street [now Adeney Avenue]. Included in this Plan, and outlined in pink is that part of the section that the contracting engineer was tasked with completing. This included sewering on both sides of this part of Cotham Road, but excluded properties such as ‘Glendonald’ and ‘Monnington’. This area was to undergo a series of subdivisions including the ‘Clifton Estate’, which created housing lots on Adeney Avenue and Florence Avenue in 1916. The most notable occupant of Clifton was William Adeney [died 1893], a pioneer of Camperdown, after which Park Street was later renamed.melbourne and metropolitan board of works, detail plans, survey plans - borough of kew, mmbw 1593, cartography -
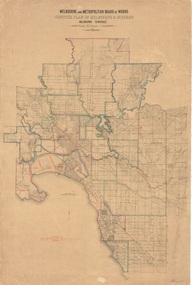 Kew Historical Society Inc
Plan, Melbourne & Metropolitan Board of Works : Contour Plan of Melbourne & Suburbs : Melbourne Sewage, 1894
The Melbourne and Metropolitan Board of Works (MMBW) plans were produced from the 1890s to the 1950s. They were crucial to the design and development of Melbourne's sewerage and drainage system. This plan forms part of a large group of MMBW plans and maps that was donated to the Society by the Mr Poulter, City Engineer of the City of Kew in 1989. Within this collection, thirty-five hand-coloured plans, backed with linen, are of statewide significance as they include annotations that provide details of construction materials used in buildings in the first decade of the 20th century as well as additional information about land ownership and usage. The copies in the Public Record Office Victoria and the State Library of Victoria are monochrome versions which do not denote building materials so that the maps in this collection are invaluable and unique tools for researchers and heritage consultants. A number of the plans are not held in the collection of the State Library of Victoria so they have the additional attribute of rarity.Digital copy of an original MMBW plan. This contour plan shows the area identified by the MMBW for purposes of drainage and sewerage in 1894. The suburbs represented extend from Williamstown in the west to Bulleen in the east, and from Preston in the north, south to Sandringham. Suburbs are outlined in coloured ink. Red lines indicate main and branch sewers in existence at the beginning of 1894 in central and inner Melbourne. These extended as far as Williamstown and Brighton, but not yet as far as Kew, where sewering did not commence until 1901. Contour lines show the topography, which was important for indicating the fall of the land for the laying of sewers and drainage channels. Kew appears to be fairly undeveloped at this date except for railway lines and stations (the Kew and Outer Circle lines), main roads, the Kew Lunatic Asylum Reserve and Studley Park. However, the contour plan does not accurately represent the density of settlement, nor the large number of houses, which were being built in Kew and other suburbs from the 1850s to the land boom of the late 1880’s and early 1890’s. This plan is part of a large and historically significant group of MMBW plans and maps that was donated to the Society by the Mr Poulter, City Engineer of the City of Kew in 1989.mmbw contour plan of melbourne and suburbs, melbourne and metropolitan board of works, melbourne sewage, cartography -
 Kew Historical Society Inc
Booklet, 1st Kew Scout Group : Recipe Book, 1975
Paperback with red cover inscribed with the title. Inside a preface including acknowledgements by the President of the Auxiliary. Printed recipes with some annotations by the owner. Text typed onto stencils then printed and assembled by members of the Auxiliary. The 1st Kew Scouts was one of the first Scout Troops in Victoria, being formed in 1909. From 1927 they met in a Scout Hall in Disraeli Street, Kew until it was demolished in 1993. Still operating from their new Scout Hall on the corner of Kilby Road and Kellett Grove, Kew.Small, self-published, paperback recipe book published by the Ladies' Auxiliary of the 1st Kew Scout Group. The book of recipes was compiled in 1967 from a selection of favourite recipes submitted by the Ladies' Auxiliary and their friends. A preface, written by the President of the Auxiliary, Margaret Jones, acknowledges the role of Miss Bet. De Hays who typed the stencils as well as assisting in the booklet's preparation. The purpose of the book was to raise funds for equipment to be used by members of the 1st Kew Scout Group.non-fictionPaperback with red cover inscribed with the title. Inside a preface including acknowledgements by the President of the Auxiliary. Printed recipes with some annotations by the owner. Text typed onto stencils then printed and assembled by members of the Auxiliary. The 1st Kew Scouts was one of the first Scout Troops in Victoria, being formed in 1909. From 1927 they met in a Scout Hall in Disraeli Street, Kew until it was demolished in 1993. Still operating from their new Scout Hall on the corner of Kilby Road and Kellett Grove, Kew.recipe books, 1st kew scout group, booklets -
!['Ross House', Cotham Road [Kew]](/media/collectors/550653872162f11fb04854aa/items/658f6ccb9239cf6fd436923e/item-media/658f6ce39239cf6fd43692f3/item-fit-380x285.jpg) Kew Historical Society Inc
Kew Historical Society IncPhotograph - 'Ross House', Cotham Road [Kew], c.1960
Ross House, formerly called Charleville, was built as a two-storey mansion in 1889 for Charles Donaldson. It was designed in the Italianate style by the architect H. Shallers and built by G. Ginham. Dr Tom King, surgeon purchased Charleville from Donaldson in 1939 and renamed it Ross House. This work forms part of the collection assembled by the historian Dorothy Rogers (1905-1973), donated to the Kew Historical Society by her son in 2015. The manuscripts, photographs, maps, and documents were sourced by her from both family and local collections or produced as references for her print publications. Many were directly used by Rogers in writing ‘Lovely Old Homes of Kew’ (1961) and 'A History of Kew' (1973), or the numerous articles on local history that she produced for suburban newspapers. Most of the photographs in the collection include detailed annotations in her hand. The Rogers Collection provides a comprehensive insight into the working habits of a historian from the 1960s to the 1970s.Facade of 'Ross House' (formerly 'Charleville') in Cotham Road, Kew. Inscription verso: "Ross House , Bib Stillwell, Cotham Rd".ross house, charleville, cotham road, kew, dorothy rogers, charles donaldson, tom king, g. ginham, h. shallers