Showing 1963 items matching "bag"
-
 Melbourne Tram Museum
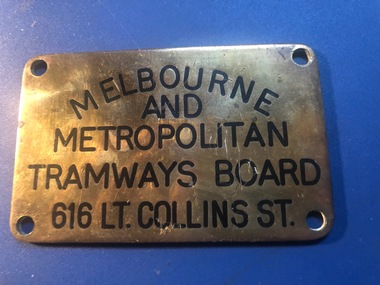
Functional object - Address Plate, Melbourne & Metropolitan Tramways Board (MMTB), 1950's?
Engraved brass address plate, with the words "Melbourne and Metropolitan Tramways Board 616 Lt. Collins St" in capital letters with the word "Melbourne" curved. Has four screw holes in the corner. Could have been used on a correspondence bag, eg for the Post Office or another Authority. Note the MMTB Head Office as at this address post 1938.trams, tramways, mmtb, head office, post office -
 National Vietnam Veterans Museum (NVVM)
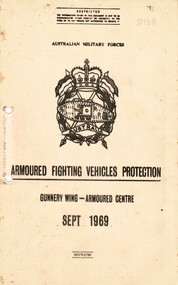
Manual, Australian Military Forces, Australian Military Forces: Armoured Fighting Vehicles Protection: Gunnery Wing - Armoured centre Sept 1969, 1969
A cream coloured cardboard cover with black information on the front. in black in reads Australian Military Forces and under this there is an insignia. Under the insignia reads Armoured Fighting Vehiches Protection (which is underlined) followed by Gunner Wing - Armoured Centre Sept 1969. There are two holes down the left hand side. The manual is loose and stored in a plastic bag.australia - armed forces - service manuals, tank warfare, gunnery wing, armoured fighting vehicles protection, armoured centre, australian military forces -
 Federation University Historical Collection
Book, Notebooks belionging to Richard Squire with mine notes
Richard Squire was a student at Ballarat School of Mines In 1905 Richard Squire was manager of the West Berry Consols at Allendale, and developed an improved system of mine ventilation, which was supported in "The Age."He was successful in combating and remedying the gas and ventilation troubles of the Deep Mines of Creswick and Allendale Districts after all had failed. MINE MANAGERS’ ASSOCIATION. Ballarat Branch. ... Mr R. B. Squire, manager of the West Berry Consols, at Allendale, submitted a paper detailing what he had done tor the betterment of ventilation in the alluvial mines of Smeaton and Mary borough districts- Members gave Mr Squire every credit for the results that he claimed to have effected; the adoption of his ideas had testified to their value to mine-owners. It was painted out, however, that for want of a thorough debate of the subject with experienced men the author had unwittingly included some general statements that required modifying in some points and extending in others, in justice to other workers among the earlier and the present day managers of mines. It was decided to invite the author to meet a sub-committee on this subject!Little black books with handwritten notes on the mines of Richard Squire .1 1916 Deliveries, Accounts, Invoices etc. .2 1911 & 1912 Notes to pay costs, equipment etc. .3 South Berry Coy. Notes from 1909 ( 2book stuck together) .4 Leigh River Time Book ( 2book stuck together) .5 Single page of Notes .6 Notes on supplies etc. 1919 .7 Leigh River Notes Dec 1920 to March 1921 ( 2book stuck together) .8 Hut Book .9 Notebook August 8th 1927 .10 6 Books stuck together various mine notes 1912 .11 Notebooks bagged because of potential mould .12 Notebooks bagged because of potential mould richard squire, notebooks, deliveries, leigh river time book, leigh river, supplies -
 Bendigo Historical Society Inc.
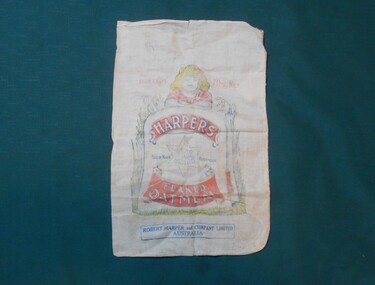
Textile - FLOUR BAG COLLECTION: ROBERT HARPER AND COMPANY, 1900-1950
Textiles. Calico bag - ''Harpers Flaked Oatmeal'' Star brand, Trademark Registered ''My Brekfus'' 7 lbs Net. Robert Harper and Company Limited Australia. Head and shoulders drawing of a blonde haired girl surrounded by wheat.On the other side of the bag is a blue and white picture of a box of ''Silver Star Starch''. Robert Harper and Co Ltd. Slogan written on box, '' The best in the world. Won't sick to the Iron''. Robert Harper and Company (1842-1919), businessman and politician, was born in Scotland. He migrated to Melbourne with his family in August 1856. He worked for J.F.McKenzie & Co., roasting and grinding millers. In 1865 he established Robert Harper & Co., trading in tea, coffee and spices from the East Indies and later in oatmeal and flour.textiles, domestic, robert harper and co calico bag -
 Melbourne Tram Museum
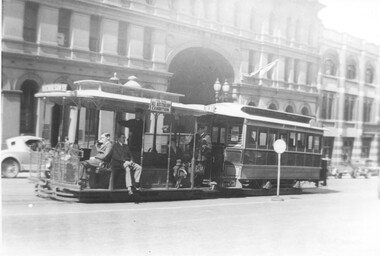
Photograph, Cable tram 534 in Bourke Street outside the St. James Building, 1924
The photograph shows a cable tram set with trailer No. 534 east bound in Bourke St on its way to Nicholson St passing the St. James Building at William Street. The conductor standing at the back of the grip car is in MMTB uniform with his ticket wallet in his left hand and bag visible. The grip man appears to be ringing his bell. There is a side advertisement for the "All Australian Exhibition". A reference to the exhibition is in The Argus of 3/11/1924 - see reference.Yields information cable trams in Bourke St and their crews.Photograph, black and white, plain backtrams, tramways, cable tram, bourke st, conductors, tram crews, william st, tram 534 -
 Bendigo Historical Society Inc.
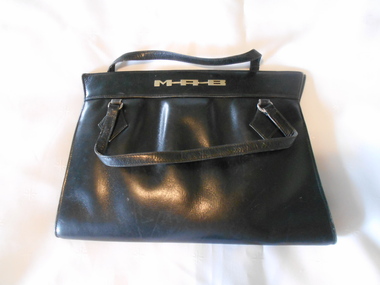
Clothing - MAGGIE BARBER COLLECTION: BLACK HAND BAG WITH SILVER INITIALS MAB
Clothing. Owners initials prominent on outside. Rectangular in shape, fine grained black leather. The leather forms an external shape, white inside a smaller watermark, black silk pouch has a silver frame and clasp to hold the required items. This is lined with a dark cream watermark silk, and has an outer section with side pocket, containing a mirror, and a smaller inner section divided into purse-like compartments. Each swection has a silver frame and clasp. A small piece of light card -red on one side, and possibly glued as a label on the otherside is the same shape as the handbag, and has printed in capital letters ''NOTE THE POINTS''. This may or may not relate to the bag. The outer leather section is slightly tapered-wider at the bottom, forming slight peaks. The top reflects these peaks, with a 3 cm wide band of leather, shaped wider at the top. 23 cm long at top, 21 cm long at lower edge. Silver metal, upper-case lettering:M-A-B, indicate the owners initials. .7 cm high, 7cm long. Two 1 cm wide, 28 cm long handles complete this stylish bag. Mirror has bevelled edges, and is backed with the same fabric, as the bag lining.costume accessories, female, black handbag with silver initials m-a-b -
 City of Moorabbin Historical Society (Operating the Box Cottage Museum)
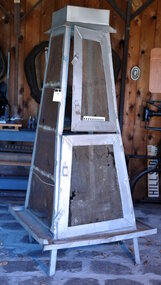
Functional object - Kitchen Equipment, Coolgardie Safe, c1900
The invention of the Coolgardie Safe is credited to Arthur Patrick McCormick, a contractor in Coolgardie, and later the Mayor of Narrogin. Coolgardie is in the Eastern Goldfields region of Western Australia. Gold was first discovered there in 1892; the townsite became a municipality in 1894, and by 1898 its population of 15,000 made it the third largest town in Western Australia after Perth and Fremantle. In the last decade of the 19th century, Coolgardie was the capital of the West Australian goldfields. Being 180 kilometres from the nearest civilisation, food supplies were initially scarce and expensive. As fresh food was a valuable commodity there was incentive to preserve it, and keep it out of reach of scavengers such as birds, dingos, dogs, ants, and flies. It was in an effort to do this, in the extreme heat of the Australian Interior, that McCormick came up with his design for the Coolgardie Safe. McCormick noticed that a wet bag placed over a bottle cooled its contents. He further noted that if this bottle was placed in a breeze, the bag would dry out more quickly, but the bottle would get colder. What McCormick had discovered was the principle of evaporation: ‘to change any liquid into a gaseous state requires energy. This energy is taken in the form of heat from its surroundings.’ Employing this principle, McCormick made a box for his provisions which he covered with a wet hessian bag. He then placed a tray on top, into which he poured water twice daily. He hung strips of flannel from the tray so that water would drip down onto the hessian bag, keeping it damp. As the water evaporated, the heat dissipated, keeping the food stored inside cool and fresh. The success of McCormick’s invention would not have worked without a steady supply of water. Fresh water was scarce in the eastern goldfields at this time but the demand for water from a steadily growing population encouraged innovation. The solution was to condense salt water. Heating salt water in tanks produced steam that was condensed in tall cylinders, cooled and then collected in catchment trays. By 1898 there were six companies supplying condensed water to the goldfields, the largest company producing 100,000 gallons of water a day. In the early 20th century, Coolgardie Safes were also manufactured commercially. These safes incorporated shelving and a door, had metal or wooden frames and hessian bodies. The feet of the safe were usually placed in a tray of water to keep ants away. (MAV website) The early settlers of Moorabbin Shire depended on this type of Food Safe to protect their food from flies and vermin as they established market gardens in the fertile area around the notorious Elster Creek A metal framed, 4 sided structure standing on 4 legs with 2 hinged doors on one side, a metal tray at base of food safe and a metal cover over top. Ridges on which to rest trays carrying food are inside safe. The Safe is enclosed by fly-wire mesh.'...IN.....GEELONG' A manufacturer's oval metal plate is embossed on one side of Safe but it is illegible.elster creek, moorabbin, brighton, dendy's special survey 1841, market gardens, infant mortality, disease, cemeteries, fruit, vegetables, pioneers, coolgardie safe, mccormick arthur patrick, dendy henry, vaccination, jones martha, jones ethel may -
 Orbost & District Historical Society
stationery, 1930's
The Orbost area was once a large bean growing area as the fertile snowy River flats produced good quality beans. It was exported to other states of Australia. Green beans were sent to Melbourne by train and later to Sydney, either via Bombala where they were railed, or to Eden to continue the journey on fish trucks. One pound per bag was considered a good price in the early 1920's and pickers were paid one shilling and six pence. Ref: Newmerella Valley of PlentyThis stationery is significant because it was specially made for the seed bean industry which was a major industry in the Orbost district for the first half of the 20th century. .1 - 2 letterheads for Orbost Beans and Grains on white paper. .2 - a buff coloured envelope for Orbost Beans and Grains Co-Operative LtdOrbost Beans and Grains Co-operative Ltd (incorporating Gippsland Bean Cleaners)stationery correspondence orbost-beans envelope letterhead -
 Upper Yarra Museum
Mallet, Wooden
A wooden Mallet could be found in most homes, and nearly all tradesmans tool box or bag, its most common use was working with wooden handled wood Chisels, because they did not damage the end of the chisel like a steel headed hammer,also they were used to fit joints of wood together as they would not damage the timber like steel hammers......Wooden mallets were also used by stone masons back to the time of the pyramids, but they were usually shaped differentlyWooden Mallet A handmade wooden mallet with a handle with a rectangular head. Carved ET on sidewood, mallet, tradesman, carpenter, cabinet maker -
 Robin Boyd Foundation
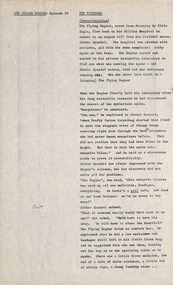
Document - Script, Robin Boyd, The Flying Dogtor. Episode 18 The Visitors, 1963
The mysterious spots were caused by mosquito bites, due to the stagnant water from the flood. They had run out of medicines, bandages, everything, with no money to buy more. The Dogtor discovered a gold nugget in his bag from the mines and told nurse Sister Spaniel to take it to the bank to change it for money. Life then returned to normal at Hilltop Hospital. Then one day, a big loud silver helicopter appeared in the sky with a notice: WOOMERA RANGE. V.I.P. TOP SECRET. SPACE SURVEY. ROCKET DIVISION.The Flying Dogtor" series was broadcast on Australian Television Network (later becoming the Seven Network) between February and April 1964 (see item D254 for schedule).Typewritten, carbon copy, foolscap, 2 pagesPage 1: handwritten 'CUT' on left hand side.the flying dogtor, robin boyd, crawford productions, manuscript -
 Kiewa Valley Historical Society
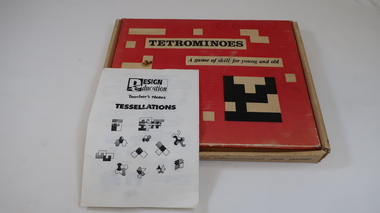
Educational Activity - Tetrominoes
Design Education - Patterns, Shapes. Tesalations. Geometry. Problem solvingMt Beauty Primary School mathematics and problem solvingCardboard box with red top cover surrounding black and beige shapes and 'Tetrominoes' / 'A game of skill for young and old'. Top cover lifts up. Inside: 2 plastic bags one with red, white and yellow plastic shapes with separate black base. Second bag: with 'Teachers Notes' leaflet and small booklet 'How to play / Tetrominois.' 1992mt beauty primary school, educational, mathematics, teaching aid -
 Royal Australian and New Zealand College of Obstetricians & Gynaecologists (RANZCOG)
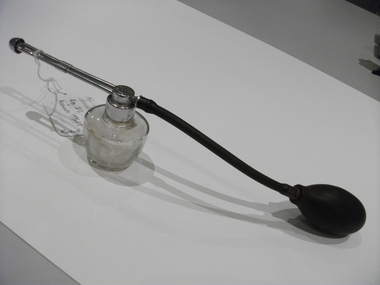
'Atomist' atomiser associated with Dr Frank Forster
The all purpose 'Atomist' atomiser was used from the 1930s to the late 1960s. The atomiser had a detachable nasal mount, and a rubber bulb which was attached to a length of tubing. It also had an adjustable spray tip. It could be used as an anaesthetic cocaine or other spray. In the 1950s it was in extensive use as a laryngeal, nasal and throat spray. The spray nozzle could be turned upwards or downwards and was similar in appearance to the De Villiers Canadian spray. The atomiser could also be used as a vaginal douche with lotion for the treatment of vaginal infections. An atomizer spray consisting of a glass container with a hollow metal tube at front and long black rubber tubing attached to a rubber bulb at the rear. Glass container has residue of white liquid in it. WARNIING: dried white powdery substance may be arsenic. Contained in sealed bag. Handle wearing nitrile gloves and ensure examination is in open area, not enclosed space. -
 Bendigo Historical Society Inc.
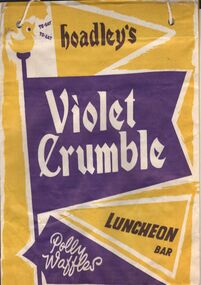
Ephemera - SHOWBAGS COLLECTION: HOADLEY'S VIOLET CRUMBLE AND POLLY WAFFLES SHOWBAG
Hoadley's showbag. The bag is in yellow, purple, black and white. On one side from the top the words: to eat, to eat - Hoadley's. At centre in big lettering: Violet Crumble and underneath in smaller letters: luncheon Bar and Polly waffles. On the other side the top is the same, followed by Polly Waffles and under that luncheon bar and tex bar. There are 8 of these bags in different conditionsbusiness, retail, advertising, business advertising usually found at agricultural shows and other promotional activities. -
 Whitehorse Historical Society Inc.
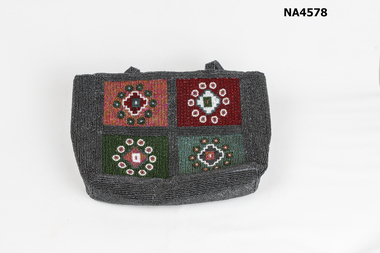
Accessory - Beaded Handbag, 1980s
Bought by Valda Arrowsmith during 1980sBeaded handbag. Background beading is in small grey beads. There are four square sections on each side with coloured beads forming geometric patterns in red, green, pink and white beads. There are two handles which are beaded in small grey beads with grey silk lining. The bag is lined with grey silk. There is a zipped compartment inside and a metal clip to close it.costume accessories, female -
 South Gippsland Shire Council
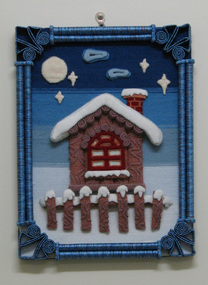
Frame, Woven, Chinese House in Snow, 1990s
Handmade three dimensional wool frame. Features a Chinese house in a winter night scene. Decorative raised parts include the frame edge, house, roof, fence, moon and stars. Each piece is bound in wool thread to create the woven effect. Colours of blue, white, brown and red. Sealed in a plastic bag. Manufacturer's label printed in Chinese on reverse. -
 Bendigo Historical Society Inc.
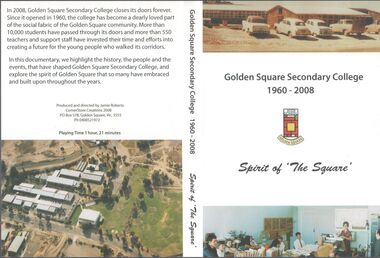
Photograph - Golden Square Secondary College Class and staff photographs
Plastic bag containing photographs of Golden Square Secondary College students. The year covered is 1993 classes 7B-7C-7D-7G-7H-7L-7R-7Y / 8A-8B-8C-8D-8E-8F-8G / 9A-9B-9C-9D-9F-9G Three photographs of teachers and staff, one photograph of the principal and vice principal.golden square secondary college, students' photographs -
 Bendigo Historical Society Inc.
Photograph - Golden Square Secondary College Class and staff photographs
Plastic bag containing photographs of Golden Square Secondary College students. The year covered is 1995 classes 7A-7B-7C-7D-7E-7F-7G / 9A-9B-9C-9D-9E-9F-9G / 10A-10B-10C-10D-10E-10F-10G Three photographs of teachers and staff, one photograph of the principal and vice principal.golden square secondary college, students' photographs -
 Mont De Lancey
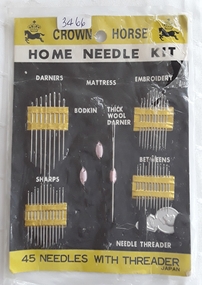
Functional object - Home Needle Kit, Crown Horse, Unknown
A Crown Horse brand Home Needle Kit with 48 needles and a threader in a plastic bag. The needles are presented in gold strips attached to a black piece of cardboard.and are labelled as - Darners, Embroidery, Thick Wool Darner, Sharps, Betweens and a Threader. Two needles are missing, - a Bodkin and Mattress. The card has two black horses underneath a black crown at the top.'Crown Horse Home Needle Kit Japan' The types of needles are as listed above.sewing equipment, sewing, sewing needles -
 Bendigo Historical Society Inc.
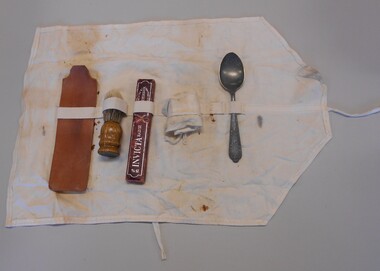
Accessory - SOLDIER HOUSEWIFE KIT
Made by H E Barry and Son, Brunswick, the soldiers housewife was a portable sewing kit that allowed soldiers to complete running repairs on their uniforms. It included, needles, thread, wool, buttons etc. Barry's also were contracted to provide shorts, shirts and trousers for the army.Soldier's housewife kit in calico bag. The kit comprise: a spoon, a sawing kit wrap in its own cloth with nine needles and three different colours threads (red, white, brown), a razor in its box on the outside Invicta razore manufacturesd by E. M. Dickinson Sheffield England, a shaving brush and a band made of leather for sharpening the razor. -
 Linton and District Historical Society Inc
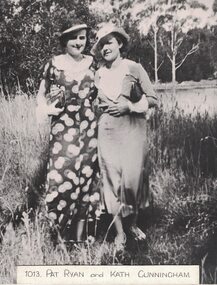
Photograph, Pat Ryan and Kath Cunningham
Pat Ryan, born 1919, was a daughter of Jim Ryan, hairdresser and tobacconist. She moved to Linton as a child in 1926 when her father bought the former Bennett/Todd shop in 1926. Katherine Veronica Cunningham was born at Cape Clear in 1907. Pat Ryan and Kath Cunningham were members of the Linton Amateur Dramatic Society in the 1930s and 1940s. (See programmes in LDHS for Amateur Dramatic Society productions.) Kath Cunningham worked at the Railway Hotel. She was on the committee which organised Linton's centenary celebrations in 1939.Enlarged black and white copy of original photograph, which shows two young women dressed stylishly, wearing hats and dress shoes. The woman on the left has a purse or small clutch bag in her hand, and the woman on the right has a handbag tucked under her arm. The photograph was taken in an outdoor setting, possibly near Linton Reservoir.pat (patricia) ryan, kath (kathleen) cunningham -
 Melbourne Tram Museum
Ephemera - Badge, Yarra Trams, "100 years of Electric Trams", 2006
Badge - metal back with pin and enamelled front for the "100 years of Electric Trams", logo for the 100 years of electric trams in Melbourne celebrations 2006. In a small plastic bag and stapled to a DL sized photocopied sheet from Yarra Trams, advising gives details and that the badge can be worn with the uniform. Has the 100 years logo on the sheet as well.trams, tramways, badges, 100 years of electric trams, yarra trams, uniforms -
 Glenelg Shire Council Cultural Collection
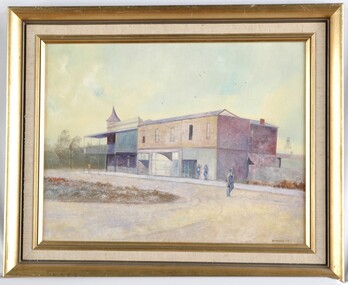
Painting, Down the Street, 1977
UnknownView of a building on a country street. The building is large, and in 3 sections, two of which may be shops. The building on the corner has a verandah and balcony over the footpath, and may be a pub. Two people lean on the wall to the right of the building. One man in overalls and carrying a bag walks along the centre of the dirt road. Framed in gold painted wooden frame.Front: B Malloch '77 (lower left) (brown paint) Back: 1977 - (yellow sticker, upper right) Mer-ger Galleries, Picture Framing sticker, order no. 1057 (sticker, lower centre) "Dow...E Street" (blue pen on sticker, lower left, torn) -
 Ballarat Tramway Museum
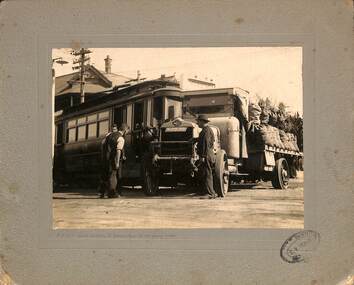
Photograph - Black and White mounted - Geelong Tram 22 in an accident - 1927
Shows an accident between a Pengelly tram and an AEC solid tyre truck, possibly carrying sacks of coal. Reg Item 8321 shows an accident damaged tram of the same type - tram 22Provides information on the consequences of an accident between a larger heavy truck and a Pengelly tram on 9-2-1927.Mounted Black and White photograph mounted on a grey cardboard, embossed with lines and a decorative pattern of a Geelong Pengelly type tram in collision with an AEC solid tyre truck carrying bagged materials, possibly coal. Has a photographic studio stamp in the bottom right hand corner "C. V. El??". 2nd copy held - on a black plastic copy format.In pencil written under the print "9-2-27 Wed 4.10pm c/o Yarra & Ryrie Sts car going east".geelong, accidents, tram 22, ryrie st, aec trucks, tramways, trams -
 Seaworks Maritime Museum
Instructions Novita Resuscitation apparatus
Instruction card for Novita resuscitation apparatus model CInstructions for the use of "Novita"/Resuscitation Apparatus Model "C"/Open cylinder valve and control valve and apply the mask firmly to the/patient's face.Adjust the opening of the control valve so that the bag/is comfortably (but not over) inflated. The adjustment of the valve should/be such that the patient just fails to empty the bag on the inhalation./If the patient responds and begins to breathe freely air may be admitted/by uncovering the air inlet orifice on the metal tubular portion of the/face mask and the control valve may be partly or completely closed. If/the breathing becomes shallow again, open the control valve and close/the air inlet orifice./ SIEBE, GORMAN & CO. LTD./ CHESSINGTON, SURREYport melbourne authority (pma) -
Stawell Historical Society Inc
Archive, Red Cross Records, 1939 - 2004
2 Archive Boxes: Archive Box 18 contains: BAG 1 1 Red Cross First Aid Group. Black Folder 1954 - 1968 Exams 1 Grey Cover July 1944 to April 1945 (Minutes). Group to Disband & Join Red Cross and become Stawell Red Cross Emergency Company. 1 Red Cover - Red Cross Service Company Annual & General Meeting Minutes July 1970 to 1 September 1989. March & September 1978 Meetings abandoned due to insufficient persons attending. 21 September 1989 Meeting called to finalise all Accounts & distribute equipment. BAG 2 1 Plastic Sleeve: Contains 1 X Loose sheets of Miscellaneous Information. 1 Green cover Shell Exercise book - Miscellaneous Information. 1 The Great Blood Bank Evolution with Blood Donor Book Mark. 1 X3 Exercise Books: Monthly List of Donors. 1 Green Cover Shell Exercise Book Aug 1960 - Feb 1968 1 Green Cover Shell Excerise Book April 1968 - July 1979 1 Angle Striped Cover Student Excercise Book Spet - 1979 - March 1982. BAG 3 Blood Bank: Blood Donors & Voluntary Staff at "Blood Takes" 1962 - 1989 1. Blue and White Dimond COver Exercise book: Sept. 1964 - June 1968 1. Blue and White Check with Green Border Embassy Exercise Book: July 1968 - June 1973. 1. Blue Dimond Cover Exercise Book. Aug 1973 - Mar. 1983 1. Red Bound Bound Blue Book. Aug 1with Blood Bank Sticker: April 1983 - June 1989. BAG 4 1 X Bank Statements BAG 5 1. Plastic Bag: 2 Junior Red Cross First Aid Booklets. 1. Grey Cover, Red bound Disaster Times Register & Catering Register. 1. Gordon Exercise Book. Brown Cover Bool Disaster Times & Catering Registers 1984--1988 ( 2 Entries) BAG 6 1. Plastic Sleeve: Assorted Newspaper cuttings, Photos, cerftifcates 3 X Plastic Scapbooks 1961 Mid 1990's BAG 7 1 Plastic Sleeve: Red Cross Recollections Cassette Tape Made By Mrs Rene Hall, Mrs AliceBurton, Mrs Mill Walker, Mrs Jean Hughes; recorded by Elizabeth and2 hand written recollections my Mrs Jean Hughes and Mrs Ivy Newman. 1 Blue Cover Invicta Reservoir Esercise book: Distributing Book: List of Materials and wool supplied to members & What They Made for solders. 1939 - 9/06/1943. 1: Australian Red Cross Knitting Book. 1. Australian Red Cross Victorian Division Pyjamas etc. 1. Small Book Tennis Tournament 1939 with Photocopy of 2 Newspaper Cuttings. BAG 8 1 Plastic Sleeve: 6 News Sheets. 1. Branch Management Book 1940 1. Unit Information Handbook 1985 1 Treasurer's Handbook 1997 1 Office Bearer's Handbook.' 1999 *1 . Stawell Unit Award & Commendation in green folder 1985. 1. Roll of Article from Stawell Times 1,9,1999' 1 Cardboard around wrap for Pewter Wien Goblet sold as a Fundraiser 1. Pewter Bell donated for meeting by Annie N=Neil, and engraved as the Annie Neil Bell 1. Blue Covered book: Study of Red Cross Services ( Stawell Branch) 1939 - 1945 By Christina Joy. * Calico Cloth with Australian Red Cross These were attached to Garments owned by Red Cross. e.g. Short Gowns used at Blood Bank Had one on the Pocket. Archive Bos 19 BAG 1 1 Mottled Black over Red bound. Mon Oct 2 1939 Public Meeting called to form branch in Stawell. Committee meeting to Aug 1946 Page 281. Pages282 - 283 Minutes of Special Meeting: Feb 1942 June 1940 Aug. 1940 2. Public Meeting called to reform the Red Cross Emergency Service 29/07/1942 to 20/03/1970 BAG 2 1: The Original Subscription Book 1939-1940 2: Annual Roll Call Books 1941 1: Gordon Exercise book - Memberships 1941/42 1942/43 2: Membership Rolls: 1944/45 - 1950/51 Membership Rolls 1952/52 - 1959/1960. 1: Red bound Mottled Grey Cover Book - Memberships 1942 - 1968 Sundry Entries 1: Blue Cover Roll Call 1975 - 2002 1: Striped Cover Roll Call 1991 - 2005 1: Membership Subscriptions 2002 - 2004 1 Yellow Cover Office Bearers and Committee Members BAG 3 1 Treasurer's Cash Book 1939 - 1943 1 Receipts & Expenditure 1939 - 1943 1 Red Cover Receipts and Expenditure 1965/66 - 1983 1 Red Bound Receipts and Expenditure 1989 1993 1 Green Cover Receipts & Expenditure 1994 -2003 1 Red and Black Cover Receipts & Expenditire 1995 - 2004 1 White Cash Book 2004 BAG 4 1 Red & Grey Marble cover Red Cross Committe Meeting May 1947 - Oct 1955 2 Special Meeting Minutes: Feb 1951 Nov 1951 1 Brown Bound Minute Book Red Cross Committe Meeting Nov 1955 - Feb 1963 Special Meeting November 1960 1 Red Bound Account Book Used as Minutes March 1963 - Sept 1970. BAG 5 1 Red Bound Black book: Annual Meeting Book 1942- 1989 1 Red Mottled Cover Book Annual Meeting Book 1990 - 2004 BAG 6 1 Red Cover Book: Oct 1970 - June 1978 1 Red Mottled Cover Book: July 1978 - Nov 1987 1 Red Mottled Cover Book July 1996 - May 2004 Tray Cloth with Red Cross Identification Tag Stitched on. (Donated by Graeme McDonough Aug 2010) stawell -
 The Beechworth Burke Museum
Ceremonial object - Ushabti of Taweret-Khaiti, Circa 1292 BC
Ushabti are tiny anthropoid (human-shaped) figures placed in the tombs of wealthy Egyptians. They were intended to do the work of the deceased in the afterlife. This purpose is implied through their name, which may have derived from the Egyptian word “to answer”. The Burke Museum in Beechworth is home to a particular ancient Egyptian Ushabti figure. This artefact was donated to the Museum in 1875. No details about how it left Egypt, arrived in Australia, and where it was located before this donation are known. The Nineteenth Century, when this artefact was donated, was a period when many museums acquired items of ancient Egyptian heritage. Many of these items were procured in less than desirable circumstances, having often been looted from ancient tombs and sold to tourists without documentation as to their original location and/or accompanying grave goods. These artefacts were also divested through partage (the trading of artefacts for funds); however, the latter is unlikely to have been the case for this artefact. Since the Ushabti was donated by an unknown donor, it is likely to have been in a private collection rather than an institution. Ushabti can be dated using iconographic analysis which is non-invasive and provides a comprehensive study of the artefact. The later period of the 18th Dynasty marked the beginning of an increase in both the inclusion of Ushabti as essential funerary items and the creation of Ushabti with tools. From this period, they are no longer depicted without tools. Depictions of tools including gardening hoes are frequently depicted grasped in the Ushabti’s hands whilst items like the seed-bag are depicted hanging on the back rather than in an alternative position. This Ushabti figure grasps a gardening hoe and a mattock and a small seed bag surrounded by a yoke bearing water jars are depicted on the upper back of the Ushabti. These features are essential in helping narrow this dating to the late 18th and before the early 20th Dynasty. The position of this seed bag also provides dating information. In the early 18th Dynasty this bag was consistently drawn on the front of the figurine; however, by the reign of Seti I, this feature moved to the back. Thus, since the seed bag is located on the back of this Ushabti, it cannot date to the early 18th Dynasty. By the 19th Dynasty, Ushabti’s were increasingly made from either faience or terracotta. The availability of these materials in Egypt resulted in the increase of Ushabti production with tombs containing many more figurines than previously seen. The Ushabti held by the Burke collections is made from terracotta. Terracotta was rarely used for Ushabti before and during the early 18th Dynasty with only the odd appearance until the late 18th Dynasty and becoming common through that period until the late Third Intermediate Period. Whilst the face has been damaged, there is no evidence for the Ushabti having been provided with an Osirian false beard. This omission rules out a dating of later than the 25th Dynasty when beards became prominent. The inscriptions also date the Ushabti to the New Kingdom. This is because of the use of sḥḏ (“to illuminate”) with Wsjr (“Osiris”) which only occurs in these periods. Therefore, considering all these elements, the Ushabti can be confidently be dated to between the late 18th to early 19th dynasty.Artefacts like this Ushabti are no longer exclusively representative of their origins in burial assemblages and significance in the mythology of the Egyptian afterlife but are also significant for the accumulated histories they have gained through travel. The movement of this artefact from Egypt to Australia allows insight into the collecting habits of the 19th century, and in particular, the reception of ancient Egyptian artefacts in small rural museums. The procurement of Egyptian artefacts was a social trend around the late 1800s to early 1900s. Egyptian artefacts were considered curiosities and recognised for their ability to attract public attention to museums. They were also utilised in Australian museums, like the Burke Museum, to connect the collection to one of the oldest civilisations known to man and since Australia was considered a “young” country by European settlers, this was vital and derived from an interest in Darwin’s “Origin of the Species” 1859. Furthermore, there was a culture of collecting in the 1800s amongst the affluent in English society which led to the appearance of many Egyptian artefacts in private collections. The acquisition of this Ushabti figure is not certain, but it was likely donated from a private collection rather than an institution. This particular artefact is significant as an example of a high-quality Ushabti representative of those produced during the late 18th or early 19th century. It provides insight into the individualism of an Ushabti and the mythology of ancient Egypt. It also provides an example of the types of items required in the tomb assemblages of this period and reinforces the importance of ensuring the successful afterlife of the deceased through art. This Ushabti belonged to a woman named Taweret-Khaiti, Chantress of Amun, in the late 18th Dynasty or early 19th Dynasty (c.1292 BC) of the Egyptian New Kingdom. It likely comes from an undetermined tomb in the locality of Thebes. This figure is made from Nile silt clay (a polyester terracotta; clay sourced from the banks of the Nile River) which was a popular material for Ushabti construction in the early 19th Dynasty. It is in a fair state of preservation (with the exception of a break through the centre) and originally made to a high quality. The face has been damaged but the eyes and eyebrows are clearly marked with black ink and the sclera painted white. The Ushabti is painted a light brown/yellow colour and features a vertical line of inscription down the lower front. The Ushabti wears a large wig and and a schematic collar. The arms are painted light brown and depicted crossed with bracelets around the wrists. It grasps a hoe and mattock. A yellow seed-basket is depicted on the Ushabti’s back. These features represent the likelihood that this particular Ushabti was intended to complete farm work for the deceased in the next life. There would have been additional Ushabti of similar design within the tomb who worked under the supervision of a foreman Ushabti. The foreman Ushabti would be depicted dressed in the clothing of the living. The inscriptions are painted freehand in black ink and written in a vertical column from the base of the collar to the foot pedestal on the front of the Ushabti. The owner of the Ushabti could elect to have the figures inscribed with their name, the Ushabti spell and any other details they deemed necessary. In the case of this example, the Ushabti is inscribed with the owner’s details and is an abbreviated version of the standard Ushabti formula. This formula ensured that the Ushabti would complete the desired task in the afterlife when called upon by the deceased. Ushabti which were not inscribed would represent their intended purpose through design; however, this Ushabti, like most made in the late 18th Dynasty, conveys its purpose both through both design and inscription. The inscription is as follows: sHD wsir nbt pr Smayt imn tA-wr(t)-xai(ti) mAa xrw which translates to: "The illuminated one, the Osiris (the deceased), the mistress of the household, Chantress of Amun, Taweret-Khaiti, true of voice (justified)"ancient egypt -
 Bendigo Historical Society Inc.
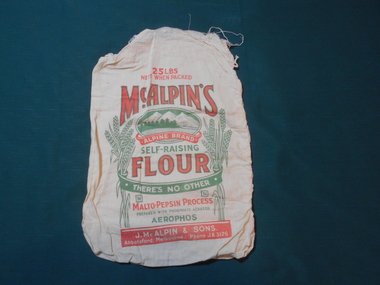
Textile - FLOUR BAG COLLECTION: MCALPIN'S FLOUR, 1900-1950
Textiles. Calico bag printed on one side in red and green. ''McAlpin's Self Raising Flour''. Alpine Brand. There's no other 25 lbs net when packed. Malto Pepsin Process. Prepaired with phosphate Aerator Aerophos. J.McAlpin & Sons, Abbotsford, Melbourne, Phone JA 3126. Centre picture of three mountain peaks in oval frame. Border edge of wheat stalks on either side. Remnants remain of stitching used to seal the top of the bag. The collection has other uncatalogued samples of McAlpin wheat bags as listed. Eight 25 lb bags. Three bags with slogans ''Enriched Self Raising Flour, Sure success every pack''. Four bags with slogans,''Pre-sifted Self Raising Flour. Sifted through silk seven times''. One bag with slogan ''Malto Calcium Enriched''. These eight bags are packed by McAlpine Flour Pty., Ltd., Abbotsford, Victoria. Three 7 lb bags. All bags include the slogans''Specially Milled, No Substitutes used''. "There's no other''. These bags packed at ''Factory Abbotsford, Melbourne, Phone JA 3126''. McAlpin's was a major Victorian flour company in the nineteenth and early twentieth centuries. Owned and operated by J. McAlpin and Sons, the company sold its flour products across Australia and overseas.textiles, domestic, mcalpin flour calico bag -
 Kiewa Valley Historical Society
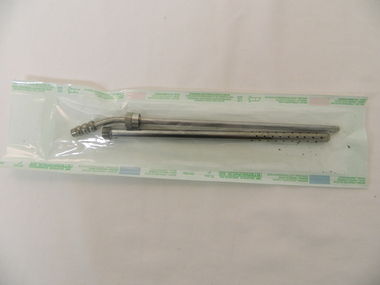
Abdominal Surgical Sucker
This medical instrument was used in the Tawonga District General Hospital which was built in the 1950s specifically for the increase in population due to the Kiewa Hydro Scheme.Historical: Shows the development of scientific hospital equipment. Provenance: Used in the Tawonga District General Hospital which was remote and therefore required good equipment.Used to suck fluid from abdomen. In sealed sterile bag - 2 metal instruments. 1. long thick nail with 9 little holes in 6 rows along the length. Other end is knob with lines embossed around it. 2. Long rod with cap on which the other side of is a bent rod with 3 'beads' at the end. This rod has a hole at the other end.medical instrument. hospital equipment. tawonga. mt beauty.abdomen -
 Federation University Historical Collection
Article - Student catalogue, One, 2002
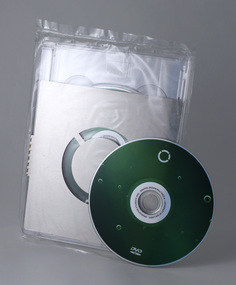
Promotional pack created by University of Ballarat, Bachelor of Visual Arts (Graphic Design / Multimedia) third year, graduating students, 2002. 22 Students: Kristian Pechotsch, Josh McGregor, Stuart Murray, Dean Gorell, Mary Thomas, Simon Hunt, Michael Renga, Kristen Retallick, Alana Smyth, Claire Robson, Jarred Rouhan, Stuart Sullivan, Glen McClay, Leigh Ryan, Luke Monssen, Daniel Buckingham, Melissa Price, Rose Kim, Melinda Radojevic, Claire Hards, Dominic Carey, Peta Wallace. A square format case version was also produced (see photos for 29178.2).Promotional pack created by University of Ballarat, Bachelor of Visual Arts (Graphic Design / Multimedia) third year, graduating students, 2002. DVD printed full colour single sided, housed in a clear plastic DVD box, wrapped in custom-cut brushed aluminium, two clear stickers featuring circular graphic and UB logo. All enclosed in a cellophane bag.university of ballarat, federation university, graphic design, multimedia, camp street campus, new north, arts academy, kristian pechotsch, josh mcgregor, stuart murray, dean gorell, mary thomas, simon hunt, michael renga, kristen retallick, alana smyth, claire robson, jarred rouhan, stuart sullivan, glen mcclay, leigh ryan, luke monssen, daniel buckingham, melissa price, rose kim, melinda radojevic, claire hards, dominic carey, peta wallace. -
 Bendigo Historical Society Inc.
Photograph - BASIL MILLER COLLECTION: DERAILED TRAM
Black and white photograph of tram, destined for Golden Square, that has derailed and is stranded on the roadside. On right side of photo 3 men apparently being interviewed by Police Officers. Tramways Conductor standing centre of picture,Note ticket bag hanging at waist). Large group gathered rear derailed tram. Inscribed on back of photo in pencil: '22/2/358.person, individual, basil miller