Showing 18408 items
matching a w
-
 Ballarat Tramway Museum
Photograph - B&W print of donated negative, John Webster, 21/08/1955 12:00:00 AM
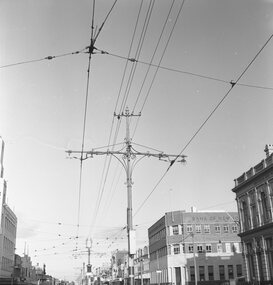
Black and white digital print from scan of a donated negative showing the overhead and pole arrangements in Ryrie St near the intersection with Moorabool St. Shows the bracket arms, isolators, overhead. Has the National Mutual, ANZ and Bank of NSW in the background. Assumed photo taken on the same day as the others - 21-8-1955. Black and White prints made from scan of negative. Original Negative stored with Negatives. Negative scanned at hi res 4/6/2020 and image updated.On left hand side of the negatives in ink is "EI 14"tramways, trams, geelong, overhead, trolley wire, ryrie st -
 Ballarat Tramway Museum
Photograph - B&W print of donated negative, 1951
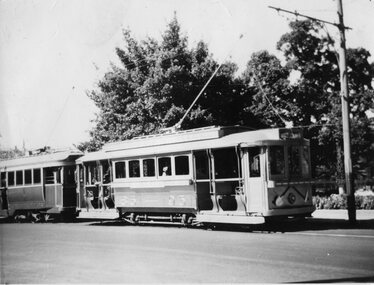
Yields information about Ballarat 's No. 23 operating as the Gold Tram in 1951Black and White photograph of Ballarat No. 23 decorated as the Gold Tram, 1951 in Sturt St, stopped behind a bogie tram. Photographer unknown, may be able to be determined given that it has been used in a publication - see inscription.On rear in blue ink "Reduced to 4 1/2 x 3 / Trim roadway as required / Photo 21"tramways, trams, decorated trams, gold tram, gold, centenary of gold, tram 23 -
 Ballarat Tramway Museum
Postcard, Ron Scholten, MMTB W4 671
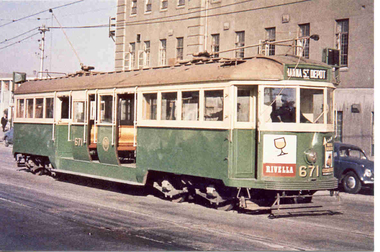
Colour photograph, printed on a postcard back format of MMTB W4 671, with destination of Hanna St Depot. On front dash canopy has advertisement for Rivella. Photographed in Sturt St, South Melbourne. Photo used in the Topmill 1996 Calendar and photo credited to Dr. H D Ellerton, 25/4/62.trams, tramways, south melbourne, hanna st depot, w class trams, sturt st -
 Moorabbin Air Museum
Document (item) - CA-15 Emergency procedures during flight Survey of commercial pilots metal fatigue Die penetrants HPR3 Handley Page performance and design details Boeing A300 B767 Turkish airline DC10 crash 3 march 1974 Avro Anson Nomad N24A high speed flight WW1 Australian pilots Australian aircraft registration Aermacchi MB-326H Jim Bede CAC Wallaby ESAMS remote piloted helicopter types of British aircraft up to 1918 SR71 U2 Ken Wallis Little Nelly Jean Batten Bob Miles Gypsy Moth Molyneux helicopter CA 25 FLUT-R-Bug Chipmunk Chris Neale Perfectus Ellis Walker New Comet Beagle Landing areas in Australia Fishermans Bend airport Southern Cross Southern Cross Junior Akro Laser Short Scion Pierpont Langley Jeep plane Homebuilt plane criteria R33 R101 R100 Graf Zeppelin Corrosion DEF Aust 143 Weight control of aircraft DCA No.17 Airtruck F14 B-1 F-4 F-15 A-6 F-16 F/A-18 CH-53E AH-64 A-10 F-5 Space Shuttle Winjeel DC-3 Her Majesty the Queen ME 410 Nestler Scout Bellmodel 214 Loire 11 Schweizer model 300 Antonov An-8 camp Nanchang cj-6 Nieuport de Lage ni-D.122 Junker K 39 ICA Brasov IAR-823 Les Mureaux 120 F&W C-3603 Spitfire Lockheed C-36 Pilatus PC-6 Heinkel He 115 Canadair CL-215 Curtiss JN-4 Jenny Antonov An-2 colt Boeing KC-135 Stuka Liberator B-52 Morane Saulnier Bf-109 Dewoitine Yak-3 F-5 KFIR F-100 B-1B B-25 B-17 Fokker D VII Mustang F-16 Aeritalia Aermacchi Fishbed Mikoyan Hawker Hunter PZL P.11 Yakovlev Yak-11 Dassault Alpha jet Westland Lynx Magni PM-3-4 Letov S 50 Partenavia P.64 Piaggio P.149D Breda Ba 64 Aerotec A-122 Farman F.40 McCulloch H-30 Junkers K 53 Cessna U-3 Bf 161, CAC Keith Meggs collection
-
Moorabbin Air Museum
Book - THERE AND BACK, ALAN W. RANDALL, 1985
-
Moorabbin Air Museum
Manual (Item) - LTN-58 ISS w/Align Display unit for L-1011 - Pilot's Guide data
-
Moorabbin Air Museum
Manual - Overall Design Specification No. H.S.D. - W/107 to meet RAAF Air Staff Requirement No. NAV/54 for a Synthetic Navigation Trainer Reference 564/3/338, Hawker Siddle Dynamics Limited
-
Moorabbin Air Museum
Document (Item) - Rolls Royce Aero Engines Assembly Instructions W Engines
-
 Ballarat Tramway Museum
Photograph - Colour Print, Clive Gibson, 1960's
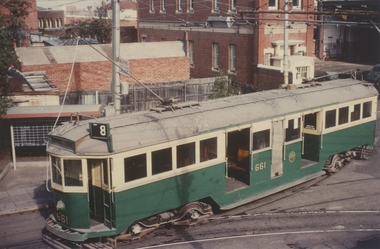
Yields information about a Melbourne tramcar that was to be later collected by the Museum, when it was operating in Melbourne.Colour print of MMTB W3 661 entering Malvern Depot from Glenferrie Road, 1960's? Photo Clive Gibson. Tram has route No. 8 showing. Printed on Kodak Paper.On rear in ink "On behalf of Clive M Gibson & Ron Scholten"trams, tramways, w class trams, malvern depot, tram 661 -
 Ballarat Tramway Museum
Photograph - Colour Print, Clive Gibson, 1960's
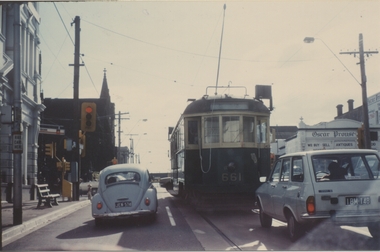
Yields information about a Melbourne tramcar that was to be later collected by the Museum, when it was operating in Melbourne.Colour print of MMTB W3 661 in Glenferrie Road, at intersection with Burwood Road, Hawthorn 1960's? Photo Clive Gibson. Tram does not have a destination box - possibly being transferred to Preston or another depot. Has the Oscar Prowse building in the background. Printed on Kodak Paper.On rear in ink "On behalf of Clive M Gibson & Ron Scholten"trams, tramways, w class trams, glenferrie rd, tram 661 -
 Ballarat Tramway Museum
Administrative record - Memorandum, Metropolitan Transit Authority (MTA), "Failure of Motor Armature Bearings", 1984
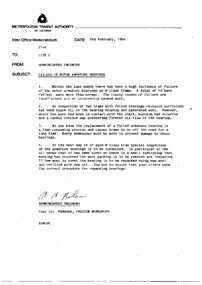
Single page A4 photocopy of a Interoffice Memo dated 8/2/1984, from the Running Sheds Engineer to Depot staff titled "Failure of Motor Armature Bearings", sign Alan Nolan. Describes the problem with the failure of bearings, inspection requirements, and looking for burnt wool or burnt wool smells. trams, tramways, w class trams, bogies, overhauls, maintenance, bearings -
 Ballarat Tramway Museum
Photograph - coloured b/w photograph, 1938
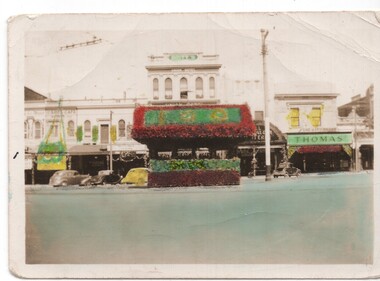
Yields information about the shelter in Sturt at the intersection of Grenville St and its decorated in 1938 for the centenary of settlement in the Ballarat district.Hand coloured print of the Grenville and Sturt St shelter taken looking south, decorated with wax paper flowers for the centenary of settlement in Ballarat district in 1938. See also Reg Item 2917 for another photograph and newspaper details. Has the Spot Cafe, Britts Union Hotel Butlin's Cakes (?) and Thomas Jewellery which appears to have been decorated as well in background.On rear in ink "Tram Shelter Junction Sturt & Grenville Sts / Ballarat Centenary 1938"trams, tramways, grenville st, centenary, shelters, sturt st -
 Ballarat Tramway Museum
Photograph - Digital image, Aug. 1968
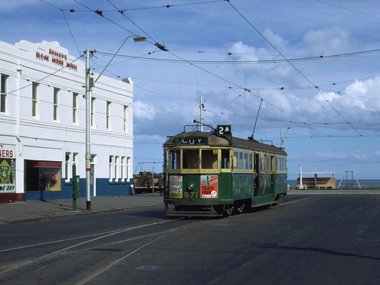
Yields information about one of the Museum's tram when it was Melbourne and the South Melbourne Beach terminus in 1968.Digital Image of MMTW W4 671 (now a BTM Tram) at the South Melbourne Beach terminus, August 1968. Photo Dick Jones via Carolyn Cleak 28/6/2010 (Trams Down Under email dated 28/6/2010). Reilly's Bleak House Hotel in the background. Note the Bundy Clock. Tram has the destination of City and showing route number 2A. This is a later photo of South Melbourne Beach terminus, with yet another view of a W4, this time 671 in August 1968. Must have been getting toward the end of the W4's by that time. The hotel verandah had gone by this time and the bundy clock had been moved. Use photo only with Dick Joni's OK.trams, tramways, south melbourne beach, mmtb, w class trams, tram 671 -
 Ballarat Tramway Museum
Photograph - Black & White Photograph/s, John Alfred, 1960
Yields information about the appearance of BTM tram No. 661 in 1960, W2 349 and how the Carnegie line section of single track was worked.Black and white photograph of trams W3 661 (Route 4 Carnegie) and X2 675 (Point Ormond), Glenhuntly Road, Elsternwick Station, during the lowering of the railway line, 1960. Photo by John Alfred. Two copies held. See also Reg Item 5163 for an Ian Brady photograph prior to the work commencing.trams, tramways, mmtb, elsternwick, point ormond, w class trams, level crossings, tram 661, tram 675 -
 Ballarat Tramway Museum
Photograph - Black & White Photograph/s, John Alfred, 1960
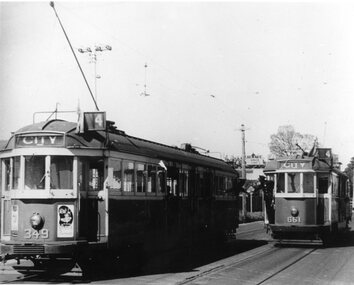
Has a strong association with a number of the workers who built the BTPS tram depot in 1973/74.Black and white photograph of trams W3 661 (Route 4 City) and W2 349 (route 4, Carnegie bound, though now showing City) Glenhuntly Road, Carnegie. The two drives are exchanging the "staff" or "token" for the single line section. c1960. Photo by John Alfred. Two copies held.trams, tramways, mmtb, carnegie, w class trams, tram 661, tram 349 -
 Ballarat Tramway Museum
Poster, Herald Sun, Take The Herald on holiday, late 1960's
Demonstrates how advertising was done within W class tramcars - boxes of the driver's door and yields information about the Herald Newspaper.Poster advertising the Herald (Melbourne evening newspaper) newspaper. Thought to date from the late 1960's possibly when the trams were withdrawn. .1 - "Take The Herald on holiday. Keep in touch while you're out of touch." - featuring a lady reading the newspaper with the heading "Gas Rig Looks like its dying" while on the beach while a child plays nearby. Two copies held. .2 - "On The Herald has Jack Elliot" with a line sketch of Jack and horse races along the bottom. Were located in the end advertising panels over the doors of W3 661 and used a base for historical photographs of 661 in Melbourne (See Reg Item 4692 and 4693) until replaced during 2009, when collected.trams, tramways, advertisements, posters, w class trams -
 Ballarat Tramway Museum
Poster, Hardie Sport shoes, advertising Hardie Ace sports shoes, late 1960's
Demonstrates how advertising was done within W class tramcars - boxes of the driver's door and yields information about the Hardie Ace Sport shoes. Has an association with Ken Rosewall, tennis champion of the era.Poster advertising Hardie Ace sports shoes. Thought to date from the late 1960's possibly when the trams were withdrawn. "The International Choice, Hardie Ace Sports shoes, Chosen by Ken Rosewall, World Professional Tennis Champion." Has a drawing of Ken? in the poster. Were located in the end advertising panels over the doors of W3 661 and used a base for historical photographs of 661 in Melbourne (See Reg Item 4692 and 4693) until replaced during 2009, when collected. Wikipedia re Ken Rosewall - tennis champion during the 1960's.trams, tramways, advertisements, posters, w class trams -
 Ballarat Tramway Museum
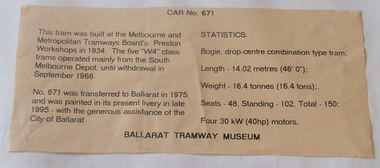
Poster, Len Millar, advertising technical and historical details of W4 671, c1995
Yields information about W4 671 technical details and demonstrates how the advertising in W4 class tramcars were used by the BTM.Poster advertising technical and historical details of W4 671. Consists of two sheets of paper printed with the information and taped together. Made by Len Millar prior to the tram's visit to Melbourne in 1996. Were located in the end advertising panels over the doors of W7 671 until replaced with a photo display panel during 2009, when collected. Two copies held.trams, tramways, advertisements, posters, w class trams -
 Queenscliffe Maritime Museum
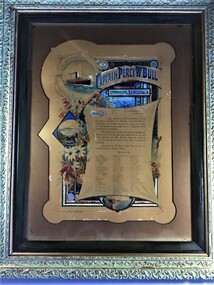
Poster - Illuminated Address, SS Westralia
Framed Illuminated Address under glassilluminated address, captain p w bull, ss westralia -
 Queenscliffe Maritime Museum
Photograph - B&W photos of QMM c1987 x 2, Two B&W QMM photos c1987, c1987
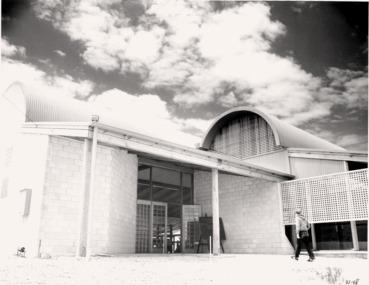
Queenscliffe Maritime Museum historyQueenscliffe Maritime MuseumEarly black & white photos of the east elevation of Queenscliffe Maritime Museum, c1987.Reverse " NIL "queenscliffe maritime museum -
 Queenscliffe Maritime Museum
Photograph - B&W photos of Queenscliffe Maritime Museum [aka Centre] c1987 x 7, B&W/Colour photos of QMM c1987, c1987
Queenscliffe Maritime Museum historyQueenscliffe Maritime MuseumBlack & white/colour photos of the east elevation of the then Queenscliffe Maritime Centre, c1987.Reverse " NIL "queenscliffe maritime museum -
 Queenscliffe Maritime Museum
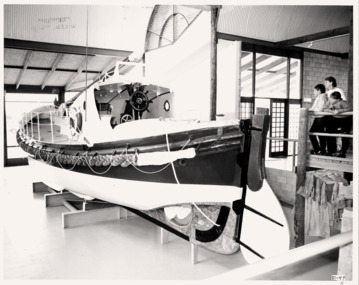
Photograph - QMM Interior photos c1987, B&W/Colour photos of QMM interiors c1987, c1987
Queenscliffe Maritime Museum historyQueenscliffe Maritime MuseumBlack & white/colour photos of the lifeboat QUEENSCLIFFE installed in the then Queenscliffe Maritime Centre, c1987.Reverse " NIL "queenscliffe maritime museum -
 Queenscliffe Maritime Museum
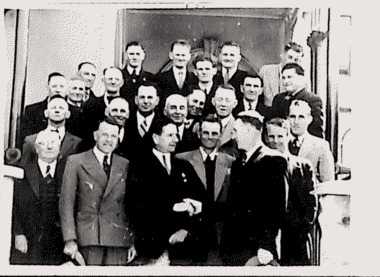
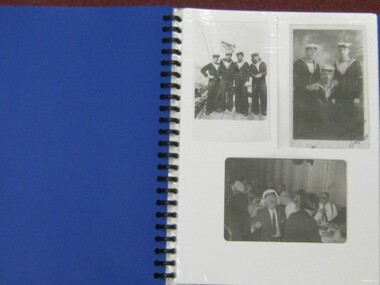
Photograph - 3 Photos of people involved in the rescue of crew from the 20t sailboat MERLAN, B&W photos of rescue team 16 Jan 1949, c1949
Lifeboat rescue crew 19491949 rescue crewSir T Maltby & guests, rescuers & crew of the MERLAN 1949, dinner.Reverse " NIL "lifeboat 'queenscliffe', lifeboat crew, football team -
 Queenscliffe Maritime Museum
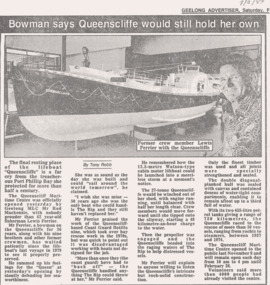
Photograph - B&W photo of lifeboat QUEENSCLIFFE, incl. Lewis Ferrier ex crew member c1987, Lifeboat QUEENSCLIFFE, incl. Lewis Ferrier c1987, c1987
Opening of Queenscliffe Maritime Centre c1987Opening of the Queenscliffe Maritime CentreNews clipping GA 2/7/1987 re Queenscliffe Maritime centre opening.Reverse " NIL "queenscliffe maritime centre -
 Queenscliffe Maritime Museum
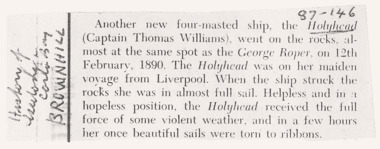
Photograph - Holyhead & Gleneuse shipwrecks, Shipwrecks, c1890 & c 1990
Port Phillip shipwrecksB&W photos of GLANEUSE & HOLYHEAD shipsNews clippings & photos of the GLANEUSE and the HOLYHEAD shipwrecks.nilhistory -
 Queenscliffe Maritime Museum
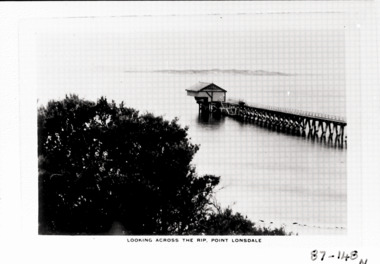
Photograph - View across the Rip, Rip views, c1900
Port Phillip from Point LonsdaleB&W photos of pier at Pt LonsdaleView across the Rip via Pt Lonsdale pier from the hill behind."Looking across The Rip, Point Lonsdalehistory -
 Queenscliffe Maritime Museum
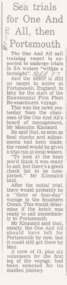
Newspaper - Clippings re Bicentennial First Fleet Re-enactment voyage participants, Bicentennial First Fleet Re-enactment, c1987
First Fleet Re-enactment Voyage & ONE & ALL sailing shipB&W photos & news articlesNewspaper articles re ONE & ALL sailing boat & First FleetNILhistory -
 Queenscliffe Maritime Museum
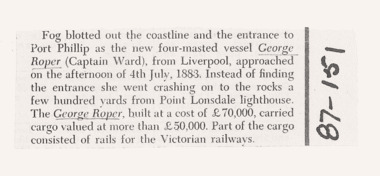
Newspaper - Clippings re George Roper shipwreck, George Roper shipwreck, c1987
First Fleet Re-enactment Voyage & ONE & ALL sailing shipB&W photos & news articlesNewspaper articles re ONE & ALL sailing boat & First FleetNILhistory -
Running Rabbits Military Museum operated by the Upwey Belgrave RSL Sub Branch
LANE W. H
William Henry Lane of Belgrave.S/No. #2704 WW1 & V91769 WW2,both ww1 & 2, army -
 Running Rabbits Military Museum operated by the Upwey Belgrave RSL Sub Branch
PEACOCK E. W
Edwin Wood Peacock S/No. #11103 - Photos, service details and other papers.documents, ww1, ran