Showing 268 items matching " temperature"
-
 Bendigo Historical Society Inc.
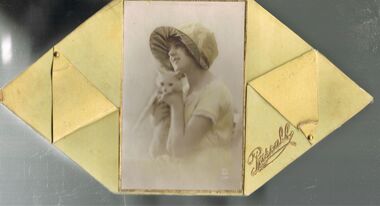
Container - CHOCOLATE BOX COLLECTION: PASCALL BOX, 1920s
Object.Pascall 1920s Yellow Chocolate Box. Design Flanged Sexangular Box with Curved Sectional Top, Sepia Photograph with Subject's Hat and Dress tinted in Pale Yellow in Centre of Lid. Photograph Surrounded by Gold Border. Subject Young Woman & Her Pet Cat. Photograph has White Mark PC Parts in a circle and the number 524 underneath. Inside Lid Pascall 1 lb Net. Contained in Box Labels Packers No 493 and Checkers No 476. Packaging Brown Paper and Fine Paper Shavings in Pale & Dark Colours. Also Another Tag Buff Paper & Red Text In Top Left Hand Corner is the Pascall London Trademark Purity & Sweetness Seal & In The Top Right-hand Corner is A Floral Emblem & The Words Furzedown. The Title On This Tag Reads Co-operation Between The Manufacturer & Consumer. The Remaining Text Reads: - These chocolates were packed with the greatest care and left in our factory in perfect condition. Extremely hot weather or contact with steam pipes may turn these chocolates grey. This is not an indication of age but of the temperature to which they have been exposed. Goods are all packed full weight; the paper shavings used are for packing and protection only. If any complaint necessary please return this ticket with the goods. James Pascall, Ltd London England. Chocolates are also still contained within the box all these years later.domestic equipment, containers, decorative chocolate box -
 Surrey Hills Historical Society Collection
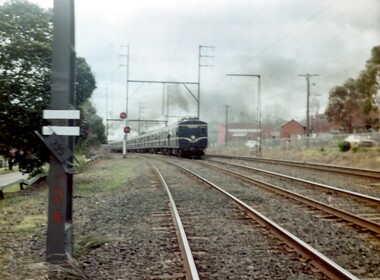
Photograph, A blue Harris electric train heads towards Union Road, Surrey Hills
The Harris blue electric trains were introduced in c1955 and followed the 'Red Rattlers'. They had a long life and were named after Norman Charles Harris, Chairman of Commissioners of the Victorian Railways, between 1940 and 1950. The first 30 7-carriage trains, known as the first series, were constructed in the United Kingdom by Gloucester Railway Carriage and Wagon Company, and delivered between 1956 and 1959. Another 30, the second series, were built by Martin & King in Melbourne, and delivered between 1961 and 1967. The trains had either two or three sets of hand-operated dual sliding doors per carriage side. Later they were fitted with power doors. Initially, until late 1978, the interiors were split into smoking and no-smoking compartments. In 1978 smoking on trains was abolished. Carriages were also designated as First or Second class until 1958, when one class travel was introduced. they had florescent lights but no heating. Most of the early carriages did not have end doors and gangways between carriages, but safety concerns led these being incorporated in the sets delivered from mid-1966. With the exceptions of the last few carriages built, all Harris trains contained asbestos insulation. The first sets contained blue asbestos, and the later sets contained white asbestos in the linings for insulation of noise and temperature. Due to the presence of asbestos, they began to be withdrawn from the mid-1980s and most were disposed of in the 1990s, by being buried at Talbot Quarry in Clayton, some having been wrapped in plastic. No original Harris trailer cars remain. A coloured photograph of a blue Harris electric train heading towards Surrey Hills station from Mont Albert station. The electricity sub-station and Lorne Parade are on the RHS of the photo and Beresford Street on the LHS. The grey, smoggy appearance of the sky suggests a winter's morning.surrey hills, trains, lorne parade, beresford street, norman charles harris, gloucester railway carriage and wagon company, martin & king, talbot quarry, harris blue train -
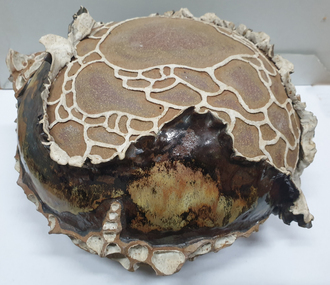
![Ceramic, Malcolm Boyd, Untitled [Male Form] by Malcolm Boyd, 1977](/media/collectors/530576742162ef0fa09a2288/items/556e8b9f2162f1015460fbfb/item-media/62a9b7295a061b9db7f1e053/item-fit-380x285.jpg) Federation University Art Collection
Federation University Art CollectionCeramic, Malcolm Boyd, Untitled [Male Form] by Malcolm Boyd, 1977
MALCOLM BOYD Born Gippsland, Victoria In 1977 Malcolm Boyd graduated with a Diploma of Visual Arts from the Gippsland Institute of Advanced Education. It was at this time that he presented this work to the Jan Feder Memorial Ceramics Collection. Over thirty years later he still has a passion for ceramic history and design. Boyd operated the Black Cockatoo Pottery from around 1980-1995, starting in Essendon, then moving to Ascot Vale, Stratford, Bairnsdale and finally Fernbank in Gippsland. His handbuilt stoneware pots and clay sculptures are wood fired at his East Gippsland studio. He often uses ochre coloured dam banks on his property at Fernbank. The local clays are crushed, screened and blended with a white stoneware body to produce a number of shades and textures. All Malcolm Boyd's pot's are hand built using moulding, coiling, slabbing, and modelling techniques, and are high temperature fired (1300C) to allow some of the very ancient oriental glazes to mature. All works spend at least 20 hours in the wood fired kilns. This work is part of the Jan Feder Memorial Ceramics Collection which was amassed with funds raised by Jan Feder's student peers at the Gippsland Centre for Art and Design in the mid 1980s after Jan Feder passed away. Although many of the works are donated the intention of the collection was to purchase from visiting lecturers who became leading ceramic artists around the world, as well as from many of the staff who taught at the Churchill Campus. This work is part of the Jan Feder Memorial Ceramics Collection. Jan Feder was an alumna of the Gippsland Campus who studied ceramics on the campus. She passed away in the mid 1980s. Her student peers raised funds to buy ceramic works in her memory. They bought works from visiting lecturers who became leading ceramic artists around the world, as well as from many of the staff who taught there.malcolm boyd, ceramics, artist, artwork, jan feder memorial ceramics collection, gippsland campus, alumni -
 Federation University Art Collection
Ceramic, Malcolm Boyd, Stoneware sculptured sphere, 1977
MALCOLM BOYD Born Gippsland, Victoria In 1977 Malcolm Boyd graduated with a Diploma of Visual Arts from the Gippsland Institute of Advanced Education. It was at this time that he presented this work to the Jan Feder Memorial Ceramics Collection. Over thirty years later he still has a passion for ceramic history and design. Boyd operated the Black Cockatoo Pottery from around 1980-1995, starting in Essendon, then moving to Ascot Vale, Stratford, Bairnsdale and finally Fernbank in Gippsland. His handbuilt stoneware pots and clay sculptures are wood fired at his East Gippsland studio. He often uses ochre coloured dam banks on his property at Fernbank. The local clays are crushed, screened and blended with a white stoneware body to produce a number of shades and textures. All Malcolm Boyd's pot's are hand built using moulding, coiling, slabbing, and modelling techniques, and are high temperature fired (1300C) to allow some of the very ancient oriental glazes to mature. All works spend at least 20 hours in the wood fired kilns. This work is part of the Jan Feder Memorial Ceramics Collection which was amassed with funds raised by Jan Feder's student peers at the Gippsland Centre for Art and Design in the mid 1980s after Jan Feder passed away. Although many of the works are donated the intention of the collection was to purchase from visiting lecturers who became leading ceramic artists around the world, as well as from many of the staff who taught at the Churchill Campus. Jan Feder Memorial Collection Presented by the artist in 1977. malcolm boyd, ceramics, stoneware, artists, artwork, jan feder memorial ceramics collection, alumni, woodfire -
 Flagstaff Hill Maritime Museum and Village
Domestic object - Bowl, Late 19th or early 20th Century
The Process of Making Pottery Decorating, Firing, Glazing, Making, Technical There is a rhythm and flow to clay. It can’t be done all at once! Even the making process! It can take weeks to get everything done, especially if you can only work on your pottery once a week! Even though we have three hour classes, it’s often just not enough time! Here is an overview of some of the processes so you have a bit more grasp on some of the technical stuff! Step One – Design There are SO many ideas out there for making stuff in clay! From delicate porcelain jewellery, through to heavy sculptural work and everything in between. Deciding your direction is sometimes not that easy – when you first start, try everything, you will naturally gravitate to the style that you enjoy! The options and variations are endless and can get a wee bit overwhelming too! Check in with me before you start to ensure your ideas will work, what order you might do things, how you could achieve the look you are seeking and any other technical data required! Step Two – Making Clay is thixotropic. This means that as you work with it, the clay first gets sloppier and wetter, before is begins to dry in the atmosphere. For most things, you simply can’t do all parts of the project at once. An example of work order might look like: Get last weeks work out from the shelves Prepare clay for today’s work – roll your clay, prepare balls for throwing, make the first stage of a pinch pot) Clean up last week’s work and put it on the shelf for bisque firing Check that you have any glazing to do – and do enough of it that you will have time to finish your main project Do the next step of your next project – there might be a further step that can’t be complete immediately, in that case, wrap your work well and put onto the shelves. Letting your work rest for a while can really help keep your work clean and professional looking. Many things require bagging under plastic to keep it ready for work the next week – put your name on the outside of the bag so you can find your work easily. We have stickers and markers. Consider how you want to decorate your work – coloured slip can be applied at a fairly wet stage (remembering that it will make your work even wetter!). Trying to apply slip to dry clay won’t work! If you want to do sgraffito – you will need to keep the work leather hard (a state of dryness where you can still work the clay with a little effort and a little water and care). Step Three – Drying Most of the time your work can go into the rack uncovered to let it dry out for the following week. If you want to continue forming or shaping you will need to double bag your work – put your work on a suitable sized bat and put the bat in a bag so the base of the bag is under the bat, then put another bag over the top of the work and tuck the top of the bag under the bat. If you want to trim (or turn) your thrown work the following week, it should also be double bagged. If your work is large, delicate, or of uneven thicknesses, you should lightly cover your work for drying. When considering the drying process, bare in mind the weather, humidity and wind! The hotter and dryer, the faster things dry and work can dry unevenly in the shelves – this can lead to cracking – another time to lightly cover your work for drying. Step Four – Trimming and Cleaning Up Your work is dry! It is called greenware now and it is at it’s most fragile! Handle everything with two hands. I often refer to soft hands – keep everything gentle and with your fingers spread as much as possible. Try to not pick up things like plates too much, and always with both hands! Before your work can be bisque fired it should be “cleaned up”. You work won’t go into the kiln if it has sharp edges – when glazed, sharp edges turn into razor blades! Use a piece of fly wire to rub the work all over – this will scratch a little so be light handed. Use a knife or metal kidney to scrape any areas that require a bit more dynamic treatment than the fly wire offers! Finally, a very light wipe over with a slightly damp sponge can help soften and soothe all of your edges and dags! Trimming thrown work: If you are planning to trim (or turn) your thrown work (and you should be), make sure you bag it well – your work should be leather hard to almost dry for easiest trimming. Use this step to finish the work completely – use a metal kidney to polish the surface, or a slightly damp sponge to give a freshly thrown look. Wipe the sponge around the rim after trimming, and check the inside of the pot for dags! Trimming slip cast work: Usually I will trim the rims of your work on the wheel the following day to make that stage easier, however you will still need to check your work for lumps and bumps. Last but not least – check that your name is still clearly on the bottom of your work. Step Five – Bisque Firing When the work is completely dry it can go into the bisque kiln. The bisque kiln is fired to 1000°C. This process burns off the water in the clay as well as some of the chemically bound water. The structure of the clay is not altered that much at this temperature. Inside the bisque kiln, the work is stacked a little, small bowl inside a larger bowl and onto a heavy plate. Smaller items like decorations or drink coasters might get stacked several high. Consideration is paid to the weight of the stack and shape of the work. A bisque kiln can fire about one and a half times the amount of work that the glaze kiln can fire. The firing takes about 10 hours to complete the cycle and about two days to cool down. Once it has been emptied the work is placed in the glaze room ready for you to decorate! Step Six – Glazing Decorating your work with colour can be a lot of fun – and time consuming! There are three main options for surface treatment at this stage: Oxide Washes Underglazes Glazes Washes and underglazes do not “glaze” the work – It will still need a layer of glaze to fully seal the clay (washes don’t need glaze on surfaces not designed for food or liquid as they can gloss up a little on their own). Underglazes are stable colourants that turn out pretty much how they look in the jar. They can be mixed with each other to form other colours and can be used like water colours to paint onto your work. Mostly they should have a clear glaze on top to seal them. Oxides are a different species – the pink oxide (cobalt) wash turns out bright blue for instance. They don’t always need a glaze on top, and some glazes can change the colour of the wash! The glazes need no other “glaze” on top! Be careful of unknown glaze interactions – you can put any combination of glaze in a bowl or on a plate, but only a single glaze on the outside of any vertical surface! Glazes are a chemical reaction under heat. We don’t know the exact chemicals in the Mayco glazes we use. I can guess by the way they interact with each other, however, on the whole, you need to test every idea you have, and not run the test on a vertical surface! Simply put, glaze is a layer of glass like substance that bonds with the clay underneath. Clay is made of silica, alumina and water. Glaze is made of mostly silica. Silica has a melting point of 1700°C and we fire to 1240°C. The silica requires a “flux” to help it melt at the lower temperature. Fluxes can be all sorts of chemicals – a common one is calcium – calcium has a melting point of 2500°C, however, together they both melt at a much lower temperature! Colourants are metal oxides like cobalt (blue), chrome (green through black), copper (green, blue, even red!), manganese (black, purple and pink) iron (red brown), etc. Different chemicals in the glaze can have dramatic effects. for example, barium carbonate (which we don’t use) turns manganese bright pink! Other elements can turn manganese dioxide brown, blue, purple and reddish brown. Manganese dioxide is a flux in and of itself as well. So, glazes that get their black and purple colours, often interact with other glazes and RUN! Our mirror black is a good example – it mixes really well with many glazes because it fluxes them – causes them to melt faster. It will also bring out many beautiful colours in the glazes because it’s black colouring most definitely comes from manganese dioxide! Glaze chemistry is a whole subject on it’s own! We use commercial Mayco glazes on purpose – for their huge range of colour possibilities, stability, cool interactions, artistic freedom with the ability to easily brush the glazes on and ease of use. We currently have almost 50 glazes on hand! A major project is to test the interactions of all glazes with each other. That is 2,500 test tiles!!!! I’m going to make the wall behind the wheels the feature wall of pretty colours! Step Seven – Glaze (Gloss or sometimes called “Glost”) Firing Most of the time this is the final stage of making your creation (but not always!) The glaze kiln goes to 1240°C. This is called cone 6, or midrange. It is the low end of stoneware temperatures. Stoneware clays and glazes are typically fired at cone 8 – 10, that is 1260 – 1290°C. The energy requirement to go from 1240°C to 1280°C is almost a 30% more! Our clay is formulated to vitrify (mature, turn “glass-like”) at 1240°, as are our glazes. A glaze kiln take around 12 hours to reach temperature and two to three days to cool down. Sometimes a third firing process is required – this is for decoration that is added to work after the glaze firing. For example – adding precious metals and lustres. this firing temperature is usually around 600 – 800°C depending upon the techniques being used. There are many students interested in gold and silver trims – we will be doing this third type of firing soon! After firing your work will be in the student finished work shelves. Remember to pay for it before you head out the door! There is a small extra charge for using porcelain clay (it’s more than twice the price of regular clay), and for any third firing process! Once your work has been fired it can not turn back into clay for millennia – so don’t fire it if you don’t like it! Put it in the bucket for recycling. https://firebirdstudios.com.au/the-process-of-making-pottery/ The bowl is an example of kitchenware used in the 19th century and still in use today.Bowl white ceramic. Crack on side. Badly stained.Backstamp very faint and unable to be read.flagstaff hill, warrnambool, shipwrecked-coast, flagstaff-hill, flagstaff-hill-maritime-museum, maritime-museum, shipwreck-coast, flagstaff-hill-maritime-village, mixing bowl, food preparation, kitchen equipment, ceramic -
 Flagstaff Hill Maritime Museum and Village
Domestic object - Bowl
The Process of Making Pottery Decorating, Firing, Glazing, Making, Technical There is a rhythm and flow to clay. It can’t be done all at once! Even the making process! It can take weeks to get everything done, especially if you can only work on your pottery once a week! Even though we have three hour classes, it’s often just not enough time! Here is an overview of some of the processes so you have a bit more grasp on some of the technical stuff! Step One – Design There are SO many ideas out there for making stuff in clay! From delicate porcelain jewellery, through to heavy sculptural work and everything in between. Deciding your direction is sometimes not that easy – when you first start, try everything, you will naturally gravitate to the style that you enjoy! The options and variations are endless and can get a wee bit overwhelming too! Check in with me before you start to ensure your ideas will work, what order you might do things, how you could achieve the look you are seeking and any other technical data required! Step Two – Making Clay is thixotropic. This means that as you work with it, the clay first gets sloppier and wetter, before is begins to dry in the atmosphere. For most things, you simply can’t do all parts of the project at once. An example of work order might look like: Get last weeks work out from the shelves Prepare clay for today’s work – roll your clay, prepare balls for throwing, make the first stage of a pinch pot) Clean up last week’s work and put it on the shelf for bisque firing Check that you have any glazing to do – and do enough of it that you will have time to finish your main project Do the next step of your next project – there might be a further step that can’t be complete immediately, in that case, wrap your work well and put onto the shelves. Letting your work rest for a while can really help keep your work clean and professional looking. Many things require bagging under plastic to keep it ready for work the next week – put your name on the outside of the bag so you can find your work easily. We have stickers and markers. Consider how you want to decorate your work – coloured slip can be applied at a fairly wet stage (remembering that it will make your work even wetter!). Trying to apply slip to dry clay won’t work! If you want to do sgraffito – you will need to keep the work leather hard (a state of dryness where you can still work the clay with a little effort and a little water and care). Step Three – Drying Most of the time your work can go into the rack uncovered to let it dry out for the following week. If you want to continue forming or shaping you will need to double bag your work – put your work on a suitable sized bat and put the bat in a bag so the base of the bag is under the bat, then put another bag over the top of the work and tuck the top of the bag under the bat. If you want to trim (or turn) your thrown work the following week, it should also be double bagged. If your work is large, delicate, or of uneven thicknesses, you should lightly cover your work for drying. When considering the drying process, bare in mind the weather, humidity and wind! The hotter and dryer, the faster things dry and work can dry unevenly in the shelves – this can lead to cracking – another time to lightly cover your work for drying. Step Four – Trimming and Cleaning Up Your work is dry! It is called greenware now and it is at it’s most fragile! Handle everything with two hands. I often refer to soft hands – keep everything gentle and with your fingers spread as much as possible. Try to not pick up things like plates too much, and always with both hands! Before your work can be bisque fired it should be “cleaned up”. You work won’t go into the kiln if it has sharp edges – when glazed, sharp edges turn into razor blades! Use a piece of fly wire to rub the work all over – this will scratch a little so be light handed. Use a knife or metal kidney to scrape any areas that require a bit more dynamic treatment than the fly wire offers! Finally, a very light wipe over with a slightly damp sponge can help soften and soothe all of your edges and dags! Trimming thrown work: If you are planning to trim (or turn) your thrown work (and you should be), make sure you bag it well – your work should be leather hard to almost dry for easiest trimming. Use this step to finish the work completely – use a metal kidney to polish the surface, or a slightly damp sponge to give a freshly thrown look. Wipe the sponge around the rim after trimming, and check the inside of the pot for dags! Trimming slip cast work: Usually I will trim the rims of your work on the wheel the following day to make that stage easier, however you will still need to check your work for lumps and bumps. Last but not least – check that your name is still clearly on the bottom of your work. Step Five – Bisque Firing When the work is completely dry it can go into the bisque kiln. The bisque kiln is fired to 1000°C. This process burns off the water in the clay as well as some of the chemically bound water. The structure of the clay is not altered that much at this temperature. Inside the bisque kiln, the work is stacked a little, small bowl inside a larger bowl and onto a heavy plate. Smaller items like decorations or drink coasters might get stacked several high. Consideration is paid to the weight of the stack and shape of the work. A bisque kiln can fire about one and a half times the amount of work that the glaze kiln can fire. The firing takes about 10 hours to complete the cycle and about two days to cool down. Once it has been emptied the work is placed in the glaze room ready for you to decorate! Step Six – Glazing Decorating your work with colour can be a lot of fun – and time consuming! There are three main options for surface treatment at this stage: Oxide Washes Underglazes Glazes Washes and underglazes do not “glaze” the work – It will still need a layer of glaze to fully seal the clay (washes don’t need glaze on surfaces not designed for food or liquid as they can gloss up a little on their own). Underglazes are stable colourants that turn out pretty much how they look in the jar. They can be mixed with each other to form other colours and can be used like water colours to paint onto your work. Mostly they should have a clear glaze on top to seal them. Oxides are a different species – the pink oxide (cobalt) wash turns out bright blue for instance. They don’t always need a glaze on top, and some glazes can change the colour of the wash! The glazes need no other “glaze” on top! Be careful of unknown glaze interactions – you can put any combination of glaze in a bowl or on a plate, but only a single glaze on the outside of any vertical surface! Glazes are a chemical reaction under heat. We don’t know the exact chemicals in the Mayco glazes we use. I can guess by the way they interact with each other, however, on the whole, you need to test every idea you have, and not run the test on a vertical surface! Simply put, glaze is a layer of glass like substance that bonds with the clay underneath. Clay is made of silica, alumina and water. Glaze is made of mostly silica. Silica has a melting point of 1700°C and we fire to 1240°C. The silica requires a “flux” to help it melt at the lower temperature. Fluxes can be all sorts of chemicals – a common one is calcium – calcium has a melting point of 2500°C, however, together they both melt at a much lower temperature! Colourants are metal oxides like cobalt (blue), chrome (green through black), copper (green, blue, even red!), manganese (black, purple and pink) iron (red brown), etc. Different chemicals in the glaze can have dramatic effects. for example, barium carbonate (which we don’t use) turns manganese bright pink! Other elements can turn manganese dioxide brown, blue, purple and reddish brown. Manganese dioxide is a flux in and of itself as well. So, glazes that get their black and purple colours, often interact with other glazes and RUN! Our mirror black is a good example – it mixes really well with many glazes because it fluxes them – causes them to melt faster. It will also bring out many beautiful colours in the glazes because it’s black colouring most definitely comes from manganese dioxide! Glaze chemistry is a whole subject on it’s own! We use commercial Mayco glazes on purpose – for their huge range of colour possibilities, stability, cool interactions, artistic freedom with the ability to easily brush the glazes on and ease of use. We currently have almost 50 glazes on hand! A major project is to test the interactions of all glazes with each other. That is 2,500 test tiles!!!! I’m going to make the wall behind the wheels the feature wall of pretty colours! Step Seven – Glaze (Gloss or sometimes called “Glost”) Firing Most of the time this is the final stage of making your creation (but not always!) The glaze kiln goes to 1240°C. This is called cone 6, or midrange. It is the low end of stoneware temperatures. Stoneware clays and glazes are typically fired at cone 8 – 10, that is 1260 – 1290°C. The energy requirement to go from 1240°C to 1280°C is almost a 30% more! Our clay is formulated to vitrify (mature, turn “glass-like”) at 1240°, as are our glazes. A glaze kiln take around 12 hours to reach temperature and two to three days to cool down. Sometimes a third firing process is required – this is for decoration that is added to work after the glaze firing. For example – adding precious metals and lustres. this firing temperature is usually around 600 – 800°C depending upon the techniques being used. There are many students interested in gold and silver trims – we will be doing this third type of firing soon! After firing your work will be in the student finished work shelves. Remember to pay for it before you head out the door! There is a small extra charge for using porcelain clay (it’s more than twice the price of regular clay), and for any third firing process! Once your work has been fired it can not turn back into clay for millennia – so don’t fire it if you don’t like it! Put it in the bucket for recycling. https://firebirdstudios.com.au/the-process-of-making-pottery/ This bowl is an example of kitchenware used in the 19th century and still in use today.Bowl white ceramic plain that has two sets of edging around lip. Inside bowl has plaster designed to look like cooking mixture.flagstaff hill, warrnambool, shipwrecked-coast, flagstaff-hill, flagstaff-hill-maritime-museum, maritime-museum, shipwreck-coast, flagstaff-hill-maritime-village, kitchen equipment, ceramic -
 Flagstaff Hill Maritime Museum and Village
Domestic object - Bowl, J & G Meakin, Late 19th or early 20th Century
The Process of Making Pottery Decorating, Firing, Glazing, Making, Technical There is a rhythm and flow to clay. It can’t be done all at once! Even the making process! It can take weeks to get everything done, especially if you can only work on your pottery once a week! Even though we have three hour classes, it’s often just not enough time! Here is an overview of some of the processes so you have a bit more grasp on some of the technical stuff! Step One – Design There are SO many ideas out there for making stuff in clay! From delicate porcelain jewellery, through to heavy sculptural work and everything in between. Deciding your direction is sometimes not that easy – when you first start, try everything, you will naturally gravitate to the style that you enjoy! The options and variations are endless and can get a wee bit overwhelming too! Check in with me before you start to ensure your ideas will work, what order you might do things, how you could achieve the look you are seeking and any other technical data required! Step Two – Making Clay is thixotropic. This means that as you work with it, the clay first gets sloppier and wetter, before is begins to dry in the atmosphere. For most things, you simply can’t do all parts of the project at once. An example of work order might look like: Get last weeks work out from the shelves Prepare clay for today’s work – roll your clay, prepare balls for throwing, make the first stage of a pinch pot) Clean up last week’s work and put it on the shelf for bisque firing Check that you have any glazing to do – and do enough of it that you will have time to finish your main project Do the next step of your next project – there might be a further step that can’t be complete immediately, in that case, wrap your work well and put onto the shelves. Letting your work rest for a while can really help keep your work clean and professional looking. Many things require bagging under plastic to keep it ready for work the next week – put your name on the outside of the bag so you can find your work easily. We have stickers and markers. Consider how you want to decorate your work – coloured slip can be applied at a fairly wet stage (remembering that it will make your work even wetter!). Trying to apply slip to dry clay won’t work! If you want to do sgraffito – you will need to keep the work leather hard (a state of dryness where you can still work the clay with a little effort and a little water and care). Step Three – Drying Most of the time your work can go into the rack uncovered to let it dry out for the following week. If you want to continue forming or shaping you will need to double bag your work – put your work on a suitable sized bat and put the bat in a bag so the base of the bag is under the bat, then put another bag over the top of the work and tuck the top of the bag under the bat. If you want to trim (or turn) your thrown work the following week, it should also be double bagged. If your work is large, delicate, or of uneven thicknesses, you should lightly cover your work for drying. When considering the drying process, bare in mind the weather, humidity and wind! The hotter and dryer, the faster things dry and work can dry unevenly in the shelves – this can lead to cracking – another time to lightly cover your work for drying. Step Four – Trimming and Cleaning Up Your work is dry! It is called greenware now and it is at it’s most fragile! Handle everything with two hands. I often refer to soft hands – keep everything gentle and with your fingers spread as much as possible. Try to not pick up things like plates too much, and always with both hands! Before your work can be bisque fired it should be “cleaned up”. You work won’t go into the kiln if it has sharp edges – when glazed, sharp edges turn into razor blades! Use a piece of fly wire to rub the work all over – this will scratch a little so be light handed. Use a knife or metal kidney to scrape any areas that require a bit more dynamic treatment than the fly wire offers! Finally, a very light wipe over with a slightly damp sponge can help soften and soothe all of your edges and dags! Trimming thrown work: If you are planning to trim (or turn) your thrown work (and you should be), make sure you bag it well – your work should be leather hard to almost dry for easiest trimming. Use this step to finish the work completely – use a metal kidney to polish the surface, or a slightly damp sponge to give a freshly thrown look. Wipe the sponge around the rim after trimming, and check the inside of the pot for dags! Trimming slip cast work: Usually I will trim the rims of your work on the wheel the following day to make that stage easier, however you will still need to check your work for lumps and bumps. Last but not least – check that your name is still clearly on the bottom of your work. Step Five – Bisque Firing When the work is completely dry it can go into the bisque kiln. The bisque kiln is fired to 1000°C. This process burns off the water in the clay as well as some of the chemically bound water. The structure of the clay is not altered that much at this temperature. Inside the bisque kiln, the work is stacked a little, small bowl inside a larger bowl and onto a heavy plate. Smaller items like decorations or drink coasters might get stacked several high. Consideration is paid to the weight of the stack and shape of the work. A bisque kiln can fire about one and a half times the amount of work that the glaze kiln can fire. The firing takes about 10 hours to complete the cycle and about two days to cool down. Once it has been emptied the work is placed in the glaze room ready for you to decorate! Step Six – Glazing Decorating your work with colour can be a lot of fun – and time consuming! There are three main options for surface treatment at this stage: Oxide Washes Underglazes Glazes Washes and underglazes do not “glaze” the work – It will still need a layer of glaze to fully seal the clay (washes don’t need glaze on surfaces not designed for food or liquid as they can gloss up a little on their own). Underglazes are stable colourants that turn out pretty much how they look in the jar. They can be mixed with each other to form other colours and can be used like water colours to paint onto your work. Mostly they should have a clear glaze on top to seal them. Oxides are a different species – the pink oxide (cobalt) wash turns out bright blue for instance. They don’t always need a glaze on top, and some glazes can change the colour of the wash! The glazes need no other “glaze” on top! Be careful of unknown glaze interactions – you can put any combination of glaze in a bowl or on a plate, but only a single glaze on the outside of any vertical surface! Glazes are a chemical reaction under heat. We don’t know the exact chemicals in the Mayco glazes we use. I can guess by the way they interact with each other, however, on the whole, you need to test every idea you have, and not run the test on a vertical surface! Simply put, glaze is a layer of glass like substance that bonds with the clay underneath. Clay is made of silica, alumina and water. Glaze is made of mostly silica. Silica has a melting point of 1700°C and we fire to 1240°C. The silica requires a “flux” to help it melt at the lower temperature. Fluxes can be all sorts of chemicals – a common one is calcium – calcium has a melting point of 2500°C, however, together they both melt at a much lower temperature! Colourants are metal oxides like cobalt (blue), chrome (green through black), copper (green, blue, even red!), manganese (black, purple and pink) iron (red brown), etc. Different chemicals in the glaze can have dramatic effects. for example, barium carbonate (which we don’t use) turns manganese bright pink! Other elements can turn manganese dioxide brown, blue, purple and reddish brown. Manganese dioxide is a flux in and of itself as well. So, glazes that get their black and purple colours, often interact with other glazes and RUN! Our mirror black is a good example – it mixes really well with many glazes because it fluxes them – causes them to melt faster. It will also bring out many beautiful colours in the glazes because it’s black colouring most definitely comes from manganese dioxide! Glaze chemistry is a whole subject on it’s own! We use commercial Mayco glazes on purpose – for their huge range of colour possibilities, stability, cool interactions, artistic freedom with the ability to easily brush the glazes on and ease of use. We currently have almost 50 glazes on hand! A major project is to test the interactions of all glazes with each other. That is 2,500 test tiles!!!! I’m going to make the wall behind the wheels the feature wall of pretty colours! Step Seven – Glaze (Gloss or sometimes called “Glost”) Firing Most of the time this is the final stage of making your creation (but not always!) The glaze kiln goes to 1240°C. This is called cone 6, or midrange. It is the low end of stoneware temperatures. Stoneware clays and glazes are typically fired at cone 8 – 10, that is 1260 – 1290°C. The energy requirement to go from 1240°C to 1280°C is almost a 30% more! Our clay is formulated to vitrify (mature, turn “glass-like”) at 1240°, as are our glazes. A glaze kiln take around 12 hours to reach temperature and two to three days to cool down. Sometimes a third firing process is required – this is for decoration that is added to work after the glaze firing. For example – adding precious metals and lustres. this firing temperature is usually around 600 – 800°C depending upon the techniques being used. There are many students interested in gold and silver trims – we will be doing this third type of firing soon! After firing your work will be in the student finished work shelves. Remember to pay for it before you head out the door! There is a small extra charge for using porcelain clay (it’s more than twice the price of regular clay), and for any third firing process! Once your work has been fired it can not turn back into clay for millennia – so don’t fire it if you don’t like it! Put it in the bucket for recycling. https://firebirdstudios.com.au/the-process-of-making-pottery/This bowl was made by renowned pottery company J & G Meakin of England. The firm was established in the mid-1800's. The bowl is an example of kitchenware used in the 19th century and still in use today.Bowl; white ceramic, round and tapering inwards towards base. Made by J and G Meakin England.On base, 'Ironstone China Reg SOL 391413' with symbolflagstaff hill, flagstaff hill maritime museum and village, warrnambool, maritime museum, maritime village, great ocean road, shipwreck coast, mixing bowl, food preparation, j & g meakin, pottery, stoke-on-trent, kitchen equipment, ceramic -
 Flagstaff Hill Maritime Museum and Village
Domestic object - Plate
The Process of Making Pottery Decorating, Firing, Glazing, Making, Technical There is a rhythm and flow to clay. It can’t be done all at once! Even the making process! It can take weeks to get everything done, especially if you can only work on your pottery once a week! Even though we have three hour classes, it’s often just not enough time! Here is an overview of some of the processes so you have a bit more grasp on some of the technical stuff! Step One – Design There are SO many ideas out there for making stuff in clay! From delicate porcelain jewellery, through to heavy sculptural work and everything in between. Deciding your direction is sometimes not that easy – when you first start, try everything, you will naturally gravitate to the style that you enjoy! The options and variations are endless and can get a wee bit overwhelming too! Check in with me before you start to ensure your ideas will work, what order you might do things, how you could achieve the look you are seeking and any other technical data required! Step Two – Making Clay is thixotropic. This means that as you work with it, the clay first gets sloppier and wetter, before is begins to dry in the atmosphere. For most things, you simply can’t do all parts of the project at once. An example of work order might look like: Get last weeks work out from the shelves Prepare clay for today’s work – roll your clay, prepare balls for throwing, make the first stage of a pinch pot) Clean up last week’s work and put it on the shelf for bisque firing Check that you have any glazing to do – and do enough of it that you will have time to finish your main project Do the next step of your next project – there might be a further step that can’t be complete immediately, in that case, wrap your work well and put onto the shelves. Letting your work rest for a while can really help keep your work clean and professional looking. Many things require bagging under plastic to keep it ready for work the next week – put your name on the outside of the bag so you can find your work easily. We have stickers and markers. Consider how you want to decorate your work – coloured slip can be applied at a fairly wet stage (remembering that it will make your work even wetter!). Trying to apply slip to dry clay won’t work! If you want to do sgraffito – you will need to keep the work leather hard (a state of dryness where you can still work the clay with a little effort and a little water and care). Step Three – Drying Most of the time your work can go into the rack uncovered to let it dry out for the following week. If you want to continue forming or shaping you will need to double bag your work – put your work on a suitable sized bat and put the bat in a bag so the base of the bag is under the bat, then put another bag over the top of the work and tuck the top of the bag under the bat. If you want to trim (or turn) your thrown work the following week, it should also be double bagged. If your work is large, delicate, or of uneven thicknesses, you should lightly cover your work for drying. When considering the drying process, bare in mind the weather, humidity and wind! The hotter and dryer, the faster things dry and work can dry unevenly in the shelves – this can lead to cracking – another time to lightly cover your work for drying. Step Four – Trimming and Cleaning Up Your work is dry! It is called greenware now and it is at it’s most fragile! Handle everything with two hands. I often refer to soft hands – keep everything gentle and with your fingers spread as much as possible. Try to not pick up things like plates too much, and always with both hands! Before your work can be bisque fired it should be “cleaned up”. You work won’t go into the kiln if it has sharp edges – when glazed, sharp edges turn into razor blades! Use a piece of fly wire to rub the work all over – this will scratch a little so be light handed. Use a knife or metal kidney to scrape any areas that require a bit more dynamic treatment than the fly wire offers! Finally, a very light wipe over with a slightly damp sponge can help soften and soothe all of your edges and dags! Trimming thrown work: If you are planning to trim (or turn) your thrown work (and you should be), make sure you bag it well – your work should be leather hard to almost dry for easiest trimming. Use this step to finish the work completely – use a metal kidney to polish the surface, or a slightly damp sponge to give a freshly thrown look. Wipe the sponge around the rim after trimming, and check the inside of the pot for dags! Trimming slip cast work: Usually I will trim the rims of your work on the wheel the following day to make that stage easier, however you will still need to check your work for lumps and bumps. Last but not least – check that your name is still clearly on the bottom of your work. Step Five – Bisque Firing When the work is completely dry it can go into the bisque kiln. The bisque kiln is fired to 1000°C. This process burns off the water in the clay as well as some of the chemically bound water. The structure of the clay is not altered that much at this temperature. Inside the bisque kiln, the work is stacked a little, small bowl inside a larger bowl and onto a heavy plate. Smaller items like decorations or drink coasters might get stacked several high. Consideration is paid to the weight of the stack and shape of the work. A bisque kiln can fire about one and a half times the amount of work that the glaze kiln can fire. The firing takes about 10 hours to complete the cycle and about two days to cool down. Once it has been emptied the work is placed in the glaze room ready for you to decorate! Step Six – Glazing Decorating your work with colour can be a lot of fun – and time consuming! There are three main options for surface treatment at this stage: Oxide Washes Underglazes Glazes Washes and underglazes do not “glaze” the work – It will still need a layer of glaze to fully seal the clay (washes don’t need glaze on surfaces not designed for food or liquid as they can gloss up a little on their own). Underglazes are stable colourants that turn out pretty much how they look in the jar. They can be mixed with each other to form other colours and can be used like water colours to paint onto your work. Mostly they should have a clear glaze on top to seal them. Oxides are a different species – the pink oxide (cobalt) wash turns out bright blue for instance. They don’t always need a glaze on top, and some glazes can change the colour of the wash! The glazes need no other “glaze” on top! Be careful of unknown glaze interactions – you can put any combination of glaze in a bowl or on a plate, but only a single glaze on the outside of any vertical surface! Glazes are a chemical reaction under heat. We don’t know the exact chemicals in the Mayco glazes we use. I can guess by the way they interact with each other, however, on the whole, you need to test every idea you have, and not run the test on a vertical surface! Simply put, glaze is a layer of glass like substance that bonds with the clay underneath. Clay is made of silica, alumina and water. Glaze is made of mostly silica. Silica has a melting point of 1700°C and we fire to 1240°C. The silica requires a “flux” to help it melt at the lower temperature. Fluxes can be all sorts of chemicals – a common one is calcium – calcium has a melting point of 2500°C, however, together they both melt at a much lower temperature! Colourants are metal oxides like cobalt (blue), chrome (green through black), copper (green, blue, even red!), manganese (black, purple and pink) iron (red brown), etc. Different chemicals in the glaze can have dramatic effects. for example, barium carbonate (which we don’t use) turns manganese bright pink! Other elements can turn manganese dioxide brown, blue, purple and reddish brown. Manganese dioxide is a flux in and of itself as well. So, glazes that get their black and purple colours, often interact with other glazes and RUN! Our mirror black is a good example – it mixes really well with many glazes because it fluxes them – causes them to melt faster. It will also bring out many beautiful colours in the glazes because it’s black colouring most definitely comes from manganese dioxide! Glaze chemistry is a whole subject on it’s own! We use commercial Mayco glazes on purpose – for their huge range of colour possibilities, stability, cool interactions, artistic freedom with the ability to easily brush the glazes on and ease of use. We currently have almost 50 glazes on hand! A major project is to test the interactions of all glazes with each other. That is 2,500 test tiles!!!! I’m going to make the wall behind the wheels the feature wall of pretty colours! Step Seven – Glaze (Gloss or sometimes called “Glost”) Firing Most of the time this is the final stage of making your creation (but not always!) The glaze kiln goes to 1240°C. This is called cone 6, or midrange. It is the low end of stoneware temperatures. Stoneware clays and glazes are typically fired at cone 8 – 10, that is 1260 – 1290°C. The energy requirement to go from 1240°C to 1280°C is almost a 30% more! Our clay is formulated to vitrify (mature, turn “glass-like”) at 1240°, as are our glazes. A glaze kiln take around 12 hours to reach temperature and two to three days to cool down. Sometimes a third firing process is required – this is for decoration that is added to work after the glaze firing. For example – adding precious metals and lustres. this firing temperature is usually around 600 – 800°C depending upon the techniques being used. There are many students interested in gold and silver trims – we will be doing this third type of firing soon! After firing your work will be in the student finished work shelves. Remember to pay for it before you head out the door! There is a small extra charge for using porcelain clay (it’s more than twice the price of regular clay), and for any third firing process! Once your work has been fired it can not turn back into clay for millennia – so don’t fire it if you don’t like it! Put it in the bucket for recycling. https://firebirdstudios.com.au/the-process-of-making-pottery/Ceramics have evolved over thousands of years.White earthenware dinner plate. Crazing evident all over.Backstamped ‘Made in England S LTD’flagstaff hill, warrnambool, shipwrecked-coast, flagstaff-hill, flagstaff-hill-maritime-museum, maritime-museum, shipwreck-coast, flagstaff-hill-maritime-village, ceramics, tableware -
 Flagstaff Hill Maritime Museum and Village
Domestic object - Plate, Johnson Bros
The Process of Making Pottery Decorating, Firing, Glazing, Making, Technical There is a rhythm and flow to clay. It can’t be done all at once! Even the making process! It can take weeks to get everything done, especially if you can only work on your pottery once a week! Even though we have three hour classes, it’s often just not enough time! Here is an overview of some of the processes so you have a bit more grasp on some of the technical stuff! Step One – Design There are SO many ideas out there for making stuff in clay! From delicate porcelain jewellery, through to heavy sculptural work and everything in between. Deciding your direction is sometimes not that easy – when you first start, try everything, you will naturally gravitate to the style that you enjoy! The options and variations are endless and can get a wee bit overwhelming too! Check in with me before you start to ensure your ideas will work, what order you might do things, how you could achieve the look you are seeking and any other technical data required! Step Two – Making Clay is thixotropic. This means that as you work with it, the clay first gets sloppier and wetter, before is begins to dry in the atmosphere. For most things, you simply can’t do all parts of the project at once. An example of work order might look like: Get last weeks work out from the shelves Prepare clay for today’s work – roll your clay, prepare balls for throwing, make the first stage of a pinch pot) Clean up last week’s work and put it on the shelf for bisque firing Check that you have any glazing to do – and do enough of it that you will have time to finish your main project Do the next step of your next project – there might be a further step that can’t be complete immediately, in that case, wrap your work well and put onto the shelves. Letting your work rest for a while can really help keep your work clean and professional looking. Many things require bagging under plastic to keep it ready for work the next week – put your name on the outside of the bag so you can find your work easily. We have stickers and markers. Consider how you want to decorate your work – coloured slip can be applied at a fairly wet stage (remembering that it will make your work even wetter!). Trying to apply slip to dry clay won’t work! If you want to do sgraffito – you will need to keep the work leather hard (a state of dryness where you can still work the clay with a little effort and a little water and care). Step Three – Drying Most of the time your work can go into the rack uncovered to let it dry out for the following week. If you want to continue forming or shaping you will need to double bag your work – put your work on a suitable sized bat and put the bat in a bag so the base of the bag is under the bat, then put another bag over the top of the work and tuck the top of the bag under the bat. If you want to trim (or turn) your thrown work the following week, it should also be double bagged. If your work is large, delicate, or of uneven thicknesses, you should lightly cover your work for drying. When considering the drying process, bare in mind the weather, humidity and wind! The hotter and dryer, the faster things dry and work can dry unevenly in the shelves – this can lead to cracking – another time to lightly cover your work for drying. Step Four – Trimming and Cleaning Up Your work is dry! It is called greenware now and it is at it’s most fragile! Handle everything with two hands. I often refer to soft hands – keep everything gentle and with your fingers spread as much as possible. Try to not pick up things like plates too much, and always with both hands! Before your work can be bisque fired it should be “cleaned up”. You work won’t go into the kiln if it has sharp edges – when glazed, sharp edges turn into razor blades! Use a piece of fly wire to rub the work all over – this will scratch a little so be light handed. Use a knife or metal kidney to scrape any areas that require a bit more dynamic treatment than the fly wire offers! Finally, a very light wipe over with a slightly damp sponge can help soften and soothe all of your edges and dags! Trimming thrown work: If you are planning to trim (or turn) your thrown work (and you should be), make sure you bag it well – your work should be leather hard to almost dry for easiest trimming. Use this step to finish the work completely – use a metal kidney to polish the surface, or a slightly damp sponge to give a freshly thrown look. Wipe the sponge around the rim after trimming, and check the inside of the pot for dags! Trimming slip cast work: Usually I will trim the rims of your work on the wheel the following day to make that stage easier, however you will still need to check your work for lumps and bumps. Last but not least – check that your name is still clearly on the bottom of your work. Step Five – Bisque Firing When the work is completely dry it can go into the bisque kiln. The bisque kiln is fired to 1000°C. This process burns off the water in the clay as well as some of the chemically bound water. The structure of the clay is not altered that much at this temperature. Inside the bisque kiln, the work is stacked a little, small bowl inside a larger bowl and onto a heavy plate. Smaller items like decorations or drink coasters might get stacked several high. Consideration is paid to the weight of the stack and shape of the work. A bisque kiln can fire about one and a half times the amount of work that the glaze kiln can fire. The firing takes about 10 hours to complete the cycle and about two days to cool down. Once it has been emptied the work is placed in the glaze room ready for you to decorate! Step Six – Glazing Decorating your work with colour can be a lot of fun – and time consuming! There are three main options for surface treatment at this stage: Oxide Washes Underglazes Glazes Washes and underglazes do not “glaze” the work – It will still need a layer of glaze to fully seal the clay (washes don’t need glaze on surfaces not designed for food or liquid as they can gloss up a little on their own). Underglazes are stable colourants that turn out pretty much how they look in the jar. They can be mixed with each other to form other colours and can be used like water colours to paint onto your work. Mostly they should have a clear glaze on top to seal them. Oxides are a different species – the pink oxide (cobalt) wash turns out bright blue for instance. They don’t always need a glaze on top, and some glazes can change the colour of the wash! The glazes need no other “glaze” on top! Be careful of unknown glaze interactions – you can put any combination of glaze in a bowl or on a plate, but only a single glaze on the outside of any vertical surface! Glazes are a chemical reaction under heat. We don’t know the exact chemicals in the Mayco glazes we use. I can guess by the way they interact with each other, however, on the whole, you need to test every idea you have, and not run the test on a vertical surface! Simply put, glaze is a layer of glass like substance that bonds with the clay underneath. Clay is made of silica, alumina and water. Glaze is made of mostly silica. Silica has a melting point of 1700°C and we fire to 1240°C. The silica requires a “flux” to help it melt at the lower temperature. Fluxes can be all sorts of chemicals – a common one is calcium – calcium has a melting point of 2500°C, however, together they both melt at a much lower temperature! Colourants are metal oxides like cobalt (blue), chrome (green through black), copper (green, blue, even red!), manganese (black, purple and pink) iron (red brown), etc. Different chemicals in the glaze can have dramatic effects. for example, barium carbonate (which we don’t use) turns manganese bright pink! Other elements can turn manganese dioxide brown, blue, purple and reddish brown. Manganese dioxide is a flux in and of itself as well. So, glazes that get their black and purple colours, often interact with other glazes and RUN! Our mirror black is a good example – it mixes really well with many glazes because it fluxes them – causes them to melt faster. It will also bring out many beautiful colours in the glazes because it’s black colouring most definitely comes from manganese dioxide! Glaze chemistry is a whole subject on it’s own! We use commercial Mayco glazes on purpose – for their huge range of colour possibilities, stability, cool interactions, artistic freedom with the ability to easily brush the glazes on and ease of use. We currently have almost 50 glazes on hand! A major project is to test the interactions of all glazes with each other. That is 2,500 test tiles!!!! I’m going to make the wall behind the wheels the feature wall of pretty colours! Step Seven – Glaze (Gloss or sometimes called “Glost”) Firing Most of the time this is the final stage of making your creation (but not always!) The glaze kiln goes to 1240°C. This is called cone 6, or midrange. It is the low end of stoneware temperatures. Stoneware clays and glazes are typically fired at cone 8 – 10, that is 1260 – 1290°C. The energy requirement to go from 1240°C to 1280°C is almost a 30% more! Our clay is formulated to vitrify (mature, turn “glass-like”) at 1240°, as are our glazes. A glaze kiln take around 12 hours to reach temperature and two to three days to cool down. Sometimes a third firing process is required – this is for decoration that is added to work after the glaze firing. For example – adding precious metals and lustres. this firing temperature is usually around 600 – 800°C depending upon the techniques being used. There are many students interested in gold and silver trims – we will be doing this third type of firing soon! After firing your work will be in the student finished work shelves. Remember to pay for it before you head out the door! There is a small extra charge for using porcelain clay (it’s more than twice the price of regular clay), and for any third firing process! Once your work has been fired it can not turn back into clay for millennia – so don’t fire it if you don’t like it! Put it in the bucket for recycling. https://firebirdstudios.com.au/the-process-of-making-pottery/Ceramics have evolved over thousands of years.A white earthenware side plate with a gadroon edge. Has water marks and chips on front.‘Johnson Bros England Reg No 15587’flagstaff hill, warrnambool, shipwrecked-coast, flagstaff-hill, flagstaff-hill-maritime-museum, maritime-museum, shipwreck-coast, flagstaff-hill-maritime-village, johnson bros, ceramics, tableware -
 Flagstaff Hill Maritime Museum and Village
Domestic object - Plate, Alfred Meakin
The Process of Making Pottery Decorating, Firing, Glazing, Making, Technical There is a rhythm and flow to clay. It can’t be done all at once! Even the making process! It can take weeks to get everything done, especially if you can only work on your pottery once a week! Even though we have three hour classes, it’s often just not enough time! Here is an overview of some of the processes so you have a bit more grasp on some of the technical stuff! Step One – Design There are SO many ideas out there for making stuff in clay! From delicate porcelain jewellery, through to heavy sculptural work and everything in between. Deciding your direction is sometimes not that easy – when you first start, try everything, you will naturally gravitate to the style that you enjoy! The options and variations are endless and can get a wee bit overwhelming too! Check in with me before you start to ensure your ideas will work, what order you might do things, how you could achieve the look you are seeking and any other technical data required! Step Two – Making Clay is thixotropic. This means that as you work with it, the clay first gets sloppier and wetter, before is begins to dry in the atmosphere. For most things, you simply can’t do all parts of the project at once. An example of work order might look like: Get last weeks work out from the shelves Prepare clay for today’s work – roll your clay, prepare balls for throwing, make the first stage of a pinch pot) Clean up last week’s work and put it on the shelf for bisque firing Check that you have any glazing to do – and do enough of it that you will have time to finish your main project Do the next step of your next project – there might be a further step that can’t be complete immediately, in that case, wrap your work well and put onto the shelves. Letting your work rest for a while can really help keep your work clean and professional looking. Many things require bagging under plastic to keep it ready for work the next week – put your name on the outside of the bag so you can find your work easily. We have stickers and markers. Consider how you want to decorate your work – coloured slip can be applied at a fairly wet stage (remembering that it will make your work even wetter!). Trying to apply slip to dry clay won’t work! If you want to do sgraffito – you will need to keep the work leather hard (a state of dryness where you can still work the clay with a little effort and a little water and care). Step Three – Drying Most of the time your work can go into the rack uncovered to let it dry out for the following week. If you want to continue forming or shaping you will need to double bag your work – put your work on a suitable sized bat and put the bat in a bag so the base of the bag is under the bat, then put another bag over the top of the work and tuck the top of the bag under the bat. If you want to trim (or turn) your thrown work the following week, it should also be double bagged. If your work is large, delicate, or of uneven thicknesses, you should lightly cover your work for drying. When considering the drying process, bare in mind the weather, humidity and wind! The hotter and dryer, the faster things dry and work can dry unevenly in the shelves – this can lead to cracking – another time to lightly cover your work for drying. Step Four – Trimming and Cleaning Up Your work is dry! It is called greenware now and it is at it’s most fragile! Handle everything with two hands. I often refer to soft hands – keep everything gentle and with your fingers spread as much as possible. Try to not pick up things like plates too much, and always with both hands! Before your work can be bisque fired it should be “cleaned up”. You work won’t go into the kiln if it has sharp edges – when glazed, sharp edges turn into razor blades! Use a piece of fly wire to rub the work all over – this will scratch a little so be light handed. Use a knife or metal kidney to scrape any areas that require a bit more dynamic treatment than the fly wire offers! Finally, a very light wipe over with a slightly damp sponge can help soften and soothe all of your edges and dags! Trimming thrown work: If you are planning to trim (or turn) your thrown work (and you should be), make sure you bag it well – your work should be leather hard to almost dry for easiest trimming. Use this step to finish the work completely – use a metal kidney to polish the surface, or a slightly damp sponge to give a freshly thrown look. Wipe the sponge around the rim after trimming, and check the inside of the pot for dags! Trimming slip cast work: Usually I will trim the rims of your work on the wheel the following day to make that stage easier, however you will still need to check your work for lumps and bumps. Last but not least – check that your name is still clearly on the bottom of your work. Step Five – Bisque Firing When the work is completely dry it can go into the bisque kiln. The bisque kiln is fired to 1000°C. This process burns off the water in the clay as well as some of the chemically bound water. The structure of the clay is not altered that much at this temperature. Inside the bisque kiln, the work is stacked a little, small bowl inside a larger bowl and onto a heavy plate. Smaller items like decorations or drink coasters might get stacked several high. Consideration is paid to the weight of the stack and shape of the work. A bisque kiln can fire about one and a half times the amount of work that the glaze kiln can fire. The firing takes about 10 hours to complete the cycle and about two days to cool down. Once it has been emptied the work is placed in the glaze room ready for you to decorate! Step Six – Glazing Decorating your work with colour can be a lot of fun – and time consuming! There are three main options for surface treatment at this stage: Oxide Washes Underglazes Glazes Washes and underglazes do not “glaze” the work – It will still need a layer of glaze to fully seal the clay (washes don’t need glaze on surfaces not designed for food or liquid as they can gloss up a little on their own). Underglazes are stable colourants that turn out pretty much how they look in the jar. They can be mixed with each other to form other colours and can be used like water colours to paint onto your work. Mostly they should have a clear glaze on top to seal them. Oxides are a different species – the pink oxide (cobalt) wash turns out bright blue for instance. They don’t always need a glaze on top, and some glazes can change the colour of the wash! The glazes need no other “glaze” on top! Be careful of unknown glaze interactions – you can put any combination of glaze in a bowl or on a plate, but only a single glaze on the outside of any vertical surface! Glazes are a chemical reaction under heat. We don’t know the exact chemicals in the Mayco glazes we use. I can guess by the way they interact with each other, however, on the whole, you need to test every idea you have, and not run the test on a vertical surface! Simply put, glaze is a layer of glass like substance that bonds with the clay underneath. Clay is made of silica, alumina and water. Glaze is made of mostly silica. Silica has a melting point of 1700°C and we fire to 1240°C. The silica requires a “flux” to help it melt at the lower temperature. Fluxes can be all sorts of chemicals – a common one is calcium – calcium has a melting point of 2500°C, however, together they both melt at a much lower temperature! Colourants are metal oxides like cobalt (blue), chrome (green through black), copper (green, blue, even red!), manganese (black, purple and pink) iron (red brown), etc. Different chemicals in the glaze can have dramatic effects. for example, barium carbonate (which we don’t use) turns manganese bright pink! Other elements can turn manganese dioxide brown, blue, purple and reddish brown. Manganese dioxide is a flux in and of itself as well. So, glazes that get their black and purple colours, often interact with other glazes and RUN! Our mirror black is a good example – it mixes really well with many glazes because it fluxes them – causes them to melt faster. It will also bring out many beautiful colours in the glazes because it’s black colouring most definitely comes from manganese dioxide! Glaze chemistry is a whole subject on it’s own! We use commercial Mayco glazes on purpose – for their huge range of colour possibilities, stability, cool interactions, artistic freedom with the ability to easily brush the glazes on and ease of use. We currently have almost 50 glazes on hand! A major project is to test the interactions of all glazes with each other. That is 2,500 test tiles!!!! I’m going to make the wall behind the wheels the feature wall of pretty colours! Step Seven – Glaze (Gloss or sometimes called “Glost”) Firing Most of the time this is the final stage of making your creation (but not always!) The glaze kiln goes to 1240°C. This is called cone 6, or midrange. It is the low end of stoneware temperatures. Stoneware clays and glazes are typically fired at cone 8 – 10, that is 1260 – 1290°C. The energy requirement to go from 1240°C to 1280°C is almost a 30% more! Our clay is formulated to vitrify (mature, turn “glass-like”) at 1240°, as are our glazes. A glaze kiln take around 12 hours to reach temperature and two to three days to cool down. Sometimes a third firing process is required – this is for decoration that is added to work after the glaze firing. For example – adding precious metals and lustres. this firing temperature is usually around 600 – 800°C depending upon the techniques being used. There are many students interested in gold and silver trims – we will be doing this third type of firing soon! After firing your work will be in the student finished work shelves. Remember to pay for it before you head out the door! There is a small extra charge for using porcelain clay (it’s more than twice the price of regular clay), and for any third firing process! Once your work has been fired it can not turn back into clay for millennia – so don’t fire it if you don’t like it! Put it in the bucket for recycling. https://firebirdstudios.com.au/the-process-of-making-pottery/Ceramics have evolved over thousands of years.Earthenware dessert plate, cream colour. Made by Alfred Meakin, England. Backstamped ‘Alfred Meakin England’. flagstaff hill, warrnambool, shipwrecked-coast, flagstaff-hill, flagstaff-hill-maritime-museum, maritime-museum, shipwreck-coast, flagstaff-hill-maritime-village, alfred meakin, ceramics, earthenware, kitchenware -
 Flagstaff Hill Maritime Museum and Village
Domestic object - Jug
The Process of Making Pottery Decorating, Firing, Glazing, Making, Technical There is a rhythm and flow to clay. It can’t be done all at once! Even the making process! It can take weeks to get everything done, especially if you can only work on your pottery once a week! Even though we have three hour classes, it’s often just not enough time! Here is an overview of some of the processes so you have a bit more grasp on some of the technical stuff! Step One – Design There are SO many ideas out there for making stuff in clay! From delicate porcelain jewellery, through to heavy sculptural work and everything in between. Deciding your direction is sometimes not that easy – when you first start, try everything, you will naturally gravitate to the style that you enjoy! The options and variations are endless and can get a wee bit overwhelming too! Check in with me before you start to ensure your ideas will work, what order you might do things, how you could achieve the look you are seeking and any other technical data required! Step Two – Making Clay is thixotropic. This means that as you work with it, the clay first gets sloppier and wetter, before is begins to dry in the atmosphere. For most things, you simply can’t do all parts of the project at once. An example of work order might look like: Get last weeks work out from the shelves Prepare clay for today’s work – roll your clay, prepare balls for throwing, make the first stage of a pinch pot) Clean up last week’s work and put it on the shelf for bisque firing Check that you have any glazing to do – and do enough of it that you will have time to finish your main project Do the next step of your next project – there might be a further step that can’t be complete immediately, in that case, wrap your work well and put onto the shelves. Letting your work rest for a while can really help keep your work clean and professional looking. Many things require bagging under plastic to keep it ready for work the next week – put your name on the outside of the bag so you can find your work easily. We have stickers and markers. Consider how you want to decorate your work – coloured slip can be applied at a fairly wet stage (remembering that it will make your work even wetter!). Trying to apply slip to dry clay won’t work! If you want to do sgraffito – you will need to keep the work leather hard (a state of dryness where you can still work the clay with a little effort and a little water and care). Step Three – Drying Most of the time your work can go into the rack uncovered to let it dry out for the following week. If you want to continue forming or shaping you will need to double bag your work – put your work on a suitable sized bat and put the bat in a bag so the base of the bag is under the bat, then put another bag over the top of the work and tuck the top of the bag under the bat. If you want to trim (or turn) your thrown work the following week, it should also be double bagged. If your work is large, delicate, or of uneven thicknesses, you should lightly cover your work for drying. When considering the drying process, bare in mind the weather, humidity and wind! The hotter and dryer, the faster things dry and work can dry unevenly in the shelves – this can lead to cracking – another time to lightly cover your work for drying. Step Four – Trimming and Cleaning Up Your work is dry! It is called greenware now and it is at it’s most fragile! Handle everything with two hands. I often refer to soft hands – keep everything gentle and with your fingers spread as much as possible. Try to not pick up things like plates too much, and always with both hands! Before your work can be bisque fired it should be “cleaned up”. You work won’t go into the kiln if it has sharp edges – when glazed, sharp edges turn into razor blades! Use a piece of fly wire to rub the work all over – this will scratch a little so be light handed. Use a knife or metal kidney to scrape any areas that require a bit more dynamic treatment than the fly wire offers! Finally, a very light wipe over with a slightly damp sponge can help soften and soothe all of your edges and dags! Trimming thrown work: If you are planning to trim (or turn) your thrown work (and you should be), make sure you bag it well – your work should be leather hard to almost dry for easiest trimming. Use this step to finish the work completely – use a metal kidney to polish the surface, or a slightly damp sponge to give a freshly thrown look. Wipe the sponge around the rim after trimming, and check the inside of the pot for dags! Trimming slip cast work: Usually I will trim the rims of your work on the wheel the following day to make that stage easier, however you will still need to check your work for lumps and bumps. Last but not least – check that your name is still clearly on the bottom of your work. Step Five – Bisque Firing When the work is completely dry it can go into the bisque kiln. The bisque kiln is fired to 1000°C. This process burns off the water in the clay as well as some of the chemically bound water. The structure of the clay is not altered that much at this temperature. Inside the bisque kiln, the work is stacked a little, small bowl inside a larger bowl and onto a heavy plate. Smaller items like decorations or drink coasters might get stacked several high. Consideration is paid to the weight of the stack and shape of the work. A bisque kiln can fire about one and a half times the amount of work that the glaze kiln can fire. The firing takes about 10 hours to complete the cycle and about two days to cool down. Once it has been emptied the work is placed in the glaze room ready for you to decorate! Step Six – Glazing Decorating your work with colour can be a lot of fun – and time consuming! There are three main options for surface treatment at this stage: Oxide Washes Underglazes Glazes Washes and underglazes do not “glaze” the work – It will still need a layer of glaze to fully seal the clay (washes don’t need glaze on surfaces not designed for food or liquid as they can gloss up a little on their own). Underglazes are stable colourants that turn out pretty much how they look in the jar. They can be mixed with each other to form other colours and can be used like water colours to paint onto your work. Mostly they should have a clear glaze on top to seal them. Oxides are a different species – the pink oxide (cobalt) wash turns out bright blue for instance. They don’t always need a glaze on top, and some glazes can change the colour of the wash! The glazes need no other “glaze” on top! Be careful of unknown glaze interactions – you can put any combination of glaze in a bowl or on a plate, but only a single glaze on the outside of any vertical surface! Glazes are a chemical reaction under heat. We don’t know the exact chemicals in the Mayco glazes we use. I can guess by the way they interact with each other, however, on the whole, you need to test every idea you have, and not run the test on a vertical surface! Simply put, glaze is a layer of glass like substance that bonds with the clay underneath. Clay is made of silica, alumina and water. Glaze is made of mostly silica. Silica has a melting point of 1700°C and we fire to 1240°C. The silica requires a “flux” to help it melt at the lower temperature. Fluxes can be all sorts of chemicals – a common one is calcium – calcium has a melting point of 2500°C, however, together they both melt at a much lower temperature! Colourants are metal oxides like cobalt (blue), chrome (green through black), copper (green, blue, even red!), manganese (black, purple and pink) iron (red brown), etc. Different chemicals in the glaze can have dramatic effects. for example, barium carbonate (which we don’t use) turns manganese bright pink! Other elements can turn manganese dioxide brown, blue, purple and reddish brown. Manganese dioxide is a flux in and of itself as well. So, glazes that get their black and purple colours, often interact with other glazes and RUN! Our mirror black is a good example – it mixes really well with many glazes because it fluxes them – causes them to melt faster. It will also bring out many beautiful colours in the glazes because it’s black colouring most definitely comes from manganese dioxide! Glaze chemistry is a whole subject on it’s own! We use commercial Mayco glazes on purpose – for their huge range of colour possibilities, stability, cool interactions, artistic freedom with the ability to easily brush the glazes on and ease of use. We currently have almost 50 glazes on hand! A major project is to test the interactions of all glazes with each other. That is 2,500 test tiles!!!! I’m going to make the wall behind the wheels the feature wall of pretty colours! Step Seven – Glaze (Gloss or sometimes called “Glost”) Firing Most of the time this is the final stage of making your creation (but not always!) The glaze kiln goes to 1240°C. This is called cone 6, or midrange. It is the low end of stoneware temperatures. Stoneware clays and glazes are typically fired at cone 8 – 10, that is 1260 – 1290°C. The energy requirement to go from 1240°C to 1280°C is almost a 30% more! Our clay is formulated to vitrify (mature, turn “glass-like”) at 1240°, as are our glazes. A glaze kiln take around 12 hours to reach temperature and two to three days to cool down. Sometimes a third firing process is required – this is for decoration that is added to work after the glaze firing. For example – adding precious metals and lustres. this firing temperature is usually around 600 – 800°C depending upon the techniques being used. There are many students interested in gold and silver trims – we will be doing this third type of firing soon! After firing your work will be in the student finished work shelves. Remember to pay for it before you head out the door! There is a small extra charge for using porcelain clay (it’s more than twice the price of regular clay), and for any third firing process! Once your work has been fired it can not turn back into clay for millennia – so don’t fire it if you don’t like it! Put it in the bucket for recycling. https://firebirdstudios.com.au/the-process-of-making-pottery/The form of the jug has been in use for many centuries.Stoneware jug. Two tone brown glaze with pierced lip behind spout. Spout chipped.None.flagstaff hill, warrnambool, shipwrecked-coast, flagstaff-hill, flagstaff-hill-maritime-museum, maritime-museum, shipwreck-coast, flagstaff-hill-maritime-village, jug, ceramic jug -
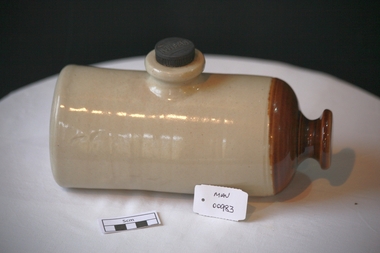 City of Moorabbin Historical Society (Operating the Box Cottage Museum)
Household Equipment, Earthenware hot water bottle 'Hoffmann', c1900
Large stoneware hot water bottle also called a foot warmer. The stoneware hot water bottle has a rubber cap, often the original stone cap would be replaced with a cork alternative to seal the hot water. Because they were mass produced and very robust many survived so the antique value is not great. Many stoneware hot water bottles are still in use today and will be for years to come. Stoneware is a certain clay fired at a particularly high temperature and glazed so that it resembles polished stone.The bottle was filled with hot water, close the stopper securely and stand them in a bed, upright, on their small flat ends so that the sheets and blankets formed a tent-like structure over them. The peak of the 'tent' was the special feature of the rounded knob opposite the flat end, which also served as a carrying handle. Used this way, the hot water bottle was supposed to heat more of the bed Josef Hoffmann (1870–1956) attended the Academy of Fine Arts in Vienna and studied architecture under Otto Wagner. As a designer, Hoffmann was creative and prolific. His design portfolio encompassed commissions for buildings and interiors but extended to things as diverse as textiles, umbrella knobs, walking stick handles, tea pots, caskets and book covers as well as glass and ceramics.In 1903, with Koloman Moser and financier Fritz Waerndorfer, Hoffmann founded the Wiener Werkstätte. The collaboration of artists, designer architects and artisans enabled the realisation of the ‘total artwork’. Hoffmann’s designs were based on simple and clear proportions and employed rich, high-quality materials. Everyday objects were conceived as part of a whole living environment and were considered works of art. A large earthenware hot water bottle.HOFFMANNearly settlers, moorabbin mckinnon, ormond, bentleigh, pottery, craftwork, earthenware, pioneers, hoffmann josef, waerndorfer fritz, moser kololan, weiner werkstatte, vienna, austria, brumpton frances -
 Flagstaff Hill Maritime Museum and Village
Ceramic - Cover, circa 1883
This ceramic cover was recovered from the wreck of the 1882-1883 George Roper between the late 1960’s to early 1970’s. It is one of the shipwreck artefacts in the John Chance Collection. The purpose of the cover is unclear. The holes could be for ventilation. The cover may have been used to protect food or keep it at an even temperature. It may also have been used for covering fragrant petals, allowing some scent to escape through the holes. The residue around the underside of the holes and their random placement indicate that the cover could be partially handmade. The discolouration could have come from its time in the sea. The GEORGE ROPER 1882 - 1883 - The George Roper was a 4-masted iron sailing ship built in Liverpool, England, in 1882 for fast international trade with Australia. The large vessel was launched in February 1883. The ship was on its first trip, departing Liverpool for Melbourne, captained by John Ward and a crew of 31. She had almost reached her destination on July 4 1883, approaching Port Phillip Bay and being towed by the steam tug William. The weather changed to rough with fog and both the George Roper and the William hit the dangerous Lonsdale Reef at Port Phillip Heads. The Captain and crew were eventually rescued and taken to Queenscliff. Salvage syndicates were able to recover a lot of the cargo before the George Roper broke up and sank. Amongst the cargo was soft goods, draperies, household items, spirits of malt and distilled liquors, chemicals, dynamite, and 1,400 tons of steel rails for the Victorian Government. Also in the hold were Russell Stourbridge bricks, as paying ballast. The ventilated cover is as an example of domestic ceramic ware of the 1880s. The cover also holds significance as it was recovered by John Chance, a diver from the wreck of the George Groper in the 1960s-70s. Items that come from several wrecks along Victoria's coast have since been donated to the Flagstaff Hill Maritime Village’s museum collection by his family, illustrating this item’s level of historical value. The George Roper is considered historically and archaeologically significant and as such, is listed on the Victorian Heritage Database, VHR S286. It is an example of a vessel built specifically for fast travel to and from Australia with a large shipment of cargo. The George Roper’s cargo of steel rails adds to the historical significance of international trade to the growing colony of Australia and Victoria in particular, with rail transportation soon to become a faster and safer form of transportation between colonial towns. Divers can still access parts of the scattered wreck and other artefacts recovered in the 1970s and 1980s can be viewed in both public and private collections. Cover; unglazed white ceramic, oval shape. The cover has holes randomly poked through its surface, one large hole is a six pointed star shape. Underneath there is a narrow rim placed slightly inside the edge. There is residue on the underneath around the holes. There is orange-brown discolouration and areas where the surface is lighter coloured. flagstaff hill, warrnambool, flagstaff hill maritime museum, maritime museum, shipwreck coast, flagstaff hill maritime village, great ocean road, john chance, west coast trader, george roper, w. h. potter & sons, w.t. dickson and son, captain john ward, russell stourbridge bricks, port phillip heads, lonsdale reef, dive wreck, vhr s286, coastal trader, ceramic, vintage, ventilated cover, domestic item -
 Ambulance Victoria Museum
Humidicrib, hand made, Circa 1950s
This wooden humidicrib came from Cobram ambulance station which was part of the old Goulburn Valley Ambulance Service. When the need for humidicribs was understood, none were available at Cobram. Not prepared to wait for a humidicrib to be issued to them, local ambulance officers made their own! If you look carefully you will see the air circulation vents and springs between the inner and outer timber boxes. These were designed to make what could be a long ride over rough roads as comfortable as possible for sick babies. Probably made in the 1950s, we do not know how many babies were saved by this particular humidicrib - but it was a success. Other ambulance services made their own after hearing about the Cobram Ambulance Station humidicrib. Source Chas Martin AHSV curator). Humidicribs are used to transport sick babies from small hospitals to major hospitals for specialist care. They work by maintaining normal body temperature and provide oxygen if needed during ambulance transit. Known by a variety of commercial names, earlier humidicribs were ones heated with water bottles. Not part of an ambulances standard equipment, humidicribs are kept in ambulance stations and carried if babies needed to be transported. In the early days before humidicribs came into use and when air ambulances did not exist, many more babies died during emergency transits than do today. A doll was sourced from St Vincent de Paul Brighton. The doll was dressed in an original hand made christening gown made in 1975 by Miss Molly Hambly from Glen Waverley (now deceased). It was used for her Great Nephew's christening in 1976. Brown timber box with top opening lid and Perspex vision/access panel in lid. inner timber cot/box free standing on springs.cobram, goulburn valley ambulance, infant, baby -
 Department of Energy, Environment and Climate Action
Prototype fuel moisture meter
Bushfire behaviour is influenced by many things including temperature, relative humidity, forest type, fuel quantity and fuel dryness, topography and even slope. Wind has a dominant effect on the Rate of Spread (ROS), and also bushfire size, shape and direction. Fuel arrangement is as important as fuel quantity (tonnes/ha). Fibrous and ribbon bark, together with elevated and near-surface scrub fuels act as ladders which lead flames into the tree canopy. But the availability of fuel to burn depends largely on its moisture content. When it exceeds 20-25% not much will burn, whereas 12-15% is generally ideal for fuel reduction burning, but if the moisture content drops as low as 7-10% virtually everything will ignite, and fire behaviour becomes extreme. During the afternoon of the Ash Wednesday bushfires on 16 February 1983 fuel moisture contents were recorded at Stawell as low as 2.7%. Fine fuels like leaves and bark can rapidly absorb moisture after a shower of rain, or from the air when the Relative Humidity (RH) is high, and the temperature is low. Conversely, they can also dry out very quickly. So even though the overall fuel quantity in the forest doesn’t change, the fine fuel availability can increase rapidly from zero after rain to many tonnes per hectare as the fuel dries out. This can happen over a few hours on hot and windy days. Heavy fuels like logs on the ground take longer to dry out. Since the 1930s foresters, firefighters and researchers have been working to develop quick and reliable techniques for measuring fuel moisture content. One of the most accurate methods is slowly drying a sample of fuel in a conventional oven for 24-48 hours to remove all the moisture and measuring the weight difference, but this takes time and is not practical in the field when rapid measurements are needed. But oven drying is often used as a benchmark to compare other methods. Microwave ovens are faster but can cause uneven drying and even char the fuel. They are also not very practical for use in the field. Some mathematical models rely on weather records such as rainfall, wind speed, evaporation, cloud cover, shading, relative humidity, slope, aspect and season of the year to predict soil and fuel moisture. The Keetch-Byram Drought Index of soil dryness is the most common. But complex fuels with leaves, twigs, grass etc make the predictive models often inadequate for fine fuels. The most common technique in Victorian forests until recently was the trusty Speedy Moisture Meter. Originally developed in England during the 1920s for measuring moisture in wheat and other grains it was adapted for Australian forest fuels in the 1950s (I think). Fuel was first ground using a Spong mincer, often attached to the bullbar of a vehicle, and a small sample placed into the Speedy together with a measure of calcium carbide and then sealed. A chemical reaction created gas pressure which was read on the external dial. There were important techniques with cleaning, mincing and using the chemicals with the Speedy to give reliable readings, but it was quick, inexpensive, robust, portable and practical in the field. It was used routinely before igniting a fuel reduction burn or measuring fuel moisture differentials on slash burns. But in about 1996, Karen Chatto and Kevin Tolhurst from the Department’s Creswick Research Station developed the Wiltronics Fuel Moisture meter which measured electrical resistance. Wiltronics is an Australian owned company operating from Ballarat. The final result was a kit that was portable, accurate and could reliably measure fuel moisture contents between 3% and 200%. Although expensive, it is now widely used by fire agencies around the world which has virtually relegated the Speedy to the back cupboard.Prototype Fuel moisture meterT-H Fine Fuel Meterforests commission victoria (fcv), bushfire, forest measurement -
 The Ed Muirhead Physics Museum
Coolidge X-ray Tube
The investigation of the x-ray appears early on to have been a priority research topic at the University of Melbourne’s School of Physics. This interest was sparked by the appointment in 1889 of Professor T.R. Lyle. Lyle, who was head of the school until 1915, is thought to have been the first person in Australia to have taken an x-ray photograph. A copy of this photograph can be found in the School of Physics Archive. For this particular experiment Lyle actually made his own x-ray tube. His successor, Professor Laby, continued to work with x-rays. During the 1920s Laby worked on the x-ray spectra of atoms and in 1930 he co-published with Dr. C.E. Eddy, Quantitative Analysis by X-Ray Spectroscopy. Also with Eddy, Laby produced the landmark paper Sensitivity of Atomic Analysis by X-rays. Laby went on to have an x-ray spectrograph of his own design manufactured by Adam Hilger Ltd. (see cat. No. 38). School of Physics, the University of Melbourne Cat. No. 22. Jacqueline Eager Student Projects Placement, Cultural Collections 2005 In 1913 Coolidge overcame the limitation of the narrow operating range of the gas X-ray tubes with the invention of the vacuum X-ray tube. A filament heated by an electric current directly releases electrons by thermionic emission. In thermionic emission, electrons are emitted from a metal surface directly by the application of an electric current to heat a wire filament. The electrons accelerate to the anode and produce X-rays. The anode has associated cooling fins due to the high temperatures attained by the release of kinetic energy by the electrons on colliding with the anode. Internal Glass sleeve: “A941/L2593/2821” -
 Flagstaff Hill Maritime Museum and Village
Domestic object - Stove, Cox and Rizzetti Stove Works, ca. 1918-1930s
Cast iron stoves burn solid fuel such as wood or coal, and are used for cooking and warmth. The stoves have a firebox with a grate where the fuel is burned. The hot air flows through flues and baffles that heat the stove top and the oven. Before cast iron stoves were invented, cooking and heating were carried out in outdoor open fires, and later, in fireplaces inside the home. In 1642 the first cast iron stove was manufactured in Lynn, Massachusetts, where molten cast iron was poured into a sand mould to make rectangular plates that were then joined together to make a box. Benjamin Franklin invented the more efficient Pennsylvania stove in 1744, and this efficient design is still used today. After the mid-19th century cast iron stoves were produced with burners in different positions, giving varied temperatures, so a wide variety of foods could be cooked at the same time at the most suitable heat, from slow cooking to baking scones. In contemporary times people the new wood-burning stoves had to meet the anti-pollution standards now in place to protect our environment. By the 1920s gas cookers were being introduced for domestic use, and by the 1930s electric home cookers were being offered to householders. PLANET STOVES In August 1925 the firm Cox and Rizzetti, Stove Works, and also Sydney Road, South Melbourne, advertised in the Brunswick and Coburg Leader of November 11, 1925 as "formerly with Harnwell and Sons" and as "specialists in solid cast iron Planet stoves ... which merit an inspection from builders and householders". The firm continued in business and was mentioned as sponsors in the King Island News in 1971. Harnwell and Sons was listed in the Victorian Government Gazette of 1894. It is curious that the firm was mentioned in an article in the Sunrasia Daily of June 14, 1934 titled 'Planet Stoves' as a manufacturer of Planet Stoves. This Planet No 3 stove is an uncommon example of cooking equipment used in kitchens in the early 20th century, as the firebox is above the oven rather than beside it. The cast iron combustion stove is significant as part of the evolution of domestic cooking. Previously cooking was mostly carried out in outdoors in open fires, and later in fireplaces indoors. Cast iron stoves are still used today and have additional features such as thermostats to monitor and maintain temperature, water heating pipes connected, and environmentally approved anti-pollution fittings. Stove; a compact, blackened cast iron combustion cooker, installed within a fireplace and enclosed by bricks on both sides. The upright rectangular stove has a flat top with three round, removable cook plates and a flue connected at the back. The front has three doors with round knob handles; a swing-down firebox door above a sliding ashtray, and two side-hinged oven doors above a sliding opening. Inside on the side walls are two pairs of runners. Behind the pair of doors is an oven with two pairs of rails and two removable metal shelves. The stove has cast inscriptions on the chimney flue and on the front of the right hand side stove door. The model of the stove is The Planet No 3, made in Melbourne.Chimney flue, "[within rectangle] THE / PLANET" Stove door, "(within oval) PLANET / No 3"flagstaff hill, flagstaff hill maritime museum and village, warrnambool, maritime museum, maritime village, great ocean road, shipwreck coast, stove, cast iron stove, combustion stove, wood-burning stove, wood stove, wood oven, solid fuel stove, cooker, the planet, planet, planet no. 3, kitchen equipment, baking, domestic cooking, cooking equipment, food preparation, planet stove, planet cooker, cooking range, slow combustion stove, antique, range cooker, cox and rizzetti, harnwell and sons, melbourne manufacturer -
 Montmorency–Eltham RSL Sub Branch
Uniform - Coat, US Cold Weather, M-65, US Cold Weather Coat
In 1951 - in the context of the Cold War - the Menzies government established the 'National Service Act 1951', which called-up men for compulsory military training for a period of 176 days. The 14th Battallion was located in Victoria. The coat has historic significance in the wider context of Australia’s involvement in the Cold War (particularly in Vietnam) and in the establishment of a National Service Scheme. Olive green army man coat with four outside pockets - two on the chest, two at the bottom; each pocket has one metallic button attached. Coat has a metallic zip as well as metallic buttons; two velcro scratches at the wrist level. Extra removable padding inside, which is attached with plastic buttons. Two identical inscriptions on right and left shoulder reading '14 National Service Battalion'. Two identical inscriptions on right and left shoulder - reading '14 National Service Battalion' Manufacturing details on the inside reading: Coat, Cold weather, Man's, Field M-65. Olive green colour. Style 8120/8542 DSA 102-81-C1204. 1. Wear as outer garment or as under-layer in cold-dry climate. 2. Wear button-in liner for added insulation. 3. Adjust closures and drawcords to ventilate; avoid over-heating of body. 4. When hood is used, lower extension shall be worn over neck opening, preventing water. 5. Brush snow or frost from garments before entering opening. 6. For fast drying, remove liner from coat. 7. Do not expose to high temperature of a stove. 8. Lubricate slide fasteners with wax. 9. For cleaning and restoring of water repellency return to laundry for machine washing in accordance with established procedures for quarpel garments. 10. Do not starch. Do not remove this label. Black ink pen inscription on manufacturing label reading '3/715875' and 'N.Wain'war, army, coat, man's coat, australian army, military uniform, national service scheme, cold war, vietnam war -
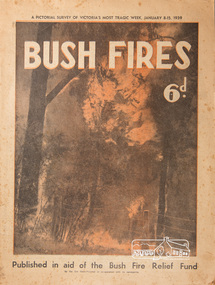 Eltham District Historical Society Inc
Magazine, Sun News-Pictorial, Bush Fires: A pictorial survey of Victoria's most tragic week, January 8-15, 1939, 1939
THE WEEK REVIEWED (Article; Bush Fires: A pictorial survey of Victoria's most tragic week, January 8-15, 1939. Published in aid of the Bush Fire Relief Fund by the Sun News-Pictorial in co-operation with its newsagents, pp2-3) THE fiercest bush fires Australia has known since its discovery are quiescent at the moment, and Victoria, in the comparative coolness of the change which came with rain on Sunday night, has begun·to count its losses. In the fiery eight days, from Sunday to Sunday, at least sixty-six men, women and children have lost their lives in forest fires, or have succumbed to burns and shock; many others have died from heat; and several serious cases of burns are being treated in hospitals. Two babies in Narrandera district have died, and ten others are in hospital, because of milk soured by the record temperatures of those eight days. Forest damage totals at least a million pounds, and incalculable damage has been done to the seedlings which were to have been the forests of the future. Water conservation will be seriously affected by the silting-up of reservoirs and streams from which protective timber has been taken by the all-engulfing flames. More than a thousand houses have been destroyed, and these, with 40 mills, and schools, post-offices, churches, and other buildings, represent a loss of at least half a million. At least 1500 are homeless. For their aid, money raised in appeals has now passed the £50,000 mark, and the biggest relief organisation ever set up in peace time has swung into operation. The First Hint Victoria's first hint of what was to come appeared on Sunday, January 8, when most parts of the State awoke to find a blistering day awaiting. At 12.20 p.m., when the thermometer reached its highest for the day, 109.6 degrees, the first fire victims were at that moment going to their death on a bush track five feet wide off the main road to Narbethong. They were the forestry officers Charles Isaac Demby and John Hartley Barling, who went to warn Demby of his danger when he parted from his companions, and was himself surrounded by the treacherous fire. It was not until 8 o'clock next morning that the tragic news was flashed throughout the State. Searchers found the two charred bodies close together, one seeking protection in the nook of two logs. Barling's watch had stopped at 1.20. In the meantime, tragedy was spreading its cloak. By Monday, big fires were raging at Toolangi, Erica, Yallourn, Monbulk, Frankston, Dromana, Drouin South, Glenburn, and Blackwood, with smaller outbreaks at many other centres. In the ensuing week, while women and children were evacuated as fast as the flames would permit, Erica-scene of the 1926 fire disaster-thrice escaped doom by a change of wind. Indeed, those who have been in the fire country these past days say that the numbers of times a change of wind has saved towns from destruction is amazing. In the towns they speak of miracles. Monday's Miracles The escapes from Monett's Mill at Erica and from the Hardwood Company's Mill at Murrindindi, near where Demby and Barling went to their death, were Monday's miracles. Twenty came out alive from each mill. At the first a 60ft. dugout provided an oven-like refuge; at the second, 12 women and children survived in the smoke-filled gloom of a three-roomed cottage while their eight men, their clothes sometimes afire, poured water on the wooden walls. Three houses out of ten remained when the fire had passed. Record Temperatures Sunday had been the hottest Melbourne day for 33 years; Monday dropped to a 76.1 degree maximum; but Tuesday dawned hotter than ever, the mercury reaching 112.5. By now rumor was racing ahead of fact; whole towns were being reported lost; the alarm was raised for scores of missing persons. But fact soon overtook rumor, and within a few days the staggering toll began to mount to a figure beyond the wildest imaginings of the panic-stricken. Six died from heat on this torrid Tuesday, and the fires spread in a wide swathe from south-west to north-east across the State. Fish died in shallow streams. A curtain of smoke hid the sky from all Victoria, and hung far out to sea. It alarmed passengers on ships. On the Ormonde, on the voyage to Sydney from Burnie, women ran on deck, believing fire had broken out in the hold. Days later the smoke reached New Zealand. In Melbourne thousands of fire-volunteers were leaving in cars: vans, motor-buses-anything reliable on wheels-to aid the country in its grim fight. In the fires at Rubicon and. Narbethong, seventeen were facing death this day. But not till Wednesday, when Melbourne breathed again in a cool change, while the country still sweltered in temperatures up to 117 degrees, did the news come through the tree blocked roads. A woman and her little daughter, trapped on the road, were among those who died. Their bodies, and those of menfolk with them, were found strewn out at intervals along the road, where the furnace of the surrounding fire had dropped them in their tracks as they ran. Twelve died at a Rubicon mill, five on the road at Narbethong. At Alexandra, not far distant, a baby was born while the fires raged, and stretcher-bearers brought in the injured. On Thursday the State Government voted £5000 for the relief of fire victims. The Governor (Lord Huntingfield) and the Lord Mayor (Cr. Coles) visited some of the stricken areas, and dipped into their pockets personally. Later, the City Council, too, voted £5000. Friday, The 13th Friday, the Thirteenth, justified its evil name. A blistering northerly came early in the morning, presaging destruction, and forcing the mercury to a new record of 114 degrees. Racing fires killed at least ten in those terrible 12 hours. Four children were engulfed in the furnace at Colac. Panic drove them, uncontrollable, into the smoke-filled road when the fire raced down behind their home. They choked to death. In other parts fires were joining to make fronts of scores of miles. Kinglake was being menaced on two fronts, £60,000 worth of timber was going up in smoke in Ballarat district. Warburton was surrounded. Residents at Lorne, favoured resort, were being driven to the sea-front by a fire which destroyed at least 20 homes. Healewille. with flames visible from the town at one stage, was in a trough between two fires which burned four guest-houses, seven homes and left its surrounding beauty-spots wastes of bowed-over, blackened tree-fern fronds; with its famous Sanctuary, however, intact. Most of Omeo was destroyed this black day: Noojee. while 200 residents crouched in the river, was being reduced to a waste of buckled iron and smoking timber; Erica was once again saved by a change of wind. Beneath a pall of smoke, the Rubicon victims were buried at Alexandra. Friday night and the early hours of Saturday saw the streets of beleagured towns strewn with exhausted fire-fighters. Their flails beside them, ready for the next call, they lay where exhaustion overtook them-on footpaths, beside lamp-posts, in gutters, in cars, under trucks. Saturday's dawn brought clear skies and lower temperatures in many parts, and from the burnt-out areas came a great rush of tragic reports. The death-roll rushed past the fifty mark with incredible speed. Some had been trapped on roads, others at mills; some, after burying their treasures, had clung too long to the places they had made their homes for many years. Four men lost their lives because one went back for his dog. By Sunday, when the first of the saving rain came, nearly another score of names had been added to the list.Newspaper magazine, 48 pages (incl. covers). Fully digitised and searchable PDFPublished in aid of the Bush Fire Relief Fund by the Sun News-Pictorial in co-operation with its newsagents.bushfires, 1939 bushfires, black friday, warrandyte -
 Falls Creek Historical Society
Poster - Kangaroo Hoppet 2024
The Kangaroo Hoppet is Australia’s premier long distance cross country ski race, and a member of the Worldloppet series of international cross country ski events. The first race at Falls Creek was held in 1979 under the name of “Australian Birkebeiner”. It was a 21km race with about 80 participants organised by the Birkebeiner Nordic Ski Club of Mount Beauty. The course started and finished at Falls Creek Alpine Resort and took participants out into the Bogong High Plains. After running the event for 10 years, it was decided they should become part of the Worldloppet series of marathon ski races. Representatives from the Birkebeiner Nordic Ski Club and the Australian Ski Federation attended the Worldloppet Annual Meeting in Finland in June 1990 to put the case for the acceptance of an Australian event into the Worldloppet series. Before being admitted, they had to demonstrate that the Birkebeiner Club could run a world class event, so three months later in August 1990 a 42km event named the Australian International Ski Marathon was held at Falls Creek together with a 21km Birkebeiner race and a 7km event called the Birkebeiner Lite. The event was approved by delegates from USA, Norway and Austria, in 1991 Australia became the 12th member of Worldloppet, with the condition that there had to be a name change. After some late night discussion allegedly involving red wine from North East Victoria the main event became the 42km Kangaroo Hoppet, with the minor events being the 21km Australian Birkebeiner, and 7km Joey Hoppet. In the winter of 1991, the first Kangaroo Hoppet was held. It was a great success and has been a regular fixture on the international ski calendar ever since. It features the main 42km event as well as a 21km event and a 7km event. The Hoppet brings the Australian snowfields to an international audience. Unfortunately due to rapidly deteriorating snow conditions on the course, combined with a weather forecast of warm temperatures and rain in the days preceding the event, the Kangaroo Hoppet was cancelled for 2024.This poster is significant because it documents an event which brings international attention to Falls Creek and the surrounding region.A poster featuring a variety of symbols representing the Falls Creek Hoppet within the outline of a kangaroo head. Logos of Worldloppet, AGL, Falls Creek, Alpine Shire Council, the Birkebeiner Nordic Ski Club, Ski Classics and Kangaroo Hoppet are across the bottom of the poster. Text: KANGAROO HOPPET 24th August 2024 Australia's Premier XC Ski Race 7 km 21 km 42 km FALLS CREEK, VIC kangaroo hoppet, worldloppet events, falls creek, mt. beauty -
Southern Sherbrooke Historical Society Inc.
Document - Rainfall records - Belgrave South
-
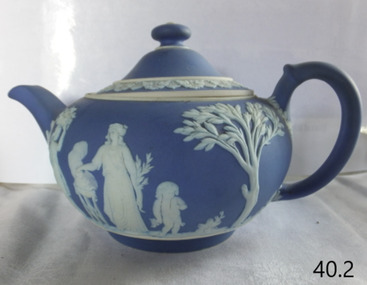 Flagstaff Hill Maritime Museum and Village
Ceramic - Teapot, Josiah Wedgwood & Sons Ltd, 1890
Josiah Wedgwood (1730–95), came from an established family of potters and trained with his elder brother. He was in partnership with the leading potter Thomas Whieldon from 1754 until 1759 when a new green ceramic glaze he had developed encouraged him to start a new business on his own. Relatives leased him the Ivy House in Burslem, Stoke-on-Trent, and his marriage to Sarah Wedgwood, a distant cousin with a sizeable dowry, helped him launch his new venture. After an extensive and systematic program of experiment Wedgwood in 1765 created a new variety of creamware, a fine glazed earthenware, which was the main body used for his table wares thereafter. After he supplied Queen Charlotte with a tea set for twelve the same year, she gave official permission to call it "Queen's Ware" (from 1767). This new form, perfected as white pearlware (from 1780), sold extremely well across Europe, and to America. It had the additional advantage of being relatively light, saving on transport costs and import tariffs in foreign markets. Wedgwood developed several further industrial innovations for his company, notably a way of measuring kiln temperatures accurately, and several new ceramic bodies including the "dry-body" Stoneware, "black basalt" (by 1769), cane ware, and jasperware (the 1770s), all designed to be sold unglazed, like "biscuit porcelain". In the later 19th century the company returned to being a leader in the design and technical innovation, as well as continuing to make many of the older styles. Despite increasing local competition in its export markets, the business continued to flourish in the 19th and early 20th centuries, remaining in the hands of the Wedgwood family, but after World War II it began to contract, along with the rest of the English pottery industry. After buying several other Staffordshire ceramics companies, in 1987 Wedgwood merged with Waterford Crystal to create Waterford Wedgwood plc, an Ireland-based luxury brands group. After a 2009 purchase by KPS Capital Partners, a New York-based private equity firm. Wedgwood has always been associated with fine china, porcelain, and luxury accessories, the entrepreneur Josiah Wedgwood rapidly became successful and was soon one of the largest manufacturers of Staffordshire pottery. Wedgwood is a significant pottery manufacturer as the company is especially associated with the "dry-bodied" (unglazed) stoneware Jasperware in contrasting colours, and in particular that in "Wedgwood blue" and white that has become a trademark. Teapot and lid, Wedgwood blue Jasperware with white patternImpressed name Wedgewood and date letter "S" = 1890flagstaff hill, warrnambool, flagstaff hill maritime museum, maritime museum, shipwreck coast, flagstaff hill maritime village, great ocean road, teapot, wedgewood blue, wedgewood teapot, tea pot, kitchen ware, josiah wedgwood, staffordshire potteries -
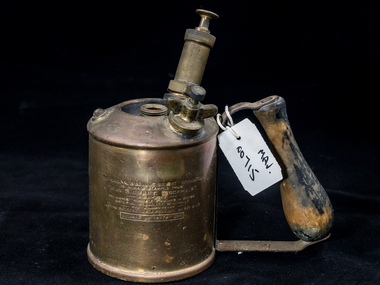 City of Moorabbin Historical Society (Operating the Box Cottage Museum)
Tools, Blowtorch 'Sievert', 20thC
A blowtorch or blowlamp is a fuel-burning tool used for applying flame and heat to various applications, usually metalworking. Early blowlamps used liquid fuel, carried in a refillable reservoir attached to the lamp. Modern blowtorches are mostly gas-fuelled. The blowlamp is of ancient origin and was used as a tool by gold and silversmiths. They began literally as a "blown lamp", a wick oil lamp with a mouth-blown tube alongside the flame. This type of lamp, with spirit fuel, continued to be in use for such small tasks into the late 20th century. In 1882, a new vaporizing technique was developed by Carl Richard Nyberg in Sweden, and the year after, the production of the Nyberg blow lamp started. It was quickly copied or licensed by many other manufacturers. Carl Richard Nyberg (May 28, 1858, – 1939) was the founder of Max Sievert’s Lödlampfabrik, then one of the largest industries in Sundbyberg, Sweden. After school he started working for a jeweller and later he moved to Stockholm and worked with various metalworks. 1882 and set up a workshop at Luntmakargatan in Stockholm making blowtorches. However the business didn't work well because it took too long to both manufacture and sell them. In 1886 he met Max Sievert (1849 - 1913) at a country fair and Sievert became interested in Nyberg's blowtorch and started selling it. In 1922 the company was sold to Max Sievert who continued to own it until 1964 when it was bought by Esso. The blowtorch is commonly used where a diffuse high temperature naked flame heat is required but not so hot as to cause combustion or welding: soldering, brazing, softening paint for removal, melting roof tar, or pre-heating large castings before welding such as for repairing. It is also common for use in weed control by controlled burn methods, melting snow and ice from pavements and driveways in cold climate areas, road repair crews may use a blowtorch to heat asphalt or bitumen for repairing cracks in preventive maintenance. It is also used in cooking; one common use is for the creation of the layer of hard caramelised sugar in a crème brûlée. A brass blowtorch, 'Sievert' with a wooden handleSIEVERTtools, blow torches, blow lamps, welding, brazing, jewellery, cookery, soldering, nyberg carl, sievert max, stockholm, sweden, spirit fuel, kerosene, gas fuel, moorabbin, bentleigh, cheltenham, market gardeners, pioneers, early settlers, plumbing, carpenters, -
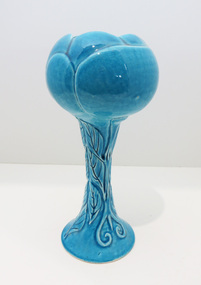 Federation University Art Collection
Ceramic - Artwork- Ceramic, Blue Goblet by John O'Loughlin
John O'LOUGHLIN Born Snowtown, South Australia In 1980 John O'Loughlin's life changed when he started wheel throwing ceramic vessels. During this time he discarded the superfluous and unnecessary clutter collected on the journey of life, yet retaining the essence of what mattered to him. John O’Loughlin's later artworks engages with the way in which organised religion, specifically the Catholic Church, deals with the translation of the spiritual into the material. Informed by his extensive travels and studies, O’Loughlin’s ceramics reference the reliquaries and church artefacts that connect the life of this world with that of faith in another world. Completing undergeduate and post graduate works at Federation University John O'Loughlin's honours thesis was entitled "Ways and Means of Meaning, The Use of Symbol and Surface as Expressive Media in Ceramic Sculpture". The University provided a serious ceramic studio equipped with all the research tools for advanced ceramic exploration. Access to raw materials and a variety of kilns combined with excellent lecturers, mentors and technicians inspired, motivated and challenged him to push his accumulating knowledge to higher levels. O'Loughlin's working method in the studio is one of quiet, determined interaction with clay, idea and content. Experimentation with a variety of temperatures, firing methods and atmospheric conditions has produced a broad tonal and textural palette. He has worked with various clay bodies overlaid with coloured oxides, slips and engobes as the foundation for many of his works. O'Loughlin ufilised raised surfaces from old cemetery tombstones using the impressed forms and textures in his constructions. This research led him to the use of dry engobes to create a sense of antiquity, with crusty and distressed surfaces that resemble objects neglected in the oceans. These objects seem covered with the accretions and accumulations of history when re-discovered and brought to the surface as miraculous objects of mystery and magic. (https://www.thefreelibrary.com/John+O%27Loughlin%3A+a+man+re-invented.-a0216897107, accessed 12 September 2020) in 2007 John completer a Masters at the University of Ballarat. This item is part of the Federation University Art Collection. The Art Collection features over 2000 works and was listed as a 'Ballarat Treasure' in 2007.Botanical inspired wheel thrown goblet with decorative incised leaves on stem and flower head shaped cup. Glazed 'JOL' on bottom.art, artwork, goblet, botanical, ceramic, john o'loughlan, alumni -
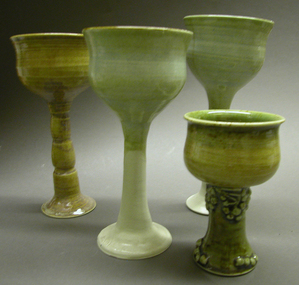 Federation University Art Collection
Ceramic - Artwork - Ceramics, Set of Four Goblets by John O'Loughlin
John O'LOUGHLIN Born Snowtown, South Australia In 1980 John O'Loughlin's life changed when he started wheel throwing ceramic vessels. During this time he discarded the superfluous and unnecessary clutter collected on the journey of life, yet retaining the essence of what mattered to him. John O’Loughlin's later artworks, such as 'Reliquary No. 20' engages with the way in which organised religion, specifically the Catholic Church, deals with the translation of the spiritual into the material. Informed by his extensive travels and studies, O’Loughlin’s ceramics reference the reliquaries and church artefacts that connect the life of this world with that of faith in another world. Completing undergeduate and post graduate works at Federation University John O'Loughlin's honours thesis was entitled "Ways and Means of Meaning, The Use of Symbol and Surface as Expressive Media in Ceramic Sculpture". The University provided a serious ceramic studio equipped with all the research tools for advanced ceramic exploration. Access to raw materials and a variety of kilns combined with excellent lecturers, mentors and technicians inspired, motivated and challenged him to push his accumulating knowledge to higher levels. O'Loughlin's working method in the studio is one of quiet, determined interaction with clay, idea and content. Experimentation with a variety of temperatures, firing methods and atmospheric conditions has produced a broad tonal and textural palette. He has worked with various clay bodies overlaid with coloured oxides, slips and engobes as the foundation for many of his works. O'Loughlin ufilised raised surfaces from old cemetery tombstones using the impressed forms and textures in his constructions. This research led him to the use of dry engobes to create a sense of antiquity, with crusty and distressed surfaces that resemble objects neglected in the oceans. These objects seem covered with the accretions and accumulations of history when re-discovered and brought to the surface as miraculous objects of mystery and magic. (https://www.thefreelibrary.com/John+O%27Loughlin%3A+a+man+re-invented.-a0216897107, accessed 12 September 2020) This item is part of the Federation University Art Collection. The Art Collection features over 2000 works and was listed as a 'Ballarat Treasure' in 2007.Four wheel thrown goblets, two with decorative stems. art, artwork, john o'loughlin, ceramics, goblets -
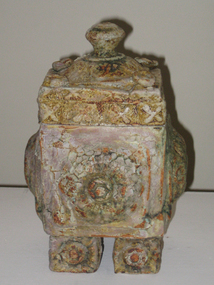 Federation University Art Collection
Ceramic - Artwork - Ceramics, 'Reliquary No. 20' by John O'Loughlin, 2007
John O'LOUGHLIN Born Snowtown, South Australia In 1980 John O'Loughlin's life changed when he started wheel throwing ceramic vessels. During this time he discarded the superfluous and unnecessary clutter collected on the journey of life, yet retaining the essence of what mattered to him. John O’Loughlin's later artworks, such as 'Reliquary No. 20' engages with the way in which organised religion, specifically the Catholic Church, deals with the translation of the spiritual into the material. Informed by his extensive travels and studies, O’Loughlin’s ceramics reference the reliquaries and church artefacts that connect the life of this world with that of faith in another world. Completing undergeduate and post graduate works at Federation University John O'Loughlin's honours thesis was entitled "Ways and Means of Meaning, The Use of Symbol and Surface as Expressive Media in Ceramic Sculpture". The University provided a serious ceramic studio equipped with all the research tools for advanced ceramic exploration. Access to raw materials and a variety of kilns combined with excellent lecturers, mentors and technicians inspired, motivated and challenged him to push his accumulating knowledge to higher levels. O'Loughlin's working method in the studio is one of quiet, determined interaction with clay, idea and content. Experimentation with a variety of temperatures, firing methods and atmospheric conditions has produced a broad tonal and textural palette. He has worked with various clay bodies overlaid with coloured oxides, slips and engobes as the foundation for many of his works. O'Loughlin ufilised raised surfaces from old cemetery tombstones using the impressed forms and textures in his constructions. This research led him to the use of dry engobes to create a sense of antiquity, with crusty and distressed surfaces that resemble objects neglected in the oceans. These objects seem covered with the accretions and accumulations of history when re-discovered and brought to the surface as miraculous objects of mystery and magic. (https://www.thefreelibrary.com/John+O%27Loughlin%3A+a+man+re-invented.-a0216897107, accessed 12 September 2020) This item is part of the Federation University Art Collection. The Art Collection features over 2000 works and was listed as a 'Ballarat Treasure' in 2007.Lidded ceramic form.art, artwork, john o'loughlan, ceramics, available, available ceramics -
 Flagstaff Hill Maritime Museum and Village
Functional object - Crucible, The Patent Plumbago Crucible Company, circa 1873
This crucible was raised from the wreck of the Loch Ard. It is one of six similar relics, in a range of sizes, now in the Flagstaff Hill collection. All were manufactured by the Morgan brothers who founded the Patent Plumbago Crucible Company in 1856, making crucibles in a small factory in Battersea London. A crucible is a container used for purifying and melting metals so that they can be cast in a mold to a predetermined shape and use. They must withstand extremely high temperatures, abrupt cooling, and shed their contents with minimal adherence. The addition of graphite to the traditional firing clays greatly enhanced the durability of industrial crucibles this technique was pioneered by the Morgan Bros thereby making a significant technological advance in foundry technology and metallurgy. The Morgans first noticed the advantages of graphite crucibles at the Great Exhibition held in London in 1851. Initially, they contracted to be sole selling agents for the American-made products of Joseph Dixon and Co. from New Jersey, but in 1856 they obtained that firm's manufacturing rights and began producing their graphite crucibles from the South London site. The Morgans imported crystalline graphite in 4-5 cwt casks from the British colony of Ceylon (now Sri Lanka) and mixed it with conventional English (Stourbridge) clays to be fired in kilns. Their products were purchased by the Royal Mints in London and India and exported to official mints in France and Germany. They were successful exhibitors of their crucibles and furnaces at the London Exhibition held in 1861 (Class 1, Mining, quarrying, metallurgy and mineral products, Exhibit 265, Patent Plumbago Crucible Co). The range of sizes represented by the six crucibles retrieved from the Loch Ard suggests they may have been part of a sample shipment intended for similar promotion in the Australian colonies or at Melbourne's International Exhibition to be held in 1880. A newspaper account of an 1864 tour of the Morgan brothers' 'Black Potteries' at Battersea indicates: "All the pots were numbered according to their contents, each number standing for one kilogram, or a little over two pounds; a No. 2 crucible contains two kilograms; a No. 3, three kilograms, and so on." These numbers are obscured by marine sediment on three of the crucibles in the Flagstaff Hill collection, but those legible on the remaining three are 5, 6, and 8. None of the six is of the same size. (For more information on the Loch Ard wreck see note sec this document) The shipwreck of the Loch Ard is of significance for Victoria and is registered on the Victorian Heritage Register ( S 417). Flagstaff Hill has a varied collection of artefacts from Loch Ard and its collection is significant for being one of the largest accumulation of artefacts from this notable Victorian shipwreck of which the crucible is a small part. The collections objects give us a snapshot of how we can interpret the story of this tragic event. The collection is also archaeologically significant as it represents aspects of Victoria's shipping history that allows us to interpret Victoria's social and historical themes of the time. Through is associated with the worst and best-known shipwreck in Victoria's history.A medium size crucible, or fluxing pot, for heating and pouring molten metal. The container rises in a slight curve from a smaller flat base to a wider open top with a lip for pouring. It was recovered from the wreck of the LOCH ARD. The crucible has a coating of sediment that obscures its numerical specifications of size and capacity. The markings that remain visible indicate it is a Morgan’s crucible, made with graphite to prevent cracking and provide a smooth non-adhesive inner surface. .On base: “…ORGAN’S …ENT”flagstaff hill, warrnambool, flagstaff-hill-maritime-museum, shipwreck-coast, flagstaff-hill-maritime-village, graphite crucible, plumbago crucible, morgan's crucible company, loch ard, morgan potteries, crucible, fluxing pot -
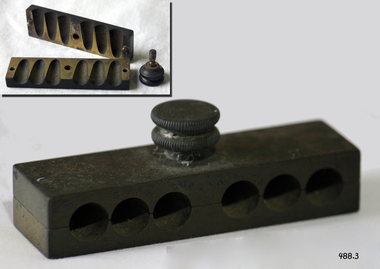 Flagstaff Hill Maritime Museum and Village
Equipment - Suppository Mould
Before factory production became commonplace in medicine, dispensing was considered an art and pill and suppository machines such as these were a vital component of any chemist’s collection. This mould dates back to the days when the local chemist or apothecary bought, sold, and manufactured all his own drugs and medicines to everybody who lived within the local community. In Victorian times, there was no such thing as off-the-shelf medicine. Every tablet, pill, suppository, ointment, potion, lotion, tincture and syrup to treat anything from a sore throat to fever, headaches or constipation, was made laboriously by hand, by the chemist. Some medicines are formulated to be used in the body cavities: the suppository (for the rectum), the pessary (for the vagina) and the bougie (for the urethra or nose). History Suppositories, pessaries and bougies have been prescribed for the last 2000 years but their popularity as a medicinal form increased from around 1840 - suppositories for constipation, haemorrhoids and later as an alternative method of drug administration, pessaries for vaginal infections and bougies for infections of the urethra, prostate, bladder or nose. Manufacture The basic method of manufacture was the same for each preparation, the shape differed. Suppositories were "bullet" or "torpedo" shaped, pessaries "bullet" shaped but larger and bougieslong and thin, tapering slightly. A base was required that would melt at body temperature. Various oils and fats have been utilised but, until the advent of modern manufactured waxes, the substances of choice were theobroma oil (cocoa butter) and a glycerin-gelatin mixture. The base was heated in a spouted pan over a water-bath until just melted. The medicament was rubbed into a little of the base (usually on a tile using a spatula) and then stirred into the rest. The melted mass was then poured into the relevant mould. Moulds were normally in two parts, made from stainless steel or brass (silver or electroplated to give a smooth surface). To facilitate removal the moulds were treated with a lubricant such as oil or soap solution. To overcome the difficulty of pouring into the long, thin bougie mould, it was usual to make a larger quantity of base, to partially unscrew the mould, fill with base and then screw the two halves of the mould together thus forcing out the excess. When cool, any excess base was scraped from the top of the mould, the mould opened and the preparations removed, packed and labelled with the doctor's instructions. https://www.rpharms.com/Portals/0/MuseumLearningResources/05%20Suppositories%20Pessaries%20and%20Bougies.pdf?ver=2020-02-06-154131-397The collection of medical instruments and other equipment in the Port Medical Office is culturally significant, being an historical example of medicine from late 19th to mid-20th century.Proctological mould for making suppositories.None.flagstaff hill, warrnambool, shipwrecked-coast, flagstaff-hill, flagstaff-hill-maritime-museum, maritime-museum, shipwreck-coast, flagstaff-hill-maritime-village, suppositories, medicine, health -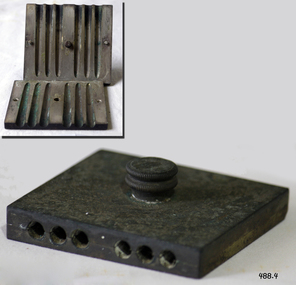
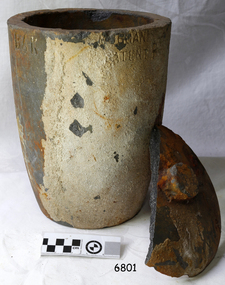 Flagstaff Hill Maritime Museum and Village
Functional object - Crucible, The Patent Plumbago Crucible Company, circa 1878
This crucible was raised from the wreck of the LOCH ARD. It is one of six similar relics, in a range of sizes, now in the Flagstaff Hill collection. All bear markings to indicate their manufacture by the Morgan brothers of Battersea, trading as the Patent Plumbago Crucible Co. A crucible is a container used for purifying and melting metals so that they can be cast in a mould to a predetermined shape and use. They must withstand extremely high temperatures, abrupt cooling, and shed their contents with minimal adherence. The addition of graphite to the traditional firing clays greatly enhanced the durability of industrial crucibles in mid-Victorian Britain, a significant technological advance at a time of great activity in foundries and expansion of demand for refined metals. The Morgans first noticed the advantages of graphite crucibles at the Great Exhibition held in London in 1851. Initially they contracted to be sole selling agents for the American-made products of Joseph Dixon and Co. from New Jersey, but in 1856 they obtained that firm’s manufacturing rights and began producing their own graphite crucibles from the South London site. The Morgans imported crystalline graphite in 4-5 cwt casks from the British colony of Ceylon (now Sri Lanka) and mixed it with conventional English (Stourbridge) clays to be fired in kilns. Their products were purchased by the Royal Mints in London and India, and exported to official mints in France and Germany. They were successful exhibitors of their crucibles and furnaces at the London Exhibition held in 1861 (Class 1, Mining, quarrying, metallurgy and mineral products, Exhibit 265, Patent Plumbago Crucible Co). The range of sizes represented by the six crucibles retrieved from the LOCH ARD, suggest they may have been part of a sample shipment intended for similar promotion in the Australian colonies ― at Melbourne’s International Exhibition to be held in 1880. The summary of cargo manifest, by Don Charlwood in ‘Wrecks and Reputations’ does not mention any crucibles, implying that they were not a large consignment of uniform items. A newspaper account of an 1864 tour of the Morgan brothers’ ‘Black Potteries’ at Battersea indicates: “All the pots were numbered according to their contents, each number standing for one kilogram, or a little over two pounds; a No. 2 crucible contains two kilogrammes; a No. 3, three kilogrammes, and so on.” These numbers are obscured by marine sediment on three of the crucibles in the Flagstaff Hill collection, but those legible on the remaining three are 5, 6, and 8. None of the six are of the same size from a visual appraisal.The shipwreck of the LOCH ARD is of State significance ― Victorian Heritage Register S417A large crucible, or fluxing pot, for heating and pouring molten metal. It was recovered from the wreck of the LOCH ARD. The clay fired vessel rises from circular flat base to a larger rim with pouring lip. It is stained a rust colour and bears some sedimentary accretion. Half of its loose fitting lid with central knob has also survived. Markings on the artefact indicate it is a Morgan’s crucible, made with graphite to prevent cracking in the furnace and provide a smooth (non-adhesive) inner surface. On base: “…RGAN’S PATENT CRUCIBLE”. On rim: “MORGAN’S PATENT P…” Below top edge "BAK"flagstaff hill, warrnambool, shipwrecked-coast, flagstaff-hill, flagstaff-hill-maritime-museum, maritime-museum, shipwreck-coast, flagstaff-hill-maritime-village, graphite crucible, plumbago crucible, morgans crucible company, loch ard, fluxing pot, crucible