Showing 2119 items matching "wrecked"
-
 Flagstaff Hill Maritime Museum and Village
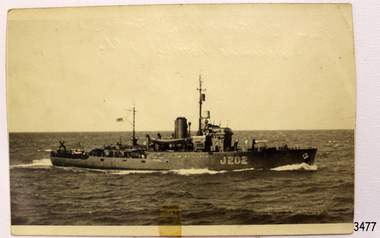
Photograph - Vessel, Steam Ship, H.M.A.S. Warrnambool J202, Between 1941-1947
This photograph is connected to the first HMAS Warrnambool (J202), which was one of 60 Bathurst class corvette vessels built during World War II by Mort's Dock & Engineering Co Ltd of Sydney under the commission of the Royal Australian Navy (RAN). It was the namesake of the City of Warrnambool in Victoria. The armed minesweeper was 57 metres long and could had a complement of 85 personnel. Its armament included 1 × 4 inch Mk XIX gun, 1 × 40 mm Bofors AA gun (installed later), 3 × 20 mm Oerlikon guns (1 later removed), machine guns and depth charge chutes and throwers. It was launched in Sydney in May, 1941. The HMAS Warrnambool began service with patrols off Bass Strait in 1941. In December the ship docked in Warrnambool Harbour and the crew marched in a parade along Timor Street. The ship’s crew received a donation of 110 books from the Warrnambool Patriotic Fund, and a plaque of the City of Warrnambool’s Coat of Arms presented by the Mayor, Cr. John R Astbury. In September 1942 a Dutch East Indies family, Samuel and Annie Jacob and seven of their eight children, was rescued by the HMAS Warrnambool and evacuated to Darwin. The family settled in Melbourne, then in 1944 Samuel tragically died. After the war ended the family was threatened with deportation under Australia’s Immigration Restriction Act 1901 (known also as the White Australia policy). Annie married her landlord, John O’Keefe but was still issued a deportation order in 1949. The family appealed to the High Court and the case became famous for being the first successful legal challenge to the Act. The HMAS Warrnambool was in Darwin during the time it was bombed, attacked by the Japanese while rescuing 73 crew from a merchant vessel that had also been attacked. The ship was involved in several other rescues and carried troops to New Guinea. Other events included escort and patrol duties on Australia's east coast, then at Fremantle and back to Darwin. When the Japanese surrendered on September 11, 1945, at the end of World War II, the ship was at Timor. It performed mine clearance work around the Solomon Islands and New Guinea after the war. On 13th September 1947 the ship was sent to lead a flotilla at the Great Barrier Reef, off the Queensland coast. The mission was to clear the defensive British mines that were laid during1941-43 to protect Australia’s boarders. The HMAS Warrnambool hit a mine near Cockburn Reef, exploded and sank shortly afterwards. One of the 70 or so men on board was killed at the time and thirty-two men were badly injured; three of these also lost their lives. The four deceased were Victorian seamen. The wounded men were transferred by boats to the nearby HMAS Swan II, where the Swan’s and the Warrnambool’s doctors cared for them. The HMAS Swan II took the survivors to Cairns, and from there the men were flown by RAAF to either Brisbane or Sydney hospitals. The HMAS Warrnambool was the only RAN ship to be sunk by a mine, and the four who lost their livers were the last naval casualties from World War II. The ship’s wartime service was recognised by three honours. In May 1948 a number of items were recovered by Navy divers from the wreck of HMAS Warrnambool. The items included the ship’s bell (inscribed HMAS Warrnambool 1941) and the round plaque with the Seal of the Warrnambool City Council. In 1949 the plaque was returned to the Council, and the bell was donated to the Australian War Memorial. Further objects were recovered by the new owners of the wreck, Southern Cross Diving and Salvage, in 1972-75. A memorial plaque, honouring the memories of all those who served on the HMAS Warrnambool until is sunk on September 13 1947, was erected in Warrnambool on September 13, 1995. NOTE: (1)- The second HMAS Warrnambool (FCPB204), also the namesake of the City of Warrnambool, was built in 1980 in Cairns, one of fifteen Fremantle Class Patrol Boats ordered by the RAN. It was just over 41 metres long with a compliment of 22 personnel. It patrolled Australia’s northern waters for illegal fishing vessels. This vessel was decommissioned in 2005. (2)- There was also a steam and sail ship named the S.S. Warrnambool, built in 1892 in London and broken up in 1926.This photograph is significant for its association with Royal Australian Navy and its vessel, HMAS Warrnambool (j202). The HMAS Warrnambool played a nationally significant role in overturning Australia’s Immigration Restriction Act 1901 (colloquially known as the White Australia policy). The ship rescued, and brought to Australia, Samuel and Annie Jacob and their family after they evacuated Dutch East India. The family was threatened with deportation and made the first successful appeal to High Court regarding that Act. The HMAS Warrnambool has - Local significance for being the namesake of the City of Warrnambool - Local significance, having docked in Warrnambool Harbour - Local significance, the crew having paraded in Timor Street, Warrnambool - State significance for its first patrol being in Bass Strait. - National significance, being present in Timor at the Japanese surrender - National significance as part of Australia’s defence force history, being one of only four Bathurst class corvettes lost while in Australian service, the only Bathurst class corvette lost after World War II, the only RAN vessel to be sunk by a mine, and associated with the last four Navy deaths of WWIIBlack and white photograph of vessel H.M.A.S. Warrnambool J202 on an open sea. The identifying number is painted on the hull. The ship is flying a white ensign. A lifeboat is suspended near the centre of the ship. Figures can be seen on deck. Hand written inscription on the reverse side. On ship's hull "J202" On reverse of photo "From P.O. FRED MATTHEWS. 23378. R.A.N." "MARIBYRNONG MAIDSTON RSL" "H.M.A.S. WARRNAMBOOL"flagstaff hill, warrnambool, shipwrecked-coast, flagstaff-hill, flagstaff-hill-maritime-museum, maritime-museum, shipwreck-coast, flagstaff-hill-maritime-village, photograph, h.m.a.s. warrnambool, maritime village, maritime museum, shipwreck coast, mort's dock & engineering co ltd, hmas warrnambool, hmas warrnambool i, hmas warrnambool j202, hmas swan ii, j202, world war ii, bathurst class corvette, royal australian navy, ran, sydney built ship, bass strait patrol, sea mine patrol, mine sweeper, mine clearance, navy divers, great barrier reef, cockburn reef, southern cross diving and salvage, warrnambool city council, cr j r astbury, mayor j r astbury, warrnambool patriotic fund, seal, coat of arms, ship’s bell, hmas warrnambool 1941, shipwreck by sea mine 1947, sea rescue, life saving, lifesaving, sinking ship, sunk ship, immigration restrictions act 1901, white australia policy, samuel and annie jacob, john o'keere, minesweeper -
 Flagstaff Hill Maritime Museum and Village
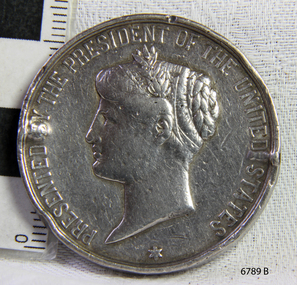
Award - Medal, Nelson Johnson, November 1880
This medal for bravery, for rescue of the crew from the shipwreck “Eric the Red” on 4th September 1880, was awarded to one of the crew of the steamer S.S. Dawn by the President of the United States in July 1881. The medal is engraved with the name “Nelson Johnson” (the anglicised version of his Swedish name Neils Frederick Yohnson). It was donated to Flagstaff Hill Maritime Village in 2013 by Nelson’s granddaughter. Nelson had migrated from Sweden to Sydney in 1879. The next year in 1880, aged 24, he was a seaman on the steamship Dawn and involved in the rescue of the survivors of the Eric the Red. Nelson Johnson was a crew member of the S.S. Dawn and was one of the rescue team in the dinghy in the early morning of September 4th 1880. Medals were awarded to the Captain and crew of the S.S. Dawn by the President of the United States, through the Consul-general (Mr Oliver M. Spencer), in July 1881 “ … in recognition of their humane efforts in rescuing the 23 survivors of the American built wooden sailing ship, the Eric the Red, on 4th September 1880.” The men were also presented with substantial monetary rewards and gifts. The city of Warrnambool’s care of the survivors was also mentioned by the President at the presentation, saying that “the city hosted and supported the crew ‘most graciously’. Previously, a week after the shipwreck, the Australian Government had also conveyed its thanks to the Captain and crew of the S.S. Dawn “Captain Griffith Jones, S.S. Dawn, The Hon. Mr Clark desires that the thanks of the Government should be conveyed to you for the prompt, persevering and seamanlike qualities displayed by you, your officers and crew in saving the number of lives you did on the occasion referred to. The hon. The Commissioner has also been pleased to award you a souvenir in commemoration of the occasion, and a sum of 65 pounds to be awarded to your officers and crew according to annexed scale. I am, &c, W Collins Rees, for and in the absence of the Chief Harbour Master.” The Awards are as follows: - Crew of DAWN'S lifeboat-Chief Officer, Mr G. Peat, 15 pounds; boat's crew-G. Sterge, A.B., 5 pounds; T. Hammond, A.B., 5 pounds; J. Black, A.B., 5 pounds; H. Edwards, A.B., 5 pounds. Dinghy's Crew-Second Officer, Mr Christie, 10 pounds; boat's crew -F. Lafer, A.B., 5 pounds; W. Johnstone, A.B., 5 pounds; Mr Lear, provedore, 5 pounds; Mr Dove, purser, 5 pounds. Captain Jones receives a piece of plate. (from “Wreck of the ship Eric the Red” by Jack Loney) The medal’s history, according to the Editor of ‘E-Sylum’ (the newsletter of The Numismatic Bibliomania Society “… appears to be an example of an 1880 State Department medal, catalogued as LS-3 (page 322 of R. W. Julian's book, Medals of the United States Mint: The First Century 1792-1892). The reverse is mostly blank for engraving, surrounded by a thin wreath. It was designed by George Morgan, chief engraver for the Philadelphia Mint, and struck in gold, silver and bronze. The one pictured here (in The Standard newspaper, 2nd July 2013) appears to be silver.” The following is an account of the events which led to the awarding of this medal. The American ship Eric the Red was a wooden, three-masted clipper ship. She had 1,580 tons register and was the largest full-rigged ship built at Bath, Maine, USA in 1871. She was built and registered by Arthur Sewall, later to become the partnership E. & A. Sewall, the 51st ship built by this company. The annually-published List of Merchant Vessels of the U.S. shows Bath was still the home port of Eric the Red in 1880. The vessel was named after the Viking discoverer, Eric ‘the Red-haired’ Thorvaldsson, who was the first European to reach the shores of North America (in 980AD). The ship Eric the Red at first traded in coal between America and Britain, and later traded in guano nitrates from South America. In 1879 she was re-metalled and was in first-class condition. On 10th June 1880 (some records say 12th June) Eric the Red departed New York for Melbourne and then Sydney. She had been commissioned by American trade representatives to carry a special cargo of 500 exhibits (1400 tons) – about a quarter to a third of America’s total exhibits - for the U.S.A. pavilion at Melbourne’s first International Exhibition. The exhibits included furniture, ironmongery, wines, chemicals, dental and surgical instruments, paper, cages, bronze lamp trimmings, axles, stamped ware, astronomical and time globes, samples of corn and the choicest of leaf tobacco. Other general cargo included merchandise such as cases of kerosene and turpentine, brooms, Bristol's Sarsaparilla, Wheeler and Wilson sewing machines, Wheeler’s thresher machine, axe handles and tools, cases of silver plate, toys, pianos and organs, carriages and Yankee notions. The Eric the Red left New York under the command of Captain Zaccheus Allen (or some records say Captain Jacques Allen) and 24 other crew including the owner’s son third mate Ned Sewall. There were also 2 saloon passengers on board. The ship had been sailing for an uneventful 85 days and the voyage was almost at its end. As Eric the Red approached Cape Otway there was a moderate north-west wind and a hazy and overcast atmosphere. On 4th September 1880 at about 1:30 am Captain Allen sighted the Cape Otway light and was keeping the ship 5-6 miles offshore to stay clear of the hazardous Otway Reef. However, he had badly misjudged his position. The ship hit the Otway Reef about 2 miles out to sea, southwest of the Cape Otway light station. Captain Allen ordered the wheel to be put ‘hard up’ thinking that she might float off the reef. The sea knocked the helmsman away from the wheel, broke the wheel ropes and carried away the rudder. The lifeboats were swamped, the mizzenmast fell, with all of its riggings, then the mainmast also fell and the ship broke in two. Some said that the passenger Vaughan, who was travelling for his health and not very strong, was washed overboard and never seen again. The ship started breaking up. The forward house came adrift with three of the crew on it as well as a longboat, which the men succeeded in launching and keeping afloat by continually bailing with their sea boots. The captain, the third mate (the owner’s son) and others clung to the mizzenmast in the sea. Then the owner’s son was washed away off the mast. Within 10 minutes the rest of the ship was in pieces, completely wrecked, with cargo and wreckage floating in the sea. The captain encouraged the second mate to swim with him to the deckhouse where there were other crew but the second mate wouldn’t go with him. Eventually, the Captain made it to the deckhouse and the men pulled him up. At about 4:30 am the group of men on the deckhouse saw the lights of a steamer and called for help. At the same time, they noticed the second mate and the other man had drifted nearby, still on the spur, and pulled them both onto the wreck. The coastal steamer SS Dawn was returning to Warrnambool from Melbourne, and its sailing time was different to its usual schedule. She was built in 1876 and bought by the Portland and Belfast Steam Navigation Co. in 1877. At the time of this journey, she was commanded by Captain Jones and was sailing between Melbourne and Portland via Warrnambool. The provedore the Dawn, Benjamin Lear, heard cries of distress coming through the portholes of the saloon. He gave the alarm and the engines were stopped. Cries could be heard clearly, coming from the land. Captain Jones sent out crew in two boats and fired off rockets and blue lights to illuminate the area. They picked up the three survivors who were in the long boat from Eric the Red. Two men were picked up out of the water, one being the owner’s son who was clinging to floating kerosene boxes. At daylight, the Dawn then rescued the 18 men from the floating portion of the deckhouse, which had drifted about 4 miles from where they’d struck the reef. Shortly after the rescue the deckhouse drifted onto breakers and was thrown onto rocks at Point Franklin, about 2 miles east of Cape Otway. Captain Jones had signalled to Cape Otway lighthouse the number of the Eric the Red and later signalled that there was a wreck at Otway Reef but there was no response from the lighthouse. The captain and crew of the Dawn spent several more hours searching unsuccessfully for more survivors, even going back as far as Apollo Bay. On board the Dawn the exhausted men received care and attention to their needs and wants, including much-needed clothing. Captain Allen was amongst the 23 battered and injured men who were rescued and later taken to Warrnambool for care. Warrnambool’s mayor and town clerk offered them all hospitality, the three badly injured men going to the hospital for care and others to the Olive Branch Hotel, then on to Melbourne. Captain Allen’s leg injury prevented him from going ashore so he and three other men travelled on the Dawn to Portland. They were met by the mayor who also treated them all with great kindness. Captain Allen took the train back to Melbourne then returned to America. Those saved were Captain Zaccheus Allen (or Jacques Allen), J. Darcy chief mate, James F. Lawrence second mate, Ned Sewall third mate and owner’s son, John French the cook, C. Nelson sail maker, Clarence W. New passenger, and able seamen Dickenson, J. Black, Denis White, C. Herbert, C. Thompson, A. Brooks, D. Wilson, J. Ellis, Q. Thompson, C. Newman, W. Paul, J. Davis, M. Horenleng, J. Ogduff, T. W. Drew, R. Richardson. Four men had lost their lives; three of them were crew (Gus Dahlgreen ship’s carpenter, H. Ackman steward, who drowned in his cabin, and George Silver seaman) and one a passenger (J. B. Vaughan). The body of one of them had been found washed up at Cape Otway and was later buried in the lighthouse cemetery; another body was seen on an inaccessible ledge. Twelve months later the second mate James F. Lawrence, from Nova Scotia passed away in the Warrnambool district; an obituary was displayed in the local paper. Neither the ship nor its cargo was insured. The ship was worth about £15,000 and the cargo was reportedly worth £40,000; only about £2,000 worth had been recovered. Cargo and wreckage washed up at Apollo Bay, Peterborough, Port Campbell, Western Port and according to some reports, even as far away as the beaches of New Zealand. The day after the wreck the government steamship Pharos was sent from Queenscliff to clear the shipping lanes of debris that could be a danger to ships. The large midship deckhouse of the ship was found floating in a calm sea near Henty Reef. Items such as an American chair, a ladder and a nest of boxes were all on top of the deckhouse. As it was so large and could cause danger to passing ships, Captain Payne had the deckhouse towed towards the shore just beyond Apollo Bay. Between Apollo Bay and Blanket Bay, the captain and crew of Pharos collected Wheeler and Wilson sewing machines, nests of boxes, bottles of Bristol’s sarsaparilla, pieces of common American chairs, axe handles, a Wheelers’ Patent thresher and a sailor’s trunk with the words “A. James” on the front. A ship’s flag-board bearing the words “Eric the Red” was found on the deckhouse; finally, those on board the Pharos had the name of the wrecked vessel. During this operation, Pharos came across the government steamer Victoria and also a steamer S.S. Otway, both of which were picking up flotsam and wreckage. A whole side of the hull and three large pieces of the other side of the hull, with some of the copper sheathing stripped off, had floated onto Point Franklin. Some of the vessels' yards and portions of her masts were on shore. The pieces of canvas attached to the yards and masts confirmed that the vessel had been under sail. The beach there was piled with debris several feet high. There were many cases of Diamond Oil kerosene, labelled R. W. Cameron and Company, New York. There were also many large planks of red pine, portions of a small white boat and a large, well-used oar. Other items found ashore included sewing machines (some consigned to ‘Long and Co.”) and notions, axe and scythe handles, hay forks, wooden pegs, rolls of wire (some branded “T.S” and Co, Melbourne”), kegs of nails branded “A.T. and Co.” from the factory of A. Field and Son, Taunton, Massachusetts, croquet balls and mallets, buggy fittings, rat traps, perfumery, cutlery and Douay Bibles, clocks, bicycles, chairs, a fly wheel, a cooking stove, timber, boxes, pianos, organs and a ladder. (Wooden clothes pegs drifted in for many years). There seemed to be no personal luggage or clothing. The Pharos encountered a long line, about one and a half miles, of f locating wreckage about 10 miles off land, southeast of Cape Otway, and in some places about 40 feet wide. It seemed that more than half of it was from Eric the Red. The ship’s crew rescued 3 cases that were for the Melbourne Exhibition and other items from amongst the debris. There were also chairs, doors, musical instruments, washing boards, nests of trunks and flycatchers floating in the sea. Most of the goods were saturated and smelt of kerosene. A section of the hull lies buried in the sand at Parker River Beach. An anchor with a chain is embedded in the rocks east of Point Franklin and a second anchor, thought to be from Eric the Red, is on display at the Cape Otway light station. (There is a photograph of a life belt on the verandah of Rivernook Guest House in Princetown with the words “ERIC THE RED / BOSTON”. This is rather a mystery as the ship was registered in Bath, Maine, USA.) Parts of the ship are on display at Bimbi Park Caravan Park and at Apollo Bay Museum. Flagstaff Hill Maritime Village also has part of the helm (steering wheel), a carved wooden sword (said to be the only remaining portion of the ship’s figurehead; further research is currently being carried out), a door, a metal rod, samples of wood and this medal awarded for the rescue of the crew. Much of the wreckage was recovered by the local residents before police and other authorities arrived at the scene. Looters went to great effort to salvage goods, being lowered down the high cliff faces to areas with little or no beach to collect items from the wreckage, their mates above watching out for dangerous waves. A Tasmanian newspaper reports on a court case in Stawell, Victoria, noting a man who was caught 2 months later selling tobacco from the wreckage of Eric the Red. Some of the silverware is still treasured by descendants of Mr Mackenzie who was given these items by officials for his help in securing the cargo. The gifts included silver coffee and teapots, half a dozen silver serviette rings and two sewing machines. A Mr G.W. Black has in his possession a medal and a purse that was awarded to his father, another Dawn crew member who was part of the rescue team. The medal is similarly inscribed and named “To John Black ….” (from “Shipwrecks” by Margaret E. Mackenzie, 3rd edition, published 1964). The wreck and cargo were sold to a Melbourne man who salvaged a quantity of high-quality tobacco and dental and surgical instruments. Timbers from the ship were salvaged and used in the construction of houses and shed around Apollo Bay, including a guest house, Milford House (since burnt down in bushfires), which had furniture, fittings and timber on the dining room floor from the ship. A 39.7-foot-long trading ketch, the Apollo, was also built from its timbers by Mr Burgess in 1883 and subsequently used in Tasmanian waters. It was the first attempt at shipbuilding in Apollo Bay. In 1881 a red light was installed about 300 feet above sea level at the base of the Cape Otway lighthouse to warn ships when they were too close to shore; It would not be visible unless a ship came within 3 miles from it. This has proved to be an effective warning. Nelson Johnson married Elizabeth Howard in 1881 and they had 10 children, the father of the medal’s donor being the youngest. They lived in 13 Tichbourne Place, South Melbourne, Victoria. Nelson died in 1922 in Fitzroy Victoria, age 66. In 1895 the owners of the S.S. Dawn, the Portland and Belfast Steam Navigation Co., wound up and sold out to the Belfast Company who took over the Dawn for one year before selling her to Howard Smith. She was condemned and sunk in Suva in 1928. The State Library of Victoria has a lithograph in its collection depicting the steamer Dawn and the shipwrecked men, titled. "Wreck of the ship Eric the Red, Cape Otway: rescue of the crew by the Dawn". The medal for bravery is associated with the ship the “The Eric the Red which is historically significant as one of Victoria's major 19th century shipwrecks. (Heritage Victoria Eric the Red; HV ID 239) The wreck led to the provision of an additional warning light placed below the Cape Otway lighthouse to alert mariners to the location of Otway Reef. The site is archaeologically significant for its remains of a large and varied cargo and ship's fittings being scattered over a wide area. The site is recreationally and aesthetically significant as it is one of the few sites along this coast where tourists can visit identifiable remains of a large wooden shipwreck, and for its location set against the background of Cape Otway, Bass Strait, and the Cape Otway lighthouse.“ (Victorian Heritage Database Registration Number S239, Official Number 8745 USA) This medal was awarded to Nelson Johnson by the U.S. President for bravery in the rescue of the Eric the Red crew. The obverse of the round, solid silver medal has an inscription around the rim. In the centre of the medal is the head of Liberty to the left, hair in a bun, with a sprig of leaves in the top left of a band around her head. There is a 6-pointed star below the portrait, between the start and end of the inscription. There are two raised areas on the rim, horizontally opposite each other, from the edge to just below the lettering and coinciding with the holes drilled in the edge. Slightly right of the top is a round indentation in the rim. The reverse has a wreath of leaves as a border, joined at the bottom by a ribbon bow. In the centre of the medal is an inscription, decorated with 3-pronged design and dots. The edge is plain with 2 small, rough and uneven holes horizontally opposite to each other, as though they had been used for mounting the medal at some stage. The medal has a matte finish on both sides and is slightly pitted and scratched.“PRESENTED BY THE PRESIDENT OF THE UNITED STATES” around the perimeter of the obverse of the medal. “TO / Nelson Johnson, / seaman of the British, / str “Dawn”, for bravery, / at risk of life, / in / rescuing the crew of / the American Ship / “Eric the Red.” “M” on obverse, truncation of the portraitwarrnambool, flagstaff hill, flagstaff hill maritime village, maritime museum, shipwreck coast, great ocean road, shipwreck artefact, eric the red, zaccheus allen, sewall, 1880, melbourne exhibition, cape otway, otway reef, victorian shipwreck, medal, nelson johnson, neils frederick yohnson, s.s. dawn, george morgan, hero -
 Flagstaff Hill Maritime Museum and Village
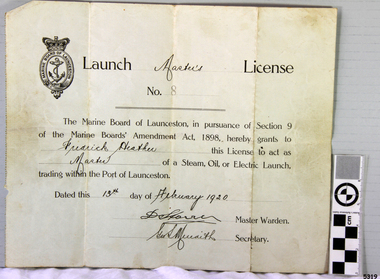
Document - License, Marine Board of Launceston, Launch Master's Licence, 13-02-1920
The Launch Master Frederick Heather was licensed to be Master of Launches within the Port of Launceston. Amongst the vessels that he captained was the S.S. ROWITTA. Fredrick’s son is one of the volunteers at the Low Head Pilot Station Museum, Frederick Heather is also related to a Harry Heather from Tasmania and was also a ship master, one of his ships being the "Alma Doepel", a sailing schooner built in 1903 and sailed by Harry for about 21 years until his death in 1937. Flagstaff Hill’s collection includes a painting of the Alma Doepel. SS ROWITTA: - The 1909 steam ferry, SS Rowitta, was installed as an exhibit at Flagstaff Hill in 1975 and was enjoyed by many visitors for 40 years. Rowitta was a timber steam ferry built in Hobart in 1909 using planks of Huon and Karri wood. It was a favourite of sightseeing passengers along Tasmania’s Tamar and Derwent rivers for 30 years. Rowitta was also known as Tarkarri and Sorrento and had worked as a coastal trading vessel between Devonport and Melbourne, and Melbourne Queenscliff and Sorrento. In 1974 Rowitta was purchased by Flagstaff Hilt to convert into a representation of the Speculant, a historic and locally significant sailing ship listed on the Victorian Heritage Database. (The Speculant was built in Scotland in 1895 and traded timber between the United Kingdom and Russia. Warrnambool’s P J McGennan & Co. then bought the vessel to trade pine timber from New Zealand to Victorian ports and cargo to Melbourne. It was the largest ship registered with Warrnambool as her home port, playing a key role in the early 1900s in the Port of Warrnambool. In 1911, on her way to Melbourne, it was wrecked near Cape Otway. None of the nine crew lost their lives.) The promised funds for converting Rowitta into the Speculant were no longer available, so it was restored back to its original configuration. The vessel represented the importance of coastal traders to transport, trade and communication in Australia times before rail and motor vehicles. Sadly, in 2015 the time had come to demolish the Rowitta due to her excessive deterioration and the high cost of ongoing repairs. The vessel had given over 100 years of service and pleasure to those who knew her. The licence is significant for its association with the Tasmanian early to mid-1900s passenger ferry, the S.S. Rowitta. It is connected to the history of the Rowitta, which was a large exhibit on display at Flagstaff Hill Maritime Village from the museum’s early beginnings until the vessel’s end of life 40 years later. The display was used as an aid to maritime education. The Rowitta represents the importance of coastal traders to transport, trade and communication along the coast of Victoria, between states, and in Australia before rail and motor vehicles. The vessel was an example of a ferry built in the early 20th century that served many different roles over its lifetime of over 100 years. Launch Master's License No 8 issued to Fredrick Heather to act as Master of a steam, oil or electric launch trading within the Port of Launceston. Date issued 13th February 1920. The license is printed with hand written details added.Handwritten on License "Master's" "Frederick Heather" "Master" "13th February 1920" Also two signatures (indecipherable) of Master Warden and Secretary.flagstaff hill, flagstaff hill maritime museum and village, warrnambool, maritime museum, maritime village, great ocean road, shipwreck coast, launch master's licence, rowitta, frederick heather, port of launceston, launch master's license, marine board of launceston, tarkarri, speculant, purdon & featherstone of hobart, passenger ferry 1909, vessel, charles street wharf launceston, sorrento -
 Flagstaff Hill Maritime Museum and Village
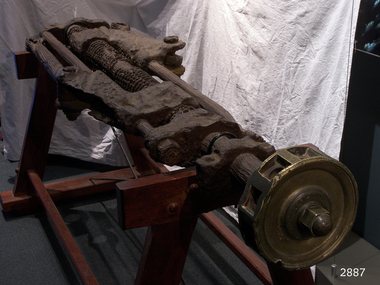
Machine - Steering Gear, 1889
Steering Gear Operation: All steering was done from the stern of the ship and a steering mechanism was used to connect the rudder to the ship's wheel, often housed in a box-like construction behind the helm. The rudder was, in turn, mounted on a pintle or stern-post held in place by gudgeon's (sockets). The steering was activated with lines attached to the blocks on the two threads (half left hand, half right hand) of the steering gear. As the helmsman turned the helm in the direction in which he wished the ship to travel, the central screw of the steering gear, which was attached to the back of the helm, turned horizontally. This caused the rods on either side of the gear to move backwards or forwards at the same time, which then turned the pintle and rudder to port or starboard. A brief history of the Newfield (1889-1892): - The Newfield was an iron and steel sailing barque of 1306 tons, built in 1889 by Alexander Stephen & Sons Dundee (Yard No 89) for Brownelles & Co., Liverpool. The Newfield was on a voyage from Sharpness to Brisbane on 29 August 1892, with a cargo of 1850 tons of fine rock salt. The Cape Otway light had been sighted in squally, bumpy weather, but the captain was under the impression it was the King Island light. The ship’s chronometers were wrong, and orders were given to tack the ship away from the light, which headed it straight for the cliffs of the Victorian coast. The vessel struck rocks about 100 yards from shore, and five feet of water immediately filled the holds. The captain gave orders to lower the boats which caused a disorganised scramble for safety among the crew. The panic resulted in the deaths of nine men, including the captain when they drowned after the boats capsized in heavy seas. The seventeen men who regained the ship decided to wait until daylight and rowed to Peterborough in the ship’s jolly boat and gig after locals had failed to secure a rocket apparatus line to the ship. The Marine Board inquiry found the wreck was caused by a "one-man style of navigation" and that the captain had not heeded the advice of his crew.The Newfield wreck and its collection of recovered items are heritage listed and are regarded as historically significant. They represent aspects of Victoria’s shipping history and their potential for us today to interpret the maritime history and social themes of the time. The assemblage of various Newfield artefacts held in the Flagstaff Hill Museum is not only significant for its association with the shipwreck but helps archaeologists when examining the relationship between the objects to better understand our colonial marine past.Ship’s steering gear, cast iron, consists of a long round metal rod into which gears have been machined. The thread of the gear from one end to almost the centre winds in a left hand direction while the thread of the gear from the other end to almost the centre winds in the right hand direction. Each end of the rod has a metal coupler attached and two narrower round rods are also attached to the coupling, one each side of the gear rod, the same length as it and parallel to it. Two more ‘S’ shaped couplers are joined to the gear rod. Each of these have an opening through which the gear rod is threaded and can move along. There is another opening in these couplers through which one of the narrower rods is threaded. The other end of this coupler has half length metal rod attached to it by a bolt through the ring at the end of the rod. One end of the steering gear still has the brass hub of the ship’s wheel solidly attached. The hub no longer has its wooden spokes but the ten holes for the spokes can be easily recognised.Noneflagstaff hill, maritime museum, shipwreck coast, warrnambool, peter carmody, carmody, newfield, shipwreck, peterborough, south west victoria, rocket, rocket crew, shipwreck artefact, flagstaff hil maritime museum, steering, steering gear, screw steering gear, sailing ship -
 Flagstaff Hill Maritime Museum and Village
Functional object - Tap, mid-late 19th century
This type of large, brass tap is typical of the plumbing fittings manufactured in the late 19th and early 20th centuries. The tap has encrustations and concretion inside, showing that it had been in the sea for quite some time. The pipe leading to the spout is squashed, nicked and appears to have been sawn or broken off. It could have once been part of the plumbing from a ship, perhaps from one of the boilers used in the kitchen, for bathing or for laundry or cleaning. The name “BEST” on the tap signifies that it could have been made by Robert Best who began his Birmingham brass foundry c. 1840, and even though The information from the donor is that tap was given to her father (1906-1982) who lived in the Warrnambool district. It was likely given by a cray fisherman or diver, who said that the tap came from the Loch Ard shipwreck, wrecked on Mutton Bird Island, east of Port Campbell, Victoria, on 1st June 1878. This could easily be the case but there is no provenance for it. ROBERT BEST, BRASS FOUNDRY Circa 1840 Robert Best founded his brass foundry business and was referred to as a Brass Chandelier of Birmingham”. In 1864 an advertisement in the Journal of Gas Lighting, Water Supply, & Sanitary Improvement announces Best and Hobson, late Robert Best, 100 Charlotte Street Birmingham, manufacturers of Chandeliers, Brass and iron fittings, Steam and Water-cocks etc. gas apparatus of every description, Plumber's brass foundry, with works at Birmingham and Great Bridge, Staffordshire. In 1867 Best & Lloyd was formed, after Best and Hobson went into liquidation, manufacturing at the Cambray Works of Wattville Road, Handsworth. It was a light industrial engineering works and one of the owners was Robert Dudley Best’s father. Robert Dudley Best (1892-1984) later took over the business of Best & Lloyd. The company is still in business at Downing Street, Smethwick, Birmingham. In 1878, brass ship furniture and bell fittings stamped “BEST” was made by William Udal & Co., who advertised as manufacturers of BEST cast and stamped brass foundry goods. This large brass tap is typical of industrial tapware of the mid-late 19th and 20th centuries. The location of the tap, when found, is associated with the Warrnambool district and could have easily been from a shipwreck due to the encrustation found inside the tap. Due to its design and manufacturer, the tap is associated with the mid-late 19th and early 20th-century manufacture of plumbing fittings. Tap, brass, heavy-duty, with butterfly handle. The design and style are typical of the plumbing of the late 1800s. Inscription pressed into the handle, within rectangular border "BEST". Encrustation and concretion are inside the tap spout. “BEST” on one side of the tap handle (Also, a label from the donor attached to the tap “from the wreckage of the LOCH ARD")flagstaff hill, warrnambool, shipwrecked coast, flagstaff hill maritime museum, maritime museum, shipwreck coast, flagstaff hill maritime village, great ocean road, robert best brass foundry, best and hobson, best & llyod, birmingham brass foundry, brass tap, best brand tap, heavy duty brass tap, industrial brass tap, boiler tap, 19th century plumbing, 19th century tapware, 19th century plumbing fitting, tap with butterfly handle, tap salvaged from shipwreck, brass fittings, steam engine fittings, water-cock fitting -
 Geelong Naval and Maritime Museum
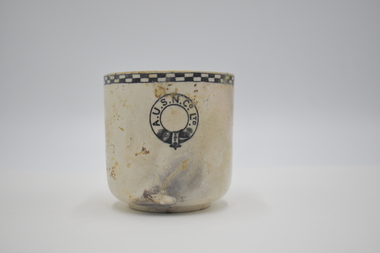
Teacup
The Orungal was originally built in Glasgow in 1923 for the Khedival Mail Steamship & Graving Dock Company of Egypt and named the S.S. Fezara. Due to the effects on steamship companies of the Great Depression including the steep costs of building new ships and increases in running costs and port charges, no new passenger ships had been ordered in Australia since before World War One. To meet demand for passenger berths, the Fezara (5826 tons) along with its sister ship the Famaka (5856 tons, renamed Ormiston), were chartered by the Australasian United Steam Navigation Company Ltd (A.U.S.N.Co.) in 1927. Both the A.U.S.N.Co and the Khedival Mail Steamship Co. were part of the P&O Group. The Orungal operated in this role as an interstate passenger and mail steamer between 1927 and 1940, being used mainly on the Melbourne to Queensland and Western Australian runs, with 240 single class berths. Following the outbreak of World War Two six of the nine large passenger liners servicing mainland Australian passenger and mail trades were requisitioned by the Government to ferry equipment, troops and supplies. Some of them were converted to armed merchant cruisers and used for patrol work and escort duties in the Indian and Pacific Oceans. The Orungal had originally been requisitioned by the government along with the Zealandia on 25 June 1940, to transport troops to Darwin, but was returned to commercial service because "of her unsuitability", perhaps too slow for the demands of the work. Despite being rejected for patrol and convoy duties the Orungal still had a vital role as one of only three passenger liners left to service the mainland Australian trade. Following its requisitioning by the Government shortly after war broke out, it had been fitted out with defensive armament. On its final voyage arriving at Port Phillip Heads from Sydney, Captain Gilling was attempting to enter the Heads ahead of a worsening south-westerly storm and, with a minefield known to have been laid in the area, had been warned by the Navy not to deviate from the swept channel. The captain and crew held fears that in the stormy seas a mine may have been carried away. In the worsening weather a blur of lights at Barwon Heads was mistaken for Port Lonsdale, and the Orungal steamed ashore onto Formby Reef, just east of the entrance of the Barwon River - instead of passing safely through the middle of the Rip. At the Marine Board Inquiry Capt. Gilling - who had been master of the Orungal since 1926 - stated that after becoming uneasy about his position and changing course to starboard one point: " At 10.21 pm I ordered the engine room to stand by and gave instructions for the patent log to be hauled in and for the sounding-gear to be got ready. Approximately two minutes later, in a flash of lightning, I saw land off the port beam. I immediately recognised it as Barwon Heads, and ordered the helm to be put hard to starboard, but the vessel struck before she had time to answer the helm" Barwon Heads and Ocean Grove residents were startled to hear the shrill blast of the ship's whistle, followed by the bright flares and explosions of signal rockets. The Queenscliff lifeboat crew, who had responded to the tragic collision between the Goorangai and another passenger liner the Duntroon in Port Phillip Bay less than 24 hours earlier, were later praised for their efforts in safely taking off all the passengers and crew. Most of the passengers were asleep at the time of the wreck, and were woken up by the commotion, the ship shaking "from stem to stern" and stewards ordering them to lifeboat stations in driving rain. It was a dramatic time with the ship siren wailing and distress rockets being fired. It was reported that "When it was found the ship was safe, the passengers all went to the music room. There they sang and danced for several hours. The ship's orchestra played merrily, and amateur performers among the passengers clowned, danced and sang to keep the laughter going. In the early hours of the morning passengers went to their cabins, most of them to sleep soundly while the keel grated on the rocks". At dawn the Queenscliff lifeboat arrived at the scene having been launched at 2.30am, and cautiously approached the ship which was being "battered by mountainous seas". By 5am oil from a burst oil line was helping to calm seas around the Orungal sufficiently enough for the lifeboat to approach, and all the passengers and crew were taken off in several trips by the lifeboat. A Court of Inquiry later found that the wreck was caused by an abnormal set of current to the north-west and cleared the officers and crew of neglect of duty. The sight of a huge liner almost on the beach saw an unprecedented amount of traffic as people drove an estimated 10,000 cars, using some 60,000 gallons of fuel in a time of strict petrol rationing, to see the spectacle. Salvage operations began in an attempt to refloat the vessel, scheduled for the high tide on 15 December 1940. However, during these operations, at 2.30 am on 13 December 1940, a major fire broke out, believed to have been caused by spontaneous combustion in the boiler room. The ship was soon ablaze, with smoke pouring from its hatches and ventilators, and at mid-morning the magazine exploded fiercely. Of the 60 men working aboard the vessel two were severely burned and had to be taken to Geelong Hospital. The gathered spectators witnessed the eerie sight of the ship's hull glowing red when night fell. The well-known building demolition contractor Whelan the Wrecker bought the salvage rights, and methodically proceeded to dismantle the ship and its fittings. The drama was not yet over for the wreckers when - without warning - the burnt-out hulk was 'attacked' by RAAF for strafing practice. Salvage rights were transferred to another private owner in 1963. By 1945 the combined effects of the exposed location, fire and salvage had seen what was left of the wreck disappear beneath the waves. The site today is marked by two of the four Scotch type boilers sitting upright and exposed at low tide, just north-east of the small boats channel at the entrance to Barwon Heads. Large sections of steel hull plating and framing, and impressively large pieces of ships structure and machinery including masts, booms, deck winches, propeller shaft, flywheel, and a thrust block lie scattered about and make the site an interesting shallow dive. It is interesting to compare the site of the Orungal with the intact remains of similar large passenger ships scuttled in deep water in the Ships' Graveyard, such as the Milora and Malaita. The site is subject to waves and surge, and is best dived on flat calm days The teacup originated from the SS Orungal and was likely used heavily in the ship's life as a passenger, mail and cargo carrier around Australia. The teacup is significant for its connections to SS Orungal and of this ships connected story of being sunk in extraordinary circumstances in the local region. A.U.S.N. Co. Ltd. Teacup salvaged from SS Orungal ss orungal, fezara, world war two, barwon heads, ocean grove -
 Flagstaff Hill Maritime Museum and Village
Ceramic - Ceramic Pieces, Minton Potteries, 1877
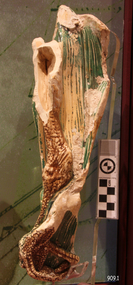
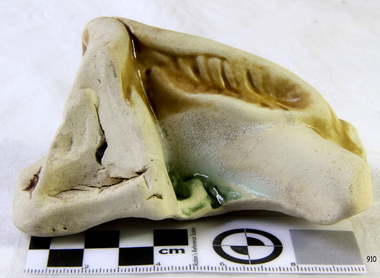
The ceramic pieces are two of five porcelain fragments washed up from the Loch Ard wreck near Port Campbell, Victoria. These fragments resemble the foot and leg of a large bird, and legend has it that another bird had drifted ashore at the same time as the Loch Ard peacock. This figurine is displayed at Flagstaff Hill Maritime Museum and regarded as the most valuable shipwreck relic. It is believed that all five fragments could belong to another peacock or a Minton porcelain stock that had been photographed in a Home Beautiful magazine in 1928. This stork appeared to be missing a leg and foot, and experts have hypothesised that the fragments could belong to this stork, the whereabouts of which are currently unknown. History of the Loch Ard: The Loch Ard got its name from ”Loch Ard”, a loch which lies to the west of Aberfoyle, and to the east of Loch Lomond. It means "high lake" in Scottish Gaelic. The vessel belonged to the famous Loch Line, which sailed many vessels from England to Australia. The Loch Ard was built in Glasgow by Barclay, Curdle and Co. in 1873, the vessel was a three-masted square-rigged iron sailing ship that measured 79.87 meters in length, 11.58 m in width, and 7 m in depth with a gross tonnage of 1693 tons with a mainmast that measured a massive 45.7 m in height. Loch Ard made three trips to Australia and one trip to Calcutta before its fateful voyage. Loch Ard left England on March 2, 1878, under the command of 29-year-old Captain Gibbs, who was newly married. The ship was bound for Melbourne with a crew of 37, plus 17 passengers. The general cargo reflected the affluence of Melbourne at the time. Onboard were straw hats, umbrellas, perfumes, clay pipes, pianos, clocks, confectionery, linen and candles, as well as a heavier load of railway irons, cement, lead and copper. There were other items included that were intended for display in the Melbourne International Exhibition of 1880. The voyage to Port Phillip was long but uneventful. Then at 3 am on June 1, 1878, Captain Gibbs was expecting to see land. But the Loch Ard was running into a fog, which greatly reduced visibility. Captain Gibbs was becoming anxious as there was no sign of land or the Cape Otway lighthouse. At 4 am, the fog lifted, and a lookout aloft announced that he could see breakers. The sheer cliffs of Victoria's west coast came into view, and Captain Gibbs realised that the ship was much closer to them than expected. He ordered as much sail to be set as time would permit and then attempted to steer the vessel out to sea. On coming head-on into the wind, the ship lost momentum, the sails fell limp, and Loch Ard's bow swung back towards land. Gibbs then ordered the anchors to be released in an attempt to hold their position. The anchors sank some 50 fathoms - but did not hold. By this time, the ship was among the breakers, and the tall cliffs of Mutton Bird Island rose behind. Just half a mile from the coast, the ship's bow was suddenly pulled around by the anchor. The captain tried to tack out to sea, but the ship struck a reef at the base of Mutton Bird Island, near Port Campbell. Waves subsequently broke over the ship, and the top deck became loose from the hull. The masts and rigging came crashing down, knocking passengers and crew overboard. When a lifeboat was finally launched, it crashed into the side of Loch Ard and capsized. Tom Pearce, who had launched the boat, managed to cling to its overturned hull and shelter beneath it. He drifted out to sea and then, on the flood tide, came into what is now known as Loch Ard Gorge. He swam to shore, bruised and dazed, and found a cave for shelter. Some of the crew stayed below deck to shelter from the falling rigging, but drowned when the ship slipped off the reef into deeper water. Eva Carmichael, a passenger, had raced onto the deck to find out what was happening, only to be confronted by towering cliffs looming above the stricken ship. In all the chaos, Captain Gibbs grabbed Eva and said, "If you are saved, Eva, let my dear wife know that I died like a sailor". That was the last Eva Carmichael saw of the captain. She was swept off the ship by a huge wave. Eva saw Tom Pearce on a small rocky beach and yelled to attract his attention. He dived in and swam to the exhausted woman and dragged her to shore. He took her to the cave and broke open the case of brandy, which had washed up on the beach. He opened a bottle to revive the unconscious woman. A few hours later, Tom scaled a cliff in search of help. He followed hoof prints and came by chance upon two men from nearby Glenample Station, three and a half miles away. In a complete state of exhaustion, he told the men of the tragedy. Tom then returned to the gorge while the two men rode back to the station to get help. By the time they reached Loch Ard Gorge, it was cold and dark. The two shipwreck survivors were taken to Glenample Station to recover. Eva stayed at the station for six weeks before returning to Ireland by steamship. In Melbourne, Tom Pearce received a hero's welcome. He was presented with the first gold medal of the Royal Humane Society of Victoria and a £1000 cheque from the Victorian Government. Concerts were performed to honour the young man's bravery and to raise money for those who lost family in the disaster. Of the 54 crew members and passengers on board, only two survived: the apprentice, Tom Pearce and the young woman passenger, Eva Carmichael, who lost her family in the tragedy. Ten days after the Loch Ard tragedy, salvage rights to the wreck were sold at auction for £2,120. Cargo valued at £3,000 was salvaged and placed on the beach, but most washed back into the sea when another storm developed. The wreck of Loch Ard still lies at the base of Mutton Bird Island. Much of the cargo has now been salvaged, and some items washed up into Loch Ard Gorge. Cargo and artefacts have also been illegally salvaged over many years before protective legislation was introduced in March 1982. One of the most unlikely pieces of cargo to have survived the shipwreck was a Minton majolica peacock- one of only nine in the world. The peacock was destined for the Melbourne 1880 International Exhibition. It had been well packed, which gave it adequate protection during the violent storm. Today, the Minton peacock can be seen at the Flagstaff Hill Maritime Museum in Warrnambool. From Australia's most dramatic shipwreck, it has now become Australia's most valuable shipwreck artifact and is one of the very few 'objects' on the Victorian State Heritage Register.The shipwreck of the Loch Ard is of significance for Victoria and is registered on the Victorian Heritage Register ( S 417). Flagstaff Hill has a varied collection of artefacts from Loch Ard and its collection is significant for being one of the largest accumulation of artefacts from this notable Victorian shipwreck. The collections object is to also give us a snapshot into history so we can interpret the story of this tragic event. The collection is also archaeologically significant as it represents aspects of Victoria's shipping history that allows us to interpret Victoria's social and historical themes of the time. The collections historically significance is that it is associated unfortunately with the worst and best-known shipwreck in Victoria's history. Glazed ceramic fragments; the two fragments fit together. They appear to be a leg section with foliage.flagstaff hill, flagstaff hill maritime museum and village, warrnambool, maritime museum, maritime village, great ocean road, shipwreck coast, ceramic, porcelain, piece, fragment, ceramic bird, loch ard, shipwreck, salvage, recover, 1877, 1878, minton, shard -
 Flagstaff Hill Maritime Museum and Village
Ceramic - Ceramic Piece, Minton Potteries, ca. 1877
The ceramic piece is one of five porcelain fragments washed up from the Loch Ard wreck near Port Campbell, Victoria. These shards resemble the foot and leg of a large bird, and legend has it that another bird had drifted ashore at the same time as the Loch Ard peacock. This figurine is on display at Flagstaff Hill Maritime Museum and regarded as the most valuable shipwreck relic. It is believed that all five fragments could belong to another peacock or a Minton porcelain stork that had been photographed in a Home Beautiful magazine in 1928. This stork appeared to be missing a leg and foot, and experts have hypothesised that the five fragments could belong to this stork, the whereabouts of which are currently unknown. History of the Loch Ard: The Loch Ard got its name from ”Loch Ard” a loch which lies to the west of Aberfoyle, and the east of Loch Lomond. It means "high lake" in Scottish Gaelic. The vessel belonged to the famous Loch Line which sailed many vessels from England to Australia. The Loch Ard was built in Glasgow by Barclay, Curdle and Co. in 1873, the vessel was a three-masted square-rigged iron sailing ship that measured 79.87 meters in length, 11.58 m in width, and 7 m in depth with a gross tonnage of 1693 tons with a mainmast that measured a massive 45.7 m in height. Loch Ard made three trips to Australia and one trip to Calcutta before its fateful voyage. Loch Ard left England on March 2, 1878, under the command of 29-year-old Captain Gibbs, who was newly married. The ship was bound for Melbourne with a crew of 37, plus 17 passengers. The general cargo reflected the affluence of Melbourne at the time. Onboard were straw hats, umbrella, perfumes, clay pipes, pianos, clocks, confectionery, linen and candles, as well as a heavier load of railway irons, cement, lead and copper. There were other items included that were intended for display in the Melbourne International Exhibition of 1880. The voyage to Port Phillip was long but uneventful. Then at 3 am on June 1, 1878, Captain Gibbs was expecting to see land. But the Loch Ard was running into a fog which greatly reduced visibility. Captain Gibbs was becoming anxious as there was no sign of land or the Cape Otway lighthouse. At 4 am the fog lifted and a lookout aloft announced that he could see breakers. The sheer cliffs of Victoria's west coast came into view, and Captain Gibbs realised that the ship was much closer to them than expected. He ordered as much sail to be set as time would permit and then attempted to steer the vessel out to sea. On coming head-on into the wind, the ship lost momentum, the sails fell limp and Loch Ard's bow swung back towards land. Gibbs then ordered the anchors to be released in an attempt to hold its position. The anchors sank some 50 fathoms - but did not hold. By this time the ship was among the breakers and the tall cliffs of Mutton Bird Island rose behind. Just half a mile from the coast, the ship's bow was suddenly pulled around by the anchor. The captain tried to tack out to sea, but the ship struck a reef at the base of Mutton Bird Island, near Port Campbell. Waves subsequently broke over the ship and the top deck became loosened from the hull. The masts and rigging came crashing down knocking passengers and crew overboard. When a lifeboat was finally launched, it crashed into the side of Loch Ard and capsized. Tom Pearce, who had launched the boat, managed to cling to its overturned hull and shelter beneath it. He drifted out to sea and then on the flood tide came into what is now known as Loch Ard Gorge. He swam to shore, bruised and dazed, and found a cave in which to shelter. Some of the crew stayed below deck to shelter from the falling rigging but drowned when the ship slipped off the reef into deeper water. Eva Carmichael a passenger had raced onto the deck to find out what was happening only to be confronted by towering cliffs looming above the stricken ship. In all the chaos, Captain Gibbs grabbed Eva and said, "If you are saved Eva, let my dear wife know that I died like a sailor". That was the last Eva Carmichael saw of the captain. She was swept off the ship by a huge wave. Eva saw Tom Pearce on a small rocky beach and yelled to attract his attention. He dived in and swam to the exhausted woman and dragged her to shore. He took her to the cave and broke the open case of brandy which had washed up on the beach. He opened a bottle to revive the unconscious woman. A few hours later Tom scaled a cliff in search of help. He followed hoof prints and came by chance upon two men from nearby Glenample Station three and a half miles away. In a complete state of exhaustion, he told the men of the tragedy. Tom then returned to the gorge while the two men rode back to the station to get help. By the time they reached Loch Ard Gorge, it was cold and dark. The two shipwreck survivors were taken to Glenample Station to recover. Eva stayed at the station for six weeks before returning to Ireland by steamship. In Melbourne, Tom Pearce received a hero's welcome. He was presented with the first gold medal of the Royal Humane Society of Victoria and a £1000 cheque from the Victorian Government. Concerts were performed to honour the young man's bravery and to raise money for those who lost family in the disaster. Of the 54 crew members and passengers on board, only two survived: the apprentice, Tom Pearce and the young woman passenger, Eva Carmichael, who lost her family in the tragedy. Ten days after the Loch Ard tragedy, salvage rights to the wreck were sold at auction for £2,120. Cargo valued at £3,000 was salvaged and placed on the beach, but most washed back into the sea when another storm developed. The wreck of Loch Ard still lies at the base of Mutton Bird Island. Much of the cargo has now been salvaged and some items were washed up into Loch Ard Gorge. Cargo and artefacts have also been illegally salvaged over many years before protective legislation was introduced in March 1982. One of the most unlikely pieces of cargo to have survived the shipwreck was a Minton majolica peacock- one of only nine in the world. The peacock was destined for the Melbourne 1880 International Exhibition in. It had been well packed, which gave it adequate protection during the violent storm. Today the Minton peacock can be seen at the Flagstaff Hill Maritime Museum in Warrnambool. From Australia's most dramatic shipwreck it has now become Australia's most valuable shipwreck artefact and is one of very few 'objects' on the Victorian State Heritage Register.The shipwreck of the Loch Ard is of significance for Victoria and is registered on the Victorian Heritage Register ( S 417). Flagstaff Hill has a varied collection of artefacts from Loch Ard and its collection is significant for being one of the largest accumulation of artefacts from this notable Victorian shipwreck. The collections object is to also give us a snapshot into history so we can interpret the story of this tragic event. The collection is also archaeologically significant as it represents aspects of Victoria's shipping history that allows us to interpret Victoria's social and historical themes of the time. The collections historically significance is that it is associated unfortunately with the worst and best-known shipwreck in Victoria's history.Ceramic shard, broken piece of pottery with some diagonally carved features. It is possibly a peacock leg section and green foliage. The ceramic piece has remnants of a coloured glaze.flagstaff hill, flagstaff hill maritime museum and village, warrnambool, maritime museum, maritime village, great ocean road, shipwreck coast, ceramic, porcelain, piece, fragment, ceramic bird, loch ard, shipwreck, salvage, recover, 1877, 1878, minton, shard -
 Mission to Seafarers Victoria
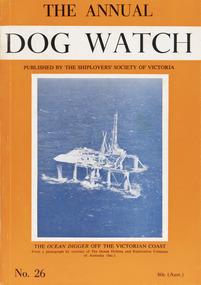
Journal (item) - Periodicals-Annual, Shiplovers' Society of Victoria, The Annual Dog Watch, 1969
This journal provides the reader with glimpses of the adventures and hardships of a seaman's life. Many of the stories are of sailing ships.Contributes to our knowledge of the importance of shipping and places on record those stories of the sea which would otherwise be lost.Contents Foreword - Commodore Michael Parker, C.V.O. - 8 Editorial - S.A.E.S. - 17 An Unusual Cruise Through Bass Strait - T. E. Goldfinch - 23 Reminiscences in Sai - George Oakes - 27 My First Christmas in the Service - Lt.-Com. H. A. Willian, M.B.E., V.R.D., R.A.N.R. (Ret) - 30 Fortune's Wheel - Captain W. E. Eglen - 34 A Very Near Thing - Ralph Ingram - 37 The Time Charter - Captain Ruben Fogelstrom - 49 Ninety Years Under the Sea - J. M. MacKenzie - 53 Many hogs and Three Serpents - Captain C. E. Parkes - 58 Feathered Navigators - Arthur E. Woodley - 60 Human Radar - T. F. Roberts - 65 The Wreck of the Dutch Ship "Vergulde Draeck" - C. Halls - 67 The Port of Portland -- Victoria - - 78 The Barque "Carrazal" - From the papers of the late Captain J. Bull - 81 Pilots (verse) - C. E. Bonwick - 83 Hazards of Sail - A letter from Commodore John Rodgers, U.S.N. - 84 Dhows - C. W. Hawkins - 88 "Full Astern" Without "Stand-by" - S. F. P. Brown - 98 The "Lightning" Passage - More extracts of the Diary of a Passenger - 103 The "Royal Charter" - J. M. Mackie - 114 More on the "Royal Charter" - Dr. H. Cohen. C.B.E. 115 An Echo of Courage - a letter from J. S. Matthews - 117 A Wartime Passage - T. S. Shoesmith - 120 Book Reviews - - 130sailing ships, steamships, shipping, seafaring life, shiplovers' society of victoria, dog watch -
 Flagstaff Hill Maritime Museum and Village
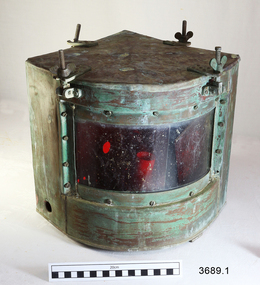
Functional object - Navigation Side Lamp, early 20th century
This pair of navigational lamps or lights was fitted to the vessel S.S. Rowitta when it was renovated to become a display passenger ferry at Flagstaff Hill Maritime Village from 1976-2015. Navigation lamps are used to indicate a vessel’s position and direction of travel to other vessels nearby. This system of coloured lamps is standardised throughout the world for all marine vessels, red is for port and green for starboard, (red is for the boats right hand side). These navigation lamps were not the original fittings for this vessel but had come from a similar vessel of the same era of the early 1900’s. The history of the lamp fittings at this time is unknown. SS ROWITTA: - The 1909 steam ferry, SS Rowitta, was installed as an exhibit at Flagstaff Hill in 1975 and was enjoyed by many visitors for 40 years. Rowitta was a timber steam ferry built in Hobart in 1909 using planks of Huon and Karri wood. She was a favourite of sightseeing passengers along Tasmania’s Tamar and Derwent rivers for 30 years. Rowitta was also known as Tarkarri and Sorrento and had worked as a coastal trading vessel between Devonport and Melbourne, and Melbourne Queenscliff and Sorrento. In 1974 Rowitta was purchased by Flagstaff Hilt to convert into a representation of the Speculant, a historic and locally significant sailing ship listed on the Victorian Heritage Database. (The Speculant was built in Scotland in 1895 and traded timber between the United Kingdom and Russia. Warrnambool’s P J McGennan & Co. then bought the vessel to trade pine timber from New Zealand to Victorian ports and cargo to Melbourne. She was the largest ship registered with Warrnambool as her home port, playing a key role in the early 1900s in the Port of Warrnambool. In 1911, on her way to Melbourne, she was wrecked near Cape Otway. None of the nine crew lost their lives.) The promised funds for converting Rowitta into the Speculant were no longer available, so she was restored back to her original configuration. She represented the importance of coastal traders to transport, trade and communication in Australia times before rail and motor vehicles. Sadly, in 2015 the time had come to demolish the Rowitta due to her excessive deterioration and the high cost of on-going repairs. She had given over 100 years of service and pleasure to those who knew her. These lamps are an historical example of navigational equipment used in the early 20th century, adhering to a navigational standard that is worldwide, and a design similar to what is still being used today. They were used on the display vessel at Flagstaff Hill Maritime Village as an aid to maritime education. The Rowitta represents the importance of coastal traders to transport, trade and communication along the coast of Victoria, between states, and in Australia before rail and motor vehicles. The vessel was an example of a ferry built in the early 20th century that served many different roles over its lifetime of over 100 years. Two side navigation ship's lamps, quarter circle shaped metal boxes with glass window and removable lid. The lid attaches to the box using four brackets, wingnuts and screws that swing down out of the way. The window of double-thickness glass is inserted on the curved side of the box and attached by screws around the frame. The inner glass panel is coloured according to the lamp’s use; port is red and starboard green. The port lamp has a round hole cut into each of the two straight sides and an electrical fitting inside. The starboard lamp also has a hole in each straight side (one with a threaded fitting). Its lid has an additional cross bar on top that has a circular space in the centre, nuts and screws fit through holes in the ends and a folding handle is attached across the centre space. The lamps were once fitted onto the vessel Rowitta. The starboard lamp has an inscription stamped into the metal. Impressed on 3689.2; “STARBOARD PATT 8025” flagstaff hill, warrnambool, flagstaff hill maritime museum, maritime museum, flagstaff hill maritime village, navigation lamp, navigation light, navigation equipment, starboard patt 8025, ship’s fitting, rowitta, tarkarri, speculant, purdon & featherstone of hobart, passenger ferry 1909, vessel, display rowitta, display passenger ferry, sorrento -
 Flagstaff Hill Maritime Museum and Village
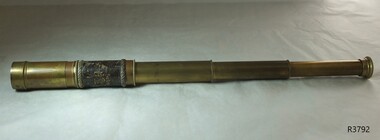
Instrument - Three draw Telescope, 20th century
This telescope was amongst various items collected from a sea dive in Port Phillip Bay. The diver was the caretaker of the Port Lonsdale Lighthouse, who dived on various wrecks in the bay during the 1960's. After the caretaker's death, his son sold off many of the shipwreck artefacts. The telescope was purchased from the caretaker's son in the 1990's by a previous owner of the Marine Shop, Queenscliff, Victoria. Many companies were making scientific instruments in Liverpool. Between 1730 up too today, they manufactured spectroscopes, telescopes, microscopes, barometers, photometers, cameras, ophthalmoscopes, and electrical equipment such as electric lamps. Liverpool was a major centre for the production of scientific items rivaling Glasgow and London from 1850 to 1920. This telescope appears to be of quality manufacture but the origins can only be surmised at based on the gold embossing to the leather surrounding the main brass tube as being associated with Liverpool England. There is no maker or owners mark, so again there is no sure way to determine the year of manufacture or maker. There were many opticians and scientific instrument makers working in and around Liverpool from 1730 through too today. Also the possibility the telescope could have been made outside Liverpool overseas should not be overlooked and may have been made as a souvenir item from Liverpool from the mid to late 20th century. The size and type of telescope is a traditional type that was used for many sporting activities in the mid to late 19th century for deer stalking, bird watching, or used generally. I believe the item dates from sometime around the early to late part of the 20th century as the use of the liver bird mark became popular in 1911. It began appearing on many manufactured items of the period up too today, denoting that these items were made by companies operating in or around Liverpool England. If the item had been made by a notable firm it would have been engraved with the makers name city of origin, or owner as was the accepted practice for these items. The writer has been unable to determine if any specific company had had exclusive use of the liver bird logo as it was widely used and was not copyrighted until the Liverpool football club successfully won a court case giving them the sole rights to the trademark in 2012.The item is also an example of the shipwreck artefacts gathered along the southwest coast of Victoria. It is also a sample of scientific instruments used up to the mid 20th century.Victorian style gentleman's three draw brass telescope with machine milling surrounding the end of each tube and around the objective end. The three tube draw has no split and all three cartridges are held within the main brass tube wrapped in leather with rope bindings at both ends 5 cm in length and beginning 7 cm from the objective end. The last 2.8 cm makes up the remainder of the brass tube which has a sliding brass sunshade. The eyepiece is flat and has a protective slide over the lens aperture. Two relay lenses are missing on the ends of the second and third tube. Gold embossed into the leather an inscription “Trade the Liver Mark” also embossed in gold a depiction of the mythical liver bird, associated with the city seal of Liverpool England. flagstaff hill, flagstaff hill maritime museum and village, warrnambool, maritime museum, maritime village, great ocean road, shipwreck coast, shipwreck artefact, port phillip bay, port lonsdale lighthouse, wreck, 1960’s diver, queenscliff marine shop, liver bird, scientific instrument, telescope, three drawer telescope, liverpool, liver bird trade mark, trade mark -
 Flagstaff Hill Maritime Museum and Village
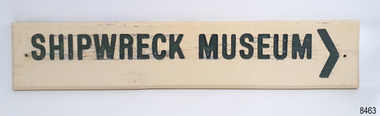
Sign - Shipwreck Museum sign, Flagstaff Hill Historic Park Planning Board, Shipwreck Museum, ca. 1975
This sign is painted on both sides. It was attached to the bluestone wall on the western wing of the Lighthouse Keeper's Quarters, the Assistant Keeper's Quarters, at Flagstaff Hill Maritime Museum and Village for almost 50 years. The Complex was opened to the public on December 11, 1975, and officially opened by Victorian Premier Sir Rupert Hamer on July 8th, 1977. The sign's reverse side reads "Loch Ard Peacock & Museum". The three rooms had displays behind glass showing various ships' fittings, cargo and personal belongings recovered from significant shipwrecks along the southwest coast of Victoria. There was also a display of information about the mysterious Mahogany Ship or Ancient Wreck. The shipwreck artefacts were recovered by local divers in the 1960s and early 1970s. Also on display was the famous Loch Ard Peacock, created in 1873, survived the shipwreck in 1878, was purchased by Flagstaff Hill in 1975 and announced as being on display in The Standard of September 15, 1975. In about 1984 the other side of the sign was painted "SHIPWRECK MUSEUM" and re-displayed on the building. The Loch Ard Peacock was by that time on display in the Entrance building; plans were underway on August 31st 1984 to build a Hall for its unique display. In February 2023 the sign was removed from the building, which was undergoing restoration and preparation for use as a new Temporary Exhibition space. The Loch Ard Peacock continued its journey around the Village; it was moved from the Entrance to the Village's newly completed Public Hal in 1986. It also spent a short time in the Stella Maris Tea Rooms. This was likely around 1998, when the Common School had moved from the Chartroom building to what had been the Public Hall. The Loch Ard Peacock was once again moved in around 2001, this time to be the central attraction and meeting place in the Great Circle Gallery, which opened on December 31st 2002. The sign continued to be displayed on the western wing of the Lighthouse Keeper's Quarters until February 2023. This wing has now been restored and re-fitted to become a facility for short-term exhibitions. A section of the original internal wall frame and wallpaper that couldn’t be kept in the building due to preservation issues have been saved and become sort of the Flagstaff Hill Collection. The sign has guided the visitors of Flagstaff Hill Maritime Museum and Village to the exhibits of artefacts from historic and significant shipwrecks. It has connected the current generations to the people and objects of the past, leading to a better understanding of our Colonial history.Sign, wooden, rectangular, with a hole through each short side. The front and reverse have different painted text. Cream paint for the background colour, green paint for the lettering, and the reverse has a white painted border. The front has an arrow painted on the right-hand side. The sign was used at Flagstaff Hill since its opening.Text on front "SHIPWRECK MUSEUM >" Text on back "LOCH ARD PEACOCK / & MUSEUM"flagstaff hill maritime museum and village, warrnambool, great ocean road, shipwreck coast, sign, building sign, shipwreck museum, loch ard peacock & museum, flagstaff hill history, assistant lighthouse keeper's cottage, assistand lighthouse keeper's quarters, public hall, common school -
 Flagstaff Hill Maritime Museum and Village
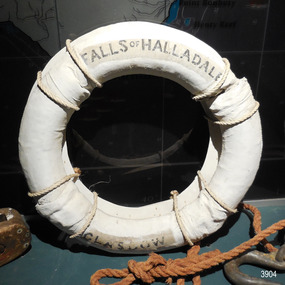
Equipment - Lifebuoy
This lifebuoy is part of the lifesaving equipment from the sailing ship the Falls of Halladale. It is filled with cork and covered with canvas and reinforcing bands. The name of the ship and its origin is printed on the lifebuoy. It has been sealed with several coats of white paint. A lifebuoy, or life-preserver, is used as a buoyancy device to keep a person afloat in the. It is usually connected by a rope to a person in a safe area such a nearby vessel or on shore. The lifebuoy is thrown to a person in distress in the water, allowing the rescuer to pull the person to safety. The lifebuoy is a made from a buoyant material such as cork or rubber and is usually covered with canvas for protection and to make it easy to grip. The first use of life saving devices in recent centuries was by the Nordic people, who used light weight wood or cork blocks to keep afloat. From the early 20th century Kapok fibre was used as a filling for buoys. Light weight balsa wood was used as a filler after WW1. In 1928 Peter Markus invented and patented the first inflatable life-preserver. By WW2 foam was combined with Kapok. Laws were passed over time that has required aeroplanes and water going-vessels to carry life-preservers on board. The Falls of Halladale 1886-1908 The vessel ‘Falls of Halladale’ was a four-masted iron-hulled barque, launched in July 1886, by Russell & Co of Greenock, Scotland and owned by the Glasgow Falls Line, which named its ships after Scottish waterfalls. The ship was built for long distance cargo trade. The Falls of Halladale was one of the last windjammers that sailed the Trade Route. The ship was on its way from New York to Melbourne via the Cape of Good Hope when, after 102 days at sea, its journey suddenly ended. During the night of November 14, 1908, in calm seas with some coastal fog, an ocean swell raised the vessel up then let it down on a submerged reef wrecked at Curdies Inlet, Peterborough. The ship was stranded and the Port Campbell Rocket Crew were sent for, to perform a rescue. However by the time they arrived, all on board had already travelled by lifeboat to the nearby beach at the Bay of Islands. The sight of the slowly disintegrating ship on the rocks attracted many sightseers. This lifebuoy is significant for its association with the famous ship the Falls of Halladale. It is significant for its association with lifesaving equipment used on board vessels in the early 20th century. The Falls of Halladale shipwreck is listed on the Victorian Heritage Register (No. S255). She was one of the last ships to sail the Trade Routes. She is one of the first vessels to have fore and aft lifting bridges. She is an example of the remains of an International Cargo Ship and also represents aspects of Victoria’s shipping industry. The wreck is protected as a Historic Shipwreck under the Commonwealth Historic Shipwrecks Act (1976).Lifebuoy; round white canvas ring, joined with hand stitching. Stencil with inscription is printed in black on first and third quadrant. The canvas has been repainted in white but avoiding the inscription in the lifebuoy. A hanging board for display is attached with white rope. Lifesaving equipment from the Falls of Halladale.“FALLS OF HALLADALE” “GLASGOW”flagstaff hill, warrnambool, shipwrecked coast, flagstaff hill maritime museum, maritime museum, shipwreck coast, flagstaff hill maritime village, great ocean road, life rings, lifebuoy, safety ring, life-saving buoy, ring buoy, life preserver, personal floating device, floatation device, safety equipment, falls of halladale, glasgow falls line, rocket crew, lifeboat, peterborough -
 Kew Historical Society Inc
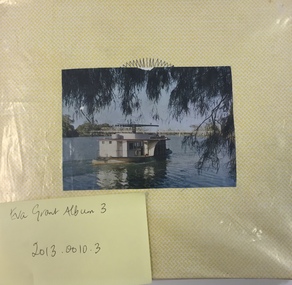
Album - Photographs of heritage sites in Victoria, Eva Grant, 1964-66
Eva Grant was a member of the Kew Historical Society. Three albums in the collection were created by her, this one, the third created between 1964 and 1966. They were donated to the Society by her daughter in 2010. Each of the albums includes photographs and newspaper cuttings collected on her travels to historic places in South East Australia in the 1950s and 1960s. Particular structures photographed in this album include: Barnawatha (Vic.) - The Hermitage | Beveridge (Vic.) - Stone cottage where Ned Kelly was born. | Brighton - St Andrew’s Church graveyard. | Chiltern (Vic.) - lake view [missing] | Cowes (Vic.) - ‘Broadwater’ [originally home of Henty-Wilson family], demolished 1965; Bell of the Speke wreck; Edward’s tree. | Euroa (Vic.) - Habbies Howe | Fairfield (Vic.) - Dight’s Falls; John Dight. | Fernshawe (Vic.) - Queen Mary tree. | Jolimont (Vic.) - Old railway tunnel linking the first Government House (1964); Sign identifying location of first Government House. | Kew (Vic.) - Cairn at Dight’s Falls; Canoe tree, Bowyer Avenue. | Kyneton - De Grave’s Flour Mill - “C”. | Maldon (Vic.) - Chinese oven; Macarthur’s House; Maldon’s oldest resident; Chinese graves x 2; [Beehive Chimney]. | Marysville (Vic.) - Centenary cairn | Mitcham (Vic.), Mud brick house x 2, Deep Creek Road. | Melbourne (Vic.) - St Paul’s Cathedral [renovation] (1964); Wreckers at Damman’s Corner, cnr Bourke and Collins Streets (1964); Princess Gate project x 2 (1964); Colonial Storekeeper’s building on cnr King and Bourke Streets (1966); Early observatory 1861-3; the Honey Memorial. | Mt Oberon (Vic.) - [obsolete] radio telephone dish. | Seymour (Vic.) - Habres (sic) House x 3.| Swan Hill (Vic.) - Major Mitchell’s Cairn (12/1964); Headstone of Andrew Beverage AM (12/1964). | Templestowe (Vic.) - Finn’s Hotel. | Thornton (Vic.) - Eildon Station. | Werribee (Vic.) - Chirnside Memorial [Presbyterian] Church; gaslight beside church | Location unknown, but possibly Swan Hill - Brick house; Wooden bullock dray. | Location unknown - Headstone of John Furlonge 1835.Important record of significant heritage properties in Victoria, many of which have since been demolished.30 page spirex bound drawing book including photographs and newspaper articles of historic buildings in Victoria. The front cover has a picture of a steam boat. The cover is encased in plastic. A number items in the album are annotated with written commentary by Eva Grant who compiled the album. Annotations and transcriptions by Eva Grant on most imageseva grant, photograph albums, heritage places - victoria -
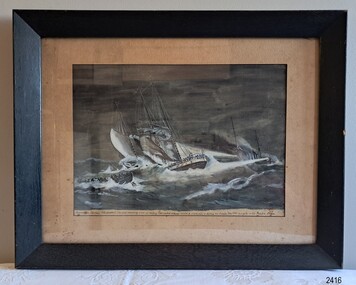 Flagstaff Hill Maritime Museum and Village
Print - Lithograph, sea rescue, R.N. Duffield, Australian cruiser “MELBOURNE” (Tons 5600) rescuing crew of sinking four-masted schooner “HELEN B. STERLING” of Halifax NS Canada, Tons 1343 in a gale in the Pacific Ocean, 19-11-1924
This framed lithograph print in watercolour and gouache was produced on November 19th, 1924, by 20th-century marine artist, Mr R.N. Duffield. It depicts the event of a sea rescue that took place two years earlier. The framer was A.L. Frith of Footscray, Melbourne, who actively advertised from 1933 to 1935. The now disbanded Shiplovers' Society of Victoria (1930-2018) donated the print, and it seems likely that this print was framed for that organisation. This graphic image shows the conditions in which the rescue from the wrecked Helen B. Sterling happened. Captain George Harris was master of the American-owned, four-masted windjammer. His wife Edith and their ten-year-old son Leslie were on board, along with a crew of fifteen seamen. The ship set off from Newcastle, NSW, on January 5th, 1922, loaded with a cargo of coal to deliver to the Society Islands and on to San Francisco. Young Leslie later wrote a lively school composition for his teacher about his experiences on board the Helen B Sterling. He tells of a fire that broke out the day after they departed and burned a hole in a beam. Then another troublesome time on the 9th, when a strong gale blew a sail off the ship. Finally, he tells of the highlight of his voyage when, on the 18th January, the ship was right in the path of a strong cyclone, which broke the mainmast. Huge waves crashed over both sides of the deck, meeting in the middle, and the ship began to sink. The rescue from the wreck was an exciting time for the young boy, and even more so when one of his cats survived after being carefully wrapped in a pillowcase and thrown down from the ship for the boy. Reporters later wrote about Leslie’s comments, “... what had grieved him most was the thought that he might never see his two little sisters again”. Captain Harris said in a published statement, “… the gale was the worst he had met in his 12 years’ experience at sea. All went well for the first week. We then encountered a strong blow from the south-east. We tried the gasoline pump, but the engine broke down, and we had to do the pumping by hand. We at once shortened sail, but the sea increased in fury to such an extent that men were washed from the pumps. I was below at 5:30 on Sunday morning [January 22nd, 1922] when the main mast went over the side, … I at once sent out SOS signals, and got word that HMAS Melbourne was coming to our assistance. I had made a mistake with regard to our position, but did not know it until 11:30 o’clock, when I sent out the correct location. This was picked up by the Melbourne and I received the following reply: “We will reach you about 2 am. Keep a good heart. The Melbourne will do all she can.” Our ship was practically awash when we were taken off.” (Ref: the ‘Helen B. Sterling Disaster’, Maitland Weekly Mercury, NSW, 4-2-1922.) Officers from the Royal Australian Navy, Captain Henry J Feakes (later Rear-Admiral) and Commander Wilfrid Ward Hunt, were on board the light cruiser, HMAS Melbourne (1913-1928), when it left Sydney for New Zealand. After the SOS was received, the ship sped at full steam towards the sinking Helen B. Sterling. They found the vessel at about midnight and shone bright search lights on the distressed ship to illuminate the desperate scene. The Melbourne was unable to move close to the schooner, so sixteen seamen, including Commander Hunt, volunteered to man the Melbourne’s lifesaving 12-oared cutter. They rowed the sea boat with great urgency towards the victims of the sinking ship, keen to save lives no matter what the conditions. When the cutter was close to the Sterling, a line was secured between the Sterling and the cutter. The weary, waterlogged and anxious men on board could be rescued, one at a time, in the breeches buoy equipment, which looked like canvas shorts with a lifesaving ring in the waistband. The victims were hauled along the line and pulled aboard by many willing hands. All eighteen crew and passengers were saved, including Captain Harris and his family. The seamen of the Melbourne received a heroes’ welcome when they arrived in New Zealand. The grateful survivors were taken to Auckland, where they received the care and comfort they needed. Melbourne’s Lord Mayor, Cr. Swanston, on behalf of the citizens of Melbourne, formally recognised the heroic rescue efforts of the seamen of the HMAS Melbourne on March 2nd, 1922, at a special presentation. Two large flags, a White Ensign and an Australian “Jack" Flag, were presented to the Captain of HMAS Melbourne, and souvenirs were awarded to the sea boat’s crew and its Commander, Wilfred Ward Hunt. Commander Hunt was also presented with an original watercolour depicting the heroic rescue from the wreck of the Helen B. Sterling, painted just after the event by renowned marine artist Arthur V Gregory (1867-1957), and he received a silver cigarette case bearing the City’s coat of arms and the inscription, "To Commander Ward Hunt from the Citizens of Melbourne as a memento of the rescue of the crew of Helen B. Stirling by H.M.A.S. Melbourne, on 23.1.22". Both the painting and the cigarette case are now treasured items inherited by his grandson; a reminder of “… a very fine naval gentleman who believed in leading by example." R.N. DUFFIELD: - The Lithograph print in our collection by 20th-century English artist R.N. Duffield is dated Nov. 19, 1924. It is very similar to, and possibly created from, the original A V Gregory watercolour presented to Commander Hunt and dated 1922. Mr R.N. Duffield has art works in the Yarmouth Museums, Norfolk Museums Collection; “Orient Liner Otranto …,” and "Convoy of six ships at sea", both painted in watercolour and gouache during the 1940s. Some of his other works, also painted in watercolour and gouache, have been advertised for sale on Internet sites. Some details differ between the original A.V. Gregory and this Lithograph Print: - -the words on the bow on the original watercolour are “Helen B. Sterling, Blain”, which is in Washington, USA, where the Sterling Shipping Company was registered from around 1919; the words on the print are “Helen B. Sterling, Halifax, N S”, for Nova Scotia, Canada, which is the hometown of Sterling Shipping Company founder’s wife, Helen B Sterling. -The watercolour is coloured and has fine details; the print is monochrome - The A V Gregory signed the watercolour in 1922, on the lower left; the print is signed with the Lithographer’s name on the lower right; “R N Duffield, Nov. 19. 1924” ARTHUR VICTOR GREGORY (1867-1957): - A.V. Gregory is a renowned marine artist who worked in watercolour and gouache. He painted actively between 1899 and 1932, creating over 3o0 works. South Melbourne, Victoria, was where he lived and worked. This Lithograph print is significant in that it depicts the rescuing of the passengers and crew of the schooner “Helen B Stirling”. At the time this was a significant event that made most Australian and New Zealand papers because of the involvement of the Australian cruiser “Melbourne”. The image demonstrates the perilous conditions experienced by seafarers. It includes an example of the line and breeches buoy method used to save lives at sea from the 1860s and into the 20th century. It reflects a time in our history when sail and steam ships cruised the world’s seas together, the former trading with a cargo of coal from Newcastle, the latter defending our country in World War I. The print is part of Flagstaff Hill Maritime Museum’s Collection of maritime artworks that depict famous events, vessels and locations, showing the evolution of sea craft, and aiding the interpretation of our maritime history. The Lithograph print is behind glass in a black painted timber frame and mounted under a cream matte. The vivid image depicts a sea rescue in progress. The night scene is illuminated by a light beaming from a steamship, the Cruiser HMAS Melbourne. It reveals figures on the deck of a sinking sailing ship, the schooner Helen B. Sterling, as foaming waves roll across it. The stricken ship has a broken main mast, and a sail has been detached. A small figure is floating in the choppy sea, secured in a breeches buoy that is attached to a rescue line between a lifesaving cutter and the sailing ship. The crewmen in the cutter are ready to haul the shipwrecked victim aboard, while the figures on the foundering ‘Sterling’ watch them. The print’s paper-covered wooden backboard is attached to the frame with small tacks. A metal hanging wire is secured to two dissimilar eyelet screws. Inscriptions include text on the bow of the sinking vessel, a handwritten title below the picture, and a handwritten name in the print’s lower right corner. On the reverse are two oval, black ink stamps and a round cream label with printed text. The hand-painted print was reproduced from a lithograph, signed in the lower right, by R.N. Duffield of England, on November 19th, 1924. A Frith of Footscray, Melbourne framed it. Painted on the ship’s bow: “HELEN B. STERLING / HALIFAX N S” [Nova Scotia, Canada] Handwritten below the print: “AUSTRALIAN CRUISER “MEMBOURNE” (Tons 5600) rescuing crew of sinking four-masted schooner “HELEN B. STERLING” of Halifax NS Canada, Tons 1343 in a gale in the Pacific Ocean.” Handwritten on lower right: “R.N. DUFFIELD / Nov. 19. 1924” (underlined) On paper label: “Phone: / Footscray 398 [some of the text has torn off] / “A. FRITH / PICTURE FRAMER / Manufacturer / 17 Paisley Street / Footscray.“ On both oval stamps: “SHIPLOVERS SOCIETY OF VICTORIA / LIBRARY” flagstaff hill, flagstaff hill maritime museum and village, warrnambool, maritime museum, maritime village, great ocean road, shipwreck coast, lithograph, lithograph print, reproduction print, helen b. sterling, the sterling, american owned schooner, halifax, halifax n s, halifax nova scotia, nova scotia, halifax n s canada, schooner, windjammer, sailing ship, four-masted ship, captain george harris, george harris, edith harris, leslie harris, sterling shipping line, hmas melbourne, hmas melbourne (1), cruiser hmas melbourne, the melbourne, australian cruiser, captain henry j feakes, commander wilfred ward hunt, sinking ship, shipwreck, sea rescue, gale, cyclone, 1922 rescue, shipwreck rescue, breeches buoy, line rescue, rescue line, lifesaving, cutter, cutter melbourne, sea boat, lifesaving crew, 12-oar cutter, shipwreck victim, r.n. duffield, marine artist, nov. 19. 1924, 20th century artist, a frith, footscray picture framer, shiplovers’ society of victoria, shiplovers’ society library, watercolour, a v gregory, arthur victor gregory, melbourne artist, newcastle coal, newcastle nsw, society islands, san fracisco, aukland new zealand, school composition, ship’s cat, sos signal, lord mayor cr. swanston, heroes, cigarette case -
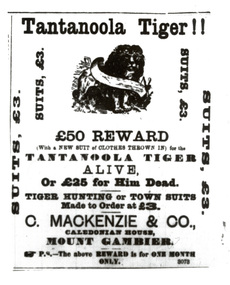 Federation University Historical Collection
Newspaper - Newsclippings, Tantanoola Tiger Newsclippings
In the early 1880s a small circus travelled between Millicent and Mt Gambier, South Australia. After camping overnight they discovered their Bengal Tiger at escaped and disappeared into dense scrub. After searching for hours they continued to Mt Gambier and reported the loss of the tiger to police. Police and local volunteers continued the search for the escaped tiger, but no sighting were made. In the early 1890s sheep in the Tantanoola area started to disappear with the still unsighted tiger being blamed. In 1893 reports of an unusual animal in the Tantanoola area started, with many describing the animal as the missing tiger, or a large dog. One eye witness claimed to have seen the animal carrying a full grown sheep in its mouth. The reports grew in number and exaggeration with sightings from Robe to Bendigo. In the Tantanoola district children were escorted with shotgun guards to and from school, with many homes keeping guns at the ready in case the tiger suddenly appeared. In August 1895 Tom Donovan shot the "Tantanoola Tiger" on Mt Salt Station, around 20 kms south of Tantanoola. The corpse was taken to Marks, a Mount Gambier taxidermist, at which time the animal was identified as an Assyrian or Northern Russian Wolf. Donovan displayed the animal far and wide. Despite the animal's death sheep continued to disappear from properties in the district over many years. It was of particular concern between 1909 and 1910. At that time Herbert Allchurch, an Adelaide detective, was sent to solve the mystery. A few days after his arrival Allchruch went to the front bar of the Tiger Hotel and arrested local rabbit shooter and trapper, Charlie Edmunson, with sheep stealing. After his 1911 trial Edmunson admitted to stealing over 4,000 sheep during the previous 20 years. He was gaoled for six years with hard-labour in January 1911. Edmunson had been selling the skins of the stolen sheep, leaving the carcusses to rot. He earned around five pounds per week during the 1990s and early 1900s, a time when the economy was depressed. It is not known had the animal known as the Tantanoola Tiger came to Australia, but it is believed it survived one of three ships wrecked of the coast between 1890 and 1893, making it to shore along with some of the shipwrecked passengers. (From a card produced by the Tantanoola Tiger Hotel, where the 'tiger' is on display.)A collection of Newsclippings from 1892 - 1895 photocopied onto A4 white paper. The clippings relate to the Tantanoola Tiger. Clippings include: * Border Watch 1892 - Tantanoola Tiger Reward * Sydney Morning Herald, 04/07/1857 - Animals in Zoological Gardens, including a number of large cats. * Claims the Tantanoola Tiger was an escaped circus animal (ie The Advertiser [Adelaide], 31 October 1893) * Search parties for the Tantanoola Tiger (ie Barrier Miner 19/05/1893; Barrier Miner 03/1081893) * Thylacine claim (ie Morning Bulletin [Rockhampton] 11/03/1895 * Afghan and Indian Hunters (ie Barrier Miner 07/02/1895) * Sighting by John Bird of Scarsdale - Wanganui Herald 15/12/1900. " ... Mr Bird was travelling on foot along a lonely track through very dense scrub, when he was stricken with amazement to see a full-grown tiger standing in a small dam about 30ft away, and holding in its jaws the carcass of a newly-killed lamb. He remained long enough to thoroughly take in the animals appearance, and then beat a hasty retreat unmolested. His description of the animal is as follows: A tawny-coloured creature, with a dirty mottled skin; in general appearance like an immense cat; body 4ft long, and of a uniform thickness from shoulder to hindquarters; in bulk equal to a very large pig. The legs were hidden in the water. A similar animal is reported to gave been seen near Canico, some miles away. ..." * Victorian country sightings # Bullarto - Argus 06/05/1905 # Dean - Launceston Examiner 28/01/1895 # Bendigo - Hobart Mercury 15/03/1895 # Ballan - Launceston Examiner 03/08/1895 * South Australian register 17/06/1885 " There is a tiger or panther wandering at large in Victoria, according to a rumour. It has taken the place of the Bunyip, whom hundreds have seen but none captured. This tiger is supposed to have broken loose from a travelling menagerie in the North-eastern district. At the beginning we should like it roved that such an escape ever took place. Perhaps the showmen were afraid to report the fact to the police; at any rate they did not do so. The first story about the tiger being seen came from the neighborhood of Wangaratta, 60 miles from the place where it is said to have commenced business on its own account. He was followed, but vanished among trees. Next we hear of a strange animal, bigger than a St Bernard's dog, but shorter legged, having appeared at least 150 miles from Wangaratta. Between Lilydale and Wangaratta there is a dividing range 2,000 feet high in the lowest past, besides several large rivers. An finally, the tiger - changed from a panther - is reported as having been seen within the suburban circle, about 8 miles from the general Post Office. They show you footprints, and point to the carcasses of mangled cows and calves. Casts have been taken of the footprints for examination by scientific men, who pronounce them doglike, and yet not doglike, but panther-like, which gives a nervous turn, for the panther may take up killing children and grown-up people. One tiger will not account for so many apparitions. There must have been a general strike among the menageries, and a breaking-up companies. ... * Research article by Philip A. Clarke "Indigenous Spirit and Ghost Folklore of 'Settled' Australia. australian animal folklore collection, tantanoola tiger, tom donovan, herbert allchurch, charles edmunson, sheep, charlie edmunson, mythical, myth, folklore -
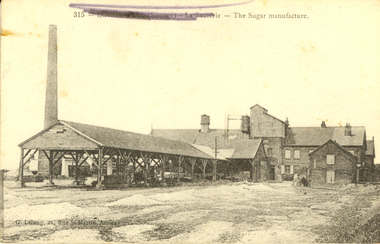 Federation University Historical Collection
Postcard, G. Lelong, The Sugar Manufacture, Somme, France, c1917, c1917
This postcard was sent from France during World War One WW1 to Violet Holmes [mother and aunty of other WW1 soldiers], by the son of a neighbouring Ascot Tourello District Family, the Wrigley Family. Violet inherited "Sauchieburn" an Ascot property on the death of her husband William Holmes in 1914. On her death this property was to be left to their 4 children and administered by a relative till the youngest child turned 27. As young boys, Violet's husband William, and his brother Henry, lived with their Aunt Catherine Coghill and Uncle William Coghill at ‘Sauchieburn’ Ascot. The Coghills had no children of their own. He and his brother Edward started a stock and station business at Clunes. Henry and Violet Holmes subsequently inherited "Sauchieburn" from Catherine (nee Holmes) and William Coghill, direct descendants of the Coghills Creek, Ascot, Tourello pioneer settler Captain William Coghill [Jane Dyer, May 2024] Catherine and her brother Edward Carter Holmes drowned at sea.This is an extract from the Korumburra Times, Wednesday June 6, 1956: The fated travellers wrecked off N.S.W. ‘On May 29th, 1886 in bright moonlight the Ly-e-Moon, the pride of the Australian coastal fleet, broke her back on the treacherous rocks of Green Cape, off the NSW coast. Eighty souls perished within range of the beacon rays of the lighthouse, including representatives of the earliest families ever to settle in Poowong. The passengers. On the main deck, Mr Edward Holmes, a Poowong grazier and former owner of ‘Wombalano’. He had sold this property with the object of going to Queensland and settling there. The proceeds of sale amounting to 1,200 pounds in gold sovereigns were under lock and key in the Purser's Office. Mr Holmes, although advanced in years, had unformed plans to invest his money in some Queensland enterprise. In the meantime he would visit his married daughter and [his] two sons, who had previously settled in Queensland. With him on board was his widowed sister Mrs Coghill who had also accepted an invitation to go north. News of the shipwreck, means of communication being slow, did not reach Korumburra for nearly a week. By then all hope had been abandoned for the missing. Relations and friends thronged the Melbourne shipping office, but the answer was always the same - All passengers unaccounted for were presumed drowned. Black and white postcard of a sugar refinery in The Somme, France. The name of the town has been scrubbed out in purple pencil by a censor during World War One. The back of the card is written on in pencil,Written on back of card: Dear Violet, received photos and letters and thank you for forwarding same. Are we having lovely spell of weather. This morning is quite warm and pleasant. The photo of you all standing in front of your house is a good one and you all look to be getting enough to eat. Mother looks as if she it getting stronger after her severe illness. Your concert party will be broken up through the Vale girls leaving but you should have no difficulty in finding volunteers to fill the ranks. By all of your letters you are all looking forward to the day we return 9as we are). I wouldn't like to bet too much that we would be home by this time next year [ ? ] by the way fritz is fighting lately he would very much like to get [peace?] I think we will give him all he wants this summer. J. Waller was here last night is looking well. With best wished to you all. I am sincerely. [W.Wrigbee? Wrigley]somme, la suererie, chatham family collection, amiens, france, world war 1, postcard, ly-ee-moon, william coghill junior, ascot victoria, pioneers of ascot, shipwreck -
 Surrey Hills Historical Society Collection
Work on paper - Vertical file, Blogg, John Kendrick
1. ‘The gum tree’ chapter from ‘The art of woodcarving’ by J.K. Blogg (undated) (4 pages). 2. ‘Manufacturers, &c.’, on Blogg family, from ‘The cyclopedia of Victoria’ (undated) (4 pages). 3. ‘A floral carnival’, from Holy Trinity fete booklet, 19.6.1921 (1 page). 4. ‘Holy trinity’ poem by J.K. Blogg 16.7.1921; AND advertisements for Dimmick & Long, and W. De W. Martin (1 page). 5. Surrey Hills Bowls Club notes including J. Blogg’s carvings (various dates) (3 pages). 6. Locations at Surrey Hills of J. Blogg’s work (1 page). 7. ‘Our own trees’ (undated) (3 pages). 8. Back page of operetta ‘The Wreck of the Argosy’, 24.9.1895 (1 page). 9. Papers of J.K. Blogg (1851-1936) (6 pages). 10. John Blogg biography (undated) (1 page). 11. J.K. Blogg – wood carver, SHNN No. 49, Nov. 1990 (1 page). 12. J.K. Blogg notes from Reaburn/Selby discussion (undated) (1 page). 13. J.K. Blogg notes by Dorothy Selby (undated) (1 page). 14. John Blogg : Noted Victorian woodcarver by Marjorie Morgan (undated) (2 pages) AND J.K. Blogg talk by grandson Bruce Blogg 14.3.1990 (1 page). 15. J.K. Blogg notes by Alan Holt (undated) (1 page). 16. Photo of J.K. Blogg (undated) (1 page). 17. ‘Woodcarving greats’ from Country style, 2002 (1 page). 18. Mornington Peninsula Regional Gallery brochure August-October 2007, (2 copies); AND ticket to ‘Drawing with chisels’ exhibition at MPRG 2007 (2 copies); AND invitation to ‘Legacy in sculptured wood’ 18.4.1993 (1 copy). 19. ‘Drawing with chisels’ (MPRG 6 sided booklet 2007) (2 copies). 20. ‘Remembering local legacy’ Progress Leader, 4.5.1993 (1 page). 21. ‘Wattle park in 1920s’, snake in Fenwick’s paddock (undated) (1 page). -
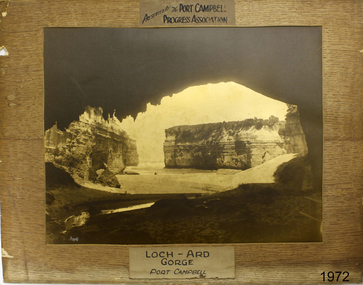 Flagstaff Hill Maritime Museum and Village
Photograph - Coastal Scene, Foyle Photographic Studio, Loch Ard Gorge Port Campbell, 1889-1919
The photograph shows the popular tourist attraction, Loch Ard Gorge, which is located along the Great Ocean Road in Victoria, near Port Campbell. The gorge is named after the famous sailing ship, the LOCH ARD, that was wrecked there in 1878. Only two of the 54 passengers and crew survived. FOYLE “Foyle” written on the photograph is the name of Foyle’s Photographic studio. At the time of the photograph, the studio was owned by both Charles and Lilian Foyle (sometimes known as Lillian or Lily), either of whom could have taken this photograph. They also worked together at a later date on the photographs, sketches and paintings of the famous and historical Pioneers’ Honour Board, which is currently on view in the Warrnambool Library. Foyles Photography was the studio of James Charles Foyle. He owned “Foyle’s Photo Card Studios” in Liebig St, Warrnambool, which operated between 1889 – 1919. A letter to the editor (by Mr Edward Vidler) in the Melbourne Argus, 3rd August 1907, mentions that in that year Warrnambool would celebrate the 60th anniversary of its proclamation as a town, and that talented local artist Miss Lily Foyle would paint 200 portraits in watercolour of the pioneers who settled in the district prior to 1860. The Pioneer Honour Board can still be seen on display in the Warrnambool Library. In the Warrnambool Standard, Dec. 1917, “Mr Foyle’s studio was awarded the contract to decorate rail cars on newly opened Trans-Continental railway, assisted by his sister, Miss Findlay.” HISTORY OF THE LOCH ARD The LOCH ARD belonged to the famous Loch Line which sailed many ships from England to Australia. Built-in Glasgow by Barclay, Curdle and Co. in 1873, the LOCH ARD was a three-masted square-rigged iron sailing ship. The ship measured 262ft 7" (79.87m) in length, 38ft (11.58m) in width, 23ft (7m) in depth and had a gross tonnage of 1693 tons. The LOCH ARD's main mast measured a massive 150ft (45.7m) in height. LOCH ARD made three trips to Australia and one trip to Calcutta before its final voyage. LOCH ARD left England on March 2, 1878, under the command of Captain Gibbs, a newly married, 29-year-old. She was bound for Melbourne with a crew of 37, plus 17 passengers and a load of cargo. The general cargo reflected the affluence of Melbourne at the time. Onboard were straw hats, umbrella, perfumes, clay pipes, pianos, clocks, confectionary, linen and candles, as well as a heavier load of railway irons, cement, lead and copper. There were items included that intended for display in the Melbourne International Exhibition in 1880. The voyage to Port Phillip was long but uneventful. At 3 am on June 1, 1878, Captain Gibbs was expecting to see land and the passengers were becoming excited as they prepared to view their new homeland in the early morning. But LOCH ARD was running into a fog which greatly reduced visibility. Captain Gibbs was becoming anxious as there was no sign of land or the Cape Otway lighthouse. At 4 am the fog lifted. A man aloft announced that he could see breakers. The sheer cliffs of Victoria's west coast came into view, and Captain Gibbs realised that the ship was much closer to them than expected. He ordered as much sail to be set as time would permit and then attempted to steer the vessel out to sea. On coming head-on into the wind, the ship lost momentum, the sails fell limp and LOCH ARD's bow swung back. Gibbs then ordered the anchors to be released in an attempt to hold its position. The anchors sank some 50 fathoms - but did not hold. By this time LOCH ARD was among the breakers and the tall cliffs of Mutton Bird Island rose behind the ship. Just half a mile from the coast, the ship's bow was suddenly pulled around by the anchor. The captain tried to tack out to sea, but the ship struck a reef at the base of Mutton Bird Island, near Port Campbell. Waves broke over the ship and the top deck was loosened from the hull. The masts and rigging came crashing down knocking passengers and crew overboard. When a lifeboat was finally launched, it crashed into the side of LOCH ARD and capsized. Tom Pearce, who had launched the boat, managed to cling to its overturned hull and shelter beneath it. He drifted out to sea and then on the flood tide came into what is now known as LOCH ARD Gorge. He swam to shore, bruised and dazed, and found a cave in which to shelter. Some of the crew stayed below deck to shelter from the falling rigging but drowned when the ship slipped off the reef into deeper water. Eva Carmichael had raced onto the deck to find out what was happening only to be confronted by towering cliffs looming above the stricken ship. In all the chaos, Captain Gibbs grabbed Eva and said, "If you are saved Eva, let my dear wife know that I died like a sailor". That was the last Eva Carmichael saw of the captain. She was swept off the ship by a huge wave. Eva saw Tom Pearce on a small rocky beach and yelled to attract his attention. He dived in and swam to the exhausted woman and dragged her to shore. He took her to the cave and broke and opened the case of brandy, which had washed up on the beach. He opened a bottle to revive the unconscious woman. A few hours later Tom scaled a cliff in search of help. He followed hoof prints and came by chance upon two men from nearby Glenample Station three and a half miles away. In a state of exhaustion, he told the men of the tragedy. Tom returned to the gorge while the two men rode back to the station to get help. By the time they reached LOCH ARD Gorge, it was cold and dark. The two shipwreck survivors were taken to Glenample Station to recover. Eva stayed at the station for six weeks before returning to Ireland, this time by steamship. In Melbourne, Tom Pearce received a hero's welcome. He was presented with the first gold medal of the Royal Humane Society of Victoria and a £1000 cheque from the Victorian Government. Concerts were performed to honour the young man's bravery and to raise money for those who lost family in the LOCH ARD disaster. Of the 54 crew members and passengers on board, only two survived: the apprentice, Tom Pearce and the young woman passenger, Eva Carmichael, who lost all of her family in the tragedy. Ten days after the LOCH ARD tragedy, salvage rights to the wreck were sold at auction for £2,120. Cargo valued at £3,000 was salvaged and placed on the beach, but most washed back into the sea when another storm developed. The wreck of LOCH ARD still lies at the base of Mutton Bird Island. Much of the cargo has now been salvaged, and some of it was washed up into what is now known as LOCH ARD Gorge. Cargo and artefacts have also been illegally salvaged over many years before protective legislation was introduced. One of the most unlikely pieces of cargo to have survived the shipwreck was a Minton porcelain peacock - one of only nine in the world. The peacock was destined for the Melbourne International Exhibition in 1880. It had been well packed, which gave it adequate protection during the violent storm. Today, the Minton peacock can be seen at the Flagstaff Hill Maritime Museum in Warrnambool. From Australia's most dramatic shipwreck it has now become Australia's most valuable shipwreck artefact and is one of very few 'objects' on the Victorian State Heritage Register.Flagstaff Hill’s collection of artefacts from LOCH ARD is significant for being one of the largest collections of artefacts from this shipwreck in Victoria. It is significant for its association with the shipwreck, which is on the Victorian Heritage Register (VHR S417). The collection is significant because of the relationship between the objects, as together they have a high potential to interpret the story of the LOCH ARD. The LOCH ARD collection is archaeologically significant as the remains of a large international passenger and cargo ship. The LOCH ARD collection is historically significant for representing aspects of Victoria’s shipping history and its potential to interpret sub-theme 1.5 of Victoria’s Framework of Historical Themes (living with natural processes). The collection is also historically significant for its association with the LOCH ARD, which was one of the worst and best-known shipwrecks in Victoria’s history. Foyle's photographs date from the late 19th century to the early 20th century, representing a time of growth in the Warrnambool district and a time when the still relatively new technology of photography was more available to the community.Photograph of Loch Ard Gorge. This sepia coloured rectangular photograph is mounted on a brown cardboard backing that has a wood grain pattern. The photograph has an inscription above it, below it, and in the bottom left corner. It was made for the purpose of a presentation by the Port Campbell Progress Association. Printed above the photograph "PRESENTED BY THE PORT CAMPBELL / PROGRESS ASSOCIATION". Printed below the photograph "LOCH ARD GORGE / PORT CAMPBELL". Hand written on bottom left corner "Foyle". flagstaff hill, warrnambool, shipwrecked coast, flagstaff hill maritime museum, maritime museum, shipwreck coast, flagstaff hill maritime village, great ocean road, loch line, loch ard, captain gibbs, eva carmichael, tom pearce, glenample station, mutton bird island, loch ard gorge, photograph, port campbell, port campbell progress association, foyle photograph, foyle photographic studio warrnambool, warrnambool photo studio -
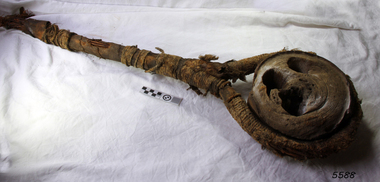 Flagstaff Hill Maritime Museum and Village
Deadeye, circa 1873
This example of a sailing ship’s ‘dead-eye’ is from the wreck of the LOCH ARD, which sank near Port Campbell in 1878. The vessel was an iron hulled clipper ship constructed for the Loch Line in 1873. It was part of a fleet of similar merchant ships owned by that company, which specialised in bringing passengers and goods from London via the Great Circle route to Melbourne, and returning to Britain via Cape Horn with the colony’s wool clip. Deadeyes were a common feature of sailing ship technology in the nineteenth century. They were a simple, cheap, and hard-wearing device that, in conjunction with another deadeye, provided an effective means of levering, or tightening, attached ropes and stays. Lower deadeyes were fixed to the sides of the ship by an encircling metal collar (inset in a flattish groove chiselled around the outer circumference of the disc), which was bolted to iron bars attached to the hull (called chain-plates). Upper deadeyes were looped by a strong hemp or wire rope (inset in a rounded groove carved around the outer circumference of the disc), which was joined to the bottom ends of the rigging which reached up to secure the masts into position (called shrouds or stays). Connecting a Lower deadeye to its corresponding Upper deadeye was a rope (called a lanyard) which looped up and down through the three “eyes” of each disc, to form a pulley system. The hitching of the two deadeyes with a looped lanyard provided the means of tightening, or loosening, the tension on the mast rigging ― essentially by pulling against the chain-plates bolted to the outside of the hull. It was a procedure that could be performed by sailors at sea and in emergencies. For example, after a gale the stays may have stretched and the masts worked loose, requiring retightening. Or, in the extreme circumstance of shipwreck, the lanyards might need to be released on the weather side, so that the masts fall away from the stricken vessel. HISTORY OF THE LOCH ARD The LOCH ARD belonged to the famous Loch Line which sailed many ships from England to Australia. Built in Glasgow by Barclay, Curdle and Co. in 1873, the LOCH ARD was a three-masted square rigged iron sailing ship. The ship measured 262ft 7" (79.87m) in length, 38ft (11.58m) in width, 23ft (7m) in depth and had a gross tonnage of 1693 tons. The LOCH ARD's main mast measured a massive 150ft (45.7m) in height. LOCH ARD made three trips to Australia and one trip to Calcutta before its final voyage. LOCH ARD left England on March 2, 1878, under the command of Captain Gibbs, a newly married, 29 year old. She was bound for Melbourne with a crew of 37, plus 17 passengers and a load of cargo. The general cargo reflected the affluence of Melbourne at the time. On board were straw hats, umbrella, perfumes, clay pipes, pianos, clocks, confectionary, linen and candles, as well as a heavier load of railway irons, cement, lead and copper. There were items included that intended for display in the Melbourne International Exhibition in 1880. The voyage to Port Phillip was long but uneventful. At 3am on June 1, 1878, Captain Gibbs was expecting to see land and the passengers were becoming excited as they prepared to view their new homeland in the early morning. But LOCH ARD was running into a fog which greatly reduced visibility. Captain Gibbs was becoming anxious as there was no sign of land or the Cape Otway lighthouse. At 4am the fog lifted. A man aloft announced that he could see breakers. The sheer cliffs of Victoria's west coast came into view, and Captain Gibbs realised that the ship was much closer to them than expected. He ordered as much sail to be set as time would permit and then attempted to steer the vessel out to sea. On coming head on into the wind, the ship lost momentum, the sails fell limp and LOCH ARD's bow swung back. Gibbs then ordered the anchors to be released in an attempt to hold its position. The anchors sank some 50 fathoms - but did not hold. By this time LOCH ARD was among the breakers and the tall cliffs of Mutton Bird Island rose behind the ship. Just half a mile from the coast, the ship's bow was suddenly pulled around by the anchor. The captain tried to tack out to sea, but the ship struck a reef at the base of Mutton Bird Island, near Port Campbell. Waves broke over the ship and the top deck was loosened from the hull. The masts and rigging came crashing down knocking passengers and crew overboard. When a lifeboat was finally launched, it crashed into the side of LOCH ARD and capsized. Tom Pearce, who had launched the boat, managed to cling to its overturned hull and shelter beneath it. He drifted out to sea and then on the flood tide came into what is now known as LOCH ARD Gorge. He swam to shore, bruised and dazed, and found a cave in which to shelter. Some of the crew stayed below deck to shelter from the falling rigging but drowned when the ship slipped off the reef into deeper water. Eva Carmichael had raced onto deck to find out what was happening only to be confronted by towering cliffs looming above the stricken ship. In all the chaos, Captain Gibbs grabbed Eva and said, "If you are saved Eva, let my dear wife know that I died like a sailor". That was the last Eva Carmichael saw of the captain. She was swept off the ship by a huge wave. Eva saw Tom Pearce on a small rocky beach and yelled to attract his attention. He dived in and swam to the exhausted woman and dragged her to shore. He took her to the cave and broke open case of brandy which had washed up on the beach. He opened a bottle to revive the unconscious woman. A few hours later Tom scaled a cliff in search of help. He followed hoof prints and came by chance upon two men from nearby Glenample Station three and a half miles away. In a state of exhaustion, he told the men of the tragedy. Tom returned to the gorge while the two men rode back to the station to get help. By the time they reached LOCH ARD Gorge, it was cold and dark. The two shipwreck survivors were taken to Glenample Station to recover. Eva stayed at the station for six weeks before returning to Ireland, this time by steamship. In Melbourne, Tom Pearce received a hero's welcome. He was presented with the first gold medal of the Royal Humane Society of Victoria and a £1000 cheque from the Victorian Government. Concerts were performed to honour the young man's bravery and to raise money for those who lost family in the LOCH ARD disaster. Of the 54 crew members and passengers on board, only two survived: the apprentice, Tom Pearce and the young woman passenger, Eva Carmichael, who lost all of her family in the tragedy. Ten days after the LOCH ARD tragedy, salvage rights to the wreck were sold at auction for £2,120. Cargo valued at £3,000 was salvaged and placed on the beach, but most washed back into the sea when another storm developed. The wreck of LOCH ARD still lies at the base of Mutton Bird Island. Much of the cargo has now been salvaged and some was washed up into what is now known as LOCH ARD Gorge. Cargo and artefacts have also been illegally salvaged over many years before protective legislation was introduced. One of the most unlikely pieces of cargo to have survived the shipwreck was a Minton porcelain peacock - one of only nine in the world. The peacock was destined for the Melbourne International Exhibition in 1880. It had been well packed, which gave it adequate protection during the violent storm. Today, the Minton peacock can be seen at the Flagstaff Hill Maritime Museum in Warrnambool. From Australia's most dramatic shipwreck it has now become Australia's most valuable shipwreck artefact and is one of very few 'objects' on the Victorian State Heritage Register. The shipwreck of the LOCH ARD is of State significance. Victorian Heritage Register S417. Flagstaff Hill’s collection of artefacts from LOCH ARD is significant for being one of the largest collections of artefacts from this shipwreck in Victoria. It is significant for its association with the shipwreck, which is on the Victorian Heritage Register (VHR S417). The collection is significant because of the relationship between the objects, as together they have a high potential to interpret the story of the LOCH ARD. The LOCH ARD collection is archaeologically significant as the remains of a large international passenger and cargo ship. The LOCH ARD collection is historically significant for representing aspects of Victoria’s shipping history and its potential to interpret sub-theme 1.5 of Victoria’s Framework of Historical Themes (living with natural processes). The collection is also historically significant for its association with the LOCH ARD, which was one of the worst and best known shipwrecks in Victoria’s history. A reasonably well-preserved ship’s deadeye with rust-stained wire loop-rope still attached. It retains portions of its original hemp cord and hessian wrapping. The flat sides of this thick wooden disc have three holes drilled through in a triangular configuration. The artefact is from the shipwreck of the LOCH ARD (1878). The survival of the loop-rope (wire cable) indicates it was an Upper Deadeye, connected to the shrouds (mast rigging).flagstaff hill, warrnambool, shipwrecked coast, flagstaff hill maritime museum, maritime museum, shipwreck coast, flagstaff hill maritime village, great ocean road, loch line, loch ard, captain gibbs, eva carmichael, tom pearce, glenample station, mutton bird island, loch ard gorge, deadeye, rigging -
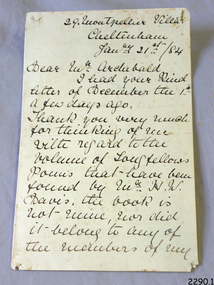 Flagstaff Hill Maritime Museum and Village
Letter
This original letter was handwritten and dated 21 January 1884. The author is Eveline V. Carmichael, of 29 Montpellier Villa, Cheltenham. Eva Carmichael was the only woman survivor of the iron clipper LOCH ARD, which was wrecked on 1 June 1878, at the subsequently named Loch Ard Gorge near Port Campbell. The letter was written to Mr J Archibald, first curator of the Warrnambool Mechanics Institute Museum, and was in response to a letter he wrote to Miss Carmichael on 1 December 1883. A complete transcript of Eva’s letter is attached as a Hard Copy Supplementary File. The letter first addressed the subject of her reply. She writes, “Thank you very much for thinking of me with regard to the volume of Longfellows Poems that have been found by Mr HW Davis [at Loch Ard Gorge], the book is not mine, nor did it belong to any members of my family. We had a ‘Longfellows’, but our book had a green cover.” The rescued book is on display at Flagstaff Hill (541) and has a blue cover. Another interesting aspect to her letter is its reference to the only other survivor from the LOCH ARD. As a postscript she writes, “You will be glad to hear that Tom Pearce is now on board the HMS Solvent. I heard from him last month he wrote from the West-Indies and seemed well and in good spirits. I have not seen him since we parted in Melbourne. I believe he is to be married next year, or perhaps this, but I do not know the young lady.” Tom Pearce was the young, male, able seaman who had risked his life to save her. In the months after the shipwreck, an excited public press speculated of a romantic connection between the two survivors, but this was clearly not the case. HISTORY OF THE LOCH ARD The LOCH ARD belonged to the famous Loch Line which sailed many ships from England to Australia. Built in Glasgow by Barclay, Curdle and Co. in 1873, the LOCH ARD was a three-masted square rigged iron sailing ship. The ship measured 262ft 7" (79.87m) in length, 38ft (11.58m) in width, 23ft (7m) in depth and had a gross tonnage of 1693 tons. The LOCH ARD's main mast measured a massive 150ft (45.7m) in height. LOCH ARD made three trips to Australia and one trip to Calcutta before its final voyage. LOCH ARD left England on March 2, 1878, under the command of Captain Gibbs, a newly married, 29 year old. She was bound for Melbourne with a crew of 37, plus 17 passengers and a load of cargo. The general cargo reflected the affluence of Melbourne at the time. On board were straw hats, umbrella, perfumes, clay pipes, pianos, clocks, confectionary, linen and candles, as well as a heavier load of railway irons, cement, lead and copper. There were items included that intended for display in the Melbourne International Exhibition in 1880. The voyage to Port Phillip was long but uneventful. At 3am on June 1, 1878, Captain Gibbs was expecting to see land and the passengers were becoming excited as they prepared to view their new homeland in the early morning. But LOCH ARD was running into a fog which greatly reduced visibility. Captain Gibbs was becoming anxious as there was no sign of land or the Cape Otway lighthouse. At 4am the fog lifted. A man aloft announced that he could see breakers. The sheer cliffs of Victoria's west coast came into view, and Captain Gibbs realised that the ship was much closer to them than expected. He ordered as much sail to be set as time would permit and then attempted to steer the vessel out to sea. On coming head on into the wind, the ship lost momentum, the sails fell limp and LOCH ARD's bow swung back. Gibbs then ordered the anchors to be released in an attempt to hold its position. The anchors sank some 50 fathoms - but did not hold. By this time LOCH ARD was among the breakers and the tall cliffs of Mutton Bird Island rose behind the ship. Just half a mile from the coast, the ship's bow was suddenly pulled around by the anchor. The captain tried to tack out to sea, but the ship struck a reef at the base of Mutton Bird Island, near Port Campbell. Waves broke over the ship and the top deck was loosened from the hull. The masts and rigging came crashing down knocking passengers and crew overboard. When a lifeboat was finally launched, it crashed into the side of LOCH ARD and capsized. Tom Pearce, who had launched the boat, managed to cling to its overturned hull and shelter beneath it. He drifted out to sea and then on the flood tide came into what is now known as LOCH ARD Gorge. He swam to shore, bruised and dazed, and found a cave in which to shelter. Some of the crew stayed below deck to shelter from the falling rigging but drowned when the ship slipped off the reef into deeper water. Eva Carmichael had raced onto deck to find out what was happening only to be confronted by towering cliffs looming above the stricken ship. In all the chaos, Captain Gibbs grabbed Eva and said, "If you are saved Eva, let my dear wife know that I died like a sailor". That was the last Eva Carmichael saw of the captain. She was swept off the ship by a huge wave. Eva saw Tom Pearce on a small rocky beach and yelled to attract his attention. He dived in and swam to the exhausted woman and dragged her to shore. He took her to the cave and broke open case of brandy which had washed up on the beach. He opened a bottle to revive the unconscious woman. A few hours later Tom scaled a cliff in search of help. He followed hoof prints and came by chance upon two men from nearby Glenample Station three and a half miles away. In a state of exhaustion, he told the men of the tragedy. Tom returned to the gorge while the two men rode back to the station to get help. By the time they reached LOCH ARD Gorge, it was cold and dark. The two shipwreck survivors were taken to Glenample Station to recover. Eva stayed at the station for six weeks before returning to Ireland, this time by steamship. In Melbourne, Tom Pearce received a hero's welcome. He was presented with the first gold medal of the Royal Humane Society of Victoria and a £1000 cheque from the Victorian Government. Concerts were performed to honour the young man's bravery and to raise money for those who lost family in the LOCH ARD disaster. Of the 54 crew members and passengers on board, only two survived: the apprentice, Tom Pearce and the young woman passenger, Eva Carmichael, who lost all of her family in the tragedy. Ten days after the LOCH ARD tragedy, salvage rights to the wreck were sold at auction for £2,120. Cargo valued at £3,000 was salvaged and placed on the beach, but most washed back into the sea when another storm developed. The wreck of LOCH ARD still lies at the base of Mutton Bird Island. Much of the cargo has now been salvaged and some was washed up into what is now known as LOCH ARD Gorge. Cargo and artefacts have also been illegally salvaged over many years before protective legislation was introduced. One of the most unlikely pieces of cargo to have survived the shipwreck was a Minton porcelain peacock - one of only nine in the world. The peacock was destined for the Melbourne International Exhibition in 1880. It had been well packed, which gave it adequate protection during the violent storm. Today, the Minton peacock can be seen at the Flagstaff Hill Maritime Museum in Warrnambool. From Australia's most dramatic shipwreck it has now become Australia's most valuable shipwreck artefact and is one of very few 'objects' on the Victorian State Heritage Register. The LOCH ARD shipwreck is of State significance – Victorian Heritage Number S417 Flagstaff Hill’s collection of artefacts from LOCH ARD is significant for being one of the largest collections of artefacts from this shipwreck in Victoria. It is significant for its association with the shipwreck, which is on the Victorian Heritage Register (VHR S417). The collection is significant because of the relationship between the objects, as together they have a high potential to interpret the story of the LOCH ARD. The LOCH ARD collection is archaeologically significant as the remains of a large international passenger and cargo ship. The LOCH ARD collection is historically significant for representing aspects of Victoria’s shipping history and its potential to interpret sub-theme 1.5 of Victoria’s Framework of Historical Themes (living with natural processes). The collection is also historically significant for its association with the LOCH ARD, which was one of the worst and best known shipwrecks in Victoria’s history. A photocopy of a letter, handwritten in ink on both sides of 4 small sheets of thick, light blue paper. The letter is in neat cursive script. The writing originally covered 7 sides of the note paper and has been reproduced as 7 separate pages. It is dated 21 January 1884, five and a half years after the LOCH ARD shipwreck. The letter is from Eva Carmichael, one of only 2 survivors from that disaster, and is addressed to J. Archibald, first curator of the Warrnambool Mechanics Institute Museum. The copies include the reproduction of a typed index card which accompanies the original letter. The card states: “Photographic copy of the letter written by Eva Carmichael to Mr J Archibald, first Curator of the Warrnambool Museum. The original letter is kept with other documents, but the writing being on both sides of the note-paper it was not possible to read in its entireity when on display”.flagstaff hill, warrnambool, shipwrecked coast, flagstaff hill maritime museum, maritime museum, shipwreck coast, flagstaff hill maritime village, great ocean road, loch line, loch ard, captain gibbs, eva carmichael, tom pearce, glenample station, mutton bird island, loch ard gorge, loch ard, survivor’s letter, eva carmichael, longfellow’s poems, warrnambool mechanics institute museum, joseph archibald, henry davis -
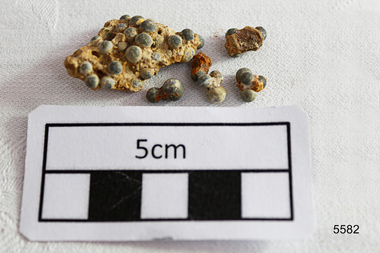 Flagstaff Hill Maritime Museum and Village
Weapon - Ammunition, Before 1878
The objects are a small sample of small gauge lead shot raised by Flagstaff Hill divers from the LOCH ARD shipwreck site in 1976. Companion pieces are in the Maritime Village collection. The three masted, iron hulled, LOCH ARD was wrecked against the tall limestone cliffs of Mutton Bird Island in the early hours of the first of June 1878. Included in her diverse and valuable cargo were 22 tons of lead shot, packed in cloth bags and wooden casks. Bulk quantities of lead shot, uniformly round balls of dull grey metal ranging from 2mm “birdshot” to 8mm “buckshot”, were routinely exported to the Australian colonies. Shot was used mostly as projectiles fired from smooth bored guns to bring down moving targets such as wild ducks and small game. It was also useful as ballast, when a dense, “pourable” weight was required to fill cavities or establish volume within a measuring container. The production of consistently round spheres of lead shot required the pouring of molten metal through a sieve and then a long drop through the atmosphere to a water filled basin for final cooling and collection. This “shot tower” process was first patented by William Watts of Bristol in 1782. His calculation of a 150 feet fall was not only to form evenly spherical droplets through surface tension, but also to provide partial cooling and solidification to each shot before they hit the water below. The value of his innovation was the minimising of indentation and shape distortion, avoiding the expense of re-smelting and re-moulding the lead. Lead shot was already being produced in Australia at the time the LOCH ARD loaded her cargo and left Gravesend on the second of March 1878. James Moir constructed a 157 feet circular stone shot tower near Hobart in 1870, with a peak annual production of 100 tons of lead shot sold in 28 pound linen bags. However colonial demand exceeded this source of local supply. The continued strength of the market for lead shot in the Colony of Victoria prompted substantial investment in additional productive capacity in Melbourne in the next decade. In 1882 Richard Hodgson erected the 160 feet round chimney-shaped Clifton Hill shot tower on Alexandra Parade (VHR H0709) and in 1889 Walter Coop built the 160 feet square tower-shaped Melbourne Central shot tower on La Trobe Street (VHR H0067). At its peak, the Coop Tower produced 6 tons of lead shot per week, or 312 tons per annum. The shipwreck of the LOCH ARD is of State significance – Victorian Heritage Register S417 Flagstaff Hill’s collection of artefacts from LOCH ARD is significant for being one of the largest collections of artefacts from this shipwreck in Victoria. It is significant for its association with the shipwreck, which is on the Victorian Heritage Register (VHR S417). The collection is significant because of the relationship between the objects, as together they have a high potential to interpret the story of the LOCH ARD. The LOCH ARD collection is archaeologically significant as the remains of a large international passenger and cargo ship. The LOCH ARD collection is historically significant for representing aspects of Victoria’s shipping history and its potential to interpret sub-theme 1.5 of Victoria’s Framework of Historical Themes (living with natural processes). The collection is also historically significant for its association with the LOCH ARD, which was one of the worst and best known shipwrecks in Victoria’s history. A quantity of 2mm and 4mm lead shot ammunition retrieved from the LOCH ARD shipwreck site. They are concreted together by sediment. There are (6) small pieces with some single shot and a larger conglomerate of cemented shot. flagstaff hill, warrnambool, shipwrecked coast, flagstaff hill maritime museum, maritime museum, shipwreck coast, flagstaff hill maritime village, great ocean road, loch line, loch ard, captain gibbs, eva carmichael, tom pearce, glenample station, mutton bird island, loch ard gorge, lead shot, colonial industry, melbourne shot towers, victorian metallurgy, colonial imports -
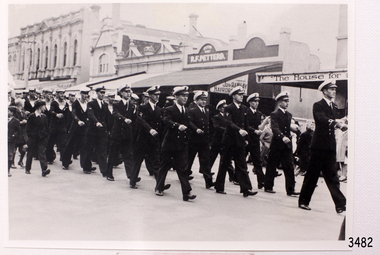 Flagstaff Hill Maritime Museum and Village
Photograph - Ship's crew, HMAS Warrnambool J202, 1941
This photograph shows the crew of the first HMAS Warrnambool (J202) marching east along Timor Street in Warrnambool, just opposite the Post Office on the corner of Gillies Street. People are watching the parade from the footpath and two boys, dressed in their ‘best’ clothes, are marching alongside the crew. The HMAS Warrnambool was one of 60 Bathurst class corvette vessels built during World War II for the Royal Australian Navy (RAN) as armed minesweepers. The namesake of the City of Warrnambool, Victoria, was launched in Sydney in 1941. The HMAS Warrnambool began service with patrols off Bass Strait in 1941. In December the ship docked in the Warrnambool harbour at Lady Bay. The crew came ashore and performed a march for the city. The Mayor, Cr. John R Astbury presented them with a plaque of the City of Warrnambool’s Coat of Arms and the Warrnambool Patriotic Fund gave them a gift of 110 books for the crew’s library. The Warrnambool served in Darwin during the time it was bombed, it was involved in several rescues and carried troops to New Guinea, it carried out escort and patrol duties on Australia's east coast, then at Fremantle and back to Darwin. The ship was at Timor when the Japanese surrendered in 1945. It performed mine clearance work around the Solomon Islands and New Guinea after the war. In 1947 the HMAS Warrnambool was at the Great Barrier Reef, off the Queensland coast, to clear the defensive British mines previously laid to protect Australia’s boarders. The ship hit a mine near Cockburn Reef, exploded and sank shortly afterwards. One of the 70 or so men on board was killed and three died later. The rescued men were transferred by boats to the nearby HMAS Swan II, which took the survivors to Cairns. The four deceased were Victorian seamen. In May 1948 the Royal Australian Navy divers recovered a number of items from the wreck, including the ship’s bell and the City of Warrnambool plaque. In 1949 the RAN returned the plaque to the Warrnambool City Council, and donated the ship’s bell to the Australian War Memorial. Further objects were recovered in 1972-75 by Southern Cross Diving and Salvage. A memorial plaque was erected in Warrnambool on September 13, 1995 in honour of all who served on HMAS Warrnambool. NOTE: (1)- HMAS Warrnambool II (FCPB204 was built in 1980 in Cairns, with a compliment of 22 personnel. It was decommissioned in 2005. (2)- SS Warrnambool, a steam and sail ship, was built in 1892 in London and broken up in 1926. [A more detailed history can be found in our Collection Record 3477.]This photograph is significant for its association with the lifesaving rescue of the crew and the sinking Royal Australian Navy vessel, HMAS Warrnambool (J202). The HMAS Warrnambool played a nationally significant role in overturning Australia’s Immigration Restriction Act 1901 (colloquially known as the White Australia policy). The ship rescued, and brought to Australia, Samuel and Annie Jacob and their family after they evacuated Dutch East India. The family was threatened with deportation and made the first successful appeal to High Court regarding that Act. The HMAS Warrnambool has - Local significance for being the namesake of the City of Warrnambool - Local significance, having docked in Warrnambool Harbour - Local significance, the crew having paraded in Timor Street, Warrnambool - State significance for its first patrol being in Bass Strait. - National significance, being present in Timor at the Japanese surrender - National significance, shown by the significance of the ship’s bell being curated as Military Heritage and Technology at the Australian War Memorial. - National significance as part of Australia’s defence force history, being one of only four Bathurst class corvettes lost while in Australian service, the only Bathurst class corvette lost after World War II, the only RAN vessel to be sunk by a mine, and associated with the last four Navy deaths of WWIIPhotograph of the crew of HMAS Warrnambool J202. This black and white image shows the crew marching east along Timor Street in Warrnambool. People are watching from the footpath and two formally dressed boys are marching alongside the sailors. Inscription on the reverse.(PRIVATE details - See Notes)flagstaff hill, maritime village, maritime museum, warrnambool, shipwreck coast, mort's dock & engineering co ltd, h.m.a.s. warrnambool, hmas warrnambool, hmas warrnambool i, hmas warrnambool j202, hmas swan ii, j202, world war ii, bathurst class corvette, royal australian navy, ran, sydney built ship, bass strait patrol, sea mine patrol, mine sweeper, mine clearance, navy divers, great barrier reef, cockburn reef, southern cross diving and salvage, warrnambool city council, cr j r astbury, mayor j r astbury, warrnambool patriotic fund, seal, coat of arms, dedicatory plaque, hmas warrnambool 1941, shipwreck by sea mine 1947, sinking ship, sunk ship, marching, parade, timor street warrnambool, minesweeper -
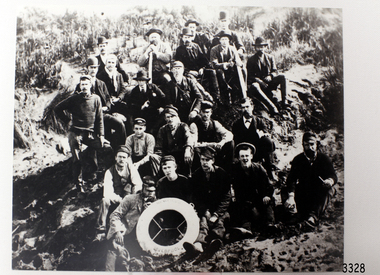 Flagstaff Hill Maritime Museum and Village
Photograph - Ship Crew, 1889-1892
This black and white photograph shows the crew of the barque Newfield. They are pictured seated on a grassy slope and rock, a lifebuoy from the Newfield, Liverpool, resting on the men in the front row. The men are formally dressed, some with bowler hats, a bow tie and pipe, rather than in their sailing uniforms. ABOUT THE NEWFIELD The Newfield left Sharpness, Scotland, on 28th May 1892 with a crew of 25 under the command of Captain George Scott and on 1st June left Liverpool. She was bound for Brisbane, Australia, with a cargo of 1850 tons of fine rock salt, the main export product of Sharpness. At about 9pm on 28th August 1892, in heavy weather, Captain Scott sighted, between heavy squalls, the Cape Otway light on the mainland of Victoria but, due to a navigational error (the ship’s chronometers were wrong), he assumed it to be the Cape Wickham light on King Island, some 40 miles south. He altered his course to the north, expecting to enter Bass Strait. The ship was now heading straight for the south west Victorian coast. At about 1:30am the Newfield ran aground on a reef about 100 yards from shore and one mile east of Curdie’s Inlet, Peterborough. The ship struck heavily three times before grounding on an inner shoal with 6 feet of water in the holds. Rough sea made the job of launching lifeboats very difficult. The first two lifeboats launched by the crew were smashed against the side of the ship and some men were crushed or swept away. The third lifeboat brought eight men to shore. It capsized when the crew tried to return it to the ship for further rescue The rescue was a difficult operation. The Port Campbell Rocket Crew arrived and fired four rocket lines, none of which connected with the ship. Peter Carmody, a local man, volunteered to swim about one mile off shore to the ship with a line to guide the fourth and final lifeboat safely to shore. He was assisted by James McKenzie and Gerard Irvine. Seventeen men survived the shipwreck but the captain and eight of his crew perished. The Newfield remained upright on the reef with sails set for a considerable time as the wind slowly ripped the canvas to shreds and the sea battered the hull to pieces. The Marine Board inquiry found the wreck was caused by a "one man style of navigation" and that the Captain had not heeded the advice of his crew. According to Jack Loney ‘… when the drama was over . . the Newfield was deserted except for the Captain’s dog and two pigs.’ Peter Carmody was awarded the Bramley Moore medal by the Liverpool Shipwreck and Humane Society for Saving Life at Ssea, which he received by mail on January 21st 1893. Flagstaff Hill’s collection of artefacts from the Newfield is significant for its association with the shipwreck Newfield, which is listed on the Victorian Heritage Registry. The collection is significant because of the relationship between the objects. The Newfield collection is archaeologically significant as the remains of an international cargo ship. The Newfield collection is historically significant for representing aspects of Victoria’s shipping history and its association with the shipwreck. The Letter accompanying the Medal for Bravery awarded to Peter Carmody is significant because the attempt to save lives is associated with the shipwreck Newfield. Black and white photograph of the crew of the sailing ship “Newfield”. The men in formal dress are seated on rocky slope with the ship’s lifebuoy showing the name “NEWFIELD, LIVERPOOL”. Photograph taken 1889-1892 flagstaff hill, warrnambool, shipwrecked-coast, flagstaff-hill, flagstaff-hill-maritime-museum, maritime-museum, shipwreck-coast, flagstaff-hill-maritime-village, newfield, photograph, crew of the newfield, 19th century sailing ship, peterborough, cape otway, medal for bravery -
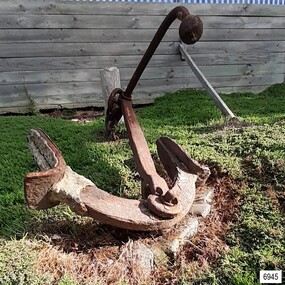 Flagstaff Hill Maritime Museum and Village
Equipment - Anchor, John Trotman, 1852 to early 1900s
This Trotman’s pattern stock anchor is the southernmost anchor on display at Flagstaff Hill’s Anchor Graveyard. This large Trotman design anchor was patented in 1852 by John Trotman and was widely used on merchant ships. On April 15th 2001 around midday this anchor was raised from the seabed of Lady Bay, Warrnambool, by the crew from Birdon Dredging, who had been hired to dredge the Harbour. The spokesperson Steve Walker, who worked for the firm, said that the anchor and long chain were found after the chain became tangled in the cutter blade of the dredging equipment. The anchor was lifted from the water and onto the Breakwater then a front-end loader placed it onto a truck that then delivered it to Flagstaff Hill Maritime Museum & Village. Howard Nichol, Museum Manager at the time, had estimated the anchor to be up to 130 years old. The previous Museum Manager, Peter Ronald, who was also a diver, had identified the anchor as a Trotman’s type and similar to those used on some of the major wrecks in the region. According to Nicholl, Museum staff believed it was possible that the anchor is one of two used as a mooring line that had been used to catch driving vessels and prevent ships from washing aground on the sand bar. The mooring line was shown as a dotted line on the 1890 chart of Lady Bay, approved by Lieutenant Stanley of the British Admiralty. by Lieutenant Stanley [British Admiralty]. The location of the anchor corresponds to a point on that map and the length of the chain supports that theory. “The map is quite a detailed survey of the Bay and it shows two anchors with buoys on the ends with probably about 100 yards of chain stretched between them. The ships would drop anchor and was the chain as a snag because this was a treacherous bay before the Breakwater was built and this was a way to eliminate that problem, "said Nichol. The mooring chain was put in place to catch drifting vessels during wild stormy weather. It was identified. ABOUT TROTMAN’S ANCHORS- The British Admiralty wanted an anchor design that had more holding power. The Committee of 1852 on Anchors was appointed to assess and report on the qualities of various anchors including Trotman’s anchors. Trotman’s pattern anchor received the highest score. The anchor is similar to the Admiral’s design but features arms that pivot when the anchor settles and the upper fluke moves to rest against the shank. The anchor then sits lower, which in turn greatly reduces the chances of the anchor’s chain, cable or rope getting tangled. The top of the shank has a fitting that allows a quick release of the anchor’s chain if this becomes necessary. This Trotman’s anchor is significant as a part of the maritime history of the Port of Warrnambool regardless of whether it belonged to one of the 29 ships that were stranded or wrecked in Lady Bay. The anchor is connected to the many attempts to maintain Warrnambool as a safe and manageable port, including the various plans for the construction of the Breakwater.Anchor: an iron Trotman’s pattern style with a rectangular-section shank that is wider in the middle and has a base that extends on two opposite sides in a ‘fork prong’ manner. A crescent-shaped, double-ended arm is fitted into the base of the shank with a bolt, enabling it to pivot. Each arm has a fluke in the shape of an upward palm with an attached metal plate that forms a horn at the back of the palm. A long, round-section pipe is fitted to the top of the shank at 90 degrees to the arms; one side has an elbow bend parallel to the arms, and both ends have an attached metal sphere. The pivoting ring at the top of the shank can be lifted for a quick release of the chain.flagstaff hill, warrnambool, maritime village, maritime museum, shipwreck coast, great ocean road, anchor, mooring, trotman, lady bay, breakwater, admiralty, ship equipment, stock anchor, john trotman, 1852 patent, 2001, birdon dredging, steve walker, howard nichol, peter ronald, british admiralty, lieutenant stanley, committee of 1852 on anchors -
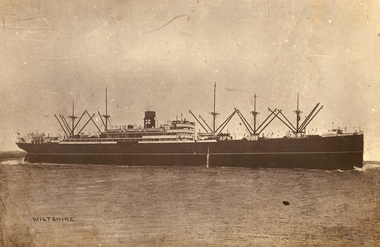 Victorian Interpretive Projects Inc.
Photograph - Digital, Troopship Wiltshire, 1918, c1918
The HMAT A18 Wiltshire (1912-1922) weighed 10,390 tons with an average cruise speed of 13.5 knots or 25.00 kmph. Described as a refrigerated steamship it was b uilt 1912 by John Brown, Clydebank for the Federal S N Co Ltd, London and was propelled by a twin screw, quadruple expansion engine 2 x 4 cylinders each 6500 hp. Owned by the Commonwealth & Dominion Line Ltd, London, it was leased by the Commonwealth until 2 October 1917. It embarked from Egypt on 2 February 1918. On 18 October 1914 at Melbourne embarked the 4th Light Horse Regiment (Victoria) A, B & C squadron & their Machine Gun Section, the 2nd Field Ambulance (Victoria) First Division. The disembarked the 4th Light Horse Regiment in Egypt on 10 December 1914. On 01 November 1914 The Wiltshire assembled with the first convoy at King George's Sound, Albany Western Australia in transporting the first detachment of the Australian and New Zealand Imperial Expeditionary Forces. It completed nine transport voyages from Australia commencing 18 October 1914 until final voyage from Sydney 9th November 1918. During that time The Wiltshire carried the 4th Field Artillery Brigade (Victoria) 2nd Division Artillery and their 1st Reinforcements, 1st Division Ammunition Column 1st Division Artillery 4th Reinforcements, thirty-four Infantry Battalion Reinforcements, the 10th, 11th & 12th Field Artillery Battery (Victoria) 4th Field Artillery Brigades, the 4th Brigade Ammunition Column 4th Field Artillery Brigade, the 1st Siege Artillery Brigade 15th Reinforcements, the 4th Light Horse Regiment (Victoria) A, B & C squadron & their Machine Gun Section, six Light Horse Brigade Reinforcements, the 1st Veterinary Section (New South Wales) 11th Reinforcements, the 1st Mobile Veterinary Section (New South Wales) 1st Division 11th Reinforcements, the 2nd Mobile Veterinary Section (Victoria, New South Wales) 2nd Division 11th Reinforcements, the 1st Cyclist Battalion (New South Wales and Queensland) 3rd Reinforcements, the 2nd Field Ambulance (Victoria) First Division & Medical Officers. After the conclusion of World War One is was wrecked Rosalie Bay, Great Barrier Island New Zealand 31 May 1922 on passage London for Dunedin. Onboard was a crew of 103 plus 1 stowaway, and 10,000 ton of general cargo. No lives lost and is now a well frequented 'Dive' wrecksite. (http://www.flotilla-australia.com/hmat.htm#A18)Photographic postcard of the troopship Wiltshire out at sea.world war one, world war, wiltshire, troop ship, mmm -
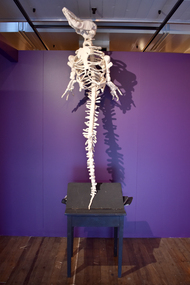 National Wool Museum
Sculpture - The Wreck of Hope, Michele Beevors, 2014
The Wreck of Hope (Long-nosed Common Dolphin skeleton, Delphinus delphis) featured as part of the exhibition Anatomy Lessons, shown at the National Wool Museum in 2024. The exhibition featured meticulously-sculpted, life size skeletons, making visitors question their place in this web of the living and the dead. From a towering giraffe stretching 4.4 metres in height, to an army of over 50 delicately rendered frogs, this exhibition was enthralling in scale. Each sculpture is an accurate portrayal of a real animal and is carefully measured, drawn, and moulded from steel, wire, and foam. The frame is then intricately knitted over to create these thought-provoking pieces. Each sculpture tells a story, one of the collection of animals by museums and collectors, of Western safari hunters, of human encroachment, and of the often-sad role of the animals in our lives. These underlying concepts are explored and reflected by the materials used. Wool, that speaks of warmth, of comfort, of care, meets the size, grace, and sheer breathtaking beauty of the pieces, clashing with the hard and complex stories beneath. This knitted dolphin skeleton was the start of Beevor's interest in comparative anatomy. Beevors recalls viewing a dolphin, one of many skeletons alongside a mouse and a lion in the Australian Museum's collection during a school visit in the 1970s. At the time, school children watched TV reruns of 'Flipper', which portrayed dolphins as intelligent and noble animals. Elsewhere, the conservation movement was growing, and appeals to protect marine mammals were gaining momentum through the 'Save the Whales' campaign. The fascination with live dolphin shows had grown throughout the 1960s and 1970s and the ethics began to be questioned. Some believe they played an important role in raising public awareness of cetaceans and their welfare. Others argued the performances glorified the dominance of heroic trainers over the subordinate dolphin, and offered little education about the dolphins' natural characteristics nor prioritised their welfare. Many of these facilities are now closed and all dolphin species are protected by international accords aimed at conserving wild populations. Despite this dolphins are still at risk of swallowing plastic waste, mercury toxicity, toxoplasmosis, boat impacts and being bycatch in commercial fishing operations. Originally from Australia, Michele Beevors has been practicing in New Zealand for the last 20 years. She is Head of Sculpture at Dunedin School of Art, Otago Polytechnic, New Zealand’s oldest, and one of its most prestigious, art schools. Beevors has exhibited in galleries, museums, and exhibition spaces in across New Zealand, Australia and Vienna with art that is defiant, unconventional, and moving.Life sized knitted skeleton of a dolphin, with white wool and internal steel, foam and wire frame. The dolphin is mounted on a wooden base, made from a desk, with books placed under the desk lid. The books and desk are painted black.knitting, art, dolphin, conservation, sculpture, skeletons, anatomy lessons, michele beevors -
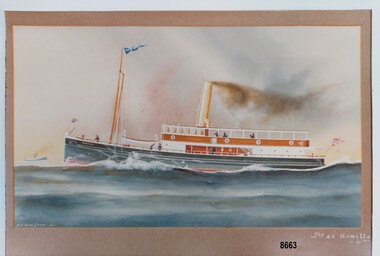 Flagstaff Hill Maritime Museum and Village
Photograph - Print of S. S. Rowitta, A.V. Gregory, 1912
S. S. ROWITTA: - The 1909 steam ferry, S. S. Rowitta, was installed as an exhibit at Flagstaff Hill in 1975 and was enjoyed by many visitors for 40 years. S. S. Rowitta was a timber steam ferry built in Hobart in 1909 using planks of Huon and Karri wood. She was a favourite of sightseeing passengers along Tasmania’s Tamar and Derwent rivers for 30 years. The Rowitta was also known as Tarkarri and Sorrento and had worked as a coastal trading vessel between Devonport and Melbourne, and Melbourne Queenscliff and Sorrento. In 1974 the S. S. Rowitta was purchased by Flagstaff Hill to convert into a representation of the Speculant, a historic and locally significant sailing ship listed on the Victorian Heritage Database. (The Speculant was built in Scotland in 1895 and traded timber between the United Kingdom and Russia. Warrnambool’s P J McGennan & Co. then bought the vessel to trade pine timber from New Zealand to Victorian ports and cargo to Melbourne. She was the largest ship registered with Warrnambool as her home port, playing a key role in the early 1900s in the Port of Warrnambool. In 1911, on her way to Melbourne, she was wrecked near Cape Otway. None of the nine crew lost their lives.) The promised funds for converting the S. S. Rowitta into the Speculant were no longer available, so she was restored back to her original configuration. She represented the importance of coastal traders to transport, trade and communication in Australia times before rail and motor vehicles. Sadly, in 2015 the time had come to demolish the Rowitta due to her excessive deterioration and the high cost of on-going repairs. She had given over 100 years of service and pleasure to those who knew her. Arthur Victor Gregory (known as A. V. Gregory) was born in Melbourne in 1867. He was the son of George Frederick Gregory who was an established marine painter with a studio in South Melbourne. A. V. Gregory worked with his father and his elder half-brother (George Frederick Junior). They made numerous photographic reproductions of their ships' portraits, selling the originals to captains and owners and the photographic prints to the crews. A. V. Gregory inherited the business on the death of his father in 1890 and continued to paint until World War 2 when he stopped for wartime security reasons. Gregory worked mainly in watercolour and gouache. He kept all his working sketches so he could repeat earlier paintings and make more copies of the same ship. His carefully detailed portraits of every kind of vessels seen on Port Phillip Bay created a body of work regarded as a valuable record of the maritime traffic of that period.This print is a significant example of the work of the well-known and well-respected marine painter A. V. Gregory who created a detailed record of shipping in the Port Phillip Bay area in the years before W.W. 2. It is also significant as it connects the history of the S. S. Rowitta, which was a large exhibit on display at Flagstaff Hill Maritime Village from the museum’s early beginnings until the vessel’s end of life 40 years later. The S. S. Rowitta represents the importance of coastal traders to transport, trade and communication along the coast of Victoria, between states, and in Australia before rail and motor vehicles and is significant for its association with Tasmanian history from the early to mid-1900s. The vessel was an example of a ferry built in the early 20th century that served many different roles over its lifetime of over 100 years.This is a photograph of a watercolour painting of the S. S. Rowitta. It shows a steamer moving through the water. The ship has a blue, metal hull, a wooden lower and upper deck, a lifeboat and smoke coming out of a chimney. Flags are flying from the bow, the stern and the mast. Seven figures can be seen on the decks. A second boat can be seen in the distance in the far left of the picture. It has the signature "A. V. Gregory - 12" in the bottom left corner and the title "S. S. Rowitta - 121 tns" in the lower right corner.Signed "A. V. Gregory -12-" Titled "The S. S. Rowitta / -121 tns" Printed on the ships' bow - "ROWITTA"flagstaff hill maritime museum and village, warrnambool, great ocean road, shipwreck coast, s. s. rowitta, rowitta, a. v. gregory, painting, marine painting, marine painter, steamer, steam ferry, passenger ferry, alfred gregory, tarkarri, sorrento, speculant, print, photograph -
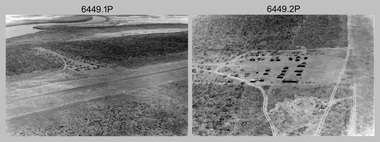 Bendigo Military Museum
Photograph - RA Svy Project C4 Aerodist Operation, Eastern Arnhem Land, NT, 1967
This is a set of 30 photographs of Royal Australian Survey Corps (RA Svy) personnel from Central Comd Fd Svy Unit (Adelaide) on Aerodist survey operation - Project C4 in Eastern Arnhem Land, Northern Territory in 1967. Photos of personnel were taken either at the operations base at Numbulwar or the main base at Gove (Nhulunbuy). RA Svy conducted nineteen Aerodist operations for 12 years from 1964 to 1975. Aerodist MRC2 was a tellurometer-based system adapted for aircraft to accurately measure distances between non-intervisible ground survey stations, using the aircraft as an intermediate station. Lower order geodetic results could be achieved by survey network trilateration. The measured distances between stations formed survey networks from which each station’s latitude and longitude was computed. Aerodist MRC2 was RA Svy’s major horizontal control survey tool for mainly medium scale topographic mapping (scale 1:100,000 Class A being spatially accurate to within 50 metres) in PNG, northern NT, north-west WA, Kalimantan Barat (West) Indonesia, Sumatra Indonesia, Gulf of Carpentaria and Cape York, QLD. In 1967, the Aerodist MRC2 Master equipment was installed in the aircraft featured in this set of photos, Executive Air Services’ (Essendon VIC) Grand Aero Commander VH-EXX. It was the same aircraft type and company contracted to Division of National Mapping for Aerodist MRC2 surveys. From July to October 1967 the aircraft was attached to Central Comd Fd Svy Unit (Adelaide - Major Don Ridge) on Project C4 eastern-Arnhem Land NT, where 317 Aerodist lines measuring 17,300 line miles were successfully completed. This was the most productive Aerodist project thus far. The most common helicopter used by RA Svy up to 1972 was the civilian Bell 47G-2 and the Sioux Light Observation Helicopters (LOH), the Australian Army’s equivalent featured in this photo set. These light observation helicopters had a limiting load carrying capacity of up to about 500 pounds. By comparison, one Aerodist team including two people weighed up to 1,500 pounds. Source: Royal Australian Survey Corps – Aerodist Years 1964-1975 by Peter Jensen. This is a set of 30 photographs of Royal Australian Survey Corps (RA Svy) personnel on Aerodist survey operations in Eastern Arnhem Land, Northern Territory in 1967. The photographs are on 35mm negative film and scanned at 96 dpi. They are part of the Army Survey Regiment’s Collection. .1) to .4) - black & white, 20th August 1967, Project C4 Aerodist Operations Base - Numbulwar, NT. .5) - Photo, black & white, 1967. Probable wrecked Indonesian fishing vessel. .6) to .8) - Photo, black & white, 1967. Unidentified survey operations base, L to R: unidentified personnel. .9) - Photo, black & white, 1967. Unidentified survey operations base, unidentified soldier driving a Haflinger 4x4 Light utility vehicle. .10) - Photo, black & white, 1967. Unidentified survey operations base, L to R: unidentified technician. .11) - Unidentified technician reading two survey altimeters to compute corrections to the measured distances for atmospheric refraction and to compute the sea level distances from the slope distances aircraft to the ground stations. .12) - Photo, black & white, 1967. Unidentified survey operations base, L to R: unidentified personnel. .13) to .16) - Photo, black & white, 1967. Unidentified personnel operating remote Aerodist MRC2 ground instruments. .17) to .18) - Photo, black & white, 1967. Unknown RA Svy office location. .19) to .20) - Photo, black & white, 1967. Aerodist MRC2 Master equipment. .21) to .22) - Photo, black & white, 1967. Aero Commander VH-EXX probably at Gove, NT, Central Comd Fd Svy Unit (Adelaide) – OC Major Don Ridge. .23) to .25) - Photo, black & white, 1967. Aero Commander VH-EXX probably at Gove, NT. Unidentified personnel. .26) - Photo, black & white, 1967. Aero Commander VH-EXX probably at Gove, NT. Aerodist antenna pods are visible on the aircraft. .27) to .29) - Photo, black & white, 1967. Australian Army Sioux Light Observation Helicopter (LOH) probably at Gove, NT. .30) - Photo, black & white, 1967. Panelled U337 survey station, visible as a white cross on aerial identification photo..1P to .2P – date and location on edge of film negative. .5P to .28P – no annotations .29P - annotated in white ‘RW-JEP Gove NT’ .30P - annotated in white ‘U337 Spool No1 Jun67’royal australian survey corps, rasvy, army survey regiment, army svy regt, fortuna, asr, aerodist, surveying, central comd fd svy unit -
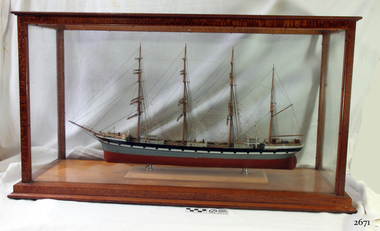 Flagstaff Hill Maritime Museum and Village
Craft - Ship Model, Falls of Halladale
The iron-hulled, four-masted barque, the Falls of Halladale, was a bulk carrier of general cargo. She left New York on August 1908 on her way to Melbourne and Sydney. In her hold, along with 56,763 tiles of unusual beautiful green American slates (roofing tiles), 5,673 coils of barbed wire, 600 stoves, 500 sewing machines, 6500 gallons of oil, 14400 gallons of benzene, and many other manufactured items, were 117 cases of crockery and glassware. Three months later and close to her destination, a navigational error caused the Falls of Halladale to be wrecked on a reef off the Peterborough headland at 3 am on the morning of the 15th of November, 1908. The captain and 29 crew members all survived, but her valuable cargo was largely lost, despite two salvage attempts in 1908-09 and 1910. ABOUT THE ‘FALLS OF HALLADALE’ (1886 - 1908) Built: in1886 by Russell & Co., Greenock shipyards, River Clyde, Scotland, UK. The company was founded in 1870 (or 1873) as a partnership between Joseph Russell (1834-1917), Anderson Rodger and William Todd Lithgow. During the period 1882-92 Russell & Co., standardised designs, which sped up their building process so much that they were able to build 271 ships over that time. In 1886 they introduced a 3000 ton class of sailing vessel with auxiliary engines and brace halyard winches. In 1890 they broke the world output record. Owner: Falls Line, Wright, Breakenridge & Co, 111 Union Street, Glasgow, Scotland. Configuration: Four masted sailing ship; iron-hulled barque; iron masts, wire rigging, fore & aft lifting bridges. Size: Length 83.87m x Breadth 12.6m x Depth 7.23m, Gross tonnage 2085 ton Wrecked: the night of 14th November 1908, Curdies Inlet, Peterborough south west Victoria Crew: 29 The Falls of Halladale was a four-masted sailing ship built-in 1886 in Glasgow, Scotland, for the long distance cargo trade and was mostly used for Pacific grain trade. She was owned by Wright, Breakenridge & Co of Glasgow and was one of several Falls Line ships, all of which were named after waterfalls in Scotland. The lines flag was of red, blue and white vertical stripes. The Falls of Halladale had a sturdy construction built to carry maximum cargo and able to maintain full sail in heavy gales, one of the last of the ‘windjammers’ that sailed the Trade Route. She and her sister ship, the Falls of Garry, were the first ships in the world to include fore and aft lifting bridges. Previous to this, heavily loaded vessels could have heavy seas break along the full length of the deck, causing serious injury or even death to those on deck. The new, raised catwalk-type decking allowed the crew to move above the deck stormy conditions. This idea is still used today on the most modern tankers and cargo vessels and has proved to be an important step forward in the safety of men at sea. On 4th August 1908, with new sails, 29 crew, and 2800 tons of cargo, the Falls of Halladale left New York, bound for Melbourne and Sydney via the Cape of Good Hope. The cargo on board was valued at £35,000 and included 56,763 tiles of American slate roofing tiles (roof slates), 5,673 coils of barbed wire, 600 stoves, 500 sewing machines, 6,500 gallons of oil, 14,400 gallons of benzene, plumbing iron, 117 cases of crockery and glassware and many other manufactured items. The Falls of Halladale had been at sail for 102 days when, at 3 am on the night of 14th November 1908, under full sail in calm seas with a six knots breeze behind and misleading fog along the coast, the great vessel rose upon an ocean swell and settled on top of a submerged reef near Peterborough on the south-west Victoria’s coast. The ship was jammed on the rocks and began filling with water. The crew launched the two lifeboats and all 29 crew landed safely on the beach over 4 miles away at the Bay of Islands. The postmistress at Peterborough, who kept a watch for vessels in distress, saw the stranding and sent out an alert to the local people. A rescue party went to the aid of the sailors and the Port Campbell rocket crew was dispatched, but the crew had all managed to reach shore safely by the time help arrived. The ship stayed in full sail on the rocky shelf for nearly two months, attracting hundreds of sightseers who watched her slowly disintegrate until the pounding seas and dynamiting by salvagers finally broke her back, and her remains disappeared back into deeper water. The valuable cargo was largely lost, despite two salvage attempts in 1908-09 and 1910. Further salvage operations were made from 1974-1986, during which time 22,000 slate tiles were recovered with the help of 14 oil drums to float them, plus personal artefacts, ship fittings, reams of paper and other items. The Court of Marine Inquiry in Melbourne ruled that the foundering of the ship was entirely due to Captain David Wood Thomson’s navigational error, not too technical failure of the Clyde-built ship. The shipwreck is a popular site for divers, about 300m offshore and in 3 – 15m of water. Some of the original cargo can be seen at the site, including pieces of roof slate and coils of barbed wire. The Falls of Halladale shipwreck is listed on the Victorian Heritage Register (No. S255). She was one of the last ships to sail the Trade Routes. She is one of the first vessels to have fore and aft lifting bridges. She is an example of the remains of an International Cargo Ship and also represents aspects of Victoria’s shipping industry. The wreck is protected as a Historic Shipwreck under the Commonwealth Historic Shipwrecks Act (1976). The Falls of Halladale shipwreck is listed on the Victorian Heritage Register (No. S255). She was one of the last ships to sail the Trade Routes. She is one of the first vessels to have fore and aft lifting bridges. She is an example of the remains of an International Cargo Ship and also represents aspects of Victoria’s shipping industry. The wreck is protected as a Historic Shipwreck under the Commonwealth Historic Shipwrecks Act (1976).Model Falls of Halladale, good condition in a glass case. falls of halladale, wright, breakenridge & co of glasgow, californian blue roof slate, warrnambool, shipwrecked-coast, flagstaff-hill, flagstaff-hill-maritime-museum, maritime-museum, shipwreck-coast, flagstaff-hill-maritime-village, shipwrecked-artefact, ships model, 1908 shipwreck, great clipper ships