Showing 260 items matching " the garden gully"
-
 Ballarat Tramway Museum
Slide - 35mm slide/s, Travis Jeffrey, c1960
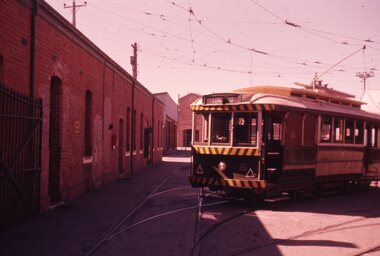
Plastic mount (black base, white cover) of a Bendigo 16 leaving or being shunted around the Depot, early 1960's. Tram has the destination of Long Gully. Has the offices of the Bendigo depot in the foreground.tramways, trams, bendigo, depot, tram 16 -
 Ballarat Tramway Museum
Photograph - Black & White Photograph/s, Ron Hann, Jan. 1963
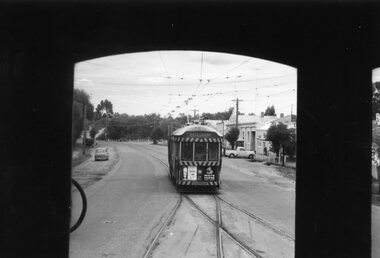
Yields information about the California Gully or Thorpe St Loop from the front of an in-bound tramcar and the tramcar it is crossing at the loop.Black and white print on heavy matt photographic paper of the Bendigo 2, crossing another bogie tram at the California Gully or Thorpe St Loop, c1963. Taken from the window of the inbound tramcar. No. 2 has the destination of Eaglehawk, a front dash panel advertisements for Whitehorse Whiskey and another for ice-cream? 2nd copy - laser print - with date etc on rear - added 22/2/2010, copy from Ron Hann. Printed on Fujifilm, Fujicolour Crystal Archive for Frontier".On rear in pencil "Eaglehawk line 1963" 2nd copy has label "Reference 6/214/27" Photo by Ron Hann" and another label "Eaglehawk Route Bendigo 01.63" tramways, trams, bendigo, eaglehawk, california gully, tram 2 -
 Ballarat Tramway Museum
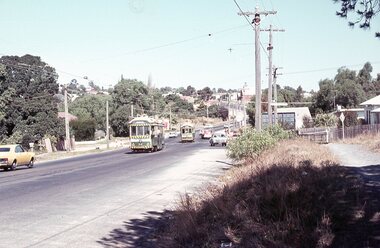
Slide - 35mm slide/s, Graham Evans, Apr. 1972
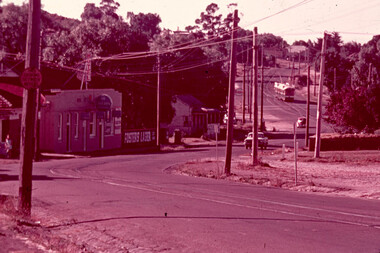
White cardboard mount, 35mm slide, from the Association of Railway Enthusiast's film strip titled "Provincial Tramway Film Strip" of a Bogie car at Long Gully Loop, in the far distance, with a Hotel and the ESSO service station in between. Has Fosters Lager and Carlton signs on hotel. Note sign on the closet pole - "No standing between Notices". The film strip notes (Reg. Item 2560), provided the following caption details: "Meandering roadway and centre road track were a feature of the long "EAGLEHAWK" line. Here an inbound car negotiates the Long Gully Loop. - April '72 (Graham Evans)" See image btm2593p.tif for high level scan of image. Stamped on base of slide "11803" and written in ink on top edge "Eaglehawk line"tramways, trams, are, film strip, long gully, eaglehawk -
 Ballarat Tramway Museum
Slide - 35mm slide/s, Graham Evans, Apr. 1972
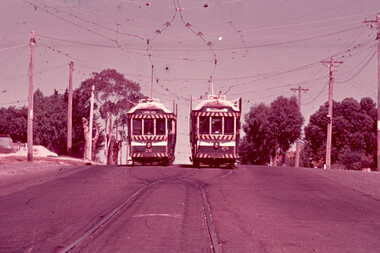
White cardboard mount, 35mm slide, from the Association of Railway Enthusiast's film strip titled "Provincial Tramway Film Strip" of a Bendigo Nos. 26 (Quarry Hill) and 25 (Eaglehawk) at Jobs Gully Loop. The film strip notes (Reg. Item 2560), provided the following caption details: "Bogie cars 26 & 25 meet at Jobs Gully loop about a mile from the terminus. Apr ' 72 (Graham Evans)" See image btm2595p.tif for high level scan of image. Stamped on base of slide "11805" and written in ink on top edge "26 & 25 Jobs Gully Eaglehawk"tramways, trams, are, film strip, jobs gully, eaglehawk, tram 26, tram 25 -
 Ballarat Tramway Museum
Slide - 35mm slide/s, Graham Evans, Apr. 1972
White cardboard mount, 35mm slide, from the Association of Railway Enthusiast's film strip titled "Provincial Tramway Film Strip" of a Bendigo No. 26 descending the Bendigo end of the bridge over the railway near Eaglehawk near Jobs Gully loop. Tram has the destination of Quarry Hill and has four roof advertisements. The film strip notes (Reg. Item 2560), provided the following caption details: "Bogie cars 26 drops down the Bendigo side of the bridge over the Eaglehawk railway, on the long journey to "QUARRY HILL". - Apr ' 72 (Graham Evans)" See image btm2596p.tif for high level scan of image. Stamped on base of slide "11806" and written in ink on top edge "26 Eaglehawk"tramways, trams, are, film strip, jobs gully, eaglehawk, railway bridge, tram 26 -
 Ballarat Tramway Museum
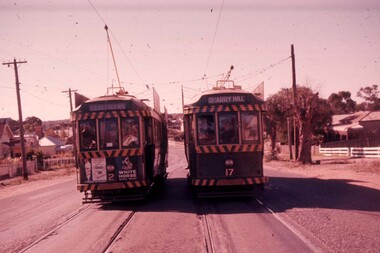
Slide - 35mm slide/s, Travis Jeffrey, c1962
Agfa plastic mount (blue base, white cover) with a photo of Bendigo 2, with destination of Eaglehawk, crossing No. 17 at Jobs Gull loop on the Eaglehawk line. No. 17 has destination of Quarry Hill. Has a Streets Ice cream and Whitehorse Whisky advertisements on the rear panel. Photo taken c1962."BES 27" in penciltramways, trams, bendigo, eaglehawk, jobs gully, tram 2, tram 17 -
 Ballarat Tramway Museum
Photograph - Digital image Set of 20, 16/04/1972 12:00:00 AM
Set of 20 digital images of Bendigo Tramways, of the last running day of the Eaglehawk to Quarry Hill line 16 April 1972, .1 - No. 24 outbound to Eaglehawk .2 - No. 3? at Manchester Loop .3 - No. 24 outbound to Eaglehawk .4 - bogie tram crossing the rail over bridge from Eaglehawk .5 - No. 18 in View St .6 - No. 24 outbound to Eaglehawk .7 - No 18 at Eaglehawk with destination roll being changed, and shopping centre in the background. .8 - No. 24 crossing the railway overbridge, going to Eaglehawk .9 - No. 3 outbound to Eaglehawk .10 - No. 24 crossing the railway overbridge, going to Eaglehawk .11 - No. 3 and 24 crossing at Long Gully .12 - No. 18 at Eaglehawk with Leo A Hughes photographer building in the background and a CFA truck passing the tram. Tram SEC roof advertisement and a banner for "German -?- Circus" at Eaglehawk and dates. .13 - No. 3 inbound on the Eaglehawk line. .14 - No. 18 outbound to Eaglehawk .15 - ditto .16 - No. 18 at Eaglehawk terminus with the Mechanics Institute in the background. .17 - No. 24 at the Eaglehawk terminus .18 - No 24 at the intersection with Taylor St .19 - No. 24 at the Eaglehawk terminus .20 - dittotrams, tramways, bendigo, eaglehawk, long gully, manchester loop, tram 24, tram 18, tram 3 -
 Ballarat Tramway Museum
Photograph - Digital image Set of 20, 16/04/1972 12:00:00 AM
Set of 22 digital images of Bendigo Tramways, of the last running day of the Eaglehawk to Quarry Hill line 16 April 1972, .1 - No. 3 and 24 crossing at Long Gully .2 - No. 3 turning at the Cricket ground, Barnard and View Sts, inbound to the City and Quarry Hill .3 - No. 3 in bound to the City and Quarry Hill, Long Gully area .4 - No. 18 inbound to the City and Quarry Hill crossing the railway bridge from Eaglehawk. .5 - Manchester Loop .6 - No. 18 inbound to the City and Quarry Hill crossing the railway bridge from Eaglehawk. .7 - No. 18 about to enter Jobs Gully Loop .8 - No. 3 about to turn at the Cricket ground, Barnard and View Sts inbound to the City and Quarry Hill .9 - No. 3 turning at the Cricket ground, Barnard and View Sts, inbound to the City and Quarry Hill .10 - No. 18 at Eaglehawk terminus with the Mechanics Institute in the background. .11 - No. 3 in bound, Ironbark area. .12 - No. 3 at Long Gully Loop .13 - No. 3 outbound to Eaglehawk. .14 - No. 18 at Eaglehawk with German circus banner on tram .15 - No. 18 on the Eaglehawk line at Jobs Gully Loop .16 - No. 24 outbound to Eaglehawk at Taylor St .17 - No. 18 inbound to the City and Quarry Hill crossing the railway bridge from Eaglehawk. .18 - No. 3 at Manchester Loop .19 - No. 18 at Eaglehawk terminus .20 - No. 18 at Eaglehawk with German circus banner on tram .21 - bogie tram at Long Gully Loop. .22 - No. 24 outbound to Eaglehawk at Taylor Sttrams, tramways, bendigo, eaglehawk, long gully, jobs gully, manchester loop, tram 24, tram 18, tram 3 -
 Ballarat Tramway Museum
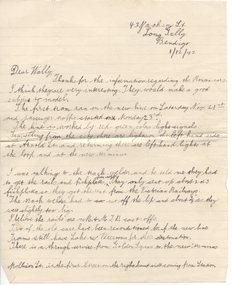
Document - Letter/s, Jim Goodman, 1/12/1942 12:00:00 AM
Handwritten letter from Jim Goodman of 43 Jackson St Long Gully, dated 1/12/1942, to Wal Jack. Gives details of the new line to North Bendigo, issues with construction, sources of rails, timetable services on the line, colour light signals. Also has notes regarding NSW and VR steam locomotives. Letter consists of three pages on light grey ruled or line paper. Contained originally within Reg Item 5623 at the front of this note book. For items see btm5623 loose items list.pdf.trams, tramways, bendigo, north bendigo, timetables -
 Ballarat Tramway Museum
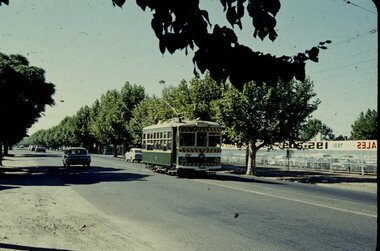
Slide - 35mm slide/s - set of 10, Campbell Duncan, Jan. 1971
Set of 10 Ferraniacolor slides - cardboard mounts taken on either 10/1/71 or 16/1/71. .1 - Birney No. 30, Golden Square line, inbound near Cathedral with car yard in background. .2 - ditto, with Cathedral gardens in background. .3 - single trucker, with two SEC roof adverts, entering Nolan St enroute to North Bendigo. Shows the driver sitting in a side on shot. A 4 square store in the background, with a fading advert for "Peeled Tomatoes". .4 - No. 6 turning from Nolan St into McCrae St with 4 square store in background. .5 - No. 26 at Quarry Hill with cemetery in background. .6 - No. 6 at the North Bendigo Terminus .7 - No. 26 outbound to Eaglehawk on the Railway Overbridge, Mt Korong Road. .8 - No. 17 (inbound to City and Quarry Hill) and another bogie crossing at a loop on the Eaglehawk line. Both trams have SEC roof adverts. The driver of the outbound car is boarding the tram. Based on .9, it is No. 3 at Long Gully. .9 - No. 3 waiting at Long Gully Loop . .10 - No. 26 at Quarry Hill terminus, with destination of Eaglehawk.In ink on slide: .1 - "1/2 mile out on Golden Square line - 10/1/71 (Sun)." .2 - "1/2 mile out on Golden Square line - 10/1/71" .3 - "Has just rounded curve near lake Weeroona on North Bendigo line - 10/1/71 (Sun)." .4 - "16/1/71" .5 - " 10/1/71 (Sun)." .6 - "North Bendigo terminus, 16/1/71 (Sat)" .7 - "10/1/71 (Sun) c 3pm" .8 - "Cross Eaglehawk line - 10/1/71 (Sun)." .9 - "Jackson St Loop on E'Hk line awaiting up - 10/1/71 " .10 - "Quarry Hill terminus Bendigo - - 10/1/71"tramways, trams, bendigo, golden square, high st, nolan st, north bendigo, quarry hill, long gully, railway bridge, tram 30, tram 6, tram 26, tram 17, tram 3 -
 Bendigo Historical Society Inc.
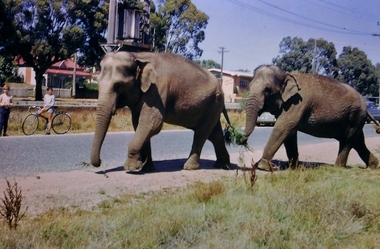
Slide - Images by Arthur Pulfer, 1957-1970
ROSEVIEW 407 High Street, Golden Square Bendigo "Roseview" was designed by Godfrey Eathorne and constructed in 1939. It is one of the few Streamline Moderne houses in the Central Goldfields region, and was one of the earliest constructed in the Bendigo region. It is an outstanding example of this style of housing. It resembles an ocean liner, and reflects the emphasis on the streamlining of methods of transportation. It utilizes both flat and curved surfaces and has little external ornamentation. The use of materials such as rounded glass windows and metal window and door frames reflects an innovative approach to construction consistent with the style. "Roseview" was constructed on a large scale, with large and spacious rooms. It reflects the prominent social status and wealth of the original owner, together with the desire for a building in 'the latest' style which was sure to attract attention and prominence in the region. It has been maintained largely in original condition. CARALULUP HOTEL 'The Sun' dated January 17, 1941 on the back. It states that 'The licence of Caralulup Hotel, near Talbot, has been surrendered, thus severing an 80 year association with the district' State Library of Victoria TOLMER GOLD ESCORT ROUTE The gold rush in New South Wales and Victoria left few able miners in South Australia. Bad economic conditions saw more than 15,000 men leave the Kapunda and Burra mines by the end of 1851. Alexander Tolmer, Commissioner of Police in 1852 proposed that the gold won by South Australians should be brought back to South Australia under an escort consisting of only a few men. In March a Gold Escort was on its way back to Adelaide with almost 6,000 ounces of gold for the vaults of the Treasury Building. After this successful trip Tolmer led two other escorts before handing over his duties. A total of eighteen gold escorts were made, the last one during November and December 1853 when Inspector Wyndham was in charge. You’ll find Gold Escort Route Monuments between Meningie, Coonalpyn and Tintinara.Many images from by Arthur Pulfer copied to slides. Twenty Slides of Bendigo: Bullen's Circus Bendigo February 1966 "Roseview", Pethard's Home at 407 High Street, Golden Square, Bendigo. 25th March 1957. House is possibly on the Midland Highway Epsom, Bendigo - 8 April 1955 Kangaroo Flat Bus Lines mini bus The Big Tree Sedgwick Road March 1972 The old Golden Gully Hotel Diamond Hill Road, Bendigo The old Lockup Eaglehawk Bendigo September 1967 Market Gardens - possibly North Bendigo North Deborah Mine photo taken from Breen Street 1958 Laying the track to get the engine into the park, looking down Mitchell Street Bendigo Engine R766 in the Victorian Railways Institute Park Railway Place Bendigo On the Methodist Church Steps Arnold street Bendigo Miner's Hut at Moliagul Basket Lunch - White Hills Botanical Gardens - St johns 100 year celebrations White Hills Swimming Pool February 1970 White Hills Botanical Gardens Bendigo Bendigo Show Parade 1958 The Arrival of the Cobb and Co Coach in Bendigo September 1963 history, bendigo, james lerk collection, golden square high school, dragon loong, white hill botanical gardens, 407 high street bendigo, r766 engine, bullens circus, caralulup, moligual, bendigo show, tolmer's gold route, kangaroo flat bus lines, eaglehawk lockup, arnold street methodist church, elephants -
 Bendigo Historical Society Inc.
Book - Out & About in Bendigo
Historical markers plaques stones tabulets and photos from an area covering Huntly across to Junortoun to Strathfieldsaye , Mandurang , Big Hill, Maiden Gully and around EaglehawkOut & About in Bendigo - Jean & Ken Arnold Cream outer edge with plum coloured insert with black writing. Front cover Photo Langley Hall Botanical gardens and former Orphanage building Back cover various photos. Pages 80. black and white photos, maps -
 Bendigo Historical Society Inc.
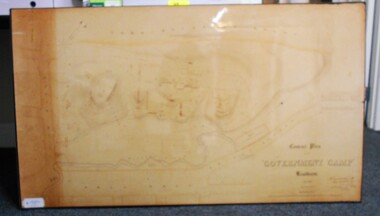
Map - CONTOUR PLAN OF THE GOVERNMENT CAMP SANDHURST 1854, 1994
Contour map (copy) of the Government Camp Sandhurst, 1854. Map is mounted on coreflute and laminated. Written in bottom righthand corner 'Contour Plan of the Government Camp, Sandhurst. Dec 1854. Signed by Richard Larritt, Assistant Surveyor, 11th December 1854.' Shown on map: Pall Mall, Bendigo Creek, Commissioner's Gully, View Place (now View Street), Post Office, Bank of Victoria, District Surgeon, Sandhurst Fire Brigade, Police Hospital, Flagstaff, Gold Office, License Shed, Military Barracks, Stables, Commissioner's Buildings, Police Office. Old Cemetery, Garden. Reference on righthand side: 'Stone or brick buildings are tinted in crimson. Wooden buildings tinted in Indian Ink. Tents and other temporary structures tinted in Burnt Sienna.' Scale of Chains, on bottom of map. Sticker on bottom left hand corner and back of map ' Presented by Survey and Mapping, Victoria, 7th Octber, 1994'.map, bendigo, government camp, pall mall, bendigo creek, commissioner's gully, view place (now view street), post office, bank of victoria, district surgeon, sandhurst fire brigade, police hospital, flagstaff, gold office, license shed, military barracks, stables, commissioner's buildings, police office. old cemetery, garden. , survey and mapping victoria. sandhurst, bendigo. -
 Ballarat Tramway Museum
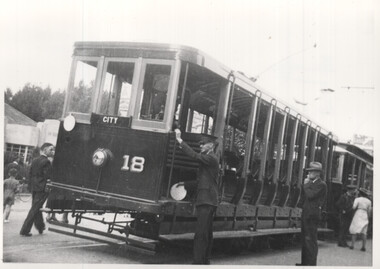
photograph - Set of 3 Black & White - ESCo trams Bendigo - Easter, Peter Duckett, c1947
Set of three photographs of early Bendigo trams photographed by Peter Duckett, Easter Monday 1946 or 1947 1 - Bendigo 18 - note the white disc held by a crew member. View St at Charing Cross. Tram has the destination of City. 2 - Original car No. 9 (in final form) and open bench car, either 17 or 18, probably at Ironbark Gully loop. Tram has destination of Quarry Hill. 3 - Original ESCo cars - Charing Cross.Yields information about Bendigo trams during Easter 1946 or 1947Set of three black and white photographs by Peter Duckett.Details the image on the rear of the print in ink.bendigo, tramcars, esco, bendigo tramways, tram 18, tram 9, charing cross, easter -
 Monbulk Historical Society
Ben Simcox
Bennie Simcox first came to the Monbulk area about 1860, following the first important gold discovery at the end of 1858. As the gold rush was short lived Simcox returned to Collingwood but later came back to Monbulk, built himself a hut to live in and become its first known permanent resident. The hut was burnt in the 1913 fires. Monbulk was thrown open to selection in 1894, and that's when the first farmers including Bennie Simcox went into Monbulk. It was a big, timbered country in those days. Once Ben had cleared some of his land he started to grow raspberries on it. He would be up before daylight ready to start picking. Ben also picked for a local family, the Camms to help make ends meet. When Ben Simcox was virtually at the retired stage, he wanted to develop his bit of the gully as a tourist attraction, As his nephew Fred Gay who owned the 10 acres below Ben wanted to farm, he was happy to swap his treed block with Ben. At a time when most settlers were clearing their properties, Ben Simcox, by contrast, cultivated the native plants and planted most of the large trees seen on the property today. And so Nathania Springs was developed as a tourist resort, and a mini-botanical garden. He diverted the natural water supply to form ornamental garden pools stocked with trout and tame native black fish. There were many visitors came to the Dandenongs, Some arriving in motor cars others in converted furniture vans lined with seats or charabancs with the long extended chassis and the open canvas roofs. Identities such as Billy Hughes, Madame Melba would often come to look through Nathania Springs. Bennie sold Nathania Springs to Councillor Ferdinand Thomas Le Juge, a boarding house proprietor and later the town baker in 1909 then in about 1921 Ben’s nephew Fred and his wife and family continued to open Nathania Springs to the public. It was not unusual in around 1924-25 for up to a thousand people a day to arrive at Nathania Springs to go through the gardens. At sixpence a time, that was a lot of money in those days. This photo is part of a collection of historic and social significance of the early settlement of Monbulk. Copies of photographs can be purchased from the Monbulk Historical Society.simcox, nathania springs, monbulk, 1860, berries -
 University of Melbourne, Burnley Campus Archives
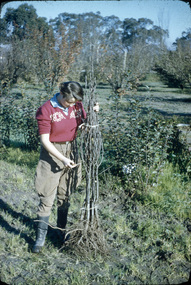
Album - Colour slides, Burnley Views, 1956-1969
Contributor: T.H. KneenBox of 47 slides, some labelled. (1) "Marjorie Hall 1st Year Student June '56 No. 1872." Working with fruit tree stock. (2) "Orchard June 1956 No. 1710." 2 men and a tractor.(3) "Camp 1957." Wilson's Promontory. (4) View of Drive No. 1677." C. 1958 (5) "GenView No. 1771." (6) "Burnley Gardens Entrance 4.4.58 N0. 1672." (7) "Wilson's Promontory Lilly Pilly Gully Nov 1960." (8) Dec '62." (9) "Dec '62." Kneen child. (10) Luffmann Ponds "Aut. 1962." (11) Grevillea Sep 1963. (12) Sep 1963.Reflection of Crack Willow in Luffmann Ponds. (13) Sep 1963. Orchard blossom. (14) View of Administration Building at sunset Aug 1964. (15) Rose 'Heat Wave.' May 1965. (16) Kneen child sitting under a tree May 1966. (17) 'Department of Agriculture Burnley Gardens' sign May 1966. (18) Administration Building May 1966. (19) Plant Science Block May 1966. ((20) Wintersweet August 1966.(Actually appears to be Witch Hazel Hamamelis mollis.) (21) Student on tractor in the Orchard October 1966. (22) Garden view, view of Principal's Residence through blossom trees October 1966. (23) Students walking through the Gardens October 1966. (24) "Leaf Cuttings Rex begonia 2 October 1966. (25) Emily Gibson beds October 1966. (26) Principal's Residence in a garden view October 1966. (27) Garden view looking towards the Principal's Residence and the Shady Garden October 1966. (28) Drive looking towards the Administration Building from the Plant Research Institute. (29) Kneen child (not Burnley?) (30) Unveiling of Burnley Horticultural College plaque commemorating 75 years, 1891-1966 - Eric Littlejohn, ?, T.H. Kneen. Includes key to Pavilion 1969. (31) "Rose Pruning Demo - Canteen." July 1969. (32, 33) "Rose Pruning Demo 1969." July 1969. (34) "Plant Science Block & College." July 1969. (35) Plant Science Block 6/69." July 1969. (36) "Burnley Gardens 6/69." looking towards Dairy and Yarra Boulevard (37) "Pond No. 1717." (38) "Pond 1748." Kneen children playing by the Luffmann Ponds, Oak tree behind.. (39) Ginkgo leaves June 1967. (42) ? (43) Erithyna caffra in flower (removed 2016) December 1966. ((44) Administration Building and Nursery from PRI." (45) Pelargoniums. (46) Azalea mollis (47) Pelargonium foreground, geranium background.marjorie hall, students, fruit trees, orchard, tractor, wilson's promontory, burnley gardens, entrance, drive, garden view, luffmann ponds, grevillea, rose, kneen family, sign, wintersweet, plant science block, administration building, students working outside, principals residence, plaque, rose pruning demonstrations, ginkgo, pelargoniums, erythryna -
 Falls Creek Historical Society
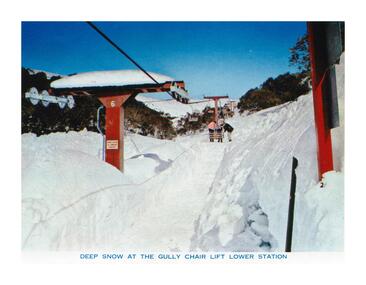
Postcard - Deep Snow at the Gully Chair Lift Lower Station
These photographs were taken in and around Falls Creek by Samuel Keith Pearce and printed for him as a foldout postcard by NuColor Vue. The postcards state they were printed for S. K. Pearce Pty. Ltd of Tawonga and Mount Beauty. Samuel Keith Pearce was born on 24 June 1917 in Armadale, Victoria. By the late 1940s he owned the Mt Beauty Supermarket, Newsagency, Drapery and Hardware store at Mount Beauty and also a store at Tawonga in partnership with his brother Gordon Cathew Pearce. For some time, they operated as Pearce Brothers. In the early 1960s Keith also opened a mini mart In Falls Creek. As well as being a keen photographer and an astute businessman, Keith Pearce was a well-known identity in the Kiewa Valley, making many contributions to the development of the area over a long period. This included serving as a member of the Bright Shire Council for many years. He worked hard to promote the interests of the Upper Kiewa Valley. As a sign of recognition and appreciation for his contribution to the community, the park opposite the grocery store in Mount Beauty was named the SK Pearce Gardens in his honour. Samuel Keith Pearce died on 7 July 1994 in Mount Beauty, VictoriaThis collection of postcards and image is significant because they were commissioned by a highly successful business in Falls Creek, Victoria.A high definition photo of the Gully Chair Lift Lower Station, Falls Creek. The area is covered in deep snow. The Gully Double Chair Lift came into operation in 1964 and operated until 1982 when it was replaced by the Gully Triple Chair.falls creek resort, tows and lifts at falls creek, the gully chairlift -
 Falls Creek Historical Society
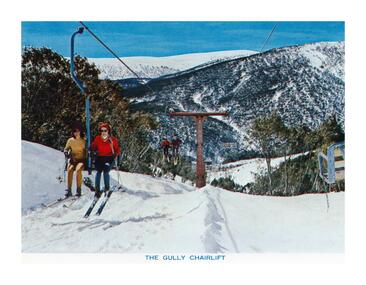
Postcard - The Gully Chair Lift
These photographs were taken in and around Falls Creek by Samuel Keith Pearce and printed for him as a foldout postcard by NuColor Vue. The postcards state they were printed for S. K. Pearce Pty. Ltd of Tawonga and Mount Beauty. Samuel Keith Pearce was born on 24 June 1917 in Armadale, Victoria. By the late 1940s he owned the Mt Beauty Supermarket, Newsagency, Drapery and Hardware store at Mount Beauty and also a store at Tawonga in partnership with his brother Gordon Cathew Pearce. For some time, they operated as Pearce Brothers. In the early 1960s Keith also opened a mini mart In Falls Creek. As well as being a keen photographer and an astute businessman, Keith Pearce was a well-known identity in the Kiewa Valley, making many contributions to the development of the area over a long period. This included serving as a member of the Bright Shire Council for many years. He worked hard to promote the interests of the Upper Kiewa Valley. As a sign of recognition and appreciation for his contribution to the community, the park opposite the grocery store in Mount Beauty was named the SK Pearce Gardens in his honour. Samuel Keith Pearce died on 7 July 1994 in Mount Beauty, VictoriaThis collection of postcards and image is significant because they were commissioned by a highly successful business in Falls Creek, Victoria.A high definition photo of skiers on the Gully Double Chair Lift, Falls Creek. The Gully Double Chair Lift came into operation in 1964 and operated until 1982 when it was replaced by the Gully Triple Chair.falls creek resort, tows and lifts at falls creek, the gully chairlift -
 Bendigo Historical Society Inc.
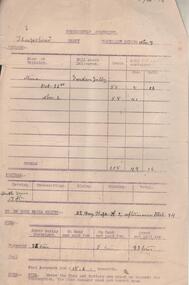
Administrative record - Sheepshead Shaft Fortnightly Statement Tonnage, 1917
... Garden Gully Mill...Bendigo Margaret Roberts goldmining Sheepshead Shaft Garden ...Two buff coloured documents. On top of page: Fortnightly Statement, Sheepshead Shaft, Fortnight ending Nov. 7 and 24/10/17. Columns filled in include: mine or tributor, mill share delivered, loads and gold (if ascertained), footage, number of rock drill shifts and fuel used. Statement is part of the Margaret Roberts Collection of mining documents.bendigo, margaret roberts, , goldmining, sheepshead shaft, garden gully mill, wood burnt, fuel, rock drill shifts -
 Bendigo Historical Society Inc.
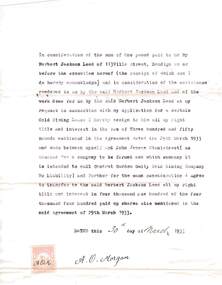
Document - MCCOLL, RANKIN AND STANISTREET COLLECTION: CENTRAL GARDEN GULLY GOLD MINING CO NL, 1933 -1936
... MCCOLL, RANKIN AND STANISTREET COLLECTION: CENTRAL GARDEN... Central Garden Gully GMC... Central Garden Gully GMC gold mining Lease Agreements McColl ...Document. Envelope contains: - Tribute Agreements. Sales Agreement for Quartz Prospecting Claims, Lease Agreements, Cert. of Inspection of Boiler, Hire Agreement for Boiler.McColl, Rankin & Stanistreetorganization, business, gold mine, mccoll, rankin & stanistreet, central garden gully gmc, gold mining, lease agreements -
 Eltham District Historical Society Inc
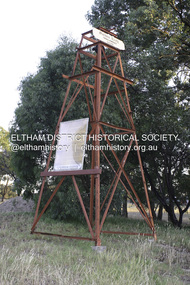
Photograph - Digital Photograph, Alan King, Golden King Mine poppet-head, Yarrambat Primary School, 1 February 2008
The Golden King Mine poppet-head stands at the school’s Yan Yean Road exit gate. Published: Nillumbik Now and Then / Marguerite Marshall 2008; photographs Alan King with Marguerite Marshall.; p23 Early Yarambat - Tanck's Corner Its early settlers, who in the 1840s were amongst the first non-Aboriginal people in the area, found life tough as they grazed their sheep and cattle. Yarrambat was then known as Tanck’s Corner or Reynolds Corner, after wood carter, Frederick Tanck, who owned land north of Ironbark Road, at the corner of Yan Yean Road, and Thomas Reynolds, owner of the opposite property. After Reynolds sold his land, the corner became known as Tanck’s Corner. In 1929 the district’s name was changed to Yarrambat, believed to mean ‘high hill’ in the Wurundjeri language. Tanck’s Corner was in the centre of gold-bearing country and the district is honeycombed with old tunnels and shafts. However although gold played a dominant role for decades, there was insufficient to develop a substantial township. Meat and agricultural produce made a greater impact. Until the mid-20th century the only substantial building was the primary school. The first gold rush occurred around 1860, the second after 1900; then during the Depression, the Government paid men to pan for gold. The first rush attracted hundreds of Chinese people to Smugglers Gully, who constructed round diggings to keep away spirits. Alluvial miners lived along the Plenty River in tents or humpies - some fenced with gardens - and some miners distilled their own ‘plonk’. It was a wild time and bushrangers - and later gangster Squizzy Taylor - were said to hide4 in the old Pioneer Tunnel in Dunne’s Gully between Heard Avenue and Pioneer Road. Mines opposite Tanck’s Corner included Beer’s Line, Golden Crown and Golden Stairs. Some of the big mines had batteries and stampers to process quartz. At first there was plenty of alluvial gold, as much as two ounces to the ton. At times gold was exposed after heavy rains so fossickers panned for gold around orchard irrigation trenches. Gold was mined until 1984 when Yarrambat’s last operating goldmine, the Golden King Mine, in North Oatlands Road, closed. The Clayton family operated it full-time, making a comfortable living and in the 1960s it was the only private family gold mine in Victoria.5 Gold was such an important part of Yarrambat’s history that a gold poppet-head is the Yarrambat Primary School’s logo. The Golden King Mine poppet-head stands at the school’s Yan Yean Road exit gate. However this school was built in 1988. The original school No 2054, at the corner of Ironbark and Yan Yean Roads, was opened in 1878 and modified to its present form in the 1920s. In 2000 it was relocated to the Heritage Museum at Yarrambat Park.7 The school, whose first head teacher was Charles Planner, consisted of one room with a three-roomed residence. The school was also the community centre. On Saturday nights it was crammed for dances or euchre parties, community singing or other social events. On Sundays, services for different denominations took turns each week. However the school had its teething problems. Parents accused Charles Planner of neglecting his duties and the school closed several times. When it closed in 1892, only church services continued. Social activities moved elsewhere, such as the tennis club to the Stuchbery tennis court opposite. A sports day and woodchop on Boxing Day around 1900 was held at the Evelyn Hill Hotel, also called Evelyn Arms and Tunnel Hill Hotel, on the Greensborough–Diamond Creek Road. An annual agricultural show in Diamond Creek paraded through the town, and New Year’s Day picnics at the Yan Yean Reservoir included highland dancing and competitions. Also popular were the Indian hawkers who visited every three months, selling trinkets, clothing and other items. One called Jimmy ‘Allem dem Bedi’, gave presents and told stories, played draughts and sold delicious curries he cooked over his camp fire at night.This collection of almost 130 photos about places and people within the Shire of Nillumbik, an urban and rural municipality in Melbourne's north, contributes to an understanding of the history of the Shire. Published in 2008 immediately prior to the Black Saturday bushfires of February 7, 2009, it documents sites that were impacted, and in some cases destroyed by the fires. It includes photographs taken especially for the publication, creating a unique time capsule representing the Shire in the early 21st century. It remains the most recent comprehenesive publication devoted to the Shire's history connecting local residents to the past. nillumbik now and then (marshall-king) collection, golden king mine, tanck's corner, yarrambat primary school -
 Bendigo Historical Society Inc.
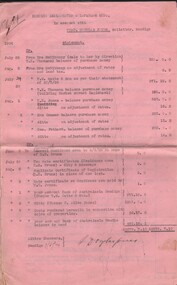
Document - MISS G ALICE JONES COLLECTION: STATEMENT
... Garden Gully Mill... Department Koch's Great Northern City of Bendigo Mr Enticknap Garden ...Bendigo Amalgamated Goldfields Ltd., in account with Fred. Douglas Jones. Pink paper dated June 6 to Aug 7, 1924. Statement contains details of costs for sale of properties by auction on 27/6/24.the miss g. alice jones collection - statement, bendigo amalgamated goldfields ltd, mrs mcgibbony, t e thomson, t c watts & son, h e jones, mrs cramer, geo pethard, h e bruns, bank of australasia bendigo, fred douglas jones, mr bishop, collman & tacchi, mines department, koch's, great northern, city of bendigo, mr enticknap, garden gully mill, nicholsons, mrs bernau, miss hesse -
 Bendigo Historical Society Inc.
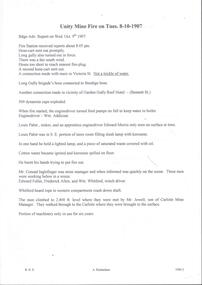
Document - ULSTER GOLD MINING COMPANY NO LIABILITY - UNITY MINE FIRE 8/10/1907 & FAMOUS GOLD MINES
... Garden Gully Reef Hotel... Bendigo Advertiser 9/10/1907 Garden Gully Reef Hotel Wm Addicoat ...Typed copy of recount by Albert Richardson of a fire at Unity Mine on Tuesday 8-10-1907. Report from the Bendigo Advertiser Wednesday October 9th 1907. Notes mention Fire Brigade, miners, how the fire started and how the men down the shaft escaped when the rope crash down the shaft. On the back is a handwritten carbon copy of notes titled Famous Gold Mines of Bendigo and Eaglehawk. Notes give yields of gold for alluvial and quartz mining. Deep Shafts in 1904 of which there were eleven with a depth of more than 3000 feet and 53 over 2000 feet and two which were more than 4000 feet. Wages for 1911 for Engine Drivers and Firemen and Boiler Attendants. Note on winding plants and air compressors.document, gold, ulster gold mining coy no liability, ulster gold mining company no liability, unity mine fire 8/10/1907, bendigo advertiser 9/10/1907, garden gully reef hotel, wm addicoat, louis pabst, edward morris, conrad inglefinger, edward fuller, frederick allen, wm whitford, mr jewell, carlisle mine, famous gold mines of bendigo and eaglehawk, new chum line, garden gully line, hustlers line, victoria quartz mine, new chum railway, mines report 1911 p15, albert richardson -
 Bendigo Historical Society Inc.
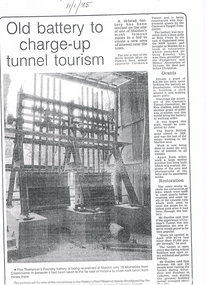
Newspaper - LONG GULLY HISTORY GROUP COLLECTION: OLD BATTERY TO CHARGE-UP TUNNEL TOURISM
BHS CollectionThree photocopies of a newspaper article titled Old Battery to charge-up tunnel tourism. The date 11/1/85 is written at the top of the article. There is a photo of the battery mentioning it was the Thompson's Foundry battery and it was being re-erected at Maldon, near Castlemaine. It has been in far of Victoria to crush rock taken from mines there. The battery will be one of the attractions in the Parkin's Reef Reserve being developed by the Conservation, Forests and Lands. Also mentioned is the work of volunteers, grants they received, restoration and tourism.bendigo, history, long gully history group, the long gully history group - old battery to charge-up tunnel tourism, thompson's foundry, parkin's reef reserve, conservation forests and lands department, carman's tunnel, north british mine, parkin's reef, carman's tunnel committee, dr doug kemsley, prospectors' and miners' association of victoria, ken garden, north british mine, george ellis -
 Eltham District Historical Society Inc
Photograph - Digital Photograph, Alan King, Blue Lake, Plenty Gorge Park, 2008
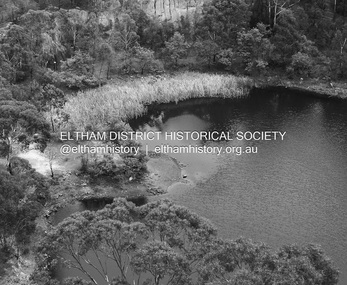
A quarry was transformed into the Blue Lake. Published: Nillumbik Now and Then / Marguerite Marshall 2008; photographs Alan King with Marguerite Marshall.; p179 The dramatic steep-sided Plenty Gorge lies along the divide of two geological areas, and separates the Nillumbik Shire and the City of Whittlesea. On the Nillumbik side are undulating hills and sedimentary rock, and in Whittlesea, lies a basalt plain formed by volcanic action up to two million years ago. This provides the Plenty Gorge Park with diverse vegetation and habitats, making it one of Greater Melbourne’s most important refuges for threatened and significant species. The park, established in 1986, consists of around 1350 hectares, and extends 11 kilometres along the Plenty River, from Greensborough to Mernda. It provides a wildlife corridor for around 500 native plant and 280 animal species. The area’s plentiful food and water attracted the Wurundjeri Aboriginal people and then European settlers. By 1837 squatters had claimed large runs of land for their sheep and cattle. The Plenty Valley was among the first in the Port Phillip District to be settled - mainly in the less heavily timbered west - and was proclaimed a settled district in 1841.But by the late 1880s, the settlers’ extensive land clearing for animal grazing, then agriculture, depleted the Wurundjeri’s traditional food sources, which helped to drive them away. Many Wurundjeri artefacts remain (now government protected), and so far 57 sites have been identified in the park, including scarred trees, burial areas and stone artefacts. Pioneer life could be very hard because of isolation, flooding, bushfires and bushrangers. Following the Black Thursday bushfires of 1851, basalt was quarried to build more fire-resistant homes. Gold discoveries in the early 1850s swelled the population, particularly around Smugglers Gully; but food production made more of an impact. In the late 1850s wheat production supplanted grazing. In the 1860s the government made small holdings available to poorer settlers. These had the greatest effect on the district, particularly in Doreen and Yarrambat, where orchards were established from the 1880s to 1914. Links with a prominent early family are the remains of Stuchbery Farm, by the river’s edge bounded by Smugglers Gully to the north and La Trobe Road, Yarrambat, to the east. The Stuchberys moved to the valley in 1890, and the family still lives in the area. In 1890, Alfred and Ada first lived in a tent where four children were born, then Alfred built the house and outbuildings around 1896. They planted an orchard, then a market garden, and developed a dairy. The family belonged to the local Methodist and tennis communities. Their grandson Walter, opened the Flying Scotsman Model Railway Museum in Yarrambat, which his widow, Vi, continues to run. Wal was also the Yarrambat CFA Captain for 22 years until 1987. Walter sold 24 hectares in 1976 for development - now Vista Court - and in 1990, the remaining 22.6 hectares for the park. Remaining are an early stone dairy and remnants of a stone barn, a pig sty and a well. Until it was destroyed by fire in 2003, a slab hut stood on the Happy Hollow Farm site, at the southern end of the park. The hut is thought to have been built in the Depression around 1893. This was a rare and late example of a slab hut with a domestic orchard close to Melbourne. Emmet Watmough and his family first occupied the hut, followed by a succession of families, until the Bell family bought it around 1948. There they led a subsistence lifestyle for 50 years, despite encroaching Melbourne suburbia. The Yellow Gum Recreation Area includes the Blue Lake, coloured turquoise at certain times of the year. Following the 1957 bushfires, this area was quarried by Reid Quarries Pty Ltd for Melbourne’s first skyscrapers, then by Boral Australia. However in the early 1970s water began seeping into the quarry forming the Blue Lake and the quarry was closed. The State Government bought the site in 1997 and opened it as a park in 1999.This collection of almost 130 photos about places and people within the Shire of Nillumbik, an urban and rural municipality in Melbourne's north, contributes to an understanding of the history of the Shire. Published in 2008 immediately prior to the Black Saturday bushfires of February 7, 2009, it documents sites that were impacted, and in some cases destroyed by the fires. It includes photographs taken especially for the publication, creating a unique time capsule representing the Shire in the early 21st century. It remains the most recent comprehenesive publication devoted to the Shire's history connecting local residents to the past. nillumbik now and then (marshall-king) collection, blue lake, plenty gorge park -
 Eltham District Historical Society Inc
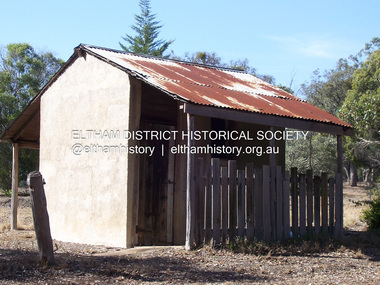
Photograph - Digital Photograph, Marguerite Marshall, Stuchbery Farm dairy, 14 March 2008
Stuchbery Farm was situated on the Plenty River bounded by Smugglers Gully to the north and La trobe Road, Yarrambat, to the east. Alan and Ada Stutchbery moved to the valley in 1890, first living in a tent where four children were born. Alfred built a home and outbuildings around 1896. They planted an orchard, then a market garden and developed a dairy. Published: Nillumbik Now and Then / Marguerite Marshall 2008; photographs Alan King with Marguerite Marshall.; p179 The dramatic steep-sided Plenty Gorge lies along the divide of two geological areas, and separates the Nillumbik Shire and the City of Whittlesea. On the Nillumbik side are undulating hills and sedimentary rock, and in Whittlesea, lies a basalt plain formed by volcanic action up to two million years ago. This provides the Plenty Gorge Park with diverse vegetation and habitats, making it one of Greater Melbourne’s most important refuges for threatened and significant species. The park, established in 1986, consists of around 1350 hectares, and extends 11 kilometres along the Plenty River, from Greensborough to Mernda. It provides a wildlife corridor for around 500 native plant and 280 animal species. The area’s plentiful food and water attracted the Wurundjeri Aboriginal people and then European settlers. By 1837 squatters had claimed large runs of land for their sheep and cattle. The Plenty Valley was among the first in the Port Phillip District to be settled - mainly in the less heavily timbered west - and was proclaimed a settled district in 1841. But by the late 1880s, the settlers’ extensive land clearing for animal grazing, then agriculture, depleted the Wurundjeri’s traditional food sources, which helped to drive them away. Many Wurundjeri artefacts remain (now government protected), and so far 57 sites have been identified in the park, including scarred trees, burial areas and stone artefacts. Pioneer life could be very hard because of isolation, flooding, bushfires and bushrangers. Following the Black Thursday bushfires of 1851, basalt was quarried to build more fire-resistant homes. Gold discoveries in the early 1850s swelled the population, particularly around Smugglers Gully; but food production made more of an impact. In the late 1850s wheat production supplanted grazing. In the 1860s the government made small holdings available to poorer settlers. These had the greatest effect on the district, particularly in Doreen and Yarrambat, where orchards were established from the 1880s to 1914. Links with a prominent early family are the remains of Stuchbery Farm, by the river’s edge bounded by Smugglers Gully to the north and La Trobe Road, Yarrambat, to the east. The Stuchberys moved to the valley in 1890, and the family still lives in the area. In 1890, Alfred and Ada first lived in a tent where four children were born, then Alfred built the house and outbuildings around 1896. They planted an orchard, then a market garden, and developed a dairy. The family belonged to the local Methodist and tennis communities. Their grandson Walter, opened the Flying Scotsman Model Railway Museum in Yarrambat, which his widow, Vi, continues to run. Wal was also the Yarrambat CFA Captain for 22 years until 1987. Walter sold 24 hectares in 1976 for development - now Vista Court - and in 1990, the remaining 22.6 hectares for the park. Remaining are an early stone dairy and remnants of a stone barn, a pig sty and a well. Until it was destroyed by fire in 2003, a slab hut stood on the Happy Hollow Farm site, at the southern end of the park. The hut is thought to have been built in the Depression around 1893. This was a rare and late example of a slab hut with a domestic orchard close to Melbourne. Emmet Watmough and his family first occupied the hut, followed by a succession of families, until the Bell family bought it around 1948. There they led a subsistence lifestyle for 50 years, despite encroaching Melbourne suburbia. The Yellow Gum Recreation Area includes the Blue Lake, coloured turquoise at certain times of the year. Following the 1957 bushfires, this area was quarried by Reid Quarries Pty Ltd for Melbourne’s first skyscrapers, then by Boral Australia. However in the early 1970s water began seeping into the quarry forming the Blue Lake and the quarry was closed. The State Government bought the site in 1997 and opened it as a park in 1999.This collection of almost 130 photos about places and people within the Shire of Nillumbik, an urban and rural municipality in Melbourne's north, contributes to an understanding of the history of the Shire. Published in 2008 immediately prior to the Black Saturday bushfires of February 7, 2009, it documents sites that were impacted, and in some cases destroyed by the fires. It includes photographs taken especially for the publication, creating a unique time capsule representing the Shire in the early 21st century. It remains the most recent comprehenesive publication devoted to the Shire's history connecting local residents to the past. nillumbik now and then (marshall-king) collection, ada stuchbery, alan stuchbery, dairy, stuchbery farm, farm buildings, yarrambat, plenty gorge park -
 Bendigo Historical Society Inc.
Photograph - Kangaroo Flat Gold Mine Collection: Deadhorse Gully, Sydney Flat Creek March 1986
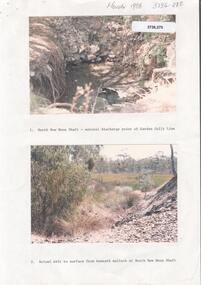
Colour photographs, seventeen images on nine page. Images labelled as follows : 1. North New Moon shaft - natural discharge point of Garden Gullly line 2. Actual exit to surface from beneath mullock at North New Moon shaft. 3. Looking into Deadhorse Gully from mullock heap at North New Moon site. 4. Deadhorse Gully downstream of WMC Weir. 5. Sydney Creek track crossing - impassable ford. 6. Sydney Creek looking downstream from ford. 7. Sydney Creek looking upstream from road near Recreation Reserve (12 inch pipe under road). 8. Sydney Creek looking downstream from same point. 9. Sydney Creek - Camp Road, looking upstream.. 10. Sydney Creek - Camp Road, looking downstream. 11. Sydney Creek - Camp Road Culverts. 12. Sydney Creek - Pyramid Road Bridge, looking upstream. 13. Sydney Creek - Pyramid Road Crossing looking downsteam. 14. Sydney Creek - rail crossing, looking upstream. 15. Sydney Creek - rail crossing, looking downstream. 16. Sydney Creek - Airstrip road, looking upstream. 17. Sydney Creek - Airstrip Road, looking downstream 12 inch pipe under road. Lined paper, in blue pen 'Deadhorse Gully-Sydney Flat Creek, March 1986, Photos of Deadhorse Gully/Sydney Flat Creek'kangaroo flat gold mine, deadhorse gully, sydney flat creek, unity mining, water discharge, north new moon, camp road, pyramid hill road, eaglehawk -
 Bendigo Historical Society Inc.
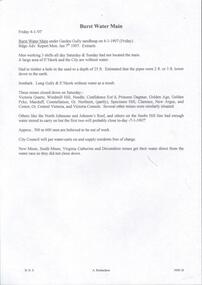
Document - DRAINAGE PROBLEMS - BURST WATER MAIN UNDER GARDEN GULLY SANDHEAP
... DRAINAGE PROBLEMS - BURST WATER MAIN UNDER GARDEN GULLY... Burst Water Main under Garden Gully Sandheap... under Garden Gully Sandheap Bendigo Advertiser 7/1/1907 Victoria ...Handwritten notes from a Bendigo Advertiser report 7 Jan 1907. Three shifts of men working all Saturday and Sunday had not located the main. A large are of Eaglehawk and the City are without water. Had to timber a hole to a depth of 25 ft. Victoria Quartz, Windmill Hill, Needle, Confidence Ext'd, Princess Dagmar, Golden Age, Golden Pyke, Macduff, constellation, Gt Northern, (partly), Specimen Hill, Clarence, New Argus, Comet, Gt Central Victoria and Victoria Consols had to close because they had no water and five to six hundred men believed to be out of work. City Council will put water-carts on and supply residents free of charge. New Moon, South Moon, Virginia , Catherine and Devonshire mines get their water direct from the water race so they did not close down. Document from Albert Richardson Collection of mining history.gold, drainage problems, drainage problems, burst water main under garden gully sandheap, bendigo advertiser, 7/1/1907, victoria quartz, windmill hill, needle, confidence ext'd, princess dagmar, golden age, golden pyke, macduff, constellation, gt northern, (partly), specimen hill, clarence, new argus, comet, gt central victoria, victoria consols, north johnsons, johnson's reef, snobs hill line, new moon south moon, virginia, catherine, devonshire, albert richardson -
 Bendigo Historical Society Inc.
Newspaper - LONG GULLY HISTORY GROUP COLLECTION: KOCK'S MINE WORKERS
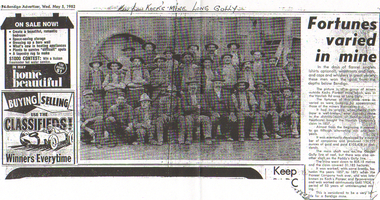
... Garden Gully Line of Reef... Pioneer Mine Henry Koch Havilah Company's Claim Garden Gully Line ...The initial partnership in a quartz crushing plant between Henry Koch, Simon Albert and Charles Wallin was dissolved in 1860 with Koch becoming the sole owner. In 1866 the crushing plant consisted of a 50 hp engine and 48 stamping heads capable of crushing 600 tons of quartz per week. By 1902 there were 72 stamps and this was by far the largest crushing plant in the area, serving many quartz mines. Henry Koch (1800-1889) was a German sailor who signed off when his ship reached Melbourne in 1851. Having heard of the gold discovery he proceeded to Bendigo where he was initially employed in puddling in the Myers Flat area. He was soon employed and then made partner in a quartz crushing plant that he became sole owner of in 1860. He was also landlord at the British and American Hotel and the Silver Mines Hotel. HE also started the Perseverance United gold claim. He married Anna Maria Theresia Heinz in 1857. In 1872 he sold the crushing plant for 75,000 pounds and took his family back to Germany. He resumed his trade as a ship builder although he maintained many Bendigo mining interests.Photocopy of an article from the Bendigo Advertiser, dated 5/5/1982 titled Fortunes carried in mine. Written above the photo is: Men from Kock's Mine Long Gully. One man is wearing a suit and the rest are in work clothes. The mine was worked, with some breaks, between 1857 and 1871 when the Pioneer Company took over, and was later known as Koch's Pioneer and Perseverance and worked continuously until 1924, a period of 53 years of uninterrupted mining.bendigo, history, long gully history group, the long gully history group - kock's mine workers, bendigo advertiser 5/5/1982, kochs pioneer mine, henry koch, havilah company's claim, garden gully line of reef, paddy's gully line, koch's pioneer and perseverance -
 Bendigo Historical Society Inc.
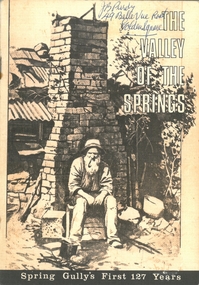
Document - PURDY COLLECTION: VALLEY OF THE SPRINGS
... to celebrate Spring Gully's First 127 Years. Contains poem about...: St. Phillips Spring Gully, choir practice; garden party ...Booklet: 'The Valley of the Springs' a booklet produced to celebrate Spring Gully's First 127 Years. Contains poem about Spring Gully by J.C. Hattam, Photos: St. Phillips Spring Gully, choir practice; garden party to raise funds for St. Phillips, taken on Keck's verandah, Abbotts Tannery, Tannery Lane, school photos, opening of tower on One Tree Hill, a mine at Diamond Hill (un-named) horse drawn vehicles, wood carter, Spring Gully reservoir being enlarged. Written on front in biro 'J.B. Purdy, 49 Bellevue Road, Golden Square. bendigo, history, spring gully