Showing 294 items matching "surrender"
-
 Wangaratta RSL Sub Branch
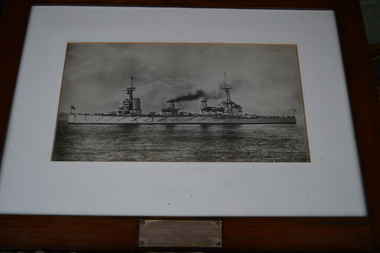
Print - Framed Print, HMAS Australia
With the outbreak of the First World War, HMAS Australia became the flagship of the naval force that captured the German colonies in the southern Pacific. She led a force which captured Rabaul on 13 September 1914 before proceeding to Samoa. With no German forces left in the South Pacific, Australia was deployed to the United Kingdom. En route she sank the German ship Eleanore Woermann. On 8 February 1915 she became flagship of the 2nd Battle-cruiser Squadron of the Royal Navy's Grand Fleet. Australia's service with the Grand Fleet consisted of a series of frequent patrols and exercises. She was twice rammed, firstly on 22 April 1916 by HMS New Zealand. This led to her missing the Battle of Jutland which, considering the disastrous losses in the Battle-cruiser Force, may well have been fortunate. She was rammed again by HMS Repulse in December 1917. Australia carried out experimental aircraft operations in 1918 and led the port column of the Grand Fleet at the surrender of the German High Seas Fleet. Returning home in 1919, Australia suffered a mutiny upon reaching Fremantle, Western Australia. Quite obsolete, she became a training vessel in Westernport until scuttled off Sydney Heads on 12 April 1924.The Australian Navy's first flagship, the battle cruiser HMAS Australia (I) was the centrepiece of the 'Fleet Unit', whose acquisition signalled the RAN's arrival as a credible ocean going force. Ordered from John Brown and Company in March 1910, construction began three months later with the total cost of the ship and fittings expected to be some £2 million. The Commonwealth Government decided upon the name Australia, and it proved a popular choice, carefully avoiding any suggestion of favouritism towards any one Australian State. The ship's badge maintained the national theme by featuring the Federation Star overlaid by a naval crown, while the motto 'Endeavour' reflected the ideal of the Australian spirit and recalled Lieutenant James Cook's ship of 1768-71.Timber frame of black and white print of a ship at sea.Imperial War Museum Photograph HMAS AUSTRALIA - RAN FLAGSHIP First flagship of the Royal Austrlian Navy 1913-1920 Sunk under the terms of the Washington Treaty 12th April 1924 This frame is made of teak from her deckhmas australia, ww1 -
 Federation University Historical Collection
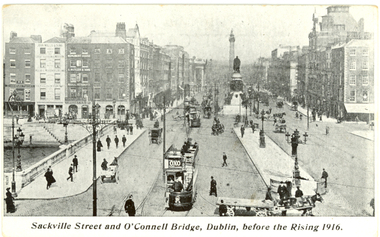
Postcard - Postcards - black and white, Coleman & Co, Dublin before and after the Rising, 1916, c1916
The Easter Uprising took place in April 1916 in Dublin and is one of the pivotal events in modern Irish history. At the end of the Easter Uprising, 15 men identified as leaders were executed at Kilmainham Jail. To some, these men were traitors, to others they became heroes. (http://www.historylearningsite.co.uk/1916_easter_rising.htm, accessed 16 April 2014) Organised by seven members of the Military Council of the Irish Republican Brotherhood,[3] the Rising began on Easter Monday, 24 April 1916, and lasted for six days. Members of the Irish Volunteers — led by schoolmaster and Irish language activist Patrick Pearse, joined by the smaller Irish Citizen Army of James Connolly, along with 200 members of Cumann na mBan — seized key locations in Dublin and proclaimed the Irish Republic independent of the United Kingdom. There were some actions in other parts of Ireland: however, except for the attack on the Royal Irish Constabulary barracks at Ashbourne, County Meath, they were minor. With vastly superior numbers and the use of artillery, the British army quickly suppressed the Rising, and Pearse agreed to an unconditional surrender on Saturday 29 April. Most of the leaders were executed following courts-martial, but the Rising succeeded in bringing physical force republicanism back to the forefront of Irish politics. (http://en.wikipedia.org/wiki/Easter_Rising, accessed 16/04/2014) Sackville Street Dublin is now known a O'Connell Street.Seven black and white postcards showing photographic scenes before and after the Rising in Dublin.chatham family archive, chatham, holmes, ireland, dublin, uprising, sackville street, o'connell bridge, citizen army, liberty hall, henry street, nelson's pillar, post office, arnott's, abbey street, ruins, hotel metropole, the rising, easter uprising, easter rebellion, o'connell, chatham family archive, chatham, holmes, ireland, dublin, uprising, sackville street, o'connell bridge, citizen army, liberty hall, henry street, nelson's pillar, post office, arnott's, abbey street, ruins, hotel metropole, the rising, easter uprising, easter rebellion, o'connell -
 Bendigo Military Museum
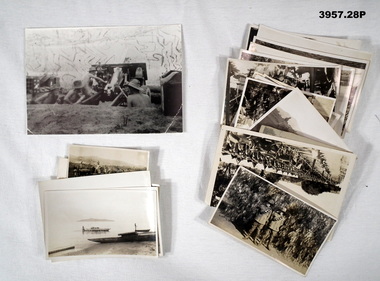
Photograph - PHOTOGRAPHS WW2, Possibly 1945
Photos labelled Jack are John Alfred TAYLOR NX102933 21st Guard Battalion. .28) This is Roy TAYLOR NX 94268 21st Field Regiment. Roy is on the left of photos. These men were brothers.Collection of photos, black / white & sepia. Some in Australia re Light Horse pre war. Most are presumably taken in New Britain up to & at wars end in 1945. One photo is in New Guinea. Many have been written on the back in pen. Photos are various sizes. Average noted. .16) Men & Bren gun carriers .17) Men & bulldozer .18) 7 men with machine gun .19) Native boats .20) Soldier & natives with canoe .21) Soldier & natives with canoe .22) 2 soldiers with POW .23) Soldier with plane wreckage .24) 3 soldiers with natives .25) 8 soldiers in group .26) Soldier sitting in plane wreck .27) Soldier in native canoe .28) Artillery unit in position firing, 4 men Handwritten on the back in pen: .1) “Jack Taylor” .2) “Jap Prisoners” .3) “After surrender, jap prisoners on New Britain” .4) “Camp on New Britain” .5) “Jap prisoners of war” .6) Jacks collection of photos New Britain .7) Jack New Britain 1945 .8) Jap Working Party New Britain .9) Camp probably New Britain .10) Wrecked jap planes on New Britain .11) Jack & mates with Jap Sword (Jack centre) .12) More japs .13) Jack & group, probably some of 21st Guard Battalion .14) 21st Light Horse Regt in Camp Wagga? .15) Two Light Horsemen, Jacks matesphotographs, japs, new britain, native -
 Surrey Hills Historical Society Collection
Photograph, Painting of Thomas Carlyle Lothian by artist Ernest Buckmaster
Ernest Buckmaster (1897-1968) was born in Hawthorn. He was not a strong boy and was taken by his grandparents to help on their mixed farm at Box Hill until he was fourteen. He attended the local state school. In 1913 he was apprenticed to James Beament, a signwriter and amateur artist. After he was rejected for military service, Beament encouraged him to join the Victorian Artists Society and to enrol at the National Gallery Art School. On 24 August 1945 he was appointed an official war artist, commissioned to paint the Japanese surrender in Singapore. He completed twenty-five pictures for the Australian War Memorial. Lothian published his book 'The Art of Ernest Buckmaster' in 1951. REF: ADB entry. Thomas Carlyle Lothian (1880-1974), publisher and publishers' representative, was born on 7 May 1880 at Newcastle-upon-Tyne, England, eldest child of John Inglis Lothian, bookkeeper, and his wife Lillias Charlotte, née Smith. He arrived in Melbourne in July 1888, John having come to represent the publishing firm of Walter Scott. In 1912, on his father's retirement, he formed the company of Thomas C Lothian Pty Ltd. Following the outbreak of war, he formed the Lothian Book Publishing Co. Pty Ltd (from 1924 the Lothian Publishing Co. Pty Ltd). By 1918 he had published more than half of his total of some 230 titles, including, in 1916, his two most ambitious productions, Elves and Fairies, illustrated by Ida Outhwaite, and The Art of Frederick McCubbin.A black and white photograph of a man, wearing glasses and a suit coat, shirt and tie.thomas lothian (mr), ernest buckmaster (mr), windsor crescent, surrey hills, john lothian (mr), house names, york street, greenhaze, mont albert road, barton street, 'st abbs', 'tantalton' -
 Melton City Libraries
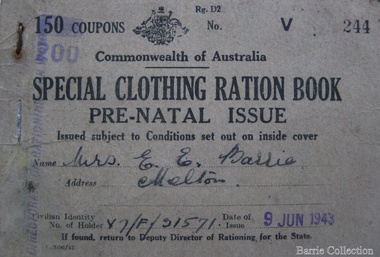
Book, Ration books and cards, 1943,1945,1947, 1948
Rationing regulations for food and clothing were gazetted on 14 May 1942. Rationing was introduced to manage shortages and control civilian consumption. It aimed to curb inflation, reduce total consumer spending, and limit impending shortages of essential goods. The broad reasoning behind the introduction of rationing was to ensure the equitable distribution of food and clothing. It was also hoped that a cut on consumer spending would lead to an increase in savings, which in turn could be invested in war loans. Australians were never as short of food nor rationed as heavily as civilians in the United Kingdom. Rationing was enforced by the use of coupons and was limited to clothing, tea, sugar, butter, and meat. From time to time, eggs and milk were also rationed under a system of priority for vulnerable groups during periods of shortage. Rationing was administered by the Rationing Commission. The basis for policing food rationing was through the surrender of coupons before rationed goods could be supplied. This had to occur between traders as well as consumers. Coupons were passed back from consumers to retailers, from retailers to wholesalers, and in many cases from wholesalers to producers, who were requested to return them to the commission. Breaches of rationing regulations were punishable under the general provisions of National Security Regulations by fines of to £100 or up to six-months imprisonment. Responding to the complaint that these penalties were inadequate, the government passed the Black Marketing Act at the end of 1942. This Act was for more serious cases and could carry a minimum penalty of £1,000.The clothing ration books and coupons belonged to Edna Barrie, the food ration card belonged to Wendy Barrie and the tea and butter ration card belong to Elizabeth Daley.local identities, war -
 Bendigo Military Museum
Photograph - PHOTOGRAPHS WW1, c. 1915 - 1919
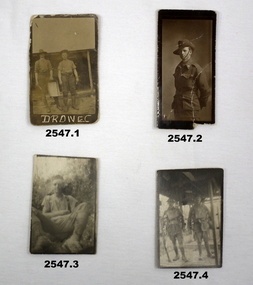
Items relating to the collection re Alexander Norman Cummin No 18, 38th Batt AIF, his brother Harold Nesbit Cummin No 1239 Camel Corp. Refer 2535P (Alexander) 2530.3P (Harold) for their service details. .6) Graves photo. On the left, Sydney Graham Issell. He had 4 years pre war service in Senior cadets and Citizens Forces reaching the rank of Sgt. Enlisted on 8.2.1916 No 912 with the rank of Cpl, C Coy 38th Batt age 21 years 11 months. Embark for England 20.6.1916, promoted L/Sgt, embark for France 22.11.1916, hospital 13.5.1917 (NYD) rejoin unit 19.5.1917, WIA 29.5.1917 GSW chest then restated GSW Back, severe, rejoin unit 12.3.1918, KIA 1.8.1918. On the right, Harold James Fraser. He had 5 years pre war service in the Cadets and Citizens Forces. Enlisted on 27.10.1916 No 2802 6th reinforcements 38th Batt age 22 years. Embark for England 16.12.1916, moves through 10th, 14th Training Batt’s then 66th Batt on 28.4.1917, promoted Sgt and alloted No 2802A, embark for France 25.8.1917 as reinforcement 38th Batt, awarded the Military medal (MM)) 12.10.1917 East of Eypres, KIA 1.8.1918. Both were buried at Vaire Wood near Corbie. .1) 2 Australian soldiers in fatigues with what looks like a cooking apparatus, with letters below DROW EC (stylised). .2) 1/2 length portrait of an Australian soldier. .3) Casual portrait of a soldier sitting in fatigues, probably Sandy. Boots look muddy, scrub in background. .4) Portrait of 2 soldiers (allied) fully armed & wearing helmets. .5) Portrait of a soldier (allied) fully armed & dangerous. .6) Black & white photo of 2 graves with white crosses. Soldiers left cross: No 912 SGT SG ISSELL 38 BN AIF, Soldier right cross: No 2802 SGT HJ FRASER 38 BN AIF. .7) Black & white photo showing 2 Australian soldiers casually dressed in the ruins of an old factory. .8) Black & white mini photo showing building ruins & what appears to be derelict boilers. .9) Black & white mini photo showing what appears to be a WWI German soldier kamerading (surrendering). This is probably posing in captured enemy clothing. 10.) Black & white mini photo showing camels at rest. .11) Black & white mini photo showing a blown up British pattern tank MK1 on sandy terrain. A track has detached & curled up over the front of the tank. .1) verso: “Me & Sandy Port De Nieppe May 1917” .2) verso: “Taken in Liverpool, England while on <> leave Jan 1918. To Mother Father & all at home with love from Sandy”photography-photographs, military history - army, 38th -
 Federation University Historical Collection
Photograph (black & White), Lieutenant-General, Sir George Stuart White, V.C. - South Africa
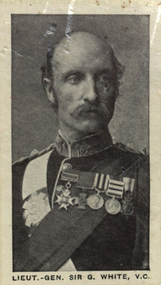
White fought at the Battle of Charasiab and at the Battle of Kandahar in the Second Anglo-Afghan War. For his actions he was awarded the Victoria Cross in 1879. White became commander of the forces in Natal in 1899 at the opening of the Second Boer War and fought at the Battle of Elandslaagte. He withdrew to Ladysmith where he took command of the garrison during the Siege of Ladysmith. When his position there became untenable he was instructed by General Sir Redvers Buller to destroy the guns and surrender the garrison on the best terms he could. White insisted on staying and held out for another four months before being relieved in February 1900. For this he was appointed a Knight Grand Cross of the Order of St Michael and St George. Earlier he had been made Knight Grand Cross of the Royal Victorian Order. In 1903 he was promoted to Field Marshall. White received many awards for his service to his country. They include the Victoria Cross (1879); Knight Grand Commander of the Order of the Indian Empire (1893); Knight Grand Cross of the Order of the Bath (1897); Knight Grand Commander of the Order of the Star of India (1898); Knight Grand Cross of the Order of St Michael and St George (1900); Knight Grand Cross of the Royal Victorian Order (1900); Order of Merit (1905). He also received the Indian Mutiny Medal; Afghanistan Medal; Kabul to Kandahar Star; Egypt Medal (1885); India General Service Medal (1885-87); Queen's South Africa Medal - Defence of Ladysmith; Queen Victoria Diamond Jubilee Medal; King Edward VII Coronation Medal; King George V Coronation Medal; Khedive's Star. Sir George Stuart White's medal and honours are displayed at the Gordon Highlanders Museum. Individual image from photographed poster of tobacco and cigarette cards.george stuart white, battle of charasiab, battle of kandahar, second anglo-afghan war, victoria cross, natal, second boer war, battle of elandslaagte, kadysmith, siege of ladysmith, general sir redvers buller, knight grand cross of the order of st michael and st george, knight grand cross of the royal victorian order, field marshall, knight grand commander of the order of the indian empire, order of merit, indian mutiny medal, afghanistan medal, kabul to kandahar star, egypt medal, indian general service medal, queen's south africa medal, queen victoria diamond jubilee medal, king edward vii coronation medal, king george v coronation medal, khedive star, gordon highlanders museum -
 Ballarat and District Irish Association
Image, James Ryan, c1864, 1864
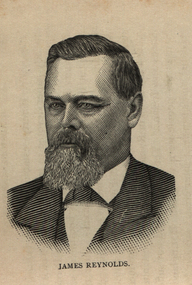
Ryan was an Irish politician. He was elected to the First Dáil at the 1918 general election and, apart from the Third Dáil (1922–1923), held his seat for Wexford until his retirement at the 1965 general election. During his long career he served as Minister for Agriculture (1932–1947), Minister for Health and Social Welfare (1947–1948 and 1951–1954) and Minister for Finance (1957–1965). (Wikipedia) While studying at university in 1913 Ryan became a founder-member of the Irish Volunteers and was sworn into the Irish Republican Brotherhood the following year. During the Easter Rising in 1916 Ryan was the medical officer in the General Post Office (GPO). He was, along with James Connolly, one of the last people to leave the GPO when the evacuation took place. Following the surrender of the patriots Ryan was deported to Stafford Jail in England and subsequently at Frongoch. He was released in August 1916. Ryan rejoined the Volunteers immediately after his release from prison, and in June 1917 he was elected Commandant of the Wexford Battalion. His political career began the following year when he was elected as a Sinn Féin candidate for the constituency of Wexford South in the 1918 general election. Like his fellow Sinn Féin MPs Ryan refused to attend the Westminster Parliament. Instead he attended the proceedings of the First Dáil on 21 January 1919. As the War of Independence went on Ryan became Brigade Commandant of South Wexford and was also elected to Wexford County Council, serving as chairman on one occasion. In September 1919 he was arrested by the British and interned on Spike Island and later Beare Island until he was released after the truce with the other TDs to attend the deliberations of the Dáil concerning the Anglo-Irish Treaty which he voted against. Ryan was later imprisoned again during the subsequent Civil War, however, while interned he won back his Dáil seat as an abstentionist Sinn Féin TD at the 1923 general election. (Wikipedia)Image of a bearded man known as James Ryan. -
 Bendigo Historical Society Inc.
Slide - Images by Arthur Pulfer, 1957-1970
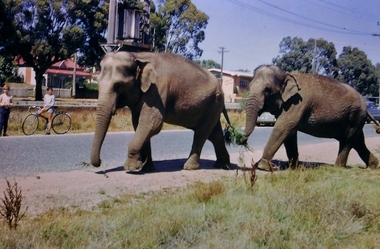
ROSEVIEW 407 High Street, Golden Square Bendigo "Roseview" was designed by Godfrey Eathorne and constructed in 1939. It is one of the few Streamline Moderne houses in the Central Goldfields region, and was one of the earliest constructed in the Bendigo region. It is an outstanding example of this style of housing. It resembles an ocean liner, and reflects the emphasis on the streamlining of methods of transportation. It utilizes both flat and curved surfaces and has little external ornamentation. The use of materials such as rounded glass windows and metal window and door frames reflects an innovative approach to construction consistent with the style. "Roseview" was constructed on a large scale, with large and spacious rooms. It reflects the prominent social status and wealth of the original owner, together with the desire for a building in 'the latest' style which was sure to attract attention and prominence in the region. It has been maintained largely in original condition. CARALULUP HOTEL 'The Sun' dated January 17, 1941 on the back. It states that 'The licence of Caralulup Hotel, near Talbot, has been surrendered, thus severing an 80 year association with the district' State Library of Victoria TOLMER GOLD ESCORT ROUTE The gold rush in New South Wales and Victoria left few able miners in South Australia. Bad economic conditions saw more than 15,000 men leave the Kapunda and Burra mines by the end of 1851. Alexander Tolmer, Commissioner of Police in 1852 proposed that the gold won by South Australians should be brought back to South Australia under an escort consisting of only a few men. In March a Gold Escort was on its way back to Adelaide with almost 6,000 ounces of gold for the vaults of the Treasury Building. After this successful trip Tolmer led two other escorts before handing over his duties. A total of eighteen gold escorts were made, the last one during November and December 1853 when Inspector Wyndham was in charge. You’ll find Gold Escort Route Monuments between Meningie, Coonalpyn and Tintinara.Many images from by Arthur Pulfer copied to slides. Twenty Slides of Bendigo: Bullen's Circus Bendigo February 1966 "Roseview", Pethard's Home at 407 High Street, Golden Square, Bendigo. 25th March 1957. House is possibly on the Midland Highway Epsom, Bendigo - 8 April 1955 Kangaroo Flat Bus Lines mini bus The Big Tree Sedgwick Road March 1972 The old Golden Gully Hotel Diamond Hill Road, Bendigo The old Lockup Eaglehawk Bendigo September 1967 Market Gardens - possibly North Bendigo North Deborah Mine photo taken from Breen Street 1958 Laying the track to get the engine into the park, looking down Mitchell Street Bendigo Engine R766 in the Victorian Railways Institute Park Railway Place Bendigo On the Methodist Church Steps Arnold street Bendigo Miner's Hut at Moliagul Basket Lunch - White Hills Botanical Gardens - St johns 100 year celebrations White Hills Swimming Pool February 1970 White Hills Botanical Gardens Bendigo Bendigo Show Parade 1958 The Arrival of the Cobb and Co Coach in Bendigo September 1963 history, bendigo, james lerk collection, golden square high school, dragon loong, white hill botanical gardens, 407 high street bendigo, r766 engine, bullens circus, caralulup, moligual, bendigo show, tolmer's gold route, kangaroo flat bus lines, eaglehawk lockup, arnold street methodist church, elephants -
 Melbourne Legacy
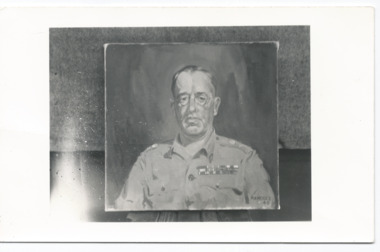
Photograph - Portrait, Lieutenant-General Sir Stanley Savige
Photograph of a painted portrait of L/- Stan Savige. The signature appears to be 'Manders '45'. He appears to be in uniform and could be from his service in World War 2. Stanley Savige is seen as the founder of Legacy when it was founded in Melbourne in September 1923. He was born in Morwell Victoria on 26/6/1890. He served in the Australian Army between 1915 and 1946, including service in both World Wars. Stanley Savige was awarded a KBE, CB, DSO, MC,ED. Stanley George Savige was born in Victoria in 1890, and enlisted in the AIF (Private 577) in March 1915. He served with 24 Battalion at Gallipoli, and was commissioned as a 2nd lieutenant prior to the evacuation, at which he was part of the final holding party at Lone Pine. In France he saw service with 6 Brigade Headquarters as well as with his battalion, and was awarded the Military Cross for his gallantry at the second battle of Bullecourt. In 1918, he became one of a small number of Australians selected for service with 'Dunsterforce' in Persia, commanding 'Urmia Force', and was awarded the Distinguished Service Order. Between the wars, Savige continued his military career with the Militia, and by 1939 he held the rank of colonel. When the 2nd AIF was raised, he was placed in command of 17 Brigade, which he led through the campaigns in Libya, Greece and Syria, before being promoted to command 3 Division (Militia) in New Guinea. In 1944, he was appointed GOC 2 Corps, in command of forces engaged in the campaign on Bougainville, and accepted the Japanese surrender there in September 1945. Lieutenant General Savige was knighted (KBE) in 1950, and died in 1954. He is widely remembered for his efforts between the wars in founding the Legacy Clubs (which he modelled on the 'Remembrance Club' formed in Hobart by his friend and former commander Sir John Gellibrand in 1923) to care for the dependants of deceased servicemen and ex-servicemen. These clubs grew into a nation wide organisation which, by the time of Savige's death, was supporting over 80 000 widows and children.This is a photographic portrait of the founder of the first Legacy Club in Australia, Sir Stanley Savige.Black and white photo of a painting of Sir Stan Savige printed onto a postcard.Stamped with 'Photograph No. MH 91859 Supplied by Military History Section (S.D.9,) General Staff L.H.Q. For official purposes ONLY, NOT TO BE PUBLISHED' in purple ink.savige, portrait, stan savige, founding legatees -
 Flagstaff Hill Maritime Museum and Village
Photograph - Ship's crew, HMAS Warrnambool J202, 1941
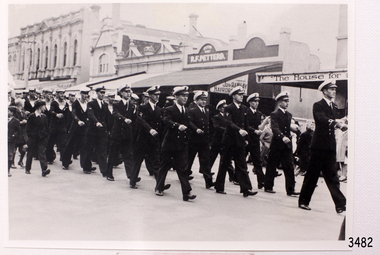
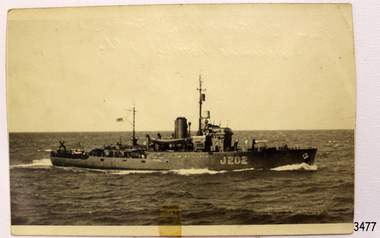
This photograph shows the crew of the first HMAS Warrnambool (J202) marching east along Timor Street in Warrnambool, just opposite the Post Office on the corner of Gillies Street. People are watching the parade from the footpath and two boys, dressed in their ‘best’ clothes, are marching alongside the crew. The HMAS Warrnambool was one of 60 Bathurst class corvette vessels built during World War II for the Royal Australian Navy (RAN) as armed minesweepers. The namesake of the City of Warrnambool, Victoria, was launched in Sydney in 1941. The HMAS Warrnambool began service with patrols off Bass Strait in 1941. In December the ship docked in the Warrnambool harbour at Lady Bay. The crew came ashore and performed a march for the city. The Mayor, Cr. John R Astbury presented them with a plaque of the City of Warrnambool’s Coat of Arms and the Warrnambool Patriotic Fund gave them a gift of 110 books for the crew’s library. The Warrnambool served in Darwin during the time it was bombed, it was involved in several rescues and carried troops to New Guinea, it carried out escort and patrol duties on Australia's east coast, then at Fremantle and back to Darwin. The ship was at Timor when the Japanese surrendered in 1945. It performed mine clearance work around the Solomon Islands and New Guinea after the war. In 1947 the HMAS Warrnambool was at the Great Barrier Reef, off the Queensland coast, to clear the defensive British mines previously laid to protect Australia’s boarders. The ship hit a mine near Cockburn Reef, exploded and sank shortly afterwards. One of the 70 or so men on board was killed and three died later. The rescued men were transferred by boats to the nearby HMAS Swan II, which took the survivors to Cairns. The four deceased were Victorian seamen. In May 1948 the Royal Australian Navy divers recovered a number of items from the wreck, including the ship’s bell and the City of Warrnambool plaque. In 1949 the RAN returned the plaque to the Warrnambool City Council, and donated the ship’s bell to the Australian War Memorial. Further objects were recovered in 1972-75 by Southern Cross Diving and Salvage. A memorial plaque was erected in Warrnambool on September 13, 1995 in honour of all who served on HMAS Warrnambool. NOTE: (1)- HMAS Warrnambool II (FCPB204 was built in 1980 in Cairns, with a compliment of 22 personnel. It was decommissioned in 2005. (2)- SS Warrnambool, a steam and sail ship, was built in 1892 in London and broken up in 1926. [A more detailed history can be found in our Collection Record 3477.]This photograph is significant for its association with the lifesaving rescue of the crew and the sinking Royal Australian Navy vessel, HMAS Warrnambool (J202). The HMAS Warrnambool played a nationally significant role in overturning Australia’s Immigration Restriction Act 1901 (colloquially known as the White Australia policy). The ship rescued, and brought to Australia, Samuel and Annie Jacob and their family after they evacuated Dutch East India. The family was threatened with deportation and made the first successful appeal to High Court regarding that Act. The HMAS Warrnambool has - Local significance for being the namesake of the City of Warrnambool - Local significance, having docked in Warrnambool Harbour - Local significance, the crew having paraded in Timor Street, Warrnambool - State significance for its first patrol being in Bass Strait. - National significance, being present in Timor at the Japanese surrender - National significance, shown by the significance of the ship’s bell being curated as Military Heritage and Technology at the Australian War Memorial. - National significance as part of Australia’s defence force history, being one of only four Bathurst class corvettes lost while in Australian service, the only Bathurst class corvette lost after World War II, the only RAN vessel to be sunk by a mine, and associated with the last four Navy deaths of WWIIPhotograph of the crew of HMAS Warrnambool J202. This black and white image shows the crew marching east along Timor Street in Warrnambool. People are watching from the footpath and two formally dressed boys are marching alongside the sailors. Inscription on the reverse.(PRIVATE details - See Notes)flagstaff hill, maritime village, maritime museum, warrnambool, shipwreck coast, mort's dock & engineering co ltd, h.m.a.s. warrnambool, hmas warrnambool, hmas warrnambool i, hmas warrnambool j202, hmas swan ii, j202, world war ii, bathurst class corvette, royal australian navy, ran, sydney built ship, bass strait patrol, sea mine patrol, mine sweeper, mine clearance, navy divers, great barrier reef, cockburn reef, southern cross diving and salvage, warrnambool city council, cr j r astbury, mayor j r astbury, warrnambool patriotic fund, seal, coat of arms, dedicatory plaque, hmas warrnambool 1941, shipwreck by sea mine 1947, sinking ship, sunk ship, marching, parade, timor street warrnambool, minesweeper -
 4th/19th Prince of Wales's Light Horse Regiment Unit History Room
Instrument - Trumpet, Cavalry, Couesnon Cie, 1901 (exact)
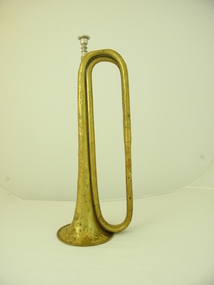
The 2nd Light Horse Regiment was raised at Enoggera in Queensland on 18 August 1914. Its recruits came mainly from Queensland but some hailed from the northern rivers district of New South Wales. The 2nd was one of three regiments of the 1st Light Horse Brigade – the first Australian mounted formation raised by Australia during the First World War. The regiment sailed from Brisbane on 25 September and disembarked in Egypt on 9 December. The 2nd Light Horse Regiment deployed to Gallipoli without its horses and landed there on 12 May 1915, joining the New Zealand and Australian Division. It played a defensive role for most of the campaign but did attack the Turkish trenches opposite Quinn’s Post, one of the most contested positions along the ANZAC Line. The first assault wave was mown down and fortunately the officer commanding the attack had the wisdom and courage to call it off. The 2nd was withdrawn from the front line in September and left the peninsula on 18 December. Back in Egypt, the 2nd Light Horse joined the ANZAC Mounted Division. Between January and May 1916, the regiment was deployed to protect the Nile valley from bands of pro-Turkish Senussi Arabs. On 18 May, as part of its parent brigade, it joined the forces defending the Suez Canal. The 1st Light Horse Brigade played a significant role in turning back the Turkish advance on the canal at the battle of Romani on 4 August. In ensuing days the regiments of the brigade participated in the immediate follow-up of the defeated Turks, but were soon withdrawn to rest. The 2nd Light Horse Regiment rejoined the Allied advance across the Sinai in November and was subsequently involved in the fighting to secure the Turkish outposts on the Palestine frontier – Maghdaba on 23 December 1916 and Rafa on 9 January 1917. A stint of protective duty along the line of communications through the Sinai followed. The 2nd’s next major engagement was the abortive second battle of Gaza on 19 April. Gaza finally fell on 7 November, after a wide outflanking move via Beersheba, in which the 1st Light Horse Brigade played a part. With the capture of Gaza, the Turkish position in southern Palestine collapsed. The 2nd Light Horse Regiment participated in the advance to Jaffa that followed, and was then committed to operations to clear and occupy the west bank of the Jordan River. It was involved in the Amman (24–27 February) and Es Salt (30 April–4 May) raids and the repulse of a major German and Turkish attack on 14 July 1918. The final British offensive of the campaign was launched along the Mediterranean coast on 19 September 1918, with the ANZAC Mounted Division taking part in a subsidiary effort east of the Jordan aimed at Amman. Turkey surrendered on 30 October 1918. The 2nd Light Horse Regiment sailed for Australia on 13 March 1919 without their horses, which were either shot or transferred to Indian cavalry units. Events in the daily routine of the soldier were signalled by bugle and trumpet calls. This trumpet is signicant because historically, it was issued to the 2nd Australian Light Horse Regiment in 1912. This Regiment served with distinction in Gallipoli and Palestine in World War 1. It is probable, but not confirmed, that tthe trumpet was used by the Regiment during these operations. Each light horse regiment was divided into four squadrons. Each squadron had a trumpeter sergeant, equipped with a cavalry trumpet, who was employed at the Squadron Headquarters Technically called a cavalry trumpet, this brass instrument can be described as a "simple trumpet" ie. the direct forerunner of the modern valve trumpet. It is in E flat not B flat as is the bugle. Both were carried slung over the player's body by means of green tasselled cords.Crest with inscription: "Exposition Universelle De Paris" with circular logo with inscribed "1900". "Hors Concours Membre De Jury". Logo formed of initials (not deciphered). "Couesnon Cie 94 Rue Dangouleme Paris". Bomb burst type logo with "01" in centre. "W H Paling & Co Ltd Sydney NSW Brisbane" On bell: "Mounted Rifles (2nd ALH)" trumpet, cavalry, musical instrument, 2nd light horse, mounted rifles -
 Flagstaff Hill Maritime Museum and Village
Craft - Ship Model, Arethusa, 1894
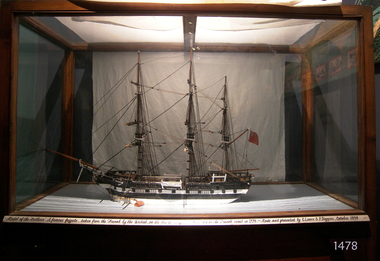
Original Ships History: Aréthuse was a French frigate, launched in 1757 during the Seven Years War between England and France. She was captured by the Royal Navy in 1759 and became the fifth-rate HMS Arethusa. She remained in Royal Navy service for twenty years until she was wrecked after being badly damaged in battle. The ship was constructed at Le Havre for privateer warfare as ”Pélerine” and soon after her launch, she was purchased by King Louis XV (1710-1774) and commissioned as Aréthuse on 21 January 1758. In June, under captain Vauquelin, she sailed through the British blockade of Louisbourg helping to defend the site before departing, again forcing the blockade. On 18 May 1759, she was in transit from Rochefort to Brest, under the command of Louis-Philippe de Rigaud, Marquis of Vaudreuil, when she was intercepted near Audierne Bay (Baie d'Audierne) by three Royal Navy ships the Thames, Venus and Chatham. She attempted to escape but after two hours, lost her topmasts and was overtaken by her pursuers. Thames and Venus engaged her with heavy fire, causing 60 casualties before the vessel surrendered. She entered service with the Royal Navy for the rest of the war, and was in service in British home waters and became responsible for the capture of several French privateer cutters. In 1777, a Scotsman James Aitken, widely known as John the Painter, was hanged from her mizzenmast for burning the Rope House at Portsmouth Royal Dockyard on 7 December 1776, to aid the struggle of American independence. The mast was struck from the ship and re-erected at the dockyard entrance so as many people as possible could watch the execution. On 17 June 1778, she fought a famous duel against the French 36-gun frigate, Belle Poule. Belle Poule was on a reconnaissance mission, along with the 26-gun Licorne, the corvette Hirondelle and the smaller Coureur when she encountered a large British squadron that included Arethusa at a point 37 km south of The Lizard. Admiral Keppel, commanding the British fleet ordered that the French ships be pursued. The captain of Belle Poule refused the order to sail back to the British fleet. The British fired a warning shot across his ship's bow, to which he responded with a full broadside. This action began a furious, two-hour battle between the two ships that resulted in the deaths of the French second captain and 30 of the crew. However, Arethusa was crippled by the loss of a mast and withdrew, allowing Belle Poule to escape. This battle was the first between British and French naval forces during the American Revolutionary War and took place around three weeks before France had made a formal declaration of war. The battle was widely celebrated in France as a victory, even inspiring a hair-style in court circles that included a model of Belle Poule. It was also viewed as a victory in Britain and became the subject of a traditional Sea shanty, The Saucy Arethusa. On 18 March 1779, under captain Charles Holmes Everitt, Arethusa engaged the French Aigrette, under Lieutenant Mortemart, sustaining considerable damage in the fight. Arethusa was wrecked the next day off Ushant, It was the fame of this Arethusa which induced the Royal Navy, during the following two centuries, to bestow the name on a further seven consecutive individual ships and two consecutive classes of cruisers. (See Provenance Sec this document for information on the makers of this model). Model ship of the 3 masted frigate the “Arethusa”, model is painted black and white with varnished deck and masts. A British flag is flown at the stern. The ship is displayed in a glass case with timber frame and 4 legged stand.Label at bottom of glass case, printed in black script on a gold strip “Model of the “Arethusa" "A famous frigate, taken from the French by the British, on the 18th of May 1759 and lost on the French coast in 1779. – Made and presented by G. Lance & P. Diggins, October 1894” flagstaff hill, warrnambool, shipwrecked-coast, flagstaff-hill, flagstaff-hill-maritime-museum, maritime-museum, shipwreck-coast, flagstaff-hill-maritime-village, arethusa ship model, george lance, peter diggins, len asling, warrnambool art gallery, warrnambool exhibition, message in a bottle -
 Australian Commando Association - Victoria
Book, A history of the 2nd Independent Company and 2/2nd Commando Squadron
The history of the No. 2 Independent Commando Company and 2/2 Commando Squadron during World War II – scarce as a 1st edition dated 1986. Having completed its training at Foster, on Wilson’s Promontory, Victoria, the 2nd Independent Company was raised and travelled north to Katherine, in the Northern Territory. However, following Japan’s entry into the war, as with the other independent companies that were sent to the islands off Australia, the 2nd was sent to Timor, where it joined the 2/40th Battalion and the rest of Sparrow Force. Sparrow Force divided itself between west Timor, part of the Netherlands East Indies, and east Timor, which belonged to Portugal. The 2/40th Battalion defended the capital of west Timor, Koepang, and the airfield at Penfui. Most of the independent company moved to the airfield at Dili, in east Timor, and the nearby mountains. Portugal was opposed to the stationing of a Dutch or Australian garrison in case this provoked the Japanese, but despite this opposition, on 17 December 1941, elements of the 2nd Independent Company and Dutch troops landed near Dili. On 20 February 1942 the Japanese invaded the island, attacking east and west Timor simultaneously. The 2/40th Battalion held out for three days, but were overrun and were killed or captured. Similarly, the 2nd could not hold the airfield and were also driven back. But they were not captured and instead retreated to the mountains where they conducted a very successful and pursued a guerrilla war against the Japanese which lasted for over a year. Following the capture of Timor, the 2nd occupation the company was listed as “missing”, the company’s signallers were able to build a wireless transmitter, nicknamed ‘Winnie the War Winner’, and on 18/19 April were able to contact Darwin. At the end of May RAN vessels began landing supplies for the Australians on the south coast of east Timor. These supply runs were very dangerous but they allowed the Australians on Timor to continue fighting. In September the guerillas were reinforced with the 2/4th Independent Company. However, this could not go on indefinitely. In August the Japanese lunched a major offensive against the guerrillas and Japanese reprisals against the civilian population of east Timor reduced their support for the Australians. The 2nd (now named the 2/2nd Independent Company) and 2/4th were withdrawn in December and January 1943 respectively. Although the 2/2nd Independent Company is best known for its time on Timor, it also saw extensive service in New Guinea and New Britain. The independent company reformed at the army’s training centre at Canungra, Queensland, where it was reinforced and reequipped. The company then moved to the Atherton Tableland, where it briefly became part of the 2/6th Cavalry (Commando) Regiment. Due to this reorganisation, in October, the 2/2nd Independent Company was renamed the 2/2nd Cavalry (Commando) Squadron. This name was later simplified to just commando squadron. When this happened though, the 2/2nd was back in action. In June 1943 the 2/2nd sailed from Townsville for Port Moresby and was subsequently flown to Bena Bena, in the Bismark Range in New Guinea’s highlands. Here they supported the 2/7th Independent Company in patrolling the Ramu River area. In the second week of July the 2/2nd moved into position, with its headquarters at Bena Bena and with its platoons’ occupying neighbouring positions. By the end of the month their patrols were skirmishing with the Japanese. The 2/2nd remained in New Guinea until October 1944. After 90 days leave, the squadron reformed at Strathpine in Queensland before sailing to New Britain in April 1945. The 2/2nd landed at Jacquinot Bay on 17 April. The squadron then moved to Wide Bay, in order to support the 13th Brigade of the 5th Division, and was based at Lamarien. Following Japan’s surrender and the end of the war, the ranks of the squadron thinned quickly as men were discharged or transferred to other units. For those who were left, they returned to Australia and in early 1946 the 2/2nd Commando Squadron was disbanded. Includes Nominal Roll Soft Cover without Dust Jacket – 270 pages -
 Flagstaff Hill Maritime Museum and Village
Photograph - Vessel, Steam Ship, H.M.A.S. Warrnambool J202, Between 1941-1947
This photograph is connected to the first HMAS Warrnambool (J202), which was one of 60 Bathurst class corvette vessels built during World War II by Mort's Dock & Engineering Co Ltd of Sydney under the commission of the Royal Australian Navy (RAN). It was the namesake of the City of Warrnambool in Victoria. The armed minesweeper was 57 metres long and could had a complement of 85 personnel. Its armament included 1 × 4 inch Mk XIX gun, 1 × 40 mm Bofors AA gun (installed later), 3 × 20 mm Oerlikon guns (1 later removed), machine guns and depth charge chutes and throwers. It was launched in Sydney in May, 1941. The HMAS Warrnambool began service with patrols off Bass Strait in 1941. In December the ship docked in Warrnambool Harbour and the crew marched in a parade along Timor Street. The ship’s crew received a donation of 110 books from the Warrnambool Patriotic Fund, and a plaque of the City of Warrnambool’s Coat of Arms presented by the Mayor, Cr. John R Astbury. In September 1942 a Dutch East Indies family, Samuel and Annie Jacob and seven of their eight children, was rescued by the HMAS Warrnambool and evacuated to Darwin. The family settled in Melbourne, then in 1944 Samuel tragically died. After the war ended the family was threatened with deportation under Australia’s Immigration Restriction Act 1901 (known also as the White Australia policy). Annie married her landlord, John O’Keefe but was still issued a deportation order in 1949. The family appealed to the High Court and the case became famous for being the first successful legal challenge to the Act. The HMAS Warrnambool was in Darwin during the time it was bombed, attacked by the Japanese while rescuing 73 crew from a merchant vessel that had also been attacked. The ship was involved in several other rescues and carried troops to New Guinea. Other events included escort and patrol duties on Australia's east coast, then at Fremantle and back to Darwin. When the Japanese surrendered on September 11, 1945, at the end of World War II, the ship was at Timor. It performed mine clearance work around the Solomon Islands and New Guinea after the war. On 13th September 1947 the ship was sent to lead a flotilla at the Great Barrier Reef, off the Queensland coast. The mission was to clear the defensive British mines that were laid during1941-43 to protect Australia’s boarders. The HMAS Warrnambool hit a mine near Cockburn Reef, exploded and sank shortly afterwards. One of the 70 or so men on board was killed at the time and thirty-two men were badly injured; three of these also lost their lives. The four deceased were Victorian seamen. The wounded men were transferred by boats to the nearby HMAS Swan II, where the Swan’s and the Warrnambool’s doctors cared for them. The HMAS Swan II took the survivors to Cairns, and from there the men were flown by RAAF to either Brisbane or Sydney hospitals. The HMAS Warrnambool was the only RAN ship to be sunk by a mine, and the four who lost their livers were the last naval casualties from World War II. The ship’s wartime service was recognised by three honours. In May 1948 a number of items were recovered by Navy divers from the wreck of HMAS Warrnambool. The items included the ship’s bell (inscribed HMAS Warrnambool 1941) and the round plaque with the Seal of the Warrnambool City Council. In 1949 the plaque was returned to the Council, and the bell was donated to the Australian War Memorial. Further objects were recovered by the new owners of the wreck, Southern Cross Diving and Salvage, in 1972-75. A memorial plaque, honouring the memories of all those who served on the HMAS Warrnambool until is sunk on September 13 1947, was erected in Warrnambool on September 13, 1995. NOTE: (1)- The second HMAS Warrnambool (FCPB204), also the namesake of the City of Warrnambool, was built in 1980 in Cairns, one of fifteen Fremantle Class Patrol Boats ordered by the RAN. It was just over 41 metres long with a compliment of 22 personnel. It patrolled Australia’s northern waters for illegal fishing vessels. This vessel was decommissioned in 2005. (2)- There was also a steam and sail ship named the S.S. Warrnambool, built in 1892 in London and broken up in 1926.This photograph is significant for its association with Royal Australian Navy and its vessel, HMAS Warrnambool (j202). The HMAS Warrnambool played a nationally significant role in overturning Australia’s Immigration Restriction Act 1901 (colloquially known as the White Australia policy). The ship rescued, and brought to Australia, Samuel and Annie Jacob and their family after they evacuated Dutch East India. The family was threatened with deportation and made the first successful appeal to High Court regarding that Act. The HMAS Warrnambool has - Local significance for being the namesake of the City of Warrnambool - Local significance, having docked in Warrnambool Harbour - Local significance, the crew having paraded in Timor Street, Warrnambool - State significance for its first patrol being in Bass Strait. - National significance, being present in Timor at the Japanese surrender - National significance as part of Australia’s defence force history, being one of only four Bathurst class corvettes lost while in Australian service, the only Bathurst class corvette lost after World War II, the only RAN vessel to be sunk by a mine, and associated with the last four Navy deaths of WWIIBlack and white photograph of vessel H.M.A.S. Warrnambool J202 on an open sea. The identifying number is painted on the hull. The ship is flying a white ensign. A lifeboat is suspended near the centre of the ship. Figures can be seen on deck. Hand written inscription on the reverse side. On ship's hull "J202" On reverse of photo "From P.O. FRED MATTHEWS. 23378. R.A.N." "MARIBYRNONG MAIDSTON RSL" "H.M.A.S. WARRNAMBOOL"flagstaff hill, warrnambool, shipwrecked-coast, flagstaff-hill, flagstaff-hill-maritime-museum, maritime-museum, shipwreck-coast, flagstaff-hill-maritime-village, photograph, h.m.a.s. warrnambool, maritime village, maritime museum, shipwreck coast, mort's dock & engineering co ltd, hmas warrnambool, hmas warrnambool i, hmas warrnambool j202, hmas swan ii, j202, world war ii, bathurst class corvette, royal australian navy, ran, sydney built ship, bass strait patrol, sea mine patrol, mine sweeper, mine clearance, navy divers, great barrier reef, cockburn reef, southern cross diving and salvage, warrnambool city council, cr j r astbury, mayor j r astbury, warrnambool patriotic fund, seal, coat of arms, ship’s bell, hmas warrnambool 1941, shipwreck by sea mine 1947, sea rescue, life saving, lifesaving, sinking ship, sunk ship, immigration restrictions act 1901, white australia policy, samuel and annie jacob, john o'keere, minesweeper -
 Royal Brighton Yacht Club
Life Ring, Vega Trophy (Mounted Wooden Life Ring)
Vega Trophy (Mounted Wooden Life Ring) Donor: Graham Noel During World War II when the Germans occupied the Channel Islands the local people went through very severe food rationing and were on the verge of starvation. Near the end of the war, the Swedish ship Vega was allowed by the Germans to deliver several shipments of food to the civilian population, easing the critical shortages of food on the islands. Further background detail can be found below. Graham Noel was born on the Islands and lived there during this harsh period. The trophy is awarded to the winner of the Combined Division AMS Aggregate Series. First Winner: Under Capricorn, P. Bedlington 2005/06 Vega – Further historical background Early in the Second World War Jersey was declared “unarmed” and the German military took over, taking quite a few lives in the process, through strafing the main harbour and a few other places which they needlessly considered threatening. A considerable number of locals evacuated to England before the Germans arrived, but more than 60% of the population remained and endured 5 years of very strict and difficult conditions. Not only was the population unable to contact relatives in the UK or elsewhere, but very quickly they found themselves subject to harsh curfews, strictly rationed foodstuffs, no fuel for vehicles, radios confiscated, and homes and hotels commandeered by the military. The military demanded first pick of all foodstuffs and kept meticulous records of all livestock forcing farmers even to show newborn calves and piglets to them, then claiming the new arrivals for their dinner tables. However there are many stories of farmers outwitting their masters when twin calves or suchlike arrived! Lawbreakers were quickly dealt with, mostly with lengthy prison terms in Jersey, but the more serious crimes were punished by being sent to some horrible French prisons, or even some of the notorious German concentration camps. All local Jews were dispatched to concentration camps, and even English born families were similarly shipped through France and on to Germany. Sadly, a considerable number of those deported did not make it back safely to Jersey. In June 1944 the locals were delighted to hear that the Allies had invaded Normandy and very soon they could hear the battles as the Allies worked their way along the French coast. Little did they know they would still have to wait another 11 months for freedom, having to put up with a very demanding German occupation force which was still determined to obey Hitler’s order to “Defend the Channel Islands to the death”. Now that France was in Allied Hands the local military commanders were unable to supplement their food supplies from France and even harsher demands were made on the local population to ensure that all branches of their still very substantial military force were reasonably well fed. As well as the military, Jersey farmers had to provide food for the Allied POWs and the many “forced labourers”, mainly of Russian, Polish and Italian backgrounds who had been directed to the island to build all the concrete bunkers. This included an underground hospital, all this complying with Hitler’s orders to ensure that the Channel Islands would never again be part of Britain. Many requests by the Jersey authorities for Red Cross assistance were rejected, but finally in December 1944 they agreed and on 30th December the Red Cross vessel “Vega” (Swedish Registry) arrived and delivered parcels to the civilian population. These parcels contained a variety of foodstuffs supplied mainly by Canadian authorities, desperately needed medical supplies, flour, oils and soaps, as well as tobacco from New Zealand. Vega made a further 3 or 4 trips and most certainly eased the desperate situation being faced by the locals. In fact, it resulted in the locals having slightly better food supplies than the military and many local farmers tell stories of having to protect their stock from marauding soldiers. Understandably Churchill was reluctant to send in an invading force to retake the Channel Islands, but by May 1945 it was clear that the Third Reich was finished and on May 9th the German Military surrendered, without a fight, to a large British landing force. On a slightly lighter note … in January 1945 Jersey stonemasons were seen in the main town square repairing flagstones … the Germans had never noticed that the name “Vega” had been formed in those flagstones! As a side note Vega is the name of the brightest star in the universe. Furthermore, throughout the occupation, despite German law that demanded confiscation of all radio sets, punishable by long prison terms or deportation to Germany, there were still many sets being listened to. The locals had a well refined news system for the dissemination of news of what was happening in the outside world. vega, graham noel, ams, combined division, aggregate -
 Melbourne Athenaeum Archives
Video - ABC 7.30 Report: The Athenaeum 's 170th birthday, Australian Broadcasting Corporation, Melbourne, Athenaeum building celebrates 170 years, 11/11/2009
Transcript: Athenaeum building celebrates 170 years Australian Broadcasting Corporation Broadcast: 11/11/2009 Reporter: Lisa Whitehead Tomorrow marks the 170th birthday of one of the nation's historic cultural landmarks. Melbourne’s Athenaeum building has, in one form or other, provided education and entertainment for the Victorian colony as it became a city; and along the way, documented its growth. Transcript KERRY O’BRIEN, PRESENTER: Tomorrow marks the 170th birthday of one of the nation's historic cultural landmarks. Melbourne's Athenaeum building has, in one form or another, provided education and entertainment. For the Victorian colonies it became a city and along the way documented its growth. The building's original library and theatre still draw devotees and as Lisa Whitehead reports, a loyal band of volunteers. KEVIN QUIGLEY, ATHENAEUM PRESIDENT: There's nothing like us that has been here from day one, four years after the boat pushed ashore, here we are. It's a thread that runs through the life of Melbourne. LISA WHITEHEAD, REPORTER: In the heart of Melbourne's CBD, the Athenaeum is a celebrity in disguise, the oldest cultural icon in the city, but barely noticed. MARJORIE DALVEAN, VOLUNTEER HISTORIAN: People of Melbourne walk past this area and they have no idea what it is. RAY LAWLER, PLAYWRIGHT: It seemed to me to be a place that absolutely, or breathes Melbourne, I suppose, culture. LISA WHITEHEAD: Just four years after Melbourne was founded, the colony built a Mechanic's Institution, one of the first in the world, a place where the working class could meet and learn. KEVIN QUIGLEY: People think of it as Wild West sort of place where these hearty types drank and rushed about, but Melbourne was freely settled. It was a city of people who wanted to better themselves - entrepreneurs. And the Mechanic's Institution was that innovative idea that had grown up in Edinburgh and London about providing an opportunity for education for the working people. LISA WHITEHEAD: Mark Twain lectured there. Later, other buildings were added and a theatre to host classic plays. And it adopted its more bourgeois friendly title of the Athenaeum. Crucially from the start there was the library, the first to offer affordable lending to the working man. And it still attracts devotees. Former University lecturer Margaret Bowman, 89, comes in every Wednesday, along with her dog to join an enthusiastic band of volunteers sorting through the archives. MARGARET BOWMAN, FORMER UNIVERSITY LECTURER: Doing research is something that I find actually I enjoy more than anything. Every old lady needs to have a project and now I've got a project. MARJORIE DALVEAN: Margaret, Christine has just found out that Alfred Deakin was a member here from 1874 to 1877. This place is not flashy, we've never been flashy. But book lovers walk in here and they know this is the place for them. ARCHIVAL FOOTAGE: Old times and old names. The Athenaeum theatre in Melbourne for more than 40 years has been one of the city's best known cinemas. LISA WHITEHEAD: In the 20th century, the theatre surrendered to the new craze of talking pictures, and one particular fan was famous Australian playwright Ray Lawler. At 13, he dropped out of school to work in a Footscray factory and two years later his first trip to the glamorous Athenaeum cinema hinted at the education he was missing. RAY LAWLER: It just had a style about it which I responded to, I think. I was looking for something and this seemed to be part of it. Ray Lawler went on to write "Summer of the Seventeenth Doll" and found literary fame overseas. About a century after it had started as an educational place for the working man, Ray Lawler had, in effect, become an Athenaeum graduate. RAL LAWLER: If they had been looking for the sort of person that they were hoping to encourage along the way, I suppose I would have been somebody that might have fitted the mould, you know. LISA WHITEHEAD: In time, the cinema was returned to its theatrical roots. FRANK THRING, 1977: It has a great resemblance to the Theatre Royal in Hobart which Larry Olivier has called the best theatre he's ever worked in. And it's almost identical. It is the true Victorian playhouse. The horseshoe shaped thing: stalls, dress circle and gallery. And you're close to the audience and they're close to you. Marvellous feeling. LISA WHITEHEAD: Today, it's still a theatre. But time has brought compromises. The once vaunted art gallery has now covered its windows and become a comedy club and performance space. TV and suburban life have eaten away at the library membership. It offers an online service now, and a recent federal government grant will pay for the upkeep of its gracious interior, including the 1930s elevator Ray Lawler used to ride. For him, it's money well spent on history quietly made and discreetly observed. RAY LAWLER: It's the lack of awareness, I think, that people don't know what they've got here. They've really got the whole history of Melbourne almost. KEVIN QUIGLEY: It was a similar organisation in Sydney but we are the only one that's got a continual lineage on the same spot. We started here and we're still here and we'll be here for another 100 years. KERRY O'BRIEN: Lisa Whitehead on a great Melbourne landmark. © 2010 ABC | Privacy Policy Beginning as the Melbourne Mechanics' Institution in 1839, the Melbourne Athenaeum has a long history that reflects the cultural and social development of Melbourne. It continues to be managed as a not-for-profit organisation by a volunteer board, with a subscription library (maintained since 1839) and a leased theatre.Video broadcast ABC 7:30 Report for 11/11/2009. "Tomorrow marks the 170th birthday of one of the nation's historic cultural landmarks. Melbourne’s Athenaeum building has, in one form or other, provided education and entertainment for the Victorian colony as it became a city; and along the way, documented its growth."athenaeum, australian broadcasting corporation, kerry o’brien, kevin quigley, lisa whitehead, marjorie dalvean, ray lawler, margaret bowman, frank thring. -
 Melbourne Legacy
Document - Speech, Commemorative Address - Sir Stanley Savige K.B.E. Federal Conference of Legacy Clubs, Canberra, 10/1954
After the death of Stan Savige this address was given at the Canberra Conference in October 1954. It is tribute to his life. Sir Stanley Savige KBE : Commemorative Address Federal Conference of Legacy Clubs, Canberra : October 1954. On the 15th of May this year Legacy learned to its enduring sorrow of the death of its Founder, Lieut. General Stanley George Savige KBE, CB, CBE, DSO, MC, ED, for more than 30 years affectionately known to us all as Legatee Stan Savige. He was the embodiment of all those things for which Legacy stands, and each one of us who knew him and worked with him feels a great and abiding sense of personal loss. It is proper, therefore, that those of us at this Conference, the first after his passing, representative of Legacy throughout the Commonwealth, and comprising so many who were his friends, so many who knew the depth of his love for Legacy, should acknowledge our debt to our Founder and ensure, so far as we may, that the inspiration of his life and work in this Cause shall not be lost to those who follow after. It was not ordained that Stanley George Savige - should enjoy a long life, but it was to prove a life of outstanding service. Born at Morwell in Victoria some 63 years ago, he received with his brothers and sisters such education as was then available to a lad in a mining district. He had no particular opportunities of advancement, but from his early days he cherished a strong ambition to make a success of his life, and with this in view he lost no opportunity of adding to his knowledge. Always a lover of the open country, a good bushman and a fine shot, he became as a young man, a Scoutmaster with a keen following of boys. Even in those early days he attracted youth and showed undoubted promise of the quality of leadership which later was to make him famous. Opportunity came with the first World War, and he took his place as a private soldier in the original 24th Battalion AIF. Followed Gallipoli and Anzac where his marksmanship and bush craft stood him in good stead. Conscious that his early training was not sufficient to secure the promotion he desired, he set himself to enlarge it. Only a man of fine fibre and rare determination could apply himself to study on that war torn Peninsula, where our men, hitherto untested, suffered every known hardship and no man knew, from hour to hour, whether he would survive. But Savige achieved it. Himself then a Corporal he found another Corporal who was a former Schoolmaster and learned from him all that he had to teach. Savige was on his way. He was commissioned on the Field and allotted the heroic task of leading the last party off that desperate coast during the famous evacuation. In France he became the Adjutant of his Battalion and one of the best known officers in the 6th Brigade. He won the Military Cross and was mentioned in despatches. Early in 1918 he received a signal distinction, He was included in a small but distinguished band of Officers and Non-Commissioned Officers from the British and Dominion Forces most carefully selected for individual courage and proved qualities of leadership, and was sent to Persia, under the command of Major-General Dunsterville, Kipling’s famous Stalky, to assist and mobilise the friendly tribes with a view to protecting the road to India, left wide open by the withdrawal of Russia. The story of the Dunsterforce, its suffering and achievements in the face of incredible hardships and difficulties, was later to be told by Savige in his book “Stalky’s Forlorn Hope”. He emerged, finally, unscathed, despite his active participation in several of the bloodiest battles of all time, with the rank of Captain and a DSO and MC to his credit, to say nothing of three mentions in despatches. In later years, further decorations were to be conferred upon him, but I believe he valued none of these so highly as his awards for outstanding personal bravery won in the Field when he was an Officer of comparatively junior rank. Such was the man who in August 1923, at the instance of his former Commander, Major-General Sir John Gellibrand, gathered around him a handful of men who had fought and laughed with him over four well remembered years. This small band adopted the name of “Legacy”, but its purpose then was, in the main, to assist in safeguarding the interests of ex-servicemen in this country. Worthy although the case undoubtedly was, the conception and ideal which was to distinguish Legacy from all kindred post-war movements did not emerge until two years later. The torch had not been lit. Legacy had not yet found its soul. What has been achieved since then is known to you all. The Legacy ideal, unique in its conception, with no known counterpart elsewhere, is now accepted, welcomed and honoured throughout the Commonwealth and abroad. But in those early days the achievements of our Founder in the face of all manner of difficulties and frustrations are worthy of our lasting memory and thankfulness. As the source of every river lies in the hills, so must the inspiration from which stems a great conceptions of service to one’s fellow men be lofty and above reproach. Savige was the embodiment of this new expression of comradeship, as he was the central figure and driving force of the little group that sponsored it. But for his zeal, his faith and determination, it is likely that the flame, newly kindled, might have flickered and died. The idea of men returned from active service pledging for the sake of their former comradeship, their personal assistance to the widows, and above all, to the children of those who had fought beside them and paid the full price of War, was so completely new and unexpected that it was by no means readily accepted. There were no funds, no precedents to guide the new adventurers, only the clear bright flame of an ideal just envisaged, and the conviction that the Cause was unassailable. Nor were there lacking many who said that the community held no place for Legacy, that it was born of sentiment only, and would quickly pass. The scoffers are gone and one since forgotten, but the torch remains and burns brighter than ever. Down the years of Legacy there are many names deserving of honour, men from all States and all stations of life, but no name stands out in such clear and bold relief as does the name of our Founder. By his works you shall know him. He was, in truth, the Soul of Legacy. He sought no office and preferred to work as one of the team. Six years went by before he accepted the Presidency of Melbourne Club, and then only because his fellows would book no further delay. “The Spirit of Legacy is Service” - so runs the Charter, and that was Savige’s Creed. By virtue of his attainments he was called upon to take a leading part in the administration of Legacy, first within his own club and later, as Chairman of the Co-ordinating Council of Legacy in Australia. But always it was the essentially human character of the work which enthralled and upheld him, and the tasks which gave him most joy were those which brought him into close personal contact with the youngsters and their home life. Like their elders they recognised his goodwill and his leadership and responded to it. It was Savige who made possible the first camps held for the boys and girls by Melbourne Club. These were erected on his own seaside property, and were originally conducted under his personal direction and largely with the aid of funds he had collected. There was hardly an important post in his own Club that Savige did not at some time occupy and adorn. He was happiest in the company of those men with whom he had served in the field, and cherished always the comradeship born of active service which is of the essence of Legacy. He was a man of strong convictions but attentive always to another’s point of view. As a Legatee he played a leading part in bringing hope and encouragement to many a mother on whom the whole responsibility of a young family had been suddenly and tragically laid; in the attainment of the ambitions of many an orphan child, which not so long since had seemed to him or her to be mere dreams, impossible of realisation. Comfort for the bereaved, new hope for the children’s physical and educational welfare, assistance with the home, aid for the sick, money for the needy and a new courage to face a future that hitherto had held no promise, all these facets of Legacy endeavour combine to present a living and enduring memorial to the man we honour as our Founder today. Between the two World Wars in addition to establishing himself successfully in civilian life and answering the constant calls of Legacy on his energy and time, Savige maintained an active association with the Army. He was convinced that a Second AIF would one day be urgently called upon, and as a Battalion Commander he spared no effort to train the Officers under his charge during the uneasy years of peace for the trial that he felt must come. These men have all subsequently had distinguished military careers, their names are well known and many of the serve in Legacy today. When the second crisis came, Savige himself was one of the first to offer, and although his youth was spent, he proudly carried the number VX13 throughout the terrible years that followed. This time he was to command, first the 17th Australian Infantry Brigade in the first action of the Second AIF against the enemy at Barida, and subsequently at Tobruk and Derna - all famous names now. It was his patrols which gave the warning - unheeded at the time - that Rommel’s reinforcements were reaching North Africa far earlier than was expected. Then followed the grim days of Greece and Crete when the fine qualities of his leadership were put to the utmost test. I have been told by those who were closest to him it was typical of Savige that when his convoys were on the move back and were being blasted from the air by the unopposed Luftwaffe, he should sit by the side of the open road, wearing his red banded cap, to steady the morale of men who had then no chance of hitting back at the enemy. Unorthodox no doubt, but here was a man indeed. Throughout the whole campaign and later when he commended the 3rd division in New Guinea and later still when with the rank of Lieutenant-General he became a Corps Commander in New Guinea and Bouganville, it was at all times characteristic of him that he should see for himself the situation in the forward areas. He dealt personally with his subordinate commanders whenever it was possible to do so. No one says his G.S.O. 1. understood better than he did the importance of front line troops seeing their G.O.C. frequently, and knowing that he was aware of and prepared to share their hardships and dangers. He took many risks that he should not have taken, exhausted himself physically and mentally times without number, and considered himself not at all in order to secure the success of his operations. Finally, in Bouganville, he brought his campaign to a victorious conclusion and accepted the personal surrender of the Japanese Commander. Savige is known as one of Australia’s most human military leaders, but let no one believe that he did not ask and receive the utmost of his men. He trained them in a hard school but he was ever conscious of their needs and observant and thoughtful of their welfare. Fearless and untiring under conditions which brought younger men down, he asked nothing that he was not himself prepared to give and do. The close of the Second World War left him with the same brave heart; but a vitality greatly impaired. He was called up again and again to perform important national tasks, notably that of Co-ordinator of Demobilisation and Dispersal. But his interest in Legacy never flagged it was in fact more personal than ever, for under his command many junior legatees, sons of former comrades had proved themselves worthy of their Fathers in war and in peace. In the bearing and achievements of the young men of the Second A.I.F. he took a particular and justifiable pride. He applied himself to the Extension of Legacy to areas where it had not previously been practicable to operate. His record of service and close personal contact with the men of both wars made him a most welcome pioneer and many new Clubs and Groups resulted from his efforts. He founded, and I doubt whether any one else could have done so, the Club in the great Capital of our Empire. His reputation and obvious sincerity surmounted obstacles that might well have daunted lesser man. Legacy’s debt to him visibly increased. But he was ever a simple man, with a great love and understanding of his fellow men and a true Legatee at heart. Much that he did will never be known or recognised, save by those who benefitted. His service in Legacy ranged from the humble kitchen of cottage and farm to our representation in Westminster Abbey itself. A knighthood set the seal upon an outstanding career. None the less when upon the death of Field Marshall Sir Thomas Blamey, Lieut. General Sir Stanley Savige became the Patron of the Melbourne Club, he retained at his own express desire, the title of Legatee Savige, and when on that final day we bade him farewell, when the Flags he had served so well were lowered and the guns which had formed a grim final salute, it was apparent to all who had eyes to see that this great and simple man had won such a place in the hearts and affection of his fellow country men as is given to few men indeed. From the packed Cathedral, escorted by his fellow Generals, followed by men of his own Units, by Legatees and a great company of others who had cause to honour and esteem him, he made his last journey. But that is not the end. His voice and presence are lost to us but his memory and inspiration must ever remain. As he has bequeathed to the National War Memorial yonder his diaries, records and battle plans, so he has bequeathed to us his fellow Legatees his greatest achievement and his trust, Legacy itself. Never was the Torch passed by worthier hands. Now it is ours to hold it high. Whatever material memorial the future many hold for him, Legacy owes its Founder a livelier recompense. It is within our power to implement what I believe to be his greatest wish, that Legacy and its ideal of comradeship and service shall flourish and endure. Let each one of us then resolve that we shall, within our Clubs, in all tasks to which we are assigned, both great and small, keep in our minds the life and spirit of Stanley George Savige, so that we may be proud at all times to say of Legacy to those who follow after - “If you would see his memorial - Look around you”.The tribute to Stanley Savige shows how greatly he was regarded by the Legatees.Off white quarto paper with black type, address given about Stan Savige to the Canberra Conference, x 12 pages.savige, speech, obituary -
 Waverley RSL Sub Branch
Minefield Warning Flag
German Luftwaffe (Land Forces) minefield warning flag from WWII.originally intended to be gas markers, rather than mines, but as it turned out, the use changed .they were mounted on a red metal pole & there were 12 to a set in a leather pack. This Flag was presented to the Treasurer of Waverley RSL. It is a souvenir from Bardia in Libya The Battle of Bardia was fought over three days between 3 and 5 January 1941, as part of Operation Compass, the first military operation of the Western Desert Campaign of the Second World War. It was the first battle of the war in which an Australian Army formation took part, the first to be commanded by an Australian general and the first to be planned by an Australian staff. Major General Iven Mackay's 6th Division assaulted the strongly held Italian fortress of Bardia, Libya, assisted by air support and naval gunfire, and under the cover of an artillery barrage. The 16th Infantry Brigade attacked at dawn from the west, where the defences were known to be weak. Sappers blew gaps in the barbed wire with Bangalore torpedoes and filled in and broke down the sides of the anti-tank ditch with picks and shovels. This allowed the infantry and 23 Matilda II tanks of the 7th Royal Tank Regiment to enter the fortress and capture all their objectives, along with 8,000 prisoners. In the second phase of the operation, the 17th Infantry Brigade exploited the breach made in the perimeter, and pressed south as far as a secondary line of defences known as the Switch Line. On the second day, the 16th Infantry Brigade captured the township of Bardia, cutting the fortress in two. Thousands of prisoners were taken, and the Italian garrison now held out only in the northern and southernmost parts of the fortress. On the third day, the 19th Infantry Brigade advanced south from Bardia, supported by artillery and the Matilda tanks, now reduced in number to just six. Its advance allowed the 17th Infantry Brigade to make progress as well, and the two brigades reduced the southern sector of the fortress. Meanwhile, the Italian garrisons in the north surrendered to the 16th Infantry Brigade and the Support Group of the British 7th Armoured Division outside the fortress. In all, some 36,000 Italian prisoners were taken. The victory at Bardia enabled the Allied forces to continue the advance into Libya and ultimately capture almost all of Cyrenaica. In turn this would lead to German intervention in the fighting in North Africa, changing the nature of the war in that theatre. Bardia boosted the competence and reputation of the Australian Army. Perhaps most important of all, it raised confidence in the possibility of an ultimate Allied victory around the world, which would lead to the Lend-Lease Act being passed in the United States http://en.wikipedia.org/wiki/Battle_of_BardiaCloth Flag bearing a skull and cross Bones on a metal spike mounted on a square varnished wooden basebardia, land mine, marker flag, minefield, mustard gas -
 Waverley RSL Sub Branch
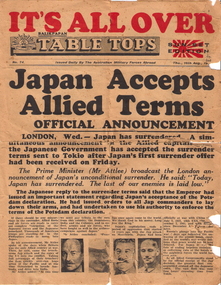
Table Tops Newspaper, Table Tops Balikpapan Tuesday 6th August 1945
This Edition, Published by AIF News, was printed to celebrate the end of WWII in the Pacific Region. It was kept by L.A.C. Charles Harold Dix 119700 R.A.A.F. No. 2 Squadron Stationed at Balikpapan at the time. (past member of RSL Waverley sub branch)Records the end of hostilities in the Pacific Region WWII and give an insight into how the news was communicated, as well as into other issues important at the time.4 page A4 Newspaper, pages brownish due to deterioration and fragile due to folds and rips.Print is still clear and readable Table Topsbalikpapan, pacific war, victory, charles harold dix, japan surrenders, newspaper, newsletter, 6th august 1945, table tops, tabletops, aif news, wwii -
 Waverley RSL Sub Branch
RSL Photo Album, RSL Photo Album Section 3
During World War II the Japanese attacked New Britain soon after the outbreak of hostilities in the Pacific Ocean. During January 1942, Japanese heavily bombed Rabaul. On 23 January, Japanese marines landed by the thousands, starting the Battle of Rabaul. The Japanese used Rabaul as a heavy base until 1944; it served as the key point for the failed invasion of Port Moresby (May to November, 1942) Note: these photos are incorrectly labelled as Nth. Britain Photograph of "OIRE LUNG " airfield is in fact "WUNUNG, JACQUINOT BAY, NEW BRITAIN, 1945-08-28. A FULL PARADE OF 37/52 INFANTRY BATTALION AND 29/46 INFANTRY BATTALION, BOTH OF 4 BRIGADE, WAS HELD ON WUNUNG AIRSTRIP. THIS PARADE WAS TO PREPARE TROOPS FOR A PARADE TO BE HELD ON 1945-09-03. SHOWN, 37/52 INFANTRY BATTALION PRESENTING ARMS." Airstrip was maintained by 1 ACSPhoto Album 360 Pocket "Photo Safe" divided for cataloguing purposes into 4 sections. Section 1 Recent Colour Photos of RSL and commemoration services Section 2 Black and white photos of earlier commemoration services, Section 3 WWII photos mainly of New Britain 1945, Section 4 Early photos of Memorabilia display.new britain, wwii, japanese surrender, pow, rms aquitania, ss nieuw amsterdam, rms mauritania, rabaul, wunung airfield, jaquinot bay, 1 acs -
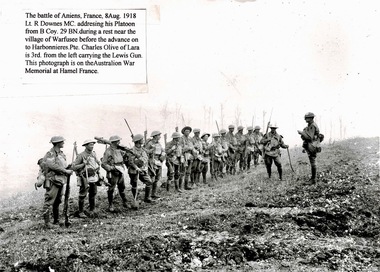 Lara RSL Sub Branch
Photo, The Battle of Amiens,France,8Aug,1918
The Battle of Amiens, also known as the Third Battle of Picardy (French: 3ème Bataille de Picardie), was the opening phase of the Allied offensive which began on 8 August 1918, later known as the Hundred Days Offensive, that ultimately led to the end of the First World War.By the end of August 8—dubbed “the black day of the German army” by Ludendorff—the Allies had penetrated German lines around the Somme with a gap some 15 miles long. Of the 27, 000 German casualties on August 8, an unprecedented proportion—12,000—had surrendered to the enemy. Though the Allies at Amiens failed to continue their impressive success in the days following August 8, the damage had been done.Rectangular shaped black and white photograph.The battle of Amiens,France,8thAug.1918.Lt R Downes MC.addressing his Platoon from B Coy.29 BN.during a rest near the village of Warfusee before the advance on to Harbonnieres.Pte Charles Olive of Lara is 3rd,from the left carrying the Lewis Gun. He was killed in action three weeks later charging a German machine gun post. Earlier in the day, he had successfully taken two machine gun posts. Photo from Australian War Memorial, Canberra.ww1, battle of amiens, australian army, lara r.s.l. pte charles olive., awm accession no e2790 -
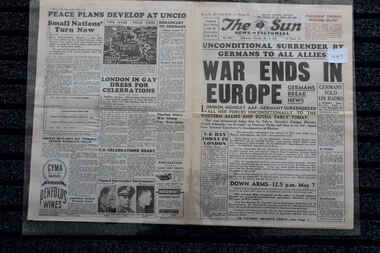 Lara RSL Sub Branch
Newspaper - The Sun Newspaper dated 5/5/1945, War Ends in Europe
Newspaper 1945 records the End Of In EuropeHistorical record2 off -Newspaper The Sun dated 5/5/1945 - War Ends In Europe2 off - Local Newspaper The Sun articles covering End of War in Europeunconditional surrender by germans to all allies -
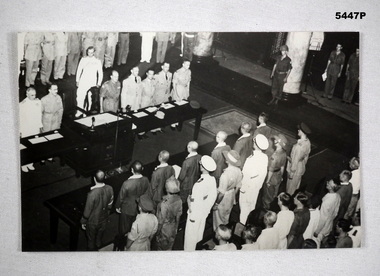 Bendigo Military Museum
Photograph - PHOTOGRAPH, JAPANESE SURRENDER, C1945-1947
Refer to CAT NO 5445.2Photograph has bee taken from high point inside a building. Looking down on an assembly of allies and Japanese officers. There are tables between them. Each Japanese officer has an allied serviceman standing at attention behind him. There is solitary US Army guard standing near a marble pillar A British Navy person probably Lord Mountbatten is approaching the centre chair.ww2, war trials, japanese surrender -
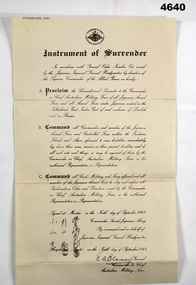 Bendigo Military Museum
Document - INSTRUMENT of SURRENDER, 9.9.1945
The document is signed in English and Japanese by “Commander Second Japanese Army” and “General Blamey C in C Australian Military Forces” on Morotai. Alan Mason collection, refer cat No 3979.2Document, rectangular shape, off white colour, all print in black, “Lithographic copy”, top has “C in C - Australian Military Forces Seal”, followed by sections A, B, C then signed off.“Signed at Morotai on the Ninth day of September 1945”japanese surrender, morotai, documents -
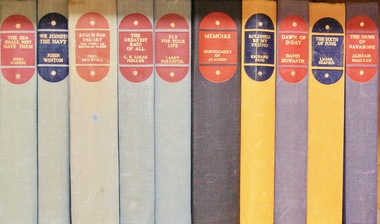 Lara RSL Sub Branch
Book, The Memoirs of Field M- Marshal Montgomery Author Montgomery of Alamein K.G, 1960
London, Europe and Dardenelles. Personal recount of boyhood in England to Military service and death.WWII personal recount. Statistics, Maps, Illustrations, Photographs. Letters .An autobiography. " A blessed companion is a book" by Jerrold Inside front pagewwii, whitehall, 8th army, london, el alamein, dardenelles, europe, unity of the west, palestine, germany, russia, high command, german surrender, italy, sicily, normandy, dunkirk, docterine of command, arnhem -
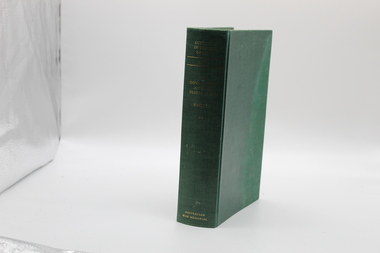 Lara RSL Sub Branch
Book, Australia in the War of 1939-1945 CIVIL Volume 2 Author Paul Hasluck The Government and the People of 1942-1945, First published 1970
This book is a follow one from the first volume written by Paul Hasluck. Maps, illustrations and photographsThe development and significant events of Australian politics during 1942-1945Australia in the War of 1939-1945 - The Government and the People 1942-45Australian War Memorialfall of singapore, south west pacific command, bombs on australian soil, macarthur, macarthur takes command, industrial - coal, austerity, manpower difficulties, 1943 elections, san francisco conference, the end of hitler's war, john curtin is dead, the surrender of japan -
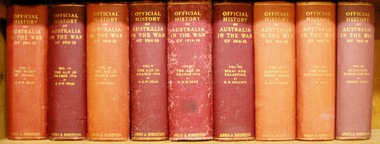 Lara RSL Sub Branch
Book, Official History of Australia in the War of 1914-18 - Volume VI - The AIF in France 1918 Author C.E.W. Bean. The AIF in France May 1918- the Armistice, Published 1942
This volume deals with those months in which the first World War turned against the German Army on the western front, and shows in detail how, in the crucial Amiens sector that change was brought about. The completion of the story of the final offensive in 1918.An account of the conclusion of the first world war with Germany being defeated and surrendering.Official History of Australia in the War of 1914-18 - Volume VI - The AIF in France 1918. Hardcover cardboard. Maps, diagrams, illustrations, chronologygerman surrender, battle of aisne 1918, monash succeeds, battle of hamel, amiens, armistice, peace treaty signed, battle of montbrehain -
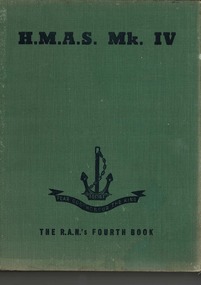 Lara RSL Sub Branch
Book, HMAS Mk IV - The RAN's Fourth Book, 1945
This is the last of the series of books chronicling the achievements of the ships and personnel of the Royal Australian Navy in WWII. For the whole of the war the Navy was on the job all over the place all of the time. From the first to the last days of WWII RAN was represented, by ships and personnel in the battle for supremacy in t he battle for supremacy at sea. They took part in every rear-guard action in the days when the tide was against. They participated in the invasions of enemy territory that came with the resurgence of Allied strength right through to the final assaults on the Japanese home islands The last book of the series of which HMAS MK IV, servIng personnel of the RAN have recorded the achievements of their service in WWII HMAS Mk IV - The RAN's Fourth Book. Green front, back and spine hardcover.. Inside front and back cover is a green sepia aerials view illustration of Japanese islands with boats and aeroplane. Illustrations, poems, stories, photographs, prints, cartoons.Dedicated to all those past and present, who 'Fear God, Honour the Kingwwii, royal australian navy, triumph of sea power, amphibian, flying seaman, invasion of borneo, whaler's crew, converted ocean liners, wrans go to sea, balikpapan, frigates, new guinea, indonesia, south east oceania, bougainville, surrender of dutch borneo, world war 2 -
Lara RSL Sub Branch
Book, Stand Easy - After the Defeat of Japan 1945 Published for The Australian Military Forces by Australian War Memorial, 1945
A collection of personal stories which extended from the collection of Khaki and Green. The service numbers have been used to identify those who have contributed to the content.Personal recounts and reminiscing of service by Army service personnel, after the Japanese surrender. The title 'Stand Easy' meaning that whilst there was a surrender the Army's task still continued. Contributors to this publication can be identified by their service number.Green hardcover with light green text and picture of soldier. The spine also has light green text of title. The inside front and back covers have green art geometric patterns. Illustrations, photographs, cartoons, blamey, nerve war, medical evacuation, 2nd australian corps, surrender of japan, bougainville, borneo, 5th australian division, 6th australian division, 7th australian division, 9th australian division, tarakan