Showing 273 items
matching armstrong st.
-
 Melton City Libraries
Photograph, Thomas Lang, 1905
Born on the 22nd October 1852 or 1849 St Ives Cornwall, in 1896 Thomas and Mary Elizabeth moved to Melton. Mr Lang’s previous school was Coliban SS No 1920. Mr Lang was the Head Teacher at Melton until 1917. In 1910 he was a Committee Member Melton Mechanics Institute and Public Library atits establishment. He was a Life Member of the Melton Mechanics Institute In 1875, he married Mary Elizabeth Coates on the 30th December at the home of Mrs Coates, Thomas Lang of Norton’s Creek aged 26 andMary Elizabeth aged 24 of Armstrongs. They had 9 children, Thomas.J. Lang, George William, Jessie, Maude, Effie, Walter, Horace, Eva and James. Passed away in 1927. Black and white photo of Langlocal identities, education -
 Charlton RSL Sub Branch
Booklet - Small army booklet, Welcome to your Army Booklet
Small booklet31.5.52 Raymond Keith Watkins. 81 Canterbury St, St Arnaud, Victoria. D.R. Watkins 105 Alma Rd, North Caulfield, Melbourne -
 Melbourne Legacy
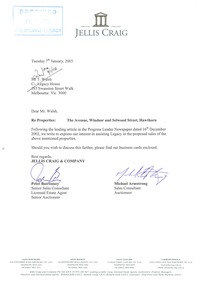
Letter - Document, letter, Sale of properties, 22 Selwood St, Hawthorn East, 9 The Avenue, Windsor, 2003
Two documents that show that in 2003 Melbourne Legacy decided to sell two of its properties, 22 Selwood St, Hawthorn East and 9 The Avenue, Windsor. This decision was taken due to rising maintenance costs and that the money raised from the sale of the properties could be used to benefit all 24,000 widows under their care. One document was a statement by President Tony Parkes about the decision and the other a letter from Jellis Craig offering to be involved in the sale. They had read about the decision in the Leader newspaper. No time frame had been set and all residents of these two properties would be consulted by Legacy personnel with a family member present. Also photocopies of the two land titles for the properties.This shows the commitment of Melbourne Legacy to ensure that residents individual circumstances, accomodation, needs preferences and location were considered in the move, and cause as little disruption to the residents as possible.Cream A4 paper, plus brochure from real estate agent, Jellis Craig,Stamped 'Received 09 JAN 2003 Melbourne Legacy' in blue ink, top left hand corner. Top centre Jellis Craig letter head. Letter signed Peter Batrouney and Micheal Armstrong (Jellis Craig).widows, properties, titles -
 Charlton Golden Grains Museum Inc
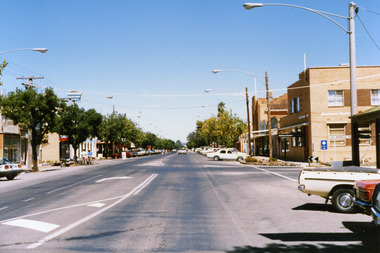
Photograph, Charlton High St 1987, c.1987
High St Charlton 1987. Part of Shire of Charlton series of photos. National Australia Bank building. Established as Bank of Victoria in 1876, later became Commercial Banking Company of Sydney. Current building built in c. 1940Colour photo of High St, Charlton looking east. National Australia Bank on the corner of High & Armstrong Streets. Sign for Victoria Bitter and East Charlton Hotel on LH side. White car travelling toward photographer. Two people holding bicycles and standing next to a motor bike on LH side of road.high st charlton, national australia bank, bank of victoria, commercial banking company of sydney, charlton, business, industry -
 Charlton Golden Grains Museum Inc
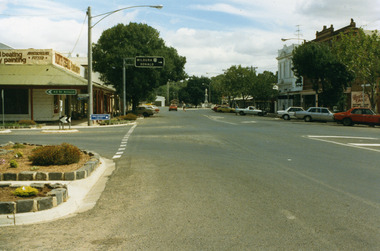
Photograph, Pollard, Jenny, High Street Charlton 1989, c.1989
High Street Charlton streetscape. Shows Sweatman's North Central Panel Beaters (formerly Charlton Motors Pty Ltd garage), Heather's Choice Gift Shop (in the former Bilton/Dillon building built 1889), Westpac Bank, War Memorial (built 1923)Colour photograph of High St Charlton taken near the corner of Armstrong Street looking west. Garden beds in lower LH, road signs pointing to St Arnaud and to Mildura and Donald. North Central Panel Beaters on corner. Orange car driving west, person crossing the road, man standing near white ute in front of Westpac bank on RH side of photo. Heather's Choice sign on side of building. War Memorial at the end of the road.sweatmans, north central panel beaters, heather's gift shop, bilton building, westpac, war memorial, charlton, business, industry -
 Linton Mechanics Institute and Free Library Collection
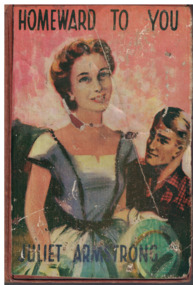
Book - Novel, Armstrong, Juliet, Homeward to You by Juliet Armstrong, 1953
... Sussex St Linton 3360 Juliet Armstrong Romance Fiction Romance ...Romance novelHardcover book with colour image of a woman and a man. 191 pages. fictionRomance noveljuliet armstrong, romance, fiction -
 Linton Mechanics Institute and Free Library Collection
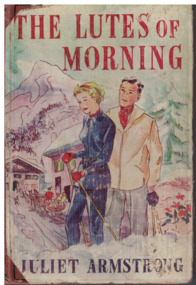
Book - Novel, Armstrong, Juliet, The Lutes of Morning by Juliet Armstrong, 1956
... Sussex St Linton 3360 Juliet Armstrong Romance Fiction Romance ...Romance novel.Hardcover book, 191 pages. Front cover of book has a colour image of a man and a woman in a snow landscape.fictionRomance novel.juliet armstrong, romance, fiction -
 Victorian Railway History Library
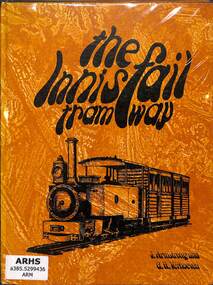
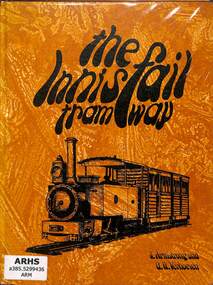
Book, Armstrong, John et al, The Innisfail Tramway, 1973
The story of the history and development of the Geraldton Shire Tramway and the Mourilyan tramway of North Queenslandill, maps, p.96.non-fictionThe story of the history and development of the Geraldton Shire Tramway and the Mourilyan tramway of North Queenslandlight railways - australia - history, narrow gauge railroads -- australia -- queensland -- history. -
 Victorian Railway History Library
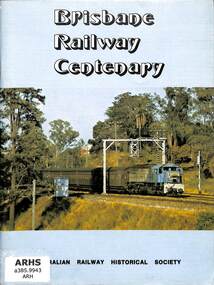
Book, Australian Railway Historical Society - Queensland Division et al, Brisbane Railway Centenary, 1976
A pictorial history of the centenary of the opening of the Queensland Government railways from Brisbane to Ipswich in 1876.ill, maps, p.56.non-fictionA pictorial history of the centenary of the opening of the Queensland Government railways from Brisbane to Ipswich in 1876. queensland railways -- history., railroad construction - queensland - history -
 Victorian Railway History Library
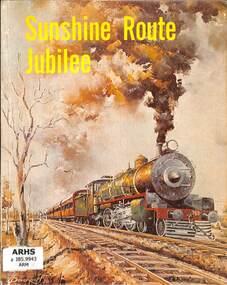
Book, Australian Railway Historical Society - Queensland Division et al, Sunshine Route Jubilee, 1975
A pictorial history of the North Coast mainline of the Queensland Government railways from Brisbane to Cairns to mark its 50th anniversary.ill, maps, p.80.non-fictionA pictorial history of the North Coast mainline of the Queensland Government railways from Brisbane to Cairns to mark its 50th anniversary.queensland railways -- history., railroad construction - queensland - history -
 Victorian Railway History Library
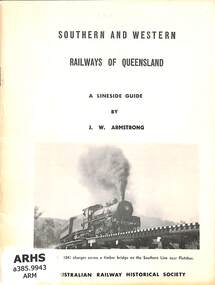
Booklet, Australian Railway Historical Society - Queensland Division, Southern and Western Railways of Queensland: A Lineside Guide
A lineside guide for the Queensland Government railway from Brisbane south & west to Toowoomba & beyond.ill, p.24.non-fictionA lineside guide for the Queensland Government railway from Brisbane south & west to Toowoomba & beyond.railroad operations - queensland - history, railroad construction - queensland - history -
 Victorian Railway History Library
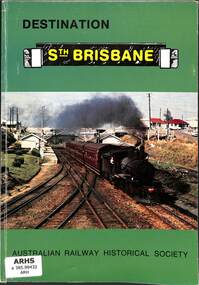
Book, Australian Railway Historical Society - Queensland Division et al, Destination Sth Brisbane, 1984
A history of the railways out of South Brisbane station in Brisbane Queensland.index, ill, maps, p.120.non-fictionA history of the railways out of South Brisbane station in Brisbane Queensland.railroad operations - queensland - history, railroad construction - queensland - history -
 Victorian Railway History Library
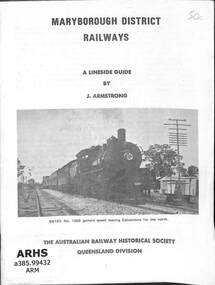
Booklet, Australian Railway Historical Society - Queensland Division, Maryborough District Railways A lineside guide, 1970
A lineside guide for the Maryborough district of the Queensland Government railway.ill, maps, p.29.non-fictionA lineside guide for the Maryborough district of the Queensland Government railway.railroad operations - queensland - history, railroad infrastructure - queensland -
 Ballarat Tramway Museum
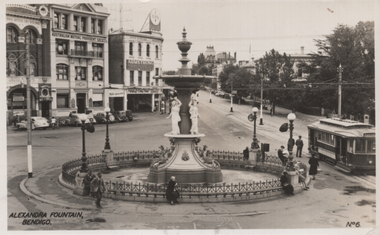
Postcard, Valentine & Sons Publishing Co, 'Alexandra Fountain Bendigo", late 1940s
Printed black and white postcard of Alexandra Fountain Bendigo with an ex-Melbourne SEC tram on the right side, going to Eaglehawk. In the view are the National Mutual, Australian Mutual Provident Society, and the Armstrong Tyre Service station. Published by Valentine of Melbourne and Sydney.Yields information about Bendigo's Charing Cross and View St late 1940s.Postcard black and white, used - No. 6.Has a letter on the rear with two stamps dated 27-6-1949 to Ken Magor from Roy and Ken about their visits to the three provincial tram systems and the narrow gauge at Ferntree Gully. The weather had not been good for their visit. See rear image.tramways, trams, bendigo, charing cross, view point -
 Ballarat Tramway Museum
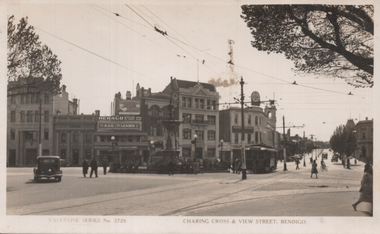
Postcard, Valentine & Sons Publishing Co, "Charing Cross & View Street Bendigo", c1930
Printed black and white postcard of Charing Cross and View St Bendigo, with SEC tram No. 10 departing for Eaglehawk. In the view are the Commonwealth Bank, Parkers Newsagent advertising The Herald, The Age, and The Leader and the Armstrong building. Published by Valentine of Melbourne and Sydney.Yields information about Bendigo's Charing Cross and View St c1930.Postcard black and white, unused - Valentines series No. 3729.On rear in pencil "No. 10 Eaglehawk dest"tramways, trams, bendigo, view st, charing cross -
 Victorian Railway History Library
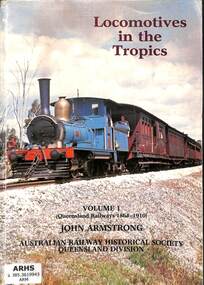
Book, Armstrong, John, Locomotives In The Tropics: Volume 1 (Queensland Railways 1864-1910), 1985
A history of steam locomotives on the Queensland Government railways built between 1864 and 1910.index, ill, p112.non-fictionA history of steam locomotives on the Queensland Government railways built between 1864 and 1910.steam locomotives - australia - history, locomotives - queensland - history -
 Victorian Railway History Library
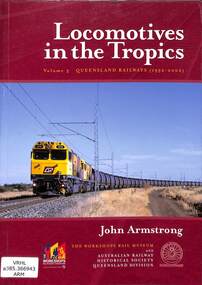
Book, Armstrong, John, Locomotives in the Tropics, 2003
Details of the diesel and electric locomotives operating on the Queensland Government Railways between 1952 and 2002.index, ill, p.196.non-fictionDetails of the diesel and electric locomotives operating on the Queensland Government Railways between 1952 and 2002.locomotives - queensland - history, locomotives -- australia -- history -
 Victorian Railway History Library
Book, Armstrong, John et al, 1973
The story of the history and development of the Geraldton Shire Tramway and the Mourilyan Tramway of North Queensland.ill, maps, p.103.non-fictionThe story of the history and development of the Geraldton Shire Tramway and the Mourilyan Tramway of North Queensland.railroads - queensland - history, tramways - australia -
 Linton and District Historical Society Inc
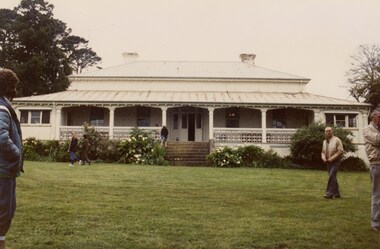
Photograph, St Enoch's Homestead, Stockyard Hill, 1986, 1986
... "St Enoch's Bill Armstrong"....LDHS activities St Enoch's homestead "St Enoch's Bill ...Colour photograph showing closer view of old homestead with people in grounds. Photograph taken on LDHS trip to St Enoch's and Mt Widderin, 1986."St Enoch's Bill Armstrong".ldhs activities, st enoch's homestead -
 Federation University Historical Collection
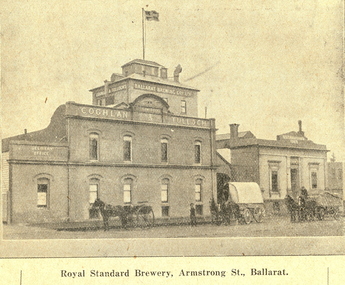
Booklet, Beautiful Ballarat, 02/1918
Purple soft covered booklet of 102 pages. Includes numerous advertisements and black and white illustrations. Topics include: Ballarat history, Eureka, Railway facilities, Railway fares to Ballarat, Lake Wendouree, Ballarat Botanical Gardens, Ballarat Zoological gardens, Ballarat Statues, Ballarat Mines and Mining, Illustrations include: Ballarat Brewing Company, passenger steamer on Lake Wendouree, Provincial hotel, Eureka Lead, Lydiard Street, Sturt Street, Ballarat Town Hall, Ballarat East Town Hall, Sunnyside Woollen Mills, Fairyland, Loch Leven Trout caught in Lake Wendouree, Ballarat Botanical Gardens, Boer War Monument, New Imperial Gold Mine, South Street Competitions, Art Gallery of Ballarat, Ballarat School of Mines, Ballarat Grammar School, Ballarat College, St Patrick's College, Ballarat Agricultural High School, Mt Clear flowering grass trees (Xanthorea Australis), Eureka Stockade Monument, Ballarat YMCA, Lake Burrumbeet, Bo-peep Creek, Moorabool Falls, Lal Lal Falls Advertisements include: Ronaldson bros. and Tippett, Charles Morris undertaker, James Smith, Huttons the jewellers, Allchin Bros, Wallace Butter Factory, F.W. Barnes and Son, Berry, Anderson and Co., Rowlandsballarat, new imperial gmc, sunnyside woollen mill, brewery, royal standard brewery, st patrick's college ballarat, ballarat grammar school, ballarat school of mines, ballarat east town hall, ballarat east botanical gardens, abc grill & tea room, a.m. palmer chemist, thomas' supply stores, ballarat brewing company, stevens the furriers, summerscales, paddlesteamer on lake wendouree, hutton's the jewellers, allchin brothers, fiat motor garage, eureka stockade, w. cornell, cornell's liver pills, f.w. barnes and son, w. rotchie's, railway, lake wendouree, w.f. coltman, bert skinner, frank besemere, fred a. reed, ballarat zoological gardens, jelbarts, brinds, rowlands soda water, american club hotel, armstrong street south, ballarat woollen mill, southern cross hotel -
 Melbourne Tram Museum
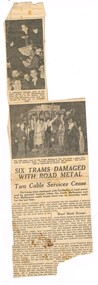
Newspaper, The Argus, "Six Trams Damaged with Road Metal", 15/03/1937 12:00:00 AM
Newspaper Clipping - from The Argus Monday 15/3/1937, titled "Six Trams Damaged with Road Metal", about the damage caused at the time of the closure of the South Melbourne and Port Melbourne cable tram services - by souvenir hunters and people at the Port Melbourne depot who through road metal (stones) at the trams as they came into the depot. The timeline gives the date of closure as Saturday 13/3/1937. Notes one of the Gripmen was a Mr. J. Armstrong. A comparison with the cutting as collected and the reproduction in The Argus on Trove, while the same photographs has a different text layout and text, possibly indicating two different editions of the paper.trams, tramways, collins st, port melbourne, south melbourne, cable trams, closure, buses -
 Melbourne Tram Museum
Magazine, Metropolitan Transit Authority (MTA), "Met Lines", 1988
Magazine, published by the Metropolitan Transit Authority of Victoria "Met Lines" (Metlines) - A4, printed on white gloss paper, centre stapled with the MTA logo or symbol. Issued under the name of Kevin Shea as Chairman. Continues from Reg Item 1142 "Met Lines" - printed in an A4 version. Major tram and bus items listed. Tramway names only listed, not railway. .1 - March 1988 - The Pandas car coming! - 20 pages - lists MTA Board, under Minister Jim Kennan; Helen Davison, Jenny Acton, Tony Tuohey, Sybille Kalbitzer, Greg Rodgers, John Usher. Advertising on trams etc, by Australian Posters - contractor, includes a photo of 814 as the Summer in the City tram, Transport Information Centre, launch of St Kilda light rail, photo of test tram 533, Tom Roper, tram 2002. Photo of farewell at Essendon depot. Final W2 - last tram in regular service - 646. .2 - June 1988 - Football theme - 16 pages - Station improvements, Jolimont Decentralisation, advertising the Met (photo for 273), new computer systems, Panamonium - pandas at the Zoo and Z8 painted for the event, new MAN buses - photo of 260. .3 - September 1988 - Uniquely Melbourne theme on the cover, some of the items sold at The Met shop, - 20 - photo of Light Rail vehicle lifting equipment at the workshops with Jack Armstrong and Les Jean, opening of The Met shop, Metrol, kids take a peek at trams (Brunswick depot). .4 - December 1988 - Festival season cover - 20 pages - MAN buses to Elwood, Transport Technology conference, article on the Thornbury Tramway Flyover (the Hump) at Preston Workshops - collisions or accidents on the flyover, tramcar details - submitted by Norm Cross. For next year 1989 - see Reg Item 1184trams, tramways, the met, mta, advertising trams, light rail, st kilda, essendon depot, zoo tram, buses, preston workshops, brunswick depot, the hump, bridges, w2 class, last tram, tram 814, tram 2002, tram 533, tram 2001, tram 8, tram 273, tram 646 -
 Melbourne Tram Museum
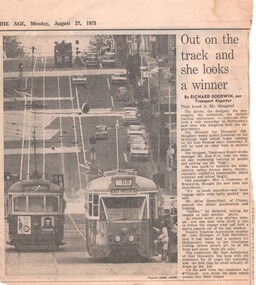
Newspaper, The Age, "Out on the track and she looks a winner", 27/08/1973 12:00:00 AM
Newspaper clipping, from The Age 27/8/1973, titled "Out on the track and she looks a winner" reporting of the launch of PCC car 104 (East Preston Route 89). Alongside is W7 1029 (City Route 96). Story by Richard Goodwin, photo by John Lamb of the tram Has comments from officials and passengers - Ken Hall MMTB, Mr Meagher (Minister for Transport), Jack Stranger (AETA) and Conductor Sam Armstrongtrams, tramways, pcc class, new trams, bourke st, launch, route 88, tram 1041, tram 1029 -
 Bendigo Historical Society Inc.
Book - AUCTION SALES: MINING CATALOGUE AUCTION SALES
Blue, black & white Woolstar exercise book with black & white check pattern to the left and a world globe over the top. Name on the front: A Richardson. Written on the front: Mining Catalogue Auction Sales. Book contains Lot numbers and description for auction sales at various mines. Mines mentioned are: Central Blue Gold Mine 19/2/42, Big Blue 23/11/1938, South Blue, Hercules Consols 19/2/1942, South Virginia 19/2/42, New Prince of Wales 5/2/48, Golden Carshalton G M 19/12/1957, North Virginia 3/5/57, North Nell Gwynne 25/2/53, South Shaft Diamond Hill, New Don 21/10/48, Sheepshead Battery Site 21/10/48, Forbes Carshalton 9/7/47, South Virginia 9/7/47, East Clarence 31/8/49?, Deborah Surplus Equipment 31/8/49, Deborah No 2 Shaft, North Deborah 31/8/49, Hercules Main Shaft 19/6/1950, Stanfield Shaft 20/6/1950, United Crushing Coy Battery (Unity Carlisle) 20/6/1950, Toolleen Gold Mine 23/2/1950, Ironbark Gold Mine 6/10/49, Ironbark South 1/12/49, Hercules New Chum 1/12/49, Great Southern Gold Mine 10/4/47, New Chum Syncline 2/3/1950, Deborah Associated 19/4/195? And the Deborah Consolidated 19/4/1950. Further information of Bendigo Mines from The Gold Mining Registry Guide to Bendigo Mines by H Kirkwood, Eaglehawk. Published by W. Welch. Mines include Lazarus New Chum Reg'd & Lazarus New Chum No 1, Princess Alexandra, Ellenborough, Trio-Hauling Coy, South Catherine Reef G. M. C., Princess Alice, Central Catherine Co,Cravens New Chum Co N. L., Garibaldi Mining and Crushing Co, Williams United, Catherine Reef Claimholders G. M. N. L., New Chum & Victoria Reef, Johnsons (Garden Gully) Line, United Ulster, Garden Gully Rly Reserve, South Ulster, Ulster and Cosmopolitan Coys, Golden Gate and Lansell'sBig 180. Some information on the Moon Mines 24/6/67 South New Moon, New Moon, Nth New Moon and New Moon Consolidated.In the reverseof the book is some information on the Lazarus New Chum Mine, Lazarus No 1 and Lazarus Mines. Also mentioned are New Chum Rly and Victoria Quartz. In 1895 a large gold bearing reef in Lazarus at 3000 feet. Also Some extracts from E. C. Dunn's Report 13/8/92 on the Lazarus Mine Old Shaft and Lazarus Main Shaft at various depths. Book not located on 6.3.25. Typed notes from book are in folder.book, bendigo, mining auction sales, auction sales, mining catalogue auction sales, a richardson, central blue g m, big blue, south blue, hercules consols, south virginia, new prince of wales, golden carshalton g m, north virginia, north nell gwynne, south shaft diamond hill, new don, sheepshead battery site, forbes carshalton, south virginia, east clarence, deborah, deborah no 2 shaft, north deborah, hercules main shaft, stanfield shaft, united crushing coy battery (unity carlisle), toolleen gold mine - toolleen, ironbark gold mine, ironbark south, hercules new chum, great southern gold mine, new chum syncline, deborah associated, deborah consolidated, j h curnow, miss kirkwood, the gold mining registry guide to bendigo mines, h kirkwood, w welch, lazarus new chum no 1, mr g armstrong, princess alexandra, h hectmann, ellenborough, amos arblaster, trio hauling coy, catherine reef g m c, w burnside, st mungo reef, princess alice, central catherine co, big catherine, belmont, cravens new chum co n l, wm w barker, c edwards, ellesmere, garibaldi mining and crushing co, henry von der heyde, w martin, williams united, wm cook, john chynowth, catherine reef claimholders g m n l, churchill davidson, edgar l rosman, new chum and victoria reef, johnsons (garden gully) line, united ulster, james mccoll, james quick, garden gully reserve, south ulster, ulster and cosmopolitan coys, golden gate, geo lansell's big 180, signal of a mine, mr langridge, e clarke, j hattam, a llewelly, n murray, a richardson, new moon, nth new moon, new moon consolidated, lazarus new chum, lazarus no 1, new chum rly, victoria quartz, lazarus, e c dunn -
 Ballarat Tramway Museum
Photograph - Illustration, "Ballarat Looking East from Town Hall Tower", c1900
... information about Sturt St from Bridge St to Armstrong St. Ballarat ...Set of two wide-angle views - both with the initials HJS and PS&Co in the bottom corners. 1 - Illustration titled - "Ballarat Looking East from Town Hall Tower" - with a horse tram turning from Sturt St into Lydiard St North and another running westbound on the north side of Sturt St. 2 - "Town Hall to Bridge St from GPO Tower" - There are no horse trams in the view. The National Mutual building is yet to be built - see reference.Yields information about Sturt St from Bridge St to Armstrong St.Illustration cut from a magazine or publicationballarat, illustrations, sturt st, lydiard st, town hall, national mutual, craigs hotel, horse trams -
 Stawell Historical Society Inc
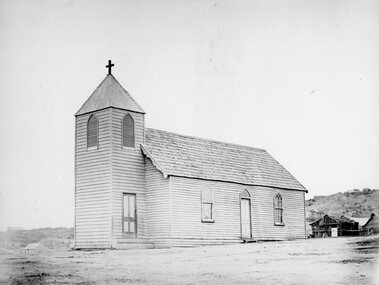
Photograph, Wooden Catholic Church, Reefs Pleasant Creek, built about 1865
Wooden Catholic Church Reefs built about 1865. Part of a collection of Photographs by Mr. O.G. Armstrong as commissioned by the Shire of Stawell for the Inter-colonial and Paris Exhibition in Melbourne in 1866. This wooden building was built about 1865 on a site held by minors right, near the present Stawell Courthouse. It was situated on a track later to become Patrick St. The present St Patricks church is built of granite, quarried in the nearby Black Range with facings of Grampians Freestone and was opened in 1873. Wooden Church with large bell tower with door at front. The edge slope of Big Hill can be seen at right.stawell religion -
 Stawell Historical Society Inc
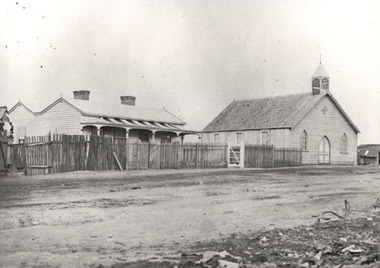
Photograph, Presbyterian Church, Reefs Pleasant Creek, built 1860
Presbyterian Church Reefs Pleasant Creek. Built 1860. Part of a collection of Photographs by Mr. O.G. Armstrong as commissioned by the Shire of Stawell in 1866 for the Inter-colonial and Paris Exhibition in Melbourne in 1866. This first Presbyterian church was built in Church Street and was of a modest design as it was to be only a temporary house of worship. The first services were held here on Sunday, August the 23rd, 1860. The present church, St Matthews Uniting Church is situated in Scallon Street and the first service were held there in 1869. House on left with picket fence and striped verandah roofing. Wooden Church Building on right.stawell religion -
 Stawell Historical Society Inc
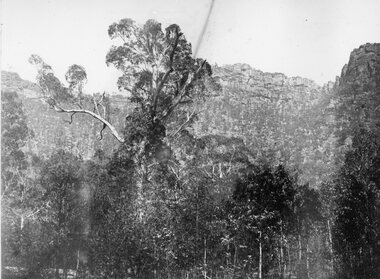
Photograph, "Barney’s Castle" in the Grampians at Halls Gap 1866
Grampians Halls Gap (Barney’s Castle). Part of a collection of Photographs by Mr. O.G. Armstrong as commissioned by the Shire of Stawell for the Inter-colonial and Paris Exhibition in Melbourne in 1866. In 1880 a branch line from Stawell Railway Yards was built to Heatherly Quarry, to carry stone for part of Parliament House Melbourne, the GPO in Elizabeth St, the Harbour Trust buildings, additions to the Melbourne Town Hall, the Stawell Courthouse Patrick Street and the Stawell Catholic Church in Patrick St. The line was taken over by the Railways Department in June 1905 and was closed in March 1949. It has since been removed but remnants of the machinery and buildings are visible at the quarry site. stawell -
 Stawell Historical Society Inc
Photograph, Upper Main Street looking East from Patrick Street corner across Layzell Street 1866
Upper Main Street looking East. Poppet Heads in Background. Oriental Bank second on left then Quartz Reef Timber Yards. Intersection is Layzell St Main Street. Advertiser Office on right in front of Earlier Mechanics Institute. Part of a collection of Photographs by Mr. O.G. Armstrong as commissioned by the Shire of Stawell for the Inter-colonial and Paris Exhibition in Melbourne in 1866. View of the top end of Main Street 1866 with the Commercial Hotel in the left foreground. On the right is the Advertiser Newspaper office an Ararat newspaper before one was started in Stawell. The building on the right with the ladder in front was the Mechanics Institute later burned down twice. Upper Main street with Poppet Heads in the background, the Oriental Bank second on left & then Quartz Reef Timber Yard 1867. Lots of people and wagons in street. Advertiser Office on right and earlier Mechanics Institute with ladder at front.Upper Main Street Reefs 1867stawell mining streetscape -
 Stawell Historical Society Inc
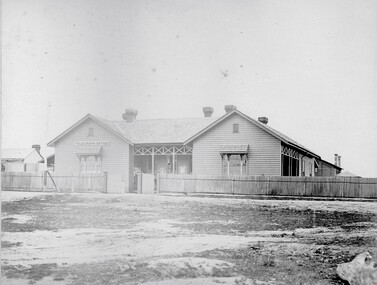
Photograph, Telegraph Office Pleasant Creek Stawell 1866
Telegraph Office Pleasant Creek Stawell. Part of a collection of Photographs by Mr. O.G. Armstrong as commissioned by the Shire of Stawell for the Inter-colonial and Paris Exhibition in Melbourne in 1866. The first post was office was erected at Commercial Street, Pleasant Creek in the goldfields, in June 1858, by J Harding and was a portable one. In October 1860 the first permanent Telegraph Office was erected by Cormick and Irvine for £329. In the same month the Post Office was removed from Commercial St in the Goldfields to the rear of the Telegraph office in Stawell. In February 1862 Edmond Johnson was appointed manager of Electrical Telegraph, Collector of Imposts and acting Postmaster. This building was later used as a private dwelling. It is situated in Lesley Street at the rear of the Pleasant Creek Courthouse although the right-hand wing has been removed. stawell