Showing 878 items
matching route 2
-
 Whitehorse Historical Society Inc.
Article, Minister Restores Axed Bus Services, 2014
Route 303 (North Ringwood to the city) to be re-instated.Route 303 (North Ringwood to the city) to be re-instated. Route 271 will include Blackburn bus stops that were serviced by Route 286.Route 303 (North Ringwood to the city) to be re-instated. bus services, transport -
Whitehorse Historical Society Inc.
Pamphlet, Getting about Nunawading, 1990's
Maps of schools, parks, bicycle and public transport routes in the City of Nunawading.Maps of schools, parks, bicycle and public transport routes in the City of Nunawading.Maps of schools, parks, bicycle and public transport routes in the City of Nunawading.public transport, city of nunawading -
Whitehorse Historical Society Inc.
Map, Survey for road from Doncaster to Ringwood, 01/03/1867
Survey in County of Bourke, Road Plan no. 390, showing early routes of Doncaster, Whitehorse and Mitcham Roads.Survey in County of Bourke, Road Plan no. 390, showing early routes of Doncaster, Whitehorse and Mitcham Roads. Measurement in chains. Surveyor: Thomas E. Rawlinson.Survey in County of Bourke, Road Plan no. 390, showing early routes of Doncaster, Whitehorse and Mitcham Roads. parish of nunawading, parish of bulleen, whitehorse road mitcham, doncaster road, doncaster east, mitcham road mitcham -
Whitehorse Historical Society Inc.
Article, Where to catch the action, 2006
Route of the Queen's Baton through Whitehorse prior to the Commonwealth Games (photo).Route of the Queen's Baton through Whitehorse prior to the Commonwealth Games (photo).Route of the Queen's Baton through Whitehorse prior to the Commonwealth Games (photo).queen's baton relay, commonwealth games, walker park, box hill town hall -
Whitehorse Historical Society Inc.
Article, Concept path at square one, 2008
Several groups are in discussion about a proposed route for a path along the Mullum Mullum Valley (photo of Mullum Mullum Creek).Several groups are in discussion about a proposed route for a path along the Mullum Mullum Valley (photo of Mullum Mullum Creek).Several groups are in discussion about a proposed route for a path along the Mullum Mullum Valley (photo of Mullum Mullum Creek).mullum mullum valley, path -
 Whitehorse Historical Society Inc.
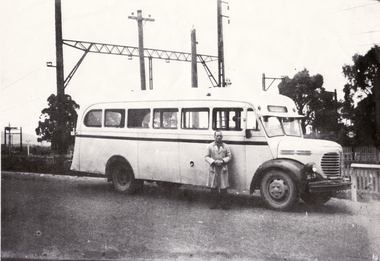
Photograph, Bill Glasson & Bus
Bill Glasson and Charlie Young owner the bus. The terminal was on the north side of Mitcham Railway Station. Route was Mitcham to Park Orchards.Black and white photo of Bill Glasson and Local Bus. Documents accompanying: ND1837 glasson, bill, bus -
 Whitehorse Historical Society Inc.
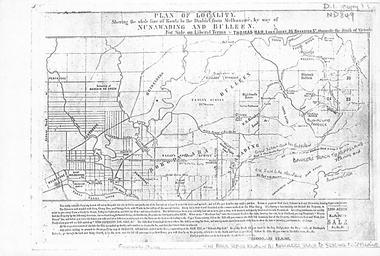
Map, Plan of locality, 1855-60?
'Plan of locality, showing the whole line of route to the district from Melbourne by way of Nunawading and Bulleen. 2,000 acres for sale... Thomas Ham, Land Agent [ 1855 - 60?]nunawading, bulleen, barkers track, land sales -
 Whitehorse Historical Society Inc.
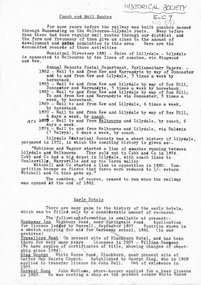
Document, Coach and Mail Routes, n.d
From Lilydale Historical Society - a short history of the coach lines from 1862 - 1876.carriages and coaches, mitchell & co., cobb & co., lilydale, kew, melbourne -
 Whitehorse Historical Society Inc.
Document, Coach and mail routes, n.d
A list of coach and mail routes from 1862 - 1876.A list of coach and mail routes from 1862 - 1876. Robertson & Wagner started a line of coaches running between Lilydale and Melbourne. They sold out to Cobb & Co in 1874. Mitchell & Co started a line in opposition in 1880. Coaches ceased to run when the railway was opened at the end of 1882. Also a list of early hotels.A list of coach and mail routes from 1862 - 1876.robinson & wagner, cobb & co, mitchell & co, carriages and coaches -
 Whitehorse Historical Society Inc.
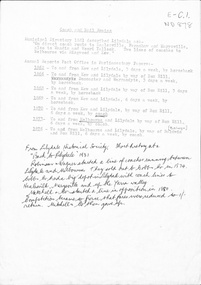
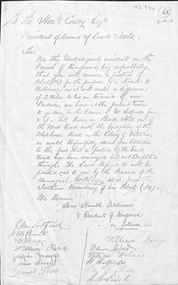
Letter - Correspondence, Roads, n.d
Request from 'Residents of Ringwood' to President of Board of Lands & Works, the Hon. Mr Casey for provision of a road alternative to 'Blood's Hill ' route. Signed by J. M. Setford and others. n.d.roads and streets, setford, j.m., ringwood, clements, a.b., blazey, w.r., parr, william, maggs, joseph, morriss, james, burge, william, holmes, william, hatfield, h., leach, g.w. -
Whitehorse Historical Society Inc.
Document, Eastern Corridor Study, 9/10/1975
Bulletin, Eastern Corridor Study (Combining Koonung and Ringwood Studies) issued by the study consultants, Alan M. Voorhees & Partners P/L, Bulletin No 3, 9 October 1975: Routes 'A', 'B' and 'E' - Ringwood Sector, Lines of minimum impact.eastern freeway, alan m. voorhees & partners p/l, roads and streets, freeways, ringwood, mitcham -
 Whitehorse Historical Society Inc.
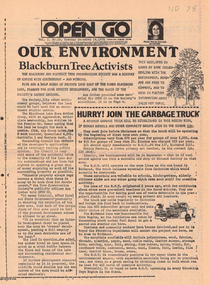
Newspaper, Open Go, 1/12/1976 12:00:00 AM
Periodical published under the Australian Assistance Plan and edited by Morna Sturrock, includes material on use of land next to Blackburn Lake, Koonung Mullum Forestway and along the route of the Eastern Freewayenviroment, blackburn & district tree preservation society, mullum mullem creek, koonung mullum forestry association, eastern freeway -
 Whitehorse Historical Society Inc.
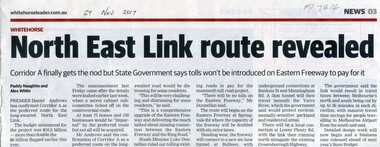
Article, North East Link Route Revealed, 2017
Corridor A of the North East Link Route has been approved by the State Government but tolls won't be introduced on the Eastern Freeway to pay for it.eastern freeway, north east link authority -
Dandenong/Cranbourne RSL Sub Branch
Large frame containing 4 photographs, Circa 1940s
Large wooden frame with 4 black and white photographs of M V Krait and crew.Photograph # 1 depicts M V Krait manned by "z" Special Unit Troops. Photo # 2 shows M V Krait who sank 38,000 tons of Japanese shipping in raids they carried out. Anchored in Hawksbury River N.S.W. Photo # 3 shows the crew of M.V. Krait blacking their skins wearing sarongs to resemble fishermen. (Note Japanese flag on rear of ship.) Photo # 4 the M V Krait en route to Singapore. -
 Whitehorse Historical Society Inc.
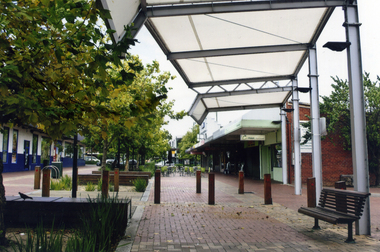
Photograph, Brittania Mall Mitcham
The Brittania Mall was part of a $5 million development of the Mitcham Shopping centre, begun in 1986. It affected both Edward Street and Brittania Street, part of which had to be re-routed. The guide hall in Brittania Street was removed to Halliday Park Mitcham. The development included extension of the New World Supermarket(now Coles) and a two level carpark.Coloured photograph of the Britannia Mall, Mitcham taken from the north end. Traffic in the distance is on Whitehorse Road - 2012shops, britannia mall, mitcham -
 Mt Dandenong & District Historical Society Inc.
Photograph, Site of Kyeema Aircraft Crash, 1978
Woman looking down slope towards the actual site of the Kyeema aircraft crash which occurred on October 25th, 1938. The Douglas DC-2 Kyeema, operated by Australian National Airways, was en-route from Adelaide to Melbourne when it overshot Essendon Airport by 20 miles. Descending in thick cloud, it crashed into the western face of Mt Dandenong, killing all 18 occupants.air crash, kyeema, mt dandenong -
 Magnet Galleries Melbourne Inc
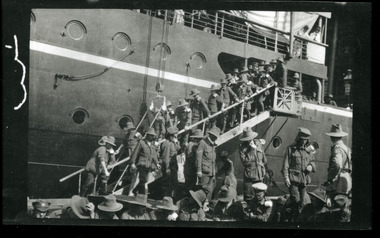
soldiers disembarking ship, les chandler_red cliffs008.tif
Soldiers disembarking at a port, possibly Colombo, while on route to war. photoaif, a.i.f, disembark, ww1, world war 1 -
 8th/13th Victorian Mounted Rifles Regimental Collection
Born digital image, September 1993
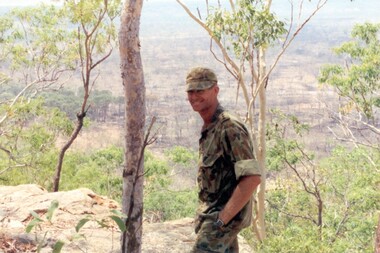
The Dibb Report into mainland defence of Australia,1986, among other things identified the requirement for protection of key assets in Northern Australia and the possibility of involving Army Reserve (Ares) units in this thus releasing regular forces for offensive operations. Dibb also pointed out that this defined role would result in a huge lift in Ares morale. In June 1988, the 3rd Division (3Div) conducted a Tactical Exercise without Troops (TEWT), Exercise ‘Distant Trumpet’ in the Katherine- Darwin area to study problems associated with defence against low level incursions against Tindal RAAF Base. Exercise ‘Northern Explorer’ followed in October of that year when units of the 3Div including A Squadron 8/13 Victorian Mounted Rifles sent patrol groups to get a first taste of environment and conditions. Post-Exercise reports had to include recommendations re: health, equipment and adaptation of Standing Operating Procedures (SOPs) in preparation for the new role deploying to Northern Australia. The first deployment by 8/13 Vistorian Mounted Rifles was in 1988. Deployments continued i following years. In September 1993, 3 Troop (Wangaratta) VMR Squadron 4/19 PWLH commanded by Captain Kelvin Robertson deployed to NT. The training began with airfield defence at Tindal followed by a 1000km recon into Arnhem Land in four Landrovers. The troop reported on the conditions of the roads, airfields, bridges (mainly causeways) resources such as fuel supplies in the towns and infrastructure. Each troop taking different route. 3 Troop had the Northern route through Kakadu National park across the East Alligator River to Oenpelli then to Maningrida and Ramangining and south to the Central Arnhem Road and back to Tindal Air force Base. Kelvin Robertson enlisted on 6 April 1981 at Cobram where Lieutenant Dan Wyborn was the troop leader at 2 Troop A Squadron 8th/13th Victorian Mounted Rifles (2TP A SQN 8/13 VMR). He completed the Initial Employment Training Course (IET) and then an M113A1 driver’s course in March 1982. Course Senior Instructor (SI) was Captain (CAPT) John McLean and wing instructor Warrant Officer Class 2 (WO2) Mick Baxter (ex-Driving & Servicing Wing instructor at the School of Armour). He served with 2TP at Cobram as a trooper Driver/Signaller until June 1982 when he was selected for officer training. He served two years as an Officer Cadet in Course 21 at Officer Cadet Training Unit (OCTU) graduating in June 1984. He returned to 8/13 VMR and completed the 1/85 Army Reserve (ARES) Regimental Officers Basic Course (ROBC Reconnaissance), then was posted immediately as 1 TP LDR for the Hay Booligal Annual Field Exercise (AFX). In 1985 he took command of 2TP at Cobram until Nov 1987 when he transferred to C Squadron First Armoured Regiment (CSQN 1AR). This began six months full time duty in which Lieutenant (LT) Robertson completed the regular army 1/88 (ROBC Tank), and then served as CSQN's first and only ARES Leopard Tank TP LDR until the next ARES LT was trained up as 2TP LDR. He later served as the CSQN Liaison Officer (LO) on the First Brigade (1 Bde) exercise ‘Predators Advance’ and as a staff officer on a Second Division (2Div) exercise. In Jan 1991 he studied at the Reserve Command and Staff College (RCSC). Upon completion of Grade 3 he was promoted to CAPT and transferred back to a reconnaissance troop, 3TP VMR SQN 4th/19th Prince of Wales’s Light Horse (4/19PWLH) at Wangaratta. CAPT Robertson transferred to the Inactive List in 1994, but in 2011 returned to the Active List serving as Operations Captain (OPS CAPT) at Regimental Headquarters (RHQ) 12th/16th Hunter River Lancers (12/16 HRL)and later Second-In-Command (2IC) Tamworth-based Operations Support Squadron (OPSPT SQN), and at 9 day exercises at Singleton range and an exercise at Townville High Range in Protective Mobility Vehicle (PMV) Bushmasters. In 2013 after completing the ARES Grade 3 Staff Officers course in Brisbane he returned home to Jerilderie and served as 2IC A SQN 4/19 PWLH based at Latchford Barracks Bonegilla. He was awarded the Defence Long Service Medal (DLSM) in 2014. Highlights of his career included being Parade Commander for the 75th anniversary Beersheba parade in Canberra on 31 October 1992. The guard, drawn from the VMR SQN 4/19 PWLH represented the 4th Light Horse Regiment, a participant of the Charge. Then twenty years later, 2012, he was invited to speak at the Quirindi Anzac Day ceremony. On this occasion he was serving with 12/16 HRL, so in two ceremonies, 20 years apart, he had represented both the 4th LHR and the 12th LHR, the two lead Regiments that charged Beersheba. CAPT Robertson was placed on the Inactive List again in 2015. Illustrates Reserve training in NT.Colour image of soldier with landscape in background being Captain Kelvin Robertson 3 Troop Leader (Wangaratta) VMR Squadron 4th/19th Prince of Wales’s Light Horse Regiment looking out over the Arafura swamp near the Maningrida to Ramingining road in Arnhem Land during exercise in the Northern Territory, September 1993.tindal, robertson -
 Ballarat Tramway Museum
Administrative record - Memorandum, State Electricity Commission of Victoria (SECV), cuttings from The Courier re possible closure, Mar. 1962
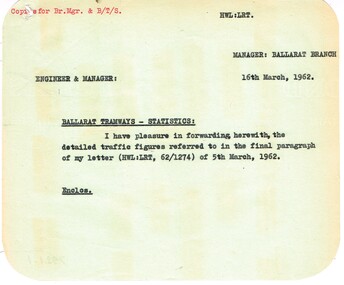
Yields information about the passenger traffic in Ballarat during Feb. 1962, Yields information about the passenger traffic in Ballarat during Feb. 1962Memorandum and Report to the Engineer & Manager from the Ballarat Manager - all with rounded corners. .1 - Memorandum dated 16/3/1962 forwarded detailed traffic figures referred to in a letter of 5/3/1962 .2 - detailed analysis of average passengers per trip including scholars for each route by hour - was dated Feb. 1962, but has been crossed out. .3 - Passenger density and direction per hour for each route - Saturday - was dated Feb. 1962 - but has been crossed out and August 1963 written in. .4 - as for .3 - for Sundays. See Reg Item 7931 for similar reports and 8030 for another version.trams, tramways, reports, passengers, ballarat -
 Ballarat Tramway Museum
Document - Report, State Electricity Commission of Victoria (SECV), "Ballarat Tramways - Statistics", Mar. 1962
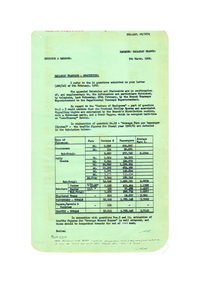
Yields detailed information about the statistics of the Ballarat Tramway system during the 1960/61 Financial year, passenger loadings, finances and tramcar operation..1 - Report titled "Ballarat Tramways - Statistics", carbon copy, dated 5/3/1962, responding to a head office letter of 6/3/1962. Compiled in association with Schedules and Statements required, in response to specific questions for compilation of reports by the SEC. Details types of passengers (Pensions, Adults, Scholars, chartered trams, passenger totals including parcels) for 1960/61. .2 - Four foolscap sheets giving details of fares and charges, route length, services, fare sections, length of fare sections, employees, trams in service, tram usage, area and population served, expenditure, revenue, loss, average fare per passenger and extra trams needed for events. Also refers to Reg Item 7932 and 7951 for the original request. All sheets have rounded corners.trams, tramways, reports, passengers, employees, fares, tramcars, routes, revenue, finances, tickets -
 Ballarat Tramway Museum
Newspaper, State Electricity Commission of Victoria (SEC) and The Courier Ballarat, SEC Spring Song, Feb. 1962
Yields information about the views of various letter writers, views of the Courier, union views, rehabilitation costs and employment.Foolscap sheet of plain paper, with rounded corners, with 4 newspaper cuttings, concerning the mooted closure of the Ballarat Tram system 28 Feb and 2 March 1962. All from The Courier, unless noted otherwise. 1 - "SEC Spring Song" - 23/2/62 - Editorial - about the SEC actions to desert Ballarat, Council meeting with Parliamentary representatives, cost of new cars and always a second-hand place. 2 - "Tramways" - 24-2-62 - letter by R. Courtney, Union Secretary, re use of new trams, one-man cars and Mr. Mawby's jet propelled buses. 2nd letter, written by a car driver, lamenting the closure, employment of trammies and SEC 3 - Untitled article - 27/2/62 - cost of rehabilitating the system given compared to buses, cost estimate from TRB, concessions (not to Pensioners), bus routes in Geelong, people preferred any replacement bus service to be run by a public authority. 4 - "Tram Employees" - 24-2-1962 - SEC would find alternative employment for the displaced tramway workers.closure, letter to the editor, editorial, sec, rehabilitation, staff, buses, concession fares -
 Ballarat Tramway Museum
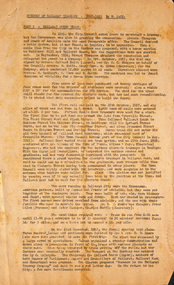
Administrative record - Memorandum, State Electricity Commission of Victoria (SECV), "Tramways Statistics", 6/02/1962 12:00:00 AM
Yields information about preparation of tramway statistics to enable the Transport Regulation Board to plan bus replacement., Yields information about preparation of tramway statistics to enable the Transport Regulation Board to plan bus replacement.Copy of a Memorandum sent by the Melbourne office, Engineer and Manager SEC to the Manager Ballarat Branch, 6/2/1962, requesting the preparation of statistics for the Transport Regulation Board planning of the Motor Omnibus Services. Has a long list of items. Similar letter to Bendigo. Also refers to Reg Item 7930 and 7932 for the response.trams, tramways, reports, passengers, employees, fares, tramcars, routes, revenue, finances, tickets -
 Ballarat Tramway Museum
Document - Report, Wal Jack, "History of Ballarat Tramways - 1887 - 1953", Original c1953, copy 2020
Part 1 - Ballarat Horse Trams - notes that much of the details was supplied by the late Inspector James. Part 2 - Electric Trams - gives dates for the withdrawal of the ESCo cars, routes, SEC and extensions, including the Forest City signals. 11 pages of a typed article or research report on foolscap paper titled "History of Ballarat Tramways - 1887 - 1953", written by Wal Jack, Gestetner printed. With the file is a set of A3 size laminated photocopies, provided by the donor. See also Reg Item 6419 for another copy.trams, tramways, sec, esco, ballarat, sec, horse trams, tramcars -
 Ballarat Tramway Museum
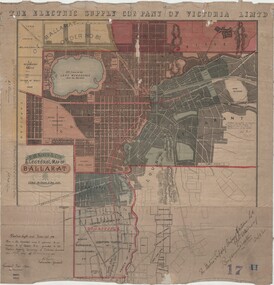
Map, Electric Supply Co. of Vic (ESCo), Ballarat Electoral Map - ESCo, 1900
Document prepared by the Electric Supply Co of Victoria, as part of an order under the Electric Light and Power Act 1896, section 5 of order No. 17 granted to company. Dated 19/2/1901 and signed by the Postmaster-General. Shows the order area being parts of the City of Ballaarat, Sebastopol and Ballarat East. Shows the street names, boundaries, principal power line routes, land reserves, parks, mine locations, railways and Lake Wendouree. Signed by R L Williams Town Clerk City of Ballarat, J R Hall for the Borough of Sebastopol, and John Gent for the Town of Ballarat EastYields information about the power supply to the Ballarat area.Cloth backed paper map, coloured and marked up as exhibit 17.Notes in ink including the signature of Benjamin Deakin 24/9/00 and certified by the three involved municipal Town Clerks.ballarat power supply, esco, electric supply co of victoria, city of ballaarat, east ballarat, sebastopol, orders, power lines, power supply -
 Ballarat Tramway Museum
Photograph - Bendigo Tram No. 2, 4/1949
Bendigo Tram No. 2. Photographer :I.K. Winney, tram displaying a white disc on the front dash that indicates a following tram in the same single line section.Yields information about SEC tramway operations.Black and white photograph on plain paper"BENDIGO No2 on EAGLEHAWK Route" "Taken by I.K.Winney 4/49" "N.J. THORPE NEG." "15 154/88"bendigo, bendigo tramcar 2, eaglehawk -
 Ballarat Tramway Museum
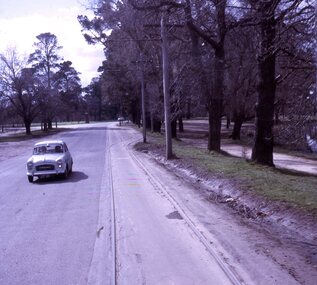
Slide - 27 mm sq slide/s - set of 9 - tram tracks - Gardens to the City, Lilian Butler, Aug. 1971
Yields information about the streetscapes of Ballarat on the Gardens to Victoria St route and in particular buildings and people that crewed the trams.Set of nine Colour 27 x 27 mm slide in a Kodachrome cardboard mount of a series of photographs taken from Wendouree Parade in the Gardens to the City tramway - taken from the front or rear window of the tram. .1 - Carlton St loop looking north .2 - Wendouree Parade, north of the Windmill Drive north intersection - has a tram stop pole. .3 - Sturt St - in bound just past Pleasant St - has passengers waiting at the tram stop. .4 - at Ascot St. .5 - at Drummond St with Shell garage in the view and a track worker. .6 - at Talbot St? with track workers repairing the road surface. .7 - at Dawson St showing the tram stop and End of Section signs. .8 - nearing the intersection with Armstrong St. .9 - nearing Lydiard St. Slide mount date cannot be read - possibly August 1971. Photo from the collection of Lilian Butler.ballarat, tramways, trams, wendouree parade, sturt st, drummond st, trackwork, tram stops, carlton st loop -
 Ballarat Tramway Museum
Slide - 27 mm sq slide/s set of 6, Lilian Butler, Tram No. 38 at the Victoria St terminus, Aug. 1971
Yields information about the streetscapes of Ballarat on the Gardens to Victoria St route and in particular buildings and people that crewed the trams.Set of six Colour 27 x 27 mm slide in a Kodachrome cardboard mount. .1 - Tram No. 38 at the Victoria St terminus, with the destination of Gardens via Sturt St West. Note the red traffic cone in the overhead by the trolley wheel positioning location device. .2 - crew of No. 30 by the tram - R. Knight (57) and Conductor W. Nancarrow (8) .3 - No. 30 at Gardens Loop .4 - as for .2 - see Also Reg item 6455. .5 - view from tram at intersection of Wendouree Parade and MacArthur St, View Point. .6 - view of trackwork at intersection of Drummond and Sturt Streets with the Southern Cross Hotel in the background. Slide mount date August 1971. Photo from the collection of Lilian Butler.ballarat, tramways, trams, victoria st, crews, gardens loop, view point, hospital corner, tram 30 -
 Ballarat Tramway Museum
Slide - 27 mm sq slide/s - set of 8 - tram tracks - Victoria St, Lilian Butler, Aug. 1971
Yields information about the streetscapes of Ballarat on the Gardens to Victoria St route and in particular buildings and people that crewed the trams.Set of eight Colour 27 x 27 mm slide in a Kodachrome cardboard mount. .1 - view of the Sturt and Lydiard St intersection from the front of the tram car with the Robbie Burns statue in the view and the Big W store. .2 - ditto at the corner of Sturt and Grenville St with the tramway shelter and the Dickins store. .3 - setting the signals for the Bridge St route. .4 - View looking east along Bridge St with Big W store and Faull's shoe shop. .5 - At intersection with Main Road, looking up the hill towards Victoria St. On the right is the advert for Viscount Ambassador Caravans. .6 - Looking along Victoria St, towards the East at E St, with the biscuit factory on the left. .7 - tram shelter at Queen St. .8 - View of the terminus looking east, showing the median strip Slide mount date August 1971. Photo from the collection of Lilian Butler.ballarat, tramways, trams, sturt st, grenville st, shelters, bridge st, signals, victoria st -
 Ballarat Tramway Museum
Slide - 27 mm sq slide/s - set of 9 - Victoria St and crews, Lilian Butler, Aug. 1971
Yields information about the streetscapes of Ballarat on the Gardens to Victoria St route and in particular buildings and people that crewed the trams.Set of nine Colour 27 x 27 mm slide in a Kodachrome cardboard mount. .1 - R. Williams (Motorman) and Danny Powell (badge 30) standing in front of a tram at Victoria St. The tram has the destination of Gardens via Sturt St West. .2 - view of No. 113 Victoria St - now Ardenlee B&B. .3 - Sunshine Biscuit Factory .4 - Mack's Hotel .5 - Stones Corner - intersection of Victoria and Mt Pleasant routes .6 - Crossing Grenville St .7 - No. 30 at the City terminus, Lydiard St with Racey's and the SEC office in the background. .8 - as for .5, but looking east with the Caltex service station in the background. .9 - No. 30 at the Victoria St terminus. Slide mount date August 1971. Photo from the collection of Lilian Butler.ballarat, tramways, trams, victoria st, bridge st, stones corner, tram 30 -
 Ballarat Tramway Museum
Slide - 27 mm sq slide/s - set of 11, Lilian Butler, Wendouree Parade and Sturt St West, Sep. 1971
Yields information about the streetscapes of Ballarat depot to Pleasant St route and in particular buildings and people that crewed the trams.Set of eleven Colour 27 x 27 mm slide in a Kodachrome cardboard mount. .1 - Wendouree Parade looking west towards St Aidans Drive - the gate pillars can be seen. .2 - ditto looking west - Fairyland .3 - ditto looking towards Gardens Loop .4 - No. 41 at Gardens Loop, with destination of Gardens via Drummond North .5 - ditto showing Mt Pleasant .6 - ditto, just past the now BTM Depot Junction. .7 - Carlton St - showing the gates .8 - Looking towards Hamilton Ave from within Carlton St loop with the signal showing red. .9 - Turning from Hamilton Ave into Sturt St West. .10 - Sturt St west looking east with the Loreto convent walls on the left hand side. .11 - Sturt St - Pleasant St intersection - showing road surface, a tram coming towards the intersection and buildings on either side. Slide mount date September 1971. Photo from the collection of Lilian Butler.ballarat, tramways, trams, wendouree parade, st aidans drive, gardens loop, depot junction, carlton st, carlton st loop, signals, sturt st west, pleasant st, tram 41