Showing 1078 items matching "timber buildings"
-
 Flagstaff Hill Maritime Museum and Village
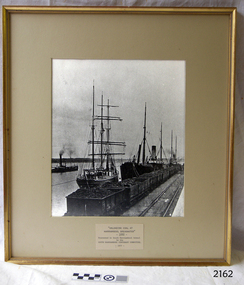
Photograph - Ships, South Warrnambool Primary School Centenary Committee, Unloading coal at Warrnambool Breakwater, 1977
This photograph was framed and mounted then presented to the South Warrnambool school by the South Warrnambool Centenary Committee in 1977 on the school's centenary year. The school was decommissioned and closed in the 1990s. In the photograph, people unload the coal from the ship beside the Breakwater and load it into the row of tramway carts. The coal would be sold to businesses and householders for the purpose of fuel for warmth, cooking, heating water and running machinery. The image shows the early days at the Port of Warrnambool. The building of the Warrnambool Breakwater had only just been completed. Steamships and sailing ships were frequent visitors to the port. Steam Navigation companies were plentiful, carrying passengers and freighting cargo such as coal, timber, food, livestock, furniture, hardware and haberdashery between Melbourne and the ports along the southwest coast of Victoria, including Warrnambool. The carts would take their loads into the township for distribution. The ship carrying the coal is thought to be the "S.S. Chillagoe" previously named "Speculant". In 1903 the Chillagoe was registered at the Port of Melbourne, and it sailed between Melbourne and Newcastle, New South Wales, where coal was mined and sold in significant quantities. In March 1890 a tragedy occurred when coal was being unloaded at the Warrnambool Breakwater. A local young man, David Ferrier, was working in the hold of the steamship Kurrara as its delivery of coal was being unloaded. A basket of coal fell from a sling onboard and came down upon Ferrier, breaking his back. He was not expected to live. In September 1890 there was a strike of coal workers but the Geelong Advertiser reported that a Warrnambool firm of coal merchants had recently received some large cargoes from Newcastle.The photograph is historically significant as it is connected with the local areas of the Warrnambool Breakwater, Lady Bay, and the South Warrnambool Primary School. The scene shows a moment in time when a steamship was unloading a shipment of coal onto tram carts on the Breakwater, which had only just been completed that year. The photograph was taken about 13 years after the opening of the South Warrnambool School, which was decommissioned around 20 years after it celebrated its centenary.. Photograph, black and white, in a gilded rectangular wooden frame, behind glass. The maritime scene shows figures on ships beside the Warrnambool Breakwater jetty and figures on the jetty, standing next to rail carts containing coal. There is a steamship further out on Lady Bay. A card below the photograph has an inscription and there is a pencil inscription on the back of the frame. The coal ship is thought to be the SS. Chillagoe. The photograph was taken in 1890 and was presented to the South Warrnambool School in its centenary year, 1977, by the South Warrnambool Centenary Committee.Typewritten on card: "UNLOADING COAL AT WARRNAMBOOL BREAKWATER"- 1890 - "Presented to Sough Warrnambool School by the SOUTH WARRNAMBOOL CENTENARY COMMITTEE - 1977 - " Handwritten in pencil on the back:"Speculant" as "SS Chillagoe" at Breakwater"flagstaff hill, warrnambool, maritime museum, maritime village, great ocean road, shipwreck coast, warrnambool breakwater, 1890, tramway, steamship, sailing ship, coal, cargo, port of warrnambool, unloading coal, chillagoe, speculant, newcastle, kurrana, david ferrier, coal strike -
 Flagstaff Hill Maritime Museum and Village
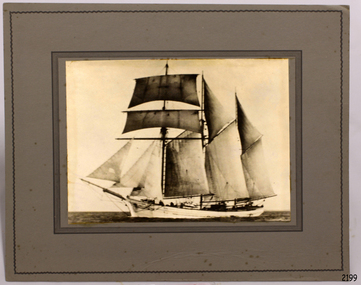
Photograph - Ship, Alma Doepel, 1931-1934
This photograph is of the square-rigged schooner "Alma Doepel". Details added to the back of the photograph incorrectly describe the vessel as "Amy Doepel / ketch / Amy Doepel". The rigging on the vessel dates the photograph to sometime between 1931-1933. The location is yet to be determined. Frederick Doepel was a shipping agent in Bellinger Valley, NSW. He employed an experienced shipwright to build Alma Doepel, which was made from local timber. He named the ship “Alma Doepel” after his baby daughter Alma. The ship was registered in Sydney and launched 19th October 1903, and her first sea voyage was in December. She traded in timber Port Macquarie/Bellinger River and New Zealand. “Alma Doepel” was purchased by Henry Jones & Co., Hobart jam makers, in partnership with Harry Heather, her new captain, in 1916. The ship was then registered in Hobart. She carried jam and timber to the mainland, particularly Melbourne, and brought back cargo for Tasmania. She even carried the piles for the building of Portland Harbour. When Harry Heather passed away in 1937 he was succeeded by Eric Droscoll. Before the square-rigged "Alma Doepel" left for Tasmania on March 8th 1937 she was fitted with a new set of sails, becoming a fore-and-aft rigged schooner. She had been the last 'top sail' schooner in Bass Strait trade! "Alma Doepel" continued her coastal trading until 1942, when she was requisitioned by the Army. In January 1943 she was left in Melbourne by her crew and the Army took her over, taking her to Sydney in February, 1943. She was relaunched by the Army in 1944 minus two of her masts and her small 1936 engine, and was fitted with three large bus engines. In March 1945 she headed for the war zone, delivering cargo up and down the coast of New Guinea, at one time carrying over 400 troops. In 1946 she returned to Hobart where the Army re-converted her back for Bass Strait trading and returned her. In January 1947 Eric Driscoll took “Alma Doepel” to the eastern Tasmanian coastal port of St. Helens, trading cargo of local mountain ash timber to Melbourne on the mainland until 1959. She was then stripped down to her hull with only a single mast and two engines, and fitted with wooden bins on rails in her hold. From 1961 to 1975 she carried limestone to a factory to make carbide. Michael Wood and David Boykett, two of the governors of "Sail and Adventure", then bought her for the price of her two Gardiner engines and in 1976 they brought her to Melbourne. An Alma Doepel Supporters Club was formed to support the ship’s major restoration to a topsail schooner. In 1987 she was overhauled in Adelaide, with the support of Elders IXL and she returned to Sydney to lead the Parade of Sail on Bicentenary Day, 25th January 1988. She returned to Melbourne in February and began sail training voyages in Port Phillip Bay, operating from an office on Station Pier. The Alma Doepel Voyagers Club was started. Trainees joined the crew in sailing the ship over nine or ten days of instruction in sailing and seamanship. These trips plus chartered trips and fund raisers continued until early 1999, when she was no longer in a condition to operate; she needed a lot of attention. She lay idle in Victoria Dock for quite some time. In April 2001 “Alma Doepel” was taken to Port Macquarie’s Lady Nelson Wharf where she became a museum ship maintained by volunteers. In 2008 she had time in dry-dock and after sea-trials headed off to Victoria Harbour, Docklands, in Melbourne, where she is currently being restored with the help of The Supporters.This phot graph is significant for its connection with the Bass Strait trade, being the last top-sail schooner to brade across the strait. The photograph is also significant in its representation of the the sailing ships that traded around Australia in the 1930s.Photograph of "Alma Doepel " a wooden, 3 masted, square rigged sailing schooner built in Sydney, launched in 10/10/1903. Photograph is sepia coloured, mounted on card, inscription on the back. Information also provided with photograph. Photograph (marked incorrectly on back) "Amy Doepel / ketch / Amy Doepel". Sticker with "91" in pencil. Information provided (dated incorrectly) "1943, Sydney, New South Wales"flagstaff hill, warrnambool, shipwreck coast, maritime museum, maritime village, photograph, alma doepel, frederick doepel, henry jones and co, harry heather, eric droscoll, alma doepel supporters club, elders ixl, parade of sail, bicentenary day, alma doepel voyagers club, last top sail schooner in bass strait trade, square-rigged, fore-and-aft rigged -
 Ringwood and District Historical Society
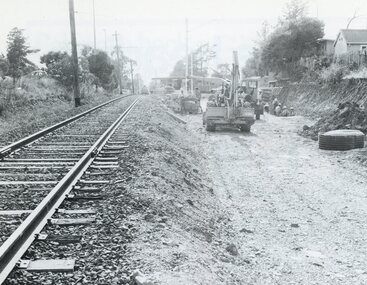
Photograph, Duplication of the five-kilometre section of railway line between Ringwood and Croydon in 1983
Digital scanFrom Vicrail News magazine, April 1983. “Duplication of the five-kilometre section of line between Ringwood and Croydon is on the way. Several major works will be undertaken over the next few months so the two tracks can be brought into service later this year. Intensive work on this section follows completion of duplication works between Ringwood and Bayswater on the Belgrave line last December. The completion of this 5.17 kilometre section between Ringwood and Bayswater means that this Belgrave line is now duplicated as far out as Ferntree Gully. Commuters using the Belgrave line now have an improved service with the intro duction in January of an additional evening peak train to Upper Ferntree Gully, two additional peak hour services in the morning from both Belgrave and Upper Ferntree Gully, and with the additional tracks delays on one line will not affect trains travelling in the opposite direction. Commenting on the completion of this stretch of track the Minister of Transport, Mr. Crabb, said a further improvement had been made with the commissioning of boom barriers at the Bedford Road level crossing in Ringwood. "The installation is part of the State Government's $9.4 million four-year plan to equip 70 dangerous level crossings throughout the State with boom barriers", he said. Works to be carried out on the Ringwood/ Croydon section include laying of new track, station works at Croydon and installation of boom barriers at East Ringwood. Already completed are bridge works to cater for double tracks at both Mt. Dandenong and Eastfield Roads between Croydon and East Ringwood and construction of an island platform at East Ringwood station. At several locations alignment of the existing track will be slightly relocated. The new line is being constructed with concrete sleepers and heavyweight rails. The existing line will also be reconstructed using these heavy 60kg per metre rails. Engineering works to be completed include installation of overhead wiring necessary to supply power to trains, construction of two new station buildings and a new platform at Croydon, provision of boom barriers, and pedestrian boom barriers at Dublin Road level crossing. East Ringwood, and replacement of existing timber overhead wire support structures with steel structures. Other works in this program included installation of boom barriers at Bedford Road, Ringwood and Scoresby Road, Bayswater and provision of a new platform for trains going to Melbourne and Heathmont. A new timetable on the Lilydale and Belgrave lines will commence when the Ringwood—Croydon duplication track work is completed.” -
 Phillip Island and District Historical Society Inc.
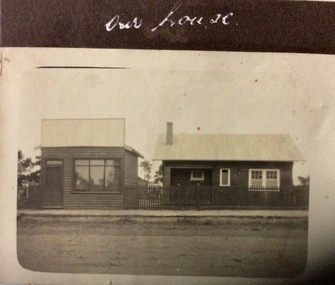
Photograph, Our house, 1925-1926
Possibly in shopping area of Cowes.Small sepia photograph of two buildings beside unmade road. On left is a small shop, that looks empty. On right is a small timber house with a metal roof.Our housephotographs, homes and haunts, cowes shop buildings -
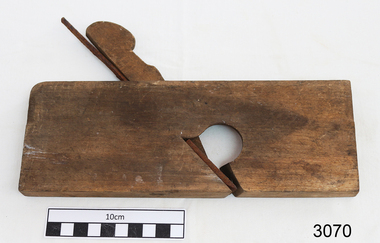 Flagstaff Hill Maritime Museum and Village
Tool - Wood Moulding Plane, Mid to late 19th century
A moulding plane is a specialised plane used for making complex shapes found in wooden mouldings that are used to decorate furniture or other wooden objects. Traditionally, moulding planes were blocks of wear-resistant hardwood, often beech or maple, which were worked to the shape of the intended moulding. The blade or iron was likewise formed to the intended moulding profile and secured in the body of the plane with a wooden wedge. A traditional cabinetmaker's shop might have many, perhaps hundreds, of moulding planes for the full range of work to be performed. Large crown mouldings required planes of six or more inches in width, which demanded great strength to push and often had additional peg handles on the sides, allowing the craftsman's apprentice or other workers to pull the plane ahead of the master who guided it. This item may be a one off item made by a cabinet maker for a particular project as the plane is not marked resulting in no history or manufacturing provenance available.A vintage tool made by an unknown maker, this item was made commercially and by individual cabinet makers for particular furniture projects that could produce an ornamental finish to timber. The tool was used before routers and spindle moulders came into regular use after World War l l, a time when to produce a decorative moulding for a piece of furniture, door trims, etc or other items had to be accomplished using hand tools and in particular one of these types of planes. These profiled planes came in various shapes and sizes to achieve a decorative finish. A significant early tool that today is quite rare and sought by collectors. It gives us a snapshot of how furniture and other decorative finishes were created on timber by the use of hand tools. Tools that were themselves hand made shows the craftsmanship used during this time not only to make a tool such as the subject item but also the craftsmanship needed to produce a decorative finish that was needed to be made for any timber item.Plane, wooden, narrow blade. Noneflagstaff hill, warrnambool, shipwrecked coast, flagstaff hill maritime museum, maritime museum, shipwreck coast, flagstaff hill maritime village, great ocean road, wooden plane, wood working tool, boat building tool, tool, woodwork tool, plane -
 Flagstaff Hill Maritime Museum and Village
Decorative object - Wall Hanging, c. 1908
The unusual beautiful green American slate roofing tile used in this wall hanging was recovered from the shipwrecked Falls of Halladale. The iron-hulled, four-masted barque, the Falls of Halladale, was a bulk carrier of general cargo. She left New York in August 1908 on her way to Melbourne and Sydney. In her hold, along with 56,763 tiles of unusual beautiful green American slates (roofing tiles), 5,673 coils of barbed wire, 600 stoves, 500 sewing machines, 6500 gallons of oil, 14400 gallons of benzene, and many other manufactured items, were 117 cases of crockery and glassware. Three months later and close to her destination, a navigational error caused the Falls of Halladale to be wrecked on a reef off the Peterborough headland at 3 am on the morning of the 15th of November, 1908. The captain and 29 crew members all survived, but her valuable cargo was largely lost, despite two salvage attempts in 1908-09 and 1910. ABOUT THE ‘FALLS OF HALLADALE’ (1886 - 1908) Built: in1886 by Russell & Co., Greenock shipyards, River Clyde, Scotland, UK. The company was founded in 1870 (or 1873) as a partnership between Joseph Russell (1834-1917), Anderson Rodger and William Todd Lithgow. During the period 1882-92 Russell & Co., they standardised designs, which sped up their building process so much that they were able to build 271 ships over that time. In 1886 they introduced a 3000 ton class of sailing vessel with auxiliary engines and brace halyard winches. In 1890 they broke the world output record. Owner: Falls Line, Wright, Breakenridge & Co, 111 Union Street, Glasgow, Scotland. Configuration: Four masted sailing ship; iron-hulled barque; iron masts, wire rigging, fore & aft lifting bridges. Size: Length 83.87m x Breadth 12.6m x Depth 7.23m, Gross tonnage 2085 ton Wrecked: the night of 14th November 1908, Curdies Inlet, Peterborough south west Victoria Crew: 29 The Falls of Halladale was a four-masted sailing ship built-in 1886 in Glasgow, Scotland, for the long-distance cargo trade and was mostly used for Pacific grain trade. She was owned by Wright, Breakenridge & Co of Glasgow and was one of several Falls Line ships, all of which were named after waterfalls in Scotland. The lines flag was of red, blue and white vertical stripes. The Falls of Halladale had a sturdy construction built to carry maximum cargo and able to maintain full sail in heavy gales, one of the last of the ‘windjammers’ that sailed the Trade Route. She and her sister ship, the Falls of Garry, were the first ships in the world to include fore and aft lifting bridges. Previous to this, heavily loaded vessels could have heavy seas break along the full length of the deck, causing serious injury or even death to those on deck. The new, raised catwalk-type decking allowed the crew to move above the deck stormy conditions. This idea is still used today on the most modern tankers and cargo vessels and has proved to be an important step forward in the safety of men at sea. On 4th August 1908, with new sails, 29 crew, and 2800 tons of cargo, the Falls of Halladale left New York, bound for Melbourne and Sydney via the Cape of Good Hope. The cargo on board was valued at £35,000 and included 56,763 tiles of American slate roofing tiles (roof slates), 5,673 coils of barbed wire, 600 stoves, 500 sewing machines, 6,500 gallons of oil, 14,400 gallons of benzene, plumbing iron, 117 cases of crockery and glassware and many other manufactured items. The Falls of Halladale had been at sail for 102 days when, at 3 am on the night of 14th November 1908, under full sail in calm seas with a six knots breeze behind and misleading fog along the coast, the great vessel rose upon an ocean swell and settled on top of a submerged reef near Peterborough on south-west Victoria’s coast. The ship was jammed on the rocks and began filling with water. The crew launched the two lifeboats and all 29 crew landed safely on the beach over 4 miles away at the Bay of Islands. The postmistress at Peterborough, who kept a watch for vessels in distress, saw the stranding and sent out an alert to the local people. A rescue party went to the aid of the sailors and the Port Campbell rocket crew was dispatched, but the crew had all managed to reach shore safely by the time help arrived. The ship stayed in full sail on the rocky shelf for nearly two months, attracting hundreds of sightseers who watched her slowly disintegrate until the pounding seas and dynamiting by salvagers finally broke her back, and her remains disappeared back into deeper water. The valuable cargo was largely lost, despite two salvage attempts in 1908-09 and 1910. Further salvage operations were made from 1974-1986, during which time 22,000 slate tiles were recovered with the help of 14 oil drums to float them, plus personal artefacts, ship fittings, reams of paper and other items. The Court of Marine Inquiry in Melbourne ruled that the foundering of the ship was entirely due to Captain David Wood Thomson’s navigational error, not too technical failure of the Clyde-built ship. The shipwreck is a popular site for divers, about 300m offshore and in 3 – 15m of water. Some of the original cargo can be seen at the site, including pieces of roof slate and coils of barbed wire.The Falls of Halladale shipwreck is listed on the Victorian Heritage Register (No. S255). She was one of the last ships to sail the Trade Routes. She is one of the first vessels to have fore and aft lifting bridges. The Falls of Halladale is an example of the remains of an International Cargo Ship and also represents aspects of Victoria’s shipping industry. The wreck is protected as a Historic Shipwreck under the Commonwealth Historic Shipwrecks Act (1976).Wall hanging, framed slate salvaged from the wreck of Falls of Halladale. Slate is visible from both sides of TIMBER frame through glass. Coloured drawing of Falls of Halladale is inserted under glass. Typed inscription " "FALLS OF HALLADALE" "Grounded, Nov 14th, at Wreck Point, Midway between Peterborough & Bay of Islands" Typed inscription " "FALLS OF HALLADALE" "Grounded, Nov 14th, at Wreck Point, Midway between Peterborough & Bay of Islands" falls of halladale, cargo, flagstaff hill, warrnambool, shipwrecked coast, flagstaff hill maritime museum, maritime museum, shipwreck coast, flagstaff hill maritime village, great ocean road, slate, slate tile, green american slates, building material, wreck point, peterborough, bay of islands, russell & co. -
 Orbost & District Historical Society
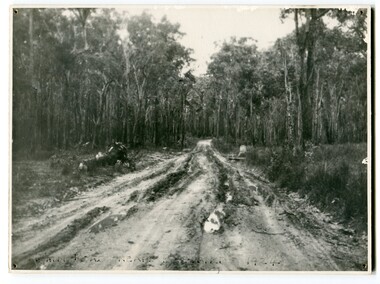
black and white photograph, 1924
This photograph shows the main road near Bellbird, East Gippsland, in 1924. This road would have been the Princes Highway, a main thoroughfare through to New South Wales. Bellbird Creek is a small rural location between Orbost and Cann River. There was no township at Cabbage Tree at this time. The Cabbage Tree Creek township was established to support the booming timber industry of the mid 20th century. Five timber mills worked full time supporting the families that were drawn to the area's wealth of natural resources. Nestled on the banks of the Cabbage Tree Creek, the township was built by those mills to house their workers. Today although the timber mills have disappeared, some of the buildings still remain. Little now remains to remind of the saw-milling history apart from photographs and some relics - a boiler and a brick furnace. There was also a thriving agricultural community farming dairy, beef, seed beans and fresh peas and beans that were sent to the Victoria Market in Melbourne. Dairy farming still plays an essential role in the township. this is a pictorial record of the Princes Highway, the main road from East Gippsland to the New South Wales border.A large black / white photograph of a very wet and boggy bush road.on front - "Main Rd near Bellbird 1924"road princes-highway bellbird-creek-1924 -
 Ringwood and District Historical Society
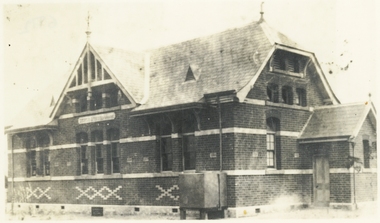
Document, State School 4688 Heathmont, c 1969
S.S, No 4688, Francis Street, Heathmont, 3135 History Two A4 pages of notes on the beginnings of the Heathmont S.S The text is:- STATE SCHOOL No 4698 Frances Street Heathmont, 3135 HISTORY School classes at Heathmont commenced in the original Methodist Church building in Canterbury Road in 1952 with Mr A.J. McKinlay as Head Teacher in charge of a school of 80 pupils. Shortly afterwards both a Parents and Citizens Association and the first School Committee were formed. Mr J.B. Harper was appointed as president of the Association and Mr H. Walker was elected as chairmen of the Committee, while Mr T. Jago acted as secretary to both bodies. Later in that same year the district Inspector, Mr H. Fleigner since retired and still a Heathmont resident, woe instrumental in obtaining a site for the establishment of the present Heathmont School at the corner of Frances Street and Balfour Avenue. The land was purchased from Mr. Handasyde, an orchardist of Wantirna South. In March 1963 a Bristol prefabricated aluminium building comprising four classrooms and an office was occupied. On April 21st, 1953 the school was opened officially by the Minister for Education, the Hon. A.E. Shepherd MLA. By December of that year the attendance had increased to 191 pupils, Mr N. Gillham was Head Teacher at the time. In February 1955 Mr. K. Gerraty succeeded Mr Gillham and by 1957 attendance had risen to 326 pupils necessitating the provision of additional light timber construction classrooms. Meanwhile the subdivision of large areas of local orchard land into housing estates with its resulting rapidly increasing population presented a persistent school accommodation problem that was met temporarily by the hiring of district church halls to accommodate a steadily rising attendance. Fortunately the tradition of voluntarily contributing to school funds and voluntarily providing labour initiated by the original parent bodies in 1952 was maintained. Then Mr V. Milligan commenced as Head Teacher in 1959, much of the steeply contoured playground area had been terraced, a football oval formed and the basketball court and assembly areas were sealed. These improvements were finally completed largely due to the enthusiasm, vigor and work effected by the School Committee under the chairmanship of Ringwood Councillor Mr JM McRae, as is borne out by the following report by Mr R.J. Chapman, District Inspector in 1961. "The local support by parents given to the Head Teacher and his staff is exceptional and I express my appreciation of their outstanding service." Mr Milligan's contribution to progress, however, lay equally in the internal educational development, particularly with regard to the teaching of reading. A course in the mechanics of speed reading, involving the use of the tachistoscope reading rate controllers and programmed comprehension sets was introduced and a start was made in the building up of a library of literature and reference books. As a result the Education Department appointed a Teacher-librarian to ensure continuity and further progress with this Reading scheme. A feature of Heathmont School is the splendid modern Art/Craft room opened while Mr L. Sebire was head teacher in 1966. This building and courtyard, linked to the original building by a covered way was designed by Mr Salvatore who acted as honorary architect, and was completed by Mr John F. Swan at a cost of �10,000 of which 52% was provided by a School Committee Co-operative loan and 42% by Departmental special grant. Materials used were white sandstone brick and oregon pine. The building bears the name of Councillor J.M. McRae Art Centre as a tribute to the man who did so much to enable its construction. An Art/Craft specialist teacher is provided by the Education Department. As attendance continued to increase to 520 children in 1969, additional accommodation became an urgent necessity. Following negotiations conducted by Mr A. Lethbridge School Committee President, Mr JJ Egan, former Principal and the present Principal, Mr A.S. Don the Education Department Assisted by a second Committee Co-operative loan, purchased the adjacent Baptist Church property thus providing much needed extra accommodation and playground area The newly acquired building is at present in use as two temporary classrooms, but will subsequent be used as a utility rope. A smaller room has been converted to a canteen operated daily by the Parents and Citizens Association, thus providing both a service to the pupils and a source of income. +Additional Keywords: McKinlay, Mr.A G Harper, Mr J.B Walker,Mr.H Fleigner, Mr.H Handasyde, Mr. G Shepherd, Hon. A.E. MLA Gillham, Mr.K Garraty, Mr.K Milligan, Mr.V McRae, Mr. J.M. Chapman,Mr.R.J. Sebire,Mr.L Salvatore,Mr. Swann,Mr.John F. Lethbridge, mr.A Egan,Mr.J.J. Don,Mr.A.S. -
 Ringwood and District Historical Society
Photograph, Twenty photographs of Ringwood in frames, 1990
Returned to RDHS from Federation Estate Art GalleryPhoto 1 (7009a) - Former "Ringwood Mail" newspaper office, Adelaide Street, 1955, looking along laneway to west. Lane between Bamford's Timber Yard, corner Warrandyte Rd. and Maroondah Highway, and went to Melbourne St, later called Civic Place. Other buildings were Ham's Billiard Saloon, the two-story Renong Chambers, bottom left Jack Orr's clothes hoists and bottom right Horman & Woolhouse plumbers. All demolished for the building of Eastland in the 1960s. The photo shown is a typical example but may not be in the collection. -
 Flagstaff Hill Maritime Museum and Village
Functional object - Ship's Wheel, 1871 or earlier
The ship building company E. & A. Sewall, from Bath, Maine, USA, built many ships that had wheels with the same decorative, starburst pattern on them as this particular wheel segment, including the Eric the Red. The wheel was manufactured by their local Bath foundry, Geo. Moulton & Co. and sold to the Sewall yard for $100, according to the construction accounts of the vessel. Eric the Red was a wooden, three masted clipper ship. She had 1,580 tons register and was the largest full-rigged ship built at Bath, Maine, USA in 1871. She was built and registered by Arthur Sewall, later to become the partnership E. & A. Sewall, and was the 51st ship built by this company. The annually-published List of Merchant Vessels of the U.S. shows that Bath was still the home port of Eric the Red in 1880. The vessel was named after the Viking discoverer, Eric the Red, who was the first European to reach the shores of North America (in 980AD). The ship Eric the Red at first traded in coal between America and Britain, and later traded in guano nitrates from South America. In 1879 she was re-metalled and was in first class condition. On 10th June 1880 (some records say 12th June) Eric the Red departed New York for Melbourne and then Sydney. She had been commissioned by American trade representatives to carry a special cargo of 500 exhibits (1400 tons) - about a quarter to a third of America’s total exhibits - from America for the U.S.A. pavilion at Melbourne’s first International Exhibition. The exhibits included furniture, ironmongery, wines, chemicals, dental and surgical instruments, paper, cages, bronze lamp trimmings, axles, stamped ware, astronomical and time globes, samples of corn and the choicest of leaf tobacco. Other general cargo included merchandise such as cases of kerosene and turpentine, brooms, Bristol's Sarsaparilla, Wheeler and Wilson sewing machines, Wheeler’s thresher machine, axe handles and tools, cases of silver plate, toys, pianos and organs, carriages and Yankee notions. The Eric the Red left New York under the command of Captain Z. Allen (or some records say Captain Jacques Allen) and 24 other crew including the owner’s son third mate Ned Sewall. There were 2 saloon passengers also. On 4th September 1880 the ship had been sailing for an uneventful 85 days and the voyage was almost at its end. Eric the Red approached Cape Otway in a moderate north-west wind and hazy and overcast atmosphere. Around 1:30am Captain Allen sighted the Cape Otway light and was keeping the ship 5-6 miles offshore to stay clear of the hazardous Otway Reef. However he had badly misjudged his position. The ship hit the Otway Reef about 2 miles out to sea, south west of the Cape Otway light station. Captain Allen ordered the wheel to be put ‘hard up’ thinking that she might float off the reef. A heavy sea knocked the man away from the wheel, broke the wheel ropes and carried away the rudder. The sea swamped the lifeboats, the mizzenmast fell, with all of its rigging, then the mainmast fell and the ship broke in two. Some said that the passenger Vaughan, who was travelling for his health and not very strong, was washed overboard and never seen again. The ship started breaking up. The forward house came adrift with three of the crew on it as well as a longboat, which the men succeeded in launching and keeping afloat by continually bailing with their sea boots. The captain, the third mate (the owner’s son) and others clung to the mizzenmast in the sea. Then the owner’s son was washed away off the mast. Within 10 minutes the rest of the ship was in pieces, completely wrecked, with cargo and wreckage floating in the sea. The captain encouraged the second mate to swim with him to the deckhouse where there were other crew but the second mate wouldn’t go with him. Eventually the Captain made it to the deckhouse and the men pulled him up. At about 4:30am the group of men on the deckhouse saw the lights of a steamer and called for help. At the same time they noticed the second mate and the other man had drifted nearby, still on the spur, and pulled them both onto the wreck. The coastal steamer Dawn was returning to Warrnambool from Melbourne, its sailing time different to its usual schedule. Cries were heard coming from out of the darkness. Captain Jones sent out two life boats, and fired off rockets and blue lights to illuminate the area. They picked up the three survivors who were in the long boat from Eric the Red. Two men were picked up out of the water, one being the owner’s son who was clinging to floating kerosene boxes. At daylight the Dawn then rescued the 18 men from the floating portion of the deckhouse, which had drifted about 4 miles from where they’d struck the reef. Shortly after the rescue the deckhouse drifted onto breakers and was thrown onto rocks at Point Franklin, about 2 miles east of Cape Otway. Captain Jones had signalled to Cape Otway lighthouse the number of the Eric the Red and later signalled that there was a wreck at Otway Reef but there was no response from the lighthouse. The captain and crew of the Dawn spent several more hours searching unsuccessfully for more survivors, even going back as far as Apollo Bay. On board the Dawn the exhausted men received care and attention to their needs and wants, including much needed clothing. Captain Allen was amongst the 23 battered and injured men who were rescued and later taken to Warrnambool for care. Warrnambool’s mayor and town clerk offered them all hospitality, the three badly injured men going to the hospital and others to the Olive Branch Hotel, then on to Melbourne. Captain Allen’s leg injury prevented him from going ashore so he and three other men travelled on the Dawn to Portland. They were met by the mayor who also treated them all with great kindness. Captain Allen took the train back to Melbourne then returned to America. Those saved were Captain Z. Allen (or Jacques Allen), J. Darcy chief mate, James F. Lawrence second mate, Ned Sewall third mate and owner’s son, John French the cook, C. Nelson sail maker, Clarence W. New passenger, and the able seamen Dickenson, J. Black, Denis White, C. Herbert, C. Thompson, A. Brooks, D. Wilson, J. Ellis, Q. Thompson, C. Newman, W. Paul, J. Davis, M. Horenleng, J. Ogduff, T. W. Drew, R. Richardson. Four men had lost their lives; three of them were crew (Gus Dahlgreen ship’s carpenter, H. Ackman steward, who drowned in his cabin, and George Silver seaman) and one a passenger (J. B. Vaughan). The body of one of them had been found washed up at Cape Otway and was later buried in the lighthouse cemetery; another body was seen on an inaccessible ledge. Twelve months later the second mate James F. Lawrence, from Nova Scotia, passed away in the Warrnambool district; an obituary was displayed in the local paper. The captain and crew of the Dawn were recognised by the United States Government in July 1881 for their humane efforts and bravery, being thanked and presented with substantial monetary rewards, medals and gifts. Neither the ship, nor its cargo, was insured. The ship was worth about £15,000 and the cargo was reportedly worth £40,000; only about £2,000 worth had been recovered. Cargo and wreckage washed up at Apollo Bay, Peterborough, Port Campbell, Western Port and according to some reports, even as far away as the beaches of New Zealand. The day after the wreck the government steam ship Pharos was sent from Queenscliff to clear the shipping lanes of debris that could be a danger to ships. The large midship deckhouse of the ship was found floating in a calm sea near Henty Reef. Items such as an American chair, a ladder and a nest of boxes were all on top of the deckhouse. As it was so large and could cause danger to passing ships, Captain Payne had the deckhouse towed towards the shore just beyond Apollo Bay. Between Apollo Bay and Blanket Bay the captain and crew of Pharos collected Wheeler and Wilson sewing machines, nests of boxes, bottles of Bristol’s sarsaparilla, pieces of common American chairs, axe handles, a Wheelers’ Patent thresher and a sailor’s trunk with the words “A. James” on the front. A ship’s flag-board bearing the words “Eric the Red” was found on the deckhouse; finally those on board the Pharos had the name of the wrecked vessel. During this operation Pharos came across the government steamer Victoria and also a steamer S.S. Otway, both of which were picking up flotsam and wreckage. A whole side of the hull and three large pieces of the other side of the hull, with some of the copper sheathing stripped off, had floated on to Point Franklin. Some of the vessels yards and portions of her masts were on shore. The pieces of canvas attached to the yards and masts confirmed that the vessel had been under sail. The beach there was piled with debris several feet high. There were many cases of Diamond Oil kerosene, labelled R. W. Cameron and Company, New York. There were also many large planks of red pine, portions of a small white boat and a large, well-used oar. Other items found ashore included sewing machines (some consigned to ‘Long and Co.”) and notions, axe and scythe handles, hay forks, wooden pegs, rolls of wire (some branded “T.S” and Co, Melbourne”), kegs of nails branded “A.T. and Co.” from the factory of A. Field and Son, Taunton, Massachusetts, croquet balls and mallets, buggy fittings, rat traps, perfumery, cutlery and Douay Bibles, clocks, bicycles, chairs, a fly wheel, a cooking stove, timber, boxes, pianos, organs and a ladder. (Wooden clothes pegs drifted in for many years). There seemed to be no personal luggage or clothing. The Pharos encountered a long line, about one and a half miles, of floating wreckage about 10 miles off land, south east of Cape Otway, and in some places about 40 feet wide. It seemed that more than half of it was from Eric the Red. The ship’s crew rescued 3 cases that were for the Melbourne Exhibition and other items from amongst the debris. There were also chairs, doors, musical instruments, washing boards, nests of trunks and fly catchers floating in the sea. Most of the goods were saturated and smelt of kerosene. A section of the hull lies buried in the sand at Parker River Beach. An anchor with chain is embedded in the rocks east of Point Franklin and a second anchor, thought to be from Eric the Red, is on display at the Cape Otway light station. (There is a photograph of a life belt on the verandah of Rivernook Guest House in Princetown with the words “ERIC THE RED / BOSTON”. This is rather a mystery as the ship was registered in Bath, Maine, USA.) Parts of the ship are on display at Bimbi Park Caravan Park and at Apollo Bay Museum. Flagstaff Hill Maritime Village also has part of the helm (steering wheel), a carved wooden sword (said to be the only remaining portion of the ship’s figurehead; further research is currently being carried out), a door, a metal rod, samples of wood and a medal for bravery. Much of the wreckage was recovered by the local residents before police and other authorities arrived at the scene. Looters went to great effort to salvage goods, being lowered down the high cliff faces to areas with little or no beach to collect items from the wreckage, their mates above watching out for dangerous waves. A Tasmanian newspaper reports on a court case in Stawell, Victoria, noting a man who was caught 2 months later selling tobacco from the wreckage of Eric the Red. Some of the silverware is still treasured by descendants of Mr Mackenzie who was given these items by officials for his help in securing the cargo. The gifts included silver coffee and tea pots, half a dozen silver serviette rings and two sewing machines. The wreck and cargo were sold to a Melbourne man who salvaged a quantity of high quality tobacco and dental and surgical instruments. Timbers from the ship were salvaged and used in the construction of houses and sheds around Apollo Bay, including a guest house, Milford House (since burnt down in bushfires), which had furniture, fittings and timber on the dining room floor from the ship. A 39.7 foot long trading ketch, the Apollo, was also built from its timbers by Mr Burgess in 1883 and subsequently used in Tasmanian waters. It was the first attempt at ship building in Apollo bay. In 1881 a red light was installed about 300 feet above sea level at the base of the Cape Otway lighthouse to warn ships when they were too close to shore; It would not be visible unless a ship came within 3 miles from it. This has proved to be an effective warning. The State Library of Victoria has a lithograph in its collection depicting the steamer Dawn and the shipwrecked men, titled. "Wreck of the ship Eric the Red, Cape Otway: rescue of the crew by the Dawn". “The Eric the Red is historically significant as one of Victoria's major 19th century shipwrecks. (Heritage Victoria Eric the Red; HV ID 239) The wreck led to the provision of an additional warning light placed below the Cape Otway lighthouse to alert mariners to the location of Otway Reef. The site is archaeologically significant for its remains of a large and varied cargo and ship's fittings being scattered over a wide area. The site is recreationally and aesthetically significant as it is one of the few sites along this coast where tourists can visit identifiable remains of a large wooden shipwreck, and for its location set against the background of Cape Otway, Bass Strait, and the Cape Otway lighthouse.“ (Victorian Heritage Database Registration Number S239, Official Number 8745 USA) Segment of a ship's wheel, or helm, from the wreck of the sailing ship Eric the Red. The wheel part is an arc shape from the outer rim of the wheel and is made up of three layers of timber. The centre layer is a dark, dense timber and is wider than the two outer layers, which are less dense and lighter in colour. The wheel segment has a vertically symmetrical, decorative copper plate inlaid on the front. The plate has a starburst pattern; six stars decorate it, each at a point where there is a metal fitting going through the three layers of timber to the rear side of the wheel. On the rear each of the six fittings has an individual copper star around it. The edges of the helm are rounded and bevelled, polished to a shine in a dark stain. Around each of the stars, front and back, the wood is a lighter colour, as though the metal in that area being polished frequently. The length of the segment suggests that it has probably come from a wheel or helm that had ten spokes. (Ref: F.H.M.M. 16th March 1994, 239.6.610.3.7. Artefact Reg No ER/1.)flagstaff hill, warrnambool, shipwrecked-coast, flagstaff-hill, flagstaff-hill-maritime-museum, maritime-museum, shipwreck-coast, flagstaff-hill-maritime-village, ship's-wheel, eric-the-red, helm, shei's wheel, ship's steering wheel -
 Flagstaff Hill Maritime Museum and Village
Muntz Metal
This sheet of copper sheathing or muntz metal has been recovered from the sea. It has been damaged by reaction of the metals to the sea, it has encrustations from the sea such as sand, and other damage has caused the edges to break away or fold over. ABOUT MUNTZ Early timber sailing ships had a problem of the timber hulls being eaten through by the marine animals called Teredo Worms, sometimes called ‘sea worms’ or ‘termites of the sea’. The worms bore holes into wood that is immersed in sea water and the bacteria inside the worms digest the wood. Shipbuilders tried to prevent this problem by applying coatings of tar, wax, lead or pitch onto the timber. In the 18th and 19th centuries the outside of their ships were sheathed in copper sheathing or a combination of 60 percent copper and 40 percent zinc (called Muntz metal). The ships would be re-metalled periodically to ensure the sheathing would remain effective. In more recent times the ships are protected with a toxic coating. Piece of Muntz metal, copper/zinc sheathing for protecting ship hulls.flagstaff hill, warrnambool, shipwrecked-coast, flagstaff-hill, flagstaff-hill-maritime-museum, maritime-museum, shipwreck-coast, flagstaff-hill-maritime-village, muntz, muntz metal, copper sheating,, copper sheathing, teredo worms, sea worms, sea termites, ship building -
 Flagstaff Hill Maritime Museum and Village
Functional object - Ship's Rib or Knee, before 1850
... hanging knee ship's knee knee bracing timber wooden ship building ...This hanging knee was from the 1850 wreck of the schooner Enterprise. The 'hanging knee' or a 'ship's knee' is used for bracing a frame or supporting a beam. It is either a naturally bent piece of wood or wood cut into a bend like an elbow. The knee can be used in the frame of a boat or ship to spread load. THE “ENTERPRISE” 1847-1850 The wooden, two-masted schooner Enterprise was built in New Zealand in 1847 and registered in Melbourne, Australia. The Enterprise carried cargos of agricultural produce and other commodities for trade between the ports of the Colony. On September 14, 1850, the Enterprise was at anchor in Lady Bay under its Master, James Gardiner Caughtt, loaded with a cargo of wheat and potatoes. A strong south-easterly wind caused the vessel to drag on its only anchor and the rudder was lost. The gale-force wind blew it sideways and it became grounded. A local indigenous man, Buckawall, braved the rough sea to take a line from the shore to the Enterprise. All five members of the crew were able to make it safely to land. The Enterprise was wrecked. The Enterprise wreck was in an area called Tramway Jetty in Lady Bay. Since then the area became the location of the Lady Bay Hotel and now, in 2019, it is in the grounds of the Deep Blue Apartments. In fact, with the constantly changing coastline through built-up sand, the wreck site is now apparently under the No 2 Caravan Park on Pertobe Road, perhaps 150 metres from the high tide. Its location was found by Ian McKiggan (leader of the various searches in the 1980s for the legendary Mahogany Ship). DIFFERENTIATING the New Zealand Schooner “Enterprise” from John Fawkner’s “Enterprize“ Dr Murray Johns, Melbourne, says in his article The Mahogany Ship Story “… As I documented in 1985, the Warrnambool wreck was of an entirely different ship, also called Enterprize [with the spelling ‘Enterprise’], but built in New Zealand in 1847. Fawkner’s ship had already been sold to Captain Sullivan in 1845 and was wrecked on the Richmond Pier in northern New South Wales early in 1847. “ - (further details are in NOTES: and FHMV documents) The hanging knee is significant for its association wreck of the Victorian Heritage Listed schooner Enterprise, VHR S238, being a New Zealand built but Australian owned coastal trader. The wreck was also significant for its association with indigenous hero Buckawall who saved the lives of the five crew on board.Portion of a ship's rib; a hanging knee, wooden, from the schooner Enterprise, 1847-1850. flagstaff hill, warrnambool, shipwrecked-coast, flagstaff-hill, flagstaff-hill-maritime-museum, maritime-museum, shipwreck-coast, flagstaff-hill-maritime-village, hanging knee, ship's knee, knee bracing timber, wooden ship building, carpentry, shipwright trade, buckawall, lady bay, enterprise, coastal steamer, ship's rib, indigenous hero, indigenous rescue -
 Flagstaff Hill Maritime Museum and Village
Decorative object - Sword, 1871 or earlier
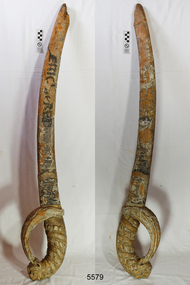
This wooden sword is said to “possibly be the only remaining part of the figurehead from the sailing ship Eric the Red.” It was previously part of the collection of the old Warrnambool Museum and the entry in its inventory says “Wooden sword, portion of the figurehead, held by “Eric the Red” at the bow.” A large part of the ship’s hull was found on the rocks and a figurehead may have been attached or washed up on the shore. The shipping records for E. & A. Sewall, the builders, owners and managers of Eric the Red, are now preserved in the Maine Maritime Museum. There is no photograph on record of Eric the Red but photographs of other ships built around that time by the same company show that these did not have figureheads, and there is no record found of a figurehead for Eric the Red being ordered or paid for. Further research is being carried out. The ship building company E. & A. Sewall, from Bath, Maine, USA, built Eric the Red, a wooden, three masted clipper ship. She had 1,580 tons register and was the largest full-rigged ship built at Bath, Maine, USA in 1871. She was built and registered by Arthur Sewall, later to become the partnership E. & A. Sewall, and was the 51st ship built by this company. The annually-published List of Merchant Vessels of the U.S. shows that Bath was still the home port of Eric the Red in 1880. The vessel was named after the Viking discoverer, Eric the Red, who was the first European to reach the shores of North America (in 980AD). The ship Eric the Red at first traded in coal between America and Britain, and later traded in guano nitrates from South America. In 1879 she was re-metalled and was in first class condition. On 10th June 1880 (some records say 12th June) Eric the Red departed New York for Melbourne and then Sydney. She had been commissioned by American trade representatives to carry a special cargo of 500 exhibits (1400 tons) - about a quarter to a third of America’s total exhibits - from America for the U.S.A. pavilion at Melbourne’s first International Exhibition. The exhibits included furniture, ironmongery, wines, chemicals, dental and surgical instruments, paper, cages, bronze lamp trimmings, axles, stamped ware, astronomical and time globes, samples of corn and the choicest of leaf tobacco. Other general cargo included merchandise such as cases of kerosene and turpentine, brooms, Bristol's Sarsaparilla, Wheeler and Wilson sewing machines, Wheeler’s thresher machine, axe handles and tools, cases of silver plate, toys, pianos and organs, carriages and Yankee notions. The Eric the Red left New York under the command of Captain Z. Allen (or some records say Captain Jacques Allen) and 24 other crew including the owner’s son third mate Ned Sewall. There were 2 saloon passengers also. On 4th September 1880 the ship had been sailing for an uneventful 85 days and the voyage was almost at its end. Eric the Red approached Cape Otway in a moderate north-west wind and hazy and overcast atmosphere. Around 1:30am Captain Allen sighted the Cape Otway light and was keeping the ship 5-6 miles offshore to stay clear of the hazardous Otway Reef. However he had badly misjudged his position. The ship hit the Otway Reef about 2 miles out to sea, south west of the Cape Otway light station. Captain Allen ordered the wheel to be put ‘hard up’ thinking that she might float off the reef. A heavy sea knocked the man away from the wheel, broke the wheel ropes and carried away the rudder. The sea swamped the lifeboats, the mizzenmast fell, with all of its rigging, then the mainmast fell and the ship broke in two. Some said that the passenger Vaughan, who was travelling for his health and not very strong, was washed overboard and never seen again. The ship started breaking up. The forward house came adrift with three of the crew on it as well as a longboat, which the men succeeded in launching and keeping afloat by continually bailing with their sea boots. The captain, the third mate (the owner’s son) and others clung to the mizzenmast in the sea. Then the owner’s son was washed away off the mast. Within 10 minutes the rest of the ship was in pieces, completely wrecked, with cargo and wreckage floating in the sea. The captain encouraged the second mate to swim with him to the deckhouse where there were other crew but the second mate wouldn’t go with him. Eventually the Captain made it to the deckhouse and the men pulled him up. At about 4:30am the group of men on the deckhouse saw the lights of a steamer and called for help. At the same time they noticed the second mate and the other man had drifted nearby, still on the spur, and pulled them both onto the wreck. The coastal steamer Dawn was returning to Warrnambool from Melbourne, its sailing time different to its usual schedule. Cries were heard coming from out of the darkness. Captain Jones sent out two life boats, and fired off rockets and blue lights to illuminate the area. They picked up the three survivors who were in the long boat from Eric the Red. Two men were picked up out of the water, one being the owner’s son who was clinging to floating kerosene boxes. At daylight the Dawn then rescued the 18 men from the floating portion of the deckhouse, which had drifted about 4 miles from where they’d struck the reef. Shortly after the rescue the deckhouse drifted onto breakers and was thrown onto rocks at Point Franklin, about 2 miles east of Cape Otway. Captain Jones had signalled to Cape Otway lighthouse the number of the Eric the Red and later signalled that there was a wreck at Otway Reef but there was no response from the lighthouse. The captain and crew of the Dawn spent several more hours searching unsuccessfully for more survivors, even going back as far as Apollo Bay. On board the Dawn the exhausted men received care and attention to their needs and wants, including much needed clothing. Captain Allen was amongst the 23 battered and injured men who were rescued and later taken to Warrnambool for care. Warrnambool’s mayor and town clerk offered them all hospitality, the three badly injured men going to the hospital and others to the Olive Branch Hotel, then on to Melbourne. Captain Allen’s leg injury prevented him from going ashore so he and three other men travelled on the Dawn to Portland. They were met by the mayor who also treated them all with great kindness. Captain Allen took the train back to Melbourne then returned to America. Those saved were Captain Z. Allen (or Jacques Allen), J. Darcy chief mate, James F. Lawrence second mate, Ned Sewall third mate and owner’s son, John French the cook, C. Nelson sail maker, Clarence W. New passenger, and the able seamen Dickenson, J. Black, Denis White, C. Herbert, C. Thompson, A. Brooks, D. Wilson, J. Ellis, Q. Thompson, C. Newman, W. Paul, J. Davis, M. Horenleng, J. Ogduff, T. W. Drew, R. Richardson. Four men had lost their lives; three of them were crew (Gus Dahlgreen ship’s carpenter, H. Ackman steward, who drowned in his cabin, and George Silver seaman) and one a passenger (J. B. Vaughan). The body of one of them had been found washed up at Cape Otway and was later buried in the lighthouse cemetery; another body was seen on an inaccessible ledge. Twelve months later the second mate James F. Lawrence, from Nova Scotia, passed away in the Warrnambool district; an obituary was displayed in the local paper. The captain and crew of the Dawn were recognised by the United States Government in July 1881 for their humane efforts and bravery, being thanked and presented with substantial monetary rewards, medals and gifts. Neither the ship, nor its cargo, was insured. The ship was worth about £15,000 and the cargo was reportedly worth £40,000; only about £2,000 worth had been recovered. Cargo and wreckage washed up at Apollo Bay, Peterborough, Port Campbell, Western Port and according to some reports, even as far away as the beaches of New Zealand. The day after the wreck the government steam ship Pharos was sent from Queenscliff to clear the shipping lanes of debris that could be a danger to ships. The large midship deckhouse of the ship was found floating in a calm sea near Henty Reef. Items such as an American chair, a ladder and a nest of boxes were all on top of the deckhouse. As it was so large and could cause danger to passing ships, Captain Payne had the deckhouse towed towards the shore just beyond Apollo Bay. Between Apollo Bay and Blanket Bay the captain and crew of Pharos collected Wheeler and Wilson sewing machines, nests of boxes, bottles of Bristol’s sarsaparilla, pieces of common American chairs, axe handles, a Wheelers’ Patent thresher and a sailor’s trunk with the words “A. James” on the front. A ship’s flag-board bearing the words “Eric the Red” was found on the deckhouse; finally those on board the Pharos had the name of the wrecked vessel. During this operation Pharos came across the government steamer Victoria and also a steamer S.S. Otway, both of which were picking up flotsam and wreckage. A whole side of the hull and three large pieces of the other side of the hull, with some of the copper sheathing stripped off, had floated on to Point Franklin. Some of the vessels yards and portions of her masts were on shore. The pieces of canvas attached to the yards and masts confirmed that the vessel had been under sail. The beach there was piled with debris several feet high. There were many cases of Diamond Oil kerosene, labelled R. W. Cameron and Company, New York. There were also many large planks of red pine, portions of a small white boat and a large, well-used oar. Other items found ashore included sewing machines (some consigned to ‘Long and Co.”) and notions, axe and scythe handles, hay forks, wooden pegs, rolls of wire (some branded “T.S” and Co, Melbourne”), kegs of nails branded “A.T. and Co.” from the factory of A. Field and Son, Taunton, Massachusetts, croquet balls and mallets, buggy fittings, rat traps, perfumery, cutlery and Douay Bibles, clocks, bicycles, chairs, a fly wheel, a cooking stove, timber, boxes, pianos, organs and a ladder. (Wooden clothes pegs drifted in for many years). There seemed to be no personal luggage or clothing. The Pharos encountered a long line, about one and a half miles, of floating wreckage about 10 miles off land, south east of Cape Otway, and in some places about 40 feet wide. It seemed that more than half of it was from Eric the Red. The ship’s crew rescued 3 cases that were for the Melbourne Exhibition and other items from amongst the debris. There were also chairs, doors, musical instruments, washing boards, nests of trunks and fly catchers floating in the sea. Most of the goods were saturated and smelt of kerosene. A section of the hull lies buried in the sand at Parker River Beach. An anchor with chain is embedded in the rocks east of Point Franklin and a second anchor, thought to be from Eric the Red, is on display at the Cape Otway light station. (There is a photograph of a life belt on the verandah of Rivernook Guest House in Princetown with the words “ERIC THE RED / BOSTON”. This is rather a mystery as the ship was registered in Bath, Maine, USA.) Parts of the ship are on display at Bimbi Park Caravan Park and at Apollo Bay Museum. Flagstaff Hill Maritime Village also has part of the helm (steering wheel), a carved wooden sword (said to be the only remaining portion of the ship’s figurehead; further research is currently being carried out), a door, a metal rod, samples of wood and a medal for bravery. Much of the wreckage was recovered by the local residents before police and other authorities arrived at the scene. Looters went to great effort to salvage goods, being lowered down the high cliff faces to areas with little or no beach to collect items from the wreckage, their mates above watching out for dangerous waves. A Tasmanian newspaper reports on a court case in Stawell, Victoria, noting a man who was caught 2 months later selling tobacco from the wreckage of Eric the Red. Some of the silverware is still treasured by descendants of Mr Mackenzie who was given these items by officials for his help in securing the cargo. The gifts included silver coffee and tea pots, half a dozen silver serviette rings and two sewing machines. The wreck and cargo were sold to a Melbourne man who salvaged a quantity of high quality tobacco and dental and surgical instruments. Timbers from the ship were salvaged and used in the construction of houses and sheds around Apollo Bay, including a guest house, Milford House (since burnt down in bushfires), which had furniture, fittings and timber on the dining room floor from the ship. A 39.7 foot long trading ketch, the Apollo, was also built from its timbers by Mr Burgess in 1883 and subsequently used in Tasmanian waters. It was the first attempt at ship building in Apollo bay. In 1881 a red light was installed about 300 feet above sea level at the base of the Cape Otway lighthouse to warn ships when they were too close to shore; It would not be visible unless a ship came within 3 miles from it. This has proved to be an effective warning. The State Library of Victoria has a lithograph in its collection depicting the steamer Dawn and the shipwrecked men, titled. "Wreck of the ship Eric the Red, Cape Otway: rescue of the crew by the Dawn".The Eric the Red is historically significant as one of Victoria's major 19th century shipwrecks. (Heritage Victoria Eric the Red; HV ID 239) The wreck led to the provision of an additional warning light placed below the Cape Otway lighthouse to alert mariners to the location of Otway Reef. The site is archaeologically significant for its remains of a large and varied cargo and ship's fittings being scattered over a wide area. The site is recreationally and aesthetically significant as it is one of the few sites along this coast where tourists can visit identifiable remains of a large wooden shipwreck, and for its location set against the background of Cape Otway, Bass Strait, and the Cape Otway lighthouse. (Victorian Heritage Database Registration Number S239, Official Number 8745 USA)This carved wooden sword, recovered from the Eric the Red, is possibly the only portion of the figurehead recovered after the wreck. There are spirals carved from the base of the handle to the top of the sword. The hilt of the sword is a lion’s head holding its tail in its mouth, the tail forming the handle. The blade of the sword has engraved patterns on it. Tiny particles of gold leaf and dark blue paint fragments can be seen between the carving marks. There are remnants of yellowish-orange and crimson paint on the handle. At some time after the sword was salvaged the name of the ship was hand painted on the blade in black paint. The tip of the sword has broken or split and the remaining part is charcoal in appearance. On both the tip and the base of the handle are parts made where the sword could have been joined onto the figurehead There is a white coating over some areas of the sword, similar to white lead putty used in traditional shipbuilding. The words “ERIC the RED” have been hand painted on the blade of the sword in black paint sometime after it was salvaged.flagstaff hill, flagstaff hill maritime museum and village, warrnambool, maritime museum, maritime village, great ocean road, shipwreck coast, sword, wooden sword, eric the red, carved sword, figurehead, snake head on sword -
 Flagstaff Hill Maritime Museum and Village
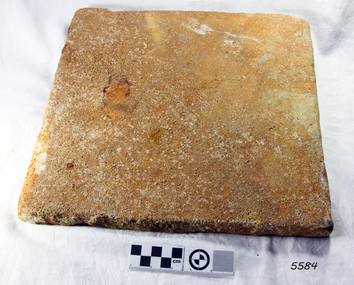
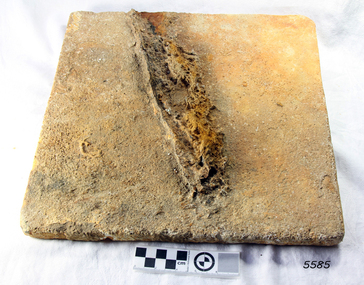
Marble Tile, circa 1878
The artefact is a white marble tile raised from the wreck of the LOCH ARD (1878). The cargo manifest of the sunken vessel has the entry “Marble £400”. This is placed directly following the entry “Glass (604 cases)”. This conjunction suggests the marble tile was originally part of a consignment intended for use in a ‘high end’ residential or public building project in the gold and wool rich Colony of Victoria. Traditionally, white or cream marble was imported into Britain from the Mediterranean region of Europe, where beds of sedimentary limestone (calcium and magnesium carbonate) had been buried over a long geological period of time. Deep in the earth’s crust, it had been subjected to immense pressures and high temperatures, sufficient to completely re-crystallise the original deposits. Marble beds began as layers of sediment at the bottom of ancient tropical seas, forming from the skeletal remains of calcareous fossils, shell, and coral fragments. The metamorphic process of prolonged compression and heating recrystallised this skeletal material, destroying all signs of the original sedimentary fabric. The resulting ‘true’ marbles of, for example, White Carrara (Tuscany, Italy), Verdi (green) Antico (Thessaly, Greece), and Rouge (red) Languadoc (Carcassone, France), were highly prized in classical decoration (sculpture and friezes) and architecture (temples and arches). Marble was found in nineteenth century Australia, but in small, uneconomic deposits, not suitable for commercial quarrying. The comparative expense of imported marble restricted its use in colonial buildings to carved fireplaces and mantel pieces, or outdoor ornaments such as fountains, statuary and grave stones. If Carrara marble floor tiles were used, they were used sparingly, as an arresting feature in entrance halls for instance. However, most prominent private and public construction used timber flooring, waxed or ‘japanned’, with carpet runners and rugs (for example the Austin’s Barwon Park Mansion, 1871), or laid tessellated and ceramic tiles of baked clay infused with colour (for example the Chirnside’s Werribee Park Mansion, 1878). HISTORY OF THE LOCH ARD The LOCH ARD belonged to the famous Loch Line which sailed many ships from England to Australia. Built in Glasgow by Barclay, Curdle and Co. in 1873, the LOCH ARD was a three-masted square rigged iron sailing ship. The ship measured 262ft 7" (79.87m) in length, 38ft (11.58m) in width, 23ft (7m) in depth and had a gross tonnage of 1693 tons. The LOCH ARD's main mast measured a massive 150ft (45.7m) in height. LOCH ARD made three trips to Australia and one trip to Calcutta before its final voyage. LOCH ARD left England on March 2, 1878, under the command of Captain Gibbs, a newly married, 29 year old. She was bound for Melbourne with a crew of 37, plus 17 passengers and a load of cargo. The general cargo reflected the affluence of Melbourne at the time. On board were straw hats, umbrella, perfumes, clay pipes, pianos, clocks, confectionary, linen and candles, as well as a heavier load of railway irons, cement, lead and copper. There were items included that intended for display in the Melbourne International Exhibition in 1880. The voyage to Port Phillip was long but uneventful. At 3am on June 1, 1878, Captain Gibbs was expecting to see land and the passengers were becoming excited as they prepared to view their new homeland in the early morning. But LOCH ARD was running into a fog which greatly reduced visibility. Captain Gibbs was becoming anxious as there was no sign of land or the Cape Otway lighthouse. At 4am the fog lifted. A man aloft announced that he could see breakers. The sheer cliffs of Victoria's west coast came into view, and Captain Gibbs realised that the ship was much closer to them than expected. He ordered as much sail to be set as time would permit and then attempted to steer the vessel out to sea. On coming head on into the wind, the ship lost momentum, the sails fell limp and LOCH ARD's bow swung back. Gibbs then ordered the anchors to be released in an attempt to hold its position. The anchors sank some 50 fathoms - but did not hold. By this time LOCH ARD was among the breakers and the tall cliffs of Mutton Bird Island rose behind the ship. Just half a mile from the coast, the ship's bow was suddenly pulled around by the anchor. The captain tried to tack out to sea, but the ship struck a reef at the base of Mutton Bird Island, near Port Campbell. Waves broke over the ship and the top deck was loosened from the hull. The masts and rigging came crashing down knocking passengers and crew overboard. When a lifeboat was finally launched, it crashed into the side of LOCH ARD and capsized. Tom Pearce, who had launched the boat, managed to cling to its overturned hull and shelter beneath it. He drifted out to sea and then on the flood tide came into what is now known as LOCH ARD Gorge. He swam to shore, bruised and dazed, and found a cave in which to shelter. Some of the crew stayed below deck to shelter from the falling rigging but drowned when the ship slipped off the reef into deeper water. Eva Carmichael had raced onto deck to find out what was happening only to be confronted by towering cliffs looming above the stricken ship. In all the chaos, Captain Gibbs grabbed Eva and said, "If you are saved Eva, let my dear wife know that I died like a sailor". That was the last Eva Carmichael saw of the captain. She was swept off the ship by a huge wave. Eva saw Tom Pearce on a small rocky beach and yelled to attract his attention. He dived in and swam to the exhausted woman and dragged her to shore. He took her to the cave and broke open case of brandy which had washed up on the beach. He opened a bottle to revive the unconscious woman. A few hours later Tom scaled a cliff in search of help. He followed hoof prints and came by chance upon two men from nearby Glenample Station three and a half miles away. In a state of exhaustion, he told the men of the tragedy. Tom returned to the gorge while the two men rode back to the station to get help. By the time they reached LOCH ARD Gorge, it was cold and dark. The two shipwreck survivors were taken to Glenample Station to recover. Eva stayed at the station for six weeks before returning to Ireland, this time by steamship. In Melbourne, Tom Pearce received a hero's welcome. He was presented with the first gold medal of the Royal Humane Society of Victoria and a £1000 cheque from the Victorian Government. Concerts were performed to honour the young man's bravery and to raise money for those who lost family in the LOCH ARD disaster. Of the 54 crew members and passengers on board, only two survived: the apprentice, Tom Pearce and the young woman passenger, Eva Carmichael, who lost all of her family in the tragedy. Ten days after the LOCH ARD tragedy, salvage rights to the wreck were sold at auction for £2,120. Cargo valued at £3,000 was salvaged and placed on the beach, but most washed back into the sea when another storm developed. The wreck of LOCH ARD still lies at the base of Mutton Bird Island. Much of the cargo has now been salvaged and some was washed up into what is now known as LOCH ARD Gorge. Cargo and artefacts have also been illegally salvaged over many years before protective legislation was introduced. One of the most unlikely pieces of cargo to have survived the shipwreck was a Minton porcelain peacock - one of only nine in the world. The peacock was destined for the Melbourne International Exhibition in 1880. It had been well packed, which gave it adequate protection during the violent storm. Today, the Minton peacock can be seen at the Flagstaff Hill Maritime Museum in Warrnambool. From Australia's most dramatic shipwreck it has now become Australia's most valuable shipwreck artefact and is one of very few 'objects' on the Victorian State Heritage Register. The wreck of the LOCH ARD is of State significance — Victorian Heritage Register S417 Flagstaff Hill’s collection of artefacts from LOCH ARD is significant for being one of the largest collections of artefacts from this shipwreck in Victoria. It is significant for its association with the shipwreck, which is on the Victorian Heritage Register (VHR S417). The collection is significant because of the relationship between the objects, as together they have a high potential to interpret the story of the LOCH ARD. The LOCH ARD collection is archaeologically significant as the remains of a large international passenger and cargo ship. The LOCH ARD collection is historically significant for representing aspects of Victoria’s shipping history and its potential to interpret sub-theme 1.5 of Victoria’s Framework of Historical Themes (living with natural processes). The collection is also historically significant for its association with the LOCH ARD, which was one of the worst and best known shipwrecks in Victoria’s history. A square marble tile retrieved from the wreck of the LOCH ARD. Most of its surface is covered by a thin layer of limestone and marine growth encrustation that is stained rust-red. The tile is ‘rough-worked’, cut to shape and size, but not smoothed or polished. There is a companion tile in similar condition in the Flagstaff Hill collection. From visual observation of the original surface (at low magnification) the tile appears to be of white Carrara-type marble.flagstaff hill, warrnambool, shipwrecked coast, flagstaff hill maritime museum, maritime museum, shipwreck coast, flagstaff hill maritime village, great ocean road, loch line, loch ard, captain gibbs, eva carmichael, tom pearce, glenample station, mutton bird island, loch ard gorge, white marble, marble tile, carrara marble, imported marble, colonial architecture, victorian building materials -
 Flagstaff Hill Maritime Museum and Village
Marble Tile, circa 1878
The artefact is a white marble tile raised from the wreck of the LOCH ARD (1878). The cargo manifest of the sunken vessel has the entry “Marble £400”. This is placed directly following the entry “Glass (604 cases)”. This conjunction suggests the marble tile was originally part of a consignment intended for use in a ‘high end’ residential or public building project in the gold and wool rich Colony of Victoria. Traditionally, white or cream marble was imported into Britain from the Mediterranean region of Europe, where beds of sedimentary limestone (calcium and magnesium carbonate) had been buried over a long geological period of time. Deep in the earth’s crust, it had been subjected to immense pressures and high temperatures, sufficient to completely re-crystallise the original deposits. Marble beds began as layers of sediment at the bottom of ancient tropical seas, forming from the skeletal remains of calcareous fossils, shell, and coral fragments. The metamorphic process of prolonged compression and heating recrystallised this skeletal material, destroying all signs of the original sedimentary fabric. The resulting ‘true’ marbles of, for example, White Carrara (Tuscany, Italy), Verdi (green) Antico (Thessaly, Greece), and Rouge (red) Languadoc (Carcassone, France), were highly prized in classical decoration (sculpture and friezes) and architecture (temples and arches). Marble was found in nineteenth century Australia, but in small, uneconomic deposits, not suitable for commercial quarrying. The comparative expense of imported marble restricted its use in colonial buildings to carved fireplaces and mantel pieces, or outdoor ornaments such as fountains, statuary and grave stones. If Carrara marble floor tiles were used, they were used sparingly, as an arresting feature in entrance halls for instance. However, most prominent private and public construction used timber flooring, waxed or ‘jappaned’, with carpet runners and rugs (for example the Austin’s Barwon Park Mansion, 1871), or laid tessellated and ceramic tiles of baked clay infused with colour (for example the Chirnside’s Werribee Park Mansion, 1878). HISTORY OF THE LOCH ARD The LOCH ARD belonged to the famous Loch Line which sailed many ships from England to Australia. Built in Glasgow by Barclay, Curdle and Co. in 1873, the LOCH ARD was a three-masted square rigged iron sailing ship. The ship measured 262ft 7" (79.87m) in length, 38ft (11.58m) in width, 23ft (7m) in depth and had a gross tonnage of 1693 tons. The LOCH ARD's main mast measured a massive 150ft (45.7m) in height. LOCH ARD made three trips to Australia and one trip to Calcutta before its final voyage. LOCH ARD left England on March 2, 1878, under the command of Captain Gibbs, a newly married, 29 year old. She was bound for Melbourne with a crew of 37, plus 17 passengers and a load of cargo. The general cargo reflected the affluence of Melbourne at the time. On board were straw hats, umbrella, perfumes, clay pipes, pianos, clocks, confectionary, linen and candles, as well as a heavier load of railway irons, cement, lead and copper. There were items included that intended for display in the Melbourne International Exhibition in 1880. The voyage to Port Phillip was long but uneventful. At 3am on June 1, 1878, Captain Gibbs was expecting to see land and the passengers were becoming excited as they prepared to view their new homeland in the early morning. But LOCH ARD was running into a fog which greatly reduced visibility. Captain Gibbs was becoming anxious as there was no sign of land or the Cape Otway lighthouse. At 4am the fog lifted. A man aloft announced that he could see breakers. The sheer cliffs of Victoria's west coast came into view, and Captain Gibbs realised that the ship was much closer to them than expected. He ordered as much sail to be set as time would permit and then attempted to steer the vessel out to sea. On coming head on into the wind, the ship lost momentum, the sails fell limp and LOCH ARD's bow swung back. Gibbs then ordered the anchors to be released in an attempt to hold its position. The anchors sank some 50 fathoms - but did not hold. By this time LOCH ARD was among the breakers and the tall cliffs of Mutton Bird Island rose behind the ship. Just half a mile from the coast, the ship's bow was suddenly pulled around by the anchor. The captain tried to tack out to sea, but the ship struck a reef at the base of Mutton Bird Island, near Port Campbell. Waves broke over the ship and the top deck was loosened from the hull. The masts and rigging came crashing down knocking passengers and crew overboard. When a lifeboat was finally launched, it crashed into the side of LOCH ARD and capsized. Tom Pearce, who had launched the boat, managed to cling to its overturned hull and shelter beneath it. He drifted out to sea and then on the flood tide came into what is now known as LOCH ARD Gorge. He swam to shore, bruised and dazed, and found a cave in which to shelter. Some of the crew stayed below deck to shelter from the falling rigging but drowned when the ship slipped off the reef into deeper water. Eva Carmichael had raced onto deck to find out what was happening only to be confronted by towering cliffs looming above the stricken ship. In all the chaos, Captain Gibbs grabbed Eva and said, "If you are saved Eva, let my dear wife know that I died like a sailor". That was the last Eva Carmichael saw of the captain. She was swept off the ship by a huge wave. Eva saw Tom Pearce on a small rocky beach and yelled to attract his attention. He dived in and swam to the exhausted woman and dragged her to shore. He took her to the cave and broke open case of brandy which had washed up on the beach. He opened a bottle to revive the unconscious woman. A few hours later Tom scaled a cliff in search of help. He followed hoof prints and came by chance upon two men from nearby Glenample Station three and a half miles away. In a state of exhaustion, he told the men of the tragedy. Tom returned to the gorge while the two men rode back to the station to get help. By the time they reached LOCH ARD Gorge, it was cold and dark. The two shipwreck survivors were taken to Glenample Station to recover. Eva stayed at the station for six weeks before returning to Ireland, this time by steamship. In Melbourne, Tom Pearce received a hero's welcome. He was presented with the first gold medal of the Royal Humane Society of Victoria and a £1000 cheque from the Victorian Government. Concerts were performed to honour the young man's bravery and to raise money for those who lost family in the LOCH ARD disaster. Of the 54 crew members and passengers on board, only two survived: the apprentice, Tom Pearce and the young woman passenger, Eva Carmichael, who lost all of her family in the tragedy. Ten days after the LOCH ARD tragedy, salvage rights to the wreck were sold at auction for £2,120. Cargo valued at £3,000 was salvaged and placed on the beach, but most washed back into the sea when another storm developed. The wreck of LOCH ARD still lies at the base of Mutton Bird Island. Much of the cargo has now been salvaged and some was washed up into what is now known as LOCH ARD Gorge. Cargo and artefacts have also been illegally salvaged over many years before protective legislation was introduced. One of the most unlikely pieces of cargo to have survived the shipwreck was a Minton porcelain peacock - one of only nine in the world. The peacock was destined for the Melbourne International Exhibition in 1880. It had been well packed, which gave it adequate protection during the violent storm. Today, the Minton peacock can be seen at the Flagstaff Hill Maritime Museum in Warrnambool. From Australia's most dramatic shipwreck it has now become Australia's most valuable shipwreck artefact and is one of very few 'objects' on the Victorian State Heritage Register. HISTORY OF THE LOCH ARD The LOCH ARD belonged to the famous Loch Line which sailed many ships from England to Australia. Built in Glasgow by Barclay, Curdle and Co. in 1873, the LOCH ARD was a three-masted square rigged iron sailing ship. The ship measured 262ft 7" (79.87m) in length, 38ft (11.58m) in width, 23ft (7m) in depth and had a gross tonnage of 1693 tons. The LOCH ARD's main mast measured a massive 150ft (45.7m) in height. LOCH ARD made three trips to Australia and one trip to Calcutta before its final voyage. LOCH ARD left England on March 2, 1878, under the command of Captain Gibbs, a newly married, 29 year old. She was bound for Melbourne with a crew of 37, plus 17 passengers and a load of cargo. The general cargo reflected the affluence of Melbourne at the time. On board were straw hats, umbrella, perfumes, clay pipes, pianos, clocks, confectionary, linen and candles, as well as a heavier load of railway irons, cement, lead and copper. There were items included that intended for display in the Melbourne International Exhibition in 1880. The voyage to Port Phillip was long but uneventful. At 3am on June 1, 1878, Captain Gibbs was expecting to see land and the passengers were becoming excited as they prepared to view their new homeland in the early morning. But LOCH ARD was running into a fog which greatly reduced visibility. Captain Gibbs was becoming anxious as there was no sign of land or the Cape Otway lighthouse. At 4am the fog lifted. A man aloft announced that he could see breakers. The sheer cliffs of Victoria's west coast came into view, and Captain Gibbs realised that the ship was much closer to them than expected. He ordered as much sail to be set as time would permit and then attempted to steer the vessel out to sea. On coming head on into the wind, the ship lost momentum, the sails fell limp and LOCH ARD's bow swung back. Gibbs then ordered the anchors to be released in an attempt to hold its position. The anchors sank some 50 fathoms - but did not hold. By this time LOCH ARD was among the breakers and the tall cliffs of Mutton Bird Island rose behind the ship. Just half a mile from the coast, the ship's bow was suddenly pulled around by the anchor. The captain tried to tack out to sea, but the ship struck a reef at the base of Mutton Bird Island, near Port Campbell. Waves broke over the ship and the top deck was loosened from the hull. The masts and rigging came crashing down knocking passengers and crew overboard. When a lifeboat was finally launched, it crashed into the side of LOCH ARD and capsized. Tom Pearce, who had launched the boat, managed to cling to its overturned hull and shelter beneath it. He drifted out to sea and then on the flood tide came into what is now known as LOCH ARD Gorge. He swam to shore, bruised and dazed, and found a cave in which to shelter. Some of the crew stayed below deck to shelter from the falling rigging but drowned when the ship slipped off the reef into deeper water. Eva Carmichael had raced onto deck to find out what was happening only to be confronted by towering cliffs looming above the stricken ship. In all the chaos, Captain Gibbs grabbed Eva and said, "If you are saved Eva, let my dear wife know that I died like a sailor". That was the last Eva Carmichael saw of the captain. She was swept off the ship by a huge wave. Eva saw Tom Pearce on a small rocky beach and yelled to attract his attention. He dived in and swam to the exhausted woman and dragged her to shore. He took her to the cave and broke open case of brandy which had washed up on the beach. He opened a bottle to revive the unconscious woman. A few hours later Tom scaled a cliff in search of help. He followed hoof prints and came by chance upon two men from nearby Glenample Station three and a half miles away. In a state of exhaustion, he told the men of the tragedy. Tom returned to the gorge while the two men rode back to the station to get help. By the time they reached LOCH ARD Gorge, it was cold and dark. The two shipwreck survivors were taken to Glenample Station to recover. Eva stayed at the station for six weeks before returning to Ireland, this time by steamship. In Melbourne, Tom Pearce received a hero's welcome. He was presented with the first gold medal of the Royal Humane Society of Victoria and a £1000 cheque from the Victorian Government. Concerts were performed to honour the young man's bravery and to raise money for those who lost family in the LOCH ARD disaster. Of the 54 crew members and passengers on board, only two survived: the apprentice, Tom Pearce and the young woman passenger, Eva Carmichael, who lost all of her family in the tragedy. Ten days after the LOCH ARD tragedy, salvage rights to the wreck were sold at auction for £2,120. Cargo valued at £3,000 was salvaged and placed on the beach, but most washed back into the sea when another storm developed. The wreck of LOCH ARD still lies at the base of Mutton Bird Island. Much of the cargo has now been salvaged and some was washed up into what is now known as LOCH ARD Gorge. Cargo and artefacts have also been illegally salvaged over many years before protective legislation was introduced. One of the most unlikely pieces of cargo to have survived the shipwreck was a Minton porcelain peacock - one of only nine in the world. The peacock was destined for the Melbourne International Exhibition in 1880. It had been well packed, which gave it adequate protection during the violent storm. Today, the Minton peacock can be seen at the Flagstaff Hill Maritime Museum in Warrnambool. From Australia's most dramatic shipwreck it has now become Australia's most valuable shipwreck artefact and is one of very few 'objects' on the Victorian State Heritage Register. The wreck of the LOCH ARD is of State significance — Victorian Heritage Register S417 Flagstaff Hill’s collection of artefacts from LOCH ARD is significant for being one of the largest collections of artefacts from this shipwreck in Victoria. It is significant for its association with the shipwreck, which is on the Victorian Heritage Register (VHR S417). The collection is significant because of the relationship between the objects, as together they have a high potential to interpret the story of the LOCH ARD. The LOCH ARD collection is archaeologically significant as the remains of a large international passenger and cargo ship. The LOCH ARD collection is historically significant for representing aspects of Victoria’s shipping history and its potential to interpret sub-theme 1.5 of Victoria’s Framework of Historical Themes (living with natural processes). The collection is also historically significant for its association with the LOCH ARD, which was one of the worst and best known shipwrecks in Victoria’s history. A square marble tile retrieved from the wreck of the LOCH ARD. Most of its surface is covered by a thin layer of limestone and marine growth encrustation that is stained rust-red. There is a piece of corroded iron encrusted at an oblique angle on the tile’s rear face. The tile is ‘rough-worked’, cut to shape and size, but not smoothed or polished. There is a companion tile in similar condition in the Flagstaff Hill collection. From visual observation of the original surface (at low magnification) the tile appears to be of white Carrara-type marble.flagstaff hill, warrnambool, shipwrecked coast, flagstaff hill maritime museum, maritime museum, shipwreck coast, flagstaff hill maritime village, great ocean road, loch line, loch ard, captain gibbs, eva carmichael, tom pearce, glenample station, mutton bird island, loch ard gorge, white marble, marble tile, carrara marble, colonial architecture, victorian building materials -
 Upper Yarra Museum
Negative Photographic Reproduction, Building of tramway track
03027 Photograph Building of tramway track Upper Yarra Shire 1888-1988 Centenary collection. Negative, Black & white.Two men with horses digging earth with scoops and then tipping it over the side of the new embankment to make it wide enough for timber traffic to pass by.building tramway track horse scraperscoop -
 Bendigo Military Museum
Furniture - TABLES, MEETING ROOM BDRSL, Red Dog Furniture, Post 2008
The centre Timbers under the glass tops came from the old Passchendaele Barracks building in Mollison Street Bendigo. The old building dated back to 1916. The building Depot was closed down and dismantled with the unit based there moved out to the new “Multi User Depot in Junortoun”. The tables were made in Bendigo and placed in the new Meeting Room of the Bendigo District RSL in Havilah Road which was named “Kokoda Room”. In another round of renovations to the Club the two tables were placed in the Soldier's Memorial Museum Pall Mall now Bendigo Military Museum. One was placed in the old Meeting room which at that time was part of the Museum, the second was placed in the old kitchen which had been converted into an BDRSL Office. With more renovations the two tables were returned to the Bendigo District RSL in a new meeting room. The two computer insets for cabling was then put into the tables. .1) .2) Two tables solid construction brown stain colour, the top has in inset of Timbers narrow a lighter brown stain laying across the width dimension, a glass top sits over these Timbers level with the heavy outside frame. Each table has an inset centre to accomodate computer cabling. There is a small plaque on each table.On the small plaques, “ Original Timbers from Passchendaele Barracks Bendigo”.brsl, smirsl, bdrslinc -
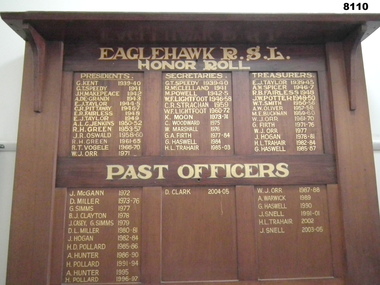 Bendigo Military Museum
Honour Board - EAGLEHAWK RSL HONOUR BOARD, Eaglehawk RSL Sub Branch, C.1939 onwards
As stated the roll is from 1939 through to 2005. In 2004/5 The Eaglehawk Sub Branch of the RSL wound down and amalgamated with the Bendigo District RSL Sub Branch Inc. The Sub branch initially from 1939 - 1943 rented a building located at 18 - 22 High St Eaglehawk. The Mathews bros then donated it to the Sub Branch in 1943 as per the plaque Cat No 8117. The Sub branch moved to a new building which was a Nissan Hut at No 2A Market Place in Eaglehawk 1957. This building was opened as per the plaque Cat No 8118. The original plaque Cat No 8117 was moved to the new building as well. The Branch remained there until they amalgamated with Bendigo. The building and land was sold in 2011.Honour Board rectangular shape, timber construction, all text in gold paint re the past Presidents, Secretaries & Treasurers from 1939 - 2005.“Eaglehawk R.S.L HONOR Roll - Past Officers”brsl, smirsl, ehrsl, honour -
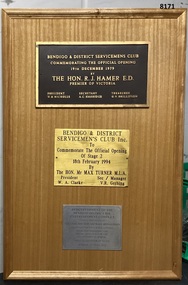 Bendigo Military Museum
Plaque - BDSC, BDRSLINC REDEVELOPEMENT, C.1979, 1994, 2014
The Bendigo & District Servicemen's Club became the Bendigo District RSL Sub Branch Inc in the year 2000 hence the difference in the name titles on the plaques. Refer Cat No 8073PLight coloured timber frame with 3 plaques different colours, shapes and sizes. 1. Top plaque re the opening of the Bendigo & District Servicemen's Club in Havilah Road Bendigo on 19.12.1979. 2. Centre plaque re stage 2 re development of the above building on 18.12.1994. 3. Bottom plaque re the re development of the Bendigo District RSL Entertainment Complex on 27.7.2014.brsl, smirsl, bdsc, bdrslinc, plaques -
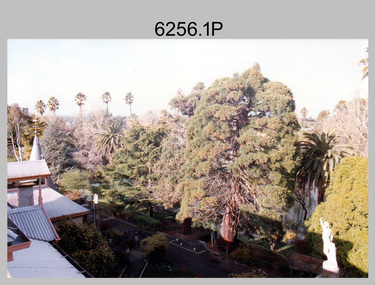 Bendigo Military Museum
Photograph - Removal of Sequoia Californian Redwood Tree - Army Survey Regiment, Fortuna, Bendigo, 1994
These nine photographs of contractors felling a sequoia Californian redwood tree was taken at the Army Survey Regiment, Fortuna, Bendigo on the 16th of September 1994. Although 23 photos were taken at the time, 14 were not scanned due to their similarity to the nine featured photos. Two sequoia Californian redwood trees were planted at the front entrance of Fortuna Villa in the early days of gold mining magnate George Lansell’s occupation in the 1870’s. They were of immense proportion and much admired during the Lansell era and RA Svy’s occupation from 1942 to 1996. In these early days of Army occupation, the trees were lopped due to concerns of their size and proximity to the Villa. The felling of the tree in 1994 was considered unsafe due to perceptions of disease. These perceptions were upsetting to staff, as some believed that although there were a few dead branches, the tree was OK. As the tree had a noticeable lean, measurements were taken indicating the tree was stable. A sequoia sapling was eventually planted as a replacement to the diseased tree. It was decided to mill and store the timber of the felled tree on-site due to its historical significance. Although future uses were not determined at the time, the timber was eventually used to construct display cabinets and souvenir pens. When Defence decided to relocate geospatial production to a new facility in Junortoun an outer suburb of Bendigo in 2008, the sequoia timber was used as a beautiful feature in the front foyer as well as several feature walls within the building, providing a historical connection Fortuna Villa.This is a set of nine photographs of contractors felling a Sequoia (Californian redwood) tree at the Army Survey Regiment, Fortuna, Bendigo on the 16th of September 1994. The colour photographs were printed on photographic paper and are part of the Army Survey Regiment’s Collection. The photographs were scanned at 300 dpi. .1) - Photo, colour, 1994, Felling of sequoia Californian redwood tree. .2) - Photo, colour, 1994, Felling of sequoia Californian redwood tree. Neil Morgan (ground maintenance) is hugging the tree. .3) - Photo, colour, 1994, Felling of sequoia Californian redwood tree. .4) to .8) - Photo, colour, 1994, Felling of sequoia Californian redwood tree. .9) - Photo, colour, 1994, background on left - WO2 Bob Garritty, foreground L to R: Geoff (ground maintenance), unidentified, Neil Morgan (ground maintenance)..1P to .9P – No personnel are identified.royal australian survey corps, rasvy, army survey regiment, army svy regt, fortuna, asr -
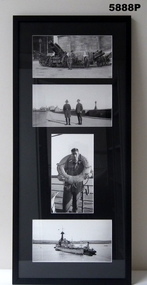 Bendigo Military Museum
Photograph - PHOTOGRAPHS, GRINTON COLLECTION, FRAMED, 2008 - 2009
Frame 9. Photo 1. Jack Grinton on leave in Paris, early 1919 with captured German guns. The place is the 'Arc de Triomphe' . Photo 2. Jack Grinton on the right. From Jack's writing the other soldier is a Private Knight. The first building in the rear is the "Don View Bar" suggesting that this is Scotland when on leave. Photo 3. Coming home, Jack on the deck of the "Karmala". They left Plymouth Harbour on 1/7/1919. Photo 4. Ships in Plymouth Harbour. Refer Cat No. 5880P for exhibition details. Refer Cat No. 1280 for Jack GRINTON Service Records.Photographs - black and white on paper. 4 photographs, top to bottom. 1. Soldier with German guns in Paris. 2. Two soldiers with buildings in the background. 3. Soldier on deck of a ship. 4. Ships in harbour. Frame - timber with black colour paint. Glass front. Mount - black colour cardboard. Backing cardboard - with handwritten notation. Backing cardboard - handwritten in blue felt tip pen "9."framed photographs, grinton collection, ww1, 38th -
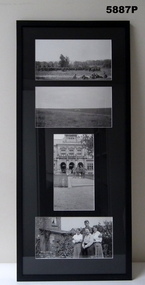 Bendigo Military Museum
Photograph - PHOTOGRAPHS, GRINTON COLLECTION, FRAMED, 2008 - 2009
Frame 8. Photo 1. Medals and Awards presentation. Believed to be at Allonville, some 4 kilometres from Amiens in May 1918. General Birdwood presented medals to the 38th Batt who were resting at Allonville for 2 weeks. Photo 2. The "Rising Sun Badge" believed to be the one on Salisbury Plain in England. Photo 3. On leave somewhere, 4 smart looking young men. Photo 4. Jack Grinton on leave in England. Within the collection there are a lot of both Jack and Bert with this family group. Refer Cat No. 5880P for Exhibition details. Refer Cat No. 1280 for Jack GRINTON Service records.Photographs - black and white on paper. 4 photographs - top to bottom. 1. Award presentation with troops. 2. "Rising Sun Badge" in a landscape scene. 3. 4 soldiers in front of a building. 4. Family group. Frame - timber with black colour paint. Glass front. Mount - black colour cardboard. Backing cardboard - handwritten notation.Backing cardboard - handwritten blue felt tip pen "8."framed photographs, grinton collection, ww1, 38th -
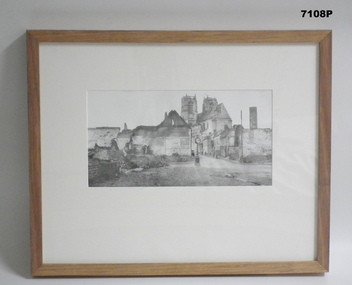 Bendigo Military Museum
Photograph - PHOTOGRAPH, FRAMED WW1, Wayne Eels, C.2008/2009
The Grinton Collection. The village of Corbie on the Somme River showing war damage, the streets have been cleared. Refer Cat No. 1280 for Jack Grintons service details. Photograph framed. Photograph - black and white photograph on paper, depicting a village scene of buildings. A number of buildings show some war damage, Frame - timber, light varnish finish, Perspex front, cardboard backing."Group 2: Burden of War", "A. Corbie",framed accessories, camera on the somme, ww1, 38th bn, grinton, villages -
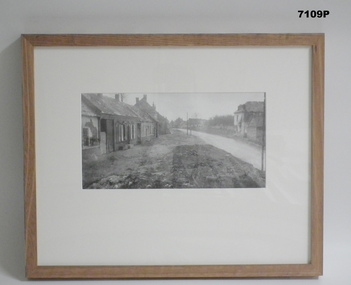 Bendigo Military Museum
Photograph - PHOTOGRAPH, FRAMED WW1, Wayne Eels, C.2008/2009
The Grinton Collection. The village of “Bray” on the Somme showing some war damage. Refer Cat no. 1280 for Jack Grintons service details Photograph framed. Photograph - black and white photograph on paper, depicting a village scene with a road and buildings. A number of buildings show war damage, Frame - timber, light varnish finish, Perspex front, cardboard backing."Group 2: Buden of War". "B. Bray".framed accessories, camera on the somme, '38th bn, grinton, villages, ww1 -
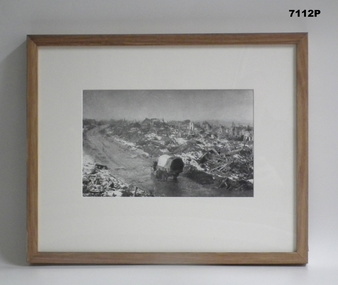 Bendigo Military Museum
Photograph - PHOTOGRAPH - FRAMED WW1, Wayne Eels, C.2008/2009
The Grinton Collection. War damaged town or city. Refer Cat No, 1280 for Jack Grintons service details.Photograph framed. Photograph - black and white photograph on paper, depicting a landscape of damaged and shattered buildings and rubble with a road and a vehicle in the foreground. Frame - timber, light varnish finish, Perspex front, cardboard backing."Group 2: Burden of War". "H. War Damage".framed accessories, camera on the somme, 38th bn, grinton, ww1, war damage -
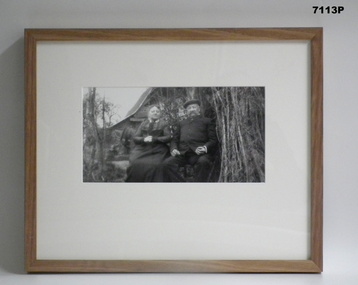 Bendigo Military Museum
Photograph - PHOTOGRAPH - FRAMED WW1, Wayne Eels, C.2008/2009
The Grinton Collection. A French Couple at Home. Refer Cat No. 1280 for Jack Grintons service details.Photograph framed. Photograph - black and white photograph on paper, depicting two civilians (French couple) sitting surrounded by vegetation. Cottage/building in the background. Frame - timber, light varnish finish, Perspex front, cardboard backing."Group 2: Burden of War". "J. French couple".framed accessories, camera on the somme, 38th bn, grinton, ww1, civilians -
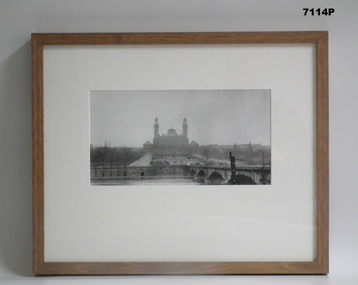 Bendigo Military Museum
Photograph - PHOTOGRAPH - FRAMED WW1, Wayne Eels, C.2008/2009
The Grinton Collection. “Palais due Trocadero"- built on the hill of Chjaillot, across the Seine from the Eiffel tower, Paris , France. Demolished in 1937. RRefer Cat No 1280 for Jack Grintons service details.Photograph framed. Photograph - black and white photograph on paper, depicting a large building (palace/exhibition space) with formal garden area, river, river wall and bridge in foreground. Frame - timber, light varnish finish, Perspex front, cardboard backing."Group 3: Trip of Lifetime". "A. Palais due Trocadero". framed accessories, camera on the somme, 38th bn, ww1, grinton, buildings -
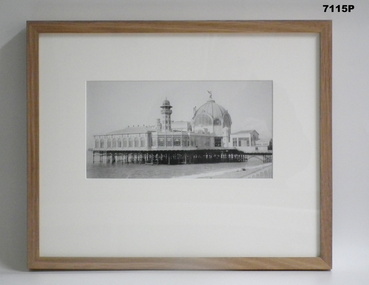 Bendigo Military Museum
Photograph - PHOTOGRAPH - FRAMED WW1, Wayne Eels, C.2008/2009
The Grinton Collection. “Palais de la Jetee"- Crystal palace in Nice, France. Refer Cat No 1280 for Jack Grintons service details.Photograph framed. Photograph - black and white photograph on paper, depicting a large ornate building (palace) on a pier structure. Foreshore in the foreground. Frame - timber, light varnish finish, Perspex front, cardboard backing."Group 3: Trip of a lifetime". "B. Palais de la Jetee"framed accessories, "camera on the somme, 38th bn, ww1, grinton, buildings -
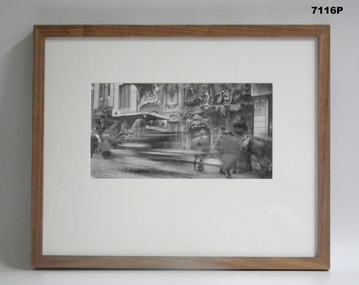 Bendigo Military Museum
Photograph - PHOTOGRAPH - FRAMED WW1, Wayne Eels, C.2008/2009
... building frontages. Frame - timber, light varnish finish, Perspex... with a number of close-up building frontages. Frame - timber, light ...The Grinton Collection. Cabaret du Ciel and Cabaret 'Enfer"- adjoining buildings in Paris, France. Refer Cat No 1280 for Jack Grintons service details.Photograph framed. Photograph - black and white photograph on paper, depicting a street scene with a number of close-up building frontages. Frame - timber, light varnish finish, Perspex front, cardboard backing."Group 3: Trip of a lifetime". "C. Cabaret due Ciel and Cabaret 'Enfer". framed accessories, camera on the somme, 38th bn, ww1, grinton -
 Bendigo Military Museum
Photograph - PHOTOGRAPH - FRAMED WW1, Wayne Eels, C.2008/2009
The Grinton Collection. 38th Bn Officers and Sergeants in Le Harve France. Identified so far. 1st of left, Sgt Fred Lehman MM, 3rd from left, Sgt Coffey. Refer Cat No. 1280 for Jack Grintons service details.Photograph framed. Photograph - black and white photograph on paper - Depicting seven soldiers in uniform standing on a foot path/terrace with balustrade in background and to left buildings and to right, water. Frame - timber, light varnish finish, Perspex front, cardboard backing."Group 3: Trip of a Lifetime" "F. 38th Battalion soldiers - Le Havre".framed accessories, camera on the somme, ww1, 38th bn, grinton, le havre