Showing 55 items matching " route 32"
-
 Melbourne Tram Museum
Ephemera - Timetable/s, Melbourne & Metropolitan Tramways Board (MMTB), "MMTB Tram Timetables", 1981
... ... Route 32...Beach - City - Feb. 1981 .5 - Route 70, 71, 76 - Wattle Park - City - April 1981 .6 - Route 72, 32, 73 - Camberwell - city - April 1981 .7 - Route 77, 78, 79 - Prahran - city, North Richmond - St Kilda Beach - April 1981 .8 - Route 82, Footscray - Highpoint West - Moonee Ponds - Bus route 223, Saturday afternoons and Sundays - Jan. 1981 9 - Route 15 & 16, 53 & 55 - St Kilda Beach - Via Swanston St or William St - Feb. 1981 10 - Routes 6, 36 and 7 - Glen Iris, July 1981...Beach - City - Feb. 1981 .5 - Route 70, 71, 76 - Wattle Park - City - April 1981 .6 - Route 72, 32, 73 - Camberwell - city - April 1981 .7 - Route 77, 78, 79 - Prahran - city, North Richmond - St Kilda Beach - April 1981 .8 - Route 82, Footscray - Highpoint West - Moonee Ponds - Bus route 223, Saturday afternoons and Sundays - Jan. 1981 9 - Route 15 & 16, 53 & 55 - St Kilda Beach - Via Swanston St or William St - Feb. 1981 10 - Routes 6, 36 and 7 - Glen Iris, July 1981 Yields information about MMTB Tram timetables 1981 Trams tramways MMTB Timetables Melbourne Fares Bus Replacement Route 1 Route 2 Route 3 Route 4 Route 5 Route 6 Route 7 Route 10 Route 12 Route 17 Route 32 Route 35 Route 36 Route 70 Route 71 Route 72 Route 73 Route 76 Route 77 Route 78 Route 79 Route 82 Route 223 route 15 route 16 route 53 route 55 Set of 10 MMTB Tram timetables, folded sheets, generally 10 sections, "MMTB Tram Timetables" Ephemera Timetable/s Melbourne & Metropolitan Tramways Board (MMTB) ...Timetables for specific routes, day of week giving information on tram times at specific time points, route map, sections and fares and organisation address - 616 Little Collins St. Melbourne. All printed on yellow paper unless noted otherwise. .1 - Route 10, 12, 17 - South Melbourne - St Kilda Beach - city - Jan. 1981 .2 - Route 5, 35 - Malvern - City .3 - Route 6, 7, 36 - Glen Iris - City - July 1981 .4 - Route 1, 2, 4 - South Melb. Beach - City - Feb. 1981 .5 - Route 70, 71, 76 - Wattle Park - City - April 1981 .6 - Route 72, 32, 73 - Camberwell - city - April 1981 .7 - Route 77, 78, 79 - Prahran - city, North Richmond - St Kilda Beach - April 1981 .8 - Route 82, Footscray - Highpoint West - Moonee Ponds - Bus route 223, Saturday afternoons and Sundays - Jan. 1981 9 - Route 15 & 16, 53 & 55 - St Kilda Beach - Via Swanston St or William St - Feb. 1981 10 - Routes 6, 36 and 7 - Glen Iris, July 1981Yields information about MMTB Tram timetables 1981Set of 10 MMTB Tram timetables, folded sheets, generally 10 sections, trams, tramways, mmtb, timetables, melbourne, fares, bus replacement, route 1, route 2, route 3, route 4, route 5, route 6, route 7, route 10, route 12, route 17, route 32, route 35, route 36, route 70, route 71, route 72, route 73, route 76, route 77, route 78, route 79, route 82, route 223, route 15, route 16, route 53, route 55 -
 Melbourne Tram Museum
Ephemera - Timetable/s, Melbourne & Metropolitan Tramways Board (MMTB), "MMTB Tram Timetables", 1974
... ... Route 32...All printed on yellow paper unless noted otherwise. .1 - Route 48, 41, 40, 29, 74, 75, 76, 28 - North Balwyn and Burwood - City - Saturdays and Sundays - Feb. 1974, printed on green paper. .2 - Route 42, 23, 44, 45 and 37, Mont Albert - City - May 1974 .3 - Route 48, 41, 40, 29, 74, 75, 76, 28 - North Balwyn and Burwood - City - Feb. 1974 .4 -Route 59, 49, 52, 51, 81 - Essendon Airport - City - Oct. 1974 .5 - Route 70, 71 and 76 - Wattle Park - City - Feb. 1974 .6 - Route 72, 32 and 73 - Camberwell - City - Feb. 1974...Melbourne Tram Museum 8 Wallen Road Hawthorn melbourne Trams tramways MMTB Timetables Melbourne Fares Route 23 Route 24 Route 28 Route 29 Route 32 Route 37 Route 40 Route 41 Route 42 Route 44 Route 45 Route 48 Route 49 Route 51 Route 52 Route 59 Route 70 Route 71 Route 72 Route 73 Route 75 Route 76 Route 81 Set of 6 MMTB Tram timetables, folded sheets, generally 10 sections, providing timetables for specific routes, day of week giving information on tram times at specific time points, route map, sections and fares and organisation address - 616 Little Collins St. ...Set of 6 MMTB Tram timetables, folded sheets, generally 10 sections, providing timetables for specific routes, day of week giving information on tram times at specific time points, route map, sections and fares and organisation address - 616 Little Collins St. Melbourne. All printed on yellow paper unless noted otherwise. .1 - Route 48, 41, 40, 29, 74, 75, 76, 28 - North Balwyn and Burwood - City - Saturdays and Sundays - Feb. 1974, printed on green paper. .2 - Route 42, 23, 44, 45 and 37, Mont Albert - City - May 1974 .3 - Route 48, 41, 40, 29, 74, 75, 76, 28 - North Balwyn and Burwood - City - Feb. 1974 .4 -Route 59, 49, 52, 51, 81 - Essendon Airport - City - Oct. 1974 .5 - Route 70, 71 and 76 - Wattle Park - City - Feb. 1974 .6 - Route 72, 32 and 73 - Camberwell - City - Feb. 1974trams, tramways, mmtb, timetables, melbourne, fares, route 23, route 24, route 28, route 29, route 32, route 37, route 40, route 41, route 42, route 44, route 45, route 48, route 49, route 51, route 52, route 59, route 70, route 71, route 72, route 73, route 75, route 76, route 81 -
 Melbourne Tram Museum
Ephemera - Timetable/s, Melbourne & Metropolitan Tramways Board (MMTB), "MMTB Tram Timetables", 1977 to 1978
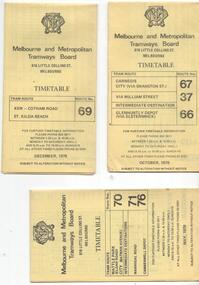
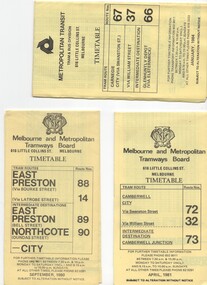
... ... Route 32.... - Route 67, 37 and 66 - Carnegie - City via Swanston St (67), via William St (37) and Glenhuntly Depot (66) - dated Oct. 1978. .2 - Route 69 - Kew Cotham Road - St Kilda Beach dated Dec. 1978 .3 - Route 70, 71 and 76 - Wattle Park - Batman Ave, Arraign Road (Route 71) and Camberwell Depot (Route 76), dated May 1978 .4 - Route 72, 32 and 73 - Camberwell City via Swanston St (72), via William St (32) and Camberwell Junction (73) dated Sept, 1978. .5 - Route 82 - Moonee Ponds - Footscray - Highpoint West - dated Sept. 1977 .6 - Route 88, 14, 89 and 90, 96, 95 and 97 - East Preston via Bourke St (88), via Latrobe St (14), East Preston Bell St (89) and Northcote Dundas St (90) to the city and East Brunswick (96), Exhibition (95) and North Fitzroy (Park St), dated May 1978. .7 - Routes 48, 24, 40, 41, 29, 74, 76. 28 - July 1978 .8 - ditto - Weekends, July 1978, printed on green paper. .9 - Bus routes 284 (East Kew - Doncaster North) and 270 (East Kew - Shoppingtown) - dated August 1978...Melbourne Tram Museum 8 Wallen Road Hawthorn melbourne Trams tramways MMTB Timetables Melbourne Fares Route 14 Route 32 Route 37 Route 66 Route 67 Route 69 Route 70 Route 71 Route 72 Route 73 Route 76 Route 82 Route 88 Route 89 Route 90 Route 95 Route 96 Route 97 Route 48 Route 24 Route 40 Route 41 Route 29 Route 74 Route 76 Route 28 Route 284 Route 270 Set of 6 MMTB Tram timetables, folded sheets, 8 sections, providing timetables for specific routes, day of week giving information on tram times at specific time points, route map, sections and fares and organisation address - 616 Little Collins St. ...Set of 6 MMTB Tram timetables, folded sheets, 8 sections, providing timetables for specific routes, day of week giving information on tram times at specific time points, route map, sections and fares and organisation address - 616 Little Collins St. Melbourne. All printed on yellow paper. 1. - Route 67, 37 and 66 - Carnegie - City via Swanston St (67), via William St (37) and Glenhuntly Depot (66) - dated Oct. 1978. .2 - Route 69 - Kew Cotham Road - St Kilda Beach dated Dec. 1978 .3 - Route 70, 71 and 76 - Wattle Park - Batman Ave, Arraign Road (Route 71) and Camberwell Depot (Route 76), dated May 1978 .4 - Route 72, 32 and 73 - Camberwell City via Swanston St (72), via William St (32) and Camberwell Junction (73) dated Sept, 1978. .5 - Route 82 - Moonee Ponds - Footscray - Highpoint West - dated Sept. 1977 .6 - Route 88, 14, 89 and 90, 96, 95 and 97 - East Preston via Bourke St (88), via Latrobe St (14), East Preston Bell St (89) and Northcote Dundas St (90) to the city and East Brunswick (96), Exhibition (95) and North Fitzroy (Park St), dated May 1978. .7 - Routes 48, 24, 40, 41, 29, 74, 76. 28 - July 1978 .8 - ditto - Weekends, July 1978, printed on green paper. .9 - Bus routes 284 (East Kew - Doncaster North) and 270 (East Kew - Shoppingtown) - dated August 1978trams, tramways, mmtb, timetables, melbourne, fares, route 14, route 32, route 37, route 66, route 67, route 69, route 70, route 71, route 72, route 73, route 76, route 82, route 88, route 89, route 90, route 95, route 96, route 97, route 48, route 24, route 40, route 41, route 29, route 74, route 76, route 28, route 284, route 270 -
 Melbourne Tram Museum
Document - Timetable/s, Melbourne & Metropolitan Tramways Board (MMTB), "MMTB Tram Timetables", 1980 - 1984
... ... Route 32...Melbourne. .1 - Route 72, 32 and 73 - Camberwell City via Swanston St (72), via William St (32) and Camberwell Junction (73) printed on yellow paper, dated April 1981 .2 - Route 88, 14, 89 and 90 - East Preston via Bourke St (88), via Latrobe St (14), East Preston Bell St (89) and Northcote Dundas St (90) to the city, printed on yellow paper, dated September 1980. .3 - Route 67, 37 and 66 - Carnegie - City via Swanston St (67), via William St (37) and Glenhuntly Depot (66) - printed on yellow paper, dated Jan. 1984 -has the Metropolitan Transit Logo. .4 - Route 70, 71 and 76 - Wattle Park - Nov 1979 .5 - Route 77, 78 and 79 - Prahran - City, Prahran - North Richmond - Nov 1979 .6 - Route 82 and 223 - Footscray - Moonee Ponds - tram and bus - Jan 1981 .7 - Route 1, 2, 4 - South Melbourne Beach - Feb 1981 .8 - Route 5 and 35 - Malvern - April 1981 .9 - route 70, 71, 76 - Wattle Park - April 1981 .10 - Route 15, 16, 53 and 55 - St Kilda Beach - Feb 1981 .11 - Route 6, 36. 7 - Glen Iris - July 1981 .12 - Route 59, 49, 51, 52, 82 - Essendon Airport March 1982 .13 - Route 48, 24, 40, 41, 29 North Balwyn - March 1982...Melbourne Tram Museum 8 Wallen Road Hawthorn melbourne Trams tramways MMTB Timetables Melbourne Fares Route 1 Route 2 Route 4 Route 5 Route 6 Route 7 Route 14 Route 15 Route 16 Route 24 Route 29 Route 32 Route 35 Route 36 Route 37 Route 40 Route 41 Route 48 Route 49 Route 51 Route 52 Route 53 Route 55 Route 59 Route 66 Route 67 Route 70 Route 71 Route 72 Route 73 Route 76 Route 77 Route 78 Route 79 Route 81 Route 82 Route 88 Route 89 Route 90 Route 223 Set of 13 MMTB Tram timetables, folded sheets, 10 sections, providing timetables for specific routes, day of week giving information on tram times at specific time points, route map, sections and fares and organisation address - 616 Little Collins St. ...Set of 13 MMTB Tram timetables, folded sheets, 10 sections, providing timetables for specific routes, day of week giving information on tram times at specific time points, route map, sections and fares and organisation address - 616 Little Collins St. Melbourne. .1 - Route 72, 32 and 73 - Camberwell City via Swanston St (72), via William St (32) and Camberwell Junction (73) printed on yellow paper, dated April 1981 .2 - Route 88, 14, 89 and 90 - East Preston via Bourke St (88), via Latrobe St (14), East Preston Bell St (89) and Northcote Dundas St (90) to the city, printed on yellow paper, dated September 1980. .3 - Route 67, 37 and 66 - Carnegie - City via Swanston St (67), via William St (37) and Glenhuntly Depot (66) - printed on yellow paper, dated Jan. 1984 -has the Metropolitan Transit Logo. .4 - Route 70, 71 and 76 - Wattle Park - Nov 1979 .5 - Route 77, 78 and 79 - Prahran - City, Prahran - North Richmond - Nov 1979 .6 - Route 82 and 223 - Footscray - Moonee Ponds - tram and bus - Jan 1981 .7 - Route 1, 2, 4 - South Melbourne Beach - Feb 1981 .8 - Route 5 and 35 - Malvern - April 1981 .9 - route 70, 71, 76 - Wattle Park - April 1981 .10 - Route 15, 16, 53 and 55 - St Kilda Beach - Feb 1981 .11 - Route 6, 36. 7 - Glen Iris - July 1981 .12 - Route 59, 49, 51, 52, 82 - Essendon Airport March 1982 .13 - Route 48, 24, 40, 41, 29 North Balwyn - March 1982trams, tramways, mmtb, timetables, melbourne, fares, route 1, route 2, route 4, route 5, route 6, route 7, route 14, route 15, route 16, route 24, route 29, route 32, route 35, route 36, route 37, route 40, route 41, route 48, route 49, route 51, route 52, route 53, route 55, route 59, route 66, route 67, route 70, route 71, route 72, route 73, route 76, route 77, route 78, route 79, route 81, route 82, route 88, route 89, route 90, route 223 -
 Melbourne Tram Museum
Ephemera - Timetable, Metropolitan Transit Authority (MTA), "Metropolitan Transit Timetables", Jan. 1984
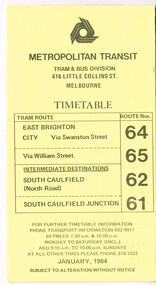
... ... Route 32...Cover was printed showing route 53 via William St, but has been crossed out in pencil. .10 - Route 19 (Coburg), 18 (Brunswick) and 20 (Bell St) - City - August 1984 .11 - Routes 59 (Airport West), 49 (Niddrie), 52 (Bulla Road), 51 (Essendon Station) and 81 (Essendon Depot) - April 1985. .12 - Route 69 - Kew Cotham Road to St Kilda Beach - Sept. 1984 .13 - Route 72 (Camberwell - City), 32 via William St and route 73 (Camberwell Junction) - August 1984. .14 - Route 1 and 21 - East Coburg - City - August 1983. ...Melbourne Tram Museum 8 Wallen Road Hawthorn melbourne Trams tramways The Met Timetables Melbourne Latrobe St La Trobe St MTA Buses Route 64 Route 65 Route 3 Route 5 Route 6 Route 8 Route 10 Route 11 Route 12 Route 13 Route 17 Route 15 Route 22 Route 16 Route 55 Route 19 Route 18 Route 20 Route 59 Route 49 Route 52 Route 51 Route 81 Route 69 Route 72 Route 32 Route 73 Route 1 Route 21 Set of 13 Metropolitan Transit Tram timetables, folded sheets, 8 to 10 sections, providing timetables for specific routes, day of week giving information on tram times at specific time points, route map, sections and fares and Transport Information Centre telephone number. ...Set of 13 Metropolitan Transit Tram timetables, folded sheets, 8 to 10 sections, providing timetables for specific routes, day of week giving information on tram times at specific time points, route map, sections and fares and Transport Information Centre telephone number. All printed on yellow paper. .1 - Route 64 (65 via William St), 62 and 61 - dated January 1984. .2 - Route 3 (Darling Road via Swanston St) with route 377 bus on Sundays via Batman Ave. - July 1984 .3 - Route 5 - Malvern Burke Road - City - July 1984. Cover was printed showing route 35 via William St, but has been crossed out in pencil. .4 - Route 6 (Glen Iris - City) and Route 7 (Malvern Town Hall) - July 1984. Cover was printed showing route 36 via William St, but has been crossed out in pencil. .5 - Route 8 - Toorak - City - June 1984. Cover was printed showing route 38 via William St, but has been crossed out in pencil. .6 - Route 10 and 11 West Preston via Collins St and Route 13 via Latrobe St - March 1985. .7 - Route 10 and 12 - South Melbourne and St Kilda Beach - City (Brunswick St) via Collins St and route 17 - Park and Clarendon Sts. - Sept 1984 .8 - Route 15 and 22 - Moreland to City, July 1983 .9 - Route 15, 16 and 55 - St Kilda Beach to City via Swanston St - July 1983. Cover was printed showing route 53 via William St, but has been crossed out in pencil. .10 - Route 19 (Coburg), 18 (Brunswick) and 20 (Bell St) - City - August 1984 .11 - Routes 59 (Airport West), 49 (Niddrie), 52 (Bulla Road), 51 (Essendon Station) and 81 (Essendon Depot) - April 1985. .12 - Route 69 - Kew Cotham Road to St Kilda Beach - Sept. 1984 .13 - Route 72 (Camberwell - City), 32 via William St and route 73 (Camberwell Junction) - August 1984. .14 - Route 1 and 21 - East Coburg - City - August 1983. Full Image of .10 added 9/4/17 following a query about route 19 timetables - see image i6trams, tramways, the met, timetables, melbourne, latrobe st, la trobe st, mta, buses, route 64, route 65, route 3, route 5, route 6, route 8, route 10, route 11, route 12, route 13, route 17, route 15, route 22, route 16, route 55, route 19, route 18, route 20, route 59, route 49, route 52, route 51, route 81, route 69, route 72, route 32, route 73, route 1, route 21 -
 Melbourne Tram Museum
Pamphlet, Public Transport Victoria (PTV), "Route 70 service changes - Swan Street tramway works", "Macarthur St tram stop 10", "Tram route 86 Improvements - using trams stops 31 and 32", "Tram route 86 Improvements - High Street Westgarth", c2012 to 2013
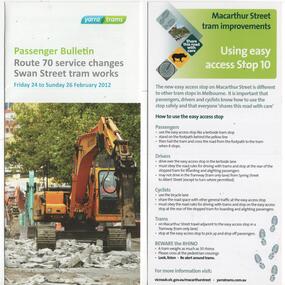
... "Route 70 service changes - Swan Street tramway works", "Macarthur St tram stop 10", "Tram route 86 Improvements - using trams stops 31 and 32", "Tram route 86 Improvements - High Street Westgarth"...Single DL sheet on light card. .3 - "Tram route 86 Improvements - using tram stops 31 and 32" - gives a map of the stop and how it may be used. ..."Route 70 service changes - Swan Street tramway works", "Macarthur St tram stop 10", "Tram route 86 Improvements - using trams stops 31 and 32", "Tram route 86 Improvements - High Street Westgarth" Pamphlet Public Transport Victoria (PTV) ...Set of four pamphlets advising of changes to tram services for the installation of various trams stops or track works. .1 - "Route 70 service changes - Swan Street tramway works" - Hoddle St intersection - 3 fold DL - Feb. 2012. .2 - "Macarthur St tram stop 10" - super stop, known as an "Easy Stop" - gives a map of the stop and how it may be used. Single DL sheet on light card. .3 - "Tram route 86 Improvements - using tram stops 31 and 32" - gives a map of the stop and how it may be used. Single DL sheet on light card. \.4 - "Tram route 86 Improvements - High Street Westgarth" - explains the use of the Central Island Platform stops - stops 27 and 30, including a diagram, printed on 3 fold DL paper. Produced by Public Transport Victoria and Yarra Trams with VicRoads.trams, tramways, public transport, tram stops, high st, northcote, route 70, route 86, macarthur st, swan st -
 Bendigo Military Museum
Photograph - Army Survey Regiment Freedom of Entry Parade Rehearsal, Fortuna. Bendigo, 1980
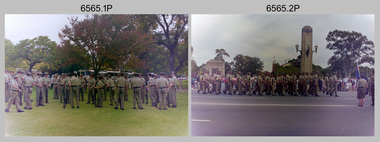
... Cartographic Squadron marches in column of route. .32) - Photo, black & white, 1980. Cartographic Squadron marches in column of route. ...Cartographic Squadron marches in column of route. .32) - Photo, black & white, 1980. Cartographic Squadron marches in column of route. ...This set of 38 black and white photographs were taken at the Army Survey Regiment’s parade rehearsal held at Fortuna, Bendigo in 1980. The rehearsal was for the Freedom of Entry parade held 1-2 weeks later in 1980. The exact date for the Freedom of Entry parade is not known. The Freedom of Entry to the City of Bendigo was an honour first conferred by the Bendigo City Council to the Army Survey Regiment in 1970. The Freedom of Entry parade in 1980 was the third time the unit exercised its right of freedom of entry. The Regiment also exercised its Freedom of Entry with anniversary parades in 1977, 1985, 1990, 1992 and 1996. Refer to items 6020.8P, 6021.25P, 6248P, 6266, 6409.2, 6430.39P, 6490.53P and 6491.21P for more Army Survey Regiment Freedom of Entry photographs, documents and certificates. See item 6471.2P for photos of Lithographic Squadron taken on the same day of this parade rehearsal. This set of 38 black and white photographs of the Army Survey Regiment (Army Svy Regt) were taken in a rehearsal for the Freedom of Entry parade to the City of Bendigo, held 1-2 weeks later in 1980. The photographs are on 35mm negative film and were scanned at 96 dpi. They are part of the Army Survey Regiment’s Collection. .1) - Photo, black & white, 1980. WO1 John McCulloch observes the rehearsal. .2) - Photo, black & white, 1980. RSM WO1 Aub Harvey, WO1 Dave Thomson and WO1 Roger Rix observe the rehearsal. .3) - Photo, black & white, 1980. Under command of SSM WO1 Bob Mason, Air Survey Squadron marches onto the parade ground - Front rank L to R: SPR Peter Jones, SPR Barry Miller, CPL Alan Hawkins. .4) - Photo, black & white, 1980. Air Survey Squadron marches on the parade ground - L to R: SPR Peter Jones, CPL Lyall Camp, SPR Barry Miller, SPR Geoff Havelberg, unidentified, CPL Alan Hawkins, CPL Peter Treble, unidentified (x2), SGT Mick Hogan, SGT Bruce Hammond, unidentified, SPR Steve Linane, SPR Jamie McRae, unidentified (x2). .5) - Photo, black & white, 1980. Air Survey Squadron formed up – CAPT Peter Ralston on far left. .6) - Photo, black & white, 1980. Air Survey Squadron inspection – L to R: CAPT Peter Ralston, CPL Alan Hawkins, CO LTCOL Bob Skitch, SGT Mick Hogan, SGT Bruce Hammond, SPR Jamie McRae. .7) - Photo, black & white, 1980. Air Survey Squadron inspection – L to R: SPR Peter Jones, unidentified, CPL Paul Hopes, unidentified, SGT Rick van der Bom, LTCOL Bob Skitch, SPR Steve Linane, CPL Mick Minchin, unidentified, SPR Gae (Robinson) Amato, unidentified, SPR Chris ‘CPL Peter Treble, Charlie’ Brown, SPR Ginny (Turner) Rowe. .8) - Photo, black & white, 1980. Lithographic Squadron marches onto the parade ground - Front rank L to R: SPR Brian Fauth, SPR Roy Hicks, SPR Per Andersen, commanded by LT Steve Cooper. .9) - Photo, black & white, 1980. Lithographic Squadron marches onto the parade ground - L to R: SSM WO1 Ken Slater, Front rank SPR Brian Fauth, SPR Roy Hicks, SPR Per Andersen, LT Steve Cooper. .10) - Photo, black & white, 1980. Lithographic Squadron inspection - L to R: CAPT Stan Vote, LT Steve Cooper, CO LTCOL Bob Skitch, SPR Neville Carr, SPR Laurie Justin, SPR Keith Quinton. .11) - Photo, black & white, 1980. Lithographic Squadron inspection - L to R: unidentified, LT Steve Cooper, CPL Frank Lenane, CPL Mick ‘Buddha’ Ellis, SPR Martin van de Maele, CO LTCOL Bob Skitch, unidentified (x2), SPR Garry Hudson, remainder unidentified. .12) - Photo, black & white, 1980. Lithographic Squadron inspection - L to R: LT Steve Cooper, CPL Rob Bogumil, unidentified, CO LTCOL Bob Skitch, CPL Bill Jones, CPL John ‘Flash’ Anderson, CPL Warren ‘Waldo’ Shirley, unidentified. .13) - Photo, black & white, 1980. Lithographic Squadron inspection - L to R: unidentified (x4), CO LTCOL Bob Skitch, unidentified, CPL Bill Jones, LT Steve Cooper, CPL Warren ‘Waldo’ Shirley. .14) - Photo, black & white, 1980. Lithographic Squadron performs form - right file L to R: SPR Brian Fauth, SPR Roy Hicks, SPR Per Andersen. .15) - Photo, black & white, 1980. Lithographic Squadron completes form at the halt. .16) - Photo, black & white, 1980. Lithographic Squadron marches in column of route – right file L to R: SPR Keith Quinton, SPR John Whaling, SPR Martin van de Maele, SPR John Whaling, SPR Garry Hudson, unidentified. Centre marker: CPL Warren ‘Waldo’ Shirley, remainder unidentified. .17) - Photo, black & white, 1980. Lithographic Squadron marches in column of route – right file L to R: SPR John Whaling, SPR Martin van de Maele, SPR John Whaling, SPR Garry Hudson, unidentified. Centre marker CPL Warren ‘Waldo’ Shirley, remainder unidentified. .18) - Photo, black & white, 1980. Lithographic Squadron marches in column of route – L to R: SPR Per Andersen, CPL Josh Degroot, SPR Neville Carr, SPR Laurie Justin, SPR Keith Quinton, SPR John Whaling, SPR Martin van de Maele, SPR John Whaling, SPR Garry Hudson, unidentified. .19) - Photo, black & white, 1980. Lithographic Squadron marches in column of route – L to R: SPR Per Andersen, CPL Josh Degroot, SPR Neville Carr, SPR Laurie Justin, SPR Keith Quinton, SPR Martin van de Maele, SPR John Whaling, SPR Garry Hudson, unidentified (x2), CPL Warren ‘Waldo’ Shirley, unidentified. .20) - Photo, black & white, 1980. Lithographic Squadron rehearses ‘rest on arms reverse.’ .21) - Photo, black & white, 1980. Cartographic Squadron marches onto the parade ground in column of route - L to R: SPR Cheryl Lofthouse, unidentified, SSM WO1 Gordon Lowery, unidentified, SPR Megan (McBurney) Reynolds, unidentified (x6), SPR Peter Main, CPL Stu Symonds, SPR Greg Else, SPR Rod Skidmore. .22) - Photo, black & white, 1980. Cartographic Squadron marches onto the parade ground in column of route - L to R: SPR Rod Skidmore, SPR Greg Else, CPL Phil McGuire, CPL Dennis Learmonth, CPL Brad Peppler, CPL Trevor Bottomley, SPR Gina (Coore) Neilson, SPR Carla Dell, CPL Lynn Johnson, commanded by CAPT Bob Williams. .23) - Photo, black & white, 1980. Cartographic Squadron inspection - L to R: unidentified officer, CAPT Bob Williams, SPR Greg Else, CO LTCOL Bob Skitch, CPL Phil McGuire, CPL Dennis Learmonth, CPL Brad Peppler, CPL Trevor Bottomley. .24) - Photo, black & white, 1980. Cartographic Squadron inspection - L to R: RSM WO1 Aub Harvey, unidentified officer, CAPT Bob Williams, CO LTCOL Bob Skitch. Front rank L to R: SPR Rod Skidmore, CPL Phil McGuire, CPL Dennis Learmonth, CPL Brad Peppler, CPL Trevor Bottomley, SPR Gina (Coore) Neilson, SPR Carla Dell, CPL Lynn Johnson. Centre rank L to R: CPL Terry Danger, SPR John Martin, SPR Bob Sheppard. SPR Megan (McBurney) Reynolds. .25) - Photo, black & white, 1980. Cartographic Squadron inspection - Front rank L to R: CPL Phil McGuire, CAPT Bob Williams, CPL Brad Peppler, CO LTCOL Bob Skitch, CPL Trevor Bottomley, SPR Gina (Coore) Neilson, SPR Carla Dell, CPL Lynn Johnson. .26) - Photo, black & white, 1980. Cartographic Squadron inspection - L to R: WO1 Roger Rix, RSM WO1 Aub Harvey, unidentified officer. Front rank L to R: SPR Rod Skidmore, SPR Greg Else, CPL Phil McGuire, CPL Brad Peppler, CPL Trevor Bottomley, SPR Gina (Coore) Neilson, SPR Carla Dell, CPL Lynn Johnson. Centre rank L to R: CPL Terry Danger, SPR John Martin, SPR Bob Sheppard. SPR Megan (McBurney) Reynolds. .27) - Photo, black & white, 1980. Cartographic Squadron inspection - L to R: CPL Dennis Learmonth, CPL Brad Peppler, CO LTCOL Bob Skitch, CPL Trevor Bottomley, SPR Gina (Coore) Neilson, SPR Carla Dell, CPL Lynn Johnson. .28) - Photo, black & white, 1980. Cartographic Squadron inspection - L to R: CAPT Bob Williams, unidentified, CO LTCOL Bob Skitch, SPR John Martin, SPR Bob Sheppard, SPR Megan (McBurney) Reynolds, rear rank L to R: SPR Peter Main, unidentified (x3). .29) - Photo, black & white, 1980. Cartographic Squadron rehearses ‘reverse arms’ - L to R: SPR Peter Main, CPL Stu Symonds, SPR Rod Skidmore, SPR Greg Else, remainder unidentified. .30) - Photo, black & white, 1980. Cartographic Squadron rehearses ‘rest on arms reverse.’ - Front rank L to R: SPR Rod Skidmore, SPR Greg Else, CPL Phil McGuire, CPL Dennis Learmonth, CPL Brad Peppler, CPL Trevor Bottomley. remainder unidentified. Centre rank L to R: unidentified (x2), SPR John Martin, SPR Bob Sheppard, SPR Megan (McBurney) Reynolds. Rear rank L to R: unidentified (x3), SPR Carla Dell on far right. .31) - Photo, black & white, 1980. Cartographic Squadron marches in column of route. .32) - Photo, black & white, 1980. Cartographic Squadron marches in column of route. Left file L to R: SPR Rod Skidmore, SPR Greg Else, CPL Phil McGuire, CPL Dennis Learmonth, CPL Brad Peppler, CPL Trevor Bottomley, SPR Gina (Coore) Neilson, SPR Carla Dell, CPL Lynn Johnson. Centre file L to R: unidentified (x2), SPR Dan Cirsky, SPR Bob Sheppard. Commanded by CAPT Bob Williams (foreground). .33) - Photo, black & white, 1980. Cartographic Squadron rehearses ‘order arms.’ Front rank L to R: SPR Rod Skidmore, SPR Greg Else, CPL Phil McGuire, CPL Dennis Learmonth, CPL Brad Peppler, CPL Trevor Bottomley, SPR Gina (Coore) Neilson, SPR Carla Dell, CPL Lynn Johnson. Centre rank L to R: unidentified (x2), SPR Dan Cirsky, SPR Megan (McBurney) Reynolds, SPR Ilen Isaac. Rear rank L to R: SPR Cathy Regan, unidentified, SPR Cheryl Lofthouse. .34) - Photo, black & white, 1980. Cartographic Squadron rehearses ‘right dress.’ Front rank L to R: SPR Rod Skidmore, SPR Greg Else, CPL Phil McGuire, CPL Dennis Learmonth, CPL Brad Peppler, CPL Trevor Bottomley, SPR Gina (Coore) Neilson, SPR Carla Dell, CPL Lynn Johnson. Centre rank L to R: SPR John Martin, SPR Bob Sheppard. SPR Megan (McBurney) Reynolds, SPR Ilen Isaac. Rear rank L to R: unidentified (x2), SPR Cathy Regan, unidentified, SPR Cheryl Lofthouse. Commanded by CAPT Bob Williams (far left). 35) - Photo, black & white, 1980. Air Survey Squadron section rehearses marching with reverse arms. L to R: SPR Bob Hopper, CPL Rick Downie, CPL Paul Hopes, unidentified (x2, SGT Rick van der Bom, SPR Steve Hilton, CPL Peter Treble, unidentified, SPR John Lane, remainder unidentified. .36) - Photo, black & white, 1980. Air Survey Squadron section rehearses marching with reverse arms. L to R: CPL Alan Hawkins, CPL John Smith, SPR Dave Jobe, unidentified (x2), SGT Mick Hogan, SPR Barry Miller, WO1 Dave Thomson. .37) - Photo, black & white, 1980. Cartographic Squadron sections practice drill. .38) - Photo, black & white, 1980. Air Survey Squadron rest break from drill practice. L to R: unidentified (x2), CPL Noel McNamara, SSGT Peter Warwick, SSGT Greg Buckingham (facing away), SGT Jim Beard, unidentified, SPR Sharon (Jones) Treble (foreground), unidentified, SGT Bruce Gordon, SPR Kristin (Isaac) Skidmore.There are no personnel identified. royal australian survey corps, rasvy, army survey regiment, army svy regt, fortuna, asr -
 Bendigo Military Museum
Photograph - 4th Field Survey Squadron ANZAC Day Parade. Adelaide, SA, 1994
... route. L to R: Officers - OC MAJ Peter Demaine, unidentified (x2), CAPT Rob Gray, CAPT Tony Stephens. L to R: CPL Brett Parkin, SGT H. Evertz, SPR Mark Linwood, SSGT Pat ‘Fuji’ Drover, SPR Mark Sinderberry, unidentified. .29) - Photo, colour, 1994. Unit preparing to halt. .30) to .32...route. L to R: Officers - OC MAJ Peter Demaine, unidentified (x2), CAPT Rob Gray, CAPT Tony Stephens. L to R: CPL Brett Parkin, SGT H. Evertz, SPR Mark Linwood, SSGT Pat ‘Fuji’ Drover, SPR Mark Sinderberry, unidentified. .29) - Photo, colour, 1994. Unit preparing to halt. .30) to .32 ...This is a set of 32 photographs of 4th Field Survey Squadron personnel parading through the streets of the Adelaide CBD on ANZAC Day, on the 25th of April 1994. The march concluded at the Cross of Sacrifice in Pennington Gardens East followed by the ANZAC Day Service of Remembrance. See items 6566.14P and 6567.11P for more photos taken during ANZAC Day, 1994.This is a set of 32 photographs of 4th Field Survey Squadron personnel parading through the streets of the Adelaide CBD on ANZAC Day, on the 25th of April 1994. The colour photographs are on 35mm negative film and are part of the Army Survey Regiment’s Collection. The photographs were scanned at 96 dpi. .1) - Photo, colour, 1994. Preparation. Bayonets fixed on SLR rifles. .2) - Photo, colour, 1994. Eyes right as unit passes dignitaries on the dais. .3) - Photo, colour, 1994. Eyes right as unit passes dignitaries on the dais. CAPT Rob Gray, centre of photo, OC MAJ Peter Demaine on right. .4) to .7) - Photo, colour, 1994. Eyes right as unit passes dignitaries on the dais. .8) - Photo, colour, 1994. Unit marches along the parade route. .9) to .13) - Photo, colour, 1994. Eyes right as unit passes dignitaries. .14) - Photo, colour, 1994. Unit marches along the parade route. Right file L to R: WO2 Peter Hammer, unidentified, SGT Dave Longbottom, SGT Paul Baker, unidentified. .15) - Photo, colour, 1994. Unit marches along the parade route. Right file L to R: SGT Paul Baker, unidentified (x2), SPR Fran Calvert, SPR Greg Richards, SGT H. Evertz. Centre file: SGT Mark Donnelly, SPR Mark McInerney, unidentified (x2), SPR Matt Arnold. .16) - Photo, colour, 1994. Unit marking time. Right file L to R: SGT Paul Baker, unidentified (x2), SPR Fran Calvert, SPR Greg Richards, SGT H. Evertz, CPL Brett Parkin. Centre file L to R: SPR Matt Arnold, SPR Mark Linwood. Right file L to R: unidentified, SPR Mark Sinderberry. Officers L to R: unidentified (x2), CAPT Rob Gray, CAPT Tony Stephens. .17) - Photo, colour, 1994. Unit marking time. L to R: SGT Paul Baker, unidentified, SSGT John ‘Shep’ Shephard, SGT Dave Longbottom, SPR Daryl Miller, CPL Steve Wegener, unidentified (x2), CPL Jeremy Archer, WO2 Peter Hammer, unidentified Warrant Officers (x2). .18) - Photo, colour, 1994. Unit marking time. L to R: SPR Mark Linwood, SPR Greg Richards, SPR Matt Arnold, SPR Mark Sinderberry, unidentified (x5), SPR Chris Pearse, unidentified, CPL Dick Crawford, unidentified, SSGT John ‘Shep’ Shephard, CPL Steve Wegener, unidentified, CPL Jeremy Archer, unidentified Warrant Officer. .19) - Photo, colour, 1994. Unit marking time. Officers L to R: unidentified (x2), CAPT Tony Stephens. L to R: SPR Mark Linwood, SPR Greg Richards, SPR Matt Arnold, SPR Mark Sinderberry, remainder unidentified. .20) - Photo, colour, 1994. Unit marched along the parade route. L to R: CAPT Rob Gray, unidentified officer. .21) - Photo, colour, 1994. Unit marches along the parade route. OC MAJ Peter Demaine. .22) - Photo, colour, 1994. Unit marches along the parade route. L to R: CAPT Tony Stephens, SPR Mark Linwood, SPR Matt Arnold, SPR Mark Sinderberry, unidentified (x3), SPR Chris Pearse, unidentified, CPL Dick Crawford, unidentified, SGT Dave Longbottom, SSGT John ‘Shep’ Shephard, CPL Steve Wegener, CPL Jeremy Archer, unidentified Warrant Officers (x2). .23) - Photo, colour, 1994. Unit marches along the parade route. L to R: SSGT John ‘Shep’ Shephard, SPR Daryl Miller, CPL Steve Wegener, unidentified, CPL Jeremy Archer, unidentified Warrant Officers (x2). .24) - Photo, colour, 1994. Unit marches along the parade route. L to R: unidentified, CPL Dick Crawford, SGT Dave Longbottom, SSGT John ‘Shep’ Shephard, unidentified, CPL Steve Wegener, WO2 Peter Hammer, CPL Jeremy Archer, unidentified Warrant Officers (x2). .25) - Photo, colour, 1994. Unit marches along the parade route. L to R: unidentified (x3), SPR Fran Calvert, unidentified (x2), SPR Chris Pearse, unidentified, CPL Dick Crawford, SPR Daryl Miller, SSGT John ‘Shep’ Shephard. .26) - Photo, colour, 1994. Unit marches along the parade route. L to R: CAPT Tony Stephens, CPL Brett Parkin, SPR Mark Linwood, SGT H. Evertz, SPR Mark Sinderberry, unidentified (x2). .27) - Photo, colour, 1994. Unit marches along the parade route. L to R: CPL Brett Parkin, CAPT Tony Stephens, SPR Mark Linwood, SPR Greg Richards, SPR Matt Arnold, unidentified, SPR Mark Sinderberry, unidentified (x3), SPR Chris Pearse, unidentified, CPL Dick Crawford, unidentified, SGT SSGT John ‘Shep’ Shephard, CPL Steve Wegener, CPL Jeremy Archer, unidentified Warrant Officer. .28) - Photo, colour, 1994. Unit marches along the parade route. L to R: Officers - OC MAJ Peter Demaine, unidentified (x2), CAPT Rob Gray, CAPT Tony Stephens. L to R: CPL Brett Parkin, SGT H. Evertz, SPR Mark Linwood, SSGT Pat ‘Fuji’ Drover, SPR Mark Sinderberry, unidentified. .29) - Photo, colour, 1994. Unit preparing to halt. .30) to .32) - Photo, colour, 1994. Unit ‘stand easy’..1P to .32P – There are no personnel identified. ‘1994 ANZAC DAY’ annotated on negatives sleeve.royal australian survey corps, rasvy, 4 fd svy sqn -
 Bendigo Historical Society Inc.
Book - 7 ROUTES SIGHTSEEING IN AND AROUND BENDIGO
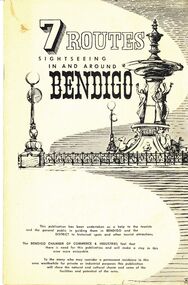
... 7 Routes Sightseeing In and Around Bendigo, 32 pages with black and white maps and photographs. ...History House 11 Mackenzie Street Bendigo goldfields BENDIGO Tourism guide Bendigo Chamber of Commerce & Industries 7 Routes Sightseeing In and Around Bendigo, 32 pages with black and white maps and photographs. ...7 Routes Sightseeing In and Around Bendigo, 32 pages with black and white maps and photographs. With IndexBendigo Chamber of Commerce & Industriesbendigo, tourism, guide -
 Bendigo Historical Society Inc.
Book - ALEC H CHISHOLM COLLECTION: BOOK ''EXPRESS TO HINDUSTAN'' BY M.H.ELLIS
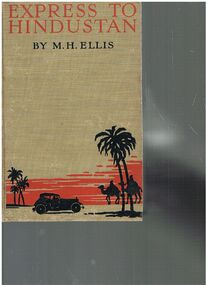
... Illustrated with 32 B&W photographs and a sketch map of the route. Published in 1929 by the Bodley Head Ltd and printed by Butler and Tanner, London. ...Illustrated with 32 B&W photographs and a sketch map of the route. Published in 1929 by the Bodley Head Ltd and printed by Butler and Tanner, London. ...Book. ALEC H CHISHOLM COLLECTION. 308 page hardcover book giving an account of a motor-car journey from London to Delhi by H. M. Ellis in 1926. Illustrated with 32 B&W photographs and a sketch map of the route. Published in 1929 by the Bodley Head Ltd and printed by Butler and Tanner, London. Catalogue sticker ''2177 ELL'' on spine. Handwritten in ink inside front cover ''To A. H. Chisholm from the Perpetrator. M. H. Ellis 25/7/29''M. H. Ellisbooks, collections, travel, alec h chisholm collection, m.h.ellis, travel, motoring -
 Seaworks Maritime Museum
Model ship, SS Iberia, 1873
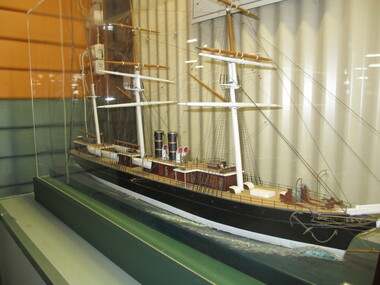
... - 1893 Passengers: 140 first, 50 second, 800 third Some significant dates in her history include: - 1881: Replaced "Aconcagua" as standby vessel on the London - Suez- Melbourne - Sydney route - 1882: Government transport during the Egyptian Arabi Pasha Campaigns - 1883 Jan 25: Placed on regular service to Australia - 1890 Jun 11: Reverted to the Liverpool - Valparaiso route - 1893: Iberia sailed to Australia to replace a disabled ship. The journey via the Cape was non-stop at 14 knots in 32 days - 1893- Fitted with triple expansion engine; 3 cylinders, 600 NHP; 4 cylindrical boilers; 13 knots; fitted by J.Rollo & Sons, Liverpool - 1903: Broken up at Genoa. 1873 single screw, compound inverted, 2 cylinder; 750 NHP, 4000 IHP, Steam pressure 70 lbs, 4 cylindrical boilers, 2 to each funnel, 14 knots. ... - 1893 Passengers: 140 first, 50 second, 800 third Some significant dates in her history include: - 1881: Replaced "Aconcagua" as standby vessel on the London - Suez- Melbourne - Sydney route - 1882: Government transport during the Egyptian Arabi Pasha Campaigns - 1883 Jan 25: Placed on regular service to Australia - 1890 Jun 11: Reverted to the Liverpool - Valparaiso route - 1893: Iberia sailed to Australia to replace a disabled ship. The journey via the Cape was non-stop at 14 knots in 32 days - 1893- Fitted with triple expansion engine; 3 cylinders, 600 NHP; 4 cylindrical boilers; 13 knots; fitted by J.Rollo & Sons, Liverpool - 1903: Broken up at Genoa. 1873 single screw, compound inverted, 2 cylinder; 750 NHP, 4000 IHP, Steam pressure 70 lbs, 4 cylindrical boilers, 2 to each funnel, 14 knots. ...SS Iberia (1873-1903) was built by John Elder & Co. (Govan yard no.162 Glasgow) and launched 6 December 1873 at a cost £151,600. However, due to strike delays, her maiden voyage was not until 21 October 1874. The Iberia was one of the last of the barque-rigged, clipper-bow type of steamer built for the Pacific Steam Navigation Company. At the time, she was also the second largest ship in world, after the Great Eastern. In 1877, a joint Orient Line and Pacific Steam Navigation Co. venture began a fortnightly mail service, first sailing between England and Australia on 12 May 1880, via Gibraltar, Naples, Port Said, Ismalia, Suez, Colombo, Albany, Adelaide, Melbourne, Sydney. Details: - Tonnage: 4,671 g, 2,982 n. - Dimensions: 433ft 6in (132.13m) x 45ft (13.72m) x 35ft 1in (10.69m). - Powered by a single screw, compound inverted 2 cylinder; 750 NHP; 4,000 IHP engine with steam pressure of 70 lbs, 4 cylindrical boilers, 2 to each funnel. - Speed 14 knots - 1873 Passengers: 100 1st, 150 2nd, 340 3rd Class. - 1893 Passengers: 140 first, 50 second, 800 third Some significant dates in her history include: - 1881: Replaced "Aconcagua" as standby vessel on the London - Suez- Melbourne - Sydney route - 1882: Government transport during the Egyptian Arabi Pasha Campaigns - 1883 Jan 25: Placed on regular service to Australia - 1890 Jun 11: Reverted to the Liverpool - Valparaiso route - 1893: Iberia sailed to Australia to replace a disabled ship. The journey via the Cape was non-stop at 14 knots in 32 days - 1893- Fitted with triple expansion engine; 3 cylinders, 600 NHP; 4 cylindrical boilers; 13 knots; fitted by J.Rollo & Sons, Liverpool - 1903: Broken up at Genoa. 1873 single screw, compound inverted, 2 cylinder; 750 NHP, 4000 IHP, Steam pressure 70 lbs, 4 cylindrical boilers, 2 to each funnel, 14 knots. Second largest ship in the world in 1874 (after the Great Eastern). Cost 151, 600 pounds. 1893 Triple expansion engine fitted. 3 cylinders 600 NHP, 4 cylindrical boilers, 15 knots, fitted by D Rollo and Sons, LiverpoolThe body of the model is carved and molded wood painted in black and white, the planked deck with detailed fittings and rigging, raised on a wooden base with simulated waves. At this time yards removed. "Iberia" -
 Ballarat Tramway Museum
Legal record, City of Ballaarat, City of Ballaarat - by-law - motor omnibuses, 7/2024
... Sets out the legal context, routes, schedule detailing stands or stops, number of omnibuses and times of operations. 1 - Regulation No. 44, dated 2/7/1924 - 32 pages - centre stapled - has a number of pencil marks. 2 - By-Law 115, dated 24/9/1930, 20 pages - centre stapled, sets out the details or forms for the vehicles to be used and their rules of operation. ...Sets out the legal context, routes, schedule detailing stands or stops, number of omnibuses and times of operations. 1 - Regulation No. 44, dated 2/7/1924 - 32 pages - centre stapled - has a number of pencil marks. 2 - By-Law 115, dated 24/9/1930, 20 pages - centre stapled, sets out the details or forms for the vehicles to be used and their rules of operation. ...Set of two legal documents or by-laws relating to the operation of motor omnibuses in the Ballarat district. Sets out the legal context, routes, schedule detailing stands or stops, number of omnibuses and times of operations. 1 - Regulation No. 44, dated 2/7/1924 - 32 pages - centre stapled - has a number of pencil marks. 2 - By-Law 115, dated 24/9/1930, 20 pages - centre stapled, sets out the details or forms for the vehicles to be used and their rules of operation. Printed by Ballarat Litho, 56 Lydiard St Ballarat.Yields information about the operation of buses licenced by the City of Ballaarat.Set of two printed by-laws of the City of Ballaarat.tramways, buses, city of ballaarat, legal matters -
 Ballarat Tramway Museum
Slide - SECV Ballarat tram 32 Sturt St West services, Ron Hood, 9/1971
... Yields information about tram operations on the Gardens via Sturt St West line shortly before closure of the route. tramways trams Sturt St tram 30 Sturt St West Victoria Park In ink "Ballarat Sept. 1971" and slide numbers 10, 12, 13 Set of 3 Colour slides in plain white cardboard mounts. Slide SECV Ballarat tram 32 ...Set of three colour photographs by Ron Hood in early Sept. 1971 of tram 30 on the Gardens via Sturt St West service. 1 - tram arriving at the Sturt and Lydiard St stop with the National Mutual, Craigs Hotel and HBA buildings in the background. 2 - In Sturt St west with Victoria Park in the background 3 - ditto - a well loaded tram.Yields information about tram operations on the Gardens via Sturt St West line shortly before closure of the route.Set of 3 Colour slides in plain white cardboard mounts.In ink "Ballarat Sept. 1971" and slide numbers 10, 12, 13tramways, trams, sturt st, tram 30, sturt st west, victoria park -
 Ballarat Tramway Museum
Slide - Ballarat trams - Sebastopol line - set of 9, Ron Hood, 9/1971
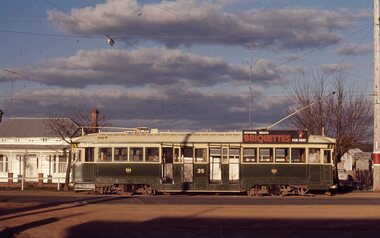
... Yields information about tram operations on the Sebastopol line shortly before closure of the route. tramways trams Albert St Sebastopol Urquhart St tram 40 tram 34 tram 35 tram 41 In ink "Sebastopol line Sept. 1971" and slide numbers 19, 29, 30, 31, 32, 33, 34, 35, & 36 Set of 9 Colour slides in plain white cardboard mounts. ...Set of nine colour photographs by Ron Hood in early Sept. 1971 of trams on the Sebastopol line: 1 - side on view of tram 35, in bound in Albert St. Has a briquettes roof advert. 2 - tram 40 northbound at the Urquhart St loop 3 - tram 41, shortly before crossing Albert St. 4 - tram 34 crossing Albert St at Ophir St Anglican Trinity Church in the background. 5 - tram 40 southbound in Albert St shortly before Ophir St 6 - tram 40 northbound in Albert St 7 - ditto 8 - tram 35 northbound with a very empty tram - only the conductor and driver 9 - tram 34 to Sebastopol dropping off passengers at Rubicon St. with the Ford car dealer sign in the background.Yields information about tram operations on the Sebastopol line shortly before closure of the route.Set of 9 Colour slides in plain white cardboard mounts.In ink "Sebastopol line Sept. 1971" and slide numbers 19, 29, 30, 31, 32, 33, 34, 35, & 36tramways, trams, albert st, sebastopol, urquhart st, tram 40, tram 34, tram 35, tram 41 -
 Ballarat Tramway Museum
Slide - Ballarat trams - Gardens via Sturt St West - set of 4, Ron Hood, 9/1971
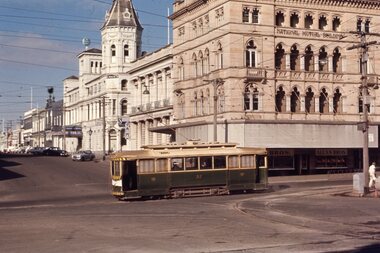
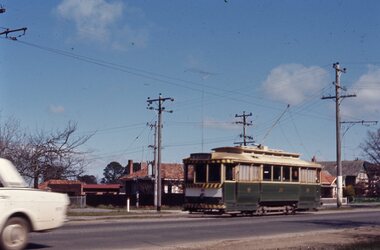
... Ballarat Tramway Museum South Gardens Reserve Wendouree Parade Ballarat Ballarat goldfields Set of four colour photographs by Ron Hood in early Sept. 1971 of trams on the Sturt St west line: 1 - Tram 32, inbound in Sturt St West to Mt Pleasant 2 - tram 30 outbound in Sturt St West 3 - tram 32 inbound in Sturt St West showing the Western Highway and the track layout. 4 - tram 30 inbound in Wendouree Parade, climbing up to Carlton St. Yields information about tram operations on the Mt Pleasant - Gardens via Sturt St West line after the closure of the Victoria St to Gardens via Drummond St Nth route. tramways trams Sturt St West Wendouree Parade tram 30 tram 32 In ink "Ballarat Sept. 1971" and slide numbers 25, 26, 27 & 28 Set of 4 Colour slides in plain white cardboard mounts. ...Set of four colour photographs by Ron Hood in early Sept. 1971 of trams on the Sturt St west line: 1 - Tram 32, inbound in Sturt St West to Mt Pleasant 2 - tram 30 outbound in Sturt St West 3 - tram 32 inbound in Sturt St West showing the Western Highway and the track layout. 4 - tram 30 inbound in Wendouree Parade, climbing up to Carlton St.Yields information about tram operations on the Mt Pleasant - Gardens via Sturt St West line after the closure of the Victoria St to Gardens via Drummond St Nth route.Set of 4 Colour slides in plain white cardboard mounts.In ink "Ballarat Sept. 1971" and slide numbers 25, 26, 27 & 28tramways, trams, sturt st west, wendouree parade, tram 30, tram 32 -
 Ballarat Tramway Museum
Administrative record, Victorian Government, "Victorian Government Gazette - No. 32", March 1929
... Victorian Government Gazette No. 32 of 20/3/1929 on pages 1081 to 1085 detailing the By-Laws and Regulations No. 58 pursuant to the Sections 9 and 46 of the Motor Omnibus Act (Urban and Country) No. 3570, of 1927 detailing the operational requirements for buses in Bendigo. Provides definitions, fares, timetables, and passengers. The regulations detail the routes...Ballarat Tramway Museum South Gardens Reserve Wendouree Parade Ballarat Ballarat goldfields Victorian Government Gazette No. 32 of 20/3/1929 on pages 1081 to 1085 detailing the By-Laws and Regulations No. 58 pursuant to the Sections 9 and 46 of the Motor Omnibus Act (Urban and Country) No. 3570, of 1927 detailing the operational requirements for buses in Bendigo. Provides definitions, fares, timetables, and passengers. The regulations detail the routes ...Victorian Government Gazette No. 32 of 20/3/1929 on pages 1081 to 1085 detailing the By-Laws and Regulations No. 58 pursuant to the Sections 9 and 46 of the Motor Omnibus Act (Urban and Country) No. 3570, of 1927 detailing the operational requirements for buses in Bendigo. Provides definitions, fares, timetables, and passengers. The regulations detail the routes, timetables, and advertising matter. A similar set of regulations are provided for the Mildura bus service. Yields information about the Bendigo bus regulations of 1929 for Bendigo.Document - 56 foolscap pages, off white paper stapled on the left hand edge.ESCo dated stamp of 16 Apr 1929buses, bendigo, museums omnibuses, regulations, bus services -
 Ballarat Tramway Museum
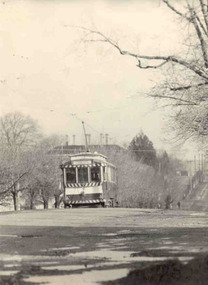
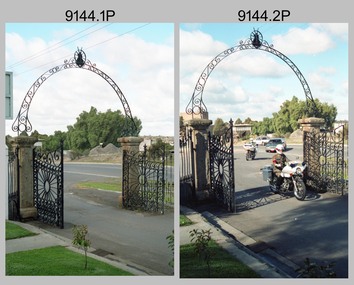
Photograph - Tram 32 - Mt Pleasant, mid 1950s
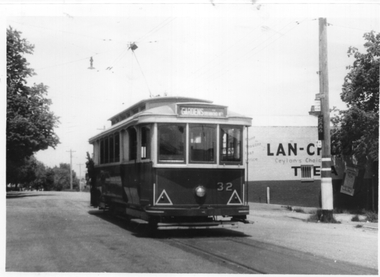
... 32...Mt Pleasant...Barkly St...Route...Tramcars tram 32 Mt Pleasant Barkly St Route Signs signs Black and White print on plain paper. ...The photograph shows SEC Ballarat tram No. 32 at Mt Pleasant fitted with large two reflective triangles on the front dash panel that were added during 1956. Tram has the destination of Gardens via Drummond St North. In the background is the shop advertising Lan Choo tea. The pole alongside has all the tramway signage including the timetable board. Photographer and date unknown - mid-1950s.Yields information about tram 32 and the Mt Pleasant terminus.Black and White print on plain paper.tramcars, tram 32, mt pleasant, barkly st, route signs, signs -
 Tramway Heritage Centre
Photograph Album (part of), Ray Pearson's Photo Album - Trams of Victorian Railways, Ballarat, Bendigo, Geelong
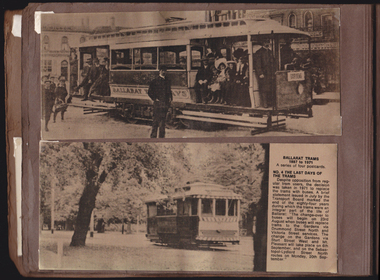
... 32 to 36. Six small electric / trams were purchased from the / Sydney Tramways in 1905 and / were converted to a similar / pattern to the 12 re-built / Ballarat horse trams. In 1906 / two open summer cars with / open cross seats (popularly / called toast racks) / were intro- / duced. These trams were packed at week-ends with / families en route...32 to 36. Six small electric / trams were purchased from the / Sydney Tramways in 1905 and / were converted to a similar / pattern to the 12 re-built / Ballarat horse trams. In 1906 / two open summer cars with / open cross seats (popularly / called toast racks) / were intro- / duced. These trams were packed at week-ends with / families en route ...Page 4 of Ray Pearson's Photo Album. Brown card page with two metallic look postcards (landscape format) placed on page using clear plastic photo corners. Both postcard images depict trams in Ballarat. Both postcards have come loose of two of their photo corners (top and bottom on the left) and are not secure on the page.Printed text to back of postcard at top: BALLARAT TRAMS / 1887 to 1971 / A series of four postcards. / NO. 2 EARLY ELECTRIC TRAMS / Electric trams first ran in / Ballarat on 18th Aigust, 1905. / Twelve of the horse trams were / converted to electric cars by lengthening them at both ends. / Eight of the remaining horse / trams were used as trailers to / the motor cars. / The electric trams were / given a secret trial during the / previous night to the opening / date, but the drivers clanged / the gongs so much that it / brought people out of their / beds in night attire. They / formed an unofficial guard of / honour around Wendouree / Parade. / The trams were gaily decor- / ated for Opening Day. As the / line of cars came down Camp / Hill (Sturt Street) filled with / local dignitaries, the brakes on / the last car failed and it crashed / into the one in front. The win- / dows of both cars were / smashed, and the occupants / who had been sitting in state / made an undignified exit. / Seating accommodation was / from 32 to 36. Six small electric / trams were purchased from the / Sydney Tramways in 1905 and / were converted to a similar / pattern to the 12 re-built / Ballarat horse trams. In 1906 / two open summer cars with / open cross seats (popularly / called toast racks) / were intro- / duced. These trams were packed at week-ends with / families en route to picnic by / the lake. A fine printed vertical line runs down the centre of the blank writing space to the left of the body text. Above is written: POSTCARD Printed text to right of image on bottom postcard: BALLARAT TRAMS / 1887 to 1971 / A series of four postcards. / NO. 4 THE LAST DAYS OF THE TRAMS / Despite opposition from reg- / ular tram users, the decision / was taken in 1971 to replace / the trams with buses. A brief / statement issued in July by the / Transport Boar marked the / end of the eighty-four years / during which the trams were an / integral part of the life of / Ballarat: “The change-over to / buses will begin on 23rd / August when buses will replace / trams to the Gardens via / Drummond Street North and / Victoria Street services. The / change on the Gardens via / Sturt Street West and Mt. / Pleasant will take place on 6th / September, and on the Sebas- / topol-Lydiard Street North / routes on Monday, 20th Sep- / tember.” A fine printed vertical line runs down the centre of the blank writing space to the left of the body text. Above is written: POSTCARDpostcard, ballarat trams, ballarat tramways, vintage trams, tram postcard, electric trams -
 Bendigo Historical Society Inc.
Newspaper - Newspaper articles by Ken Arnold, Out &About, 2000 - 2003
... Route 6.10.00 18. Volcanic Rock Cairn. Woodstock 13.10.00 19. Garfield Water Wheel 20.10.00 20. Anticline. Castlemaine 27.10.00 21. Lawson Bridge 10.11.00 22. Plaque. Sutton Grange area 17.11.00 23. Memorial Cairn. Maryborough 1.12.00 24. Lonely Grave 8.12.00 25. Moonlight Flat Church 5.1.01 26. Historic Church. Near Tullaroop reservoir 12.1.01 27. Granite Statue. Castlemaine 19.1.01 28. Marker. Near Tullaroop reservoir 25.1.01 29. Church Site. Mologa 2.2.01 30. Church Site. Mologa 9.2.01 31. Plaque. Mologa 16.2.01 32...Route 6.10.00 18. Volcanic Rock Cairn. Woodstock 13.10.00 19. Garfield Water Wheel 20.10.00 20. Anticline. Castlemaine 27.10.00 21. Lawson Bridge 10.11.00 22. Plaque. Sutton Grange area 17.11.00 23. Memorial Cairn. Maryborough 1.12.00 24. Lonely Grave 8.12.00 25. Moonlight Flat Church 5.1.01 26. Historic Church. Near Tullaroop reservoir 12.1.01 27. Granite Statue. Castlemaine 19.1.01 28. Marker. Near Tullaroop reservoir 25.1.01 29. Church Site. Mologa 2.2.01 30. Church Site. Mologa 9.2.01 31. Plaque. Mologa 16.2.01 32 ...Ken Arnold is a Bendigo author and publisher.A series of one hundred and thirty-five articles written by Ken Arnold and published in the Bendigo Weekly between 2000 and 2003. Each article has a topic or theme and includes historical information and details. Each article includes a photograph. The articles are stored in a red vinyl covered two ring A5 folder. Index below. Number Article Name Date 1. Centenary of Victoria 19.5.00 2. Storm Water Drain 26.5.00 3. Granite Rollers 2.6.00 4. Poverty Mine 9.6.00 5. Golden Monument. St Arnaud 16.6.00 6. Turner Statue 7.7.00 7. Gold Monument. High St Golden Square 30.6.00 8. Gold Monument. Howard Square Bendigo 14.7.00 9. Lansell Statue 21.7.00 10. Shelbourne West School 18.8.00 11. Mologa’s State Schools 25.8.00 12. Salinity Stone. Pyramid Hill 1.9.00 13. Cairn. Carisbrook 8.9.00 14. Commemorative Markers. Taradale 15.9.00 15. Burke Monument. Castlemaine 22.9.00 16. Cairn. Harcourt area 29.9.00 17. Cairn Marks Gold Route 6.10.00 18. Volcanic Rock Cairn. Woodstock 13.10.00 19. Garfield Water Wheel 20.10.00 20. Anticline. Castlemaine 27.10.00 21. Lawson Bridge 10.11.00 22. Plaque. Sutton Grange area 17.11.00 23. Memorial Cairn. Maryborough 1.12.00 24. Lonely Grave 8.12.00 25. Moonlight Flat Church 5.1.01 26. Historic Church. Near Tullaroop reservoir 12.1.01 27. Granite Statue. Castlemaine 19.1.01 28. Marker. Near Tullaroop reservoir 25.1.01 29. Church Site. Mologa 2.2.01 30. Church Site. Mologa 9.2.01 31. Plaque. Mologa 16.2.01 32. Mincha School 23.2.01 33. Historic Marker. Mincha 2.3.01 34. Expedition Marker. Pyramid Hill 9.3.01 35. Irrigation Marker. Tragowel 16.3.01 36. Mologa School Sites 23.3.01 37. Cairn. Pyramid Hill 30.3.01 38. Plaque. Pyramid Hill 6.4.01 39. Bristol Hill Lookout Tower. Maryborough 12.4.01 40. Eppalock Reservoir 20.4.01 41. Colbinabbin Cairn 27.4.01 42. Mount Macedon Cross 4.5.01 43. Memorial Gateway. Macedon 11.5.01 44. Cairn. Daylesford 18.5.01 45. Grave. Carlsruhe 25.5.01 46. Water Tower. Elmore 1.6.01 47. State School Site. Glenalbyn 8.6.01 48. Cairn. Kanya 15.6.01 49. Lonely Grave. Wedderburn 22.6.01 50. Church Cairn. Glenalbyn 29.6.01 51. Kamarooka School 6.7.01 52. Granite Marker. Moyston 13.7.01 53. Memorial Park. Kerang 20.7.01 54. Water Plaque. Bears Lagoon 27.7.01 55. Cemetery. Bears Lagoon 3.8.01 56. Race Monument 10.8.01 57. Cairn. Pyalong 17.8.01 58. Cairn. In memory of Edward Parker 24.8.01 59. Mt Macedon 31.8.01 60. Mt Macedon Cairn 7.9.01 61. Expedition Pass. Chewton 14.9.01 62. Granite Archway. St Arnaud 21.9.01 63. Stuart Mill School Site 28.9.01 64. School Site. Beazley’s Bridge 5.10.01 65. Fosterville 12.10.01 66. Barnadown 19.10.01 67. Salisbury School Site 26.10.01 68. Cricket History at Wattle Flat 2.11.01 69. School Site. Waterloo Plains 9.11.01 70. Carapooee School Site 11.01 71. Turkish Gun. Maldon 11.01 72. Kooreh 30.11.01 73. Marnoo East School 7.12.01 74. Bulgana Site 14.12.01 75. Emu School 21.12.01 76. Kooroocheang 4.1.02 77. Church Site. Gre Gre North 11.1.02 78. Carmens Tunnel. Maldon 18.1.02 79. Monument. Maldon 25.1.02 80. Woodfull Plaques. Maldon 1.2.02 81. Carapooee. St Peters Anglican Church 8.2.02 82. Cairn. Kingower 15.2.02 83. Cob & Co Stopover. Rheola 22.2.02 84. Flynn Monument 1.3.02 85. The Welcome Stranger. Moliagul 8.3.02 86. Campbell’s Creek Reserve 15.3.02 87. Mine. Fryerstown 22.3.02 88. Escott Grave. Near Chewton 28.3.02 89. School No 808. Kurting area 5.4.02 90. Graves. Bendigo Creek 10.5.02 91. School. Fish Point, Benjeroop North 17.5.02 92. Old Township. Diggora 24.5.02 93. Diggora West (1) 31.5.02 94. Diggora West (2) 7.6.02 95. School No 2735. Gower East 14.6.02 96. Pannoomilloo 21.6.02 97. Kamarooka Settlement 28.6.02 98. Mincha West State School No 1931 5.7.02 99. Bridges. Arnold 12.7.02 100. Woodvale 19.7.02 101. A Famous Son of Raywood. Jack Donaldson 26.7.02 102. Tandarra Area Schools 2.8.02 103. Dingee 9.8.02 104. Avonmore 30.8.02 105. Myola East School 6.9.02 106. Colbinabbin West 13.9.02 107. Colbinabbin West School 20.9.02 108. Runnymede area 27.9.02 109. Wanalta 4.10.02 110. School Sites. Between Wanalta and Carop 11.10.02 111. Burramboot 18.10.02 112. Kangaroo Chair. 25.10.02 113. Mincha South 1.11.02 114. Woodlands Church 8.11.02 115. School site. Sylvaterre 15.11.02 116. Terrick Terrick 22.11.02 117. Leitchville 29.11.02 118. Pennyweight Cemetery. Castlemaine 6.12.02 119. Mincha Area 13.12.02 120. Musk School 20.12.02 121. Dowie Park. Carisbrook 3.1.03 122. Neereman School Site 10.1.03 123. Bald Rock 17.1.03 124. Sylvaterre School Site 24.1.02 125. Carlsruhe 31.1.02 126. Athenaeum. Maldon 7.2.03 127. School. Mincha West 14.2.03 128. Yarraberb 21.2.03 129. Settlement Marker. Ravenswood Estate 28.2.03 130. Comini Reserve. Ravenswood 7.3.03 131. Ironbark and Gold Track. Whroo 14.3.03 132. Burke and Wills Obelisk. Castlemaine 21.3.03 133. James Cook Statue. Myers St Bendigo 28.3.03 134. St Marys Church. Axedale 4 .4.03 135. Butter Factory Site. Warragamba 11.4.03 events, monuments, historical sites, landmarks -
 Ballarat Tramway Museum
Photograph - Digital image Set of 3, Peter Bruce, "No. 32 Lydiard St North", 1970s
... Ballarat Tramway Museum South Gardens Reserve Wendouree Parade Ballarat Ballarat goldfields Yields information about the Lydiard St North Route, and the landscape. Trams tramways Lydiard St North tram 32 Digital image, black and white, set of three images of No. 32 in Lydiard St North, taken with a telephoto lens at various locations. ...Yields information about the Lydiard St North Route, and the landscape.Digital image, black and white, set of three images of No. 32 in Lydiard St North, taken with a telephoto lens at various locations. Photo taken by Peter Bruce 1970's and 1971, prior to the closure of the Ballarat tramway system. Peter's Title of image: "No. 32 Lydiard St North"trams, tramways, lydiard st north, tram 32 -
 Ballarat Tramway Museum
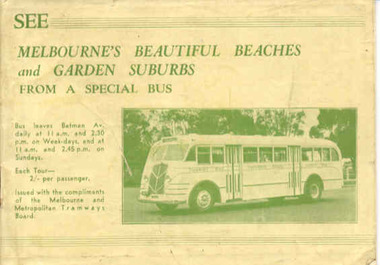
Book, Melbourne and Metropolitan Tramways Board (MMTB), "See Melbourne's Beautiful Beaches and Garden Suburbs from a Special Bus", 1940
... route with notes and photographs. Page 14 shows a maximum traction tram on the reserved track in Dandenong road and page 30, W2 488 outbound in Victoria Parade. Page 32...route with notes and photographs. Page 14 shows a maximum traction tram on the reserved track in Dandenong road and page 30, W2 488 outbound in Victoria Parade. Page 32 ...The book advertising MMTB's Special tourist bus, giving overall tour details on page 1, including fares, time of departures and reservations. Each tour has a map showing the route, details of the tour route with notes and photographs. Page 14 shows a maximum traction tram on the reserved track in Dandenong road and page 30, W2 488 outbound in Victoria Parade. Page 32 has an advertisement for the Round Trip by Tram 1/-. Front cover has details of the departure times and fares and a photo of the Tourist Bus. The supplementary sheet has been prepared for the tours that operated daily from Sun Sept. 17 to Friday May 31, except Anzac Day. See item 10133 for the 1938 version.Demonstrates the work of the MMTB providing sightseeing tours using a special bus and its publicity methodThirty two page landscape booklet on semi gloss white paper with off white cover and single supplementary white sheet tipped onto the inside of the front cover titled "See Melbourne's Beautiful Beaches and Garden Suburbs from a Special Bus". Saddle stapled, printed letterpress. Text printed in black and green ink. Cover green ink only. trams, tramways, mmtb, bus tours, melbourne, sightseeing -
 Ballarat Tramway Museum
Slide - 35mm slide/s - set of 32, Noel Simons, 25/02/1971 12:00:00 AM
... route for North Bendigo. Photo taken after tram has passed photographer. 1201.31 - No. 7 in High St. just past Wattle St. with the Cathedral in the background. Tram has two SEC roof ads good side on photo, 'Everything's fine in my all electric kitchen' and 'Electrical cooking - clean, quick, economical'. 1201.32 - No. 7 in High St. nearing Wattle St. Has Cathedral in the background. Photo taken after tram has passed photographer. Slide 35mm slide/s - set of 32 ...Set of 31 transparencies taken on 25/2/1972 on Kodak mounts. 1201.1 - Bendigo No. 26 in Bond St. just after leaving Long Gully en route for Quarry Hill. Has Norris Supermarket in background. Has two SEC roof ads. 1201.2 - No. 26 climbing View St. from Charing Cross en route to Eaglehawk. Has ANZ bank and AMOCO service station in background. 1201.3 - as for 1201.3, but after tram has passed photographer. Has buildings west of Mackenzie St. in photograph. 1201.4 - Tram stop and centre of the road pole with two "CARS STOP BY REQUEST" signs mounted on pole at the corner of Mackenzie St. 1201.5 - same position as for 1201.3, but with No. 5 descending the street. 1201.6 - same position as for 1201.2, but with No. 5 descending the street. Photo taken after tram has passed photographer. 1201.7 - No. 7 in Nolan St. from across the park at Lake Weeroona. 1201.8 - No. 7 entering McCrae St from Nolan St. - distant view. Note "TRAM "sign on left hand side under tree and overhead in McCrae St. from former track that once was in this street. 1201.9 - No. 7 in High St. with Cathedral in background. Tram en route to North Bendigo. Note scaffolding around Cathedral main spire area. 1201.10 - No. 7 crossing Bendigo Creek bridge in High St. near Golden Square. Has a Caltex Service station in the background. 1201.11 - No. 7 at Golden Square terminus with Sunburst Fruit Juices and a Peters Ice cream delivery vans alongside. 1201.12 - as for 1201.11 but photo taken from behind tram, with the end of the rails in the photograph. 1201.13 - No. 7 and 21 in Pall Mall at Charing Cross with No. 5 in the background. Taken some distance away from the location. 1201.14 - No. 7 at Golden Square terminus, taken a short distance from the tram terminus. Shows Milk Bar on right hand side and the hotel on the left hand side. Taken from the south side of the roadway. 1201.15 - as from 1201.14 but taken from the north side of the roadway. 1201.16 - No 5 waiting at California Gully loop. Distant photo showing surrounds 1201.17 - No. 5 en route for Quarry Hill crossing No. 26 at California Gully. 1201.18 - No. 26 at Eaglehawk terminus with Eaglehawk Town Hall and Post Office in background. 1201.19 - No. 21 arriving at Charing Cross en route to North Bendigo. Has Alexandra Fountain in the background, ANZ bank RACV building, and other buildings on the north side of Pall Mall or Nolan St. 1201.20 - No. 26 en route for Quarry Hill at Charing Cross, with crew standing by front door. Has Colonial Mutual life building, Armstrong Tyre Service (Firestone) and a sign for Cohns Drinks in the background. 1201.21 - as for 1201.20 but with No. 5 en route to Eaglehawk now in photograph. 1201.22 - No. 26 at Quarry Hill terminus. 1201.23 - No. 26 at Quarry Hill terminus, view of front portion of tram only from a gate at the Bendigo cemetery. 1201.24 - Track at the end of the Quarry Hill line showing the point blades of the former "Y" terminus and the overhead for this. 1201.25 - No. 2 at the Quarry Hill terminus, looking along the former Trackwork. 1201.26 - as for 1201.25 1201.27 - number not used. 1201.28 - Golden Square terminus from some distance from the actual terminus, showing the Warning sign "TRAM" for motorists from the south. No. 7 at the terminus. 1201.29 - No. 7 passing through the Golden Square shopping centre. Numerous cars and pedestrians. Tram en route for North Bendigo. 1201.30 - No. 7 in High St. Golden Square, en route for North Bendigo. Photo taken after tram has passed photographer. 1201.31 - No. 7 in High St. just past Wattle St. with the Cathedral in the background. Tram has two SEC roof ads good side on photo, 'Everything's fine in my all electric kitchen' and 'Electrical cooking - clean, quick, economical'. 1201.32 - No. 7 in High St. nearing Wattle St. Has Cathedral in the background. Photo taken after tram has passed photographer.Information written on in black ink and date stamped on purple ink. 1201.1 - "No. 26 in Bond St just after leaving Long Gully" 1201.2 - "No. 26 climbing View St. from Charing Cross" 1201.3 - "No. 26 ascending View St. from Charing Cross (At Mackenzie St.)" 1201.4 - "View St. & Mackenzie St." 1201.5 - "No. 5 in View St. near Mackenzie St." 1201.6 - "No. 5 in View St. nearing Charing Cross." 1201.7 - "No. 7 in Nolan St. seen from Lake Weeroona Park." 1201.8 - "No. 7 entering McRae St. from Nolan St. Note "TRAM" warning sign on left. 1201.9 - "No. 7 in High St. passing Short St." 1201.10 - "No. 7 crossing Bendigo Creek bridge in High St. near Golden Square." 1201.11 - "No. 7 at Golden Square terminus" 1201.12 - "No. 7 at Golden Square terminus" 1201.13 - "No 7, 21 and 5 at Charing Cross" 1201.14 - "No. 7 at Golden Square terminus" 1201.15 - "No. 7 at Golden Square terminus" 1201.16 - "No 5 waiting at California Gully loop." 1201.17 - "Nos. 5 and 26 crossing at California Gully loop" 1201.18 - "No. 26 at Eaglehawk terminus" 1201.19 - "No. 21 arriving at Charing Cross from Golden Square" 1201.20 - "No. 26 at Charing Cross" 1201.21 - "Nos. 5 and 26 at Charing Cross." 1201.22 - "No. 26 at Quarry Hill terminus" 1201.23 - "No. 26 at Quarry Hill terminus seen through the gates of the Bendigo Cemetery." 1201.24 - "Quarry Hill terminus showing remains for former double track layout abandoned before 1964." 1201.25 - "No. 2 at Quarry Hill terminus" 1201.26 - "No. 2 at Quarry Hill terminus" 1201.28 - "The Southern approach to Golden Square with No. 7 standing at the terminus, "TRAM" warning sign on the left. 1201.29 - "No. 7 passing through Golden Square Shopping Centre" 1201.30 - "No. 7 in High St. Golden Square" 1201.31 - "No. 7 in High St. passing Wattle St." 1201.32 - "No. 7 in High St. nearing Wattle St."tramways, trams, bendigo, bond st., view st., nolan st., high st., eaglehawk, california gully, charing cross, quarry hill, trackwork, tram 2, tram 5, tram 7, tram 21, tram 26 -
 Ballarat Tramway Museum
Photograph - Black & White Photograph/s, Peter Bruce, c1970
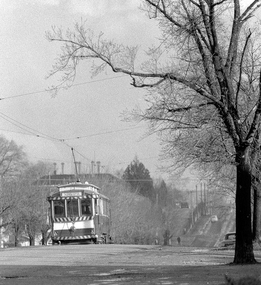
... 32 inbound along Lydiard St. North, just south of intersection with Gregory St. Telephoto lens photograph, showing hilly nature of route, tram forms only a small part of photograph. ...32 inbound along Lydiard St. North, just south of intersection with Gregory St. Telephoto lens photograph, showing hilly nature of route, tram forms only a small part of photograph. ...Black and white photograph of SEC Ballarat No. 32 inbound along Lydiard St. North, just south of intersection with Gregory St. Telephoto lens photograph, showing hilly nature of route, tram forms only a small part of photograph. Tram has destination of "SEBASTOPOL". Winter photograph.trams, tramways, ballarat., lydiard st. north, gregory st , tram 32 -
 Ballarat Tramway Museum
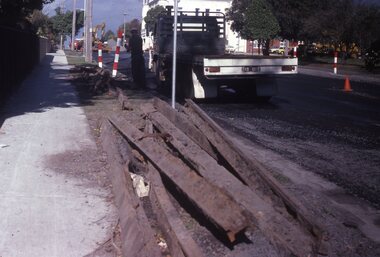
Slide - 35mm slide/s - set of 11, May 1979c
... All in Pakington St., Newtown, ex Newtown route. 2268.1 - slide 29 - look south from the north of Retreat Road. .2 - 30 - No. 276 in background, looking south .3 - 31 - City of Newtown Town Hall in background. .4 - 32 - opposite to that of No. 29. .5 - 33 - Looking south .6 - 34 - looking south with Aphrasia St. in the background. .7 - 35 - as for .2 .8 - 36 - Opposite No. 278, looking south .9 - 1 - opposite No. 276/278. .10 - 2 - ditto .11 - 3 - Outside No. 278, looking south. ...All in Pakington St., Newtown, ex Newtown route. 2268.1 - slide 29 - look south from the north of Retreat Road. .2 - 30 - No. 276 in background, looking south .3 - 31 - City of Newtown Town Hall in background. .4 - 32 - opposite to that of No. 29. .5 - 33 - Looking south .6 - 34 - looking south with Aphrasia St. in the background. .7 - 35 - as for .2 .8 - 36 - Opposite No. 278, looking south .9 - 1 - opposite No. 276/278. .10 - 2 - ditto .11 - 3 - Outside No. 278, looking south. ...Set of eleven colour slides (Kodak) showing the removal of tram track in Geelong, c May 1979. All in Pakington St., Newtown, ex Newtown route. 2268.1 - slide 29 - look south from the north of Retreat Road. .2 - 30 - No. 276 in background, looking south .3 - 31 - City of Newtown Town Hall in background. .4 - 32 - opposite to that of No. 29. .5 - 33 - Looking south .6 - 34 - looking south with Aphrasia St. in the background. .7 - 35 - as for .2 .8 - 36 - Opposite No. 278, looking south .9 - 1 - opposite No. 276/278. .10 - 2 - ditto .11 - 3 - Outside No. 278, looking south. Bus stop still in position. See Letter to Dave O'Neil and responses.tramways, trams, geelong, track removal, pakington st, newtown -
 Bendigo Military Museum
Photograph - CGS LTGEN Coates Visit Parade - Army Survey Regiment, Fortuna, Bendigo, 1990
... route. L to R: SGT Frank Downie, SPR Scott Cameron, MAJ Peter Clark, SPR Mark Linwood. .29) - Photo, colour, 1990. Parade contingent stands at attention. .30) - Photo, colour, 1990. Parade contingent stands at ease. Rear rank L to R: LCPL Stuart Midgley, SPR Marcus Seecamp, CPL Steve Wainwright, SPR Todd Reynolds, SPR Rachel (Stanford) Scott, SPR Gavin Craggs, CPL Raelene (Munting) Brodie, remainder unidentified. .31) - Photo, colour, 1990. Parade contingent stands at attention. Front rank L to R: SSGT Graham Johnston, unidentified, SPR Leigh Palfrey, LCPL Ian Brown, CPL Craig Kellet, SPR Greg Howell, unidentified, SPR Jo Otto, remainder unidentified. .32...route. L to R: SGT Frank Downie, SPR Scott Cameron, MAJ Peter Clark, SPR Mark Linwood. .29) - Photo, colour, 1990. Parade contingent stands at attention. .30) - Photo, colour, 1990. Parade contingent stands at ease. Rear rank L to R: LCPL Stuart Midgley, SPR Marcus Seecamp, CPL Steve Wainwright, SPR Todd Reynolds, SPR Rachel (Stanford) Scott, SPR Gavin Craggs, CPL Raelene (Munting) Brodie, remainder unidentified. .31) - Photo, colour, 1990. Parade contingent stands at attention. Front rank L to R: SSGT Graham Johnston, unidentified, SPR Leigh Palfrey, LCPL Ian Brown, CPL Craig Kellet, SPR Greg Howell, unidentified, SPR Jo Otto, remainder unidentified. .32 ...This set of 36 photographs was taken in August 1990 at a parade to welcome the Australian Army Chief of the General Staff (CGS)’s visit to the Army Survey Regiment, Fortuna, Bendigo. Lieutenant General Henry John Coates AC MBE was a senior officer in the Australian Army who served as Chief of the General Staff from 1990 to 1992. The name of the CGS’s aide de camp officer is unknown. The CGS and the RSM-A visit to the Army Survey Regiment is covered on page 145 of Valerie Lovejoy’s book 'Mapmakers of Fortuna – A history of the Army Survey Regiment’ ISBN: 0-646-42120-4. See Item 6154.6P for additional photos taken during the visit.This is a set of 36 photographs taken on the occasion of the Chief of the General Staff (CGS) - Lieutenant General Henry John Coates AC MBE’s visit to the Army Survey Regiment, Bendigo in August 1990. Colour photographs are on 35mm negative film and scanned at 2400 dpi. They are part of the Army Survey Regiment’s Collection. .1) to .4) - Photo, colour, 1990. The CGS motorcade drives through the Army Survey Regiment front gate. .5) - Photo, colour, 1990. The CGS motorcade arrives at the parade ground. L to R: CPL Dave Cook, SPR Gordon Santo. .6) - Photo, colour, 1990. The CGS motorcade arrives at the parade ground. L to R: CPL Dave Cook, CO LTCOL Rene van den Tol. .7) - Photo, colour, 1990. The CGS is greeted. L to R: CGS LTGEN John Coates AC MBE, unidentified aide de camp officer, SPR Gordon Santo, CO LTCOL Rene van den Tol. .8) - Photo, colour, 1990. CGS LTGEN John Coates AC MBE returns the Army Survey Regiment’s salute. Parade host - CO LTCOL Rene van den Tol is on his right. .9) - Photo, colour, 1990. CGS LTGEN John Coates AC MBE returns the Army Survey Regiment’s salute. Parade host - CO LTCOL Rene van den Tol is on his right. Parade commander – MAJ Peter Clark is on his left. .10) - Photo, colour, 1990. Parade Inspection. In foreground L to R: right marker - SSGT Graham Johnston, CGS LTGEN John Coates AC MBE, CO LTCOL Rene van den Tol, unidentified aide de camp officer. .11) to .13) - Photo, colour, 1990. Parade Inspection. L to R: CGS LTGEN John Coates AC MBE, CO LTCOL Rene van den Tol, unidentified personnel. .14) - Photo, colour, 1990. Parade Inspection. CGS LTGEN John Coates AC MBE, unidentified personnel. .15) - Photo, colour, 1990. Parade Inspection. L to R: CGS LTGEN John Coates AC MBE, CO LTCOL Rene van den Tol, unidentified personnel. .16) - Photo, colour, 1990. Parade Inspection. CGS LTGEN John Coates AC MBE, unidentified personnel. .17) - Photo, colour, 1990. Parade Inspection. L to R: CGS LTGEN John Coates AC MBE, unidentified personnel, CPL Steve Coulson, SPR Chris Wynn, SPR Andrew Arman, SPR Grant Davis, SGT Frank Downie. .18) - Photo, colour, 1990. Parade Inspection. L to R: CGS LTGEN John Coates AC MBE, SGT Frank Downie. .19) - Photo, colour, 1990. Parade Inspection. L to R: MAJ Peter Clark, unidentified aide de camp officer, CGS LTGEN John Coates AC MBE, SGT Frank Downie. .20) - Photo, colour, 1990. Parade Inspection. L to R: CGS LTGEN John Coates AC MBE, CO LTCOL Rene van den Tol, MAJ Peter Clark. In foreground left marker - LCPL Stuart Midgley, right marker - SSGT Graham Johnston. .21) - Photo, colour, 1990. Parade Inspection. L to R: CGS LTGEN John Coates AC MBE, CO LTCOL Rene van den Tol, MAJ Peter Clark. Rear rank L to R: unidentified, SPR Todd Reynolds, SPR Rachel (Stanford) Scott, SPR Gavin Craggs, CPL Raelene (Munting) Brodie, SPR John ‘Docc’ Commons, remainder unidentified. Front rank: SSGT Andy Boath, remainder unidentified .22) - Photo, colour, 1990. Parade Inspection. L to R: CO LTCOL Rene van den Tol, LCPL Puch ‘Charlie’ Tran, CGS LTGEN John Coates AC MBE, CPL Eric Nicholson, MAJ Peter Clark. .23) - Photo, colour, 1990. Parade Inspection. L to R: CGS LTGEN John Coates AC MBE, CO LTCOL Rene van den Tol. Rear rank L to R: SPR Rachel (Stanford) Scott, SPR Gavin Craggs, CPL Raelene (Munting) Brodie, SPR Sue (Foote) Bourne, SPR John ‘Docc’ Commons, remainder unidentified. .24) - Photo, colour, 1990. Parade Inspection. L to R: CGS LTGEN John Coates AC MBE, CO LTCOL Rene van den Tol. Rear rank L to R: SPR Gavin Craggs, CPL Raelene (Munting) Brodie, SPR Sue (Foote) Bourne, SPR John ‘Docc’ Commons, remainder unidentified. .25) & .26) - Photo, colour, 1990. Parade Inspection. L to R: CGS LTGEN John Coates AC MBE, CO LTCOL Rene van den Tol. Rear rank L to R: LCPL Stuart Midgley, SPR Marcus Seecamp, CPl Steve Wainwright, SPR Todd Reynolds, SPR Rachel (Stanford) Scott, remainder unidentified. .27) - Photo, colour, 1990. Parade Inspection. L to R: right marker - SSGT Graham Johnston, MAJ Peter Clark. CGS LTGEN John Coates AC MBE. .28) - Photo, colour, 1990. Parade contingent marches forward in column of route. L to R: SGT Frank Downie, SPR Scott Cameron, MAJ Peter Clark, SPR Mark Linwood. .29) - Photo, colour, 1990. Parade contingent stands at attention. .30) - Photo, colour, 1990. Parade contingent stands at ease. Rear rank L to R: LCPL Stuart Midgley, SPR Marcus Seecamp, CPL Steve Wainwright, SPR Todd Reynolds, SPR Rachel (Stanford) Scott, SPR Gavin Craggs, CPL Raelene (Munting) Brodie, remainder unidentified. .31) - Photo, colour, 1990. Parade contingent stands at attention. Front rank L to R: SSGT Graham Johnston, unidentified, SPR Leigh Palfrey, LCPL Ian Brown, CPL Craig Kellet, SPR Greg Howell, unidentified, SPR Jo Otto, remainder unidentified. .32) - Photo, colour, 1990. Parade contingent presents arms. Front rank L to R: SSGT Graham Johnston, unidentified, SPR Leigh Palfrey, LCPL Ian Brown, CPL Craig Kellet, SPR Greg Howell, unidentified, SPR Jo Otto, remainder unidentified. .33) - Photo, colour, 1990. Parade contingent presents arms. Rear rank L to R: LCPL Stuart Midgley, SPR Marcus Seecamp, CPL Steve Wainwright, SPR Todd Reynolds, SPR Rachel (Stanford) Scott, SPR Gavin Craggs, CPL Raelene (Munting) Brodie, remainder unidentified. .34) - Photo, colour, 1990. CGS LTGEN John Coates AC MBE returns the Army Survey Regiment’s salute. Parade host - CO LTCOL Rene van den Tol is on his left. .35) - Photo, colour, 1990. Military police escorts in readiness for departure. .36) - Photo, colour, 1990. Departure of the CGS. L to R: unidentified aide de camp officer, CGS LTGEN John Coates AC MBE, CO LTCOL Rene van den Tol, LT Garrett Addison. In background L to R: SSGT Andy Boath, CPL Mark Lander, SPR Ken Labouchardiere..1P to .36P – Not annotated. Stored with ‘CMDR 3MD Visit Mar 90’ film negative sleeve sets.royal australian survey corps, rasvy, army survey regiment, army svy regt, fortuna -
 Victorian Railway History Library
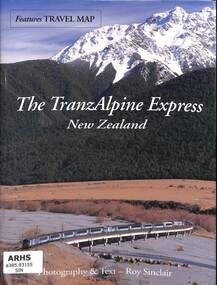
Book, Sinclair, Roy, The TranzAlpine Express New Zealand, 2004
... Victorian Railway History Library 39 St Edmonds Rd Prahran Prahran railroads - New Zealand - Pictorial Railroads - New Zealand - Tranz-Alpine A pictorial record of the route of the TranzAlpine Express from Christchurch to Greymouth in the South Island of New Zealand. ill, maps, p.32. ...A pictorial record of the route of the TranzAlpine Express from Christchurch to Greymouth in the South Island of New Zealand.ill, maps, p.32.non-fictionA pictorial record of the route of the TranzAlpine Express from Christchurch to Greymouth in the South Island of New Zealand.railroads - new zealand - pictorial, railroads - new zealand - tranz-alpine -
 Victorian Railway History Library
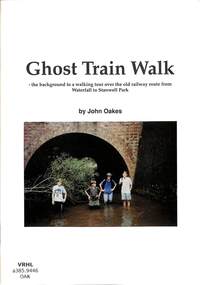
Book, Oakes, John, Ghost Train Walk
... Victorian Railway History Library 39 St Edmonds Rd Prahran Prahran railroad construction - New South Wales - history Railroads - New South Wales - history The background to a walking tour over the old railway route from Waterfall to Stanwell Park in the Illawarra region of New South Wales. ill, maps, p.32. ...The background to a walking tour over the old railway route from Waterfall to Stanwell Park in the Illawarra region of New South Wales.ill, maps, p.32.non-fictionThe background to a walking tour over the old railway route from Waterfall to Stanwell Park in the Illawarra region of New South Wales.railroad construction - new south wales - history, railroads - new south wales - history -
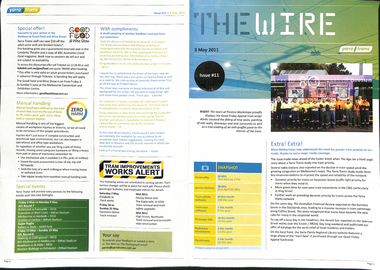 Melbourne Tram Museum
Magazine, Yarra Trams, "The Wire", 5/2011 to 1/2015
... (see htd5043i21 for a image from an unknown newspaper of the actual event - features Z3 158.) .11 - No. 25 - 22/11/2011 - new staff guide, Gold Coast tram line, Macarthur St, overhead, fund raising, route numbering update. .12 - No. 26 - 6/12/2011 - Swanston St Superstops, Newmarket bridge strikes, rhinos. .13 - No. 27 - 20/12/2011 - Christmas carnival, Lenny Bates, portable crossover, uniforms. .14 - No. 28 - 17/1/2012 - Passing of Len Bates, Myki, Gardiner railway station. 14a - No. 29 - 31/1/2012 - Southbank depot, patronage, myki, think like a passenger, fatigue management, .15 - No. 30 - 15/2/2012 - visit of Keolis, SNCF people, list of Executive leadership team with photos, Swanston St works, Myki introduction. .16 - No. 31 - 29/2/2012 - patronage up, tram postage stamps, Myki, rhinos. .17 - No. 32 - 14/3/2012 - St Kilda Rd trackwork, fund raising, Southbank Depot extensions, Myki, driving conditions, grand prix. .18 - No. 33 - 30/3/2012 - introduction of the PTV, end of MetLink and Transport Ticketing Authority, changes in management structure, trackwork, Gold Coast tramway and Keolis. .19 - No. 34 - Dr Jake - Royal children's Hospital super stop, route 96 - Premium line. .20 - No. 35, 2/5/2012 - Revision of Rules, trackwork in St Kilda Road and Elizabeth St, Myki, safety - Zero Harm. .21 - No. 69 - 25/9/2013 - Passengers paying their way, E class update, Mal Ashworth retires, progress report, feedback, new chime on trams. .22 - No. 70 - 9/10/2013 - Art comes alive, tram 925, driver simulator at Preston Workshops, E class project, 90th Glen Huntly. .23 - No. 83 - 23/4/2014 - Screen time for trams, new PIDs on B class, assistance animals, Operations Centre, Preston Workshops, Electrical log sheets to SLV. .24 - No. 89 - 23/7/2014 - punctuality, refresh of network map (fold-out map), women drivers. .25 - No. 97 - 19/11/2014 - Revitalising route 96, Keolis news, free tram zone, guide dogs. .26 - No. 99 - 17/12/2014 - Accessibility week, new uniform top for CSE's, free tram zone, world trade centre stop upgrade, heat stress, Art tram 158. .27 - No. 100 - 14/1/2015 - Route 96 complete, New Years eve free travel, fare compliance, patronage down, .28 - No. 12 - 16/5/2011 - Gold coast tramway, performance dashboard, tramworks and the rhino .29 - No. 16 - 19/7/2011 - Depot managers, tevor jones, record patronage, vision, rhino .30 - No. 17 - 2/8/2011 - High St Westgarth works, Duncan Smith, David Clarke Training, Swanston St works, and Preston Workshops . .32 - No. 39 - 28/6.2012 - maintenance, Emmanual Sorin, transformation, fare evasion, and Combino in Potsdam. .33 - No. 105 - 25/3/2015 - Grand Prix, Elgin and Lygon upgrade, Camberwell Junction, PTV hub, overhead. .34 - No. 78 - 12/2/2014 - January heatwave, Australian Open, Mark Wild of PTV, and Curt Skinner - voice in Channel 10 series Get Ace .35 - No. 81 - 26/3/2014 - drug and alcohol testing, zero harm, Victoria Bridge works, Keolis, relations with Toronto, Collins St safety and incident on a route 57 tram. .36 - No. 109 - 20/5/2015 - Goodbye Z class, Hello E class, Kew Depot centenary, drug & alcohol reminder, passenger satisfaction, Anzac day, B class life extension. .37 - No. 110 - 3/6/2015 - 3rd W class tram back grom Bendigo, employer of the year, CSE's go digital, Camberwell depot, Queensbridge tram and bus stop and Tram Hub preview. .38 - No. 115 - Feb. 2016 - 12 page centre stapled - New Year's eve services, spike the rhino is back, Burke Road level crossing removed, more E class, safe network in 2106, tennis, customers happy, New Preston depot, Farewell to Clement, Z class 40 years on network....(see htd5043i21 for a image from an unknown newspaper of the actual event - features Z3 158.) .11 - No. 25 - 22/11/2011 - new staff guide, Gold Coast tram line, Macarthur St, overhead, fund raising, route numbering update. .12 - No. 26 - 6/12/2011 - Swanston St Superstops, Newmarket bridge strikes, rhinos. .13 - No. 27 - 20/12/2011 - Christmas carnival, Lenny Bates, portable crossover, uniforms. .14 - No. 28 - 17/1/2012 - Passing of Len Bates, Myki, Gardiner railway station. 14a - No. 29 - 31/1/2012 - Southbank depot, patronage, myki, think like a passenger, fatigue management, .15 - No. 30 - 15/2/2012 - visit of Keolis, SNCF people, list of Executive leadership team with photos, Swanston St works, Myki introduction. .16 - No. 31 - 29/2/2012 - patronage up, tram postage stamps, Myki, rhinos. .17 - No. 32 - 14/3/2012 - St Kilda Rd trackwork, fund raising, Southbank Depot extensions, Myki, driving conditions, grand prix. .18 - No. 33 - 30/3/2012 - introduction of the PTV, end of MetLink and Transport Ticketing Authority, changes in management structure, trackwork, Gold Coast tramway and Keolis. .19 - No. 34 - Dr Jake - Royal children's Hospital super stop, route 96 - Premium line. .20 - No. 35, 2/5/2012 - Revision of Rules, trackwork in St Kilda Road and Elizabeth St, Myki, safety - Zero Harm. .21 - No. 69 - 25/9/2013 - Passengers paying their way, E class update, Mal Ashworth retires, progress report, feedback, new chime on trams. .22 - No. 70 - 9/10/2013 - Art comes alive, tram 925, driver simulator at Preston Workshops, E class project, 90th Glen Huntly. .23 - No. 83 - 23/4/2014 - Screen time for trams, new PIDs on B class, assistance animals, Operations Centre, Preston Workshops, Electrical log sheets to SLV. .24 - No. 89 - 23/7/2014 - punctuality, refresh of network map (fold-out map), women drivers. .25 - No. 97 - 19/11/2014 - Revitalising route 96, Keolis news, free tram zone, guide dogs. .26 - No. 99 - 17/12/2014 - Accessibility week, new uniform top for CSE's, free tram zone, world trade centre stop upgrade, heat stress, Art tram 158. .27 - No. 100 - 14/1/2015 - Route 96 complete, New Years eve free travel, fare compliance, patronage down, .28 - No. 12 - 16/5/2011 - Gold coast tramway, performance dashboard, tramworks and the rhino .29 - No. 16 - 19/7/2011 - Depot managers, tevor jones, record patronage, vision, rhino .30 - No. 17 - 2/8/2011 - High St Westgarth works, Duncan Smith, David Clarke Training, Swanston St works, and Preston Workshops . .32 - No. 39 - 28/6.2012 - maintenance, Emmanual Sorin, transformation, fare evasion, and Combino in Potsdam. .33 - No. 105 - 25/3/2015 - Grand Prix, Elgin and Lygon upgrade, Camberwell Junction, PTV hub, overhead. .34 - No. 78 - 12/2/2014 - January heatwave, Australian Open, Mark Wild of PTV, and Curt Skinner - voice in Channel 10 series Get Ace .35 - No. 81 - 26/3/2014 - drug and alcohol testing, zero harm, Victoria Bridge works, Keolis, relations with Toronto, Collins St safety and incident on a route 57 tram. .36 - No. 109 - 20/5/2015 - Goodbye Z class, Hello E class, Kew Depot centenary, drug & alcohol reminder, passenger satisfaction, Anzac day, B class life extension. .37 - No. 110 - 3/6/2015 - 3rd W class tram back grom Bendigo, employer of the year, CSE's go digital, Camberwell depot, Queensbridge tram and bus stop and Tram Hub preview. .38 - No. 115 - Feb. 2016 - 12 page centre stapled - New Year's eve services, spike the rhino is back, Burke Road level crossing removed, more E class, safe network in 2106, tennis, customers happy, New Preston depot, Farewell to Clement, Z class 40 years on network. ...0 - No 9 - 1/4/2011 - Rhinos on skateboards, Did you know, Spencer St works, 00 - No 10 - 19/4/2011 - safety boards, busting ghost routes, works alerts, travelling without tickets, launch of a new tram network maps and compliments received from customers. .1 - No. 11 of 3/5/2011 with the revised Yarra trams logo, traffic priority, work over Easter in Spencer St at Bourke and Collins St, Good Friday appeal, safety, passenger feedback and future works. .2 - No. 13 - 31/5/2011 - new uniform, cleaning, CEPR, trackwork - Fitzroy St, Northcote, Rhino, Carlton Control. .3 - No. 14 - 15/6/2011 - Haymarket Roundabout, accessibility, maintenance, CSE. 3a - No. 16 - 19/7/2011 - Managers on the move, Trevor Jones, Yarra's vision, Richard Ch'ng and Rhino update. .4 - No. 17 - 2/8/2011 - High St Westgarth trackwork, Swanston St, IMF CEO visit .5 - No. 18 - 16/8/2011 - Performance benchmarks met, Preston Workshops, repairs to 3018, tram signal priority. .6 - No . 19 - 30/8/2011 - New E class trams, routes "a" or "d", TramTracker in shelters, police, fare evasion .7 - No. 20 - 15/9/2011 - Football trams, Superstops, Bridge Road, Rhinos. .8 - No. 21 - 27/9/2011 - CEO's journey to work, accessibility, increased patronage, E class. .8a - No. 22 - 11/10/2011 - Minister Mulder visit, E class, Customer experience, Elizabeth Kerdelhue Corporate Affairs Director, flood indicator in Wellington Parade, Keolis - Orleans and PTV coming your way. .9 - No. 23 - 25/10/2011 - forthcoming royal visit, opening for Footscray Road extension, Rhinos, Stockholm .10 - No. 24 - 8/11/2011- Royal visit, photos, Z3 158, route 86 works in High St. (see htd5043i21 for a image from an unknown newspaper of the actual event - features Z3 158.) .11 - No. 25 - 22/11/2011 - new staff guide, Gold Coast tram line, Macarthur St, overhead, fund raising, route numbering update. .12 - No. 26 - 6/12/2011 - Swanston St Superstops, Newmarket bridge strikes, rhinos. .13 - No. 27 - 20/12/2011 - Christmas carnival, Lenny Bates, portable crossover, uniforms. .14 - No. 28 - 17/1/2012 - Passing of Len Bates, Myki, Gardiner railway station. 14a - No. 29 - 31/1/2012 - Southbank depot, patronage, myki, think like a passenger, fatigue management, .15 - No. 30 - 15/2/2012 - visit of Keolis, SNCF people, list of Executive leadership team with photos, Swanston St works, Myki introduction. .16 - No. 31 - 29/2/2012 - patronage up, tram postage stamps, Myki, rhinos. .17 - No. 32 - 14/3/2012 - St Kilda Rd trackwork, fund raising, Southbank Depot extensions, Myki, driving conditions, grand prix. .18 - No. 33 - 30/3/2012 - introduction of the PTV, end of MetLink and Transport Ticketing Authority, changes in management structure, trackwork, Gold Coast tramway and Keolis. .19 - No. 34 - Dr Jake - Royal children's Hospital super stop, route 96 - Premium line. .20 - No. 35, 2/5/2012 - Revision of Rules, trackwork in St Kilda Road and Elizabeth St, Myki, safety - Zero Harm. .21 - No. 69 - 25/9/2013 - Passengers paying their way, E class update, Mal Ashworth retires, progress report, feedback, new chime on trams. .22 - No. 70 - 9/10/2013 - Art comes alive, tram 925, driver simulator at Preston Workshops, E class project, 90th Glen Huntly. .23 - No. 83 - 23/4/2014 - Screen time for trams, new PIDs on B class, assistance animals, Operations Centre, Preston Workshops, Electrical log sheets to SLV. .24 - No. 89 - 23/7/2014 - punctuality, refresh of network map (fold-out map), women drivers. .25 - No. 97 - 19/11/2014 - Revitalising route 96, Keolis news, free tram zone, guide dogs. .26 - No. 99 - 17/12/2014 - Accessibility week, new uniform top for CSE's, free tram zone, world trade centre stop upgrade, heat stress, Art tram 158. .27 - No. 100 - 14/1/2015 - Route 96 complete, New Years eve free travel, fare compliance, patronage down, .28 - No. 12 - 16/5/2011 - Gold coast tramway, performance dashboard, tramworks and the rhino .29 - No. 16 - 19/7/2011 - Depot managers, tevor jones, record patronage, vision, rhino .30 - No. 17 - 2/8/2011 - High St Westgarth works, Duncan Smith, David Clarke Training, Swanston St works, and Preston Workshops . .32 - No. 39 - 28/6.2012 - maintenance, Emmanual Sorin, transformation, fare evasion, and Combino in Potsdam. .33 - No. 105 - 25/3/2015 - Grand Prix, Elgin and Lygon upgrade, Camberwell Junction, PTV hub, overhead. .34 - No. 78 - 12/2/2014 - January heatwave, Australian Open, Mark Wild of PTV, and Curt Skinner - voice in Channel 10 series Get Ace .35 - No. 81 - 26/3/2014 - drug and alcohol testing, zero harm, Victoria Bridge works, Keolis, relations with Toronto, Collins St safety and incident on a route 57 tram. .36 - No. 109 - 20/5/2015 - Goodbye Z class, Hello E class, Kew Depot centenary, drug & alcohol reminder, passenger satisfaction, Anzac day, B class life extension. .37 - No. 110 - 3/6/2015 - 3rd W class tram back grom Bendigo, employer of the year, CSE's go digital, Camberwell depot, Queensbridge tram and bus stop and Tram Hub preview. .38 - No. 115 - Feb. 2016 - 12 page centre stapled - New Year's eve services, spike the rhino is back, Burke Road level crossing removed, more E class, safe network in 2106, tennis, customers happy, New Preston depot, Farewell to Clement, Z class 40 years on network.Demonstrates Yarra trams staff newsletters.Set of 34 Yarra Trams internal newsletter "The Wire", All A4, printed in full colour. All four pages unless noted otherwise, full colour, performance snapshot on front cover.trams, tramways, yarra trams, traffic control, trackwork, spencer st, fund raising, operations, rhinos, carlton control, high st, haymarket, preston workshops, e class, route numbers, bridge road, wellington parade, ptv, royal visit, footscray road, gold coast, macarthur st, swanston st, superstops, newmarket, gardiner, burke road, level crossings, railway squares, myki, metlink, tickets, route 96, rules, st kilda road, elizabeth st, tram 158, tram 925, glen huntly depot, simulator, b class, opeations centre, art trams, patronage, kew depot, new preston, queensbridge, w class, bendigo, map -
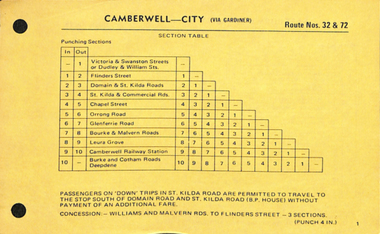 Melbourne Tram Museum
Book, Melbourne & Metropolitan Tramways Board (MMTB), Untitled but containing an extract of MMTB Electric Tramways and Motor Omnibuses Traffic Information Book" (Sections and Fares), Mar. 1981
... Pages 1 - 32 Details the various section and fares for each tram route. See item 1302 for the full book. 2 copies held....Pages 1 - 32 Details the various section and fares for each tram route. See item 1302 for the full book. 2 copies held. ...Grey card covers book, with the yellow pages only of the sections for general information, tram fares, secured with an Arnos binder metal clip on the left hand side, untitled containing an extract of the "MMTB Electric Tramways and Motor Omnibuses Traffic Information Book", dated March 1981. Pages 1 - 32 Details the various section and fares for each tram route. See item 1302 for the full book. 2 copies held.trams, tramways, mmtb, tickets, fares, sections -
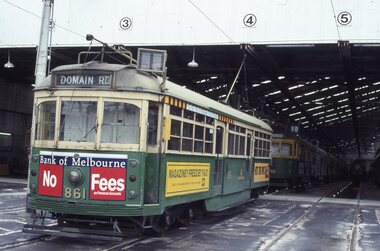 Melbourne Tram Museum
Album - Robert Thomson Slide Collection, "Melbourne 1-10th October 1993"
... Number Brief Description RT001 South Melbourne depot - tram 861 -"Domain Rd" RT002 Fitzroy St, St Kilda - tram 858 - route 16 RT003 "3" - Z class - tram 210 - "City" - route 05 RT004 Swanston St - tram 989 - "University" - route 8 RT005 Swanston St - tram 992 - "City" - route 6 RT006 Swanston St - tram 867 - "City" - route 8 RT007 "2" - Track Relay Wattletree Road RT008 "1" Track Relay Wattletree Road - tram 214 - route 05 RT009 Swanston St - tram 26 - "City - Swanston St" - route 6 RT010 Balaclava Junction - tram 76 - route 09 RT011 "6" - Track Relay Wattletree Road RT012 Fitzroy St - tram 2042 - "East Brunswick" route 96 RT013 Swanston St - tram 985 - "City" - route 8 RT014 "4" - Track Relay Wattletree Road, Malvern East, looking east to terminus at Burke Rd RT015 "5" - Track Relay Wattletree Road RT016 Collins St - tram 923 - "St Kilda Beach" - route 12 RT017 Victoria Pde Siding - tram 67 - "Special" - route 12 RT018 Nth Fitzroy Depot - trams 2037 & 2021 RT019 Park Street - tram 844 - "West Preston" - route 10 RT020 South Melb Beach Ter - tram 49 RT021 St Kilda Line - tram 67 - "East Brunswick" - route 96 RT022 Port Melb Terminus - tram 67 - "Port Melb'ne" - route 111 RT023 Port Melb Line - tram 2038 - "Exhibition Bldg" - route 111 RT024 Sth Melb Depot - tram 937 – “Restaurant" RT025 Collins St - tram 282 - "City" - route 42 RT026 Spring Street - tram 2100 - "City Spencer St" - route 86 RT027 Spring Street - tram 2093 - "Port Melbourne" - route 111 RT028 "1" New Track Spring St RT029 "2" track construction - Spring St RT030 "3" track construction - Spring St RT031 "4" track construction - Spring St RT032 "5" track construction - Spring St Demonstrates the work of Robert Thomson in photography, collection and/or production of slides Melbourne tramways trams Track Construction Assembled album in a black presentation folder of 32 colour slides, collected or produced by Robert Thomson. ...Photo - see pdf file for further information. Number Brief Description RT001 South Melbourne depot - tram 861 -"Domain Rd" RT002 Fitzroy St, St Kilda - tram 858 - route 16 RT003 "3" - Z class - tram 210 - "City" - route 05 RT004 Swanston St - tram 989 - "University" - route 8 RT005 Swanston St - tram 992 - "City" - route 6 RT006 Swanston St - tram 867 - "City" - route 8 RT007 "2" - Track Relay Wattletree Road RT008 "1" Track Relay Wattletree Road - tram 214 - route 05 RT009 Swanston St - tram 26 - "City - Swanston St" - route 6 RT010 Balaclava Junction - tram 76 - route 09 RT011 "6" - Track Relay Wattletree Road RT012 Fitzroy St - tram 2042 - "East Brunswick" route 96 RT013 Swanston St - tram 985 - "City" - route 8 RT014 "4" - Track Relay Wattletree Road, Malvern East, looking east to terminus at Burke Rd RT015 "5" - Track Relay Wattletree Road RT016 Collins St - tram 923 - "St Kilda Beach" - route 12 RT017 Victoria Pde Siding - tram 67 - "Special" - route 12 RT018 Nth Fitzroy Depot - trams 2037 & 2021 RT019 Park Street - tram 844 - "West Preston" - route 10 RT020 South Melb Beach Ter - tram 49 RT021 St Kilda Line - tram 67 - "East Brunswick" - route 96 RT022 Port Melb Terminus - tram 67 - "Port Melb'ne" - route 111 RT023 Port Melb Line - tram 2038 - "Exhibition Bldg" - route 111 RT024 Sth Melb Depot - tram 937 – “Restaurant" RT025 Collins St - tram 282 - "City" - route 42 RT026 Spring Street - tram 2100 - "City Spencer St" - route 86 RT027 Spring Street - tram 2093 - "Port Melbourne" - route 111 RT028 "1" New Track Spring St RT029 "2" track construction - Spring St RT030 "3" track construction - Spring St RT031 "4" track construction - Spring St RT032 "5" track construction - Spring St Demonstrates the work of Robert Thomson in photography, collection and/or production of slidesAssembled album in a black presentation folder of 32 colour slides, collected or produced by Robert Thomson. All photographs have been scanned and placed on the Museum's G drive. A list of all photographs with details has been compiled. melbourne, tramways, trams, track construction