
Showing 99 items matching " substance use"
-
 Robin Boyd Foundation
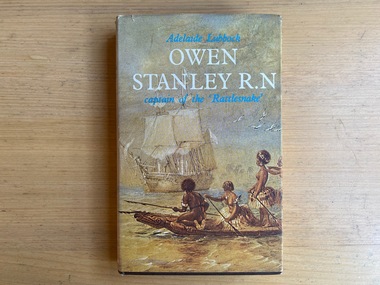
Book, Adelaide Lubbock, Owen Stanley R.N. Captain of the Rattlesnake, 1967
... ... Substance use...Biography Substance use Walsh St library Hardcover w/ Dust Jacket Owen Stanley R.N. ...Hardcover w/ Dust Jacketbiography, substance use, walsh st library -
 Koorie Heritage Trust
Book, Brady, Maggie, Heavy metal : the social meaning of petrol sniffing in Australia, 1992
... | Aboriginal Australians -- Substance use. | Inhalant abuse -- Australia..... | Aboriginal Australians -- Substance use. | Inhalant abuse -- Australia. In Heavy Metal the author attempts to go beyond the socio-political or disease models. ...In Heavy Metal the author attempts to go beyond the socio-political or disease models. Brady focuses on petrol (gasoline) sniffing in a number of Aboriginal communities to arrive at an understanding of the users' subjective decisions to engage in this behaviour.... This informed ethnographic account is the first major published study of contemporary drug use by Aborigines.xii, 223 p. ; ill., maps : 24 cm.In Heavy Metal the author attempts to go beyond the socio-political or disease models. Brady focuses on petrol (gasoline) sniffing in a number of Aboriginal communities to arrive at an understanding of the users' subjective decisions to engage in this behaviour.... This informed ethnographic account is the first major published study of contemporary drug use by Aborigines.petrol sniffing -- australia. | aboriginal australians -- health and hygiene. | aboriginal australians -- substance use. | inhalant abuse -- australia. -
 Flagstaff Hill Maritime Museum and Village
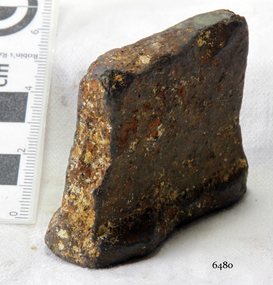
Relic
... Item of unknown use, unknown substance and lost heratage....flagstaff hill warrnambool shipwrecked-coast flagstaff-hill flagstaff-hill-maritime-museum maritime-museum shipwreck-coast flagstaff-hill-maritime-village Item of unknown use, unknown substance and lost heratage. Relic ...Item of unknown use, unknown substance and lost heratage.flagstaff hill, warrnambool, shipwrecked-coast, flagstaff-hill, flagstaff-hill-maritime-museum, maritime-museum, shipwreck-coast, flagstaff-hill-maritime-village -
 Warrnambool and District Historical Society Inc.
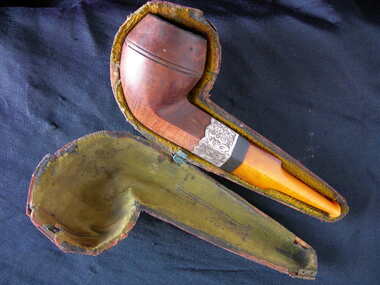
Pipe and case, Circa 19th century
... Tobacco was the most common substance used which dated from the mid 1600's. ...Tobacco was the most common substance used which dated from the mid 1600's. ...Pipe smoking is the oldest form of smoking. Tobacco was the most common substance used which dated from the mid 1600's. The practice is typically associated with relaxation and is more typically a mans' domain. Pipe of various types and construction were often used in ceremonies in many cultures around the world. The practice has declined in many parts of the world due to the A common item linked to a fairly common practice of the 18th- 20th centuries..1 Brown and caramel coloured pipe separated with a black band and silver overlay engraved with a leaf pattern.The bowl section is dark brown with a fine wood grain. The stem section is amber in colour and is possibly an early composite material such as bakelite. .2 The pipe shaped case is wood and is covered with leather on the outside and lined with greenish velvet with a small metal hinge on one end.W.A.T.with hallmark anchor, lion and unreadable letter.pipe, warrnambool, smoking pipe, gentleman's pipe -
 Parks Victoria - Days Mill and Farm
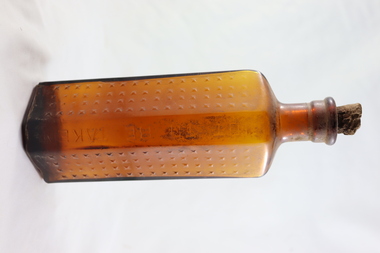
Container - Bottle
... Once contained a poisonous liquid substance. Probably used on site....Once contained a poisonous liquid substance. Probably used on site. william day ann day joseph day robert day "NOT TO BE TAKEN" Amber coloured bottle with a cork intact. ...Was found in an above ground rubbish pile at Days Mill and Farm. Once contained a poisonous liquid substance. Probably used on site.Amber coloured bottle with a cork intact. It has several flat sides, some with raised bumps and "NOT TO BE TAKEN" in raised lettering on the front panel of the bottle. "NOT TO BE TAKEN" william day, ann day, joseph day, robert day -
 City of Moorabbin Historical Society (Operating the Box Cottage Museum)
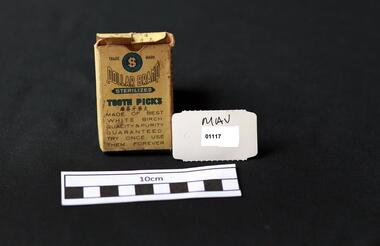
Containers, paper packet toothpicks 'Peacock', Peacock brand China, mid 20thC
... A toothpick is a small stick of wood, plastic, bamboo, metal, bone or other substance used to remove detritus from the teeth, usually after a meal. ...A toothpick is a small stick of wood, plastic, bamboo, metal, bone or other substance used to remove detritus from the teeth, usually after a meal. ...A toothpick is a small stick of wood, plastic, bamboo, metal, bone or other substance used to remove detritus from the teeth, usually after a meal. A toothpick usually has one or two sharp ends to insert between teeth. They can come in both wood and plastic, and can also be used for picking up small appetizers (like cheese cubes or olives) or as a cocktail stick. Toothpicks are well known in all cultures. Before the toothbrush was invented, teeth were cleaned with hard and soft dental woods. The first toothpick-manufacturing machine was developed in 1869, by Marc Signorello. Another was patented in 1872, by Silas Noble and J. P. Cooley A small paper packet containing wooden toothpicksTRADE $ MARK / DOLLAR BRAND / STERILIZED / TOOTHPICKS / (chinese characters) / MADE OF BEST / WHITE BIRCH / QUALITY & PURITY / GUARANTEED / TRY ONCE USE / THEM FOREVER. wood, toothpicks, dental cleaning, dentists, timber, birch trees, signorello marc, noble silas, cooley j. p. , moorabbin bentleigh cheltenham, maret gardeners, early settlers, -
 Embroiderers Guild, Victoria
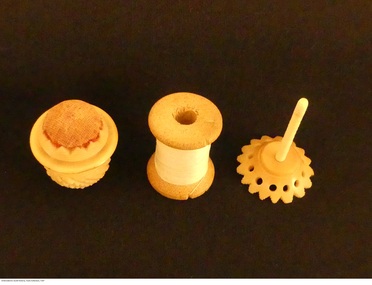
Tool - Vegetable ivory combined cotton reel holder and pin cushion, 1830-1870
... Vegetable ivory became a popular substance to use for needlework tools c 1860, it was very suitable for lathe turning and cheaper than ivory. ...Vegetable ivory became a popular substance to use for needlework tools c 1860, it was very suitable for lathe turning and cheaper than ivory. ...Vegetable ivory became a popular substance to use for needlework tools c 1860, it was very suitable for lathe turning and cheaper than ivory. Combining the cotton reel with a pincushion created a convenient tool to display and use. Presence of the wooden cotton reel dated 1863 tells of an early cotton reel, and that the piece was used.Vegetable ivory was a substitute for elephant ivory, this standing compendium was an useful item for display. Unusual to have a wooden cotton reel with a name and date. Standing thistle shaped carved vegetable ivory combined cotton reel holder and pincushion with bone spindle and worn red velvet pincushion. Cotton reel on it is a replacement and has cotton on it. Base of cotton reel in indian ink: "Gina Pipe, May 15th, 1863"reel, vegetable ivory -
 Coal Creek Community Park & Museum
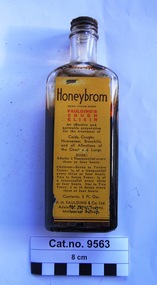
Cough Mixture, 1906-1990 (ref. Trademark registration)
... 'Honeybrom' Trade mark 205, was first registered by F H Faulding in Australia ( Class 5: Chemical substances prepared for use in medicine and pharmacy), on 2 July 1906 and removed from the register on 2 July 1990. ...'Honeybrom' Trade mark 205, was first registered by F H Faulding in Australia ( Class 5: Chemical substances prepared for use in medicine and pharmacy), on 2 July 1906 and removed from the register on 2 July 1990. ...'Honeybrom' Trade mark 205, was first registered by F H Faulding in Australia ( Class 5: Chemical substances prepared for use in medicine and pharmacy), on 2 July 1906 and removed from the register on 2 July 1990. URL https://search.ipaustralia.gov.au/trademarks/search/view/205?q=honeybrom Rectangular clear glass bottle for screw top, but with only cork lining of top remaining, with a yellow label printed in dark brown and red, containing a dark brown viscous liquid.One base to one side 'A121' and on the other side '1960' or '19, symbol,0'. Paper label : 'Honeybrom REGD. TRADEMARK FAULDING'S COUGH ELIXIR An effective and agreeable preparation for the treatment of Colds, Coughs, Hoarseness, Bronchitis, and all Affections of the Chest and Lungs. DOSE: Adults : 1 teaspoonful every three or four hours. Children - Seven to Twelve Years : 1/2 of a teaspoonful every three or four hours. Two to Seven Years : 1/4 of a teaspoon every three or four hours. One to Two Years : 5 to 10 drops every three or four hours. Contents : 3 Fl. Ozs. F.H. Faulding & Co Ltd. Adelaide, Perth, Sydney, Melbourne, Brisbane'.bottle, moulded glass. -
 Box Hill Historical Society
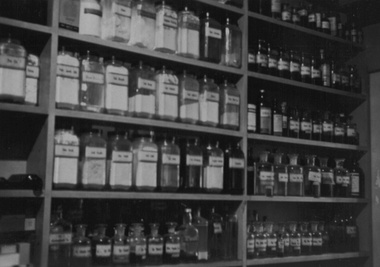
Photograph - Shops - pharmacies, 1950
... It shows jars of substances used to make up medications. The pharmacy of C.P. ...It shows jars of substances used to make up medications. The pharmacy of C.P. ...A close-up view of the shelves in the pharmacy of C.P. Wood. It shows jars of substances used to make up medications. The pharmacy of C.P. Wood was at 950 Station Street, Box Hill. In the early days of pharmacy, most medicines were compounded from liquid and solid ingredients, often from plants, which were made up into tinctures, infusions or syrups, and were collectively called "Galenicals" (named after Galen). Proprietary preparations were viewed with some suspicion. Up until the 1950's pharmacists manufactured and often prescribed many of these preparations for minor ailments. The powders and liquids shown in the photo would have been used to compound medicines in a mortar and pestle, which were often tonics, stomach mixtures and powders. By 1950, hand-made pills were rarely prescribed with the advent of machine manufactured tablets and capsules. Syrup of glucose, liquorice root and gum acacia or tragacanth were often used as binding agents to make the pill mass to which the drug required would be added. The ingredients would be worked into a malleable consistency, which was rolled into a thin pipe. This would be placed on the pill machine and the cutter would produce pill size pieces which were rolled into roughly spherical shapes and coated with starch, french chalk liquorice powder or varnish. In the early days some pills were coated in silver or gold leaf. A gross of pills would take a great deal of time to make and the job would often be given to the apprentice to make under supervision, to keep the wages cost lower.B&w photopharmacies, wood> c.p., businesses, station street, box hill, chemists -
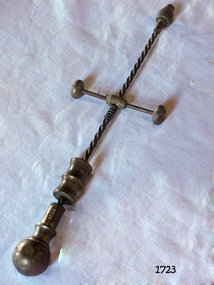 Flagstaff Hill Maritime Museum and Village
Tool - Archimedes Drill, 1900 to 1930s
... This tool provides a quick and easy way to bore holes through ordinary fret wood and other substances, smaller versions are used in jewellery making where precision drilling is required. ...This tool provides a quick and easy way to bore holes through ordinary fret wood and other substances, smaller versions are used in jewellery making where precision drilling is required. ...The Archimedes drill, also known as a fretwork drill, is an old type of drill which works on the Archimedian principle; the drill rotates quickly as the barrel on the stem is worked up and down. This tool provides a quick and easy way to bore holes through ordinary fret wood and other substances, smaller versions are used in jewellery making where precision drilling is required. There were numerous different sized Archimedes drills made from various materials, usually a combination of wood and steel, some being all steel and some including brass parts. The fancier versions of these drills included parts made from Rosewood, Ebony, Ivory and decorative brass parts. Some of the later Archimedes drills had technological improvements such as a ratchet device and the inclusion of fly-weights. The ratchet device allows the drill to revolve continuously in the cutting direction. The fly-weights give momentum to maintain the speed of the drill during the upward stroke of the hand. Most old examples have no makers names.A vintage drilling tool that has been nickel plated with brass fitting and easier to sterilise. The item therefore could have been used in the medical profession as a bone drill during surgery. Weighted Archimedes drill all metal construction, nickel plated with brass handles centrifugal typeNoneflagstaff hill, warrnambool, flagstaff-hill, flagstaff-hill-maritime-museum, maritime-museum, shipwreck-coast, flagstaff-hill-maritime-village, archimedean drill, drill, tool, drilling tool -
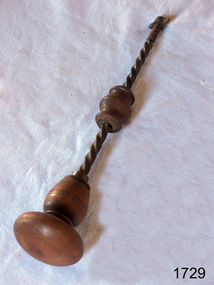 Flagstaff Hill Maritime Museum and Village
Tool - Archimedean drill, Mid to late 1800s
... This tool provides a quick and easy way to bore holes through ordinary fret wood and other substances, smaller versions are used in jewellery making where precision drilling is required. ...This tool provides a quick and easy way to bore holes through ordinary fret wood and other substances, smaller versions are used in jewellery making where precision drilling is required. ...The Archimedes drill, also known as a fretwork drill, is an old type of drill which works on the Archimedian principle; the drill rotates quickly as the barrel on the stem is worked up and down. This tool provides a quick and easy way to bore holes through ordinary fret wood and other substances, smaller versions are used in jewellery making where precision drilling is required. There were numerous different sized Archimedes drills made from various materials, usually a combination of wood and steel, some being all steel and some including brass parts. The fancier versions of these drills included parts made from Rosewood, Ebony, Ivory and decorative brass parts. Some of the later Archimedes drills had technological improvements such as a ratchet device and the inclusion of fly-weights. The ratchet device allows the drill to revolve continuously in the cutting direction. The fly-weights give momentum to maintain the speed of the drill during the upward stroke of the hand. Most old examples such as the subject item have no makers names.A vintage drilling tool that gives a snapshot into how holes were drilled by hand into small or delicate objects during the Victorian era. Tools from this time are today regarded as collectable items eagerly sought by collectors of antique tools.Archimedean drill with wooden grip and butterfly nut on chuck.Noneflagstaff hill, warrnambool, flagstaff-hill, flagstaff-hill-maritime-museum, maritime-museum, shipwreck-coast, flagstaff-hill-maritime-village, archimedean drill, drill, fretwork tools, wood working tools -
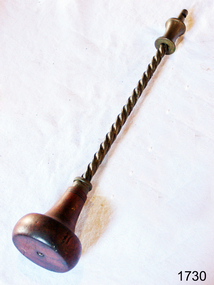 Flagstaff Hill Maritime Museum and Village
Tool - Archimedean drill, Late 19th Century
... This tool provides a quick and easy way to bore holes through ordinary fret wood and other substances, smaller versions are used in jewellery making where precision drilling is required. ...This tool provides a quick and easy way to bore holes through ordinary fret wood and other substances, smaller versions are used in jewellery making where precision drilling is required. ...The Archimedes drill, also known as a fretwork drill, is an old type of drill which works on the Archimedian principle; the drill rotates quickly as the barrel on the stem is worked up and down. This tool provides a quick and easy way to bore holes through ordinary fret wood and other substances, smaller versions are used in jewellery making where precision drilling is required. There were numerous different sized Archimedes drills made from various materials, usually a combination of wood and steel, some being all steel and some including brass parts. The fancier versions of these drills included parts made from Rosewood, Ebony, Ivory and decorative brass parts. Some of the later Archimedes drills had technological improvements such as a ratchet device and the inclusion of fly-weights. The ratchet device allows the drill to revolve continuously in the cutting direction. The fly-weights give momentum to maintain the speed of the drill during the upward stroke of the hand. Most old examples have no makers names.A vintage drilling tool, the item therefore could have been used in various industries or professions where precise drilling is required. Archimedean drill with Rosewood hand, brass grip and fittings Noneflagstaff hill, warrnambool, shipwrecked-coast, flagstaff-hill, flagstaff-hill-maritime-museum, maritime-museum, shipwreck-coast, flagstaff-hill-maritime-village, archimedean drill -
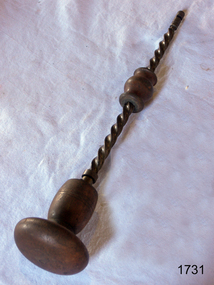 Flagstaff Hill Maritime Museum and Village
Tool - Archimedean drill, Late 19th Century
... This tool provides a quick and easy way to bore holes through ordinary fret wood and other substances, smaller versions are used in jewellery making where precision drilling is required. ...This tool provides a quick and easy way to bore holes through ordinary fret wood and other substances, smaller versions are used in jewellery making where precision drilling is required. ...The Archimedes drill, also known as a fretwork drill, is an old type of drill which works on the Archimedian principle; the drill rotates quickly as the barrel on the stem is worked up and down. This tool provides a quick and easy way to bore holes through ordinary fret wood and other substances, smaller versions are used in jewellery making where precision drilling is required. There were numerous different sized Archimedes drills made from various materials, usually a combination of wood and steel, some being all steel and some including brass parts. The fancier versions of these drills included parts made from Rosewood, Ebony, Ivory and decorative brass parts. Some of the later Archimedes drills had technological improvements such as a ratchet device and the inclusion of fly-weights. The ratchet device allows the drill to revolve continuously in the cutting direction. The fly-weights give momentum to maintain the speed of the drill during the upward stroke of the hand. Most old examples such as the subject item have no makers names.A vintage drilling tool that gives a snapshot into how holes were drilled by hand into small or delicate objects during the Victorian era. Tools from this time are today regarded as collectable items eagerly sought by collectors of antique tools. Archimedean drill with Rosewood hand, brass bearings, steel twist and wooden grip. Noneflagstaff hill, warrnambool, flagstaff-hill, flagstaff-hill-maritime-museum, maritime-museum, shipwreck-coast, flagstaff-hill-maritime-village, archimedean drill, archimedean drill with wooden hand, drilling tool -
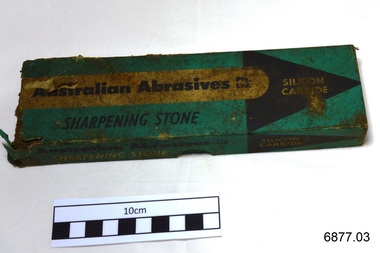 Flagstaff Hill Maritime Museum and Village
Sharpening Stone, mid 1900's
... Initially the substance was used for polishing gems then it went on to be used as an abrasive in sandpapers, grinding and sharpening stones and cutting tools. ...Initially the substance was used for polishing gems then it went on to be used as an abrasive in sandpapers, grinding and sharpening stones and cutting tools. ...In 1938 William Edward Mc Pherson established Australian Abrasives Pty. Ltd., manufacturing grinding and filing tools, blades and other similar hardware items. This sharpening stone is made of silicon carbide, which is a very hard synthetic product. The compound was discovered in America in 1981 by Edward Achison whilst trying to make artificial diamonds from a mixture of clay and powdered coke. Initially the substance was used for polishing gems then it went on to be used as an abrasive in sandpapers, grinding and sharpening stones and cutting tools. This sharpening stone was donated to Flagstaff Hill Maritime Village by the family of Doctor William Roy Angus, Surgeon and Oculist. It is part of the “W.R. Angus Collection” includes historical medical equipment, surgical instruments and material once belonging to Dr Edward Ryan and Dr Thomas Francis Ryan, (both of Nhill, Victoria) as well as Dr Angus’ own belongings. The Collection’s history spans the medical practices of the two Doctors Ryan, from 1885-1926 plus that of Dr Angus, up until 1969. ABOUT THE “W.R.ANGUS COLLECTION” Doctor William Roy Angus M.B., B.S., Adel., 1923, F.R.C.S. Edin.,1928 (also known as Dr Roy Angus) was born in Murrumbeena, Victoria in 1901 and lived until 1970. He qualified as a doctor in 1923 at University of Adelaide, was Resident Medical Officer at the Royal Adelaide Hospital in 1924 and for a period was house surgeon to Sir (then Mr.) Henry Simpson Newland. Dr Angus was briefly an Assistant to Dr Riddell of Kapunda, then commenced private practice at Curramulka, Yorke Peninsula, SA, where he was physician, surgeon and chemist. In 1926, he was appointed as new Medical Assistant to Dr Thomas Francis Ryan (T.F. Ryan, or Tom), in Nhill, Victoria, where his experiences included radiology and pharmacy. In 1927 he was Acting House Surgeon in Dr Tom Ryan’s absence. Dr Angus had become engaged to Gladys Forsyth and they decided he further his studies overseas in the UK in 1927. He studied at London University College Hospital and at Edinburgh Royal Infirmary and in 1928, was awarded FRCS (Fellow from the Royal College of Surgeons), Edinburgh. He worked his passage back to Australia as a Ship’s Surgeon on the on the Australian Commonwealth Line’s T.S.S. Largs Bay. Dr Angus married Gladys in 1929, in Ballarat. (They went on to have one son (Graham 1932, born in SA) and two daughters (Helen (died 12/07/1996) and Berenice (Berry), both born at Mira, Nhill ) According to Berry, her mother Gladys made a lot of their clothes. She was very talented and did some lovely embroidery including lingerie for her trousseau and beautifully handmade baby clothes. Dr Angus was a ‘flying doctor’ for the A.I.M. (Australian Inland Ministry) Aerial Medical Service in 1928 . Its first station was in the remote town of Oodnadatta, where Dr Angus was stationed. He was locum tenens there on North-South Railway at 21 Mile Camp. He took up this ‘flying doctor’ position in response to a call from Dr John Flynn; the organisation was later known as the Flying Doctor Service, then the Royal Flying Doctor Service. A lot of his work during this time involved dental surgery also. Between 1928-1932 he was surgeon at the Curramulka Hospital, Yorke Peninsula, South Australia. In 1933 Dr Angus returned to Nhill and purchased a share of the Nelson Street practice and Mira hospital (a 2 bed ward at the Nelson Street Practice) from Dr Les Middleton one of the Middleton Brothers, the current owners of what previously once Dr Tom Ryan’s practice. Dr Tom and his brother had worked as surgeons included eye surgery. Dr Tom Ryan performed many of his operations in the Mira private hospital on his premises. He had been House Surgeon at the Nhill Hospital 1902-1926. Dr Tom Ryan had one of the only two pieces of radiology equipment in Victoria during his practicing years – The Royal Melbourne Hospital had the other one. Over the years Dr Tom Ryan had gradually set up what was effectively a training school for country general-practitioner-surgeons. Each patient was carefully examined, including using the X-ray machine, and any surgery was discussed and planned with Dr Ryan’s assistants several days in advance. Dr Angus gained experience in using the X-ray machine there during his time as assistant to Dr Ryan. When Dr Angus bought into the Nelson Street premises in Nhill he was also appointed as the Nhill Hospital’s Honorary House Surgeon 1933-1938. His practitioner’s plate from his Nhill surgery is now mounted on the doorway to the Port Medical Office at Flagstaff Hill Maritime Village, Warrnambool. When Dr Angus took up practice in the Dr Edward and Dr Tom Ryan’s old premises he obtained their extensive collection of historical medical equipment and materials spanning 1884-1926. A large part of this collection is now on display at the Port Medical Office at Flagstaff Hill Maritime Village in Warrnambool. In 1939 Dr Angus and his family moved to Warrnambool where he purchased “Birchwood,” the 1852 home and medical practice of Dr John Hunter Henderson, at 214 Koroit Street. (This property was sold in1965 to the State Government and is now the site of the Warrnambool Police Station. and an ALDI sore is on the land that was once their tennis court). The Angus family was able to afford gardeners, cooks and maids; their home was a popular place for visiting dignitaries to stay whilst visiting Warrnambool. Dr Angus had his own silk worm farm at home in a Mulberry tree. His young daughter used his centrifuge for spinning the silk. Dr Angus was appointed on a part-time basis as Port Medical Officer (Health Officer) in Warrnambool and held this position until the 1940’s when the government no longer required the service of a Port Medical Officer in Warrnambool; he was thus Warrnambool’s last serving Port Medical Officer. (Masters of immigrant ships arriving in port reported incidents of diseases, illness and death and the Port Medical Officer made a decision on whether the ship required Quarantine and for how long, in this way preventing contagious illness from spreading from new immigrants to the residents already in the colony.) Dr Angus was a member of the Australian Medical Association, for 35 years and surgeon at the Warrnambool Base Hospital 1939-1942, He served as a Surgeon Captain during WWII1942-45, in Ballarat, Victoria, and in Bonegilla, N.S.W., completing his service just before the end of the war due to suffering from a heart attack. During his convalescence he carved an intricate and ‘most artistic’ chess set from the material that dentures were made from. He then studied ophthalmology at the Royal Melbourne Eye and Ear Hospital and created cosmetically superior artificial eyes by pioneering using the intrascleral cartilage. Angus received accolades from the Ophthalmological Society of Australasia for this work. He returned to Warrnambool to commence practice as an ophthalmologist, pioneering in artificial eye improvements. He was Honorary Consultant Ophthalmologist to Warrnambool Base Hospital for 31 years. He made monthly visits to Portland as a visiting surgeon, to perform eye surgery. He represented the Victorian South-West subdivision of the Australian Medical Association as its secretary between 1949 and 1956 and as chairman from 1956 to 1958. In 1968 Dr Angus was elected member of Spain’s Barraquer Institute of Barcelona after his research work in Intrasclearal cartilage grafting, becoming one of the few Australian ophthalmologists to receive this honour, and in the following year presented his final paper on Living Intrasclearal Cartilage Implants at the Inaugural Meeting of the Australian College of Ophthalmologists in Melbourne In his personal life Dr Angus was a Presbyterian and treated Sunday as a Sabbath, a day of rest. He would visit 3 or 4 country patients on a Sunday, taking his children along ‘for the ride’ and to visit with him. Sunday evenings he would play the pianola and sing Scottish songs to his family. One of Dr Angus’ patients was Margaret MacKenzie, author of a book on local shipwrecks that she’d seen as an eye witness from the late 1880’s in Peterborough, Victoria. In the early 1950’s Dr Angus, painted a picture of a shipwreck for the cover jacket of Margaret’s book, Shipwrecks and More Shipwrecks. She was blind in later life and her daughter wrote the actual book for her. Dr Angus and his wife Gladys were very involved in Warrnambool’s society with a strong interest in civic affairs. He had an interest in people and the community They were both involved in the creation of Flagstaff Hill, including the layout of the gardens. After his death (28th March 1970) his family requested his practitioner’s plate, medical instruments and some personal belongings be displayed in the Port Medical Office surgery at Flagstaff Hill Maritime Village, and be called the “W. R. Angus Collection”. W.R. Angus Collection is significant for still being located at the site it is connected with, Doctor Angus being the last Port Medical Officer in Warrnambool. The collection of medical instruments and other equipment is culturally significant, being an historical example of medicine from late 19th to mid-20th century. Dr Angus assisted Dr Tom Ryan, a pioneer in the use of X-rays and in ocular surgery. Sharpening stone, part of the W.R. Angus Collection. Grey, rectangular block of silicon carbide made from two pieces of different densities joined together. Sharpening stone is in green and black cardboard box with lid. Maker is Australian Abrasives Pty Ltd. Circa mid 1900’s.Box text "AUSTRALIAN ABRASIVES Pty Ltd SHARPENING STONE" and "SILICON CARBIDE" and "NO. 108 / COMB", "8" x 2" x 1" "flagstaff hill, warrnambool, shipwrecked coast, flagstaff hill maritime museum, maritime museum, shipwreck coast, flagstaff hill maritime village, great ocean road, dr w r angus, dr ryan, sharpening stone, australian abrasives pty ltd, sharpening tool, metal working equipment -
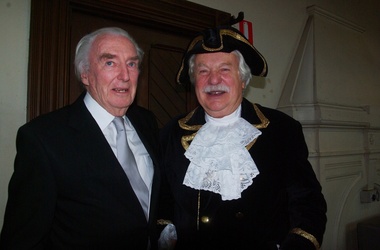 Ballarat Heritage Services
Digital photographs, L.J. Gervasoni, Prof McIntyre and Philip Slobom, c2009
... "We know of special cases where it has been used, such as high profile projects like Sydney Harbour Bridge, but Boroondara is one of the first in Victoria to employ this natural plant-based paint-stripping treatment to a large-scale building," Cr Healey said. "What this means is that no harmful substances..."We know of special cases where it has been used, such as high profile projects like Sydney Harbour Bridge, but Boroondara is one of the first in Victoria to employ this natural plant-based paint-stripping treatment to a large-scale building," Cr Healey said. "What this means is that no harmful substances ...Environmental approach to preserving Kew Court House 4 June 2010 Paint stripping from older buildings can be a hazardous task. The City of Boroondara has found an environmentally sustainable solution for the works at local heritage icon, the Kew Police Station and Court House. Council used an organic based paint stripping alternative as part of the repairs to the rendering on the building facade. Over nearly three months, the damaged and unsound render was removed, the paint was stripped and the render was repainted. Usually, paint is removed via high pressure water cleaning or sandblasting. This is a harsh method and involves combining extreme high amounts of pressure, water and sand and is highly toxic. It also creates high noise levels. In this 'green' project, Council used a soy bean paint stripper. The process uses a paste-like substance, which is highly effective, non toxic and biodegradable, and applied by hand. Initially, a bandage is applied (much like a leg waxing strip) over the top of paste. It is allowed to dry and then the bandage is stripped off. Noise was kept to a minimum by using the paint stripping alternative. Scrapings and bandages are then bagged and sent to the tip as landfill, so it does not end up in our water supply. The waste and debris don’t run-off into drains, and the bags and bi-products are biodegradable. Studley Ward Councillor Phillip Healey explained that soy bean paint removal is not greatly used in Melbourne or the local government sector. "We know of special cases where it has been used, such as high profile projects like Sydney Harbour Bridge, but Boroondara is one of the first in Victoria to employ this natural plant-based paint-stripping treatment to a large-scale building," Cr Healey said. "What this means is that no harmful substances were used and no injury was caused, soy paint removal also preserves, protects and restores the heritage integrity and decorative stone masonry features of the historic building. "This is a terrific example of our commitment to 'enhancing the environment' which is one of our key directions in the 2010–15 Council Plan." The restoration of the Kew Court House and Police Station is expected to be completed in the year ahead. Council purchased the heritage building in 2007 with the intention for it to be restored and used for the community. The building required extensive renovation including repair of the slate roof and ventilation dome, and the renovation plans include a new foyer, bathrooms and kitchen to ensure the venue meets a broad range of community needs. Heritage Victoria helped fund the cost of the roof repairs with a grant of $250,000, along with the Australian Government contributing $330,000 through its Regional and Local Community Infrastructure Program. Restoration Underway Concept plans for a new performance and exhibition space at the Kew Court House and Police Station have been developed by the City of Boroondara. Two years ago, Council Purchased the Kew Court House and Police Station from the State Government for $825,000 with the intention for it to be restored and used for the community. The building requires extensive renovation including repair of the slate roof and ventilation dome. The renovation plans include a new foyer, bathrooms and kitchen to ensure the venue meets a broad range of community needs. The restoration has been assisted with a Federal Government grant of $330,000 under the Regional and Local Community Infrastructure Program. In 2008, Council was also successful in obtaining a Heritage Victoria Grant of $250,000 towards the costs of the roof repairs. Having satisfied the necessary permit requirements, works are about to commence using slate of a similar quality to the original. The City of Boroondara would like to thank all residents and businesses who have contributed to the Kew Court House Restoration Appeal which has raised $650,000. Special thanks go to a private donor who donated $250,000 and the Kew Senior Citizens Club which contributed $50,000. NEWS FLASH 14th March “Council moves to provide certainty for the restoration of the courthouse”. In a historic meeting last night 13th March 07 at Boroondara Council voted overwhelmingly to complete the purchase of the Kew Court House. The partnership continues between the Kew Court House Restoration Appeal and the Council to see this project through. The project now has the overwhelming support of Council. “It is no longer about “if” it is about “when” the doors will re open” said Prof Peter McIntyre. With the property secured the fundraising can now be completed without the encumbrances and we know the restoration will be undertaken as the funds become available from the appeal. Work can commence as soon as significant fund raising is achieved. “The community, philanthropists and corporations can now enter this project with certainty. 7th March At the Council meeting on 5th March, following many hours of debate a motion was passed by 5 to 4 vote to purchase the Kew Court House and Police Station outright. As of 7th March Cr Dick Menting lodged a rescission notice. This means that there was another Council meeting at 6pm, Tuesday 13th March at Council Chambers. MEDIA RELEASE - Kew, 3rd December 2006 APPEAL LAUNCHED TO SAVE A NATIONAL TREASURE On the morning of Saturday 18th. November 2006 the people of Kew were aroused by the triumphant sound of the Boroondara Brass which had assembled outside the former Kew Police Station. After four long years of neglect, the precinct was being heralded back to life, and what a heartwarming sound it was for all those early shoppers who gathered to hear Cr. Phillip Healey introduce Patrons and supporters of the Save the Court House campaign. Following the speeches, the "Thermometer" was unveiled and the Appeal was formally under way. The various committees have worked very hard during these past weeks. The Kew Court House Arts Association Inc. has been formed under the leadership of Graeme McCoubrie. This organization brings all the amateur theatre groups in the City of Boroondara together with a view to providing them with a permanent performing space within the former Court House. As well as intimate theatre, there will be provision for the staging of instrumental and choral performances before an audience of 40 to 50 people. The Police Station will compliment the function of the Court House by providing a venue for artist groups to exhibit their work, for the Historical Societies of Boroondara to meet, and for study groups to meet, for activities such as play and poetry readings. It will be a Hub for the Arts in Kew. Of course none of this can happen unless the money to pay for restoration of the buildings is raised, and we only have until March 2007 in which to do this. The City of Boroondara, Kew Historical Society and the East Kew Community Bank are working together as a team to make this dream a reality, but WE NEED YOUR HELP. This is a fantastic one-off opportunity, and it must not be wasted. Donations to the Appeal can be made through the Kew East Kew Community Bank or any branch of the Bendigo Bank, or through the Kew Historical Society Inc., P.O. Box 175 Kew Vic 3101. All donations over $2 are tax deductible through the Community Enterprise Foundation. End Media Release Kew Courthouse future looks bright The State Government has accepted an offer from the local government of Boroondara to purchase the former Kew Courthouse and Police Station, Minister for Finance John Lenders said today. In a joint statement with the Mayor of Boroondara, Councillor Jack Wegman, Mr Lenders said he was pleased that agreement had been reached and the contract of sale document finalised. “I welcome the Council making this step towards purchasing this property after recent negotiations,” Mr Lenders said. “The settlement date for the purchase of the property is March 2007. The State government sold the property to Council at a reduced cost of $825,000 for community use. The full value of the buildings on the commercial marketplace was estimated to be about $2million,” he said. Cr Wegman said the Contract of Sale provides that if the funds cannot be raised to restore the property for use as community buildings then they will be returned to the State government. In relation to this additional funding to restore and modernise the buildings, Council and the community will work together over the next eight months, with the encouragement of the State government, Cr Wegman said. Mr Lenders said both he and the Premier had advised the Council of fundraising opportunities to help the Council convert the property for its future use. Cr Wegman noted that applications for funding from the Community Support Fund and for State government heritage grants were being processed. “Council has agreed to a Memorandum of Understanding with the Kew Historical Society outlining arrangements for the Kew Court House Restoration Appeal and Council is delighted with the level of support shown by the community and is confident of a bright future for these historic buildings.” Mr Lenders said the Bracks Government is committed to securing the best outcome when buildings that have once served the community outlive their original purpose. “There is a responsibility for Governments to practice good financial management and achieve the best possible price when an asset is longer used by the State,” he said. “There is also a responsibility to consider the local community. The Government and City of Boroondara have worked hard to achieve a balance between these two interests.” The building ceased to operate as a courthouse in 1971 and as a police station in 2002. Part of the building was also used as a post office and this section of the building was sold by the Commonwealth in 1992 to a private owner and is currently run as a licensed restaurant. It is listed on the State's Heritage Register as a place of historical and architectural significance and is protected by the Victorian Heritage Act. Created: 30 August 2006 Last Update: 10 January 2007 kew, kew court house, phillip slobom, town crier, professor peter mcintyre -
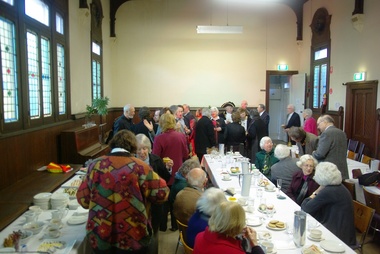 Ballarat Heritage Services
Photograph - Digital photographs, L.J. Gervasoni, Kew Historical Society in the Former Kew Court House, c2009
... "We know of special cases where it has been used, such as high profile projects like Sydney Harbour Bridge, but Boroondara is one of the first in Victoria to employ this natural plant-based paint-stripping treatment to a large-scale building," Cr Healey said. "What this means is that no harmful substances..."We know of special cases where it has been used, such as high profile projects like Sydney Harbour Bridge, but Boroondara is one of the first in Victoria to employ this natural plant-based paint-stripping treatment to a large-scale building," Cr Healey said. "What this means is that no harmful substances ...Environmental approach to preserving Kew Court House 4 June 2010 Paint stripping from older buildings can be a hazardous task. The City of Boroondara has found an environmentally sustainable solution for the works at local heritage icon, the Kew Police Station and Court House. Council used an organic based paint stripping alternative as part of the repairs to the rendering on the building facade. Over nearly three months, the damaged and unsound render was removed, the paint was stripped and the render was repainted. Usually, paint is removed via high pressure water cleaning or sandblasting. This is a harsh method and involves combining extreme high amounts of pressure, water and sand and is highly toxic. It also creates high noise levels. In this 'green' project, Council used a soy bean paint stripper. The process uses a paste-like substance, which is highly effective, non toxic and biodegradable, and applied by hand. Initially, a bandage is applied (much like a leg waxing strip) over the top of paste. It is allowed to dry and then the bandage is stripped off. Noise was kept to a minimum by using the paint stripping alternative. Scrapings and bandages are then bagged and sent to the tip as landfill, so it does not end up in our water supply. The waste and debris don’t run-off into drains, and the bags and bi-products are biodegradable. Studley Ward Councillor Phillip Healey explained that soy bean paint removal is not greatly used in Melbourne or the local government sector. "We know of special cases where it has been used, such as high profile projects like Sydney Harbour Bridge, but Boroondara is one of the first in Victoria to employ this natural plant-based paint-stripping treatment to a large-scale building," Cr Healey said. "What this means is that no harmful substances were used and no injury was caused, soy paint removal also preserves, protects and restores the heritage integrity and decorative stone masonry features of the historic building. "This is a terrific example of our commitment to 'enhancing the environment' which is one of our key directions in the 2010–15 Council Plan." The restoration of the Kew Court House and Police Station is expected to be completed in the year ahead. Council purchased the heritage building in 2007 with the intention for it to be restored and used for the community. The building required extensive renovation including repair of the slate roof and ventilation dome, and the renovation plans include a new foyer, bathrooms and kitchen to ensure the venue meets a broad range of community needs. Heritage Victoria helped fund the cost of the roof repairs with a grant of $250,000, along with the Australian Government contributing $330,000 through its Regional and Local Community Infrastructure Program. Restoration Underway Concept plans for a new performance and exhibition space at the Kew Court House and Police Station have been developed by the City of Boroondara. Two years ago, Council Purchased the Kew Court House and Police Station from the State Government for $825,000 with the intention for it to be restored and used for the community. The building requires extensive renovation including repair of the slate roof and ventilation dome. The renovation plans include a new foyer, bathrooms and kitchen to ensure the venue meets a broad range of community needs. The restoration has been assisted with a Federal Government grant of $330,000 under the Regional and Local Community Infrastructure Program. In 2008, Council was also successful in obtaining a Heritage Victoria Grant of $250,000 towards the costs of the roof repairs. Having satisfied the necessary permit requirements, works are about to commence using slate of a similar quality to the original. The City of Boroondara would like to thank all residents and businesses who have contributed to the Kew Court House Restoration Appeal which has raised $650,000. Special thanks go to a private donor who donated $250,000 and the Kew Senior Citizens Club which contributed $50,000. NEWS FLASH 14th March “Council moves to provide certainty for the restoration of the courthouse”. In a historic meeting last night 13th March 07 at Boroondara Council voted overwhelmingly to complete the purchase of the Kew Court House. The partnership continues between the Kew Court House Restoration Appeal and the Council to see this project through. The project now has the overwhelming support of Council. “It is no longer about “if” it is about “when” the doors will re open” said Prof Peter McIntyre. With the property secured the fundraising can now be completed without the encumbrances and we know the restoration will be undertaken as the funds become available from the appeal. Work can commence as soon as significant fund raising is achieved. “The community, philanthropists and corporations can now enter this project with certainty. 7th March At the Council meeting on 5th March, following many hours of debate a motion was passed by 5 to 4 vote to purchase the Kew Court House and Police Station outright. As of 7th March Cr Dick Menting lodged a rescission notice. This means that there was another Council meeting at 6pm, Tuesday 13th March at Council Chambers. MEDIA RELEASE - Kew, 3rd December 2006 APPEAL LAUNCHED TO SAVE A NATIONAL TREASURE On the morning of Saturday 18th. November 2006 the people of Kew were aroused by the triumphant sound of the Boroondara Brass which had assembled outside the former Kew Police Station. After four long years of neglect, the precinct was being heralded back to life, and what a heartwarming sound it was for all those early shoppers who gathered to hear Cr. Phillip Healey introduce Patrons and supporters of the Save the Court House campaign. Following the speeches, the "Thermometer" was unveiled and the Appeal was formally under way. The various committees have worked very hard during these past weeks. The Kew Court House Arts Association Inc. has been formed under the leadership of Graeme McCoubrie. This organization brings all the amateur theatre groups in the City of Boroondara together with a view to providing them with a permanent performing space within the former Court House. As well as intimate theatre, there will be provision for the staging of instrumental and choral performances before an audience of 40 to 50 people. The Police Station will compliment the function of the Court House by providing a venue for artist groups to exhibit their work, for the Historical Societies of Boroondara to meet, and for study groups to meet, for activities such as play and poetry readings. It will be a Hub for the Arts in Kew. Of course none of this can happen unless the money to pay for restoration of the buildings is raised, and we only have until March 2007 in which to do this. The City of Boroondara, Kew Historical Society and the East Kew Community Bank are working together as a team to make this dream a reality, but WE NEED YOUR HELP. This is a fantastic one-off opportunity, and it must not be wasted. Donations to the Appeal can be made through the Kew East Kew Community Bank or any branch of the Bendigo Bank, or through the Kew Historical Society Inc., P.O. Box 175 Kew Vic 3101. All donations over $2 are tax deductible through the Community Enterprise Foundation. End Media Release Kew Courthouse future looks bright The State Government has accepted an offer from the local government of Boroondara to purchase the former Kew Courthouse and Police Station, Minister for Finance John Lenders said today. In a joint statement with the Mayor of Boroondara, Councillor Jack Wegman, Mr Lenders said he was pleased that agreement had been reached and the contract of sale document finalised. “I welcome the Council making this step towards purchasing this property after recent negotiations,” Mr Lenders said. “The settlement date for the purchase of the property is March 2007. The State government sold the property to Council at a reduced cost of $825,000 for community use. The full value of the buildings on the commercial marketplace was estimated to be about $2million,” he said. Cr Wegman said the Contract of Sale provides that if the funds cannot be raised to restore the property for use as community buildings then they will be returned to the State government. In relation to this additional funding to restore and modernise the buildings, Council and the community will work together over the next eight months, with the encouragement of the State government, Cr Wegman said. Mr Lenders said both he and the Premier had advised the Council of fundraising opportunities to help the Council convert the property for its future use. Cr Wegman noted that applications for funding from the Community Support Fund and for State government heritage grants were being processed. “Council has agreed to a Memorandum of Understanding with the Kew Historical Society outlining arrangements for the Kew Court House Restoration Appeal and Council is delighted with the level of support shown by the community and is confident of a bright future for these historic buildings.” Mr Lenders said the Bracks Government is committed to securing the best outcome when buildings that have once served the community outlive their original purpose. “There is a responsibility for Governments to practice good financial management and achieve the best possible price when an asset is longer used by the State,” he said. “There is also a responsibility to consider the local community. The Government and City of Boroondara have worked hard to achieve a balance between these two interests.” The building ceased to operate as a courthouse in 1971 and as a police station in 2002. Part of the building was also used as a post office and this section of the building was sold by the Commonwealth in 1992 to a private owner and is currently run as a licensed restaurant. It is listed on the State's Heritage Register as a place of historical and architectural significance and is protected by the Victorian Heritage Act. Created: 30 August 2006 Last Update: 10 January 2007 Colour photograph of the Kew Historical Society holding an event in the Former Kew Court House.kew, kew court house, kew historical society, meeting, city of boroondara -
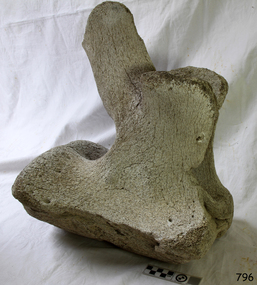 Flagstaff Hill Maritime Museum and Village
Animal specimen - Whale bone, Undetermined
... use to fuel street lamps. The British were not interested. In his diary, Adams wrote that he told Pitt, “the fat of the spermaceti whale gives the clearest and most beautiful flame of any substance that is known in nature, and we are surprised you prefer darkness, and consequent robberies, burglaries, and murders in your streets to receiving as a remittance our spermaceti oil.” ...use to fuel street lamps. The British were not interested. In his diary, Adams wrote that he told Pitt, “the fat of the spermaceti whale gives the clearest and most beautiful flame of any substance that is known in nature, and we are surprised you prefer darkness, and consequent robberies, burglaries, and murders in your streets to receiving as a remittance our spermaceti oil.” ...Prior to carrying out a detailed condition report of the cetacean skeletons, it is useful to have an understanding of the materials we are likely to encounter, in terms of structure and chemistry. This entry invites you to join in learning about the composition of whale bone and oil. Whale bone (Cetacean) bone is comprised of a composite structure of both an inorganic matrix of mainly hydroxylapatite (a calcium phosphate mineral), providing strength and rigidity, as well as an organic protein ‘scaffolding’ of mainly collagen, facilitating growth and repair (O’Connor 2008, CCI 2010). Collagen is also the structural protein component in cartilage between the whale vertebrae and attached to the fins of both the Killer Whale and the Dolphin. Relative proportions in the bone composition (affecting density), are linked with the feeding habits and mechanical stresses typically endured by bones of particular whale types. A Sperm Whale (Physeter macrocephalus Linnaeus, 1758) skeleton (toothed) thus has a higher mineral value (~67%) than a Fin Whale (Balaenoptera physalus Linnaeus, 1758) (baleen) (~60%) (Turner Walker 2012). The internal structure of bone can be divided into compact and cancellous bone. In whales, load-bearing structures such as mandibles and upper limb bones (e.g. humerus, sternum) are largely composed of compact bone (Turner Walker 2012). This consists of lamella concentrically deposited around the longitudinal axis and is permeated by fluid carrying channels (O’Connor 2008). Cancellous (spongy) bone, with a highly porous angular network of trabeculae, is less stiff and thus found in whale ribs and vertebrae (Turner Walker 2012). Whale oil Whales not only carry a thick layer of fat (blubber) in the soft tissue of their body for heat insulation and as a food store while they are alive, but also hold large oil (lipid) reserves in their porous bones. Following maceration of the whale skeleton after death to remove the soft tissue, the bones retain a high lipid content (Higgs et. al 2010). Particularly bones with a spongy (porous) structure have a high capacity to hold oil-rich marrow. Comparative data of various whale species suggests the skull, particularly the cranium and mandible bones are particularly oil rich. Along the vertebral column, the lipid content is reduced, particularly in the thoracic vertebrae (~10-25%), yet greatly increases from the lumbar to the caudal vertebrae (~40-55%). The chest area (scapula, sternum and ribs) show a mid-range lipid content (~15-30%), with vertically orientated ribs being more heavily soaked lower down (Turner Walker 2012, Higgs et. al 2010). Whale oil is largely composed of triglycerides (molecules of fatty acids attached to a glycerol molecule). In Arctic whales a higher proportion of unsaturated, versus saturated fatty acids make up the lipid. Unsaturated fatty acids (with double or triple carbon bonds causing chain kinks, preventing close packing (solidifying) of molecules), are more likely to be liquid (oil), versus solid (fat) at room temperature (Smith and March 2007). Objects Made From the Whaling Industry We all know that men set forth in sailing ships and risked their lives to harpoon whales on the open seas throughout the 1800s. And while Moby Dick and other tales have made whaling stories immortal, people today generally don't appreciate that the whalers were part of a well-organized industry. The ships that set out from ports in New England roamed as far as the Pacific in hunt of specific species of whales. Adventure may have been the draw for some whalers, but for the captains who owned whaling ships, and the investors which financed voyages, there was a considerable monetary payoff. The gigantic carcasses of whales were chopped and boiled down and turned into products such as the fine oil needed to lubricate increasing advanced machine tools. And beyond the oil derived from whales, even their bones, in an era before the invention of plastic, was used to make a wide variety of consumer goods. In short, whales were a valuable natural resource the same as wood, minerals, or petroleum we now pump from the ground. Oil From Whale’s Blubber Oil was the main product sought from whales, and it was used to lubricate machinery and to provide illumination by burning it in lamps. When a whale was killed, it was towed to the ship and its blubber, the thick insulating fat under its skin, would be peeled and cut from its carcass in a process known as “flensing.” The blubber was minced into chunks and boiled in large vats on board the whaling ship, producing oil. The oil taken from whale blubber was packaged in casks and transported back to the whaling ship’s home port (such as New Bedford, Massachusetts, the busiest American whaling port in the mid-1800s). From the ports it would be sold and transported across the country and would find its way into a huge variety of products. Whale oil, in addition to be used for lubrication and illumination, was also used to manufacture soaps, paint, and varnish. Whale oil was also utilized in some processes used to manufacture textiles and rope. Spermaceti, a Highly Regarded Oil A peculiar oil found in the head of the sperm whale, spermaceti, was highly prized. The oil was waxy, and was commonly used in making candles. In fact, candles made of spermaceti were considered the best in the world, producing a bright clear flame without an excess of smoke. Spermaceti was also used, distilled in liquid form, as an oil to fuel lamps. The main American whaling port, New Bedford, Massachusetts, was thus known as "The City That Lit the World." When John Adams was the ambassador to Great Britain before serving as president he recorded in his diary a conversation about spermaceti he had with the British Prime Minister William Pitt. Adams, keen to promote the New England whaling industry, was trying to convince the British to import spermaceti sold by American whalers, which the British could use to fuel street lamps. The British were not interested. In his diary, Adams wrote that he told Pitt, “the fat of the spermaceti whale gives the clearest and most beautiful flame of any substance that is known in nature, and we are surprised you prefer darkness, and consequent robberies, burglaries, and murders in your streets to receiving as a remittance our spermaceti oil.” Despite the failed sales pitch John Adams made in the late 1700s, the American whaling industry boomed in the early to mid-1800s. And spermaceti was a major component of that success. Spermaceti could be refined into a lubricant that was ideal for precision machinery. The machine tools that made the growth of industry possible in the United States were lubricated, and essentially made possible, by oil derived from spermaceti. Baleen, or "Whalebone" The bones and teeth of various species of whales were used in a number of products, many of them common implements in a 19th century household. Whales are said to have produced “the plastic of the 1800s.” The "bone" of the whale which was most commonly used wasn’t technically a bone, it was baleen, a hard material arrayed in large plates, like gigantic combs, in the mouths of some species of whales. The purpose of the baleen is to act as a sieve, catching tiny organisms in sea water, which the whale consumes as food. As baleen was tough yet flexible, it could be used in a number of practical applications. And it became commonly known as "whalebone." Perhaps the most common use of whalebone was in the manufacture of corsets, which fashionable ladies in the 1800s wore to compress their waistlines. One typical corset advertisement from the 1800s proudly proclaims, “Real Whalebone Only Used.” Whalebone was also used for collar stays, buggy whips, and toys. Its remarkable flexibility even caused it to be used as the springs in early typewriters. The comparison to plastic is apt. Think of common items which today might be made of plastic, and it's likely that similar items in the 1800s would have been made of whalebone. Baleen whales do not have teeth. But the teeth of other whales, such as the sperm whale, would be used as ivory in such products as chess pieces, piano keys, or the handles of walking sticks. Pieces of scrimshaw, or carved whale's teeth, would probably be the best remembered use of whale's teeth. However, the carved teeth were created to pass the time on whaling voyages and were never a mass production item. Their relative rarity, of course, is why genuine pieces of 19th century scrimshaw are considered to be valuable collectibles today. Reference: McNamara, Robert. "Objects Made From the Whaling Industry." ThoughtCo, Jul. 31, 2021, thoughtco.com/products-produced-from-whales-1774070.Whale bone was an important commodity, used in corsets, collar stays, buggy whips, and toys.Whale bone vertebrae. Advanced stage of calcification as indicated by deep pitting. Off white to grey.Noneflagstaff hill, warrnambool, shipwrecked-coast, flagstaff-hill, flagstaff-hill-maritime-museum, maritime-museum, shipwreck-coast, flagstaff-hill-maritime-village, whales, whale bone, corsets, toys, whips, whalebone -
 Flagstaff Hill Maritime Museum and Village
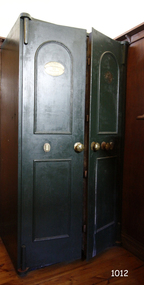
Functional object - Safe, W. Marr, Circa 1855
... used to make the boxes. In about 1840 Thomas Milner, a Sheffield tinsmith, made the earliest safes that could safely protect their contents from a surrounding fire. This was achieved by including tubes of a substance...used to make the boxes. In about 1840 Thomas Milner, a Sheffield tinsmith, made the earliest safes that could safely protect their contents from a surrounding fire. This was achieved by including tubes of a substance ...This strong, heavy bank safe was made by W. Marr in London. It was formerly owned by the ANZ Bank in Portland, Victoria. Portland’s ANZ Bank was originally a branch of the Bank of Australasia, which first came to Australia in 1835, opening in Sydney. Portland’s Bank of Australasia began in a bluestone building built on the north corner of Julia and Bentinck Streets by stonemason William Robb in 1855, around the time of Australia’s Gold Rush. Eventually, in 1951, the Bank of Australasia merged with the Union Bank to become the Australia & New Zealand Bank, known as the ANZ. Portland’s branch of the Bank of Australasia then moved into the old Union Bank building at 44 Percy Streets; both bank buildings were built around the same. The maker of this safe, W. (William) Marr, obtained a patent in 1834 for what is believed to be the first fire-retarding patent, building this into the lining of strong boxes. Others made further design improvements such as hardening the metal plates used to make the boxes. In about 1840 Thomas Milner, a Sheffield tinsmith, made the earliest safes that could safely protect their contents from a surrounding fire. This was achieved by including tubes of a substance between the inner and outer walls of the safe that would react to the heat and the contents would put the fire out. In 1851 an Exhibition at London’s Crystal Palace included fire-proof safes from different vendors. William Marr was listed under Fireproof Box Makers in the 1842 London Trades Directory, at 33 Broad Street, and 52 Cheapside. William Marr & Son were appointed to supply Her Majesty’s National Debt Office and other departments in 1860, with the address 9 Walbrook, Vulcan Safe Works, Skin Yard, Bankside, Southwark, London. 1n 1870 the address for William Marr listed under Safe Makers and Agents in the London Trades Directory was 67 Cannon Street. The manufacturer, W Marr, is significant as an inventor of a way to make a strong box fireproof, then patented his secure safe. This invention indicates that security of money was of great importance in the mid-1800s as it continues to be today. The secure safe would have given much comfort to those with investments and savings, as well as to the bank itself, the custodian of other people's money. This safe was made in London and exported to colonial Australia, giving significance to the safe as an item that was high in the list of the needs of the early Australians and their businesses. The safe has local historical significance as it was used by the original Bank of Australasia in Portland, which was built in 1855 and went on to become the ANZ Bank, still in operation today. The bank was an integral part of the establishment and growth of commerce in Colonial Victoria.Safe; heavy metal bank safe, painted green. Double doors each have top and bottom external hinges, and two front panels; the top panels are arched. The thick doors have five sliding locks. Inside is a fixed metal compartment with a locked sliding metal drawer, and several fitted shelves plus some temporary removable shelving. Both doors have a decorative brass knob near the centre opening. Left door has an oval artificial keyhole and a space where another fitting has been attached. The right door has a second brass knob and an oval keyhole. The top panels of the left door has an oval plaque with an inscription; the right door has evidence that there was an oval attachment. Made by W. Marr, London.Text embossed on plaque: "W. MARR / PATENTEE & MANUFACTURER / 52 / /CHEAPSIDE / LONDON" flagstaff hill, warrnambool, shipwreck coast, flagstaff hill maritime museum, flagstaff hill maritime village, maritime museum, great ocean road, shipwreck artefact, safe, bank safe, vault, security, finances, anz bank, portland bank, w marr, william w marr, financial institution, savings, gold exchange, loans, investments, safety, safe maker, lock maker, iron box, strong-room -
 Flagstaff Hill Maritime Museum and Village
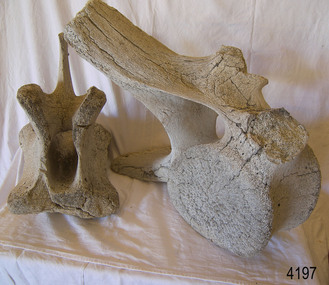
Animal specimen - Whale bone, Undetermined
... use to fuel street lamps. The British were not interested. In his diary, Adams wrote that he told Pitt, “the fat of the spermaceti whale gives the clearest and most beautiful flame of any substance that is known in nature, and we are surprised you prefer darkness, and consequent robberies, burglaries, and murders in your streets to receiving as a remittance our spermaceti oil.” ...use to fuel street lamps. The British were not interested. In his diary, Adams wrote that he told Pitt, “the fat of the spermaceti whale gives the clearest and most beautiful flame of any substance that is known in nature, and we are surprised you prefer darkness, and consequent robberies, burglaries, and murders in your streets to receiving as a remittance our spermaceti oil.” ...Prior to carrying out a detailed condition report of the cetacean skeletons, it is useful to have an understanding of the materials we are likely to encounter, in terms of structure and chemistry. This entry invites you to join in learning about the composition of whale bone and oil. Whale bone (Cetacean) bone is comprised of a composite structure of both an inorganic matrix of mainly hydroxylapatite (a calcium phosphate mineral), providing strength and rigidity, as well as an organic protein ‘scaffolding’ of mainly collagen, facilitating growth and repair (O’Connor 2008, CCI 2010). Collagen is also the structural protein component in cartilage between the whale vertebrae and attached to the fins of both the Killer Whale and the Dolphin. Relative proportions in the bone composition (affecting density), are linked with the feeding habits and mechanical stresses typically endured by bones of particular whale types. A Sperm Whale (Physeter macrocephalus Linnaeus, 1758) skeleton (toothed) thus has a higher mineral value (~67%) than a Fin Whale (Balaenoptera physalus Linnaeus, 1758) (baleen) (~60%) (Turner Walker 2012). The internal structure of bone can be divided into compact and cancellous bone. In whales, load-bearing structures such as mandibles and upper limb bones (e.g. humerus, sternum) are largely composed of compact bone (Turner Walker 2012). This consists of lamella concentrically deposited around the longitudinal axis and is permeated by fluid carrying channels (O’Connor 2008). Cancellous (spongy) bone, with a highly porous angular network of trabeculae, is less stiff and thus found in whale ribs and vertebrae (Turner Walker 2012). Whale oil Whales not only carry a thick layer of fat (blubber) in the soft tissue of their body for heat insulation and as a food store while they are alive, but also hold large oil (lipid) reserves in their porous bones. Following maceration of the whale skeleton after death to remove the soft tissue, the bones retain a high lipid content (Higgs et. al 2010). Particularly bones with a spongy (porous) structure have a high capacity to hold oil-rich marrow. Comparative data of various whale species suggests the skull, particularly the cranium and mandible bones are particularly oil rich. Along the vertebral column, the lipid content is reduced, particularly in the thoracic vertebrae (~10-25%), yet greatly increases from the lumbar to the caudal vertebrae (~40-55%). The chest area (scapula, sternum and ribs) show a mid-range lipid content (~15-30%), with vertically orientated ribs being more heavily soaked lower down (Turner Walker 2012, Higgs et. al 2010). Whale oil is largely composed of triglycerides (molecules of fatty acids attached to a glycerol molecule). In Arctic whales a higher proportion of unsaturated, versus saturated fatty acids make up the lipid. Unsaturated fatty acids (with double or triple carbon bonds causing chain kinks, preventing close packing (solidifying) of molecules), are more likely to be liquid (oil), versus solid (fat) at room temperature (Smith and March 2007). Objects Made From the Whaling Industry We all know that men set forth in sailing ships and risked their lives to harpoon whales on the open seas throughout the 1800s. And while Moby Dick and other tales have made whaling stories immortal, people today generally don't appreciate that the whalers were part of a well-organized industry. The ships that set out from ports in New England roamed as far as the Pacific in hunt of specific species of whales. Adventure may have been the draw for some whalers, but for the captains who owned whaling ships, and the investors which financed voyages, there was a considerable monetary payoff. The gigantic carcasses of whales were chopped and boiled down and turned into products such as the fine oil needed to lubricate increasing advanced machine tools. And beyond the oil derived from whales, even their bones, in an era before the invention of plastic, was used to make a wide variety of consumer goods. In short, whales were a valuable natural resource the same as wood, minerals, or petroleum we now pump from the ground. Oil From Whale’s Blubber Oil was the main product sought from whales, and it was used to lubricate machinery and to provide illumination by burning it in lamps. When a whale was killed, it was towed to the ship and its blubber, the thick insulating fat under its skin, would be peeled and cut from its carcass in a process known as “flensing.” The blubber was minced into chunks and boiled in large vats on board the whaling ship, producing oil. The oil taken from whale blubber was packaged in casks and transported back to the whaling ship’s home port (such as New Bedford, Massachusetts, the busiest American whaling port in the mid-1800s). From the ports it would be sold and transported across the country and would find its way into a huge variety of products. Whale oil, in addition to be used for lubrication and illumination, was also used to manufacture soaps, paint, and varnish. Whale oil was also utilized in some processes used to manufacture textiles and rope. Spermaceti, a Highly Regarded Oil A peculiar oil found in the head of the sperm whale, spermaceti, was highly prized. The oil was waxy, and was commonly used in making candles. In fact, candles made of spermaceti were considered the best in the world, producing a bright clear flame without an excess of smoke. Spermaceti was also used, distilled in liquid form, as an oil to fuel lamps. The main American whaling port, New Bedford, Massachusetts, was thus known as "The City That Lit the World." When John Adams was the ambassador to Great Britain before serving as president he recorded in his diary a conversation about spermaceti he had with the British Prime Minister William Pitt. Adams, keen to promote the New England whaling industry, was trying to convince the British to import spermaceti sold by American whalers, which the British could use to fuel street lamps. The British were not interested. In his diary, Adams wrote that he told Pitt, “the fat of the spermaceti whale gives the clearest and most beautiful flame of any substance that is known in nature, and we are surprised you prefer darkness, and consequent robberies, burglaries, and murders in your streets to receiving as a remittance our spermaceti oil.” Despite the failed sales pitch John Adams made in the late 1700s, the American whaling industry boomed in the early to mid-1800s. And spermaceti was a major component of that success. Spermaceti could be refined into a lubricant that was ideal for precision machinery. The machine tools that made the growth of industry possible in the United States were lubricated, and essentially made possible, by oil derived from spermaceti. Baleen, or "Whalebone" The bones and teeth of various species of whales were used in a number of products, many of them common implements in a 19th century household. Whales are said to have produced “the plastic of the 1800s.” The "bone" of the whale which was most commonly used wasn’t technically a bone, it was baleen, a hard material arrayed in large plates, like gigantic combs, in the mouths of some species of whales. The purpose of the baleen is to act as a sieve, catching tiny organisms in sea water, which the whale consumes as food. As baleen was tough yet flexible, it could be used in a number of practical applications. And it became commonly known as "whalebone." Perhaps the most common use of whalebone was in the manufacture of corsets, which fashionable ladies in the 1800s wore to compress their waistlines. One typical corset advertisement from the 1800s proudly proclaims, “Real Whalebone Only Used.” Whalebone was also used for collar stays, buggy whips, and toys. Its remarkable flexibility even caused it to be used as the springs in early typewriters. The comparison to plastic is apt. Think of common items which today might be made of plastic, and it's likely that similar items in the 1800s would have been made of whalebone. Baleen whales do not have teeth. But the teeth of other whales, such as the sperm whale, would be used as ivory in such products as chess pieces, piano keys, or the handles of walking sticks. Pieces of scrimshaw, or carved whale's teeth, would probably be the best remembered use of whale's teeth. However, the carved teeth were created to pass the time on whaling voyages and were never a mass production item. Their relative rarity, of course, is why genuine pieces of 19th century scrimshaw are considered to be valuable collectibles today. Reference: McNamara, Robert. "Objects Made From the Whaling Industry." ThoughtCo, Jul. 31, 2021, thoughtco.com/products-produced-from-whales-1774070.Whale bone was an important commodity, used in corsets, collar stays, buggy whips, and toys.Whale bone in two pieces. Advanced stage of calcification as indicated by deep pitting. Off white to grey.None.flagstaff hill, warrnambool, shipwrecked-coast, flagstaff-hill, flagstaff-hill-maritime-museum, maritime-museum, shipwreck-coast, flagstaff-hill-maritime-village, whale bones, whale skeleton, whales, whale bone, corsets, toys, whips -
 Flagstaff Hill Maritime Museum and Village
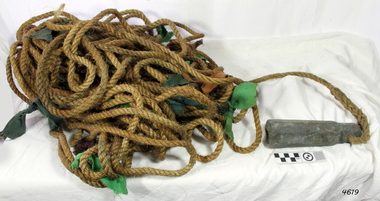
Equipment - Lead line
... used was a Fathom, which equals 1.83 metres. The codes were: - 2 fathoms = 2 strips of leather 3 fathoms = 3 strips of leather 5 fathoms = white duck fabric 7 fathoms = red bunting fabric 10 fathoms = leather with a hole 13 fathoms = blue serge fabric 15 fathoms = white duck fabric 17 fathoms = red bunting 20 fathoms = 2 knots The lead weight could be between 7 -14 pounds (3.5 – 6.5kg) and the rope would be approximately 25 fathoms (45m). The hollowed-out end of the weight would hold a stick substance...used was a Fathom, which equals 1.83 metres. The codes were: - 2 fathoms = 2 strips of leather 3 fathoms = 3 strips of leather 5 fathoms = white duck fabric 7 fathoms = red bunting fabric 10 fathoms = leather with a hole 13 fathoms = blue serge fabric 15 fathoms = white duck fabric 17 fathoms = red bunting 20 fathoms = 2 knots The lead weight could be between 7 -14 pounds (3.5 – 6.5kg) and the rope would be approximately 25 fathoms (45m). The hollowed-out end of the weight would hold a stick substance ...The lead line or hand lead is a simple navigational instrument used as a depth finder to measure the depth of water under the ship’s keel and to take samples of the sea bed. The long line may be marked at regular intervals with tags of different coloured and textured fabric, such as rope, leather and cloth. Each tag was a code to represent a certain depth. The leadsman’s eyes and hands could distinguish the depth easily as he drew in the lead line, day or night and in poor weather conditions. A standard set of codes for the tags was used so that the depth of the sea could be easily and quickly read. The measurement used was a Fathom, which equals 1.83 metres. The codes were: - 2 fathoms = 2 strips of leather 3 fathoms = 3 strips of leather 5 fathoms = white duck fabric 7 fathoms = red bunting fabric 10 fathoms = leather with a hole 13 fathoms = blue serge fabric 15 fathoms = white duck fabric 17 fathoms = red bunting 20 fathoms = 2 knots The lead weight could be between 7 -14 pounds (3.5 – 6.5kg) and the rope would be approximately 25 fathoms (45m). The hollowed-out end of the weight would hold a stick substance such as tallow or wax, which would pick up samples from the sea bed which would show whether the vessel was close to, or far away from, the shore. The leadsman would stand at the front of the vessel and cast the lead line into the sea. When it hit bottom he would note the tag marker nearest the surface of the water and call out his finding. Then he would haul it up again and examine the kind of matter that adhered to the end of the weight, whether it be sand, mud, gravel, or the colour of it. This information would be given to the ship’s helmsman or navigator and would help indicate the proximity to the land.This handheld lead is an example of early marine navigational equipment used by sailors to travel the seas to measure the depth of the water and sample the nature of the seabed. It helps to understand the history and progress made from the very basic to the sophisticated technology of today.Lead line, sounding line or depth finder. The long length of rope has a heavy lead weight attached to the end. Coloured fabric tags are tied onto the rope at regular intervals, representing different depths. The concave base of weight holds sticky substances such as tallow or beeswax, providing an adhesive surface to collect samples of sea bed like sand, shells or pebbles. flagstaff hill, warrnambool, shipwrecked coast, flagstaff hill maritime museum, maritime museum, shipwreck coast, flagstaff hill maritime village, lead line, depth finder, hand lead, sounding lin, leadsmane, navigation instrument, leadline, hand lead line -
 Federation University Historical Collection
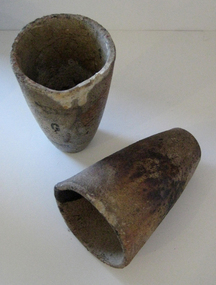
Ceramic Crucible, Morgan Fluxing Pot
... A crucible is a vessel made of a refractory substance such as graphite or porcelain, used for melting and calcining materials at high temperatures. ...A crucible is a vessel made of a refractory substance such as graphite or porcelain, used for melting and calcining materials at high temperatures. ...A crucible is a vessel made of a refractory substance such as graphite or porcelain, used for melting and calcining materials at high temperatures. (http://www.thefreedictionary.com/crucible) Morgan Crucible was established in 1856. See http://ubshwiki.ballarat.edu.au/index.php/Morgan_Crucible_Co. A crucible is used to hold small amounts of chemicals during heating at high temperatures. The lid covers the bowl so nothing escapes, or to keep oxygen out of the reaction. (http://wiki.answers.com/Q/What_is_a_crucible_and_how_is_it_used_in_a_laboratory)Two used narrow high shape crucibles with small spouts made by Morgan of England. They are heat-resistant containers used to melt ores, metals, and other materials. One has green (copper origin?) glaze like material on the base and sidecrucible, assaying, morgan -
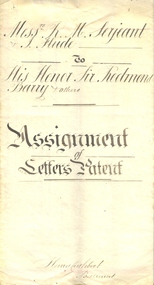 Federation University Historical Collection
Document, Indenture Between Robert M. Serjeant, Joseph Flude and the Trustees of the Ballarat School of Mines regarding Letters of Patents for the Benefit of the Ballarat School of Mines, 1877, 04/03/1875
... substance is affected by means of a scraper at the base of the cone. It was claimed that this was a new mode of introducing heated air, and the exclusion of flame during the operation of roasting pyrites. The self-acting charge and discharge of the furnace and the peculiar construction of the hot air chambers, and the use...substance is affected by means of a scraper at the base of the cone. It was claimed that this was a new mode of introducing heated air, and the exclusion of flame during the operation of roasting pyrites. The self-acting charge and discharge of the furnace and the peculiar construction of the hot air chambers, and the use ...R.M. Serjeant was listed as a mining manager and Joseph Flude as a metallurgist. In 1875 they were both living in Ballarat. The patent number is A.D.1875, 4th March. No 2031. According to the patent the hearth of the furnace is in the form of a cone revolving horizontally. The feed is supplied to the apex of the cone by an archimedian screw. The crown of the furnace comprises a double covering or roof with an intermediate chamber for receiving heated air. The inner covering is pierced to admit of the heated air being brought into contact with the pyrites on the face of the revolving hearth. The discharge of the roasted substance is affected by means of a scraper at the base of the cone. It was claimed that this was a new mode of introducing heated air, and the exclusion of flame during the operation of roasting pyrites. The self-acting charge and discharge of the furnace and the peculiar construction of the hot air chambers, and the use of perforated bricks through which the supply of air is affected were also new. (http://patentsvictoria.net/002031.html) From the Goulburn Herald, 14 September 1878 "A feature connected with the school of mines is the yet unfinished pyrites works. The extraction of the gold from pyrites and the utilization for commercial purposes of other substances connected with pyrites are peculiarly important to Ballarat, because were a simple and inexpensive method devised there are millions and millions of tons of quartz that would then be made remunerative. With this thought in their minds two scientific gentlemen invented the school of mines self-acting rotatory furnace. This, for lack of funds, has not been completed as yet, but the amount in hand for the purpose is daily increasing, and it will eventually be an accomplished fact. It is in contemplation also to erect machinery shops in connection with the school, and it is purposed to con struct a steam-engine to do at once the work of the pyrites treatment and the ma chine room. A model shaft and mine too are being prepared for on the reserve, so that practical mining of the most thorough character may be taught on the ground.'Large indenture on red bordered vellum. The indenture was regarding a patent for the benefit of the Ballarat School of Mines. Letters Patent for an Invention for Roasting Pyrites to be called 'the Ballarat School of Mines self-Acting Pyrites Furnace" to Robery Malachy Serjeant and Joseph Flude. The large document is on a vellum type paper complete with stamps and seal. The document is signed by Acting-Governor William Stawell. Inscriptions and Markings Written on verso: "Date of Patent 4th March 1875 No 2031 Letters Patent for An invention for roasting pyrities to be called "The Ballarat School of Mines Self-acting Pyrities Furnace" to Robert Malachy Serjeant and Joseph Flude Melbourne, Victoriaballarat school of mines, serjeant, r.m. serjeant, robert m. serjeant, flude, joseph flude, patent, barry, redmond barry, rogers, judge rogers, bland, rivett henry bland, john airy, warrington rogers, establishment, indenture, legal, cuthbert, ballarat school of mines trustees, william stawell, john warrington rogers -
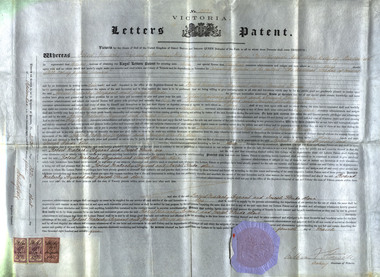 Federation University Historical Collection
Document, Letters Patent for an Invention for Roasting Pyrites, 1875, 1875
... substance is affected by means of a scraper at the base of the cone. It was claimed that this was a new mode of introducing heated air, and the exclusion of flame during the operation of roasting pyrites. The self-acting charge and discharge of the furnace and the peculiar construction of the hot air chambers, and the use...substance is affected by means of a scraper at the base of the cone. It was claimed that this was a new mode of introducing heated air, and the exclusion of flame during the operation of roasting pyrites. The self-acting charge and discharge of the furnace and the peculiar construction of the hot air chambers, and the use ...R.M. Serjeant was listed as a mining manager and Joseph Flude as a metallurgist. In 1875 they were both living in Ballarat. The patent number is A.D.1875, 4th March. No 2031. According to the patent the hearth of the furnace is in the form of a cone revolving horizontally. The feed is supplied to the apex of the cone by an archimedian screw. The crown of the furnace comprises a double covering or roof with an intermediate chamber for receiving heated air. The inner covering is pierced to admit of the heated air being brought into contact with the pyrites on the face of the revolving hearth. The discharge of the roasted substance is affected by means of a scraper at the base of the cone. It was claimed that this was a new mode of introducing heated air, and the exclusion of flame during the operation of roasting pyrites. The self-acting charge and discharge of the furnace and the peculiar construction of the hot air chambers, and the use of perforated bricks through which the supply of air is affected were also new. (http://patentsvictoria.net/002031.html) From the Goulburn Herald, 14 September 1878 "A feature connected with the school of mines is the yet unfinished pyrites works. The extraction of the gold from pyrites and the utilization for commercial purposes of other substances connected with pyrites are peculiarly important to Ballarat, because were a simple and inexpensive method devised there are millions and millions of tons of quartz that would then be made remunerative. With this thought in their minds two scientific gentlemen invented the school of mines self-acting rotatory furnace. This, for lack of funds, has not been completed as yet, but the amount in hand for the purpose is daily increasing, and it will eventually be an accomplished fact. It is in contemplation also to erect machinery shops in connection with the school, and it is purposed to con struct a steam-engine to do at once the work of the pyrites treatment and the ma chine room. A model shaft and mine too are being prepared for on the reserve, so that practical mining of the most thorough character may be taught on the ground.'Letters Patent for an Invention for Roasting Pyrites to be called 'the Ballarat School of Mines Self-Acting Pyrites Furnace' to Robert Malachy Serjeant and Joseph Flude. The large document is on a vellum type paper complete with stamps and seal. The document is signed by Acting-Governor William Stawell.Written on verso: "Date of Patent 4th March 1875 No 2031 Letters Patent for An invention for roasting pyrities to be called "The Ballarat School of Mines Self-acting Pyrities Furnace" to Robert Malachy Serjeant and Joseph Flude Melbourne, Victoriaballarat school of mines, serjeant, r.m. serjeant, robert m. serjeant, flude, joseph flude, richard gibbs, stawell, william stawell, pyrities furnace, philately, statute stamp, seal (victoria), ballarat school of mines self-acting pyrities furnace, ballarat school of mines self-acting pyrites furnace -
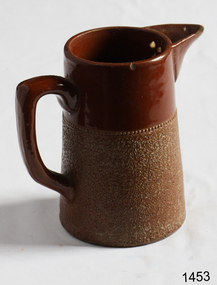 Flagstaff Hill Maritime Museum and Village
Domestic object - Jug
... use. I can guess by the way they interact with each other, however, on the whole, you need to test every idea you have, and not run the test on a vertical surface! Simply put, glaze is a layer of glass like substance...use. I can guess by the way they interact with each other, however, on the whole, you need to test every idea you have, and not run the test on a vertical surface! Simply put, glaze is a layer of glass like substance ...The Process of Making Pottery Decorating, Firing, Glazing, Making, Technical There is a rhythm and flow to clay. It can’t be done all at once! Even the making process! It can take weeks to get everything done, especially if you can only work on your pottery once a week! Even though we have three hour classes, it’s often just not enough time! Here is an overview of some of the processes so you have a bit more grasp on some of the technical stuff! Step One – Design There are SO many ideas out there for making stuff in clay! From delicate porcelain jewellery, through to heavy sculptural work and everything in between. Deciding your direction is sometimes not that easy – when you first start, try everything, you will naturally gravitate to the style that you enjoy! The options and variations are endless and can get a wee bit overwhelming too! Check in with me before you start to ensure your ideas will work, what order you might do things, how you could achieve the look you are seeking and any other technical data required! Step Two – Making Clay is thixotropic. This means that as you work with it, the clay first gets sloppier and wetter, before is begins to dry in the atmosphere. For most things, you simply can’t do all parts of the project at once. An example of work order might look like: Get last weeks work out from the shelves Prepare clay for today’s work – roll your clay, prepare balls for throwing, make the first stage of a pinch pot) Clean up last week’s work and put it on the shelf for bisque firing Check that you have any glazing to do – and do enough of it that you will have time to finish your main project Do the next step of your next project – there might be a further step that can’t be complete immediately, in that case, wrap your work well and put onto the shelves. Letting your work rest for a while can really help keep your work clean and professional looking. Many things require bagging under plastic to keep it ready for work the next week – put your name on the outside of the bag so you can find your work easily. We have stickers and markers. Consider how you want to decorate your work – coloured slip can be applied at a fairly wet stage (remembering that it will make your work even wetter!). Trying to apply slip to dry clay won’t work! If you want to do sgraffito – you will need to keep the work leather hard (a state of dryness where you can still work the clay with a little effort and a little water and care). Step Three – Drying Most of the time your work can go into the rack uncovered to let it dry out for the following week. If you want to continue forming or shaping you will need to double bag your work – put your work on a suitable sized bat and put the bat in a bag so the base of the bag is under the bat, then put another bag over the top of the work and tuck the top of the bag under the bat. If you want to trim (or turn) your thrown work the following week, it should also be double bagged. If your work is large, delicate, or of uneven thicknesses, you should lightly cover your work for drying. When considering the drying process, bare in mind the weather, humidity and wind! The hotter and dryer, the faster things dry and work can dry unevenly in the shelves – this can lead to cracking – another time to lightly cover your work for drying. Step Four – Trimming and Cleaning Up Your work is dry! It is called greenware now and it is at it’s most fragile! Handle everything with two hands. I often refer to soft hands – keep everything gentle and with your fingers spread as much as possible. Try to not pick up things like plates too much, and always with both hands! Before your work can be bisque fired it should be “cleaned up”. You work won’t go into the kiln if it has sharp edges – when glazed, sharp edges turn into razor blades! Use a piece of fly wire to rub the work all over – this will scratch a little so be light handed. Use a knife or metal kidney to scrape any areas that require a bit more dynamic treatment than the fly wire offers! Finally, a very light wipe over with a slightly damp sponge can help soften and soothe all of your edges and dags! Trimming thrown work: If you are planning to trim (or turn) your thrown work (and you should be), make sure you bag it well – your work should be leather hard to almost dry for easiest trimming. Use this step to finish the work completely – use a metal kidney to polish the surface, or a slightly damp sponge to give a freshly thrown look. Wipe the sponge around the rim after trimming, and check the inside of the pot for dags! Trimming slip cast work: Usually I will trim the rims of your work on the wheel the following day to make that stage easier, however you will still need to check your work for lumps and bumps. Last but not least – check that your name is still clearly on the bottom of your work. Step Five – Bisque Firing When the work is completely dry it can go into the bisque kiln. The bisque kiln is fired to 1000°C. This process burns off the water in the clay as well as some of the chemically bound water. The structure of the clay is not altered that much at this temperature. Inside the bisque kiln, the work is stacked a little, small bowl inside a larger bowl and onto a heavy plate. Smaller items like decorations or drink coasters might get stacked several high. Consideration is paid to the weight of the stack and shape of the work. A bisque kiln can fire about one and a half times the amount of work that the glaze kiln can fire. The firing takes about 10 hours to complete the cycle and about two days to cool down. Once it has been emptied the work is placed in the glaze room ready for you to decorate! Step Six – Glazing Decorating your work with colour can be a lot of fun – and time consuming! There are three main options for surface treatment at this stage: Oxide Washes Underglazes Glazes Washes and underglazes do not “glaze” the work – It will still need a layer of glaze to fully seal the clay (washes don’t need glaze on surfaces not designed for food or liquid as they can gloss up a little on their own). Underglazes are stable colourants that turn out pretty much how they look in the jar. They can be mixed with each other to form other colours and can be used like water colours to paint onto your work. Mostly they should have a clear glaze on top to seal them. Oxides are a different species – the pink oxide (cobalt) wash turns out bright blue for instance. They don’t always need a glaze on top, and some glazes can change the colour of the wash! The glazes need no other “glaze” on top! Be careful of unknown glaze interactions – you can put any combination of glaze in a bowl or on a plate, but only a single glaze on the outside of any vertical surface! Glazes are a chemical reaction under heat. We don’t know the exact chemicals in the Mayco glazes we use. I can guess by the way they interact with each other, however, on the whole, you need to test every idea you have, and not run the test on a vertical surface! Simply put, glaze is a layer of glass like substance that bonds with the clay underneath. Clay is made of silica, alumina and water. Glaze is made of mostly silica. Silica has a melting point of 1700°C and we fire to 1240°C. The silica requires a “flux” to help it melt at the lower temperature. Fluxes can be all sorts of chemicals – a common one is calcium – calcium has a melting point of 2500°C, however, together they both melt at a much lower temperature! Colourants are metal oxides like cobalt (blue), chrome (green through black), copper (green, blue, even red!), manganese (black, purple and pink) iron (red brown), etc. Different chemicals in the glaze can have dramatic effects. for example, barium carbonate (which we don’t use) turns manganese bright pink! Other elements can turn manganese dioxide brown, blue, purple and reddish brown. Manganese dioxide is a flux in and of itself as well. So, glazes that get their black and purple colours, often interact with other glazes and RUN! Our mirror black is a good example – it mixes really well with many glazes because it fluxes them – causes them to melt faster. It will also bring out many beautiful colours in the glazes because it’s black colouring most definitely comes from manganese dioxide! Glaze chemistry is a whole subject on it’s own! We use commercial Mayco glazes on purpose – for their huge range of colour possibilities, stability, cool interactions, artistic freedom with the ability to easily brush the glazes on and ease of use. We currently have almost 50 glazes on hand! A major project is to test the interactions of all glazes with each other. That is 2,500 test tiles!!!! I’m going to make the wall behind the wheels the feature wall of pretty colours! Step Seven – Glaze (Gloss or sometimes called “Glost”) Firing Most of the time this is the final stage of making your creation (but not always!) The glaze kiln goes to 1240°C. This is called cone 6, or midrange. It is the low end of stoneware temperatures. Stoneware clays and glazes are typically fired at cone 8 – 10, that is 1260 – 1290°C. The energy requirement to go from 1240°C to 1280°C is almost a 30% more! Our clay is formulated to vitrify (mature, turn “glass-like”) at 1240°, as are our glazes. A glaze kiln take around 12 hours to reach temperature and two to three days to cool down. Sometimes a third firing process is required – this is for decoration that is added to work after the glaze firing. For example – adding precious metals and lustres. this firing temperature is usually around 600 – 800°C depending upon the techniques being used. There are many students interested in gold and silver trims – we will be doing this third type of firing soon! After firing your work will be in the student finished work shelves. Remember to pay for it before you head out the door! There is a small extra charge for using porcelain clay (it’s more than twice the price of regular clay), and for any third firing process! Once your work has been fired it can not turn back into clay for millennia – so don’t fire it if you don’t like it! Put it in the bucket for recycling. https://firebirdstudios.com.au/the-process-of-making-pottery/The form of the jug has been in use for many centuries.Stoneware jug. Two tone brown glaze with pierced lip behind spout. Spout chipped.None.flagstaff hill, warrnambool, shipwrecked-coast, flagstaff-hill, flagstaff-hill-maritime-museum, maritime-museum, shipwreck-coast, flagstaff-hill-maritime-village, jug, ceramic jug -
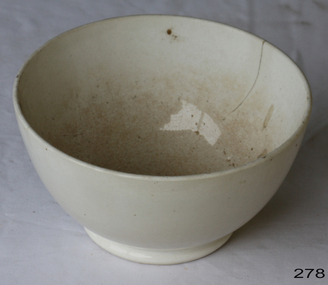 Flagstaff Hill Maritime Museum and Village
Domestic object - Bowl, Late 19th or early 20th Century
... use. I can guess by the way they interact with each other, however, on the whole, you need to test every idea you have, and not run the test on a vertical surface! Simply put, glaze is a layer of glass like substance...use. I can guess by the way they interact with each other, however, on the whole, you need to test every idea you have, and not run the test on a vertical surface! Simply put, glaze is a layer of glass like substance ...The Process of Making Pottery Decorating, Firing, Glazing, Making, Technical There is a rhythm and flow to clay. It can’t be done all at once! Even the making process! It can take weeks to get everything done, especially if you can only work on your pottery once a week! Even though we have three hour classes, it’s often just not enough time! Here is an overview of some of the processes so you have a bit more grasp on some of the technical stuff! Step One – Design There are SO many ideas out there for making stuff in clay! From delicate porcelain jewellery, through to heavy sculptural work and everything in between. Deciding your direction is sometimes not that easy – when you first start, try everything, you will naturally gravitate to the style that you enjoy! The options and variations are endless and can get a wee bit overwhelming too! Check in with me before you start to ensure your ideas will work, what order you might do things, how you could achieve the look you are seeking and any other technical data required! Step Two – Making Clay is thixotropic. This means that as you work with it, the clay first gets sloppier and wetter, before is begins to dry in the atmosphere. For most things, you simply can’t do all parts of the project at once. An example of work order might look like: Get last weeks work out from the shelves Prepare clay for today’s work – roll your clay, prepare balls for throwing, make the first stage of a pinch pot) Clean up last week’s work and put it on the shelf for bisque firing Check that you have any glazing to do – and do enough of it that you will have time to finish your main project Do the next step of your next project – there might be a further step that can’t be complete immediately, in that case, wrap your work well and put onto the shelves. Letting your work rest for a while can really help keep your work clean and professional looking. Many things require bagging under plastic to keep it ready for work the next week – put your name on the outside of the bag so you can find your work easily. We have stickers and markers. Consider how you want to decorate your work – coloured slip can be applied at a fairly wet stage (remembering that it will make your work even wetter!). Trying to apply slip to dry clay won’t work! If you want to do sgraffito – you will need to keep the work leather hard (a state of dryness where you can still work the clay with a little effort and a little water and care). Step Three – Drying Most of the time your work can go into the rack uncovered to let it dry out for the following week. If you want to continue forming or shaping you will need to double bag your work – put your work on a suitable sized bat and put the bat in a bag so the base of the bag is under the bat, then put another bag over the top of the work and tuck the top of the bag under the bat. If you want to trim (or turn) your thrown work the following week, it should also be double bagged. If your work is large, delicate, or of uneven thicknesses, you should lightly cover your work for drying. When considering the drying process, bare in mind the weather, humidity and wind! The hotter and dryer, the faster things dry and work can dry unevenly in the shelves – this can lead to cracking – another time to lightly cover your work for drying. Step Four – Trimming and Cleaning Up Your work is dry! It is called greenware now and it is at it’s most fragile! Handle everything with two hands. I often refer to soft hands – keep everything gentle and with your fingers spread as much as possible. Try to not pick up things like plates too much, and always with both hands! Before your work can be bisque fired it should be “cleaned up”. You work won’t go into the kiln if it has sharp edges – when glazed, sharp edges turn into razor blades! Use a piece of fly wire to rub the work all over – this will scratch a little so be light handed. Use a knife or metal kidney to scrape any areas that require a bit more dynamic treatment than the fly wire offers! Finally, a very light wipe over with a slightly damp sponge can help soften and soothe all of your edges and dags! Trimming thrown work: If you are planning to trim (or turn) your thrown work (and you should be), make sure you bag it well – your work should be leather hard to almost dry for easiest trimming. Use this step to finish the work completely – use a metal kidney to polish the surface, or a slightly damp sponge to give a freshly thrown look. Wipe the sponge around the rim after trimming, and check the inside of the pot for dags! Trimming slip cast work: Usually I will trim the rims of your work on the wheel the following day to make that stage easier, however you will still need to check your work for lumps and bumps. Last but not least – check that your name is still clearly on the bottom of your work. Step Five – Bisque Firing When the work is completely dry it can go into the bisque kiln. The bisque kiln is fired to 1000°C. This process burns off the water in the clay as well as some of the chemically bound water. The structure of the clay is not altered that much at this temperature. Inside the bisque kiln, the work is stacked a little, small bowl inside a larger bowl and onto a heavy plate. Smaller items like decorations or drink coasters might get stacked several high. Consideration is paid to the weight of the stack and shape of the work. A bisque kiln can fire about one and a half times the amount of work that the glaze kiln can fire. The firing takes about 10 hours to complete the cycle and about two days to cool down. Once it has been emptied the work is placed in the glaze room ready for you to decorate! Step Six – Glazing Decorating your work with colour can be a lot of fun – and time consuming! There are three main options for surface treatment at this stage: Oxide Washes Underglazes Glazes Washes and underglazes do not “glaze” the work – It will still need a layer of glaze to fully seal the clay (washes don’t need glaze on surfaces not designed for food or liquid as they can gloss up a little on their own). Underglazes are stable colourants that turn out pretty much how they look in the jar. They can be mixed with each other to form other colours and can be used like water colours to paint onto your work. Mostly they should have a clear glaze on top to seal them. Oxides are a different species – the pink oxide (cobalt) wash turns out bright blue for instance. They don’t always need a glaze on top, and some glazes can change the colour of the wash! The glazes need no other “glaze” on top! Be careful of unknown glaze interactions – you can put any combination of glaze in a bowl or on a plate, but only a single glaze on the outside of any vertical surface! Glazes are a chemical reaction under heat. We don’t know the exact chemicals in the Mayco glazes we use. I can guess by the way they interact with each other, however, on the whole, you need to test every idea you have, and not run the test on a vertical surface! Simply put, glaze is a layer of glass like substance that bonds with the clay underneath. Clay is made of silica, alumina and water. Glaze is made of mostly silica. Silica has a melting point of 1700°C and we fire to 1240°C. The silica requires a “flux” to help it melt at the lower temperature. Fluxes can be all sorts of chemicals – a common one is calcium – calcium has a melting point of 2500°C, however, together they both melt at a much lower temperature! Colourants are metal oxides like cobalt (blue), chrome (green through black), copper (green, blue, even red!), manganese (black, purple and pink) iron (red brown), etc. Different chemicals in the glaze can have dramatic effects. for example, barium carbonate (which we don’t use) turns manganese bright pink! Other elements can turn manganese dioxide brown, blue, purple and reddish brown. Manganese dioxide is a flux in and of itself as well. So, glazes that get their black and purple colours, often interact with other glazes and RUN! Our mirror black is a good example – it mixes really well with many glazes because it fluxes them – causes them to melt faster. It will also bring out many beautiful colours in the glazes because it’s black colouring most definitely comes from manganese dioxide! Glaze chemistry is a whole subject on it’s own! We use commercial Mayco glazes on purpose – for their huge range of colour possibilities, stability, cool interactions, artistic freedom with the ability to easily brush the glazes on and ease of use. We currently have almost 50 glazes on hand! A major project is to test the interactions of all glazes with each other. That is 2,500 test tiles!!!! I’m going to make the wall behind the wheels the feature wall of pretty colours! Step Seven – Glaze (Gloss or sometimes called “Glost”) Firing Most of the time this is the final stage of making your creation (but not always!) The glaze kiln goes to 1240°C. This is called cone 6, or midrange. It is the low end of stoneware temperatures. Stoneware clays and glazes are typically fired at cone 8 – 10, that is 1260 – 1290°C. The energy requirement to go from 1240°C to 1280°C is almost a 30% more! Our clay is formulated to vitrify (mature, turn “glass-like”) at 1240°, as are our glazes. A glaze kiln take around 12 hours to reach temperature and two to three days to cool down. Sometimes a third firing process is required – this is for decoration that is added to work after the glaze firing. For example – adding precious metals and lustres. this firing temperature is usually around 600 – 800°C depending upon the techniques being used. There are many students interested in gold and silver trims – we will be doing this third type of firing soon! After firing your work will be in the student finished work shelves. Remember to pay for it before you head out the door! There is a small extra charge for using porcelain clay (it’s more than twice the price of regular clay), and for any third firing process! Once your work has been fired it can not turn back into clay for millennia – so don’t fire it if you don’t like it! Put it in the bucket for recycling. https://firebirdstudios.com.au/the-process-of-making-pottery/ The bowl is an example of kitchenware used in the 19th century and still in use today.Bowl white ceramic. Crack on side. Badly stained.Backstamp very faint and unable to be read.flagstaff hill, warrnambool, shipwrecked-coast, flagstaff-hill, flagstaff-hill-maritime-museum, maritime-museum, shipwreck-coast, flagstaff-hill-maritime-village, mixing bowl, food preparation, kitchen equipment, ceramic -
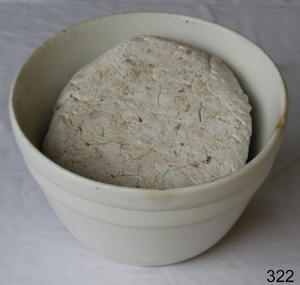 Flagstaff Hill Maritime Museum and Village
Domestic object - Bowl
... use. I can guess by the way they interact with each other, however, on the whole, you need to test every idea you have, and not run the test on a vertical surface! Simply put, glaze is a layer of glass like substance...use. I can guess by the way they interact with each other, however, on the whole, you need to test every idea you have, and not run the test on a vertical surface! Simply put, glaze is a layer of glass like substance ...The Process of Making Pottery Decorating, Firing, Glazing, Making, Technical There is a rhythm and flow to clay. It can’t be done all at once! Even the making process! It can take weeks to get everything done, especially if you can only work on your pottery once a week! Even though we have three hour classes, it’s often just not enough time! Here is an overview of some of the processes so you have a bit more grasp on some of the technical stuff! Step One – Design There are SO many ideas out there for making stuff in clay! From delicate porcelain jewellery, through to heavy sculptural work and everything in between. Deciding your direction is sometimes not that easy – when you first start, try everything, you will naturally gravitate to the style that you enjoy! The options and variations are endless and can get a wee bit overwhelming too! Check in with me before you start to ensure your ideas will work, what order you might do things, how you could achieve the look you are seeking and any other technical data required! Step Two – Making Clay is thixotropic. This means that as you work with it, the clay first gets sloppier and wetter, before is begins to dry in the atmosphere. For most things, you simply can’t do all parts of the project at once. An example of work order might look like: Get last weeks work out from the shelves Prepare clay for today’s work – roll your clay, prepare balls for throwing, make the first stage of a pinch pot) Clean up last week’s work and put it on the shelf for bisque firing Check that you have any glazing to do – and do enough of it that you will have time to finish your main project Do the next step of your next project – there might be a further step that can’t be complete immediately, in that case, wrap your work well and put onto the shelves. Letting your work rest for a while can really help keep your work clean and professional looking. Many things require bagging under plastic to keep it ready for work the next week – put your name on the outside of the bag so you can find your work easily. We have stickers and markers. Consider how you want to decorate your work – coloured slip can be applied at a fairly wet stage (remembering that it will make your work even wetter!). Trying to apply slip to dry clay won’t work! If you want to do sgraffito – you will need to keep the work leather hard (a state of dryness where you can still work the clay with a little effort and a little water and care). Step Three – Drying Most of the time your work can go into the rack uncovered to let it dry out for the following week. If you want to continue forming or shaping you will need to double bag your work – put your work on a suitable sized bat and put the bat in a bag so the base of the bag is under the bat, then put another bag over the top of the work and tuck the top of the bag under the bat. If you want to trim (or turn) your thrown work the following week, it should also be double bagged. If your work is large, delicate, or of uneven thicknesses, you should lightly cover your work for drying. When considering the drying process, bare in mind the weather, humidity and wind! The hotter and dryer, the faster things dry and work can dry unevenly in the shelves – this can lead to cracking – another time to lightly cover your work for drying. Step Four – Trimming and Cleaning Up Your work is dry! It is called greenware now and it is at it’s most fragile! Handle everything with two hands. I often refer to soft hands – keep everything gentle and with your fingers spread as much as possible. Try to not pick up things like plates too much, and always with both hands! Before your work can be bisque fired it should be “cleaned up”. You work won’t go into the kiln if it has sharp edges – when glazed, sharp edges turn into razor blades! Use a piece of fly wire to rub the work all over – this will scratch a little so be light handed. Use a knife or metal kidney to scrape any areas that require a bit more dynamic treatment than the fly wire offers! Finally, a very light wipe over with a slightly damp sponge can help soften and soothe all of your edges and dags! Trimming thrown work: If you are planning to trim (or turn) your thrown work (and you should be), make sure you bag it well – your work should be leather hard to almost dry for easiest trimming. Use this step to finish the work completely – use a metal kidney to polish the surface, or a slightly damp sponge to give a freshly thrown look. Wipe the sponge around the rim after trimming, and check the inside of the pot for dags! Trimming slip cast work: Usually I will trim the rims of your work on the wheel the following day to make that stage easier, however you will still need to check your work for lumps and bumps. Last but not least – check that your name is still clearly on the bottom of your work. Step Five – Bisque Firing When the work is completely dry it can go into the bisque kiln. The bisque kiln is fired to 1000°C. This process burns off the water in the clay as well as some of the chemically bound water. The structure of the clay is not altered that much at this temperature. Inside the bisque kiln, the work is stacked a little, small bowl inside a larger bowl and onto a heavy plate. Smaller items like decorations or drink coasters might get stacked several high. Consideration is paid to the weight of the stack and shape of the work. A bisque kiln can fire about one and a half times the amount of work that the glaze kiln can fire. The firing takes about 10 hours to complete the cycle and about two days to cool down. Once it has been emptied the work is placed in the glaze room ready for you to decorate! Step Six – Glazing Decorating your work with colour can be a lot of fun – and time consuming! There are three main options for surface treatment at this stage: Oxide Washes Underglazes Glazes Washes and underglazes do not “glaze” the work – It will still need a layer of glaze to fully seal the clay (washes don’t need glaze on surfaces not designed for food or liquid as they can gloss up a little on their own). Underglazes are stable colourants that turn out pretty much how they look in the jar. They can be mixed with each other to form other colours and can be used like water colours to paint onto your work. Mostly they should have a clear glaze on top to seal them. Oxides are a different species – the pink oxide (cobalt) wash turns out bright blue for instance. They don’t always need a glaze on top, and some glazes can change the colour of the wash! The glazes need no other “glaze” on top! Be careful of unknown glaze interactions – you can put any combination of glaze in a bowl or on a plate, but only a single glaze on the outside of any vertical surface! Glazes are a chemical reaction under heat. We don’t know the exact chemicals in the Mayco glazes we use. I can guess by the way they interact with each other, however, on the whole, you need to test every idea you have, and not run the test on a vertical surface! Simply put, glaze is a layer of glass like substance that bonds with the clay underneath. Clay is made of silica, alumina and water. Glaze is made of mostly silica. Silica has a melting point of 1700°C and we fire to 1240°C. The silica requires a “flux” to help it melt at the lower temperature. Fluxes can be all sorts of chemicals – a common one is calcium – calcium has a melting point of 2500°C, however, together they both melt at a much lower temperature! Colourants are metal oxides like cobalt (blue), chrome (green through black), copper (green, blue, even red!), manganese (black, purple and pink) iron (red brown), etc. Different chemicals in the glaze can have dramatic effects. for example, barium carbonate (which we don’t use) turns manganese bright pink! Other elements can turn manganese dioxide brown, blue, purple and reddish brown. Manganese dioxide is a flux in and of itself as well. So, glazes that get their black and purple colours, often interact with other glazes and RUN! Our mirror black is a good example – it mixes really well with many glazes because it fluxes them – causes them to melt faster. It will also bring out many beautiful colours in the glazes because it’s black colouring most definitely comes from manganese dioxide! Glaze chemistry is a whole subject on it’s own! We use commercial Mayco glazes on purpose – for their huge range of colour possibilities, stability, cool interactions, artistic freedom with the ability to easily brush the glazes on and ease of use. We currently have almost 50 glazes on hand! A major project is to test the interactions of all glazes with each other. That is 2,500 test tiles!!!! I’m going to make the wall behind the wheels the feature wall of pretty colours! Step Seven – Glaze (Gloss or sometimes called “Glost”) Firing Most of the time this is the final stage of making your creation (but not always!) The glaze kiln goes to 1240°C. This is called cone 6, or midrange. It is the low end of stoneware temperatures. Stoneware clays and glazes are typically fired at cone 8 – 10, that is 1260 – 1290°C. The energy requirement to go from 1240°C to 1280°C is almost a 30% more! Our clay is formulated to vitrify (mature, turn “glass-like”) at 1240°, as are our glazes. A glaze kiln take around 12 hours to reach temperature and two to three days to cool down. Sometimes a third firing process is required – this is for decoration that is added to work after the glaze firing. For example – adding precious metals and lustres. this firing temperature is usually around 600 – 800°C depending upon the techniques being used. There are many students interested in gold and silver trims – we will be doing this third type of firing soon! After firing your work will be in the student finished work shelves. Remember to pay for it before you head out the door! There is a small extra charge for using porcelain clay (it’s more than twice the price of regular clay), and for any third firing process! Once your work has been fired it can not turn back into clay for millennia – so don’t fire it if you don’t like it! Put it in the bucket for recycling. https://firebirdstudios.com.au/the-process-of-making-pottery/ This bowl is an example of kitchenware used in the 19th century and still in use today.Bowl white ceramic plain that has two sets of edging around lip. Inside bowl has plaster designed to look like cooking mixture.flagstaff hill, warrnambool, shipwrecked-coast, flagstaff-hill, flagstaff-hill-maritime-museum, maritime-museum, shipwreck-coast, flagstaff-hill-maritime-village, kitchen equipment, ceramic -
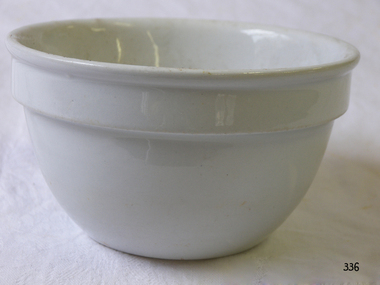 Flagstaff Hill Maritime Museum and Village
Domestic object - Bowl, J & G Meakin, Late 19th or early 20th Century
... use. I can guess by the way they interact with each other, however, on the whole, you need to test every idea you have, and not run the test on a vertical surface! Simply put, glaze is a layer of glass like substance...use. I can guess by the way they interact with each other, however, on the whole, you need to test every idea you have, and not run the test on a vertical surface! Simply put, glaze is a layer of glass like substance ...The Process of Making Pottery Decorating, Firing, Glazing, Making, Technical There is a rhythm and flow to clay. It can’t be done all at once! Even the making process! It can take weeks to get everything done, especially if you can only work on your pottery once a week! Even though we have three hour classes, it’s often just not enough time! Here is an overview of some of the processes so you have a bit more grasp on some of the technical stuff! Step One – Design There are SO many ideas out there for making stuff in clay! From delicate porcelain jewellery, through to heavy sculptural work and everything in between. Deciding your direction is sometimes not that easy – when you first start, try everything, you will naturally gravitate to the style that you enjoy! The options and variations are endless and can get a wee bit overwhelming too! Check in with me before you start to ensure your ideas will work, what order you might do things, how you could achieve the look you are seeking and any other technical data required! Step Two – Making Clay is thixotropic. This means that as you work with it, the clay first gets sloppier and wetter, before is begins to dry in the atmosphere. For most things, you simply can’t do all parts of the project at once. An example of work order might look like: Get last weeks work out from the shelves Prepare clay for today’s work – roll your clay, prepare balls for throwing, make the first stage of a pinch pot) Clean up last week’s work and put it on the shelf for bisque firing Check that you have any glazing to do – and do enough of it that you will have time to finish your main project Do the next step of your next project – there might be a further step that can’t be complete immediately, in that case, wrap your work well and put onto the shelves. Letting your work rest for a while can really help keep your work clean and professional looking. Many things require bagging under plastic to keep it ready for work the next week – put your name on the outside of the bag so you can find your work easily. We have stickers and markers. Consider how you want to decorate your work – coloured slip can be applied at a fairly wet stage (remembering that it will make your work even wetter!). Trying to apply slip to dry clay won’t work! If you want to do sgraffito – you will need to keep the work leather hard (a state of dryness where you can still work the clay with a little effort and a little water and care). Step Three – Drying Most of the time your work can go into the rack uncovered to let it dry out for the following week. If you want to continue forming or shaping you will need to double bag your work – put your work on a suitable sized bat and put the bat in a bag so the base of the bag is under the bat, then put another bag over the top of the work and tuck the top of the bag under the bat. If you want to trim (or turn) your thrown work the following week, it should also be double bagged. If your work is large, delicate, or of uneven thicknesses, you should lightly cover your work for drying. When considering the drying process, bare in mind the weather, humidity and wind! The hotter and dryer, the faster things dry and work can dry unevenly in the shelves – this can lead to cracking – another time to lightly cover your work for drying. Step Four – Trimming and Cleaning Up Your work is dry! It is called greenware now and it is at it’s most fragile! Handle everything with two hands. I often refer to soft hands – keep everything gentle and with your fingers spread as much as possible. Try to not pick up things like plates too much, and always with both hands! Before your work can be bisque fired it should be “cleaned up”. You work won’t go into the kiln if it has sharp edges – when glazed, sharp edges turn into razor blades! Use a piece of fly wire to rub the work all over – this will scratch a little so be light handed. Use a knife or metal kidney to scrape any areas that require a bit more dynamic treatment than the fly wire offers! Finally, a very light wipe over with a slightly damp sponge can help soften and soothe all of your edges and dags! Trimming thrown work: If you are planning to trim (or turn) your thrown work (and you should be), make sure you bag it well – your work should be leather hard to almost dry for easiest trimming. Use this step to finish the work completely – use a metal kidney to polish the surface, or a slightly damp sponge to give a freshly thrown look. Wipe the sponge around the rim after trimming, and check the inside of the pot for dags! Trimming slip cast work: Usually I will trim the rims of your work on the wheel the following day to make that stage easier, however you will still need to check your work for lumps and bumps. Last but not least – check that your name is still clearly on the bottom of your work. Step Five – Bisque Firing When the work is completely dry it can go into the bisque kiln. The bisque kiln is fired to 1000°C. This process burns off the water in the clay as well as some of the chemically bound water. The structure of the clay is not altered that much at this temperature. Inside the bisque kiln, the work is stacked a little, small bowl inside a larger bowl and onto a heavy plate. Smaller items like decorations or drink coasters might get stacked several high. Consideration is paid to the weight of the stack and shape of the work. A bisque kiln can fire about one and a half times the amount of work that the glaze kiln can fire. The firing takes about 10 hours to complete the cycle and about two days to cool down. Once it has been emptied the work is placed in the glaze room ready for you to decorate! Step Six – Glazing Decorating your work with colour can be a lot of fun – and time consuming! There are three main options for surface treatment at this stage: Oxide Washes Underglazes Glazes Washes and underglazes do not “glaze” the work – It will still need a layer of glaze to fully seal the clay (washes don’t need glaze on surfaces not designed for food or liquid as they can gloss up a little on their own). Underglazes are stable colourants that turn out pretty much how they look in the jar. They can be mixed with each other to form other colours and can be used like water colours to paint onto your work. Mostly they should have a clear glaze on top to seal them. Oxides are a different species – the pink oxide (cobalt) wash turns out bright blue for instance. They don’t always need a glaze on top, and some glazes can change the colour of the wash! The glazes need no other “glaze” on top! Be careful of unknown glaze interactions – you can put any combination of glaze in a bowl or on a plate, but only a single glaze on the outside of any vertical surface! Glazes are a chemical reaction under heat. We don’t know the exact chemicals in the Mayco glazes we use. I can guess by the way they interact with each other, however, on the whole, you need to test every idea you have, and not run the test on a vertical surface! Simply put, glaze is a layer of glass like substance that bonds with the clay underneath. Clay is made of silica, alumina and water. Glaze is made of mostly silica. Silica has a melting point of 1700°C and we fire to 1240°C. The silica requires a “flux” to help it melt at the lower temperature. Fluxes can be all sorts of chemicals – a common one is calcium – calcium has a melting point of 2500°C, however, together they both melt at a much lower temperature! Colourants are metal oxides like cobalt (blue), chrome (green through black), copper (green, blue, even red!), manganese (black, purple and pink) iron (red brown), etc. Different chemicals in the glaze can have dramatic effects. for example, barium carbonate (which we don’t use) turns manganese bright pink! Other elements can turn manganese dioxide brown, blue, purple and reddish brown. Manganese dioxide is a flux in and of itself as well. So, glazes that get their black and purple colours, often interact with other glazes and RUN! Our mirror black is a good example – it mixes really well with many glazes because it fluxes them – causes them to melt faster. It will also bring out many beautiful colours in the glazes because it’s black colouring most definitely comes from manganese dioxide! Glaze chemistry is a whole subject on it’s own! We use commercial Mayco glazes on purpose – for their huge range of colour possibilities, stability, cool interactions, artistic freedom with the ability to easily brush the glazes on and ease of use. We currently have almost 50 glazes on hand! A major project is to test the interactions of all glazes with each other. That is 2,500 test tiles!!!! I’m going to make the wall behind the wheels the feature wall of pretty colours! Step Seven – Glaze (Gloss or sometimes called “Glost”) Firing Most of the time this is the final stage of making your creation (but not always!) The glaze kiln goes to 1240°C. This is called cone 6, or midrange. It is the low end of stoneware temperatures. Stoneware clays and glazes are typically fired at cone 8 – 10, that is 1260 – 1290°C. The energy requirement to go from 1240°C to 1280°C is almost a 30% more! Our clay is formulated to vitrify (mature, turn “glass-like”) at 1240°, as are our glazes. A glaze kiln take around 12 hours to reach temperature and two to three days to cool down. Sometimes a third firing process is required – this is for decoration that is added to work after the glaze firing. For example – adding precious metals and lustres. this firing temperature is usually around 600 – 800°C depending upon the techniques being used. There are many students interested in gold and silver trims – we will be doing this third type of firing soon! After firing your work will be in the student finished work shelves. Remember to pay for it before you head out the door! There is a small extra charge for using porcelain clay (it’s more than twice the price of regular clay), and for any third firing process! Once your work has been fired it can not turn back into clay for millennia – so don’t fire it if you don’t like it! Put it in the bucket for recycling. https://firebirdstudios.com.au/the-process-of-making-pottery/This bowl was made by renowned pottery company J & G Meakin of England. The firm was established in the mid-1800's. The bowl is an example of kitchenware used in the 19th century and still in use today.Bowl; white ceramic, round and tapering inwards towards base. Made by J and G Meakin England.On base, 'Ironstone China Reg SOL 391413' with symbolflagstaff hill, flagstaff hill maritime museum and village, warrnambool, maritime museum, maritime village, great ocean road, shipwreck coast, mixing bowl, food preparation, j & g meakin, pottery, stoke-on-trent, kitchen equipment, ceramic -
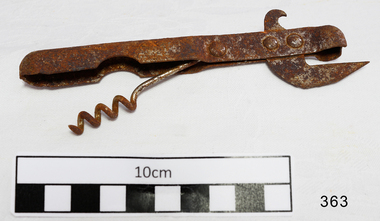 Flagstaff Hill Maritime Museum and Village
Domestic object - Can Opener, Bottle Opener & Corkscrew
... People used the blade to puncture the top of the can near its edge, push the upper jaw against the side of the can, and drag the blade through the metal along the rim. Because meat was the first and most popular canned substance...People used the blade to puncture the top of the can near its edge, push the upper jaw against the side of the can, and drag the blade through the metal along the rim. Because meat was the first and most popular canned substance ...It took 15 years to invent the can. It took 100 more to invent a standard way to open it. In the 19th century, decades after the invention of canning, there were virtually no can openers. Canned food, such as sardines, came with its own "key" to peel back the tin lid. Birth of the can One of the oddest things about the can opener is that the can predates it by almost 150 years. Though common today, cans were once military-grade technology. In 1795, Napoleon, to whom the phrase "an army marches on its stomach" is attributed, offered 12,000 francs to anyone who could find a way to preserve food. Without any knowledge of bacteria or their role in food spoilage, scientists didn't even know where to begin. It took 15 years before a chef named Nicholas Appert claimed the prize after successfully jarring food. Soon after that, his countryman Philippe de Girard came up with a variant on Appert's method—metal tins—and sold the idea to the British. Spoiled food, and the sickness it caused, was a widespread problem. The public would have benefited from canned food, but for decades cans were almost exclusively for the army and the navy. The canning process, with its hours of boiling and steaming, its scrupulous cleanliness, its heated metal, and its need for a great deal of disposable material, made canned food far too expensive for anyone but the military. No can openers were needed or even possible. The metal of early cans was too thick to make openers practical. Soldiers and sailors had plenty of sharp objects on hand and made ample use of them when they wanted to eat. During the 19th century, the process of canning was refined and mechanised, and the metal wall of the average can slimmed down enough that a civilian could get it open—if that civilian had the right tool. No one had that tool yet, so early cans had to open themselves. In other words, they came with built-in openers. The result was a confusing but pleasing free-for-all, in terms of product engineering. Each type of food came with its own kind of can, and each kind of can came with its own kind of opener. Tinned fish and meat were often sold in rectangular cans. These cans were fitted with a "key" that would roll down the top of the can. Coffee, beans, and other types of meat were packaged in cylinders with metal strips that could be peeled back with their own kinds of built-in keys. Cans of milk, which didn't need to be completely opened, came with puncture devices. As tinned food became more common, its containers became more regular. A nice cylindrical can became the norm, and, as these cans filled kitchens, more engineers put their minds to finding a convenient way to open all of them. The first standalone can opener worked on a simple principle: point, stab, and pull. From the mid-19th century to the end of World War I, the typical can opener looked roughly like a wrench, if the lower 'jaw' of the wrench were replaced with a blade. People used the blade to puncture the top of the can near its edge, push the upper jaw against the side of the can, and drag the blade through the metal along the rim. Because meat was the first and most popular canned substance, these can openers were often shaped to look like cows and given the nickname 'bully beef can openers'. The bully beef can opener, popular in the mid-19th century, resulted in many lost fingers. Later, a corkscrew was added that was seated in the handle, and could be pulled out for use. Bully beef can openers were so common, effective, and sturdy that they are still frequently available on collectors' sites. Some are advertised as “still working,” and every last one of them is, without a doubt, soaked in the blood of our ancestors. Dragging a sharp blade along the edge of a can is certain to cause injury sooner or later. So once people got a reliable can shape and a reliable way to get the can open, the search was on for a reliable way to get a can open without the possibility of losing a finger. The answer came in 1925, from the Star Can Opener Company of San Francisco. This is probably the first can opener that resembles the one people have in their kitchens today. Instead of using a blade to pry open a metal can, buyers could clamp the edge of the can between two wheels and twist the handle of one of the wheels to move the blade around the lip. The Star can openers weren't perfect. Compared to the bully beef model, they were flimsy and breakable, but they probably prevented a few injuries. Six short years after the Star model came to market, the first electric can opener was invented. It was patented in 1931 by the Bunker Clancey Company of Kansas City, who had already been sued by the Star Can Opener Company for trying sell a double-wheeled can opener like the Star model (the case was dismissed). The electric can opener must have seemed like the wave of the future and a sure-fire seller, but it proved to be too far ahead of its time. In 1931 not that many households had electricity, and those that did weren't interested in buying can openers. The Bunker Clancey Company was subsequently bought by the Rival Company, which still makes small appliances like can openers today. It took another 25 years for electrically powered can openers to become practical. In the 1950s, Walter Hess Bodle and his daughter, Elizabeth Bodle, developed an electric can opener in the family garage. Walter came up with the opener's blades and motor, and Elizabeth sculpted the outside. Their can opener was a free-standing unit that could sit on the kitchen counter. The Udico brand of the Union Die Casting Company put it on the market in time for Christmas in 1956 and had great success with it. Over the next few years it came out in different styles and colours, and, like the bully beef can opener, has become a collector's item. Also like the bully beef model, Udico can openers often still work. They don't make 'em like they used to. Although there have been some design changes and refinements over the last sixty years, there have yet to be any more leaps forward in can opener technology. If you're resentfully opening a can, you are almost certainly doing it using the Star design, manually forcing the can between two wheels, or the Bodle design, clamping the can into a free-standing electrical opener. Whether or not you enjoy your holiday meals, at least you can be happy that you are not getting poisoned by your own food or cutting open your hand with the blade you use to get at it. That's something, right?The can opener, Bottle opener and the corkscrew are still very important and essential items in most kitchens.Metal can opener, chromed, with bottle opener, and a corkscrew seated in the handle.None.flagstaff hill, warrnambool, shipwrecked-coast, flagstaff-hill, flagstaff-hill-maritime-museum, maritime-museum, shipwreck-coast, flagstaff-hill-maritime-village, canning, can opener, corkscrew, bottle opener, kitchen equipment -
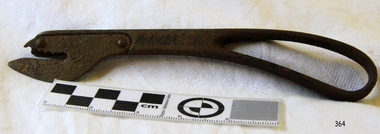 Flagstaff Hill Maritime Museum and Village
Domestic object - Can Opener
... People used the blade to puncture the top of the can near its edge, push the upper jaw against the side of the can, and drag the blade through the metal along the rim. Because meat was the first and most popular canned substance...People used the blade to puncture the top of the can near its edge, push the upper jaw against the side of the can, and drag the blade through the metal along the rim. Because meat was the first and most popular canned substance ...It took 15 years to invent the can. It took 100 more to invent a standard way to open it. In the 19th century, decades after the invention of canning, there were virtually no can openers. Canned food, such as sardines, came with its own "key" to peel back the tin lid. Birth of the can One of the oddest things about the can opener is that the can predates it by almost 150 years. Though common today, cans were once military-grade technology. In 1795, Napoleon, to whom the phrase "an army marches on its stomach" is attributed, offered 12,000 francs to anyone who could find a way to preserve food. Without any knowledge of bacteria or their role in food spoilage, scientists didn't even know where to begin. It took 15 years before a chef named Nicholas Appert claimed the prize after successfully jarring food. Soon after that, his countryman Philippe de Girard came up with a variant on Appert's method—metal tins—and sold the idea to the British. Spoiled food, and the sickness it caused, was a widespread problem. The public would have benefited from canned food, but for decades cans were almost exclusively for the army and the navy. The canning process, with its hours of boiling and steaming, its scrupulous cleanliness, its heated metal, and its need for a great deal of disposable material, made canned food far too expensive for anyone but the military. No can openers were needed or even possible. The metal of early cans was too thick to make openers practical. Soldiers and sailors had plenty of sharp objects on hand and made ample use of them when they wanted to eat. During the 19th century, the process of canning was refined and mechanised, and the metal wall of the average can slimmed down enough that a civilian could get it open—if that civilian had the right tool. No one had that tool yet, so early cans had to open themselves. In other words, they came with built-in openers. The result was a confusing but pleasing free-for-all, in terms of product engineering. Each type of food came with its own kind of can, and each kind of can came with its own kind of opener. Tinned fish and meat were often sold in rectangular cans. These cans were fitted with a "key" that would roll down the top of the can. Coffee, beans, and other types of meat were packaged in cylinders with metal strips that could be peeled back with their own kinds of built-in keys. Cans of milk, which didn't need to be completely opened, came with puncture devices. As tinned food became more common, its containers became more regular. A nice cylindrical can became the norm, and, as these cans filled kitchens, more engineers put their minds to finding a convenient way to open all of them. The first standalone can opener worked on a simple principle: point, stab, and pull. From the mid-19th century to the end of World War I, the typical can opener looked roughly like a wrench, if the lower 'jaw' of the wrench were replaced with a blade. People used the blade to puncture the top of the can near its edge, push the upper jaw against the side of the can, and drag the blade through the metal along the rim. Because meat was the first and most popular canned substance, these can openers were often shaped to look like cows and given the nickname 'bully beef can openers'. The bully beef can opener, popular in the mid-19th century, resulted in many lost fingers. Bully beef can openers were so common, effective, and sturdy that they are still frequently available on collectors' sites. Some are advertised as “still working,” and every last one of them is, without a doubt, soaked in the blood of our ancestors. Dragging a sharp blade along the edge of a can is certain to cause injury sooner or later. So once people got a reliable can shape and a reliable way to get the can open, the search was on for a reliable way to get a can open without the possibility of losing a finger. The answer came in 1925, from the Star Can Opener Company of San Francisco. This is probably the first can opener that resembles the one people have in their kitchens today. Instead of using a blade to pry open a metal can, buyers could clamp the edge of the can between two wheels and twist the handle of one of the wheels to move the blade around the lip. The Star can openers weren't perfect. Compared to the bully beef model, they were flimsy and breakable, but they probably prevented a few injuries. Six short years after the Star model came to market, the first electric can opener was invented. It was patented in 1931 by the Bunker Clancey Company of Kansas City, who had already been sued by the Star Can Opener Company for trying sell a double-wheeled can opener like the Star model (the case was dismissed). The electric can opener must have seemed like the wave of the future and a sure-fire seller, but it proved to be too far ahead of its time. In 1931 not that many households had electricity, and those that did weren't interested in buying can openers. The Bunker Clancey Company was subsequently bought by the Rival Company, which still makes small appliances like can openers today. It took another 25 years for electrically powered can openers to become practical. In the 1950s, Walter Hess Bodle and his daughter, Elizabeth Bodle, developed an electric can opener in the family garage. Walter came up with the opener's blades and motor, and Elizabeth sculpted the outside. Their can opener was a free-standing unit that could sit on the kitchen counter. The Udico brand of the Union Die Casting Company put it on the market in time for Christmas in 1956 and had great success with it. Over the next few years it came out in different styles and colours, and, like the bully beef can opener, has become a collector's item. Also like the bully beef model, Udico can openers often still work. They don't make 'em like they used to. Although there have been some design changes and refinements over the last sixty years, there have yet to be any more leaps forward in can opener technology. If you're resentfully opening a can, you are almost certainly doing it using the Star design, manually forcing the can between two wheels, or the Bodle design, clamping the can into a free-standing electrical opener. Whether or not you enjoy your holiday meals, at least you can be happy that you are not getting poisoned by your own food or cutting open your hand with the blade you use to get at it. That's something, right?The can opener is still a very important and essential item in most kitchens.Can opener, right handed, metal, upper blade section serrated, inscription 'Peerless Pat.Feb 11-90'.Peerless Pat.Feb 11-90flagstaff hill, warrnambool, shipwrecked-coast, flagstaff-hill, flagstaff-hill-maritime-museum, maritime-museum, shipwreck-coast, flagstaff-hill-maritime-village, cannning, can opener, kitchen equipment -
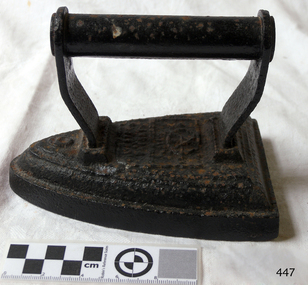 Flagstaff Hill Maritime Museum and Village
Domestic object - Iron
... Two of the oldest sorts of iron were either containers filled with a burning substance, or solid lumps of metal which could be heated directly. Metal pans filled with hot coals were used for smoothing fabrics in China in the 1st century BC. ...Two of the oldest sorts of iron were either containers filled with a burning substance, or solid lumps of metal which could be heated directly. Metal pans filled with hot coals were used for smoothing fabrics in China in the 1st century BC. ...Before the introduction of electricity, irons were heated by combustion, either in a fire or with some internal arrangement. An "electric flatiron" was invented by American Henry Seely White and patented on June 6, 1882. It weighed almost 15 pounds (6.8 kg) and took a long time to heat. The UK Electricity Association is reported to have said that an electric iron with a carbon arc appeared in France in 1880, but this is considered doubtful. Two of the oldest sorts of iron were either containers filled with a burning substance, or solid lumps of metal which could be heated directly. Metal pans filled with hot coals were used for smoothing fabrics in China in the 1st century BC. A later design consisted of an iron box which could be filled with hot coals, which had to be periodically aerated by attaching a bellows. In the late nineteenth and early twentieth centuries, there were many irons in use that were heated by fuels such as kerosene, ethanol, whale oil, natural gas, carbide gas (acetylene, as with carbide lamps), or even gasoline. Some houses were equipped with a system of pipes for distributing natural gas or carbide gas to different rooms in order to operate appliances such as irons, in addition to lights. Despite the risk of fire, liquid-fuel irons were sold in U.S. rural areas up through World War II. In Kerala in India, burning coconut shells were used instead of charcoal, as they have a similar heating capacity. This method is still in use as a backup device, since power outages are frequent. Other box irons had heated metal inserts instead of hot coals. From the 17th century, sadirons or sad irons (from Middle English "sad", meaning "solid", used in English through the 1800s[4]) began to be used. They were thick slabs of cast iron, triangular and with a handle, heated in a fire or on a stove. These were also called flat irons. A laundry worker would employ a cluster of solid irons that were heated from a single source: As the iron currently in use cooled down, it could be quickly replaced by a hot one. https://en.wikipedia.org/wiki/Clothes_ironThis iron is typical of the clothes iron used before electric irons superseded it.Salter iron no. 6, painted black but with rust showing through. Salter iron no. 6.flagstaff hill, warrnambool, shipwrecked-coast, flagstaff-hill, flagstaff-hill-maritime-museum, maritime-museum, shipwreck-coast, flagstaff-hill-maritime-village, iron, clothes, laundry
