Showing 22 items matching " tram 175"
-
 Melbourne Tram Museum
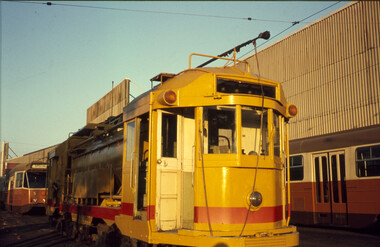
Slide - MMTB and MTA, tramway operations set of 11, Hugh Ballment, 1950s to 1980s
... ...tram 175...The tram has a destination of Kew Depot. HBM125 - MTA Tram 175, May 1996, LaTrobe St, At Spencer St. ...The tram has a destination of Kew Depot. HBM125 - MTA Tram 175, May 1996, LaTrobe St, At Spencer St. ...Set of 11 photos by Hugh Ballment, unless noted, of MTA and MMTB trams: HBM116 - MMTB Tram 7, 10/06/1982, Preston Workshops, Flusher, with Z5 behind and another Z class tram alongside. HBM117 - MMTB Tram 1041, c1976, Mt Alexander Rd, North Essendon. Only has one trolley retriever fitted. Running a Special. HBM118 - MMTB Tram 1041, c1976, Elizabeth St, City terminus, running a route 19, North Coburg. An inspector is talking to the driver. IN the background is a W2 class tram in Flinders St and the Flinders St station building with a Sitmar Cruises sign. HBM119 - MMTB Tram 94, March 1987, Peel St siding, with Vic Market building in the background. HBM120 - MMTB Tram 1041, October 1973, Flinders St, with a Harris train on the viaduct, the large signal gantry, Rodney Mark's, and Holyman in the background. HBM121 - MMTB, July 1981, Elizabeth St terminus, from Flinders St station, showing the terminal arrangements and two trams. In the foreground is a sign for Hosies Hotel. Photo about July 1981, following the installation of a scissors crossover and before an inspector's cabin was installed along with a shelter. HBM122 - MTA, c1996, Swanston St, From Princes Bridge. With two Z-class trams. In the background is Flinders St Station, adverts for Optus, Samsung, and Crown Casino, along with decorations for Christmas. Photo HBM123 - MTA Tram 2077, c1996, Bourke St, at Spring St. In the background is Rydges Hotel and the Imperial Hotel. HBM124 - MTA Tram 809, c1996, High St, Kew, Near back road Kew depot. The tram has a destination of Kew Depot. HBM125 - MTA Tram 175, May 1996, LaTrobe St, At Spencer St. Tram has the destination of Richmond Punt Road and is in an all-over advertising livery for Thai Airlines - which gives a date of May 1996. HBM126 - MTA Tram 136, c1996, Collins St, near William St. The tram has the destination of West Preston. Yields information about Melbourne tram operations, with 1950s to 1980s photos of Melbourne tramways.Kodachrome cardboard and plastic mounts, with notes - set of 11tramways, new tramway, tram 7, mt alexander road, tram 1041, tram 94, peel st, elizabeth st, north essendon, flinders st, tram 2077, tram 175, tram 136, collins st, la trobe st, tram 809, high st, kew depot, bourke st -
 Melbourne Tram Museum
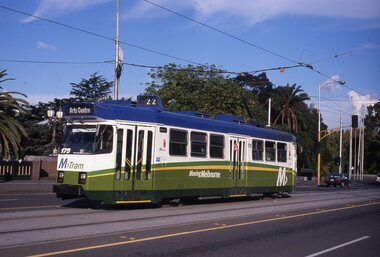
Slide - Set of 11, Colin Rough, 28/04/2003 12:00:00 AM
... ... tram 175...All in M>Tram livery unless noted otherwise. .1 - Z3 175, Route 22, Arts Centre. .2 - Z3 116, Melbourne University, route 72 in all over advertising for Vodaphone. .3 - Z3 190, Camberwell, Route 72 .4 - D1 3508, University, route 5, in in all over advertising for Cold Shot Beer .5 - D1 3501, University, route 6 .6 - Z3 157, University, route 3, in all over advertising for "Make Out" .7 - Z3 204, Toorak Route 8, in all over advertising for Qantas to Broome .8 - Z3 131, University Route 6 .9 - Z3 164, St Kilda Beach, route 16 .10 - D1 3508, University, route 5, in all over advertising for Cold Shot Beer .11 - Z3 175, Route 22, Moreland...Melbourne Tram Museum 8 Wallen Road Hawthorn melbourne Trams tramways St Kilda Rd M>Tram Route 22 Arts Centre Route 72 Route 5 Route 6 Route 3 Route 8 Route 16 Z3 class tram 175 tram 116 tram 190 tram 3508 tram 3501 tram 157 tram 204 tram 131 tram 164 D1 class On front written on a label "M>Tram, St Kilda Road, Melbourne 28/4/03" and the tram number. ...Set of 11, 35mm Tecnodia white plastic mount slides by Colin Rough of trams in St Kilda Road, near the Arts Centre on 28/4/2003. All in M>Tram livery unless noted otherwise. .1 - Z3 175, Route 22, Arts Centre. .2 - Z3 116, Melbourne University, route 72 in all over advertising for Vodaphone. .3 - Z3 190, Camberwell, Route 72 .4 - D1 3508, University, route 5, in in all over advertising for Cold Shot Beer .5 - D1 3501, University, route 6 .6 - Z3 157, University, route 3, in all over advertising for "Make Out" .7 - Z3 204, Toorak Route 8, in all over advertising for Qantas to Broome .8 - Z3 131, University Route 6 .9 - Z3 164, St Kilda Beach, route 16 .10 - D1 3508, University, route 5, in all over advertising for Cold Shot Beer .11 - Z3 175, Route 22, MorelandOn front written on a label "M>Tram, St Kilda Road, Melbourne 28/4/03" and the tram number.trams, tramways, st kilda rd, m>tram, route 22, arts centre, route 72, route 5, route 6, route 3, route 8, route 16, z3 class, tram 175, tram 116, tram 190, tram 3508, tram 3501, tram 157, tram 204, tram 131, tram 164, d1 class -
 Melbourne Tram Museum
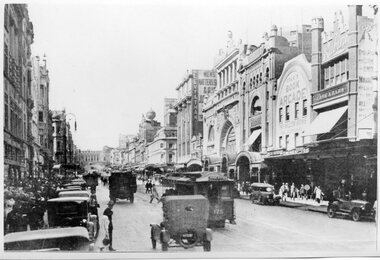
Photograph - Black and White - Bourke Street looking east 1920s
... ...tram 175...Tramways trams cable cars bourke street tram 175 Coles Book Arcade Leviathan store Photograph - Black and White - Bourke Street looking east - late 1920s Photograph Black and White - Bourke Street looking east 1920s ...Photo of Bourke St looking east from near the Post Office, with motor cars and cable cars. The cable car set has saloon car 175 with the destination of Preston. In the background is the Leviathan store and Coles Book Arcade. The destination of Preston was short lived, introduced after the amalgamation of the Clifton Hill and Northcote lines in 1925 - see notes.Yields information about Bourke St in the late 1920's between Elizabeth and Swanston Streets.Photograph - Black and White - Bourke Street looking east - late 1920stramways, trams, cable cars, bourke street, tram 175, coles book arcade, leviathan store -
 Melbourne Tram Museum
Postcard - Z3 175, Nu-color-Vue, "Melbourne 2006 - Commonwealth Games", 2006
... ...tram 175...Postcard produced by Nucolorvue, featuring Z3 175 in M>Tram colour scheme in Swanston St with the Flinders St station building in the background. ...Yields information about tram 175 in the M>Tram livery and demonstrates a Nucolorvue postcard produced for the 2006 Commonwealth Games. tramcars tramways M>Tram Z3 class tram 175 Flinders St Station Swanston St Commonwealth Games Postcard, unused, divided back coloured, "Melbourne 2006 - Commonwealth Games" Postcard Z3 175 Nu-color-Vue ...Postcard produced by Nucolorvue, featuring Z3 175 in M>Tram colour scheme in Swanston St with the Flinders St station building in the background. Produced for the 2006 Commonwealth Games held in Melbourne. Another Z3 is in the background.Yields information about tram 175 in the M>Tram livery and demonstrates a Nucolorvue postcard produced for the 2006 Commonwealth Games.Postcard, unused, divided back coloured,tramcars, tramways, m>tram, z3 class, tram 175, flinders st station, swanston st, commonwealth games -
 Melbourne Tram Museum
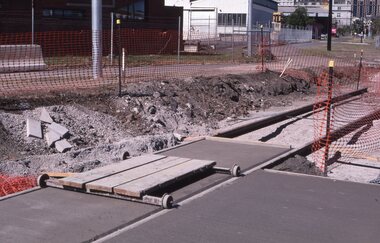
Album - Robert Thomson Slide Collection, "13.11.2001 to 19.11.2001 October 2003 512-537"
... Number Brief Description RT149 Docklands - track work RT150 "2" track work at Glenferrie Rd RT151 Box Hill terminus - tram 3029 - "Port Melbourne" route 109 - at Elgar Rd stop RT152 Docklands RT153 East Brighton terminus - tram 112 - "University" - route 64 RT154 "4" - track work excavators at Malvern & Glenferrie Rds RT155 Box Hill terminus - tram 3035 - "via City" route 109 RT156 Docklands - track work RT157 "1" New Junction Malvern - Glenferrie RT158 "3" track work at Malvern & Glenferrie Rds RT159 Docklands - La Trobe St - tram 2073 - "Bundoora RMIT" - route 86 & tram 2003 - "Bundoora RMIT" - route 86 RT160 Docklands RT161 Docklands - Collins St extension RT162 Docklands - track work RT163 Collins St -tram 124 - "West Preston" - route 112 - at Town Hall stop RT164 Port Melb terminus - tram 278 - "Mont Albert" - route 109 RT165 Swanston St - tram 67 - "University" - route 6 RT166 Port Melb terminus - "Mont Albert" - route 109 RT167 Camberwell Depot - tram 971 - "City" - route 55, tram 881 - "Camberwell" RT168 Victoria Pde - tram 3004 -"Mont Albert" - route 109 RT169 Victoria Pde - tram 175 - "St Kilda Fitzroy St" - route 112 & "Mont Albert" - route 109 RT170 Spencer St - tram 957 - "City Circle" route 0 & tram 195 - "West Preston" - route 12 RT171 Domain Road Interchange - tram 134 "West Coburg" - route 55 7 tram 22 - "Camberwell" - route 72 RT172 St Kilda Rd - tram 96 - "University" - route 67 RT173 Swanston St - tram 24 - at Collins St RT174 West Coburg - tram 130 - "Doman & St Kilda Rds" - route 55...Number Brief Description RT149 Docklands - track work RT150 "2" track work at Glenferrie Rd RT151 Box Hill terminus - tram 3029 - "Port Melbourne" route 109 - at Elgar Rd stop RT152 Docklands RT153 East Brighton terminus - tram 112 - "University" - route 64 RT154 "4" - track work excavators at Malvern & Glenferrie Rds RT155 Box Hill terminus - tram 3035 - "via City" route 109 RT156 Docklands - track work RT157 "1" New Junction Malvern - Glenferrie RT158 "3" track work at Malvern & Glenferrie Rds RT159 Docklands - La Trobe St - tram 2073 - "Bundoora RMIT" - route 86 & tram 2003 - "Bundoora RMIT" - route 86 RT160 Docklands RT161 Docklands - Collins St extension RT162 Docklands - track work RT163 Collins St -tram 124 - "West Preston" - route 112 - at Town Hall stop RT164 Port Melb terminus - tram 278 - "Mont Albert" - route 109 RT165 Swanston St - tram 67 - "University" - route 6 RT166 Port Melb terminus - "Mont Albert" - route 109 RT167 Camberwell Depot - tram 971 - "City" - route 55, tram 881 - "Camberwell" RT168 Victoria Pde - tram 3004 -"Mont Albert" - route 109 RT169 Victoria Pde - tram 175 - "St Kilda Fitzroy St" - route 112 & "Mont Albert" - route 109 RT170 Spencer St - tram 957 - "City Circle" route 0 & tram 195 - "West Preston" - route 12 RT171 Domain Road Interchange - tram 134 "West Coburg" - route 55 7 tram 22 - "Camberwell" - route 72 RT172 St Kilda Rd - tram 96 - "University" - route 67 RT173 Swanston St - tram 24 - at Collins St RT174 West Coburg - tram 130 - "Doman & St Kilda Rds" - route 55 Demonstrates the work of Robert Thomson in photography, collection and/or production of slides Melbourne tramways trams Track Construction Assembled album in a black presentation folder of 26 colour slides, collected or produced by Robert Thomson. ...Photo - see pdf file for further information. Number Brief Description RT149 Docklands - track work RT150 "2" track work at Glenferrie Rd RT151 Box Hill terminus - tram 3029 - "Port Melbourne" route 109 - at Elgar Rd stop RT152 Docklands RT153 East Brighton terminus - tram 112 - "University" - route 64 RT154 "4" - track work excavators at Malvern & Glenferrie Rds RT155 Box Hill terminus - tram 3035 - "via City" route 109 RT156 Docklands - track work RT157 "1" New Junction Malvern - Glenferrie RT158 "3" track work at Malvern & Glenferrie Rds RT159 Docklands - La Trobe St - tram 2073 - "Bundoora RMIT" - route 86 & tram 2003 - "Bundoora RMIT" - route 86 RT160 Docklands RT161 Docklands - Collins St extension RT162 Docklands - track work RT163 Collins St -tram 124 - "West Preston" - route 112 - at Town Hall stop RT164 Port Melb terminus - tram 278 - "Mont Albert" - route 109 RT165 Swanston St - tram 67 - "University" - route 6 RT166 Port Melb terminus - "Mont Albert" - route 109 RT167 Camberwell Depot - tram 971 - "City" - route 55, tram 881 - "Camberwell" RT168 Victoria Pde - tram 3004 -"Mont Albert" - route 109 RT169 Victoria Pde - tram 175 - "St Kilda Fitzroy St" - route 112 & "Mont Albert" - route 109 RT170 Spencer St - tram 957 - "City Circle" route 0 & tram 195 - "West Preston" - route 12 RT171 Domain Road Interchange - tram 134 "West Coburg" - route 55 7 tram 22 - "Camberwell" - route 72 RT172 St Kilda Rd - tram 96 - "University" - route 67 RT173 Swanston St - tram 24 - at Collins St RT174 West Coburg - tram 130 - "Doman & St Kilda Rds" - route 55Demonstrates the work of Robert Thomson in photography, collection and/or production of slidesAssembled album in a black presentation folder of 26 colour slides, collected or produced by Robert Thomson. All photographs have been scanned and placed on the Museum's G drive. A list of all photographs with details has been compiled. melbourne, tramways, trams, track construction -
 Ballarat Tramway Museum
Document - Table Cards (Sheets), State Electricity Commission of Victoria (SECV), Geelong Trams Runs, 1950's
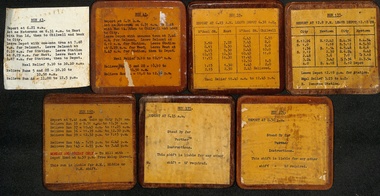
... .1 - Run 43 - Chilwell, Belmont and West - includes a loose sheet of paper. .2 - Run 59 - Chilwell and East .3 - Run 135 - Newtown - city .4 - Run 169 - Relive various runs .5 - Run 175 - Standby shift commencing 6.15am .6 - Run 176 - Standby shift commencing 2.30pm See also Reg Item 3155, 6270 and 8134 for other examples and 8135 for a Bendigo example. Demonstrates the method of advising tram ...Table cards gives details for the Motorman and Conductor, starting times, meal times, relief and taken by details. Not known when made - 1950's? .1 - Run 43 - Chilwell, Belmont and West - includes a loose sheet of paper. .2 - Run 59 - Chilwell and East .3 - Run 135 - Newtown - city .4 - Run 169 - Relive various runs .5 - Run 175 - Standby shift commencing 6.15am .6 - Run 176 - Standby shift commencing 2.30pm See also Reg Item 3155, 6270 and 8134 for other examples and 8135 for a Bendigo example.Demonstrates the method of advising tram crew their shift work. Set of six Typed table card or run card, for Geelong Trams Runs glued and varnished onto a sheet of three ply timber - plywood boards and one typed paper sheet.trams, tramways, secv, forms, timetables, geelong, btm -
 Ballarat Tramway Museum
Album - Postcards & Photographs - Vic Solomons and others - Australian Tramways, Vic Solomons, 2023
... Unknown Newcastle 172 Photo High St West Maitland - steam tram Unknown Maitland 173 Photo High St West Maitland - steam tram Unknown Maitland 174 Post Card Argent St near tram terminal Broken Hill NSW c1900 Broken Hill 175 postcard Argent St looking south Broken Hill - with Ken Magor's notes on rear Unknown Broken Hill 176 Photo Toronto - steam tram 61A Unknown Toronto 177 Photo 124A trial run 1911? ...Unknown Newcastle 172 Photo High St West Maitland - steam tram Unknown Maitland 173 Photo High St West Maitland - steam tram Unknown Maitland 174 Post Card Argent St near tram terminal Broken Hill NSW c1900 Broken Hill 175 postcard Argent St looking south Broken Hill - with Ken Magor's notes on rear Unknown Broken Hill 176 Photo Toronto - steam tram 61A Unknown Toronto 177 Photo 124A trial run 1911? ...Contains 184 images of postcards and photographs collected primarily by Vic Solomons of Sydney, with others from the collection of Wal Jack and Warren Doubleday. Covers almost all of Australia's tramway systems. 1 Post Card Hay St Perth Looking East No 3 Unknown Perth 2 Post Card Cars 30 & 90 both on Route 19 pass in Barrack St looking South Perth WA 1935.02.18 Perth 3 Post Card Hay St Looking East Perth WA Unknown Perth 4 Post Card William St Perth WA Unknown Perth 5 Post Card Perth from Shaftsbury Hotel Unknown Perth 6 Post Card Hay St Perth WA Looking East Unknown Perth 7 Post Card Barrack St Perth Unknown Perth 8 Post Card Murray Views No 3 High St Showing Town Hall Fremantle WA Unknown Fremantle 9 Post Card High St Fremantle WA Unknown Fremantle 10 Post Card View of Bolder City Golden Mile in the Background (Section No 1) 1908.08.20 Kalgoolie 11 Post Card Hannan St Kalgoolie 1900.08.19 Kalgoolie 12 Post Card Hannan St Kalgoolie WA (No 2) Unknown Kalgoolie 13 Post Card Intersection Hannan & Maritana Sts Kalgoolie WA Unknown Kalgoolie 14 Post Card Hannan St Kalgoolie Unknown Kalgoolie 15 Post Card Lane Street Bolder City Unknown Kalgoolie 16 Post Card Hobart Double Deck Tram Unknown Hobart 17 Post Card Macquarie St Hobart Unknown Hobart 18 Photo Liverpool Street Hobart Unknown Hobart 19 Photo Hobart 21 Unknown Hobart 20 Photo Hobart 14 in Elizabeth St Hobart Unknown Hobart 21 Post Card Macquarie St Hobart Unknown Hobart 22 Post Card Macquarie St Hobart Tas Unknown Hobart 23 Photo Double Decker Tram 3 at G.P.O. Hobart Tas No 31 Unknown Hobart 24 Post Card Double Decker Tram 19 Hobart Tas A B Series No 24 Unknown Hobart 25 Photo Hobart Municipal Tramways Tas No 95 Unknown Hobart 26 Post Card Elizabeth St Hobart Unknown Hobart 27 Post Card Elizabeth St Hobart Unknown Hobart 28 Post Card Elizabeth St Hobart Unknown Hobart 29 Post Card Elizabeth St Hobart Tas Unknown Hobart 30 Post Card HMT 21 with crew at Beach Road Terminus Unknown Hobart 31 Post Card HMT 9 & another with crew at Beach Road Terminus. Front cover photo of Destination GPO 1921.01.00 Hobart 32 Post Card Cascade Road and Mount Wellington Hobart Unknown Hobart 33 Post Card Elizabeth St Hobart Unknown Hobart 34 Post Card Elizabeth St Hobart Unknown Hobart 35 Post Card Elizabeth St Hobart 1915.04.07 Hobart 36 Post Card Macquarie St Hobart Tas Unknown Hobart 37 Post Card Macquarie St showing Post Office Hobart 1908.03.12 Hobart 38 Post Card Hobart Municipal Tramways 21 Unknown Hobart 39 Post Card Elizabeth St Hobart Tas Unknown Hobart 40 Post Card Liverpool Street Hobart Unknown Hobart 41 Post Card Electric Tram Launceston Tas 446 W J Little Photo 1919.02.08 Launbceston 42 Post Card Launceston Tram no 3 1911.08.30 Launbceston 43 Post Card Launceston Tram no 3 passes tram No 1 Unknown Launbceston 44 Post Card Tram 6 at Trevallyn a popular suburb Launceston Tasmania Unknown Launbceston 45 Post Card Tram 7 at Trevallyn Road Terminus Launceston Tasmania Unknown Launbceston 46 Post Card Tram 4 in Brisbane St Launceston Unknown Launbceston 47 Post Card Tram 9 in Brisbane St Launceston Tasmania Unknown Launbceston 48 Post Card Camerom Street Launceston Tasmania Unknown Launbceston 49 Post Card Murray Views No 15 Jetty Road Glenelg Terminus 1962-02-08 Adelaide 50 Post Card Bay Tram at Jetty Road Terminus Glenelg SA Unknown Adelaide 51 Post Card Tram 3 in King William Street Adelaide S Aust Unknown Adelaide 52 Post Card Valentine Series No 3065 The Old Horse Tram Victor Harbour Unknown Victor Harbour 53 Post Card Bourke Street Melbourne with Cable Car Looking East 1904.04.25 Melbourne 54 Post Card Opening of New Electric Tramway Elsternwick 1913-11-13 Melbourne 55 Post Card Cable trams in Clarendon St Sth Melb Unknown Melbourne 56 Post Card Pall Mall from Charing Cross Bendigo Unknown Bendigo 57 Post Card Tram 4 & 7 pass at The Fountain and Mitchell Street Bendigo Vic Rose Series P 3198 Unknown Bendigo 58 Post Card M&MTB 133 at Charing Cross bound for Eaglehawk Bendigo Vic Murray Views No 45 Unknown Bendigo 59 Post Card Pall Mall Bendigo Vic Unknown Bendigo 60 Post Card Charing Cross & Mitchell St Bendigo Trams passing 1919.00.00 Bendigo 61 Post Card Pall Mall Looking East Unknown Bendigo 62 Post Card Electric Trams and City Hotel Bendigo Vic Unknown Bendigo 63 Post Card Moorabool Street Geelong V 23 Unknown Geelong 64 Post Card Murray Views No 3 Moorabool Street Geelong Vic Unknown Geelong 65 Post Card The Rose Series P 2487 Ryrie Street Geelong Vic Unknown Geelong 66 Post Card Southern Cross Series 2696 Ryrie Stret Geelong Vic Unknown Geelong 67 Post Card The Rose Series P 1490 Ryrie Street Geelong Vic 1920-03-04 Geelong 68 Post Card Valentine Series No 1568 Lower Sturt Street Ballarat Unknown Ballarat 69 Post Card Rose Series P 1710 Sturt Street Ballarat Victoria Unknown Ballarat 70 Post Card Sturt Street Ballarat Victoria Unknown Ballarat 71 Post Card Horse Tram In Sturt Street Ballarat 1905.11.10 Ballarat 72 Post Card Sturt Street Ballarat Looking North-West Unknown Ballarat 73 Post Card Shoppes Square Sturt Street Ballarat Looking North Unknown Ballarat 74 Post Card Junction Sturt and Lydiard Streets Ballarat 1909-09-01 Ballarat 75 Post Card The Electric Supply Co Souvenir Tram Ticket No 3085of the opening of Electric System August 18 1905 1905.08.18 Ballarat 76 Post Card Sturt Street Ballarat Victoria 1907.11.25 Ballarat 77 Post Card Off to the Gardens Electric Tram Ballarat Unknown Ballarat 78 Post Card Sturt Street Ballarat 1907.04.16 Ballarat 79 Post Card Sturt Street Ballarat Looking East Electric tram with Double Deck Trailer 1911.04.17 Ballarat 80 Post Card Sturt Street Ballarat Looking East Unknown Ballarat 81 Post Card Sturt Street Ballarat Looking West 1911.03.01 Ballarat 82 Post Card Town Hall and Sturt Street Ballarat Unknown Ballarat 83 Post Card Lydiard Street Ballarat 1906.11.23 Ballarat 84 Post Card Looking North along Adelaide Street from George Street Brisbane Sidues Series No 764 Unknown Brisbane 85 Post Card Looking South along Queen Street from the Creek Street Intersection Brisbane Qld Sirues Series No 1379 Unknown Brisbane 86 Post Card George Street from near Supreme Court Brisbane Unknown Brisbane 87 Post Card Queen and Eagle Streets Brisbane 1907.07.04 Brisbane 88 Post Card Queen Street showing His Majesty’s Theatre Brisbane Unknown Brisbane 89 Post Card Queen Street Treasury Building 1908.01.20 Brisbane 90 Post Card G P O and Queen Street Brisbane Unknown Brisbane 91 Post Card Queen Street Brisbane Looking from Wharf Street Unknown Brisbane 92 Post Card Customs House Brisbane 1905.02.16 Brisbane 93 Post Card Queen St Brisbane 1905.09.16 Brisbane 94 Post Card Queen St Brisbane 1907.11.19 Brisbane 95 Post Card Treasury Buildings Brisbane Unknown Brisbane 96 Post Card Queen and Eagle Streets Brisbane Unknown Brisbane 97 Post Card The Valley Corner Brisbane Unknown Brisbane 98 Post Card Brisbane Queen Street opposite General Post Office Unknown Brisbane 99 Post Card North Quay and Milton Beach Brisbane Q Unknown Brisbane 100 Post Card Victoria Bridge Brisbane South Side 1907.08.14 Brisbane 101 Post Card Victoria Bridge Brisbane Unknown Brisbane 102 Post Card Breakfast Creek Bridge Brisbane Q Unknown Brisbane 103 Post Card Melbourne Street Station South Brisbane Queensland Unknown Brisbane 104 Post Card General Post Office Queen Street Brisbane 1955.09.23 Brisbane 105 Post Card Customs House Brisbane 1904.11.04 Brisbane 106 Post Card Queen St Brisbane 1919.11.00 Brisbane 107 Post Card Queen St Brisbane Sidues Series No 627 Unknown Brisbane 108 Post Card Creek Street Brisbane Queensland Unknown Brisbane 109 Post Card Customs House and Garden Reach Brisbane Queensland 1910.00.08 Brisbane 110 Post Card Queen and Creek Streets Brisbane 1909.06.07 Brisbane 111 Post Card Queensland National Bank andd Queen Street Brisbane Queensland Unknown Brisbane 112 Post Card Queen Street and Treasury Buildings Brisbane 0000.09.07 Brisbane 113 Post Card Queen Street showing “Courier” Buildings Brisbane Unknown Brisbane 114 Post Card Intersection George & Roma Streets Brisbane Q 1916.05.11 Brisbane 115 Post Card Adelaide Street Brisbane Q Unknown Brisbane 116 Post Card G P O Queen Street Brisbane Q Unknown Brisbane 117 Post Card Treasury Building Brisbane 1906.03-20 Brisbane 118 Post Card Queen and Eagle Streets Brisbane 1907.02.01 Brisbane 119 Post Card Queen St Brisbane Unknown Brisbane 120 Post Card Queen St Brisbane Q Unknown Brisbane 121 Post Card Victoria Bridge Brisbane 1906.07.30 Brisbane 122 Post Card An Unusual View showing Head of Queen Street Victoria Bridge & South SideSuburbs Brisbane Q Unknown Brisbane 123 Post Card Petries Bight Brisbane Q Unknown Brisbane 124 Post Card South End Victoria Bridge Brisbane Q Unknown Brisbane 125 Post Card Customs House Brisbane Unknown Brisbane 126 Post Card Photo of toastrack car circa 1910 Unknown Brisbane 127 Post Card Treasury Buildings Brisbane Unknown Brisbane 128 Post Card East Street Rockhampton with Steam Tram & trailer Unknown Rockhampton 129 Post Card Post Office Rockhampton with steam tram Unknown Rockhampton 130 Post Card East Street Rockhampton with Steam Trams Rose Series P 7154 Unknown Rockhampton 131 Post Card William Street Rockhampton Rose Series P 7156 Unknown Rockhampton 132 Post Card Central East Street Rockhampton Q with Steam Trams Unknown Rockhampton 133 Photo Sturt St Ballarat Unknown Ballarat 134 Photo Bridge Street Ballarat Unknown Ballarat 135 Post Card George St Sydney Unknown Sydney 136 Post Card Elizabeth St Sydney Unknown Sydney 137 Post Card Railway Square Unknown Sydney 138 Post Card Sydney Harbor Bridge - pending receipt 139 Post Card Kings Cross - Mowbray Series with description on rear from C Roy G Field Unknown Sydney 140 Post Card Kings Cross - Mowbray Series with description on rear from C Roy G Field Unknown Sydney 141 Post Card Central Railway Station Sydney - Rose Series P6033 1954-01-26 Sydney 142 Post card William Street Darlinghurst looking towards City - Rose Series P6602 unknown Sydney 143 Post Card Circular Quay Sydney - Rose Series P6680 Unknown Sydney 144 Post Card View at Manly NSW - Rose Series B1003 Unknown Sydney 145 Post Card Hunter St Newcastle NSW - Rose Series P7843 Unknown Newcastle 146 Post Card Bank Corner Newcastle NSW - Mowbray Series No. 155 Unknown Newcastle 147 Post Card Hunter St Newcastle NSW Unknown Newcastle 148 Post Card Criterion Hotel Hunter St Newcastle NSW Unknown Newcastle 149 Photo Horse tram at Newtown Station 1894 to 1898 - PTC photo c1894 Newtown 150 Photo Steam tram motor No 3 at Railway Square 1879 1879 Sydney 151 Photo Railway steam tram c1900 with a horse drawn double deck bus c1900 Sydney 152 Photo Steam motor 5A and doubled deck bus Unknown Sydney 153 Photo Steam motor 53A with detail notes on rear 1922 Sydney 154 Photo Cable tram set at Milsons Point ferry terminal c1900 Sydney 155 Photo Early Sydney electric car - Ocean St - Rose Bay Unknown Sydney 156 Photo George St looking souoth c1905 c1905 Sydney 157 Photo Tram 165 at Circular Quay Unknown Sydney 158 Photo Tramcar ferry or transporter at The Spit Unknown Sydney 159 Photo tram 882 George St at Marti Place, 1937 1937 Sydney 160 Photo Tram 826 Railway Sq area Unknown Sydney 161 Photo Railway Sq in background, Broadway with double decker bus and toastrack car late 1930s Sydney 162 Photo Coupled St Pitt St? - photo Ben Parle Feb. 1950 Sydney 163 Photo Electric tram No. 2 - North Sydney with side trolley pole running Unknown Sydney 164 Photo George St - Horden's Corner Unknown Sydney 165 Photo George St at Martin Place c1920 Sydney 166 Photo Castlereagh St Sydney c1928 c1928 Sydney 167 Photo Railway Sqare c1920 c1920 Sydney 168 Photo Darling St Countereweight Unknown Sydney 169 Photo Trolley bus depot Unknown Sydney 170 Photo Trolley bus No. 14 Unknown Sydney 171 Photo Newcastle Railway Station with steam tram - Wharf Road?? Unknown Newcastle 172 Photo High St West Maitland - steam tram Unknown Maitland 173 Photo High St West Maitland - steam tram Unknown Maitland 174 Post Card Argent St near tram terminal Broken Hill NSW c1900 Broken Hill 175 postcard Argent St looking south Broken Hill - with Ken Magor's notes on rear Unknown Broken Hill 176 Photo Toronto - steam tram 61A Unknown Toronto 177 Photo 124A trial run 1911? Sutherland - Cronulla line 1911 Sutherland 178 Photo 103A at a tram stop Unknown Sydney 179 Photo Cable tram set at Crows Nest terminus grip car 12, trailer 22 Unknown Sydney 180 Photo Cable tram Queens Square Sydney 1903 Sydney 181 Photo cars 2078 and 2077 Chatswood late 1950s Sydney 182 Photo car 1877 Balmain area late 1950s Sydney 183 Photo Trolley bus - Rockdale destination Late 1950s Sydney 184 Photo Broken Hill steam tram - motor 18A North Tram Unknown Broken Hill 185 Photo Millars Point Sydney NSW - ferry/tram interchange, unknown Sydney All items imaged including the rear or back where there was writing of information. All files stored on the Museum's Photo Collections directory. Demonstrates through the medium of many images, Australian tramway systems and Ballarat's place in them.Album - heavy card covers, plastic lined with postcard or 6x4 photo sleeves.australia, tramways, postcards, photographs, steam trams, horse trams, cable trams, trolley buses -
 Ballarat Tramway Museum
Book, Broken Hill Pty Co Ltd (BHP), "BHP - Hot rolled carbon steel sections and plates", 1967
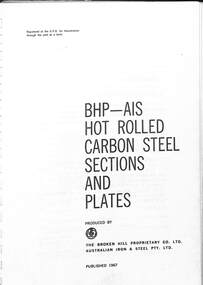
... Rail sections listed: 387 pound/yard crane rail 175 lb crane rail 146 lb crane rail 107 lb - 53 kg/m with fishplate and sleeper plates details 102 lb or 51 kg grooved tram rail 94 lb or 47 kg - fishplates and sleeper plates 91 lb or 45 kg NZR standard rail 82 lb or 41 kg - fishplates and sleeper plates 75 lb or 37 kg - fishplates and sleeper plates 63 lb or 30 kg - fishplates 45 lb or 22 kg - fishplates 30 lb or 15kg - fishplates 20 lb or 10kg - fishplates ...Rail sections listed: 387 pound/yard crane rail 175 lb crane rail 146 lb crane rail 107 lb - 53 kg/m with fishplate and sleeper plates details 102 lb or 51 kg grooved tram rail 94 lb or 47 kg - fishplates and sleeper plates 91 lb or 45 kg NZR standard rail 82 lb or 41 kg - fishplates and sleeper plates 75 lb or 37 kg - fishplates and sleeper plates 63 lb or 30 kg - fishplates 45 lb or 22 kg - fishplates 30 lb or 15kg - fishplates 20 lb or 10kg - fishplates Yields information about rails and associated items produced by BHP AIS in 1967 along with other steel sections and plates. railways tramways rails BHP fishplates sleeper plates Book - 132 pages, white comb bound + blue plastic covers. ...Published by BHP 1967 gives the dimensions and properties of rails, steel sections and plates produced by Australian Iron and Steel and Broken Hill Pty Ltd. Was supplied free by BHP to students. Rail sections listed: 387 pound/yard crane rail 175 lb crane rail 146 lb crane rail 107 lb - 53 kg/m with fishplate and sleeper plates details 102 lb or 51 kg grooved tram rail 94 lb or 47 kg - fishplates and sleeper plates 91 lb or 45 kg NZR standard rail 82 lb or 41 kg - fishplates and sleeper plates 75 lb or 37 kg - fishplates and sleeper plates 63 lb or 30 kg - fishplates 45 lb or 22 kg - fishplates 30 lb or 15kg - fishplates 20 lb or 10kg - fishplates Yields information about rails and associated items produced by BHP AIS in 1967 along with other steel sections and plates.Book - 132 pages, white comb bound + blue plastic covers.railways, tramways, rails, bhp, fishplates, sleeper plates -
 Ballarat Tramway Museum
Photograph - Black & White Photograph/s, Darge No.1136, c1910
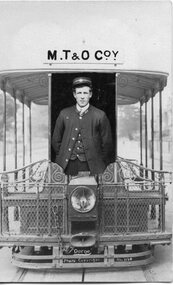
... tram between the roof uprights and the decorative front apron. "M. T & O Coy" have been printed on the destination panel. At base of card is "Darge Photo copyright No. 1136". On rear is printed Postcard, /Correspondence/Address Only. On side of card vertically is "DARGE, Photographer, 175...tram between the roof uprights and the decorative front apron. "M. T & O Coy" have been printed on the destination panel. At base of card is "Darge Photo copyright No. 1136". On rear is printed Postcard, /Correspondence/Address Only. On side of card vertically is "DARGE, Photographer, 175 ...Black and white postcard printed photograph of the front of a Melbourne Tramway and Omnibus Co. cable car with the photograph of an employee in uniform against a black background merged into the front of the cable tram between the roof uprights and the decorative front apron. "M. T & O Coy" have been printed on the destination panel. At base of card is "Darge Photo copyright No. 1136". On rear is printed Postcard, /Correspondence/Address Only. On side of card vertically is "DARGE, Photographer, 175 Collins St. Melbourne Vic." In position where stamp would go, in a square box repeated twice, are the words "KODAK AUSTRALIA", along with decorative scrolls. See btm632doc.pdf for historical note re print.Niltrams, tramways, melbourne, cable trams, darge photographer's, mtoco , tram cable car -
 City of Melbourne Libraries
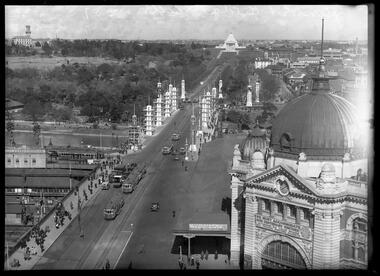
Photograph, Bull, Hugh Jones, 1897-1993, Princes Bridge Centenary pylons under construction
... 175 non wards at any given time. In 1931 it also operated a mothercraft training school. The centre foreground shows the commencement of Princes Bridge. Beneath the left side of the bridge was the site of the original Princes Bridge Station, by this time incorporated into Flinders Street Station, and today the area is the site of Federation Square. It was linked to Flinders Street station by the railway tracks that ran underneath the northern approach to the bridge. This photo shows a tram...175 non wards at any given time. In 1931 it also operated a mothercraft training school. The centre foreground shows the commencement of Princes Bridge. Beneath the left side of the bridge was the site of the original Princes Bridge Station, by this time incorporated into Flinders Street Station, and today the area is the site of Federation Square. It was linked to Flinders Street station by the railway tracks that ran underneath the northern approach to the bridge. This photo shows a tram ...Princes Bridge Centenary pylons under construction Possibly taken from Young and Jacksons Hotel (formerly Princes Bridge Hotel) on the corner of Flinders and Swanston streets, Flinders Street Station’s clocks and main entrance dominate, along with its distinctive copper dome and decorative façade. The time on the main clock is 1.40pm, and the sign underneath, reflecting Melbourne’s upcoming Centenary reads, “We must accommodate our Centenary visitors! Citizens! Do your share by taking paying guests.” At left is the original Princes Bridge Station, today the site of Federation Square. The riverside tram terminus advertises a Café/Tobacconist/Refreshment Room selling cigars & cigarettes, fountain drinks & confectionery, and in smaller text: “Leave your boot repairs here”. Nearly everyone is dressed in dark suits, coats and hats. The footpaths are wide and there are no traffic lights. The roadway stretches towards the Shrine of Remembrance, not yet dedicated but very dominant on the skyline. Government House is clearly visible across the wide parkland that would come to be known as Kings Domain and that is an area of deep importance to the people of the Eastern Kulin. Originally, Birrarung was part of a network of swamps and lagoons linked to the course of the river. From 1896, Public Works Department engineer Carlo Catani, oversaw a new channel to straighten the river and the swamps and lagoons were filled with spoil from the channel works. From the same vantage point today, only the top of the tower of Government House would be visible. The photo captures the pylons along Princes Bridge, mid-construction and being installed to mark Melbourne’s Centenary. The pylons were not without controversy. Both The Argus and The Age bemoaned them for being “made almost entirely of imported softwood timber”, denying work to native hardwood timber workers and sawmillers, and leading visitors to think Australia did not have its own exceptional native hardwoods. The pylons were also variously described in their incomplete state, as unimaginative and resembling an oilfield. Published: The Age 5 September 1934 Featured in "Newsworthy: Melbourne in photographs 1933-1936" exhibition at East Melbourne Library, October to December 2023. Exhibition caption by project volunteer, Louise McKenzie Photographer notations on slide: "Pylons + St Kilda Rd C57" Published: Age (Melbourne, Vic. : 1854 - 1954), Wednesday 5 September 1934, page 11 Published title: DECORATIONS -- THEN AND NOW. Published caption: "Although not completed yet, some impression of the effect of the decorations on Princes-bridge may be obtained from the first picture which shows the majestic sweep of St Kilda road with the Shrine of Remembrance and Government House dominating the horizon. The area to the left of St. Kilda-road and in front of Government House is portion of the area which it is proposed to call the King's Domain, which extends to Domain-road and Anderson-street..." Description: East-facing, elevated view of Flinders Street Station and Princes Bridge, featuring partially completed pylons erected for Melbourne's Centenary celebrations. The Shrine of Remembrance and Government House can be seen in the distance. In the foreground are trams, cars and trucks, pedestrians, Batman Avenue tram terminus and refreshment rooms. Signage on Flinders Street Station encourages citizens to accommodate Centenary visitors. The Melbourne Centenary was held 1934-35 in celebration John Batman's proclamation that Melbourne "the place for a village". Centenary events included a visit by Prince Henry, Duke of Gloucester. A Centenary Cake measuring 50 feet in height and ten tons in weight was cut into 250,000 pieces and sold at 1 shilling per piece for charity. Spectacular floodlighting of city landmarks, the creation of the Pioneer Women's Memorial Garden, and the MacRobertson Air Race from London, were other notable activities. Research by project volunteer, Louise McKenzie: The photo in The Age collage of 5 September 1934 has a slightly cropped foreground. The original photo has been taken from an elevated vantage point, most probably the roof of the Nicholas Building on the corner of Flinders and Swanston streets. The right foreground is dominated by the main “clocks” entrance to Flinders Street Station, showing its distinctive copper dome and decorative façade. The time on the main clock is 1.40 pm. The main sign on the front of the Station reads, "We Must Accommodate our Centenary Visitors! Citizens! Do your share by taking paying guests. Write to The Official Centenary Accommodation Bureau, 436 Collins St. City. Tel M 4671”. Another sign at eye level at the main entrance says: “Cheap Trips on Sundays”. The sign on the end of the roof along the eastern side of the station reads, “The Babies Need Your Help! Support Broadmeadows Foundling Hospital Appeal. July and August”. Run by the Sisters of St Joseph of the Sacred Heart, St Joseph’s Foundling Hospital was a purpose built infants’ home for up to 300 babies, plus accommodation for expectant mothers, mainly single women. In the early 1930s, the department (Victorian Children’s Welfare Department) contracted St Joseph’s Foundling Hospital to care for an additional 60 infant state wards, and up to 175 non wards at any given time. In 1931 it also operated a mothercraft training school. The centre foreground shows the commencement of Princes Bridge. Beneath the left side of the bridge was the site of the original Princes Bridge Station, by this time incorporated into Flinders Street Station, and today the area is the site of Federation Square. It was linked to Flinders Street station by the railway tracks that ran underneath the northern approach to the bridge. This photo shows a tram terminus which has a Café/Tobacconist/Refreshment Room, selling cigars & cigarettes, fountain drinks & confectionary, and a sign: Leave your boot repairs here. In the foreground is a wide roadway running south/north, comprising two vehicle lanes each heading north/south, and a central section containing two sets of tram tracks. There are cars, buses and delivery vans on the roadway. The trams visible are Glen Iris (Route No. 6; tram no. 448), Toorak (Route No. 8, tram no. 333), ? (No. 7), ? (No. 1), and ? (No. 2A). The footpaths are extremely wide. There is a square newspaper/magazine stand on the eastern side footpath. And also a “Ferry” sign. There are no traffic lights, but a policeman is visible on the roadway. There are pedestrians – men, women, children, a porter with trolley, women with prams. Clothing comprises dark suits, coats and hats for nearly everyone. There are double headed “Collins Street” lights along the side of the roadway, and along the northern riverbank. The roadway in the foreground is an extension of Swanston Street, which becomes Princes Bridge, then St Kilda Road, stretching towards the Shrine of Remembrance, and diverting past it. The Shrine had not yet been officially dedicated, and looks very white and dominant on the skyline. On the LHS of St Kilda Road, Government House is clearly visible across the wide parkland to be known as Kings Domain. The Kings Domain area is important to the people of the Eastern Kulin nation, and also has historical importance for its association with the early settlement of Melbourne and the foundation of British colonial administration in Victoria. On the southern side of the Yarra River (Birrarung) an historic rowing boathouse is visible, located adjacent to the Alexandra Gardens. Originally Birrarung was part of a network of swamps and lagoons linked to the course of the river. From 1896, under the guidance of engineer Carlo Catani* a new channel to straighten the river was created and the swamps and lagoons were filled with spoil from the channel works. The gardens were then created and completed in time for a Royal visit by the Duke of York in May 1901. The gardens are named after Alexandra of Denmark, the wife of King Edward VII. Both these areas, plus the Royal Botanic Gardens Victoria, Shrine of Remembrance Reserve, Sidney Myer Music Bowl, Government House, and the Queen Victoria Gardens together form the Domain Parklands. The extent of the subsequent plantings is evident today, where from the same vantage point only the top of the tower of Government House would be visible. *Catani was born in Florence in 1852, but after arriving in Melbourne worked as a civil engineer for the Victorian Government. His last major project was the reclamation of the foreshore of St Kilda, envisaged in the style of a European resort, complete with a split level esplanade, bathing pavilions, dance halls, amusements and a French-Italian style of landscape complete with palms. The gardens at the end of Fitzroy Street, St Kilda, now bear his name. The historic boathouse visible across the Yarra is another glimpse into Melbourne’s past. “Boathouse Row” comprises 7 amateur rowing clubs, the first established in 1859 (Melbourne University Boat Club). Other Clubs were Richmond, Melbourne, Banks, Melbourne Grammar School, Yarra Yarra and Mercantile. South of the river and west of the bridge is an area today developed into the Melbourne arts precinct of Hamer Hall and the Arts Centre. But at this time it was the home of Wirths Olympia Circus, which comprised Wirths Pleasure Park (an amusement park), a 5,000 seat auditorium – Hippodrome, a roller skating rink, a glaciarium, a cinema, and the Green Mill Dance Hall. Dog shows were also held at Olympia. The Green Mill Dance Hall closed in 1950, and the remainder of the Wirth buildings on site were destroyed by fire in December 1953. The feature of the photo is the pylons erected along Princes Bridge to mark Melbourne’s Centenary in 1934. The sixteen plastered pylons were designed by Roy Prentice, the second person to qualify as an architect at The University of Melbourne’s Bachelor of Architecture degree, in 1933, aged 27. Simon Reeves in his article marking the 100th birthday of Roy Prentice on 20 June 2006 reports that the State Electricity Commission sponsored this work, and the Argus reported that “… the pylons were “illuminated from within to give the effect of soft radiance”. Australia Home Beautiful 1 Oct 1934 reports in a very detailed and comprehensive article: The 10 taller pylons, including flagpole, were 48 ft, with a base of 8 ft. Timber-framed and faced with fibrous plaster and galvanised sheet iron, each structure was securely bolted to a concrete foundation three feet in depth. Panels of glass let into the shaft of each pylon were indirectly lit by 40, 100 watt lamps, and the upper bank of internal lamps were dyed so as to flood the panels with a deep red light. The decorative painted shields and flagpoles/pennants were illuminated by three 200 watt projectors concealed in the roof of each pylon, and were part of an electric night light decoration scheme involving 28 miles of wire to supply more than 20,000 lights. An article in the Argus on 18 October 1934 provided minute detail of the lighting erected in Melbourne for the Centenary, converting it “… into a coloured fairyland by night.” The estimated cost of 10 pounds per hour the lights were on. The display included 800 standard light poles 30 feet high which were tiered with electric bulbs concealed in inverted cones, 138 specially designed “Venetian poles” draped in flags trophies and streamers. The streets included in the electric night light decoration scheme were Bourke Street from Spring to William, the entire length of Collins Street, Flinders Street from Elizabeth to Spring, Lonsdale Street from Elizabeth to Swanston, Swanston and Elizabeth Streets from Flinders to Lonsdale, and parts of Springs and Spencer Streets. Together with the Princes Bridge pylons, approximately 28 miles of wire was required to supply power to the more than 20,000 lights. And that is just in the city of Melbourne. It was estimated the same amount of lighting was duplicated among other local councils. The pylons were not without controversy. The Argus on 28 August 1934 in an article headed “Imported Timber in Pylons” reported that the Princes Bridge pylons are “made almost entirely of imported softwood timber”, and have therefore denied work to native hardwood timber workers and sawmillers. The same day the Melbourne Age ran a similar story, bemoaning the fact that foreign oregon had been used which may lead tourists to think Australia did not have its own exceptional native hardwoods. A Camberwell City Councillor described the pylons as unimaginative, and the Herald reported that skeletons of pylons for the Centenary decorations in their present form led the area to resemble an oilfield! The Yarra River and Princes Bridge have long been a focal point of Melbourne life. In the early days of European settlement in Melbourne a rope-hauled punt carried people across the Yarra River. A surge in population and increased shipping traffic created a need for a bridge. There was difficulty in agreeing on a suitable site for the bridge (options were crossing at Elizabeth, Swanston, Queen or Market Streets), but the NSW Government favoured Swanston Street and the Melbourne Town Council decided on a temporary bridge across the Yarra spanning from the foot of Swanston Street. This first bridge was a single span timber toll bridge designed by Scottish born bridge designer David Lennox, and completed in 1845. It was 120 feet long, had a roadway of 17 feet wide, and a footpath on one side of 4 feet. It was leased to the Melbourne Bridge Company in the name of Robert A Balbirnie. The tollhouse was on the north side of the river and the toll keeper, Patrick Doherty, was credited with saving nine lives during the four years he was in charge of the toll station. The second bridge was stone (completed 1850), and named Prince’s Bridge after the HRH Prince of Wales, later Edward VII. It was designed with an elliptical single arc and an exceedingly small rise in proportion to the span. However, this design created an obstacle for flood waters, and together with Melbourne’s increasing population it was quickly apparent that a new bridge was required. At its opening on 15 November 1850 coincided with the imminent declaration of Victoria as a separate colony, it provided a moment of great celebration for Melbournians and “The opening ceremony was described as the grandest processional display witnessed in the colony.” (ToMelbourne.com.au) Princes Bridge in its present form, as depicted in this photograph, was designed by Jenkins, D’Ebro and Grainger, and constructed in 1886-88 by David Munro. John Grainger (father of Australian composer Percy Grainger) did the majority of the design work for the bridge. The structure was to have three arches each 96 feet wide measured across the river, and the banks on both sides were raised to allow more space for floodwater to flow. St Kilda Road was originally many feet below the current level. The bridge is of architectural significance for its substantial size, giant half columns, extensive use of wrought and cast iron, decorative elements (cast-iron lamps) and the skilled stonemasonry in the construction of the abutments and piers. Its main design features are similar to those of Blackfriars Bridge in London (1870). The bluestones were quarried from Footscray, the Malmsbury stones were from quarries at Kyneton, and the granite from Harcourt. The cost was met by the State of Victoria, City of Melbourne, and six out of seven of its municipalities, and their coats of arms feature on the bridge. The building of the bridge reflected the boom period of Melbourne, including the Victorian gold rush 1851- late 1860s, and its contractor, David Munro, was also responsible for the construction of Queens Bridge and Sandridge Railway Bridge. The Centenary pylons are no longer in place, but today this intersection still plays a major part in Melbourne’s daily life: people still meet “under the clocks” at Flinders Street station, and the route in and out of the city along St Kilda Road is often a feature of parades such as Moomba, the Grand Final Parade, and of course the Anzac Day Parade which commences at the Princes Bridge intersection and finishes at the Shrine of Remembrance. There are many tram routes, which cross the Bridge, and it directs pedestrians towards the Arts Precinct, the various components of Domain Park, plus the Southbank restaurant and rowing precincts. Even though this is a street scene, it feels very intimate; the viewer is instantly immersed in the activity of a Melbourne afternoon, looking down St Kilda Road from a viewpoint near today’s Federation Square. References: DECORATIONS -- THEN AND NOW. (1934, September 5). The Age (Melbourne, Vic. : 1854 - 1954), p. 11. Retrieved September 21, 2023, from http://nla.gov.au/nla.news-article205880269 'Flinders Street railway station', Wikipedia, https://en.wikipedia.org/wiki/Flinders_Street_railway_station 'St Joseph’s Foundling Hospital (1901-75)', Finding Records, Department of Health and Human Services, State of Victoria, https://www.findingrecords.dhhs.vic.gov.au/collectionresultspage/St-JosephsFoundling-Hospital-Babies-Home#departmental-administration 'Alexandra Gardens', City of Melbourne, https://www.melbourne.vic.gov.au/community/parks-open-spaces/major-parks-gardens/Pages/alexandra-gardens.aspx 'Wirths Circus', Wikipedia, https://en.wikipedia.org/wiki/Wirth's_Circus 'Roy Prentice: Centenary Architect', Built Heritage Pty Ltd, Simon Reeves, https://www.builtheritage.com.au/downloads/prentice.pdf 'Princes Bridge', Heritage Council Victoria, https://vhd.heritagecouncil.vic.gov.au/places/817 PORT PHILLIP. (1846, April 1). The Sydney Morning Herald (NSW : 1842 - 1954), p. 3. Retrieved September 21, 2023, from http://nla.gov.au/nla.news-article12886251 'Edward VII', Wikipedia, https://en.wikipedia.org/wiki/Edward_VII 'Princes Bridge', ToMelbourne.com, https://tomelbourne.com.au/princes-bridge/ 'Princes Bridge', eMelbourne, https://www.emelbourne.net.au/biogs/EM01189b.htm 'Princes Bridge', Australia for everyone, http://australiaforeveryone.com.au/files/melbourne/princes-bridge.html 'Victorian gold rush', Wikipedia, https://en.wikipedia.org/wiki/Victorian_gold_rush IMPORTED TIMBER IN PYLONS (1934, August 28). The Argus (Melbourne, Vic. : 1848 - 1957), p. 9. Retrieved September 21, 2023, from http://nla.gov.au/nla.news-article10952507 Princes-Bridge Pylons. (1934, August 28). The Age (Melbourne, Vic. : 1854 - 1954), p. 7. Retrieved September 21, 2023, from http://nla.gov.au/nla.news-article205532235 Pylons Appear Near Princes Bridge (1934, August 18). The Herald (Melbourne, Vic. : 1861 - 1954), p. 1. Retrieved September 21, 2023, from http://nla.gov.au/nla.news-article243104375 PRINCES-BRIDGE PYLONS. (1934, September 20). The Age (Melbourne, Vic. : 1854 - 1954), p. 10. Retrieved September 21, 2023, from http://nla.gov.au/nla.news-article205873535 28 Miles of Wire (1934, October 18). The Argus (Melbourne, Vic. : 1848 - 1957), p. 1 (The Junior Argus). Retrieved September 21, 2023, from http://nla.gov.au/nla.news-article10977836 'Historical references for Boathouse Row, Melbourne', http://boathouserowmelbourne.com.au/history/ 'ITALIAN DELEGATION TO HONOUR CARLO CATANI, DESIGNER OF THE ST KILDA FORESHORE, St Kilda Historical Society, 2001, https://web.archive.org/web/20070928061938/http://www.skhs.org.au/~SKHSarticles/articles/Carlo_Catani.html# HISTORY IN LIGHTS (1934, July 12). The Herald (Melbourne, Vic. : 1861 - 1954), p. 16. Retrieved September 21, 2023, from http://nla.gov.au/nla.news-article243172436 'Dressing Melbourne for the Duke', The Australian home beautiful: a journal for the home builder. Vol 12 No. 10 (1 October 1934), page 21, 58. Retrieved September 14, 2023, from http://nla.gov.au/nla.obj-2950922209Photographer notations on slide: "Pylons + St Kilda Rd C57".centenaries, bridges, lighting, flinders street railway station -
 Ballarat Tramway Museum
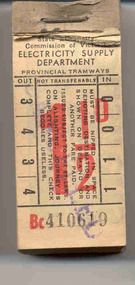
Ephemera - Ticket/s, State Electricity Commission of Victoria (SECV), SEC 1-1/2d, 1940's?
... Ballarat Tramway Museum South Gardens Reserve Wendouree Parade Ballarat Ballarat goldfields Trams tramways SECV Tickets Parcels Block of about 175 tickets - black ink on 60 gsm buff paper, denomination 1 1/2d (printed in red), numbered Bc410619 - B410799, headed State Electricity Commission of Victoria, Electricity Supply Department, Provincial Tramways. ...Block of about 175 tickets - black ink on 60 gsm buff paper, denomination 1 1/2d (printed in red), numbered Bc410619 - B410799, headed State Electricity Commission of Victoria, Electricity Supply Department, Provincial Tramways. Originally a block of 200 tickets been stapled onto a heavy cardboard back with a heavy metal staple and a small cardboard retaining strip at the top of the ticket. The ticket number is in black ink while the "Bc" prefix is in red. On the back of each ticket is a "Bushells, the Tea of Flavour" advertisement. On each side various codes when clipped denoted the destination or section the ticket was validated for. Tickets Nos - 410634 - 38 have been torn out prior to collection. Each ticket in block has been stamped "CANCELLED". Thought to be used prior to 1950's around the second world war. See Reg. Item 230, 3d ticket in top left hand corner of page 27, has a note "wartime" written under it.trams, tramways, secv, tickets, parcels -
 Melbourne Tram Museum
Album - Charles Craig - part 1 of 2, 1950s to 1970s
... 175 – has on rear – R. Lilburn 4/82 CC187 Y1 610 on AETA tour CC188 Y1 610 on AETA tour with large group – Point Ormond CC189 AETA display – has GH55-32 in pencil on rear CC190 AETA display – has GH55-29 in pencil on rear CC191 Y1 610 on AETA tour with large group – Point Ormond CC192 VR 53 at Footscray CC193 VR cars 40 and 34 at Elwood wash dock CC194 W7 1024 as the 1970 Christmas tram CC195 Geelong – loading a set of 22E trucks CC196 Geelong 10 and 23 running an AETA special CC197 Geelong – AETA special CC198 Geelong 7 at Junction CC199 Geelong 10, in the city CC200 Geelong 33 with Belmont destination CC201 Geelong 15 Eastern Park destination 29-3-1948 CC202 Geelong 23 at Railway Station – 29-3-1948 CC203 Geelong 23 at Railway Station – 29-3-1948 CC204 Geelong – loading a bogie tram CC205 Geelong – loading a bogie tram CC206 Geelong 40 – loaded on truck CC207 Geelong 40 – on jacks CC208 Geelong 40 on jacks – 19 behind CC209 Geelong 38 with two workers on either side CC210 – 214 Australian Historic Tramways stamp folder and set CC215 Bendigo 17 at depot – has dup JBS on rear CC216 Bendigo 20, 29 bogie and straight sill car at Charing Cross CC217 Bendigo one man bogie Pall Mall CC218 Bendigo – Bogie 23, other cars and welding truck at depot CC219 Bendigo 7 with Quarry Hill destination CC220 Bendigo 21 with Lake Weerona destination CC221 ESCo 18 Ballarat CC222 Ballarat bogie 22 on AETA special CC223 Ditto CC224 Ballarat 34 at Stones Corner – R Lilburn CC225 Ballarat 15 in Bridge St – R Lilburn CC226 Ballarat 40 at Gardens – R Lilburn CC227 Ballarat 37 running out of depot – R Lilburn CC228 Postcard – Valentines – Sturt St with loaded horse tram trailer CC229 AETA Geelong tram tour ticket – 29-3-1948 CC230 Postcard – Geelong – Valentine 2114 – T&G building CC231 Postcard – PMTT ! ...175 – has on rear – R. Lilburn 4/82 CC187 Y1 610 on AETA tour CC188 Y1 610 on AETA tour with large group – Point Ormond CC189 AETA display – has GH55-32 in pencil on rear CC190 AETA display – has GH55-29 in pencil on rear CC191 Y1 610 on AETA tour with large group – Point Ormond CC192 VR 53 at Footscray CC193 VR cars 40 and 34 at Elwood wash dock CC194 W7 1024 as the 1970 Christmas tram CC195 Geelong – loading a set of 22E trucks CC196 Geelong 10 and 23 running an AETA special CC197 Geelong – AETA special CC198 Geelong 7 at Junction CC199 Geelong 10, in the city CC200 Geelong 33 with Belmont destination CC201 Geelong 15 Eastern Park destination 29-3-1948 CC202 Geelong 23 at Railway Station – 29-3-1948 CC203 Geelong 23 at Railway Station – 29-3-1948 CC204 Geelong – loading a bogie tram CC205 Geelong – loading a bogie tram CC206 Geelong 40 – loaded on truck CC207 Geelong 40 – on jacks CC208 Geelong 40 on jacks – 19 behind CC209 Geelong 38 with two workers on either side CC210 – 214 Australian Historic Tramways stamp folder and set CC215 Bendigo 17 at depot – has dup JBS on rear CC216 Bendigo 20, 29 bogie and straight sill car at Charing Cross CC217 Bendigo one man bogie Pall Mall CC218 Bendigo – Bogie 23, other cars and welding truck at depot CC219 Bendigo 7 with Quarry Hill destination CC220 Bendigo 21 with Lake Weerona destination CC221 ESCo 18 Ballarat CC222 Ballarat bogie 22 on AETA special CC223 Ditto CC224 Ballarat 34 at Stones Corner – R Lilburn CC225 Ballarat 15 in Bridge St – R Lilburn CC226 Ballarat 40 at Gardens – R Lilburn CC227 Ballarat 37 running out of depot – R Lilburn CC228 Postcard – Valentines – Sturt St with loaded horse tram trailer CC229 AETA Geelong tram tour ticket – 29-3-1948 CC230 Postcard – Geelong – Valentine 2114 – T&G building CC231 Postcard – PMTT ! ...Photo - see pdf file for further information. Number Brief Description CC1 S178 at Elsternwick level crossing track works CC2 Building East Preston Depot 1955 CC3 Camberwell depot – post WW2 – lots of trams and a black cat CC4 W2 584 and SW6 958 northbound – Chapel St and Brighton Road CC5 W2 357 – southbound, Chapel St Brighton Road CC6 Pascoe Vale Road, Raceday working – note the signal CC7 The Preston Workshops - The Argus, post WW2, 223, 647 et al CC8 923 or is it 922 being built at Preston – The Argus photo - CC8A 832 being positioned onto trucks at Preston after an overhaul – Argus Photo – see also CC306 CC9 Footscray depot` CC10 W5 797 in St Kilda Road during track works – 1950s CC11 W2 457 at Kew Post Office CC12 Wellington Parade – W2 432, 492 and 337 – special event CC13 Swan St line up of trams – football? Or other special event – Sinclair’s bus on the right side. CC14 W2 630 being washed at a depot – The Argus photo CC15 Royal Park line at Flemington Road – W2 355 and W5 786 CC16 Nicholson St track construction from a tram cab CC17 T181 on tour at Gordon St CC18 T181 on Maribyrnong Bridge CC19 Ditto at River St just off bridge CC20 As for CC18 CC21 At Raleigh Rd CC22 T181 at Footscray depot CC23 Track construction, Nicholson, just north of Gertrude CC24 Commissioning overhead Bourke St tram 988 CC25 Queens Parade – 997 and 994 CC26 Swapping trolley wheel to skid – commissioning CC27 Track construction in Gertrude St CC28 985 in Queens Parade running special CC29 997 in Queens Parade CC30 1033 at North Fitzroy – AETA Special CC31 Bourke St at Elizabeth St – has passengers on board CC32 W6 985, 996 Queens Parade, Mk 3 bus 333 CC33 As above CC34 Showing construction at Nicholson & Gertrude – Bourke St CC35 W2 223 on Burnley temporary bridge – VR track expansion CC36 W5 823 – ditto CC37 Tram on old bridge prior to removal CC38 W2 433 on temporary bridge with new bridge beams and old track CC39 Looking down showing temporary single track – Swan St CC40 Tait train passing under tram bridge CC41 SW6 on single line – off loading CC42 W2 547 at City Road Junction CC43 City Road Jtn – 1969 – 596 and 771 CC44 City Road Jtn – 1969 – 596 and 771 (same as CC45 438 in Flinders St CC46 355 somewhere CC47 552 somewhere CC47A 364 at Preston Workshops? CC48 W2 334 on Traverser – Preston Workshops CC49 Wellington pade – large line up of trams, c1950 925, and 611 CC50 W2 493 Franklin st – advertising for Savings Certificates CC51 Possibly 551 with advertising for fund raising for Blind institute CC52 249 at Hawthorn – Riversdale Junction – with a Tally Ho and Village Fair Aux. board CC53 MMTB Postcard of 511 CC54 Wattle Park terminus with Single line warning sign CC55 Wattle Park Duplication CC56 36 at Domain Junction – 833 CC57 36 at Domain Junction CC58 36 at Domain Junction with 810 and 833 CC59 36 in Swanston by Flinders St Station CC60 36 in Spencer St at A’Beckett CC61 36 crossing Collins St CC62 36 crossing Collins St CC63 36 northbound in St Kilda Road with Shrine in background CC64 36 northbound in Swanston St at Flinders St CC65 Postcard – Ballarat 36 in Domain Road CC66 Postcard - Stampshow – Hawthorn Horse tram CC67 Postcard - Stampshow – Peace cable tram CC68 Postcard - 1041 and cable car set 1 at Preston CC69 Postcard - Colins & Elizabeth – greetings from old Melbourne CC70 Postcard - Cable car set at Preston CC71 Postcard - Twentyman’s cable cars CC72 Postcard - Nu-color-vue – horse tram 256 CC73 Cable car set – Market & Flinders CC74 Cable trams at Twentymans’ in their shed CC75 Cable tram track at Bourke & Spencer prior to removal CC76 Cable tram bogie at Preston Workshops – used as a dolly CC77 Cable trams at Twentymans’ CC78 Postcard - Valentines – Bourke looking west from Swanston CC79 Postcard - Rose 3938 – Bourke at Swanston – the Leviathan building CC80 Postcard - Valentines – Elizabeth St looking south from Collins – No. 19 CC81 Postcard - Rose P4765 – Bourke St Melbourne CC82 Postcard - Rose 4090 – cable tram passing Parliament house CC83 Postcard - Valentines – GPO Elizabeth St CC84 Interior of cable trailer with clothing on a set CC85 Elizabeth St looking north CC86 Cigarette card - Collins St No. 41- WD HO Wills CC87 Postcard - Rialto building with cable set CC88 Postcard - Valentines - Swanston at Flinders looking north CC89 CC90 Q 150 Hanna St – dated on rear CC91 176 turning – photo ex Alan Jungworth CC92 161 on Princes Bridge – minimum fare 4d sign and Inspector CC93 459 at Point Ormond CC94 158 at Gordon St – side on view CC95 X 217 in Swanston St CC96 X 217 in Swanston St with an East Brighton destination CC97 T177 CC98 T177 Peel St – no destination roll – being transferred? CC99 X1 462 in Glenhuntly Road to Point Ormond CC100 X1 462 in Glenhuntly Road to Elsternwick Rly Station CC101 X1 462 in Glenhuntly Road to Point Ormond CC102 Q 150 Hanna St CC103 190 at Camberwell Depot CC104 T182 at Footscray CC105 X1 466 and W2 at Footscray CC106 190 at Camberwell Depot CC107 X1 467 Barkly St Footscray CC108 X2 679 turning into William St from La Trobe St CC109 X2 677 Glenhuntly Road with Point Ormond Destination CC110 Postcard T180 CC111 Postcard format – X1 467 on a truck – see also CC178 CC112 Postcard format – X1 467 at Wantirna South CC113 Q200 and SW6 896 at Thornbury – has labels on rear CC114 T177, Ballarat Road – has labels on rear CC115 T178 at Point Ormond CC116 Postcard X1 465 and 466 CC117 Postcard – X2 676 CC118 Postcard – TMSV X2 217 CC119 810 on temporary bridging – 24-12-67 CC120 W2 575 – Queens Parade junction in, still temporary bridging, substation under construction CC121 Forming Queens Parade Junction base slab CC122 W2 596 prior to tramway works – all tracks still in position CC123 It’s a mass of reinforcing – bridging being formed CC124 Looking north with substation being built CC125 Looking east with some rather tight curves, Wellington St still in use CC126 SW6 958 ex Wellington St with all tracks and signal box and buildings. CC127 Victoria Pde at Gisborne looking east – at least 4 cars CC128 SW6 893? With dash canopy lights and SW6 862 and a man with a newspaper CC129 SW6 894 on the S curves, with tram in Wellington St CC130 Similar photo CC131 W2 564 turning into Wellington St – the concrete tracks are not that old CC132 W2 552 running out of Wellington St CC133 W5 732 from Fitzroy St into St Kilda Road with next iteration in position – very wonky CC134 W5 764 turning into Fitzroy St CC135 SW6 947 turning from Wellington St CC136 W2 586 running out of High St CC137 W2 500 turning into Wellington St CC138 W2 543 in Wellington St inbound CC139 L103 with St Kilda Junction destination, and a tower truck on right CC140 Workmen – new track in Queensway in use CC141 Ditto CC142 L103 in Queensway, and another car in bound CC143 Looking east along Wellington St which has been taken out of use. Also a MMTB Roller CC144 W5 824 and a W2 and all types of wobbly temporary track CC145 W2 354 to High St CC146 Sw6 947 on the S bends CC147 W2 500 looking north – tram on the S bends CC148 SW6 896 leaving the S bend CC149 W2 357 and a MMTB City bus with trees/gardens on the side CC150 W5 817 Elliot Ave – see also CC302 CC151 W2 552 – note the large trolley bridge CC152 W2 550 at depot or workshops CC153 1B truck CC154 SW2 432 CC155 W2 155 at Glenhuntly CC156 SW6 937 on AETA tour? CC157 X2 677 on Footscray service – Ballarat Rd? CC158 W2 641 – High St Kew? CC159 SW6 847 – Power St Hawthorn CC160 Simpson St – big line up CC161 W2 546 truck No. 1? CC162 W2s at Glenhuntly depot CC163 No. 15 truck under 899 CC164 206 and other junk at Preston Workshops CC165 W in Swanston St Melbourne – Rose series card CC166 Y1 613 Batman Ave?? or William St at Collins CC167 Tram plans CC168 X 217 Swanston St – see also 95 and 96 CC169 217 in Swanston St – same as 95 CC169A 192 in St Kilda Road at Princes bridge CC170 192 in St Kilda Road at Princes bridge CC171 Bendigo 3 arriving Malvern depot – being unloaded CC172 Ditto CC173 T180 at a depot CC174 X1 463 wheel set CC175 C30 – dog car side view – close up CC176 C30 dog car CC177 206 and 30 at Preston Workshops CC178 X1 467 on a truck – see CC111 also CC179 42 CC180 42 at a depot, no destination box CC181 W2 556 1A type truck CC182 Flinders St Station – Rose Series CC183 W7 1035 Spring – Nicholson St CC184 W7 1022 MMTB Post Card CC185 Adelaide 178 – has on rear – R. Lilburn 4/82 CC186 Adelaide 175 – has on rear – R. Lilburn 4/82 CC187 Y1 610 on AETA tour CC188 Y1 610 on AETA tour with large group – Point Ormond CC189 AETA display – has GH55-32 in pencil on rear CC190 AETA display – has GH55-29 in pencil on rear CC191 Y1 610 on AETA tour with large group – Point Ormond CC192 VR 53 at Footscray CC193 VR cars 40 and 34 at Elwood wash dock CC194 W7 1024 as the 1970 Christmas tram CC195 Geelong – loading a set of 22E trucks CC196 Geelong 10 and 23 running an AETA special CC197 Geelong – AETA special CC198 Geelong 7 at Junction CC199 Geelong 10, in the city CC200 Geelong 33 with Belmont destination CC201 Geelong 15 Eastern Park destination 29-3-1948 CC202 Geelong 23 at Railway Station – 29-3-1948 CC203 Geelong 23 at Railway Station – 29-3-1948 CC204 Geelong – loading a bogie tram CC205 Geelong – loading a bogie tram CC206 Geelong 40 – loaded on truck CC207 Geelong 40 – on jacks CC208 Geelong 40 on jacks – 19 behind CC209 Geelong 38 with two workers on either side CC210 – 214 Australian Historic Tramways stamp folder and set CC215 Bendigo 17 at depot – has dup JBS on rear CC216 Bendigo 20, 29 bogie and straight sill car at Charing Cross CC217 Bendigo one man bogie Pall Mall CC218 Bendigo – Bogie 23, other cars and welding truck at depot CC219 Bendigo 7 with Quarry Hill destination CC220 Bendigo 21 with Lake Weerona destination CC221 ESCo 18 Ballarat CC222 Ballarat bogie 22 on AETA special CC223 Ditto CC224 Ballarat 34 at Stones Corner – R Lilburn CC225 Ballarat 15 in Bridge St – R Lilburn CC226 Ballarat 40 at Gardens – R Lilburn CC227 Ballarat 37 running out of depot – R Lilburn CC228 Postcard – Valentines – Sturt St with loaded horse tram trailer CC229 AETA Geelong tram tour ticket – 29-3-1948 CC230 Postcard – Geelong – Valentine 2114 – T&G building CC231 Postcard – PMTT ! – High St Malvern CC232 Postcard – Empire – Glenferrie Road, Malvern at Wattletree Rd CC233 Postcard Y469, MMTB CC234 Postcard Z2 Spring St CC235 Postcard – Z1 MMTB CC236 Postcard – Stamp Show W1 431 CC237 Postcard – Stamp show B2005 CC238 Postcard – Stamp show W6 982 CC239 Postcard – Valentines 1264 – Johnstone Park with tram in distance CC240 Postcard – Rose 10711 – Swanston and Lonsdale – Hospital and W232 CC241 Postcard – Rose 4827 – Fitzroy St St Kilda W2 362 and 548 CC242 Postcard – Valentines – 939 – St Kilda War Memorial, W and a R? CC243 Postcard – Valentines – 572 – St Kilda War Memorial, W 413 and 140? CC244 Postcard – Valentines – 938 – Uper and Lower Esplanade – L 104 CC245 Postcard – St Kilda Rd at Princes Bridge Y1 and W CC246 Postcard – Biscay BG82 – W5 814 - CC247 Postcard – Biscay 796112 – Bourke St looking west CC248 Postcard – Biscay 796109 – Bourke St looking east CC249 Postcard – Biscay 2AUS58 – Z5 Bourke St CC250 Postcard – Biscay BG 249 – Swanston St CC251 Postcard – National View – St Kilda Rd – shrine and Prince Henrys W2 405 CC252 Postcard – Nu color vue – 11 ML 156 – St Kilda Rd CC253 Postcard – Nu color vue – 11 ML 153 – Swanston St CC254 Postcard – Nu Color vue – Collins St 442 CC255 Postcard – Pitt card – Adelaide – H 364 at Victoria St CC256 Postcard – SPER L/P 154 CC257 Postcard – BTMS – 550 CC258 Postcard – SPER – Brisbane 295 CC259 Adelaide 131 at Burnside – has R Lilburn on card, c1911 CC260 Adelaide 194 CC261 Adelaide 235, with two crew, The News photo CC262 Rockhampton, outside post office – has source of photo details CC263 Sydney – 2086 and 2062 arriving Circular Quay CC264 Sydney – P class – Pitt St? CC265 Sydney – 1610 at Circular Quay CC266 Brisbane 99 and 468 CC267 Sydney with bridge behind CC268 Steam tram Paramatta Park – 103 CC269 Sydney – Museum Station =- Elizabeth St CC270 Sydney – weed burner 137S at a loop Demonstrates the work of Charles Craig in photography and collection of prints.Assembled album in a black presentation folder of 270 photographs from the Charles Craig Collection - 86 sleeves - part 1 of 2. All photographs have been scanned and placed on the Museum's G drive. A list of all photographs with details where possible has been compiled. Victorian Provincial, Launceston, Hobart and Sydney tram photos have been transferred to other Museums, image files retained.melbourne, tramways, tramcars, trams, charles craig, st kilda junction, trackworks -
 Melbourne Tram Museum
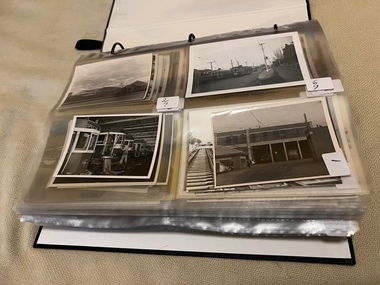
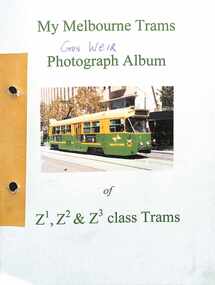
Album, Gus Weir, My Melbourne Trams - Z1, Z2 & Z3 class trams, 1980 to 2011
... Part 3 - Z1 & Z2 & Z3 - 96, 100, 101, 108, 112, 113, 114, 115, 116, 117, 120, 122, 123, 125, 126, 128, 199, 136, 137 & 138 Part 4 - Z3 138, 139, 148, 150, 151, 154, 157, 155, 158 (Royal Tram), 160, 163, 164, 166, 167, 168, 169, 170 & 173 Part 5 - Z3 175, 176. 178, 179, 181, 182, 185, 186, 187, 193, 194, 196, 197, 199, 201, 203, & 204 Part 6 - Z3 204, 205, 208, 209, 211, 217, 219, 220, 222, 223, 224, 225, 226, 228, 229 & 230, ...Part 3 - Z1 & Z2 & Z3 - 96, 100, 101, 108, 112, 113, 114, 115, 116, 117, 120, 122, 123, 125, 126, 128, 199, 136, 137 & 138 Part 4 - Z3 138, 139, 148, 150, 151, 154, 157, 155, 158 (Royal Tram), 160, 163, 164, 166, 167, 168, 169, 170 & 173 Part 5 - Z3 175, 176. 178, 179, 181, 182, 185, 186, 187, 193, 194, 196, 197, 199, 201, 203, & 204 Part 6 - Z3 204, 205, 208, 209, 211, 217, 219, 220, 222, 223, 224, 225, 226, 228, 229 & 230, Yields detailed information about Melbourne trams from 1980 to 2011 Tramways tramcars Albums Z1 class Z2 class Z3 class Melbourne MMTB The Met PTC Yarra Trams Swanston Trams M>Tram Domain Junction Swanston St Bourke St Set of 70 album sheets most with four photos - some blanks to allow for further photos. ...Compiled by Gus Weir of the Wellington Tramway Museum, former Wellington tram driver. Comprises some 70 double-sided album sheets for photographs of Melbourne Z1, Z2 and Z3 class trams. Scanned into 6 parts as pdf files. Many photos taken at Domain Interchange, Swanston Walk, Bourke St, St Kilda Road, Elizbeth St and La Trobe St. Photos by Gus himself during Melbourne visits with some by B R Symons, D W Jones, and Michael P Hawkins Part 1 - Introduction - Z1, 1, 2, 3, 4, 5, 7, 9, 10, 14, 19 & 22. Part 2 - Z1, 28, 31, 34, 37, 39, 49, 43, 45, 47, 49, 50, 52, 54, 56, 58, 59, 61, 63, 65, 71, 70, 73, 80, 81, 84, 85, 86, 87, 89, 93 & 95. Part 3 - Z1 & Z2 & Z3 - 96, 100, 101, 108, 112, 113, 114, 115, 116, 117, 120, 122, 123, 125, 126, 128, 199, 136, 137 & 138 Part 4 - Z3 138, 139, 148, 150, 151, 154, 157, 155, 158 (Royal Tram), 160, 163, 164, 166, 167, 168, 169, 170 & 173 Part 5 - Z3 175, 176. 178, 179, 181, 182, 185, 186, 187, 193, 194, 196, 197, 199, 201, 203, & 204 Part 6 - Z3 204, 205, 208, 209, 211, 217, 219, 220, 222, 223, 224, 225, 226, 228, 229 & 230, Yields detailed information about Melbourne trams from 1980 to 2011Set of 70 album sheets most with four photos - some blanks to allow for further photos. Each photo has a label on the rear, with details of the photograph location, photographer and date. An insert label on each page gives tram number, location and date. See last image file - Gus Weir Obituary - Wellington Tramway Museum 2019.tramways, tramcars, albums, z1 class, z2 class, z3 class, melbourne, mmtb, the met, ptc, yarra trams, swanston trams, m>tram, domain junction, swanston st, bourke st -
 Melbourne Tram Museum
Photograph - Black and White photograph/s - mounted, Darge Photos, early to mid 1920's?
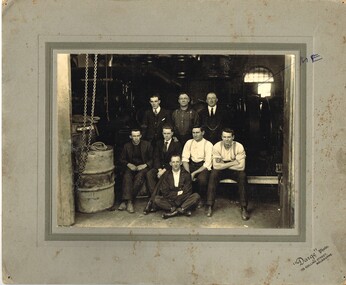
... Trams tramways Power Station Personnel Equipment Essendon NMETL Substation One person has been arrowed the expression "ME" written onto the photograph. Black and White photograph, mounted onto grey impressed and lined card of 8 men in a doorway a the Essendon or Ascot Vale Power House operated by The North Melbourne and Electric Tramways and Lighting Company. NMETL Has the power station equipment in the background. Photo by "Darge" Photos, 175 ...Black and White photograph, mounted onto grey impressed and lined card of 8 men in a doorway a the Essendon or Ascot Vale Power House operated by The North Melbourne and Electric Tramways and Lighting Company. NMETL Has the power station equipment in the background. Photo by "Darge" Photos, 175 Collins St Melbourne, printed on the bottom right hand corner. Mr Murdoch the manager, most likely in the right hand of the top row. Others unknown. May have been taken a the time of the hand over of Essendon Power Station to the SEC / MMTBOne person has been arrowed the expression "ME" written onto the photograph.trams, tramways, power station, personnel, equipment, essendon, nmetl, substation -
 Melbourne Tram Museum
Photograph - Black and White photograph/s - mounted, Darge Photos, late 1910's to early 1920's?
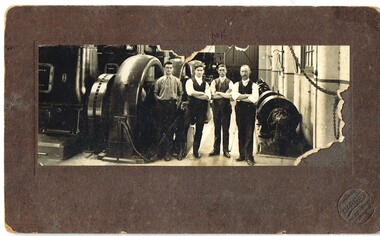
... Trams tramways Power Station Personnel Equipment Essendon NMETL One person has been arrowed the expression "ME" written onto the photograph. Black and White photograph, mounted onto dark grey card of 4 men in standing by a generator at the Essendon or Ascot Vale Power House operated by The North Melbourne and Electric Tramways and Lighting Company. NMETL Has the power station equipment in the background. Photo by "Darge" Photos, 175 ...Black and White photograph, mounted onto dark grey card of 4 men in standing by a generator at the Essendon or Ascot Vale Power House operated by The North Melbourne and Electric Tramways and Lighting Company. NMETL Has the power station equipment in the background. Photo by "Darge" Photos, 175 Collins St Melbourne with the name impressed into the bottom right hand corner.One person has been arrowed the expression "ME" written onto the photograph.trams, tramways, power station, personnel, equipment, essendon, nmetl -
 Melbourne Tram Museum
Pamphlet, Melbourne Festival, "Melbourne Art Trams Oct 2015 - Apr 2016, 2014
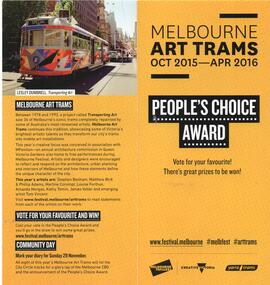
... Trams. Amanda Morgan - 2009 Kathy Temin - 136 Martine Corompt - 270 Louise Forthun - 209 Matthew Bird - 3509 Phillip Adams - 3509 Tom Vincent - 925 Stephen Banham - 3008 James Voller - 175 Lesley Dumbrell - 731 Two copies held...Trams. Amanda Morgan - 2009 Kathy Temin - 136 Martine Corompt - 270 Louise Forthun - 209 Matthew Bird - 3509 Phillip Adams - 3509 Tom Vincent - 925 Stephen Banham - 3008 James Voller - 175 Lesley Dumbrell - 731 Two copies held Yields information about the 2015-2016 Melbourne Art Trams Trams tramways Yarra Trams Transporting Art Decorated Trams Exhibitions tram 731 tram 925 tram 3509 tram 151 tram 252 tram 3008 tram 209 tram 259 tram 158 Pamphlet, folded sheet to give a DL size, pink background titled "Melbourne Art Trams" - Oct. 2015 to April 2016, vote for your favourite tram in the People's choice awards! ...Melbourne Art Trams On the rear is a photo of the SW5 731 Lesley Dumbrell Transporting Art Tram. Also notes that you can use TramTracker to find the Art Trams. Amanda Morgan - 2009 Kathy Temin - 136 Martine Corompt - 270 Louise Forthun - 209 Matthew Bird - 3509 Phillip Adams - 3509 Tom Vincent - 925 Stephen Banham - 3008 James Voller - 175 Lesley Dumbrell - 731 Two copies heldYields information about the 2015-2016 Melbourne Art TramsPamphlet, folded sheet to give a DL size, pink background titled "Melbourne Art Trams" - Oct. 2015 to April 2016, vote for your favourite tram in the People's choice awards! - part of the Melbourne festival. Notes the Transporting Art trams. Inside the pamphlet are images of the artwork on 8 different trams including the artist names and title of the work if any. Has Melbourne Festival, Yarra Trams, PTV, Arts Victoria and Victorian Govt. logos.trams, tramways, yarra trams, transporting art, decorated trams, exhibitions, tram 731, tram 925, tram 3509, tram 151, tram 252, tram 3008, tram 209, tram 259, tram 158 -
 Melbourne Tram Museum
Photograph - Black and White photograph - mounted, Darge Photos, 1918
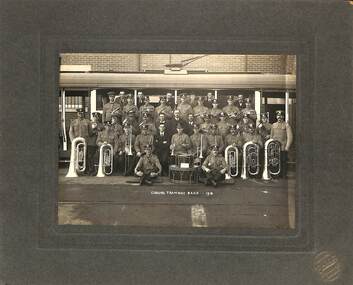
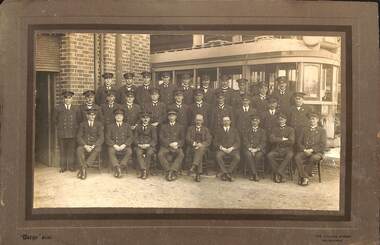
... Melbourne Tram Museum 8 Wallen Road Hawthorn melbourne Trams tramways Coburg Bands MBCTT Coburg depot s class Mounted black and white photograph titled "Coburg Tramway Band - 1918", mounted onto embossed black card with the studio photo stamp in gold colour. Features 40 men, 30 in uniform with instruments and 10 men in suits. Has in the background a MCBTT S class tramcar with the Trust depot office block behind. Made by Darge studio, 175 ...Mounted black and white photograph titled "Coburg Tramway Band - 1918", mounted onto embossed black card with the studio photo stamp in gold colour. Features 40 men, 30 in uniform with instruments and 10 men in suits. Has in the background a MCBTT S class tramcar with the Trust depot office block behind. Made by Darge studio, 175 Collins St Melbourne.trams, tramways, coburg, bands, mbctt, coburg depot, s class -
 Melbourne Tram Museum
Photograph - Black and White photograph - mounted, Darge Photos, c1921
... tram behind has been renumbered to P class 131, fitted with the large roller destination box and has route 17 showing. There are 30 men shown, only the depot manager? not in a uniform. Includes Inspectors. A number of men have a returned service man badges showing. No staff numbers. Made by Darge studio, 175...tram behind has been renumbered to P class 131, fitted with the large roller destination box and has route 17 showing. There are 30 men shown, only the depot manager? not in a uniform. Includes Inspectors. A number of men have a returned service man badges showing. No staff numbers. Made by Darge studio, 175 ...Mounted black and white photograph of the crews and staff at the Hawthorn Tram Depot c1921 mounted onto a dark grey card. The tram behind has been renumbered to P class 131, fitted with the large roller destination box and has route 17 showing. There are 30 men shown, only the depot manager? not in a uniform. Includes Inspectors. A number of men have a returned service man badges showing. No staff numbers. Made by Darge studio, 175 Collins St Melbourne.trams, tramways, hawthorn depot, route 17, p class, staff, uniforms, crews, tram 131, mmtb -
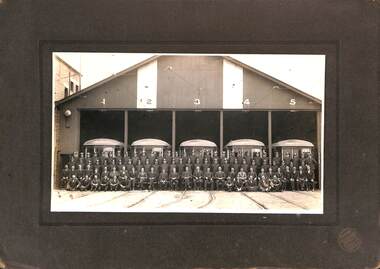 Melbourne Tram Museum
Photograph - MBCTT group Coburg Depot, Darge Photos, 1920
... Trams - MBCTT type - with destinations of Coburg, Barkers Road, Melbourne, Albion St and Fawkner. Photo possibly before the MBCTT was absorbed by the MMTB in Feb. 1920. There appear to be a few wearing Returned Servicemen badges in the photograph. Photo by Darge 175...Trams - MBCTT type - with destinations of Coburg, Barkers Road, Melbourne, Albion St and Fawkner. Photo possibly before the MBCTT was absorbed by the MMTB in Feb. 1920. There appear to be a few wearing Returned Servicemen badges in the photograph. Photo by Darge 175 ...Photograph of 58 men in uniform and 38 men in suits or dress clothing at the Coburg Tram Depot with five tramcars behind. Trams - MBCTT type - with destinations of Coburg, Barkers Road, Melbourne, Albion St and Fawkner. Photo possibly before the MBCTT was absorbed by the MMTB in Feb. 1920. There appear to be a few wearing Returned Servicemen badges in the photograph. Photo by Darge 175 Collins St Melbourne in a gold block stamp. See items 177 for a 1916 and 9327 c1917 group photograph.Yields information of MBCTT crews c1920Mounted black and white photograph - dark grey card, semi-embossed.In pencil on the rear "Coburg Tram Depot"trams, tramways, staff, personnel, uniforms, mbctt, coburg depot, coburg, fawkner, barkers road, albion st -
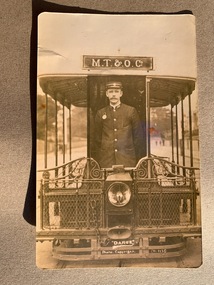 Melbourne Tram Museum
Photograph - Digital Image - gripman Harold Dihm, c1900
... tram between the roof uprights and the decorative front apron. "M. T & O Coy" has been printed on the destination panel. At the base of the card is "Darge Photo copyright No. 1136". On the rear is a printed Postcard, /Correspondence/Address Only. On the side of the card vertically is "DARGE, Photographer, 175...tram between the roof uprights and the decorative front apron. "M. T & O Coy" has been printed on the destination panel. At the base of the card is "Darge Photo copyright No. 1136". On the rear is a printed Postcard, /Correspondence/Address Only. On the side of the card vertically is "DARGE, Photographer, 175 ...Black and white postcard printed photograph of the front of a Melbourne Tramway and Omnibus Co. cable car with the photograph of Harold Waldmaiar Dihm in uniform against a black background merged into the front of the cable tram between the roof uprights and the decorative front apron. "M. T & O Coy" has been printed on the destination panel. At the base of the card is "Darge Photo copyright No. 1136". On the rear is a printed Postcard, /Correspondence/Address Only. On the side of the card vertically is "DARGE, Photographer, 175 Collins St. Melbourne Vic. and the name of the person - "Harold Waldmaiar Dihm 1869 - 1940" and "T Rose".Demonstrates an cable tram employee photograph by Darge Studios. Digital image of a photograph.cable trams, dummies, crews, gripmen, employees -
 Melbourne Tram Museum
Badge - Inspector traffic numbers, Stokes and Sons, 1950s
... Tram Museum 8 Wallen Road Hawthorn melbourne Use to identify a traffic Inspector - see item 8840 for an example fitted to a cap. Made by Stokes and Sons Demonstrates the method of identifying Inspectors. badges tramways operations employees A set of six badges, cast and assembled, features metal nickel plate numbers within a blue enamel oval fitted with two round lugs on the rear to enable them to be clipped to a uniform item. Most have the stamp of "Stokes" stamped onto the rear. Badge numbers 162, 175 ...Use to identify a traffic Inspector - see item 8840 for an example fitted to a cap. Made by Stokes and SonsDemonstrates the method of identifying Inspectors.A set of six badges, cast and assembled, features metal nickel plate numbers within a blue enamel oval fitted with two round lugs on the rear to enable them to be clipped to a uniform item. Most have the stamp of "Stokes" stamped onto the rear. Badge numbers 162, 175, 180, 183, 198 and 221.badges, tramways, operations, employees -
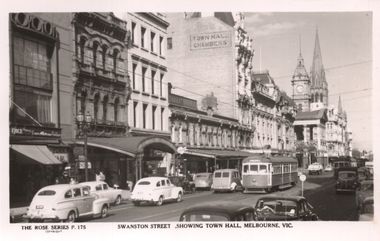 Melbourne Tram Museum
Postcard, Rose Stereograph Co, "Swanston Street, showing Town Hall, Melbourne Vic", c1954
... 175, titled "Swanston Street, showing Town Hall, Melbourne Vic" looking south from near Bourke Street. Has SW6 class 920, (route 7) and another wide body tramcar in the view. Has the Town Hall Chambers building in the photograph. Yields information about Swanston St from Bourke St. C1954 trams ...Rose Series postcard P.175, titled "Swanston Street, showing Town Hall, Melbourne Vic" looking south from near Bourke Street. Has SW6 class 920, (route 7) and another wide body tramcar in the view. Has the Town Hall Chambers building in the photograph.Yields information about Swanston St from Bourke St. C1954Postcard - printed real photograph with Rose Stereograph Co. name on the rear. UsedHas a letter to Ken from R Williams written on the rear.trams, tramways, swanston st, sw6 class, tram 920, rose series