Showing 83 items matching "army attack "
-
 Moorabbin Air Museum
Book - American military aircraft, American Combat Planes
... ...Army attack & light bombers...American military aircraft The wars & the aircraft Army attack & light bombers Air force bombers Air force fighters Navy patrol aircraft Navy attack planes Navy fighters History & specifications of US combat aircraft from WW1 to late 1960s, circa 1968 American Combat Planes Book American military aircraft ...History & specifications of US combat aircraft from WW1 to late 1960s, circa 1968non-fictionHistory & specifications of US combat aircraft from WW1 to late 1960s, circa 1968the wars & the aircraft, army attack & light bombers, air force bombers, air force fighters, navy patrol aircraft, navy attack planes, navy fighters -
 National Vietnam Veterans Museum (NVVM)
Headwear - Helmet (U.S. helicopter pilot)
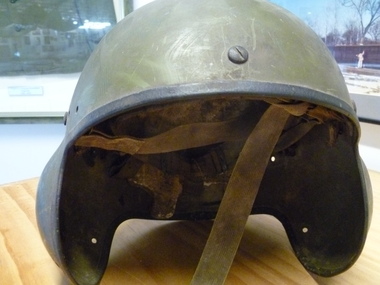
... In January and February 1968, Hue, located on the central coast between Da Nang in the south and the Demilitarized Zone in the north, was the scene of heavy fighting between US and South Vietnamese forces and units of the North Vietnamese Army which had attacked Hue as part of the 1968 Tet Offensive. ...In January and February 1968, Hue, located on the central coast between Da Nang in the south and the Demilitarized Zone in the north, was the scene of heavy fighting between US and South Vietnamese forces and units of the North Vietnamese Army which had attacked Hue as part of the 1968 Tet Offensive. ...US Helicopter Pilot Helmet c1968. This Vietnam war era US helicopter pilot helmet was found during de-silting of the Perfume River through the old imperial capital city of Hue in 1999. In January and February 1968, Hue, located on the central coast between Da Nang in the south and the Demilitarized Zone in the north, was the scene of heavy fighting between US and South Vietnamese forces and units of the North Vietnamese Army which had attacked Hue as part of the 1968 Tet Offensive. This item was donated by Craftsman Francis William Penfold (3790124) who was a National Serviceman and was with the Royal Corps of Australian Electrical and Mechanical Engineers and served with 102 Field Workshop from February 1968 to August 1968 Vietnam 1968.Olive green, metal flying helmet with lining and bulges in sides to accommodate headphones.helmet, american pilot, perfume river, hue, demilitarized zone, da nang, us forces, south vietnamese forces, north vietnamese army, tet offensive (1968), craftsman francis william penfold, 3790124, australian national serviceman, royal corps of australian electrical and mechanical engineers., 102 field workshop -
Moorabbin Air Museum
Document (item) - Roland Jahne Collection - See Description for details
... Army CH-47 Chinook helicopter Photo No date U.S. Army AH-1 Cobra attack helicopter Booklet No date Technology for Underwriters 25 Aero engines Flyer No date Orenda Series V-8 Aero Engines Flyer No date CTS800-4N Commercial Helicopter Engine Flyer No date CFE738 Flyer No date Pratt & Whitney Canada - PT6A - Large Flyer No date Pratt & Whitney Canada - PT6A - Small Booklet No date Textron Lycoming The Elements of Power Booklet No date Textron Lycoming A New Generation of Power Booklet 1 9 91 Textron Lycoming The LF507 Turbofan Stapled pages 1/1/1934 Bristol Pegasus. ...Army CH-47 Chinook helicopter Photo No date U.S. Army AH-1 Cobra attack helicopter Booklet No date Technology for Underwriters 25 Aero engines Flyer No date Orenda Series V-8 Aero Engines Flyer No date CTS800-4N Commercial Helicopter Engine Flyer No date CFE738 Flyer No date Pratt & Whitney Canada - PT6A - Large Flyer No date Pratt & Whitney Canada - PT6A - Small Booklet No date Textron Lycoming The Elements of Power Booklet No date Textron Lycoming A New Generation of Power Booklet 1 9 91 Textron Lycoming The LF507 Turbofan Stapled pages 1/1/1934 Bristol Pegasus. ... -
 Bendigo Military Museum
Book - BOOKS, MILITARY INSTRUCTION, Australian Army, 1940-1945
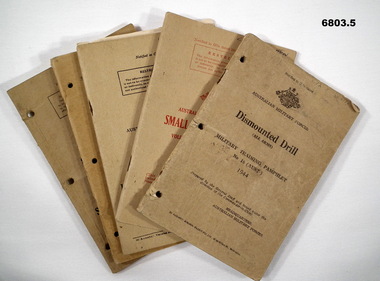
... Attack (Australia)” 4. “Small Arms Training, Small Arms Tactics” 5. Training in Fieldcraft and Elementary tactics. 1. Book, soft cardboard cover, dark beige, black print, 80 pages. 2. Book - soft cardboard cover, beige, red print on cover, 80 pages. 3. Book - soft cardboard cover, beige, black print, 38 pages. 4. Book - soft cardboard, dark beige, black print 84 pages. 5. Book - soft, cardboard, beige, black print, 58 pages. Book BOOKS, MILITARY INSTRUCTION Australian Army ...Items in the collection re "Lt. Col. J. Swatton", refer Cat No 6719.2P for his service details.1. Book, soft cardboard cover, dark beige, black print, 80 pages. 2. Book - soft cardboard cover, beige, red print on cover, 80 pages. 3. Book - soft cardboard cover, beige, black print, 38 pages. 4. Book - soft cardboard, dark beige, black print 84 pages. 5. Book - soft, cardboard, beige, black print, 58 pages.1. “Dismounted Drill (all arms)” 2. “Small Arms Training - Grenades” 3. “Projector, Infantry, Tank Attack (Australia)” 4. “Small Arms Training, Small Arms Tactics” 5. Training in Fieldcraft and Elementary tactics.passchendaele barracks trust, military instructions, lt.col swatton -
 Bendigo Military Museum
Document - TRAINING NOTES, UNIFILE, Exercise 'Milk Run' Problem 4
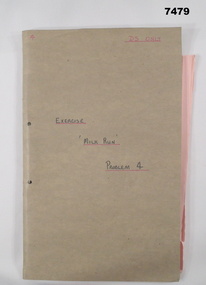
... attack. Part of the Kevin John Herdman, No. 397661, Collection. See Catalogue No. 5942P for details of his service record. training notes Exercise Milk Run army tactics Kevin John Herdman Handwritten in black on front cover: “EXERCISE 'MILK RUN' PROBLEM 4” Handwritten in red on top RH corner of the front cover: “D S ONLY”. ...Exercise "Milk Run' focused on tactics used for a mock invasion of Queensland by troops from New South Wales and details of Queensland's counter attack. Part of the Kevin John Herdman, No. 397661, Collection. See Catalogue No. 5942P for details of his service record.Light brown coloured foolscap manila folder containing training notes printed on pink and green coloured pages. Text on pages in black type. Handwritten title in black ink and underlined in red on front cover. Pages secured with an adjustable metal fastener. Folder's manufacturer's logo printed on inside of the front cover.Handwritten in black on front cover: “EXERCISE 'MILK RUN' PROBLEM 4” Handwritten in red on top RH corner of the front cover: “D S ONLY”.training notes, exercise milk run, army tactics, kevin john herdman -
 Bendigo Military Museum
Administrative record - SERVICE RECORDS, SHIRE OF KORONG CERTIFICATE, c.WWII
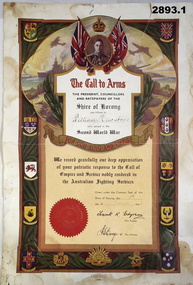
... On discharge from the Army on 9.1.1946 he was a Pte in 106 Tank Attack Regiment. Part of the HEWSTON collection WW1 & WW2. ...On discharge from the Army on 9.1.1946 he was a Pte in 106 Tank Attack Regiment. Part of the HEWSTON collection WW1 & WW2. documents-certificates-records military history - service records Shire .1) “The Call to Arms, Shire of Korong Tribute Certificate” .1) Certificate, colour illustrated on white paper, printed in black & red ink with coloured Coat of Arms of Commonwealth Countries. .2) Service records, black & white paper, photocopies 8 pages. ...HERBERT THOMAS (BILL) HEWSTON No VX71132 enlisted in the 2nd AIF on 6.1.1942 age 28 years 2 months. On discharge from the Army on 9.1.1946 he was a Pte in 106 Tank Attack Regiment. Part of the HEWSTON collection WW1 & WW2. .1) Certificate, colour illustrated on white paper, printed in black & red ink with coloured Coat of Arms of Commonwealth Countries. .2) Service records, black & white paper, photocopies 8 pages..1) “The Call to Arms, Shire of Korong Tribute Certificate”documents-certificates-records, military history - service records, shire -
 Bendigo Military Museum
Photograph
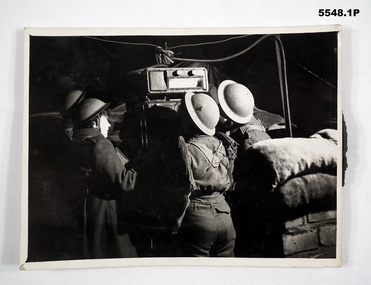
... All photos of female British Army soldiers manning Air Defence Stations protecting Air Field from enemy attack using range finding equipment and predictors tracking incoming aircraft. ...Bendigo Military Museum 37 - 39 Pall Mall Bendigo goldfields All photos of female British Army soldiers manning Air Defence Stations protecting Air Field from enemy attack using range finding equipment and predictors tracking incoming aircraft. ...All photos of female British Army soldiers manning Air Defence Stations protecting Air Field from enemy attack using range finding equipment and predictors tracking incoming aircraft. Related to Beryl Scrimshaw (Morrel) of British Army. refer Cat No.304P & 315. All black and white photos of female British soldiers manning Air Defence Units. 1. Soldiers using prediction at night to track aircraft. 2. Soldiers in British Uniform at night using range finder to track aircraft. 3. Soldiers in British Uniform at night using range finder to track aircraft.On back - stamp of "Manchester Guardian & Evening News" Photo 1 also has description "Predictor". Photo 2 has description "Aircraft Spotter".aircraft defence, female soldiers, british army -
 Bendigo Military Museum
photograph - Fortuna - 1st Year of Army Occupation in Bendigo, 1942
... Army Troop was ‘Reynard St, Coburg.’ By late 1941 as Japan extended its control throughout Indo-China, resolving the accommodation problem of AHQ Cartographic Company located in Melbourne became more urgent. The steady Japanese advance made the bombing of Melbourne no longer a remote possibility, and in accordance with a general policy of dispersion, the Deputy Chief of the General Staff, Major General Sidney Rowell instructed Major William Sarll, in the interests of security of plant and to provide against possible damage of air attack, to investigate suitable safer inland accommodation for AHQ Cartographic Company. ...Army Troop was ‘Reynard St, Coburg.’ By late 1941 as Japan extended its control throughout Indo-China, resolving the accommodation problem of AHQ Cartographic Company located in Melbourne became more urgent. The steady Japanese advance made the bombing of Melbourne no longer a remote possibility, and in accordance with a general policy of dispersion, the Deputy Chief of the General Staff, Major General Sidney Rowell instructed Major William Sarll, in the interests of security of plant and to provide against possible damage of air attack, to investigate suitable safer inland accommodation for AHQ Cartographic Company. ...This is a set of 17 photographs taken during the first year of Army occupation at Fortuna, Bendigo in 1942. The photos provide an insight into the preparatory work performed on the Fortuna Villa and surrounding buildings, by the Working Party 5th Army Troop and Ordnance Training Depot, before its occupation by personnel from LHQ Cartographic Company, Royal Australian Survey Corps. The annotation on the back of Photos .9P and .10P is misspelt. The correct spelling is ‘Nell Gwynne’. The poppet head of the Central Nell Gwynne mine is still an iconic landmark in Bendigo, lying just down the road from the poppet head lookout at Victoria Hill. The Central Nell Gwynne was the premier mine of Bendigo's 1930s mining revival and is of high historical value, due to the extensive and relatively intact features which remain at the site. The annotation on the back of Photo .17P is incorrect. The location of HQ 5th Army Troop was ‘Reynard St, Coburg.’ By late 1941 as Japan extended its control throughout Indo-China, resolving the accommodation problem of AHQ Cartographic Company located in Melbourne became more urgent. The steady Japanese advance made the bombing of Melbourne no longer a remote possibility, and in accordance with a general policy of dispersion, the Deputy Chief of the General Staff, Major General Sidney Rowell instructed Major William Sarll, in the interests of security of plant and to provide against possible damage of air attack, to investigate suitable safer inland accommodation for AHQ Cartographic Company. Major Sarll inspected many properties before finding one that would meet the requirements of the Cartographic Company. In late 1941, he came to inspect Fortuna, a rambling old mansion with about fifteen acres of ground in central Bendigo. Initially there was no intention to occupy the site beyond the end of the war, although Major Sarll's report to the Director of Survey noted many advantages in moving the Company to Bendigo. Major General Rowell quickly approved the selection of Fortuna before other authorities, which were investigating the evacuation of school children, could get in ahead of the Cartographic Company. On 23 March 1942, the Commonwealth of Australia, under the provisions of the National Security Act of 1939, took possession of the house, the old battery buildings and the fifteen acres of grounds. Under Warrant Officer J. Trist’s direction, over fifty Parks and Works tradesmen completed building works necessary to accommodate the Survey Corps’ military, map making and printing requirements. The building program was still under way when the first officer, Lieutenant Ralph Westgarth, arrived in May 1942 with the advance party which received and positioned all equipment as it came up from Melbourne in semi-trailers. Once the equipment was installed the rest of the Cartographic Company completed its shift to Bendigo by 11th June 1942. The first year of the Survey Corps’ occupation of Fortuna is covered in more detail with additional historic photographs, in pages 17-22 of Valerie Lovejoy’s book 'Mapmakers of Fortuna – A history of the Army Survey Regiment’ ISBN: 0-646-42120-4.This is a set of 17 photographs taken during the first year of Army Occupation at Fortuna, Bendigo in 1942. The black and white photographs were printed on photographic paper and are part of the Army Survey Regiment’s Collection. The photographs were scanned at 300 dpi. .1) - Photo, black & white, 1942. Bendigo Parks and Works tradesmen at Fortuna. L to R: Cliff Day, Ernie Arnold, Norm? .2) - Photo, black & white, 1942. “Don” - possibly SGT Don Sutcliffe. Fortuna, Bendigo. .3) - Photo, black & white, 1942. Parks and Works tradesmen in garden at Fortuna, Bendigo. L to R: Fred & Ernie. .4) - Photo, black & white, 1942. Benny Jack Williams at Fortuna, Bendigo. Accommodation tents were erected above the lake, which later became the parade ground. .5) - Photo, black & white, 1942. Working dress - Giggle suits. Parks and Works tradesmen at Fortuna, Bendigo. L to R: Cliff and Harry on big roof. .6) - Photo, black & white, 1942. Parks and Works tradesmen at Fortuna, Bendigo. Ted on big roof. .7) - Photo, black & white, 1942. Gold crusher battery just behind Fortuna. .8) - Photo, black & white, 1942. Scene of Bendigo from Fortuna. .9) - Photo, black & white, 1942. Nell Gwynne Mine from mullock heap at Victoria Hill near Fortuna, Bendigo. .10) - Photo, black & white, 1942. Nell Gwynne Mine and crusher near Fortuna, Bendigo. .11) - Photo, black & white, 1942. Sluicing for gold at Eaglehawk. .12) - Photo, black & white, 1942. Fortuna, Bendigo taken from the far side of tennis courts. .13) - Photo, black & white, 1942. Fortuna, Bendigo & its reflection from across the lake. .14) - Photo, black & white, 1942. Fortuna, Bendigo from the fishpond. .15) - Photo, black & white, 1942. Fortuna, Bendigo. .16) - Photo, black & white, 1942. First Fortuna Football Team at unknown location. L to R: 5th Bob Wright, 11th SGT Don Sutcliffe. .17) - Photo, black & white, 1942. Working Party from 5th Army Troop and Ordnance Training Depot at Fortuna, Bendigo.Some personnel are identified. Annotated with date within photos. .1) – Annotated on back ‘Cliff, Ernie, Norm, Dec ‘42. Cliff Day - dairy farmer, plasterers’ labourer. Ernie Arnold – hard plasterer. Norm? - QM Store for tools etc. QM Store was the Stables.’ .2) - Annotated on back ‘Don. Fortuna 1942’ .3) - Annotated on back ‘Fred & Ernie. Dec 1942. Carpenters. Note the state of the gardens.’ .4) - Annotated on back ‘Benny Jack Williams Fortuna Bendigo. Tents were erected where present day parade ground is above the lake.’ .5) - Annotated on back ‘Working dress - Giggle suits. June 42. Cliff and Harry on big roof. This photo was taken as the ventilating ridge was being installed on the building housing the printing machines. The machines were installed later by civilian labour when building was complete.’ .6) - Annotated on back ‘Ted on big roof Fortuna Bendigo.’ .7) - Annotated on back ‘Gold crusher battery – Bendigo for slay heap – 1942. 12 stamp battery. Just behind Fortuna. Was working at night when the “Army” came to Bendigo. Later removed to “Coolgardie - WA. Present site of Southern Cross TV.’ .8) - Annotated on back ‘Scene of Bendigo from Fortuna. June 1942.’ .9) - Annotated on back ‘Nell Gwyne Mine from mullock heap (Victoria Hill) Sept 1942.’ .10) - Annotated on back ‘Nell Gwyne Mine and crusher September 1942.’ .11) - Annotated on back ‘Sluicing for gold at Eaglehawk. August 1942.’ .12) - Annotated on back ‘Fortuna Bendigo 1942. Taken from far side of tennis courts.’ .13) - Annotated on back ‘ “Fortuna” across the lake & reflection.’ .14) - Annotated on back ‘Fortuna from fishpond June 1942.’ .15) - Annotated on back ‘Fortuna Dec 1942.’ .16) - Annotated on front ‘X’ x2. Annotated on back First Fortuna Football Team 1942‘Bob Wright’, ‘SGT Don Sutcliffe’. .17) - Annotated ‘Working Party at Fortuna before one of the drafts’, Working Party 5th Army Troop and Ordnance Training Depot Showgrounds, now the Sportsground Bendigo’, ‘HQ of 5th Army Troop was Reynards Rd, Coburg.’royal australian survey corps, rasvy, army survey regiment, army svy regt, fortuna, asr -
4th/19th Prince of Wales's Light Horse Regiment Unit History Room
Card - Christmas Card, 1915 (exact)
... attack and the The 4th/19th Prince of Wales’s Light Horse Regiment has a long and distinguished history that pre-dates Federation to colonial Victoria’s mounted troops. Our history parallels that of the nation, including its active participation in some of the most inspiring events in Australian Military History including the Defence of ANZAC and the charge at Beersheba. The Regiment is based on a linkage of the two post-World War II Victorian Army ...Service of Frank Phillips Prior to the commencement of World War I, Frank Phillips served in the Minyip Troop of the Light Horse militia. His civilian occupation was that of clerk. On 22 August 1914 he enlisted in C Squadron 4th Light Horse Regiment. The 4th Light Horse Regiment embarked on the troop ship “Wiltshire “ for training at Mena Camp, in Egypt. During May 1915 the Regiment was deployed to the Gallipoli campaign in a dismounted role. After seven months, the Gallipoli campaigned was abandoned and the troops withdrawn. On return to Egypt the 4th Light Horse Regiment divided with one component deployed to Palestine and the other to the Western Front. Frank went on to serve in Palestine. He was promoted to Sergeant while at Gallipoli and, in Palestine, was promoted to Captain, serving as Adjutant of the Regiment. He was granted furlough to return to Australia from 14 October 1916 to 12 March 1917. On 16 January 1918 he was Mentioned in Despatches Citation: At Hill 750 near Bir El Esani on 30-4-17 he led an attack on Hill 750 under heavy rifle fire capturing the position and 7 armed Bedouins. On 23-5-17 during reconnaissance, he led and attack on 790 under very heavy rifle and machine gun fire and captured the position, inflicting losses on the Turks. He has, at all times, set a fine example of courage to his men. 22 October: 1918 he was awarded the Military Cross Recommendation of Commanding Officer – For exceptional gallantry and devotion to duty on the 28th September 1918, during the crossing of the JORDAN near EL MIN, this officer (adjutant of the Regiment) personally reconnoitred for crossings under heavy M.G. fire and led the Regiment to the only available crossing, rendering invaluable assistance during the crossing. On 3oth September when the Regiment was advanced guard on to KAUKAB, this officer’s personal reconnaissance to confirm patrol reports was of the highest order and utmost value to his C.O. culminating in the capture of KAUKAB with a mounted attack and the The 4th/19th Prince of Wales’s Light Horse Regiment has a long and distinguished history that pre-dates Federation to colonial Victoria’s mounted troops. Our history parallels that of the nation, including its active participation in some of the most inspiring events in Australian Military History including the Defence of ANZAC and the charge at Beersheba. The Regiment is based on a linkage of the two post-World War II Victorian Army Reserve RAAC units - 4th/19th Prince of Wales’ Light Horse and 8th/13th Victorian Mounted Rifles. From these units we derive our links with the six Light Horse Regiments of Victoria and Southern New South Wales (4th, 8th, 13th, 17th, 19th and 20th Light Horse Regiments.) The Regiment proudly bears the guidon of the 4th Light Horse, with the guidons of the remaining regiments being laid up in the crypt of the Melbourne Shrine of Remembrance. During World War I, the 4th Light Horse Regiment served with distinction on three fronts – Gallipoli, Palestine and the Western Front. Corporal, later Captain, Phillips was a member of the 4th Australian Light Horse Regiment. He created the post card while serving with the Regiment as a Corporal at Gallipoli. Post Card hand made and sent to familyFrom Cpl Frank Phillips, 4th Australian Light Horse Regiment. Entries in pencil Front: Addressed to Andrew Phillips (father) at Minyip, Victoria, Message: “A Merry Christmas and Happy New Year to all, Made while on my day out. Love Frank” Reverse Top Centre – 4 LH Badge Centre – cloth map of Australia stapled to card Bottom – Print of flag stapled to card, Irish green ensign, Union flag in canton, gold coloured Irish harp on fly. Notations: Broadmeadows, Wiltshire (Troop Ship), Shrapnel Gully, Suicide Gully, Courtney’s Post Mena, Mex, Heliopolis, Imbros, Gallipoli, Turkish soil underneath (flag), Australia on Turkey, Lone Pine, Leans Trench, Constantinople, All honour to our Irish comrades, To greet you 1915-16. From the shells, yells, and little Hells, of the Darda Dardenelles 0 – 0 May you enjoy your Xmas dinner as I hope to enjoy my Xmas billy in the trenches.ww1, gallipoli, 4th light horse, post card, frank phillips -
 4th/19th Prince of Wales's Light Horse Regiment Unit History Room
Film - DVD, The Great Tank Battle of Kursk
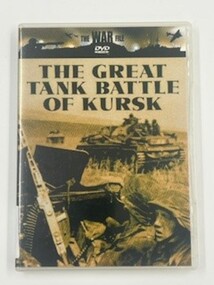
... The great tank battle of Kursk took place in 1943, when the Germans mounted a huge attack on the Soviet army with a force f some 900,000 men, 2,700 of their most fearsome tanks, 10,000 artillery pieces and 2,000 aircraft. ...Codenamed 'Operation Citadel', the attack was Adolf Hitler's plan to avenge the disaster that befell the German 6th Army at Stalingrad. ...The great tank battle of Kursk took place in 1943, when the Germans mounted a huge attack on the Soviet army with a force f some 900,000 men, 2,700 of their most fearsome tanks, 10,000 artillery pieces and 2,000 aircraft. Codenamed 'Operation Citadel', the attack was Adolf Hitler's plan to avenge the disaster that befell the German 6th Army at Stalingrad.DVD in caseThe War File - The Great Tank Battle of Kursk -
 Orbost & District Historical Society
air raid siren, pre WW11
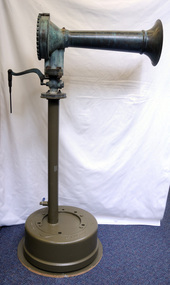
... During 1941-43 it was considered imminent that Japan's army may attempt to invade Australia. Anticipating Japanese air and submarine attacks, blackout restrictions were introduced and air raid warning instructions issued. ...Orbost & District Historical Society Ruskin Street Orbost gippsland During 1941-43 it was considered imminent that Japan's army may attempt to invade Australia. Anticipating Japanese air and submarine attacks, blackout restrictions were introduced and air raid warning instructions issued. ...During 1941-43 it was considered imminent that Japan's army may attempt to invade Australia. Anticipating Japanese air and submarine attacks, blackout restrictions were introduced and air raid warning instructions issued. This air-raid siren was installed on the roof of the G.P. Motors (originally Winchester & Rodwell Garage) during World War 2. This item reflect our past. World War II continues to evoke strong memories. Items which were part of this time are reminders of the local community's involvement.An air raid siren on a round base. It has a brass trumpet and a handle attached to pull from the ground.On base - MAX-DIA -422,15mm PLATE 10 HOLES J. WIPFLI GATIC AUSTRALIA MANUFACTURER DIES TOOLS PLASTICS MELBOURNEww11 air-raid-siren communications military -
 Orbost & District Historical Society
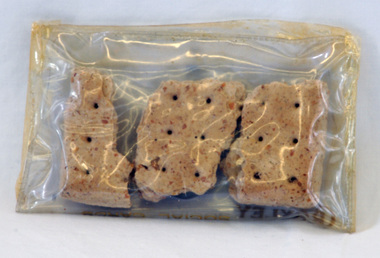
biscuit rations, c. 1899
... attacks from weevil pests and allowing them to be transported with little breakage. Hard ration biscuits were a staple of soldier's diets. This item is an example of an early ration supplied to soldiers serving overseas. army-biscuits boer-war-biscuits Three dry biscuits, hard tack, roughly rectangular shape and with 6 prick holes. biscuit rations ...These biscuits were supposedly issued to Jacob Perry when he served in the Boer War in South Africa in 1899. Jacob Perry was a member of an early family in Orbost and these biscuits were donated by George Perry. Hard tack biscuits were part of a soldier's individual ration in the Boer War and were so hard that they were often soaked in water before consumption if this was possible. Made of 13 parts flour to one part of water, the biscuits were slowly dried in the baking process, rendering them so hard that they deterred attacks from weevil pests and allowing them to be transported with little breakage. Hard ration biscuits were a staple of soldier's diets. This item is an example of an early ration supplied to soldiers serving overseas.Three dry biscuits, hard tack, roughly rectangular shape and with 6 prick holes.army-biscuits boer-war-biscuits -
 Lara RSL Sub Branch
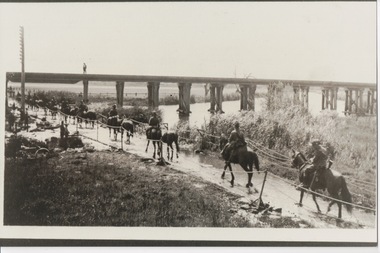
Photograph, Set 4 photographs. and others for Torquay Light Horse camp, 1940
... attack and defence. By 1914, when Australia joined the war against Germany, there were 23 Light Horse regiments of militia volunteers. Many men from these units joined the Light Horse regiments of the Australian Imperial Force (AIF). Men were given remounts (if not using their own horses) – army...attack and defence. By 1914, when Australia joined the war against Germany, there were 23 Light Horse regiments of militia volunteers. Many men from these units joined the Light Horse regiments of the Australian Imperial Force (AIF). Men were given remounts (if not using their own horses) – army ...These images capture for all time Light Horsemen travelling through Geelong on their way to camp at Torquay for the last Group meeting in Australia . information following - details obtained from .........https://torquayhistory.com/light-horse-brigade/ On Australia Day, 1997, Sir John Young unveiled this plaque on Point Danger, Torquay. Torquay history, Light Horse Training Camp, WW2 Plaque at Pt. Danger Note----- (See images to view plaque) The plaque identifies a significant event in Torquay’s history and the sentiments of ‘change’ for the Light Horse Brigade – from horses to machines. In 1940 the four Light Horse Regiments (4th, 8th, 13th and 20th), some 5000 Light Horse and 2000 horses camped and trained at Torquay. Three other regiments, formerly mounted on horses, were also at Torquay ‘mounted’ on privately owned trucks and cars. Division troops included Artillery, Engineers, Signals, Field Ambulance and other branches of the Army necessary to enable a Division to function. It wasn’t just the sheer numbers of men coming to this little town that made the event significant, it was also the fact that the men of the Light Horse were dramatic, almost glamorous figures and it is easy to see their exploits as some splendid adventure. Horses have played a special role in the story of Australia. They were the only means of transport across this huge country, so it was necessary for everyone to have the ability to ride a horse. When war broke out in 1899 between Britain and the Boers of South Africa (“Boer” was Dutch for “farmer”) Australia sent troops to fight. At first Britain was wary of using untried, unprofessional colonial cavalrymen but soon saw that the slouch-hatted Australian “bushmen” were a match for the fast-moving and unconventional mounted commandos of the Boers. The Australians proved themselves to be expert rough-riding horsemen and good shots. Bush life had hardened them to go for long periods with little food and water. They also showed remarkable ability to find their way in a strange country and use its features for cover, in both attack and defence. By 1914, when Australia joined the war against Germany, there were 23 Light Horse regiments of militia volunteers. Many men from these units joined the Light Horse regiments of the Australian Imperial Force (AIF). Men were given remounts (if not using their own horses) – army horses bought by Commonwealth purchasing officers from graziers and breeders. These were called “walers” because they were a New South Wales stockhorse type – strong, great-hearted animals with the strains of the thoroughbred and semi-draught to give them speed, strength and stamina. On 1st November, 1914, Australia’s First Infantry Division and the first four Light Horse regiments sailed for England in a fleet of transport ships. The first of the Light Horse arrived at Gallipoli in May without their horses. Back with their horses after Gallipoli, they were formidable combatants across the Sinai and Palestine. Some British commanders observed that the light horseman moved with a “lazy, slouching gait, like that of a sleepy tiger” but described how the promise of battle “changes that careless gait, into a live athletic swing that takes him over the ground much quicker than other troops”. They had Light Horse, Torquay, training campdeveloped a reputation as formidable infantrymen. The Turks called them “the White Ghurkas” – a reference to their deadly skill with the bayonet. The Arabs called them “The Kings of the Feathers”. The plume had originally been a battle honour of the Queensland Mounted Infantry for their work in the shearer’s strike of 1891. During WW1 it was adopted by almost all the Light Horse Regiments. It was the proud badge of the light horseman. The most famous of their battles was the attack on Beersheba- the charge of the 4th Light Horse Brigade. Mounted infantrymen and their superb walers had carried out one of the most successful cavalry charges in history – against what seemed impossible odds. They surprised the Turks by charging cavalry-style, when they would normally have ridden close to an objective then dismounted to fight. The fall of Beersheba swung the battle tide against the Turks in Palestine; and changed the history of the Middle East. While 19 men from the Surf Coast Shire served with the 4th Light Horse over the course of WW1, only four were involved in the charge of Beersheba- John GAYLARD, Philip QUINN.(Winchelsea); Wallace FINDLAY (Anglesea); Harry TRIGG (Bambra). After the war, Light Horse units played a key role in the Australian Government’s compulsory military training programme. The Citizen Military Forces (C.M.F.) thrived on the glamour of the wartime Light Horse tradition, ignoring the possibility that motor vehicles would soon replace the horses. When training was no longer compulsory, the C.M.F. regiments declined and horses became more of a luxury during the 1930s depression years of poverty and unemployment. Some regiments were motorised. Then, in 1939, Australia joined Britain in another world war. Training was increased for the militia at both home bases and regional training camps. The camp at Torquay in 1940, commanded by Major General Rankin, was at Divisional strength. By the end of the camp some felt that the Division was ready for active service. Gradually, over the next four years, the Australian Light Horse units were mounted on wheels and tracks and the horses were retired. Six men enlisted at the Torquay camp and another 57 men and women enlisted at Torquay for service in WW2. Those who served in the Militia provided valuable Officers and NCOs and men for the armed services during the war. Each infantry division of the 2nd AIF had a Light Horse regiment attached to it. But the day of the Australian mounted soldier hadn’t quite passed. During World War II, Australia’s 6th Cavalry Regiment formed a mounted unit they called “The Kelly Gang” which did valuable scouting work. In New Guinea, a mounted Light Horse Troop did patrol duty and helped carry supplies. Some fully equipped walers were flown into Borneo for reconnaissance in rugged mountain country. But by the end of the war, in 1945, the horse had disappeared from the Australian Army. References: Australian Light Horse Association www.lighthorse.org.au National Australia Archives Australian War Memorial Surf Coast Shire WW1 memorials www.togethertheyserved.com The Light horse- a Cavalry under Canvas Light Horse, Training Camp, Torquay, WW2 Late in 1939 it was decided to set up a Lighthorse training camp in Torquay to train both men and horses for the battles of the Second World War. Horses, men and equipment came on special trains from all over Victoria and NSW, and as you would expect horseman came from areas such as Omeo and Sale, the Wimmera and the Western District. They arrived at the Geelong racecourse for watering in the Barwon River and then were ridden across the ford at the breakwater and began their 11 mile trek to Torquay. Light Horse, Training Camp, Torquay, WW2 Tent city By the end of January 1940 the camp at Torquay accommodated some 5000 men and 2500 horses of the Second Cavalry Division. The rows of horses, tents and huts near Blackgate Road were quite a sight. While the cavalrymen engaged in exercises on the land and on the beaches, many of the troops took over the Torquay School for special training of men and officers. Mr Bob Pettit local farmer and Councillor for the Barrabool Shire, wrote about the Light horse in the Surf Coast Community News in 1985 saying “They used to travel about the district riding four abreast in one long convoy. To my annoyance they went through my property and shut all the gates behind them. I had certain gates open to let stock in to the water holes and it would take me three -quarters of an hour to follow the horsemen up and put all the gates right again” he continued “the men from the Light Horse were here when the fire went through in March 1940. He recalled an incident when early one morning, as some one blew the bugle, a soldier putting a white sheet on the line frightened the horses. They panicked and ran off in all directions. Six went over the cliff near Bird Rock, five were never found, and the rest were gathered up after nearly a fortnight in the bush around Addiscott and Anglesea" Light Horse, Training Camp, Torquay, WW2, Geelong Parade Geelong parade The training camp culminated in a parade through the streets of Geelong on March 12th 1940. The salute was given at the Town Hall and the troops continued on a route to the You Yang’s for a training exercise. Note-----(see media section for photograph) The Camp was abandoned in mid 1940 as it was deemed unsuitable for training during winter and the cost of a permanent camp could not be justified if it could not be used all year. Historic.......Rare,,,Interpretive.Sepia photographs.set of four ....post card size ....Horses &LighthorsemenNo 1, Lighthorsemen Regiment Geelong 1940......No 2 Light Horse at Breakwater Geelong 1938 to 1940....No 3 Light Horse at Breakwater Geelong 1938 to 1940.....No 4 Light Horse crossing Breakwater camped at Geelong Showgrounds. These markings are on reverse of photographs.light horsemengeelong 1940., world war 2 -
 Lara RSL Sub Branch
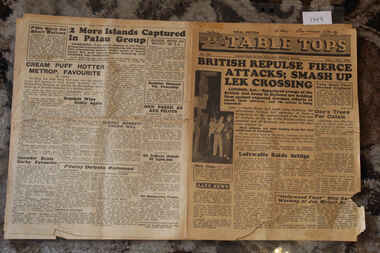
Newspaper - Table Tops Newspaper Dated 1/10/1944, Table Tops Newspaper Dated 1/10/1944 Armed Forces Australian produced for Australian Troops
... Lara RSL Sub Branch McClelland Ave Lara Table Tops Newspaper produced by First Australian Army Press unit for Australian Troops Dated 1/10/1944 four pages Australian Forces produced Newspaper for issue to Australian Troops british repulse fierce attacks smash up lek crossing - 2 more island captured in palau group - local news events world war 2 newspaper table tops dated 1/10/1944 British Repulse Fierce Attacks Smash Up Lek Crossing - 2 more island captured in Palau Group - Local News Events, for pages Table Tops Newspaper dated 1/10/1944 -Produced by Australian Armed Forces Queensland for Issue to Australian Troops Table Tops Newspaper Dated 1/10/1944 Armed Forces Australian produced for Australian Troops Newspaper Table Tops Newspaper Dated 1/10/1944 ...Table Tops Newspaper produced by First Australian Army Press unit for Australian Troops Dated 1/10/1944 four pagesAustralian Forces produced Newspaper for issue to Australian TroopsTable Tops Newspaper dated 1/10/1944 -Produced by Australian Armed Forces Queensland for Issue to Australian TroopsBritish Repulse Fierce Attacks Smash Up Lek Crossing - 2 more island captured in Palau Group - Local News Events, for pagesbritish repulse fierce attacks smash up lek crossing - 2 more island captured in palau group - local news events, world war 2, newspaper, table tops dated 1/10/1944 -
 Flagstaff Hill Maritime Museum and Village
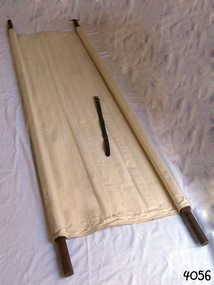
Equipment - Field Stretcher, Australian Defence Force, 1939-1942
... attack. During his convalescence, he carved an intricate and ‘most artistic’ chess set from the material used for making dentures. The stretcher is an example of portable medical and emergency equipment used by the military and emergency services in the 19th and early 20th centuries. It is significant for its connection to Dr W R Abgus, who practised medicine in the community, the Australian Army ...This field stretcher was the property of Dr. William Roy Angus. It was donated to Flagstaff Hill Maritime Village by the family of Doctor William Roy Angus, Surgeon and Oculist. It is part of the “W.R. Angus Collection” that includes historical medical equipment, surgical instruments, and material once belonging to Dr Edward Ryan and Dr Thomas Francis Ryan (both of Nhill, Victoria), as well as Dr Angus’ belongings. The Collection’s history spans the medical practices of the two Doctors Ryan, from 1885-1926, plus that of Dr Angus, up until 1969. W R Angus served with the Australian Department of Defence as a Surgeon Captain during World War II from 1942 to 1945, in Ballarat, Victoria, and Bonegilla, N.S.W., completing his service just before the end of the war due to suffering from a heart attack. During his convalescence, he carved an intricate and ‘most artistic’ chess set from the material used for making dentures.The stretcher is an example of portable medical and emergency equipment used by the military and emergency services in the 19th and early 20th centuries. It is significant for its connection to Dr W R Abgus, who practised medicine in the community, the Australian Army and the Flying Doctor service from the 1920s to 1960s. He was also Warrnambool's last Port Medical Officer.Medical Field Stretcher: cream coloured canvas with wooden poles through side hems and a leather strap with buckle to keep parts together when folded or rolled up. This stretcher is part of the W.R. Angus Collection.flagstaff hill, flagstaff hill maritime museum and village, warrnambool, maritime museum, maritime village, great ocean road, shipwreck coast, stretcher, field stretcher, first aid, military equipment, medical equipment, emergency equipment, dr w r angus, canvas stretcher, patient transport, world war ii, ww2, australian department of defence, military doctor, medic, military stretcher, field gear, army stretcher, litter, adf, folding stretcher, w.r. angus -
 Waverley RSL Sub Branch
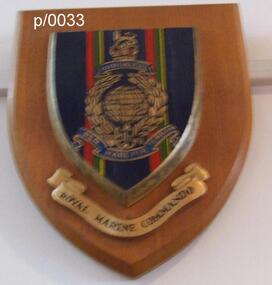
Plaque Royal Marine Commando Gibraltar, Royal Marine Commando Gibraltar
... Army Marine regiments (Queen's Own Marines, 1st Marines, 2nd Marines, 3rd Marines) in holding that fortress against determined assaults, despite extreme privation. There are no other battle honours displayed on the colours of the four battalion-sized units of the current Corps. The Latin motto "Per Mare Per Terram" translates into English as "By Sea By Land" describing how the Royal Marines both attack...Army Marine regiments (Queen's Own Marines, 1st Marines, 2nd Marines, 3rd Marines) in holding that fortress against determined assaults, despite extreme privation. There are no other battle honours displayed on the colours of the four battalion-sized units of the current Corps. The Latin motto "Per Mare Per Terram" translates into English as "By Sea By Land" describing how the Royal Marines both attack ...The word Gibraltar refers to the Great Siege of Gibraltar by French and Spanish forces, from 1779 to 1783, in support of the American Revolution. It was awarded in 1827 by George IV as a special distinction for the services of four of the old Army Marine regiments (Queen's Own Marines, 1st Marines, 2nd Marines, 3rd Marines) in holding that fortress against determined assaults, despite extreme privation. There are no other battle honours displayed on the colours of the four battalion-sized units of the current Corps. The Latin motto "Per Mare Per Terram" translates into English as "By Sea By Land" describing how the Royal Marines both attack and defend. The fouled anchor, incorporated into the emblem in 1747, is the badge of the Lord High Admiral and shows that the Corps is part of the Naval Service. Per Mare Per Terram ("By Sea By Land"), the motto of the Marines, is believed to have been used for the first time in 1775.Wooden Plaque Royal Marine Commando Gibraltar Royal Marine Commando Gibraltar -
 Waverley RSL Sub Branch
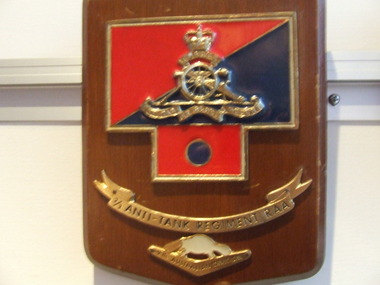
Plaque Royal Regiment of Australian Artillery 2/3 Anti Tank Regiment
... Attack Regiment. The colors are sometimes shown as the reverse of the above.http://www.awm.gov.au/collection/records/awmohww2/army/vol1/awmohww2-army-vol1-app4.pdf The "T" shape of the colour patch denotes the Regiment served at Tobruk ...Attack Regiment. The colors are sometimes shown as the reverse of the above.http://www.awm.gov.au/collection/records/awmohww2/army/vol1/awmohww2-army-vol1-app4.pdf The "T" shape of the colour patch denotes the Regiment served at Tobruk 2/3 anti-tank regiment 2/3 tank attack regiment tobruk Plaque Royal Regiment of Australian Artillery 2/3 Anti Tank Regiment Wooden Plaque 15cm x 13cm with insignia of Plaque Royal Regiment of Australian Artillery 2/3 Anti Tank Regiment Plaque Royal Regiment of Australian Artillery 2/3 Anti Tank Regiment Plaque Royal Regiment of Australian Artillery 2/3 Anti Tank Regiment ...This regiment 2/3 Anti-tank later was known as the 2/3 Tank Attack Regiment. The colors are sometimes shown as the reverse of the above.http://www.awm.gov.au/collection/records/awmohww2/army/vol1/awmohww2-army-vol1-app4.pdf The "T" shape of the colour patch denotes the Regiment served at Tobruk Wooden Plaque 15cm x 13cm with insignia of Plaque Royal Regiment of Australian Artillery 2/3 Anti Tank Regiment Plaque Royal Regiment of Australian Artillery 2/3 Anti Tank Regiment 2/3 anti-tank regiment, 2/3 tank attack regiment, tobruk -
 Waverley RSL Sub Branch
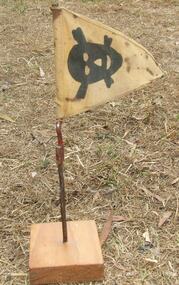
Minefield Warning Flag
... Army formation took part, the first to be commanded by an Australian general and the first to be planned by an Australian staff. Major General Iven Mackay's 6th Division assaulted the strongly held Italian fortress of Bardia, Libya, assisted by air support and naval gunfire, and under the cover of an artillery barrage. The 16th Infantry Brigade attacked ...German Luftwaffe (Land Forces) minefield warning flag from WWII.originally intended to be gas markers, rather than mines, but as it turned out, the use changed .they were mounted on a red metal pole & there were 12 to a set in a leather pack. This Flag was presented to the Treasurer of Waverley RSL. It is a souvenir from Bardia in Libya The Battle of Bardia was fought over three days between 3 and 5 January 1941, as part of Operation Compass, the first military operation of the Western Desert Campaign of the Second World War. It was the first battle of the war in which an Australian Army formation took part, the first to be commanded by an Australian general and the first to be planned by an Australian staff. Major General Iven Mackay's 6th Division assaulted the strongly held Italian fortress of Bardia, Libya, assisted by air support and naval gunfire, and under the cover of an artillery barrage. The 16th Infantry Brigade attacked at dawn from the west, where the defences were known to be weak. Sappers blew gaps in the barbed wire with Bangalore torpedoes and filled in and broke down the sides of the anti-tank ditch with picks and shovels. This allowed the infantry and 23 Matilda II tanks of the 7th Royal Tank Regiment to enter the fortress and capture all their objectives, along with 8,000 prisoners. In the second phase of the operation, the 17th Infantry Brigade exploited the breach made in the perimeter, and pressed south as far as a secondary line of defences known as the Switch Line. On the second day, the 16th Infantry Brigade captured the township of Bardia, cutting the fortress in two. Thousands of prisoners were taken, and the Italian garrison now held out only in the northern and southernmost parts of the fortress. On the third day, the 19th Infantry Brigade advanced south from Bardia, supported by artillery and the Matilda tanks, now reduced in number to just six. Its advance allowed the 17th Infantry Brigade to make progress as well, and the two brigades reduced the southern sector of the fortress. Meanwhile, the Italian garrisons in the north surrendered to the 16th Infantry Brigade and the Support Group of the British 7th Armoured Division outside the fortress. In all, some 36,000 Italian prisoners were taken. The victory at Bardia enabled the Allied forces to continue the advance into Libya and ultimately capture almost all of Cyrenaica. In turn this would lead to German intervention in the fighting in North Africa, changing the nature of the war in that theatre. Bardia boosted the competence and reputation of the Australian Army. Perhaps most important of all, it raised confidence in the possibility of an ultimate Allied victory around the world, which would lead to the Lend-Lease Act being passed in the United States http://en.wikipedia.org/wiki/Battle_of_BardiaCloth Flag bearing a skull and cross Bones on a metal spike mounted on a square varnished wooden basebardia, land mine, marker flag, minefield, mustard gas -
 Waverley RSL Sub Branch
Print Kapyong, Kapyong
... attacks. By the afternoon of 25 April the road through to the Canadians had been cleared of Chinese and 2 PPCLI was relieved by US Army units. ...attacks. By the afternoon of 25 April the road through to the Canadians had been cleared of Chinese and 2 PPCLI was relieved by US Army units. ...On 23 April, the 3rd Battalion, Royal Australian Regiment (3 RAR), under the command of Lieutenant Colonel Bruce Ferguson, and the 2nd Battalion, Princess Patricia's Canadian Light Infantry, occupied prominent hills on either side of the seven-kilometre-wide valley, where a small tributary joined the Kapyong River. Also forward were headquarters units, tanks and artillery. The 1st Battalion, Middlesex Regiment, were to the rear. Early in the evening, retreating South Koreans streamed past the Commonwealth position, with Chinese forces closely intermingled. Soon afterwards a platoon of American tanks supporting 3 RAR was overrun. The Kapyong valley was too large an area to defend with the forces available, and the brigade was spread very thinly. Throughout the night the Chinese repeatedly pressed the Australian positions, attacking in waves over their own dead and wounded. At dawn, A Company, under the command of Major Bernard "Ben" O'Dowd, found that the Chinese had infiltrated its position, but a counter-attack was able to eject them. Meanwhile B Company, which had spent the night on a hill near the riiver, discovered Chinese occupying some old bunkers on a small knoll. Hand-to-hand fighting ensued with grenades and bayonets. C Company, under the command of Captain Reg Saunders, was in position to reinforce both A and B Companies. "Major O'Dowd then directed the radio operator to contact anyone. The American 1st Marine Division answered but their operator refused to believe who our operator was speaking for. Major O'Dowd took the phone and demanded to speak to the commanding officer. The general in charge of the [Marine] division came on the phone and told O'Dowd we didn't exist as we had been wiped out the night before. Major O'Dowd said, 'I've got news for you, we are still here and we are staying here.'" Private Patrick Knowles, 3 RAR, on the morning of 24 April 1951 Fighting continued throughout the day with the Australians holding their positions, and the Chinese also engaging D Company. But late on 24 April, with their position now untenable, the Australians were forced into a fighting withdrawal down a ridge to the valley, where they rejoined the brigade. Their withdrawal was supported by New Zealand artillery from the 16th Field Regiment. Having found the Canadian position unassailable, the Chinese made no further attacks. By the afternoon of 25 April the road through to the Canadians had been cleared of Chinese and 2 PPCLI was relieved by US Army units. On Anzac Day 1951, the Australians rested after a long fight. Thirty-two Australians were killed and 53 were wounded for their part in stalling the Chinese advance and preventing Seoul from falling into enemy hands. Lieutenant Colonel Bruce Ferguson was awarded the Distinguished Service Order for his skilful leadership, and the Australian and Canadian battalions both received United States Presidential Distinguished Unit Citations for their part in the battle. http://www.awm.gov.au/exhibitions/korea/operations/kapyong/Print of painting of action in Kapyong Korea in wooden frame under glassDonated by Frank Arnold on behalf of Korean Veterans Association of Australia inc.korea, kapyong, 3rar -
 The Beechworth Burke Museum
Photograph
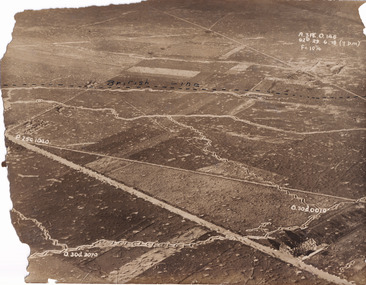
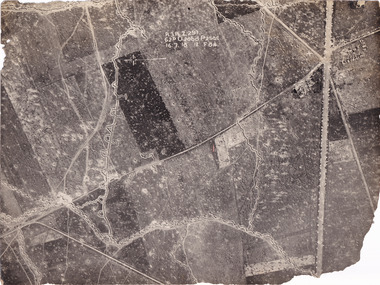
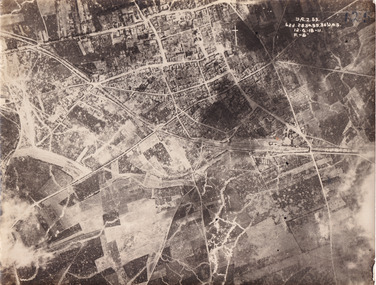
... Following the Race to the Sea, both the French-British and German armies dug in along a meandering line of fortified trenches, stretching from the North Sea to the Swiss frontier with France. Between 1915 and 1917 there were several offensives along the Western Front. The attacks...Following the Race to the Sea, both the French-British and German armies dug in along a meandering line of fortified trenches, stretching from the North Sea to the Swiss frontier with France. Between 1915 and 1917 there were several offensives along the Western Front. The attacks ...Taken some time between 1914-18, the photograph depicts an aerial view of trenches in France. The image mostly shows rural landscape, although there is a house in the bottom right corner. A dotted line has been drawn across the photograph, marking the section of trenches that belonged to British forces during World War I. It is believed that the line marking on this record denotes a section of the Western Front. The Western Front was the main theatre of war during World War I. Following the outbreak of war in August 1914, the German Army opened the Western Front by invading Luxembourg and Belgium, then gaining military control of important industrial regions in France. The German advance was halted with the Battle of the Marne. Following the Race to the Sea, both the French-British and German armies dug in along a meandering line of fortified trenches, stretching from the North Sea to the Swiss frontier with France. Between 1915 and 1917 there were several offensives along the Western Front. The attacks employed massive artillery bombardments and massed infantry advances. Entrenchments, machine gun emplacements, barbed wire and artillery repeatedly inflicted severe casualties during attacks and counter-attacks and no significant advances were made. Among the most notable of these offensives were the Battle of Verdun (1916), the Battle of the Somme (1916), and the Battle of Passchendaele (1917).The record is historically significant due to its connection to World War I. This conflict is integral to Australian culture as it was the single greatest loss of life and the greatest repatriation of casualties in the country's history. Australia’s involvement in the First World War began when the Australian government established the Australian Imperial Force (AIF) in August 1914. Immediately, men were recruited to serve the British Empire in the Middle East and on the Western Front. The record has strong research potential. This is due to the ongoing public and scholarly interest in war, history, and especially the ANZAC legend, which is commemorated annually on 25 April, known as ANZAC Day.Sepia rectangular photograph printed on matte photographic paper.Obverse: A.3FE.O.146 / G2R 29 . 6 . 18 (Y p.m) / F= 10 1/4 / British Line / ------------------------------------------ / P. 250 1040 / 0. 30d. 0010 / 0. 30d. 3070 /military album, military, war, wwi, world war i, france, great britain, trenches, village, rural, western front -
 The Beechworth Burke Museum
Photograph
... Following the Race to the Sea, both the French-British and German armies dug in along a meandering line of fortified trenches, stretching from the North Sea to the Swiss frontier with France. Between 1915 and 1917 there were several offensives along the Western Front. The attacks...Following the Race to the Sea, both the French-British and German armies dug in along a meandering line of fortified trenches, stretching from the North Sea to the Swiss frontier with France. Between 1915 and 1917 there were several offensives along the Western Front. The attacks ...Taken some time between 1914-18, the photograph depicts an aerial view of trenches in France. The image mostly shows rural landscape, although there is a cluster of houses in the top right corner. It is believed that this record denotes a section of the Western Front. The Western Front was the main theatre of war during World War I. Following the outbreak of war in August 1914, the German Army opened the Western Front by invading Luxembourg and Belgium, then gaining military control of important industrial regions in France. The German advance was halted with the Battle of the Marne. Following the Race to the Sea, both the French-British and German armies dug in along a meandering line of fortified trenches, stretching from the North Sea to the Swiss frontier with France. Between 1915 and 1917 there were several offensives along the Western Front. The attacks employed massive artillery bombardments and massed infantry advances. Entrenchments, machine gun emplacements, barbed wire and artillery repeatedly inflicted severe casualties during attacks and counter-attacks and no significant advances were made. Among the most notable of these offensives were the Battle of Verdun (1916), the Battle of the Somme (1916), and the Battle of Passchendaele (1917).The record is historically significant due to its connection to World War I. This conflict is integral to Australian culture as it was the single greatest loss of life and the greatest repatriation of casualties in the country's history. Australia’s involvement in the First World War began when the Australian government established the Australian Imperial Force (AIF) in August 1914. Immediately, men were recruited to serve the British Empire in the Middle East and on the Western Front. The record has strong research potential. This is due to the ongoing public and scholarly interest in war, history, and especially the ANZAC legend, which is commemorated annually on 25 April, known as ANZAC Day.Black and white rectangular photograph printed on matte photographic paper.Obverse: A.3.FE.2.291 / 62D O.20bd.P.25O.C / 16.7.18 / 12 / F 8 1/4 / Reverse: 6532military album, military, army, war, wwi, world war i, france, trenches -
 The Beechworth Burke Museum
Photograph, c. 1918
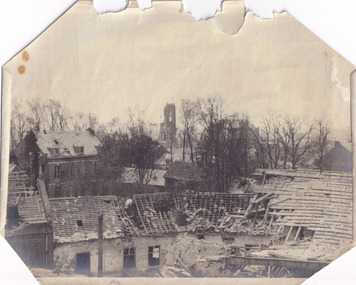
... armies, the Allied cause might have been lost. The fate of Amiens hung in the balance as two Australian brigades were given the task of retaking Villers-Bretonneux through a swift night-time counter attack. ...Taken in c. 1918, this photograph depicts the ruins of the French village Villers-Bretonneux. In the foreground of the image are rows of shell damaged houses and buildings. In the background of the image stands a tower of the ruined church.On 24 April, Villers-Bretonneux was captured by the Germans as they advanced towards the regional city of Amiens. If they achieved their goal and drove onto the French coast, splitting the British and French armies, the Allied cause might have been lost. The fate of Amiens hung in the balance as two Australian brigades were given the task of retaking Villers-Bretonneux through a swift night-time counter attack. One brigade would assault from the south, while another would attack from the north. The assault began at 10pm on 24 April. The 13th Brigade in the south were held up by German machine guns, before the Australians linked up east of the village. After dawn on 25 April Australian and British troops were involved in fierce fighting to clear the Germans from the village. Some Germans escaped Villers-Bretonneux through nearby woods. Later on the morning of 25 April, three years to the day after the Anzacs landings at Gallipoli, French and Australian flags were raised over Villers-Bretonneux.Black and white rectangular reproduced photograph printed on matte photographic paperReverse: (A copyright and reproduction notice from the Australian War Museum, printed upside-down in blue ink) Church x Ruins/ Villers Bretonneux/ (in pencil) burke museum, world war 1, ww1, wwi, france, australia, villers-bretonneux, ruins, military album -
 The Beechworth Burke Museum
Photograph, 5 November 1917
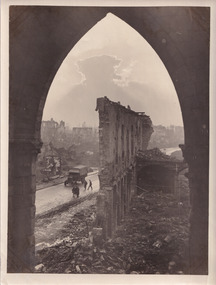
... army vehicle and personal are located on the street beneath the ruined wall. First Battle of Ypres, (October 19–November 22, 1914), first of three costly World War I battles centred on the city of Ypres (now Ieper) in western Flanders. Attempted flank attacks ...Taken on the 5 November 1917 by James Francis Hurley, this photograph depicts the a war damaged Ypres. The shell damaged wall of the Cloth Hall is featured in the centre of the photograph, with an army vehicle and personal are located on the street beneath the ruined wall.First Battle of Ypres, (October 19–November 22, 1914), first of three costly World War I battles centred on the city of Ypres (now Ieper) in western Flanders. Attempted flank attacks by both the Allies and the Germans failed to achieve significant breakthroughs, and both sides settled into the trench warfare that would characterize the remainder of the war on the Western Front.Black and white rectangular reproduced photograph printed on mate photographic paperReverse: 6525/ (A copyright and reproduction notice from the Australian War Museum, printed upside-down in blue ink)military album, burke museum, world war one, world war 1, ww1, ypres, belguim, ruins, first battle of ypres, james francis hurley -
 The Beechworth Burke Museum
Photograph, c. 1917
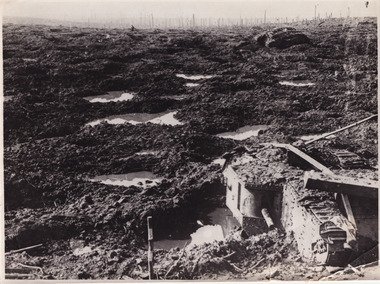
... attack on 31 July 1917. Fighting went on, often in appalling weather and despite crippling losses, until November. Finally, with the army ...This photograph depicts the third battle of Ypres (Battle of Passchendaele). Depicted is a trench battlefield that has been turned to mud. Two army tank vehicles have been buried in the mud of the trenches. A single soldier stands in the background surveying the battlefield.After mid-1917, and following mutinies in the over-strained French Army, the British Forces had to assume an even greater role in the war on the Western Front. For Field Marshal Sir Douglas Haig, the British commander-in-chief, this provided an opportunity to launch an offensive that he had long wanted. Attacking from Ypres in Belgium, he planned to drive the Germans from the surrounding dominant ridges and even hoped to reach the Belgian coast. Following on the success at Messines in June, he unleashed his great attack on 31 July 1917. Fighting went on, often in appalling weather and despite crippling losses, until November. Finally, with the army stuck in muddy fields churned up by the artillery fire, the bloody offensive came to an untidy close. Many would afterwards call this offensive, actually a series of battles, after the name of the village that had become the last objective – 'Passchendaele'. In the Battle off Passchendaele, the 1st, 2nd and 3rd Australian Divisions captured Broodseinde Ridge on 4 October 1917. It was a vital victory. But, then it began to rain. Five days later the 2nd Australian Division suffered heavily in a further attack in the mud. Finally, on 12 October, another attack, involving the 3rd Division assisted by the 4th, was made against the village of Passchendaele atop the main ridge. In the face of heavy fire, the men fought in the mire while struggling to keep up with their artillery barrages. Ground was taken but it could not be held. In wretched conditions, with casualties mounting at an appalling rate, the Australians had to fall back. The troops were finally exhausted and could do no more; by 15 November they handed over to the Canadians.Black and white rectangular reproduced photograph printed on mate photographic paperReverse: 6523/ (A copyright and reproduction notice from the Australian War Museum, printed upside-down in blue ink)/military album, burke museum, beechworth, military vehicle, trenches, trench warfare, wwi, world war one, world war 1, ypres, belgium -
 The Beechworth Burke Museum
Photograph
... A counter-attack by two Australian brigades and a British brigade during the night of 24 April partly surrounded Villers-Bretonneux, and on 25 April, the town was recaptured. On 26 April, the role of the Moroccan division of the French army...A counter-attack by two Australian brigades and a British brigade during the night of 24 April partly surrounded Villers-Bretonneux, and on 25 April, the town was recaptured. On 26 April, the role of the Moroccan division of the French army ...Taken some time between 1914-18, the photograph depicts an aerial view of Villers-Bretonneux in France, a region which was part of the Western Front during World War I. The image mostly shows rural landscape. The Western Front was the main theatre of war during World War I. Following the outbreak of war in August 1914, the German Army opened the Western Front by invading Luxembourg and Belgium, then gaining military control of important industrial regions in France. The German advance was halted with the Battle of the Marne. Following the Race to the Sea, both the French-British and German armies dug in along a meandering line of fortified trenches, stretching from the North Sea to the Swiss frontier with France. The First Battle of Villers-Bretonneux occurred between 30 March - 5 April 1918. It took place during Operation Michael, part of the German Spring Offensive on the Western Front. The offensive began against the British Fifth Army and the Third Army on the Somme, and pushed back the British and French reinforcements on the north side of the Somme. The capture of Villers-Bretonneux, close to Amiens, a strategically important road and rail-junction, would have brought the Germans within artillery-range. In late March, troops from the Australian Imperial Force were brought south from Belgium as reinforcements to help shore up the line. In early April, the Germans launched an attack to capture Villers-Bretonneux. After a determined defence by British and Australian troops, the attackers were close to success until a counter-attack by the 9th Australian Infantry Brigade and British troops late in the afternoon of 4 April restored the situation and halted the German advance on Amiens. The Second Battle of Villers-Bretonneux occurred between 24 - 27 April 1918, during the German Spring Offensive to the east of Amiens. It is notable for being the first occasion on which tanks fought against each other. A counter-attack by two Australian brigades and a British brigade during the night of 24 April partly surrounded Villers-Bretonneux, and on 25 April, the town was recaptured. On 26 April, the role of the Moroccan division of the French army was crucial in pushing back German units. Australian, British and French troops nearly restored the original front line by 27 April.The record is historically significant due to its connection to World War I. This conflict is integral to Australian culture as it was the single greatest loss of life and the greatest repatriation of casualties in the country's history. Australia’s involvement in the First World War began when the Australian government established the Australian Imperial Force (AIF) in August 1914. Immediately, men were recruited to serve the British Empire in the Middle East and on the Western Front. Additionally, the record's significance is enhanced by its depiction of Villers-Bretonneux. The battles that occurred in this town during World War I are especially historically significant to Australia as this is where the Australian Imperial Force had one their greatest World War I victories. An Australian flag still flies over Villers-Bretonneux in the present. Furthermore, a plaque outside the Villers-Bretonneux Town Hall recounts the battles fought to save the town in 1918. Kangaroos feature over the entrance to the Town Hall, and the main street is named Rue de Melbourne. More officially, recognition of the significance of the battle in Villers-Bretonneux is found at the Australian National Memorial, which was built just outside the town. It commemorates all Australians who fought in France and Belgium and includes the names of 10,772 who died in France and have no known grave. Each year, a small ceremony is held at the memorial to mark the sacrifice made by the soldiers. Lastly, the record has strong research potential. This is due to the ongoing public and scholarly interest in war, history, and especially the ANZAC legend, which is commemorated annually on 25 April, known as ANZAC Day.Sepia rectangular photograph printed on matte photographic paper.Obverse: yAE.2.35. / 125 / 62d.2834.35.36.VA.5. / 12.G.18-11 / F.-(?)" /military album, wwi, world war i, villers-bretonneux, australian imperial force, aif, france, war, army, conflict, germany, 1918, battle -
 Monbulk RSL Sub Branch
Book, Suzanne Wellborn, Bush heroes : a people, a place, a legend, 2002
... army - soldiers - western australia More than one quarter of the Australian soldiers chosen to land on Gallipoli at dawn on 25 April 1915 were Western Australians. Four years later, only one in four of them had escaped death or severe injury. But that morning, by climbing the cliffs under a hail of Turkish bullets, they won a permanent place in Australia's most celebrated national legend. At Gallipoli that was all any of the attacking ...More than one quarter of the Australian soldiers chosen to land on Gallipoli at dawn on 25 April 1915 were Western Australians. Four years later, only one in four of them had escaped death or severe injury. But that morning, by climbing the cliffs under a hail of Turkish bullets, they won a permanent place in Australia's most celebrated national legend. At Gallipoli that was all any of the attacking troops won." "The British and French, whose armies also suffered heavy losses at the Dardanelles, regarded the campaign as nothing but a humiliating military disaster best forgotten. In Australia Gallipoli was hailed as 'the proving of a nation's soul' and the day of the landing became sacred.Index, bibliography, notes, ill, maps, p.240.non-fictionMore than one quarter of the Australian soldiers chosen to land on Gallipoli at dawn on 25 April 1915 were Western Australians. Four years later, only one in four of them had escaped death or severe injury. But that morning, by climbing the cliffs under a hail of Turkish bullets, they won a permanent place in Australia's most celebrated national legend. At Gallipoli that was all any of the attacking troops won." "The British and French, whose armies also suffered heavy losses at the Dardanelles, regarded the campaign as nothing but a humiliating military disaster best forgotten. In Australia Gallipoli was hailed as 'the proving of a nation's soul' and the day of the landing became sacred.world war 1914-1918 - campaigns - gallipoli, australian army - soldiers - western australia -
 Monbulk RSL Sub Branch
Book, Will Davies, Last one hundred days : the Australian road to victory in the First World War, 2018
... Army'. On this day the major Allied counteroffensive began, with the AIF in the vanguard of the attack. ...In March 1918, with the fear of a one-million-man American army landing in France, the Germans attacked. In response, Australian soldiers were involved in a number of engagements, culminating in the Second Battle of Villers-Bretonneux and the saving of Amiens, and Paris, from German occupation. Then came General John Monash's first victory as the Commanding Officer of the newly formed Australian Corps at Hamel. This victory, and the tactics it tested, became crucial to the Allied victory after 8 August, the 'black day of the German Army'. On this day the major Allied counteroffensive began, with the AIF in the vanguard of the attack. The Australians, with the Canadians to the south and the British across the Somme to the north, drove the Germans back, first along the line of the Somme and then across the river to Mont St Quentin, Péronne and on to the formidable Hindenburg Line, before the last Australian infantry action at Montbrehain in early October. Fast-paced and tense, the story of The Last 100 Days is animated by the voices of Australian soldiers as they endured the war's closing stages with humour and stoicism; and as they fought a series of battles in which they played a pivotal role in securing Allied victory. Collapse summaryIndex, bibliography, notes, ill, p.340.non-fictionIn March 1918, with the fear of a one-million-man American army landing in France, the Germans attacked. In response, Australian soldiers were involved in a number of engagements, culminating in the Second Battle of Villers-Bretonneux and the saving of Amiens, and Paris, from German occupation. Then came General John Monash's first victory as the Commanding Officer of the newly formed Australian Corps at Hamel. This victory, and the tactics it tested, became crucial to the Allied victory after 8 August, the 'black day of the German Army'. On this day the major Allied counteroffensive began, with the AIF in the vanguard of the attack. The Australians, with the Canadians to the south and the British across the Somme to the north, drove the Germans back, first along the line of the Somme and then across the river to Mont St Quentin, Péronne and on to the formidable Hindenburg Line, before the last Australian infantry action at Montbrehain in early October. Fast-paced and tense, the story of The Last 100 Days is animated by the voices of Australian soldiers as they endured the war's closing stages with humour and stoicism; and as they fought a series of battles in which they played a pivotal role in securing Allied victory. Collapse summary world war 1914- 1918 - campaigns - western front, western front - australian participation - 1918 -
 Monbulk RSL Sub Branch
Book, Craig Deayton, The battle of Messines : 1917, 2017
... Monbulk RSL Sub Branch 48 Main Road Monbulk yarra-valley-and-the-dandenong-ranges world war 1914-1918- campaigns - western front battles of messines - australian participation - 1917 On 7 June 1917, the British Second Army launched its attack on Messines Ridge, detonating 19 giant mines beneath the German front-line positions. ...On 7 June 1917, the British Second Army launched its attack on Messines Ridge, detonating 19 giant mines beneath the German front-line positions. By the end of the day, one of the strongest positions on the Western Front had fallen, a place of such importance that the Germans had pledged to hold it at any cost. It was the greatest British victory in three years of war. The first two years of the First World War had represented an almost unending catalogue of disaster for the Australians. Messines was not only their first real victory, it was also the first test in senior command for Major General John Monash who commanded the newly formed 3rd Division and would later be hailed as Australia's greatest soldier. Messines was a baptism of fire for the 3rd Division which came into the line alongside the battle-scarred 4th Australian Division, badly mauled at Bullecourt just six weeks earlier in one of the worst defeats of the war. The fighting at Messines would descend into unimaginable savagery, a lethal and sometimes hand-to-hand affair of bayonets, clubs, bombs and incessant machine-gun fire, described by one Australian as '72 hours of Hell'. After their string of bloody defeats over 1915 and 1916, Messines would be the ultimate test for the Australians. Collapse summaryIndex, bibliography, ill (col), p.172.non-fictionOn 7 June 1917, the British Second Army launched its attack on Messines Ridge, detonating 19 giant mines beneath the German front-line positions. By the end of the day, one of the strongest positions on the Western Front had fallen, a place of such importance that the Germans had pledged to hold it at any cost. It was the greatest British victory in three years of war. The first two years of the First World War had represented an almost unending catalogue of disaster for the Australians. Messines was not only their first real victory, it was also the first test in senior command for Major General John Monash who commanded the newly formed 3rd Division and would later be hailed as Australia's greatest soldier. Messines was a baptism of fire for the 3rd Division which came into the line alongside the battle-scarred 4th Australian Division, badly mauled at Bullecourt just six weeks earlier in one of the worst defeats of the war. The fighting at Messines would descend into unimaginable savagery, a lethal and sometimes hand-to-hand affair of bayonets, clubs, bombs and incessant machine-gun fire, described by one Australian as '72 hours of Hell'. After their string of bloody defeats over 1915 and 1916, Messines would be the ultimate test for the Australians. Collapse summary world war 1914-1918- campaigns - western front, battles of messines - australian participation - 1917 -
 Monbulk RSL Sub Branch
Book, Department of Information, Battle of the Ridges, 1943
... Monbulk RSL Sub Branch 48 Main Road Monbulk yarra-valley-and-the-dandenong-ranges World war 1939 – 1945 – Campaigns – New Guinea World war 1939-1945 - Australia Australian army brochure relating to the attack on Salamaua in 1943 Ill, p.32. ...Australian army brochure relating to the attack on Salamaua in 1943Ill, p.32.non-fictionAustralian army brochure relating to the attack on Salamaua in 1943world war 1939 – 1945 – campaigns – new guinea, world war 1939-1945 - australia -
 Monbulk RSL Sub Branch
Book, Arcturus Publishing, 1918 : the year of victories, 2003
... Victory could only be gained by the immediate application of overwhelming force in new tactical form; the 'fire-waltz' artillery barrage and the storm-trooper infantry attack. 1918 examines both the Germans' tactics and the Allies' preferred solution to fighting this war, the combination of artillery, tanks, infantry and aircraft, and argues that this reached a level of sophistication in command and control never before achieved. The war of attrition was far from over, but as more Americans arrived in France the ghastly cost became affordable. For the Germans, it became a question of whether they could negotiate an armistice before their armies ...At the outset of 1918 Germany faced certain defeat as a result of Allied technical innovation in tanks and aircraft, and the American entry into the war. Victory could only be gained by the immediate application of overwhelming force in new tactical form; the 'fire-waltz' artillery barrage and the storm-trooper infantry attack. 1918 examines both the Germans' tactics and the Allies' preferred solution to fighting this war, the combination of artillery, tanks, infantry and aircraft, and argues that this reached a level of sophistication in command and control never before achieved. The war of attrition was far from over, but as more Americans arrived in France the ghastly cost became affordable. For the Germans, it became a question of whether they could negotiate an armistice before their armies were utterly destroyed.Index, bib, maps, p.235.non-fictionAt the outset of 1918 Germany faced certain defeat as a result of Allied technical innovation in tanks and aircraft, and the American entry into the war. Victory could only be gained by the immediate application of overwhelming force in new tactical form; the 'fire-waltz' artillery barrage and the storm-trooper infantry attack. 1918 examines both the Germans' tactics and the Allies' preferred solution to fighting this war, the combination of artillery, tanks, infantry and aircraft, and argues that this reached a level of sophistication in command and control never before achieved. The war of attrition was far from over, but as more Americans arrived in France the ghastly cost became affordable. For the Germans, it became a question of whether they could negotiate an armistice before their armies were utterly destroyed.world war 1914-1918 - history, world war 1914-1918 - campaigns - france