
Showing 353 items matching "bendigo tram 3"
-
 Ballarat Tramway Museum
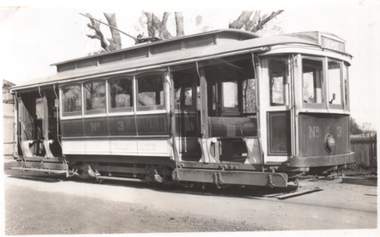
Photograph - ESCo Bendigo tram 3, 1930s
... ESCo Bendigo tram 3......Bendigo...tram 3...Photograph of Bendigo Tram No 3 at the tram depot, with the destination of Depot. ...Photograph of Bendigo Tram No 3 at the tram depot, with the destination of Depot. ...Photograph of Bendigo Tram No 3 at the tram depot, with the destination of Depot. Tram in the ESCo Red and Cream colour scheme with the tram number on the side of the vehicle. The tram commenced life with the Hawthorn Tramway Trust as their No. 8. Became No. 114 when the MMTB took over, sold to the SEC in 1931 and became Bendigo No. 3. It was donated to the AETA in 1956 and subsequently rebuilt as HTT 8. The tram is on display at the Melbourne Tram Museum Hawthorn. See reference for further details. One of a series of 7 photos (items 9108 to 9114) possibly taken at the time of the SEC takeover in 1934 to illustrate the type of tram that was being used at Bendigo. Possibly an SEC report photo. Based on the book Destination Eaglehawk, most likely from the Basil Miller collection.Yields information about Bendigo tram 3 during the mid 1930s.Photograph, black and white with notes on rear.In ink on rear "No. 3 - Electric Supply Co of Victoria (Prior to 1934 when SEC acquired the undertaking), and Ken Magor stamp.tramways, trams, bendigo, tram 3, aeta, tram 8, bendigo tramway -
 Ballarat Tramway Museum
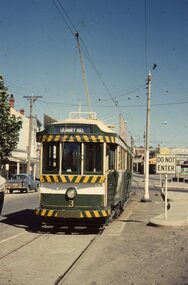
Photograph - Bendigo Tram 3, Tram at the Eaglehawk terminus, 10 January 1971
... Bendigo Tram 3...bendigo tram 3...trams in Bendigo were battery-operated and started running in June 1890. These were replaced when the electric network opened in 1903 with a fleet of twelve trams manufactured by Duncan and Fraser of Adelaide. Bendigo Tramways ceased operating in 1972 after 82 years. Tram 3...Photograph taken by Campbell Duncan, 10 January, 1971. bendigo tram 3 first tram 1890 electric 1903 duncan and fraser 82 years eaglehawk terminus campbell duncan photographer Handwritten notation in ink on mount Colour image in C/B Ferraniacolor - 35mm slide Tram at the Eaglehawk terminus, 10 January 1971 Photograph Bendigo Tram 3 ...The first trams in Bendigo were battery-operated and started running in June 1890. These were replaced when the electric network opened in 1903 with a fleet of twelve trams manufactured by Duncan and Fraser of Adelaide. Bendigo Tramways ceased operating in 1972 after 82 years. Tram 3 at the terminus at Eaglehawk. Photograph taken by Campbell Duncan, 10 January, 1971.Colour image in C/B Ferraniacolor - 35mm slideHandwritten notation in ink on mountbendigo tram 3, first tram 1890, electric 1903, duncan and fraser, 82 years, eaglehawk terminus, campbell duncan, photographer -
 Ballarat Tramway Museum
Photograph - Bendigo Tram 3, Tram at the Eaglehawk terminus, 10 January 1971
... Bendigo Tram 3...Tram at the Eaglehawk terminus, 10 January 1971 Photograph Bendigo Tram 3 ... -
 Ballarat Tramway Museum
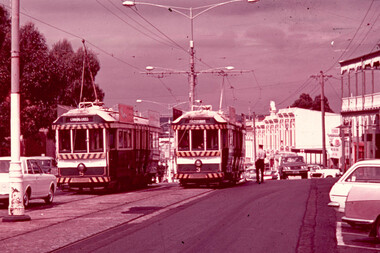
Slide - 35mm slide/s, Max Michell, Apr. 1972
... ... Bendigo... tram 3...White cardboard mount, 35mm slide, from the Association of Railway Enthusiast's film strip titled "Provincial Tramway Film Strip" of Bendigo trams Nos. 3 and 5 in View St., near Rowan St. ...Tramways trams ARE Film Strip View St Bendigo tram 3 tram 5 Stamped on base of slide "11802" and written in ink on top edge "No 3 & 5 Eaglehawk line Bendigo" White cardboard mount, 35mm slide, from the Association of Railway Enthusiast's film strip titled "Provincial Tramway Film Strip" of Bendigo trams Nos. 3 and 5 in View St., near Rowan St. ...White cardboard mount, 35mm slide, from the Association of Railway Enthusiast's film strip titled "Provincial Tramway Film Strip" of Bendigo trams Nos. 3 and 5 in View St., near Rowan St. No. 3 has destination of Eaglehawk, while No. 5, inbound has destination of Charing Cross. An SEC Employee is standing by the rear of No. 3 The film strip notes (Reg. Item 2560), provided the following caption details: "Bogie cars 3 & 5 (running out of course due to an earlier failure) meet on the double track at the Bendigo end of the "EAGLEHAWK" Line - Apr. '72 (Max Michell)" See image btm2592p.tif for high level scan of image. Stamped on base of slide "11802" and written in ink on top edge "No 3 & 5 Eaglehawk line Bendigo"tramways, trams, are, film strip, view st, bendigo, tram 3, tram 5 -
 Ballarat Tramway Museum
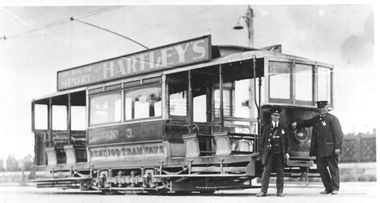
Photograph - Bendigo 3 and crew, 1920s?
... ...Bendigo...tram 3...The photograph shows ESCo Bendigo No. 3 with the conductor and driver standing at the front of the tram. ... and the crew uniforms Tramcars trams Bendigo tram 3 uniforms Black and white photograph on plain paper Photograph Bendigo 3 and crew ...The photograph shows ESCo Bendigo No. 3 with the conductor and driver standing at the front of the tram. Tram has a Hartley's sporting goods roof advertisement. Taken at the Bendigo Cemetery, Carpenter St Bendigo. The tram has been fitted with windscreens but not converted for one-man operation. Provides information about the uniforms of the time. Photo during the 1920s?Yields information about Bendigo tram No. 3 and the crew uniformsBlack and white photograph on plain papertramcars, trams, bendigo, tram 3, uniforms -
 Ballarat Tramway Museum
Slide - 35mm slide/s, Noel Simons, Dec. 1971
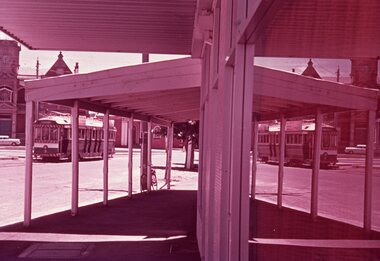
... ... Bendigo... tram 3...Tramways trams Eaglehawk Bendigo tram 3 "No. 3 and its reflection at Eaglehawk terminus" and "Dec 1971" in purple ink using a hand stamp. ...One slide on a Kodak Ready Mount made from the Association of Railway Enthusiast Provincial Tramways film strip, during December 1971 of Bendigo No. 3 at Eaglehawk terminus with its reflection in a shop window looking through a multi post verandah. Has the Eaglehawk Town Hall in the background."No. 3 and its reflection at Eaglehawk terminus" and "Dec 1971" in purple ink using a hand stamp.tramways, trams, eaglehawk, bendigo, tram 3 -
 Melbourne Tram Museum
Photograph - Black & White Photograph/s, late 1960's
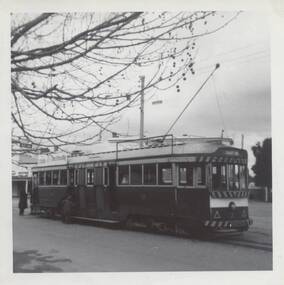
... ... Bendigo... tram 3...Black and white photograph of Bendigo No. 3 at the Eaglehawk terminus late 1960's or early 1970's. Has passengers boarding the tram. ...Trams tramways Maximum Traction SECV Bendigo tram 3 On rear in pencil "Max Tract Ex Geelong, Ex MMTB ex Hawthorn TT" Black and white photograph of Bendigo No. 3 at the Eaglehawk terminus late 1960's or early 1970's. ...Black and white photograph of Bendigo No. 3 at the Eaglehawk terminus late 1960's or early 1970's. Has passengers boarding the tram. The tram has the destination of Quarry Hill.On rear in pencil "Max Tract Ex Geelong, Ex MMTB ex Hawthorn TT"trams, tramways, maximum traction, secv, bendigo, tram 3 -
 Ballarat Tramway Museum
Slide - Bendigo tram depot - set of 6, Ron Hood, 12/1970
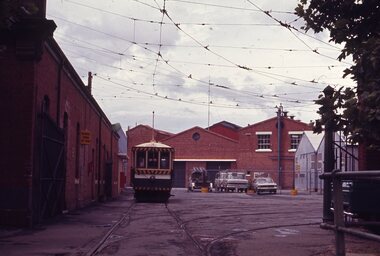
... Bendigo depot...Scrubber...tram 3...Set of six colour photographs by Ron Hood December 1970 taken at the Bendigo tram depot: 1 - Bendigo scrubber parked in the depot yard. 2 - tram No. 3 shunting in the yard. 3 - ditto 4 - general view of the front of the depot shed with trams 23 and 30. 5 - scrubber tram 6 - depot entrance...Set of six colour photographs by Ron Hood December 1970 taken at the Bendigo tram depot: 1 - Bendigo scrubber parked in the depot yard. 2 - tram No. 3 shunting in the yard. 3 - ditto 4 - general view of the front of the depot shed with trams 23 and 30. 5 - scrubber tram 6 - depot entrance Yields information about the Bendigo tram depot and some of the trams at the time - December. 1970 tramways trams Bendigo depot Scrubber tram 3 tram 23 tram 30 Numbered "Bendigo Depot" in ink and slide nos, 12 to 17. ...Set of six colour photographs by Ron Hood December 1970 taken at the Bendigo tram depot: 1 - Bendigo scrubber parked in the depot yard. 2 - tram No. 3 shunting in the yard. 3 - ditto 4 - general view of the front of the depot shed with trams 23 and 30. 5 - scrubber tram 6 - depot entranceYields information about the Bendigo tram depot and some of the trams at the time - December. 1970Set of 6 Colour slides in hanimount cardboard mounts.Numbered "Bendigo Depot" in ink and slide nos, 12 to 17.tramways, trams, bendigo depot, scrubber, tram 3, tram 23, tram 30 -
 Ballarat Tramway Museum
Slide - 35mm slide/s, Travis Jeffrey, late 1960's or early 1970's
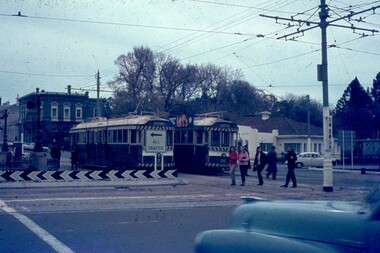
... Bendigo... Charing Cross... tram 3...Agfa plastic mount (blue base, white cover) with a photo of Bendigo Nos. 3 and 26 at Charing Cross. The trams are bound for Eaglehawk, Quarry Hill respectively. ...Tramways trams Bendigo Charing Cross tram 3 tram 26 "BES 48" in pencil. ...Agfa plastic mount (blue base, white cover) with a photo of Bendigo Nos. 3 and 26 at Charing Cross. The trams are bound for Eaglehawk, Quarry Hill respectively. Photo shows the traffic arrangements at Charing Cross prior to closure. Photo taken late 1960's early 1970's from the window of another tram. No. 3 has two roof advertisement racks which are empty, while No. 26 has a SEC briquettes roof advertisement."BES 48" in pencil.tramways, trams, bendigo, charing cross, tram 3, tram 26 -
 Ballarat Tramway Museum
Photograph - Black & White Photograph/s, Ian Barkla, c1960
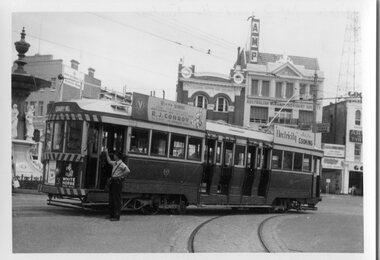
... Bendigo... Charing Cross ...Tram 3...Black and white photograph of Bendigo 3 at Charing Cross, with the Fountain in left hand edge of photograph. Photo shows the curve from View St. into Pall Mall. Tram...Trams Tramways Bendigo Charing Cross Tram 3 On rear in black biro "Bendigo No. 3 at the Fountain ' Ex Geelong 32, Ex 122 MMTB". ...Black and white photograph of Bendigo 3 at Charing Cross, with the Fountain in left hand edge of photograph. Photo shows the curve from View St. into Pall Mall. Tram has "White Horse" whiskey ad and another ad on the drivers dash panel, an SEC roof ad on the rear of the tram and R.J.Conroy's Victa Mowers roof ad on the front of the tram. Conductor in a short sleeved shirt, is standing at front of tram talking to the driver. AMP and CML buildings in background. Tram has been fitted with dash canopy lighting, but not the enlarged white strip. Not dated.On rear in black biro "Bendigo No. 3 at the Fountain ' Ex Geelong 32, Ex 122 MMTB".trams, tramways, bendigo, charing cross , tram 3 -
 Ballarat Tramway Museum
Photograph - Black & White Photograph/s - set of 2, George Bishop, Dec. 1971
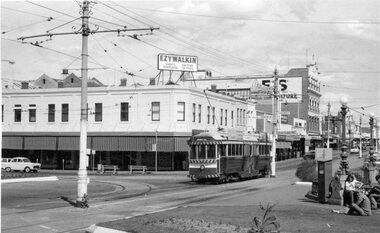
... Bendigo... Charing Cross... tram 3...tramways trams Bendigo Charing Cross tram 3 On the back of two of the photos in ink or pencil "No. 3, Charing Cross December/ G. ...Set of two Black and white photographs of Bendigo No. 3 leaving Charing Cross for Quarry Hill 12/1971. Photos by George Bishop. Both have the Ezywalkin sign and building in the background and people sitting on the ground by the fountain.On the back of two of the photos in ink or pencil "No. 3, Charing Cross December/ G. Bishop photo" On the rear of .2 is a label "No. 3 at Charing Cross Bendigo, December 1971"tramways, trams, bendigo, charing cross, tram 3 -
 Bendigo Historical Society Inc.
Negative - TRAM NO. 3 EAGLEHAWK, 1890-2017
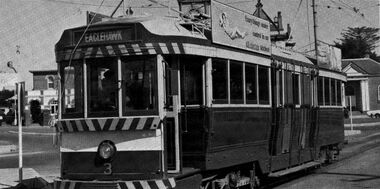
... BENDIGO...Tramways...tram no. 3...BENDIGO Tramways tram no. 3 http://www.bendigotramways.com/images/stories/pdf/thebendigotramwaystory.pdf (Full History of Tramways) Negative of Tram Number 3 Eaglehawk. ...Negative of Tram Number 3 Eaglehawk. bendigo, tramways, tram no. 3, http://www.bendigotramways.com/images/stories/pdf/thebendigotramwaystory.pdf (full history of tramways) -
 Ballarat Tramway Museum
Slide - 35mm slide/s - set of 3, Eldon Hogan, early 1960's
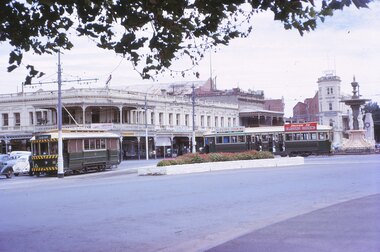
... .1 - "Trams at Bendigo" .2 - "Trams at Fountain at Bendigo" .3 - "Tram at Eaglehawk" all in pencil...Tramways trams Bendigo Eaglehawk Charing Cross tram 16 tram 18 tram 25 .1 - "Trams at Bendigo" .2 - "Trams at Fountain at Bendigo" .3 - "Tram at Eaglehawk" all in pencil Set of three Kodak cardboard mounted slides - have handwritten captions and slide numbers - no date, post dash canopy lights but with the largely green front - early 1960's. ...Set of three Kodak cardboard mounted slides - have handwritten captions and slide numbers - no date, post dash canopy lights but with the largely green front - early 1960's. From the Eldon Hogan collection. Scanned on the Canon scanner at the depot 15/12/1971 at the time of the installation of the scanner. .1 - No. 16 and a bogie car at Charing Cross, early 1960's with the City Club Hotel in the background. .2 - No. 18 at Charing Cross with the destination of Quarry Hill and with the City Club Hotel in the background .3 - No. 25 at the Eaglehawk terminus with two crewmen standing in front of the tram. Tram has the destination of Eaglehawk. The Town Hall in the background has a money raising thermometer for the Olympic Swimming Pool fund..1 - "Trams at Bendigo" .2 - "Trams at Fountain at Bendigo" .3 - "Tram at Eaglehawk" all in penciltramways, trams, bendigo, eaglehawk, charing cross, tram 16, tram 18, tram 25 -
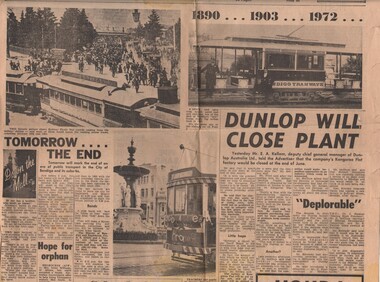 Bendigo Historical Society Inc.
Document - BASIL MILLER COLLECTION: TRAMS - 'TOMORROW THE END'
... Front page article of the end of Bendigo Trams. Three (3) photos - c1890, 1903, and 1972. ...PERSON Individual basil miller Front page article of the end of Bendigo Trams. Three (3) photos - c1890, 1903, and 1972. ...Front page article of the end of Bendigo Trams. Three (3) photos - c1890, 1903, and 1972. Bendigo Advertiser No. 35239. Saturday April 15th 1972.person, individual, basil miller -
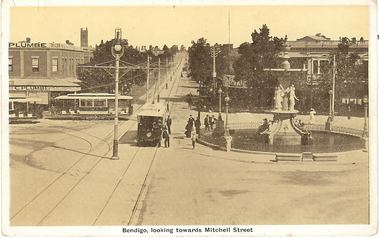 Bendigo Historical Society Inc.
Photograph - BASIL MILLER COLLECTION: 3 TRAMS AT CHARRING CROSS
... Bendigo, 3 trams at Charing Cross, view looking up Mitchell St. ...BHS Collection PERSON Individual basil miller Bendigo, 3 trams at Charing Cross, view looking up Mitchell St. ...BHS CollectionBendigo, 3 trams at Charing Cross, view looking up Mitchell St. City Club Hotel (centre right), Alexandra Fountain (right), Emery and Gibson Corner (centre left).person, individual, basil miller -
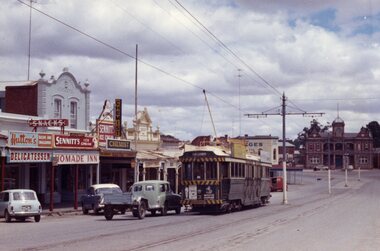 Ballarat Tramway Museum
Photograph - Colour Photograph/s, 21/11/1962 12:00:00 AM
... Bendigo... Town Hall.... High St... tram 3...Colour print of Bendigo SECV Bendigo tram 3 travelling High St Eaglehawk towards the Eaglehawk Terminus. ...Eaglehawk Bendigo Town Hall. High St tram 3 On rear top left hand corner "3" Colour print of Bendigo SECV Bendigo tram 3 travelling High St Eaglehawk towards the Eaglehawk Terminus. ...Colour print of Bendigo SECV Bendigo tram 3 travelling High St Eaglehawk towards the Eaglehawk Terminus. Photo taken after the tram has passed the photographer. On Kodacolor paper with a Kodak red ink stamp on rear. Tram has dash canopy lights, but no large white strip under the drivers windows. Photo not dated but appears to be at about the same time as 977, 21.11.1962. Has Eaglehawk Town Hall and Post office in background and shops along the south side of High St. Tram showing destination of "Eaglehawk". Tram has White Horse Whiskey ad and another on front dash panel and two roof ads. In photo are advertisements for "Hutton's Bacon" and "Sennett's Ice Cream" on shop roof advertisements.On rear top left hand corner "3"eaglehawk, bendigo, town hall., high st, tram 3 -
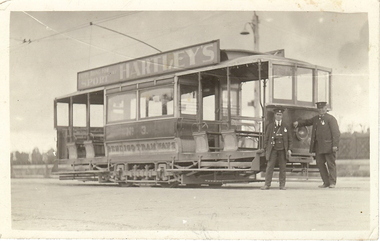 Bendigo Historical Society Inc.
Photograph - BASIL MILLER COLLECTION: ELECTRIC TRAM NO. 3
... Black and white postcard of Bendigo Tramways Electric Tram No. 3 showing a driver and a conductor. ...BHS Collection PERSON Individual basil miller Kodak Australia Black and white postcard of Bendigo Tramways Electric Tram No. 3 showing a driver and a conductor. ...BHS CollectionBlack and white postcard of Bendigo Tramways Electric Tram No. 3 showing a driver and a conductor. Advertising 'Hartley's Everything for Sport'. Taken in front of Bendigo Cemetery, Carpenter St, Bendigo.Kodak Australiaperson, individual, basil miller -
 Bendigo Historical Society Inc.
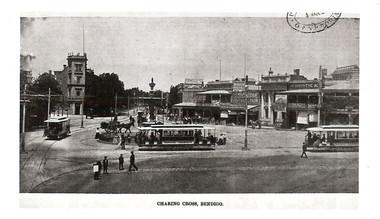
Photograph - BASIL MILLER COLLECTION: PHOTOGRAPHIC COPY OF CHARING CROSS
... Clearly visible Warren's Viewpoint Hotel, Bendigo Co-operative. 3 Trams at Alexandra Fountain. On back of photo written in blue ink Bendigo. ...Clearly visible Warren's Viewpoint Hotel, Bendigo Co-operative. 3 Trams at Alexandra Fountain. On back of photo written in blue ink Bendigo. ...BHs CollectionBlack and white photo copy of Charing Cross, looking towards City Family Hotel and Viewpoint. Clearly visible Warren's Viewpoint Hotel, Bendigo Co-operative. 3 Trams at Alexandra Fountain. On back of photo written in blue ink Bendigo. Trams at Fountain. Middle one is a 3-window saloon. - Note its body differences. Copied from ''The Bendigonian'', 3/1/05. Stamped on back 'K.S.Kings Collection' S-A.776.person, individual, basil miller -
 Melbourne Tram Museum
Album - A collection of, John Fitzsimons, "Tickets"
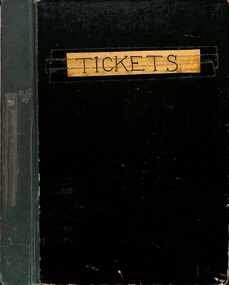
... Contains the following tickets showing the style of tickets issued by various public transport operators. 3 pages of MMTB Imperial currency tickets 1 page of Pensioner concessions 3 pages of decimal currency tickets including dual currency type 1 page of Ultimate tickets - type sold at safety zones by Zone sellers 1 page of PMG prepaid tickets, special supplementary journal, machine bus ticket 1 page of PMG prepaid Section tickets, 1 page of incapacitated section tickets 2 pages of Hospital tickets Scholar's Concession ticket issued to the donor, Swimming class tickets and a Police ticket. 2 pages of unidentified tickets SPER National Park line 1 page of Adelaide tickets 4 pages of Provincial tramway tickets, dual currency including a Bendigo battery tram ticket. 3 pages of Brisbane tram and bus tickets 2 pages of Launceston bus tickets - 1968 1 page of Hobart tickets VR motor coach (bus) ticket 1 page of Perth tram tickets A TAA ground transport ticket San Francisco ticket, Hong Kong tickets, 2 pages of recovered MMTB tickets from behind tramcar seats - imperial currency and one MMTB Supplementary Running Journal....Contains the following tickets showing the style of tickets issued by various public transport operators. 3 pages of MMTB Imperial currency tickets 1 page of Pensioner concessions 3 pages of decimal currency tickets including dual currency type 1 page of Ultimate tickets - type sold at safety zones by Zone sellers 1 page of PMG prepaid tickets, special supplementary journal, machine bus ticket 1 page of PMG prepaid Section tickets, 1 page of incapacitated section tickets 2 pages of Hospital tickets Scholar's Concession ticket issued to the donor, Swimming class tickets and a Police ticket. 2 pages of unidentified tickets SPER National Park line 1 page of Adelaide tickets 4 pages of Provincial tramway tickets, dual currency including a Bendigo battery tram ticket. 3 pages of Brisbane tram and bus tickets 2 pages of Launceston bus tickets - 1968 1 page of Hobart tickets VR motor coach (bus) ticket 1 page of Perth tram tickets A TAA ground transport ticket San Francisco ticket, Hong Kong tickets, 2 pages of recovered MMTB tickets from behind tramcar seats - imperial currency and one MMTB Supplementary Running Journal. ...Contains the following tickets showing the style of tickets issued by various public transport operators. 3 pages of MMTB Imperial currency tickets 1 page of Pensioner concessions 3 pages of decimal currency tickets including dual currency type 1 page of Ultimate tickets - type sold at safety zones by Zone sellers 1 page of PMG prepaid tickets, special supplementary journal, machine bus ticket 1 page of PMG prepaid Section tickets, 1 page of incapacitated section tickets 2 pages of Hospital tickets Scholar's Concession ticket issued to the donor, Swimming class tickets and a Police ticket. 2 pages of unidentified tickets SPER National Park line 1 page of Adelaide tickets 4 pages of Provincial tramway tickets, dual currency including a Bendigo battery tram ticket. 3 pages of Brisbane tram and bus tickets 2 pages of Launceston bus tickets - 1968 1 page of Hobart tickets VR motor coach (bus) ticket 1 page of Perth tram tickets A TAA ground transport ticket San Francisco ticket, Hong Kong tickets, 2 pages of recovered MMTB tickets from behind tramcar seats - imperial currency and one MMTB Supplementary Running Journal.Yields information about the style of tickets issued by Australian Public Transport systems.Album - heavy black/green card covers containing 35 ruled quarto sheets secured with an Arnos metal binder with the title "Tickets" taped to the front of the object.tramways, melbourne, tickets, ballarat, bendigo, adelaide, launceston, hobart, brisbane, hong kong, taa airlines, perth, san francsico, sper, pmg -
 Bendigo Historical Society Inc.
Postcard - Alice McGregor Postcard Collection, 1900 - 1920
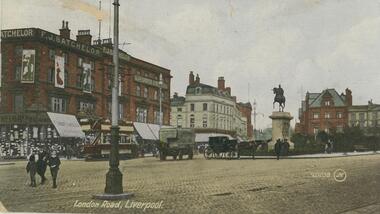
... Bendigo Buried: Kangaroo Flat Cemetery See additional research. Postcard Album of Alice McGregor contained 86 post cards. POSTCARD Collector Alice McGregor Addressed to A.M. Davidson Esq., c/o Teachers' Training College, Cumberland, Dunedin, New Zealand Sender - unknown Dated 1/2/14 Postcard Album of Alice McGregor containing 86 post cards. See 1400. Colour photo of London Road, Liverpool, England. Equestrian statue in the Square. Two horse drawn vehicles and a tram. 3 ...Alice McGREGOR Born: 1908; unknown parents. Possibly adopted by the Salter family? Electoral Roll 1936: Highland Terrace Kangaroo Flat. Alice Mary Salter and William Robert Salter living together; presumed to be sister and brother. William Robert Salter was killed in a MVA in Bendigo in 1937 aged 26. In Victoria in 1938, Alice Mary Salter married James Thomas McGregor (born Victoria 1917, died Victoria 1983, buried Fawkner Cemetery) Lived: 1968; 22 Wade Street Golden Square Alice McGregor Died: 1999 aged 91 at Anne Caudle Centre, Bendigo Buried: Kangaroo Flat Cemetery See additional research. Postcard Album of Alice McGregor contained 86 post cards.Postcard Album of Alice McGregor containing 86 post cards. See 1400. Colour photo of London Road, Liverpool, England. Equestrian statue in the Square. Two horse drawn vehicles and a tram. 3 figures at bottom left. Addressed to A.M. Davidson Esq., c/o Teachers' Training College, Cumberland, Dunedin, New Zealand Sender - unknown Dated 1/2/14 postcard, collector, alice mcgregor -
 Bendigo Historical Society Inc.
Book - Last Tram at 11, 2008
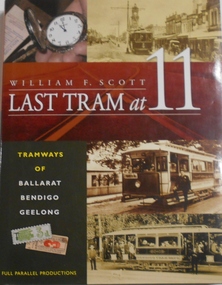
... 'Last Tram at 11' by William F Scott. Tramways of Ballarat, Bendigo and Geelong. Front of dust jacket has 3 B&W photos of trams. ...Tramways Bendigo Tramways Ballarat Tramways Geelong Hard cover book of 198 pages. 'Last Tram at 11' by William F Scott. Tramways of Ballarat, Bendigo and Geelong. Front of dust jacket has 3 ...Hard cover book of 198 pages. 'Last Tram at 11' by William F Scott. Tramways of Ballarat, Bendigo and Geelong. Front of dust jacket has 3 B&W photos of trams. Rear of dust cover has a short intro by Professor Weston Bate. Illustrated with maps and colour and B&W photos of trams. Published by Full Parallel Productions, Clunes, Victoria in 2008. Printed by 1010 Printing International Ltd, Hong Kongtramways bendigo, tramways ballarat, tramways geelong -
 Bendigo Historical Society Inc.
Document - Price Lists, 1922-24
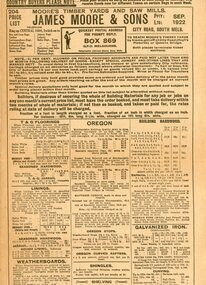
... trams and even what is believed to be the first commercially produced airplane propeller. The site also included a nail making factory. These goods were sold throughout the state before the company went into voluntary liquidation in 1935. James Louis Moore was born in Ireland 12/8/1843 and died in London 3/2/1913 before his body was returned to Melbourne for burial in the family vault in April 1913. The business continued under his sons Walter, Louis and Arthur. Another son, William had disappeared in 1906. history bendigo ...James Moore and Sons had a timber and saw mill at City Rd., South Melbourne. They employed over 600 men with a wide range of skills, turning out milled timber for building, household items and other cabinetry, the wooden bodies of trams and even what is believed to be the first commercially produced airplane propeller. The site also included a nail making factory. These goods were sold throughout the state before the company went into voluntary liquidation in 1935. James Louis Moore was born in Ireland 12/8/1843 and died in London 3/2/1913 before his body was returned to Melbourne for burial in the family vault in April 1913. The business continued under his sons Walter, Louis and Arthur. Another son, William had disappeared in 1906.James Moore and Sons Timber Yard and Saw Mills Price List for September 1922 and April 1924 listing prices for floorings; Oregon; building hardwood; galvanised iron; linings etc. Four pages.history, bendigo, abbott collection, james moore and sons -
 Bendigo Historical Society Inc.
Administrative record - National Trust Collection: Bendigo Joss House Tram Stop, 1968
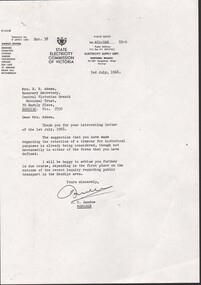
... National Trust Collection: Bendigo Joss House Tram Stop 3219 A -letter 3 Jul 1968 - between State Electricity Commission of Victoria and National Trust, Central Victorian Branch, noting the retention of the tramcar for historical purposes is under consideration 3219 B - 9 Feb 1971 - article from the Bendigo Advertiser, noting that the Bendigo City Council and the Eaglehawk Borough Counicl will request that one tram from Eaglehawk and one from each type for Bendigo be retained of the Bendigo Depot for five years following removal of the tram service 3219 CA - 23 March 1971 - between State Electricity Commission of Victoria and National Trust, Victorian Branch, concerns proposals for the preservation of a section of the electric tramway systems at both Ballarat and Bendigo 3219 CB - 9 Mar 1971 - letter from the National Trust, Central Victorian Branch, seeking advice and clarification on the extent to which the State Electricity Commission would be involved in the preservation of segments of the tramways system in Ballarat and Bendigo. 3219 D undated, foolscap typed sheet from The Tramway Museum of Victoria Ltd. entitled "You wish to help part of Victoria's Tramway History", covering Bendigo, Ballarat and Geelong tramways system 3219 E - 3 June 1971 - correspondence from NT Victoria and, referencing 23/03/1971 letter and Tramways flyer; noting a "forlorn hope" that retention of trams in Ballarat and Bendigo will not occur due to maintenance costs and operating costs being the "killers". 3219 F - 29 March 1971 - letter from the between State Electricity Commission of Victoria and National Trust, Central Victorian Branch, to SEC noting the retention of the historic trams in Bendigo and Ballarat will be taken up by the NT Branches in these areas. 3219 G - 30 Sept 1982 memorandum from National Trust, Central Victorian Branch, requesting to be notified of the Trust's Council on the decision regarding the tram stopover at the Bendigo Joss House 32198 H - 11 Oct 1982 - heritage Week 1983 / Joss House Trams, Bendigo 3219 I - 26 Oct 1982 - Note for file: The Central Victorian Branch seeks clarification in regard to the problem between the Bendigo Trust and the Bendigo Branch of the National Trust over the stopping of the "talking" tram at the Joss House 3219 J - 18 November 1982 - file note: discussions with Daryl McClure re trams. ...Chinese society on Bendigo Goldfields Bendigo Joss House Bendigo Joss House Chinese on the Bendigo Gold fields National Trust Collection: Bendigo Joss House Tram Stop 3219 A -letter 3 Jul 1968 - between State Electricity Commission of Victoria and National Trust, Central Victorian Branch, noting the retention of the tramcar for historical purposes is under consideration 3219 B - 9 Feb 1971 - article from the Bendigo Advertiser, noting that the Bendigo City Council and the Eaglehawk Borough Counicl will request that one tram from Eaglehawk and one from each type for Bendigo be retained of the Bendigo Depot for five years following removal of the tram service 3219 CA - 23 March 1971 - between State Electricity Commission of Victoria and National Trust, Victorian Branch, concerns proposals for the preservation of a section of the electric tramway systems at both Ballarat and Bendigo 3219 CB - 9 Mar 1971 - letter from the National Trust, Central Victorian Branch, seeking advice and clarification on the extent to which the State Electricity Commission would be involved in the preservation of segments of the tramways system in Ballarat and Bendigo. 3219 D undated, foolscap typed sheet from The Tramway Museum of Victoria Ltd. entitled "You wish to help part of Victoria's Tramway History", covering Bendigo, Ballarat and Geelong tramways system 3219 E - 3 June 1971 - correspondence from NT Victoria and, referencing 23/03/1971 letter and Tramways flyer; noting a "forlorn hope" that retention of trams in Ballarat and Bendigo will not occur due to maintenance costs and operating costs being the "killers". 3219 F - 29 March 1971 - letter from the between State Electricity Commission of Victoria and National Trust, Central Victorian Branch, to SEC noting the retention of the historic trams in Bendigo and Ballarat will be taken up by the NT Branches in these areas. 3219 G - 30 Sept 1982 memorandum from National Trust, Central Victorian Branch, requesting to be notified of the Trust's Council on the decision regarding the tram stopover at the Bendigo Joss House 32198 H - 11 Oct 1982 - heritage Week 1983 / Joss House Trams, Bendigo 3219 I - 26 Oct 1982 - Note for file: The Central Victorian Branch seeks clarification in regard to the problem between the Bendigo Trust and the Bendigo Branch of the National Trust over the stopping of the "talking" tram at the Joss House 3219 J - 18 November 1982 - file note: discussions with Daryl McClure re trams. ...Chinese society on Bendigo Goldfields Bendigo Joss HouseNational Trust Collection: Bendigo Joss House Tram Stop 3219 A -letter 3 Jul 1968 - between State Electricity Commission of Victoria and National Trust, Central Victorian Branch, noting the retention of the tramcar for historical purposes is under consideration 3219 B - 9 Feb 1971 - article from the Bendigo Advertiser, noting that the Bendigo City Council and the Eaglehawk Borough Counicl will request that one tram from Eaglehawk and one from each type for Bendigo be retained of the Bendigo Depot for five years following removal of the tram service 3219 CA - 23 March 1971 - between State Electricity Commission of Victoria and National Trust, Victorian Branch, concerns proposals for the preservation of a section of the electric tramway systems at both Ballarat and Bendigo 3219 CB - 9 Mar 1971 - letter from the National Trust, Central Victorian Branch, seeking advice and clarification on the extent to which the State Electricity Commission would be involved in the preservation of segments of the tramways system in Ballarat and Bendigo. 3219 D undated, foolscap typed sheet from The Tramway Museum of Victoria Ltd. entitled "You wish to help part of Victoria's Tramway History", covering Bendigo, Ballarat and Geelong tramways system 3219 E - 3 June 1971 - correspondence from NT Victoria and, referencing 23/03/1971 letter and Tramways flyer; noting a "forlorn hope" that retention of trams in Ballarat and Bendigo will not occur due to maintenance costs and operating costs being the "killers". 3219 F - 29 March 1971 - letter from the between State Electricity Commission of Victoria and National Trust, Central Victorian Branch, to SEC noting the retention of the historic trams in Bendigo and Ballarat will be taken up by the NT Branches in these areas. 3219 G - 30 Sept 1982 memorandum from National Trust, Central Victorian Branch, requesting to be notified of the Trust's Council on the decision regarding the tram stopover at the Bendigo Joss House 32198 H - 11 Oct 1982 - heritage Week 1983 / Joss House Trams, Bendigo 3219 I - 26 Oct 1982 - Note for file: The Central Victorian Branch seeks clarification in regard to the problem between the Bendigo Trust and the Bendigo Branch of the National Trust over the stopping of the "talking" tram at the Joss House 3219 J - 18 November 1982 - file note: discussions with Daryl McClure re trams. Discussions "were not very conclusive". 32198 K - Bendigo Advertiser 19 November 1983 - The Bendigo Trust to meet with the NT Central Victorian Branch to resolve issues preventing vintage tram stopover at the Chinese Joss House 3219 L - 4 Mat 1988 - The Bendigo Trust resolved to meet with three representatives of the NT Central Victoria Branch at the next meeting on 23 May 3219 M - undated pie charts of attendance statistics for the Chinese Joss House, Bendigobendigo joss house, chinese on the bendigo gold fields -
 Bendigo Historical Society Inc.
Photograph - Robert Green Collection - Photos of Bendigo Tramways - Sheet 3 of 8, 1960s
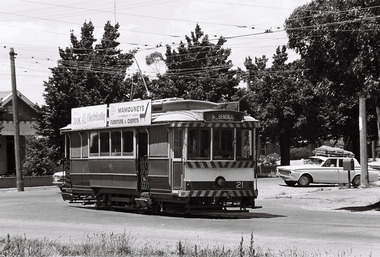
... Photos: 11147.3a No 21 turns out of McRae St into Nolan Street, on its way to North Bendigo 11147.3b No 5 on the way to Eaglehawk 11147.3c No 21 leaves Charing Cross towards North Bendigo, City Family Hotel in the background 11147.3d No 18 completes its run from Eaglehawk at the fountain, and is returning to the depot 11147.3e No 18 turns from McRae St into Tramway Avenue and the depot 11147.3f No 18 turns from McRae St into Tramway Avenue and the depot 11147.3g No 28 at the depot 11147.3h No 6 on its way to Golden Square 11147.3i No 6 at the Golden square Terminus, High and Maple Streets 11147.3j No 25 from Quarry Hill at the intersection of Wills and Mitchell Street 11147.3k No 2 leaves the Mitchell St railway bridge into Carpenter Street on its way to Quarry Hill 11147.3l No 21 comes into the Golden square Terminus, steeple of the Methodist church in the background 11147.3m Tram heading along McRae St in front of the School of Mines 11147.3n Tram heading along McRae St towards Pall Mall in front of the School of Mines 11147.o No 24 heading to Eaglehawk at the corner of Barnard and Forest Streets 11147.3p Three trams lined up in the depot, possible early morning or evening 11147.3q Tram No 21 at the North Bendigo Terminus, possible early morning or evening 11147.3s Tram leaving the Eaglehawk Town Hall in the dark 11147.3t View up Pall Mall towards the fountain from Mundy Street intersection 11147.3u Birney Car No 28 Special leaving the depot, crossing the Back Creek 11147.3w Birney Car No 28 Special at Eaglehawk Canterbury Park 11147.3x No 28 Birney Car Special hading to Eaglehawk at Iron Bark, just past the Marong Road turn-off at Iron Bark 11147.3y No 28 Birney Car Special heading to Eaglehawk at Long Gully, opposite the Manchester Arms Hotel 11147.3z No 28 Birney Car Special 11147aa No 28 Birney Car Special comes into the Eaglehawk Terminus 11147ab No 28 Birney Car Special heads down view St past the Rifle Brigade Hotel 11147ac No 28 Birney Car Special heads down Pall Mall past the Court House Hotel 11147.3ad No 5 to Eaglehawk runs up McCrae St in front of the School of Mines 11147.3ae No 28 Birney Car passes the Mundy St intersection with McRae St heading to the fountain 11147.3af No 3 passes the Mundy St intersection with McRae St heading to Eaglehawk 11147.3ah Tram passes the School of Mines in McRae St heading to the fountain 11147.3ai Birney Car Tram passes the School of Mines in McRae St heading to the fountain 11147.3aj Tramways High Electrical termination box Photograph Robert Green Collection - Photos of Bendigo Tramways - Sheet 3 of 8 ...This collection contains eight archive sheets (Sheet 1 to Sheet 8) of strips of original 35mm black and white negatives of photographs taken during the 1960s and early 1970s by Robert Green, of the Bendigo State Electricty Commission of Victoria Tramways prior to their abandonment The collection also includes two archive quality sheets (Sheet A and Sheet B) of original 35mm colour slides taken by Robert Green during the same period. Sheet B also contains one slide taken by Robert's friend Keigh S King (1928-2019) who was the author of the book 'The Bendigo Tramways an illustrated history, published by the Australian Railway Historical Society Victorian Division Melbourne in February 1972; BHS Item no. 5052. The collection also includes one USB stick which contains images of all photographs described above, except for one colour slide taken by Keith S Kings. Sixteen black and white prints from the images are also included.Robert Green Collection, this item contains 35 Black and White Negatives of the trams at various locations around Bendigo. Photos: 11147.3a No 21 turns out of McRae St into Nolan Street, on its way to North Bendigo 11147.3b No 5 on the way to Eaglehawk 11147.3c No 21 leaves Charing Cross towards North Bendigo, City Family Hotel in the background 11147.3d No 18 completes its run from Eaglehawk at the fountain, and is returning to the depot 11147.3e No 18 turns from McRae St into Tramway Avenue and the depot 11147.3f No 18 turns from McRae St into Tramway Avenue and the depot 11147.3g No 28 at the depot 11147.3h No 6 on its way to Golden Square 11147.3i No 6 at the Golden square Terminus, High and Maple Streets 11147.3j No 25 from Quarry Hill at the intersection of Wills and Mitchell Street 11147.3k No 2 leaves the Mitchell St railway bridge into Carpenter Street on its way to Quarry Hill 11147.3l No 21 comes into the Golden square Terminus, steeple of the Methodist church in the background 11147.3m Tram heading along McRae St in front of the School of Mines 11147.3n Tram heading along McRae St towards Pall Mall in front of the School of Mines 11147.o No 24 heading to Eaglehawk at the corner of Barnard and Forest Streets 11147.3p Three trams lined up in the depot, possible early morning or evening 11147.3q Tram No 21 at the North Bendigo Terminus, possible early morning or evening 11147.3s Tram leaving the Eaglehawk Town Hall in the dark 11147.3t View up Pall Mall towards the fountain from Mundy Street intersection 11147.3u Birney Car No 28 Special leaving the depot, crossing the Back Creek 11147.3w Birney Car No 28 Special at Eaglehawk Canterbury Park 11147.3x No 28 Birney Car Special hading to Eaglehawk at Iron Bark, just past the Marong Road turn-off at Iron Bark 11147.3y No 28 Birney Car Special heading to Eaglehawk at Long Gully, opposite the Manchester Arms Hotel 11147.3z No 28 Birney Car Special 11147aa No 28 Birney Car Special comes into the Eaglehawk Terminus 11147ab No 28 Birney Car Special heads down view St past the Rifle Brigade Hotel 11147ac No 28 Birney Car Special heads down Pall Mall past the Court House Hotel 11147.3ad No 5 to Eaglehawk runs up McCrae St in front of the School of Mines 11147.3ae No 28 Birney Car passes the Mundy St intersection with McRae St heading to the fountain 11147.3af No 3 passes the Mundy St intersection with McRae St heading to Eaglehawk 11147.3ah Tram passes the School of Mines in McRae St heading to the fountain 11147.3ai Birney Car Tram passes the School of Mines in McRae St heading to the fountain 11147.3aj Tramways High Electrical termination boxkeith s king, bendigo, trams, robert green -
 Bendigo Historical Society Inc.
Photograph - Robert Green Collection - Photos of Bendigo Tramways - Sheet 4 of 8, 1960s
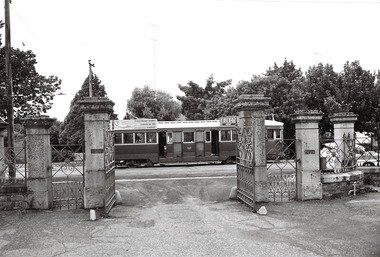
... Photos: 11147.4a Tram at Carpenter St Quarry Hill, Cemetery Gates Terminus 11147.4b Tram and Conductor at Carpenter St Quarry Hill, Cemetery Gates Terminus 11147.4c Overhead Pole, wires and tram stop sign; and end of section sign 11147.4d Overhead Pole, wires and tram stop sign; and end of section sign, in View Street 11147.4e Quarry Hill, Eaglehawk and Golden Square Trams meeting at the Fountain, Charing Cross 11147.4f Quarry Hill, Eaglehawk trams and overhead sign at the fountain roundabout 11147.4g Tram line Point at the Fountain 11147.4h All lines cross at the fountain 11147.4i Turning Caution sign at Tramways Avenue (to the depot) and McRae Street 11147.4j Trams stop by request sign 11147.4k No 4 at the intersection of Eaglehawk and Havilah Roads, Long Gully 11147.4l No 4 to Quarry Hill picking up passengers in Eaglehawk Road 11147.4m No 30 Birney Car heading to Golden Square 11147.4n Birney Car crossing the creek 11147.4o Birney Car No 30 leaving Golden Square in High Street 11147.4p No 3 heading to Eaglehawk 11147.4q No 25 heading to Quarry Hill in Carpenter St possibly 11147.4r Three trams at the loop in Carpenter St Quarry Hill 11147.4s Two trams at the Quarry Hill Terminus Carpenter St 11147.4t Two trams at Canterbury Park Eaglehawk 11147.4u Birney Car 29 Special at Eaglehawk Terminus 11147.4v Passing No 26 at Eaglehawk Photograph Robert Green Collection - Photos of Bendigo Tramways - Sheet 4 of 8 ...This collection contains eight archive sheets (Sheet 1 to Sheet 8) of strips of original 35mm black and white negatives of photographs taken during the 1960s and early 1970s by Robert Green, of the Bendigo State Electricty Commission of Victoria Tramways prior to their abandonment The collection also includes two archive quality sheets (Sheet A and Sheet B) of original 35mm colour slides taken by Robert Green during the same period. Sheet B also contains one slide taken by Robert's friend Keigh S King (1928-2019) who was the author of the book 'The Bendigo Tramways an illustrated history, published by the Australian Railway Historical Society Victorian Division Melbourne in February 1972; BHS Item no. 5052. The collection also includes one USB stick which contains images of all photographs described above, except for one colour slide taken by Keith S Kings. Sixteen black and white prints from the images are also included.Robert Green Collection, this item contains 22 Black and White Negatives of the trams at various locations around Bendigo. Photos: 11147.4a Tram at Carpenter St Quarry Hill, Cemetery Gates Terminus 11147.4b Tram and Conductor at Carpenter St Quarry Hill, Cemetery Gates Terminus 11147.4c Overhead Pole, wires and tram stop sign; and end of section sign 11147.4d Overhead Pole, wires and tram stop sign; and end of section sign, in View Street 11147.4e Quarry Hill, Eaglehawk and Golden Square Trams meeting at the Fountain, Charing Cross 11147.4f Quarry Hill, Eaglehawk trams and overhead sign at the fountain roundabout 11147.4g Tram line Point at the Fountain 11147.4h All lines cross at the fountain 11147.4i Turning Caution sign at Tramways Avenue (to the depot) and McRae Street 11147.4j Trams stop by request sign 11147.4k No 4 at the intersection of Eaglehawk and Havilah Roads, Long Gully 11147.4l No 4 to Quarry Hill picking up passengers in Eaglehawk Road 11147.4m No 30 Birney Car heading to Golden Square 11147.4n Birney Car crossing the creek 11147.4o Birney Car No 30 leaving Golden Square in High Street 11147.4p No 3 heading to Eaglehawk 11147.4q No 25 heading to Quarry Hill in Carpenter St possibly 11147.4r Three trams at the loop in Carpenter St Quarry Hill 11147.4s Two trams at the Quarry Hill Terminus Carpenter St 11147.4t Two trams at Canterbury Park Eaglehawk 11147.4u Birney Car 29 Special at Eaglehawk Terminus 11147.4v Passing No 26 at Eaglehawkkeith s king, bendigo, trams, robert green -
 Bendigo Historical Society Inc.
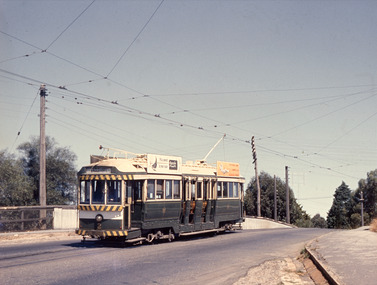
Photograph - Robert Green Collection - Photos of Bendigo Tramways - Sheet A of 10, 1972
... trams at various locations around Bendigo. Photos: 11147.9a No 2 to Eaglehawk leaves Carpenter Street, crosses the railway line and enters Mitchell Street 11147.9b Two Birney Cars ready to depart in Pall Mall 11147.9c Nos 30 and 28 Birney Cars ready to depart in Pall Mall 11147.9d No 30 to North Bendigo turns off Weeroona Avenue into Caledonia St at the Gas Works 11147.9e No 5 comes up View Street past Dudley House and the Masonic Hall 11147.9f No 28 Birney Car 11147.9g No 3 comes into Eaglehawk 11147.9h Nos 2 and 3 cross over at the Eaglehawk Road and Cuneen Streets Loop in Long Gully 11147.9j No 30 Birney Car crosses the Munday St and Pall Mall intersection heading for the fountain 11147.9k No 28 Birney Car comes down Nolan Street past the Lake Weeroona 11147.9l No 30 Birney Car in the darkness 11147.9m The Scrubber Car comes up Mitchell Street 11147.9n The Scrubber Car 11147.9o No 18 at Eaglehawk, Bendigo T.M.S of Vic. ...bendigo trams robert green Robert Green Collection, this item contains Colour Slides of the trams at various locations around Bendigo. Photos: 11147.9a No 2 to Eaglehawk leaves Carpenter Street, crosses the railway line and enters Mitchell Street 11147.9b Two Birney Cars ready to depart in Pall Mall 11147.9c Nos 30 and 28 Birney Cars ready to depart in Pall Mall 11147.9d No 30 to North Bendigo turns off Weeroona Avenue into Caledonia St at the Gas Works 11147.9e No 5 comes up View Street past Dudley House and the Masonic Hall 11147.9f No 28 Birney Car 11147.9g No 3 comes into Eaglehawk 11147.9h Nos 2 and 3 cross over at the Eaglehawk Road and Cuneen Streets Loop in Long Gully 11147.9j No 30 Birney Car crosses the Munday St and Pall Mall intersection heading for the fountain 11147.9k No 28 Birney Car comes down Nolan Street past the Lake Weeroona 11147.9l No 30 Birney Car in the darkness 11147.9m The Scrubber Car comes up Mitchell Street 11147.9n The Scrubber Car 11147.9o No 18 at Eaglehawk, Bendigo T.M.S of Vic. ...This collection contains eight archive sheets (Sheet 1 to Sheet 8) of strips of original 35mm black and white negatives of photographs taken during the 1960s and early 1970s by Robert Green, of the Bendigo State Electricty Commission of Victoria Tramways prior to their abandonment The collection also includes two archive quality sheets (Sheet A and Sheet B) of original 35mm colour slides taken by Robert Green during the same period. Sheet B also contains one slide taken by Robert's friend Keigh S King (1928-2019) who was the author of the book 'The Bendigo Tramways an illustrated history, published by the Australian Railway Historical Society Victorian Division Melbourne in February 1972; BHS Item no. 5052. The collection also includes one USB stick which contains images of all photographs described above, except for one colour slide taken by Keith S Kings. Sixteen black and white prints from the images are also included.Robert Green Collection, this item contains Colour Slides of the trams at various locations around Bendigo. Photos: 11147.9a No 2 to Eaglehawk leaves Carpenter Street, crosses the railway line and enters Mitchell Street 11147.9b Two Birney Cars ready to depart in Pall Mall 11147.9c Nos 30 and 28 Birney Cars ready to depart in Pall Mall 11147.9d No 30 to North Bendigo turns off Weeroona Avenue into Caledonia St at the Gas Works 11147.9e No 5 comes up View Street past Dudley House and the Masonic Hall 11147.9f No 28 Birney Car 11147.9g No 3 comes into Eaglehawk 11147.9h Nos 2 and 3 cross over at the Eaglehawk Road and Cuneen Streets Loop in Long Gully 11147.9j No 30 Birney Car crosses the Munday St and Pall Mall intersection heading for the fountain 11147.9k No 28 Birney Car comes down Nolan Street past the Lake Weeroona 11147.9l No 30 Birney Car in the darkness 11147.9m The Scrubber Car comes up Mitchell Street 11147.9n The Scrubber Car 11147.9o No 18 at Eaglehawk, Bendigo T.M.S of Vic. Ltd Photo, Sat 15 April 1972. Robert Green and John Fitzsimons holding "Last Tram Mail" 1/125 f8. Taken at 9am on the second last day of the trams.keith s king, bendigo, trams, robert green -
 Bendigo Historical Society Inc.
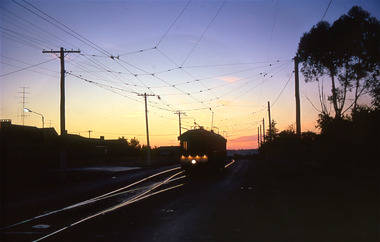
Photograph - Robert Green Collection - Photos of Bendigo Tramways - Sheet B of 10, 1960s
... Bendigo. Photos: 11147.10a Tram in the darkness, sunset or morning 11147.10b Coming off the railway Line bridge towards Eaglehawk 11147.10c Coming on to the railway Line bridge from Eaglehawk 11147.10d The Quarry Hill and Eaglehawk trams waiting to leave the fountain 11147.10e No 18 from Quarry Hill arrives at the fountain 11147.10f Getting ready to leave the fountain for Eaglehawk 11147.10g Policeman on point duty and tram at the fountain, Charing Cross 11147.10h Eaglehawk and Quarry Hill trams at the fountain 11147.10i Policeman on point duty and tram at the fountain, Charing Cross, looking down Pall Mall 11147.10j No 3 roars up View Street at the corner of McKenzie Street 11147.10k From the Rifle Brigade Hotel the Eaglehawk tram comes past the Queen Elizabeth Oval down View Street 11147.10l From the Rifle Brigade Hotel the Eaglehawk tram comes past the Queen Elizabeth Oval down View Street 11147.10m From the Rifle Brigade Hotel the Eaglehawk tram up View Street opposite the Masonic Hall 11147.10n From the Rifle Brigade Hotel the Eaglehawk tram goes past the Queen Elizabeth Oval up View Street 11147.10o From the Rifle Brigade Hotel the Eaglehawk tram comes up View Street opposite the Masonic Hall 11147.10p From the Victoria Hotel Balcony, the Eaglehawk No 18 arrives 11147.10q From the Victoria Hotel Balcony, the Eaglehawk No 18 departs towards Bendigo 11147.10r Tram No 2 arrives into Eaglehawk 11147.10s Tram No 2 heads to Quarry Hill from California Gully (Probable) 11147.1t Tram on its way out of Long Gully along Mt Korong (Eaglehawk) Road towards Eaglehawk. ...Bendigo. Photos: 11147.10a Tram in the darkness, sunset or morning 11147.10b Coming off the railway Line bridge towards Eaglehawk 11147.10c Coming on to the railway Line bridge from Eaglehawk 11147.10d The Quarry Hill and Eaglehawk trams waiting to leave the fountain 11147.10e No 18 from Quarry Hill arrives at the fountain 11147.10f Getting ready to leave the fountain for Eaglehawk 11147.10g Policeman on point duty and tram at the fountain, Charing Cross 11147.10h Eaglehawk and Quarry Hill trams at the fountain 11147.10i Policeman on point duty and tram at the fountain, Charing Cross, looking down Pall Mall 11147.10j No 3 roars up View Street at the corner of McKenzie Street 11147.10k From the Rifle Brigade Hotel the Eaglehawk tram comes past the Queen Elizabeth Oval down View Street 11147.10l From the Rifle Brigade Hotel the Eaglehawk tram comes past the Queen Elizabeth Oval down View Street 11147.10m From the Rifle Brigade Hotel the Eaglehawk tram up View Street opposite the Masonic Hall 11147.10n From the Rifle Brigade Hotel the Eaglehawk tram goes past the Queen Elizabeth Oval up View Street 11147.10o From the Rifle Brigade Hotel the Eaglehawk tram comes up View Street opposite the Masonic Hall 11147.10p From the Victoria Hotel Balcony, the Eaglehawk No 18 arrives 11147.10q From the Victoria Hotel Balcony, the Eaglehawk No 18 departs towards Bendigo 11147.10r Tram No 2 arrives into Eaglehawk 11147.10s Tram No 2 heads to Quarry Hill from California Gully (Probable) 11147.1t Tram on its way out of Long Gully along Mt Korong (Eaglehawk) Road towards Eaglehawk. ...This collection contains eight archive sheets (Sheet 1 to Sheet 8) of strips of original 35mm black and white negatives of photographs taken during the 1960s and early 1970s by Robert Green, of the Bendigo State Electricty Commission of Victoria Tramways prior to their abandonment The collection also includes two archive quality sheets (Sheet A and Sheet B) of original 35mm colour slides taken by Robert Green during the same period. Sheet B also contains one slide taken by Robert's friend Keigh S King (1928-2019) who was the author of the book 'The Bendigo Tramways an illustrated history, published by the Australian Railway Historical Society Victorian Division Melbourne in February 1972; BHS Item no. 5052. The collection also includes one USB stick which contains images of all photographs described above, except for one colour slide taken by Keith S Kings. Sixteen black and white prints from the images are also included.Robert Green Collection, this item contains 20 Colour Slides of the trams at various locations around Bendigo. Photos: 11147.10a Tram in the darkness, sunset or morning 11147.10b Coming off the railway Line bridge towards Eaglehawk 11147.10c Coming on to the railway Line bridge from Eaglehawk 11147.10d The Quarry Hill and Eaglehawk trams waiting to leave the fountain 11147.10e No 18 from Quarry Hill arrives at the fountain 11147.10f Getting ready to leave the fountain for Eaglehawk 11147.10g Policeman on point duty and tram at the fountain, Charing Cross 11147.10h Eaglehawk and Quarry Hill trams at the fountain 11147.10i Policeman on point duty and tram at the fountain, Charing Cross, looking down Pall Mall 11147.10j No 3 roars up View Street at the corner of McKenzie Street 11147.10k From the Rifle Brigade Hotel the Eaglehawk tram comes past the Queen Elizabeth Oval down View Street 11147.10l From the Rifle Brigade Hotel the Eaglehawk tram comes past the Queen Elizabeth Oval down View Street 11147.10m From the Rifle Brigade Hotel the Eaglehawk tram up View Street opposite the Masonic Hall 11147.10n From the Rifle Brigade Hotel the Eaglehawk tram goes past the Queen Elizabeth Oval up View Street 11147.10o From the Rifle Brigade Hotel the Eaglehawk tram comes up View Street opposite the Masonic Hall 11147.10p From the Victoria Hotel Balcony, the Eaglehawk No 18 arrives 11147.10q From the Victoria Hotel Balcony, the Eaglehawk No 18 departs towards Bendigo 11147.10r Tram No 2 arrives into Eaglehawk 11147.10s Tram No 2 heads to Quarry Hill from California Gully (Probable) 11147.1t Tram on its way out of Long Gully along Mt Korong (Eaglehawk) Road towards Eaglehawk. Houses in the foreground, on the left is 245 Eaglehawk Road and on the right 241 Eaglehawk Road.keith s king, bendigo, trams, robert green -
Bendigo Historical Society Inc.
Mixed media - Robert Green Collection - Photos of Bendigo Tramways - Black and White Prints, 1968
... Robert Green Collection, this item 11147.12 contains 20 printed photos scanned from eight plastic archival sheets of black and white negatives, also one PDF Document entitled "Bendigo's Last Tram Mail" 11147.12v PDF The day before permanent closure of the Bendigo tramways on Sunday 16 April 1972, the Tramway Museum Society of Victoria Inc (TMSV) arranged for “Last Tram Mail” to be carried along the Eaglehawk line to simulate the once regular transport of mail around the city by tram. 5.5 x 3.5 Inch Photo Prints 11147.12a Print from Sheet 3 (11147.3ac) No 28 Birney Car Special heads down Pall Mall past the Court House Hotel 11147.12b Print from Sheet 8 (11147.8c) No 18 passing the View Street and Rowan Street intersection 11147.12c Print from Sheet 8 (11147.8u) No 25 at the Bendigo Cemetery Terminus 11147.12d Print from Sheet 5 (11147.5e) No 18 and old shop front 11147.12e Print from Sheet 7 (11147.7s) Passing Trams 11147.12f Print from Sheet 3 (11147.3s) Tram leaving the Eaglehawk Town Hall in the dark 11147.12g Print from Sheet 5 (11147.5m) No 21 returning to the Tramways Avenue Depot with the scrubber tram on the left 11147.12l Print from Sheet 6 (11147.6ag) Four trams and one driver at the depot TMS Bendigo Tour 24 March 1968. 11147.12m Print from Sheet 2 (11147.2ac) Birney Car 28 passes 17 at the Long gully Manchester Arms Hotel Loop TMS Bendigo Tour 24 March 1968 11147.12n Print from Sheet 2 (11147.2u) No 28 Special Birney Car on the Quarry Hill Line TMS Bendigo Tour 24 March 1968 11147.12o Print from Sheet 2 (11147.2v) No 30 Special Birney Car on the Quarry Hill Line TMS Bendigo Tour 24 March 1968 11147.12q Print from Sheet 2 (11147.2ab) The four Birney Cars at Eaglehawk beside the town hall TMS Bendigo Tour 24 March 1968 11147.12r Print from Sheet 6 (11147.6z) Birney Car 11 and two others arriving at the depot TMS Bendigo Tour 24 March 1968 11147.12s Print from Sheet 2 (11147.2t) The four Birney Cars at the Carpenter Street, Quarry Hill Loop TMS Bendigo Tour 24 March 1968 11147.12t Print from Sheet 2 (11147.2h) No 30, 29, 28 and 11 Birney Cars lined up at the Depot TMS Bendigo Tour 24 March 1968 11147.12u Print from Sheet 2 (11147.2ad) No 21 and two others at the North Bendigo terminus TMS Bendigo Tour 24 March 1968 8 x 10 Inch Photo Prints 11147.12h Print from Sheet 3 (11147.3ai) Birney Car Tram passes the School of Mines in McRae St heading to the fountain 11147.12i Print from Sheet 2 (11147.2a) No 30, 29, 28 and 11 Birney Cars lined up at the Depot 11147.12j Print from Sheet 2 (11147.2a) No 30, 29, 28 and 11 Birney Cars lined up at the Depot 11147.12k Print from Sheet 2 (11147.2a) No 30, 29, 28 and 11 Birney Cars lined up at the Depot...Sixteen black and white prints from the images are also included. keith s king bendigo trams robert green Robert Green Collection, this item 11147.12 contains 20 printed photos scanned from eight plastic archival sheets of black and white negatives, also one PDF Document entitled "Bendigo's Last Tram Mail" 11147.12v PDF The day before permanent closure of the Bendigo tramways on Sunday 16 April 1972, the Tramway Museum Society of Victoria Inc (TMSV) arranged for “Last Tram Mail” to be carried along the Eaglehawk line to simulate the once regular transport of mail around the city by tram. 5.5 x 3.5 Inch Photo Prints 11147.12a Print from Sheet 3 (11147.3ac) No 28 Birney Car Special heads down Pall Mall past the Court House Hotel 11147.12b Print from Sheet 8 (11147.8c) No 18 passing the View Street and Rowan Street intersection 11147.12c Print from Sheet 8 (11147.8u) No 25 at the Bendigo Cemetery Terminus 11147.12d Print from Sheet 5 (11147.5e) No 18 and old shop front 11147.12e Print from Sheet 7 (11147.7s) Passing Trams 11147.12f Print from Sheet 3 (11147.3s) Tram leaving the Eaglehawk Town Hall in the dark 11147.12g Print from Sheet 5 (11147.5m) No 21 returning to the Tramways Avenue Depot with the scrubber tram on the left 11147.12l Print from Sheet 6 (11147.6ag) Four trams and one driver at the depot TMS Bendigo Tour 24 March 1968. 11147.12m Print from Sheet 2 (11147.2ac) Birney Car 28 passes 17 at the Long gully Manchester Arms Hotel Loop TMS Bendigo Tour 24 March 1968 11147.12n Print from Sheet 2 (11147.2u) No 28 Special Birney Car on the Quarry Hill Line TMS Bendigo Tour 24 March 1968 11147.12o Print from Sheet 2 (11147.2v) No 30 Special Birney Car on the Quarry Hill Line TMS Bendigo Tour 24 March 1968 11147.12q Print from Sheet 2 (11147.2ab) The four Birney Cars at Eaglehawk beside the town hall TMS Bendigo Tour 24 March 1968 11147.12r Print from Sheet 6 (11147.6z) Birney Car 11 and two others arriving at the depot TMS Bendigo Tour 24 March 1968 11147.12s Print from Sheet 2 (11147.2t) The four Birney Cars at the Carpenter Street, Quarry Hill Loop TMS Bendigo Tour 24 March 1968 11147.12t Print from Sheet 2 (11147.2h) No 30, 29, 28 and 11 Birney Cars lined up at the Depot TMS Bendigo Tour 24 March 1968 11147.12u Print from Sheet 2 (11147.2ad) No 21 and two others at the North Bendigo terminus TMS Bendigo Tour 24 March 1968 8 x 10 Inch Photo Prints 11147.12h Print from Sheet 3 (11147.3ai) Birney Car Tram passes the School of Mines in McRae St heading to the fountain 11147.12i Print from Sheet 2 (11147.2a) No 30, 29, 28 and 11 Birney Cars lined up at the Depot 11147.12j Print from Sheet 2 (11147.2a) No 30, 29, 28 and 11 Birney Cars lined up at the Depot 11147.12k Print from Sheet 2 (11147.2a) No 30, 29, 28 and 11 Birney Cars lined up at the Depot Mixed media Robert Green Collection - Photos of Bendigo Tramways - Black and White Prints ...This collection contains eight archive sheets (Sheet 1 to Sheet 8) of strips of original 35mm black and white negatives of photographs taken during the 1960s and early 1970s by Robert Green, of the Bendigo State Electricty Commission of Victoria Tramways prior to their abandonment The collection also includes two archive quality sheets (Sheet A and Sheet B) of original 35mm colour slides taken by Robert Green during the same period. Sheet B also contains one slide taken by Robert's friend Keigh S King (1928-2019) who was the author of the book 'The Bendigo Tramways an illustrated history, published by the Australian Railway Historical Society Victorian Division Melbourne in February 1972; BHS Item no. 5052. The collection also includes one USB stick which contains images of all photographs described above, except for one colour slide taken by Keith S Kings. Sixteen black and white prints from the images are also included.Robert Green Collection, this item 11147.12 contains 20 printed photos scanned from eight plastic archival sheets of black and white negatives, also one PDF Document entitled "Bendigo's Last Tram Mail" 11147.12v PDF The day before permanent closure of the Bendigo tramways on Sunday 16 April 1972, the Tramway Museum Society of Victoria Inc (TMSV) arranged for “Last Tram Mail” to be carried along the Eaglehawk line to simulate the once regular transport of mail around the city by tram. 5.5 x 3.5 Inch Photo Prints 11147.12a Print from Sheet 3 (11147.3ac) No 28 Birney Car Special heads down Pall Mall past the Court House Hotel 11147.12b Print from Sheet 8 (11147.8c) No 18 passing the View Street and Rowan Street intersection 11147.12c Print from Sheet 8 (11147.8u) No 25 at the Bendigo Cemetery Terminus 11147.12d Print from Sheet 5 (11147.5e) No 18 and old shop front 11147.12e Print from Sheet 7 (11147.7s) Passing Trams 11147.12f Print from Sheet 3 (11147.3s) Tram leaving the Eaglehawk Town Hall in the dark 11147.12g Print from Sheet 5 (11147.5m) No 21 returning to the Tramways Avenue Depot with the scrubber tram on the left 11147.12l Print from Sheet 6 (11147.6ag) Four trams and one driver at the depot TMS Bendigo Tour 24 March 1968. 11147.12m Print from Sheet 2 (11147.2ac) Birney Car 28 passes 17 at the Long gully Manchester Arms Hotel Loop TMS Bendigo Tour 24 March 1968 11147.12n Print from Sheet 2 (11147.2u) No 28 Special Birney Car on the Quarry Hill Line TMS Bendigo Tour 24 March 1968 11147.12o Print from Sheet 2 (11147.2v) No 30 Special Birney Car on the Quarry Hill Line TMS Bendigo Tour 24 March 1968 11147.12q Print from Sheet 2 (11147.2ab) The four Birney Cars at Eaglehawk beside the town hall TMS Bendigo Tour 24 March 1968 11147.12r Print from Sheet 6 (11147.6z) Birney Car 11 and two others arriving at the depot TMS Bendigo Tour 24 March 1968 11147.12s Print from Sheet 2 (11147.2t) The four Birney Cars at the Carpenter Street, Quarry Hill Loop TMS Bendigo Tour 24 March 1968 11147.12t Print from Sheet 2 (11147.2h) No 30, 29, 28 and 11 Birney Cars lined up at the Depot TMS Bendigo Tour 24 March 1968 11147.12u Print from Sheet 2 (11147.2ad) No 21 and two others at the North Bendigo terminus TMS Bendigo Tour 24 March 1968 8 x 10 Inch Photo Prints 11147.12h Print from Sheet 3 (11147.3ai) Birney Car Tram passes the School of Mines in McRae St heading to the fountain 11147.12i Print from Sheet 2 (11147.2a) No 30, 29, 28 and 11 Birney Cars lined up at the Depot 11147.12j Print from Sheet 2 (11147.2a) No 30, 29, 28 and 11 Birney Cars lined up at the Depot 11147.12k Print from Sheet 2 (11147.2a) No 30, 29, 28 and 11 Birney Cars lined up at the Depotkeith s king, bendigo, trams, robert green -
 Tramway Heritage Centre
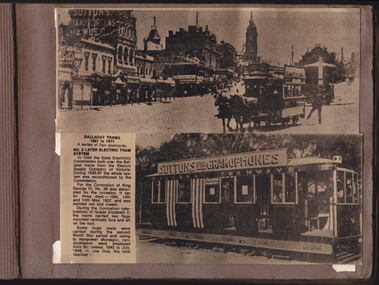
Photograph Album (part of), Ray Pearson's Photo Album - Trams of Victorian Railways, Ballarat, Bendigo, Geelong
... 3 of Ray Pearson's Photo Album. Brown card page with two metallic look postcards (landscape format) placed on page using clear plastic photo corners. Both postcard images depict trams in Ballarat. The bottom postcard has come loose of two of it's photo corners (top and bottom on the right) and is not secure on the page. A hand written inscription is written in pencil behind the bottom photograph. Ray Pearson's Photo Album - Trams of Victorian Railways, Ballarat, Bendigo ...Page 3 of Ray Pearson's Photo Album. Brown card page with two metallic look postcards (landscape format) placed on page using clear plastic photo corners. Both postcard images depict trams in Ballarat. The bottom postcard has come loose of two of it's photo corners (top and bottom on the right) and is not secure on the page. A hand written inscription is written in pencil behind the bottom photograph.Hand written inscription in pencil behind postcard at base of page: W.4. Printed text to left of image on bottom postcard: BALLARAT TRAMS / 1887 to 1971 / A series of four postcards. / NO. 3 LATER ELECTRIC TRAM SYSTEM / In 1934 the State Electricity / Commission took over the Bal- / larat trams from the Electric / Supply Company of Victoria. / During 1935-37 the whole sys- / tem was reconditioned by the / Commission. / For the Coronation of King / George VI, No. 28 was decor- / ated for the occasion. It ran / for three days – 12th, 13th / and 14th May, 1937, and was / painted red and cream. / During the Coronation cele- / brations of Queen Elizabeth II, / the trams carried two flags / mounted vertically fore and aft / on the roof. / Some huge loads were / carried during the second / World War period and owing / to man power shortages, con- / doctresses were employed / from September, 1942 to July, 1946. At one time, the total / reached 23. Printed text to back of bottom postcard: BALLARAT TRAMS / 1887 to 1971 / A series of four postcards. / In the early fifties, loading / on the trams was heavy. When / the lag in housing was over- / taken, however, breadwinners / started to leave the trams and / travel to work in cars. Increas- / ing affluence in the sixties ac- / centuated the trend. Soon the / trams were running with mount- / ing annual losses. Most of the / passengers travelling in these / times were concession holders: / students, pensioners, deserted / wives and T.P.I.'s A fine printed vertical line runs down the centre of the blank writing space to the left of the body text. Above is written: POSTCARD postcard, coronation, ray pearson, vintage trams, ballarat tramway, tram postcard, female conductors, suttons, ballarat tram -
 Tramway Heritage Centre
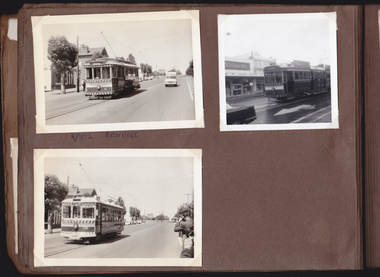
Photograph Album (part of), Ray Pearson's Photo Album - Trams of Victorian Railways, Ballarat, Bendigo, Geelong
... bendigo tramways bendigo tram vintage tram Hand written inscription in biro under top left photo: 4/3/72 BENDIGO Page 6 of Ray Pearson's Photo Album. ...Page 6 of Ray Pearson's Photo Album. Brown card page with three photographs (landscape format) placed on page using clear plastic photo corners. All photographs depict trams in Bendigo. A hand written inscription appears beneath the top left photo. The brown paper is indented in some places from text written on facing page and also has minor damage to bottom right corner where it looks like an adhesive photo corner has been removed.Hand written inscription in biro under top left photo: 4/3/72 BENDIGObendigo tramways, bendigo tram, vintage tram
