
Showing 285 items matching "do care"
-
 Eltham District Historical Society Inc
Document - Folder, Markby, Dorothy
... ...Do Care...Dorothy Markby was a volunteer at organisations in Kangaroo Ground and Jagajaga: Kangaroo Ground Primary School Parents Committee, Eltham High School Committee, Kangaroo Ground Rural Fire Brigade auxiliary, Planning Committee for kindergarten at Kangaroo Ground, Lifeline, Do Care, Rosanna Indoor Bowls Committee, Rosanna Fire Station Community House Committee, and member of Eltham Historical Society. ...Dorothy Markby was a volunteer at organisations in Kangaroo Ground and Jagajaga: Kangaroo Ground Primary School Parents Committee, Eltham High School Committee, Kangaroo Ground Rural Fire Brigade auxiliary, Planning Committee for kindergarten at Kangaroo Ground, Lifeline, Do Care, Rosanna Indoor Bowls Committee, Rosanna Fire Station Community House Committee, and member of Eltham Historical Society. ...Dorothy Markby was a volunteer at organisations in Kangaroo Ground and Jagajaga: Kangaroo Ground Primary School Parents Committee, Eltham High School Committee, Kangaroo Ground Rural Fire Brigade auxiliary, Planning Committee for kindergarten at Kangaroo Ground, Lifeline, Do Care, Rosanna Indoor Bowls Committee, Rosanna Fire Station Community House Committee, and member of Eltham Historical Society. Contents Photocopy, no date, of a page from an unidentified document listing volunteers: Maria Long, Dorothy Marby andFrances(?) McIntyreNewspaper clippings, A4 photocopies, etcdorothy markby, kangaroo ground primary school parents committee, eltham high school committee, kangaroo ground rural fire brigade auxiliary, kangaroo ground kindergarten, lifeline, do care, rosanna indoor bowls committee, rosanna fire station community house committee, eltham historical society, maria long, frances mcintyre -
 Melbourne Legacy
Pamphlet, What you should know about Legacy, 1968
... It includes the story of Legacy and what Legacy does. Headings include: Care of families ; Welfare ; Education and Training ; Boys' and Girls' classes ; Holidays and camps ; Residences ; Widows' Club....It includes the story of Legacy and what Legacy does. Headings include: Care of families ; Welfare ; Education and Training ; Boys' and Girls' classes ; Holidays and camps ; Residences ; Widows' Club. ...This is an example of Melbourne Legacy promotional material that was issued to inform the public on the work of Legacy. It includes the story of Legacy and what Legacy does. Headings include: Care of families ; Welfare ; Education and Training ; Boys' and Girls' classes ; Holidays and camps ; Residences ; Widows' Club.An example of promotional material issued by Legacy in 1968.Brochure to promote Legacy in 1968 with a black and white photo of a young boy in a slouch hat on the cover and black and white photos inside.legacy promotion, fundraising -
 Australian Nursing & Midwifery Federation
Australian Nursing Federation aged care campaign badge, 2001
... Branch newsletters from late 2001 focused on aged care staff shortages & under-funding, with placards from rallies featuring slogans such as 'Aged care nurses. We care. Do you?' and 'Aged care. Who care? We care'. ...Branch newsletters from late 2001 focused on aged care staff shortages & under-funding, with placards from rallies featuring slogans such as 'Aged care nurses. We care. Do you?' and 'Aged care. Who care? We care'. ...Button distributed to and worn by Australian Nursing Federation (ANF) members. The ANF has been campaigning for more funding and qualified nurses to improve the quality of aged care for the past several decades, and continues to do so. This particular badge is from a 2001 campaign in the lead up to a November 2001 Australian federal election. The campaign called on the government and opposition to make commitments to around aged care staffing and funding. Branch newsletters from late 2001 focused on aged care staff shortages & under-funding, with placards from rallies featuring slogans such as 'Aged care nurses. We care. Do you?' and 'Aged care. Who care? We care'. Therefore, it is believed that this badge was manufactured and distributed from August to December 2001.Circular orange and dark blue plastic badge. Silver metal, plastic-coated, with safety pin fastener adhered to back. Badge printed with 'Aged Care. Who Cares? I care.' and the ANF [Australian Nursing Federation] logo. 'I Care.' is underlined.nursing, nurses, unionism, aged care, lobbying, 2001 federal election, funding, badges, buttons, pins, trade unions, labour history, staffing, workforce, patient care -
Port Melbourne Historical & Preservation Society
Photograph - Share and Care volunteer, Arthur Rowan, 1990s
... Caption on pink paper pasted on:'Arthur Rowan, Share and Care. "By doing voluntary work, I help myself while I help others. ...Caption on pink paper pasted on:'Arthur Rowan, Share and Care. "By doing voluntary work, I help myself while I help others. ...From a series featuring local volunteers, displayed at a community centre function to honour them. Mounted black and white photo of Share and Care volunteer Arthur ROWAN at the desk in his home workshop. Mounted on white cardboard. Caption on pink paper pasted on:'Arthur Rowan, Share and Care. "By doing voluntary work, I help myself while I help others. It keeps me going"''8' in green marker on back. In pencio: 'Pat G'societies clubs unions and other organisations, south port day links, share and care, arthur rowan, volunteers -
 Melbourne Legacy
Pamphlet, What you should know about Legacy, 1960s
... It includes the story of Legacy and what Legacy does. Headings include: Care of families ; Welfare ; Education and Training ; Boys' and Girls' classes ; Holidays and camps ; Homes; Widows' Club. ...It includes the story of Legacy and what Legacy does. Headings include: Care of families ; Welfare ; Education and Training ; Boys' and Girls' classes ; Holidays and camps ; Homes; Widows' Club. ...A copy of a flyer that explains what Legacy does, printed in the 1960s. Photos include firewood delivery, legatee visiting a home, girls classes and boys classes and widows. It is an example of Melbourne Legacy promotional material that was issued to inform the public on the work of Legacy. It includes the story of Legacy and what Legacy does. Headings include: Care of families ; Welfare ; Education and Training ; Boys' and Girls' classes ; Holidays and camps ; Homes; Widows' Club. Was compiled in a folio of proforma stationery. A similar set of proformas are at 00338.A record of forms and items used in Legacy's business practices in the 1960s.White brochure with black and white photos and a reply paid envelope pasted on brown paper from a folio of forms and brochures from the 1960s.proformas, stationery, legacy promotion -
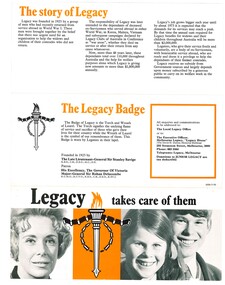 Melbourne Legacy
Pamphlet, Legacy takes care of them, 1960s
... It includes the story of Legacy and what Legacy does. Headings include: Care of families ; Welfare ; Education and Training ; Boys' and Girls' classes ; Holidays and camps ; homes ; Widows' Club. ...It includes the story of Legacy and what Legacy does. Headings include: Care of families ; Welfare ; Education and Training ; Boys' and Girls' classes ; Holidays and camps ; homes ; Widows' Club. ...A copy of a flyer that explains what Legacy does, printed in the 1960s. Photos include legatee advising a family, girls classes and boys classes, a hike and widows. It is an example of Melbourne Legacy promotional material that was issued to inform the public on the work of Legacy. It includes the story of Legacy and what Legacy does. Headings include: Care of families ; Welfare ; Education and Training ; Boys' and Girls' classes ; Holidays and camps ; homes ; Widows' Club. Legacy's phone number had changed again to 663 3564. Was compiled in a folio of proforma stationery. A similar set of proformas are at 00338.A record of forms and items used in Legacy's business practices in the 1960s.White brochure with black and white photos pasted on brown paper from a folio of forms and brochures from the 1960s.proformas, stationery, legacy promotion -
![Australian Nursing Federation aged care campaign badge, [1990s-2000s?]](/media/collectors/5bb42dc221eaf31100db1d3b/items/5c64e94c21ea6a1300c11c26/item-media/5c64e95821ea6a1300c12f52/item-fit-380x285.jpg?cb=6) Australian Nursing & Midwifery Federation
Australian Nursing & Midwifery FederationAustralian Nursing Federation aged care campaign badge, [1990s-2000s?]
... The ANF has been campaigning for more funding and qualified nurses to improve the quality of aged care for the past several decades, and continues to do so. Aged care campaigning became particularly prominent in the late 1990s and 2000s, with large campaigns by both the national and state/territory branches of the ANF. ...The ANF has been campaigning for more funding and qualified nurses to improve the quality of aged care for the past several decades, and continues to do so. Aged care campaigning became particularly prominent in the late 1990s and 2000s, with large campaigns by both the national and state/territory branches of the ANF. ...Button distributed to and worn by Australian Nursing Federation (ANF) members. The ANF has been campaigning for more funding and qualified nurses to improve the quality of aged care for the past several decades, and continues to do so. Aged care campaigning became particularly prominent in the late 1990s and 2000s, with large campaigns by both the national and state/territory branches of the ANF. The Royal Australian Nursing Federation became the Australian Nursing Federation (ANF) in 1989, and then became the Australian Nursing and Midwifery Federation in 2013, suggesting this badge is from the 1990s or early 2000s.Circular blue, green and white plastic badge. Silver metal, plastic-coated, with safety pin fastener adhered to back. Badge printed with 'Quality Aged Care needs Qualified Nurses' and the ANF [Australian Nursing Federation] logo. 'needs' is italicised and 'Qualified Nurses' is underlined.nursing, nurses, unionism, aged care, lobbying, funding, badges, buttons, pins, staffing, trade unions, labour history, workforce, patient care, australian nursing federation, victoria -
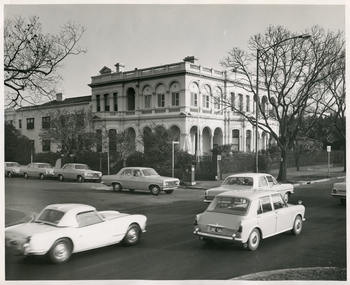 Royal District Nursing Service (now known as Bolton Clarke)
Photograph - Photograph, black and white, 15 05 1967
... The Sisters nursed patients referred by Hospitals and General Practitioners giving treatments, such as injections, wound care and doing other procedures, as well as assisting them with general care when required. ...The Sisters nursed patients referred by Hospitals and General Practitioners giving treatments, such as injections, wound care and doing other procedures, as well as assisting them with general care when required. ...The Royal District Nursing Service (RDNS) Sister is leaving Headquarters, 452 St. Kilda Road, Melbourne, to administer nursing care to patients in their own homes. The Sisters nursed patients referred by Hospitals and General Practitioners giving treatments, such as injections, wound care and doing other procedures, as well as assisting them with general care when required. The Sister is driving an Australian built Holden car of the 1960s which, along with the other parked Holden cars are part of the RDNS fleet of vehicles. From its inception in 1885 the Trained nurses (Nurses) of the then named Melbourne District Nursing Society (MDNS), later named Royal District Nursing Service (RDNS) gave high quality nursing care to patients in their own homes. They nursed patients referred by Hospitals and General Practitioners giving treatments, such as injections, wound care and doing other procedures, as well as assisting them with general care when required. From the early days the Nurses taught the importance of good hygiene, cleanliness, good nutrition in the prevention and curing of disease and in maintaining good health, as well as giving advice and support to the patient and their carers. The Sisters liaised with the patient’s Doctor. District has had various modes of transport over the last 130 years. At first the Nurses walked the streets and lane ways amid the slums of central Melbourne. As the Society expanded bicycles, public transport, District cars, the use of a Motor Auxiliary, nurses own cars, and even a motorcycle were used, and all these forms were intermingled until RDNS had its own fleet of vehicles. By 2009 there were 598 cars in the fleet and the nurses travelled 9 million 200,000 kilometres – this is equivalent to 12 trips to the moon and back. The Royal District Nursing Service (RDNS) building at 452 St. Kilda Road, Melbourne was originally called 'Airlie', the childhood home of Stanley Melbourne Bruce, the Prime Minister of Australia 1923-1929. RDNS, then named Melbourne District Nursing Service (MDNS) moved into this building as their Nurses Home and Headquarters in 1953. MDNS was given Royal patronage in 1966 and continued to occupy the building until 1996. 452 St. Kilda Road, Melbourne is listed on the Victorian Heritage Register. In the foreground of this black and white photograph are three cars on St. Kilda Road passing Arthur Street on their left. In the centre is a Royal District Nursing Service, (RDNS), Sister sitting at the driving wheel of her RDNS grey Holden car in Arthur Street, at the corner of St. Kilda Road. Behind the car are two round poles inset in the nature strip near the kerb; the pole on the right holds the street signs 'Arthur St' which points to the left of the photograph, and 'St Kilda Rd' points towards the number '452' attached to a square concrete column and metal spiked fence running down the right of the photograph behind the nature strip. In the background of the photograph is the corner view showing two sides, part in Arthur Street and part in St. Kilda Road, of RDNS Headquarters which is a large white two storey Italian style building, which has arched Arcadia on the ground floor, and an arched Arcade on the second floor; a flat roof with two chimneys is seen. A garden with trees can be seen running in front of both sides of the building and behind the cast iron spiked fence. In Arthur Street, to the left of the large building is a two storey white building with a tiled roof. It has a white solid fence in front of it Parked at the kerb in front of this building, and the section of RDNS large white building in Arthur Street, are three other RDNS grey Holden cars. Parts of a large trees are seen on the left and right of the photograph.Photographers stamp. Quote GE 46rdns, royal district nursing service, rdns transport, rdns headquarters -
![Australian Nursing Federation aged care campaign badge, [2006-2011?]](/media/collectors/5bb42dc221eaf31100db1d3b/items/5c490ca421ea731428fc731d/item-media/5c490cb121ea731428fc84a5/item-fit-380x285.jpg?cb=6) Australian Nursing & Midwifery Federation
Australian Nursing & Midwifery FederationAustralian Nursing Federation aged care campaign badge, [2006-2011?]
... The ANF has been campaigning for more funding and qualified nurses to improve the quality of aged care for the past several decades, and continues to do so. Aged care funding and commitment to workforce improvements were a particular focus of enterprise bargaining for the Victorian Branch around 2006-2011, and similar issues formed the basis of a large federal ANF campaign conducted around the same time entitled 'Because we care'. ...The ANF has been campaigning for more funding and qualified nurses to improve the quality of aged care for the past several decades, and continues to do so. Aged care funding and commitment to workforce improvements were a particular focus of enterprise bargaining for the Victorian Branch around 2006-2011, and similar issues formed the basis of a large federal ANF campaign conducted around the same time entitled 'Because we care'. ...Button distributed to and worn by Australian Nursing Federation (ANF) members. The ANF has been campaigning for more funding and qualified nurses to improve the quality of aged care for the past several decades, and continues to do so. Aged care funding and commitment to workforce improvements were a particular focus of enterprise bargaining for the Victorian Branch around 2006-2011, and similar issues formed the basis of a large federal ANF campaign conducted around the same time entitled 'Because we care'. The Royal Australian Nursing Federation became the Australian Nursing Federation (ANF) in 1989, and then became the Australian Nursing and Midwifery Federation in 2013. This historical background suggests the badge is from around 2006 to 2011.Circular red, white and blue plastic badge. Silver metal, plastic-coated, with safety pin fastener adhered to back. Badge printed with 'VALUE AGED CARE NURSING PROPERLY FOR BETTER RESIDENT CARE' and the ANF [Australian Nursing Federation] website address of the time (www.anfvic.asn.au).nursing, nurses, unionism, trade unions, aged care, funding, badges, buttons, pins, labour history, staffing, wages, workforce, patient care, australian nursing federation, campaigning -
 Australian Nursing & Midwifery Federation
Australian Nursing Federation aged care campaign badge, 2006
... The ANF has been campaigning for more funding and qualified nurses to improve the quality of aged care for the past several decades, and continues to do so. The 'Aged care nurses worth more not less' campaign was run throughout 2005-2006 during private aged care enterprise bargaining negotiations. ...The ANF has been campaigning for more funding and qualified nurses to improve the quality of aged care for the past several decades, and continues to do so. The 'Aged care nurses worth more not less' campaign was run throughout 2005-2006 during private aged care enterprise bargaining negotiations. ...Button distributed to and worn by Australian Nursing Federation (ANF) members. The ANF has been campaigning for more funding and qualified nurses to improve the quality of aged care for the past several decades, and continues to do so. The 'Aged care nurses worth more not less' campaign was run throughout 2005-2006 during private aged care enterprise bargaining negotiations. Claims focused on unsafe staffing levels and an inadequate skill mix of registered and unregistered staff. The Royal Australian Nursing Federation became the Australian Nursing Federation (ANF) in 1989, and then became the Australian Nursing and Midwifery Federation in 2013, suggesting this badge is from the 1990s or early 2000s.Circular pink and black plastic badge. Silver metal, plastic-coated, with safety pin fastener adhered to back. Badge printed with 'Aged care WORTH MORE NOT LESS' and the ANF [Australian Nursing Federation] logo. 'NOT LESS' is underlined.nursing, nurses, unionism, aged care, lobbying, funding, badges, buttons, pins, trade unions, labour history, staffing, workforce, patient care -
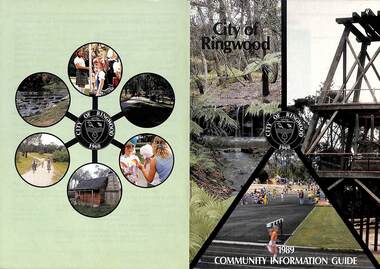 Ringwood and District Historical Society
Booklet, City of Ringwood 1989 Community Information Guide, 1989
... LOCAL COMMUNITY SERVICES Accommodation 37 Alcoholism 37 Birthright 38 Blind 38 Care Force 39 Catholic Family Welfare Bureau 39 Central Ringwood Community Centre 39 Childbirth and Parenting Association 39 & 40 Churches 40 & 41 Community Services Victoria 42 Day Centres and Drop In Centres 43 Do Care 43 Drugs 43 Elderly Day Care 44 Emergency Housing 45 Family Planning Services 45 Financial Counselling 46 Hearing Aid Service 47 Hospitals 47 Housing 48 Information 48 Legal 49 Literacy 50 Lone Parents 50 Marriage Celebrants 50 Maroondah Social Health Centre 51 Neighbourhood Mediation Centre - Outer East 51 North Ringwood Community House 52 Nursing 52 Optometric Services 52 Playgroups 53 Podiatry 53 Pre-Schools 54 Red Cross 55 Retirement 55 Ringwood Croydon Advisory Service 55 Schools 56 & 57 Senior Citizens' Centres 58 Transport 59 Twins 59 Unemployment 60 Volunteering 60 Youth Accommodation Project (Maroondah). 60 Youth Emergency Accommodation Services... 60 ...LOCAL COMMUNITY SERVICES Accommodation 37 Alcoholism 37 Birthright 38 Blind 38 Care Force 39 Catholic Family Welfare Bureau 39 Central Ringwood Community Centre 39 Childbirth and Parenting Association 39 & 40 Churches 40 & 41 Community Services Victoria 42 Day Centres and Drop In Centres 43 Do Care 43 Drugs 43 Elderly Day Care 44 Emergency Housing 45 Family Planning Services 45 Financial Counselling 46 Hearing Aid Service 47 Hospitals 47 Housing 48 Information 48 Legal 49 Literacy 50 Lone Parents 50 Marriage Celebrants 50 Maroondah Social Health Centre 51 Neighbourhood Mediation Centre - Outer East 51 North Ringwood Community House 52 Nursing 52 Optometric Services 52 Playgroups 53 Podiatry 53 Pre-Schools 54 Red Cross 55 Retirement 55 Ringwood Croydon Advisory Service 55 Schools 56 & 57 Senior Citizens' Centres 58 Transport 59 Twins 59 Unemployment 60 Volunteering 60 Youth Accommodation Project (Maroondah). 60 Youth Emergency Accommodation Services... 60 Community information booklet issued by City of Ringwood for 1989 - covering the facilities and activities of the Ringwood Council and other local organisations and associations. ...Community information booklet issued by City of Ringwood for 1989 - covering the facilities and activities of the Ringwood Council and other local organisations and associations. Cover photographs: Front - Fern Gully at Ringwood Lake, Poppett Head at rear of Lake, Athletics Track. Back - Highland Carnival, Wombalano Park, Miners Cottage at Ringwood Lake, Bike Path, Water Cascade at rear of Lake.CONTENTS: (page no.) 1. COUNCIL SERVICES After School Activities Programme 29 Aged Services 31, 32 & 33 Aquatic Centre 20 & 21 Budget 14 Building Information 16 By-Laws 26 Chief Executive's Message 9 Children's Services 29 Civic Centre 4 Committees of Council 5 Common Questions 36 Community Plan 10 & 11 Council Meeting Dates 4 Council Representatives 8 Councillors 6 & 7 Dogs 26 Dual Occupancy 12 Emergency Telephone Numbers 63 Family Day Care 29 Fire Hazards 27 Garbage 34 & 35 Golf Course 24 Home Handyman Services 31 Home Help 31 Incinerators 26 Knaith Road Child Care Centre 29 Library 23 Maternal and Child Health 28 Mayoral Message – Cr. R. Gardini 3 Meals on Wheels 31 Members of Parliament 62 Parks and Gardens 18 Rates 25 Residential Development Provisions 12 & 13 Ringwood Bypass Road 13 Ringwood Convention Centre & Performing Arts Centre 22 Ringwood District Centre 14 Staff 10 Town Planning 17 Works Depot 30 Youth Outreach Worker 33 2. LOCAL COMMUNITY SERVICES Accommodation 37 Alcoholism 37 Birthright 38 Blind 38 Care Force 39 Catholic Family Welfare Bureau 39 Central Ringwood Community Centre 39 Childbirth and Parenting Association 39 & 40 Churches 40 & 41 Community Services Victoria 42 Day Centres and Drop In Centres 43 Do Care 43 Drugs 43 Elderly Day Care 44 Emergency Housing 45 Family Planning Services 45 Financial Counselling 46 Hearing Aid Service 47 Hospitals 47 Housing 48 Information 48 Legal 49 Literacy 50 Lone Parents 50 Marriage Celebrants 50 Maroondah Social Health Centre 51 Neighbourhood Mediation Centre - Outer East 51 North Ringwood Community House 52 Nursing 52 Optometric Services 52 Playgroups 53 Podiatry 53 Pre-Schools 54 Red Cross 55 Retirement 55 Ringwood Croydon Advisory Service 55 Schools 56 & 57 Senior Citizens' Centres 58 Transport 59 Twins 59 Unemployment 60 Volunteering 60 Youth Accommodation Project (Maroondah). 60 Youth Emergency Accommodation Services... 60 rinx -
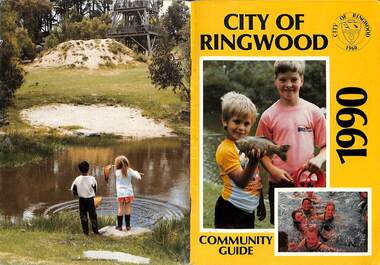 Ringwood and District Historical Society
Booklet, City of Ringwood 1990 Community Guide, 1990
... LOCAL COMMUNITY SERVICES Accommodation 42 Aged Accommodation 42 Alcoholism 42 Arthritis Foundation 43 Arts and Crafts 43 Blind 43 Care Force 43 Catholic Family Welfare Bureau 43 Central Ringwood Community Centre 43 Childbirth and Parenting Association 44 Churches 45 Community Services Victoria 47 Day Centres and Drop-in Centres 48 Disabled Facilities 49 Do Care 50 Drugs 50 Elderly Day Care 50 Emergency Housing 51 Family Planning Services 51 Financial Counselling 52 Hearing Aid Service 53 Hospitals 54 Housing 54 Information 55 Legal 55 Literacy 55 Lone Parents 57 Marriage Celebrants 57 Maroondah Social Health Centre 57 Neighbourhood Mediation Centre - Outer East 57 North Ringwood Community House 53 Nursing 59 Optometric Services 59 Playgroups 60 Pre-Schools 60 Red Cross 61 Retirement 62 Ringwood Croydon Advisory Service 62 Schools 63 Senior Citizens' Centres 65 Transport 66 Twins 66 Unemployment 66 Volunteering 66 Youth Accommodation Project (Maroondah) 67 Youth Emergency Services 67 ...LOCAL COMMUNITY SERVICES Accommodation 42 Aged Accommodation 42 Alcoholism 42 Arthritis Foundation 43 Arts and Crafts 43 Blind 43 Care Force 43 Catholic Family Welfare Bureau 43 Central Ringwood Community Centre 43 Childbirth and Parenting Association 44 Churches 45 Community Services Victoria 47 Day Centres and Drop-in Centres 48 Disabled Facilities 49 Do Care 50 Drugs 50 Elderly Day Care 50 Emergency Housing 51 Family Planning Services 51 Financial Counselling 52 Hearing Aid Service 53 Hospitals 54 Housing 54 Information 55 Legal 55 Literacy 55 Lone Parents 57 Marriage Celebrants 57 Maroondah Social Health Centre 57 Neighbourhood Mediation Centre - Outer East 57 North Ringwood Community House 53 Nursing 59 Optometric Services 59 Playgroups 60 Pre-Schools 60 Red Cross 61 Retirement 62 Ringwood Croydon Advisory Service 62 Schools 63 Senior Citizens' Centres 65 Transport 66 Twins 66 Unemployment 66 Volunteering 66 Youth Accommodation Project (Maroondah) 67 Youth Emergency Services 67 Community information booklet issued by City of Ringwood for 1990 - covering the facilities and activities of the Ringwood Council and other local organisations and associations. ...Community information booklet issued by City of Ringwood for 1990 - covering the facilities and activities of the Ringwood Council and other local organisations and associations.CONTENTS: (page no.) 1. COUNCIL SERVICES After School Programme 33 Aged Services 33, 34,35 Aquatic Centre 15,16,17 Aquatic Centre Bonus Vouchers 17 Biological Wasp Control 24 Budget 13,14 Building information 26 By-Laws 29 Chief Executive's Message 9 Children's Services 44 Citizenship 35 Civic Centre 4 Committees of Council 5 Common Questions 39 Council Meeting Dates 4 Council Representatives 8 Councillors 6,7 Dogs 29 Emergency Telephone Numbers 67 Family Day Care 32 Fire Hazards 29 Garbage 37 Golf Course 19 Health and Environmental Services 24 Home Handyman Services 54 Home Help 33 Immunisation 25 incinerators 29 Knaith Road Child Care Centre 32 Library 22 Library Service Senior Citizens 34 Maternal and Child Health 31 Mayoral Message - Cr. Lillian Rosewarne 3 Meals on Wheels 33 Members of Parliament 40 Parks and Gardens 22,23 Rates 28 Residential Development Provisions 12 Ringwood Bypass Road 11 Ringwood Convention Centre & Performing Arts Centre 20 Ringwood District Centre 13 Ringwood Festival 21 Shopping Bus 34 Staff 10 Town Planning 26 Works Depot 36 Youth Outreach Worker 36 2. LOCAL COMMUNITY SERVICES Accommodation 42 Aged Accommodation 42 Alcoholism 42 Arthritis Foundation 43 Arts and Crafts 43 Blind 43 Care Force 43 Catholic Family Welfare Bureau 43 Central Ringwood Community Centre 43 Childbirth and Parenting Association 44 Churches 45 Community Services Victoria 47 Day Centres and Drop-in Centres 48 Disabled Facilities 49 Do Care 50 Drugs 50 Elderly Day Care 50 Emergency Housing 51 Family Planning Services 51 Financial Counselling 52 Hearing Aid Service 53 Hospitals 54 Housing 54 Information 55 Legal 55 Literacy 55 Lone Parents 57 Marriage Celebrants 57 Maroondah Social Health Centre 57 Neighbourhood Mediation Centre - Outer East 57 North Ringwood Community House 53 Nursing 59 Optometric Services 59 Playgroups 60 Pre-Schools 60 Red Cross 61 Retirement 62 Ringwood Croydon Advisory Service 62 Schools 63 Senior Citizens' Centres 65 Transport 66 Twins 66 Unemployment 66 Volunteering 66 Youth Accommodation Project (Maroondah) 67 Youth Emergency Services 67 rinx -
 Sunshine and District Historical Society Incorporated
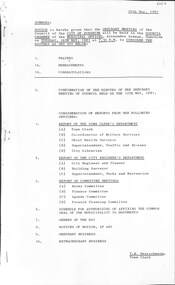
Administrative record - City of Sunshine - Commissioner Mr Alexander Alex George Gillon Collection 1976 - 1982 - Notice of ordinary meeting of the council 26th May 1981, City of Sunshine, 20th May 1981
... Notice of Ordinary Meeting of the Council 26th May 1981 Report of the Town Clerk's Department Report of the Town Clerk Italo-Australian Social Club Proposal to Sub-Lease Elderly Persons Units South Road Housing Estate (Former Quarry Showers Street) Council Auditor Vicswim Programme 1982 Report of the Co-Ordinator of Welfare Services Migrants and the Review of Mental Health Legislation Victorian Welcoming Committee Albion Community House Delegation of Authority Request for Financial Assistance Wesley Central "Do-Care" Services Emergency Relief Emergency Costs for Low Income Earners SEC and Gas & Fuel Report of the Chief Health Surveyor Rubbish Dumber Report in The Advocate 13th May 1981 Page 3 Albion Reid Land Private Industrial Tip Reid Street Albion Health Act Registrations Health Act 1958 section 44(1) Nuisance 7 Hillside Crescent Maribyrnong Abatement Notice Pursuant to Section 44 Health Act 1958 7 Hillside Crescent Maribyrnong Application for Transfer of Proprietorship to Another Registration of Premises Under the Health Act Report of the Medical Officer of Health Report of the City Librarian Reciprocal Library Membership Association of Neighbourhood Learning Centres Report of the City Engineer & Planner Planning Permit Application Extension to Olex Cables Factory in Excess of 7.0 metres in Height Corner of 207 Sunshine Road South West Corner Olympia Street Tottenham Planning Permit Application Display Home Centre Lots 16 to 19 Furlong Road St. ...Station Road Deer Park Rothray Avenue Ballarat Road Glengala Road Sunshine West Monash Street Jackson Street Maidstone Tottenham Hotel Middle Road Fitzgerald Road Derrimut Oleander Drive Eva Street Hall Street Kings Road Main Road West The Esplanade Adair Place Warrington Crescent Notice of Ordinary Meeting of the Council 26th May 1981 Report of the Town Clerk's Department Report of the Town Clerk Italo-Australian Social Club Proposal to Sub-Lease Elderly Persons Units South Road Housing Estate (Former Quarry Showers Street) Council Auditor Vicswim Programme 1982 Report of the Co-Ordinator of Welfare Services Migrants and the Review of Mental Health Legislation Victorian Welcoming Committee Albion Community House Delegation of Authority Request for Financial Assistance Wesley Central "Do-Care" Services Emergency Relief Emergency Costs for Low Income Earners SEC and Gas & Fuel Report of the Chief Health Surveyor Rubbish Dumber Report in The Advocate 13th May 1981 Page 3 Albion Reid Land Private Industrial Tip Reid Street Albion Health Act Registrations Health Act 1958 section 44(1) Nuisance 7 Hillside Crescent Maribyrnong Abatement Notice Pursuant to Section 44 Health Act 1958 7 Hillside Crescent Maribyrnong Application for Transfer of Proprietorship to Another Registration of Premises Under the Health Act Report of the Medical Officer of Health Report of the City Librarian Reciprocal Library Membership Association of Neighbourhood Learning Centres Report of the City Engineer & Planner Planning Permit Application Extension to Olex Cables Factory in Excess of 7.0 metres in Height Corner of 207 Sunshine Road South West Corner Olympia Street Tottenham Planning Permit Application Display Home Centre Lots 16 to 19 Furlong Road St. ...Notice of Ordinary Meeting of the Council 26th May 1981 Report of the Town Clerk's Department Report of the Town Clerk Italo-Australian Social Club Proposal to Sub-Lease Elderly Persons Units South Road Housing Estate (Former Quarry Showers Street) Council Auditor Vicswim Programme 1982 Report of the Co-Ordinator of Welfare Services Migrants and the Review of Mental Health Legislation Victorian Welcoming Committee Albion Community House Delegation of Authority Request for Financial Assistance Wesley Central "Do-Care" Services Emergency Relief Emergency Costs for Low Income Earners SEC and Gas & Fuel Report of the Chief Health Surveyor Rubbish Dumber Report in The Advocate 13th May 1981 Page 3 Albion Reid Land Private Industrial Tip Reid Street Albion Health Act Registrations Health Act 1958 section 44(1) Nuisance 7 Hillside Crescent Maribyrnong Abatement Notice Pursuant to Section 44 Health Act 1958 7 Hillside Crescent Maribyrnong Application for Transfer of Proprietorship to Another Registration of Premises Under the Health Act Report of the Medical Officer of Health Report of the City Librarian Reciprocal Library Membership Association of Neighbourhood Learning Centres Report of the City Engineer & Planner Planning Permit Application Extension to Olex Cables Factory in Excess of 7.0 metres in Height Corner of 207 Sunshine Road South West Corner Olympia Street Tottenham Planning Permit Application Display Home Centre Lots 16 to 19 Furlong Road St. Albans Planning Permit Application John Kontek and Son (Aust) Ltd Offices 237 - 241 Hampshire Road South West Corner Devonshire Road Sunshine Delegated Matters Mezzanine Level Storage Area W.L. Allen Foundry 3 Hulett Street Albion Planning Permit Application Subdivision (Industrial Lots) Reid Street Ardeer Planning Permit Application Factory / Office A.T. Stead Frederick Street Tottenham Planning Permit Application Factory Lots 14, 15 & 16 McIntyre Road Sunshine North Planning Permit Application Re-Positioning of Non-Illuminated Sign (Business Sign) St. Albans Community & Resource Centre Andrea Street St. Albans Planning Permit Application Residential Subdivision and Industrial Use St. Albans Road and Furlong Road St. Albans Planning Permit Application Re-Roofing of Factory 45 - 47 Market Road Sunshine Planning Permit Application I.C.I. Australia Operations Pty Ltd Polypropylene Film Plant Lot 1 Station Road Deer Park Planning Permit Application Warehouse Lots 313 & 314 Rothray Avenue Sunshine North Planning Permit Application Panel Sign 495 Ballarat Road Sunshine Planning Permit Application Cafe Ground floor Office First Floor 99 Glengala Road Sunshine West Planning Permit Application Medical Consulting Room and Town House Lot 2 Monash Street Sunshine Planning Permit Application Medical Consulting Room 16 Jackson Street Maidstone Planning Permit Application Illuminated Non Flashing Sign Tottenham Hotel Sunshine Road Tottenham Plan of Subdivision I.C.I. Middle Road, Fitzgerald Road and Station Road Deer Park Strata Subdivision 2 Oleander Drive St. Albans Plan of Subdivision Ballart Road Sunshine Plan of Transfer Discontinued Part of Former Eva Street South of Hall Street Sunshine West Installation of Intersection Signals Kings Road / Main Road West / Station Road St. Albans Availability of Sewers Albanvale Fairbairn Road Branch Sewer Section 4 and Sewerage Reticulation Area No 404 Report of the Building Surveyor Building on Land Liable to Flooding 35 The Esplanade Maribyrnong Building Department Telephone Service Location of Building 1 Adair Place Sunshine West Location of Building Lot 865 Warrington Crescent Deer Park Council Policy for Outbuildings Report of the Superintendent of Parks & Recreation Tenders for Fencing Various Reserves Schedule for Authorising of Affixing the Common Seal of the Municipality to Documents Orders of the Day Accounts Submitted for Payment as at 15th May 1981 Delegation of Authority Albion Community Houseitalo-australian social club, furlong road, st. albans, south road, showers street, braybrook, albion community house, selwyn park, selwyn street, albion, albion reid, reid street, alion reid tip, hillside crescent, maribyrnong, olex cables, sunshine road, olympia street, tottenham, hampshire road, devonshire road, sunshine, w.l. allen foundry, hulett street, a.t. stead, frederick street, mcintyre road, sunshine north, st. albans community & resource centre, andrea street, st. albans road, market road, i.c.i., station road, deer park, rothray avenue, ballarat road, glengala road, sunshine west, monash street, jackson street, maidstone, tottenham hotel, middle road, fitzgerald road, derrimut, oleander drive, eva street, hall street, kings road, main road west, the esplanade, adair place, warrington crescent -
 Federation University Historical Collection
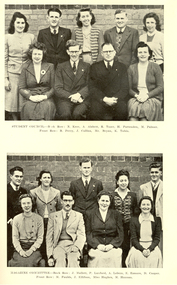
Booklet, Extra Muros, 1947, 1947
... What we should do and how it is to be done is difficult to descibe, but if we ourselves have taught something of the Anzac Sprit we shall not fail. In particular, we shold take care...What we should do and how it is to be done is difficult to descibe, but if we ourselves have taught something of the Anzac Sprit we shall not fail. In particular, we shold take care ...Each year World War One and World War Two veteran, and Ballarat Teachers' College Principal addressed the College community for ANZAC Day. The following are excerpts of his 1947 address. "...But we should do more than remember, and instead of pausing once a year for this purpose is should be our aim to remember daily - every day should be an Anzac Day so that we shall be inspired to take stock of ourselves if we are tryig to be worthy of almidst 100,000 dead who died to keep this country free to progress nobly towards a worthy goal, What are we dong about it? As a body of teachers er should be particulalrly concerned, as in our hands largely the growth of the children lies. In the schools we can do much in our work of every day to develop right standards and a better outlook amongst the children it is our privilege to teach. We can successfully teach the three "R's" but if this is all we do then we have failed. Is should be our aim, living in the spirit of those who gace so much, to dedicate ourselfes to the work of teaching young people how to live; to train them gently in ethical standards of conduct; to take responsibility; to live through the operation with otherts; to be prepared to give service without thought of personal gain; to realise to the full all that is best in them for the good of all. What we should do and how it is to be done is difficult to descibe, but if we ourselves have taught something of the Anzac Sprit we shall not fail. In particular, we shold take care of the orphan and th child of the disabled soldier. We should explore all avenues to see what that these children get every opportunity for higher education. As far as it lies in our power we should see that these children do not suffer - thus the legacy of war is ours. In a few months you will be going out to your schools. You will have young children around you. Let you arims be high. Try to live worthily and let your little community be the better and the finer for your coming. If you achiec somethig of thise then 100,000 shall nit have died in vain." Blue soft covered, stapled booklet named 'Extra Muros', the magazine of the Ballarat Teachers College, ANZAC Day. The contents include: The Year's Sport, J. Arthur Rank; Music; Dingo Blood; Anzac Day 1947; History of Sport; J. Arthur Rank Named images include: staff and students; Sports Committee; Social Committee; Student Council; Magazine Committee' Daylesford Camp; Anglesea Camp; Grampians Camp; Exies, College staff and students;A number of authorgraps are written into the back page. ballarat teachers' college, ellwood, lord, robinson, tozer, connelly, pattenden, collins, blake, faulds, sunderland, miller, bryan, yeo, frank lord, lindsay w. harley, lindsay w. harley, anzac day -
 Flagstaff Hill Maritime Museum and Village
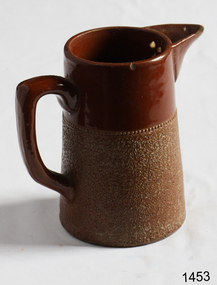
Domestic object - Jug
... If you want to do sgraffito – you will need to keep the work leather hard (a state of dryness where you can still work the clay with a little effort and a little water and care). ...If you want to do sgraffito – you will need to keep the work leather hard (a state of dryness where you can still work the clay with a little effort and a little water and care). ...The Process of Making Pottery Decorating, Firing, Glazing, Making, Technical There is a rhythm and flow to clay. It can’t be done all at once! Even the making process! It can take weeks to get everything done, especially if you can only work on your pottery once a week! Even though we have three hour classes, it’s often just not enough time! Here is an overview of some of the processes so you have a bit more grasp on some of the technical stuff! Step One – Design There are SO many ideas out there for making stuff in clay! From delicate porcelain jewellery, through to heavy sculptural work and everything in between. Deciding your direction is sometimes not that easy – when you first start, try everything, you will naturally gravitate to the style that you enjoy! The options and variations are endless and can get a wee bit overwhelming too! Check in with me before you start to ensure your ideas will work, what order you might do things, how you could achieve the look you are seeking and any other technical data required! Step Two – Making Clay is thixotropic. This means that as you work with it, the clay first gets sloppier and wetter, before is begins to dry in the atmosphere. For most things, you simply can’t do all parts of the project at once. An example of work order might look like: Get last weeks work out from the shelves Prepare clay for today’s work – roll your clay, prepare balls for throwing, make the first stage of a pinch pot) Clean up last week’s work and put it on the shelf for bisque firing Check that you have any glazing to do – and do enough of it that you will have time to finish your main project Do the next step of your next project – there might be a further step that can’t be complete immediately, in that case, wrap your work well and put onto the shelves. Letting your work rest for a while can really help keep your work clean and professional looking. Many things require bagging under plastic to keep it ready for work the next week – put your name on the outside of the bag so you can find your work easily. We have stickers and markers. Consider how you want to decorate your work – coloured slip can be applied at a fairly wet stage (remembering that it will make your work even wetter!). Trying to apply slip to dry clay won’t work! If you want to do sgraffito – you will need to keep the work leather hard (a state of dryness where you can still work the clay with a little effort and a little water and care). Step Three – Drying Most of the time your work can go into the rack uncovered to let it dry out for the following week. If you want to continue forming or shaping you will need to double bag your work – put your work on a suitable sized bat and put the bat in a bag so the base of the bag is under the bat, then put another bag over the top of the work and tuck the top of the bag under the bat. If you want to trim (or turn) your thrown work the following week, it should also be double bagged. If your work is large, delicate, or of uneven thicknesses, you should lightly cover your work for drying. When considering the drying process, bare in mind the weather, humidity and wind! The hotter and dryer, the faster things dry and work can dry unevenly in the shelves – this can lead to cracking – another time to lightly cover your work for drying. Step Four – Trimming and Cleaning Up Your work is dry! It is called greenware now and it is at it’s most fragile! Handle everything with two hands. I often refer to soft hands – keep everything gentle and with your fingers spread as much as possible. Try to not pick up things like plates too much, and always with both hands! Before your work can be bisque fired it should be “cleaned up”. You work won’t go into the kiln if it has sharp edges – when glazed, sharp edges turn into razor blades! Use a piece of fly wire to rub the work all over – this will scratch a little so be light handed. Use a knife or metal kidney to scrape any areas that require a bit more dynamic treatment than the fly wire offers! Finally, a very light wipe over with a slightly damp sponge can help soften and soothe all of your edges and dags! Trimming thrown work: If you are planning to trim (or turn) your thrown work (and you should be), make sure you bag it well – your work should be leather hard to almost dry for easiest trimming. Use this step to finish the work completely – use a metal kidney to polish the surface, or a slightly damp sponge to give a freshly thrown look. Wipe the sponge around the rim after trimming, and check the inside of the pot for dags! Trimming slip cast work: Usually I will trim the rims of your work on the wheel the following day to make that stage easier, however you will still need to check your work for lumps and bumps. Last but not least – check that your name is still clearly on the bottom of your work. Step Five – Bisque Firing When the work is completely dry it can go into the bisque kiln. The bisque kiln is fired to 1000°C. This process burns off the water in the clay as well as some of the chemically bound water. The structure of the clay is not altered that much at this temperature. Inside the bisque kiln, the work is stacked a little, small bowl inside a larger bowl and onto a heavy plate. Smaller items like decorations or drink coasters might get stacked several high. Consideration is paid to the weight of the stack and shape of the work. A bisque kiln can fire about one and a half times the amount of work that the glaze kiln can fire. The firing takes about 10 hours to complete the cycle and about two days to cool down. Once it has been emptied the work is placed in the glaze room ready for you to decorate! Step Six – Glazing Decorating your work with colour can be a lot of fun – and time consuming! There are three main options for surface treatment at this stage: Oxide Washes Underglazes Glazes Washes and underglazes do not “glaze” the work – It will still need a layer of glaze to fully seal the clay (washes don’t need glaze on surfaces not designed for food or liquid as they can gloss up a little on their own). Underglazes are stable colourants that turn out pretty much how they look in the jar. They can be mixed with each other to form other colours and can be used like water colours to paint onto your work. Mostly they should have a clear glaze on top to seal them. Oxides are a different species – the pink oxide (cobalt) wash turns out bright blue for instance. They don’t always need a glaze on top, and some glazes can change the colour of the wash! The glazes need no other “glaze” on top! Be careful of unknown glaze interactions – you can put any combination of glaze in a bowl or on a plate, but only a single glaze on the outside of any vertical surface! Glazes are a chemical reaction under heat. We don’t know the exact chemicals in the Mayco glazes we use. I can guess by the way they interact with each other, however, on the whole, you need to test every idea you have, and not run the test on a vertical surface! Simply put, glaze is a layer of glass like substance that bonds with the clay underneath. Clay is made of silica, alumina and water. Glaze is made of mostly silica. Silica has a melting point of 1700°C and we fire to 1240°C. The silica requires a “flux” to help it melt at the lower temperature. Fluxes can be all sorts of chemicals – a common one is calcium – calcium has a melting point of 2500°C, however, together they both melt at a much lower temperature! Colourants are metal oxides like cobalt (blue), chrome (green through black), copper (green, blue, even red!), manganese (black, purple and pink) iron (red brown), etc. Different chemicals in the glaze can have dramatic effects. for example, barium carbonate (which we don’t use) turns manganese bright pink! Other elements can turn manganese dioxide brown, blue, purple and reddish brown. Manganese dioxide is a flux in and of itself as well. So, glazes that get their black and purple colours, often interact with other glazes and RUN! Our mirror black is a good example – it mixes really well with many glazes because it fluxes them – causes them to melt faster. It will also bring out many beautiful colours in the glazes because it’s black colouring most definitely comes from manganese dioxide! Glaze chemistry is a whole subject on it’s own! We use commercial Mayco glazes on purpose – for their huge range of colour possibilities, stability, cool interactions, artistic freedom with the ability to easily brush the glazes on and ease of use. We currently have almost 50 glazes on hand! A major project is to test the interactions of all glazes with each other. That is 2,500 test tiles!!!! I’m going to make the wall behind the wheels the feature wall of pretty colours! Step Seven – Glaze (Gloss or sometimes called “Glost”) Firing Most of the time this is the final stage of making your creation (but not always!) The glaze kiln goes to 1240°C. This is called cone 6, or midrange. It is the low end of stoneware temperatures. Stoneware clays and glazes are typically fired at cone 8 – 10, that is 1260 – 1290°C. The energy requirement to go from 1240°C to 1280°C is almost a 30% more! Our clay is formulated to vitrify (mature, turn “glass-like”) at 1240°, as are our glazes. A glaze kiln take around 12 hours to reach temperature and two to three days to cool down. Sometimes a third firing process is required – this is for decoration that is added to work after the glaze firing. For example – adding precious metals and lustres. this firing temperature is usually around 600 – 800°C depending upon the techniques being used. There are many students interested in gold and silver trims – we will be doing this third type of firing soon! After firing your work will be in the student finished work shelves. Remember to pay for it before you head out the door! There is a small extra charge for using porcelain clay (it’s more than twice the price of regular clay), and for any third firing process! Once your work has been fired it can not turn back into clay for millennia – so don’t fire it if you don’t like it! Put it in the bucket for recycling. https://firebirdstudios.com.au/the-process-of-making-pottery/The form of the jug has been in use for many centuries.Stoneware jug. Two tone brown glaze with pierced lip behind spout. Spout chipped.None.flagstaff hill, warrnambool, shipwrecked-coast, flagstaff-hill, flagstaff-hill-maritime-museum, maritime-museum, shipwreck-coast, flagstaff-hill-maritime-village, jug, ceramic jug -
 Flagstaff Hill Maritime Museum and Village
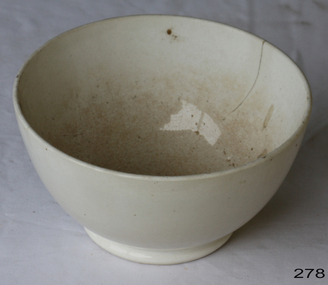
Domestic object - Bowl, Late 19th or early 20th Century
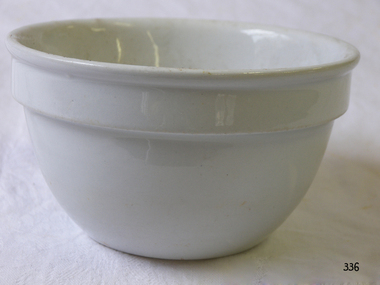
... If you want to do sgraffito – you will need to keep the work leather hard (a state of dryness where you can still work the clay with a little effort and a little water and care). ...If you want to do sgraffito – you will need to keep the work leather hard (a state of dryness where you can still work the clay with a little effort and a little water and care). ...The Process of Making Pottery Decorating, Firing, Glazing, Making, Technical There is a rhythm and flow to clay. It can’t be done all at once! Even the making process! It can take weeks to get everything done, especially if you can only work on your pottery once a week! Even though we have three hour classes, it’s often just not enough time! Here is an overview of some of the processes so you have a bit more grasp on some of the technical stuff! Step One – Design There are SO many ideas out there for making stuff in clay! From delicate porcelain jewellery, through to heavy sculptural work and everything in between. Deciding your direction is sometimes not that easy – when you first start, try everything, you will naturally gravitate to the style that you enjoy! The options and variations are endless and can get a wee bit overwhelming too! Check in with me before you start to ensure your ideas will work, what order you might do things, how you could achieve the look you are seeking and any other technical data required! Step Two – Making Clay is thixotropic. This means that as you work with it, the clay first gets sloppier and wetter, before is begins to dry in the atmosphere. For most things, you simply can’t do all parts of the project at once. An example of work order might look like: Get last weeks work out from the shelves Prepare clay for today’s work – roll your clay, prepare balls for throwing, make the first stage of a pinch pot) Clean up last week’s work and put it on the shelf for bisque firing Check that you have any glazing to do – and do enough of it that you will have time to finish your main project Do the next step of your next project – there might be a further step that can’t be complete immediately, in that case, wrap your work well and put onto the shelves. Letting your work rest for a while can really help keep your work clean and professional looking. Many things require bagging under plastic to keep it ready for work the next week – put your name on the outside of the bag so you can find your work easily. We have stickers and markers. Consider how you want to decorate your work – coloured slip can be applied at a fairly wet stage (remembering that it will make your work even wetter!). Trying to apply slip to dry clay won’t work! If you want to do sgraffito – you will need to keep the work leather hard (a state of dryness where you can still work the clay with a little effort and a little water and care). Step Three – Drying Most of the time your work can go into the rack uncovered to let it dry out for the following week. If you want to continue forming or shaping you will need to double bag your work – put your work on a suitable sized bat and put the bat in a bag so the base of the bag is under the bat, then put another bag over the top of the work and tuck the top of the bag under the bat. If you want to trim (or turn) your thrown work the following week, it should also be double bagged. If your work is large, delicate, or of uneven thicknesses, you should lightly cover your work for drying. When considering the drying process, bare in mind the weather, humidity and wind! The hotter and dryer, the faster things dry and work can dry unevenly in the shelves – this can lead to cracking – another time to lightly cover your work for drying. Step Four – Trimming and Cleaning Up Your work is dry! It is called greenware now and it is at it’s most fragile! Handle everything with two hands. I often refer to soft hands – keep everything gentle and with your fingers spread as much as possible. Try to not pick up things like plates too much, and always with both hands! Before your work can be bisque fired it should be “cleaned up”. You work won’t go into the kiln if it has sharp edges – when glazed, sharp edges turn into razor blades! Use a piece of fly wire to rub the work all over – this will scratch a little so be light handed. Use a knife or metal kidney to scrape any areas that require a bit more dynamic treatment than the fly wire offers! Finally, a very light wipe over with a slightly damp sponge can help soften and soothe all of your edges and dags! Trimming thrown work: If you are planning to trim (or turn) your thrown work (and you should be), make sure you bag it well – your work should be leather hard to almost dry for easiest trimming. Use this step to finish the work completely – use a metal kidney to polish the surface, or a slightly damp sponge to give a freshly thrown look. Wipe the sponge around the rim after trimming, and check the inside of the pot for dags! Trimming slip cast work: Usually I will trim the rims of your work on the wheel the following day to make that stage easier, however you will still need to check your work for lumps and bumps. Last but not least – check that your name is still clearly on the bottom of your work. Step Five – Bisque Firing When the work is completely dry it can go into the bisque kiln. The bisque kiln is fired to 1000°C. This process burns off the water in the clay as well as some of the chemically bound water. The structure of the clay is not altered that much at this temperature. Inside the bisque kiln, the work is stacked a little, small bowl inside a larger bowl and onto a heavy plate. Smaller items like decorations or drink coasters might get stacked several high. Consideration is paid to the weight of the stack and shape of the work. A bisque kiln can fire about one and a half times the amount of work that the glaze kiln can fire. The firing takes about 10 hours to complete the cycle and about two days to cool down. Once it has been emptied the work is placed in the glaze room ready for you to decorate! Step Six – Glazing Decorating your work with colour can be a lot of fun – and time consuming! There are three main options for surface treatment at this stage: Oxide Washes Underglazes Glazes Washes and underglazes do not “glaze” the work – It will still need a layer of glaze to fully seal the clay (washes don’t need glaze on surfaces not designed for food or liquid as they can gloss up a little on their own). Underglazes are stable colourants that turn out pretty much how they look in the jar. They can be mixed with each other to form other colours and can be used like water colours to paint onto your work. Mostly they should have a clear glaze on top to seal them. Oxides are a different species – the pink oxide (cobalt) wash turns out bright blue for instance. They don’t always need a glaze on top, and some glazes can change the colour of the wash! The glazes need no other “glaze” on top! Be careful of unknown glaze interactions – you can put any combination of glaze in a bowl or on a plate, but only a single glaze on the outside of any vertical surface! Glazes are a chemical reaction under heat. We don’t know the exact chemicals in the Mayco glazes we use. I can guess by the way they interact with each other, however, on the whole, you need to test every idea you have, and not run the test on a vertical surface! Simply put, glaze is a layer of glass like substance that bonds with the clay underneath. Clay is made of silica, alumina and water. Glaze is made of mostly silica. Silica has a melting point of 1700°C and we fire to 1240°C. The silica requires a “flux” to help it melt at the lower temperature. Fluxes can be all sorts of chemicals – a common one is calcium – calcium has a melting point of 2500°C, however, together they both melt at a much lower temperature! Colourants are metal oxides like cobalt (blue), chrome (green through black), copper (green, blue, even red!), manganese (black, purple and pink) iron (red brown), etc. Different chemicals in the glaze can have dramatic effects. for example, barium carbonate (which we don’t use) turns manganese bright pink! Other elements can turn manganese dioxide brown, blue, purple and reddish brown. Manganese dioxide is a flux in and of itself as well. So, glazes that get their black and purple colours, often interact with other glazes and RUN! Our mirror black is a good example – it mixes really well with many glazes because it fluxes them – causes them to melt faster. It will also bring out many beautiful colours in the glazes because it’s black colouring most definitely comes from manganese dioxide! Glaze chemistry is a whole subject on it’s own! We use commercial Mayco glazes on purpose – for their huge range of colour possibilities, stability, cool interactions, artistic freedom with the ability to easily brush the glazes on and ease of use. We currently have almost 50 glazes on hand! A major project is to test the interactions of all glazes with each other. That is 2,500 test tiles!!!! I’m going to make the wall behind the wheels the feature wall of pretty colours! Step Seven – Glaze (Gloss or sometimes called “Glost”) Firing Most of the time this is the final stage of making your creation (but not always!) The glaze kiln goes to 1240°C. This is called cone 6, or midrange. It is the low end of stoneware temperatures. Stoneware clays and glazes are typically fired at cone 8 – 10, that is 1260 – 1290°C. The energy requirement to go from 1240°C to 1280°C is almost a 30% more! Our clay is formulated to vitrify (mature, turn “glass-like”) at 1240°, as are our glazes. A glaze kiln take around 12 hours to reach temperature and two to three days to cool down. Sometimes a third firing process is required – this is for decoration that is added to work after the glaze firing. For example – adding precious metals and lustres. this firing temperature is usually around 600 – 800°C depending upon the techniques being used. There are many students interested in gold and silver trims – we will be doing this third type of firing soon! After firing your work will be in the student finished work shelves. Remember to pay for it before you head out the door! There is a small extra charge for using porcelain clay (it’s more than twice the price of regular clay), and for any third firing process! Once your work has been fired it can not turn back into clay for millennia – so don’t fire it if you don’t like it! Put it in the bucket for recycling. https://firebirdstudios.com.au/the-process-of-making-pottery/ The bowl is an example of kitchenware used in the 19th century and still in use today.Bowl white ceramic. Crack on side. Badly stained.Backstamp very faint and unable to be read.flagstaff hill, warrnambool, shipwrecked-coast, flagstaff-hill, flagstaff-hill-maritime-museum, maritime-museum, shipwreck-coast, flagstaff-hill-maritime-village, mixing bowl, food preparation, kitchen equipment, ceramic -
 Flagstaff Hill Maritime Museum and Village
Domestic object - Bowl
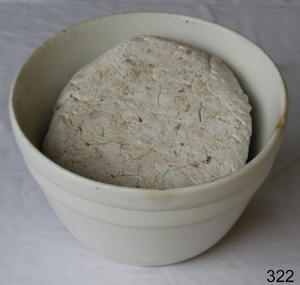
... If you want to do sgraffito – you will need to keep the work leather hard (a state of dryness where you can still work the clay with a little effort and a little water and care). ...If you want to do sgraffito – you will need to keep the work leather hard (a state of dryness where you can still work the clay with a little effort and a little water and care). ...The Process of Making Pottery Decorating, Firing, Glazing, Making, Technical There is a rhythm and flow to clay. It can’t be done all at once! Even the making process! It can take weeks to get everything done, especially if you can only work on your pottery once a week! Even though we have three hour classes, it’s often just not enough time! Here is an overview of some of the processes so you have a bit more grasp on some of the technical stuff! Step One – Design There are SO many ideas out there for making stuff in clay! From delicate porcelain jewellery, through to heavy sculptural work and everything in between. Deciding your direction is sometimes not that easy – when you first start, try everything, you will naturally gravitate to the style that you enjoy! The options and variations are endless and can get a wee bit overwhelming too! Check in with me before you start to ensure your ideas will work, what order you might do things, how you could achieve the look you are seeking and any other technical data required! Step Two – Making Clay is thixotropic. This means that as you work with it, the clay first gets sloppier and wetter, before is begins to dry in the atmosphere. For most things, you simply can’t do all parts of the project at once. An example of work order might look like: Get last weeks work out from the shelves Prepare clay for today’s work – roll your clay, prepare balls for throwing, make the first stage of a pinch pot) Clean up last week’s work and put it on the shelf for bisque firing Check that you have any glazing to do – and do enough of it that you will have time to finish your main project Do the next step of your next project – there might be a further step that can’t be complete immediately, in that case, wrap your work well and put onto the shelves. Letting your work rest for a while can really help keep your work clean and professional looking. Many things require bagging under plastic to keep it ready for work the next week – put your name on the outside of the bag so you can find your work easily. We have stickers and markers. Consider how you want to decorate your work – coloured slip can be applied at a fairly wet stage (remembering that it will make your work even wetter!). Trying to apply slip to dry clay won’t work! If you want to do sgraffito – you will need to keep the work leather hard (a state of dryness where you can still work the clay with a little effort and a little water and care). Step Three – Drying Most of the time your work can go into the rack uncovered to let it dry out for the following week. If you want to continue forming or shaping you will need to double bag your work – put your work on a suitable sized bat and put the bat in a bag so the base of the bag is under the bat, then put another bag over the top of the work and tuck the top of the bag under the bat. If you want to trim (or turn) your thrown work the following week, it should also be double bagged. If your work is large, delicate, or of uneven thicknesses, you should lightly cover your work for drying. When considering the drying process, bare in mind the weather, humidity and wind! The hotter and dryer, the faster things dry and work can dry unevenly in the shelves – this can lead to cracking – another time to lightly cover your work for drying. Step Four – Trimming and Cleaning Up Your work is dry! It is called greenware now and it is at it’s most fragile! Handle everything with two hands. I often refer to soft hands – keep everything gentle and with your fingers spread as much as possible. Try to not pick up things like plates too much, and always with both hands! Before your work can be bisque fired it should be “cleaned up”. You work won’t go into the kiln if it has sharp edges – when glazed, sharp edges turn into razor blades! Use a piece of fly wire to rub the work all over – this will scratch a little so be light handed. Use a knife or metal kidney to scrape any areas that require a bit more dynamic treatment than the fly wire offers! Finally, a very light wipe over with a slightly damp sponge can help soften and soothe all of your edges and dags! Trimming thrown work: If you are planning to trim (or turn) your thrown work (and you should be), make sure you bag it well – your work should be leather hard to almost dry for easiest trimming. Use this step to finish the work completely – use a metal kidney to polish the surface, or a slightly damp sponge to give a freshly thrown look. Wipe the sponge around the rim after trimming, and check the inside of the pot for dags! Trimming slip cast work: Usually I will trim the rims of your work on the wheel the following day to make that stage easier, however you will still need to check your work for lumps and bumps. Last but not least – check that your name is still clearly on the bottom of your work. Step Five – Bisque Firing When the work is completely dry it can go into the bisque kiln. The bisque kiln is fired to 1000°C. This process burns off the water in the clay as well as some of the chemically bound water. The structure of the clay is not altered that much at this temperature. Inside the bisque kiln, the work is stacked a little, small bowl inside a larger bowl and onto a heavy plate. Smaller items like decorations or drink coasters might get stacked several high. Consideration is paid to the weight of the stack and shape of the work. A bisque kiln can fire about one and a half times the amount of work that the glaze kiln can fire. The firing takes about 10 hours to complete the cycle and about two days to cool down. Once it has been emptied the work is placed in the glaze room ready for you to decorate! Step Six – Glazing Decorating your work with colour can be a lot of fun – and time consuming! There are three main options for surface treatment at this stage: Oxide Washes Underglazes Glazes Washes and underglazes do not “glaze” the work – It will still need a layer of glaze to fully seal the clay (washes don’t need glaze on surfaces not designed for food or liquid as they can gloss up a little on their own). Underglazes are stable colourants that turn out pretty much how they look in the jar. They can be mixed with each other to form other colours and can be used like water colours to paint onto your work. Mostly they should have a clear glaze on top to seal them. Oxides are a different species – the pink oxide (cobalt) wash turns out bright blue for instance. They don’t always need a glaze on top, and some glazes can change the colour of the wash! The glazes need no other “glaze” on top! Be careful of unknown glaze interactions – you can put any combination of glaze in a bowl or on a plate, but only a single glaze on the outside of any vertical surface! Glazes are a chemical reaction under heat. We don’t know the exact chemicals in the Mayco glazes we use. I can guess by the way they interact with each other, however, on the whole, you need to test every idea you have, and not run the test on a vertical surface! Simply put, glaze is a layer of glass like substance that bonds with the clay underneath. Clay is made of silica, alumina and water. Glaze is made of mostly silica. Silica has a melting point of 1700°C and we fire to 1240°C. The silica requires a “flux” to help it melt at the lower temperature. Fluxes can be all sorts of chemicals – a common one is calcium – calcium has a melting point of 2500°C, however, together they both melt at a much lower temperature! Colourants are metal oxides like cobalt (blue), chrome (green through black), copper (green, blue, even red!), manganese (black, purple and pink) iron (red brown), etc. Different chemicals in the glaze can have dramatic effects. for example, barium carbonate (which we don’t use) turns manganese bright pink! Other elements can turn manganese dioxide brown, blue, purple and reddish brown. Manganese dioxide is a flux in and of itself as well. So, glazes that get their black and purple colours, often interact with other glazes and RUN! Our mirror black is a good example – it mixes really well with many glazes because it fluxes them – causes them to melt faster. It will also bring out many beautiful colours in the glazes because it’s black colouring most definitely comes from manganese dioxide! Glaze chemistry is a whole subject on it’s own! We use commercial Mayco glazes on purpose – for their huge range of colour possibilities, stability, cool interactions, artistic freedom with the ability to easily brush the glazes on and ease of use. We currently have almost 50 glazes on hand! A major project is to test the interactions of all glazes with each other. That is 2,500 test tiles!!!! I’m going to make the wall behind the wheels the feature wall of pretty colours! Step Seven – Glaze (Gloss or sometimes called “Glost”) Firing Most of the time this is the final stage of making your creation (but not always!) The glaze kiln goes to 1240°C. This is called cone 6, or midrange. It is the low end of stoneware temperatures. Stoneware clays and glazes are typically fired at cone 8 – 10, that is 1260 – 1290°C. The energy requirement to go from 1240°C to 1280°C is almost a 30% more! Our clay is formulated to vitrify (mature, turn “glass-like”) at 1240°, as are our glazes. A glaze kiln take around 12 hours to reach temperature and two to three days to cool down. Sometimes a third firing process is required – this is for decoration that is added to work after the glaze firing. For example – adding precious metals and lustres. this firing temperature is usually around 600 – 800°C depending upon the techniques being used. There are many students interested in gold and silver trims – we will be doing this third type of firing soon! After firing your work will be in the student finished work shelves. Remember to pay for it before you head out the door! There is a small extra charge for using porcelain clay (it’s more than twice the price of regular clay), and for any third firing process! Once your work has been fired it can not turn back into clay for millennia – so don’t fire it if you don’t like it! Put it in the bucket for recycling. https://firebirdstudios.com.au/the-process-of-making-pottery/ This bowl is an example of kitchenware used in the 19th century and still in use today.Bowl white ceramic plain that has two sets of edging around lip. Inside bowl has plaster designed to look like cooking mixture.flagstaff hill, warrnambool, shipwrecked-coast, flagstaff-hill, flagstaff-hill-maritime-museum, maritime-museum, shipwreck-coast, flagstaff-hill-maritime-village, kitchen equipment, ceramic -
 Flagstaff Hill Maritime Museum and Village
Domestic object - Bowl, J & G Meakin, Late 19th or early 20th Century
... If you want to do sgraffito – you will need to keep the work leather hard (a state of dryness where you can still work the clay with a little effort and a little water and care). ...If you want to do sgraffito – you will need to keep the work leather hard (a state of dryness where you can still work the clay with a little effort and a little water and care). ...The Process of Making Pottery Decorating, Firing, Glazing, Making, Technical There is a rhythm and flow to clay. It can’t be done all at once! Even the making process! It can take weeks to get everything done, especially if you can only work on your pottery once a week! Even though we have three hour classes, it’s often just not enough time! Here is an overview of some of the processes so you have a bit more grasp on some of the technical stuff! Step One – Design There are SO many ideas out there for making stuff in clay! From delicate porcelain jewellery, through to heavy sculptural work and everything in between. Deciding your direction is sometimes not that easy – when you first start, try everything, you will naturally gravitate to the style that you enjoy! The options and variations are endless and can get a wee bit overwhelming too! Check in with me before you start to ensure your ideas will work, what order you might do things, how you could achieve the look you are seeking and any other technical data required! Step Two – Making Clay is thixotropic. This means that as you work with it, the clay first gets sloppier and wetter, before is begins to dry in the atmosphere. For most things, you simply can’t do all parts of the project at once. An example of work order might look like: Get last weeks work out from the shelves Prepare clay for today’s work – roll your clay, prepare balls for throwing, make the first stage of a pinch pot) Clean up last week’s work and put it on the shelf for bisque firing Check that you have any glazing to do – and do enough of it that you will have time to finish your main project Do the next step of your next project – there might be a further step that can’t be complete immediately, in that case, wrap your work well and put onto the shelves. Letting your work rest for a while can really help keep your work clean and professional looking. Many things require bagging under plastic to keep it ready for work the next week – put your name on the outside of the bag so you can find your work easily. We have stickers and markers. Consider how you want to decorate your work – coloured slip can be applied at a fairly wet stage (remembering that it will make your work even wetter!). Trying to apply slip to dry clay won’t work! If you want to do sgraffito – you will need to keep the work leather hard (a state of dryness where you can still work the clay with a little effort and a little water and care). Step Three – Drying Most of the time your work can go into the rack uncovered to let it dry out for the following week. If you want to continue forming or shaping you will need to double bag your work – put your work on a suitable sized bat and put the bat in a bag so the base of the bag is under the bat, then put another bag over the top of the work and tuck the top of the bag under the bat. If you want to trim (or turn) your thrown work the following week, it should also be double bagged. If your work is large, delicate, or of uneven thicknesses, you should lightly cover your work for drying. When considering the drying process, bare in mind the weather, humidity and wind! The hotter and dryer, the faster things dry and work can dry unevenly in the shelves – this can lead to cracking – another time to lightly cover your work for drying. Step Four – Trimming and Cleaning Up Your work is dry! It is called greenware now and it is at it’s most fragile! Handle everything with two hands. I often refer to soft hands – keep everything gentle and with your fingers spread as much as possible. Try to not pick up things like plates too much, and always with both hands! Before your work can be bisque fired it should be “cleaned up”. You work won’t go into the kiln if it has sharp edges – when glazed, sharp edges turn into razor blades! Use a piece of fly wire to rub the work all over – this will scratch a little so be light handed. Use a knife or metal kidney to scrape any areas that require a bit more dynamic treatment than the fly wire offers! Finally, a very light wipe over with a slightly damp sponge can help soften and soothe all of your edges and dags! Trimming thrown work: If you are planning to trim (or turn) your thrown work (and you should be), make sure you bag it well – your work should be leather hard to almost dry for easiest trimming. Use this step to finish the work completely – use a metal kidney to polish the surface, or a slightly damp sponge to give a freshly thrown look. Wipe the sponge around the rim after trimming, and check the inside of the pot for dags! Trimming slip cast work: Usually I will trim the rims of your work on the wheel the following day to make that stage easier, however you will still need to check your work for lumps and bumps. Last but not least – check that your name is still clearly on the bottom of your work. Step Five – Bisque Firing When the work is completely dry it can go into the bisque kiln. The bisque kiln is fired to 1000°C. This process burns off the water in the clay as well as some of the chemically bound water. The structure of the clay is not altered that much at this temperature. Inside the bisque kiln, the work is stacked a little, small bowl inside a larger bowl and onto a heavy plate. Smaller items like decorations or drink coasters might get stacked several high. Consideration is paid to the weight of the stack and shape of the work. A bisque kiln can fire about one and a half times the amount of work that the glaze kiln can fire. The firing takes about 10 hours to complete the cycle and about two days to cool down. Once it has been emptied the work is placed in the glaze room ready for you to decorate! Step Six – Glazing Decorating your work with colour can be a lot of fun – and time consuming! There are three main options for surface treatment at this stage: Oxide Washes Underglazes Glazes Washes and underglazes do not “glaze” the work – It will still need a layer of glaze to fully seal the clay (washes don’t need glaze on surfaces not designed for food or liquid as they can gloss up a little on their own). Underglazes are stable colourants that turn out pretty much how they look in the jar. They can be mixed with each other to form other colours and can be used like water colours to paint onto your work. Mostly they should have a clear glaze on top to seal them. Oxides are a different species – the pink oxide (cobalt) wash turns out bright blue for instance. They don’t always need a glaze on top, and some glazes can change the colour of the wash! The glazes need no other “glaze” on top! Be careful of unknown glaze interactions – you can put any combination of glaze in a bowl or on a plate, but only a single glaze on the outside of any vertical surface! Glazes are a chemical reaction under heat. We don’t know the exact chemicals in the Mayco glazes we use. I can guess by the way they interact with each other, however, on the whole, you need to test every idea you have, and not run the test on a vertical surface! Simply put, glaze is a layer of glass like substance that bonds with the clay underneath. Clay is made of silica, alumina and water. Glaze is made of mostly silica. Silica has a melting point of 1700°C and we fire to 1240°C. The silica requires a “flux” to help it melt at the lower temperature. Fluxes can be all sorts of chemicals – a common one is calcium – calcium has a melting point of 2500°C, however, together they both melt at a much lower temperature! Colourants are metal oxides like cobalt (blue), chrome (green through black), copper (green, blue, even red!), manganese (black, purple and pink) iron (red brown), etc. Different chemicals in the glaze can have dramatic effects. for example, barium carbonate (which we don’t use) turns manganese bright pink! Other elements can turn manganese dioxide brown, blue, purple and reddish brown. Manganese dioxide is a flux in and of itself as well. So, glazes that get their black and purple colours, often interact with other glazes and RUN! Our mirror black is a good example – it mixes really well with many glazes because it fluxes them – causes them to melt faster. It will also bring out many beautiful colours in the glazes because it’s black colouring most definitely comes from manganese dioxide! Glaze chemistry is a whole subject on it’s own! We use commercial Mayco glazes on purpose – for their huge range of colour possibilities, stability, cool interactions, artistic freedom with the ability to easily brush the glazes on and ease of use. We currently have almost 50 glazes on hand! A major project is to test the interactions of all glazes with each other. That is 2,500 test tiles!!!! I’m going to make the wall behind the wheels the feature wall of pretty colours! Step Seven – Glaze (Gloss or sometimes called “Glost”) Firing Most of the time this is the final stage of making your creation (but not always!) The glaze kiln goes to 1240°C. This is called cone 6, or midrange. It is the low end of stoneware temperatures. Stoneware clays and glazes are typically fired at cone 8 – 10, that is 1260 – 1290°C. The energy requirement to go from 1240°C to 1280°C is almost a 30% more! Our clay is formulated to vitrify (mature, turn “glass-like”) at 1240°, as are our glazes. A glaze kiln take around 12 hours to reach temperature and two to three days to cool down. Sometimes a third firing process is required – this is for decoration that is added to work after the glaze firing. For example – adding precious metals and lustres. this firing temperature is usually around 600 – 800°C depending upon the techniques being used. There are many students interested in gold and silver trims – we will be doing this third type of firing soon! After firing your work will be in the student finished work shelves. Remember to pay for it before you head out the door! There is a small extra charge for using porcelain clay (it’s more than twice the price of regular clay), and for any third firing process! Once your work has been fired it can not turn back into clay for millennia – so don’t fire it if you don’t like it! Put it in the bucket for recycling. https://firebirdstudios.com.au/the-process-of-making-pottery/This bowl was made by renowned pottery company J & G Meakin of England. The firm was established in the mid-1800's. The bowl is an example of kitchenware used in the 19th century and still in use today.Bowl; white ceramic, round and tapering inwards towards base. Made by J and G Meakin England.On base, 'Ironstone China Reg SOL 391413' with symbolflagstaff hill, flagstaff hill maritime museum and village, warrnambool, maritime museum, maritime village, great ocean road, shipwreck coast, mixing bowl, food preparation, j & g meakin, pottery, stoke-on-trent, kitchen equipment, ceramic -
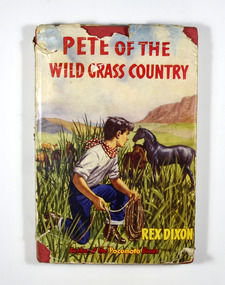 Marysville & District Historical Society
Book, Rex Dixon, Pete of the Wild Grass Country, 1954
... When the Indians moved on to new hunting grounds Pete was left to take care of himself. This he does by roaming over the Wild Grass Country catching wild horses, which he sells to his friend Murky Joe. ...Pete Cimarron, the wild boy, was raised by Indians in the Wild Grass Country of Texas. When the Indians moved on to new hunting grounds Pete was left to take care of himself. This he does by roaming over the Wild Grass Country catching wild horses, which he sells to his friend Murky Joe. When the wagon trains from the east begin to settle near the Wild Grass Country, Pete finds himself swept into an exciting struggle to claim and hold his land.Front dust cover shows a boy holding a rope lasso hiding behind tall grasses watching a black horse. There are other horses in the background. Also in the background is a grass plain which is ringed by mountains. The book itself is bound in red with the title in black writing. On the front of the book there is a logo of the Panther Library. The name of the author, the title and the publisher are written in black down the spine of the book.fictionPete Cimarron, the wild boy, was raised by Indians in the Wild Grass Country of Texas. When the Indians moved on to new hunting grounds Pete was left to take care of himself. This he does by roaming over the Wild Grass Country catching wild horses, which he sells to his friend Murky Joe. When the wagon trains from the east begin to settle near the Wild Grass Country, Pete finds himself swept into an exciting struggle to claim and hold his land.indians, texas, horses, rex dixon, panther library, fiction -
Marysville & District Historical Society
Ephemera (Item) - Information brochure, Artworkz Tourism, MARYSVILLE TOWNSHIP, 11-2020
... Disclaimer: The authors have taken care to ensure this/ publication is correct, though please be aware that/ errors and omissions do occur....An information brochure on the township of Marysville in Victoria. marysville victoria australia information brochure artworkz tourism 2009 black saturday bushfires bruno's sculpture garden steavenson falls gallipoli lake keppel falls lady talbot drive cora lynn falls cambarville walk phantom falls taggerty river visitor area meeting of the waters the beeches cambarville day visitor area the big tree keppel hut keppel lookout mount gordon marysville golf course jock's lookout gallipoli park yellow dog day visitor area Disclaimer: The authors have taken care to ensure this/ publication is correct, though please be aware that/ errors and omissions do occur. ...An information brochure on the township of Marysville in Victoria. This brochure was produced by Artworkz Tourism in November 2020.An information brochure on the township of Marysville in Victoria.Disclaimer: The authors have taken care to ensure this/ publication is correct, though please be aware that/ errors and omissions do occur.marysville, victoria, australia, information brochure, artworkz tourism, 2009 black saturday bushfires, bruno's sculpture garden, steavenson falls, gallipoli lake, keppel falls, lady talbot drive, cora lynn falls, cambarville walk, phantom falls, taggerty river visitor area, meeting of the waters, the beeches, cambarville day visitor area, the big tree, keppel hut, keppel lookout, mount gordon, marysville golf course, jock's lookout, gallipoli park, yellow dog day visitor area -
Marysville & District Historical Society
Ephemera (Item) - Information brochure, Artworkz Tourism, MARYSVILLE THINGS TO DO AROUND MARYSVILLE, 27-01-2018
... Disclaimer: The authors have taken care to ensure this/ publication is correct, though please be aware that/ errors and omissions do occur....An information brochure on things to do around Marysville in Victoria. marysville victoria australia information brochure gallipoli park lake gallipoli lake steavenson falls steavenson river bruno's art and sculpture garden fernshaw park buxton recreation reserve taggerty river areas anderson mill camping area cooks mill camping area neds gully camping area keppel creek day area beauty spot nature walk gilbert gully nature walk michaeldene track cathedral range the beeches walk tree fern gully walk crystal journey marysville market lake mountain ski resort marysville golf club marysville public outdoor swimming pool buxton trout & salmon farm keppel's lookout jock's lookout mount gordon armstrong lookout keppel falls phantom falls cora lynn falls meeting of the waters st ronan's well preiffer falls camberville historical township keppels hut the big culvert the big tree marysville historical society Disclaimer: The authors have taken care to ensure this/ publication is correct, though please be aware that/ errors and omissions do occur. ...An information brochure on things to do around Marysville in Victoria.An information brochure on things to do around Marysville in Victoria.Disclaimer: The authors have taken care to ensure this/ publication is correct, though please be aware that/ errors and omissions do occur.marysville, victoria, australia, information brochure, gallipoli park lake, gallipoli lake, steavenson falls, steavenson river, bruno's art and sculpture garden, fernshaw park, buxton recreation reserve, taggerty river areas, anderson mill camping area, cooks mill camping area, neds gully camping area, keppel creek day area, beauty spot nature walk, gilbert gully nature walk, michaeldene track, cathedral range, the beeches walk, tree fern gully walk, crystal journey, marysville market, lake mountain ski resort, marysville golf club, marysville public outdoor swimming pool, buxton trout & salmon farm, keppel's lookout, jock's lookout, mount gordon, armstrong lookout, keppel falls, phantom falls, cora lynn falls, meeting of the waters, st ronan's well, preiffer falls, camberville historical township, keppels hut, the big culvert, the big tree, marysville historical society -
Marysville & District Historical Society
Ephemera (Item) - Information brochure, Artworkz Tourism, MARYSVILLE-MARYSVILLE ATTRACTIONS, 23-11-2014
... Disclaimer: The authors have taken care to ensure this/ publication is correct, though please be aware that/ errors and omissions do occur....An information brochure on various attractions to be visited in an around Marysville. marysville victoria australia information brochure bruno's sculpture garden steavenson falls gallipoli lake keppel falls cora lynn falls phantom falls taggerty river visitor area the beeches meeting of the waters cambarville day visitor area the big tree the big culvert keppels hut keppel lookout mount gordon marysville golf course trestle bridge marysville caravan park marysville swimming pool jock's lookout yellow dog day visitor area artworkz tourism Disclaimer: The authors have taken care to ensure this/ publication is correct, though please be aware that/ errors and omissions do occur. ...An information brochure on various attractions to be visited in an around Marysville. This brochure was produced by Artworkz Tourism in November 2014.An information brochure on various attractions to be visited in an around Marysville.Disclaimer: The authors have taken care to ensure this/ publication is correct, though please be aware that/ errors and omissions do occur.marysville, victoria, australia, information brochure, bruno's sculpture garden, steavenson falls, gallipoli lake, keppel falls, cora lynn falls, phantom falls, taggerty river visitor area, the beeches, meeting of the waters, cambarville day visitor area, the big tree, the big culvert, keppels hut, keppel lookout, mount gordon, marysville golf course, trestle bridge, marysville caravan park, marysville swimming pool, jock's lookout, yellow dog day visitor area, artworkz tourism -
Marysville & District Historical Society
Ephemera (Item) - Information brochure, Artworkz Tourism, MARYSVILLE-REFLECTIVE GARDENS & KIN PLAYSPACE, 04-01-2020
... Disclaimer: The authors have taken care to ensure this/ publication is correct, though please be aware that/ errors and omissions do occur....An information brochure on reflective gardens and play spaces in and around Marysville. marysville victoria australia information brochure bruno torfs steavenson river gallipoli lake gallipoli park marysville visitor information centre artworkz tourism Disclaimer: The authors have taken care to ensure this/ publication is correct, though please be aware that/ errors and omissions do occur. ...An information brochure on reflective gardens and play spaces in and around Marysville. This brochure was produced by Artworkz Tourism in January 2020.An information brochure on reflective gardens and play spaces in and around Marysville.Disclaimer: The authors have taken care to ensure this/ publication is correct, though please be aware that/ errors and omissions do occur.marysville, victoria, australia, information brochure, bruno torfs, steavenson river, gallipoli lake, gallipoli park, marysville visitor information centre, artworkz tourism -
Marysville & District Historical Society
Ephemera (Item) - Information brochure, Artworkz Tourism, MARYSVILLE-BEAUTY SPOT NATURE TRAIL WALK, 04-01-2020
... Disclaimer: The authors have taken care to ensure this/ publication is correct, though please be aware that/ errors and omissions do occur....An information brochure on the Beauty Spot Nature Trail Walk in Marysville. marysville victoria australia information brochure artworkz tourism beauty spot nature trail walk Disclaimer: The authors have taken care to ensure this/ publication is correct, though please be aware that/ errors and omissions do occur. ...An information brochure on the Beauty Spot Nature Trail Walk in Marysville. This brochure was produced by Artworkz Tourism in January 2020.An information brochure on the Beauty Spot Nature Trail Walk in Marysville.Disclaimer: The authors have taken care to ensure this/ publication is correct, though please be aware that/ errors and omissions do occur.marysville, victoria, australia, information brochure, artworkz tourism, beauty spot nature trail walk -
Marysville & District Historical Society
Ephemera (Item) - Information brochure, Artworkz Tourism, MARYSVILLE-TREE FERN GULLY NATURE TRAIL WALK, 04-01-2020
... Disclaimer: The authors have taken care to ensure this/ publication is correct, though please be aware that/ errors and omissions do occur....An information brochure on the Tree Fern Gully Nature Trail Walk in Marysville. marysville victoria australia information brochure artworkz tourism tree fern gully nature trail walk tree fern gully walk Disclaimer: The authors have taken care to ensure this/ publication is correct, though please be aware that/ errors and omissions do occur. ...An information brochure on the Tree Fern Gully Nature Trail Walk in Marysville. This brochure was produced by Artworkz Tourism in January 2020.An information brochure on the Tree Fern Gully Nature Trail Walk in Marysville.Disclaimer: The authors have taken care to ensure this/ publication is correct, though please be aware that/ errors and omissions do occur.marysville, victoria, australia, information brochure, artworkz tourism, tree fern gully nature trail walk, tree fern gully walk -
Marysville & District Historical Society
Ephemera (Item) - Information brochure, Artworkz Tourism, MARYSVILLE-MICHAELDENE NATURE TRAIL WALK, 04-01-2020
... Disclaimer: The authors have taken care to ensure this/ publication is correct, though please be aware that/ errors and omissions do occur....An information brochure on the Michaeldene Nature Trail Walk in Marysville. marysville victoria australia information brochure artworkz tourism michaeldene nature trail walk michaeldene walking track Disclaimer: The authors have taken care to ensure this/ publication is correct, though please be aware that/ errors and omissions do occur. ...An information brochure on the Michaeldene Nature Trail Walk in Marysville. This brochure was produced by Artworkz Tourism in January 2020.An information brochure on the Michaeldene Nature Trail Walk in Marysville.Disclaimer: The authors have taken care to ensure this/ publication is correct, though please be aware that/ errors and omissions do occur.marysville, victoria, australia, information brochure, artworkz tourism, michaeldene nature trail walk, michaeldene walking track -
Marysville & District Historical Society
Ephemera (Item) - Information brochure, Artworkz Tourism, DISTRICT-WATERFALLS, 07-02-2020
... Disclaimer: The authors have taken care to ensure this/ publication is correct, though please be aware that/ errors and omissions do occur....An information brochure on the waterfalls in the district in and surrounding Marysville. marysville victoria australia information brochure artworkz tourism cora lynn falls strath creek falls phantom falls caveat falls and cascades steavenson falls snobs creek falls keppel falls rubicon falls whilhelmina falls murrindindi cascades Disclaimer: The authors have taken care to ensure this/ publication is correct, though please be aware that/ errors and omissions do occur. ...An information brochure on the waterfalls in the district in and surrounding Marysville. This brochure was produced by Artworkz Tourism in February 2020.An information brochure on the waterfalls in the district in and surrounding Marysville.Disclaimer: The authors have taken care to ensure this/ publication is correct, though please be aware that/ errors and omissions do occur.marysville, victoria, australia, information brochure, artworkz tourism, cora lynn falls, strath creek falls, phantom falls, caveat falls and cascades, steavenson falls, snobs creek falls, keppel falls, rubicon falls, whilhelmina falls, murrindindi cascades -
Marysville & District Historical Society
Ephemera (Item) - Information brochure, Artworkz Tourism, MARYSVILLE-YELLOW DOG DAY VISITOR AREA, 23-04-2018
... Disclaimer: The authors have taken care to ensure this/ publication is correct, though please be aware that/ errors and omissions do occur....An information brochure on the Yellow Dog Day Visitor Area near Marysville. marysville victoria australia information brochure artworkz tourism yellow dog day visitor area Disclaimer: The authors have taken care to ensure this/ publication is correct, though please be aware that/ errors and omissions do occur. ...An information brochure on the Yellow Dog Day Visitor Area near Marysville. This brochure was produced by Artworkz Tourism in April 2018.An information brochure on the Yellow Dog Day Visitor Area near Marysville.Disclaimer: The authors have taken care to ensure this/ publication is correct, though please be aware that/ errors and omissions do occur.marysville, victoria, australia, information brochure, artworkz tourism, yellow dog day visitor area -
Marysville & District Historical Society
Ephemera (Item) - Information brochure, Artworkz Tourism, MARYSVILLE-ANDERSON MILL CAMP AREA, 26-03-2016
... Disclaimer: The authors have taken care to ensure this/ publication is correct, though please be aware that/ errors and omissions do occur....An information brochure on the Anderson Mill camp area near Marysville. marysville victoria australia information brochure artworkz tourism anderson mill camp area anderson mill Disclaimer: The authors have taken care to ensure this/ publication is correct, though please be aware that/ errors and omissions do occur. ...An information brochure on the Anderson Mill camp area near Marysville. This brochure was produced by Artworkz Tourism in March 2016.An information brochure on the Anderson Mill camp area near Marysville.Disclaimer: The authors have taken care to ensure this/ publication is correct, though please be aware that/ errors and omissions do occur.marysville, victoria, australia, information brochure, artworkz tourism, anderson mill camp area, anderson mill -
Marysville & District Historical Society
Ephemera (Item) - Information brochure, Artworkz Tourism, MARYSVILLE-KEPPEL CREEK CAMP AREA, 26-03-2016
... Disclaimer: The authors have taken care to ensure this/ publication is correct, though please be aware that/ errors and omissions do occur....An information brochure on the Keppel Creek camp area near Marysville. marysville victoria australia information brochure artworkz tourism keppel creek camp area keppel creek day visitor area Disclaimer: The authors have taken care to ensure this/ publication is correct, though please be aware that/ errors and omissions do occur. ...An information brochure on the Keppel Creek camp area near Marysville. This brochure was produced by Artworkz Tourism in March 2016.An information brochure on the Keppel Creek camp area near Marysville.Disclaimer: The authors have taken care to ensure this/ publication is correct, though please be aware that/ errors and omissions do occur.marysville, victoria, australia, information brochure, artworkz tourism, keppel creek camp area, keppel creek day visitor area
