
Showing 31 items matching "finishing of metal surfaces "
-
 Moorabbin Air Museum
Book - Aircraft construction, BALM Handbook of Approved Aircraft Finishing Schemes and Specifications
... ...Finishing of metal surfaces & components...Aircraft construction Finishing of fabric covered aircraft Finishing of wood surfaces & components Finishing of metal surfaces & components Sundry finishes Useful hints Finishing schemes for particular components Products classification Guide to protection & decoration of all types of aircraft components & parts, circa 1942 BALM Handbook of Approved Aircraft Finishing Schemes and Specifications Book Aircraft construction ...Guide to protection & decoration of all types of aircraft components & parts, circa 1942non-fictionGuide to protection & decoration of all types of aircraft components & parts, circa 1942finishing of fabric covered aircraft, finishing of wood surfaces & components, finishing of metal surfaces & components, sundry finishes, useful hints, finishing schemes for particular components, products classification -
 Flagstaff Hill Maritime Museum and Village
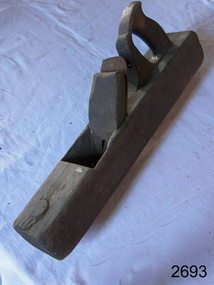
Tool - Plane, Mid to late 19th Century
... metal planes and improvements in the late 19th century. A jack plane came to be referred to as a "No. 5" plane or a "Bailey pattern No. 5" at the end of the 19th century. A vintage tool made by an unknown company, this item was made commercially for firms and individuals that worked in wood and needed a tool that could remove large amounts of timber. These jack or dressing planes came in various shapes and sizes to achieve a flat and even finish to timber surfaces ...A jack plane (or fore plane) is a general-purpose woodworking bench plane, used for dressing timber down to the correct size in preparation for truing and/or edge jointing. It is usually the first plane used on rough stock, but in exceptional cases can be preceded by the scrub plane. Jack planes are 300–460 mm long and 64–76 mm wide, with wooden-stocked planes sometimes being slightly wider. The blade is 44–57 mm wide that is often slightly convex (or ground with rounded corners) to prevent digging in to or marking the work. The cut is generally set deeper than on most other planes as the plane's purpose is to remove stock rather than to gain a good finish (smoothing planes are used for that). In preparing stock, the jack plane is used after the scrub plane and before the joiner plane and smoothing plane. The carpenters' name for the plane is related to the saying "jack of all trades" as jack planes can be made to perform some of the work of both smoothing and joiner planes, especially on smaller pieces of work. Its other name of the fore plane is more generally used by joiners and may come from the fact that it "is used before you come to work either with the Smooth Plane or with the Joiner". Early planes were all wood, except for the cutter, or combined a wood base with a metal blade holder and adjustment system on top. Although there were earlier all-metal planes, Leonard Bailey patented many all-metal planes and improvements in the late 19th century. A jack plane came to be referred to as a "No. 5" plane or a "Bailey pattern No. 5" at the end of the 19th century. A vintage tool made by an unknown company, this item was made commercially for firms and individuals that worked in wood and needed a tool that could remove large amounts of timber. These jack or dressing planes came in various shapes and sizes to achieve a flat and even finish to timber surfaces before the use of smoothing planes and came in many sizes. A significant tool from the mid to late 19th century that is still in use today with early models sought after by collectors. It gives us a snapshot of how furniture and other finishes were created on timber by the use of cutting edged hand tools. Tools that were themselves hand made shows the craftsmanship used during this time not only to make a tool such as the subject item but also the craftsmanship needed to produce a decorative or even finish that was needed for the finishing of timber items. Jack Plane handle is attached by large screw there is a round piece of wood tacked to front. noneflagstaff hill, warrnambool, shipwrecked-coast, flagstaff-hill, flagstaff-hill-maritime-museum, maritime-museum, shipwreck-coast, flagstaff-hill-maritime-village, jack plane -
 Flagstaff Hill Maritime Museum and Village
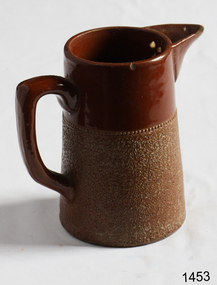
Domestic object - Jug
... metal kidney to scrape any areas that require a bit more dynamic treatment than the fly wire offers! Finally, a very light wipe over with a slightly damp sponge can help soften and soothe all of your edges and dags! Trimming thrown work: If you are planning to trim (or turn) your thrown work (and you should be), make sure you bag it well – your work should be leather hard to almost dry for easiest trimming. Use this step to finish the work completely – use a metal kidney to polish the surface...metal kidney to scrape any areas that require a bit more dynamic treatment than the fly wire offers! Finally, a very light wipe over with a slightly damp sponge can help soften and soothe all of your edges and dags! Trimming thrown work: If you are planning to trim (or turn) your thrown work (and you should be), make sure you bag it well – your work should be leather hard to almost dry for easiest trimming. Use this step to finish the work completely – use a metal kidney to polish the surface ...The Process of Making Pottery Decorating, Firing, Glazing, Making, Technical There is a rhythm and flow to clay. It can’t be done all at once! Even the making process! It can take weeks to get everything done, especially if you can only work on your pottery once a week! Even though we have three hour classes, it’s often just not enough time! Here is an overview of some of the processes so you have a bit more grasp on some of the technical stuff! Step One – Design There are SO many ideas out there for making stuff in clay! From delicate porcelain jewellery, through to heavy sculptural work and everything in between. Deciding your direction is sometimes not that easy – when you first start, try everything, you will naturally gravitate to the style that you enjoy! The options and variations are endless and can get a wee bit overwhelming too! Check in with me before you start to ensure your ideas will work, what order you might do things, how you could achieve the look you are seeking and any other technical data required! Step Two – Making Clay is thixotropic. This means that as you work with it, the clay first gets sloppier and wetter, before is begins to dry in the atmosphere. For most things, you simply can’t do all parts of the project at once. An example of work order might look like: Get last weeks work out from the shelves Prepare clay for today’s work – roll your clay, prepare balls for throwing, make the first stage of a pinch pot) Clean up last week’s work and put it on the shelf for bisque firing Check that you have any glazing to do – and do enough of it that you will have time to finish your main project Do the next step of your next project – there might be a further step that can’t be complete immediately, in that case, wrap your work well and put onto the shelves. Letting your work rest for a while can really help keep your work clean and professional looking. Many things require bagging under plastic to keep it ready for work the next week – put your name on the outside of the bag so you can find your work easily. We have stickers and markers. Consider how you want to decorate your work – coloured slip can be applied at a fairly wet stage (remembering that it will make your work even wetter!). Trying to apply slip to dry clay won’t work! If you want to do sgraffito – you will need to keep the work leather hard (a state of dryness where you can still work the clay with a little effort and a little water and care). Step Three – Drying Most of the time your work can go into the rack uncovered to let it dry out for the following week. If you want to continue forming or shaping you will need to double bag your work – put your work on a suitable sized bat and put the bat in a bag so the base of the bag is under the bat, then put another bag over the top of the work and tuck the top of the bag under the bat. If you want to trim (or turn) your thrown work the following week, it should also be double bagged. If your work is large, delicate, or of uneven thicknesses, you should lightly cover your work for drying. When considering the drying process, bare in mind the weather, humidity and wind! The hotter and dryer, the faster things dry and work can dry unevenly in the shelves – this can lead to cracking – another time to lightly cover your work for drying. Step Four – Trimming and Cleaning Up Your work is dry! It is called greenware now and it is at it’s most fragile! Handle everything with two hands. I often refer to soft hands – keep everything gentle and with your fingers spread as much as possible. Try to not pick up things like plates too much, and always with both hands! Before your work can be bisque fired it should be “cleaned up”. You work won’t go into the kiln if it has sharp edges – when glazed, sharp edges turn into razor blades! Use a piece of fly wire to rub the work all over – this will scratch a little so be light handed. Use a knife or metal kidney to scrape any areas that require a bit more dynamic treatment than the fly wire offers! Finally, a very light wipe over with a slightly damp sponge can help soften and soothe all of your edges and dags! Trimming thrown work: If you are planning to trim (or turn) your thrown work (and you should be), make sure you bag it well – your work should be leather hard to almost dry for easiest trimming. Use this step to finish the work completely – use a metal kidney to polish the surface, or a slightly damp sponge to give a freshly thrown look. Wipe the sponge around the rim after trimming, and check the inside of the pot for dags! Trimming slip cast work: Usually I will trim the rims of your work on the wheel the following day to make that stage easier, however you will still need to check your work for lumps and bumps. Last but not least – check that your name is still clearly on the bottom of your work. Step Five – Bisque Firing When the work is completely dry it can go into the bisque kiln. The bisque kiln is fired to 1000°C. This process burns off the water in the clay as well as some of the chemically bound water. The structure of the clay is not altered that much at this temperature. Inside the bisque kiln, the work is stacked a little, small bowl inside a larger bowl and onto a heavy plate. Smaller items like decorations or drink coasters might get stacked several high. Consideration is paid to the weight of the stack and shape of the work. A bisque kiln can fire about one and a half times the amount of work that the glaze kiln can fire. The firing takes about 10 hours to complete the cycle and about two days to cool down. Once it has been emptied the work is placed in the glaze room ready for you to decorate! Step Six – Glazing Decorating your work with colour can be a lot of fun – and time consuming! There are three main options for surface treatment at this stage: Oxide Washes Underglazes Glazes Washes and underglazes do not “glaze” the work – It will still need a layer of glaze to fully seal the clay (washes don’t need glaze on surfaces not designed for food or liquid as they can gloss up a little on their own). Underglazes are stable colourants that turn out pretty much how they look in the jar. They can be mixed with each other to form other colours and can be used like water colours to paint onto your work. Mostly they should have a clear glaze on top to seal them. Oxides are a different species – the pink oxide (cobalt) wash turns out bright blue for instance. They don’t always need a glaze on top, and some glazes can change the colour of the wash! The glazes need no other “glaze” on top! Be careful of unknown glaze interactions – you can put any combination of glaze in a bowl or on a plate, but only a single glaze on the outside of any vertical surface! Glazes are a chemical reaction under heat. We don’t know the exact chemicals in the Mayco glazes we use. I can guess by the way they interact with each other, however, on the whole, you need to test every idea you have, and not run the test on a vertical surface! Simply put, glaze is a layer of glass like substance that bonds with the clay underneath. Clay is made of silica, alumina and water. Glaze is made of mostly silica. Silica has a melting point of 1700°C and we fire to 1240°C. The silica requires a “flux” to help it melt at the lower temperature. Fluxes can be all sorts of chemicals – a common one is calcium – calcium has a melting point of 2500°C, however, together they both melt at a much lower temperature! Colourants are metal oxides like cobalt (blue), chrome (green through black), copper (green, blue, even red!), manganese (black, purple and pink) iron (red brown), etc. Different chemicals in the glaze can have dramatic effects. for example, barium carbonate (which we don’t use) turns manganese bright pink! Other elements can turn manganese dioxide brown, blue, purple and reddish brown. Manganese dioxide is a flux in and of itself as well. So, glazes that get their black and purple colours, often interact with other glazes and RUN! Our mirror black is a good example – it mixes really well with many glazes because it fluxes them – causes them to melt faster. It will also bring out many beautiful colours in the glazes because it’s black colouring most definitely comes from manganese dioxide! Glaze chemistry is a whole subject on it’s own! We use commercial Mayco glazes on purpose – for their huge range of colour possibilities, stability, cool interactions, artistic freedom with the ability to easily brush the glazes on and ease of use. We currently have almost 50 glazes on hand! A major project is to test the interactions of all glazes with each other. That is 2,500 test tiles!!!! I’m going to make the wall behind the wheels the feature wall of pretty colours! Step Seven – Glaze (Gloss or sometimes called “Glost”) Firing Most of the time this is the final stage of making your creation (but not always!) The glaze kiln goes to 1240°C. This is called cone 6, or midrange. It is the low end of stoneware temperatures. Stoneware clays and glazes are typically fired at cone 8 – 10, that is 1260 – 1290°C. The energy requirement to go from 1240°C to 1280°C is almost a 30% more! Our clay is formulated to vitrify (mature, turn “glass-like”) at 1240°, as are our glazes. A glaze kiln take around 12 hours to reach temperature and two to three days to cool down. Sometimes a third firing process is required – this is for decoration that is added to work after the glaze firing. For example – adding precious metals and lustres. this firing temperature is usually around 600 – 800°C depending upon the techniques being used. There are many students interested in gold and silver trims – we will be doing this third type of firing soon! After firing your work will be in the student finished work shelves. Remember to pay for it before you head out the door! There is a small extra charge for using porcelain clay (it’s more than twice the price of regular clay), and for any third firing process! Once your work has been fired it can not turn back into clay for millennia – so don’t fire it if you don’t like it! Put it in the bucket for recycling. https://firebirdstudios.com.au/the-process-of-making-pottery/The form of the jug has been in use for many centuries.Stoneware jug. Two tone brown glaze with pierced lip behind spout. Spout chipped.None.flagstaff hill, warrnambool, shipwrecked-coast, flagstaff-hill, flagstaff-hill-maritime-museum, maritime-museum, shipwreck-coast, flagstaff-hill-maritime-village, jug, ceramic jug -
 Flagstaff Hill Maritime Museum and Village
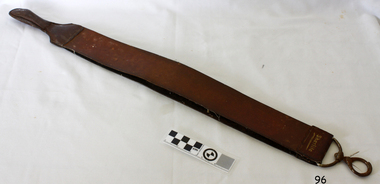
Domestic object - Razor Strop, circa 1922
... metal fittings. Stropping faces; sharpening surface is stained red and finishing surface is stained black. ...metal fittings. Stropping faces; sharpening surface is stained red and finishing surface is stained black. ...A razor strop such as this one was used to sharpen and polish straight-edged razors. This particular design has a swivel hook with a locking clip that allows for movement as the strop is being used. This strop is branded "Sherlite". On May 5th, 1922 the Commonwealth officially accepted and advertised the Trade Mark Application of Thomas Sherry of Victoria, for the Trade Mark of "Sherlite" to be used under the heading of "Leather, Skins unwrought and Wrought”. Thomas Sherry’s application was to use the word “Sherlite” for detachable soles made of rubberised leather. Straight razors and cut-throat razors were the major tools for shaving before the safety razor was invented in the 1880s and even today specialist shaving shops still sell straight razors. Along with the razor, the process of shaving would commonly involve lathering up shaving soap with a shaving brush that had boar bristles. Men could own several razors and rotate them through the week and some shops sold the razors in a set, a razor for each day of the week. Straight razors could require stropping more than once during the shaving of a heavy beard, and stropping would also be performed at the end of each shave. Honing would only be performed two or three times a year, preserving the blade's edge. A lot of skill was needed to hone and strop the blades of these early razors and the methods to do so were a large part of the curriculum in Barber colleges. The razor would be sharpened on a grinding wheel then honed on sharpening stone and finally finished using a strop. Straight edge razors would usually be sold unfinished and that process would be completed by the customer. A razor strop, usually made from leather, thick canvas, or light timber, would be used to straighten and polish the straight razor for shaving. Strops could also be used to polish other blades such as knives, small metal tools, and chisels. Sometimes an abrasive polishing compound is also used to give a mirror finish. Some strops, such as this one in our Collection, are designed to be used while hanging from a nail or peg, while others are handheld. The person using the strop would draw the spine of the blade down along the strop with the blade following, without putting any pressure on the blade. At the end of the stroke, rotate the blade over its spine then draw the spine along the strop again so that the edge moves away from the top. The finer grade of leather strap is used to give the final finish.Razor strop, leather, and metal. Sherlite brand, double straps: two straps of different grade leather joined at ends with metal fittings. Stropping faces; sharpening surface is stained red and finishing surface is stained black. One end has a padded, bulbous-shaped leather grip handle, the other end has a metal, swivel hook hanger. Inscriptions painted in gold on leather at the hook end.Razor strop, leather and metal. Sherlite brand, double straps: two straps of different grade leather joined at ends with metal fittings. Stropping faces; sharpening surface is stained red and finishing surface is stained black. One end has padded, bulbous shaped leather grip handle, the other end has metal, swivel hook hanger. Inscriptions printed in gold on leather at hook end.Printed gold lettering stamped “Sherlite”flagstaff hill, warrnambool, shipwrecked coast, flagstaff hill maritime museum, maritime museum, shipwreck coast, flagstaff hill maritime village, great ocean road, shaving leather, shaving accessory, barber’s equipment, barber shop razor strop, razor strop, straight razor, razor and knife sharpener, sherlite razor strop, personal effects, toiletries, thomas sherry -
 Flagstaff Hill Maritime Museum and Village
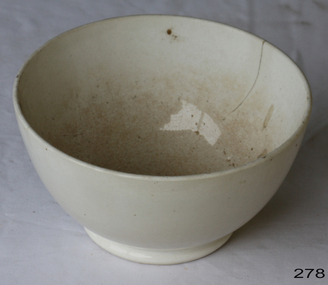
Domestic object - Bowl, Late 19th or early 20th Century
... metal kidney to scrape any areas that require a bit more dynamic treatment than the fly wire offers! Finally, a very light wipe over with a slightly damp sponge can help soften and soothe all of your edges and dags! Trimming thrown work: If you are planning to trim (or turn) your thrown work (and you should be), make sure you bag it well – your work should be leather hard to almost dry for easiest trimming. Use this step to finish the work completely – use a metal kidney to polish the surface...metal kidney to scrape any areas that require a bit more dynamic treatment than the fly wire offers! Finally, a very light wipe over with a slightly damp sponge can help soften and soothe all of your edges and dags! Trimming thrown work: If you are planning to trim (or turn) your thrown work (and you should be), make sure you bag it well – your work should be leather hard to almost dry for easiest trimming. Use this step to finish the work completely – use a metal kidney to polish the surface ...The Process of Making Pottery Decorating, Firing, Glazing, Making, Technical There is a rhythm and flow to clay. It can’t be done all at once! Even the making process! It can take weeks to get everything done, especially if you can only work on your pottery once a week! Even though we have three hour classes, it’s often just not enough time! Here is an overview of some of the processes so you have a bit more grasp on some of the technical stuff! Step One – Design There are SO many ideas out there for making stuff in clay! From delicate porcelain jewellery, through to heavy sculptural work and everything in between. Deciding your direction is sometimes not that easy – when you first start, try everything, you will naturally gravitate to the style that you enjoy! The options and variations are endless and can get a wee bit overwhelming too! Check in with me before you start to ensure your ideas will work, what order you might do things, how you could achieve the look you are seeking and any other technical data required! Step Two – Making Clay is thixotropic. This means that as you work with it, the clay first gets sloppier and wetter, before is begins to dry in the atmosphere. For most things, you simply can’t do all parts of the project at once. An example of work order might look like: Get last weeks work out from the shelves Prepare clay for today’s work – roll your clay, prepare balls for throwing, make the first stage of a pinch pot) Clean up last week’s work and put it on the shelf for bisque firing Check that you have any glazing to do – and do enough of it that you will have time to finish your main project Do the next step of your next project – there might be a further step that can’t be complete immediately, in that case, wrap your work well and put onto the shelves. Letting your work rest for a while can really help keep your work clean and professional looking. Many things require bagging under plastic to keep it ready for work the next week – put your name on the outside of the bag so you can find your work easily. We have stickers and markers. Consider how you want to decorate your work – coloured slip can be applied at a fairly wet stage (remembering that it will make your work even wetter!). Trying to apply slip to dry clay won’t work! If you want to do sgraffito – you will need to keep the work leather hard (a state of dryness where you can still work the clay with a little effort and a little water and care). Step Three – Drying Most of the time your work can go into the rack uncovered to let it dry out for the following week. If you want to continue forming or shaping you will need to double bag your work – put your work on a suitable sized bat and put the bat in a bag so the base of the bag is under the bat, then put another bag over the top of the work and tuck the top of the bag under the bat. If you want to trim (or turn) your thrown work the following week, it should also be double bagged. If your work is large, delicate, or of uneven thicknesses, you should lightly cover your work for drying. When considering the drying process, bare in mind the weather, humidity and wind! The hotter and dryer, the faster things dry and work can dry unevenly in the shelves – this can lead to cracking – another time to lightly cover your work for drying. Step Four – Trimming and Cleaning Up Your work is dry! It is called greenware now and it is at it’s most fragile! Handle everything with two hands. I often refer to soft hands – keep everything gentle and with your fingers spread as much as possible. Try to not pick up things like plates too much, and always with both hands! Before your work can be bisque fired it should be “cleaned up”. You work won’t go into the kiln if it has sharp edges – when glazed, sharp edges turn into razor blades! Use a piece of fly wire to rub the work all over – this will scratch a little so be light handed. Use a knife or metal kidney to scrape any areas that require a bit more dynamic treatment than the fly wire offers! Finally, a very light wipe over with a slightly damp sponge can help soften and soothe all of your edges and dags! Trimming thrown work: If you are planning to trim (or turn) your thrown work (and you should be), make sure you bag it well – your work should be leather hard to almost dry for easiest trimming. Use this step to finish the work completely – use a metal kidney to polish the surface, or a slightly damp sponge to give a freshly thrown look. Wipe the sponge around the rim after trimming, and check the inside of the pot for dags! Trimming slip cast work: Usually I will trim the rims of your work on the wheel the following day to make that stage easier, however you will still need to check your work for lumps and bumps. Last but not least – check that your name is still clearly on the bottom of your work. Step Five – Bisque Firing When the work is completely dry it can go into the bisque kiln. The bisque kiln is fired to 1000°C. This process burns off the water in the clay as well as some of the chemically bound water. The structure of the clay is not altered that much at this temperature. Inside the bisque kiln, the work is stacked a little, small bowl inside a larger bowl and onto a heavy plate. Smaller items like decorations or drink coasters might get stacked several high. Consideration is paid to the weight of the stack and shape of the work. A bisque kiln can fire about one and a half times the amount of work that the glaze kiln can fire. The firing takes about 10 hours to complete the cycle and about two days to cool down. Once it has been emptied the work is placed in the glaze room ready for you to decorate! Step Six – Glazing Decorating your work with colour can be a lot of fun – and time consuming! There are three main options for surface treatment at this stage: Oxide Washes Underglazes Glazes Washes and underglazes do not “glaze” the work – It will still need a layer of glaze to fully seal the clay (washes don’t need glaze on surfaces not designed for food or liquid as they can gloss up a little on their own). Underglazes are stable colourants that turn out pretty much how they look in the jar. They can be mixed with each other to form other colours and can be used like water colours to paint onto your work. Mostly they should have a clear glaze on top to seal them. Oxides are a different species – the pink oxide (cobalt) wash turns out bright blue for instance. They don’t always need a glaze on top, and some glazes can change the colour of the wash! The glazes need no other “glaze” on top! Be careful of unknown glaze interactions – you can put any combination of glaze in a bowl or on a plate, but only a single glaze on the outside of any vertical surface! Glazes are a chemical reaction under heat. We don’t know the exact chemicals in the Mayco glazes we use. I can guess by the way they interact with each other, however, on the whole, you need to test every idea you have, and not run the test on a vertical surface! Simply put, glaze is a layer of glass like substance that bonds with the clay underneath. Clay is made of silica, alumina and water. Glaze is made of mostly silica. Silica has a melting point of 1700°C and we fire to 1240°C. The silica requires a “flux” to help it melt at the lower temperature. Fluxes can be all sorts of chemicals – a common one is calcium – calcium has a melting point of 2500°C, however, together they both melt at a much lower temperature! Colourants are metal oxides like cobalt (blue), chrome (green through black), copper (green, blue, even red!), manganese (black, purple and pink) iron (red brown), etc. Different chemicals in the glaze can have dramatic effects. for example, barium carbonate (which we don’t use) turns manganese bright pink! Other elements can turn manganese dioxide brown, blue, purple and reddish brown. Manganese dioxide is a flux in and of itself as well. So, glazes that get their black and purple colours, often interact with other glazes and RUN! Our mirror black is a good example – it mixes really well with many glazes because it fluxes them – causes them to melt faster. It will also bring out many beautiful colours in the glazes because it’s black colouring most definitely comes from manganese dioxide! Glaze chemistry is a whole subject on it’s own! We use commercial Mayco glazes on purpose – for their huge range of colour possibilities, stability, cool interactions, artistic freedom with the ability to easily brush the glazes on and ease of use. We currently have almost 50 glazes on hand! A major project is to test the interactions of all glazes with each other. That is 2,500 test tiles!!!! I’m going to make the wall behind the wheels the feature wall of pretty colours! Step Seven – Glaze (Gloss or sometimes called “Glost”) Firing Most of the time this is the final stage of making your creation (but not always!) The glaze kiln goes to 1240°C. This is called cone 6, or midrange. It is the low end of stoneware temperatures. Stoneware clays and glazes are typically fired at cone 8 – 10, that is 1260 – 1290°C. The energy requirement to go from 1240°C to 1280°C is almost a 30% more! Our clay is formulated to vitrify (mature, turn “glass-like”) at 1240°, as are our glazes. A glaze kiln take around 12 hours to reach temperature and two to three days to cool down. Sometimes a third firing process is required – this is for decoration that is added to work after the glaze firing. For example – adding precious metals and lustres. this firing temperature is usually around 600 – 800°C depending upon the techniques being used. There are many students interested in gold and silver trims – we will be doing this third type of firing soon! After firing your work will be in the student finished work shelves. Remember to pay for it before you head out the door! There is a small extra charge for using porcelain clay (it’s more than twice the price of regular clay), and for any third firing process! Once your work has been fired it can not turn back into clay for millennia – so don’t fire it if you don’t like it! Put it in the bucket for recycling. https://firebirdstudios.com.au/the-process-of-making-pottery/ The bowl is an example of kitchenware used in the 19th century and still in use today.Bowl white ceramic. Crack on side. Badly stained.Backstamp very faint and unable to be read.flagstaff hill, warrnambool, shipwrecked-coast, flagstaff-hill, flagstaff-hill-maritime-museum, maritime-museum, shipwreck-coast, flagstaff-hill-maritime-village, mixing bowl, food preparation, kitchen equipment, ceramic -
 Flagstaff Hill Maritime Museum and Village
Domestic object - Bowl
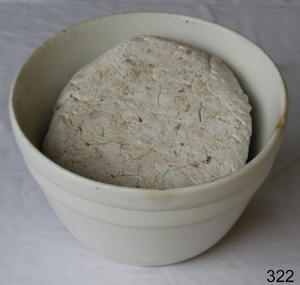
... metal kidney to scrape any areas that require a bit more dynamic treatment than the fly wire offers! Finally, a very light wipe over with a slightly damp sponge can help soften and soothe all of your edges and dags! Trimming thrown work: If you are planning to trim (or turn) your thrown work (and you should be), make sure you bag it well – your work should be leather hard to almost dry for easiest trimming. Use this step to finish the work completely – use a metal kidney to polish the surface...metal kidney to scrape any areas that require a bit more dynamic treatment than the fly wire offers! Finally, a very light wipe over with a slightly damp sponge can help soften and soothe all of your edges and dags! Trimming thrown work: If you are planning to trim (or turn) your thrown work (and you should be), make sure you bag it well – your work should be leather hard to almost dry for easiest trimming. Use this step to finish the work completely – use a metal kidney to polish the surface ...The Process of Making Pottery Decorating, Firing, Glazing, Making, Technical There is a rhythm and flow to clay. It can’t be done all at once! Even the making process! It can take weeks to get everything done, especially if you can only work on your pottery once a week! Even though we have three hour classes, it’s often just not enough time! Here is an overview of some of the processes so you have a bit more grasp on some of the technical stuff! Step One – Design There are SO many ideas out there for making stuff in clay! From delicate porcelain jewellery, through to heavy sculptural work and everything in between. Deciding your direction is sometimes not that easy – when you first start, try everything, you will naturally gravitate to the style that you enjoy! The options and variations are endless and can get a wee bit overwhelming too! Check in with me before you start to ensure your ideas will work, what order you might do things, how you could achieve the look you are seeking and any other technical data required! Step Two – Making Clay is thixotropic. This means that as you work with it, the clay first gets sloppier and wetter, before is begins to dry in the atmosphere. For most things, you simply can’t do all parts of the project at once. An example of work order might look like: Get last weeks work out from the shelves Prepare clay for today’s work – roll your clay, prepare balls for throwing, make the first stage of a pinch pot) Clean up last week’s work and put it on the shelf for bisque firing Check that you have any glazing to do – and do enough of it that you will have time to finish your main project Do the next step of your next project – there might be a further step that can’t be complete immediately, in that case, wrap your work well and put onto the shelves. Letting your work rest for a while can really help keep your work clean and professional looking. Many things require bagging under plastic to keep it ready for work the next week – put your name on the outside of the bag so you can find your work easily. We have stickers and markers. Consider how you want to decorate your work – coloured slip can be applied at a fairly wet stage (remembering that it will make your work even wetter!). Trying to apply slip to dry clay won’t work! If you want to do sgraffito – you will need to keep the work leather hard (a state of dryness where you can still work the clay with a little effort and a little water and care). Step Three – Drying Most of the time your work can go into the rack uncovered to let it dry out for the following week. If you want to continue forming or shaping you will need to double bag your work – put your work on a suitable sized bat and put the bat in a bag so the base of the bag is under the bat, then put another bag over the top of the work and tuck the top of the bag under the bat. If you want to trim (or turn) your thrown work the following week, it should also be double bagged. If your work is large, delicate, or of uneven thicknesses, you should lightly cover your work for drying. When considering the drying process, bare in mind the weather, humidity and wind! The hotter and dryer, the faster things dry and work can dry unevenly in the shelves – this can lead to cracking – another time to lightly cover your work for drying. Step Four – Trimming and Cleaning Up Your work is dry! It is called greenware now and it is at it’s most fragile! Handle everything with two hands. I often refer to soft hands – keep everything gentle and with your fingers spread as much as possible. Try to not pick up things like plates too much, and always with both hands! Before your work can be bisque fired it should be “cleaned up”. You work won’t go into the kiln if it has sharp edges – when glazed, sharp edges turn into razor blades! Use a piece of fly wire to rub the work all over – this will scratch a little so be light handed. Use a knife or metal kidney to scrape any areas that require a bit more dynamic treatment than the fly wire offers! Finally, a very light wipe over with a slightly damp sponge can help soften and soothe all of your edges and dags! Trimming thrown work: If you are planning to trim (or turn) your thrown work (and you should be), make sure you bag it well – your work should be leather hard to almost dry for easiest trimming. Use this step to finish the work completely – use a metal kidney to polish the surface, or a slightly damp sponge to give a freshly thrown look. Wipe the sponge around the rim after trimming, and check the inside of the pot for dags! Trimming slip cast work: Usually I will trim the rims of your work on the wheel the following day to make that stage easier, however you will still need to check your work for lumps and bumps. Last but not least – check that your name is still clearly on the bottom of your work. Step Five – Bisque Firing When the work is completely dry it can go into the bisque kiln. The bisque kiln is fired to 1000°C. This process burns off the water in the clay as well as some of the chemically bound water. The structure of the clay is not altered that much at this temperature. Inside the bisque kiln, the work is stacked a little, small bowl inside a larger bowl and onto a heavy plate. Smaller items like decorations or drink coasters might get stacked several high. Consideration is paid to the weight of the stack and shape of the work. A bisque kiln can fire about one and a half times the amount of work that the glaze kiln can fire. The firing takes about 10 hours to complete the cycle and about two days to cool down. Once it has been emptied the work is placed in the glaze room ready for you to decorate! Step Six – Glazing Decorating your work with colour can be a lot of fun – and time consuming! There are three main options for surface treatment at this stage: Oxide Washes Underglazes Glazes Washes and underglazes do not “glaze” the work – It will still need a layer of glaze to fully seal the clay (washes don’t need glaze on surfaces not designed for food or liquid as they can gloss up a little on their own). Underglazes are stable colourants that turn out pretty much how they look in the jar. They can be mixed with each other to form other colours and can be used like water colours to paint onto your work. Mostly they should have a clear glaze on top to seal them. Oxides are a different species – the pink oxide (cobalt) wash turns out bright blue for instance. They don’t always need a glaze on top, and some glazes can change the colour of the wash! The glazes need no other “glaze” on top! Be careful of unknown glaze interactions – you can put any combination of glaze in a bowl or on a plate, but only a single glaze on the outside of any vertical surface! Glazes are a chemical reaction under heat. We don’t know the exact chemicals in the Mayco glazes we use. I can guess by the way they interact with each other, however, on the whole, you need to test every idea you have, and not run the test on a vertical surface! Simply put, glaze is a layer of glass like substance that bonds with the clay underneath. Clay is made of silica, alumina and water. Glaze is made of mostly silica. Silica has a melting point of 1700°C and we fire to 1240°C. The silica requires a “flux” to help it melt at the lower temperature. Fluxes can be all sorts of chemicals – a common one is calcium – calcium has a melting point of 2500°C, however, together they both melt at a much lower temperature! Colourants are metal oxides like cobalt (blue), chrome (green through black), copper (green, blue, even red!), manganese (black, purple and pink) iron (red brown), etc. Different chemicals in the glaze can have dramatic effects. for example, barium carbonate (which we don’t use) turns manganese bright pink! Other elements can turn manganese dioxide brown, blue, purple and reddish brown. Manganese dioxide is a flux in and of itself as well. So, glazes that get their black and purple colours, often interact with other glazes and RUN! Our mirror black is a good example – it mixes really well with many glazes because it fluxes them – causes them to melt faster. It will also bring out many beautiful colours in the glazes because it’s black colouring most definitely comes from manganese dioxide! Glaze chemistry is a whole subject on it’s own! We use commercial Mayco glazes on purpose – for their huge range of colour possibilities, stability, cool interactions, artistic freedom with the ability to easily brush the glazes on and ease of use. We currently have almost 50 glazes on hand! A major project is to test the interactions of all glazes with each other. That is 2,500 test tiles!!!! I’m going to make the wall behind the wheels the feature wall of pretty colours! Step Seven – Glaze (Gloss or sometimes called “Glost”) Firing Most of the time this is the final stage of making your creation (but not always!) The glaze kiln goes to 1240°C. This is called cone 6, or midrange. It is the low end of stoneware temperatures. Stoneware clays and glazes are typically fired at cone 8 – 10, that is 1260 – 1290°C. The energy requirement to go from 1240°C to 1280°C is almost a 30% more! Our clay is formulated to vitrify (mature, turn “glass-like”) at 1240°, as are our glazes. A glaze kiln take around 12 hours to reach temperature and two to three days to cool down. Sometimes a third firing process is required – this is for decoration that is added to work after the glaze firing. For example – adding precious metals and lustres. this firing temperature is usually around 600 – 800°C depending upon the techniques being used. There are many students interested in gold and silver trims – we will be doing this third type of firing soon! After firing your work will be in the student finished work shelves. Remember to pay for it before you head out the door! There is a small extra charge for using porcelain clay (it’s more than twice the price of regular clay), and for any third firing process! Once your work has been fired it can not turn back into clay for millennia – so don’t fire it if you don’t like it! Put it in the bucket for recycling. https://firebirdstudios.com.au/the-process-of-making-pottery/ This bowl is an example of kitchenware used in the 19th century and still in use today.Bowl white ceramic plain that has two sets of edging around lip. Inside bowl has plaster designed to look like cooking mixture.flagstaff hill, warrnambool, shipwrecked-coast, flagstaff-hill, flagstaff-hill-maritime-museum, maritime-museum, shipwreck-coast, flagstaff-hill-maritime-village, kitchen equipment, ceramic -
 Flagstaff Hill Maritime Museum and Village
Domestic object - Bowl, J & G Meakin, Late 19th or early 20th Century
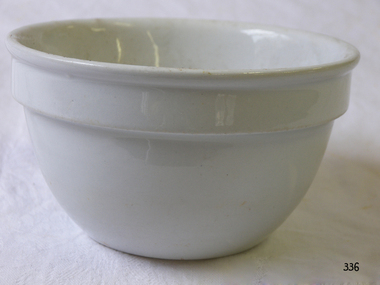
... metal kidney to scrape any areas that require a bit more dynamic treatment than the fly wire offers! Finally, a very light wipe over with a slightly damp sponge can help soften and soothe all of your edges and dags! Trimming thrown work: If you are planning to trim (or turn) your thrown work (and you should be), make sure you bag it well – your work should be leather hard to almost dry for easiest trimming. Use this step to finish the work completely – use a metal kidney to polish the surface...metal kidney to scrape any areas that require a bit more dynamic treatment than the fly wire offers! Finally, a very light wipe over with a slightly damp sponge can help soften and soothe all of your edges and dags! Trimming thrown work: If you are planning to trim (or turn) your thrown work (and you should be), make sure you bag it well – your work should be leather hard to almost dry for easiest trimming. Use this step to finish the work completely – use a metal kidney to polish the surface ...The Process of Making Pottery Decorating, Firing, Glazing, Making, Technical There is a rhythm and flow to clay. It can’t be done all at once! Even the making process! It can take weeks to get everything done, especially if you can only work on your pottery once a week! Even though we have three hour classes, it’s often just not enough time! Here is an overview of some of the processes so you have a bit more grasp on some of the technical stuff! Step One – Design There are SO many ideas out there for making stuff in clay! From delicate porcelain jewellery, through to heavy sculptural work and everything in between. Deciding your direction is sometimes not that easy – when you first start, try everything, you will naturally gravitate to the style that you enjoy! The options and variations are endless and can get a wee bit overwhelming too! Check in with me before you start to ensure your ideas will work, what order you might do things, how you could achieve the look you are seeking and any other technical data required! Step Two – Making Clay is thixotropic. This means that as you work with it, the clay first gets sloppier and wetter, before is begins to dry in the atmosphere. For most things, you simply can’t do all parts of the project at once. An example of work order might look like: Get last weeks work out from the shelves Prepare clay for today’s work – roll your clay, prepare balls for throwing, make the first stage of a pinch pot) Clean up last week’s work and put it on the shelf for bisque firing Check that you have any glazing to do – and do enough of it that you will have time to finish your main project Do the next step of your next project – there might be a further step that can’t be complete immediately, in that case, wrap your work well and put onto the shelves. Letting your work rest for a while can really help keep your work clean and professional looking. Many things require bagging under plastic to keep it ready for work the next week – put your name on the outside of the bag so you can find your work easily. We have stickers and markers. Consider how you want to decorate your work – coloured slip can be applied at a fairly wet stage (remembering that it will make your work even wetter!). Trying to apply slip to dry clay won’t work! If you want to do sgraffito – you will need to keep the work leather hard (a state of dryness where you can still work the clay with a little effort and a little water and care). Step Three – Drying Most of the time your work can go into the rack uncovered to let it dry out for the following week. If you want to continue forming or shaping you will need to double bag your work – put your work on a suitable sized bat and put the bat in a bag so the base of the bag is under the bat, then put another bag over the top of the work and tuck the top of the bag under the bat. If you want to trim (or turn) your thrown work the following week, it should also be double bagged. If your work is large, delicate, or of uneven thicknesses, you should lightly cover your work for drying. When considering the drying process, bare in mind the weather, humidity and wind! The hotter and dryer, the faster things dry and work can dry unevenly in the shelves – this can lead to cracking – another time to lightly cover your work for drying. Step Four – Trimming and Cleaning Up Your work is dry! It is called greenware now and it is at it’s most fragile! Handle everything with two hands. I often refer to soft hands – keep everything gentle and with your fingers spread as much as possible. Try to not pick up things like plates too much, and always with both hands! Before your work can be bisque fired it should be “cleaned up”. You work won’t go into the kiln if it has sharp edges – when glazed, sharp edges turn into razor blades! Use a piece of fly wire to rub the work all over – this will scratch a little so be light handed. Use a knife or metal kidney to scrape any areas that require a bit more dynamic treatment than the fly wire offers! Finally, a very light wipe over with a slightly damp sponge can help soften and soothe all of your edges and dags! Trimming thrown work: If you are planning to trim (or turn) your thrown work (and you should be), make sure you bag it well – your work should be leather hard to almost dry for easiest trimming. Use this step to finish the work completely – use a metal kidney to polish the surface, or a slightly damp sponge to give a freshly thrown look. Wipe the sponge around the rim after trimming, and check the inside of the pot for dags! Trimming slip cast work: Usually I will trim the rims of your work on the wheel the following day to make that stage easier, however you will still need to check your work for lumps and bumps. Last but not least – check that your name is still clearly on the bottom of your work. Step Five – Bisque Firing When the work is completely dry it can go into the bisque kiln. The bisque kiln is fired to 1000°C. This process burns off the water in the clay as well as some of the chemically bound water. The structure of the clay is not altered that much at this temperature. Inside the bisque kiln, the work is stacked a little, small bowl inside a larger bowl and onto a heavy plate. Smaller items like decorations or drink coasters might get stacked several high. Consideration is paid to the weight of the stack and shape of the work. A bisque kiln can fire about one and a half times the amount of work that the glaze kiln can fire. The firing takes about 10 hours to complete the cycle and about two days to cool down. Once it has been emptied the work is placed in the glaze room ready for you to decorate! Step Six – Glazing Decorating your work with colour can be a lot of fun – and time consuming! There are three main options for surface treatment at this stage: Oxide Washes Underglazes Glazes Washes and underglazes do not “glaze” the work – It will still need a layer of glaze to fully seal the clay (washes don’t need glaze on surfaces not designed for food or liquid as they can gloss up a little on their own). Underglazes are stable colourants that turn out pretty much how they look in the jar. They can be mixed with each other to form other colours and can be used like water colours to paint onto your work. Mostly they should have a clear glaze on top to seal them. Oxides are a different species – the pink oxide (cobalt) wash turns out bright blue for instance. They don’t always need a glaze on top, and some glazes can change the colour of the wash! The glazes need no other “glaze” on top! Be careful of unknown glaze interactions – you can put any combination of glaze in a bowl or on a plate, but only a single glaze on the outside of any vertical surface! Glazes are a chemical reaction under heat. We don’t know the exact chemicals in the Mayco glazes we use. I can guess by the way they interact with each other, however, on the whole, you need to test every idea you have, and not run the test on a vertical surface! Simply put, glaze is a layer of glass like substance that bonds with the clay underneath. Clay is made of silica, alumina and water. Glaze is made of mostly silica. Silica has a melting point of 1700°C and we fire to 1240°C. The silica requires a “flux” to help it melt at the lower temperature. Fluxes can be all sorts of chemicals – a common one is calcium – calcium has a melting point of 2500°C, however, together they both melt at a much lower temperature! Colourants are metal oxides like cobalt (blue), chrome (green through black), copper (green, blue, even red!), manganese (black, purple and pink) iron (red brown), etc. Different chemicals in the glaze can have dramatic effects. for example, barium carbonate (which we don’t use) turns manganese bright pink! Other elements can turn manganese dioxide brown, blue, purple and reddish brown. Manganese dioxide is a flux in and of itself as well. So, glazes that get their black and purple colours, often interact with other glazes and RUN! Our mirror black is a good example – it mixes really well with many glazes because it fluxes them – causes them to melt faster. It will also bring out many beautiful colours in the glazes because it’s black colouring most definitely comes from manganese dioxide! Glaze chemistry is a whole subject on it’s own! We use commercial Mayco glazes on purpose – for their huge range of colour possibilities, stability, cool interactions, artistic freedom with the ability to easily brush the glazes on and ease of use. We currently have almost 50 glazes on hand! A major project is to test the interactions of all glazes with each other. That is 2,500 test tiles!!!! I’m going to make the wall behind the wheels the feature wall of pretty colours! Step Seven – Glaze (Gloss or sometimes called “Glost”) Firing Most of the time this is the final stage of making your creation (but not always!) The glaze kiln goes to 1240°C. This is called cone 6, or midrange. It is the low end of stoneware temperatures. Stoneware clays and glazes are typically fired at cone 8 – 10, that is 1260 – 1290°C. The energy requirement to go from 1240°C to 1280°C is almost a 30% more! Our clay is formulated to vitrify (mature, turn “glass-like”) at 1240°, as are our glazes. A glaze kiln take around 12 hours to reach temperature and two to three days to cool down. Sometimes a third firing process is required – this is for decoration that is added to work after the glaze firing. For example – adding precious metals and lustres. this firing temperature is usually around 600 – 800°C depending upon the techniques being used. There are many students interested in gold and silver trims – we will be doing this third type of firing soon! After firing your work will be in the student finished work shelves. Remember to pay for it before you head out the door! There is a small extra charge for using porcelain clay (it’s more than twice the price of regular clay), and for any third firing process! Once your work has been fired it can not turn back into clay for millennia – so don’t fire it if you don’t like it! Put it in the bucket for recycling. https://firebirdstudios.com.au/the-process-of-making-pottery/This bowl was made by renowned pottery company J & G Meakin of England. The firm was established in the mid-1800's. The bowl is an example of kitchenware used in the 19th century and still in use today.Bowl; white ceramic, round and tapering inwards towards base. Made by J and G Meakin England.On base, 'Ironstone China Reg SOL 391413' with symbolflagstaff hill, flagstaff hill maritime museum and village, warrnambool, maritime museum, maritime village, great ocean road, shipwreck coast, mixing bowl, food preparation, j & g meakin, pottery, stoke-on-trent, kitchen equipment, ceramic -
 Flagstaff Hill Maritime Museum and Village
Audio - Phonograph Horn, Thomas A. Edison, Edison Laboratory, c.1909
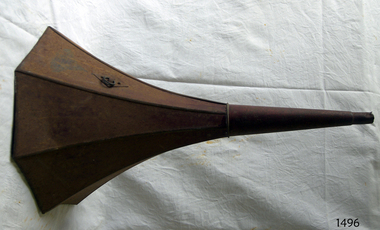
... metal with a scalloped finish at the opening. The narrow end is hollow and ready to fit onto a phonograph outlet. There are two rings attached together on the side of the horn, perhaps for storing on a hook. The inner surface...metal with a scalloped finish at the opening. The narrow end is hollow and ready to fit onto a phonograph outlet. There are two rings attached together on the side of the horn, perhaps for storing on a hook. The inner surface ...This external horn is part of an Edison Fireside Phonograph made in c.1909. The horn was attached to the machine when in use. The rings on the side of the horn allowed the horn to be suspended above the machine. The narrow opening on the horn was attached to the sound outlet on the machine and the conical shape of the horn amplified the sound. The horn was suspended to allow a clear sound. This was done by attaching the ring fitted to the outside of the horn to a chain or chord, which in turn was attached to a curved wire fitted to the phonograph machine. The phonograph machine was invented by Thomas Alva Edison in the late 19th century. Edison adapted the idea used when sending messages over a telegraph machine. He patented the phonograph in early 1878. The phonograph was able to record sound and play it back sound. This amazing invention opened up a whole new world of entertainments, where wax cylinders of pre-recorded sound could be purchased with a wide variety of music and played over and over. The first wax cylinders were white and used a combination of bees' wax and animal fax or tallow. By 1892 Edison was using 'brown wax' cylinders that ranged from cream through to dark brown. The Edison Phonograph Company was formed in 1887 to produce these machines. He sold the company in 1855 to the North American Phonograph Company but bought that company in 1890. He started the Edison Spring Motor factory in 1895 and then the National Phonograph Company in 1896. In 1910 the company became Thomas A. Edison Inc. In 1898 Edison produced the Edison Standard Phonograph, the first phonograph to carry his own trade mark. He began mass producing duplicate copies of his wax cylinders in 1901 using moulds instead of engraving the cylinders. The wax was black and harder than the brown wax. The ends of the cylinders were bevelled so that the title's label could be added. The last phonograph machine to use an external horn was produced in 1912 due to the much more robust records being invented. In 1913 Edison started producing the Edison Disc Phonograph. The company stopped trading in 1929. [NOTE: a phonograph machine plays cylinders, a gramophone plays records]This Edison external phonograph horn is significant for its connection to the c.1909 Edison Fireside phonograph model. The phonograph machine brought a new era of music into the homes of everyday people but was only popular for a few decades due to the growing popularity of records, which gave a much higher quality sound and were more robust.Phonograph horn; open horn, a conical shape with the lower part flaring out. The horn's shape on the opening half is octagonal, made from eight joined sheets of metal with a scalloped finish at the opening. The narrow end is hollow and ready to fit onto a phonograph outlet. There are two rings attached together on the side of the horn, perhaps for storing on a hook. The inner surface of the horn has remnants of deep red paint. This horn is from the Edison Fireside phonograph. (There is a mark on the outside of the horn where the Edison brand would be)flagstaff hill, maritime museum, maritime village, warrnambool, great ocean road, shipwreck coast, gramophone, phonograph, music player, entertainment, audio equipment, edison, thomas a edison, horn, phonograph horn, amplifier, audio, sound recording, sound playback, phonograph machine, external horn, edison phonograph company, wax cylinders, edison spring motor factory, national phonograph company, thomas a. edison inc, phonographic cylinder, sound reproduction -
 Federation University Historical Collection
Scientific Instruments, Specific Gravity: Metal Cubes - boxed set of seven
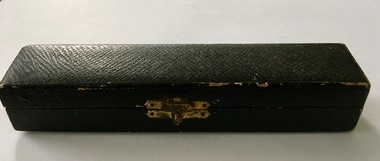
... metal of cubes: 1) Brass; 2) Lead; 3) Steel; 4) Copper; 5) Aluminium; 6) ? a ferrous alloy; 7) ? a ferrous alloy. A set of seven 2-cm cubes, individually numbered 1 - 7, in a hinged-lid storage box with black surface finish. ...Used in Physics Laboratory at Ballarat School of Mines for calculating/confirming relative density (or the specific gravity) of given metal samples. This would have been in Elementary physics experiments.A set of seven 2-cm cubes, individually numbered 1 - 7, in a hinged-lid storage box with black surface finish.Number and metal of cubes: 1) Brass; 2) Lead; 3) Steel; 4) Copper; 5) Aluminium; 6) ? a ferrous alloy; 7) ? a ferrous alloy.physics, laboratory, ballarat school of mines, relative density, specific gravity, metal, elementary physics, brass, lead, steel, copper, aluminium, ferrous alloy -
 Flagstaff Hill Maritime Museum and Village
Equipment - Foot Grip, Frank McDowell, Early 20th century
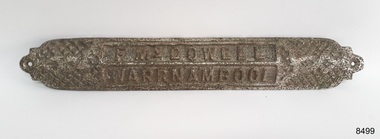
... finish. Rectangular metal plate with textured crossed over diagonal lines on the top surface and inset rectangles with impressed text. the curved and shaped ends have a drilled round hole. the length of the plate is an inverted 'v' shape towards the base. ...finish. Rectangular metal plate with textured crossed over diagonal lines on the top surface and inset rectangles with impressed text. the curved and shaped ends have a drilled round hole. the length of the plate is an inverted 'v' shape towards the base. ...This foot grip was made and owned by Frederick William McDowell (Fred) (1880 to 15-6-1967). It would be been joined to the stafe or frame of a jinker and used to step up from the ground and onto the seat. He was a wheelwright by trade. He made and repaired vehicles such gigs, buggies, jinkers, sulkeys, spring carts and farm wagons. His workshop was on the corner of Cramer Street and Raglan Parade in Warrnambool., previously the site of Fotheringhams, and after McDowell's, and still in 2023, occupied by Reece Plumbing Fred's workplace prior to retiring was at Bryant & Waterson's in Kepler Street, opposite the Criterian Hotel, making rubber tyred horse-driven farm wagons.This jinker's foot grip id part of a jinker or two-wheeled carriage. It is a rare item, made by a local wheelwright Frank McDowell who operated his buggy making and repair business in Warrnambool's CBD in the early twentieth century. It is an example of the equipment used on horse-drawn vehicles for safety and convenience.Foot grip, iron with silver plate finish. Rectangular metal plate with textured crossed over diagonal lines on the top surface and inset rectangles with impressed text. the curved and shaped ends have a drilled round hole. the length of the plate is an inverted 'v' shape towards the base. Made by F. McDowell, Warrnambool."F McDOWELL" "WARRNAMBOOL"flagstaff hill, warrnambool, flagstaff hill maritime museum, maritime museum, shipwreck coast, flagstaff hill maritime village, great ocean road, fred mcdowell, frederick mcdowell, wheelwright, gig, buggy, jinker, sulkey, spring cart, farm wagon, 2-wheeled cart, horse cart, horse cart parts, jinker buggy, transport, vehicle, horse drawn, horse jinker, bryant & waterson, jinker part, jinker foot grip, step, foot plate, horse cart part, stafe, 2-wheeled carriage -
 Flagstaff Hill Maritime Museum and Village
Domestic object - Razor Strop, Early 19th century
... metal fittings. Stropping faces; sharpening surface is stained red and finishing surface is stained black. ... is stained red and finishing surface is stained black. One end has padded, bulbous shaped leather handle, the other end has metal, swivel hook hanger. ...A razor strop is flexible strip of leather or canvas used to maintain a shaving edge on a thin blade such as a straight razor. Fine powdered jeweler's rouge or other pastes can be added as an abrasive to polish the blade. The strop may be a hanging strip or a hand-held paddle. This one is a hanging strop. Strops were quite commonly found in barber shops and homes before the invention of the safety razor, They are still used for sharpening tool blades. The person using the strop would draw the spine of the blade down along the strop with the blade following, without putting any pressure on the blade. At the end of the stroke, rotate the blade over its spine then draw the spine along the strop again so that the edge moves away from the top. The finer grade of leather strap is used to give the final finish. KEEN EDGE MANUFACTURER In March 1906 Popular Mechanics magazine included an advertisement for Keen Edge Strop. The promise given by the advertiser, Eddy Mfg. Co. (206 Broadway, New York) was “Use the Keen Edge strop for 90 days and if not satisfied return to us and we will refund your money“. The advertisement was for a Combination Razor Strop, “the only strop made which requires no dressing.” Readers were invited to send for a booklet on Razor and the Face. In 1924 Popular Mechanics, published by Hearst Magazines, displayed an advertisement seeking a sales manager “… to sell [to] drug, hardware and cigar stores Keen Edge Strop Dressing, which sharpens straight razors and safety blades and removes old razor strops.” At that time the Keen Edge Mfg. Company was in Dallas, Texas. Razor strops are of historical significance, representing personal effects of men from the time period when men relied on strops to keep a sharp edge on their shaving blade. Strops were commonly owned and used until the acceptance of safety razors.Razor strop, leather and metal. Keen Edge brand, double straps: two straps of different grade leather joined at ends with metal fittings. Stropping faces; sharpening surface is stained red and finishing surface is stained black. One end has padded, bulbous shaped leather handle, the other end has metal, swivel hook hanger. Inscriptions pressed into leather at the ends of the straps. Impressed into leather "FINEST SELECTED HIDE", "KEEN EDGE", "FINISH" (black stained side), “A SHARPENER" (red stained side), “1 2 3”warrnambool, shipwrecked coast, flagstaff hill maritime museum, maritime museum, shipwreck coast, great ocean road, shaving leather, shaving accessory, barber’s equipment, barber shop razor strop, razor strop, straight razor, razor and knife sharpener, keen edge razor strop -
 Flagstaff Hill Maritime Museum and Village
Domestic object - Plate
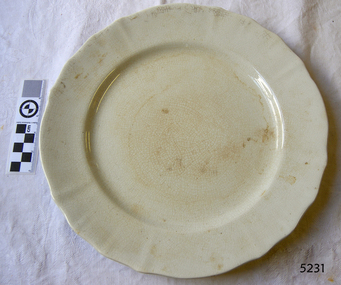
... metal kidney to scrape any areas that require a bit more dynamic treatment than the fly wire offers! Finally, a very light wipe over with a slightly damp sponge can help soften and soothe all of your edges and dags! Trimming thrown work: If you are planning to trim (or turn) your thrown work (and you should be), make sure you bag it well – your work should be leather hard to almost dry for easiest trimming. Use this step to finish the work completely – use a metal kidney to polish the surface...metal kidney to scrape any areas that require a bit more dynamic treatment than the fly wire offers! Finally, a very light wipe over with a slightly damp sponge can help soften and soothe all of your edges and dags! Trimming thrown work: If you are planning to trim (or turn) your thrown work (and you should be), make sure you bag it well – your work should be leather hard to almost dry for easiest trimming. Use this step to finish the work completely – use a metal kidney to polish the surface ...The Process of Making Pottery Decorating, Firing, Glazing, Making, Technical There is a rhythm and flow to clay. It can’t be done all at once! Even the making process! It can take weeks to get everything done, especially if you can only work on your pottery once a week! Even though we have three hour classes, it’s often just not enough time! Here is an overview of some of the processes so you have a bit more grasp on some of the technical stuff! Step One – Design There are SO many ideas out there for making stuff in clay! From delicate porcelain jewellery, through to heavy sculptural work and everything in between. Deciding your direction is sometimes not that easy – when you first start, try everything, you will naturally gravitate to the style that you enjoy! The options and variations are endless and can get a wee bit overwhelming too! Check in with me before you start to ensure your ideas will work, what order you might do things, how you could achieve the look you are seeking and any other technical data required! Step Two – Making Clay is thixotropic. This means that as you work with it, the clay first gets sloppier and wetter, before is begins to dry in the atmosphere. For most things, you simply can’t do all parts of the project at once. An example of work order might look like: Get last weeks work out from the shelves Prepare clay for today’s work – roll your clay, prepare balls for throwing, make the first stage of a pinch pot) Clean up last week’s work and put it on the shelf for bisque firing Check that you have any glazing to do – and do enough of it that you will have time to finish your main project Do the next step of your next project – there might be a further step that can’t be complete immediately, in that case, wrap your work well and put onto the shelves. Letting your work rest for a while can really help keep your work clean and professional looking. Many things require bagging under plastic to keep it ready for work the next week – put your name on the outside of the bag so you can find your work easily. We have stickers and markers. Consider how you want to decorate your work – coloured slip can be applied at a fairly wet stage (remembering that it will make your work even wetter!). Trying to apply slip to dry clay won’t work! If you want to do sgraffito – you will need to keep the work leather hard (a state of dryness where you can still work the clay with a little effort and a little water and care). Step Three – Drying Most of the time your work can go into the rack uncovered to let it dry out for the following week. If you want to continue forming or shaping you will need to double bag your work – put your work on a suitable sized bat and put the bat in a bag so the base of the bag is under the bat, then put another bag over the top of the work and tuck the top of the bag under the bat. If you want to trim (or turn) your thrown work the following week, it should also be double bagged. If your work is large, delicate, or of uneven thicknesses, you should lightly cover your work for drying. When considering the drying process, bare in mind the weather, humidity and wind! The hotter and dryer, the faster things dry and work can dry unevenly in the shelves – this can lead to cracking – another time to lightly cover your work for drying. Step Four – Trimming and Cleaning Up Your work is dry! It is called greenware now and it is at it’s most fragile! Handle everything with two hands. I often refer to soft hands – keep everything gentle and with your fingers spread as much as possible. Try to not pick up things like plates too much, and always with both hands! Before your work can be bisque fired it should be “cleaned up”. You work won’t go into the kiln if it has sharp edges – when glazed, sharp edges turn into razor blades! Use a piece of fly wire to rub the work all over – this will scratch a little so be light handed. Use a knife or metal kidney to scrape any areas that require a bit more dynamic treatment than the fly wire offers! Finally, a very light wipe over with a slightly damp sponge can help soften and soothe all of your edges and dags! Trimming thrown work: If you are planning to trim (or turn) your thrown work (and you should be), make sure you bag it well – your work should be leather hard to almost dry for easiest trimming. Use this step to finish the work completely – use a metal kidney to polish the surface, or a slightly damp sponge to give a freshly thrown look. Wipe the sponge around the rim after trimming, and check the inside of the pot for dags! Trimming slip cast work: Usually I will trim the rims of your work on the wheel the following day to make that stage easier, however you will still need to check your work for lumps and bumps. Last but not least – check that your name is still clearly on the bottom of your work. Step Five – Bisque Firing When the work is completely dry it can go into the bisque kiln. The bisque kiln is fired to 1000°C. This process burns off the water in the clay as well as some of the chemically bound water. The structure of the clay is not altered that much at this temperature. Inside the bisque kiln, the work is stacked a little, small bowl inside a larger bowl and onto a heavy plate. Smaller items like decorations or drink coasters might get stacked several high. Consideration is paid to the weight of the stack and shape of the work. A bisque kiln can fire about one and a half times the amount of work that the glaze kiln can fire. The firing takes about 10 hours to complete the cycle and about two days to cool down. Once it has been emptied the work is placed in the glaze room ready for you to decorate! Step Six – Glazing Decorating your work with colour can be a lot of fun – and time consuming! There are three main options for surface treatment at this stage: Oxide Washes Underglazes Glazes Washes and underglazes do not “glaze” the work – It will still need a layer of glaze to fully seal the clay (washes don’t need glaze on surfaces not designed for food or liquid as they can gloss up a little on their own). Underglazes are stable colourants that turn out pretty much how they look in the jar. They can be mixed with each other to form other colours and can be used like water colours to paint onto your work. Mostly they should have a clear glaze on top to seal them. Oxides are a different species – the pink oxide (cobalt) wash turns out bright blue for instance. They don’t always need a glaze on top, and some glazes can change the colour of the wash! The glazes need no other “glaze” on top! Be careful of unknown glaze interactions – you can put any combination of glaze in a bowl or on a plate, but only a single glaze on the outside of any vertical surface! Glazes are a chemical reaction under heat. We don’t know the exact chemicals in the Mayco glazes we use. I can guess by the way they interact with each other, however, on the whole, you need to test every idea you have, and not run the test on a vertical surface! Simply put, glaze is a layer of glass like substance that bonds with the clay underneath. Clay is made of silica, alumina and water. Glaze is made of mostly silica. Silica has a melting point of 1700°C and we fire to 1240°C. The silica requires a “flux” to help it melt at the lower temperature. Fluxes can be all sorts of chemicals – a common one is calcium – calcium has a melting point of 2500°C, however, together they both melt at a much lower temperature! Colourants are metal oxides like cobalt (blue), chrome (green through black), copper (green, blue, even red!), manganese (black, purple and pink) iron (red brown), etc. Different chemicals in the glaze can have dramatic effects. for example, barium carbonate (which we don’t use) turns manganese bright pink! Other elements can turn manganese dioxide brown, blue, purple and reddish brown. Manganese dioxide is a flux in and of itself as well. So, glazes that get their black and purple colours, often interact with other glazes and RUN! Our mirror black is a good example – it mixes really well with many glazes because it fluxes them – causes them to melt faster. It will also bring out many beautiful colours in the glazes because it’s black colouring most definitely comes from manganese dioxide! Glaze chemistry is a whole subject on it’s own! We use commercial Mayco glazes on purpose – for their huge range of colour possibilities, stability, cool interactions, artistic freedom with the ability to easily brush the glazes on and ease of use. We currently have almost 50 glazes on hand! A major project is to test the interactions of all glazes with each other. That is 2,500 test tiles!!!! I’m going to make the wall behind the wheels the feature wall of pretty colours! Step Seven – Glaze (Gloss or sometimes called “Glost”) Firing Most of the time this is the final stage of making your creation (but not always!) The glaze kiln goes to 1240°C. This is called cone 6, or midrange. It is the low end of stoneware temperatures. Stoneware clays and glazes are typically fired at cone 8 – 10, that is 1260 – 1290°C. The energy requirement to go from 1240°C to 1280°C is almost a 30% more! Our clay is formulated to vitrify (mature, turn “glass-like”) at 1240°, as are our glazes. A glaze kiln take around 12 hours to reach temperature and two to three days to cool down. Sometimes a third firing process is required – this is for decoration that is added to work after the glaze firing. For example – adding precious metals and lustres. this firing temperature is usually around 600 – 800°C depending upon the techniques being used. There are many students interested in gold and silver trims – we will be doing this third type of firing soon! After firing your work will be in the student finished work shelves. Remember to pay for it before you head out the door! There is a small extra charge for using porcelain clay (it’s more than twice the price of regular clay), and for any third firing process! Once your work has been fired it can not turn back into clay for millennia – so don’t fire it if you don’t like it! Put it in the bucket for recycling. https://firebirdstudios.com.au/the-process-of-making-pottery/Ceramics have evolved over thousands of years.White earthenware dinner plate. Crazing evident all over.Backstamped ‘Made in England S LTD’flagstaff hill, warrnambool, shipwrecked-coast, flagstaff-hill, flagstaff-hill-maritime-museum, maritime-museum, shipwreck-coast, flagstaff-hill-maritime-village, ceramics, tableware -
 Flagstaff Hill Maritime Museum and Village
Domestic object - Plate, Johnson Bros
... metal kidney to scrape any areas that require a bit more dynamic treatment than the fly wire offers! Finally, a very light wipe over with a slightly damp sponge can help soften and soothe all of your edges and dags! Trimming thrown work: If you are planning to trim (or turn) your thrown work (and you should be), make sure you bag it well – your work should be leather hard to almost dry for easiest trimming. Use this step to finish the work completely – use a metal kidney to polish the surface...metal kidney to scrape any areas that require a bit more dynamic treatment than the fly wire offers! Finally, a very light wipe over with a slightly damp sponge can help soften and soothe all of your edges and dags! Trimming thrown work: If you are planning to trim (or turn) your thrown work (and you should be), make sure you bag it well – your work should be leather hard to almost dry for easiest trimming. Use this step to finish the work completely – use a metal kidney to polish the surface ...The Process of Making Pottery Decorating, Firing, Glazing, Making, Technical There is a rhythm and flow to clay. It can’t be done all at once! Even the making process! It can take weeks to get everything done, especially if you can only work on your pottery once a week! Even though we have three hour classes, it’s often just not enough time! Here is an overview of some of the processes so you have a bit more grasp on some of the technical stuff! Step One – Design There are SO many ideas out there for making stuff in clay! From delicate porcelain jewellery, through to heavy sculptural work and everything in between. Deciding your direction is sometimes not that easy – when you first start, try everything, you will naturally gravitate to the style that you enjoy! The options and variations are endless and can get a wee bit overwhelming too! Check in with me before you start to ensure your ideas will work, what order you might do things, how you could achieve the look you are seeking and any other technical data required! Step Two – Making Clay is thixotropic. This means that as you work with it, the clay first gets sloppier and wetter, before is begins to dry in the atmosphere. For most things, you simply can’t do all parts of the project at once. An example of work order might look like: Get last weeks work out from the shelves Prepare clay for today’s work – roll your clay, prepare balls for throwing, make the first stage of a pinch pot) Clean up last week’s work and put it on the shelf for bisque firing Check that you have any glazing to do – and do enough of it that you will have time to finish your main project Do the next step of your next project – there might be a further step that can’t be complete immediately, in that case, wrap your work well and put onto the shelves. Letting your work rest for a while can really help keep your work clean and professional looking. Many things require bagging under plastic to keep it ready for work the next week – put your name on the outside of the bag so you can find your work easily. We have stickers and markers. Consider how you want to decorate your work – coloured slip can be applied at a fairly wet stage (remembering that it will make your work even wetter!). Trying to apply slip to dry clay won’t work! If you want to do sgraffito – you will need to keep the work leather hard (a state of dryness where you can still work the clay with a little effort and a little water and care). Step Three – Drying Most of the time your work can go into the rack uncovered to let it dry out for the following week. If you want to continue forming or shaping you will need to double bag your work – put your work on a suitable sized bat and put the bat in a bag so the base of the bag is under the bat, then put another bag over the top of the work and tuck the top of the bag under the bat. If you want to trim (or turn) your thrown work the following week, it should also be double bagged. If your work is large, delicate, or of uneven thicknesses, you should lightly cover your work for drying. When considering the drying process, bare in mind the weather, humidity and wind! The hotter and dryer, the faster things dry and work can dry unevenly in the shelves – this can lead to cracking – another time to lightly cover your work for drying. Step Four – Trimming and Cleaning Up Your work is dry! It is called greenware now and it is at it’s most fragile! Handle everything with two hands. I often refer to soft hands – keep everything gentle and with your fingers spread as much as possible. Try to not pick up things like plates too much, and always with both hands! Before your work can be bisque fired it should be “cleaned up”. You work won’t go into the kiln if it has sharp edges – when glazed, sharp edges turn into razor blades! Use a piece of fly wire to rub the work all over – this will scratch a little so be light handed. Use a knife or metal kidney to scrape any areas that require a bit more dynamic treatment than the fly wire offers! Finally, a very light wipe over with a slightly damp sponge can help soften and soothe all of your edges and dags! Trimming thrown work: If you are planning to trim (or turn) your thrown work (and you should be), make sure you bag it well – your work should be leather hard to almost dry for easiest trimming. Use this step to finish the work completely – use a metal kidney to polish the surface, or a slightly damp sponge to give a freshly thrown look. Wipe the sponge around the rim after trimming, and check the inside of the pot for dags! Trimming slip cast work: Usually I will trim the rims of your work on the wheel the following day to make that stage easier, however you will still need to check your work for lumps and bumps. Last but not least – check that your name is still clearly on the bottom of your work. Step Five – Bisque Firing When the work is completely dry it can go into the bisque kiln. The bisque kiln is fired to 1000°C. This process burns off the water in the clay as well as some of the chemically bound water. The structure of the clay is not altered that much at this temperature. Inside the bisque kiln, the work is stacked a little, small bowl inside a larger bowl and onto a heavy plate. Smaller items like decorations or drink coasters might get stacked several high. Consideration is paid to the weight of the stack and shape of the work. A bisque kiln can fire about one and a half times the amount of work that the glaze kiln can fire. The firing takes about 10 hours to complete the cycle and about two days to cool down. Once it has been emptied the work is placed in the glaze room ready for you to decorate! Step Six – Glazing Decorating your work with colour can be a lot of fun – and time consuming! There are three main options for surface treatment at this stage: Oxide Washes Underglazes Glazes Washes and underglazes do not “glaze” the work – It will still need a layer of glaze to fully seal the clay (washes don’t need glaze on surfaces not designed for food or liquid as they can gloss up a little on their own). Underglazes are stable colourants that turn out pretty much how they look in the jar. They can be mixed with each other to form other colours and can be used like water colours to paint onto your work. Mostly they should have a clear glaze on top to seal them. Oxides are a different species – the pink oxide (cobalt) wash turns out bright blue for instance. They don’t always need a glaze on top, and some glazes can change the colour of the wash! The glazes need no other “glaze” on top! Be careful of unknown glaze interactions – you can put any combination of glaze in a bowl or on a plate, but only a single glaze on the outside of any vertical surface! Glazes are a chemical reaction under heat. We don’t know the exact chemicals in the Mayco glazes we use. I can guess by the way they interact with each other, however, on the whole, you need to test every idea you have, and not run the test on a vertical surface! Simply put, glaze is a layer of glass like substance that bonds with the clay underneath. Clay is made of silica, alumina and water. Glaze is made of mostly silica. Silica has a melting point of 1700°C and we fire to 1240°C. The silica requires a “flux” to help it melt at the lower temperature. Fluxes can be all sorts of chemicals – a common one is calcium – calcium has a melting point of 2500°C, however, together they both melt at a much lower temperature! Colourants are metal oxides like cobalt (blue), chrome (green through black), copper (green, blue, even red!), manganese (black, purple and pink) iron (red brown), etc. Different chemicals in the glaze can have dramatic effects. for example, barium carbonate (which we don’t use) turns manganese bright pink! Other elements can turn manganese dioxide brown, blue, purple and reddish brown. Manganese dioxide is a flux in and of itself as well. So, glazes that get their black and purple colours, often interact with other glazes and RUN! Our mirror black is a good example – it mixes really well with many glazes because it fluxes them – causes them to melt faster. It will also bring out many beautiful colours in the glazes because it’s black colouring most definitely comes from manganese dioxide! Glaze chemistry is a whole subject on it’s own! We use commercial Mayco glazes on purpose – for their huge range of colour possibilities, stability, cool interactions, artistic freedom with the ability to easily brush the glazes on and ease of use. We currently have almost 50 glazes on hand! A major project is to test the interactions of all glazes with each other. That is 2,500 test tiles!!!! I’m going to make the wall behind the wheels the feature wall of pretty colours! Step Seven – Glaze (Gloss or sometimes called “Glost”) Firing Most of the time this is the final stage of making your creation (but not always!) The glaze kiln goes to 1240°C. This is called cone 6, or midrange. It is the low end of stoneware temperatures. Stoneware clays and glazes are typically fired at cone 8 – 10, that is 1260 – 1290°C. The energy requirement to go from 1240°C to 1280°C is almost a 30% more! Our clay is formulated to vitrify (mature, turn “glass-like”) at 1240°, as are our glazes. A glaze kiln take around 12 hours to reach temperature and two to three days to cool down. Sometimes a third firing process is required – this is for decoration that is added to work after the glaze firing. For example – adding precious metals and lustres. this firing temperature is usually around 600 – 800°C depending upon the techniques being used. There are many students interested in gold and silver trims – we will be doing this third type of firing soon! After firing your work will be in the student finished work shelves. Remember to pay for it before you head out the door! There is a small extra charge for using porcelain clay (it’s more than twice the price of regular clay), and for any third firing process! Once your work has been fired it can not turn back into clay for millennia – so don’t fire it if you don’t like it! Put it in the bucket for recycling. https://firebirdstudios.com.au/the-process-of-making-pottery/Ceramics have evolved over thousands of years.A white earthenware side plate with a gadroon edge. Has water marks and chips on front.‘Johnson Bros England Reg No 15587’flagstaff hill, warrnambool, shipwrecked-coast, flagstaff-hill, flagstaff-hill-maritime-museum, maritime-museum, shipwreck-coast, flagstaff-hill-maritime-village, johnson bros, ceramics, tableware -
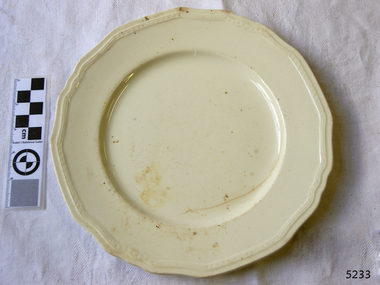 Flagstaff Hill Maritime Museum and Village
Domestic object - Plate, Alfred Meakin
... metal kidney to scrape any areas that require a bit more dynamic treatment than the fly wire offers! Finally, a very light wipe over with a slightly damp sponge can help soften and soothe all of your edges and dags! Trimming thrown work: If you are planning to trim (or turn) your thrown work (and you should be), make sure you bag it well – your work should be leather hard to almost dry for easiest trimming. Use this step to finish the work completely – use a metal kidney to polish the surface...metal kidney to scrape any areas that require a bit more dynamic treatment than the fly wire offers! Finally, a very light wipe over with a slightly damp sponge can help soften and soothe all of your edges and dags! Trimming thrown work: If you are planning to trim (or turn) your thrown work (and you should be), make sure you bag it well – your work should be leather hard to almost dry for easiest trimming. Use this step to finish the work completely – use a metal kidney to polish the surface ...The Process of Making Pottery Decorating, Firing, Glazing, Making, Technical There is a rhythm and flow to clay. It can’t be done all at once! Even the making process! It can take weeks to get everything done, especially if you can only work on your pottery once a week! Even though we have three hour classes, it’s often just not enough time! Here is an overview of some of the processes so you have a bit more grasp on some of the technical stuff! Step One – Design There are SO many ideas out there for making stuff in clay! From delicate porcelain jewellery, through to heavy sculptural work and everything in between. Deciding your direction is sometimes not that easy – when you first start, try everything, you will naturally gravitate to the style that you enjoy! The options and variations are endless and can get a wee bit overwhelming too! Check in with me before you start to ensure your ideas will work, what order you might do things, how you could achieve the look you are seeking and any other technical data required! Step Two – Making Clay is thixotropic. This means that as you work with it, the clay first gets sloppier and wetter, before is begins to dry in the atmosphere. For most things, you simply can’t do all parts of the project at once. An example of work order might look like: Get last weeks work out from the shelves Prepare clay for today’s work – roll your clay, prepare balls for throwing, make the first stage of a pinch pot) Clean up last week’s work and put it on the shelf for bisque firing Check that you have any glazing to do – and do enough of it that you will have time to finish your main project Do the next step of your next project – there might be a further step that can’t be complete immediately, in that case, wrap your work well and put onto the shelves. Letting your work rest for a while can really help keep your work clean and professional looking. Many things require bagging under plastic to keep it ready for work the next week – put your name on the outside of the bag so you can find your work easily. We have stickers and markers. Consider how you want to decorate your work – coloured slip can be applied at a fairly wet stage (remembering that it will make your work even wetter!). Trying to apply slip to dry clay won’t work! If you want to do sgraffito – you will need to keep the work leather hard (a state of dryness where you can still work the clay with a little effort and a little water and care). Step Three – Drying Most of the time your work can go into the rack uncovered to let it dry out for the following week. If you want to continue forming or shaping you will need to double bag your work – put your work on a suitable sized bat and put the bat in a bag so the base of the bag is under the bat, then put another bag over the top of the work and tuck the top of the bag under the bat. If you want to trim (or turn) your thrown work the following week, it should also be double bagged. If your work is large, delicate, or of uneven thicknesses, you should lightly cover your work for drying. When considering the drying process, bare in mind the weather, humidity and wind! The hotter and dryer, the faster things dry and work can dry unevenly in the shelves – this can lead to cracking – another time to lightly cover your work for drying. Step Four – Trimming and Cleaning Up Your work is dry! It is called greenware now and it is at it’s most fragile! Handle everything with two hands. I often refer to soft hands – keep everything gentle and with your fingers spread as much as possible. Try to not pick up things like plates too much, and always with both hands! Before your work can be bisque fired it should be “cleaned up”. You work won’t go into the kiln if it has sharp edges – when glazed, sharp edges turn into razor blades! Use a piece of fly wire to rub the work all over – this will scratch a little so be light handed. Use a knife or metal kidney to scrape any areas that require a bit more dynamic treatment than the fly wire offers! Finally, a very light wipe over with a slightly damp sponge can help soften and soothe all of your edges and dags! Trimming thrown work: If you are planning to trim (or turn) your thrown work (and you should be), make sure you bag it well – your work should be leather hard to almost dry for easiest trimming. Use this step to finish the work completely – use a metal kidney to polish the surface, or a slightly damp sponge to give a freshly thrown look. Wipe the sponge around the rim after trimming, and check the inside of the pot for dags! Trimming slip cast work: Usually I will trim the rims of your work on the wheel the following day to make that stage easier, however you will still need to check your work for lumps and bumps. Last but not least – check that your name is still clearly on the bottom of your work. Step Five – Bisque Firing When the work is completely dry it can go into the bisque kiln. The bisque kiln is fired to 1000°C. This process burns off the water in the clay as well as some of the chemically bound water. The structure of the clay is not altered that much at this temperature. Inside the bisque kiln, the work is stacked a little, small bowl inside a larger bowl and onto a heavy plate. Smaller items like decorations or drink coasters might get stacked several high. Consideration is paid to the weight of the stack and shape of the work. A bisque kiln can fire about one and a half times the amount of work that the glaze kiln can fire. The firing takes about 10 hours to complete the cycle and about two days to cool down. Once it has been emptied the work is placed in the glaze room ready for you to decorate! Step Six – Glazing Decorating your work with colour can be a lot of fun – and time consuming! There are three main options for surface treatment at this stage: Oxide Washes Underglazes Glazes Washes and underglazes do not “glaze” the work – It will still need a layer of glaze to fully seal the clay (washes don’t need glaze on surfaces not designed for food or liquid as they can gloss up a little on their own). Underglazes are stable colourants that turn out pretty much how they look in the jar. They can be mixed with each other to form other colours and can be used like water colours to paint onto your work. Mostly they should have a clear glaze on top to seal them. Oxides are a different species – the pink oxide (cobalt) wash turns out bright blue for instance. They don’t always need a glaze on top, and some glazes can change the colour of the wash! The glazes need no other “glaze” on top! Be careful of unknown glaze interactions – you can put any combination of glaze in a bowl or on a plate, but only a single glaze on the outside of any vertical surface! Glazes are a chemical reaction under heat. We don’t know the exact chemicals in the Mayco glazes we use. I can guess by the way they interact with each other, however, on the whole, you need to test every idea you have, and not run the test on a vertical surface! Simply put, glaze is a layer of glass like substance that bonds with the clay underneath. Clay is made of silica, alumina and water. Glaze is made of mostly silica. Silica has a melting point of 1700°C and we fire to 1240°C. The silica requires a “flux” to help it melt at the lower temperature. Fluxes can be all sorts of chemicals – a common one is calcium – calcium has a melting point of 2500°C, however, together they both melt at a much lower temperature! Colourants are metal oxides like cobalt (blue), chrome (green through black), copper (green, blue, even red!), manganese (black, purple and pink) iron (red brown), etc. Different chemicals in the glaze can have dramatic effects. for example, barium carbonate (which we don’t use) turns manganese bright pink! Other elements can turn manganese dioxide brown, blue, purple and reddish brown. Manganese dioxide is a flux in and of itself as well. So, glazes that get their black and purple colours, often interact with other glazes and RUN! Our mirror black is a good example – it mixes really well with many glazes because it fluxes them – causes them to melt faster. It will also bring out many beautiful colours in the glazes because it’s black colouring most definitely comes from manganese dioxide! Glaze chemistry is a whole subject on it’s own! We use commercial Mayco glazes on purpose – for their huge range of colour possibilities, stability, cool interactions, artistic freedom with the ability to easily brush the glazes on and ease of use. We currently have almost 50 glazes on hand! A major project is to test the interactions of all glazes with each other. That is 2,500 test tiles!!!! I’m going to make the wall behind the wheels the feature wall of pretty colours! Step Seven – Glaze (Gloss or sometimes called “Glost”) Firing Most of the time this is the final stage of making your creation (but not always!) The glaze kiln goes to 1240°C. This is called cone 6, or midrange. It is the low end of stoneware temperatures. Stoneware clays and glazes are typically fired at cone 8 – 10, that is 1260 – 1290°C. The energy requirement to go from 1240°C to 1280°C is almost a 30% more! Our clay is formulated to vitrify (mature, turn “glass-like”) at 1240°, as are our glazes. A glaze kiln take around 12 hours to reach temperature and two to three days to cool down. Sometimes a third firing process is required – this is for decoration that is added to work after the glaze firing. For example – adding precious metals and lustres. this firing temperature is usually around 600 – 800°C depending upon the techniques being used. There are many students interested in gold and silver trims – we will be doing this third type of firing soon! After firing your work will be in the student finished work shelves. Remember to pay for it before you head out the door! There is a small extra charge for using porcelain clay (it’s more than twice the price of regular clay), and for any third firing process! Once your work has been fired it can not turn back into clay for millennia – so don’t fire it if you don’t like it! Put it in the bucket for recycling. https://firebirdstudios.com.au/the-process-of-making-pottery/Ceramics have evolved over thousands of years.Earthenware dessert plate, cream colour. Made by Alfred Meakin, England. Backstamped ‘Alfred Meakin England’. flagstaff hill, warrnambool, shipwrecked-coast, flagstaff-hill, flagstaff-hill-maritime-museum, maritime-museum, shipwreck-coast, flagstaff-hill-maritime-village, alfred meakin, ceramics, earthenware, kitchenware -
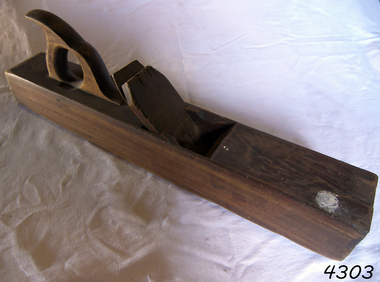 Flagstaff Hill Maritime Museum and Village
Tool - Joiner or Jack Plane, Late 19th to first quarter of the 20th century
... metal planes and improvements in the late 19th century. A jack plane came to be referred to as a "No. 5" plane or a "Bailey pattern No. 5" at the end of the 19th century. A vintage tool made by an unknown company, this item was made commercially for firms and individuals that worked in wood and needed a tool that could remove large amounts of timber. These jack or dressing planes came in various shapes and sizes to achieve a flat and even finish to timber surfaces ...A jack plane (or fore plane) is a general-purpose woodworking bench plane, used for dressing timber down to the correct size in preparation for truing and/or edge jointing. It is usually the first plane used on rough stock, but in exceptional cases can be preceded by the scrub plane. Jack planes are 300–460 mm long and 64–76 mm wide, with wooden-stocked planes sometimes being slightly wider. The blade is 44–57 mm wide that is often slightly convex (or ground with rounded corners) to prevent digging in to or marking the work. The cut is generally set deeper than on most other planes as the plane's purpose is to remove stock rather than to gain a good finish (smoothing planes are used for that). In preparing stock, the jack plane is used after the scrub plane and before the jointer plane and smoothing plane. The carpenters' name for the plane is related to the saying "jack of all trades" as jack planes can be made to perform some of the work of both smoothing and jointer planes, especially on smaller pieces of work. Its other name of the fore plane is more generally used by joiners and may come from the fact that it "is used before you come to work either with the Smooth Plane or with the Jointer". Early planes were all wood, except for the cutter, or combined a wood base with a metal blade holder and adjustment system on top. Although there were earlier all-metal planes, Leonard Bailey patented many all-metal planes and improvements in the late 19th century. A jack plane came to be referred to as a "No. 5" plane or a "Bailey pattern No. 5" at the end of the 19th century. A vintage tool made by an unknown company, this item was made commercially for firms and individuals that worked in wood and needed a tool that could remove large amounts of timber. These jack or dressing planes came in various shapes and sizes to achieve a flat and even finish to timber surfaces before the use of smoothing planes and came in many sizes. A significant tool from the mid to late 19th century that is still in use today with early models sought after by collectors. It gives us a snapshot of how furniture and other finishes were created on timber by the use of cutting edged hand tools. Tools that were themselves handmade shows the craftsmanship used during this time not only to make a tool such as the subject item but also the craftsmanship needed to produce a decorative or even finish that was needed for the finishing of timber items. Jack or Fore plane with blade and wedge. Marked "D Morris" (owner)flagstaff hill, warrnambool, flagstaff hill maritime museum, maritime museum, shipwreck coast, flagstaff hill maritime village, great ocean road, plane, fore plane, d morris, jack plane, wood working tools -
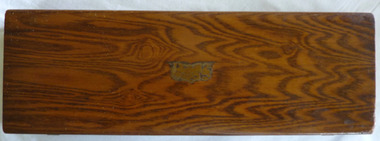 Warrnambool and District Historical Society Inc.
Functional object - Box Swinton Collection, Mid 20th century
... The top and the sides have a brown varnished surface with a marbled finish. The remains of a metal plaque are in the centre of the top. ...The top and the sides have a brown varnished surface with a marbled finish. The remains of a metal plaque are in the centre of the top. ...This box comes from the Swinton collection and belonged to Alex Swinton. The Swinton family are a pioneering family in Warrnambool with William and Ann Swinton arriving in the town in 1854. Swinton businesses (stores selling furnishings, produce, hardware, clothing, glassware etc.) have been important in Timor Street, Warrnambool since 1865 and are among the oldest family businesses in Australia. Alexander Swinton (1907-1986) was the son of George and Florence Swinton of Merri Crescent Warrnambool. He attended Warrnambool Technical School in the early 1920s. This box is of minor interest as a memento of Alexander Swinton, a prominent member of a prominent Warrnambool family.This is a rectangular-shaped wooden box. It has a rough surface base suggesting that it once was covered in some type of cloth. The top and the sides have a brown varnished surface with a marbled finish. The remains of a metal plaque are in the centre of the top. The inside of the box suggests that it was originally padded to fit a particular object. The lid has two metal hinges and the two catches on the side are metal. Some lettering inside is encased in the outline of a shield and a triangle. Union Case …. Trade Mark H.Coward (or Goward) alexander swinton, warrnambool, history of warrnambool, swinton -
The Ed Muirhead Physics Museum
Resistance Ratio Bridge, J.L. William
... Electroplated, no apparent decorative elements. 14 rotatable, removable nuts. Surface finish: Brushed metal. ...Electroplated, no apparent decorative elements. 14 rotatable, removable nuts. Surface finish: Brushed metal. Resistance Ratio Bridge, J.L. ...Machine-made/cut, appears to be lathe turned. Electroplated, no apparent decorative elements. 14 rotatable, removable nuts. Surface finish: Brushed metal. “Ratio Resistance’ Handwritten pen on paper adhered with sticky tape on top circular face. Medallion screwed to top circular face: “J.L. WILLIAM/SCIENTIFIC INSTRUMENTS/ SERIAL NO. TYPE/ MELBOURNE - AUSTRALIA.” Machine-made manufacturer’s label, enamel on brass plate (unconfirmed) screw fixed, “Resistance/between/the knobs/as shown/Resistances (+0.05 at most). Handwritten pen on aged paper label attached with coated twine. -
The Ed Muirhead Physics Museum
Post Office Box
... Metal plate top screwed onto wooden box base, 15 black dials 3.0cm in height. Brass electrical connectors, brass plugs with Bakelite tops. Surface finish...Metal plate top screwed onto wooden box base, 15 black dials 3.0cm in height. Brass electrical connectors, brass plugs with Bakelite tops. Surface finish ...Assembled wood, bakelite and metal (screwed). Metal plate top screwed onto wooden box base, 15 black dials 3.0cm in height. Brass electrical connectors, brass plugs with Bakelite tops. Surface finish: machined. Inscribed on top face along the back edge: “T.E.P.L MELBOURNE [an arrow pointing upwards] 240 1941” Inscribed on top face along the front edge: “EUREKA, BRITISH STANDARD OHMS” Also instructive labels inscribed on top face: “POSITIVE POLE/LINE OR EARTH” “LINE AND GALVANOMETER” “GALVANOMETER” “NEGATIVE POLE AT 15.5OCENT” -
The Ed Muirhead Physics Museum
Electrical Tuning Fork 1000 Hz
... Metal plate: “AUDIO OSCILLATOR/TYPE 813A SERIAL NO. 6. [the number 6 is inscribed into the surface]/ GENERAL RADIO CO./CAMBRIDGE, MASS. U.S.A./ OFF [2 arrows] ON” Assembled, hand built, moulded, cast. Polished, engraved. Surface finish ...Assembled, hand built, moulded, cast. Polished, engraved. Surface finish: polished. Damaged label adhered to upper face: “PUR[illegible] BY/ UN[illegible]” Metal plate: “AUDIO OSCILLATOR/TYPE 813A SERIAL NO. 6. [the number 6 is inscribed into the surface]/ GENERAL RADIO CO./CAMBRIDGE, MASS. U.S.A./ OFF [2 arrows] ON” -
The Ed Muirhead Physics Museum
Clockwork Chart Recorder
... Metal: plated. Wood: varnished. Accessories: key. Surface finish: coated. ...Metal: plated. Wood: varnished. Accessories: key. Surface finish: coated. ...No. of pieces: 2 (with removable parts) Assembled, soldered/welded. Metal: plated. Wood: varnished. Accessories: key. Surface finish: coated. -
The Ed Muirhead Physics Museum
Wheatstone Bridge Leeds & Northrup Co
... Perforated machined metal surface spray painted, machined plastic surface coating, wood base most likely hand varnished. Surface finish...Perforated machined metal surface spray painted, machined plastic surface coating, wood base most likely hand varnished. Surface finish ...Machined metal sides and interior, machined plastic top with plastic dials, handmade wood base with dovetail joins and mitred corners. Perforated machined metal surface spray painted, machined plastic surface coating, wood base most likely hand varnished. Surface finish: metal sides painted matt blue, plastic top brownish red coating with smooth matt finish, wood base varnished. Inscribed on top face: “LEEDS & NORTHRUP CO./PHILADELPHIA/62798. Paper Sticker on back metal side: “PA 3” Diamond shaped paper label adhered to top face with diagram handwritten in black ink. -
The Ed Muirhead Physics Museum
Resistance Bridge Hartmann & Braun
... Uncoated metal, polished wood. Surface finish: wood varnish. ...Uncoated metal, polished wood. Surface finish: wood varnish. Resistance Bridge Hartmann & Braun ...Machined metal parts, polymer base, wooden box plinth. Uncoated metal, polished wood. Surface finish: wood varnish. [Stamped] on upper face, centre of front edge: Hartmann & Braun A.G./ Frankfurt a.M/ No 13881. [Stamped] on upper face, centre of back edge: Manufacturer’s symbol. Paint dot on upper face in top left corner approx. 0.7-1.0cm in diameter. -
Moorabbin Air Museum
Document (item) - CAC Collection - Military Handbook - Protective Finishes For Metal And Wood Surfaces
... Department Of Defence USA MIL-HDBK-132A CAC Collection - Military Handbook - Protective Finishes For Metal And Wood Surfaces Document CAC Collection - Military Handbook - Protective Finishes For Metal And Wood Surfaces ...Department Of Defence USA MIL-HDBK-132A -
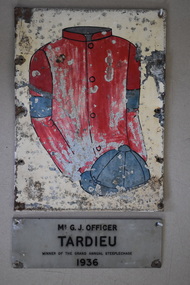 Warrnambool and District Historical Society Inc.
Plaque, Tardieu, C 1990
... finish the course the other being Montargis. The owner of the the horse Mr Officer was chairman of the Warrnambool Racing club at the time. These plaques are of interest as mementoes of the Warrnambool Grand Annual Steeplechase one of Australia's most significant hurdle races. warrnambool racing club warrnambool grand annual steeplechase Mr G J Officer TARDIEU Winner of the Grand Annual Steeplechase 1936. .1 Silver coloured metal plaque in a rectangular shape with four holes in each corner for attachment to a surface. ...These plaques were once on display at the Warrnambool racecourse with the smaller one originally affixed to a seat. These plaques commemorate the winner of the Grand Annual Steeplechase in Warrnambool in 1931. The Warrnambool Grand Annual Steeplechase was first held in June 1872. Today it is part of the Warrnambool May Racing Carnival and is run over 5,500 metres with 32 fences. Tardieu won the race in 1936 and was one of only two horses with riders to finish the course the other being Montargis. The owner of the the horse Mr Officer was chairman of the Warrnambool Racing club at the time.These plaques are of interest as mementoes of the Warrnambool Grand Annual Steeplechase one of Australia's most significant hurdle races..1 Silver coloured metal plaque in a rectangular shape with four holes in each corner for attachment to a surface. There is black printing on the plaque. .2 A rectangular shaped metal plaque with ten perforations along the longer sides. The plaque has a sketch of a jockey's cap and silks in blue and pink. Mr G J Officer TARDIEU Winner of the Grand Annual Steeplechase 1936.warrnambool, racing club, warrnambool grand annual steeplechase -
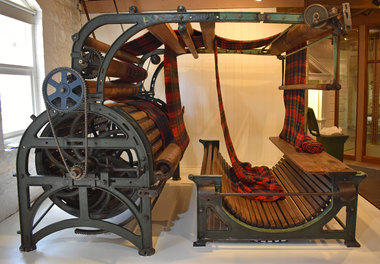 National Wool Museum
Machine - Teasel Gig, c1890
... finish fabrics. It uses the prickly flower head off the teasle plant (Dispsacus Fullonum) to do the delicate work to raise the surface, or nap, the woollen cloth. At least 1,500 teasle heads are needed for one gig. The teasel is a thistle like plant whose dried heads are used on the teasel gig. They are fixed to frames around the drum, or gig. The gig turns in the opposite direction to the flow of the cloth until the nap is raised. Also spelled as Teazel Gig. textile finishing raising raising machinery Teasel Gig Fabric Wool Processing Plants Thistle Drum Large metal ...When the fabric is removed from the loom it is often stiff, rough and uneven. There are a number of finishing processes, both mechanical and chemical that give wool fabrics their special look and feel. The fabric is often scoured again to remove oils and dirt picked up during manufacture. It is then pressed. For a soft and fluffy surface, the fabric is brushed. For a smooth surface, it is shorn. For centuries, machines similar to this teasle gig were used to finish fabrics. It uses the prickly flower head off the teasle plant (Dispsacus Fullonum) to do the delicate work to raise the surface, or nap, the woollen cloth. At least 1,500 teasle heads are needed for one gig. The teasel is a thistle like plant whose dried heads are used on the teasel gig. They are fixed to frames around the drum, or gig. The gig turns in the opposite direction to the flow of the cloth until the nap is raised. Also spelled as Teazel Gig.Large metal machine with wooden rollers and teasel covered drum.textile finishing, raising, raising machinery, teasel gig, fabric, wool processing, plants, thistle, drum -
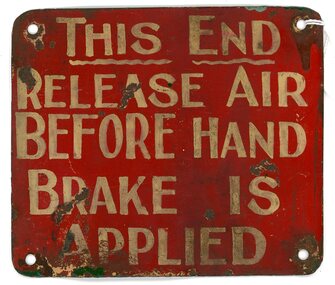 Ballarat Tramway Museum
Sign - "THIS END RELEASE AIR BEFORE HAND BRAKE IS APPLIED"
... metal sign painted in red. Hand painted lettering reads "THIS END RELEASE AIR BEFORE HAND BRAKE IS APPLIED" painted in off white. The corners of the sign have been rounded, with a hole made in each corner for attaching to the tram car. The reverse has the number 33 printed in small black lettering. The back of the sign has not been painted and has a rusted surface finish...metal sign painted in red. Hand painted lettering reads "THIS END RELEASE AIR BEFORE HAND BRAKE IS APPLIED" painted in off white. The corners of the sign have been rounded, with a hole made in each corner for attaching to the tram car. The reverse has the number 33 printed in small black lettering. The back of the sign has not been painted and has a rusted surface finish ...Demonstrates how the SEC used painted metal signs to advise and remind staff of procedures for operating equipment.A metal sign painted in red. Hand painted lettering reads "THIS END RELEASE AIR BEFORE HAND BRAKE IS APPLIED" painted in off white. The corners of the sign have been rounded, with a hole made in each corner for attaching to the tram car. The reverse has the number 33 printed in small black lettering. The back of the sign has not been painted and has a rusted surface finish. The plate is slightly buckled.The number 33 is written in black on the reverse.tramways sign, painted signage for trams -
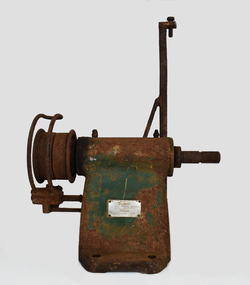 National Wool Museum
Tool - Grinder, 1960-69
... The reverse of these grinding plates has the same green painted metal finish found on the grinder. This paint is also in a ‘farm used’ condition, with surface oxidation present. ...The reverse of these grinding plates has the same green painted metal finish found on the grinder. This paint is also in a ‘farm used’ condition, with surface oxidation present. ...Cooper S.E. Ball Bearing Grinder made and guaranteed by Sunbeam Corporation Limited. Grinders like this example have been made the same since the early 1900s, with this grinder thought to have been produced in the 1960s. It is belt driven, with the other end of the belt being attached to an engine; the same engine that would have powered the overhead shearing equipment in shearing sheds. It was common for shearing teams to bring their own equipment, especially pre-1960 as most shearing sheds were not connected to power, and shearers preferred to work with their own equipment. The engines that powered the shears and grinder were typically fuelled with kerosene or petrol. The large circular disks are attached to the bolt that protrudes from the grinder and fastened tightly with a nut. An example of seeing a similar grinder in action can be found on the following link - https://www.youtube.com/watch?v=O7eimI_Gm9o. Inventor Frederick Wolseley made the world's first commercially successful power-shearing system in Australia in 1888. US company Cooper, which had been founded in 1843 as a maker of sheep dip, began selling Wolseley equipment in the USA in 1895. The Chicago Flexible Shaft Company successfully entered the power-shearing market a few years later and entered a joint venture with Cooper. It set up a branch in Sydney and sold shearing sets, and engines to power them, into the Australian market. In 1921 the US parent company, realising it needed to make products whose sales were not as seasonal as those of shearing equipment, made its first household appliances and branded them Sunbeam. In 1933, changes in exchange rates and taxes led the company to manufacture engines and shearing equipment in Australia via subsidiary Cooper Engineering, which changed its name to Sunbeam in 1946. Although most Australians know of this company as a major manufacturer of household appliances, its rural division flourished and retained the Sunbeam name for shearing equipment even after it was taken over by New Zealand company Tru-Test in 2001. The grinder is formed from a central arch shaped block of green painted metal. Much of this paint has been lost to age, leaving the grinder in a ‘farm used’ condition with much surface oxidation present. On the front of the arch is a specification plate, reading “Cooper S.E. ball bearing grinder. Made and guaranteed by Sunbeam”. At the foot of the arch, three bolt holes are found for securing the grinder to the base of a solid wooden surface. Two of the bolt holes are found on the front of the grinder, with another found on the rear. From the central arch, a bolt protrudes to the right of the grinder. This large bolt is for securing a grinding plate to the grinder. Above the central arch is a pendulum which holds the comb / cutter that is being sharpened. From the pendulum, a large arm extends down (not pictured) to meet and strike the plate spinning at a rapid speed. On the left-hand side of the central arch of the grinder, a wheel is found which a belt is attached to for power. This belt is then attached to a separate engine, spinning the wheel and hence powering the grinder. The wheel is partially covered with a section of protective bent tube, designed to provide protection from the rapidly spinning wheel. Below this wheel is the belt shifter. It is designed to move the protective bent tube from one side of the grinder to the other, to accommodate the grinder in the setup of different shearing sheds. The two separate grinding plates are identical. They have a slight slope for sharpening the comb and cutters in the correct method, with a slight bias towards the base, or “tooth”, of the equipment. The disks have a large central bolt for attaching to the grinder. They have tags on the horizontal axis of the grinding plates, for securing the plates in transportation, and to help with initial alignment when setting up the grinder. The reverse of these grinding plates has the same green painted metal finish found on the grinder. This paint is also in a ‘farm used’ condition, with surface oxidation present. The grinder would be provided from the factory with a comb holder, shifter for securing the grinding plates, emery cloth and emery glue. The emery cloth is what does the actual grinding and is applied to the grinding disks, replacing once well worn. These items can be seen in the final images in the multimedia section, showcasing advertising for this grinder. Plate. Inscribed. “Cooper / S.E. BALL BEARING GRINDER / MADE AND GUARANTEED BY / Sunbeam / CORPORATION LIMITED / SYDNEY MELBOURNE / ADELAIDE BRISBANE ”sheep shearing, shearing equipment, sunbeam, grinder -
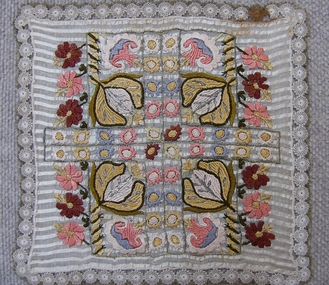 Embroiderers Guild, Victoria
Textile - Mat, Baroness Viola, Late 19th century
... Czechoslovakia Embroidery Surface stitchery Mid European Late 19th century White silk gauze with a self stripe is the background for this ornate design in coloured twisted silks and metal threads. The decorative edge is Armenian edging with an added gilt finish ...Made by Viola, sister of Baroness Felicitas Wiedersperger of Tazovitz. Belonged to the above Baroness.White silk gauze with a self stripe is the background for this ornate design in coloured twisted silks and metal threads. The decorative edge is Armenian edging with an added gilt finish.czechoslovakia, embroidery, surface stitchery, mid european, late 19th century -
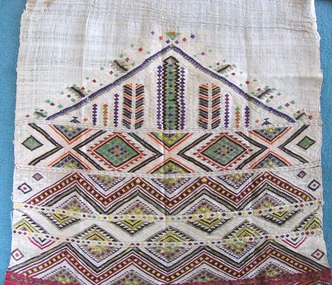 Embroiderers Guild, Victoria
Textile - Towel
... Weaving Towels Surface stitchery Southern Europe Dark cream hand woven linen with one end decorated to 29 cms. Geometric band design in red, orange, yellow, green, mauve finishing in a red border. Some metal ...The donor gave this towel to the Guild for the auction for Guild funds in 1981, but was 'rescued' for the Collection.Dark cream hand woven linen with one end decorated to 29 cms. Geometric band design in red, orange, yellow, green, mauve finishing in a red border. Some metal threads.weaving, towels, surface stitchery, southern europe -
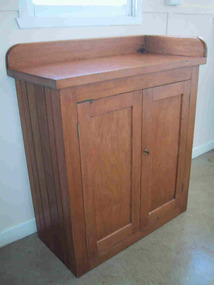 Parks Victoria - Cape Nelson Lightstation
Furniture - Cabinet
... metal or turned wood. Most also are made from a light‐coloured wood, which in this case is possibly Huon pine. Some are painted, others show evidence of paint which has since been removed in an effort to restore the surface, and a few retain their original wood finish. ...metal or turned wood. Most also are made from a light‐coloured wood, which in this case is possibly Huon pine. Some are painted, others show evidence of paint which has since been removed in an effort to restore the surface, and a few retain their original wood finish. ...The two‐door cabinet with a bench top is a simply made nineteenth century utilitarian cupboard. It is similar in style to cupboards that were built into spaces either side of fireplaces in keepers’ quarters. All have two doors simply framed around recessed central panels, which are sometimes bevelled. They are opened with a key, or by a basic knob made of metal or turned wood. Most also are made from a light‐coloured wood, which in this case is possibly Huon pine. Some are painted, others show evidence of paint which has since been removed in an effort to restore the surface, and a few retain their original wood finish. This cabinet, which has plain recessed unbevelled panels, has one internal shelf and stands on the floor without a plinth base. The bench top has basic squared edges, and a low backing with curved ends extends around one side. These features suggest the cabinet was fixed and originally built into a corner. The Cape Nelson CMP identified a similar but slightly different cabinet in one of the assistant keepers’ quarters which is shown with shelves added to the top. Other similar two‐door, benchtop cupboards that were probably built‐in include those at Cape Otway and Cape Schanck , which have since been moved out of the residences. Built‐in cabinets were standard fittings in lightkeeper quarters as illustrated by the Point Hicks Lightstation CMP, which shows a built cupboard beside a fireplace. The Cape Nelson cabinet, an original domestic furnishing provided by the Public Works Department, has first level contributory significance for its historic values and provenance to the lightstation.Two‐door cabinet with a bench top. The doors are simply framed around recessed central panels.Light coloured wood.
