Showing 46 items matching "gun fights"
-
 Linton Mechanics Institute and Free Library Collection
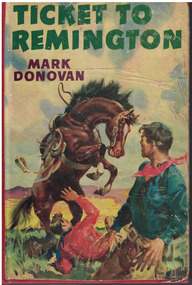
Book - Novel, Donovan, Mark, Ticket to Remington, A 'Link' Murlee Story by Mark Donovan, 1953
... ...Gun Fights...Westerns Railroads Gun Fights Fiction Western story about a railroad company experiencing issues with a rival company. 192 pages. ...Western story about a railroad company experiencing issues with a rival company. 192 pages.Hard cover book with a colour image of a horse rearing above a man lying on the ground whilst another man looks on. Western story about a railroad company experiencing issues with a rival company.fictionWestern story about a railroad company experiencing issues with a rival company. 192 pages.westerns, railroads, gun fights, fiction -
 Linton Mechanics Institute and Free Library Collection
Book - Novel, Hopson, William, The Gringo bandit, n.d. [1952]
... . ; blue cover ; Front page of original dust jacket, featuring gun fight, cut and pasted onto front cover ; blurb from original just jacket cut and pasted onto front end paper.... ; blue cover ; Front page of original dust jacket, featuring gun fight, cut and pasted onto front cover ; blurb from original just jacket cut and pasted onto front end paper The Gringo bandit Book Novel Hopson, William Wright & Brown Limited C. ...The story of Ed Lash and Pancho Villa and their adventures as riders and cattlemen.176p. ; blue cover ; Front page of original dust jacket, featuring gun fight, cut and pasted onto front cover ; blurb from original just jacket cut and pasted onto front end paperfictionThe story of Ed Lash and Pancho Villa and their adventures as riders and cattlemen.fiction, western, william hopson -
Linton Mechanics Institute and Free Library Collection
Book - Novel, Tyler, Clarke, Showdown at Singing Sands : a Clint Lacey western, 1956
... :red cover, section of original dust jacket pasted to front cover, image depicts two men engaged in a gun fight. Summary of plot cut from dust jacket pasted to front end paper....:red cover, section of original dust jacket pasted to front cover, image depicts two men engaged in a gun fight. Summary of plot cut from dust jacket pasted to front end paper. ...Western adventure fiction160 p. :red cover, section of original dust jacket pasted to front cover, image depicts two men engaged in a gun fight. Summary of plot cut from dust jacket pasted to front end paper.fictionWestern adventure fictionfiction, westerns, clarke tyler -
 Red Cliffs Military Museum
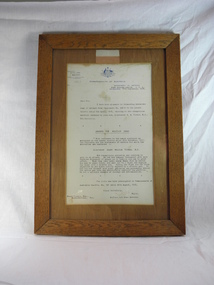
Framed Letter, Citation for Military Cross, 17/12/1918 (exact)
... When they came under heavy shell fire he halted his men in shell holes, and went out to a flank and engaged the enemy with a machine gun. During the fight for the final objective he was again heavily opposed by a machine gun. ...When they came under heavy shell fire he halted his men in shell holes, and went out to a flank and engaged the enemy with a machine gun. During the fight for the final objective he was again heavily opposed by a machine gun. ...This letter was sent to Mr. Frank Tickle Esquire in Warracknabeal, in Victoria, to inform him that his son Lieutenant Frank William Tickle,M.C. 8th Battaslion, had been awarded the Military Cross. With reference to the award conferred as announced in the London Gazette dated 26th November, 1917. "For conpicuous gallantry and devotion to duty in an attack. He led his company throughout with such fearless disregard of danger as to inspire his men to great effort. When they came under heavy shell fire he halted his men in shell holes, and went out to a flank and engaged the enemy with a machine gun. During the fight for the final objective he was again heavily opposed by a machine gun. He led his men forward with great gallantry and personally killed the entire gun crew and successfully captured the position. He set a splendid example of courage and determination."Letter in brown wooden frame with the Battalion colour patch attached to wooden surround under the glass.The letter has the Commonwealth of Australia emblem on the top of the page and was issued by the Department of Defence on the 17th September 1918, to notify Lieutenant F.W. Tickle's father the he had been awarded the Military Cross. It also has the citation for which the Military Cross was awarded. The paper backing on the frame is detiorating.world war one, letter, citation, military cross, lieutenant frank william tickle, m c, 30th august 1918, commonwealth of, australia, department of defence, frank tickle esquire, commonwealth of australia gazette, no 137, london gazette 26th november, 1917 -
 Warrnambool and District Historical Society Inc.
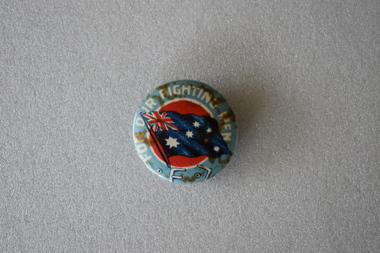
Badges, Australian Comfort Funds, circa 1916
... FIGHTING MEN AUSTRALIAN.COMFORTS. FUND .1 Circular metal and enamel badge. The front features the Australian flag on a red background surrounded by a white annulus and a pale blue ring with text. There are rust marks on the surface.The reverse has a pin clip. .2 Identical to .1 but very discoloured and faded. .3 Circular metal and enamel badge. The front features a the head and shoulders of an Australian soldier in uniform with a slouch hat and a gun ...These three badges all bear the phrase " For Our Fighting Men" and were sold to raise funds for Australian servicemen's comforts in World War One. The funds would have been used to send food and amenities parcels to those serving overseas, to provide assistance to those soldiers who had returned to Australia or were serving within Australia. The funds from the sale of these badges were directed to the Australian Comforts Fund which was an organisation formed in August 1916 from the amalgamation of the State groups formed to provide assistance to those serving in World War One. These badges are of interest as examples of those made and sold in Australia during World War One to provide comforts for Australian servicemen..1 Circular metal and enamel badge. The front features the Australian flag on a red background surrounded by a white annulus and a pale blue ring with text. There are rust marks on the surface.The reverse has a pin clip. .2 Identical to .1 but very discoloured and faded. .3 Circular metal and enamel badge. The front features a the head and shoulders of an Australian soldier in uniform with a slouch hat and a gun with bayonet fixed against a background of the Australian flag. Inside the outer rim of pale gold is a white ring with red text. There is a pin clip on the reverse. .1 FOR OUR FIGHTING MEN .2 Identical to .1 .3 OUR FIGHTING MEN AUSTRALIAN.COMFORTS. FUNDaustralian comforts fund -
 Bendigo Military Museum
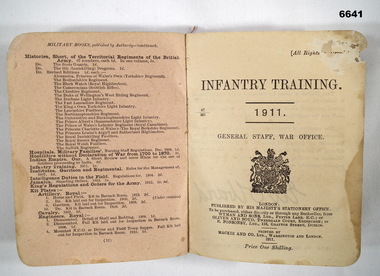
Book - BOOK, INFANTRY TRAINING 1911 (UK), His Majesty's Stationery Office/ Mackie & Co. Ltd, 1911
... It has drill movements, with and without arms, Coy and Btn level drills, machine gun drill. Infantry in battle, Attack Defence, fighting environments, Bayonet drills....It has drill movements, with and without arms, Coy and Btn level drills, machine gun drill. Infantry in battle, Attack Defence, fighting environments, Bayonet drills. ...This is a pocket sized book. Red Buckram cover. It has 217 pages, printed in black ink. It has drawings and Military Manoeuvre's. It has drill movements, with and without arms, Coy and Btn level drills, machine gun drill. Infantry in battle, Attack Defence, fighting environments, Bayonet drills.Inside in advert section p.5, is written in pencil, Coat 7918, Rifle 4809, Bayonet 4893.passchendaele barracks trust, infantry trg 1911 -
 Bendigo Military Museum
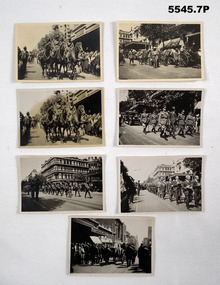
Photograph - PHOTOGRAPHS - A SET OF SEVEN PHOTOGRAPHS SHOWING FUNERAL MARCH FOR CAPTAIN ALBERT JACKA, 1932
... Gun carriage and coffin stationary. 2 soldiers in WW1 fighting kit in Rest on Arms Reverse. ...Gun carriage and coffin stationary. 2 soldiers in WW1 fighting kit in Rest on Arms Reverse. ...Captain Albert Jacka, VC, 14 Bn, first VC in WW1.A set of seven black and white photos showing the funeral march for Captain Albert Jacka VC in Melbourne 1932. 1. & 2. Front of gun carriage team. 3 horses and 2 riders. 3. Party of armed soldiers, bayonets fixed, marching in formation. 4. Gun carriage and coffin stationary. 2 soldiers in WW1 fighting kit in Rest on Arms Reverse. Civilian clothed men, hats off. One drummer is marching past. 5. Group of eight senior Officers marching. Most are in uniform with swords. 6. Large group of marching men in civilian clothes. They hold their hats against their heart. A civilian policeman is standing as crowd control. 7. The gun carriage and coffin moving away. Men in civilian crowd have removed their headdress. There are two files of men either side of the coffin, marching beside it.1. "Jacka's Funeral" on rear. 2. Funeral Captain Jacka, Melbourne 1932. 3. "Albert Jacka's Funeral" on rear. 4. "Albert Jacka's Funeral" on rear. 5. "Members of Jacka's battalion at his funeral. Jan 1932." on rear. 6. "Funeral Capt Albert Jacka 'Australia's first VC'" on rear. 7. "Funeral Capt Albert Jacka, Melbourne 1931" on rear.albert jacka vc, funeral, melbourne -
 4th/19th Prince of Wales's Light Horse Regiment Unit History Room
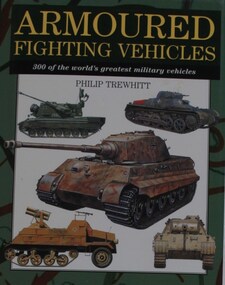
Book, Philip Trewhitt: Armoured Fighting Vehicles, 300 of the world's greatest military vehicles, 2000 (exact); Reprinted 2001, 2002, 2003, 2004
... 4th/19th Prince of Wales's Light Horse Regiment Unit History Room 4/19 PWLH Regiment, Building 78 Simpson Barracks Macleod melbourne world war 1 world war 2 military history tanks armour armoured fighting vehicles wheeled infantry vehicles anti aircraft guns military vehicles philip trewhitt world war 1 world war 2 military history tanks armour armoured fighting vehicles wheeled infantry vehicles anti aircraft guns military vehicles philip trewhitt ISBN 1-84013-338-4 A compendium of of the most important and influential military vehicles that have been in service since World War 1. ...A compendium of of the most important and influential military vehicles that have been in service since World War 1. Each vehicle featured is illustrated by a full-colour side-profile artwork, and accompanied by a detailed specifications table giving country of origin, crew, weight, dimensions, armour, armament, powerplant and performance, all measurements in imperial and metric. Accompanying text for each vehicle summarises its development and service history.ISBN 1-84013-338-4world war 1, world war 2, military history, tanks, armour, armoured fighting vehicles, wheeled infantry vehicles, anti aircraft guns, military vehicles, philip trewhitt, world war 1, world war 2, military history, tanks, armour, armoured fighting vehicles, wheeled infantry vehicles, anti aircraft guns, military vehicles, philip trewhitt -
 4th/19th Prince of Wales's Light Horse Regiment Unit History Room
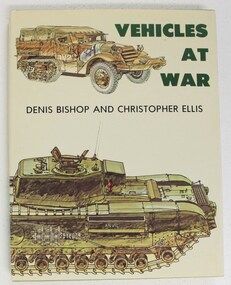
Book, Denis Bishop & Christopher Ellis: Vehicles at War, 1979 (exact)
... 4th/19th Prince of Wales's Light Horse Regiment Unit History Room 4/19 PWLH Regiment, Building 78 Simpson Barracks Macleod melbourne military history tanks armoured fighting vehicles military vehicles scout car armoured cars half track military history tanks armoured fighting vehicles military vehicles scout car armoured cars half track ISBN 0-04-623012-2 An account of vehicles which have made history in mechanised warfare. Ranging from tanks, armoured cars, personnel carriers, and gun ...An account of vehicles which have made history in mechanised warfare. Ranging from tanks, armoured cars, personnel carriers, and gun carriers to vehicles such as jeeps, staff cars, ambulances, traction engines and motor cycles. Examples are from many countries and theatres of war, from the Crimean War to the Cold War. Contains 225 colour illustrations and 261 in black & white. ISBN 0-04-623012-2military history, tanks, armoured fighting vehicles, military vehicles, scout car, armoured cars, half track, military history, tanks, armoured fighting vehicles, military vehicles, scout car, armoured cars, half track -
 4th/19th Prince of Wales's Light Horse Regiment Unit History Room
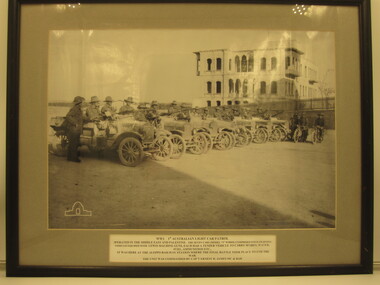
Photograph - Framed Photograph, WW1 1st Australian Light Car Patrol
... The seven cars (Model "T" Fords) comprised four fighting vehicles equipped with Lewis machine guns. Each had a tender vehicle to carry spares, water, fuel, ammunition etc. ...Guns AWM logo. Caption: WW1 1st Australian Light Car Patrol. Operated in the Middle East and Palestine. The seven cars (Model "T" Fords) comprised four fighting vehicles equipped with Lewis machine guns. ...See InscriptionFramed B&W photo of 7 patrol cars with crews at Aleppo Railway Station, Syria. Two motor cycles are in shotAWM logo. Caption: WW1 1st Australian Light Car Patrol. Operated in the Middle East and Palestine. The seven cars (Model "T" Fords) comprised four fighting vehicles equipped with Lewis machine guns. Each had a tender vehicle to carry spares, water, fuel, ammunition etc. It was here at Aleppo Railway Station where the final battle took place to end the war. The unit was commanded by Cap't Ernest H James MC & Barww1 1st australian light car patrol, 7 ford model t vehicles fitted with lewis machine guns -
 Warrnambool RSL Sub Branch
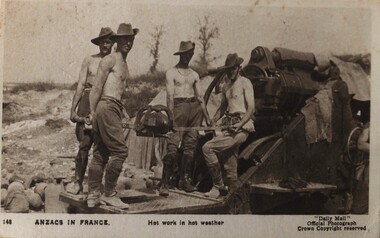
Work on paper - Postcard propaganda WW1 (see Notes), ANZACS IN FRANCE, WW1 in England by Daily Mail
... Warrnambool RSL Sub Branch Cnr Merri & Liebig Streets Warrnambool great-ocean-road part of set of propaganda pics to be sent 'home' Attempts to present an idealised view of the fighting although the surroundings counteract this. Soldires in WW1 On Reverse: Hot weather and hot work at their big gun have induced these splendidly built Anzacs to strip to the waist. ...part of set of propaganda pics to be sent 'home'Attempts to present an idealised view of the fighting although the surroundings counteract this.Black and White PostcardOn Reverse: Hot weather and hot work at their big gun have induced these splendidly built Anzacs to strip to the waist. Also Series XIX No 148soldires in ww1 -
 The Beechworth Burke Museum
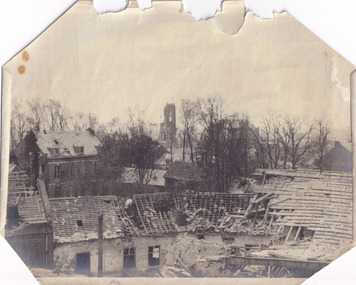
Photograph, c. 1918
... The 13th Brigade in the south were held up by German machine guns, before the Australians linked up east of the village. After dawn on 25 April Australian and British troops were involved in fierce fighting to clear the Germans from the village. ...Taken in c. 1918, this photograph depicts the ruins of the French village Villers-Bretonneux. In the foreground of the image are rows of shell damaged houses and buildings. In the background of the image stands a tower of the ruined church.On 24 April, Villers-Bretonneux was captured by the Germans as they advanced towards the regional city of Amiens. If they achieved their goal and drove onto the French coast, splitting the British and French armies, the Allied cause might have been lost. The fate of Amiens hung in the balance as two Australian brigades were given the task of retaking Villers-Bretonneux through a swift night-time counter attack. One brigade would assault from the south, while another would attack from the north. The assault began at 10pm on 24 April. The 13th Brigade in the south were held up by German machine guns, before the Australians linked up east of the village. After dawn on 25 April Australian and British troops were involved in fierce fighting to clear the Germans from the village. Some Germans escaped Villers-Bretonneux through nearby woods. Later on the morning of 25 April, three years to the day after the Anzacs landings at Gallipoli, French and Australian flags were raised over Villers-Bretonneux.Black and white rectangular reproduced photograph printed on matte photographic paperReverse: (A copyright and reproduction notice from the Australian War Museum, printed upside-down in blue ink) Church x Ruins/ Villers Bretonneux/ (in pencil) burke museum, world war 1, ww1, wwi, france, australia, villers-bretonneux, ruins, military album -
 The Beechworth Burke Museum
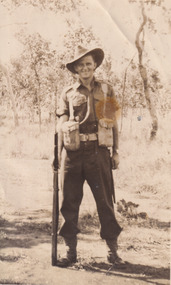
Photograph, c.1914
... During this fight, German forces captured several batteries of the 1st Australian Division’s artillery but the Australians led a strong counter-attack by four of their battalions and recaptured the village and most of the guns from the German forces. ...During this fight, German forces captured several batteries of the 1st Australian Division’s artillery but the Australians led a strong counter-attack by four of their battalions and recaptured the village and most of the guns from the German forces. ...This photograph depicts a soldier, credited on the reverse as Fred Foster. The young man is dressed in military attire and is standing tall with a gun beside him. He is located in the Australian bush and the date of the photograph is unknown. Frederick “Fred” Arthur Foster was nephew to famous Bushranger Edward “Ned” Kelly. He was born on the 15th of March 1889 in Forbes, New South Wales. He was the eldest son of Catherine “Kate” Kelly and William Henry “Bricky” Foster. After the death of his mother in October of 1898 from apparent drowning, Foster (then aged 9) was raised by his grandmother Ellen Kelly (née Quinn) at Eleven Mile Creek in Victoria. On the 29th of June 1915, 26 year old Foster travelled to Melbourne, Victoria and enlisted in the Australian Army. He was a Private in the 17th Infantry Battalion (originally C.Company, 47th battalion). He previously was attached to the 55th Battalion but transferred in 1916. Prior to enlisting in the army, Foster worked as a Bee Keeper and served in the 16th Light Horse regiment at Benalla. Foster had blue eyes, brown hair and was of Presbyterian faith. On the 28th of February 1917, Foster travelled to France aboard SS “Golden Eagle”. He was killed in action in Lagnicourt, France on the 15th of April 1917 at 28 years old. The Battle in Lagnicourt France, on the Western Front, occurred from the 1st of March to the 30th of April of 1917 and was the location of fierce fighting between Germany and the British Empire. Germany became aware of a weakness they had along the Hindenburg Line, one of these weaknesses was located in Lagnicourt which is a small village in Northern France. Therefore, the Germans decided to launch a counter-attack in this area on the 15th of April at dawn. During this fight, German forces captured several batteries of the 1st Australian Division’s artillery but the Australians led a strong counter-attack by four of their battalions and recaptured the village and most of the guns from the German forces. German forces were forced into a premature withdrawal. This battle was not undertaken in typical WW1 “trench” style warfare. Instead, the battle was up on the ground in what was described as “old open style warfare”. In this battle, slightly more than 1000 casualties were Australian, with 300 of these prisoners of war. German forces suffered a loss of over 2300 casualties with 360 taken captive. Foster was one of 43 in his regiment who died, 87 were wounded and 51 reported missing. Foster was buried at location in Lagnicourt and whilst the grave was initially marked, it is now unknown. Foster’s service, alongside those who fell at Lagnicourt, is commemorated at the Australian National Memorial in Villers-Bretonneux, France along with other national Australian memorial sites.Photography played an important part in World War 1. Photographs of men in their military uniforms served as propaganda during the Great War to reassure civilians back at home of the military prowess of their nation and the bravery of their men. It did this while hiding the true horrors which faced the men in battle. These photographs, which includes those taken at home prior to embarking overseas like Fred Foster’s, act as censored memory for those who have lost a loved one at war. It enables families to remember their relatives in their youth and standing proudly rather than having to face the actual danger and horror which faced these men at the front line. The battle of Lagnicourt France was a victory for the European Empire and therefore, men who lost their lives protecting their countries became heroes and were awarded posthumous medals for their service. Photos of soldiers in their uniforms, were undertaken by men like Foster, so their families would be able to retain their memories and likeness before they embarked for war. Many men were killed or horribly wounded so these images were important for reminding families about their sons/ husbands/ brothers/ cousins and friends. This photo is a part of the Burke Museum Kelly album which includes numerous photographs relating to the Kelly Gang. As the son of Kate Kelly and William “Bricky” Foster, Fred Foster is an important part of the Kelly story after the execution of Edward “Ned” Kelly which has information it can impart relating to the history of the family after 1880. Whilst an important element of the Kelly Album, Foster’s photograph is also historically important in its own right for its connection to the Great War and the experiences of a soldier at the Western Front.Original sepia rectangular photograph developed on matte photographic paper, unmounted.Reverse: (Top right corner of reverse:) FRED FOSTER/ (Top centre of reverse:) Kate Kelly's son.kelly album, fred foster, kate kelly, photograph, australian soldier, the kelly gang, australian bush, burke museum, sepia photo, gum trees, family of the kelly gang, world war i, langnicourt, france, great war, 1917, ned kelly, frederick foster, william "bricky" foster, ellen kelly, military history, australian military -
 Mission to Seafarers Victoria
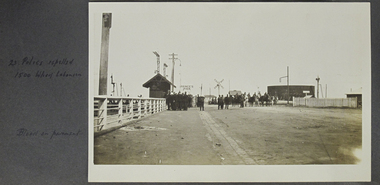
Photograph - Photograph, Sepia, 23 Police repelled 1500 Wharf Labourers - Blood on Pavement, November 1928
... Strike-breakers were brought in and police, armed with guns and brandishing batons, lined the wharf to protect them. Tempers rose, fighting broke out, and a nervous inspector ordered his men to fire first into the air, then into the crowd....Strike-breakers were brought in and police, armed with guns and brandishing batons, lined the wharf to protect them. Tempers rose, fighting broke out, and a nervous inspector ordered his men to fire first into the air, then into the crowd. strike wharfs police port melbourne princes pier alan whittaker fan album 1928 labourers on page 8 23 Police repelled 1500 Wharf Labourers - Blood on Pavement Photograph Photograph, Sepia ...In October 1928, on the eve of the Great Depression, Melbourne’s wharfies went on strike. Strike-breakers were brought in and police, armed with guns and brandishing batons, lined the wharf to protect them. Tempers rose, fighting broke out, and a nervous inspector ordered his men to fire first into the air, then into the crowd.on page 8strike, wharfs, police, port melbourne, princes pier, alan whittaker, fan album, 1928, labourers -
 Monbulk RSL Sub Branch
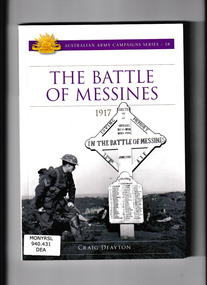
Book, Craig Deayton, The battle of Messines : 1917, 2017
... The fighting at Messines would descend into unimaginable savagery, a lethal and sometimes hand-to-hand affair of bayonets, clubs, bombs and incessant machine-gun fire, described by one Australian as '72 hours of Hell'. ...On 7 June 1917, the British Second Army launched its attack on Messines Ridge, detonating 19 giant mines beneath the German front-line positions. By the end of the day, one of the strongest positions on the Western Front had fallen, a place of such importance that the Germans had pledged to hold it at any cost. It was the greatest British victory in three years of war. The first two years of the First World War had represented an almost unending catalogue of disaster for the Australians. Messines was not only their first real victory, it was also the first test in senior command for Major General John Monash who commanded the newly formed 3rd Division and would later be hailed as Australia's greatest soldier. Messines was a baptism of fire for the 3rd Division which came into the line alongside the battle-scarred 4th Australian Division, badly mauled at Bullecourt just six weeks earlier in one of the worst defeats of the war. The fighting at Messines would descend into unimaginable savagery, a lethal and sometimes hand-to-hand affair of bayonets, clubs, bombs and incessant machine-gun fire, described by one Australian as '72 hours of Hell'. After their string of bloody defeats over 1915 and 1916, Messines would be the ultimate test for the Australians. Collapse summaryIndex, bibliography, ill (col), p.172.non-fictionOn 7 June 1917, the British Second Army launched its attack on Messines Ridge, detonating 19 giant mines beneath the German front-line positions. By the end of the day, one of the strongest positions on the Western Front had fallen, a place of such importance that the Germans had pledged to hold it at any cost. It was the greatest British victory in three years of war. The first two years of the First World War had represented an almost unending catalogue of disaster for the Australians. Messines was not only their first real victory, it was also the first test in senior command for Major General John Monash who commanded the newly formed 3rd Division and would later be hailed as Australia's greatest soldier. Messines was a baptism of fire for the 3rd Division which came into the line alongside the battle-scarred 4th Australian Division, badly mauled at Bullecourt just six weeks earlier in one of the worst defeats of the war. The fighting at Messines would descend into unimaginable savagery, a lethal and sometimes hand-to-hand affair of bayonets, clubs, bombs and incessant machine-gun fire, described by one Australian as '72 hours of Hell'. After their string of bloody defeats over 1915 and 1916, Messines would be the ultimate test for the Australians. Collapse summary world war 1914-1918- campaigns - western front, battles of messines - australian participation - 1917 -
 Monbulk RSL Sub Branch
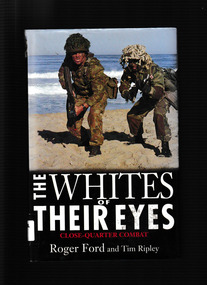
Book, Roger Ford et al, The whites of their eyes : close-quarter combat, 1997
... Starting with WWI trench fighting, they go all the way of up the Gulf, Chechen and Yugoslav wars that were current when the book was written. We see and discuss, Submachine guns ...The authors trace close-quarter combat in the automatic fire era. Starting with WWI trench fighting, they go all the way of up the Gulf, Chechen and Yugoslav wars that were current when the book was written. We see and discuss, Submachine guns, grenades, knives, mines, and all the level of entrenchment from scrapes to deep bunkersIndex, ill, p.298.non-fictionThe authors trace close-quarter combat in the automatic fire era. Starting with WWI trench fighting, they go all the way of up the Gulf, Chechen and Yugoslav wars that were current when the book was written. We see and discuss, Submachine guns, grenades, knives, mines, and all the level of entrenchment from scrapes to deep bunkersmilitary science, hand to hand combat -
 Queenscliffe Maritime Museum
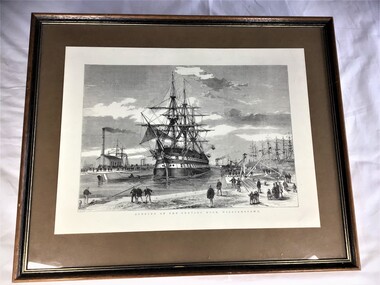
Print - Framed copy of an engraving of the sailing ship 'Nelson' in the Alfred Graving Dock in Williamstown, 1868, HMVS Nelson in the Alfred Graving Dock, Williamstown, Victoria, 1868
... Following upon a series of ‘Russian scares’ in the 1870s, Nelson presumably by permission of the Admiralty, was converted into a fighting ship for the Victorian Navy; she was cut down to a single- decker, the fore and mizzen masts were removed, and the armament modified by the landing of several of the old muzzle-loaders and the addition of a number of new breech-loading guns. ...As the White Ensign was reserved entirely for the use of the Royal Navy, the Admiral decided to approve of a new ensign for the Victorian Navy and this was flown for the first time from Nelson on 9th March 1870. The new ensign was very similar to the present day national flag and incorporated the Union flag with five white stars on a blue field.Following upon a series of ‘Russian scares’ in the 1870s, Nelson presumably by permission of the Admiralty, was converted into a fighting ship for the Victorian Navy; she was cut down to a single- decker, the fore and mizzen masts were removed, and the armament modified by the landing of several of the old muzzle-loaders and the addition of a number of new breech-loading guns. This conversion was carried out in the new drydock in 1881.A framed copy of an engraving entitled: 'Opening of the Graving Dock, Williamstown'.Opening of the Graving Dock, Williamstownhmvs nelson, alfred graving dock, williamstown -
 Australian Commando Association - Victoria
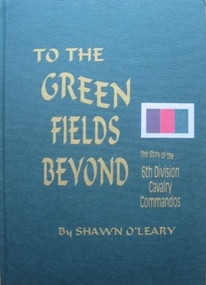
Book - 6th Div, Shawn OLeary, To The Green Fields Beyond:The story of the 6th Division Cavalry Commandos
... gun carriers, and operated with British troops in capturing Sollum. Towards the end of May the regiment moved to Palestine, where it came under the command of the 7th Division for the imminent invasion of Syria. The regiment experienced its heaviest fighting ...The comprehensive history of the 6th Australian Division Cavalry Commandos – a (now out of print) reprint of one of the rarer Armoured unit history books. This is the story of one of Australia’s most famous fighting regiments during World War II. As an armoured cavalry unit it fought the Italians and Germans in the sands of the African desert and the Vichy French in the mountains of Syria. Later as a dismounted commando unit it fought the Japanese in the terrifying jungles of New Guinea. The heroism of the men in its ranks and the actions in which they engaged are portrayed in a way which makes battle deeds leap realistically from the pages. “To The Green Fields Beyond” is a documented and detailed book which is of value to everyone who is interested in Australia’s story. Seldom before has such a contribution been made to record of our national history. The book has been approved and sponsored by the Australian War Memorial. The 6th Division Cavalry Regiment was formed in November 1939 and, just two months later, was sent overseas to the Middle East in January 1940. Arriving in Egypt, the regiment immediately went to Palestine, where it joined the rest of the 6th Division and trained using machine-gun carriers and, from October, six old Vickers light tanks. At the end of the year the regiment moved into the Western Desert, where it joined British forces ready for the major offensive to commence on 9 December. Two days later the regiment became the first unit of the 2nd Australian Imperial Force (AIF) to go into action when one of its squadron fought a sharp action against the Italians holding Garn el Grein and Fort Maddalina on 11 and 12 December. By 21 December British forces had captured Sidi Barrrani and the desert was now open for the 6th Division’s advance along the Libyan coast. On 3 January 1941 the division attacked and captured the Italian fort of Bardia. The regiment’s A Squadron, under the command of Major Denzil Macarthur-Onslow, who went on to command the 4th Armoured Brigade, supported the attack. Tobruk was the next Italian fort to be captured, with the regiment again in support and covering the 19th Brigade’s advance. The regiment, though, was under-equipped and without its full compliment of vehicles, using only machine gun carriers. To compensate for this, A Squadron was parity re-equipped with captured Italian light tanks, which had large kangaroos painted on the hulls and turrets to distinguish them from enemy vehicles. After Tobruk, the regiment was used as part of the advance guard in the capture of Derna and then Benghazi. In April the unit moved to Helwan, where it was equipped with Vickers light tanks and machine-gun carriers, and operated with British troops in capturing Sollum. Towards the end of May the regiment moved to Palestine, where it came under the command of the 7th Division for the imminent invasion of Syria. The regiment experienced its heaviest fighting during the Syrian campaign, which began on 7 June. A Squadron was attached to the 21st Brigade and advanced along the coast, where the rugged hills made it difficult to manoeuvre the tanks and carriers. The squadron was relieved by one of the 9th Division Cavalry Regiment’s squadrons on 13 and 14 June. C Squadron, meanwhile, was with the 25th Brigade, and advanced along the Rosh Pinna road, engaging strong enemy defences at Fort Khirbe. C Squadron was relieved by B Squadron, which was later attacked by Vichy French tanks that were supported by heavy artillery and machine-gun fire, which forced the Australians to withdrawal. Always willing or needing to improvise during the campaign, A and B Squadrons both operated three captured French R35 Renault light tanks, while C Squadron provided personnel for a horse troop, quickly nicknamed the “Kelly Gang”, to patrol the high, rugged hills near the Mardjayoun–Banis Road. The regiment remained in Syria as part of the occupation force and returned to Australia in March 1942. It was sent to the Adelaide River, in the Northern Territory, and then later to Murgon, in Queensland. In 1943 and 1944 divisional cavalry regiments were reorganised into cavalry (commando) regiments. In January 1944 the 6th Division Cavalry Regiment became the 2/6th Cavalry (Commando) Regiment. The regiment lost its vehicles and became the administrative headquarters for the 2/7th, 2/9th, and 2/10th Commando Squadrons. The regiment remained with the 6th Division and participated in the Aitpae–Wewak campaign, in New Guinea, during 1945. Includes Nominal Rollnon-fictionThe comprehensive history of the 6th Australian Division Cavalry Commandos – a (now out of print) reprint of one of the rarer Armoured unit history books. This is the story of one of Australia’s most famous fighting regiments during World War II. As an armoured cavalry unit it fought the Italians and Germans in the sands of the African desert and the Vichy French in the mountains of Syria. Later as a dismounted commando unit it fought the Japanese in the terrifying jungles of New Guinea. The heroism of the men in its ranks and the actions in which they engaged are portrayed in a way which makes battle deeds leap realistically from the pages. “To The Green Fields Beyond” is a documented and detailed book which is of value to everyone who is interested in Australia’s story. Seldom before has such a contribution been made to record of our national history. The book has been approved and sponsored by the Australian War Memorial. The 6th Division Cavalry Regiment was formed in November 1939 and, just two months later, was sent overseas to the Middle East in January 1940. Arriving in Egypt, the regiment immediately went to Palestine, where it joined the rest of the 6th Division and trained using machine-gun carriers and, from October, six old Vickers light tanks. At the end of the year the regiment moved into the Western Desert, where it joined British forces ready for the major offensive to commence on 9 December. Two days later the regiment became the first unit of the 2nd Australian Imperial Force (AIF) to go into action when one of its squadron fought a sharp action against the Italians holding Garn el Grein and Fort Maddalina on 11 and 12 December. By 21 December British forces had captured Sidi Barrrani and the desert was now open for the 6th Division’s advance along the Libyan coast. On 3 January 1941 the division attacked and captured the Italian fort of Bardia. The regiment’s A Squadron, under the command of Major Denzil Macarthur-Onslow, who went on to command the 4th Armoured Brigade, supported the attack. Tobruk was the next Italian fort to be captured, with the regiment again in support and covering the 19th Brigade’s advance. The regiment, though, was under-equipped and without its full compliment of vehicles, using only machine gun carriers. To compensate for this, A Squadron was parity re-equipped with captured Italian light tanks, which had large kangaroos painted on the hulls and turrets to distinguish them from enemy vehicles. After Tobruk, the regiment was used as part of the advance guard in the capture of Derna and then Benghazi. In April the unit moved to Helwan, where it was equipped with Vickers light tanks and machine-gun carriers, and operated with British troops in capturing Sollum. Towards the end of May the regiment moved to Palestine, where it came under the command of the 7th Division for the imminent invasion of Syria. The regiment experienced its heaviest fighting during the Syrian campaign, which began on 7 June. A Squadron was attached to the 21st Brigade and advanced along the coast, where the rugged hills made it difficult to manoeuvre the tanks and carriers. The squadron was relieved by one of the 9th Division Cavalry Regiment’s squadrons on 13 and 14 June. C Squadron, meanwhile, was with the 25th Brigade, and advanced along the Rosh Pinna road, engaging strong enemy defences at Fort Khirbe. C Squadron was relieved by B Squadron, which was later attacked by Vichy French tanks that were supported by heavy artillery and machine-gun fire, which forced the Australians to withdrawal. Always willing or needing to improvise during the campaign, A and B Squadrons both operated three captured French R35 Renault light tanks, while C Squadron provided personnel for a horse troop, quickly nicknamed the “Kelly Gang”, to patrol the high, rugged hills near the Mardjayoun–Banis Road. The regiment remained in Syria as part of the occupation force and returned to Australia in March 1942. It was sent to the Adelaide River, in the Northern Territory, and then later to Murgon, in Queensland. In 1943 and 1944 divisional cavalry regiments were reorganised into cavalry (commando) regiments. In January 1944 the 6th Division Cavalry Regiment became the 2/6th Cavalry (Commando) Regiment. The regiment lost its vehicles and became the administrative headquarters for the 2/7th, 2/9th, and 2/10th Commando Squadrons. The regiment remained with the 6th Division and participated in the Aitpae–Wewak campaign, in New Guinea, during 1945. Includes Nominal Rollww2, australian commandos, australian special forces, world war 2 -
 Federation University Historical Collection
Photograph (black & White), Modder River - South Africa
... guns pounded the buildings near Modder River Station and the north bank of the river, missing the trenches on the south bank. The battle became a stalemate. The British found an opening on the Boer's right flank at Rosmead ford downstream and drove the Boers out of Rosmead. De la Rey drove them back into a small insecure bridgehead. The Boers feared they were vulnerable and withdrew during the night. Methuen reported that the battle had been "one of the hardest and most trying fights...guns pounded the buildings near Modder River Station and the north bank of the river, missing the trenches on the south bank. The battle became a stalemate. The British found an opening on the Boer's right flank at Rosmead ford downstream and drove the Boers out of Rosmead. De la Rey drove them back into a small insecure bridgehead. The Boers feared they were vulnerable and withdrew during the night. Methuen reported that the battle had been "one of the hardest and most trying fights ...When war broke out in 1899, and early target for the Boers was the diamond-mining centre of Kimberley. This was located near the point where the Transvaal, Orange Free State and Cape Colony met. General Sir Redvers Buller detached the 1st Division under Lieutenant General Lord Methuen to relieve the Siege of Kimberley. This decision was made partly for reasons of prestige. To capture Kimberley (which contained the famous imperialist and former Prime Minister of Cape Colony, Cecil Rhodes) would be a major propaganda victory for the British. Methuen's force advanced north and won two engagements against the Boers of the Orange Free State. Reinforcements from Transvaal under General Koos de la Rey arrived and he convinced the Boers to follow his plans for attacking the British. Instead of relying on the hills for protection and missing their targets, de la Rey proposed they make use of the flat veld and introduced them to the Mauser rifle with its flat trajectory. Trenches were built in the banks of the Modder River from which they could sweep the veld for a great distance. The trenches were built on the south side of the river and on the smaller Riet River where they meet at Modder River Station. Methuen's force began advancing towards the Modder planning to cross the river. The Boers opened fire and the British troops were unable to find cover on the veld. They had to lay flat so as not to be seen or hit. The British guns pounded the buildings near Modder River Station and the north bank of the river, missing the trenches on the south bank. The battle became a stalemate. The British found an opening on the Boer's right flank at Rosmead ford downstream and drove the Boers out of Rosmead. De la Rey drove them back into a small insecure bridgehead. The Boers feared they were vulnerable and withdrew during the night. Methuen reported that the battle had been "one of the hardest and most trying fights in the annals of the British army". Individual image from photographed poster of tobacco and cigarette cards.boers, diamind-mining, kimberley, transvaal, orange free state, cape colony, sir rdvers buller, lieutenant general lord methuen, siege of kimberley, cecil rhodes, general koos dde la rey, mauser rifle, veld, modder river, modder river station, trenches, riet river, rosmead -
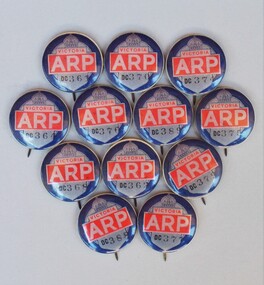 Sunshine and District Historical Society Incorporated
Memorabilia - Air Raid Precautions (ARP) badges, Circa early 1940's
... Air Raid Precautions included air raid drills, shelters (usually trenches), first aid, fire fighting, rescue of 'gassed' persons, evacuation drills, demolition and repair squads, monitoring of blackouts. Melbourne was deemed vulnerable to aerial attack because of its centralised port and industrial facilities and so Anti-aircraft guns were installed in Maribyrnong. ...Air Raid Precautions included air raid drills, shelters (usually trenches), first aid, fire fighting, rescue of 'gassed' persons, evacuation drills, demolition and repair squads, monitoring of blackouts. Melbourne was deemed vulnerable to aerial attack because of its centralised port and industrial facilities and so Anti-aircraft guns were installed in Maribyrnong. ...Mr Webb King was an Air Raid Warden during World War 2. These badges were found when his workshop was being cleared out, and so were donated to our society. The badges in our possession do not have the word WARDEN printed on them, like the image of the badge shown on the Darebin Heritage 'Air Raid Protection Services (ARP)' publication, or the image of a badge offered for sale on ebay. At this stage we are uncertain of why this is so. If anybody knows the answer then please leave a message on this site. During World War 2 Australian municipalities were expected to take precautions against air raids, with the Government campaigning to recruit men over 45 to be volunteer Air Raid Wardens. It was also common for women to become wardens. Wardens carried gas masks, helmets, and rattles or whistles. The wardens received 7 to 8 one hour sessions of training, and their chief duty was to advise people of precautions to take, and to ensure those precautions were taken. Air Raid Precautions included air raid drills, shelters (usually trenches), first aid, fire fighting, rescue of 'gassed' persons, evacuation drills, demolition and repair squads, monitoring of blackouts. Melbourne was deemed vulnerable to aerial attack because of its centralised port and industrial facilities and so Anti-aircraft guns were installed in Maribyrnong. By early 1942 more than 60,000 people voluntarily carried out Air Raid Precautions duties according to the Autobiography of Robert V. J. Padula OAM. As the threat diminished during 1943 and 1944 the need for air raid precautions was slowly reduced, and some shelters (trenches) were filled. The two photos showing Air Raid Wardens are out of copyright and have been sourced from the 'Argus Newspaper Collection of Photographs, State Library of Victoria.' The image showing one warden on Swanston Street Melbourne has been cropped to remove extras not connected with the photo. Other sources of information for this report are: (1) http://bpadula.tripod.com/autobiography/id100.html, (2) https://www.awm.gov.au/exhibitions/underattack/mobilise/precautions.asp, (3) http://heritage.darebinlibraries.vic.gov.au/article/57. The ARP badges are a historic reminder of the precautions that were taken in Victoria during the early years of World War 2. The precautions were an effort to minimise the harmful effects of a theoretical air raid. The war started to turn and so an air raid never came, however many people received valuable training in what precautions needed to be taken.Pressed metal round badges with pins. Main feature of badges is the large whitish lettering ARP on a red background. A black outlined crown and the word VICTORIA in red on whitish background is also on the badges. At the bottom of the badges in black are the letters DC plus the numbers of the badges.Serial Numbers of the badges are: DC 361, DC 362, DC 364, DC 368, DC 370, DC 374, DC 375, DC 376, DC 377, DC 379, DC 388, DC 389.arp. arp badge, air raid precautions, air raid precautions warden, warden, badges -
 City of Melbourne Libraries
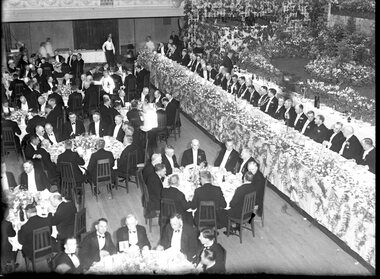
Photograph, Bull, Hugh Jones, 1897-1993, Lord Mayor's Dinner, Melbourne Town Hall
... The term “Armistice Day” was coined after WWI: “At 11 am on 11 November 1918, the guns on the Western Front fell silent after more than four years of continuous warfare. The Germans called for an armistice (suspension of fighting) in order to secure a peace settlement. ...The term “Armistice Day” was coined after WWI: “At 11 am on 11 November 1918, the guns on the Western Front fell silent after more than four years of continuous warfare. The Germans called for an armistice (suspension of fighting) in order to secure a peace settlement. ...Photographer notations on slide: "General View Of Lord Mayor's Dinner At Town Hall Nov 1936 B112" Published: The Age, Tuesday 10 November 1936, page 13 Published title: LORD MAYOR'S BANQUET Published caption: The brilliant scene inside the Melbourne Town Hall last night during the Lord Mayor’s banquet. Trove article identifier: http://nla.gov.au/nla.news-article205939431 Description: 700 guests (all men) are seated around numerous tables in the Melbourne Town Hall for the Lord Mayor's dinner in November 1936. Before the stage is a top table of 35 men, all dressed smartly in black dinner suits, with either a black or white bow tie. Many are wearing their medals. The Lord Mayor has on his Mayoral chains, and to his right is the Governor of Victoria, Lord Huntingfield. The stage is heavily decorated with fresh flowers. Research by project volunteer, Louise McKenzie: This image takes up one quarter of the photographic space on page 13 of The Age on 10 November 1936, reflecting the importance of the event and also the sheer dramatics of the image: 700 guests (all men), a top table of 35, and all dressed smartly in black dinner suits, with either a black or white bow tie. Many are wearing their medals. The Lord Mayor has on his Mayoral chains, and to his right is the Governor of Victoria, Lord Huntingfield. Further to his right is a man with an impressive sash across his chest. It is a very animated, and rather informal, moment. Banks of fresh flowers smother the stage, which is decorated in the manner of a terrace at an English stately home. Tables are laden with food, drink and decorations, and the wait staff (men and women) are also formally dressed, in the manner of Downton Abbey. It is spectacular, dramatic, and luxurious, and perpetuates the proud descriptor of “Marvellous Melbourne” as conferred by London Journalist George Augustus Sala when he visited the city in 1885. During its 1880s boom, Melbourne was the second-largest city in the British Empire, after London, and reputedly the richest city in the world. At times the expression was used with some irony, but "...in Victoria’s centenary year, 1934, with the city mired in another depression, a publisher bravely entitled a book of souvenir photographs Marvellous Melbourne, claiming that the subject ‘still finds apt expression in the happy one-time sobriquet’.” This photo seems to reflect an ongoing pride in Melbourne and a desire for it to live up to its descriptor and celebrate its post-centenary era in style. So it is no surprise to find that on page 11 of The Age on the same day, a second photo is to be found – a cropped view of one table – along with a very detailed description of the night, its purpose, and a surprise announcement. But, who was the Lord Mayor in whose honour the dinner was held? In 1934, the Lord Mayor of Melbourne was Cr. Alexander George Wales, (born Richmond, 11 October 1885, died Elsterwick, 31 May 1962). His father was a contractor and quarry-owner, but was blinded in an industrial accident in 1899. Consequently Alexander, then aged 14, left Brunswick State School to become a railway labourer working at a quarry, and in 1903 joined the Commonwealth public service as a clerk and began studying at night school, determined to improve himself. In 1907 he was appointed secretary of the Albion Quarrying Co. (in which the family had an interest), then its managing director and chairman. As the Australian Dictionary of Biography notes, he was instrumental in expanding the company’s interests, "...becoming director of the Hardware Co. of Australia Pty Ltd, the Twentieth Century Building and Investment Society, the Albion Sand Co. and the Geelong Brick Co.”. His public career began in 1914 when he was elected to the Brunswick council. He was mayor 1917-18, and in 1925 progressed to the Melbourne City Council where he remained for 29 years, being a member of most council committees. He served three successive terms as lord mayor (1934-37), was Chairman of the council’s decorations committee for Melbourne’s centenary, president of the Metropolitan Fire Brigades Board (1936), and Chairman of the Public Works Committee (1937-39). In 1936 he was elected to the Legislative Council with United Australia Party support, but later resigned over possible State government contract tender irregularities. Wales received "the customary reward” of a knighthood and was invested at Buckingham Palace by King George VI whose coronation he attended in 1937. He was an early director of what is now Ampol, and helped the development of the petroleum industry in Australia after visiting the USA in 1943 and 1946. He was impressed by that country’s wartime shipbuilding efforts and supported closer ties with the USA. “While president (1947-48) of the Melbourne Chamber of Commerce, Wales was a vocal critic of the Federal Labor Government, ...a staunch anti-socialist ... and a focus for conservative opposition to the Curtin and Chifley governments...” He is described as “a natural leader in business and civic politics,... a powerful force in the Melbourne City Council... opposing democratic reforms such as the creation of a Greater Melbourne Council and the abolition of plural voting, but advocat[ing] the redevelopment of city-owned property like the Eastern and Western markets...” So, this Lord Mayor’s dinner marks the third successive term in office for Governor Cr. A G Wales. The room is filled with powerful and influential men, and provided a platform for the Premier of Victoria, Albert Dunstan (1882-1950, United Country party) to announce that if the City Council would bear half the cost the State Government would build a bridge at Punt Road “at once”. He announced that the Government proposed to have the bridge built by the Country Roads Board, and allow the City Council to pay its share on convenient terms, and further, it would investigate the shared provision of more Yarra bridges. The proposal for the Punt Road Bridge was met with applause as the Yarra River constituted a serious traffic barrier. On 12 November 1936, two days after the Lord Mayor’s dinner, The Age published an article, “Building without a Plan”. It questions the appropriateness of the next Yarra bridge being the one at Punt Road, and encourages a “proper procedure” to look at the provision of additional Yarra bridges as a whole. But in fact this topic had been canvassed back in August when Melbourne City Council’s public works committee had recommended the replacement of the footbridge at Punt Road with a bridge, and if the Country Roads Board would declare this portion of Punt Road, including the river crossing, a State Highway, this could give the Board authority to construct the bridge and allocate the cost. Hence the reference at the dinner to a shared expense. Still an integral part of traffic management today, the Hoddle Bridge carries Punt Road over the Yarra River between Richmond and South Yarra in Melbourne. It is a five-lane road bridge with narrow footpaths on either side. It is of continuous reinforced concrete T-beam construction with five segmental arched spans, supported on transverse piers, and linked by concrete cross-beams. “The piers terminate in a series of tapered concrete pillars with Art Deco-styled steamlined decoration. Each pillar supports a Victorian-style lamp. The infill railings are geometric-patterned painted metal. Construction began in late 1937, and it was opened by Premier Albert Dunstan on 22 December 1938. It replaced an earlier footbridge, which in turn had replaced a punt service. The bridge (originally referred to as Punt Road Bridge) was named after Robert Hoddle, who planned central Melbourne’s Hoddle Grid, the grid of streets which form Melbourne’s central business district. Hoddle arrived in Australia from the UK in 1823 and went on to carry out surveys in NSW and Queensland before arriving in Melbourne in 1837. He designed layouts for both Melbourne and Williamstown, and later Geelong and other Victorian country areas. He was keen that major streets be at least 30 metres wide. ”With remarkable foresight he provided for wide boulevards from the city to the suburbs, but the subdivisions of early speculators in inner suburbs created the bottle-necks of today. After the separation of the colony in 1851, he became Victoria’s first surveyor-general... and advocated the provision of three-chain (60 m) roads and the widening of all existing main roads from one (20 m) to three chains." However, he was met with constant opposition and in 1853, was eased out of office. As a small and interesting aside: Hoddle was appointed auctioneer for the first sale of crown land in Melbourne on 1 June 1837. His commission was 57 pounds 12s 7d. and he bought two allotments for himself at a cost of 54 pounds. After he died his second wife married Richard Buckhurst Buxton, a member of the family which in 1860s Melbourne established the Australian property dynasty of Buxton Real Estate, Becton, MAB Corporation etc. Returning to the dinner and The Age article of 10 November 1836: Another topic of the after-dinner speeches was a reference to the upcoming Armistice Day. “The Minister of Customs (Mr White) said the proximity of Armistice day reminded us that eighteen years ago we had high hopes of prolonged peace.” The term “Armistice Day” was coined after WWI: “At 11 am on 11 November 1918, the guns on the Western Front fell silent after more than four years of continuous warfare. The Germans called for an armistice (suspension of fighting) in order to secure a peace settlement. They accepted the allied terms on unconditional surrender. Therefore on the 11th hour of the 11th day of the 11th month, a minute’s silence is observed and dedicated to those soldiers who died fighting to protect the nation. Originally known as Armistice Day, it was renamed Remembrance Day after World War Two to commemorate those who were killed in both World Wars. Today it refers to the loss of Australian lives from all wars and conflicts, accompanied by the words, "We will remember them, Lest we forget"." There was comment at the dinner about the need to remain firm in supporting the “democratic government in the British Empire to avoid a “plunge into savagery”. There was a grave responsibility on the British people to keep democracy alive, and that could not be done without adequate defence forces... Many weak governments in non-British countries had been swept aside by strong-fisted dictators, who now were the real threat to peace”. With the benefit of hindsight these were very pertinent comments and tragically prophetic. The Melbourne Shrine of Remembrance had only been dedicated two years earlier, at a ceremony attended by the Duke of Gloucester, son of King George V. Over 300,000 citizens attended: one third of the population of Melbourne. It became the location for the Anzac Day Dawn Service. Originally the march travelled from the Shrine into the city, however, in 1936, this was reversed, and the Shrine became the termination point for Anzac Day Marches. Also significant in 1936, was the installation of a statue in the west forecourt of the Shrine: “The Man with the Donkey” (aka 'Private John Simpson and his Little Donkey'). The work is said to represent the “valour and compassion of the Australian soldier”. Its full citation, according to the City of Melbourne City Collection is: West Side of Base: "The / Man with his Donkey / Gallipoli, April 25 to May 19 / in Commemoration / of the valour and compassion / of the Australian Soldier" AFTER LANDING AT GALLIPOLI, SIMPSON, WITH HIS LITTLE DONKEY, WORKED ALONE, DAY AND NIGHT TAKING WATER TO THE FRONT LINE AND CARRYING THE WOUNDED BACK TO THE DRESSING STATIONS. HE AND HIS DONKEY WERE KILLED BY A SHRAPNEL SHELL ON THE 19TH MAY, 1915. SIMPSON WAS MENTIONED IN DISPATCHES BY SIR IAN HAMILTON, COMMANDER-IN-CHIEF OF THE MEDITERRANEAN EXPEDITIONARY FORCE. / Erected by Public Subscription under auspices of the / Red Cross Society. East Side of Base: Private John Simpson." Their summary in background states: "A bronze figure of Simpson and his donkey with a wounded man on the donkey's back on a granite pedestal. Private John Simpson Kirkpatrick’s intrepid and short-lived exploits during the Gallipoli campaign have made him a popular figure of World War One. He has been mythologised to represent the lauded values of the digger, and he symbolises all those who went into battle unarmed. Born in England in 1892, he came to Australia in 1910. He enlisted to make his way back to England, but as a member of the 3rd Field Ambulance AIA was sent to Gallipoli. After just three weeks of bearing wounded soldiers across Shrapnel Gully on the back of his donkey, Simpson was killed by shrapnel fire. Simpson’s story became a powerful propaganda tool for enlistment in Australia, but following the war he was quickly forgotten. With the Shrine of Remembrance nearing completion in 1933, the memory of Simpson was rekindled to commemorate all who gave their lives to help others during the war. One plaque reads: ‘The / Man with his donkey / Gallipoli … / In commemoration / of the valour and compassion / of the Australian soldier’. In 1935, Wallace Anderson’s design for the memorial was selected though a competition organised by the Australian Red Cross. Anderson had served during the war and worked at the Australian War Memorial after his return. His Man with the Donkey was cast in Italy, and after some debate was sited near the shrine. Unveiled 20th June, 1936." The sculptor, Victorian-born William Wallace Anderson (1888-1975), served in France during WWI and afterwards produced a number of bronze war memorials and memorial portraits, predominantly in Victoria. “His most famous work is that of Simpson and his Donkey (1935), which he completed after winning a competition conducted by the Victorian Division of the Australian Red Cross. Anderson’s fee was 350 pounds; the cast, made by the Chiurazzi Foundry, Naples, Italy, cost 40 pounds. The work... has become well known as a symbol of the Anzac tradition.” A debate as to the siting of the statue arose from a strong view expressed by General Sir John Monash that no representation of individual members of the Australian Defence Force be located on the Shrine itself. Hence its location off to the northwest of the forecourt, in a garden of rosemary. And finally we return to the photo of the grand Lord Mayor’s dinner! An article in The Argus of 4 November 1936 refers to “Brilliant Scene at Lord Mayor’s Ball – Hall Becomes a Garden”. So now it becomes clear why the Town Hall, location of the Lord Mayor’s Dinner on 10 November 1934, only 6 days later, is so lavishly decorated. The floral decorations from the Ball are still in place - an early example of “recycling”, which is gratifying to note at a time of Depression. The reporter has captured the scene with enthusiasm: “Hundreds of tiny rose lights, hidden among pink roses, transformed the Melbourne Town Hall into a magical garden last night, when the Lord Mayor and Lady Mayoress (Councillor A. C. Wales, M.L.C., and Mrs. Wales) entertained about 3,500 guests at a ball. His Excellency the Governor (Lord Huntingfield) and Lady Huntingfield were present, while Rear-Admiral and Mrs. Lane Poole and officers from the visiting squadron were among the special guests. The balconies all round the hall were hidden by a white trellis, covered with pink blossoms and greenery. Rosy flowers were issued up every pillar, and great golden lamps, hanging from the door, were seated in greenery and trails of sweet peas. The organ gallery was converted into a terrace garden with stone steps leading to banks of pink azaleas, pink pelargoniums, masses of calceolarias, and the lovely deep mauve and blue of cinerarias. Slender Japanese maples and poplar trees grew from the higher slopes amid thickets of hostas, while a fascinating illusion was created by the lofty conservatory windows, which formed the background, and which were tinted cerulean blue to simulate the sky seen through glass. Large fern baskets hung from the conservatory roof, and the whole scene was enclosed in trellises of blossom. In the entrance palm green shrubs stood like sentinels round the passed floor, and flowers bloomed in misty golds. The long corridor upstairs leading to the council chamber was lined with an avenue of poplar trees in tubs. In the Lower Town Hall great banks of calceolarias and azaleas decked the upper dais, and each supper table was adorned with a different coloured flower with sprays of roses and Japanese maple laid on the snowy cloths. The adjoining supper-rooms were fragrant with the scent of huge bowls of stock in mauve, purple, and pink, while the white walls were covered with palm leaves and flowers. The roof garden below the clock tower was enclosed as a buffet with rose wreathed walls, and flowers were arranged attractively in the Lady Mayoress's rooms." References: LORD MAYOR'S BANQUET. CENTURY MAKERS AT THE M.C.G. BEFORE THE CHANGE. (1936, November 10). The Age (Melbourne, Vic. : 1854 - 1954), p. 13. Retrieved September 4, 2024, from http://nla.gov.au/nla.news-article205939431 'Portrait of Sir George Wales (Lord Mayor 1934-1937)', City Collection, City of Melbourne, https://citycollection.melbourne.vic.gov.au/portrait-of-sir-george-wales-lord-mayor-1934-37/ Graeme Davison, 'Marvellous Melbourne', eMelbourne, https://www.emelbourne.net.au/biogs/EM00906b.htm THE LORD MAYOR'S BANQUET. (1936, November 10). The Age (Melbourne, Vic. : 1854 - 1954), p. 11. Retrieved September 26, 2024, from http://nla.gov.au/nla.news-article205939643 BRILLIANT SCENE AT LORD MAYOR'S BALL Hall Becomes a Garden (1936, November 4). The Argus (Melbourne, Vic. : 1848 - 1957), p. 14. Retrieved September 26, 2024, from http://nla.gov.au/nla.news-article11932746 'Hoddle Bridge', Wikipedia, https://en.wikipedia.org/wiki/Hoddle_Bridge 'Hoddle Bridge', Victorian Heritage Database Report, Victorian Heritage Council, https://vhd.heritagecouncil.vic.gov.au/places/195689/download-report David Dunstan, 'Wales, Sir Alexander George (1885–1962)', Australian Dictionary of Biography, National Centre of Biography, Australian National University, https://adb.anu.edu.au/biography/wales-sir-alexander-george-8951/text15737, published first in hardcopy 1990, accessed online 26 September 2024. Marjorie J. Tipping, 'Hoddle, Robert (1794–1881)', Australian Dictionary of Biography, National Centre of Biography, Australian National University, https://adb.anu.edu.au/biography/hoddle-robert-2190/text2823, published first in hardcopy 1966, accessed online 26 September 2024. BUILDING WITHOUT A PLAN. (1936, November 12). The Age (Melbourne, Vic. : 1854 - 1954), p. 8. Retrieved September 26, 2024, from http://nla.gov.au/nla.news-article205949762 NEW BRIDGE AT PUNT ROAD (1936, August 12). The Argus (Melbourne, Vic. : 1848 - 1957), p. 10. Retrieved September 26, 2024, from http://nla.gov.au/nla.news-article11902131 'The Shrine of Remembrance', Beaconsfield’s Soldiers: https://beaconsfield.org.au/digitalmemorial/shrine-introduction/ 'Shrine of Remembrance', Wikipedia, https://en.wikipedia.org/wiki/Shrine_of_Remembrance Ken Scarlett, 'Anderson, William Wallace (1888–1975)', Australian Dictionary of Biography, National Centre of Biography, Australian National University, https://adb.anu.edu.au/biography/anderson-william-wallace-9362/text16441, published first in hardcopy 1993, accessed online 26 September 2024. 'Man with the Donkey', City Collection, City of Melbourne, https://citycollection.melbourne.vic.gov.au/man-with-the-donkey-aka-private-john-simpson-and-his-little-donkey/ 'Remembrance Day', Australian Army, https://www.army.gov.au/about-us/history-and-research/traditions/remembrance-day Photographer notations on slide: "General View Of Lord Mayor's Dinner At Town Hall Nov 1936 B112".melbourne town hall, mayors, lord mayors, centenaries, bridges, dinners, clothing and dress, festive decorations, dances and balls, eating and drinking, shrine of remembrance, governors, monuments and memorials, 1930-1939, plants -
 National Vietnam Veterans Museum (NVVM)
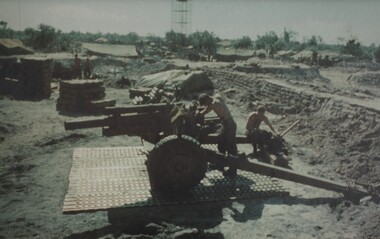
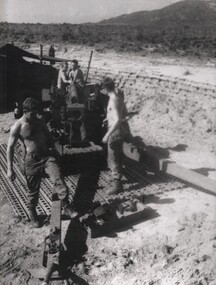
Photograph, Gibbons, Denis, Gun Maintenance 1
... A coloured photograph of Gunners of 104 Battery Royal Australian Artillery at Fire Base Betty carry out maintenance on their gun durung a lull in fighting. The Gunners had a never ending battle against the tropical weather and its affect on the guns....Photograph 104 Battery Fire Base Betty Long Bein Tet Offensive Gibbons Collection Catalogue Gunners Royal Australian Artillery Denis Gibbons A coloured photograph of Gunners of 104 Battery Royal Australian Artillery at Fire Base Betty carry out maintenance on their gun durung a lull in fighting. The Gunners had a never ending battle against the tropical weather and its affect on the guns. ...Denis Gibbons (1937 – 2011) Trained with the Australian Army, before travelling to Vietnam in January 1966, Denis stayed with the 1st Australian Task Force in Nui Dat working as a photographer. For almost five years Gibbons toured with nine Australian infantry battalions, posting compelling war images from within many combat zones before being flown out in late November 1970 after sustaining injuries. The images held within the National Vietnam Veterans Museum make up the Gibbons Collection. A coloured photograph of Gunners of 104 Battery Royal Australian Artillery at Fire Base Betty carry out maintenance on their gun durung a lull in fighting. The Gunners had a never ending battle against the tropical weather and its affect on the guns.photograph, 104 battery, fire base betty, long bein, tet offensive, gibbons collection catalogue, gunners, royal australian artillery, denis gibbons -
 National Vietnam Veterans Museum (NVVM)
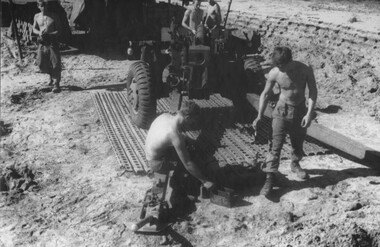
Photograph, Gibbons, Denis, Gun Maintenance 2
... A coloured photograph of Gunners of 104 Battery, Royal Australian Artillery, at Fire Base Betty carry our maintenance on their gun durung a lull in fighting. The Gunners had a never ending battle against the tropical weather and its affect on the guns....Photograph 104 Battery RAA Fire Base Betty Long Bien Tet Offensive Gibbons Collection Catalogue Gunners Royal Australian Artillery Denis Gibbons A coloured photograph of Gunners of 104 Battery, Royal Australian Artillery, at Fire Base Betty carry our maintenance on their gun durung a lull in fighting. The Gunners had a never ending battle against the tropical weather and its affect on the guns. ...Denis Gibbons (1937 – 2011) Trained with the Australian Army, before travelling to Vietnam in January 1966, Denis stayed with the 1st Australian Task Force in Nui Dat working as a photographer. For almost five years Gibbons toured with nine Australian infantry battalions, posting compelling war images from within many combat zones before being flown out in late November 1970 after sustaining injuries. The images held within the National Vietnam Veterans Museum make up the Gibbons Collection.A coloured photograph of Gunners of 104 Battery, Royal Australian Artillery, at Fire Base Betty carry our maintenance on their gun durung a lull in fighting. The Gunners had a never ending battle against the tropical weather and its affect on the guns.photograph, 104 battery, raa, fire base betty, long bien, tet offensive, gibbons collection catalogue, gunners, royal australian artillery, denis gibbons -
 National Vietnam Veterans Museum (NVVM)
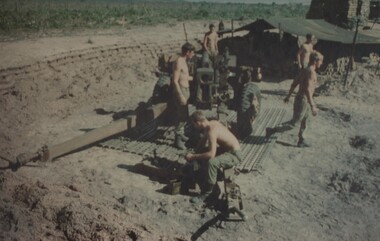
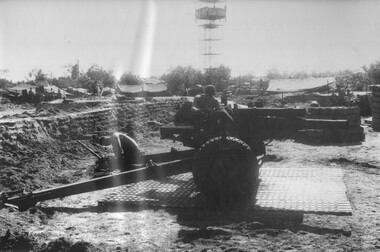
Photograph, Gibbons, Denis, Gun Maintenance 3
... A black and white photograph of Gunners of 104 Battery Royal Australian Artillery at Fire Base Betty carry our maintenance on their gun during a lull in fighting. The Gunners had a never ending battle against the tropical weather and its affect on the guns....Photograph RAA 104 Battery Fire Base Betty Long Bien Tet Offensive Gibbons Collection Catalogue Gunners Royal Australian Artillery Denis Gibbons A black and white photograph of Gunners of 104 Battery Royal Australian Artillery at Fire Base Betty carry our maintenance on their gun during a lull in fighting. The Gunners had a never ending battle against the tropical weather and its affect on the guns. ...Denis Gibbons (1937 – 2011) Trained with the Australian Army, before travelling to Vietnam in January 1966, Denis stayed with the 1st Australian Task Force in Nui Dat working as a photographer. For almost five years Gibbons toured with nine Australian infantry battalions, posting compelling war images from within many combat zones before being flown out in late November 1970 after sustaining injuries. The images held within the National Vietnam Veterans Museum make up the Gibbons Collection.A black and white photograph of Gunners of 104 Battery Royal Australian Artillery at Fire Base Betty carry our maintenance on their gun during a lull in fighting. The Gunners had a never ending battle against the tropical weather and its affect on the guns.photograph, raa, 104 battery, fire base betty, long bien, tet offensive, gibbons collection catalogue, gunners, royal australian artillery, denis gibbons -
 National Vietnam Veterans Museum (NVVM)
Photograph, Gibbons, Denis, Gun Maintenance 4
... A black and white photograph of Gunners of 104 Battery Royal Australian Artillery at Fire Base Betty carry our maintenance on their gun durung a lull in fighting. The Gunners had a never ending battle against the tropical weather and its affect on the guns....Photograph RAA 104 Battery Fire Base Betty Long Bien Tet Offensive Gibbons Collection Catalogue Royal Australian Artillery Gunners Denis Gibbons A black and white photograph of Gunners of 104 Battery Royal Australian Artillery at Fire Base Betty carry our maintenance on their gun durung a lull in fighting. The Gunners had a never ending battle against the tropical weather and its affect on the guns. ...Denis Gibbons (1937 – 2011) Trained with the Australian Army, before travelling to Vietnam in January 1966, Denis stayed with the 1st Australian Task Force in Nui Dat working as a photographer. For almost five years Gibbons toured with nine Australian infantry battalions, posting compelling war images from within many combat zones before being flown out in late November 1970 after sustaining injuries. The images held within the National Vietnam Veterans Museum make up the Gibbons Collection.A black and white photograph of Gunners of 104 Battery Royal Australian Artillery at Fire Base Betty carry our maintenance on their gun durung a lull in fighting. The Gunners had a never ending battle against the tropical weather and its affect on the guns.photograph, raa, 104 battery, fire base betty, long bien, tet offensive, gibbons collection catalogue, royal australian artillery, gunners, denis gibbons -
 National Vietnam Veterans Museum (NVVM)
Photograph, Gibbons, Denis, Gun Maintenance 5
... A black and white photograph of Gunners of 104 Battery, Royal Australian Artillery, at Fire Base Betty carry out maintenance on their gun durung a lull in fighting. The Gunners had a never ending battle against the tropical weather and its affect on the guns....Photograph 104 Battery RAA Artillery Long Bien Tet Offensive Gibbons Collection Catalogue Gunners Royal Australian Artillery Denis Gibbons Fire Base Betty A black and white photograph of Gunners of 104 Battery, Royal Australian Artillery, at Fire Base Betty carry out maintenance on their gun durung a lull in fighting. The Gunners had a never ending battle against the tropical weather and its affect on the guns. ...Denis Gibbons (1937 – 2011) Trained with the Australian Army, before travelling to Vietnam in January 1966, Denis stayed with the 1st Australian Task Force in Nui Dat working as a photographer. For almost five years Gibbons toured with nine Australian infantry battalions, posting compelling war images from within many combat zones before being flown out in late November 1970 after sustaining injuries. The images held within the National Vietnam Veterans Museum make up the Gibbons Collection.A black and white photograph of Gunners of 104 Battery, Royal Australian Artillery, at Fire Base Betty carry out maintenance on their gun durung a lull in fighting. The Gunners had a never ending battle against the tropical weather and its affect on the guns.photograph, 104 battery, raa, artillery, long bien, tet offensive, gibbons collection catalogue, gunners, royal australian artillery, denis gibbons, fire base betty -
 National Vietnam Veterans Museum (NVVM)
Book, Rottman, Gordon, Viet Cong and NVA Tunnels and Fortifications of the Vietnam War, 2006
... National Vietnam Veterans Museum (NVVM) 25 Veterans Drive Newhaven phillip-island-and-the-bass-coast 1961-1975 -- Tunnel warfare Vietnam War (1961-1975) US Marines Tunnel Rats The elaborate fortification that our Marines were forced to attack - the hundreds of metres of neck-deep bunkers, fighting holes, gun pits, and connectiong trenches so cleverly woven into the hedgerows, buildings, and thickets - were constructed over the previous weels by full-time efforts of a local VC support battalion. ...The elaborate fortification that our Marines were forced to attack - the hundreds of metres of neck-deep bunkers, fighting holes, gun pits, and connectiong trenches so cleverly woven into the hedgerows, buildings, and thickets - were constructed over the previous weels by full-time efforts of a local VC support battalion.The elaborate fortification that our Marines were forced to attack - the hundreds of metres of neck-deep bunkers, fighting holes, gun pits, and connectiong trenches so cleverly woven into the hedgerows, buildings, and thickets - were constructed over the previous weels by full-time efforts of a local VC support battalion. 1961-1975 -- tunnel warfare, vietnam war (1961-1975), us marines, tunnel rats -
 National Vietnam Veterans Museum (NVVM)
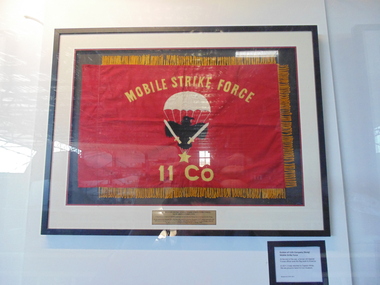
Banner - Banner, framed, 11 Co (Nung)
... guns. White contacted Da Nang, explaining the predicament, and was ordered to remain where he was. A Civilian Irregular Defense Group (CIDG) platoon was sent to reinforce his numbers. This was a para military force comprised mainly of indigenous highlanders, trained by United States Special Forces. They also brought with them two mortars and their crews. At 3.15am on 10 May 1968 some members of the CIDG chose to assist the NVA to attack the fort instead of supporting Mike Force, and close hand to hand fighting...guns. White contacted Da Nang, explaining the predicament, and was ordered to remain where he was. A Civilian Irregular Defense Group (CIDG) platoon was sent to reinforce his numbers. This was a para military force comprised mainly of indigenous highlanders, trained by United States Special Forces. They also brought with them two mortars and their crews. At 3.15am on 10 May 1968 some members of the CIDG chose to assist the NVA to attack the fort instead of supporting Mike Force, and close hand to hand fighting ...Captain John E D White, Australian Army Training Team in Vietnam (AATTV) took over command of 11 Mobile Strike Force (Mike Force) Company in Da Nang, Vietnam, in February 1968. He was 26 years old. The 2 NVA Division was moving from Laos into South Vietnam and his mission was to establish contact with the division and trace its movements south. In mid-March the company was air lifted to the Special Forces camp of Kham Duc, near the Laotian border. They used an old French Foreign Legion fort as a temporary base from which patrols could be sent out. White called it Ngok Tavak after a nearby mountain. Initially, patrols failed to find the enemy, but in late April a patrol clashed with the enemy. At the same time, White received intelligence that the NVA division was closing in. At night they could hear explosions in the distance heading toward them. White decided their best chance was to leave the fort and take to the jungle to adopt guerrilla tactics. However, in the meantime a platoon of United States Marine Corps artillery arrived bringing with them two howitzers and a stockpile of ammunition. To abandon the fort was to abandon the guns. White contacted Da Nang, explaining the predicament, and was ordered to remain where he was. A Civilian Irregular Defense Group (CIDG) platoon was sent to reinforce his numbers. This was a para military force comprised mainly of indigenous highlanders, trained by United States Special Forces. They also brought with them two mortars and their crews. At 3.15am on 10 May 1968 some members of the CIDG chose to assist the NVA to attack the fort instead of supporting Mike Force, and close hand to hand fighting followed, along with grenade attacks and heavy machine gun fire. Air support offered a brief respite from the NVA attack, and some NVA forces were pushed back outside the perimeter by counter attacks, but at 9am White contacted Da Nang to advise that his position was untenable. A second attack was imminent and they could not withstand it, so they would have to withdraw. The wounded were evacuated by helicopter (under orders from Major Mai, the NVA had not attacked the previous medical helicopters that collected the wounded under the cover of air strikes) and at 1pm the rest of the force evacuated east, into the jungle. The NVA did not notice their withdrawal, and continued mortar attacks on the fort for another ninety minutes. Seven kilometres from the fort White called for a helicopter withdrawal of his forces. The force was successfully lifted to Kham Duc and then Da Nang. (Credit AWM)Black framed glass covered flag. Red material with gold fringe, gold writing with Blackbird in the centre with parachute holding 2 white swords standing on a gold star. 11Co. in gold underneath. Gold plaque mounted under the flag.GUIDON OF 11 COY (NUNG) MOBILE STRIKE FORCE (MIKE FORCE) /5th SF GROUP, 1 CORPS, SVN/ A Significant number of AATTV personnel served with this Nung Company based in Da Nang./ At the end of the Vietnam War, this flag was taken by a former US SF officer and held until/ when it was given to former Captain John "Jed" White (AATTV), CO 11 Coy (Nung), who led/ the MIKE Forces at the Battle of Ngok Tavak on 10 May 1968.battle of ngok tavak, mobile strike force, nung, john white -
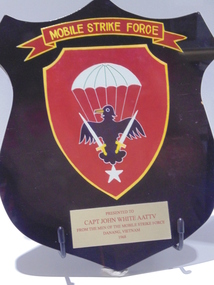 National Vietnam Veterans Museum (NVVM)
Plaque, Mobile Strike Force Shield
... guns. White contacted Da Nang, explaining the predicament, and was ordered to remain where he was. A Civilian Irregular Defense Group (CIDG) platoon was sent to reinforce his numbers. This was a para military force comprised mainly of indigenous highlanders, trained by United States Special Forces. They also brought with them two mortars and their crews. At 3.15am on 10 May 1968 some members of the CIDG chose to assist the NVA to attack the fort instead of supporting Mike Force, and close hand to hand fighting...guns. White contacted Da Nang, explaining the predicament, and was ordered to remain where he was. A Civilian Irregular Defense Group (CIDG) platoon was sent to reinforce his numbers. This was a para military force comprised mainly of indigenous highlanders, trained by United States Special Forces. They also brought with them two mortars and their crews. At 3.15am on 10 May 1968 some members of the CIDG chose to assist the NVA to attack the fort instead of supporting Mike Force, and close hand to hand fighting ...Captain John E D White, Australian Army Training Team in Vietnam (AATTV) took over command of 11 Mobile Strike Force (Mike Force) Company in Da Nang, Vietnam, in February 1968. He was 26 years old. The 2 NVA Division was moving from Laos into South Vietnam and his mission was to establish contact with the division and trace its movements south. In mid-March the company was air lifted to the Special Forces camp of Kham Duc, near the Laotian border. They used an old French Foreign Legion fort as a temporary base from which patrols could be sent out. White called it Ngok Tavak after a nearby mountain. Initially, patrols failed to find the enemy, but in late April a patrol clashed with the enemy. At the same time, White received intelligence that the NVA division was closing in. At night they could hear explosions in the distance heading toward them. White decided their best chance was to leave the fort and take to the jungle to adopt guerrilla tactics. However, in the meantime a platoon of United States Marine Corps artillery arrived bringing with them two howitzers and a stockpile of ammunition. To abandon the fort was to abandon the guns. White contacted Da Nang, explaining the predicament, and was ordered to remain where he was. A Civilian Irregular Defense Group (CIDG) platoon was sent to reinforce his numbers. This was a para military force comprised mainly of indigenous highlanders, trained by United States Special Forces. They also brought with them two mortars and their crews. At 3.15am on 10 May 1968 some members of the CIDG chose to assist the NVA to attack the fort instead of supporting Mike Force, and close hand to hand fighting followed, along with grenade attacks and heavy machine gun fire. Air support offered a brief respite from the NVA attack, and some NVA forces were pushed back outside the perimeter by counter attacks, but at 9am White contacted Da Nang to advise that his position was untenable. A second attack was imminent and they could not withstand it, so they would have to withdraw. The wounded were evacuated by helicopter (under orders from Major Mai, the NVA had not attacked the previous medical helicopters that collected the wounded under the cover of air strikes) and at 1pm the rest of the force evacuated east, into the jungle. The NVA did not notice their withdrawal, and continued mortar attacks on the fort for another ninety minutes. Seven kilometres from the fort White called for a helicopter withdrawal of his forces. The force was successfully lifted to Kham Duc and then Da Nang. (Credit AWM)A wooden shield painted grey/black celebrating the 40th Anniversary of the Battle of Ngok Tavak. There are three messages from mates written in black on the back. The shield was presented to Capt John (Jed) White.Presented to Captain John White, AATTV from the men of the Mobile Strike Force, Danang, Vietnam, 1968.mobile strike force, capt john (jed) white, shield, battle of ngok tavak -
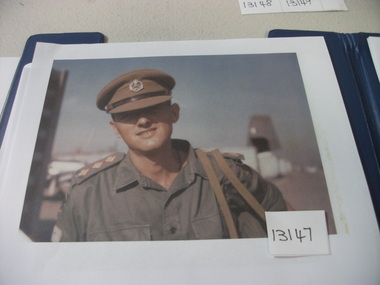 National Vietnam Veterans Museum (NVVM)
Photograph, Captain John White, AATTV, arrives in Vietnam, January 1968, 1/01/1968 12:00:00 AM
... guns. White contacted Da Nang, explaining the predicament, and was ordered to remain where he was. A Civilian Irregular Defense Group (CIDG) platoon was sent to reinforce his numbers. This was a para military force comprised mainly of indigenous highlanders, trained by United States Special Forces. They also brought with them two mortars and their crews. At 3.15am on 10 May 1968 some members of the CIDG chose to assist the NVA to attack the fort instead of supporting Mike Force, and close hand to hand fighting...guns. White contacted Da Nang, explaining the predicament, and was ordered to remain where he was. A Civilian Irregular Defense Group (CIDG) platoon was sent to reinforce his numbers. This was a para military force comprised mainly of indigenous highlanders, trained by United States Special Forces. They also brought with them two mortars and their crews. At 3.15am on 10 May 1968 some members of the CIDG chose to assist the NVA to attack the fort instead of supporting Mike Force, and close hand to hand fighting ...Captain John E D White, Australian Army Training Team in Vietnam (AATTV) took over command of 11 Mobile Strike Force (Mike Force) Company in Da Nang, Vietnam, in February 1968. He was 26 years old. The 2 NVA Division was moving from Laos into South Vietnam and his mission was to establish contact with the division and trace its movements south. In mid-March the company was air lifted to the Special Forces camp of Kham Duc, near the Laotian border. They used an old French Foreign Legion fort as a temporary base from which patrols could be sent out. White called it Ngok Tavak after a nearby mountain. Initially, patrols failed to find the enemy, but in late April a patrol clashed with the enemy. At the same time, White received intelligence that the NVA division was closing in. At night they could hear explosions in the distance heading toward them. White decided their best chance was to leave the fort and take to the jungle to adopt guerrilla tactics. However, in the meantime a platoon of United States Marine Corps artillery arrived bringing with them two howitzers and a stockpile of ammunition. To abandon the fort was to abandon the guns. White contacted Da Nang, explaining the predicament, and was ordered to remain where he was. A Civilian Irregular Defense Group (CIDG) platoon was sent to reinforce his numbers. This was a para military force comprised mainly of indigenous highlanders, trained by United States Special Forces. They also brought with them two mortars and their crews. At 3.15am on 10 May 1968 some members of the CIDG chose to assist the NVA to attack the fort instead of supporting Mike Force, and close hand to hand fighting followed, along with grenade attacks and heavy machine gun fire. Air support offered a brief respite from the NVA attack, and some NVA forces were pushed back outside the perimeter by counter attacks, but at 9am White contacted Da Nang to advise that his position was untenable. A second attack was imminent and they could not withstand it, so they would have to withdraw. The wounded were evacuated by helicopter (under orders from Major Mai, the NVA had not attacked the previous medical helicopters that collected the wounded under the cover of air strikes) and at 1pm the rest of the force evacuated east, into the jungle. The NVA did not notice their withdrawal, and continued mortar attacks on the fort for another ninety minutes. Seven kilometres from the fort White called for a helicopter withdrawal of his forces. The force was successfully lifted to Kham Duc and then Da Nang. (Credit AWM)Coloured image of John (Jed) White, aged 26 arriving at Tan Son Nhut Airport in full uniform, bag straps over left shoulder. Close- up of chest and head with plane visible in the background.AWM - p 11058,001capt john (jed) white, aattv, battle of ngok tavak