
Showing 145 items matching "junction bridge"
-
 Buninyong & District Historical Society
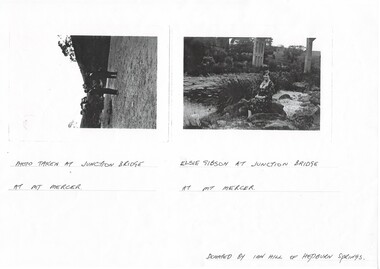
Photograph - Photocopy of two original B/W photographs, Mt Mercer Junction Bridge, photocopy made in 1995
... Mt Mercer Junction Bridge...Junction Bridge...Photos taken of the Junction Bridge at Mt Mercer, documenting the location, date unknown....Mt Mercer Junction Bridge. Photo 1 shows two men on the river bed probably looking at the bridge. ...Photo taken at Junction Bridge at Mt Mercer. Photo 2. Elsie Gibson at Junction Bridge at Mt Mercer. ...Photos taken of the Junction Bridge at Mt Mercer, documenting the location, date unknown. ...Photos taken of the Junction Bridge at Mt Mercer, documenting the location, date unknown.The photos document the physical status of the location of the Junction Bridge at Mt Mercer at the time of photography, date unknown.Mt Mercer Junction Bridge. Photo 1 shows two men on the river bed probably looking at the bridge. Photo 2 shows Elsie Gibson sitting on the river bank with the bridge in the background.Photo 1. Photo taken at Junction Bridge at Mt Mercer. Photo 2. Elsie Gibson at Junction Bridge at Mt Mercer. Donated by Ian Hill of Hepburn Springsjunction bridge, mt mercer, bridge, elsie gibson, gibson, landscape -
 Buninyong & District Historical Society
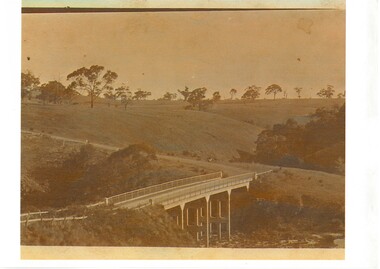
Photograph - Sepia photograph of original, Leigh Grand Junction Bridge, Leigh Grand Junction Bridge
... Sepia photograph of original, Leigh Grand Junction Bridge...Leigh Grand Junction Bridge...Leigh Grand Junction Bridge...Leigh Grand Junction Bridge Photograph Sepia photograph of original, Leigh Grand Junction Bridge ...Bridges, reinforced concrete construction by C.C.P.WilsonSepia photo, Photo of concrete bridge spanning gully, rolling landscape with scattered trees. leigh grand junction bridge, c.c.p. wilson -
 Ballaarat Mechanics' Institute (BMI Ballarat)
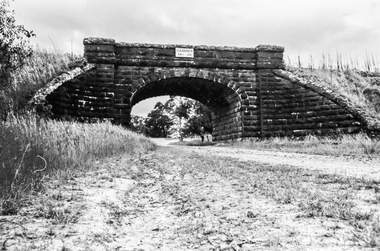
Film - Photograph by Herb Richmond. ca 1971, Lal Lal - Elaine Road- Railway Over Road Bridge, opposite junction Mt. Doran Road
... Lal Lal - Elaine Road- Railway Over Road Bridge, opposite junction Mt. Doran Road...Lal Lal - Elaine Road- Railway Over Road Bridge, opposite junction Mt. Doran Road Film Photograph by Herb Richmond. ca 1971 ...Ballarat History35mm B&W Kodak Plus X Pan Film.ballarat, ballaraat, lal-lal, elaine, railway, bridge -
 Ballaarat Mechanics' Institute (BMI Ballarat)
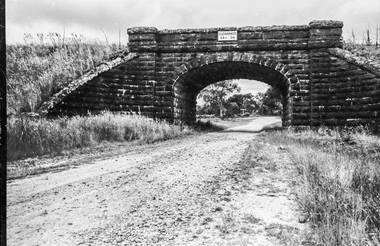
Film - Photograph by Herb Richmond. ca 1971, Lal Lal - Elaine Road- Railway Over Road Bridge, opposite junction Mt. Doran Road
... Lal Lal - Elaine Road- Railway Over Road Bridge, opposite junction Mt. Doran Road...Lal Lal - Elaine Road- Railway Over Road Bridge, opposite junction Mt. Doran Road Film Photograph by Herb Richmond. ca 1971 ...Ballarat History35mm B&W Kodak Plus X Pan Film.ballarat, ballaraat, lal-lal, elaine, railway, bridge -
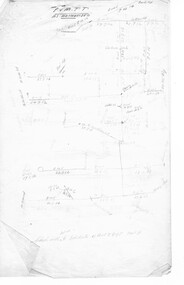 Melbourne Tram Museum
Document - Research Notes, H. S. McComb, development and timing of the "PMTT" - part 1, 1950's
... McComb - gives layout of the PMTT system, sketches of track layout, opening dates, sketches of various junctions, bridges, track miles, junctions, reconciliations of track lengths from various sources, Camberwell Junction and cross overs. ...McComb - gives layout of the PMTT system, sketches of track layout, opening dates, sketches of various junctions, bridges, track miles, junctions, reconciliations of track lengths from various sources, Camberwell Junction and cross overs. ...Set of papers, handwritten concerning the development and timing of the "PMTT", Prahran and Malvern - about 13 sheets. Prepared by H. S. McComb - gives layout of the PMTT system, sketches of track layout, opening dates, sketches of various junctions, bridges, track miles, junctions, reconciliations of track lengths from various sources, Camberwell Junction and cross overs. Items 2041 to 2052 within box 72.3 in a brown folder marked "PMTT" in red pencil.trams, tramways, pmtt, malvern, routes, track, malvern depot, camberwell junction, surveys -
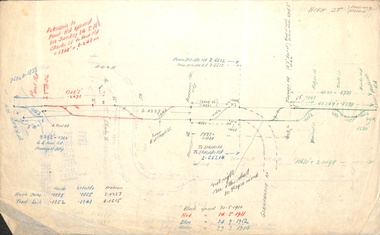 Melbourne Tram Museum
Document - Research Notes, H. S. McComb, Extracts of PMTT Minutes - track layouts, 1950's
... McComb - gives layout of the PMTT system, primarily of Burke Road, sketches of track layout, opening dates, sketches of various junctions, bridges, track miles, junctions, reconciliation of track lengths from various sources of High St Malvern, extension to Punt Road and St Kilda Roads includes duplications and a Wattle Tree Road. ...McComb - gives layout of the PMTT system, primarily of Burke Road, sketches of track layout, opening dates, sketches of various junctions, bridges, track miles, junctions, reconciliation of track lengths from various sources of High St Malvern, extension to Punt Road and St Kilda Roads includes duplications and a Wattle Tree Road. ...Set of papers, handwritten concerning the development and timing of the "PMTT", Prahran and Malvern - 6 sheets. Prepared by H. S. McComb - gives layout of the PMTT system, primarily of Burke Road, sketches of track layout, opening dates, sketches of various junctions, bridges, track miles, junctions, reconciliation of track lengths from various sources of High St Malvern, extension to Punt Road and St Kilda Roads includes duplications and a Wattle Tree Road. Items 2041 to 2052 within box 72.3 in a brown folder marked "PMTT" in red pencil.trams, tramways, pmtt, malvern, routes, track, surveys, punt rd, high st, wattle tree rd, duplications -
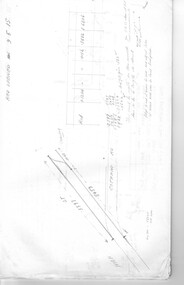 Melbourne Tram Museum
Document - Research Notes, H. S. McComb, development and timing of the "PMTT" part 3, 1950's
... McComb - gives layout of the PMTT system, of track layout, opening dates, sketches of various junctions, bridges, track miles, junctions: Kew Junction, Glen Huntly Road, Glenhuntly Road, Victoria St cable tram terminus, Barkers Road, Commercial Road, Malvern Road, Hawthorn Road, Balaclava Junction, Caulfield station loop, Glenferrie Road. ...McComb - gives layout of the PMTT system, of track layout, opening dates, sketches of various junctions, bridges, track miles, junctions: Kew Junction, Glen Huntly Road, Glenhuntly Road, Victoria St cable tram terminus, Barkers Road, Commercial Road, Malvern Road, Hawthorn Road, Balaclava Junction, Caulfield station loop, Glenferrie Road. ...Set of papers, handwritten concerning the development and timing of the "PMTT", Prahran and Malvern - about 30 sheets. Prepared by H. S. McComb - gives layout of the PMTT system, of track layout, opening dates, sketches of various junctions, bridges, track miles, junctions: Kew Junction, Glen Huntly Road, Glenhuntly Road, Victoria St cable tram terminus, Barkers Road, Commercial Road, Malvern Road, Hawthorn Road, Balaclava Junction, Caulfield station loop, Glenferrie Road. Items 2041 to 2052 within box 72.3 in a brown folder marked "PMTT" in red pencil.trams, tramways, pmtt, malvern, routes, track, kew junction, victoria st, barkers rd, glenhuntly rd, malvern rd, caulfield, hawthorn rd, balaclava rd, balaclava junction, glenferrie rd -
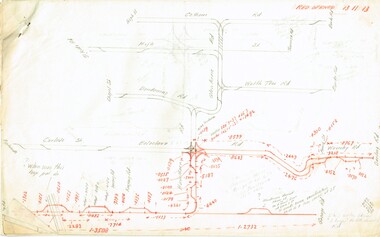 Melbourne Tram Museum
Document - Research Notes, H. S. McComb, development and timing of the "PMTT" - part 4, 1950's
... McComb - gives layout of the PMTT system, primarily of Burke Road, sketches of track layout, opening dates, sketches of various junctions, bridges, track miles, junctions, reconciliation of track lengths from various sources includes Glenferrie and Cotham Road, Balaclava Road, Hawthorn Road, Glenhuntly Road, Waverley Road and St Kilda Esplanade, Candy Corner. ...McComb - gives layout of the PMTT system, primarily of Burke Road, sketches of track layout, opening dates, sketches of various junctions, bridges, track miles, junctions, reconciliation of track lengths from various sources includes Glenferrie and Cotham Road, Balaclava Road, Hawthorn Road, Glenhuntly Road, Waverley Road and St Kilda Esplanade, Candy Corner. ...Set of papers, handwritten concerning the development and timing of the "PMTT", Prahran and Malvern - about 40 sheets. Prepared by H. S. McComb - gives layout of the PMTT system, primarily of Burke Road, sketches of track layout, opening dates, sketches of various junctions, bridges, track miles, junctions, reconciliation of track lengths from various sources includes Glenferrie and Cotham Road, Balaclava Road, Hawthorn Road, Glenhuntly Road, Waverley Road and St Kilda Esplanade, Candy Corner. Items 2041 to 2052 within box 72.3 in a brown folder marked "PMTT" in red pencil.trams, tramways, pmtt, malvern, routes, track, surveys, glenferrie rd, cotham rd, balaclava rd, hawthorn rd, waverley rd, st kilda, candy corner -
 Melbourne Tram Museum
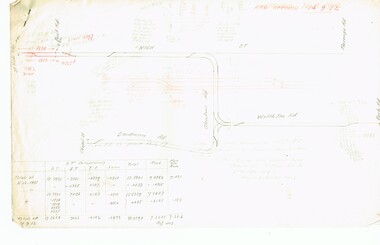
Document - Research Notes, H. S. McComb, development and timing of the "PMTT" - part 5, 1950's
... McComb - gives layout of the PMTT system, primarily of Burke Road, sketches of track layout, opening dates, sketches of various junctions, bridges, track miles, junctions, reconciliation of track lengths from various sources includes High St Malvern, extension to Punt Road, Dandenong Road, Wattle Tree Road, including its duplication Items 2041 to 2052 within box 72.3 in a brown folder marked "PMTT" in red pencil....McComb - gives layout of the PMTT system, primarily of Burke Road, sketches of track layout, opening dates, sketches of various junctions, bridges, track miles, junctions, reconciliation of track lengths from various sources includes High St Malvern, extension to Punt Road, Dandenong Road, Wattle Tree Road, including its duplication Items 2041 to 2052 within box 72.3 in a brown folder marked "PMTT" in red pencil. development and timing of the "PMTT" - part 5 Document Research Notes H. ...Set of papers, handwritten concerning the development and timing of the "PMTT", Prahran and Malvern - about 20 sheets. Prepared by H. S. McComb - gives layout of the PMTT system, primarily of Burke Road, sketches of track layout, opening dates, sketches of various junctions, bridges, track miles, junctions, reconciliation of track lengths from various sources includes High St Malvern, extension to Punt Road, Dandenong Road, Wattle Tree Road, including its duplication Items 2041 to 2052 within box 72.3 in a brown folder marked "PMTT" in red pencil.trams, tramways, pmtt, malvern, routes, track, surveys, wattle tree rd, punt rd, dandenong rd, high st, duplications -
 Melbourne Tram Museum
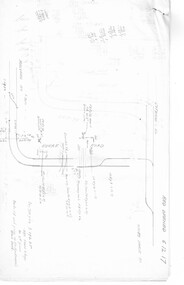
Document - Research Notes, H. S. McComb, development and timing of the "PMTT" - part 2, 1950's
... McComb - gives layout of the PMTT system, primarily of Burke Road, sketches of track layout, opening dates, sketches of various junctions, bridges, track miles, junctions, reconciliation of track lengths from various sources includes Whitehorse Road, Victoria St cable tram terminus, Kew Depot, Candy Corner, St Kilda terminus, Malvern Depot, High St, Items 2041 to 2052 within box 72.3 in a brown folder marked "PMTT" in red pencil....McComb - gives layout of the PMTT system, primarily of Burke Road, sketches of track layout, opening dates, sketches of various junctions, bridges, track miles, junctions, reconciliation of track lengths from various sources includes Whitehorse Road, Victoria St cable tram terminus, Kew Depot, Candy Corner, St Kilda terminus, Malvern Depot, High St, Items 2041 to 2052 within box 72.3 in a brown folder marked "PMTT" in red pencil. development and timing of the "PMTT" - part 2 Document Research Notes H. ...Set of papers, handwritten concerning the development and timing of the "PMTT", Prahran and Malvern - about 40 sheets. Prepared by H. S. McComb - gives layout of the PMTT system, primarily of Burke Road, sketches of track layout, opening dates, sketches of various junctions, bridges, track miles, junctions, reconciliation of track lengths from various sources includes Whitehorse Road, Victoria St cable tram terminus, Kew Depot, Candy Corner, St Kilda terminus, Malvern Depot, High St, Items 2041 to 2052 within box 72.3 in a brown folder marked "PMTT" in red pencil.trams, tramways, pmtt, malvern, routes, track, kew depot, burke rd, surveys, victoria st, whitehorse rd, malvern depot, st kilda, candy corner -
 Ballarat Tramway Museum
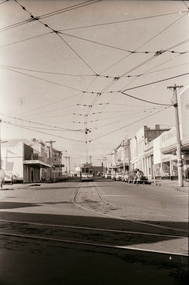
Negative - Set of 3, Campbell Duncan, 10/08/1971 12:00:00 AM
... Set of 3 photographs taken on 10/8/1971 by Campbell Duncan of trams in the Main of No. 31 approaching the junction with Bridge St and Victoria St. The tram has the destination of Gardens via Drummond North and a Twin Lakes sign. ...Trams tramways Main Road Stones Corner tram 31 Set of 3 photographs taken on 10/8/1971 by Campbell Duncan of trams in the Main of No. 31 approaching the junction with Bridge St and Victoria St. The tram has the destination of Gardens via Drummond North and a Twin Lakes sign. ...Yields information about tram operations and the street views at Stones Corner.Set of 3 photographs taken on 10/8/1971 by Campbell Duncan of trams in the Main of No. 31 approaching the junction with Bridge St and Victoria St. The tram has the destination of Gardens via Drummond North and a Twin Lakes sign. In the background are the Avery Scales store, Wearwell and Stones Corner. Shows the overhead arrangements at this location.trams, tramways, main road, stones corner, tram 31 -
 Melbourne Tram Museum
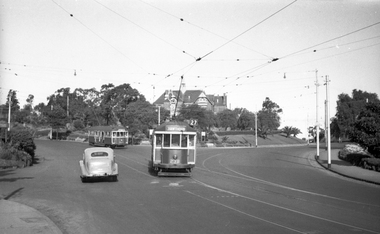
Negative, Wal Jack, 19/01/1941 12:00:00 AM
... , Route 40) at Hawthorn Bridge Junction, Church St and Burwood Road, Hawthorn. ..., Route 40) at Hawthorn Bridge Junction, Church St and Burwood Road, Hawthorn. ...Black and white negative, by Wal Jack, of W2 238 (Hawthorn Route 27) and W2 625 (Spencer St?, Route 40) at Hawthorn Bridge Junction, Church St and Burwood Road, Hawthorn. In the background is the Hawthorn West Primary School. Photo dated 19-1-1941 in the Wal Jack album along with details of the location.trams, tramways, hawthorn bridge, church st, burwood road, route 40, route 27, w2 class, tram 238, tram 625 -
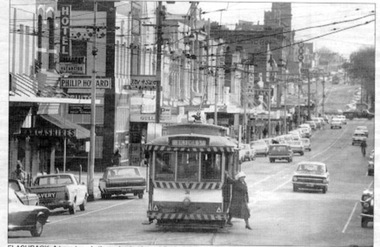 Ballarat Tramway Museum
Newspaper, Alison Wynd, "Ballarat trams must pay their own way: Hiscock", 7/01/1997 12:00:00 AM
... Includes a photo of SEC No. 31 with a Victoria St. destination at the junction in Bridge St with the Mount Pleasant line, with a women stepping from the tram. ...Includes a photo of SEC No. 31 with a Victoria St. destination at the junction in Bridge St with the Mount Pleasant line, with a women stepping from the tram. ...Item written by Alison Wynd in The Courier, Ballarat, page 7 on 7/1/1997 reporting on a statement by the Chairman of the Ballarat Tourism Board, Peter Hiscock that trams would have run profitably if they were reintroduced to Ballarat Streets. Comments on possible staging, tourist and engineering studies and market. Includes a photo of SEC No. 31 with a Victoria St. destination at the junction in Bridge St with the Mount Pleasant line, with a women stepping from the tram. An adjacent item reports on the appointment of Robin Cooper as Victorian Transport Minister to replace Mr Alan Brown.feasibility study, ballarat city tramway, ballarat revival, transport minister -
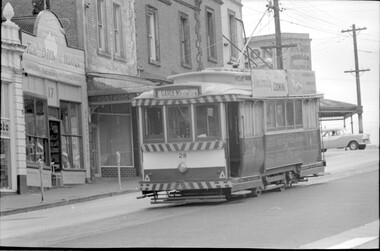 Ballarat Tramway Museum
Photograph - SECV Ballarat 28 - Victoria St, Mal Rowe, 31/12/1968
... Photograph showing Ballarat 28 descending the Victoria St hill to the Bridge St junction, Bakery Hill, with the destination of Gardens. ...Photograph showing Ballarat 28 descending the Victoria St hill to the Bridge St junction, Bakery Hill, with the destination of Gardens. ...Photograph showing Ballarat 28 descending the Victoria St hill to the Bridge St junction, Bakery Hill, with the destination of Gardens. IN the background are "Tom Dick & Harrys" furniture and antiques store and R A Hudson electrical. Note the parking meters.Yields information about the shops in Victoria St near the junction for Mt Pleasant prior to redevelopment.Digital image of a black and white photograph.tramways, tramcars, victoria st, tram 28 -
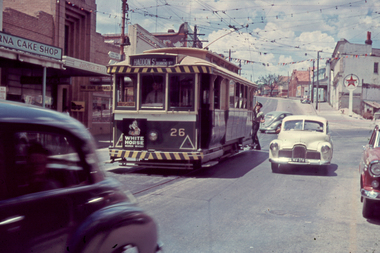 Ballarat Tramway Museum
Slide - 35mm slide/s, Travis Jeffrey, 1961
... Agfa plastic mount (blue base, white cover) of a photograph of No. 26 at the junction of Bridge and Victoria St. turning pole, with destination of Haddon St, with the Verna Cake shop, State Savings Bank of Victoria and Caltex Service station in the background.. ...Tramways trams Bridge St Haddon St Victoria St tram 26 "BAS 18" in pencil Agfa plastic mount (blue base, white cover) of a photograph of No. 26 at the junction of Bridge and Victoria St. turning pole, with destination of Haddon St, with the Verna Cake shop, State Savings Bank of Victoria and Caltex Service station in the background.. ...Agfa plastic mount (blue base, white cover) of a photograph of No. 26 at the junction of Bridge and Victoria St. turning pole, with destination of Haddon St, with the Verna Cake shop, State Savings Bank of Victoria and Caltex Service station in the background.. Tram is in the process of being fitted with dash canopy lights and tiger strips and White Horse Whiskey advertisement on the back dash panel. Photo taken early 1961. Slide rescanned at 3200 dpi 24-10-2020, jpg replaced, tiff file retained. This file was scanned in 2003 and may show colour changes."BAS 18" in penciltramways, trams, bridge st, haddon st, victoria st, tram 26 -
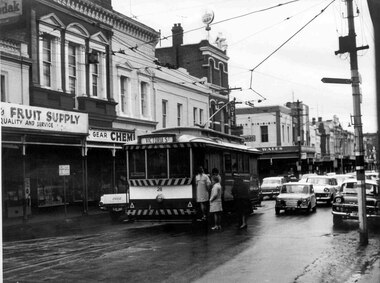 Ballarat Tramway Museum
Photograph - Black & White Photograph/s and Black and White photograph/s, John Phillips, 1968
... Black and white print of No. 28, picking up four lady passengers at the junction in Bridge St, Stones Corner. Tram has the destination of Victoria St. ...Yields information about the use of the trams in Bridge St - the major shopping strip at the time in Ballarat, shows the nature of the strip, the passengers (all ladies) and the motor cars in use at the time. tramways trams Bridge St Stones Corner Passengers tram 28 On rear of second print - "Copyright John Phillips 1968 Bridge St" and in bottom right hand corner "William Scott" and address label. Black and white print of No. 28, picking up four lady passengers at the junction in Bridge St, Stones Corner. ...Yields information about the use of the trams in Bridge St - the major shopping strip at the time in Ballarat, shows the nature of the strip, the passengers (all ladies) and the motor cars in use at the time.Black and white print of No. 28, picking up four lady passengers at the junction in Bridge St, Stones Corner. Tram has the destination of Victoria St. Photo taken late 1960's, early 1970's. In the photo are the Bank of NSW buildings, Gear Chemist and Hotel on the Corner of Peel and Bridge Sts. See also 3129A for Mounted A3 display photograph in AS Box 16B. Print and photo by John Phillips. Second copy added 13/4/2009 - see history .1 - Black and White photograph mounted on heavy cardboard backing, used for display purposes. On rear of second print - "Copyright John Phillips 1968 Bridge St" and in bottom right hand corner "William Scott" and address label.tramways, trams, bridge st, stones corner, passengers, tram 28 -
 Melbourne Tram Museum
Photograph - Digital Image, Kevin O'Reilly, Kew Barkers Rd, c1930
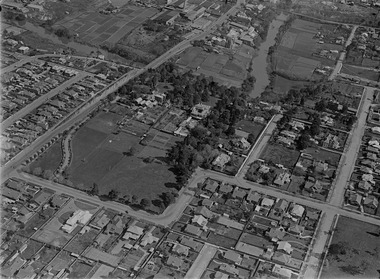
... Image titled "Kew Barkers Rd" on CD, looking west from over Kew Junction towards Victoria Bridge over the Yarra River. Has a W class tram, eastbound in Victoria St, about to cross the bridge. ...Image titled "Kew Barkers Rd" on CD, looking west from over Kew Junction towards Victoria Bridge over the Yarra River. Has a W class tram, eastbound in Victoria St, about to cross the bridge. c1930 (Cable conversion late 1929) Kew Barkers Rd Photograph Digital Image Kevin O'Reilly Kevin O'Reilly ...Image from CD (Compact Diskette for use in computers) - see Reg Item 135. Image titled "Kew Barkers Rd" on CD, looking west from over Kew Junction towards Victoria Bridge over the Yarra River. Has a W class tram, eastbound in Victoria St, about to cross the bridge. c1930 (Cable conversion late 1929)trams, tramways, kew, barkers rd, victoria st -
 Ballarat Tramway Museum
Photograph - Black & White Photograph/s and Black and White photograph/s -mounted, John Phillips, 1968
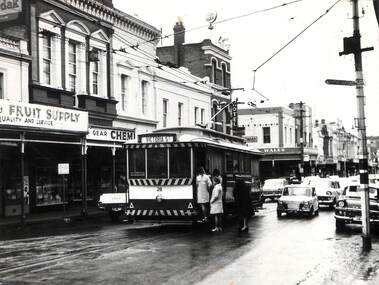
... Black and white print of No. 28, picking up four lady passengers at the junction in Bridge St, Stones Corner. Tram has the destination of Victoria St. ...Yields information about the use of the trams in Bridge St - the major shopping strip at the time in Ballarat, shows the nature of the strip, the passengers (all ladies) and the motor cars in use at the time. tramways trams Bridge St Stones Corner Passengers tram 28 On rear of second print - "Copyright John Phillips 1968 Bridge St" and in bottom right hand corner "William Scott" and address label. Black and white print of No. 28, picking up four lady passengers at the junction in Bridge St, Stones Corner. ...Yields information about the use of the trams in Bridge St - the major shopping strip at the time in Ballarat, shows the nature of the strip, the passengers (all ladies) and the motor cars in use at the time.Black and white print of No. 28, picking up four lady passengers at the junction in Bridge St, Stones Corner. Tram has the destination of Victoria St. Photo taken late 1960's, early 1970's. In the photo are the Bank of NSW buildings, Gear Chemist and Hotel on the Corner of Peel and Bridge Sts. See also Item 3129A for Mounted A3 display photograph in AS Box 16B. Print and photo by John Phillips. Second copy added 13/4/2009 - see history .1 - Black and White photograph mounted on heavy cardboard backing, used for display purposes. See item in AS Box 16B. On rear of second print - "Copyright John Phillips 1968 Bridge St" and in bottom right hand corner "William Scott" and address label.tramways, trams, bridge st, stones corner, passengers, tram 28 -
 Ballarat Tramway Museum
Photograph - Digital image, 1970s
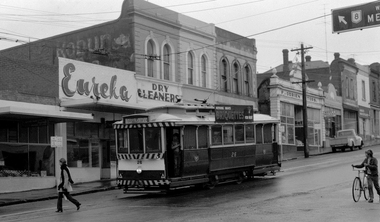
... Digital image, black and white, of No. 26 at Stones Corner, junction of Bridge, Victoria and Main St, Bakery Hill. ...Trams tramways Stones Corner Bakery Hill Victoria St Bridge St tram 26 Digital image, black and white, of No. 26 at Stones Corner, junction of Bridge, Victoria and Main St, Bakery Hill. ...Yields information about the Bakery St Hill on the Victoria St route.Digital image, black and white, of No. 26 at Stones Corner, junction of Bridge, Victoria and Main St, Bakery Hill. No the young girl in slacks walking in front of the tram, the boy wheeling the bike down the street and the young boy standing in the front door of the tram. In the background is Eureka Dry Cleaners, an old Robur tea ad on a building, F. O'Brien Motors. The tram has the destination of Gardens via Sturt St West and a SEC Briquettes Roof advert. Photo taken by Peter Bruce 1970's and 1971, prior to the closure of the Ballarat tramway system. Peter's Title of image: "No. 26 Victoria and Bridge"trams, tramways, stones corner, bakery hill, victoria st, bridge st, tram 26 -
 Kew Historical Society Inc
Photograph - Filling in the Outer Circle Railway cutting at East Kew, 1939
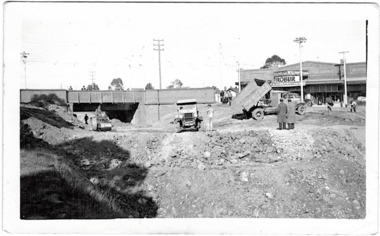
... In the background is the metal bridge with brick piers, adjacent to the Harp Junction. The bridge crossed the cutting, linking the two parts of High Street. ... with brick piers, adjacent to the Harp Junction. The bridge crossed the cutting, linking the two parts of High Street. ...W.D. Vaughan (Kew's Civic Century, 1960, pp.195-6) quotes Council Minutes of 1938 and 1939 to record that: "After protracted negotiations between the Council, the Railways Department and the Tramways Board agreement was reached in June, 1938, for the filling of the railway cutting at the Harp Junction and shifting tram tracks to the High Street alignment ... The Outer Circle railway land from Princess Street to Park Crescent was purchased by the Kew Council in October, 1939, for 2,750 [pounds]. The land from Park Crescent to High Street was leased for 1 [pound] per annum. Considerable work was done in levelling the embankments to the original surface level."Important and rare photograph of the period, showing major works by Kew Council in Kew East working on a significant piece of urban infrastructure.Small, original black and white positive (photograph) showing workers and vehicles filling in the tracks of the former Outer Circle railway at East Kew. In the background is the metal bridge with brick piers, adjacent to the Harp Junction. The bridge crossed the cutting, linking the two parts of High Street. Behind the tip truck, painted on the side with the name 'Fowler Quarries' [located Keilor Road, North Essendon], one can see shops [including T.G. Garroway, Cash Grocer] in High Street. What appears to be the City of Kew Steamroller is immediately in front of the bridge. A group of passers-by watch from the bridge and from the road. Annotation in pencil on verso: "Filling in Outer Circle line at High St East Kew prior to straightening High St. (c. Feb 1930?)outer circle railway, railway cuttings, harp junction, high street -- kew east -
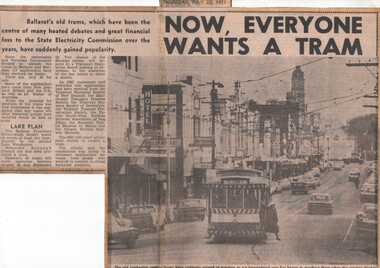 Ballarat Tramway Museum
Newspaper, The Courier Ballarat, "Now everyone wants a tram", 22/07/1971 12:00:00 AM
... Has a photo of No.31 at the junction of Bridge and Main Streets Ballarat. One of large group of newspaper cuttings from John Bainbridge, 7/4/02. ...Has a photo of No.31 at the junction of Bridge and Main Streets Ballarat. One of large group of newspaper cuttings from John Bainbridge, 7/4/02. ...Newspaper clipping from The Courier, Ballarat, dated Thursday 22/7/1971, titled "Now everyone wants a tram". Item reports on the 117 applications for the 48 trams in Ballarat and Bendigo. Applications from NZ, UK and USA had been received. Mentions the Ballarat Tramway Preservation Society, Borough of Sebastopol. The SEC was selecting the most worthy, but eliminating applications for them as sleepouts. Has a photo of No.31 at the junction of Bridge and Main Streets Ballarat. One of large group of newspaper cuttings from John Bainbridge, 7/4/02. Item has been folded for inclusion within a scrap book. Has a piece of plain paper Secured to the back of the portion that was not Secured to the scrap book itself.btps, tram acquisition, sale of trams, sec -
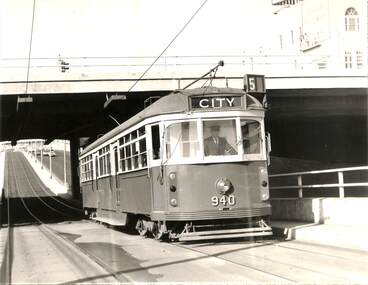 Melbourne Tram Museum
Photograph - Black & White Photograph/s, Melbourne & Metropolitan Tramways Board (MMTB), c July 1970
... Black and white photograph - large format - of tram W6 940 inbound on route 5 passing under the St Kilda Junction road over bridge with Queens Way St Kilda reserve track in the background. ...Trams tramways St Kilda Junction W6 class Queens Way tram 940 Black and white photograph - large format - of tram W6 940 inbound on route 5 passing under the St Kilda Junction road over bridge with Queens Way St Kilda reserve track in the background. ...Black and white photograph - large format - of tram W6 940 inbound on route 5 passing under the St Kilda Junction road over bridge with Queens Way St Kilda reserve track in the background. The tram has the destination of City. The tram was the first to be fitted with marker lights - noted in Bourke St 3/7, Herald Sun 3/7 following strong public pressure. See page 5 of the June 1970 issue of Monarail, the magazine of the Monash University Railway club. See also image i2, from the June 1970 issue of TMSV Running Journal with a photo of the tram at the time of the launch. Image provided by Mal Rowe 30-9-2018.trams, tramways, st kilda junction, w6 class, queens way, tram 940 -
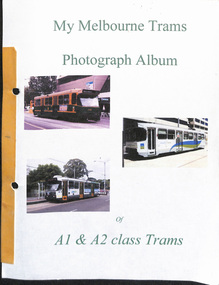 Melbourne Tram Museum
Album, Gus Weir, My Melbourne Trams - A1 & A2 class trams, 1991 to 2012
... Many photos taken in the City area, Kew Junction, Port Junction, Port Melbourne, Hawthorn Bridge, Mont Albert, Docklands Photos by Gus himself during Melbourne visits. ...Many photos taken in the City area, Kew Junction, Port Junction, Port Melbourne, Hawthorn Bridge, Mont Albert, Docklands Photos by Gus himself during Melbourne visits. ...Compiled by Gus Weir of the Wellington Tramway Museum, former Wellington tram driver. Comprises some 33 double-sided album sheets for photographs of Melbourne A1 & A2 class trams. Scanned into 3 parts as pdf files. Many photos taken in the City area, Kew Junction, Port Junction, Port Melbourne, Hawthorn Bridge, Mont Albert, Docklands Photos by Gus himself during Melbourne visits. Part 1 - cover - A1 231, 232, 233, 236, 237, 238, 239, 240, 243, 246 Part 2 - A1 246, 248, 255, 256, 257, 258, A2 259. 260, 261, 262, 263, 264, 268, 269, 275, 278, 280, 282, 283, 284, 286 and 287 Part 3 - A2 288, 291, 292, 293, 294, 295, 296, 298, & 300 Yields detailed information about Melbourne trams from 1991 to 2012Set of 33 album sheets generally with four photos within a bound album, with many blanks to allow for further photos. Each photo has a label on the rear, with details of the photograph's location, photographer, and date. An insert label on each page gives the tram number, location, and date.tramways, tramcars, albums, melbourne, yarra trams, m>tram, kew, docklands, cbd, kew junction, port melbourne, port junction, a1 class, a2 class -
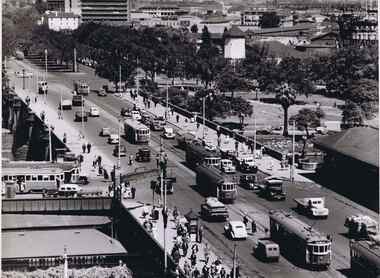 Melbourne Tram Museum
Photograph - Black & White Photograph/s, Australian Govt. Department of Information, late 1940's
... Bridge, early 1950's. Has nine trams in the view, mainly W2's, but one W3 and many motor vehicles, trucks etc. Shows the gardens in the now Southbank area, the junction just past the bridge of South Melbourne tram line, Wirth Bros Circus and other buildings, Prince Henry's Hospital. ...Bridge, early 1950's. Has nine trams in the view, mainly W2's, but one W3 and many motor vehicles, trucks etc. Shows the gardens in the now Southbank area, the junction just past the bridge of South Melbourne tram line, Wirth Bros Circus and other buildings, Prince Henry's Hospital. ...Black and white photograph taken from St Pauls Cathedral Melbourne, looking south over Princes Bridge, early 1950's. Has nine trams in the view, mainly W2's, but one W3 and many motor vehicles, trucks etc. Shows the gardens in the now Southbank area, the junction just past the bridge of South Melbourne tram line, Wirth Bros Circus and other buildings, Prince Henry's Hospital. In particular is an Olympic pool direction sign hanging below the Batman Ave tram sign. This would have been the pool in Batman Ave, nearer to Flinders St, within the Flinders St yard complex, not the 1956 pool. Directly below is a female pedestrian dress in the classic 1950's "Dior" look. Over the bridge on the west side is "The Trocadero" formerly The Green Mill Dance Hall opened on 07/09/1926. West of that again is "Olympia" run by Wirth's . In the distance is Prince Henry's Hospital, the tall section was built in 1942, since demolished. Rod Atkins noted that the Olympia burnt down in the early fifties about the same the Trocadia closed, so pre 1953. Note the centre pole is still place at the Sturt Street intersection. In Batman Ave we have two W2's 401 and earlier one. In St Kilda Road we have four W2's in foreground in then W3 - No. 667 then a W4 then a SW6 in the distance. Outbound on route 4D is 578, behind it is 340 on route 5. A safety zone is between 578 and 340.Stamped on rear "Australian Official Photograph / Department of Information" and the number "L3121" in pencil.trams, tramways, swanston st, princes bridge, melbourne, south melbourne, tram 401, tram 667, tram 578 -
 Melbourne Tram Museum
Album - Charles Craig - part 1 of 2, 1950s to 1970s
... CC99 X1 462 in Glenhuntly Road to Point Ormond CC100 X1 462 in Glenhuntly Road to Elsternwick Rly Station CC101 X1 462 in Glenhuntly Road to Point Ormond CC102 Q 150 Hanna St CC103 190 at Camberwell Depot CC104 T182 at Footscray CC105 X1 466 and W2 at Footscray CC106 190 at Camberwell Depot CC107 X1 467 Barkly St Footscray CC108 X2 679 turning into William St from La Trobe St CC109 X2 677 Glenhuntly Road with Point Ormond Destination CC110 Postcard T180 CC111 Postcard format – X1 467 on a truck – see also CC178 CC112 Postcard format – X1 467 at Wantirna South CC113 Q200 and SW6 896 at Thornbury – has labels on rear CC114 T177, Ballarat Road – has labels on rear CC115 T178 at Point Ormond CC116 Postcard X1 465 and 466 CC117 Postcard – X2 676 CC118 Postcard – TMSV X2 217 CC119 810 on temporary bridging – 24-12-67 CC120 W2 575 – Queens Parade junction in, still temporary bridging, substation under construction CC121 Forming Queens Parade Junction base slab CC122 W2 596 prior to tramway works – all tracks still in position CC123 It’s a mass of reinforcing – bridging being formed CC124 Looking north with substation being built CC125 Looking east with some rather tight curves, Wellington St still in use CC126 SW6 958 ex Wellington St with all tracks and signal box and buildings. ...CC99 X1 462 in Glenhuntly Road to Point Ormond CC100 X1 462 in Glenhuntly Road to Elsternwick Rly Station CC101 X1 462 in Glenhuntly Road to Point Ormond CC102 Q 150 Hanna St CC103 190 at Camberwell Depot CC104 T182 at Footscray CC105 X1 466 and W2 at Footscray CC106 190 at Camberwell Depot CC107 X1 467 Barkly St Footscray CC108 X2 679 turning into William St from La Trobe St CC109 X2 677 Glenhuntly Road with Point Ormond Destination CC110 Postcard T180 CC111 Postcard format – X1 467 on a truck – see also CC178 CC112 Postcard format – X1 467 at Wantirna South CC113 Q200 and SW6 896 at Thornbury – has labels on rear CC114 T177, Ballarat Road – has labels on rear CC115 T178 at Point Ormond CC116 Postcard X1 465 and 466 CC117 Postcard – X2 676 CC118 Postcard – TMSV X2 217 CC119 810 on temporary bridging – 24-12-67 CC120 W2 575 – Queens Parade junction in, still temporary bridging, substation under construction CC121 Forming Queens Parade Junction base slab CC122 W2 596 prior to tramway works – all tracks still in position CC123 It’s a mass of reinforcing – bridging being formed CC124 Looking north with substation being built CC125 Looking east with some rather tight curves, Wellington St still in use CC126 SW6 958 ex Wellington St with all tracks and signal box and buildings. ...Photo - see pdf file for further information. Number Brief Description CC1 S178 at Elsternwick level crossing track works CC2 Building East Preston Depot 1955 CC3 Camberwell depot – post WW2 – lots of trams and a black cat CC4 W2 584 and SW6 958 northbound – Chapel St and Brighton Road CC5 W2 357 – southbound, Chapel St Brighton Road CC6 Pascoe Vale Road, Raceday working – note the signal CC7 The Preston Workshops - The Argus, post WW2, 223, 647 et al CC8 923 or is it 922 being built at Preston – The Argus photo - CC8A 832 being positioned onto trucks at Preston after an overhaul – Argus Photo – see also CC306 CC9 Footscray depot` CC10 W5 797 in St Kilda Road during track works – 1950s CC11 W2 457 at Kew Post Office CC12 Wellington Parade – W2 432, 492 and 337 – special event CC13 Swan St line up of trams – football? Or other special event – Sinclair’s bus on the right side. CC14 W2 630 being washed at a depot – The Argus photo CC15 Royal Park line at Flemington Road – W2 355 and W5 786 CC16 Nicholson St track construction from a tram cab CC17 T181 on tour at Gordon St CC18 T181 on Maribyrnong Bridge CC19 Ditto at River St just off bridge CC20 As for CC18 CC21 At Raleigh Rd CC22 T181 at Footscray depot CC23 Track construction, Nicholson, just north of Gertrude CC24 Commissioning overhead Bourke St tram 988 CC25 Queens Parade – 997 and 994 CC26 Swapping trolley wheel to skid – commissioning CC27 Track construction in Gertrude St CC28 985 in Queens Parade running special CC29 997 in Queens Parade CC30 1033 at North Fitzroy – AETA Special CC31 Bourke St at Elizabeth St – has passengers on board CC32 W6 985, 996 Queens Parade, Mk 3 bus 333 CC33 As above CC34 Showing construction at Nicholson & Gertrude – Bourke St CC35 W2 223 on Burnley temporary bridge – VR track expansion CC36 W5 823 – ditto CC37 Tram on old bridge prior to removal CC38 W2 433 on temporary bridge with new bridge beams and old track CC39 Looking down showing temporary single track – Swan St CC40 Tait train passing under tram bridge CC41 SW6 on single line – off loading CC42 W2 547 at City Road Junction CC43 City Road Jtn – 1969 – 596 and 771 CC44 City Road Jtn – 1969 – 596 and 771 (same as CC45 438 in Flinders St CC46 355 somewhere CC47 552 somewhere CC47A 364 at Preston Workshops? CC48 W2 334 on Traverser – Preston Workshops CC49 Wellington pade – large line up of trams, c1950 925, and 611 CC50 W2 493 Franklin st – advertising for Savings Certificates CC51 Possibly 551 with advertising for fund raising for Blind institute CC52 249 at Hawthorn – Riversdale Junction – with a Tally Ho and Village Fair Aux. board CC53 MMTB Postcard of 511 CC54 Wattle Park terminus with Single line warning sign CC55 Wattle Park Duplication CC56 36 at Domain Junction – 833 CC57 36 at Domain Junction CC58 36 at Domain Junction with 810 and 833 CC59 36 in Swanston by Flinders St Station CC60 36 in Spencer St at A’Beckett CC61 36 crossing Collins St CC62 36 crossing Collins St CC63 36 northbound in St Kilda Road with Shrine in background CC64 36 northbound in Swanston St at Flinders St CC65 Postcard – Ballarat 36 in Domain Road CC66 Postcard - Stampshow – Hawthorn Horse tram CC67 Postcard - Stampshow – Peace cable tram CC68 Postcard - 1041 and cable car set 1 at Preston CC69 Postcard - Colins & Elizabeth – greetings from old Melbourne CC70 Postcard - Cable car set at Preston CC71 Postcard - Twentyman’s cable cars CC72 Postcard - Nu-color-vue – horse tram 256 CC73 Cable car set – Market & Flinders CC74 Cable trams at Twentymans’ in their shed CC75 Cable tram track at Bourke & Spencer prior to removal CC76 Cable tram bogie at Preston Workshops – used as a dolly CC77 Cable trams at Twentymans’ CC78 Postcard - Valentines – Bourke looking west from Swanston CC79 Postcard - Rose 3938 – Bourke at Swanston – the Leviathan building CC80 Postcard - Valentines – Elizabeth St looking south from Collins – No. 19 CC81 Postcard - Rose P4765 – Bourke St Melbourne CC82 Postcard - Rose 4090 – cable tram passing Parliament house CC83 Postcard - Valentines – GPO Elizabeth St CC84 Interior of cable trailer with clothing on a set CC85 Elizabeth St looking north CC86 Cigarette card - Collins St No. 41- WD HO Wills CC87 Postcard - Rialto building with cable set CC88 Postcard - Valentines - Swanston at Flinders looking north CC89 CC90 Q 150 Hanna St – dated on rear CC91 176 turning – photo ex Alan Jungworth CC92 161 on Princes Bridge – minimum fare 4d sign and Inspector CC93 459 at Point Ormond CC94 158 at Gordon St – side on view CC95 X 217 in Swanston St CC96 X 217 in Swanston St with an East Brighton destination CC97 T177 CC98 T177 Peel St – no destination roll – being transferred? CC99 X1 462 in Glenhuntly Road to Point Ormond CC100 X1 462 in Glenhuntly Road to Elsternwick Rly Station CC101 X1 462 in Glenhuntly Road to Point Ormond CC102 Q 150 Hanna St CC103 190 at Camberwell Depot CC104 T182 at Footscray CC105 X1 466 and W2 at Footscray CC106 190 at Camberwell Depot CC107 X1 467 Barkly St Footscray CC108 X2 679 turning into William St from La Trobe St CC109 X2 677 Glenhuntly Road with Point Ormond Destination CC110 Postcard T180 CC111 Postcard format – X1 467 on a truck – see also CC178 CC112 Postcard format – X1 467 at Wantirna South CC113 Q200 and SW6 896 at Thornbury – has labels on rear CC114 T177, Ballarat Road – has labels on rear CC115 T178 at Point Ormond CC116 Postcard X1 465 and 466 CC117 Postcard – X2 676 CC118 Postcard – TMSV X2 217 CC119 810 on temporary bridging – 24-12-67 CC120 W2 575 – Queens Parade junction in, still temporary bridging, substation under construction CC121 Forming Queens Parade Junction base slab CC122 W2 596 prior to tramway works – all tracks still in position CC123 It’s a mass of reinforcing – bridging being formed CC124 Looking north with substation being built CC125 Looking east with some rather tight curves, Wellington St still in use CC126 SW6 958 ex Wellington St with all tracks and signal box and buildings. CC127 Victoria Pde at Gisborne looking east – at least 4 cars CC128 SW6 893? With dash canopy lights and SW6 862 and a man with a newspaper CC129 SW6 894 on the S curves, with tram in Wellington St CC130 Similar photo CC131 W2 564 turning into Wellington St – the concrete tracks are not that old CC132 W2 552 running out of Wellington St CC133 W5 732 from Fitzroy St into St Kilda Road with next iteration in position – very wonky CC134 W5 764 turning into Fitzroy St CC135 SW6 947 turning from Wellington St CC136 W2 586 running out of High St CC137 W2 500 turning into Wellington St CC138 W2 543 in Wellington St inbound CC139 L103 with St Kilda Junction destination, and a tower truck on right CC140 Workmen – new track in Queensway in use CC141 Ditto CC142 L103 in Queensway, and another car in bound CC143 Looking east along Wellington St which has been taken out of use. Also a MMTB Roller CC144 W5 824 and a W2 and all types of wobbly temporary track CC145 W2 354 to High St CC146 Sw6 947 on the S bends CC147 W2 500 looking north – tram on the S bends CC148 SW6 896 leaving the S bend CC149 W2 357 and a MMTB City bus with trees/gardens on the side CC150 W5 817 Elliot Ave – see also CC302 CC151 W2 552 – note the large trolley bridge CC152 W2 550 at depot or workshops CC153 1B truck CC154 SW2 432 CC155 W2 155 at Glenhuntly CC156 SW6 937 on AETA tour? CC157 X2 677 on Footscray service – Ballarat Rd? CC158 W2 641 – High St Kew? CC159 SW6 847 – Power St Hawthorn CC160 Simpson St – big line up CC161 W2 546 truck No. 1? CC162 W2s at Glenhuntly depot CC163 No. 15 truck under 899 CC164 206 and other junk at Preston Workshops CC165 W in Swanston St Melbourne – Rose series card CC166 Y1 613 Batman Ave?? or William St at Collins CC167 Tram plans CC168 X 217 Swanston St – see also 95 and 96 CC169 217 in Swanston St – same as 95 CC169A 192 in St Kilda Road at Princes bridge CC170 192 in St Kilda Road at Princes bridge CC171 Bendigo 3 arriving Malvern depot – being unloaded CC172 Ditto CC173 T180 at a depot CC174 X1 463 wheel set CC175 C30 – dog car side view – close up CC176 C30 dog car CC177 206 and 30 at Preston Workshops CC178 X1 467 on a truck – see CC111 also CC179 42 CC180 42 at a depot, no destination box CC181 W2 556 1A type truck CC182 Flinders St Station – Rose Series CC183 W7 1035 Spring – Nicholson St CC184 W7 1022 MMTB Post Card CC185 Adelaide 178 – has on rear – R. Lilburn 4/82 CC186 Adelaide 175 – has on rear – R. Lilburn 4/82 CC187 Y1 610 on AETA tour CC188 Y1 610 on AETA tour with large group – Point Ormond CC189 AETA display – has GH55-32 in pencil on rear CC190 AETA display – has GH55-29 in pencil on rear CC191 Y1 610 on AETA tour with large group – Point Ormond CC192 VR 53 at Footscray CC193 VR cars 40 and 34 at Elwood wash dock CC194 W7 1024 as the 1970 Christmas tram CC195 Geelong – loading a set of 22E trucks CC196 Geelong 10 and 23 running an AETA special CC197 Geelong – AETA special CC198 Geelong 7 at Junction CC199 Geelong 10, in the city CC200 Geelong 33 with Belmont destination CC201 Geelong 15 Eastern Park destination 29-3-1948 CC202 Geelong 23 at Railway Station – 29-3-1948 CC203 Geelong 23 at Railway Station – 29-3-1948 CC204 Geelong – loading a bogie tram CC205 Geelong – loading a bogie tram CC206 Geelong 40 – loaded on truck CC207 Geelong 40 – on jacks CC208 Geelong 40 on jacks – 19 behind CC209 Geelong 38 with two workers on either side CC210 – 214 Australian Historic Tramways stamp folder and set CC215 Bendigo 17 at depot – has dup JBS on rear CC216 Bendigo 20, 29 bogie and straight sill car at Charing Cross CC217 Bendigo one man bogie Pall Mall CC218 Bendigo – Bogie 23, other cars and welding truck at depot CC219 Bendigo 7 with Quarry Hill destination CC220 Bendigo 21 with Lake Weerona destination CC221 ESCo 18 Ballarat CC222 Ballarat bogie 22 on AETA special CC223 Ditto CC224 Ballarat 34 at Stones Corner – R Lilburn CC225 Ballarat 15 in Bridge St – R Lilburn CC226 Ballarat 40 at Gardens – R Lilburn CC227 Ballarat 37 running out of depot – R Lilburn CC228 Postcard – Valentines – Sturt St with loaded horse tram trailer CC229 AETA Geelong tram tour ticket – 29-3-1948 CC230 Postcard – Geelong – Valentine 2114 – T&G building CC231 Postcard – PMTT ! – High St Malvern CC232 Postcard – Empire – Glenferrie Road, Malvern at Wattletree Rd CC233 Postcard Y469, MMTB CC234 Postcard Z2 Spring St CC235 Postcard – Z1 MMTB CC236 Postcard – Stamp Show W1 431 CC237 Postcard – Stamp show B2005 CC238 Postcard – Stamp show W6 982 CC239 Postcard – Valentines 1264 – Johnstone Park with tram in distance CC240 Postcard – Rose 10711 – Swanston and Lonsdale – Hospital and W232 CC241 Postcard – Rose 4827 – Fitzroy St St Kilda W2 362 and 548 CC242 Postcard – Valentines – 939 – St Kilda War Memorial, W and a R? CC243 Postcard – Valentines – 572 – St Kilda War Memorial, W 413 and 140? CC244 Postcard – Valentines – 938 – Uper and Lower Esplanade – L 104 CC245 Postcard – St Kilda Rd at Princes Bridge Y1 and W CC246 Postcard – Biscay BG82 – W5 814 - CC247 Postcard – Biscay 796112 – Bourke St looking west CC248 Postcard – Biscay 796109 – Bourke St looking east CC249 Postcard – Biscay 2AUS58 – Z5 Bourke St CC250 Postcard – Biscay BG 249 – Swanston St CC251 Postcard – National View – St Kilda Rd – shrine and Prince Henrys W2 405 CC252 Postcard – Nu color vue – 11 ML 156 – St Kilda Rd CC253 Postcard – Nu color vue – 11 ML 153 – Swanston St CC254 Postcard – Nu Color vue – Collins St 442 CC255 Postcard – Pitt card – Adelaide – H 364 at Victoria St CC256 Postcard – SPER L/P 154 CC257 Postcard – BTMS – 550 CC258 Postcard – SPER – Brisbane 295 CC259 Adelaide 131 at Burnside – has R Lilburn on card, c1911 CC260 Adelaide 194 CC261 Adelaide 235, with two crew, The News photo CC262 Rockhampton, outside post office – has source of photo details CC263 Sydney – 2086 and 2062 arriving Circular Quay CC264 Sydney – P class – Pitt St? CC265 Sydney – 1610 at Circular Quay CC266 Brisbane 99 and 468 CC267 Sydney with bridge behind CC268 Steam tram Paramatta Park – 103 CC269 Sydney – Museum Station =- Elizabeth St CC270 Sydney – weed burner 137S at a loop Demonstrates the work of Charles Craig in photography and collection of prints.Assembled album in a black presentation folder of 270 photographs from the Charles Craig Collection - 86 sleeves - part 1 of 2. All photographs have been scanned and placed on the Museum's G drive. A list of all photographs with details where possible has been compiled. Victorian Provincial, Launceston, Hobart and Sydney tram photos have been transferred to other Museums, image files retained.melbourne, tramways, tramcars, trams, charles craig, st kilda junction, trackworks -
 Upper Yarra Museum
Negative Photographic Reproduction, Bridge over Yarra at the Doon, 1911, Yarra Junction
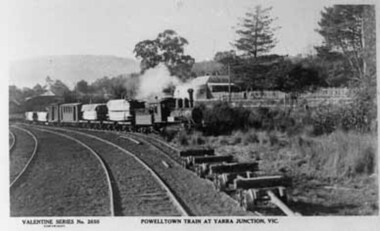
... Bridge over Yarra at the Doon, 1911, Yarra Junction...PC Valentine 2650 Powelltown timber train at Yarra Junction Negative Black white Scanned at 600 dpi. Bridge over Yarra at the Doon, 1911, Yarra Junction Negative Photographic Reproduction Sandy Ross ...PC Valentine 2650 Powelltown timber train at Yarra Junction Negative Black white Scanned at 600 dpi. -
 Upper Yarra Museum
Negative Photographic Reproduction, Bullock team at Yarra Junction
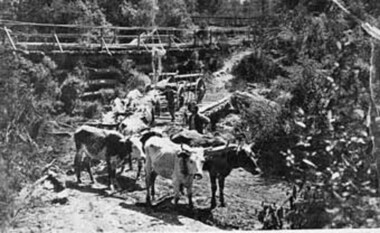
... bullock team carts bridge yarra junction...bullock team carts bridge yarra junction Bullock team at Yarra Junction Negative Black white Scanned at 600 dpi. ...Bullock team at Yarra Junction Negative Black white Scanned at 600 dpi.bullock team carts bridge yarra junction -
 The Beechworth Burke Museum
Photograph, c.1927-1930
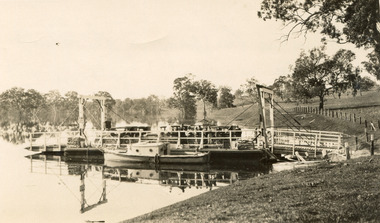
... . / Our only means of getting out / of Bethanga for the present / Until the bridge is completed / it is 2 miles above the junction / of the Mitta + Murray. .... / Our only means of getting out / of Bethanga for the present / Until the bridge is completed / it is 2 miles above the junction / of the Mitta + Murray. ...This image shows the Punt (a kind of small boat) that took residents of Bethanga across the Murray River before the Bethanga Bridge was built. Bethanga Bridge was built between 1927 and 1930, and was made a necessity by the building of the Hume Dam. The Hume Dam, formerly known as the Hume Weir, was in construction between 1919 and 1936, which swelled the Murray River into the floodplain to the East of the dam permanently, creating Lake Hume, and isolating the residents of Bethanga and nearby towns, for whom the trip all the way around the new lake to another river crossing was a massive undertaking. The person who wrote on the back of this card instead chose to cross the river on a boat until the Bethanga Bridge became available. Interestingly, partially submerged trees can be seen in the lake in the background of this photograph, illustrating that the dam had already begun to fill the floodplain even before the bridge was built. This photograph shows the methods the residents of Bethanga used while the Bethanga Bridge was being built. This record is associated with the Heritage Listed sites of the Hume Dam and the Bethanga Bridge, and shows the environment during the process of construction and the creation of Lake HumeSepia rectangular photograph printed on matte photographic paperReverse: 1997.3189 / 84 -19 -1 / This is the snap of the Punt. / Our only means of getting out / of Bethanga for the present / Until the bridge is completed / it is 2 miles above the junction / of the Mitta + Murray. It is / 1/2 a mile wide + runs across / the Murray into NSW / Kodak Print / bethanga, bethanga bridge, hume, hume dam, artificial lake, lake hume, hume weir, flood, floodplain, boat, punt, weir, pier, dock, transport, transportation -
 Marysville & District Historical Society
Document (Item) - Document-Table, Judith Vimpani, Yarra Track Hostelries- Marysville to Woods Point, Unknown
... bridge hotel...john robson...granton...clifford...wilks creek...wilks creek hotel...patrick maloney...steavenson...marysville hotel...australian hotel...junction...A document outling all the hostelries that existed along the Yarra Track between Marysville and Wood's Point. yarra track marysville wood's point woods point fernshaw paradise plains black spur mount grant george edwards walker family melbourne new chum hit & miss restaurant mr clifford michael woods glen watts tri bhean hotel ewen cameron ewen hugh cameron thomas barton butler's wood's point directory globe hotel swanston street mount juliet ben more & c jordan district jefferson's watts bridge inn matthew jefferson reefer's hotel boyle's hotel william henry johnson samuel boyle black spur hotel fisher's creek narbethong fisher's home hotel black spur inn frederick fisher william hodson wood's point road acheron river acheron bridge hotel john robson granton clifford wilks creek wilks creek hotel patrick maloney steavenson marysville hotel australian hotel junction hotel the dutchman's restaurant henry kuyper william podlech mount arnold mount arnold hotel charles schultz james toohey john gleeson joy burchall ian newman henry brockman belle isle belle elle bellell creek upper yarra guerin's bridge bell's hotel henry petty celia moran ruth petty cumberland creek cumberland creek store and restaurant cumberland creek hotel charles edwin hargreaves annie hargreaves urina hargreaves alice hargreaves healesville josiah hargreaves henderson drysdale henry whelan halfway house thomas smith svendson gosling donovans creek chesterville perry's hotel john perry perry's coach and horses hotel edward courtney scandinavian hotel the swede's walker's hotel jacob burchart golden fleece theodore kappler george koehler's hotel david walker millicent walker elsie jowett bill walker big river royal mail hotel shaw's slingsby davies edwin jones elizabeth jane parker sandridge archibald charles edwin jones matlock alexander myers frank berwick frederick jones ned jones jennie jones sophie milllicent parker jones thomas shaw dorothy walker travellers rest hotel reefton summers john fehring f fehring katerina fehring john christoph blumeyer anne fehring john baker evelyn observer anna katrina baker hannah catherine baker john frederick baker mcmahon's creek oaks the springs st clair sinclair's valley mountain home hotel neilson collins waters jan emma sinclair john sinclair mr cox peter sinclair willie we have missed you hotel spring vale hotel robert matthews thomas crawford A document outlining all the hostelries that existed along the Yarra Track between Marysville and Wood's Point. ...A document outlining all the hostelries that existed along the Yarra Track between Marysville and Wood's Point.A document outling all the hostelries that existed along the Yarra Track between Marysville and Wood's Point.yarra track, marysville, wood's point, woods point, fernshaw, paradise plains, black spur, mount grant, george edwards, walker family, melbourne, new chum, hit & miss restaurant, mr clifford, michael woods, glen watts, tri bhean hotel, ewen cameron, ewen hugh cameron, thomas barton, butler's wood's point directory, globe hotel, swanston street, mount juliet, ben more & c, jordan district, jefferson's watts bridge inn, matthew jefferson, reefer's hotel, boyle's hotel, william henry johnson, samuel boyle, black spur hotel, fisher's creek, narbethong, fisher's home hotel, black spur inn, frederick fisher, william hodson, wood's point road, acheron river, acheron bridge hotel, john robson, granton, clifford, wilks creek, wilks creek hotel, patrick maloney, steavenson, marysville hotel, australian hotel, junction hotel, the dutchman's restaurant, henry kuyper, william podlech, mount arnold, mount arnold hotel, charles schultz, james toohey, john gleeson, joy burchall, ian newman, henry brockman, belle isle, belle elle, bellell creek, upper yarra, guerin's bridge, bell's hotel, henry petty, celia moran, ruth petty, cumberland creek, cumberland creek store and restaurant, cumberland creek hotel, charles edwin hargreaves, annie hargreaves, urina hargreaves, alice hargreaves, healesville, josiah hargreaves, henderson drysdale, henry whelan, halfway house, thomas smith, svendson, gosling, donovans creek, chesterville, perry's hotel, john perry, perry's coach and horses hotel, edward courtney, scandinavian hotel, the swede's, walker's hotel, jacob burchart, golden fleece, theodore kappler, george koehler's hotel, david walker, millicent walker, elsie jowett, bill walker, big river, royal mail hotel, shaw's, slingsby davies, edwin jones, elizabeth jane parker, sandridge, archibald charles edwin jones, matlock, alexander myers, frank berwick frederick jones, ned jones, jennie jones, sophie milllicent parker jones, thomas shaw, dorothy walker, travellers rest hotel, reefton, summers, john fehring, f fehring, katerina fehring, john christoph blumeyer, anne fehring, john baker, evelyn observer, anna katrina baker, hannah catherine baker, john frederick baker, mcmahon's creek, oaks, the springs, st clair, sinclair's valley, mountain home hotel, neilson, collins, waters, jan emma sinclair, john sinclair, mr cox, peter sinclair, willie we have missed you hotel, spring vale hotel, robert matthews, thomas crawford -
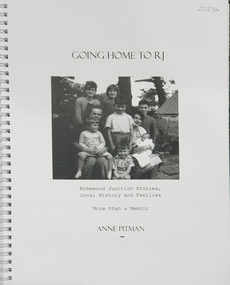 Federation University Historical Collection
Book, Anne Pitman, Going Home to RJ: Rokewood Junction Stories, Local History and Families: More than a Memoir, 2023
... junction state School...Commeralghip...Paddy's Gully Bridge...Rokewood Rokewood Junction Chatham Kurus-a-ruc Henry Pitman Elizabeth Pitman William Henry Pitman Rokewood junction state School Commeralghip Paddy's Gully Bridge Illabrook Conereyalk Woady Yalloak Creek Mt Misery Creek Paddy's Gully Diggings. ...Beverley Chatham ( daughter of Arthur Chatham) suggested that Commerlghip refers to Watering holes and underground springs found in the Little Woady Yallok and Mt Misery Creeks. Rokewood Junction was proclaimed a township in 1885, originally known as a gold-mining township called Paddy's Gully Diggings.Ringbound publication of 212 pagesnon-fictionBeverley Chatham ( daughter of Arthur Chatham) suggested that Commerlghip refers to Watering holes and underground springs found in the Little Woady Yallok and Mt Misery Creeks. Rokewood Junction was proclaimed a township in 1885, originally known as a gold-mining township called Paddy's Gully Diggings. rokewood, rokewood junction, chatham, kurus-a-ruc, henry pitman, elizabeth pitman, william henry pitman, rokewood junction state school, commeralghip, paddy's gully bridge, illabrook, conereyalk, woady yalloak creek, mt misery creek, paddy's gully diggings., dereel, pitfield, wadawurrung, william rutland, squatters, aborigines, aboriginal, charlotte walsh, maurice walsh, julie pitman, ben liston, sheep and wool, george hawkins, natthew wakeling, christopher moody, mt misery goldfield, john bower, mary bower, hyslop's hotel, cumberland store, jane hyslop, edward collyer, jospeh gladstone, lucas's bakery, henry batty, william young, ellen rigby, chinese, joseph anguey, eliza anguey, murder of thomas ulick burke, william achultze, william schiltze, nicholas grenfell, tomas bramley murder, emily malhoff, drowning, ah lin, eliza richards, luisa bupell, eleanor holmes, rachel holmes, joseph holloway, noah holloway, thomas faulkner, robert eli hearn, george todhunter briggs, john robinson fairweather, rokewood common, edward bussell, louisa bussell, irving rachinger, john chatham, doris chatham, peter chatham, jack chatham, imogen chatham, domenico rizzoli, mary rizzoli, rokewood junction railway line, illabrook football and netball club, cape clear, red cross, keith annear, fire brigade, rokewood junction post office, len aarons, dereel pre-emptive right, rokewood junction avenue of honour, arthur chatham
