
Showing 96 items matching "knife edge"
-
 Moorabbin Air Museum
Book - Aerobatics, Conquest of Lines and Symmetry
... ...Knife edge...Aerobatics Cockpit checks Chandelies & lazy eights Spin The loop Immelman turn Hammerhead Cuban eight Knife edge Slow roll types Reverse Cuban eight Snap & barrel rolls Outside loop & half loop Square loop English bunt Inverted spin Tail slide Compound maneuvers Overview of aerobatic techniques, circa 1970 Conquest of Lines and Symmetry Book Aerobatics ...Overview of aerobatic techniques, circa 1970non-fictionOverview of aerobatic techniques, circa 1970cockpit checks, chandelies & lazy eights, spin, the loop, immelman turn, hammerhead, cuban eight, knife edge, slow roll types, reverse cuban eight, snap & barrel rolls, outside loop & half loop, square loop, english bunt, inverted spin, tail slide, compound maneuvers -
 Flagstaff Hill Maritime Museum and Village
Domestic object - Razor Strop, Early 19th century
... razor and knife sharpener...keen edge...edge on their shaving blade. Strops were commonly owned and used until the acceptance of safety razors. warrnambool shipwrecked coast flagstaff hill maritime museum maritime museum shipwreck coast great ocean road shaving leather shaving accessory barber’s equipment barber shop razor strop razor strop straight razor razor and knife sharpener keen edge razor strop Impressed into leather "FINEST SELECTED HIDE", "KEEN EDGE", "FINISH" (black stained side), “A SHARPENER" (red stained side), “1 2 3” Razor strop, leather and metal. ...A razor strop is flexible strip of leather or canvas used to maintain a shaving edge on a thin blade such as a straight razor. Fine powdered jeweler's rouge or other pastes can be added as an abrasive to polish the blade. The strop may be a hanging strip or a hand-held paddle. This one is a hanging strop. Strops were quite commonly found in barber shops and homes before the invention of the safety razor, They are still used for sharpening tool blades. The person using the strop would draw the spine of the blade down along the strop with the blade following, without putting any pressure on the blade. At the end of the stroke, rotate the blade over its spine then draw the spine along the strop again so that the edge moves away from the top. The finer grade of leather strap is used to give the final finish. KEEN EDGE MANUFACTURER In March 1906 Popular Mechanics magazine included an advertisement for Keen Edge Strop. The promise given by the advertiser, Eddy Mfg. Co. (206 Broadway, New York) was “Use the Keen Edge strop for 90 days and if not satisfied return to us and we will refund your money“. The advertisement was for a Combination Razor Strop, “the only strop made which requires no dressing.” Readers were invited to send for a booklet on Razor and the Face. In 1924 Popular Mechanics, published by Hearst Magazines, displayed an advertisement seeking a sales manager “… to sell [to] drug, hardware and cigar stores Keen Edge Strop Dressing, which sharpens straight razors and safety blades and removes old razor strops.” At that time the Keen Edge Mfg. Company was in Dallas, Texas. Razor strops are of historical significance, representing personal effects of men from the time period when men relied on strops to keep a sharp edge on their shaving blade. Strops were commonly owned and used until the acceptance of safety razors.Razor strop, leather and metal. Keen Edge brand, double straps: two straps of different grade leather joined at ends with metal fittings. Stropping faces; sharpening surface is stained red and finishing surface is stained black. One end has padded, bulbous shaped leather handle, the other end has metal, swivel hook hanger. Inscriptions pressed into leather at the ends of the straps. Impressed into leather "FINEST SELECTED HIDE", "KEEN EDGE", "FINISH" (black stained side), “A SHARPENER" (red stained side), “1 2 3”warrnambool, shipwrecked coast, flagstaff hill maritime museum, maritime museum, shipwreck coast, great ocean road, shaving leather, shaving accessory, barber’s equipment, barber shop razor strop, razor strop, straight razor, razor and knife sharpener, keen edge razor strop -
 Creswick Campus Historical Collection - University of Melbourne
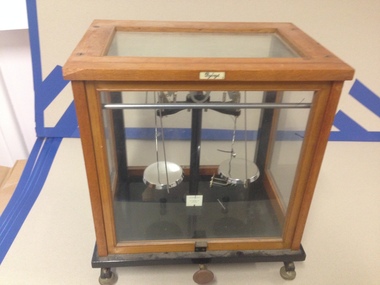
Equipment, WA Webb Ltd, 1914-1933
... The distributors mark is found at the bottom of the scales on a white plaque.When the levers are realised it allows the pans to rest, reducing the pressure on the knife-edges. A plaque at the top reads Bybryt. ...The distributors mark is found at the bottom of the scales on a white plaque.When the levers are realised it allows the pans to rest, reducing the pressure on the knife-edges. A plaque at the top reads Bybryt. ...The distributors mark is found at the bottom of the scales on a white plaque.When the levers are realised it allows the pans to rest, reducing the pressure on the knife-edges. A plaque at the top reads Bybryt. A plaque at the back reads �War Finish�, a typical mark for products for miiltary use or for austere timesPharmacy Scales in CabinetWar Finish -
 Ballarat Tramway Museum
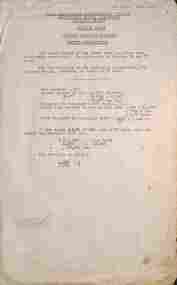
Document, State Electricity Commission of Victoria (SECV), "Maximum Traction Tramcars - Weight Distribution", 3/1959
... See item 10065 for a method using a weight and a knife edge....See item 10065 for a method using a weight and a knife edge. Yields information about a method of measuring the weight distribution of a Brill 22E or maximum traction bogie. tramways SECV tramcars Maximum Traction Pony axles Brill 22E weight distribution On front in ink "S/S Lacks"? ...Typed note, dated 5/3/1959, regarding measuring the weight distribution on a Maximum Traction tramcar, pony wheel, using a jack with a pressure gauge. Appears to be a theoretical document. Has the initials JRP in the top right-hand corner. See item 10065 for a method using a weight and a knife edge.Yields information about a method of measuring the weight distribution of a Brill 22E or maximum traction bogie.Document - foolscap typed sheet with hand written note.On front in ink "S/S Lacks"? and on rear "Depot Foreman"tramways, secv, tramcars, maximum traction, pony axles, brill 22e, weight distribution -
 Federation University Historical Collection
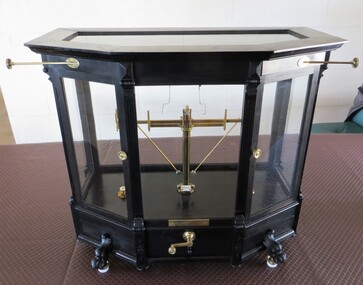
Equipment - Beam Balance, C. Staudinger & Co, John W. Glover's Beam Balance, c. 1915
... It has a long beam and a complex system of jewel knife edges and bearings. ...It has a long beam and a complex system of jewel knife edges and bearings. John W. Glover's Beam Balance Equipment Beam Balance C. ...John Warren Glover was a significant operator of cyanide re-processing works in the goldfields from around 1900. He lived at 123 Webster Street for many years, and operated quite a substantial three roomed private laboratory on the grounds for assays associated with his operations. This balance was used at that laboratory. The Webster Street property is believed to be the first brick fronted house in Ballarat and the bricks were ballast from a Scottish Ship. The property remained in the Glover Family until it was sold in 1955. John Warren had car or licence registration no 12. A German made beam balance that would have been an extremely sensitive, and top of the line for its time (probably 1910 – 20’s). It has a long beam and a complex system of jewel knife edges and bearings. Plaque on front with C. Staudinger & Co. Machf, Gisssen (Gibben)mining, goldfields, beam balance, german, c. standinger & co., jw glover, john glover, warren glover, john warren glover, john w. glover, weights and measures, c. staudinger and co, carl staudinger, scientific equiment -
 4th/19th Prince of Wales's Light Horse Regiment Unit History Room
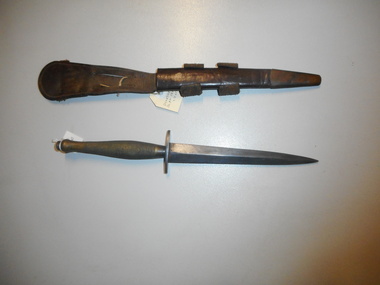
Weapon - Commando Knife, World War 2 Fairbairn Sykes Commando knife, abt 1940
... World War 2 Fairbairn Sykes Commando knife, double edged 16.5 cm blade with leather scabbard...knife commando World War 2 Fairbairn Sykes Commando knife, double edged 16.5 cm blade with leather scabbard World War 2 Fairbairn Sykes Commando knife Weapon Commando Knife Fairbairn Sykes ...World War 2 Fairbairn Sykes Commando knife, double edged 16.5 cm blade with leather scabbardknife, commando -
 Orbost & District Historical Society
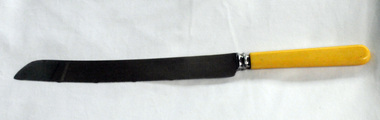
bread knife
... A stainless steel serrated edged knife with a cream coloured handle (bone?)...Alstergren-timber-Cabbage-Tree Rem-Lottie cook-house-Alstergren's-timber-mill bread-knife-Orbost-Hardware on blade -""Made in Sheffield expressly for Orbost Hardware and Timber Co, Orbost" A stainless steel serrated edged knife with a cream coloured handle (bone?) ...This knife was used by Lottie Rem who ran the cookhouse at Astergren;s Timber Mill at Cabbage Tree in East Gippsland from 1954 until 1966.. It was bought in Orbost around 1957 - 1958. Sited on the banks of the Cabbage Tree Creek, the township was built by the timber mills to house their workers. Although the timber mills have disappeared, some of the buildings still remain. The "Cook House" and "Manager's House" are two buildings. The Cook House was built to supply meals to the workers of the Alstergren Mill. Some of the original interior walls were made from hessian and wallpaper. The few houses to survive to today are now used as private dwellings.The Cabbage Tree Creek township was established to support the booming timber industry of the mid 20th century. Five timber mills worked full time supporting the families that were drawn to the area's wealth of natural resources. this item is associated with the history of Cabbage Tree.A stainless steel serrated edged knife with a cream coloured handle (bone?)on blade -""Made in Sheffield expressly for Orbost Hardware and Timber Co, Orbost"alstergren-timber-cabbage-tree rem-lottie cook-house-alstergren's-timber-mill bread-knife-orbost-hardware -
 Whitehorse Historical Society Inc.
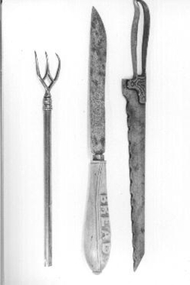
Domestic object - Bread Knife
... Serrated edge bread knife with curved metal handle....domestic items cutlery Standard U.S.A. Serrated edge bread knife with curved metal handle. Domestic object Bread Knife ...Serrated edge bread knife with curved metal handle.Standard U.S.A.domestic items, cutlery -
 Parks Victoria - Wilsons Promontory Lightstation
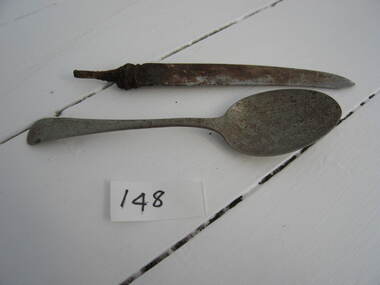
Spoon and knife
... Metal spoon and a serrated edged knife without a handle. Both items have some corrosion. ...knife without its handle are known to have been used by WWII RAAF or navy personnel in their accommodation quarters 1942-1945. The items, if original to the site, have second level contributory significance for the evidence they provide of the WWII buildings and their use between 1942 and 1945. Metal spoon and a serrated edged ...Used by RAAF personell in accommodation quarters 1942 -1946. WWII wartime objects – living in the RAAF camp . They provide evidence of the contents of the RAAF barracks and recreation hut erected in 1942 and occupied until 1945. Some of the items such as cutlery, a wood heater/stove, domestic radio (remnants) were used in daily life by servicemen. Spoons x 3 (WPLS 0101.3; likely provenance); spoon and knife (0148.2 likely provenance)The two metal small spoons, two large spoons and knife without its handle are known to have been used by WWII RAAF or navy personnel in their accommodation quarters 1942-1945. The items, if original to the site, have second level contributory significance for the evidence they provide of the WWII buildings and their use between 1942 and 1945. Metal spoon and a serrated edged knife without a handle. Both items have some corrosion. -
 City of Moorabbin Historical Society (Operating the Box Cottage Museum)
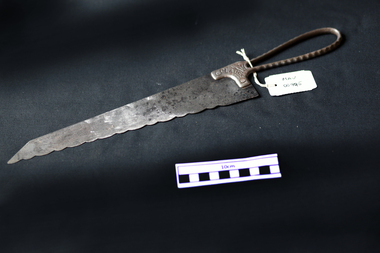
Kitchen Equipment, Bread Knife 'Clauss', c1900
... A large Bread Knife with scalloped / serrated edge and looped handle ...In 2004, Acme United Corporation acquired the Clauss inventory, trademarks and brand names from Alco Industries for approximately $500,000 cutlery, knives, clauss shear company, ohio, freemont, market gardeners, early settlers, moorabbin, cheltenham, Front : CLAUSS Back : FREEMONT / OHIO A large Bread Knife with scalloped / serrated edge and looped handle Kitchen Equipment, Bread Knife 'Clauss' Clauss ...Clauss Cutlery’s long and vivid history started in early 1880’s when John Clauss and his younger brother Henrie established Elyria Shear Works in Elyria, Ohio. At one time the company was the largest manufacturer of scissors and shears in the world and was acquired by Acme United Corporation in 2004. John and Henrie Clauss, of German origin, started Elyria Shear Works from a one-room building in Elyria, Ohio Together with five employees, they began manufacturing scissors, shears, straight razors and serrated kitchen knives In August 1887, the Company moved to Fremont, Ohio to be near an accessible, abundant supply of natural gas which had recently been discovered. 1889, disaster struck as the plant was completely destroyed by fire, In 4 months Clauss built a new plant and was back in full operation and changed the company’s name to Clauss Shear Company. 1919 Clauss Shear merged with Henkel Company, to become Henkel-Clauss Company. Henkel Company was founded in 1906 to manufacture manicure and pedicure files, knives, shears and razors. After World War II, Clauss was unable to compete with European firms producing household scissors and shifted its focus to industrial scissors. In 1967 Clauss was taken over by Alco Standard Corporation who integrated Clauss into its existing structure to manufacture tools for industrial niche markets. Clauss made surgical scissors for eye operations, heavy duty metal cutting shears, poultry shears for gutting chickens and specialty items such as anti-acid, anti-magnetic tweezers for the electronics industry. Clauss had approximately 100 employees and produced about $18 million in annual revenues in the late 1980s, but profits continued to decline. In 2004, Acme United Corporation acquired the Clauss inventory, trademarks and brand names from Alco Industries for approximately $500,000A large Bread Knife with scalloped / serrated edge and looped handle Front : CLAUSS Back : FREEMONT / OHIOcutlery, knives, clauss shear company, ohio, freemont, market gardeners, early settlers, moorabbin, cheltenham, -
 Flagstaff Hill Maritime Museum and Village
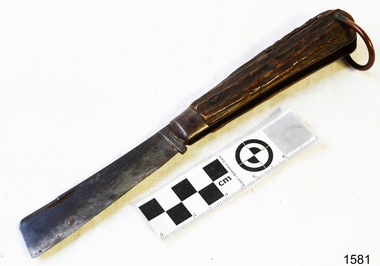
Pocket Knife, Joseph Rodgers and Son
... Pocket knife. Single edge folding blade with square cut end steel blade and frame with horn grips. ...flagstaff hill warrnambool shipwrecked-coast flagstaff-hill flagstaff-hill-maritime-museum maritime-museum shipwreck-coast flagstaff-hill-maritime-village pocket knife joseph rodgers and son Pocket knife. Single edge folding blade with square cut end steel blade and frame with horn grips. ...Pocket knife. Single edge folding blade with square cut end steel blade and frame with horn grips. Made by Joseph Rodgers and Son, Norfolk St, Sheffield, England. Model No 6.flagstaff hill, warrnambool, shipwrecked-coast, flagstaff-hill, flagstaff-hill-maritime-museum, maritime-museum, shipwreck-coast, flagstaff-hill-maritime-village, pocket knife, joseph rodgers and son -
 Flagstaff Hill Maritime Museum and Village
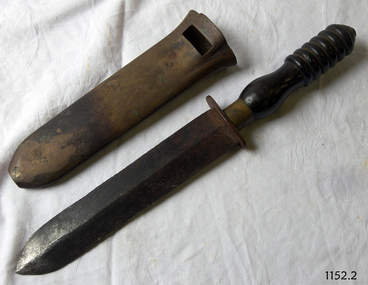
Knife
... Diver's Knife, rare first class ca. 1900 (wooden handle) Siebe Gorman diving knife, two edge blade, and a push-in brass scabbard. ...flagstaff hill warrnambool shipwrecked coast flagstaff hill maritime museum maritime museum shipwreck coast flagstaff hill maritime village great ocean road diver's knive knife siebe gorman The blade is imprinted "Siebe Gorman & Co" Diver's Knife, rare first class ca. 1900 (wooden handle) Siebe Gorman diving knife, two edge blade, and a push-in brass scabbard. ...Diver's Knife, rare first class ca. 1900 (wooden handle) Siebe Gorman diving knife, two edge blade, and a push-in brass scabbard. The leather carrying strap is missing. The blade is imprinted Siebe Gorman & Co The blade is imprinted "Siebe Gorman & Co"flagstaff hill, warrnambool, shipwrecked coast, flagstaff hill maritime museum, maritime museum, shipwreck coast, flagstaff hill maritime village, great ocean road, diver's knive, knife, siebe, gorman -
 Flagstaff Hill Maritime Museum and Village
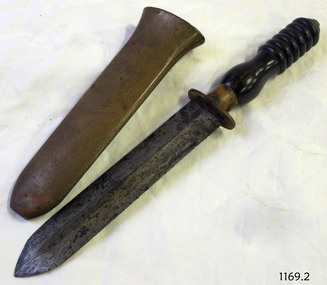
Knife
... Divers Knife, rare first class Ca 1900 (wooden handle) Siebe Gorman diving knife, two edge blade, and a push-in brass scabbard. ...Flagstaff Hill Warrnambool Shipwrecked-coast Flagstaff-Hill Flagstaff-Hill-Maritime-Museum Maritime-Museum Shipwreck-coast Flagstaff-Hill-Maritime-Village Divers Knife, rare first class Ca 1900 (wooden handle) Siebe Gorman diving knife, two edge blade, and a push-in brass scabbard. ...Divers Knife, rare first class Ca 1900 (wooden handle) Siebe Gorman diving knife, two edge blade, and a push-in brass scabbard. The leather carrying strap is missing. The blade is imprinted Siebe Gorman & Co. Wooden handle is cracked. "3" on scabard.flagstaff hill, warrnambool, shipwrecked-coast, flagstaff-hill, flagstaff-hill-maritime-museum, maritime-museum, shipwreck-coast, flagstaff-hill-maritime-village -
 National Wool Museum
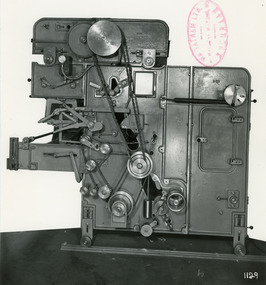
Photograph - Product Photograph, Patent Automatic Feed Machine
... Diagonal Scale Pan with improved knife edge suspension. Dual Trap Doors over Pan actuated by Solenoid. ...Diagonal Scale Pan with improved knife edge suspension. Dual Trap Doors over Pan actuated by Solenoid. ...These are sales photographs for William Tatham Ltd. of Rochdale. These photographs are taken in the fitting shop at William Tatham Ltd. where final assembly would have taken place. An Automatic Feeding Machine automatically and sequentially supplies uncarded wool to carding machines, The photographed machine was made by William Tatham Ltd, a textile engineering company based in Rochdale, UK. Established in 1866 Tatham developed innovative textile machinery and send their products to Australia and other countries around the world.A black and white photo of a Patent Automatic Feed Machine in a portrait format. Black wiritng on the rear, typed with a typewriter.Front - mid left corner - Wm. TATHAM Ltd. ROCHDALE. Machine Maker Front bottom right corner - 1129 Rear - Patent Automatic Feed with Extended Hopper fitted with balanced pressure plate which operates through Variable Speed Device to regulate speed of spiked lattice in accordance with material in Hopper. Electro-Magnetic Clutch Drive to spiked lattice controlled by Mercery Switch on scale arm. Diagonal Scale Pan with improved knife edge suspension. Dual Trap Doors over Pan actuated by Solenoid. Automatic device to slow spiked lattice just prior to weigh being obtained. Ball or roller bearings to main shaft, combs and other parts. Self-aligning bearing to timing shaft etc.textile machinery, tatham, wool manufacture, carding, automatic feeding machine, wool -
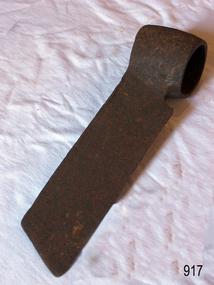 Flagstaff Hill Maritime Museum and Village
Tool - Froe, Late 19th to Early 20th century
... It is typically an L-shaped tool made up of a wedge-shaped blade with a dull, but not blunt, knife edge and a wood handle. Blades were usually straight with a socket forged at one end for a handle, but curved blades were also made. ...It is typically an L-shaped tool made up of a wedge-shaped blade with a dull, but not blunt, knife edge and a wood handle. Blades were usually straight with a socket forged at one end for a handle, but curved blades were also made. ...A froe was used for splitting, or riving, wood in the early days and was a skill practiced by craftsmen who made boards, shingles, c lapboards, fences, basket splints, chair parts, wagon spokes, lath, and more. Our ancestors used axes, gluts or wedges, froes, draw knives and spelk planes for splitting wood. The froe was designed in many sizes and designs for splitting timber. It is typically an L-shaped tool made up of a wedge-shaped blade with a dull, but not blunt, knife edge and a wood handle. Blades were usually straight with a socket forged at one end for a handle, but curved blades were also made. Most handles were round and tapered and were inserted up through this socket. But some froes had eyes similar to those on axes for handles that were wedged. The froe handle is held in an upright position in one hand while the other hand drives the top of the blade downward with a wood froe club or mallet. After a split is started, the froe is wiggled downward to lengthen it until the split is complete. Most old froes were hand forged, but they were also available in many catalogues. The 1873 D.R. Barton American catalogue offered straight froes at 12 1/2 cents per inch. You can still buy new froes from many tool manufacturers today.A tool that has not changed in design or use since its inception several hundred years ago to split timber for various uses.Froe, also called cooper's froe or stave froe, without handle.Noneflagstaff hill, warrnambool, flagstaff-hill, flagstaff-hill-maritime-museum, maritime-museum, shipwreck-coast, flagstaff-hill-maritime-village, froe, cooper's froe, stave froe, wood splitter, carpenders tools, coopers tool, splitting timber -
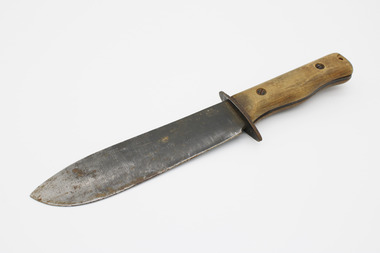 Woodend RSL
British WWII RAF and Special Forces Survival Knife, Late WWII?
... Heavy duty survival knife with single edged oval shaped broad blade and wooden handle contoured for grip. ...Heavy duty survival knife with single edged oval shaped broad blade and wooden handle contoured for grip. ...A rare example of a Type D Survival Knife issued to British RAF during the latter part of WWII.Heavy duty survival knife with single edged oval shaped broad blade and wooden handle contoured for grip. Two large screws secure the grips. The pommel end has a wrist cord hole (cord not present). See also item 2020.000034-2 (leather sheath). Blunt end of blade near grip there is engraved '27C/2360', reverse side is the makers mark 'Rodgers Sheffield England'.british airforce, survival knife, ww2, wwii, type d -
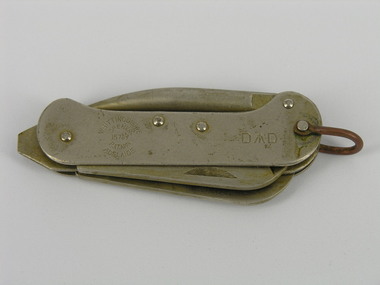 Frankston RSL Sub Branch
Knife, Pocket
... Standard Australian Army servicemans metal pocket knife with three folding implements. It has a single edge knife blade, a can and bottle opener and a marlin spike all hinged to fold away into the knife body. ...Standard Australian Army servicemans metal pocket knife with three folding implements. It has a single edge knife blade, a can and bottle opener and a marlin spike all hinged to fold away into the knife body. ...Standard Australian Army servicemans metal pocket knife with three folding implements. It has a single edge knife blade, a can and bottle opener and a marlin spike all hinged to fold away into the knife body. One end of the knife is equipped with a screwdriver blade stub. The other end is equipped with a pivoting copper suspension loop. The body of the knife is stamped with the manufacturer's details, which includes a description of the style of knife as an 'opener', patent number '15737' and a 'D^D' stamp. This knife is wrapped in a waxed piece of paper printed with the instructions for using the can opener blade.The body of the knife is stamped with the following inscription "WITTINGSLOWE, OPENER, ADELAIDE, PAT.APPLN 15737" and a 'D^D' stamp.vietnam, australian, army, pocket knife, opener -
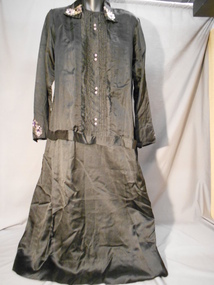 Bendigo Historical Society Inc.
Clothing - FRIEDA KAHLAND COLLECTION: BLACK SILK SATIN DRESS, 1920-30's
... Three quarter length sleeves slit at lower edge, and trimmed with two mauve buttons and two silk flowers appliquéd at each lower edge. Four knife pleats at each side of front skirt/ Back straight through from shoulders.garments from the Executors of the late Frieda Kahland 11400.122,11400.364, 11400.365, 11400.366.. ...Three quarter length sleeves slit at lower edge, and trimmed with two mauve buttons and two silk flowers appliquéd at each lower edge. Four knife pleats at each side of front skirt/ Back straight through from shoulders.garments from the Executors of the late Frieda Kahland 11400.122,11400.364, 11400.365, 11400.366.. ...Black silk-satin machine stitched dress. Dropped waist with bans 3.5 cm wide across front. Pleat from neckline to dropped waist, 2.5 cm wide and fastened down by four groupings of two one cm diameter buttons, mauve in colour. Four rows of narrow pin tucks each side of centre front and one tuck one cm wide on outer side of pintucks. Six press stud fasteners concealed under left hand tuck. Fold down collar, with two silk embroidered flowers appliquéd at collar fronts. Three quarter length sleeves slit at lower edge, and trimmed with two mauve buttons and two silk flowers appliquéd at each lower edge. Four knife pleats at each side of front skirt/ Back straight through from shoulders.garments from the Executors of the late Frieda Kahland 11400.122,11400.364, 11400.365, 11400.366.. Donated by A.L.Lienhop of Harcourt.costume, female, black silk-satin dress -
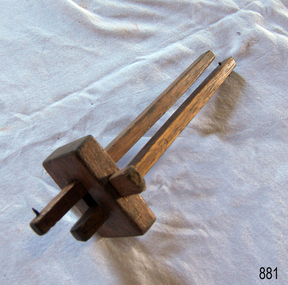 Flagstaff Hill Maritime Museum and Village
Tool - Marking Gauge, Believed to be homemade between 1900 to 1940s given no makers marks and the naivety of its construction
... edge or surface. It is used in joinery and sheet metal work operations. The gauge consists of a beam, a headstock, and a scribing or marking implement, typically a pin, knife, pen or wheel. ...edge or surface. It is used in joinery and sheet metal work operations. The gauge consists of a beam, a headstock, and a scribing or marking implement, typically a pin, knife, pen or wheel. ...A marking gauge, also known as a scratch gauge, is used in woodworking and metalworking to mark out lines for cutting or other operations. The purpose of the gauge is to scribe a line parallel to a reference edge or surface. It is used in joinery and sheet metal work operations. The gauge consists of a beam, a headstock, and a scribing or marking implement, typically a pin, knife, pen or wheel. The headstock slides along the beam and is locked in place by various means: a locking screw, cam lever, or a wedge. The marking implement is fixed to one end of the beam. These types of gauges have been in use for many centuries and have not changed much in their design.An item that has not changed in use since its inception many hundreds of years ago. These types of marking gauges used by cabinet and joinery makers to mark or scribe their work for cutting are still produced and used today in many sizes by professional cabinet makers and individuals.Cabinet makers marking gauge, wooden, two adjustable staffs secured be a wedge through the block. Each staff has a metal nail in the end.Noneflagstaff hill, warrnambool, shipwrecked-coast, flagstaff-hill, flagstaff-hill-maritime-museum, maritime-museum, shipwreck-coast, flagstaff-hill-maritime-village -
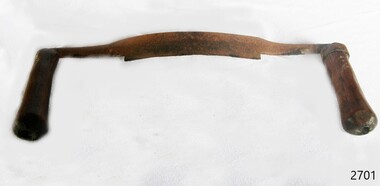 Flagstaff Hill Maritime Museum and Village
Tool - Draw Knife, Prior to 1950
... A draw knife or drawing knife, draw shave, shaving knife is a traditional woodworking hand tool used to shape wood by removing shavings. It consists of a blade with a handle at each end. The blade is much longer along the cutting edge...A draw knife or drawing knife, draw shave, shaving knife is a traditional woodworking hand tool used to shape wood by removing shavings. It consists of a blade with a handle at each end. The blade is much longer along the cutting edge ...A draw knife or drawing knife, draw shave, shaving knife is a traditional woodworking hand tool used to shape wood by removing shavings. It consists of a blade with a handle at each end. The blade is much longer along the cutting edge than it is deep (from cutting edge to back edge). It is pulled or "drawn" toward the user. A draw knife is commonly used to remove large slices of wood for flat faceted work, to debark trees, or to create roughly rounded or cylindrical billets for further work on a lathe, or it can shave like a spokeshave plane, where finer finishing is less of concern than a rapid result. The thin blade lends itself to create complex concave or convex curves such as in making staves for barrels.A specialised tool used in many different types of wood working and in the making of barrels, this type of tool has been used for many hundreds of years by coopers and other woodworking craftsmen all around the world. It is a tool that has not changed in design during this time and is still used today by craftsmen in the making of wooden barrels for the storage of wines etc. However this item at this time cannot be associated with an historical event, person or place, provenance is unknown, item assessed as a collection asset as it is believed to have been produced before 1950.Draw knife with metal blade and two wooden handlesNoneflagstaff hill, warrnambool, flagstaff-hill, flagstaff-hill-maritime-museum, shipwreck-coast, flagstaff-hill-maritime-village, draw knife, coopers tools, woodworking tools, knife, cooperage -
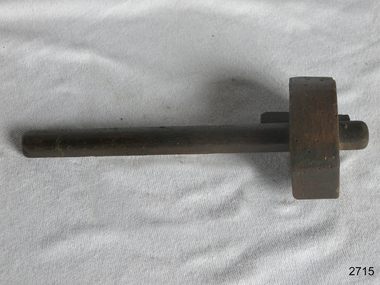 Flagstaff Hill Maritime Museum and Village
Tool - Marking Gauge, Prior to 1950
... edge or surface. It is used in joinery and sheet metal operations. The gauge consists of a beam, a headstock, and a scribing or marking implement, typically a pin, knife, pen or wheel. ...edge or surface. It is used in joinery and sheet metal operations. The gauge consists of a beam, a headstock, and a scribing or marking implement, typically a pin, knife, pen or wheel. ...A marking gauge, also known as a scratch gauge, and] is used in woodworking and metalworking to mark out lines for cutting or other operations. The purpose of the gauge is to scribe a line parallel to a reference edge or surface. It is used in joinery and sheet metal operations. The gauge consists of a beam, a headstock, and a scribing or marking implement, typically a pin, knife, pen or wheel. The headstock slides along the beam, and is locked in place by various means: a locking screw, cam lever, or a wedge. The marking implement is fixed to one end of the beam.A tool that has been in use since woodworking began for hundreds if not thousands of years without much change to the design or how the tool is used. Its use to scribe a line in various material as a cutting guide and is still in use today by many trades. Wooden marking Gauge, smallNonewarrnambool, flagstaff-hill, flagstaff-hill-maritime-museum, maritime-museum, shipwreck-coast, flagstaff-hill-maritime-village, marking gauge, woodworking, carpenters tools, tool -
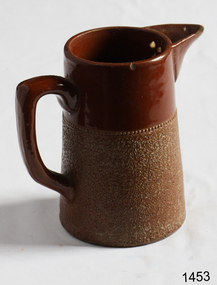 Flagstaff Hill Maritime Museum and Village
Domestic object - Jug
... edges turn into razor blades! Use a piece of fly wire to rub the work all over – this will scratch a little so be light handed. Use a knife...edges turn into razor blades! Use a piece of fly wire to rub the work all over – this will scratch a little so be light handed. Use a knife ...The Process of Making Pottery Decorating, Firing, Glazing, Making, Technical There is a rhythm and flow to clay. It can’t be done all at once! Even the making process! It can take weeks to get everything done, especially if you can only work on your pottery once a week! Even though we have three hour classes, it’s often just not enough time! Here is an overview of some of the processes so you have a bit more grasp on some of the technical stuff! Step One – Design There are SO many ideas out there for making stuff in clay! From delicate porcelain jewellery, through to heavy sculptural work and everything in between. Deciding your direction is sometimes not that easy – when you first start, try everything, you will naturally gravitate to the style that you enjoy! The options and variations are endless and can get a wee bit overwhelming too! Check in with me before you start to ensure your ideas will work, what order you might do things, how you could achieve the look you are seeking and any other technical data required! Step Two – Making Clay is thixotropic. This means that as you work with it, the clay first gets sloppier and wetter, before is begins to dry in the atmosphere. For most things, you simply can’t do all parts of the project at once. An example of work order might look like: Get last weeks work out from the shelves Prepare clay for today’s work – roll your clay, prepare balls for throwing, make the first stage of a pinch pot) Clean up last week’s work and put it on the shelf for bisque firing Check that you have any glazing to do – and do enough of it that you will have time to finish your main project Do the next step of your next project – there might be a further step that can’t be complete immediately, in that case, wrap your work well and put onto the shelves. Letting your work rest for a while can really help keep your work clean and professional looking. Many things require bagging under plastic to keep it ready for work the next week – put your name on the outside of the bag so you can find your work easily. We have stickers and markers. Consider how you want to decorate your work – coloured slip can be applied at a fairly wet stage (remembering that it will make your work even wetter!). Trying to apply slip to dry clay won’t work! If you want to do sgraffito – you will need to keep the work leather hard (a state of dryness where you can still work the clay with a little effort and a little water and care). Step Three – Drying Most of the time your work can go into the rack uncovered to let it dry out for the following week. If you want to continue forming or shaping you will need to double bag your work – put your work on a suitable sized bat and put the bat in a bag so the base of the bag is under the bat, then put another bag over the top of the work and tuck the top of the bag under the bat. If you want to trim (or turn) your thrown work the following week, it should also be double bagged. If your work is large, delicate, or of uneven thicknesses, you should lightly cover your work for drying. When considering the drying process, bare in mind the weather, humidity and wind! The hotter and dryer, the faster things dry and work can dry unevenly in the shelves – this can lead to cracking – another time to lightly cover your work for drying. Step Four – Trimming and Cleaning Up Your work is dry! It is called greenware now and it is at it’s most fragile! Handle everything with two hands. I often refer to soft hands – keep everything gentle and with your fingers spread as much as possible. Try to not pick up things like plates too much, and always with both hands! Before your work can be bisque fired it should be “cleaned up”. You work won’t go into the kiln if it has sharp edges – when glazed, sharp edges turn into razor blades! Use a piece of fly wire to rub the work all over – this will scratch a little so be light handed. Use a knife or metal kidney to scrape any areas that require a bit more dynamic treatment than the fly wire offers! Finally, a very light wipe over with a slightly damp sponge can help soften and soothe all of your edges and dags! Trimming thrown work: If you are planning to trim (or turn) your thrown work (and you should be), make sure you bag it well – your work should be leather hard to almost dry for easiest trimming. Use this step to finish the work completely – use a metal kidney to polish the surface, or a slightly damp sponge to give a freshly thrown look. Wipe the sponge around the rim after trimming, and check the inside of the pot for dags! Trimming slip cast work: Usually I will trim the rims of your work on the wheel the following day to make that stage easier, however you will still need to check your work for lumps and bumps. Last but not least – check that your name is still clearly on the bottom of your work. Step Five – Bisque Firing When the work is completely dry it can go into the bisque kiln. The bisque kiln is fired to 1000°C. This process burns off the water in the clay as well as some of the chemically bound water. The structure of the clay is not altered that much at this temperature. Inside the bisque kiln, the work is stacked a little, small bowl inside a larger bowl and onto a heavy plate. Smaller items like decorations or drink coasters might get stacked several high. Consideration is paid to the weight of the stack and shape of the work. A bisque kiln can fire about one and a half times the amount of work that the glaze kiln can fire. The firing takes about 10 hours to complete the cycle and about two days to cool down. Once it has been emptied the work is placed in the glaze room ready for you to decorate! Step Six – Glazing Decorating your work with colour can be a lot of fun – and time consuming! There are three main options for surface treatment at this stage: Oxide Washes Underglazes Glazes Washes and underglazes do not “glaze” the work – It will still need a layer of glaze to fully seal the clay (washes don’t need glaze on surfaces not designed for food or liquid as they can gloss up a little on their own). Underglazes are stable colourants that turn out pretty much how they look in the jar. They can be mixed with each other to form other colours and can be used like water colours to paint onto your work. Mostly they should have a clear glaze on top to seal them. Oxides are a different species – the pink oxide (cobalt) wash turns out bright blue for instance. They don’t always need a glaze on top, and some glazes can change the colour of the wash! The glazes need no other “glaze” on top! Be careful of unknown glaze interactions – you can put any combination of glaze in a bowl or on a plate, but only a single glaze on the outside of any vertical surface! Glazes are a chemical reaction under heat. We don’t know the exact chemicals in the Mayco glazes we use. I can guess by the way they interact with each other, however, on the whole, you need to test every idea you have, and not run the test on a vertical surface! Simply put, glaze is a layer of glass like substance that bonds with the clay underneath. Clay is made of silica, alumina and water. Glaze is made of mostly silica. Silica has a melting point of 1700°C and we fire to 1240°C. The silica requires a “flux” to help it melt at the lower temperature. Fluxes can be all sorts of chemicals – a common one is calcium – calcium has a melting point of 2500°C, however, together they both melt at a much lower temperature! Colourants are metal oxides like cobalt (blue), chrome (green through black), copper (green, blue, even red!), manganese (black, purple and pink) iron (red brown), etc. Different chemicals in the glaze can have dramatic effects. for example, barium carbonate (which we don’t use) turns manganese bright pink! Other elements can turn manganese dioxide brown, blue, purple and reddish brown. Manganese dioxide is a flux in and of itself as well. So, glazes that get their black and purple colours, often interact with other glazes and RUN! Our mirror black is a good example – it mixes really well with many glazes because it fluxes them – causes them to melt faster. It will also bring out many beautiful colours in the glazes because it’s black colouring most definitely comes from manganese dioxide! Glaze chemistry is a whole subject on it’s own! We use commercial Mayco glazes on purpose – for their huge range of colour possibilities, stability, cool interactions, artistic freedom with the ability to easily brush the glazes on and ease of use. We currently have almost 50 glazes on hand! A major project is to test the interactions of all glazes with each other. That is 2,500 test tiles!!!! I’m going to make the wall behind the wheels the feature wall of pretty colours! Step Seven – Glaze (Gloss or sometimes called “Glost”) Firing Most of the time this is the final stage of making your creation (but not always!) The glaze kiln goes to 1240°C. This is called cone 6, or midrange. It is the low end of stoneware temperatures. Stoneware clays and glazes are typically fired at cone 8 – 10, that is 1260 – 1290°C. The energy requirement to go from 1240°C to 1280°C is almost a 30% more! Our clay is formulated to vitrify (mature, turn “glass-like”) at 1240°, as are our glazes. A glaze kiln take around 12 hours to reach temperature and two to three days to cool down. Sometimes a third firing process is required – this is for decoration that is added to work after the glaze firing. For example – adding precious metals and lustres. this firing temperature is usually around 600 – 800°C depending upon the techniques being used. There are many students interested in gold and silver trims – we will be doing this third type of firing soon! After firing your work will be in the student finished work shelves. Remember to pay for it before you head out the door! There is a small extra charge for using porcelain clay (it’s more than twice the price of regular clay), and for any third firing process! Once your work has been fired it can not turn back into clay for millennia – so don’t fire it if you don’t like it! Put it in the bucket for recycling. https://firebirdstudios.com.au/the-process-of-making-pottery/The form of the jug has been in use for many centuries.Stoneware jug. Two tone brown glaze with pierced lip behind spout. Spout chipped.None.flagstaff hill, warrnambool, shipwrecked-coast, flagstaff-hill, flagstaff-hill-maritime-museum, maritime-museum, shipwreck-coast, flagstaff-hill-maritime-village, jug, ceramic jug -
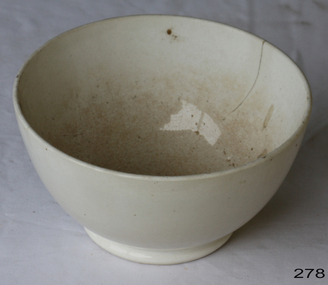 Flagstaff Hill Maritime Museum and Village
Domestic object - Bowl, Late 19th or early 20th Century
... edges turn into razor blades! Use a piece of fly wire to rub the work all over – this will scratch a little so be light handed. Use a knife...edges turn into razor blades! Use a piece of fly wire to rub the work all over – this will scratch a little so be light handed. Use a knife ...The Process of Making Pottery Decorating, Firing, Glazing, Making, Technical There is a rhythm and flow to clay. It can’t be done all at once! Even the making process! It can take weeks to get everything done, especially if you can only work on your pottery once a week! Even though we have three hour classes, it’s often just not enough time! Here is an overview of some of the processes so you have a bit more grasp on some of the technical stuff! Step One – Design There are SO many ideas out there for making stuff in clay! From delicate porcelain jewellery, through to heavy sculptural work and everything in between. Deciding your direction is sometimes not that easy – when you first start, try everything, you will naturally gravitate to the style that you enjoy! The options and variations are endless and can get a wee bit overwhelming too! Check in with me before you start to ensure your ideas will work, what order you might do things, how you could achieve the look you are seeking and any other technical data required! Step Two – Making Clay is thixotropic. This means that as you work with it, the clay first gets sloppier and wetter, before is begins to dry in the atmosphere. For most things, you simply can’t do all parts of the project at once. An example of work order might look like: Get last weeks work out from the shelves Prepare clay for today’s work – roll your clay, prepare balls for throwing, make the first stage of a pinch pot) Clean up last week’s work and put it on the shelf for bisque firing Check that you have any glazing to do – and do enough of it that you will have time to finish your main project Do the next step of your next project – there might be a further step that can’t be complete immediately, in that case, wrap your work well and put onto the shelves. Letting your work rest for a while can really help keep your work clean and professional looking. Many things require bagging under plastic to keep it ready for work the next week – put your name on the outside of the bag so you can find your work easily. We have stickers and markers. Consider how you want to decorate your work – coloured slip can be applied at a fairly wet stage (remembering that it will make your work even wetter!). Trying to apply slip to dry clay won’t work! If you want to do sgraffito – you will need to keep the work leather hard (a state of dryness where you can still work the clay with a little effort and a little water and care). Step Three – Drying Most of the time your work can go into the rack uncovered to let it dry out for the following week. If you want to continue forming or shaping you will need to double bag your work – put your work on a suitable sized bat and put the bat in a bag so the base of the bag is under the bat, then put another bag over the top of the work and tuck the top of the bag under the bat. If you want to trim (or turn) your thrown work the following week, it should also be double bagged. If your work is large, delicate, or of uneven thicknesses, you should lightly cover your work for drying. When considering the drying process, bare in mind the weather, humidity and wind! The hotter and dryer, the faster things dry and work can dry unevenly in the shelves – this can lead to cracking – another time to lightly cover your work for drying. Step Four – Trimming and Cleaning Up Your work is dry! It is called greenware now and it is at it’s most fragile! Handle everything with two hands. I often refer to soft hands – keep everything gentle and with your fingers spread as much as possible. Try to not pick up things like plates too much, and always with both hands! Before your work can be bisque fired it should be “cleaned up”. You work won’t go into the kiln if it has sharp edges – when glazed, sharp edges turn into razor blades! Use a piece of fly wire to rub the work all over – this will scratch a little so be light handed. Use a knife or metal kidney to scrape any areas that require a bit more dynamic treatment than the fly wire offers! Finally, a very light wipe over with a slightly damp sponge can help soften and soothe all of your edges and dags! Trimming thrown work: If you are planning to trim (or turn) your thrown work (and you should be), make sure you bag it well – your work should be leather hard to almost dry for easiest trimming. Use this step to finish the work completely – use a metal kidney to polish the surface, or a slightly damp sponge to give a freshly thrown look. Wipe the sponge around the rim after trimming, and check the inside of the pot for dags! Trimming slip cast work: Usually I will trim the rims of your work on the wheel the following day to make that stage easier, however you will still need to check your work for lumps and bumps. Last but not least – check that your name is still clearly on the bottom of your work. Step Five – Bisque Firing When the work is completely dry it can go into the bisque kiln. The bisque kiln is fired to 1000°C. This process burns off the water in the clay as well as some of the chemically bound water. The structure of the clay is not altered that much at this temperature. Inside the bisque kiln, the work is stacked a little, small bowl inside a larger bowl and onto a heavy plate. Smaller items like decorations or drink coasters might get stacked several high. Consideration is paid to the weight of the stack and shape of the work. A bisque kiln can fire about one and a half times the amount of work that the glaze kiln can fire. The firing takes about 10 hours to complete the cycle and about two days to cool down. Once it has been emptied the work is placed in the glaze room ready for you to decorate! Step Six – Glazing Decorating your work with colour can be a lot of fun – and time consuming! There are three main options for surface treatment at this stage: Oxide Washes Underglazes Glazes Washes and underglazes do not “glaze” the work – It will still need a layer of glaze to fully seal the clay (washes don’t need glaze on surfaces not designed for food or liquid as they can gloss up a little on their own). Underglazes are stable colourants that turn out pretty much how they look in the jar. They can be mixed with each other to form other colours and can be used like water colours to paint onto your work. Mostly they should have a clear glaze on top to seal them. Oxides are a different species – the pink oxide (cobalt) wash turns out bright blue for instance. They don’t always need a glaze on top, and some glazes can change the colour of the wash! The glazes need no other “glaze” on top! Be careful of unknown glaze interactions – you can put any combination of glaze in a bowl or on a plate, but only a single glaze on the outside of any vertical surface! Glazes are a chemical reaction under heat. We don’t know the exact chemicals in the Mayco glazes we use. I can guess by the way they interact with each other, however, on the whole, you need to test every idea you have, and not run the test on a vertical surface! Simply put, glaze is a layer of glass like substance that bonds with the clay underneath. Clay is made of silica, alumina and water. Glaze is made of mostly silica. Silica has a melting point of 1700°C and we fire to 1240°C. The silica requires a “flux” to help it melt at the lower temperature. Fluxes can be all sorts of chemicals – a common one is calcium – calcium has a melting point of 2500°C, however, together they both melt at a much lower temperature! Colourants are metal oxides like cobalt (blue), chrome (green through black), copper (green, blue, even red!), manganese (black, purple and pink) iron (red brown), etc. Different chemicals in the glaze can have dramatic effects. for example, barium carbonate (which we don’t use) turns manganese bright pink! Other elements can turn manganese dioxide brown, blue, purple and reddish brown. Manganese dioxide is a flux in and of itself as well. So, glazes that get their black and purple colours, often interact with other glazes and RUN! Our mirror black is a good example – it mixes really well with many glazes because it fluxes them – causes them to melt faster. It will also bring out many beautiful colours in the glazes because it’s black colouring most definitely comes from manganese dioxide! Glaze chemistry is a whole subject on it’s own! We use commercial Mayco glazes on purpose – for their huge range of colour possibilities, stability, cool interactions, artistic freedom with the ability to easily brush the glazes on and ease of use. We currently have almost 50 glazes on hand! A major project is to test the interactions of all glazes with each other. That is 2,500 test tiles!!!! I’m going to make the wall behind the wheels the feature wall of pretty colours! Step Seven – Glaze (Gloss or sometimes called “Glost”) Firing Most of the time this is the final stage of making your creation (but not always!) The glaze kiln goes to 1240°C. This is called cone 6, or midrange. It is the low end of stoneware temperatures. Stoneware clays and glazes are typically fired at cone 8 – 10, that is 1260 – 1290°C. The energy requirement to go from 1240°C to 1280°C is almost a 30% more! Our clay is formulated to vitrify (mature, turn “glass-like”) at 1240°, as are our glazes. A glaze kiln take around 12 hours to reach temperature and two to three days to cool down. Sometimes a third firing process is required – this is for decoration that is added to work after the glaze firing. For example – adding precious metals and lustres. this firing temperature is usually around 600 – 800°C depending upon the techniques being used. There are many students interested in gold and silver trims – we will be doing this third type of firing soon! After firing your work will be in the student finished work shelves. Remember to pay for it before you head out the door! There is a small extra charge for using porcelain clay (it’s more than twice the price of regular clay), and for any third firing process! Once your work has been fired it can not turn back into clay for millennia – so don’t fire it if you don’t like it! Put it in the bucket for recycling. https://firebirdstudios.com.au/the-process-of-making-pottery/ The bowl is an example of kitchenware used in the 19th century and still in use today.Bowl white ceramic. Crack on side. Badly stained.Backstamp very faint and unable to be read.flagstaff hill, warrnambool, shipwrecked-coast, flagstaff-hill, flagstaff-hill-maritime-museum, maritime-museum, shipwreck-coast, flagstaff-hill-maritime-village, mixing bowl, food preparation, kitchen equipment, ceramic -
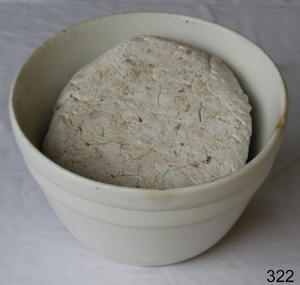 Flagstaff Hill Maritime Museum and Village
Domestic object - Bowl
... edges turn into razor blades! Use a piece of fly wire to rub the work all over – this will scratch a little so be light handed. Use a knife...edges turn into razor blades! Use a piece of fly wire to rub the work all over – this will scratch a little so be light handed. Use a knife ...The Process of Making Pottery Decorating, Firing, Glazing, Making, Technical There is a rhythm and flow to clay. It can’t be done all at once! Even the making process! It can take weeks to get everything done, especially if you can only work on your pottery once a week! Even though we have three hour classes, it’s often just not enough time! Here is an overview of some of the processes so you have a bit more grasp on some of the technical stuff! Step One – Design There are SO many ideas out there for making stuff in clay! From delicate porcelain jewellery, through to heavy sculptural work and everything in between. Deciding your direction is sometimes not that easy – when you first start, try everything, you will naturally gravitate to the style that you enjoy! The options and variations are endless and can get a wee bit overwhelming too! Check in with me before you start to ensure your ideas will work, what order you might do things, how you could achieve the look you are seeking and any other technical data required! Step Two – Making Clay is thixotropic. This means that as you work with it, the clay first gets sloppier and wetter, before is begins to dry in the atmosphere. For most things, you simply can’t do all parts of the project at once. An example of work order might look like: Get last weeks work out from the shelves Prepare clay for today’s work – roll your clay, prepare balls for throwing, make the first stage of a pinch pot) Clean up last week’s work and put it on the shelf for bisque firing Check that you have any glazing to do – and do enough of it that you will have time to finish your main project Do the next step of your next project – there might be a further step that can’t be complete immediately, in that case, wrap your work well and put onto the shelves. Letting your work rest for a while can really help keep your work clean and professional looking. Many things require bagging under plastic to keep it ready for work the next week – put your name on the outside of the bag so you can find your work easily. We have stickers and markers. Consider how you want to decorate your work – coloured slip can be applied at a fairly wet stage (remembering that it will make your work even wetter!). Trying to apply slip to dry clay won’t work! If you want to do sgraffito – you will need to keep the work leather hard (a state of dryness where you can still work the clay with a little effort and a little water and care). Step Three – Drying Most of the time your work can go into the rack uncovered to let it dry out for the following week. If you want to continue forming or shaping you will need to double bag your work – put your work on a suitable sized bat and put the bat in a bag so the base of the bag is under the bat, then put another bag over the top of the work and tuck the top of the bag under the bat. If you want to trim (or turn) your thrown work the following week, it should also be double bagged. If your work is large, delicate, or of uneven thicknesses, you should lightly cover your work for drying. When considering the drying process, bare in mind the weather, humidity and wind! The hotter and dryer, the faster things dry and work can dry unevenly in the shelves – this can lead to cracking – another time to lightly cover your work for drying. Step Four – Trimming and Cleaning Up Your work is dry! It is called greenware now and it is at it’s most fragile! Handle everything with two hands. I often refer to soft hands – keep everything gentle and with your fingers spread as much as possible. Try to not pick up things like plates too much, and always with both hands! Before your work can be bisque fired it should be “cleaned up”. You work won’t go into the kiln if it has sharp edges – when glazed, sharp edges turn into razor blades! Use a piece of fly wire to rub the work all over – this will scratch a little so be light handed. Use a knife or metal kidney to scrape any areas that require a bit more dynamic treatment than the fly wire offers! Finally, a very light wipe over with a slightly damp sponge can help soften and soothe all of your edges and dags! Trimming thrown work: If you are planning to trim (or turn) your thrown work (and you should be), make sure you bag it well – your work should be leather hard to almost dry for easiest trimming. Use this step to finish the work completely – use a metal kidney to polish the surface, or a slightly damp sponge to give a freshly thrown look. Wipe the sponge around the rim after trimming, and check the inside of the pot for dags! Trimming slip cast work: Usually I will trim the rims of your work on the wheel the following day to make that stage easier, however you will still need to check your work for lumps and bumps. Last but not least – check that your name is still clearly on the bottom of your work. Step Five – Bisque Firing When the work is completely dry it can go into the bisque kiln. The bisque kiln is fired to 1000°C. This process burns off the water in the clay as well as some of the chemically bound water. The structure of the clay is not altered that much at this temperature. Inside the bisque kiln, the work is stacked a little, small bowl inside a larger bowl and onto a heavy plate. Smaller items like decorations or drink coasters might get stacked several high. Consideration is paid to the weight of the stack and shape of the work. A bisque kiln can fire about one and a half times the amount of work that the glaze kiln can fire. The firing takes about 10 hours to complete the cycle and about two days to cool down. Once it has been emptied the work is placed in the glaze room ready for you to decorate! Step Six – Glazing Decorating your work with colour can be a lot of fun – and time consuming! There are three main options for surface treatment at this stage: Oxide Washes Underglazes Glazes Washes and underglazes do not “glaze” the work – It will still need a layer of glaze to fully seal the clay (washes don’t need glaze on surfaces not designed for food or liquid as they can gloss up a little on their own). Underglazes are stable colourants that turn out pretty much how they look in the jar. They can be mixed with each other to form other colours and can be used like water colours to paint onto your work. Mostly they should have a clear glaze on top to seal them. Oxides are a different species – the pink oxide (cobalt) wash turns out bright blue for instance. They don’t always need a glaze on top, and some glazes can change the colour of the wash! The glazes need no other “glaze” on top! Be careful of unknown glaze interactions – you can put any combination of glaze in a bowl or on a plate, but only a single glaze on the outside of any vertical surface! Glazes are a chemical reaction under heat. We don’t know the exact chemicals in the Mayco glazes we use. I can guess by the way they interact with each other, however, on the whole, you need to test every idea you have, and not run the test on a vertical surface! Simply put, glaze is a layer of glass like substance that bonds with the clay underneath. Clay is made of silica, alumina and water. Glaze is made of mostly silica. Silica has a melting point of 1700°C and we fire to 1240°C. The silica requires a “flux” to help it melt at the lower temperature. Fluxes can be all sorts of chemicals – a common one is calcium – calcium has a melting point of 2500°C, however, together they both melt at a much lower temperature! Colourants are metal oxides like cobalt (blue), chrome (green through black), copper (green, blue, even red!), manganese (black, purple and pink) iron (red brown), etc. Different chemicals in the glaze can have dramatic effects. for example, barium carbonate (which we don’t use) turns manganese bright pink! Other elements can turn manganese dioxide brown, blue, purple and reddish brown. Manganese dioxide is a flux in and of itself as well. So, glazes that get their black and purple colours, often interact with other glazes and RUN! Our mirror black is a good example – it mixes really well with many glazes because it fluxes them – causes them to melt faster. It will also bring out many beautiful colours in the glazes because it’s black colouring most definitely comes from manganese dioxide! Glaze chemistry is a whole subject on it’s own! We use commercial Mayco glazes on purpose – for their huge range of colour possibilities, stability, cool interactions, artistic freedom with the ability to easily brush the glazes on and ease of use. We currently have almost 50 glazes on hand! A major project is to test the interactions of all glazes with each other. That is 2,500 test tiles!!!! I’m going to make the wall behind the wheels the feature wall of pretty colours! Step Seven – Glaze (Gloss or sometimes called “Glost”) Firing Most of the time this is the final stage of making your creation (but not always!) The glaze kiln goes to 1240°C. This is called cone 6, or midrange. It is the low end of stoneware temperatures. Stoneware clays and glazes are typically fired at cone 8 – 10, that is 1260 – 1290°C. The energy requirement to go from 1240°C to 1280°C is almost a 30% more! Our clay is formulated to vitrify (mature, turn “glass-like”) at 1240°, as are our glazes. A glaze kiln take around 12 hours to reach temperature and two to three days to cool down. Sometimes a third firing process is required – this is for decoration that is added to work after the glaze firing. For example – adding precious metals and lustres. this firing temperature is usually around 600 – 800°C depending upon the techniques being used. There are many students interested in gold and silver trims – we will be doing this third type of firing soon! After firing your work will be in the student finished work shelves. Remember to pay for it before you head out the door! There is a small extra charge for using porcelain clay (it’s more than twice the price of regular clay), and for any third firing process! Once your work has been fired it can not turn back into clay for millennia – so don’t fire it if you don’t like it! Put it in the bucket for recycling. https://firebirdstudios.com.au/the-process-of-making-pottery/ This bowl is an example of kitchenware used in the 19th century and still in use today.Bowl white ceramic plain that has two sets of edging around lip. Inside bowl has plaster designed to look like cooking mixture.flagstaff hill, warrnambool, shipwrecked-coast, flagstaff-hill, flagstaff-hill-maritime-museum, maritime-museum, shipwreck-coast, flagstaff-hill-maritime-village, kitchen equipment, ceramic -
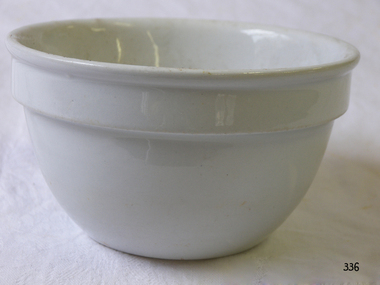 Flagstaff Hill Maritime Museum and Village
Domestic object - Bowl, J & G Meakin, Late 19th or early 20th Century
... edges turn into razor blades! Use a piece of fly wire to rub the work all over – this will scratch a little so be light handed. Use a knife...edges turn into razor blades! Use a piece of fly wire to rub the work all over – this will scratch a little so be light handed. Use a knife ...The Process of Making Pottery Decorating, Firing, Glazing, Making, Technical There is a rhythm and flow to clay. It can’t be done all at once! Even the making process! It can take weeks to get everything done, especially if you can only work on your pottery once a week! Even though we have three hour classes, it’s often just not enough time! Here is an overview of some of the processes so you have a bit more grasp on some of the technical stuff! Step One – Design There are SO many ideas out there for making stuff in clay! From delicate porcelain jewellery, through to heavy sculptural work and everything in between. Deciding your direction is sometimes not that easy – when you first start, try everything, you will naturally gravitate to the style that you enjoy! The options and variations are endless and can get a wee bit overwhelming too! Check in with me before you start to ensure your ideas will work, what order you might do things, how you could achieve the look you are seeking and any other technical data required! Step Two – Making Clay is thixotropic. This means that as you work with it, the clay first gets sloppier and wetter, before is begins to dry in the atmosphere. For most things, you simply can’t do all parts of the project at once. An example of work order might look like: Get last weeks work out from the shelves Prepare clay for today’s work – roll your clay, prepare balls for throwing, make the first stage of a pinch pot) Clean up last week’s work and put it on the shelf for bisque firing Check that you have any glazing to do – and do enough of it that you will have time to finish your main project Do the next step of your next project – there might be a further step that can’t be complete immediately, in that case, wrap your work well and put onto the shelves. Letting your work rest for a while can really help keep your work clean and professional looking. Many things require bagging under plastic to keep it ready for work the next week – put your name on the outside of the bag so you can find your work easily. We have stickers and markers. Consider how you want to decorate your work – coloured slip can be applied at a fairly wet stage (remembering that it will make your work even wetter!). Trying to apply slip to dry clay won’t work! If you want to do sgraffito – you will need to keep the work leather hard (a state of dryness where you can still work the clay with a little effort and a little water and care). Step Three – Drying Most of the time your work can go into the rack uncovered to let it dry out for the following week. If you want to continue forming or shaping you will need to double bag your work – put your work on a suitable sized bat and put the bat in a bag so the base of the bag is under the bat, then put another bag over the top of the work and tuck the top of the bag under the bat. If you want to trim (or turn) your thrown work the following week, it should also be double bagged. If your work is large, delicate, or of uneven thicknesses, you should lightly cover your work for drying. When considering the drying process, bare in mind the weather, humidity and wind! The hotter and dryer, the faster things dry and work can dry unevenly in the shelves – this can lead to cracking – another time to lightly cover your work for drying. Step Four – Trimming and Cleaning Up Your work is dry! It is called greenware now and it is at it’s most fragile! Handle everything with two hands. I often refer to soft hands – keep everything gentle and with your fingers spread as much as possible. Try to not pick up things like plates too much, and always with both hands! Before your work can be bisque fired it should be “cleaned up”. You work won’t go into the kiln if it has sharp edges – when glazed, sharp edges turn into razor blades! Use a piece of fly wire to rub the work all over – this will scratch a little so be light handed. Use a knife or metal kidney to scrape any areas that require a bit more dynamic treatment than the fly wire offers! Finally, a very light wipe over with a slightly damp sponge can help soften and soothe all of your edges and dags! Trimming thrown work: If you are planning to trim (or turn) your thrown work (and you should be), make sure you bag it well – your work should be leather hard to almost dry for easiest trimming. Use this step to finish the work completely – use a metal kidney to polish the surface, or a slightly damp sponge to give a freshly thrown look. Wipe the sponge around the rim after trimming, and check the inside of the pot for dags! Trimming slip cast work: Usually I will trim the rims of your work on the wheel the following day to make that stage easier, however you will still need to check your work for lumps and bumps. Last but not least – check that your name is still clearly on the bottom of your work. Step Five – Bisque Firing When the work is completely dry it can go into the bisque kiln. The bisque kiln is fired to 1000°C. This process burns off the water in the clay as well as some of the chemically bound water. The structure of the clay is not altered that much at this temperature. Inside the bisque kiln, the work is stacked a little, small bowl inside a larger bowl and onto a heavy plate. Smaller items like decorations or drink coasters might get stacked several high. Consideration is paid to the weight of the stack and shape of the work. A bisque kiln can fire about one and a half times the amount of work that the glaze kiln can fire. The firing takes about 10 hours to complete the cycle and about two days to cool down. Once it has been emptied the work is placed in the glaze room ready for you to decorate! Step Six – Glazing Decorating your work with colour can be a lot of fun – and time consuming! There are three main options for surface treatment at this stage: Oxide Washes Underglazes Glazes Washes and underglazes do not “glaze” the work – It will still need a layer of glaze to fully seal the clay (washes don’t need glaze on surfaces not designed for food or liquid as they can gloss up a little on their own). Underglazes are stable colourants that turn out pretty much how they look in the jar. They can be mixed with each other to form other colours and can be used like water colours to paint onto your work. Mostly they should have a clear glaze on top to seal them. Oxides are a different species – the pink oxide (cobalt) wash turns out bright blue for instance. They don’t always need a glaze on top, and some glazes can change the colour of the wash! The glazes need no other “glaze” on top! Be careful of unknown glaze interactions – you can put any combination of glaze in a bowl or on a plate, but only a single glaze on the outside of any vertical surface! Glazes are a chemical reaction under heat. We don’t know the exact chemicals in the Mayco glazes we use. I can guess by the way they interact with each other, however, on the whole, you need to test every idea you have, and not run the test on a vertical surface! Simply put, glaze is a layer of glass like substance that bonds with the clay underneath. Clay is made of silica, alumina and water. Glaze is made of mostly silica. Silica has a melting point of 1700°C and we fire to 1240°C. The silica requires a “flux” to help it melt at the lower temperature. Fluxes can be all sorts of chemicals – a common one is calcium – calcium has a melting point of 2500°C, however, together they both melt at a much lower temperature! Colourants are metal oxides like cobalt (blue), chrome (green through black), copper (green, blue, even red!), manganese (black, purple and pink) iron (red brown), etc. Different chemicals in the glaze can have dramatic effects. for example, barium carbonate (which we don’t use) turns manganese bright pink! Other elements can turn manganese dioxide brown, blue, purple and reddish brown. Manganese dioxide is a flux in and of itself as well. So, glazes that get their black and purple colours, often interact with other glazes and RUN! Our mirror black is a good example – it mixes really well with many glazes because it fluxes them – causes them to melt faster. It will also bring out many beautiful colours in the glazes because it’s black colouring most definitely comes from manganese dioxide! Glaze chemistry is a whole subject on it’s own! We use commercial Mayco glazes on purpose – for their huge range of colour possibilities, stability, cool interactions, artistic freedom with the ability to easily brush the glazes on and ease of use. We currently have almost 50 glazes on hand! A major project is to test the interactions of all glazes with each other. That is 2,500 test tiles!!!! I’m going to make the wall behind the wheels the feature wall of pretty colours! Step Seven – Glaze (Gloss or sometimes called “Glost”) Firing Most of the time this is the final stage of making your creation (but not always!) The glaze kiln goes to 1240°C. This is called cone 6, or midrange. It is the low end of stoneware temperatures. Stoneware clays and glazes are typically fired at cone 8 – 10, that is 1260 – 1290°C. The energy requirement to go from 1240°C to 1280°C is almost a 30% more! Our clay is formulated to vitrify (mature, turn “glass-like”) at 1240°, as are our glazes. A glaze kiln take around 12 hours to reach temperature and two to three days to cool down. Sometimes a third firing process is required – this is for decoration that is added to work after the glaze firing. For example – adding precious metals and lustres. this firing temperature is usually around 600 – 800°C depending upon the techniques being used. There are many students interested in gold and silver trims – we will be doing this third type of firing soon! After firing your work will be in the student finished work shelves. Remember to pay for it before you head out the door! There is a small extra charge for using porcelain clay (it’s more than twice the price of regular clay), and for any third firing process! Once your work has been fired it can not turn back into clay for millennia – so don’t fire it if you don’t like it! Put it in the bucket for recycling. https://firebirdstudios.com.au/the-process-of-making-pottery/This bowl was made by renowned pottery company J & G Meakin of England. The firm was established in the mid-1800's. The bowl is an example of kitchenware used in the 19th century and still in use today.Bowl; white ceramic, round and tapering inwards towards base. Made by J and G Meakin England.On base, 'Ironstone China Reg SOL 391413' with symbolflagstaff hill, flagstaff hill maritime museum and village, warrnambool, maritime museum, maritime village, great ocean road, shipwreck coast, mixing bowl, food preparation, j & g meakin, pottery, stoke-on-trent, kitchen equipment, ceramic -
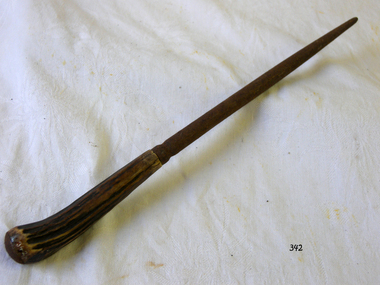 Flagstaff Hill Maritime Museum and Village
Domestic object - Sharpening Steel
... edge of the blade against the base of the steel, then sliding the blade away from yourself along the steel while moving it down – the blade moves diagonally, while the steel remains stationary. This should be done with the blade held at an angle to the steel, usually about 20°, and repeating on the opposite side at the same angle. This is repeated five to ten times per side. Steeling It is often recommended that steeling be performed immediately before or after using a knife...edge of the blade against the base of the steel, then sliding the blade away from yourself along the steel while moving it down – the blade moves diagonally, while the steel remains stationary. This should be done with the blade held at an angle to the steel, usually about 20°, and repeating on the opposite side at the same angle. This is repeated five to ten times per side. Steeling It is often recommended that steeling be performed immediately before or after using a knife ...A honing steel, sometimes referred to as a sharpening steel, whet steel, sharpening stick, sharpening rod, butcher's steel, and chef's steel, is a rod of steel, ceramic or diamond-coated steel used to restore keenness to dulled blade edges. They are flat, oval, or round in cross-section and up to 30 centimetres (1 ft) long. The steel and ceramic honing steels may have longitudinal ridges, whereas the diamond-coated steels are smooth but embedded with abrasive diamond particles. Non-abrasive honing rods such as smooth ceramic or ribbed steel are able to remove small amounts of metal via adhesive wear. In normal use, the rod is applied to the blade at a slightly higher angle than that of the bevel, resulting in the formation of a micro-bevel. The term "hone" is associated with light maintenance performed on a blade without the effort and precision normally associated with sharpening, so the name "hone" was borrowed. In the 1980s, ceramic abrasives became increasingly popular and proved an equal, if not superior, method for accomplishing the same daily maintenance tasks; manufacturers replaced steels with ceramic (and later, manufactured diamond abrasive) sharpening "steels" that were actually hones. Use Honing steels are used by lightly placing the near edge of the blade against the base of the steel, then sliding the blade away from yourself along the steel while moving it down – the blade moves diagonally, while the steel remains stationary. This should be done with the blade held at an angle to the steel, usually about 20°, and repeating on the opposite side at the same angle. This is repeated five to ten times per side. Steeling It is often recommended that steeling be performed immediately before or after using a knife and can be done daily. By contrast, knives are generally sharpened much less frequently. A traditional smooth honing steel is of no use if the edge is blunt, because it removes no material; instead it fixes deformations along the edge of a sharp blade, technically known as burnishing. There has long been speculation about the efficacy of steeling (re-aligning the edge) vs honing (removing minor deformation with abrasives); studies tend to favour abrasives for daily maintenance, especially in high-carbide-volume "stainless" steels (such as the popular CPM S30V steel, which tends to "tear out" when steeled rather than re-forming an edge.) Small honing steel for outdoor activities Usage trends Steels have traditionally been used in the West, especially in heavy-use scenarios (e.g. butchering, where the edge deforms due to forceful contact with bone). These scenarios also lead Western trends toward blades tempered to a lower level of hardness (and thus lower brittleness). In East Asia, notably Japan, harder knives are preferred, so there is little need for steeling intra-day, as the edge does not deform as much. Instead, the blade is honed as needed on a waterstone. While tradition has kept the practice of steeling alive in Western kitchens, the majority of honing steels sold are abrasive rather than smooth, and knives are harder and more frequently made of stainless steel, which does not respond to traditional steeling techniques as well as high-carbon/low alloy tool steels.The sharpening steel is essential to maintain the sharpness of carving and other knives.Steel knife sharpener with bone handle. Part of a carving set.None.flagstaff hill, warrnambool, shipwrecked-coast, flagstaff-hill, flagstaff-hill-maritime-museum, maritime-museum, shipwreck-coast, flagstaff-hill-maritime-village, sharpening steel, carving set, kitchen equipment -
 Flagstaff Hill Maritime Museum and Village
Domestic object - Knife
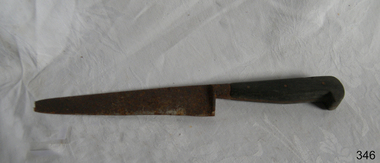
... Knife; wooden handle and shaped metal blade with serrated cutting edge....Flagstaff Hill Warrnambool Shipwrecked-coast Flagstaff-Hill Flagstaff-Hill-Maritime-Museum Maritime-Museum Shipwreck-coast Flagstaff-Hill-Maritime-Village Kitchen knife Food preparation Knife; wooden handle and shaped metal blade with serrated cutting edge. Domestic object Knife ...This knife would have been used for food preparation.Knife; wooden handle and shaped metal blade with serrated cutting edge.flagstaff hill, warrnambool, shipwrecked-coast, flagstaff-hill, flagstaff-hill-maritime-museum, maritime-museum, shipwreck-coast, flagstaff-hill-maritime-village, kitchen knife, food preparation -
 Flagstaff Hill Maritime Museum and Village
Domestic object - Knife
... knife tool. As the centuries went on, iron and then steel became commonplace across the entire world. Knives created from those materials were much more durable and easier to maintain their sharpness after prolonged use. During medieval times in Europe, steel metallurgy managed to evolve knives from small single or double-bladed edges...knife tool. As the centuries went on, iron and then steel became commonplace across the entire world. Knives created from those materials were much more durable and easier to maintain their sharpness after prolonged use. During medieval times in Europe, steel metallurgy managed to evolve knives from small single or double-bladed edges ...From the early days of our race, the knife represented one of the first and most important tools that enabled rise of our technology, military, culture, science and all other things that brought us to this point of modern civilisation. As a vital tool for survival, combat, construction and food preparation, the knife quickly became the most basic tool from which all others were born. In those ancient times, 500,000 years ago, sharpened stones started slowly evolving, becoming more and more like their modern counterpart. Before the time when fire enabled the melting of the various metals, and forging them into modern knives, their stone counterparts received several visual upgrades. Double bladed knives were most popular, and their wooden or stone hilts were decorated with animal skins and feathers. Those knives represented a great deal of pride for the warriors and elders who owned them, and that tradition continued to be practised with the arrival of the Bronze Age. The appearance of metallurgy brought the ability to create knives from softer types of metal. Even though knives from bronze did not provide durability over longer periods of time [easily dulled, and susceptible to corrosion), their sharpness and slim designed proved to be superior to any stone knife tool. As the centuries went on, iron and then steel became commonplace across the entire world. Knives created from those materials were much more durable and easier to maintain their sharpness after prolonged use. During medieval times in Europe, steel metallurgy managed to evolve knives from small single or double-bladed edges to larger sizes - swords, spears and axes. Even with all those advancements, the use of knives as an eating utensil continued to be used in some small circles. Even as early as the 15th century, wealthy circles of people started carrying personal knives, intended for double use - both eating and defending against threats. During those times the host were not obliged to provide their guest with any kind of eating utensil in addition to plates, so wealthy males used their eating knives for cutting their own meals, and the meals of nearby female guests. Slim double-bladed knives were good for cutting and piercing foods. As the use of forks became widespread in the whole of Europe by the late 17th century, most people used this kind of small knife on a regular basis (a combination of two knives, one for stabilising and other for cutting the meal). http://www.eatingutensils.net/history-of-cutlery/knife-history/The knife is one of the most important items that has enabled the development of civilisation over thousands of years.Carving knife with wooden handle and rusted slender metal blade.None.flagstaff hill, warrnambool, shipwrecked-coast, flagstaff-hill, flagstaff-hill-maritime-museum, maritime-museum, shipwreck-coast, flagstaff-hill-maritime-village, knife, kitchen equipment, dining -
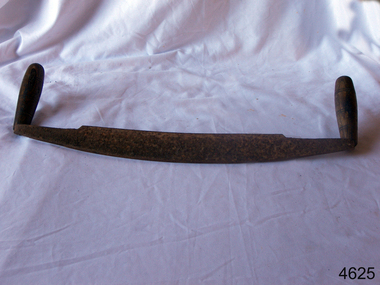 Flagstaff Hill Maritime Museum and Village
Tool - Draw Knife, Prior to 1950
... A draw knife or drawing knife, draw shave, shaving knife is a traditional woodworking hand tool used to shape wood by removing shavings. It consists of a blade with a handle at each end. The blade is much longer along the cutting edge...A draw knife or drawing knife, draw shave, shaving knife is a traditional woodworking hand tool used to shape wood by removing shavings. It consists of a blade with a handle at each end. The blade is much longer along the cutting edge ...A draw knife or drawing knife, draw shave, shaving knife is a traditional woodworking hand tool used to shape wood by removing shavings. It consists of a blade with a handle at each end. The blade is much longer along the cutting edge than it is deep (from cutting edge to back edge). It is pulled or "drawn" toward the user. A draw knife is commonly used to remove large slices of wood for flat faceted work, to debark trees, or to create roughly rounded or cylindrical billets for further work on a lathe, or it can shave like a spokeshave plane, where finer finishing is less of concern than a rapid result. The thin blade lends itself to create complex concave or convex curves such as in making staves for barrels.A specialised tool used in many different types of wood working and in the making of barrels, this type of tool has been used for many hundreds of years by coopers and other woodworking craftsmen all around the world. It is a tool that has not changed in design during this time and is still used today by craftsmen in the making of wooden barrels for the storage of wines etc.Draw knife with metal blade and two wooden handlesNoneflagstaff hill, warrnambool, flagstaff-hill, flagstaff-hill-maritime-museum, shipwreck-coast, flagstaff-hill-maritime-village, draw knife, coopers tools, woodworking tools, knife, cooperage -
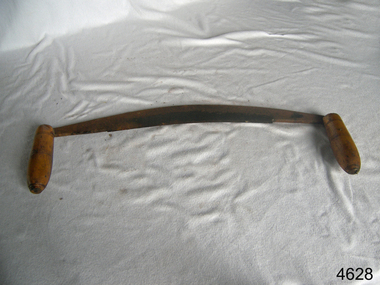 Flagstaff Hill Maritime Museum and Village
Tool - Draw Knife, Prior to 1950
... A draw knife or drawing knife, draw shave, shaving knife is a traditional woodworking hand tool used to shape wood by removing shavings. It consists of a blade with a handle at each end. The blade is much longer along the cutting edge...A draw knife or drawing knife, draw shave, shaving knife is a traditional woodworking hand tool used to shape wood by removing shavings. It consists of a blade with a handle at each end. The blade is much longer along the cutting edge ...A draw knife or drawing knife, draw shave, shaving knife is a traditional woodworking hand tool used to shape wood by removing shavings. It consists of a blade with a handle at each end. The blade is much longer along the cutting edge than it is deep (from cutting edge to back edge). It is pulled or "drawn" toward the user. A draw knife is commonly used to remove large slices of wood for flat faceted work, to debark trees, or to create roughly rounded or cylindrical billets for further work on a lathe, or it can shave like a spokeshave plane, where finer finishing is less of concern than a rapid result. The thin blade lends itself to create complex concave or convex curves such as in making staves for barrels.A specialised tool used in many different types of wood working and in the making of barrels, this type of tool has been used for many hundreds of years by coopers and other woodworking craftsmen all around the world. It is a tool that has not changed in design during this time and is still used today by craftsmen in the making of wooden barrels for the storage of wines etc.Draw knife with metal blade and two wooden handlesMarkings on blade unreadable flagstaff hill, warrnambool, flagstaff-hill, flagstaff-hill-maritime-museum, shipwreck-coast, flagstaff-hill-maritime-village, draw knife, coopers tools, woodworking tools, knife, cooperage
