Showing 699 items matching "royal welcome"
-
 Kiewa Valley Historical Society
Book - Non Fiction History, Australia's Royal Welcome 1954, circa 1954
... Australia's Royal Welcome 1954...There are 115 black and white photographs and 25 coloured photographs contained in this book. Australia's Royal Welcome 1954 Book - Non Fiction History Herald and Weekly Times Ltd ...This publication covers the mid 1900s and relates to a period where the majority of the Australian population was engrossed with the Queen of Australia, even though her Highness did not reside on this continent. The period covered was before the great immigration insurgence from Europe.The Labour Party's "White Australian" policy was a hinderance and a barrier towards the Asian and African prospective immigrants. The motto Queen and Country was still very ingrained in the rural population. This period in Australian domestic self reliance, brought about the growing strength and very active trade union movement and their staunch support for the Tariff protection against a growing swell of imported goods. This self reliance psyche was essentially a by product of World War II, and the isolation felt by the Australian People. The Queen (royalty) was the binding force holding the British Empire together which was emphasised with her popularity when touring Australia Queen Elizabeth's visited the MCG twice in 1954 1. to attend an assembly of ex-servicemen and women's organisations 2. to attend a Children's Display. She also visited Government House and visited Country Victoria on the Royal train from 24th Feb - 9th March.The Kiewa Valley and all the rural areas in the region were still very much tied to the "mother land" and trade between Britain and Australia was very strong. Trade with Asian manufacturers was minimal and needed the late 1900s to see both the trade and immigration barriers fall. This book was produced during a time when the majority of Australians looked more to England for trade and companionship. The agricultural trade with England and Europe was very high and the motto of the time was "Australia grows on the sheep's back". Late 1900's saw the motto "Australia grows on the miner's back" The Queen was still very popular then which was emphasised by the large crowds which greeted her on tour. Residents of Mt Beauty including Cubs, Brownies, Scouts and Guides travelled to Benalla to see the Queen. Clare Roper was a founding member of the KVHS and attended a garden party at Buckingham Palace representing the local CWA. She has purchased this book and therefore giving this a close historical significance connection, it has good provenance and interpretive capacity. This hard(blue coloured) covered book contains thirty six double sided pages. Both the first and last pages (inside cover included) has the royal crest of Australia (kangaroo and emu) balancing the individual six states crests ,united under the royal crown. The first six double pages, each portraying a coloured free hand sketches of various Australian scenery enclosing the Queen's day by day and State by State itinerary. There are 115 black and white photographs and 25 coloured photographs contained in this book.Third page has free hand penned signature "Clare Roper"1954 royal tour, queen elizabeth ii monarchy, british empire in the 1900s, god save the queen. -
 Bendigo Historical Society Inc.
Document - RAAF RADAR REUNION COLLECTION: WELCOME TO ROYAL AUSTRALIAN AIR FORCE 41 WING
... RAAF RADAR REUNION COLLECTION: WELCOME TO ROYAL AUSTRALIAN AIR FORCE 41 WING...Small information booklet titled: Welcome to Royal Australian Air Force 41 Wing, Chapters are The air defence ground environment - No.41 Wing, a brief history - No.2 control and reporting unit - No.3 control and reporting unit - No.114 mobile control and reporting unit - software development unit....Document RAAF RADAR REUNION COLLECTION: WELCOME TO ROYAL AUSTRALIAN AIR FORCE 41 WING ...Small information booklet titled: Welcome to Royal Australian Air Force 41 Wing, Chapters are The air defence ground environment - No.41 Wing, a brief history - No.2 control and reporting unit - No.3 control and reporting unit - No.114 mobile control and reporting unit - software development unit.military, airforce, raaf radar -
 Marysville & District Historical Society
THE TRIANGLE NEWS-VOL 3 NO 5-MARCH 10 1978
... ...royal welcome...Marysville & District Historical Society 39 Darwin Street Marysville yarra-valley-and-the-dandenong-ranges marysville victoria australia buxton tragedy-gail greatorex thanks sister molly community care centre births elizabeth ackerman finishes course wanted to buy happy birthday wanted 1st marysville girl guides l.a. swimming club marysville kindergarten roster marysville primary school mothers' club cricket club wind up fruit salad farm royal welcome boots mcleod auction sale alexandra high school mothers' club wirreanda committee marysville football club for sale senior citizens who is henry? ...marysville, victoria, australia, buxton tragedy-gail greatorex, thanks sister molly, community care centre, births, elizabeth ackerman finishes course, wanted to buy, happy birthday, wanted, 1st marysville girl guides l.a., swimming club, marysville kindergarten roster, marysville primary school mothers' club, cricket club wind up, fruit salad farm, royal welcome, boots mcleod, auction sale, alexandra high school mothers' club, wirreanda committee, marysville football club, for sale, senior citizens, who is henry?, duck season, golf club, bowls, marysville lions club, maths tutoring in your home -
 Bendigo Historical Society Inc.
Document - SOUVENIR, CITY OF BENDIGO,TABLEAU WELCOMING THE DUKE & DUCHESS OF GLOUSTER
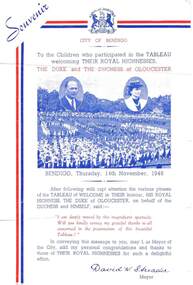
... Document, Souvenir, City of Bendigo, to the children who participated in the TABLEAU (Gathering,Games,) welcoming His Royal Highness, The Duke of Gloucester and his wife The Duchess of Gloucester on Thursday 14th November 1946.Mayor of Bendigo , David W. ...Document, Souvenir, City of Bendigo, to the children who participated in the TABLEAU (Gathering,Games,) welcoming His Royal Highness, The Duke of Gloucester and his wife The Duchess of Gloucester on Thursday 14th November 1946.Mayor of Bendigo , David W. ...Document, Souvenir, City of Bendigo, to the children who participated in the TABLEAU (Gathering,Games,) welcoming His Royal Highness, The Duke of Gloucester and his wife The Duchess of Gloucester on Thursday 14th November 1946.Mayor of Bendigo , David W. Streader also conveyed a message and thanks to THEIR ROYAL HIGHNESSES.document, souvenir, city of bendigo, tableau welcoming the duke & duchess of glouster. -
Port Melbourne Historical & Preservation Society
Photograph - Port Melbourne Strong Post in St Kilda Road, waiting for the arrival of Duke and Duchess of York, 21 Apr 1927
... The Port Melbourne Council established a Strong Post in St Kilda Road to welcome the royal couple. Standing third and fourth from left Mrs CRICHTON, holding an Australian flag, and Cr J P CRICHTON. ...The Port Melbourne Council established a Strong Post in St Kilda Road to welcome the royal couple. Standing third and fourth from left Mrs CRICHTON, holding an Australian flag, and Cr J P CRICHTON. ...In 1927 the Duke and Duchess of York (later King George VI and Queen Elizabeth) visited Australia. The Port Melbourne Council established a Strong Post in St Kilda Road to welcome the royal couple. Standing third and fourth from left Mrs CRICHTON, holding an Australian flag, and Cr J P CRICHTON. The tall man in centre of photograph looking at the camera is S S ANDERSON, Town Clerk. Second from right is Cr William HOWE, Mayor. This is the final version of the proof also held in the PMHPS collection (293.01) where the oval inset of the royal couple has been swapped from the right hand upper corner in the proof to the upper left corner in final version.Sepia photograph with a brown wooden mount of a Port Melbourne Council group in St Kilda Road awaiting the arrival of Duke and Duchess of York - 21 April, 1927. A oval photo of the royal couple is inset in the top left corner. "Port Melbourne Strong Post St. Kilda Rd. - Arrival of Duke & Duchess of York, April 21st 1927" below the image on the mount.local government - city of port melbourne, duke of york, duchess of york, william howe, sydney sims anderson, royal visits and occasions, mayors, town clerks, james peter crichton, elizabeth branton crichton nee portbury -
 City of Greater Bendigo - Civic Collection
Work on paper - Commemorative photographic montage, Bartlett Bros, Duke and Duchess of York Royal Visit to Bendigo, 1927
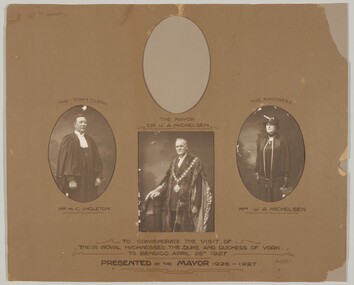
... They arrived on April 28th via train where an enthusiastic crowd of over 5000 people watched as the Royal Couple were driven from the station to the Upper Reserve. (Queen Elizabeth Oval) A special arch “THE GATE TO THE GOLDEN NORTH “was erected to welcome the Royal Couple. ...They arrived on April 28th via train where an enthusiastic crowd of over 5000 people watched as the Royal Couple were driven from the station to the Upper Reserve. (Queen Elizabeth Oval) A special arch “THE GATE TO THE GOLDEN NORTH “was erected to welcome the Royal Couple. ...In 1927, the Duke and Duchess of York (1895-1952), later King George VI and Queen Elizabeth (1900-2002), the Queen Mother, embarked on a Royal Tour of Australia and New Zealand. A key purpose of the tour was to open the provisional Parliament House in Canberra, but it also served as a gesture of gratitude for Australia's contributions during World War 1. Although not originally scheduled to visit locations outside of Melbourne, the Duke and Duchess made time in their itinerary to visit Bendigo during their trip to Australia in 1927. They arrived on April 28th via train where an enthusiastic crowd of over 5000 people watched as the Royal Couple were driven from the station to the Upper Reserve. (Queen Elizabeth Oval) A special arch “THE GATE TO THE GOLDEN NORTH “was erected to welcome the Royal Couple. Brown card mount with four cut windows to house black and white photographic portraits. Only three of the four photographs in place with top photograph missing. Handwritten text under each window and lower centre of mount. Frame missing.The Town Clerk / Mr H.C. Ingleton The Mayor / Cr J. A. Michelsen The Mayoress / Mrs J. A. Michelsen To Commemorate The Visit of / Their Royal Highnesses , The . Duke and Duchesss of York / To Bendigo. April 28th 1927 / Presented by the Mayor 1926 - 1927city of greater bendigo royal visits, city of bendigo mayoress, city of bendigo mayor, mayoress michelsen, mayor michelsen -
Port Melbourne Historical & Preservation Society
Photograph - Proof - Port Melbourne Strong Post in St Kilda Road, waiting for the arrival of Duke and Duchess of York, The Sears Studio, 21 Apr 1927
... The Port Melbourne Council established a Strong Post in St Kilda Road to welcome the royal couple. Standing third and fourth from left Mrs CRICHTON, holding an Australian flag, and Cr J P CRICHTON. ...The Port Melbourne Council established a Strong Post in St Kilda Road to welcome the royal couple. Standing third and fourth from left Mrs CRICHTON, holding an Australian flag, and Cr J P CRICHTON. ...In 1927 the Duke and Duchess of York (later King George VI and Queen Elizabeth) visited Australia. The Port Melbourne Council established a Strong Post in St Kilda Road to welcome the royal couple. Standing third and fourth from left Mrs CRICHTON, holding an Australian flag, and Cr J P CRICHTON. The tall man in centre of photograph looking at the camera is S S ANDERSON, Town Clerk. Second from right is Cr William HOWE, Mayor. This is a proof version of the final photo also held in the PMHPS collection (293.02) where the oval inset of the royal couple has been swapped from the right hand upper corner in the proof to the upper left corner in final version. Note that the price for copies of the photo is inscribed on the mount. 5/- for this (the large size) and 2/6 for a smaller size.Sepia proof photograph in a cardboard mount of Port Melbourne Council Group in St Kilda Road awaiting the arrival of Duke and Duchess of York - 21 April, 1927. A oval photo of the royal couple is inset (pasted) in the top right corner."This size 5/- each, smaller size 2/6 each" in pencil on the top left corner of the mount. "PROOF" stamped on the right edge of the mount.local government - city of port melbourne, duke of york, duchess of york, william howe, sydney sims anderson, royal visits and occasions, mayors, town clerks, james peter crichton, elizabeth branton crichton nee portbury -
 National Wool Museum
Photograph, Queen Elizabeth II visit to Geelong, 1988
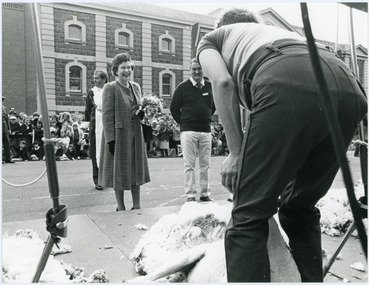
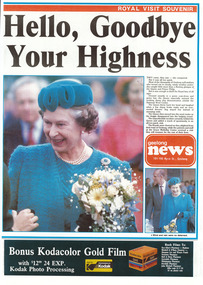
... Crowds gathered to welcome the royal couple, wool shearing demonstrations took place outside the centre and “Spud” the sheepdog exhibited his heading talents. ...Crowds gathered to welcome the royal couple, wool shearing demonstrations took place outside the centre and “Spud” the sheepdog exhibited his heading talents. ...In 1988 Her Majesty Queen Elizabeth II and Prince Philip travelled across Australia to take part in the bicentenary celebrations. In April Her Majesty Queen Elizabeth II and Prince Philip arrived in Geelong to open the Wool Week Display in the almost complete National Wool Centre. Crowds gathered to welcome the royal couple, wool shearing demonstrations took place outside the centre and “Spud” the sheepdog exhibited his heading talents. During their visit to the wool centre they were met by the chairman of the Geelong Regional Commission, Mr Colin Atkins and Mrs Monique Atkins. The Queen was presented with a rug woven by the museums 1910 gripper-type Axminster Jacquard carpet loom and the Duke was presented with a woollen jumper. In return the Queen presented three letters from the archives of the Windsor Castle to the museum. The couple left in the afternoon, charming the Geelong crowd. Two black and white photographs of Her Majesty Queen Elizabeth II, accompanied by the City of Greater Geelong Mayor, Jim Fidge, watching a shearing demonstration by local Geelong shearers outside the then National Wool Centre. Her Majesty Queen Elizabeth II opened the Wool Week Display in the almost complete National Wool Centre during her visit in April 1988.royal visit, wool centre, geelong, queen elizabeth ii, prince philip, national wool centre., bicentenary celebrations -
 National Wool Museum
Royal Visit Souvenir, 29th April 1988
... Crowds gathered to welcome the royal couple, wool shearing demonstrations took place outside the centre and “Spud” the sheepdog exhibited his herding talents. ...Crowds gathered to welcome the royal couple, wool shearing demonstrations took place outside the centre and “Spud” the sheepdog exhibited his herding talents. ...In 1988 Her Majesty Queen Elizabeth II and Prince Philip travelled across Australia to take part in the bicentenary celebrations. In April Her Majesty Queen Elizabeth II and Prince Philip arrived in Geelong to open the Wool Week Display in the almost complete National Wool Centre. Crowds gathered to welcome the royal couple, wool shearing demonstrations took place outside the centre and “Spud” the sheepdog exhibited his herding talents. During their visit to the wool centre they were met by the chairman of the Geelong Regional Commission, Mr Colin Atkins and Mrs Monique Atkins. The Queen was presented with a rug woven by the museums 1910 gripper-type Axminster Jacquard carpet loom and the Duke was presented with a woollen jumper. In return the Queen presented three letters from the archives of the Windsor Castle to the museum. The couple left in the afternoon, charming the Geelong crowd. Souvenir newspaper, relating to Her Majesty Queen Elizabeth II visit to Geelong in April 1988 where she opened the Wool Week Display in the almost complete National Wool Centre.Front page title: Hello, Goodbye Your Highnessroyal visit -
 National Wool Museum
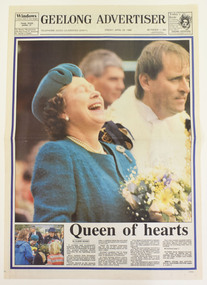
Royal Souvenir Edition, 29/4/1988
... Crowds gathered to welcome the royal couple, wool shearing demonstrations took place outside the centre and “Spud” the sheepdog exhibited his heading talents. ...Crowds gathered to welcome the royal couple, wool shearing demonstrations took place outside the centre and “Spud” the sheepdog exhibited his heading talents. ...In 1988 Her Majesty Queen Elizabeth II and Prince Philip travelled across Australia to take part in the bicentenary celebrations. In April Her Majesty Queen Elizabeth II and Prince Philip arrived in Geelong to open the Wool Week Display in the almost complete National Wool Centre. Crowds gathered to welcome the royal couple, wool shearing demonstrations took place outside the centre and “Spud” the sheepdog exhibited his heading talents. During their visit to the wool centre they were met by the chairman of the Geelong Regional Commission, Mr Colin Atkins and Mrs Monique Atkins. The Queen was presented with a rug woven by the museums 1910 gripper-type Axminster Jacquard carpet loom and the Duke was presented with a woollen jumper. In return the Queen presented three letters from the archives of the Windsor Castle to the museum. The couple left in the afternoon, charming the Geelong crowd. Souvenir newspaper, consisting of one large rectangular pieces of newsprint folded in half to form two pages. It contains articles and photographs relating to Her Majesty Queen Elizabeth II visit to Geelong in April 1988 where she opened the Wool Week Display in the almost complete National Wool Centre.Front page heading: Queen of heartsroyal visit -
 National Wool Museum
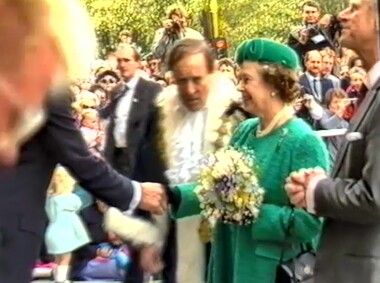
Film - The Visit to the National Wool Centre by Her Majesty Queen Elizabeth II, April 1988
... Crowds gathered to welcome the royal couple, wool shearing demonstrations took place outside the centre and “Spud” the sheepdog exhibited his herding talents. ...Crowds gathered to welcome the royal couple, wool shearing demonstrations took place outside the centre and “Spud” the sheepdog exhibited his herding talents. ...In 1988 Her Majesty Queen Elizabeth II and Prince Philip travelled across Australia to take part in the bicentenary celebrations. In April Her Majesty Queen Elizabeth II and Prince Philip arrived in Geelong to open the Wool Week Display in the almost complete National Wool Centre. Crowds gathered to welcome the royal couple, wool shearing demonstrations took place outside the centre and “Spud” the sheepdog exhibited his herding talents. During their visit to the wool centre they were met by the chairman of the Geelong Regional Commission, Mr Colin Atkins and Mrs Monique Atkins. The Queen was presented with a rug woven by the museums 1910 gripper-type Axminster Jacquard carpet loom and the Duke was presented with a woollen jumper. In return the Queen presented three letters from the archives of the Windsor Castle to the museum. The couple left in the afternoon, charming the Geelong crowd.Black VHS tape with black and yellow stickers and printed text. Tape is housed in a black plastic case. Film includes colour footage and audio. 00:13 - titles 00:21 - Queen greeting crowds of people on Moorabool Street 00:41 - sheep herding demonstration on Moorabool Street 01:04 - sheep shearing demonstration 01:53 - Queen tours inside the National Wool Centre 02:17 - Queen watches loom demonstration 02:34 - wool auction 04:02 - Queen and Prince Philip sign two registers 06:10 - Queen exits National Wool Centre 06:12 - Queen greets crowds on the street 07:04 - Queen enters vehicle 07:18 - endLabel on case: Queens Visit / National Wool Centre.film, national wool centre, bicentennial, her majesty queen elizabeth ii, prince philip, national wool museum, royal visit -
 St Kilda Historical Society
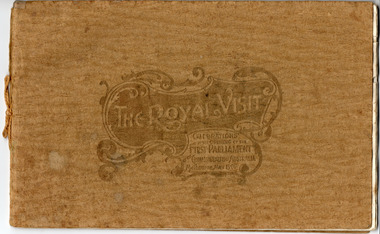
Memorabilia - Booklet, The Royal Visit Celebrations at the Opening of the First Parliament Commonwealth of Australia Melbourne May 1901, 1901
... Booklet contains photographs of: THH the Duke and Duchess of Cornwall and York; Earl of Hopetoun, Governor General, and Countess; Commonwealth Ministry; The Royal Party at Government House Melbourne; TRH the Duke and Duchess Landing at St Kilda Pier; The Mayor of Melbourne Welcoming His Royal Highness at the entrance to the City; Procession Passing down Bourke Street; Presentation of War Medals to Victorian Soldiers; The Duke of York and his Staff; St Kilda and Prahran Arch; City Arch; Procession passing Princes Bridge; Opening Ceremony at First Federal Parliament; Citizens' Arch; Queen Victoria Arch; Royal Yacht Ophir; Warships Gromoboi (Russian) and Brooklyn (USA); German Arch; Chinese Arch; State School Fete at Exhibition Building; The University Commencement; Group of Fijian Constabulary; Laying Foundation Stone, Soldiers' Memorial Ballarat; Visit to South Star Gold Mine, Ballarat; Illuminations at Princes Bridge and Flinders Street Station; Illuminations at Parliament House and Treasury; Illuminations at Town Hall and City Arch...St Kilda Historical Society St Kilda Branch Library 150 Carlisle Street St Kilda melbourne Booklet contains photographs of: THH the Duke and Duchess of Cornwall and York; Earl of Hopetoun, Governor General, and Countess; Commonwealth Ministry; The Royal Party at Government House Melbourne; TRH the Duke and Duchess Landing at St Kilda Pier; The Mayor of Melbourne Welcoming His Royal Highness at the entrance to the City; Procession Passing down Bourke Street; Presentation of War Medals to Victorian Soldiers; The Duke of York and his Staff; St Kilda and Prahran Arch; City Arch; Procession passing Princes Bridge; Opening Ceremony at First Federal Parliament; Citizens' Arch; Queen Victoria Arch; Royal Yacht Ophir; Warships Gromoboi (Russian) and Brooklyn (USA); German Arch; Chinese Arch; State School Fete at Exhibition Building; The University Commencement; Group of Fijian Constabulary; Laying Foundation Stone, Soldiers' Memorial Ballarat; Visit to South Star Gold Mine, Ballarat; Illuminations at Princes Bridge and Flinders Street Station; Illuminations at Parliament House and Treasury; Illuminations at Town Hall and City Arch Duke and Duchess of Cornwall and York Royal visits 1901 Opening of Parliament Federation arch St Kilda and Prahran Arch City Arch German Arch Chinese Arch Handwritten inscription on title page: 'For the Boy from Grandfather in memory of a very happy time we spent together May 1901' Gold coloured paper cover embossed and tied with gold thread. ...Booklet contains photographs of: THH the Duke and Duchess of Cornwall and York; Earl of Hopetoun, Governor General, and Countess; Commonwealth Ministry; The Royal Party at Government House Melbourne; TRH the Duke and Duchess Landing at St Kilda Pier; The Mayor of Melbourne Welcoming His Royal Highness at the entrance to the City; Procession Passing down Bourke Street; Presentation of War Medals to Victorian Soldiers; The Duke of York and his Staff; St Kilda and Prahran Arch; City Arch; Procession passing Princes Bridge; Opening Ceremony at First Federal Parliament; Citizens' Arch; Queen Victoria Arch; Royal Yacht Ophir; Warships Gromoboi (Russian) and Brooklyn (USA); German Arch; Chinese Arch; State School Fete at Exhibition Building; The University Commencement; Group of Fijian Constabulary; Laying Foundation Stone, Soldiers' Memorial Ballarat; Visit to South Star Gold Mine, Ballarat; Illuminations at Princes Bridge and Flinders Street Station; Illuminations at Parliament House and Treasury; Illuminations at Town Hall and City ArchGold coloured paper cover embossed and tied with gold thread. Contains 16 pages of cream coloured paper printed in black, some with blue decorative margins.Handwritten inscription on title page: 'For the Boy from Grandfather in memory of a very happy time we spent together May 1901'duke and duchess of cornwall and york, royal visits, 1901, opening of parliament, federation arch, st kilda and prahran arch, city arch, german arch, chinese arch -
 City of Melbourne Libraries
Photograph, Bull, Hugh Jones, 1897-1993, "A Royal Portrait" (Duke of York), 1933
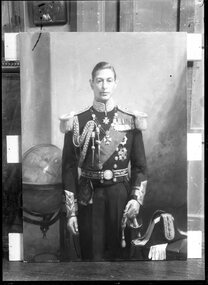
... At 10.30 am, Australia’s eighth Prime Minister, Mr Stanley Bruce (1923-1929) welcomed the Royal couple onto the crimson carpeted portico. ...At 10.30 am, Australia’s eighth Prime Minister, Mr Stanley Bruce (1923-1929) welcomed the Royal couple onto the crimson carpeted portico. ...Published: The Age, Sat 14 October 1933 Published title: A Royal Portrait Published caption: "Seen at his studio, Alphington, Mr. W. B. Mclnnes's portrait of the Duke of York, which he painted recently on commission from the trustees of the Castlemaine Gallery, at St. John’s Wood, London, impresses as a vital record of one whose natural habitat is a palace, and whose place in life is one of near relationship to the throne of England. The Duke is painted in the uniform of the admiral of the fleet, a highly ornate vesture entailing much elaboration of gold and numerous medals, in dealing with which the artist has not failed to centre his attention on the head, and has succeeded in producing what is undoubtedly a soundly painted portrait and a good likeness. During the five fittings Mr. Mclnnes, apart from the ordinary social amenities, found his Royal sitter little inclined to talk, though he spoke feelingly of his trip to Australia and the pleasure it had given him: but with the Duchess the tendency to be sociable was much more clearly pronounced. She took, and expressed, a keen interest in the social and political matters of the day with a special concern for the supremacy of England and Australia in all questions relating to sport, such as cricket, tennis and golf. She spoke well of her portrait painted by Quinn, and regretted that she would not see the two hung side by side at the Castlemaine Gallery." Description: An unframed painting of a standing, middle-aged man dressed in the uniform of a Royal Navy admiral of the Fleet with medals, sash, ornate belt, cuffs and epaulettes. His left hand rests on the handle of a sword in its scabbard and his bicorn hat and white gloves are on a table beside him. To his right is a globe of the world showing Australia. Research by project volunteer, Fiona Collyer: In 1933, Castlemaine Art Gallery trustees commissioned artist W.B. McInnes (1889-1939) to paint a portrait of Prince Albert, Duke of York as a companion piece to the portrait of his wife, the Duchess of York, that the gallery had commissioned Australian official war artist James Quinn (1869-1951) to paint in 1930. During the First World War, the Duchess’s childhood home, Glamis Castle in Scotland was used as a makeshift military hospital and convalescence home for wounded soldiers. Many servicemen from the Castlemaine area recuperated there and had fond memories of the kindness of the teenage Lady Elizabeth Bowes-Lyon (1900-2002, later Duchess of York) who spent the war years running errands and aiding in the welfare and morale of the patients. In 1927, the Duke and Duchess of York (later King George VI and Queen Elizabeth) came to Australia to formally open the newly built Parliament House in Canberra and to tour the country. While visiting Victoria in April, they embarked on a whistle-stop train journey to Bendigo, stopping at Kyneton for ten minutes and Castlemaine for 15 minutes. At Kyneton, an excited crowd of 10,000 people welcomed the couple with “three cheers and three cheers for Baby Betty” before the Duchess was presented with a bouquet of locally grown roses and the Duke a bound album of photographs of noted beauty spots of the district. Next the Royal Couple stopped at Castlemaine to the cheers of 15,000 people. There the couple were presented with a basket of prime quality Harcourt apples and a pair of cot blankets, manufactured at Castlemaine Woollen Mills, a birthday gift for baby Princess Betty. The Duchess recognised Colonel W.E. James, of the Seventh Battalion, who had convalesced at Glamis Castle in 1917, and they chatted before the train departed, while the Duke shook hands with returned soldiers. Last stop was the town of Bendigo which was colourfully decorated with bunting and flags, arches and flowers. 3000 pigeons were released on their arrival and the liberated birds circled overhead for several minutes as if to welcome the Royal Couple. A crowd of 50,000 cheering people lined the streets in bright sunshine as the couple drove by. From an arch over Hargreaves Street, pretty girls showered the pair with rose petals. The Duke was presented with a gold nugget and an album, handsomely bound in morocco, of a history of the Bendigo mining industry, while the Duchess received a bouquet of prize winning white chrysanthemums. After 75 minutes in Bendigo they journeyed back to Melbourne for a State reception. While the couple were in Melbourne, the Duke often played lawn tennis at the Government House courts with three times Grand Slam champion Norman Brookes, who declared that while he considered the Duke a second class player whose serve lacked sting, he had a fine backhand and with time and practice he could become a first class player. The federal Parliament had previously been situated in Melbourne, but Canberra was chosen as the location for Australia’s capital as a compromise between fierce rival states, Victoria and NSW. It is written in the Constitution that the federal capital would be in “the State of NSW... distant not less than one hundred miles from Sydney.” The word Canberra is thought to derive from the local Ngunnawal word “Kanbarra” meaning “meeting place”. The Provisional Parliament House was a large, white, three storey building facetiously dubbed “The Wedding Cake”, plonked down in a bare, former sheep paddock. It was decorated for the event with Union Jacks and Australian red ensign flags. On 9 May, the day of the opening, the expectant crowd assembled in front of the building. Only two of the spectators were Aboriginal. One was Jimmy Clements (1847-1927, aka Nangar or Yangar, but popularly known as “King Billy”), accompanied by his three dogs. (The title “King” or “Queen” was often given by white settlers to Aborigines who were seen as allies and could maintain good relations between First Nations groups and the colonists. Some were given inscribed brass breastplates or gorgets to wear.) Jimmy was an excellent horse breaker and expert tracker for the police. He was also the nephew of “Queen” Nellie Hamilton (1842-1897) of the Canberra-Queanbeyan region, home of the Ngambri and Ngunnawal people. Nellie was the oldest surviving full-blooded Aboriginal woman in the district. The other was George John Noble (1840s-1928, aka Ooloogan, also “Marvellous” due to his regular use of the word). Both were initiated Wiradjuri walamira elders: “clever men” believed to have the ability to heal physical and spiritual ailments. They were also travelling showmen, skilled at boomerang and spear throwing and often performed at country agricultural shows and football matches. They had walked barefoot for three days from the Brungle Mission, near Gundagai. 11 May 1927, The Argus reported that “King Billy... claims sovereign rights to the Federal Territory” which the National Archives of Australia describes as “possibly the first recorded instance of Aboriginal protest at Parliament House in Canberra.” 10 May 1927, The Argus reported on Jimmy Clements: “During the wait great interest was taken in the appearance near the east stand of an aborigine, a member of the Gundagai tribe, and a well known character in the district. He was very old and grey and ruggedly picturesque. He was determined to go his own way in spite of the arguments of two inspectors and one sergeant of police. Immediately and instinctively the crowd in the stands rallied to his side. There were choruses of advice and encouragement for him to do as he pleased. A well-known clergyman stood up and called out that the aborigine had a better right than any man present to a place on the steps of the House of Parliament and in the Senate during the ceremony. The old man’s persistence and the sympathy of the crowd won him an excellent position and also a shower of small change that must have amounted to 30/ or 40/ [shillings].” At 10.30 am, Australia’s eighth Prime Minister, Mr Stanley Bruce (1923-1929) welcomed the Royal couple onto the crimson carpeted portico. Unfortunately, Dame Nellie Melba’s rendition of “God Save the King” and the greater part of the Duke’s reply was drowned out by the roar of squadrons of aeroplanes circling overhead. A brief religious service followed, conducted by leaders of the Methodist, Presbyterian and Anglican churches. Interestingly, there was no Roman Catholic representation at the ceremony even though around one quarter of Australians were Catholic at the time. The Duke unlocked the front doors with a golden key, then unveiled a statue of his father King George V by sculptor Sir Bertram Mackennal in the King’s Hall. Then the official party, Senators, members of the House of Representatives and invited guests entered the Senate chamber where the Duke read a message from the King, establishing Canberra as the seat of the Federal Government, watched on by Australia’s elite. The conclusion of the ceremony was announced by a gay fanfare of trumpets from the entrance of Parliament House and a 21 gun salute and answered by cheers from the crowd. The dignitaries then feasted on a luncheon of turtle soup, poached schnapper, fillets of beef, roast chicken and ham, straw potatoes, green peas, Canberra Pudding (a pudding made with dripping, dried fruit and jam), fruit, ices, coffee and cheese. They toasted the King with non-alcoholic fruit punch as the Federal Capital Territory (later ACT) was a “dry” area and no speeches were made. The diary entry that day of Ethel Baird, Lady Stonehaven, the wife of the Governor-General, is brief and to the point: “To P.H. & waited for Yorks. Ceremony went off without a hitch. Ghastly Banquet Lunch.” Later that day, the Duke mounted a coal black mare, police horse Number 303 which had been hastily re-named “Black Bess” for the occasion, to receive the final salute from the assembled troops and returned soldiers dressed in mufti. The RAAF squadron were flying overhead in “V” formations when suddenly, one of the planes, piloted by Flying Officer Francis Charles Ewen, left the formation, nose-diving 900 metres from Parliament House and landing behind the Y.W.C.A. refreshment marquee. Francis, aged only 28, tragically died of his wounds later that day. The Federal Capital Commission contracted Sargent’s Pies of Sydney to supply 5000 meals for the event. They supplied pies, sausage rolls, scones and sandwiches with the agreed price of 3 shillings a head. Only 1200 meals were served and the uneaten remainder dumped, with the Commission bearing the cost of the unsold food. An estimated crowd of 20,000 attended the opening, far fewer than the expected 100,000. Many visitors travelled long distances, bringing their own hampers of food and camping in tents as there was very limited accommodation available. Thousands of people around Australia listened to the ceremony broadcast on the wireless, with receiving sets installed in schools, public halls and workplaces and it was also filmed for posterity. The next morning, the Royal couple, along with Prime Minister Bruce and Mrs Bruce held an informal public reception on the steps of Parliament House where early settlers, residents and visitors to Canberra filed past them. The Press widely reported Jimmy Clements’ encounter with the Duke and Duchess. The Sun-Pictorial reported 11 May 1927: "MET THE DUKE. ABORIGINE KING HE APPROVED Sugarbag: Sports Suit. John Clements, otherwise King Billy, a full blooded aborigine king, aged 86, was among the 2000 who filed past the Duke and the Duchess at the public reception at Canberra to day. “How you likem Duke and Duchess Billy?” he was asked afterwards. “I think they are both very nice.” he replied in good English. King Billy was a very bedraggled figure, with tangled locks and a beard which almost hid his wrinkled and black face. He wore an old sports suit and carried a sugarbag. Passing the Duke and Duchess he turned full towards them. The crowd cheered, and the Duke and Duchess smiled. The Duke was particularly amused.” The Canberra Times reported 13 May 1927: "A REAL AUSTRALIAN. A quaint but pathetic figure stood in broad relief in the queue of ranks at the reception. Where his dusky forbears have gathered in native ceremonial for centuries past, a lone representative of a fast vanishing race saluted visiting Royalty. Despite the grotesque garb and untamed mane the aborigine comported himself not without dignity. With his three faithful dogs, he made an immediate target for a battery of cameras.” "The Argus reported 11 May 1927: "...an ancient aborigine who calls himself King Billy and who claims sovereign rights to the federal Territory walked slowly forward alone and saluted the Duke and Duchess. They cheerily acknowledged his greeting. The old aborigine, with his long, matted beard and nondescript clothing, is a popular identity of Canberra, and must be one of the most extraordinary figures who has received a Royal salute.” The Sun (Sydney) reported 10 May 1927: “Suddenly, in the midst of the forest of green and white colored hats of women, appeared a head with a shaggy leonine mane and a patriarchal beard. Jacky, the aboriginal, an identity of the district, who is also known as the King of Canberra, had arrived to testify to his loyalty. He saluted the Duke with an excellent dash, and shambled past with his faithful sheep dog aide-de-camp at his heels. The Duke and Duchess were highly amused at this quaint figure moving along with a sort of bodyguard of shrieking young boys and girls.” The Sydney Morning Herald 11 May 1927 mistook Jimmy for his friend “Marvellous”: “...the appearance of an aged aboriginal widely known in the district as “Marvellous, the uncrowned king of Queanbeyan." His beaming black countenance was almost hidden beneath a shock of hair and beard. Bare-footed and carrying a sugar bag in one hand and a tiny Australian flag in the other, he at first mistook a policeman at the foot of the steps for the Duke. To his great embarrassment and to the vast amusement of the onlookers, the policeman became the object of a hearty salutation. However, "Marvellous" was quickly shepherded back to a position in the procession and as he passed along brought his hand up to an approved military salute for the benefit of their Royal Highnesses. The Duke returned it with a special wave.” The Labor Daily 11 May 1927 irreverently reported on the scene: "People March Past. Some 400 people, old identities of Canberra marched past. They were mostly aged ladies with memories faithfully preserving the traditions of other days and curtsied reverently. The younger generations, who speedily joined the procession, behaved differently however. Surely it was the most motley collection that ever passed before Royalty. Men without collars jostled others well dressed. Fat women, young women, children of all heights and ages were there. The oldest inhabitants, in the persons of the abo, "Marbly", and his companion were present. The poor old fellows evidently were keen to get closer to the Duke than the procession dared go, but they were overawed by the stern glances of military men.” The Canberra Times reported 13 May 1927: "...and towards the end of the procession, a full-blooded aboriginal, bareheaded and barefooted, and carrying an old swag on his back, made a picturesque figure as he several times saluted the Royal couple, his old eyes beaming inexpressible delight.” The Register reported 11 May 1927: "PUBLIC MARCH PAST. Old “Jacky”, an aboriginal identity of the district, who has been following the proceedings of the various ceremonies with apparently great interest, appeared in the march past. He halted in front of the steps and raised his hand to his shaggy grey locks in an attempt at a salute. Smiling, the Duke returned the salute, and the Duchess bestowed a charming smile on the figure of mingled pathos and comedy.” Tweed Daily reported 12 May 1927: “King Billy” WAS THERE. Appropriately enough, the inevitable “King Billy” with his refreshing impression of possum and gum-leaves, was present at the dedication of the Federal capital at Canberra. Bare-footed, in a dingy old suit and battered felt hat, he wandered on to the empty stand after the illustrious assemblage had passed into Parliament House. A desolate figure in all that he stood for, he proved, an amiable representative of the dispossessed race. He cheerfully waved a Union Jack for the camera man, and grinned into the very eye of a movie man’s camera without flinching.” Footage of Jimmy filmed that day features in the film “The Birth Of White Australia” produced in 1928 and shows him enthusiastically waving a small Union Jack flag in front of Parliament House with his three dogs at his feet. The caption reads " "King Billy" calls for cheers for the son of the great white King across the seas. “Mine tinkit that pfellers father budgeree King liket me” supposedly says Jimmy." Jimmy told the Daily Telegraph, 13 May 1927 “I have opened your Parliament House on my own ground, now you can go and look at it." Jimmy died on 28 August 1927, aged 80. The Herald newspaper on 30 August 1927, published an illustration depicting Jimmy’s dog standing on his grave, his customary chimney pot hat leaning on his headstone. The caption reads: “The Dead King — His Only Mourner. Drawn by Will Dyson (King Billy, last of the Canberra aborigines, lived just long enough to see the Duke of York open Australia’s capital on the site where his tribe once roamed. He died in the Queanbeyan Hospital yesterday morning.)” A letter published in the Sydney Morning Herald, 19 September 1927 reported: "Old King Billy... Sir, ...I would like to mention... the passing away of one, if not the last remaining aboriginal chieftains. He may be called “Old King Billy,” and his death occurred here in Queanbeyan a few weeks ago. The removal of this well-known black has left another big gap in all that remains distinctively Australian in character. He was one of the last remaining tribe of the Monaro district, and one of the most predominant personalities throughout the Commonwealth. ...he had lived through 80 years all told. He was on many occasions sought by artists for his splendid physique and personality as a model, and many a journey he has had to make to Sydney on that account. A more striking and pronounced type could not be found. ...A very fine cast in lifelike form is to be seen in the Australian Museum, Sydney ...his last important appearance in public was at the Commonwealth celebrations at Canberra, to which territory he partly belonged. ...we have no aborigine statue chiselled to the memory of their race, a more fitting and lasting memorial could not be undertaken than to have one modelled from this fine figure and erected to the memory of his race at Canberra... It would be a fitting adornment if planted with the Australian gumtrees for any avenue or garden. [King Billy] ...a very intelligent fellow, responding readily to kindness and common sense. Hoping yet to see a befitting testimonial and a lasting memorial to a race that is rapidly and I may say, unfortunately, disappearing, I am etc., SYDNEY R.OAKLEY, Queanbeyan." The “lifelike form” referred to by the correspondent was a sculpture that Jimmy Clements had posed for: “The Wunderlich Aboriginal Group” for The Australian Museum in Sydney. In 1925, Mr Ernest Wunderlich, director of Wunderlich Limited, manufacturer of building materials and President of the Board of Trustees at The Australian Museum, commissioned renowned sculptor George Rayner Hoff (sculptor of the Anzac Memorial in Hyde Park, Sydney, National War Memorial in Adelaide, and “Lion” the original Holden Motor Company car emblem) to sculpt a life sized Aboriginal family group diorama as a gift to the Museum. There was much concern at this time that the Aboriginal population and especially the “full blooded” were fading into oblivion so fast that they may soon become extinct. Three “full blooded” Aborigines were chosen for models. An article in The Australian Museum magazine, July/September 1926 about The Wunderlich Aboriginal Group explained “...it will not be many years before the aborigine, in New South Wales and Victoria at least, will be an entity of the past. Every year sees a shrinkage in their number, and the coastal tribes that once roamed the Sydney district are, unfortunately, no longer with us. ...the man, who is hurling a boomerang, is Yangar, or “Jimmy Clements,” son of Gayan-Bleuet-Galoom, the late “King of Orange,” western New South Wales. “Jimmy” is an old man, but well preserved. He has a very retentive memory and recollects the various tribal customs and initiation ceremonies, but regarding these he is extremely reticent and will not communicate his “honoured secrets.” The female figure is “Nellie Walker,” a daughter of Geri-Bungel, and a native of Bombala, Monaro district, southern New South Wales. The boy is Harold Marsh, aged nine years, who was born at Kinchela, Macleay River, northern New South Wales. He is now living at the Brewarrina settlement... In the selection of aborigines great care had to be taken to ensure that the individuals were pure bloods, and to the Aborigines’ Protection Board and the Police Department of this State thanks are due for the valuable assistance rendered by them.” Ngarigo woman, Nellie Bungil Walker (1867-1932) had five children, two died as babies and her remaining children were taken from her. She worked as a domestic and was living at La Perouse Aboriginal Community, Sydney at the time of her sculpture’s creation. In the years after the sculpture was made, Nellie and Rayner remained friends. Yaegl boy Harold “Harry” Marsh was from the Kinchela Aboriginal Training Home for boys near Kempsey, (1924-1970), an agricultural training institution under the jurisdiction of the Aboriginal Protection Board to house Aboriginal boys forcibly removed from their families “in the interest of the moral or physical welfare” of the boys. The boys at Kinchela were aged 5-15 years old and referred to as numbers, not names and any connection to Aboriginal culture or language was forbidden. Brutal and cruel physical punishment and sexual assaults were rampant. Survivors recall being flogged and chained naked to a huge Morton Bay fig tree overnight or “sent down the line” where every boy was ordered to punch the “wrong doer” as hard as possible for fear that they would be next. The Kinchela children are acknowledged as part of the Stolen Generation. In 1925, Rayner Hoff created a terracotta bust “Harry Marsh” which is in the collection of the Art Gallery of New South Wales. The figures of the trio were modelled in clay before being cast in plaster and hand-coloured by Museum artist Miss Ethel A. King. The finished figures were completed with wigs and fur pelts and with Jimmy hurling a boomerang and Nellie holding a dilly-bag. They were placed in a glass cabinet in the Australian Ethnology Gallery. The subjects were not named. The Sydney Morning Herald 1 July 1926 critiqued the sculptures. "A GROUP OF STATUARY. MUSEUM’S ACQUISITION. Artistically the group is very fine, for the sculptor has caught his subjects in attitudes that reveal all the stalwart athletic lines of their bodies... The man, who is depicted as about 60 years of age, is bearded, immense, and savagely primitive-is throwing a boomerang, and beside him a boy, aged about 11 years is following beneath a shading hand, the flight of birds at which the hunter aims. Behind them, patient, obedient, stand(s) the woman waiting with her dilly bag to gather the spoils.” In 1996, Nellie’s daughter, Victoria Kempsey née Walker, happened to visit The Australian Museum and saw the sculpture of her mother, displayed semi-naked in a glass cabinet, alongside glass cabinets of taxidermied animals. She had last seen her mother 62 years previously when Nellie was dying from tuberculosis. Greatly distressed, Victoria wrote to the Museum requesting that they remove the sculpture, which they did. In 2023, a documentary was produced called “Her Name Is Nanny Nellie” which follows the journey of Nellie Walker’s great-granddaughter Auntie Irene Ridgeway discovering Nellie’s story, honouring her life and restoring her sculpture. Irene told Refinery29 Australia that “It was about reclaiming her life, reclaiming her history and who she really was as a real person. She was not a naked and unnamed lady standing in a museum. It's giving them back their families, they weren't just there to be looked at as flora and fauna or as 'natives'." The documentary was written and directed by Irene’s son Daniel King and premiered at the 2023 Adelaide Film Festival and broadcast on NITV. The restored sculpture of Nellie, dressed in 1920s style clothing was displayed at The Australian Museum, Sydney in The Bayala Nura Gallery in 2023. Irene wanted Nellie to be depicted in the way she actually was when she posed for the sculpture in 1925. The other two sculptures were not displayed due to ongoing conversations with family members and the fragility of the sculptures. It is anticipated that they may be displayed in the future. Melbourne born William Beckwith (Bill) McInnes (1889-1939) studied drawing at National Gallery School in Melbourne from the age of 14 under the tuition of artist Frederick McCubbin before succeeding his former teacher as Master of Drawing at the School from 1916-1934. He was acting Director of the NGV and Head of the National Gallery School from 1934. In 1927, Bill and official war artist H. Septimus Power were commissioned to paint the opening of the new federal Parliament House in Canberra. Septimus painted the general scene of the arrival of the Royal entourage in front of Parliament House, while Bill depicted the ceremony inside the Senate chamber. Bill was widely acclaimed for his landscapes and lauded as the heir to great Australian landscape artist Arthur Streeton. He won the Archibald Prize seven times (including the inaugural, a portrait of architect Desbrowe Annear) which made him a highly sought after portrait painter and he earned kudos for his commission to paint the Duke of York. During the breaks in painting the portrait, the pair chatted and Bill was surprised by the Duke’s wide knowledge of Australian affairs. The Duke was particularly interested to hear how the rabbit crisis was being handled. Bill’s work is held in major Australian galleries including the NGV, which has 12 of his paintings in their collection. Bill was married to fellow artist Violet McInnes and they lived at “The Poplars” in Alphington with their six children. Violet painted still life of flowers and portraits. In 1941, she entered her portrait of fellow artist Sybil Craig into the Archibald Prize and in 1945 Violet was appointed an official war artist. Defending his traditional style Bill said “...we in Australia have not been bitten by Cubism or Futurism or other of the “isms”...and I am glad of it”. References: THE DUCHESS OF YORK. (1931, December 7). The Argus (Melbourne, Vic. : 1848 - 1957), p. 8. Retrieved April 3, 2025, from http://nla.gov.au/nla.news-article4427568 WAR NURSE (1930, March 11). The Sun (Sydney, NSW : 1910 - 1954), p. 1. Retrieved April 3, 2025, from http://nla.gov.au/nla.news-article223714728 The Royal Visit. (1927, April 29). The Age (Melbourne, Vic. : 1854 - 1954), p. 9. Retrieved April 4, 2025, from http://nla.gov.au/nla.news-article205813465 Canberra. (1927, April 30). Advocate (Burnie, Tas. : 1890 - 1954), p. 5. Retrieved January 10, 2025, from http://nla.gov.au/nla.news-article68233606 Australian Dictionary of Biography, Nangar, https://adb.anu.edu.au/biography/nangar-33736 Australian Dictionary of Biography, Jimmy Clements, https://en.wikipedia.org/wiki/Jimmy_Clements Wikipedia, George John Noble, https://en.wikipedia.org/wiki/George_John_Noble PARLIAMENT AT CANBERRA. (1927, May 14). The Australasian (Melbourne, Vic. : 1864 - 1946), p. 37 (METROPOLITAN EDITION). Retrieved December 25, 2024, from http://nla.gov.au/nla.news-article140733921 CANBERRA CEREMONY (1927, May 10). The Argus (Melbourne, Vic. : 1848 - 1957), p. 19. Retrieved November 3, 2024, from http://nla.gov.au/nla.news-article3853643 CANBERRA. (1927, May 11). The Argus (Melbourne, Vic. : 1848 - 1957), p. 20. Retrieved November 24, 2024, from http://nla.gov.au/nla.news-article3853897 THE FINAL SCENES (1927, May 11). The Labor Daily (Sydney, NSW : 1924 - 1938), p. 5. Retrieved January 10, 2025, from http://nla.gov.au/nla.news-article236614453 TWIN SONS (1927, May 10). The Sun (Sydney, NSW : 1910 - 1954), p. 11. Retrieved April 4, 2025, from http://nla.gov.au/nla.news-article223616143 National Archives of Australia, Aboriginal [Jimmy Clements, a Wiradjuri elder] on steps of Parliament House (King Billy), https://recordsearch.naa.gov.au/SearchNRetrieve/Interface/ViewImage.aspx?B=3050026 Sydney Morning Herald, The chant of Jimmy Clements: I’ll do the honours on my ground, thanks, https://www.smh.com.au/national/the-chant-of-jimmy-clements-i-ll-do-the-honours-on-my-ground-thanks-20241023-p5kkt5.html MET THE DUKE (1927, May 11). The Sun News-Pictorial (Melbourne, Vic. : 1922 - 1954; 1956), p. 14. Retrieved November 3, 2024, from http://nla.gov.au/nla.news-article275177101 PUBLIC MARCH PAST. (1927, May 11). The Register (Adelaide, SA : 1901 - 1929), p. 11. Retrieved April 2, 2025, from http://nla.gov.au/nla.news-article54271512 A REAL AUSTRALIAN (1927, May 13). The Canberra Times (ACT : 1926 - 1995), p. 12. Retrieved December 18, 2024, from http://nla.gov.au/nla.news-article1213124 THE PEOPLE'S DAY (1927, May 13). The Canberra Times (ACT : 1926 - 1995), p. 3. Retrieved April 3, 2025, from http://nla.gov.au/nla.news-article1213105 KING BILLY" WAS THERE. (1927, May 12). Tweed Daily (Murwillumbah, NSW : 1914 - 1949), p. 2. Retrieved November 27, 2024, from http://nla.gov.au/nla.news-article190193273 A BUSY DAY. (1927, May 11). The Sydney Morning Herald (NSW : 1842 - 1954), p. 15. Retrieved November 3, 2024, from http://nla.gov.au/nla.news-article16374845 Nothing Wrong With Canberra Opening, Says "King Billy" (1927, May 13). The Daily Telegraph (Sydney, NSW : 1883 - 1930), p. 2. Retrieved November 3, 2024, from http://nla.gov.au/nla.news-article245750627 THIS IS MARVELLOUS! (1927, May 11). The Sun News-Pictorial (Melbourne, Vic. : 1922 - 1954; 1956), p. 16. Retrieved December 9, 2024, from http://nla.gov.au/nla.news-article275177155 Mildenhall's Canberra, Royal Visit, May 1927. Canberra citizens passing the Royal Party on the front steps of Parliament House at the Civic Reception 1927 [photograph], https://mildenhall.moadoph.gov.au/rephoto/62 Australian Dictionary of Biography, 1927 - Jimmy Clements, John Noble, and the Opening of Parliament House, https://adb.anu.edu.au/the-quest-for-indigenous-recognition/jimmy-clements YouTube, The Birth of White Australia (1928), amateurish racism on the big screen [Jimmy Clements at 11.12 minutes in], https://www.youtube.com/watch?v=OByX4iPsTgo YouTube, We Were Just Little Boys, https://m.youtube.com/watch?v=u4Hw9d91k2E WASTE AT CANBERRA. (1927, May 20). The South Eastern Times (Millicent, SA : 1906 - 1954), p. 1. Retrieved April 4, 2025, from http://nla.gov.au/nla.news-article200058308 YouTube, Museum of Australian Democracy at Old Parliament House, Whispers in the Corridors-An Aboriginal Presence, https://www.youtube.com/watch?v=fwifXP61M5Y History Snoop, Air Fatality in Canberra Scars an Historic Day in Australia, https://www.historysnoop.com/air-fatality-in-canberra/ YouTube, NFSA Films, The Opening Of Canberra, Australia's Capital City, https://www.youtube.com/watch?v=pOA8llA0iE0 Pauline Conolly, Pudding & Pies at Parliament House, https://paulineconolly.com/2022/pudding-and-pies-at-parliament-house/ THE MENU (1927, May 5). The Sun (Sydney, NSW : 1910 - 1954), p. 13 (FINAL EXTRA). Retrieved April 2, 2025, from http://nla.gov.au/nla.news-article223623278 PROMISING (1927, May 7). The Sun (Sydney, NSW : 1910 - 1954), p. 2. Retrieved December 15, 2024, from http://nla.gov.au/nla.news-article223616208 The Dead King -- His Only Mourner (1927, August 30). The Herald (Melbourne, Vic. : 1861 - 1954), p. 6. Retrieved November 3, 2024, from http://nla.gov.au/nla.news-article244196114 The VOICE of the CITY (1927, August 31). The Daily Telegraph (Sydney, NSW : 1883 - 1930), p. 4. Retrieved December 26, 2024, from http://nla.gov.au/nla.news-article246406061 THE LAST OF HIS TRIBE. (1927, September 2). Bairnsdale Advertiser and Tambo and Omeo Chronicle (Vic. : 1882 - 1946), p. 6. Retrieved December 24, 2024, from http://nla.gov.au/nla.news-article269318935 GONE WEST. (1927, September 17). The Irwin Index (Mingenew, WA : 1926 - 1956), p. 1. Retrieved December 23, 2024, from http://nla.gov.au/nla.news-article251554113 King Billy Dead. (1927, September 10). The Port Macquarie News and Hastings River Advocate (NSW : 1882 - 1950), p. 5. Retrieved December 1, 2024, from http://nla.gov.au/nla.news-article112534982 DEATH OF KING BILLY OF CANBERRA. (1927, September 16). Huon Times (Franklin, Tas. : 1910 - 1933), p. 5. Retrieved December 23, 2024, from http://nla.gov.au/nla.news-article136428435 OLD KING BILLY. (1927, September 19). The Sydney Morning Herald (NSW : 1842 - 1954), p. 5. Retrieved November 19, 2024, from http://nla.gov.au/nla.news-article16404722 "Marvellous" is Dead. (1928, March 30). The Gundagai Times and Tumut, Adelong and Murrumbidgee District Advertiser (NSW : 1868 - 1931), p. 2. Retrieved December 8, 2024, from http://nla.gov.au/nla.news-article122748136 LAST OF LACHLAN RIVER TRIBE (1926, May 3). Evening News (Sydney, NSW : 1869 - 1931), p. 7. Retrieved December 18, 2024, from http://nla.gov.au/nla.news-article117289515 Coal Strike Effects (1926, June 11). The Daily Telegraph (Sydney, NSW : 1883 - 1930), p. 14. Retrieved November 30, 2024, from http://nla.gov.au/nla.news-article245759732 SBS On Demand, Her name is Nanny Nellie, https://www.sbs.com.au/ondemand/movie/her-name-is-nanny-nellie/2300137539512 The Australian Museum Magazine, Vol. 2, No. 11, July-Sept 1926, The Wunderlich Aboriginal Group, https://shorturl.at/uViTe ABC News, King Billy and Marvellous were not invited to the 1927 opening of Parliament House — but that didn't stop their fight for sovereignty, https://shorturl.at/HGpjC Museum of Australian Democracy at Old Parliament House, The thieving diva: behind the scenes of the opening ceremony at Parliament House, https://www.moadoph.gov.au/explore/stories/heritage/the-thieving-diva-behind-the-scenes-of-the-opening-ceremony-at-parliament Refinery29, Beyond a museum glass case: one First Nations woman's quest to reclaim her ancestors' story, https://www.refinery29.com/en-au/my-name-is-nelly-documentary-irene-ridgeway-interview Sydney Morning Herald, Why it took 100 years to restore the dignity of Nanny Nellie, https://www.smh.com.au/national/why-it-took-100-years-to-restore-the-dignity-of-nanny-nellie-20230719-p5dpjo.html Australian Museum, Meeting Nanny Nellie, https://australian.museum/publications/explore_summer2024/nanny-nellie/ ABORIGINES. (1926, July 1). The Sydney Morning Herald (NSW : 1842 - 1954), p. 14. Retrieved November 29, 2024, from http://nla.gov.au/nla.news-article16302447 Wikipedia, Kinchela Aboriginal Boys Training Home, https://en.wikipedia.org/wiki/Kinchela_Aboriginal_Boys%27_Training_Home Art Gallery NSW, Harry Marsh by Rayner Hoff, https://www.artgallery.nsw.gov.au/collection/works/59.2000/ Art Gallery of South Australia, Lion (produced for the Holden Motor Company) by Rayner Hoff, https://www.agsa.sa.gov.au/collection-publications/collection/works/lion-produced-for-the-holden-motor-company/27253/ Wikipedia, William Beckwith McInnes, https://en.wikipedia.org/wiki/William_Beckwith_McInnes DUKE OF YORK PORTRAIT UNIVEILED IN CASTLEMAINE GALLERY (1933, December 4). The Sun News-Pictorial (Melbourne, Vic. : 1922 - 1954; 1956), p. 18. Retrieved April 4, 2025, from http://nla.gov.au/nla.news-article276125581 Castlemaine Art Museum, Portrait of His Royal Majesty the Duke of York, https://collection.castlemaineartmuseum.org.au/objects/181/portrait-of-his-royal-majesty-the-duke-of-yorkPhotographer notations on slide: "Portrait of Duke of York by W.B. McInnes 1933 B4".1930-1939, aboriginal culture, royal visits, openings (events), sculpture, land rights, museums, museum displays -
 Warrnambool and District Historical Society Inc.
Medal, Stokes, Visit of Prince of Wales 1920, 1920
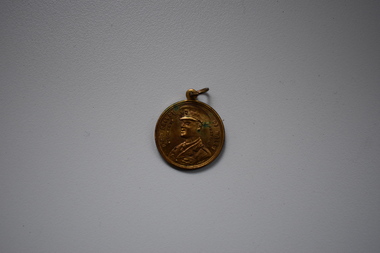
... Royal family in Britain to the people of Australia for their involvement and support during World War One. This particular medal was produced to mark the visit of the Prince of Wales to Geelong. This medal has no known local provenance but is retained for display purposes. World War One History of Warrnambool Prince of Wales H.R.H. Prince of Wales Welcome ...This medal was issued to commemorate the visit to Australia of the Prince of Wales in 1920. The visit was primarily an expression of thanks by the Royal family in Britain to the people of Australia for their involvement and support during World War One. This particular medal was produced to mark the visit of the Prince of Wales to Geelong.This medal has no known local provenance but is retained for display purposes.This is a round bronze medal. The obverse side has an image of the Prince of Wales in uniform with printing around the edges. The reverse has a coat of arms with decorative patterns and leaf fronds and printing. The medal has a loop and a metal ring at the top for attachment to a ribbon or a cord.H.R.H. Prince of Wales Welcome to Australia Stokes To Commemorate the Visit of H.R.H. Prince of Wales to Australia Geelong June 1920 world war one, history of warrnambool, prince of wales -
 Bendigo Military Museum
Booklet - Welcome to the Army Survey Regiment, Army Survey Regiment, Circa late 1970's
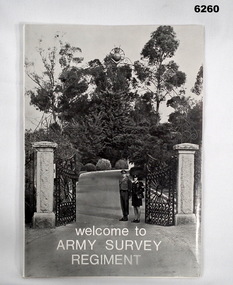
... Royal Australian Survey Corps RASvy Fortuna Army Survey Regiment Army Svy Regt ASR A4 soft covered booklet, paper pages held together with "ARNOS" an Fastener Welcome to the Army Survey Regiment Booklet Welcome to the Army Survey Regiment Army Survey Regiment ...An information booklet provided to new arrivals at the Army Svy Regt. It contains information on daily routine, unit facilities and services, accommodation options, sports policy, Regimental Appointments, recreational facilities and places of interest around Bendigo. Cover photo of the gate entrance to the Army Survey Regiment on the cover. WO1 Ken and Cpl Heather Slater stand at the gate. A4 soft covered booklet, paper pages held together with "ARNOS" an Fastenerroyal australian survey corps, rasvy, fortuna, army survey regiment, army svy regt, asr -
 Bendigo Military Museum
Pamphlet - SOUVENIR PROGRAM, SOLDIERS MEMORIAL INSTITUTE 2018, City of Greater Bendigo, C. Nov 2018
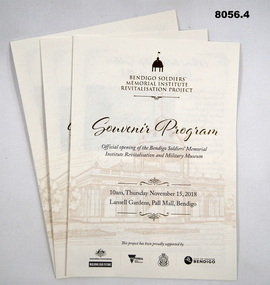
... At the bottom are the logo's of the Federal & State Governments, RSL and City of Greater Bendigo Page 2 is titled "About the Bendigo Soldiers Memorial Institute" with a photo showing the "Hustlers Royal Reserve Mine No 2" which was on the site where the SMI now stands. Page 3 has details of the program, music, Official welcome, speakers, ribbon cutting, the ODE, Last Post, National Anthem, close of formalities and light refreshments. ...At the bottom are the logo's of the Federal & State Governments, RSL and City of Greater Bendigo Page 2 is titled "About the Bendigo Soldiers Memorial Institute" with a photo showing the "Hustlers Royal Reserve Mine No 2" which was on the site where the SMI now stands. Page 3 has details of the program, music, Official welcome, speakers, ribbon cutting, the ODE, Last Post, National Anthem, close of formalities and light refreshments. ...When the SMI was opened in Nov 1921 the Bendigo RSL Sub - Branch had occupancy from that day on. The Building became a Museum opened to the public in 1998 by the RSL. The origins of this project goes back to 2011 with a letter to the City of Greater Bendigo of the possibility of an upgrade to the SMI from the Bendigo District RSL Sub - Branch Inc. Some renovations had already taken place and some structural work. After initial talks a sub - committee of 3 persons from the RSL was elected to work with the Council along with other bodies who would be involved. Plans eventuated by 2015 and were put to the RSL for approval. From there the fund raising began from the State/Federal Govt's, RSL, the Public and Council itself. This was achieved and finally in Sept 2016 the SMI/Museum was packed up completely and the Renovations began in 2017. Souvenir program, card yellow colour folding, front page is in gold and black writing with an image of the Dome on the SMI followed by in gold, "Bendigo Soldiers Memorial Institute Revitalisation Project" then in gold, "Souvenir Program", in the centre has details re time, date, place. At the bottom are the logo's of the Federal & State Governments, RSL and City of Greater Bendigo Page 2 is titled "About the Bendigo Soldiers Memorial Institute" with a photo showing the "Hustlers Royal Reserve Mine No 2" which was on the site where the SMI now stands. Page 3 has details of the program, music, Official welcome, speakers, ribbon cutting, the ODE, Last Post, National Anthem, close of formalities and light refreshments. Page 4 has a photo of the original souvenir pamphlet used at the original opening on November 15th 1921, 97 years to the day. at the bottom, "Thankyou section to all those involved in the project""Official opening of the Bendigo Soldiers Memorial Institute Revitalisation and Military Museum 10am Thursday November 15, 2018, Lansell gardens, Pall, Mall Bendigo"brsl, smirsl, program -
 Bendigo Military Museum
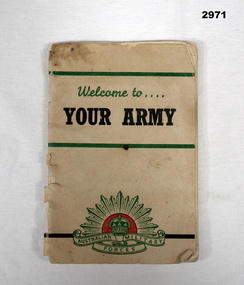
Booklet - BOOKLET, WELCOME TO YOUR ARMY, 1955
... Booklet BOOKLET, WELCOME TO YOUR ARMY. The Royal Australian Army Ordnance Corps ...The forward in the booklet is by ; Chief of the General Staff was Lt Gen H Wells. His forward is dated Aug 55.Small booklet, white coloured soft cover, 35 pages. Two x green stripes across front, within these stripes is the title. At the bottom centre is a green coloured Rising Sun badge.On cover In green ink: “Welcome To” In black ink below: “Your Army” Bottom centre green coloured Rising Sun badge with words “Australian Military Forces”books-military-history, your army, passchendaele barracks trust -
 Bendigo Military Museum
Administrative record - Army Survey Regiment - Operation Welcome Stranger - Operation Report
... Covering 1:250,000 map areas SJ54-4 St Arnaud, SJ 55-1 Bendigo, SJ54-8 Ballarat, SJ %%-2 Wangaratta Royal Australian Survey Corps RASvy Fortuna Army Survey Regiment Army Svy Regt ASR An A4 booklet sepia cardboard cover, brown text Survey Corps Badge, Photo of " Welcome Stranger Monument", outline shape of Victoria, glide on Arnos fastener binder. ...Operation Report of Mapping areas in central Victoria in 29 Mar 84 - 6 Mar 85. Covering 1:250,000 map areas SJ54-4 St Arnaud, SJ 55-1 Bendigo, SJ54-8 Ballarat, SJ %%-2 WangarattaAn A4 booklet sepia cardboard cover, brown text Survey Corps Badge, Photo of " Welcome Stranger Monument", outline shape of Victoria, glide on Arnos fastener binder.royal australian survey corps, rasvy, fortuna, army survey regiment, army svy regt, asr -
 Federation University Historical Collection
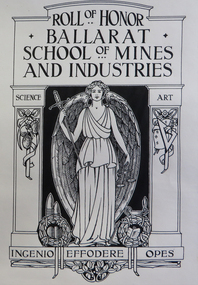
Book - Roll of Honor, Ballarat School of Mines Honor Book, c1920
... "Amongst the important local commissions received during the year was the designing and supplying of the Municipal Council's Address of Welcome Casket for presentation to His Royal Highness the Prince of Wales, the designing and supervising of a large four-light stained glass window for the Lydiard Street Methodist Church, ... and supply numerous honor books, honor boards, etc., for public institutions and school." ..."Amongst the important local commissions received during the year was the designing and supplying of the Municipal Council's Address of Welcome Casket for presentation to His Royal Highness the Prince of Wales, the designing and supervising of a large four-light stained glass window for the Lydiard Street Methodist Church, ... and supply numerous honor books, honor boards, etc., for public institutions and school." ...The Ballarat Technical Art School made many honour boards for schools and organisation in Victoria and interstate. Their own was made, but the names were not listed. The Ballarat School of Mines Annual Report for 1921 states: 'It has been decided, for the present, to record the names of our students who served in the warm, in an Honor Book, and to defer the erectin of an Honor Board until we can feel ssured that the Roll is complete. the wide spread occupations of our students has rendered it very difficult for us to secure detailed information of their service. A handsome Honor Book and Case has been designed and executed by the staff ad students of the technical Art School, and the engrossing of the names and military records will be proceeded with as soon as possible. The Technical Art School was quite busy with commissions. The SMB Annual Report of 1918 states: 'under the direction of the Art principal (Mr H.H. Smith), the work of the Art School continues to receive wide public recognition. Handsome Honor Boars have been designed and executed for the Sydney Sports' Club, the St Arnaud High School, the Birregurra State School, the Wendouree State School and the Ballarat Old Colonists' Club. The School also designed the certificates for the Young Workers' Patriotic Guild, the 'Herald" Shield for perpetual competition at the technical Schools' athletic meetings, the "Hansen" Shield for competition among the Northern District High Schools, two metal tablets for the Castlemaine high School, and a certificate for the Grampians Secondary Schools' Association. Numerous Honor Books and Mural cases have also been designed for State Schools.' Over 400 former students and staff of the Ballarat School of Mines served during World War One. The 1920 SMb Students' Magazine said' 'Many students left Australia with the first Contingent, and since then, the School has been represented on every field where Australians have fought, from the first landing at Gallipoli to the decisive victory on the 8 August 1918.' The influence of the school was appropriately shown in the fact that at least 13 of its students were officers in the Australian Mining Corps. The title page has the initials 'D.J.' which most probably stands for Donald I. Johnston, a teacher with the Ballarat Technical Art school from 1920 to 1949. The Ballarat School of Mines World War 1 Honor Book remained uncompleted for more than 90 years. The names of over 400 SMB staff and students who served their country were not inscribed until 2012, despite names, ranks and service records being compiled. A restoration project was instigated as part of the 140th anniversary of the Ballarat School of Mines in 2010. Names were inscribed into the book by Calligrapher Lyn Forrester. The University of Ballarat believed this project is important not only to SMB's history, but the families and descendants of those who served while studying or teaching at SMB. The restoration project involved names being hand written in calligraphy into the Honor Book and was funded with the assistance of the 'Restoring Community War Memorial Grant'. The memorial was designed and made by the staff and students of the Ballarat School of Mines Technical Art School under the direction of Principal Herbert H. Smith. In 1921 the Ballarat School of Mines Annual Report recorded: "It has been decided, for the present, to record the names of our students who served in the war, in an Honor Book, and to defer the erection of an Honor Board until we can feel assured that the roll is complete. The wide spread occupations of our students has rended it very difficult for us to secure detailed information of their service. A handsome Honor Book and case has been designed and executed by the staff and students of the Technical Art School, and the engrossing of the names and miliatary records will proceed with as soon as possible. The Ballarat Technical Art School and was involved with the design and manufacture of numerous WW1 memorials. When it came time to complete their own memorial, the Principal died, and the Honor Roll must have been overlooked in the confusion that ensued. There have been numerous theories about why the Honor Roll was never completed, one being that it was because the SMB Principal, Maurice Copland, literally worked himself to death organising repatriation classes for ex-soldiers who attended SMB. The Courier of 18 November 1922 said of Maurice Copland: “He put his very best into the work for the welfare of the soldiers; in fact, he did too much for the good of his physique, for he wore himself out in the services of the returned men. If ever there was a war victim the late Mr Copland was one. But for the stress of work entailed by those repatriation classes and the amount of general war work which he performed Mr Copland would probably have been with them today." Understandably, SMB was thrown into some disarray by their Principal's death and the Honor Book was not completed. The University of Ballarat would like to finally honor its SMB war veterans by completing the Honor Book and as a further mark of respect, dedicate the project to Maurice Copland. The Ballarat Technical Art School undertook many honor boards. The Ballarat School of Mines Annual Report 1918 states: "Under the direction of the Art Principal (Mr H.H. Smith), the work of the Art School continues to receive a wide public recognition. handsome Honor Boards have been designed and executed for the Sydney Sports' Club, the St Arnaud High School, the Birregurra State School, the wendouree State School and the Ballarat Old Colonists' Club. The School also designed certificates for the Young Workers' patriotic Guild, the "Herald" Shield for perpetual Competition at the Technical schools athletics meetings, the "Hansen" Shield for competition in the northern District High Schools, two metal tablets for the Castlemaine High School, and a certificate for the Grampians Secondary Schools' Association. Numerous Honor Gooks and mural cases have also been designed for State Schools." The 1920 Ballarat School of Mines Annual Report stated: Public appreciation of the High standard of design and artistic craft work produced by the students of the Art School, under the direction of the Principal (Mr Herbert H. Smith), continues to be demonstrated by the lage number of important commissions entrusted to the school, not only by the public bodies and business firms by the Education Department and public bodies all over the State." "Amongst the important local commissions received during the year was the designing and supplying of the Municipal Council's Address of Welcome Casket for presentation to His Royal Highness the Prince of Wales, the designing and supervising of a large four-light stained glass window for the Lydiard Street Methodist Church, ... and supply numerous honor books, honor boards, etc., for public institutions and school." "The School has been honored by, and has acceded to the request of the Education Department to supply designs for the title page, chapter headings and initial letters for the War Service Book which it is about to publish, Mr F. Tate, director of Education, recognising the students' work in this direction by an appreciative letter of thanks. The Education Department has also been instrumental in directing to the School applications from all parts of the State, including Melbourne, for the School to supply competitive sports shields, honor boards, books and designs for certificates, and various decorative objects. The School has therefor been responsible for much work coming to local Ballarat firms which would otherwise have found its way to Melbourne or other centres. In 2011, as the result of a 'Restoring Community War Memorials Grant' calligrapher Lynton Forrester was commissioned to record over 400 names into the honor book. A red leatherbound Ballarat School of Mines Honor Book. The book includes a title page relating to the Ballarat School of Mines and Industries. The Ballarat School of Mines Honor Book was not finally inscribed with names until 2011-2012. world war one, ww1, ballarat school of mines, world war 1, world war i, honour roll, calligraphy, don johnston, honor book, honor roll, copeland, maurice copeland, honour book, roll of honour, percy coltman, arthur e. tandy, leslie coulter -
 Orbost & District Historical Society
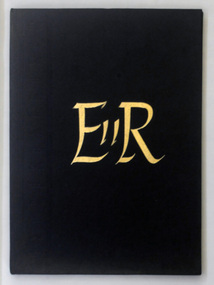
book, The Queen in Victoria, 1954
... Royal Highness the Duke of Edinburgh visited Victoria from 24th February to 9th March, 1954. The Argus was a morning daily newspaper, established in 1846 and closing in 1957. On 28 July 1952, The Argus became the first newspaper in the world to publish colour photographs in a daily paper. A large contingent of 160 students in a convoy of six school buses left the Orbost post Office at 6.a.m. to "Join in Acclaiming Our Gracious Queen" in Sale. An estimated 35,000 Gippslanders welcomed...Royal Highness the Duke of Edinburgh visited Victoria from 24th February to 9th March, 1954. The Argus was a morning daily newspaper, established in 1846 and closing in 1957. On 28 July 1952, The Argus became the first newspaper in the world to publish colour photographs in a daily paper. A large contingent of 160 students in a convoy of six school buses left the Orbost post Office at 6.a.m. to "Join in Acclaiming Our Gracious Queen" in Sale. An estimated 35,000 Gippslanders welcomed ...In June 1953 , Elizabeth II was crowned Queen of the United Kingdom, Canada, Australia, New Zealand, South Africa, Ceylon (now Sri Lanka), and Pakistan, and became the Head of the Commonwealth. Her Majesty Queen Elizabeth the Second and His Royal Highness the Duke of Edinburgh visited Victoria from 24th February to 9th March, 1954. The Argus was a morning daily newspaper, established in 1846 and closing in 1957. On 28 July 1952, The Argus became the first newspaper in the world to publish colour photographs in a daily paper. A large contingent of 160 students in a convoy of six school buses left the Orbost post Office at 6.a.m. to "Join in Acclaiming Our Gracious Queen" in Sale. An estimated 35,000 Gippslanders welcomed the Her Majesty, the Queen and the Duke of Edinburgh. (info. from S.R.M. March 2, 10, 1954. A three guinea prize was offered for an essay on the royal visit. This item reflects the interest in the royal family to Australians at this time as well as the general feeling of respect and admiration felt by the rural communities towards the British Royal Family, especially towards Queen Elizabeth II.A hard covered book of 77 pp. The front cover is black with "E11R" in gold print. It is a pictorial story of Queen Elizabeth 11's visit to Victoria in 1954 - 24 February - 9 March.book-the-queen-in-victoria royalty -
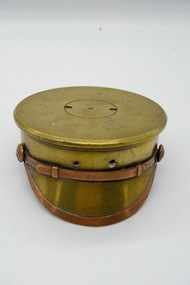 Lara RSL Sub Branch
18 Pounder shell ashtray, Souvenir, 1927
... welcomed into people’s homes. Such objects were embodied with personal experiences of war, later to become objects textured with memory, remembrance, and longing – attributes that clearly go beyond an object’s form and function. 18-Pounder Artillery Shells: The Great War Recycled and Re-Circulated Categories :Material Culture Machine Subscribe Share on facebook Share on twitter The intention of war is to kill, to maim and to destroy using, for example, the agency of 18-pounder artillery shells (so-called because they weighed 18 pounds). The shells were loaded in to the 18-pounder field guns used by the Royal...welcomed into people’s homes. Such objects were embodied with personal experiences of war, later to become objects textured with memory, remembrance, and longing – attributes that clearly go beyond an object’s form and function. 18-Pounder Artillery Shells: The Great War Recycled and Re-Circulated Categories :Material Culture Machine Subscribe Share on facebook Share on twitter The intention of war is to kill, to maim and to destroy using, for example, the agency of 18-pounder artillery shells (so-called because they weighed 18 pounds). The shells were loaded in to the 18-pounder field guns used by the Royal ...Artillery shells were designed to be recycled and spent shells were returned to the munitions factory for re-filling, a mark engraved upon the head-stamp at each re-filling. Millions upon millions of shells were recycled and re-fired. Relationships with ‘objects’ were forged as recycled objects of conflict were welcomed into people’s homes. Such objects were embodied with personal experiences of war, later to become objects textured with memory, remembrance, and longing – attributes that clearly go beyond an object’s form and function. 18-Pounder Artillery Shells: The Great War Recycled and Re-Circulated Categories :Material Culture Machine Subscribe Share on facebook Share on twitter The intention of war is to kill, to maim and to destroy using, for example, the agency of 18-pounder artillery shells (so-called because they weighed 18 pounds). The shells were loaded in to the 18-pounder field guns used by the Royal Artillery and targeted to destroy German batteries and trenches as well as to shoot down aeroplanes. Horse-drawn field gun, Canal du Nord, France. Taken by First World War photographer David McLellan. Available via the National Library of Scotland as CC BY-NC-SA Horse-drawn field gun, Canal du Nord, France. Taken by First World War photographer David McLellan. Available via the National Library of Scotland as CC BY-NC-SA In Under Fire, Henri Barbusse recounts how the incessant and diabolical din of war constantly bombarded the soldier body with the unendurable noise of bursting shells that caused pain to the ears (Barbusse 2010 [1933]: 207). The noise was so ‘monstrously resounding’ that one felt ‘annihilated by the mere sound of the downpour of thunder’ (Barbusse 2010 [1933]: 206). Artillery shells were designed to be recycled and spent shells were returned to the munitions factory for re-filling, a mark engraved upon the head-stamp at each re-filling. Millions upon millions of shells were recycled and re-fired. A mound of spent shell cases, Nord, Nord-pas-de-Calais, France. Taken by war photographer, Tom Aitken, 1918. Available via the National Library of Scotland as CC BY-NC-SA. A mound of spent shell cases, Nord, Nord-pas-de-Calais, France. Taken by war photographer, Tom Aitken, 1918. Available via the National Library of Scotland as CC BY-NC-SA. People’s experience of the First World War did not end with the armistice. Whilst the noise of the artillery had ceased, the noise of war was remembered. Harry Patch on arriving home injured recalled being ‘jumpy for a while’ with the least noise prompting him to dive for cover (2009: 114). Something else materialised. Relationships with ‘objects’ were forged as recycled objects of conflict were welcomed into people’s homes. Such objects were embodied with personal experiences of war, later to become objects textured with memory, remembrance, and longing – attributes that clearly go beyond an object’s form and function. The head-stamp of these particular shells displays the British broad arrow and the initials ‘EOC’ indicates that they were made at the Elswick Ordnance Company, England; the initials ‘CF’ signal that the charge was loaded with cordite, a standard propellant. Spent shells were illicitly scavenged from massive mounds by both soldiers and civilians alike to become personal souvenirs or to swap or sell. Spent artillery shells were crafted, often using a hammer and a bent nail. The crafting of trench art reflects the construction of an identity that offers momentary relief from the hell experienced in the trenches. The lid of an 18Pounder shell which has been adapted for use as an ash tray.Lot 27 1927, 18Pr, III, EOC, C/F, Defence broad arrow, -
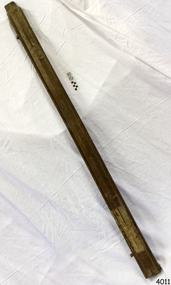 Flagstaff Hill Maritime Museum and Village
Tool - Wood Sample, Before 1878
... welcome. He was presented with the first gold medal of the Royal Humane Society of Victoria and a £1000 cheque from the Victorian Government. ...welcome. He was presented with the first gold medal of the Royal Humane Society of Victoria and a £1000 cheque from the Victorian Government. ...On a piece of paper subsequently glued near one end of its curved upper face, this length of planed and polished hardwood timber bears the inscription: “A [p]iece of w[r]ec[k] of the Loch Ard wrecked near Sherbroke River”. The timber is carefully worked with rich dark colouring and a uniformly moulded design, suggesting that it was part of a fitting or furnishing that was publicly visible and prominent. If the artefact is what it is declared to be, then it is possible that it formed part of the ship’s railings or companionway stairs. The LOCH ARD was a 1,693 ton, 3 masted barque, built on the Clyde in 1873. In an age of increasing competition for the emigrant passenger trade from steam-driven vessels, special attention was paid to her wooden furnishings and fittings. The Loch Line owners prided themselves on their attractive, distinctively painted, sailing ships. Below decks, where cargo and third class passengers were stowed, was made of iron. But everything above deck, and on show to the saloon and second class passengers, was carved and varnished timber. Captain Daish’s 1878 report for the ship’s underwriters notes “a quantity of general Cargo washed up in a confused mass” in the cove and “a number of Cases, Casks and Bales; also deals and boards floating about in some of the gorges” further west of the shipwreck. Contemporary newspaper accounts also reported a large quantity of cargo and timber washed ashore in the days following the LOCH ARD shipwreck, adding “but those were speedily removed by persons who came down from Port Campbell, Scott’s Creek and other places with carts and pack horses”. The appearance and good condition of this wood artefact, and the aged patina and dated hand-writing style of its pasted on inscription, support the suggestion that it was ‘souvenired’ from the floating debris of the LOCH ARD at or near the 1878 date of its foundering off Mutton Bird Island. HISTORY OF THE LOCH ARD The LOCH ARD belonged to the famous Loch Line which sailed many ships from England to Australia. Built in Glasgow by Barclay, Curdle and Co. in 1873, the LOCH ARD was a three-masted square rigged iron sailing ship. The ship measured 262ft 7" (79.87m) in length, 38ft (11.58m) in width, 23ft (7m) in depth and had a gross tonnage of 1693 tons. The LOCH ARD's main mast measured a massive 150ft (45.7m) in height. LOCH ARD made three trips to Australia and one trip to Calcutta before its final voyage. LOCH ARD left England on March 2, 1878, under the command of Captain Gibbs, a newly married, 29 year old. She was bound for Melbourne with a crew of 37, plus 17 passengers and a load of cargo. The general cargo reflected the affluence of Melbourne at the time. On board were straw hats, umbrella, perfumes, clay pipes, pianos, clocks, confectionary, linen and candles, as well as a heavier load of railway irons, cement, lead and copper. There were items included that intended for display in the Melbourne International Exhibition in 1880. The voyage to Port Phillip was long but uneventful. At 3am on June 1, 1878, Captain Gibbs was expecting to see land and the passengers were becoming excited as they prepared to view their new homeland in the early morning. But LOCH ARD was running into a fog which greatly reduced visibility. Captain Gibbs was becoming anxious as there was no sign of land or the Cape Otway lighthouse. At 4am the fog lifted. A man aloft announced that he could see breakers. The sheer cliffs of Victoria's west coast came into view, and Captain Gibbs realised that the ship was much closer to them than expected. He ordered as much sail to be set as time would permit and then attempted to steer the vessel out to sea. On coming head on into the wind, the ship lost momentum, the sails fell limp and LOCH ARD's bow swung back. Gibbs then ordered the anchors to be released in an attempt to hold its position. The anchors sank some 50 fathoms - but did not hold. By this time LOCH ARD was among the breakers and the tall cliffs of Mutton Bird Island rose behind the ship. Just half a mile from the coast, the ship's bow was suddenly pulled around by the anchor. The captain tried to tack out to sea, but the ship struck a reef at the base of Mutton Bird Island, near Port Campbell. Waves broke over the ship and the top deck was loosened from the hull. The masts and rigging came crashing down knocking passengers and crew overboard. When a lifeboat was finally launched, it crashed into the side of LOCH ARD and capsized. Tom Pearce, who had launched the boat, managed to cling to its overturned hull and shelter beneath it. He drifted out to sea and then on the flood tide came into what is now known as LOCH ARD Gorge. He swam to shore, bruised and dazed, and found a cave in which to shelter. Some of the crew stayed below deck to shelter from the falling rigging but drowned when the ship slipped off the reef into deeper water. Eva Carmichael had raced onto deck to find out what was happening only to be confronted by towering cliffs looming above the stricken ship. In all the chaos, Captain Gibbs grabbed Eva and said, "If you are saved Eva, let my dear wife know that I died like a sailor". That was the last Eva Carmichael saw of the captain. She was swept off the ship by a huge wave. Eva saw Tom Pearce on a small rocky beach and yelled to attract his attention. He dived in and swam to the exhausted woman and dragged her to shore. He took her to the cave and broke open case of brandy which had washed up on the beach. He opened a bottle to revive the unconscious woman. A few hours later Tom scaled a cliff in search of help. He followed hoof prints and came by chance upon two men from nearby Glenample Station three and a half miles away. In a state of exhaustion, he told the men of the tragedy. Tom returned to the gorge while the two men rode back to the station to get help. By the time they reached LOCH ARD Gorge, it was cold and dark. The two shipwreck survivors were taken to Glenample Station to recover. Eva stayed at the station for six weeks before returning to Ireland, this time by steamship. In Melbourne, Tom Pearce received a hero's welcome. He was presented with the first gold medal of the Royal Humane Society of Victoria and a £1000 cheque from the Victorian Government. Concerts were performed to honour the young man's bravery and to raise money for those who lost family in the LOCH ARD disaster. Of the 54 crew members and passengers on board, only two survived: the apprentice, Tom Pearce and the young woman passenger, Eva Carmichael, who lost all of her family in the tragedy. Ten days after the LOCH ARD tragedy, salvage rights to the wreck were sold at auction for £2,120. Cargo valued at £3,000 was salvaged and placed on the beach, but most washed back into the sea when another storm developed. The wreck of LOCH ARD still lies at the base of Mutton Bird Island. Much of the cargo has now been salvaged and some was washed up into what is now known as LOCH ARD Gorge. Cargo and artefacts have also been illegally salvaged over many years before protective legislation was introduced. One of the most unlikely pieces of cargo to have survived the shipwreck was a Minton porcelain peacock - one of only nine in the world. The peacock was destined for the Melbourne International Exhibition in 1880. It had been well packed, which gave it adequate protection during the violent storm. Today, the Minton peacock can be seen at the Flagstaff Hill Maritime Museum in Warrnambool. From Australia's most dramatic shipwreck it has now become Australia's most valuable shipwreck artefact and is one of very few 'objects' on the Victorian State Heritage Register. The Loch Ard wreck is of state significance – Victorian Heritage Register S417. However there is a lack of documented provenance that limits the interpretive value of this piece of timber (for example, its potential to interpret nineteenth century souveniring and scavenging from shipwrecks along the south west coast of Victoria). Flagstaff Hill’s collection of artefacts from LOCH ARD is significant for being one of the largest collections of artefacts from this shipwreck in Victoria. It is significant for its association with the shipwreck, which is on the Victorian Heritage Register (VHR S417). The collection is significant because of the relationship between the objects, as together they have a high potential to interpret the story of the LOCH ARD. The LOCH ARD collection is archaeologically significant as the remains of a large international passenger and cargo ship. The LOCH ARD collection is historically significant for representing aspects of Victoria’s shipping history and its potential to interpret sub-theme 1.5 of Victoria’s Framework of Historical Themes (living with natural processes). The collection is also historically significant for its association with the LOCH ARD, which was one of the worst and best known shipwrecks in Victoria’s history. A length of hardwood timber, planed and varnished to smooth finish on three sides, with two unfinished tongues protruding from each end (one broken off), possibly from the wreck of the LOCH ARD. The front or upper face is moulded and routed to a regular, linear (skirting board type) design along its entire length, the two sides flat planed. One side contains two inserted dowel rods that have been broken off. The bottom face has not been finished to the same standard. The sample is good quality wood that has retained its density and weight and shows no evidence of having been submerged in seawater for any length of time. Glued on to the upper face of the length of timber near the right hand end is a deteriorated square of paper bearing an inscription. The paper, peeling back and with torn edges, is stuck over an original wood stain but under a subsequent layer of varnish. The faded ink words are indecipherable where paper is missing, but written carefully in an old fashioned cursive script.The inscription on the paper reads: “A [p]iece of w[r]ec[k] of the Loch Ard wrecked near Sherbroke River”. flagstaff hill, warrnambool, shipwrecked coast, flagstaff hill maritime museum, maritime museum, shipwreck coast, flagstaff hill maritime village, great ocean road, loch line, loch ard, captain gibbs, eva carmichael, tom pearce, glenample station, mutton bird island, loch ard gorge, nineteenth-century souveniring, shipwreck scavenging, loch line sailing ships, wood sample -
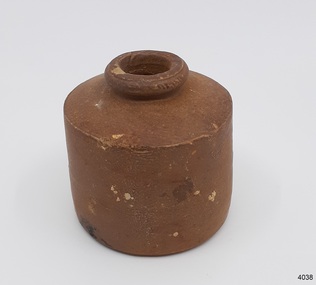 Flagstaff Hill Maritime Museum and Village
Container - Ink Bottle, Prior to 1878
... welcome. He was presented with the first gold medal of the Royal Humane Society of Victoria and a £1000 cheque from the Victorian Government. ...welcome. He was presented with the first gold medal of the Royal Humane Society of Victoria and a £1000 cheque from the Victorian Government. ...This design of ink bottle was commonly referred to as a ‘penny ink well’ because it was very inexpensive to produce. It is also known as a dwarf ink bottle. Pen and ink has been in use for hand writing from about the seventh century up until the mid-20th century up until around the mid-19th century a quill pen made from a bird’s feather was used. In the 1850s the steel point pen was invented and could be manufactured on machines in large quantities. In the 1880s a successful portable fountain pen was designed, giving a smooth flowing ink and ease of use replacing the quill or dip pen. History of the Loch Ard: The Loch Ard got its name from "Loch Ard" a loch that lies to the west of Aberfoyle, and the east of Loch Lomond. It means "high lake" in Scottish Gaelic. The vessel belonged to the famous Loch Line which sailed many vessels from England to Australia. The Loch Ard was built in Glasgow by Barclay, Curle & Co. in 1873, the vessel was a three-masted square-rigged iron sailing ship that measured 79.87 meters in length, 11.58 m in width, and 7 m in depth with a gross tonnage of 1693 tons with a mainmast that measured a massive 45.7 m in height. Loch Ard made three trips to Australia and one trip to Calcutta before its fateful voyage. Loch Ard left England on March 2, 1878, under the command of 29-year-old Captain Gibbs, who was newly married. The ship was bound for Melbourne with a crew of 37, plus 17 passengers. The general cargo reflected the affluence of Melbourne at the time. Onboard were straw hats, umbrellas, perfumes, clay pipes, pianos, clocks, confectionery, linen, and candles, as well as a heavier load of railway irons, cement, lead, and copper. There were other items included that were intended for display in the Melbourne International Exhibition of 1880. The voyage to Port Phillip was long but uneventful. Then at 3 am on June 1, 1878, Captain Gibbs was expecting to see land. But the Loch Ard was running into a fog which greatly reduced visibility. Captain Gibbs was becoming anxious as there was no sign of land or the Cape Otway lighthouse. At 4 am the fog lifted and a lookout aloft announced that he could see breakers. The sheer cliffs of Victoria's west coast came into view, and Captain Gibbs realised that the ship was much closer to them than expected. He ordered as much sail to be set as time would permit and then attempted to steer the vessel out to sea. On coming head-on into the wind, the ship lost momentum, the sails fell limp and Loch Ard's bow swung back towards land. Gibbs then ordered the anchors to be released in an attempt to hold their position. The anchors sank some 50 fathoms - but did not hold. By this time the ship was among the breakers and the tall cliffs of Mutton Bird Island rose behind. Just half a mile from the coast, the ship's bow was suddenly pulled around by the anchor. The captain tried to tack out to sea, but the ship struck a reef at the base of Mutton Bird Island, near Port Campbell. Waves subsequently broke over the ship and the top deck became loosened from the hull. The masts and rigging came crashing down knocking passengers and crew overboard. When a lifeboat was finally launched, it crashed into the side of Loch Ard and capsized. Tom Pearce, who had launched the boat, managed to cling to its overturned hull and shelter beneath it. He drifted out to sea and then on the flood tide came into what is now known as Lochard Gorge. He swam to shore, bruised and dazed, and found a cave in which to shelter. Some of the crew stayed below deck to shelter from the falling rigging but drowned when the ship slipped off the reef into deeper water. Eva Carmichael a passenger had raced onto the deck to find out what was happening only to be confronted by towering cliffs looming above the stricken ship. In all the chaos, Captain Gibbs grabbed Eva and said, "If you are saved Eva, let my dear wife know that I died like a sailor". That was the last Eva Carmichael saw of the captain. She was swept off the ship by a huge wave. Eva saw Tom Pearce on a small rocky beach and yelled to attract his attention. He dived in and swam to the exhausted woman and dragged her to shore. He took her to the cave and broke the open case of brandy that had washed up on the beach. He opened a bottle to revive the unconscious woman. A few hours later Tom scaled a cliff in search of help. He followed hoof prints and came by chance upon two men from nearby Glenample Station three and a half miles away. In a complete state of exhaustion, he told the men of the tragedy. Tom then returned to the gorge while the two men rode back to the station to get help. By the time they reached Loch Ard Gorge, it was cold and dark. The two shipwreck survivors were taken to Glenample Station to recover. Eva stayed at the station for six weeks before returning to Ireland by steamship. In Melbourne, Tom Pearce received a hero's welcome. He was presented with the first gold medal of the Royal Humane Society of Victoria and a £1000 cheque from the Victorian Government. Concerts were performed to honour the young man's bravery and to raise money for those who lost families in the disaster. Of the 54 crew members and passengers on board, only two survived: the apprentice, Tom Pearce, and the young woman passenger, Eva Carmichael, who lost her family in the tragedy. Ten days after the Lochard tragedy, salvage rights to the wreck were sold at auction for £2,120. Cargo valued at £3,000 was salvaged and placed on the beach, but most washed back into the sea when another storm developed. The wreck of Lochard still lies at the base of Mutton Bird Island. Much of the cargo has now been salvaged and some items were washed up into Lochard Gorge. Cargo and artefact's have also been illegally salvaged over many years before protective legislation was introduced in March 1982. One of the most unlikely pieces of cargo to have survived the shipwreck was a Minton majolica peacock- one of only nine in the world. The peacock was destined for the Melbourne 1880 International Exhibition. It had been well packed, which gave it adequate protection during the violent storm. Today the Minton peacock can be seen at the Flagstaff Hill Maritime Museum in Warrnambool. From Australia's most dramatic shipwreck it has now become Australia's most valuable shipwreck artifact and is one of very few 'objects' on the Victorian State Heritage Register.This ink well is historically significant as it represents methods of hand written communication that were still common up until the mid-20th century, when fountain pens and ballpoint pens took over in popularity and convenience. The shipwreck of the Loch Ard is of significance for Victoria and is registered on the Victorian Heritage Register ( S 417). Flagstaff Hill has a varied collection of artefact's from Loch Ard and its collection is significant for being one of the largest accumulation of artefact's from this notable Victorian shipwreck of which the subject items are a small part. The collection's objects give us a snapshot of how we can interpret the story of this tragic event. The collection is also archaeologically significant as it represents aspects of Victoria's shipping history that allows us to interpret Victoria's social and historical themes of the time. Through is associated with the worst and best-known shipwreck in Victoria's history.Stoneware penny Ink bottle ironstone salt-glazed, stoneware cylindrical shape with small mouth and squat neck, broad shoulders brown colour, . with light coloured encrustation spots.flagstaff hill, warrnambool, flagstaff hill maritime museum, shipwreck coast, flagstaff hill maritime village, great ocean road, loch line, loch ard, captain gibbs, eva carmichael, tom pearce, glenample station, mutton bird island, loch ard gorge, penny ink well, writing equipment, domestic, stoneware, clay, ceramic, pottery, ink well, inkwell, ink bottle, dip pen, ink, hand writing, business, vintage, dwarf ink -
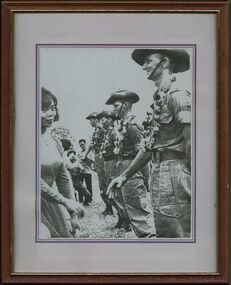 Frankston RSL Sub Branch
Photograph
... Framed photograph of Major MacDonald as he is greeted by a Vietnamese woman after being presented with a garland during the welcoming ceremony for the 1st Battalion, the Royal Australian Regiment (1RAR). ...Frankston RSL Sub Branch 183 Cranbourne Road Frankston mornington-peninsula Framed photograph of Major MacDonald as he is greeted by a Vietnamese woman after being presented with a garland during the welcoming ceremony for the 1st Battalion, the Royal Australian Regiment (1RAR). ...Framed photograph of Major MacDonald as he is greeted by a Vietnamese woman after being presented with a garland during the welcoming ceremony for the 1st Battalion, the Royal Australian Regiment (1RAR). Gia Dinh Province, Saigon. June 1965. refer AWM collection < http://www.awm.gov.au/collection/DNE/65/0024/VN/ > -
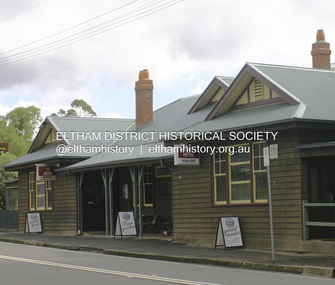 Eltham District Historical Society Inc
Photograph - Digital Photograph, Alan King, Panton Hill Hotel, 27 March 2008
... Royal Geographical Society. Despite Panton Hill’s prosperity, it still lacked many services as poor roads made access to Melbourne difficult. A horse-drawn mail coach travelled to Melbourne until 1890, when the railway came to Heidelberg. The nearest doctor was at Yarra Glen or Heidelberg, and the Indian hawker Singh’s annual visit was very welcome...Royal Geographical Society. Despite Panton Hill’s prosperity, it still lacked many services as poor roads made access to Melbourne difficult. A horse-drawn mail coach travelled to Melbourne until 1890, when the railway came to Heidelberg. The nearest doctor was at Yarra Glen or Heidelberg, and the Indian hawker Singh’s annual visit was very welcome ...Today’s Panton Hill Hotel was built around 1920. Published: Nillumbik Now and Then / Marguerite Marshall 2008; photographs Alan King with Marguerite Marshall.; p61 Panton Hill was originally known as Kingstown, and consisted of only one hotel when the Orams Reef was discovered in 1859. Kingstown was a quartz mining centre and many old mine shafts remain in the area. Orams Reef was one of the first reefs with a rich find of gold in the area. The Hotel Francais, which had been operating in 1861, was well situated on the way to Queenstown (later St Andrews). So was Herr Hirt’s Hotel and store at Smiths Gully. The Kingstown hotel, known as the Frenchman’s and in 1864 as the Hotel de France, was run by a Monsieur Emile Hude and his wife Jeanne, and known for its good food. They hosted social events, business conventions and debates, attracting patrons from as far as Melbourne. The hotel’s name was changed to Panton Hill Hotel in 1905. In 1883 Charles Caudwell built another hotel nearby, possibly in Long Gully Road,3 which it is thought, was burnt down early last century. Today’s Panton Hill Hotel, built around 1920, is the only one of the cluster of buildings in the main road, not to date from around the turn of last century. It was severely damaged by fire in 2003, then underwent extensive alterations. It is the township’s only hotel and is an example of a modest hotel building exterior, constructed early last century. In its early days the hotel also housed the first post office, newsagency and store. Orams Reef yielded a total of £100,000, and fossikers also found alluvial gold in the creeks and gullies, but there is no record of the total value of their finds. Gold greatly increased the Panton Hill population, which peaked between 1865 and 1885. On holidays large sports meetings were held with wood chopping contests and foot races and the day would end with a ball. Miners came from various countries to seek their fortune, including many from China. The Chinese became unpopular however, and gradually left the district, although some stayed and grew and sold vegetables.5 Panton Hill was named after Joseph Panton, who in 1862 was appointed Police Magistrate for the Woods Point, Heidelberg and Yarra districts. Panton was an outstanding man, who in 1852, was Commissioner of Crown Lands and Assistant Commissioner of Goldfields at Bendigo. In 1874 he was promoted to Chief Magistrate for the Melbourne Police. Panton was also an artist, becoming president of the Victorian Arts Society in 1888, and in 1913, president of the Royal Geographical Society. Despite Panton Hill’s prosperity, it still lacked many services as poor roads made access to Melbourne difficult. A horse-drawn mail coach travelled to Melbourne until 1890, when the railway came to Heidelberg. The nearest doctor was at Yarra Glen or Heidelberg, and the Indian hawker Singh’s annual visit was very welcome. A miner’s shack opposite the school was used as a post office. Today’s general store and post office in the main road dates from early last century, and has changed considerably. While most people searched for gold, the more enterprising ones established farms to feed the diggers. Farmers grew wheat, barley and oats, and sent animal skins to the Eltham tannery, to make furs in Melbourne. As gold became scarce from around 1880, miners took up farming on 19 to 20 acre (8ha) allotments. The first settlers in Cherry Tree Road included Purcell, Smith, Owens, Hughes and Shillinglaw. By 1900 all the land had been taken up around Panton Hill and Hurstbridge. The orchards in Panton Hill and the wider district, particularly of apple and pear, were very successful, and made Panton Hill a cohesive and successful community. About 1914 the Moores built the first cool-store and refrigeration plant at their orchard in Cherry Tree Road. Many settlers planted vineyards and made high quality wine, but in 1922 the blight destroyed them.This collection of almost 130 photos about places and people within the Shire of Nillumbik, an urban and rural municipality in Melbourne's north, contributes to an understanding of the history of the Shire. Published in 2008 immediately prior to the Black Saturday bushfires of February 7, 2009, it documents sites that were impacted, and in some cases destroyed by the fires. It includes photographs taken especially for the publication, creating a unique time capsule representing the Shire in the early 21st century. It remains the most recent comprehenesive publication devoted to the Shire's history connecting local residents to the past. nillumbik now and then (marshall-king) collection, panton hill hotel -
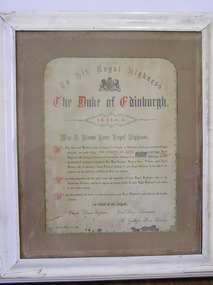 Ballarat Fire Brigade
Certificate, just prior to December 10th, 1867
... To His Royal Higness / The Duke of Edinburugh / May It Please Your Royal Highness / We Othe fficers and Members of the Ballaarat Fire Brigade, an institution based upon pure philanthropic / principles, our motto being "We Strive to Save" bear to approach your Royal / Highness with feelings of devotion and attachment, and deep felt gratitude to the Almighty, for this / opportunity of envicingour loyalty to Her Most Gracious Majesty Queen Victoria, your Royal / Mother: and, of tendering a hearty Firemans welcome to Your Royal Highness, in the land of our / adoption, and the good town of Ballaarat East, our residence. / We are deeply impressed with the great honor and importance of your Royal Higness's visit to the / Australian Colonies, and beg to express our fervent wishes for your Royal Highness's safe return / to our mother country. / We have the privilege and honor, to subscribe ourselves your Royal Higness's most obedient and humble / servants. / On behalf of the Brigade / Charles Dunn, Captain Carl Franz, Lieutenant / R. ...Ballarat Fire Brigade Corner Barkly & East Streets Ballarat East goldfields Certificate is of the pledge that the brigade made to His Royal Highness the Duke of Edinburugh at a dinner that the Duke attended at the Ballarat Fire Station on 10th December 1867 during a royal visit to the district. ballarat fire brigade queen victoria his royal higness the duke of edinburugh december 1867 1867 captain charles dunn captain dunn lieutenant carl franz lieutenant franz honourary secretary r geilhofer his royal highness the duke of edinburugh To His Royal Higness / The Duke of Edinburugh / May It Please Your Royal Highness / We Othe fficers and Members of the Ballaarat Fire Brigade, an institution based upon pure philanthropic / principles, our motto being "We Strive to Save" bear to approach your Royal / Highness with feelings of devotion and attachment, and deep felt gratitude to the Almighty, for this / opportunity of envicingour loyalty to Her Most Gracious Majesty Queen Victoria, your Royal / Mother: and, of tendering a hearty Firemans welcome to Your Royal Highness, in the land of our / adoption, and the good town of Ballaarat East, our residence. / We are deeply impressed with the great honor and importance of your Royal Higness's visit to the / Australian Colonies, and beg to express our fervent wishes for your Royal Highness's safe return / to our mother country. / We have the privilege and honor, to subscribe ourselves your Royal Higness's most obedient and humble / servants. / On behalf of the Brigade / Charles Dunn, Captain Carl Franz, Lieutenant / R. ...Certificate is of the pledge that the brigade made to His Royal Highness the Duke of Edinburugh at a dinner that the Duke attended at the Ballarat Fire Station on 10th December 1867 during a royal visit to the district. White timber framed pledge from the Ballarat Fire Brigade to His Royal Highness the Duke of Edinburugh during his royal visit in December 1867. Pledge is on white paper with a coat of arms near the centre at the top of the page. Lettering is mainly in black ink with some red coloured letters being used. Certificate has a light brown coloured border around it with a hand drawn scrolled decorative edge made in gold colour. To His Royal Higness / The Duke of Edinburugh / May It Please Your Royal Highness / We Othe fficers and Members of the Ballaarat Fire Brigade, an institution based upon pure philanthropic / principles, our motto being "We Strive to Save" bear to approach your Royal / Highness with feelings of devotion and attachment, and deep felt gratitude to the Almighty, for this / opportunity of envicingour loyalty to Her Most Gracious Majesty Queen Victoria, your Royal / Mother: and, of tendering a hearty Firemans welcome to Your Royal Highness, in the land of our / adoption, and the good town of Ballaarat East, our residence. / We are deeply impressed with the great honor and importance of your Royal Higness's visit to the / Australian Colonies, and beg to express our fervent wishes for your Royal Highness's safe return / to our mother country. / We have the privilege and honor, to subscribe ourselves your Royal Higness's most obedient and humble / servants. / On behalf of the Brigade / Charles Dunn, Captain Carl Franz, Lieutenant / R. Geilhofer, Hon. Secretary / Ballaarat, December, 1867ballarat fire brigade, queen victoria, his royal higness, the duke of edinburugh, december 1867, 1867, captain charles dunn, captain dunn, lieutenant carl franz, lieutenant franz, honourary secretary r geilhofer, his royal highness the duke of edinburugh -
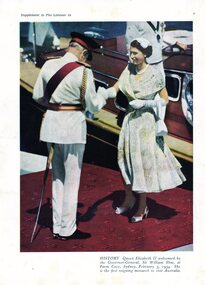 Greensborough Historical Society
Photograph, Listener In, Queen Elizabeth II welcomed by Governor General Sir William Slim during her visit to Australia in 1954, 1954
... Greensborough Historical Society 34A Glenauburn Road Lower Plenty Lower Plenty melbourne Queen Elizabeth II welcomed by Governor General Sir William Slim during her visit to Australia in 1954. royal tour of australia 1954 queen elizabeth II royal family Supplement to the "Listener In" Colour photograph from news magazine Queen Elizabeth II welcomed by Governor General Sir William Slim during her visit to Australia in 1954 Photograph Photograph Listener In ...Queen Elizabeth II welcomed by Governor General Sir William Slim during her visit to Australia in 1954.Colour photograph from news magazinenon-fictionSupplement to the "Listener In"royal tour of australia 1954, queen elizabeth ii, royal family -
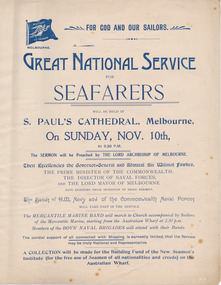 Mission to Seafarers Victoria
Flyer, Victorian Seamen's Mission, Great National Service for Seafarers, 1907
... Representatives come from the Royal and Merchant Navies, the commercial world, shipping companies, mission and philanthropic societies, veterans’ associations, labour unions, youth and leisure organisations, but anyone is welcome to attend. seafarers service 1907 reverend alfred gurney goldsmith dr lowther clarke archibishop of melbourne st paul cathedral admiral sir wilmot fawkes seamen's mission missions to seamen battle of trafalgar trafalgar day horatio nelson Small flyer in cream colour paper and printed in blue ink. ...The first Seafarers Service was held on 23 October 1905 in the St Paul's Cathedral in London to celebrate the Centenary of the Battle of Trafalgar and the death of Vice-Admiral Horatio Nelson on 21 October 1805. Reverend Alfred Gurney Goldsmith launched the first Seafarers Service two years later and the first service was held on Sunday 10 November 1907.The service continue to reflect the full range of the maritime activities in Australia. Representatives come from the Royal and Merchant Navies, the commercial world, shipping companies, mission and philanthropic societies, veterans’ associations, labour unions, youth and leisure organisations, but anyone is welcome to attend.Small flyer in cream colour paper and printed in blue ink. Flying angel flag at the top left corner.seafarers service, 1907, reverend alfred gurney goldsmith, dr lowther clarke, archibishop of melbourne, st paul cathedral, admiral sir wilmot fawkes, seamen's mission, missions to seamen, battle of trafalgar, trafalgar day, horatio nelson -
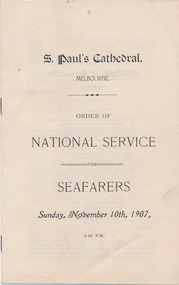 Mission to Seafarers Victoria
Programme, The Victoria Missions to Seamen, Great National Service for Seafarers, 1907
... Representatives come from the Royal and Merchant Navies, the commercial world, shipping companies, mission and philanthropic societies, veterans’ associations, labour unions, youth and leisure organisations, but anyone is welcome to attend. seafarers service 1907 reverend alfred gurney goldsmith dr lowther clarke archibishop of melbourne st paul cathedral admiral sir wilmot fawkes seamen's mission missions to seamen battle of trafalgar trafalgar day horatio nelson 8 pages booklet in cream colour printed in black ink. ...The first Seafarers Service was held on 23 October 1905 in the St Paul's Cathedral in London to celebrate the Centenary of the Battle of Trafalgar and the death of Vice-Admiral Horatio Nelson on 21 October 1805. Reverend Alfred Gurney Goldsmith launched the first Seafarers Service two years later and the first service was held on Sunday 10 November 1907 and has been held every year since.The service continue to reflect the full range of the maritime activities in Australia. Representatives come from the Royal and Merchant Navies, the commercial world, shipping companies, mission and philanthropic societies, veterans’ associations, labour unions, youth and leisure organisations, but anyone is welcome to attend.8 pages booklet in cream colour printed in black ink.seafarers service, 1907, reverend alfred gurney goldsmith, dr lowther clarke, archibishop of melbourne, st paul cathedral, admiral sir wilmot fawkes, seamen's mission, missions to seamen, battle of trafalgar, trafalgar day, horatio nelson -
 Mission to Seafarers Victoria
Flyer, Mission to Seafarers Victoria, Annual Seafarers Service 19 October 2020, 19 October 2020
... Representatives come from the Royal and Merchant Navies, the commercial world, shipping companies, mission and philanthropic societies, veterans’ associations, labour unions, youth and leisure organisations, but anyone is welcome to attend. ...The first Seafarers Service was held on 23 October 1905 in the St Paul's Cathedral in London to celebrate the Centenary of the Battle of Trafalgar and the death of Vice-Admiral Horatio Nelson on 21 October 1805. Reverend Alfred Gurney Goldsmith launched the first Seafarers Service two years later and the first service was held on Sunday 10 November 1907.The service continue to reflect the full range of the maritime activities in Australia. Representatives come from the Royal and Merchant Navies, the commercial world, shipping companies, mission and philanthropic societies, veterans’ associations, labour unions, youth and leisure organisations, but anyone is welcome to attend. During the pandemic, the event, like many others, happened without public so was broadcasted live on Channel 31 on the 19 October 2020, and then livestreamed on Tube on 20 October 2020.Flyer invitent to watch the annual seafarers service broadcasted in 2020covid, 2020, online, youtube, live broadcast, st paul's cathedral, melbourne, merchant navy, royal australian navy, ran, mission to seafarers, seafarers service, pandemic, nigel porteous, reverend onofre punnay, inni punnay, channel 31, battle of trafalgar, trafalgar day, horatio nelson