Showing 400 items matching "s. king"
-
 Phillip Island and District Historical Society Inc.
Book, GILL, William Wyatt, Myths and songs from the South Pacific / by Rev. William Wyatt Gill ; With a preface by F. Max Mu?ller, 1876
... ...Henry S. King & Co....Book GILL, William Wyatt Henry S. King & Co. ...Labelled 'Cowes Municipal Public Library', 'Phillip Island Historical Society, Cleeland Bequest'.mythology, polynesian, mangaia, cook islands, religion, songs, polynesia -
 Federation University Historical Collection
Book, W. Stanley Jevons, Money and the Mechanism of Exchange, 1876
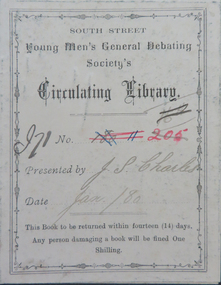
... ...Henry S. King & Co....Stanley Jevons Henry S. King & Co. ...Crimson and black cloth bound book of 350 pages. Formerly part of the South Street Young Men's General Debating Society's Circulating Library.non-fictionmoney, south street, south street debating society, south street young men's general debating society circulating library, bookplate, j.s. charles, john p. charles, library, barter, currency, metals as money, coining, coins, standards, exchange, promissory notes, paper currency, credit documents, foreign bills of exchange, bank of england, corn rents, legal tender -
 Linton Mechanics Institute and Free Library Collection
Book - Novel, Ranking, B. Montgomerie, Streams From Hidden Sources by B. Montgomerie Ranking, 1872
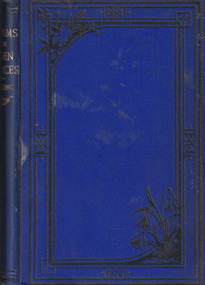
... ...Henry S. King & Co....Montgomerie Henry S. King & Co. Spottiswoode & Co. ...Seven stages of time.Hardcover book, 227 pages. Cover of book is royal blue with decorative black bordering. Gold embossed text on spine.fictionSeven stages of time.b. montgomerie ranking, fiction -
 Anglesea and District Historical Society
Book, Tennyson in Memorium, 1876
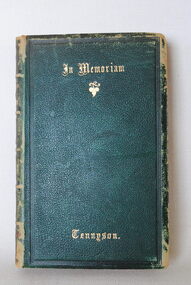
... Henry S. King and Co. London...Tennyson in Memorium Book Henry S. King and Co. London ..."In Memorium" consists of 131 smaller poems of varying length. The stanzas are isometric with the rhyme scheme ABBA, a form that has become known as the "In Memorium Stanza". Tennyson wrote this book after he learned that his beloved friend Arthur Henry Hallum had died suddenly and unexpectedly of fever at 22. It was written over the course of 17 years (1833-1849).Front: In Memorium (gold with gold leaf) / Tennyson Also on spine.tennyson, poetry -
Port Melbourne Historical & Preservation Society
Photograph - Port Melbourne Third Eighteen football team, Lagoon Reserve, Port Melbourne, 1939
... ...H S KING...BACK ROW L - R Mr. H S King (President), George Fisher, J Foden, A Brown, B Rosewarne, R Banks, D Gleeson, H Eason, Mrs. ...BACK ROW L - R Mr. H S King (President), George Fisher, J Foden, A Brown, B Rosewarne, R Banks, D Gleeson, H Eason, Mrs. ...Colour lasercopy of black and white, colourised photo of Port Melbourne Third Eighteen football team 1939 (team colours have been added on jumpers and socks). Taken outside rooms at Lagoon Reserve. BACK ROW L - R Mr. H S King (President), George Fisher, J Foden, A Brown, B Rosewarne, R Banks, D Gleeson, H Eason, Mrs. O King (Secretary) MIDDLE ROW L - R C Edland (Assistant Secretary), J Erridge, Albert "Digger" Cosham, H Barnes (Captain & Coach), G Upton (Vice Captain), A Ambler, Jack "Splinter" Lowrie (Boundary Umpire) FRONT ROW L - R P Howard, C Nuttall, R Marshall, A "Bertie" Maskell. E Johnstonsport - australian rules football, lagoon reserve, port melbourne football club, pmfc, h s king, george fisher, j foden, a brown, b rosewarne, r banks, d gleeson, h eason, mrs o king -
 Bendigo Historical Society Inc.
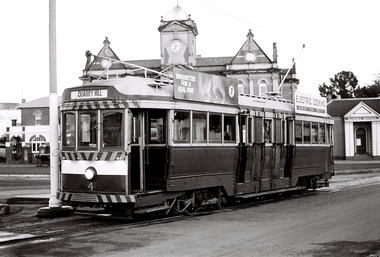
Photograph - Robert Green Collection - Photos of Bendigo Tramways - Sheet 1 of 8, 1960s
... keith s king...Sheet B also contains one slide taken by Robert's friend Keigh S King (1928-2019) who was the author of the book 'The Bendigo Tramways an illustrated history, published by the Australian Railway Historical Society Victorian Division Melbourne in February 1972; BHS Item no. 5052. ...Sixteen black and white prints from the images are also included. keith s king bendigo trams robert green Robert Green Collection, this item contains thirty three Black and White Negatives of trams at various locations around Bendigo. ...This collection contains eight archive sheets (Sheet 1 to Sheet 8) of strips of original 35mm black and white negatives of photographs taken during the 1960s and early 1970s by Robert Green, of the Bendigo State Electricty Commission of Victoria Tramways prior to their abandonment The collection also includes two archive quality sheets (Sheet A and Sheet B) of original 35mm colour slides taken by Robert Green during the same period. Sheet B also contains one slide taken by Robert's friend Keigh S King (1928-2019) who was the author of the book 'The Bendigo Tramways an illustrated history, published by the Australian Railway Historical Society Victorian Division Melbourne in February 1972; BHS Item no. 5052. The collection also includes one USB stick which contains images of all photographs described above, except for one colour slide taken by Keith S Kings. Sixteen black and white prints from the images are also included.Robert Green Collection, this item contains thirty three Black and White Negatives of trams at various locations around Bendigo. Photos: 11147.1a and 11147.1b Tram on its way out of Long Gully along Mt Korong (Eaglehawk) Road towards Eaglehawk. Houses in the foreground, on the left is 245 Eaglehawk Road and on the right 241 Eaglehawk Road. 11147.1c Birney Car Tram on its way out of Long Gully along Mt Korong (Eaglehawk) Road towards Eaglehawk, looking back ove the Long Gully township. 11147.1d Birney Car Tram on its way out of Long Gully along Mt Korong (Eaglehawk) Road towards Eaglehawk. Houses in the foreground, on the left is 245 Eaglehawk Road and on the right 241 Eaglehawk Road. 11147.1e No 28 Birney Car Special 11147.1f No 28 Birney Car Special and No 2 possibly in Eaglehawk 11147.1g No 18 roars up Eaglehawk Road into Iron Bark 11147.1h Tram crossing the railway at Jobs Gully, on its way to Bendigo 11147.1i Tram crossing the railway at Jobs Gully, on its way to Eaglehawk 11147.1j Central Deborah Gold Mine 11147.1k The intersection of Reginald and Houston St, with the Cemetery on the left. 11147.1l Tram Stop on Pall Mall opposite Ezywalkins Conrner of Mitchell St 11147.1m Electrical Cable junction box 11147.1n Electrical Cable junction box 11147.1o No 18 at Canterbury Park Terminus Eaglehawk 11147.1p No 26 at the top of Mitchell St on its way to Quarry Hill 11147.1q Nos 26 and 18 at the Railway Station stop in Mitchell St 11147.1r No 18 coming down Mitchell St 11147.1s No 5 possibly in Carpenter St 11147.1t No 5 at the Cemetery Gates ready to depart the terminus 11147.1u No 5 at the Cemetery Gates ready to depart the terminus 11147.1v No 5 at the Cemetery Gates ready to depart the terminus 11147.1w Nos 18 and 5 crossover at the Fountain 11147.1x Nos 18 and 5 crossover at the Fountain 11147.1y Nos 18 and 5 crossover at the Fountain 11147.1z Heading into Long Gully past the Manchester Arms Hotel 11147.1aa No 5 loading passengers at the Eaglehawk Terminus next to Canterbury Park 11147.1ab Traffic conjestion at the loop on the way back to Bendigo 11147.1ac The Eaglehawk Terminus next to Canterbury Park 11147.1ad The Eaglehawk Terminus next to Canterbury Park 11147.1ae The Eaglehawk Terminus next to Canterbury Park 11147.1af The Eaglehawk Terminus next to Canterbury Parkkeith s king, bendigo, trams, robert green -
 Bendigo Historical Society Inc.
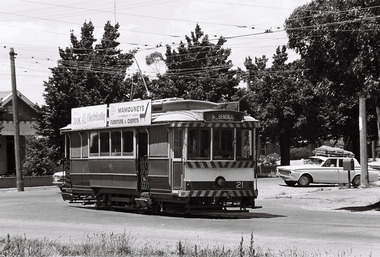
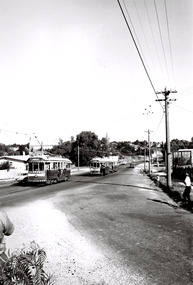
Photograph - Robert Green Collection - Photos of Bendigo Tramways - Sheet 3 of 8, 1960s
... keith s king...Sheet B also contains one slide taken by Robert's friend Keigh S King (1928-2019) who was the author of the book 'The Bendigo Tramways an illustrated history, published by the Australian Railway Historical Society Victorian Division Melbourne in February 1972; BHS Item no. 5052. ...Sixteen black and white prints from the images are also included. keith s king bendigo trams robert green Robert Green Collection, this item contains 35 Black and White Negatives of the trams at various locations around Bendigo. ...This collection contains eight archive sheets (Sheet 1 to Sheet 8) of strips of original 35mm black and white negatives of photographs taken during the 1960s and early 1970s by Robert Green, of the Bendigo State Electricty Commission of Victoria Tramways prior to their abandonment The collection also includes two archive quality sheets (Sheet A and Sheet B) of original 35mm colour slides taken by Robert Green during the same period. Sheet B also contains one slide taken by Robert's friend Keigh S King (1928-2019) who was the author of the book 'The Bendigo Tramways an illustrated history, published by the Australian Railway Historical Society Victorian Division Melbourne in February 1972; BHS Item no. 5052. The collection also includes one USB stick which contains images of all photographs described above, except for one colour slide taken by Keith S Kings. Sixteen black and white prints from the images are also included.Robert Green Collection, this item contains 35 Black and White Negatives of the trams at various locations around Bendigo. Photos: 11147.3a No 21 turns out of McRae St into Nolan Street, on its way to North Bendigo 11147.3b No 5 on the way to Eaglehawk 11147.3c No 21 leaves Charing Cross towards North Bendigo, City Family Hotel in the background 11147.3d No 18 completes its run from Eaglehawk at the fountain, and is returning to the depot 11147.3e No 18 turns from McRae St into Tramway Avenue and the depot 11147.3f No 18 turns from McRae St into Tramway Avenue and the depot 11147.3g No 28 at the depot 11147.3h No 6 on its way to Golden Square 11147.3i No 6 at the Golden square Terminus, High and Maple Streets 11147.3j No 25 from Quarry Hill at the intersection of Wills and Mitchell Street 11147.3k No 2 leaves the Mitchell St railway bridge into Carpenter Street on its way to Quarry Hill 11147.3l No 21 comes into the Golden square Terminus, steeple of the Methodist church in the background 11147.3m Tram heading along McRae St in front of the School of Mines 11147.3n Tram heading along McRae St towards Pall Mall in front of the School of Mines 11147.o No 24 heading to Eaglehawk at the corner of Barnard and Forest Streets 11147.3p Three trams lined up in the depot, possible early morning or evening 11147.3q Tram No 21 at the North Bendigo Terminus, possible early morning or evening 11147.3s Tram leaving the Eaglehawk Town Hall in the dark 11147.3t View up Pall Mall towards the fountain from Mundy Street intersection 11147.3u Birney Car No 28 Special leaving the depot, crossing the Back Creek 11147.3w Birney Car No 28 Special at Eaglehawk Canterbury Park 11147.3x No 28 Birney Car Special hading to Eaglehawk at Iron Bark, just past the Marong Road turn-off at Iron Bark 11147.3y No 28 Birney Car Special heading to Eaglehawk at Long Gully, opposite the Manchester Arms Hotel 11147.3z No 28 Birney Car Special 11147aa No 28 Birney Car Special comes into the Eaglehawk Terminus 11147ab No 28 Birney Car Special heads down view St past the Rifle Brigade Hotel 11147ac No 28 Birney Car Special heads down Pall Mall past the Court House Hotel 11147.3ad No 5 to Eaglehawk runs up McCrae St in front of the School of Mines 11147.3ae No 28 Birney Car passes the Mundy St intersection with McRae St heading to the fountain 11147.3af No 3 passes the Mundy St intersection with McRae St heading to Eaglehawk 11147.3ah Tram passes the School of Mines in McRae St heading to the fountain 11147.3ai Birney Car Tram passes the School of Mines in McRae St heading to the fountain 11147.3aj Tramways High Electrical termination boxkeith s king, bendigo, trams, robert green -
 Bendigo Historical Society Inc.
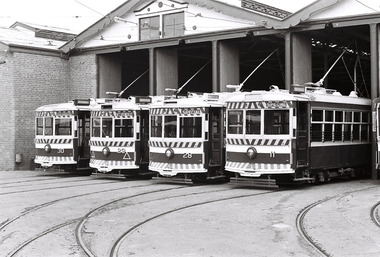
Photograph - Robert Green Collection - Photos of Bendigo Tramways - Sheet 2 of 8, 1960s
... keith s king...Sheet B also contains one slide taken by Robert's friend Keigh S King (1928-2019) who was the author of the book 'The Bendigo Tramways an illustrated history, published by the Australian Railway Historical Society Victorian Division Melbourne in February 1972; BHS Item no. 5052. ...Sixteen black and white prints from the images are also included. keith s king bendigo trams robert green Robert Green Collection, this item contains 34 Black and White Negatives of the trams at various locations around Bendigo. ...This collection contains eight archive sheets (Sheet 1 to Sheet 8) of strips of original 35mm black and white negatives of photographs taken during the 1960s and early 1970s by Robert Green, of the Bendigo State Electricty Commission of Victoria Tramways prior to their abandonment The collection also includes two archive quality sheets (Sheet A and Sheet B) of original 35mm colour slides taken by Robert Green during the same period. Sheet B also contains one slide taken by Robert's friend Keigh S King (1928-2019) who was the author of the book 'The Bendigo Tramways an illustrated history, published by the Australian Railway Historical Society Victorian Division Melbourne in February 1972; BHS Item no. 5052. The collection also includes one USB stick which contains images of all photographs described above, except for one colour slide taken by Keith S Kings. Sixteen black and white prints from the images are also included.Robert Green Collection, this item contains 34 Black and White Negatives of the trams at various locations around Bendigo. Photos: 11147.2a No 30, 29, 28 and 11 Birney Cars lined up at the Depot 11147.2b No 30, 29, 28 and 11 Birney Cars lined up at the Depot 11147.2c No 30, 29, 28 and 11 Birney Cars lined up at the Depot 11147.2d No 30, 29, 28 and 11 Birney Cars lined up at the Depot 11147.2e No 30, 29, 28 and 11 Birney Cars lined up at the Depot 11147.2f No 30, 29, 28 Birney Cars lined up at the Depot 11147.2g No 30, 29, 28 and 11 Birney Cars lined up at the Depot 11147.2h No 30, 29, 28 and 11 Birney Cars lined up at the Depot 11147.2i No 30, 29, 28 and 11 Birney Cars and No 25 lined up at the Depot 11147.2j No 30, 29, 28 and 11 Birney Cars and No 25 lined up at the Depot 11147.2k No 28 and 11 Birney Cars lined up at the Depot 11147.2l No 30 Special leaves the depot watched by the photographer 11147.2m No 29 Special leaves the depot 11147.2n Driver and passenger inside a Birney Car 11147.2o Driver and passenger inside a Birney Car heading up Pall Mall 11147.2p The four Birney Cars in Carpenter Street, Quarry Hill Terminus at the Cemetery Gates 11147.2q The four Birney Cars in Carpenter Street, Quarry Hill Terminus at the Cemetery Gates 11147.2r The four Birney Cars in Carpenter Street, Quarry Hill Terminus at the Cemetery Gates 11147.2s The four Birney Cars in Carpenter Street, Quarry Hill Terminus at the Cemetery Gates 11147.2t The four Birney Cars at the Carpenter Street, Quarry Hill Loop 11147.2u No 28 Special Birney Car 11147.2v No 30 Special Birney Car 11147.2w The four Birney Cars at the fountain side by side getting reading to depart to Eaglehawk 11147.2x The four Birney Cars at Eaglehawk beside Canterbury Park 11147.2y The four Birney Cars at Eaglehawk beside Canterbury Park with the Drivers and the Inspector 11147.2z The four Birney Cars at Eaglehawk beside Canterbury Park 11147.2aa The four Birney Cars at Eaglehawk beside Canterbury Park 11147.2ab The four Birney Cars at Eaglehawk beside the town hall 11147.2ac Birney Car 28 passes 17 at the Long gully Manchester Arms Hotel Loop 11147.2ad No 21 and two others at the North Bendigo terminus 11147.2af Four trams heading to Golden Square in High Street 11147.2ag Four trams heading to Golden Square in High Street 11147.2ah Four trams heading at the Golden Square Terminus at Maple High Streetskeith s king, bendigo, trams, robert green -
Bendigo Historical Society Inc.
Mixed media - Robert Green Collection - Photos of Bendigo Tramways - USB of Images, 1960s
... keith s king...Sheet B also contains one slide taken by Robert's friend Keigh S King (1928-2019) who was the author of the book 'The Bendigo Tramways an illustrated history, published by the Australian Railway Historical Society Victorian Division Melbourne in February 1972; BHS Item no. 5052. ...Sheet B also contains one slide taken by Robert's friend Keigh S King (1928-2019) who was the author of the book 'The Bendigo Tramways an illustrated history, published by the Australian Railway Historical Society Victorian Division Melbourne in February 1972; BHS Item no. 5052. ...This collection contains eight archive sheets (Sheet 1 to Sheet 8) of strips of original 35mm black and white negatives of photographs taken during the 1960s and early 1970s by Robert Green, of the Bendigo State Electricty Commission of Victoria Tramways prior to their abandonment The collection also includes two archive quality sheets (Sheet A and Sheet B) of original 35mm colour slides taken by Robert Green during the same period. Sheet B also contains one slide taken by Robert's friend Keigh S King (1928-2019) who was the author of the book 'The Bendigo Tramways an illustrated history, published by the Australian Railway Historical Society Victorian Division Melbourne in February 1972; BHS Item no. 5052. The collection also includes one USB stick which contains images of all photographs described above, except for one colour slide taken by Keith S Kings. Sixteen black and white prints from the images are also included.Robert Green Collection: This item is a USB Stick 11147.11a which contains images scanned from eight plastic archival sheets of black and white negatives and colour slides. It contains all the images in 11147.1 to 11147.11keith s king, bendigo, trams, robert green -
Bendigo Historical Society Inc.
Mixed media - Robert Green Collection - Photos of Bendigo Tramways - Black and White Prints, 1968
... keith s king...Sheet B also contains one slide taken by Robert's friend Keigh S King (1928-2019) who was the author of the book 'The Bendigo Tramways an illustrated history, published by the Australian Railway Historical Society Victorian Division Melbourne in February 1972; BHS Item no. 5052. ...Sheet B also contains one slide taken by Robert's friend Keigh S King (1928-2019) who was the author of the book 'The Bendigo Tramways an illustrated history, published by the Australian Railway Historical Society Victorian Division Melbourne in February 1972; BHS Item no. 5052. ...This collection contains eight archive sheets (Sheet 1 to Sheet 8) of strips of original 35mm black and white negatives of photographs taken during the 1960s and early 1970s by Robert Green, of the Bendigo State Electricty Commission of Victoria Tramways prior to their abandonment The collection also includes two archive quality sheets (Sheet A and Sheet B) of original 35mm colour slides taken by Robert Green during the same period. Sheet B also contains one slide taken by Robert's friend Keigh S King (1928-2019) who was the author of the book 'The Bendigo Tramways an illustrated history, published by the Australian Railway Historical Society Victorian Division Melbourne in February 1972; BHS Item no. 5052. The collection also includes one USB stick which contains images of all photographs described above, except for one colour slide taken by Keith S Kings. Sixteen black and white prints from the images are also included.Robert Green Collection, this item 11147.12 contains 20 printed photos scanned from eight plastic archival sheets of black and white negatives, also one PDF Document entitled "Bendigo's Last Tram Mail" 11147.12v PDF The day before permanent closure of the Bendigo tramways on Sunday 16 April 1972, the Tramway Museum Society of Victoria Inc (TMSV) arranged for “Last Tram Mail” to be carried along the Eaglehawk line to simulate the once regular transport of mail around the city by tram. 5.5 x 3.5 Inch Photo Prints 11147.12a Print from Sheet 3 (11147.3ac) No 28 Birney Car Special heads down Pall Mall past the Court House Hotel 11147.12b Print from Sheet 8 (11147.8c) No 18 passing the View Street and Rowan Street intersection 11147.12c Print from Sheet 8 (11147.8u) No 25 at the Bendigo Cemetery Terminus 11147.12d Print from Sheet 5 (11147.5e) No 18 and old shop front 11147.12e Print from Sheet 7 (11147.7s) Passing Trams 11147.12f Print from Sheet 3 (11147.3s) Tram leaving the Eaglehawk Town Hall in the dark 11147.12g Print from Sheet 5 (11147.5m) No 21 returning to the Tramways Avenue Depot with the scrubber tram on the left 11147.12l Print from Sheet 6 (11147.6ag) Four trams and one driver at the depot TMS Bendigo Tour 24 March 1968. 11147.12m Print from Sheet 2 (11147.2ac) Birney Car 28 passes 17 at the Long gully Manchester Arms Hotel Loop TMS Bendigo Tour 24 March 1968 11147.12n Print from Sheet 2 (11147.2u) No 28 Special Birney Car on the Quarry Hill Line TMS Bendigo Tour 24 March 1968 11147.12o Print from Sheet 2 (11147.2v) No 30 Special Birney Car on the Quarry Hill Line TMS Bendigo Tour 24 March 1968 11147.12q Print from Sheet 2 (11147.2ab) The four Birney Cars at Eaglehawk beside the town hall TMS Bendigo Tour 24 March 1968 11147.12r Print from Sheet 6 (11147.6z) Birney Car 11 and two others arriving at the depot TMS Bendigo Tour 24 March 1968 11147.12s Print from Sheet 2 (11147.2t) The four Birney Cars at the Carpenter Street, Quarry Hill Loop TMS Bendigo Tour 24 March 1968 11147.12t Print from Sheet 2 (11147.2h) No 30, 29, 28 and 11 Birney Cars lined up at the Depot TMS Bendigo Tour 24 March 1968 11147.12u Print from Sheet 2 (11147.2ad) No 21 and two others at the North Bendigo terminus TMS Bendigo Tour 24 March 1968 8 x 10 Inch Photo Prints 11147.12h Print from Sheet 3 (11147.3ai) Birney Car Tram passes the School of Mines in McRae St heading to the fountain 11147.12i Print from Sheet 2 (11147.2a) No 30, 29, 28 and 11 Birney Cars lined up at the Depot 11147.12j Print from Sheet 2 (11147.2a) No 30, 29, 28 and 11 Birney Cars lined up at the Depot 11147.12k Print from Sheet 2 (11147.2a) No 30, 29, 28 and 11 Birney Cars lined up at the Depotkeith s king, bendigo, trams, robert green -
 Bendigo Historical Society Inc.
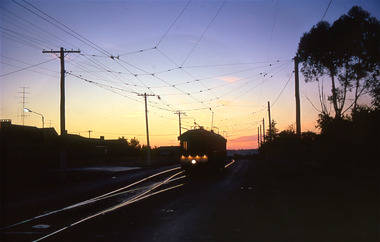
Photograph - Robert Green Collection - Photos of Bendigo Tramways - Sheet B of 10, 1960s
... keith s king...Sheet B also contains one slide taken by Robert's friend Keigh S King (1928-2019) who was the author of the book 'The Bendigo Tramways an illustrated history, published by the Australian Railway Historical Society Victorian Division Melbourne in February 1972; BHS Item no. 5052. ...Sixteen black and white prints from the images are also included. keith s king bendigo trams robert green Robert Green Collection, this item contains 20 Colour Slides of the trams at various locations around Bendigo. ...This collection contains eight archive sheets (Sheet 1 to Sheet 8) of strips of original 35mm black and white negatives of photographs taken during the 1960s and early 1970s by Robert Green, of the Bendigo State Electricty Commission of Victoria Tramways prior to their abandonment The collection also includes two archive quality sheets (Sheet A and Sheet B) of original 35mm colour slides taken by Robert Green during the same period. Sheet B also contains one slide taken by Robert's friend Keigh S King (1928-2019) who was the author of the book 'The Bendigo Tramways an illustrated history, published by the Australian Railway Historical Society Victorian Division Melbourne in February 1972; BHS Item no. 5052. The collection also includes one USB stick which contains images of all photographs described above, except for one colour slide taken by Keith S Kings. Sixteen black and white prints from the images are also included.Robert Green Collection, this item contains 20 Colour Slides of the trams at various locations around Bendigo. Photos: 11147.10a Tram in the darkness, sunset or morning 11147.10b Coming off the railway Line bridge towards Eaglehawk 11147.10c Coming on to the railway Line bridge from Eaglehawk 11147.10d The Quarry Hill and Eaglehawk trams waiting to leave the fountain 11147.10e No 18 from Quarry Hill arrives at the fountain 11147.10f Getting ready to leave the fountain for Eaglehawk 11147.10g Policeman on point duty and tram at the fountain, Charing Cross 11147.10h Eaglehawk and Quarry Hill trams at the fountain 11147.10i Policeman on point duty and tram at the fountain, Charing Cross, looking down Pall Mall 11147.10j No 3 roars up View Street at the corner of McKenzie Street 11147.10k From the Rifle Brigade Hotel the Eaglehawk tram comes past the Queen Elizabeth Oval down View Street 11147.10l From the Rifle Brigade Hotel the Eaglehawk tram comes past the Queen Elizabeth Oval down View Street 11147.10m From the Rifle Brigade Hotel the Eaglehawk tram up View Street opposite the Masonic Hall 11147.10n From the Rifle Brigade Hotel the Eaglehawk tram goes past the Queen Elizabeth Oval up View Street 11147.10o From the Rifle Brigade Hotel the Eaglehawk tram comes up View Street opposite the Masonic Hall 11147.10p From the Victoria Hotel Balcony, the Eaglehawk No 18 arrives 11147.10q From the Victoria Hotel Balcony, the Eaglehawk No 18 departs towards Bendigo 11147.10r Tram No 2 arrives into Eaglehawk 11147.10s Tram No 2 heads to Quarry Hill from California Gully (Probable) 11147.1t Tram on its way out of Long Gully along Mt Korong (Eaglehawk) Road towards Eaglehawk. Houses in the foreground, on the left is 245 Eaglehawk Road and on the right 241 Eaglehawk Road.keith s king, bendigo, trams, robert green -
 Bendigo Historical Society Inc.
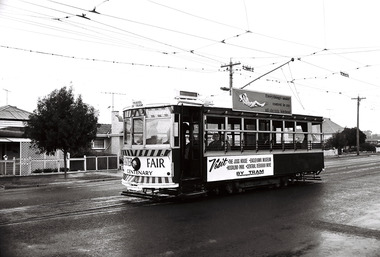
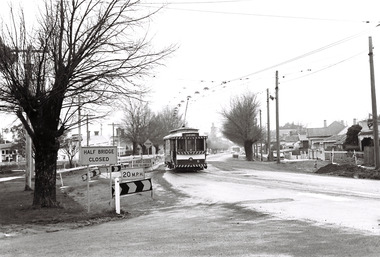
Photograph - Robert Green Collection - Photos of Bendigo Tramways - Sheet 5 of 8, 1960s
... keith s king...Sheet B also contains one slide taken by Robert's friend Keigh S King (1928-2019) who was the author of the book 'The Bendigo Tramways an illustrated history, published by the Australian Railway Historical Society Victorian Division Melbourne in February 1972; BHS Item no. 5052. ...Sixteen black and white prints from the images are also included. keith s king bendigo trams robert green Robert Green Collection, this item contains 23 Black and White Negatives of the trams at various locations around Bendigo. ...This collection contains eight archive sheets (Sheet 1 to Sheet 8) of strips of original 35mm black and white negatives of photographs taken during the 1960s and early 1970s by Robert Green, of the Bendigo State Electricty Commission of Victoria Tramways prior to their abandonment The collection also includes two archive quality sheets (Sheet A and Sheet B) of original 35mm colour slides taken by Robert Green during the same period. Sheet B also contains one slide taken by Robert's friend Keigh S King (1928-2019) who was the author of the book 'The Bendigo Tramways an illustrated history, published by the Australian Railway Historical Society Victorian Division Melbourne in February 1972; BHS Item no. 5052. The collection also includes one USB stick which contains images of all photographs described above, except for one colour slide taken by Keith S Kings. Sixteen black and white prints from the images are also included.Robert Green Collection, this item contains 23 Black and White Negatives of the trams at various locations around Bendigo. Photos: 11147.5a Birney car decked out in advertising for the Bendigo Easter Fair 11147.5b Birney car decked out in advertising for the Bendigo Easter Fair heading to North Bendigo in Mcrae St 11147.5c Birney car decked out in advertising for the Bendigo Easter Fair heading to North Bendigo in Mcrae St passing No 17 and another tram approaching from the depot 11147.5d Birney car decked out in advertising for the Bendigo Easter Fair heading into the depot in Tramway Avenue 11147.5e No 18 and old shop front 11147.5f Tram Turning into Tramways Avenue from Mcrae St 11147.5g Three trams at the Golden Square Terminus in High Street 11147.5h No 18 tram in Mcrae Street passing by Tramways Avenue to North Bendigo 11147.5i No 21 returning to the Tramways Avenue Depot off Mcrae Street 11147.5j No 21 returning to the Tramways Avenue Depot off Mcrae Street 11147.5k No 21 returning to the Tramways Avenue Depot crossing the Back Creek 11147.5l No 21 returning to the Tramways Avenue Depot 11147.5m No 21 returning to the Tramways Avenue Depot with the scrubber tram on the left 11147.5n No 21 in the Tramways Avenue Depot 11147.5o Nos 18 and 17 pass at the Golden Square Terminus in High St 11147.5p No 17 on its way to the North Bendigo Terminus 11147.5q No 17 turns from the North Bendigo Terminus into Finn Street 11147.5r No 17 heading to the North Bendigo Terminus along Thunder Street 11147.5s No 17 at the North Bendigo Terminus off Finn Street 11147.5t Train heading from the Swan Hill direction to Bendigo off the Finn Street crossing 11147.5u No 25 heading to Golden Square 11147.5v No 25 turns from Weeroona Avenue into Caledonia Street 11147.5w The Easter Fair, intersection of Pall Mall and Williamson St with Myer Stores in the backgroundkeith s king, bendigo, trams, robert green -
 Bendigo Historical Society Inc.
Photograph - Robert Green Collection - Photos of Bendigo Tramways - Sheet 8 of 10, 1960s
... keith s king...Sheet B also contains one slide taken by Robert's friend Keigh S King (1928-2019) who was the author of the book 'The Bendigo Tramways an illustrated history, published by the Australian Railway Historical Society Victorian Division Melbourne in February 1972; BHS Item no. 5052. ...Sixteen black and white prints from the images are also included. keith s king bendigo trams robert green Robert Green Collection, this item contains 22 Black and White Negatives of the trams at various locations around Bendigo. ...This collection contains eight archive sheets (Sheet 1 to Sheet 8) of strips of original 35mm black and white negatives of photographs taken during the 1960s and early 1970s by Robert Green, of the Bendigo State Electricty Commission of Victoria Tramways prior to their abandonment The collection also includes two archive quality sheets (Sheet A and Sheet B) of original 35mm colour slides taken by Robert Green during the same period. Sheet B also contains one slide taken by Robert's friend Keigh S King (1928-2019) who was the author of the book 'The Bendigo Tramways an illustrated history, published by the Australian Railway Historical Society Victorian Division Melbourne in February 1972; BHS Item no. 5052. The collection also includes one USB stick which contains images of all photographs described above, except for one colour slide taken by Keith S Kings. Sixteen black and white prints from the images are also included.Robert Green Collection, this item contains 22 Black and White Negatives of the trams at various locations around Bendigo. Photos: 11147.8a No 4 outside the Eaglehawk Town Hall 11147.8b No 7 at the North Bendigo Terminus 11147.8c No 18 passing the View Street and Rowan Street intersection 11147.8d No 24 and driver at the fountain 11147.8e No 7 at the fountain 11147.8f No 24 and at the fountain 11147.8g No 24 and driver at Eaglehawk 11147.8h Picking up passengers at North Bendigo Terminus 11147.8i Birney Car 30 in Finn Street North Bendigo 11147.8j No 30 has just crossed the Bendigo Creek in high St Golden Square 11147.8k No 30 has just crossed the Bendigo Creek in High St Golden Square and is passing No 2 11147.8l Nos 29 and 19 at the depot with two drivers 11147.8m No 29 comes up Pall Mall past the Williamson St intersection 11147.8n No 29 comes up Pall Mall 11147.8o No 29 at the Golden Square Terminus loop 11147.8p No 29 and another at the Golden Square Terminus 11147.8q The Pahran and Malvern Tramways Trust Logo 11147.8r Passing No 6 on the High St Loop 11147.8s Passing No 6 on the High St Loop, Sacred Heart Cathedral Spire being buit in the background 11147.8t At the Cemetery Gate Quarry Hill 11147.8u No 25 at the Bendigo Cemetery Terminus 11147.8v At the Quarry Hill Gates in Carpenter Streetkeith s king, bendigo, trams, robert green -
 Bendigo Historical Society Inc.
Photograph - Robert Green Collection - Photos of Bendigo Tramways - Sheet 6 of 8, 1960s
... keith s king...Sheet B also contains one slide taken by Robert's friend Keigh S King (1928-2019) who was the author of the book 'The Bendigo Tramways an illustrated history, published by the Australian Railway Historical Society Victorian Division Melbourne in February 1972; BHS Item no. 5052. ...Sixteen black and white prints from the images are also included. keith s king bendigo trams robert green Robert Green Collection, this item contains 33 Black and White Negatives of the trams at various locations around Bendigo. ...This collection contains eight archive sheets (Sheet 1 to Sheet 8) of strips of original 35mm black and white negatives of photographs taken during the 1960s and early 1970s by Robert Green, of the Bendigo State Electricty Commission of Victoria Tramways prior to their abandonment The collection also includes two archive quality sheets (Sheet A and Sheet B) of original 35mm colour slides taken by Robert Green during the same period. Sheet B also contains one slide taken by Robert's friend Keigh S King (1928-2019) who was the author of the book 'The Bendigo Tramways an illustrated history, published by the Australian Railway Historical Society Victorian Division Melbourne in February 1972; BHS Item no. 5052. The collection also includes one USB stick which contains images of all photographs described above, except for one colour slide taken by Keith S Kings. Sixteen black and white prints from the images are also included.Robert Green Collection, this item contains 33 Black and White Negatives of the trams at various locations around Bendigo. Photos: 11147.6a Two trams passing at the loop in Eaglehawk Road at the Philpot Street intersection 11147.6b Two trams passing at the loop in Eaglehawk Road at the Philpot Street intersection 11147.6c Two trams passing at the loop in Eaglehawk Road at the Philpot Street intersection 11147.6d Two trams leave the loop in Eaglehawk Road at the Philpot Street intersection 11147.6e No 18 heading out of Iron Bark to Long Gully along Eaglehawk Road 11147.6f No 25 Special head down View Street at the McKenzie Street intersection 11147.6g The No 25 Special from Eaglehawk arrives at the fountain 11147.h No 2 to Eaglehawk comes up View Street past the Infant Welfare Centre 11147.6i The Quarry Hill tram passes the Carpenter and Houston St intersection at the corner of the cemetery 11147.6j The Quarry Hill tram passes the Carpenter and Houston St intersection at the corner of the cemetery 11147.6k The Quarry Hill tram approached the terminus at the Cemetery gates 11147.6l The Quarry Hill tram at the terminus at the Cemetery gates picking up passengers 11147.6m The Quarry Hill tram at the terminus at the Cemetery gates picking up passengers 11147.6n The Quarry Hill tram at the terminus at the Cemetery gates picking up passengers 11147.6o Tram and large crown in front of the Eaglehawk Town Hall 11147.6p Tram and large crown in front of the Eaglehawk Town Hall 11147.6q Tram and large crown in front of the Eaglehawk Town Hall 11147.6q Two Trams and large crown in front of the Eaglehawk Town Hall 11147.6r Two Trams and large crown in front of the Eaglehawk Town Hall 11147.6s Passengers on the "Last Tram" 11147.6t Passengers on the "Last Tram" 11147.6u Passengers on the "Last Tram" 11147.6v Two trams leaving the depot crossing the Back Creek 11147.6w The Scrubber tram in the depot 11147.6x Birney Car 30 tram in the depot 11147.6y Birney Car 29 and two others arriving at the depot 11147.6z Birney Car 11 and two others arriving at the depot 11147.6aa No 11 Birney Car at the depot 11147.6ab No 28 Birney Car at the depot 11147.6ac Nos 29, 11 and 25 at the depot 11147.6ad Birney Car 28 arrives at the depot 11147.6ae Birney Cars Nos 30 and 29 in the depot 11147.6af The Scrubber Car at the depot 11147.6ag Four trams and one driver at the depot TMS Bendigo Tour 24 March 1968keith s king, bendigo, trams, robert green -
 Bendigo Historical Society Inc.
Photograph - Robert Green Collection - Photos of Bendigo Tramways - Sheet 7 of 8, 1960s
... keith s king...Sheet B also contains one slide taken by Robert's friend Keigh S King (1928-2019) who was the author of the book 'The Bendigo Tramways an illustrated history, published by the Australian Railway Historical Society Victorian Division Melbourne in February 1972; BHS Item no. 5052. ...Sixteen black and white prints from the images are also included. keith s king bendigo trams robert green Robert Green Collection, this item contains 28 Black and White Negatives of the trams at various locations around Bendigo. ...This collection contains eight archive sheets (Sheet 1 to Sheet 8) of strips of original 35mm black and white negatives of photographs taken during the 1960s and early 1970s by Robert Green, of the Bendigo State Electricty Commission of Victoria Tramways prior to their abandonment The collection also includes two archive quality sheets (Sheet A and Sheet B) of original 35mm colour slides taken by Robert Green during the same period. Sheet B also contains one slide taken by Robert's friend Keigh S King (1928-2019) who was the author of the book 'The Bendigo Tramways an illustrated history, published by the Australian Railway Historical Society Victorian Division Melbourne in February 1972; BHS Item no. 5052. The collection also includes one USB stick which contains images of all photographs described above, except for one colour slide taken by Keith S Kings. Sixteen black and white prints from the images are also included.Robert Green Collection, this item contains 28 Black and White Negatives of the trams at various locations around Bendigo. Photos: 11147.7a No 6 to Golden Square in Mcrae Street 11147.7b No 21 to North Bendigo in Mcrae Street 11147.7c No 7 to North Bendigo in Mcrae Street 11147.7d No 7 to North Bendigo in Mcrae Street passes No 21 to Golden Square on the loop 11147.7e The Depot and Back Creek bridge 11147.7f The Depot and Back Creek bridge 11147.7g Nos 25, 23 and 30 in the depot 11147.7h The photographer in Thunder Street North Bendigo, railway line in the background 11147.7i No 21 coming up to the North Bendigo terminus in Thunder or Finn street 11147.7j No 21 leaving the North Bendigo terminus in Thunder or Finn street 11147.7k The Photographer in Thunder Street, North Bendigo 11147.7l No 21 in Thunder or Finn street 11147.7m No 21 in Thunder or Finn street 11147.7n No 17 in Eaglehawk 11147.7o No 17 in Eaglehawk 11147.7p No 26 at the top of Mitchell Street 11147.7q No 26 heading to Eaglehawk in the rain 11147.7r No 2 to Quarry Hill in the rain at the Manchester Arms Loop 11147.7s Passing Trams 11147.7t No 30 Birney Car to Quarry Hill in the rain at the Manchester Arms Loop 11147.7u No 7 to North Bendigo, the rowing Club in the background, Thunder Street 11147.7v No 7 turns into Finn Street from the North Bendigo Terminus 11147.7w The Birney Car turns into the North Bendigo Terminus from Finn Street 11147.7x The Birney Car turns into the North Bendigo Terminus from Finn Street 11147.7y Two trams at the North Bendigo Terminus 11147.7z No 24 approaches the Cemetery gates and horse hitching posts in Quarry Hill 11147.7aa The Cemetery and horse hitching posts in Quarry Hill 11147.7ab No 24 and horse hitching post in Quarry Hillkeith s king, bendigo, trams, robert green -
 Bendigo Historical Society Inc.
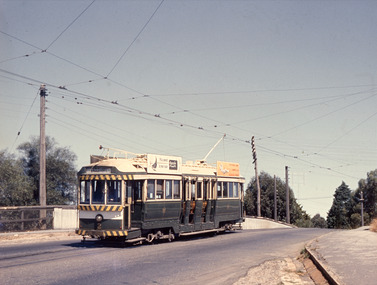
Photograph - Robert Green Collection - Photos of Bendigo Tramways - Sheet A of 10, 1972
... keith s king...Sheet B also contains one slide taken by Robert's friend Keigh S King (1928-2019) who was the author of the book 'The Bendigo Tramways an illustrated history, published by the Australian Railway Historical Society Victorian Division Melbourne in February 1972; BHS Item no. 5052. ...Sixteen black and white prints from the images are also included. keith s king bendigo trams robert green Robert Green Collection, this item contains Colour Slides of the trams at various locations around Bendigo. ...This collection contains eight archive sheets (Sheet 1 to Sheet 8) of strips of original 35mm black and white negatives of photographs taken during the 1960s and early 1970s by Robert Green, of the Bendigo State Electricty Commission of Victoria Tramways prior to their abandonment The collection also includes two archive quality sheets (Sheet A and Sheet B) of original 35mm colour slides taken by Robert Green during the same period. Sheet B also contains one slide taken by Robert's friend Keigh S King (1928-2019) who was the author of the book 'The Bendigo Tramways an illustrated history, published by the Australian Railway Historical Society Victorian Division Melbourne in February 1972; BHS Item no. 5052. The collection also includes one USB stick which contains images of all photographs described above, except for one colour slide taken by Keith S Kings. Sixteen black and white prints from the images are also included.Robert Green Collection, this item contains Colour Slides of the trams at various locations around Bendigo. Photos: 11147.9a No 2 to Eaglehawk leaves Carpenter Street, crosses the railway line and enters Mitchell Street 11147.9b Two Birney Cars ready to depart in Pall Mall 11147.9c Nos 30 and 28 Birney Cars ready to depart in Pall Mall 11147.9d No 30 to North Bendigo turns off Weeroona Avenue into Caledonia St at the Gas Works 11147.9e No 5 comes up View Street past Dudley House and the Masonic Hall 11147.9f No 28 Birney Car 11147.9g No 3 comes into Eaglehawk 11147.9h Nos 2 and 3 cross over at the Eaglehawk Road and Cuneen Streets Loop in Long Gully 11147.9j No 30 Birney Car crosses the Munday St and Pall Mall intersection heading for the fountain 11147.9k No 28 Birney Car comes down Nolan Street past the Lake Weeroona 11147.9l No 30 Birney Car in the darkness 11147.9m The Scrubber Car comes up Mitchell Street 11147.9n The Scrubber Car 11147.9o No 18 at Eaglehawk, Bendigo T.M.S of Vic. Ltd Photo, Sat 15 April 1972. Robert Green and John Fitzsimons holding "Last Tram Mail" 1/125 f8. Taken at 9am on the second last day of the trams.keith s king, bendigo, trams, robert green -
 Bendigo Historical Society Inc.
Photograph - Robert Green Collection - Photos of Bendigo Tramways - Sheet 4 of 8, 1960s
... keith s king...Sheet B also contains one slide taken by Robert's friend Keigh S King (1928-2019) who was the author of the book 'The Bendigo Tramways an illustrated history, published by the Australian Railway Historical Society Victorian Division Melbourne in February 1972; BHS Item no. 5052. ...Sixteen black and white prints from the images are also included. keith s king bendigo trams robert green Robert Green Collection, this item contains 22 Black and White Negatives of the trams at various locations around Bendigo. ...This collection contains eight archive sheets (Sheet 1 to Sheet 8) of strips of original 35mm black and white negatives of photographs taken during the 1960s and early 1970s by Robert Green, of the Bendigo State Electricty Commission of Victoria Tramways prior to their abandonment The collection also includes two archive quality sheets (Sheet A and Sheet B) of original 35mm colour slides taken by Robert Green during the same period. Sheet B also contains one slide taken by Robert's friend Keigh S King (1928-2019) who was the author of the book 'The Bendigo Tramways an illustrated history, published by the Australian Railway Historical Society Victorian Division Melbourne in February 1972; BHS Item no. 5052. The collection also includes one USB stick which contains images of all photographs described above, except for one colour slide taken by Keith S Kings. Sixteen black and white prints from the images are also included.Robert Green Collection, this item contains 22 Black and White Negatives of the trams at various locations around Bendigo. Photos: 11147.4a Tram at Carpenter St Quarry Hill, Cemetery Gates Terminus 11147.4b Tram and Conductor at Carpenter St Quarry Hill, Cemetery Gates Terminus 11147.4c Overhead Pole, wires and tram stop sign; and end of section sign 11147.4d Overhead Pole, wires and tram stop sign; and end of section sign, in View Street 11147.4e Quarry Hill, Eaglehawk and Golden Square Trams meeting at the Fountain, Charing Cross 11147.4f Quarry Hill, Eaglehawk trams and overhead sign at the fountain roundabout 11147.4g Tram line Point at the Fountain 11147.4h All lines cross at the fountain 11147.4i Turning Caution sign at Tramways Avenue (to the depot) and McRae Street 11147.4j Trams stop by request sign 11147.4k No 4 at the intersection of Eaglehawk and Havilah Roads, Long Gully 11147.4l No 4 to Quarry Hill picking up passengers in Eaglehawk Road 11147.4m No 30 Birney Car heading to Golden Square 11147.4n Birney Car crossing the creek 11147.4o Birney Car No 30 leaving Golden Square in High Street 11147.4p No 3 heading to Eaglehawk 11147.4q No 25 heading to Quarry Hill in Carpenter St possibly 11147.4r Three trams at the loop in Carpenter St Quarry Hill 11147.4s Two trams at the Quarry Hill Terminus Carpenter St 11147.4t Two trams at Canterbury Park Eaglehawk 11147.4u Birney Car 29 Special at Eaglehawk Terminus 11147.4v Passing No 26 at Eaglehawkkeith s king, bendigo, trams, robert green -
 Kew Historical Society Inc
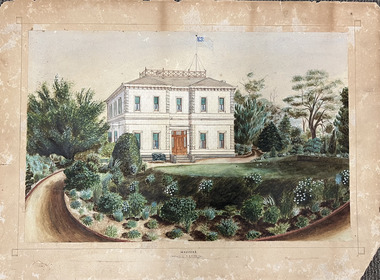
Work on paper, Madford: the property of A.S. King Esq
... "MADFORD / The Property of A. S. KING Esq"...Thomas Mitchell William Siddeley Arthur Septimus King "MADFORD / The Property of A. S. KING Esq" This fine perspective drawing of the architectural elements of Madford [formerly Elm Lodge, later St Anthony's Home for Babies] is contrasted with the freer addition in watercolour of the layout and plants of the garden facing Wellington Street. ...The Victorian-era mansion Madford in Wellington Street had several incarnations before it was finally demolished. While the precise details of its original construction have not been discovered, we know that it was originally named Elm Lodge, and that the property was offered for sale in 1863 by Thomas Mitchell, of the firm Mitchell & Bonneau, wholesale ironmongers and merchants. The house was sold in about 1873 to William Siddeley (1827-1905), who was described on the occasion of his death as ‘the father of Australian shipping’. The next owner was Arthur Septimus King (1827- 99), who renamed the house Madford after his purchase of the property in 1875. It was A.S. King for whom this artwork was completed. Following King’s death in 1899, portions of the property were sold, including to the Borough of Kew in 1905, to form the Alexandra Gardens. Then, in 1920, the house and its remaining lands were sold to the Catholic Church who opened St Anthony’s Home for Children on the site in 1922. That building was promptly demolished, and the site redeveloped circa 1976.Gift of James Pearson, 2022This fine perspective drawing of the architectural elements of Madford [formerly Elm Lodge, later St Anthony's Home for Babies] is contrasted with the freer addition in watercolour of the layout and plants of the garden facing Wellington Street. The view selected is the south-facing main facade and the west facing side. After A.S. King purchased the house in 1875, it was extended with new wings at the rear to accommodate his large family. There is no indication of these extensions in the painting so its creation must predate the renovations, and probably depicts the original building on the site."MADFORD / The Property of A. S. KING Esq"elm lodge, madford, st anthony's home for babies, houses -- wellington street -- kew (vic.), thomas mitchell, william siddeley, arthur septimus king -
 Box Hill Historical Society
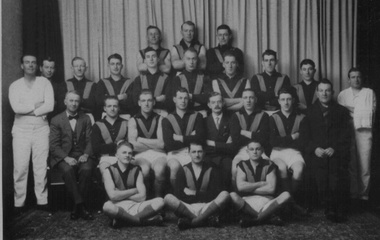
Photograph - Box Hill City Football Club team, Alfred Brown, 1929
... S....King> D....Edwards, R. Russell, S. Russell, D. King. Second row: R. Hardy, F. Morrison, J. ...Russell> R. Russell> S. King> D. Hardy> D. Morrison> F. Russell> J. ...View of the Box Hill Box Hill City Football Club team for the 1929 season. They are identified as Back row: L. Woollard, A. Tilley, L. Morgan. Third row: G. Beale, V. Collier, A. Barnes, N. Boswell, A. Hardy, R. Edwards, R. Russell, S. Russell, D. King. Second row: R. Hardy, F. Morrison, J. Russell, E. Elliott, J. G. Penson, R. James, R. Cairnduff, R. Parsonage. Front row: T. Gough, F. O'Brien, L. Dummelow. B&w photoaustralian rules football, box hill city football club, woollard> l., tilley> a., morgan> l., beale> g., collier> v., barnes> a., boswell> n., hardy> a., edwards> r., russell> r., russell> s., king> d., hardy> d., morrison> f., russell> j., elliott> e., penson> j. g., james> r., cairnduff> r., parsonage> r., gough> t., o'brien> f., dummelow> l., sports and recreations -
Kadimah Jewish Cultural Centre and National Library
Programme, The Treasure Seekers; 1940
... ...S. King...Garfinkel Ella Honig M. Wald S. King M. Brown Malka Honig Sarah Honig I. ...Comedy in 3 Acts. Produced by B. Newman-Jubal for the Kadimah Jewish Concert Theatredovid herman theatre, a. boral, anna light, rachel levita, s. kenigsberg, i. garfinkel, ella honig, m. wald, s. king, m. brown, malka honig, sarah honig, i. rothman, i. ripps, n. fogel, sarah kay, dora rothman, s. freedman, s. factor -
Kadimah Jewish Cultural Centre and National Library
Programme, The Kingdom of Beggars; 1939
... ...Mr. S. King...Mendelsohn Mr. M. Levy Mr. S. King Mr. S. Factor Mr. I. Gurfinkel Mr. M. ...Drama in 4 acts, produced by B. Newman-Jubal. Piano - J. Hacker. Kadimah Jewish Art Theatredovid herman theatre, mr. r. hirsh, mr. c. borall, mr. m. shechter, mr i. rothman, mr. j. white, mr a. light, mrs. r. wald, mrs. r. lifshits, mr. u. white, mr. a. aloni, mrs. r. levita, mrs. d. rothman, mr. a. rosner, mrs. e. korn, mr. s. mendelsohn, mr. m. levy, mr. s. king, mr. s. factor, mr. i. gurfinkel, mr. m. wald, mr. n. foegel, miss m. honik, miss s. honig, mr. a. murk -
Kadimah Jewish Cultural Centre and National Library
Programme, The Enemy of the People; 1940
... ...S. King...Freedman S. Mendelson S. King A. Rosner J. Baker R. Birstein I. Garfunkel. ...Play in 5 acts produced by B. Newman-Jubal for Kadimah Yiddish Art Theatredovid herman theatre, b. newman-jubal, a. light, r. levita, e. honig, a. fogel, i. ripps, s. faktor, a. boral, m. wald, s. freedman, s. mendelson, s. king, a. rosner, j. baker, r. birstein, i. garfunkel. m. garfunkel, kamisky, pell, sisters ruda, d. stein, p. taft -
Kadimah Jewish Cultural Centre and National Library
Programme, In the Desert of the Negev; 1950
... ...S. King...Brustman B. Rosenberg S. King A. Rosenberg Ch. Goldab A. Shadur In the Desert of the Negev; 1950 Programme ...Play in 3 acts by J. Mosinson. Produced by Rachel Holzer. Mount Scopus College - Parents and Subscribers Associationdovid herman theatre, s. hochgelernter, rachel holzer, m.goldberg, l. rothman, p. kochen, m. dombrovski, d. rothman, j. sher, s. brustman, b. rosenberg, s. king, a. rosenberg, ch. goldab, a. shadur -
Kadimah Jewish Cultural Centre and National Library
Programme, Chad-Gadia; 1940
... ...S. King...Mendelson S. Freedman S. King M. Wald K. Korn M. Braun N. Fogel Chad-Gadia; 1940 Programme ...The Kadimah Ydiish Art Theatre presents cabaret. Produced by B. Newman-Jubal. Music Miss M. Rochlindovid herman theatre, r. brilliant, d. rothman, e. korn, r. levita, n. perlov, m. garfunkel, s. honig, s. mendelson, s. freedman, s. king, m. wald, k. korn, m. braun, n. fogel -
 Flagstaff Hill Maritime Museum and Village
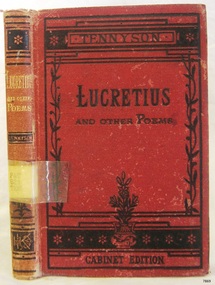
Book, The Works of Alfred Tennyson Vol 4
... The Works of Alfred Tennyson Vol 4 Lucretius and other Poems Author: A L Tennyson Publisher: Henry S King & Co Date: 1874...The Warrnambool Mechanics' Institute’s publication collection is of both local and state significance. warrnambool shipwrecked-coast flagstaff-hill flagstaff-hill-maritime-museum maritime-museum shipwreck-coast flagstaff-hill-maritime-village shipwrecked-artefact book pattison collection warrnambool library warrnambool mechanics’ institute ralph eric pattison corangamite regional library service warrnambool city librarian mechanics’ institute library victorian library board warrnambool books and records warrnambool children’s library great ocean road The Works of Alfred Tennyson Vol 4 Lucretius A L Tennyson Label on spine cover with typed text PAT 8212 TEN Pastedown front endpaper has sticker from Warrnambool Mechanics Institute and Free Library Second loose endpaper has a stamp from Corangamite Regional Library Service The Works of Alfred Tennyson Vol 4 Lucretius and other Poems Author: A L Tennyson Publisher: Henry S King & Co Date: 1874 The Works of Alfred Tennyson Vol 4 Book ...This item is from the ‘Pattison Collection’, a collection of books and records that was originally owned by the Warrnambool Mechanics’ Institute, which was founded in Warrnambool in 1853. By 1886 the Warrnambool Mechanics’ Institute (WMI) had grown to have a Library, Museum and Fine Arts Gallery, with a collection of “… choice productions of art, and valuable specimens in almost every branch and many wonderful national curiosities are now to be seen there, including historic relics of the town and district.” It later included a School of Design. Although it was very well patronised, the lack of financial support led the WMI in 1911 to ask the City Council to take it over. In 1935 Ralph Pattison was appointed as City Librarian to establish and organise the Warrnambool Library as it was then called. When the WMI building was pulled down in 1963 a new civic building was erected on the site and the new Warrnambool Library, on behalf of the City Council, took over all the holdings of the WMI. At this time some of the items were separated and identified as the ‘Pattison Collection’, named after Ralph Pattison. Eventually the components of the WMI were distributed from the Warrnambool Library to various places, including the Art Gallery, Historical Society and Flagstaff Hill. Later some were even distributed to other regional branches of Corangamite Regional Library and passed to and fro. It is difficult now to trace just where all of the items have ended up. The books at Flagstaff Hill Maritime Village generally display stamps and markings from Pattison as well as a variety of other institutions including the Mechanics’ Institute itself. RALPH ERIC PATTISON Ralph Eric Pattison was born in Rockhampton, Queensland, in 1891. He married Maude Swan from Warrnambool in 1920 and they set up home in Warrnambool. In 1935 Pattison accepted a position as City Librarian for the Warrnambool City Council. His huge challenge was to make a functional library within two rooms of the Mechanics’ Institute. He tirelessly cleaned, cleared and sorted a disarrayed collection of old books, jars of preserved specimens and other items reserved for exhibition in the city’s museum. He developed and updated the library with a wide variety of books for all tastes, including reference books for students; a difficult task to fulfil during the years following the Depression. He converted all of the lower area of the building into a library, reference room and reading room for members and the public. The books were sorted and stored using a cataloguing and card index system that he had developed himself. He also prepared the upper floor of the building and established the Art Gallery and later the Museum, a place to exhibit the many old relics that had been stored for years for this purpose. One of the treasures he found was a beautiful ancient clock, which he repaired, restored and enjoyed using in his office during the years of his service there. Ralph Pattison was described as “a meticulous gentleman whose punctuality, floorless courtesy and distinctive neat dress were hallmarks of his character, and ‘his’ clock controlled his daily routine, and his opening and closing of the library’s large heavy doors to the minute.” Pattison took leave during 1942 to 1945 to serve in the Royal Australian Navy, Volunteer Reserve as Lieutenant. A few years later he converted one of the Museum’s rooms into a Children’s Library, stocking it with suitable books for the younger generation. This was an instant success. In the 1950’s he had the honour of being appointed to the Victorian Library Board and received more inspiration from the monthly conferences in Melbourne. He was sadly retired in 1959 after over 23 years of service, due to the fact that he had gone over the working age of council officers. However he continued to take a very keen interest in the continual development of the Library until his death in 1969. The Pattison Collection, along with other items at Flagstaff Hill Maritime Village, was originally part of the Warrnambool Mechanics' Institute’s collection. The Warrnambool Mechanics’ Institute Collection is primarily significant in its totality, rather than for the individual objects it contains. Its contents are highly representative of the development of Mechanics' Institute libraries across Australia, particularly Victoria. A diversity of publications and themes has been amassed, and these provide clues to our understanding of the nature of and changes in the reading habits of Victorians from the 1850s to the middle of the 20th century. The collection also highlights the Warrnambool community’s commitment to the Mechanics’ Institute, reading, literacy and learning in the regions, and proves that access to knowledge was not impeded by distance. These items help to provide a more complete picture of our community’s ideals and aspirations. The Warrnambool Mechanics Institute book collection has historical and social significance for its strong association with the Mechanics Institute movement and the important role it played in the intellectual, cultural and social development of people throughout the latter part of the nineteenth century and the early twentieth century. The collection of books is a rare example of an early lending library and its significance is enhanced by the survival of an original collection of many volumes. The Warrnambool Mechanics' Institute’s publication collection is of both local and state significance. The Works of Alfred Tennyson Vol 4 Lucretius and other Poems Author: A L Tennyson Publisher: Henry S King & Co Date: 1874Label on spine cover with typed text PAT 8212 TEN Pastedown front endpaper has sticker from Warrnambool Mechanics Institute and Free Library Second loose endpaper has a stamp from Corangamite Regional Library Service warrnambool, shipwrecked-coast, flagstaff-hill, flagstaff-hill-maritime-museum, maritime-museum, shipwreck-coast, flagstaff-hill-maritime-village, shipwrecked-artefact, book, pattison collection, warrnambool library, warrnambool mechanics’ institute, ralph eric pattison, corangamite regional library service, warrnambool city librarian, mechanics’ institute library, victorian library board, warrnambool books and records, warrnambool children’s library, great ocean road, the works of alfred tennyson vol 4, lucretius, a l tennyson -
Frankston RSL Sub Branch
Plaque, Memorial, 1914-1918 Memorial Plaque, 1920 (estimated); Issued from 1920
... s...penny...king...Although Richard Harness was living at 52 Victoria Street, Abbotsford when enlisted, together with a scroll from the King, it was donated by a Frankston Family. commemorative memorial plaque dead man s penny king s richard evans harkness Around the edge are the words 'HE DIED FOR FREEDOM AND HONOUR' On the righthand side of the plaque is the name of the soldier, in this case Richard Evans Harkness. ...This round, bronze memorial plaque was presented to the family of Private Richard Evans Harkness, service number 3426, of the 37th Battalion, (8th Reinforcements) who was killed in action at Villers-Bretonneux on 12th August, 1918. Colloquially known as 'Dead Man's Penny' or 'King's Penny', this plaque was given to the next of kin of service personnel who died on active service in WW1. 1914-1918 Memorial Plaque In early 1920 it was announced that the next-of-kin of all Australian servicemen and women whose deaths were attributable to the First World War would receive a memorial plaque and scroll "as a solace for bereavement and as a memento". The memorial plaques were not uniquely Australian. In fact they were designed and produced in Britain and issued to commemorate all those who died as a result of war service from within the British Commonwealth. The idea for the plaques was originally conceived mid-way through the war. In 1917 a competition was announced to obtain a suitable design and 800 entries were eventually received. The winner, Mr. E. Carter Preston of Liverpool, England, was chosen in 1918. He was awarded a prize of 250 pounds. Mr Manning Pike directed the manufacture of the memorial plaques at the Memorial Plaque Factory set up at Acton, London. Some later plaques were also made at the Woolwich Arsenal. The cost of manufacturing so many plaques must have been considerable. Each plaque had the name of the soldier commemorated individually embossed (some were engraved) as part of the design. The full name was given without any indication of rank or honours to show the equality of sacrifice of all those who had lost their lives. The scroll designed to accompany the plaques was of thick paper, headed by the royal coat-of-arms, and bore the following message: "He whom this scroll commemorates was numbered among those who, at the call of King and Country, left all that was dear to them, endured hardness, faced danger, and finally passed out of the sight of men by the path of duty and self-sacrifice, giving up their own lives that others might live in freedom. Let those that come after see that his name is not forgotten". Underneath the message the serviceman or woman’s name, rank, honours and unit were written by hand in red ink. Because of the late arrival in Australia of the plaques many scrolls were sent out separately. A message from the King, "I join with my grateful people in sending you this memorial of a brave life given for others in the Great War", was included with the scroll. The first plaques were distributed in Australia in 1922. Each plaque was sent out from Base Records Office at Victoria Barracks in Melbourne by second-class mail. Approximately 60,000 plaques were issued in Australia. Families of deceased members of the Royal Australian Navy and the Australian Army Nursing Service also received plaques and scrolls This plaque is significant because it commemorates the death of an Australian soldier on active service in World War 1. It is representative of some 60,000 issued to next of kin of soldiers killed in World War 1. Although Richard Harness was living at 52 Victoria Street, Abbotsford when enlisted, together with a scroll from the King, it was donated by a Frankston Family.This round, bronze memorial plaque was presented to the family of Australian Army private Richard Evans Harkness, service number 03426, of the 37th battalion, 8th re-inforcement. Harkness was killed in action on 12th August, 1918, near the French village of Proyart, during the 3rd Division's advance along the Somme Valley. further details can be found here: https://www.awm.gov.au/collection/U51477 Colloquially known as 'Dead Man's Penny' or 'King's Penny', these plaques were awarded to the next of kin of service personnel who died on active service during WW1. refer to link for further information : http://www.awm.gov.au/encyclopedia/memorial_scroll/plaque.aspAround the edge are the words 'HE DIED FOR FREEDOM AND HONOUR' On the righthand side of the plaque is the name of the soldier, in this case Richard Evans Harkness.commemorative, memorial, plaque, dead, man s, penny, king s, richard, evans, harkness -
 Flagstaff Hill Maritime Museum and Village
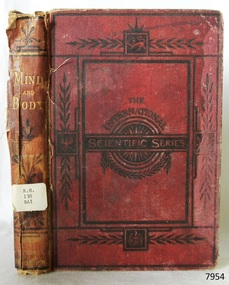
Book, The International Scientific Series Vol 4
... Author: Alexander Bain Publisher: Henry S King & Co Date: 1876...Author: Alexander Bain Publisher: Henry S King & Co Date: 1876 The International Scientific Series Vol 4 Book ...This item is from the ‘Pattison Collection’, a collection of books and records that was originally owned by the Warrnambool Mechanics’ Institute, which was founded in Warrnambool in 1853. By 1886 the Warrnambool Mechanics’ Institute (WMI) had grown to have a Library, Museum and Fine Arts Gallery, with a collection of “… choice productions of art, and valuable specimens in almost every branch and many wonderful national curiosities are now to be seen there, including historic relics of the town and district.” It later included a School of Design. Although it was very well patronised, the lack of financial support led the WMI in 1911 to ask the City Council to take it over. In 1935 Ralph Pattison was appointed as City Librarian to establish and organise the Warrnambool Library as it was then called. When the WMI building was pulled down in 1963 a new civic building was erected on the site and the new Warrnambool Library, on behalf of the City Council, took over all the holdings of the WMI. At this time some of the items were separated and identified as the ‘Pattison Collection’, named after Ralph Pattison. Eventually the components of the WMI were distributed from the Warrnambool Library to various places, including the Art Gallery, Historical Society and Flagstaff Hill. Later some were even distributed to other regional branches of Corangamite Regional Library and passed to and fro. It is difficult now to trace just where all of the items have ended up. The books at Flagstaff Hill Maritime Village generally display stamps and markings from Pattison as well as a variety of other institutions including the Mechanics’ Institute itself. RALPH ERIC PATTISON Ralph Eric Pattison was born in Rockhampton, Queensland, in 1891. He married Maude Swan from Warrnambool in 1920 and they set up home in Warrnambool. In 1935 Pattison accepted a position as City Librarian for the Warrnambool City Council. His huge challenge was to make a functional library within two rooms of the Mechanics’ Institute. He tirelessly cleaned, cleared and sorted a disarrayed collection of old books, jars of preserved specimens and other items reserved for exhibition in the city’s museum. He developed and updated the library with a wide variety of books for all tastes, including reference books for students; a difficult task to fulfil during the years following the Depression. He converted all of the lower area of the building into a library, reference room and reading room for members and the public. The books were sorted and stored using a cataloguing and card index system that he had developed himself. He also prepared the upper floor of the building and established the Art Gallery and later the Museum, a place to exhibit the many old relics that had been stored for years for this purpose. One of the treasures he found was a beautiful ancient clock, which he repaired, restored and enjoyed using in his office during the years of his service there. Ralph Pattison was described as “a meticulous gentleman whose punctuality, floorless courtesy and distinctive neat dress were hallmarks of his character, and ‘his’ clock controlled his daily routine, and his opening and closing of the library’s large heavy doors to the minute.” Pattison took leave during 1942 to 1942 to serve in the Royal Australian Navy, Volunteer Reserve as Lieutenant. A few years later he converted one of the Museum’s rooms into a Children’s Library, stocking it with suitable books for the younger generation. This was an instant success. In the 1950’s he had the honour of being appointed to the Victorian Library Board and received more inspiration from the monthly conferences in Melbourne. He was sadly retired in 1959 after over 23 years of service, due to the fact that he had gone over the working age of council officers. However he continued to take a very keen interest in the continual development of the Library until his death in 1969. The Pattison Collection, along with other items at Flagstaff Hill Maritime Village, was originally part of the Warrnambool Mechanics' Institute’s collection. The Warrnambool Mechanics’ Institute Collection is primarily significant in its totality, rather than for the individual objects it contains. Its contents are highly representative of the development of Mechanics' Institute libraries across Australia, particularly Victoria. A diversity of publications and themes has been amassed, and these provide clues to our understanding of the nature of and changes in the reading habits of Victorians from the 1850s to the middle of the 20th century. The collection also highlights the Warrnambool community’s commitment to the Mechanics’ Institute, reading, literacy and learning in the regions, and proves that access to knowledge was not impeded by distance. These items help to provide a more complete picture of our community’s ideals and aspirations. The Warrnambool Mechanics Institute book collection has historical and social significance for its strong association with the Mechanics Institute movement and the important role it played in the intellectual, cultural and social development of people throughout the latter part of the nineteenth century and the early twentieth century. The collection of books is a rare example of an early lending library and its significance is enhanced by the survival of an original collection of many volumes. The Warrnambool Mechanics' Institute’s publication collection is of both local and state significance. The International Scientific Series Vol 4 Mind and Body - The Theories of the Relation. Author: Alexander Bain Publisher: Henry S King & Co Date: 1876Label on spine cover with typed text R.H.130 BAI Pastedown front endpaper has sticker from Warrnambool Mechanics Institute and Free Library covered by a sticker from Corangamite Regional Library Service warrnambool, shipwrecked-coast, flagstaff-hill, flagstaff-hill-maritime-museum, maritime-museum, shipwreck-coast, flagstaff-hill-maritime-village, shipwrecked-artefact, book, warrnambool mechanics’ institute, pattison collection, warrnambool library, ralph eric pattison, corangamite regional library service, warrnambool city librarian, mechanics’ institute library, victorian library board, warrnambool books and records, the international scientific series vol 4, alexander bain -
 Bendigo Historical Society Inc.
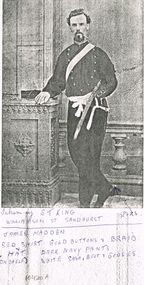
Photograph - PHOTOCOPY OF JAMES MADDEN IN UNIFORM
... S. T. King Williamson Sandhurst....History House 11 Mackenzie Street Bendigo goldfields MILITARY World war 2 james madden S. T. King Williamson Sandhurst. Photocopy of James Madden in uniform resting his right arm on a ledge and his right leg hooked behind his left leg. ...Photocopy of James Madden in uniform resting his right arm on a ledge and his right leg hooked behind his left leg. James is wearing a red shirt, with gold buttons and braid, dark navy pants with white sash from left to right, belt and gloves. James also has his sheathed sword being held in the crook of his left arm. His right boot indicates that he is wearing spurs.13 page typewritten letter written whilst aboard the SS. Orion on the Mediterranean Sea , 28 march 1938. The letter gives details of the sights and goods able to be purchased in the area. Small letter envelope with the name of Harcourt Granite Quarries J. Blight and Co., Proprietors, if not claimed within ten days to be returned to the Manager, printed in the bottom left corner.S. T. King Williamson Sandhurst.military, world war 2, james madden -
 Bendigo Historical Society Inc.
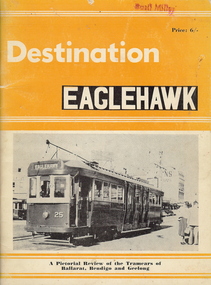
Document - BASIL MILLER COLLECTION: TRAMS BOOK 'DESTINATION EAGLEHAWK'
... This 47 page booklet was compiled by Keith S King and published in 1965....This 47 page booklet was compiled by Keith S King and published in 1965. PERSON Individual basil miller Book 'Destination Eaglehawk' by K. ...This 47 page booklet was compiled by Keith S King and published in 1965.Book 'Destination Eaglehawk' by K. S. Kingsperson, individual, basil miller -
 Kew Historical Society Inc
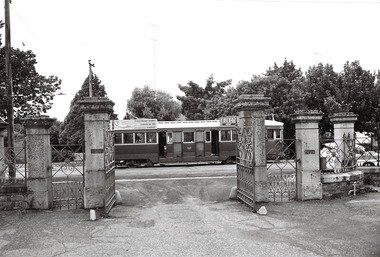
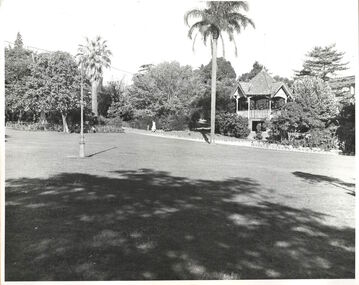
Photograph, Alexandra Gardens, c.1960
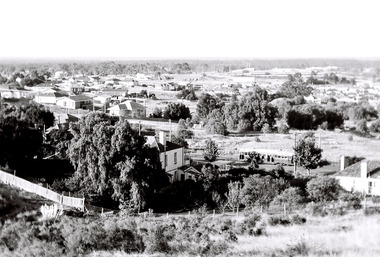
... Formerly part of S. King. (Rest of Estate mainly belongs to St Anthonys home). ...Formerly part of S. King. (Rest of Estate mainly belongs to St Anthonys home). ...Rotunda, Alexandra Gardens (1910-c.1960). The Alexandra Gardens’ rotunda was located within three acres of ‘gem like’ gardens ‘bright with verdant lawns and choice blooms’ in the centre of Kew. Designed by architects Grainger and Little, the ornate two-storey wooden kiosk functioned as a children’s shelter on the ground level and a bandstand and oratory dais on the upper. Funded by council and community subscription, it was a ‘symbol of the public spirit of Victoria’ and a Kew Jubilee commemoration memorial. Opened in 1910, the Kew Brass Band christened it the ‘finest band rotunda in Melbourne’. Deterioration saw its demise 50 years later. This work forms part of the collection assembled by the historian Dorothy Rogers, that was donated to the Kew Historical Society by her son John Rogers in 2015. The manuscripts, photographs, maps, and documents were sourced by her from both family and local collections or produced as references for her print publications. Many were directly used by Rogers in writing ‘Lovely Old Homes of Kew’ (1961) and 'A History of Kew' (1973), or the numerous articles on local history that she produced for suburban newspapers. Most of the photographs in the collection include detailed annotations in her hand. The Rogers Collection provides a comprehensive insight into the working habits of a historian in the 1960s and 1970s. Together it forms the largest privately-donated collection within the archives of the Kew Historical Society.Lawn and original rotunda in the Alexandra Gardens, Cotham Road, Kew. The Alexandra Gardens were opened in 1908. The land on which the gardens were formed originally formed part of the Madford Estate. A feature of the gardens was a large brick, wood and tiled rotunda. "Alexandra Gardens. Formerly part of S. King. (Rest of Estate mainly belongs to St Anthonys home). Opened 1908. Alexandra Gardens. (Rotunda now demolished)"alexandra gardens, kew, dorothy rogers