
Showing 87 items matching "technical order "
-
 Moorabbin Air Museum
Document (item) - Commonwealth Aircraft Corporation Technical Order CAC Avon Sabre Mk30 Mk31 Mk32 modifications Mod. No
... Commonwealth Aircraft Corporation Technical Order CAC Avon Sabre Mk30 Mk31 Mk32 modifications Mod. ...Commonwealth Aircraft Corporation Technical Order CAC Avon Sabre Mk30 Mk31 Mk32 modifications Mod. ...Document Commonwealth Aircraft Corporation Technical Order CAC Avon Sabre Mk30 Mk31 Mk32 modifications Mod. ...Development of the CAC Sabre Mk.30 Mk.31 Mk.32 ModificationsHandwritten notes on the envelopes with the modification number -
Moorabbin Air Museum
Document (item) - Handbook Maintenance Instructions. USAF Series L-26B L-26C Aero Commander Technical Order 1L-26B-2, Aero Commander Technical Order 1L-26B-2
... USAF Series L-26B L-26C Aero Commander Technical Order 1L-26B-2...Aero Commander Technical Order 1L-26B-2...Aero Commander Technical Order 1L-26B-2 Document Handbook Maintenance Instructions. ... -
Moorabbin Air Museum
Manual (Item) - Handbook of Instructions with Part Catalog for Booster Coils (Types A-1 and C-1) Technical Order No 03-5-9
... Handbook of Instructions with Part Catalog for Booster Coils (Types A-1 and C-1) Technical Order No 03-5-9...Handbook of Instructions with Part Catalog for Booster Coils (Types A-1 and C-1) Technical Order No 03-5-9...Handbook of Instructions with Part Catalog for Booster Coils (Types A-1 and C-1) Technical Order No 03-5-9 Manual Handbook of Instructions with Part Catalog for Booster Coils (Types A-1 and C-1) Technical Order No 03-5-9 ... -
Moorabbin Air Museum
Document (Item) - Handbook of Operating Instructions R2600-8 and -9 and -13 Aircraft Engines Technical Order 02-35HB-1
... Handbook of Operating Instructions R2600-8 and -9 and -13 Aircraft Engines Technical Order 02-35HB-1...Document Handbook of Operating Instructions R2600-8 and -9 and -13 Aircraft Engines Technical Order 02-35HB-1 ... -
Moorabbin Air Museum
Document (Item) - (SP) Lincoln Technical Order No 143 Rescue Markings
... (SP) Lincoln Technical Order No 143 Rescue Markings...Document (SP) Lincoln Technical Order No 143 Rescue Markings ... -
Moorabbin Air Museum
Book (Item) - Handbook Of Instructions With Parts Catalogue For Relay Switch, Generator Current Control (200 Ampere Rating For Use With 24-Volt DC Systems), Handbook Of Instructions With Parts Catalogue For Relay Switch , Generator Current Control (200 Ampere Rating For Use With 24-Volt DC Systems)
... Technical Order No.03-5AF-3...Technical Order No.03-5AF-3 Handbook Of Instructions With Parts Catalogue For Relay Switch , Generator Current Control (200 Ampere Rating For Use With 24-Volt DC Systems) Book Handbook Of Instructions With Parts Catalogue For Relay Switch, Generator Current Control (200 Ampere Rating For Use With 24-Volt DC Systems) ... -
4th/19th Prince of Wales's Light Horse Regiment Unit History Room
Book, Government Printers (?), Instruction Book Radio Set SCR-536-C, 1942
... Technical Order No 08-10-136...Radio SCR-536C User Manual Technical Order No 08-10-136 Soft covered book detailing the general description, operation and maintenance of the Radio Set SCR-536-C Instruction Book Radio Set SCR-536-C Book Government Printers (?) ...Soft covered book detailing the general description, operation and maintenance of the Radio Set SCR-536-CTechnical Order No 08-10-136radio scr-536c, user manual -
Moorabbin Air Museum
Book (Item) - Handbook Of Instructions With Parts Catalogue For The Fuel Level Gauges (D-C Selysn)
... Technical Order No.05-55A-3...Technical Order No.05-55A-3 Handbook Of Instructions With Parts Catalogue For The Fuel Level Gauges (D-C Selysn) Book Handbook Of Instructions With Parts Catalogue For The Fuel Level Gauges (D-C Selysn) ...Technical Order No.05-55A-3 -
Moorabbin Air Museum
Book (Item) - Parts Catalogue Bank And Turn Indicator Type C-1
... Technical Order No. 05-20A-3...Technical Order No. 05-20A-3 Parts Catalogue Bank And Turn Indicator Type C-1 Book Parts Catalogue Bank And Turn Indicator Type C-1 ...Technical Order No. 05-20A-3 -
Moorabbin Air Museum
Book (Item) - Handbook Of Instructions With Parts Catalogue Oil Temperature Regulators
... Technical Order No.03-15-17...Technical Order No.03-15-17 Handbook Of Instructions With Parts Catalogue Oil Temperature Regulators Book Handbook Of Instructions With Parts Catalogue Oil Temperature Regulators ...Technical Order No.03-15-17 -
Moorabbin Air Museum
Book (Item) - Handbook Of Instructions With Parts Catalogue For The Type P-1 Engine-Driven Generator ( Model 2CM46A1) Manufactured By The General Electric Company, Handbook Of Instructions With Parts Catalogue For The Type P-1 Engine-Driven Generator ( Model 2CM46A1)
... Technical Order No.03-5AD-1...Technical Order No.03-5AD-1 Handbook Of Instructions With Parts Catalogue For The Type P-1 Engine-Driven Generator ( Model 2CM46A1) Book Handbook Of Instructions With Parts Catalogue For The Type P-1 Engine-Driven Generator ( Model 2CM46A1) Manufactured By The General Electric Company ...Technical Order No.03-5AD-1 -
Moorabbin Air Museum
Document (Item) - (SP) Technical Orders - multitude - list in "Context"
... Technical Order AN 03-10ABB-163 Cyl Plug Selector Valve Assy Overhaul with Parts Breakdown...Possibly related to navigation Technical Order AN 03-10ABB-163 Cyl Plug Selector Valve Assy Overhaul with Parts Breakdown Technical Order AN 03-5-308 Switch Pressure Actuated Overhaul with Parts Breakdown Technical Order AN 05-55A-13 D-C Selsyn Position Indicators and Transmitters Technical Order AN-03-10ABB-237 Swing Check Valve Overhaul with Parts Breakdown Technical Order TO-00-20A-2 Airplane Maintenance Forms Technical Order TO-01-1-390 Food and Galley Equipment Responsibility Technical Order TO-01-1-515 Rework Solenoid Control Head Part 966129 Technical Order TO-01-1-619 Oxygen Regulators Inspection and Replacement Technical Order TO-02-10AB-1 R985 Aircraft Engines Operations Technical Order TO-03-1-6 Solenoid Meshing Devices Ops Service Overhaul Technical Order TO-06-1-8 Fuels and Lubricants Technical Order TO-06-10-1 Lubrication oils Grades and Use Technical Order TO-08-5-10 Radio SCR-578-A Defective Reels RL-48 Technical Order TO-1-1-383 Removal of Ammunition from Aircraft Technical Order TO-10-25-3 Film Developer Assy Operations Servicing Parts Catalog Technical Order TO-14S3-1-503 Inspection of Life Raft CO2 Cylinders Technical Order TO-15A1-2-12-3 Air Pressure Regulator Overhaul Technical Order TO-15H4-2-2-3 Ignition Units Overhaul Technical Order TO-15H6-2-2-123 Cockpit Temperature Control Box Technical Order TO-15H6-2-2-13 Cockpit Temperature Control Box Technical Order TO-15H6-2-2-163 Cockpit Temperature Control Box Overhaul Technical Order TO-1F-1-525 Safety Wirting Pilot Oxygen Shutoff Valve Technical Order TO-1F-86-210 Sabre Electrical Connector for Test Equipment Technical Order TO-2R-0470-12 AN 02A-40EB-2 Aircraft Engines Service Technical Order TO-2R-0470-13 AN 02A-40EB-3 Aircraft Engines Overhaul Technical Order TO-2R-0470-14 AN 02A-40EB-4 Aircraft Engines Parts Breakdown Technical Order TO-4S-1-2 High Pressure Air Valve Cores Technical Order TO-4S5-2-3 Tail Skid Shock Struts Overhaul Technical Order TO-5F4-3-3 True Airspeed Signal Control Amplifier Overhaul Technical Order TO-6J13-2-1-501 Dual Float Switch Assy Installation Technical Order TO-6J14-1-5 Torque Values Self Sealing Bladder Cell Multi Bolt Fittings Technical Order TO-6J3-4-15-4A VS-2 Fuel Regulator Parts Breakdown Technical Order TO-6J5-15-3 Fuel Filetr Assy Overhaul Technical Order TO-6J5-15-4 Fuel Filter Assy Parts Breakdown Technical Order TO-6J5-18-3 Micronic Filters Overhaul Technical Order TO-6J5-18-4 Micronic Filters Parts Breakdown Technical Order TO-6J5-24-3 Av Fuel Filter Replaceable Micronic Element Technical Order TO-6J5-5-3 Fuel Filter 03S12166D Overhaul with Parts Breakdown Technical Order TO-6R-1-2 Engine Carburetor Installation Technical Order TO-6R1-3-1-35 Bendix Injector Carburetor Overhaul Technical Order TO-6R9-2-11-3 Valve Check Overhaul with Parts Breakdown Technical Order TO-6R9-2-12-3 Swing Check Valve Overhaul with Parts Breakdown Technical Order TO-6R9-2-14-3 Check Valve Flow Indicator Overhaul wth Parts Breakdown Technical Order TO-8A6-3-3-3 AC Generator Overhaul Technical Order TO-8A6-8-4-4 Engine Driven Aircraft Generator Parts Breakdown Technical Order TO-8A6-9-3-3 Aircraft AC Generator Overhaul Technical Order TO-8D1-21-3-33 Fractional Horsepower Motor 5BA25AJ28B Overhaul with Parts Breakdown Technical Order TO-8D1-21-3-33 Fractional Horsepower Motor 5BA25MJ426B Overhaul with Parts Breakdown Technical Order TO-8D1-29-2-3 Direct Current Motor Parts Breakdown Technical Order TO-8D1-9-13-23 Oil Cooler Flap Control Overhaul Parts Breakdown Technical Order TO-8D1-9-19-3 Direct Current Motor Overhaul with Parts Breakdown Technical Order TO-8D1-9-21-3 Electromechanical Linear Actuator Overhaul Technical Order TO-8D1-9-21-4 Electromechanical Linear Actuator Parts Breakdown Technical Order TO-8D1-9-22-3 Electromechanical Power Unit Overhaul Technical Order TO-8D1-9-22-4 Electromechanical Power Unit Parts Breakdown Technical Order TO-8D3-8-6-3 Position Light Flasher Overhaul Technical Order TO-8D6-5-4-504 Mod Westinghouse Generator A45J247 Technical Order TO-8E2-5-2-13 Aircraft Magnetos Overhaul Technical Order TO-8E2-5-2-14 Aircraft Magnetos Parts Breakdown Technical Order TO-8RI-3-5-3 Generator Field Control Relay M-2 Overhaul Technical Order TO-9H4-2-24-4A Stratopower Hydraulic Pump Parts Breakdown Document (SP) Technical Orders - multitude - list in "Context" ...Possibly related to navigationtechnical order an 03-10abb-163 cyl plug selector valve assy overhaul with parts breakdown, technical order an 03-5-308 switch pressure actuated overhaul with parts breakdown, technical order an 05-55a-13 d-c selsyn position indicators and transmitters, technical order an-03-10abb-237 swing check valve overhaul with parts breakdown, technical order to-00-20a-2 airplane maintenance forms, technical order to-01-1-390 food and galley equipment responsibility, technical order to-01-1-515 rework solenoid control head part 966129, technical order to-01-1-619 oxygen regulators inspection and replacement, technical order to-02-10ab-1 r985 aircraft engines operations, technical order to-03-1-6 solenoid meshing devices ops service overhaul, technical order to-06-1-8 fuels and lubricants, technical order to-06-10-1 lubrication oils grades and use, technical order to-08-5-10 radio scr-578-a defective reels rl-48, technical order to-1-1-383 removal of ammunition from aircraft, technical order to-10-25-3 film developer assy operations servicing parts catalog, technical order to-14s3-1-503 inspection of life raft co2 cylinders, technical order to-15a1-2-12-3 air pressure regulator overhaul, technical order to-15h4-2-2-3 ignition units overhaul, technical order to-15h6-2-2-123 cockpit temperature control box, technical order to-15h6-2-2-13 cockpit temperature control box, technical order to-15h6-2-2-163 cockpit temperature control box overhaul, technical order to-1f-1-525 safety wirting pilot oxygen shutoff valve, technical order to-1f-86-210 sabre electrical connector for test equipment, technical order to-2r-0470-12 an 02a-40eb-2 aircraft engines service, technical order to-2r-0470-13 an 02a-40eb-3 aircraft engines overhaul, technical order to-2r-0470-14 an 02a-40eb-4 aircraft engines parts breakdown, technical order to-4s-1-2 high pressure air valve cores, technical order to-4s5-2-3 tail skid shock struts overhaul, technical order to-5f4-3-3 true airspeed signal control amplifier overhaul, technical order to-6j13-2-1-501 dual float switch assy installation, technical order to-6j14-1-5 torque values self sealing bladder cell multi bolt fittings, technical order to-6j3-4-15-4a vs-2 fuel regulator parts breakdown, technical order to-6j5-15-3 fuel filetr assy overhaul, technical order to-6j5-15-4 fuel filter assy parts breakdown, technical order to-6j5-18-3 micronic filters overhaul, technical order to-6j5-18-4 micronic filters parts breakdown, technical order to-6j5-24-3 av fuel filter replaceable micronic element, technical order to-6j5-5-3 fuel filter 03s12166d overhaul with parts breakdown, technical order to-6r-1-2 engine carburetor installation, technical order to-6r1-3-1-35 bendix injector carburetor overhaul, technical order to-6r9-2-11-3 valve check overhaul with parts breakdown, technical order to-6r9-2-12-3 swing check valve overhaul with parts breakdown, technical order to-6r9-2-14-3 check valve flow indicator overhaul wth parts breakdown, technical order to-8a6-3-3-3 ac generator overhaul, technical order to-8a6-8-4-4 engine driven aircraft generator parts breakdown, technical order to-8a6-9-3-3 aircraft ac generator overhaul, technical order to-8d1-21-3-33 fractional horsepower motor 5ba25aj28b overhaul with parts breakdown, technical order to-8d1-21-3-33 fractional horsepower motor 5ba25mj426b overhaul with parts breakdown, technical order to-8d1-29-2-3 direct current motor parts breakdown, technical order to-8d1-9-13-23 oil cooler flap control overhaul parts breakdown, technical order to-8d1-9-19-3 direct current motor overhaul with parts breakdown, technical order to-8d1-9-21-3 electromechanical linear actuator overhaul, technical order to-8d1-9-21-4 electromechanical linear actuator parts breakdown, technical order to-8d1-9-22-3 electromechanical power unit overhaul, technical order to-8d1-9-22-4 electromechanical power unit parts breakdown, technical order to-8d3-8-6-3 position light flasher overhaul, technical order to-8d6-5-4-504 mod westinghouse generator a45j247, technical order to-8e2-5-2-13 aircraft magnetos overhaul, technical order to-8e2-5-2-14 aircraft magnetos parts breakdown, technical order to-8ri-3-5-3 generator field control relay m-2 overhaul, technical order to-9h4-2-24-4a stratopower hydraulic pump parts breakdown -
Moorabbin Air Museum
Book (Item) - Instruction Book For Operation And Maintenance Of Radio Set SCR-578-A
... Army Air Forces Technical Order No.08.10.94...Army Air Forces Technical Order No.08.10.94 Instruction Book For Operation And Maintenance Of Radio Set SCR-578-A Book Instruction Book For Operation And Maintenance Of Radio Set SCR-578-A ...Army Air Forces Technical Order No.08.10.94 -
Moorabbin Air Museum
Document (Item) - Handbook Of Instructions With Parts Catalogue For The Type A-5 Rate Of Climb Indicators
... Bendix Aviation Corp Technical Order No.05-20-11...Bendix Aviation Corp Technical Order No.05-20-11 Handbook Of Instructions With Parts Catalogue For The Type A-5 Rate Of Climb Indicators Document Handbook Of Instructions With Parts Catalogue For The Type A-5 Rate Of Climb Indicators ...Manufactured By Pioneer Instrument Co. Div. Bendix Aviation Corp Technical Order No.05-20-11 -
Moorabbin Air Museum
Book - Aircraft engineering, Aircraft Engineering for Pilots
... ...Technical order & inspection systems...Aircraft engineering Aircraft general Reciprocating engines Jet engines Technical order & inspection systems Basic information on aircraft engineering for student pilots, circa 1955 Aircraft Engineering for Pilots Book Aircraft engineering ...Basic information on aircraft engineering for student pilots, circa 1955non-fictionBasic information on aircraft engineering for student pilots, circa 1955aircraft general, reciprocating engines, jet engines, technical order & inspection systems -
 Federation University Historical Collection
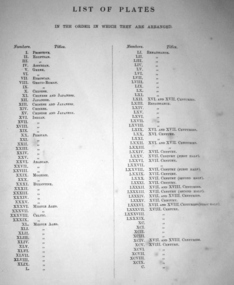
Book, Charles Auguste Albert Racinet, Polychromatic Ornament, 1877 (exact)
... technical art school library bookplate A book plate inside front cover with a heading "Ballarat School of Art Library No. R/171. Stamped with "Reference","Education Department" and "Ballarat School of Art Library" Book. Large red leather cover. Title written in gold on spine. Illustrations (black & white), 100 of chromolithographic plates in gold, silver and colours. Various styles of ancient, oriental and medieval art including the Renaissance, the 17th, and the 18th centuries. Subjects are arranged in historical order ...Monsieur Charles Auguste Albert Racinet was born in Paris on July 20th, 1825. His job was representative of a group of 19th-century industrial draughtsmen, teachers of technical drawing and factory studio manager. He helped in spreading the most significant design of the decorative arts of the time. Racinet learned his trade from his father. He was trained by neo-classical artists in the ambit of Percier and Fontaine. August Racinet was influenced by the Schinkel tendency and supported by architects such as Hittorf and Voillet-le-Duc.Book. Large red leather cover. Title written in gold on spine. Illustrations (black & white), 100 of chromolithographic plates in gold, silver and colours. Various styles of ancient, oriental and medieval art including the Renaissance, the 17th, and the 18th centuries. Subjects are arranged in historical order. Text translated from the original French. The book includes a table of contents, a list of plates, a classified index and an introduction.A book plate inside front cover with a heading "Ballarat School of Art Library No. R/171. Stamped with "Reference","Education Department" and "Ballarat School of Art Library"art, paintings, textile, designs, decoration and craft, ornaments, ballarat technical art school library, bookplate -
 Federation University Historical Collection
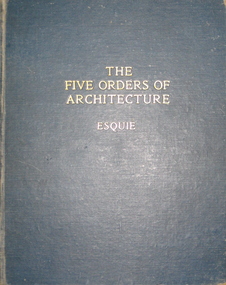
Book, The Five Orders of Architecture: according to Vignola, Possibly 1931
... order...shadow projection...arch of titus...bookplate...library plate...ballarat technical...His two masterpieces are the Villa Farnese at Caprarola and the Jesuits' Church of the Gesù in Rome. roman architecture greek architecture orders of architecture vignola doric order tuscan order ionic order corinthian order composite order shadow projection arch of titus bookplate library plate ballarat technical art school library A bookplate inside front cover titled 'Ballarat School of Art Library No. ...Giacomo Barozzi was born at Vignola. He was called Vignola after the name of the town where he was born. Giacomo was an Italian architect of 16th century. He was among those Italian architects who spread the Italian Renaissance style throughout Western Europe. His two masterpieces are the Villa Farnese at Caprarola and the Jesuits' Church of the Gesù in Rome. A blue cloth hard cover book. Title and author's name is engraved in gilt on front cover and spine. Illustrations in b/w. It includes 26 p. of text and 66 b/w plates, notes on the plates and a glossary of French and English terms. The book also includes studies of shadow projection and the orders and thier application.A bookplate inside front cover titled 'Ballarat School of Art Library No. AD/13. A library due date card with patron's name "Vignola, G.B da" date: 24/4/1968.roman architecture, greek architecture, orders of architecture, vignola, doric order, tuscan order, ionic order, corinthian order, composite order, shadow projection, arch of titus, bookplate, library plate, ballarat technical art school library -
 Federation University Historical Collection
Book, Jack A. Hoadley, Antarctica to Footscray: Arch Hoadley, 2010, 2010
... Technical School. Mr Hoadley was one of the tutorial staff at the School of Mines, and secretary of the School Science Club, and is known to a still wider circle as one of the party which Dr Mawson led to his South Polar expedition." Hoadley joined the Boy Scout Association in 1919, and was Chief Commissioner of the Victoria Boy Scout Association in 1928 to 1937. The scout area of Moonee Ponds is named the Hoadley Area in his honour. Charles Hoadley was made a Commander of the Order...Technical School. Mr Hoadley was one of the tutorial staff at the School of Mines, and secretary of the School Science Club, and is known to a still wider circle as one of the party which Dr Mawson led to his South Polar expedition." Hoadley joined the Boy Scout Association in 1919, and was Chief Commissioner of the Victoria Boy Scout Association in 1928 to 1937. The scout area of Moonee Ponds is named the Hoadley Area in his honour. Charles Hoadley was made a Commander of the Order ...Predominantly brown covered paperback of 460 pages featuring an image of Arch Hoadley in Antarctica on the cover.non-fictionballarat school of mines, antarctica, footscray technical school, baden powell, scouts, douglas mawson, arch hoadley -
 Federation University Historical Collection
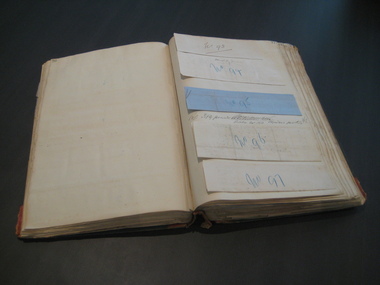
Book, Ballarat School of Mines Invoice Book, 1870 - 1875
... order at start at 1 in each calendar year. Large book, green leather with red binding, numerous original invoices pasted onto the pages. The first pages of the scrapbook includes correspondence relating to the refurbishment of the former Ballarat Court House which was used as the Ballarat School of Mines from 1870. The building was demolished c1913 to make way for the Ballarat Technical ...Scrap book containing invoices relating to accounts to be paid by the Ballarat School of Mines between 1870 until 1875. The School of Mines at Ballarat was the first school of Mines in Australia and was established in 1870. The works done to the former Ballarat Circuit Court House were overseen by Robert Davidson (architect and Surveyor) with the contractor being James Williams. Large book, green leather with red binding, numerous original invoices pasted onto the pages. The first pages of the scrapbook includes correspondence relating to the refurbishment of the former Ballarat Court House which was used as the Ballarat School of Mines from 1870. The building was demolished c1913 to make way for the Ballarat Technical Art School (still standing). * 23 August 1870 - Bateman, Clark & Co, The Ballarat Courier * August 1870 - Klug Bros. Furniture and Bedding Warehouse * April 1870 - J. Armstrong * Statement of Receipts and Expenditure from 23rd Aug. 1870 to 19 January 1871 * W. Gooch, * 1870 - William L. Mullen, Ballarat Stationery Warehouse & Printing Office, * 31Jany. 1871 - A.H. King, Iron Merchant, * 1 February 1871 - Richard Tunbridge, Timber Merchant, * January 4th 1871- Henry Gough, * 8th March 1871 William Murfet, * March 1871- Maxwell Morrow, * 1 February 1871- James Curtis, Caxton Steam Printing Works, * May 4th 1871 - William Blomeley, Iron and Brass Founder, * 4 May 1871 - Thomas Rogers, Draper, Milliner, Haberdasher & c. * May14 1871- George Shannon & Co, Importers of China, Glass & Earthenware, * May 31st 1871, Wreford & Co, Machine Printers, *1st July 1871 William McCulloch & Co,( late Reynolds and English) General Carriers to all parts of the Colony, * 1871- J.J. McDonald, Plumber and Gas Fitters, * August 29th 1871 - Eyres Brothers, Furnishing and General Ironmongers, * 1st August 1871, Frank Pinkerton,H Ben. Franklin Printing and Stationary House 18, Armstrong Street, Ballarat. * 12TH July 1871 J. Donovan, * 10th August, 1871 - Edward Rand, Wholesale Druggist & Importer, *11 Nov 1871 - Matthew Hamilton, * October 2nd 1871 - C.B. Retallack, Engineer and General Smith, *December 8 1871 - James Harrington, * June 1871 - Wayne, Wholesale Druggist * 21st Nov. 1871 - Smith Brothers, Timber Merchants. * 5 January 1872 - T. Eggington, Carpenter, * 12 January 1872 - James Fayle, Plumbers & Ironwork * January 26th 1872 - S. Stansfield, * August 10th 1872 - John H. Hammond Wholesale and Retail, Bookseller, Commercial and General Stationer, etc. etc."VOUCHER" inscribed on spine in gold Each invoice pasted into the scrapbook has a number written onto it. The numbers are in chronological order at start at 1 in each calendar year. ballarat school of mines, redmond barry, hugh gray, henry richards caselli, henry caselli, joseph flude, ballarat court house, harrie wood, clock, invoice book, robert davison, james williams, ballarat circuit court house, old ballarat court, emanuel steinfeld, j.t. sleep, c.b. retallack, john phillips, eyres bros, ballaarat gas company, national insurance company, broadbent bros, charles evans, niven and co, william johnson, william ford, george robertson, william vale, m.d. hamilton, plumbago crucible company, morgans crucibles, h.r. caselli, henry richards caselli, george evans, bateman, clark & co,, klug bros., j. armstrong, w. gooch,, william l. mullen, a.h. king, richard tunbridge, henry gough,, william murfet,, james curtis, william blomeley,, thomas rogers, george shannon, wreford, william mcculloch, j.j. mcdonald, frank pinkerton, ben franklin printing and stationary house, j. donovan, edward rand, matthew hamilton, c.b. retallack,, james harrington, smith brothers,, james fayle,, maxwell morrow,, s. stansfield, walhalla, brunswick house, t rogers -
Federation University Historical Collection
Booklet, GIAE Official Opening, 1976, 11/1976
... Order-in-Council in September 1968. On its establishment, the Institute assumed responsibility for the diploma coursed previously offered at Yallourn Technical College. ...Order-in-Council in September 1968. On its establishment, the Institute assumed responsibility for the diploma coursed previously offered at Yallourn Technical College. ...The Gippsland Institute of Advanced Education was established by an Order-in-Council in September 1968. On its establishment, the Institute assumed responsibility for the diploma coursed previously offered at Yallourn Technical College. In 1972 the Institute transferred part of its operations to the first of its permanent buildings on a large campus in rural surrounding near the township of Churchill, ten kilometres south of Morwell, and 160 kilometres east of Melbourne. The campus site plan report prepared in 1970 by the Institute's campus planners, Yuncken Freeman Architects Pty Ltd, provided the conceptual base for the development of a new campus at Churchill. All facilities were planned to converge on a central space; all having the ability to expand outwards. Central to the campus plan was the concept of an internal pedestrian street connecting all academic divisions to the central facilities. The first building was completed in 1972. The Administration Building, Visual Art & Maintenance Workshops, Multi-Purpose Building, and Student residences were designed by Yuncken Freeman Architects. The central Facilities Building (cafeteria and Union) were designed by Chancellor and Patrick, the Education Building and Applied Science Building is designed by Eggleston, McDonald and Secomb.Grey and yellow soft covered booklet prepared for the official opening of Gippsland Institute of Advanced Education.gippsland institute of advanced education, gippsland campus, churchill, m.w. hopper, c.h. ford, lindsay thompson, j.l. carrick, r.w. muncey -
 Federation University Historical Collection
Book, Ballarat Junior Technical School Certificates, 1914-1939, 1914-1939
... In date order each student who received a certificate from the Ballarat Junior Technical School between 1914 and 1939 is listed, along with their results. ...In date order each student who received a certificate from the Ballarat Junior Technical School between 1914 and 1939 is listed, along with their results. ...The Ballarat Junior Technical School was part of the Ballarat School of Mines.P [Peter] Chatham was the brother of Philip Chatham's father, John [Jack] ChathamFoolscap, charcoal green book with red leather binding and marbled edges. In date order each student who received a certificate from the Ballarat Junior Technical School between 1914 and 1939 is listed, along with their results. ballarat junior technical school, certificates, guido brelaz, noel brelaz, harold adair, norman anstis, howard beanland, allan bernaldo, g. g. callister, francis capuano, j.e. capuano, peter chatham, arthur coates, leslie crouch, richard dale, francis davis, henry dodds, jack dulfer, john dulfer, donald furlong, john garner, bennett gluyas, otto hauser, r, haymes, graham hopwood, arthur h. hoskin, r.m. kittelty, carl krahnert, larkin, michael, leask, james, leech, george, fred longhurst, john martin, john mcnabb, harold morton, g.g. netherway, harry o'bern, h. pitman, keith rash, percival a. trompf, percy trompf, harold g. wakeling, harold waller, robert h. warnock, thomas wasley, george webb, albert williams, john a. garner, walter button, jack kopke, b. bernaldo, a. snowden, g.c. callister, a.l. brittain, w.j. bassett, j.k. kneeshaw, ronald ditchfield, l.a. chung -
 Flagstaff Hill Maritime Museum and Village
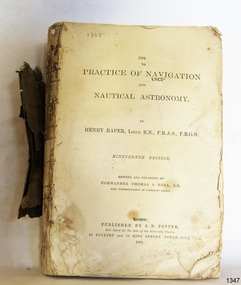
Book - Technical Reference, Henry Raper, Lieut. R.N, The Practice of Navigation and Nautical Astronomy, 1891
... technical textbook is the nineteenth edition of the book by Henry Raper, Lieutenant in the Royal Navy with awards that include F.R.A.S. (Fellow of the Royal Astronomical Society) and F.R.G.S. (Friend of the Royal Geographical Society). The book is dedicated in honour of Rear-Admiral Sir Francis Beaufort K.C.B., Hydrographer to the Admiralty. He was awarded the title K.C.B. (King's Commander) as a Member of the Order...technical textbook is the nineteenth edition of the book by Henry Raper, Lieutenant in the Royal Navy with awards that include F.R.A.S. (Fellow of the Royal Astronomical Society) and F.R.G.S. (Friend of the Royal Geographical Society). The book is dedicated in honour of Rear-Admiral Sir Francis Beaufort K.C.B., Hydrographer to the Admiralty. He was awarded the title K.C.B. (King's Commander) as a Member of the Order ...This technical textbook is the nineteenth edition of the book by Henry Raper, Lieutenant in the Royal Navy with awards that include F.R.A.S. (Fellow of the Royal Astronomical Society) and F.R.G.S. (Friend of the Royal Geographical Society). The book is dedicated in honour of Rear-Admiral Sir Francis Beaufort K.C.B., Hydrographer to the Admiralty. He was awarded the title K.C.B. (King's Commander) as a Member of the Order of Bath, an order of British Chivalry, The book was first published in 1840 and soon became a resource for navigation students. It includes topics on nautical navigation, astronomy, navigation charts, calculations and mathematical tables, time, tides, ships, longitude, and position at sea. Thomas A. Hull, who revised and expanded this edition, was a Commander in the Royal Navy and had previously been Superintendent of Admiralty Charts used for navigation worldwide by seamen from many walks of life. The publisher, J D Potter of London, was at that time the sole agent for the Admiralty Charts produced by the Royal Navy. Printer Spottswoode and Co.,. was established by William Strachan in 1738. In 1819 his nephews A and R Spottswoode took over the business and bought premises in New-Street Square and Shoe Lane. In 1850 over 200 workers were employed by the firm. and five years later the business became Spottswoode & Co. Andrew Spottswoode invented the Spottswoode Press.This technical book was very popular as a textbook for students of maritime navigation, written and updated by members of the British Royal Navy and relied upon for accurate advice and information. The first edition was published in 1840, this edition was updated, expanded and published in 1891 when ports around the world were filling with travellers, merchants and business people. Title: The Practice of Navigation and Nautical Astronomy Author: Henry Raper, Lieut, R.N., F.R.A.S., F.R.G.S. Nineteenth Edition, revised and enlarged by Commander Thomas A. Hull, R.N., Late Superintendant of Admiralty Charts Dedication: To Rear-Admiral Sir Francis Beaufort K.C.B. Publisher: J D Potter, London, sole agent for the sale of Admiralty Charts Printer: Spottswoode and Co. New-Street Square, London Date: 1891 Small leather hardcover book with gold embossed text and lines on the spine. The Dedication in the book is as follows: - "To Rear-Admiral Sir Francis Beaufort K.C.B. Hydrographer to the Admiralty. Sir, The eminent station which you occupy in the naval scientific world renders it highly gratifying to me to dedicate the following Work to you as a testimony of my regard and esteem; while the general accordance of my views on the subject with those of your more experienced judgement, gives me the greater confidence in laying my labours before the Public. I have the honour to be, Sir, Your obedient servant, HENRY RAPER"flagstaff hill maritime museum, maritime museum, shipwreck coast, flagstaff hill, warrnambool, flagstaff hill maritime village, book, navigation, nautical astronomy, hydrography, nautical charts, nautical navigation, astronomical navigation, admiralty charts, henry raper, thomas a. hull, royal navy, j d potter, royal astronomical society, royal geographical society, calculations, mathematical tables, longitude, latitude, nautical time, location at sea, position at sea, maritime, practical navigation, spottswoode and co., sir francis beaufort, k.c.b., rear-admiral sir francis beaufort, hydrographer to the admiralty, scientific book, naval science -
 Flagstaff Hill Maritime Museum and Village
Domestic object - Jug
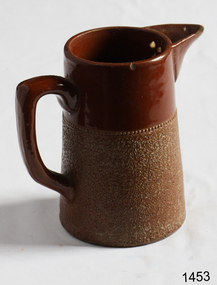
... technical stuff! Step One – Design There are SO many ideas out there for making stuff in clay! From delicate porcelain jewellery, through to heavy sculptural work and everything in between. Deciding your direction is sometimes not that easy – when you first start, try everything, you will naturally gravitate to the style that you enjoy! The options and variations are endless and can get a wee bit overwhelming too! Check in with me before you start to ensure your ideas will work, what order...technical stuff! Step One – Design There are SO many ideas out there for making stuff in clay! From delicate porcelain jewellery, through to heavy sculptural work and everything in between. Deciding your direction is sometimes not that easy – when you first start, try everything, you will naturally gravitate to the style that you enjoy! The options and variations are endless and can get a wee bit overwhelming too! Check in with me before you start to ensure your ideas will work, what order ...The Process of Making Pottery Decorating, Firing, Glazing, Making, Technical There is a rhythm and flow to clay. It can’t be done all at once! Even the making process! It can take weeks to get everything done, especially if you can only work on your pottery once a week! Even though we have three hour classes, it’s often just not enough time! Here is an overview of some of the processes so you have a bit more grasp on some of the technical stuff! Step One – Design There are SO many ideas out there for making stuff in clay! From delicate porcelain jewellery, through to heavy sculptural work and everything in between. Deciding your direction is sometimes not that easy – when you first start, try everything, you will naturally gravitate to the style that you enjoy! The options and variations are endless and can get a wee bit overwhelming too! Check in with me before you start to ensure your ideas will work, what order you might do things, how you could achieve the look you are seeking and any other technical data required! Step Two – Making Clay is thixotropic. This means that as you work with it, the clay first gets sloppier and wetter, before is begins to dry in the atmosphere. For most things, you simply can’t do all parts of the project at once. An example of work order might look like: Get last weeks work out from the shelves Prepare clay for today’s work – roll your clay, prepare balls for throwing, make the first stage of a pinch pot) Clean up last week’s work and put it on the shelf for bisque firing Check that you have any glazing to do – and do enough of it that you will have time to finish your main project Do the next step of your next project – there might be a further step that can’t be complete immediately, in that case, wrap your work well and put onto the shelves. Letting your work rest for a while can really help keep your work clean and professional looking. Many things require bagging under plastic to keep it ready for work the next week – put your name on the outside of the bag so you can find your work easily. We have stickers and markers. Consider how you want to decorate your work – coloured slip can be applied at a fairly wet stage (remembering that it will make your work even wetter!). Trying to apply slip to dry clay won’t work! If you want to do sgraffito – you will need to keep the work leather hard (a state of dryness where you can still work the clay with a little effort and a little water and care). Step Three – Drying Most of the time your work can go into the rack uncovered to let it dry out for the following week. If you want to continue forming or shaping you will need to double bag your work – put your work on a suitable sized bat and put the bat in a bag so the base of the bag is under the bat, then put another bag over the top of the work and tuck the top of the bag under the bat. If you want to trim (or turn) your thrown work the following week, it should also be double bagged. If your work is large, delicate, or of uneven thicknesses, you should lightly cover your work for drying. When considering the drying process, bare in mind the weather, humidity and wind! The hotter and dryer, the faster things dry and work can dry unevenly in the shelves – this can lead to cracking – another time to lightly cover your work for drying. Step Four – Trimming and Cleaning Up Your work is dry! It is called greenware now and it is at it’s most fragile! Handle everything with two hands. I often refer to soft hands – keep everything gentle and with your fingers spread as much as possible. Try to not pick up things like plates too much, and always with both hands! Before your work can be bisque fired it should be “cleaned up”. You work won’t go into the kiln if it has sharp edges – when glazed, sharp edges turn into razor blades! Use a piece of fly wire to rub the work all over – this will scratch a little so be light handed. Use a knife or metal kidney to scrape any areas that require a bit more dynamic treatment than the fly wire offers! Finally, a very light wipe over with a slightly damp sponge can help soften and soothe all of your edges and dags! Trimming thrown work: If you are planning to trim (or turn) your thrown work (and you should be), make sure you bag it well – your work should be leather hard to almost dry for easiest trimming. Use this step to finish the work completely – use a metal kidney to polish the surface, or a slightly damp sponge to give a freshly thrown look. Wipe the sponge around the rim after trimming, and check the inside of the pot for dags! Trimming slip cast work: Usually I will trim the rims of your work on the wheel the following day to make that stage easier, however you will still need to check your work for lumps and bumps. Last but not least – check that your name is still clearly on the bottom of your work. Step Five – Bisque Firing When the work is completely dry it can go into the bisque kiln. The bisque kiln is fired to 1000°C. This process burns off the water in the clay as well as some of the chemically bound water. The structure of the clay is not altered that much at this temperature. Inside the bisque kiln, the work is stacked a little, small bowl inside a larger bowl and onto a heavy plate. Smaller items like decorations or drink coasters might get stacked several high. Consideration is paid to the weight of the stack and shape of the work. A bisque kiln can fire about one and a half times the amount of work that the glaze kiln can fire. The firing takes about 10 hours to complete the cycle and about two days to cool down. Once it has been emptied the work is placed in the glaze room ready for you to decorate! Step Six – Glazing Decorating your work with colour can be a lot of fun – and time consuming! There are three main options for surface treatment at this stage: Oxide Washes Underglazes Glazes Washes and underglazes do not “glaze” the work – It will still need a layer of glaze to fully seal the clay (washes don’t need glaze on surfaces not designed for food or liquid as they can gloss up a little on their own). Underglazes are stable colourants that turn out pretty much how they look in the jar. They can be mixed with each other to form other colours and can be used like water colours to paint onto your work. Mostly they should have a clear glaze on top to seal them. Oxides are a different species – the pink oxide (cobalt) wash turns out bright blue for instance. They don’t always need a glaze on top, and some glazes can change the colour of the wash! The glazes need no other “glaze” on top! Be careful of unknown glaze interactions – you can put any combination of glaze in a bowl or on a plate, but only a single glaze on the outside of any vertical surface! Glazes are a chemical reaction under heat. We don’t know the exact chemicals in the Mayco glazes we use. I can guess by the way they interact with each other, however, on the whole, you need to test every idea you have, and not run the test on a vertical surface! Simply put, glaze is a layer of glass like substance that bonds with the clay underneath. Clay is made of silica, alumina and water. Glaze is made of mostly silica. Silica has a melting point of 1700°C and we fire to 1240°C. The silica requires a “flux” to help it melt at the lower temperature. Fluxes can be all sorts of chemicals – a common one is calcium – calcium has a melting point of 2500°C, however, together they both melt at a much lower temperature! Colourants are metal oxides like cobalt (blue), chrome (green through black), copper (green, blue, even red!), manganese (black, purple and pink) iron (red brown), etc. Different chemicals in the glaze can have dramatic effects. for example, barium carbonate (which we don’t use) turns manganese bright pink! Other elements can turn manganese dioxide brown, blue, purple and reddish brown. Manganese dioxide is a flux in and of itself as well. So, glazes that get their black and purple colours, often interact with other glazes and RUN! Our mirror black is a good example – it mixes really well with many glazes because it fluxes them – causes them to melt faster. It will also bring out many beautiful colours in the glazes because it’s black colouring most definitely comes from manganese dioxide! Glaze chemistry is a whole subject on it’s own! We use commercial Mayco glazes on purpose – for their huge range of colour possibilities, stability, cool interactions, artistic freedom with the ability to easily brush the glazes on and ease of use. We currently have almost 50 glazes on hand! A major project is to test the interactions of all glazes with each other. That is 2,500 test tiles!!!! I’m going to make the wall behind the wheels the feature wall of pretty colours! Step Seven – Glaze (Gloss or sometimes called “Glost”) Firing Most of the time this is the final stage of making your creation (but not always!) The glaze kiln goes to 1240°C. This is called cone 6, or midrange. It is the low end of stoneware temperatures. Stoneware clays and glazes are typically fired at cone 8 – 10, that is 1260 – 1290°C. The energy requirement to go from 1240°C to 1280°C is almost a 30% more! Our clay is formulated to vitrify (mature, turn “glass-like”) at 1240°, as are our glazes. A glaze kiln take around 12 hours to reach temperature and two to three days to cool down. Sometimes a third firing process is required – this is for decoration that is added to work after the glaze firing. For example – adding precious metals and lustres. this firing temperature is usually around 600 – 800°C depending upon the techniques being used. There are many students interested in gold and silver trims – we will be doing this third type of firing soon! After firing your work will be in the student finished work shelves. Remember to pay for it before you head out the door! There is a small extra charge for using porcelain clay (it’s more than twice the price of regular clay), and for any third firing process! Once your work has been fired it can not turn back into clay for millennia – so don’t fire it if you don’t like it! Put it in the bucket for recycling. https://firebirdstudios.com.au/the-process-of-making-pottery/The form of the jug has been in use for many centuries.Stoneware jug. Two tone brown glaze with pierced lip behind spout. Spout chipped.None.flagstaff hill, warrnambool, shipwrecked-coast, flagstaff-hill, flagstaff-hill-maritime-museum, maritime-museum, shipwreck-coast, flagstaff-hill-maritime-village, jug, ceramic jug -
 Flagstaff Hill Maritime Museum and Village
Domestic object - Bowl, Late 19th or early 20th Century
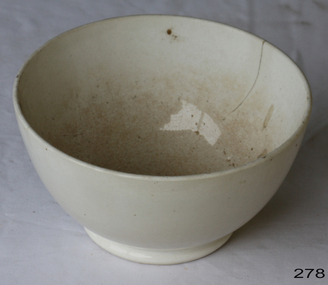
... technical stuff! Step One – Design There are SO many ideas out there for making stuff in clay! From delicate porcelain jewellery, through to heavy sculptural work and everything in between. Deciding your direction is sometimes not that easy – when you first start, try everything, you will naturally gravitate to the style that you enjoy! The options and variations are endless and can get a wee bit overwhelming too! Check in with me before you start to ensure your ideas will work, what order...technical stuff! Step One – Design There are SO many ideas out there for making stuff in clay! From delicate porcelain jewellery, through to heavy sculptural work and everything in between. Deciding your direction is sometimes not that easy – when you first start, try everything, you will naturally gravitate to the style that you enjoy! The options and variations are endless and can get a wee bit overwhelming too! Check in with me before you start to ensure your ideas will work, what order ...The Process of Making Pottery Decorating, Firing, Glazing, Making, Technical There is a rhythm and flow to clay. It can’t be done all at once! Even the making process! It can take weeks to get everything done, especially if you can only work on your pottery once a week! Even though we have three hour classes, it’s often just not enough time! Here is an overview of some of the processes so you have a bit more grasp on some of the technical stuff! Step One – Design There are SO many ideas out there for making stuff in clay! From delicate porcelain jewellery, through to heavy sculptural work and everything in between. Deciding your direction is sometimes not that easy – when you first start, try everything, you will naturally gravitate to the style that you enjoy! The options and variations are endless and can get a wee bit overwhelming too! Check in with me before you start to ensure your ideas will work, what order you might do things, how you could achieve the look you are seeking and any other technical data required! Step Two – Making Clay is thixotropic. This means that as you work with it, the clay first gets sloppier and wetter, before is begins to dry in the atmosphere. For most things, you simply can’t do all parts of the project at once. An example of work order might look like: Get last weeks work out from the shelves Prepare clay for today’s work – roll your clay, prepare balls for throwing, make the first stage of a pinch pot) Clean up last week’s work and put it on the shelf for bisque firing Check that you have any glazing to do – and do enough of it that you will have time to finish your main project Do the next step of your next project – there might be a further step that can’t be complete immediately, in that case, wrap your work well and put onto the shelves. Letting your work rest for a while can really help keep your work clean and professional looking. Many things require bagging under plastic to keep it ready for work the next week – put your name on the outside of the bag so you can find your work easily. We have stickers and markers. Consider how you want to decorate your work – coloured slip can be applied at a fairly wet stage (remembering that it will make your work even wetter!). Trying to apply slip to dry clay won’t work! If you want to do sgraffito – you will need to keep the work leather hard (a state of dryness where you can still work the clay with a little effort and a little water and care). Step Three – Drying Most of the time your work can go into the rack uncovered to let it dry out for the following week. If you want to continue forming or shaping you will need to double bag your work – put your work on a suitable sized bat and put the bat in a bag so the base of the bag is under the bat, then put another bag over the top of the work and tuck the top of the bag under the bat. If you want to trim (or turn) your thrown work the following week, it should also be double bagged. If your work is large, delicate, or of uneven thicknesses, you should lightly cover your work for drying. When considering the drying process, bare in mind the weather, humidity and wind! The hotter and dryer, the faster things dry and work can dry unevenly in the shelves – this can lead to cracking – another time to lightly cover your work for drying. Step Four – Trimming and Cleaning Up Your work is dry! It is called greenware now and it is at it’s most fragile! Handle everything with two hands. I often refer to soft hands – keep everything gentle and with your fingers spread as much as possible. Try to not pick up things like plates too much, and always with both hands! Before your work can be bisque fired it should be “cleaned up”. You work won’t go into the kiln if it has sharp edges – when glazed, sharp edges turn into razor blades! Use a piece of fly wire to rub the work all over – this will scratch a little so be light handed. Use a knife or metal kidney to scrape any areas that require a bit more dynamic treatment than the fly wire offers! Finally, a very light wipe over with a slightly damp sponge can help soften and soothe all of your edges and dags! Trimming thrown work: If you are planning to trim (or turn) your thrown work (and you should be), make sure you bag it well – your work should be leather hard to almost dry for easiest trimming. Use this step to finish the work completely – use a metal kidney to polish the surface, or a slightly damp sponge to give a freshly thrown look. Wipe the sponge around the rim after trimming, and check the inside of the pot for dags! Trimming slip cast work: Usually I will trim the rims of your work on the wheel the following day to make that stage easier, however you will still need to check your work for lumps and bumps. Last but not least – check that your name is still clearly on the bottom of your work. Step Five – Bisque Firing When the work is completely dry it can go into the bisque kiln. The bisque kiln is fired to 1000°C. This process burns off the water in the clay as well as some of the chemically bound water. The structure of the clay is not altered that much at this temperature. Inside the bisque kiln, the work is stacked a little, small bowl inside a larger bowl and onto a heavy plate. Smaller items like decorations or drink coasters might get stacked several high. Consideration is paid to the weight of the stack and shape of the work. A bisque kiln can fire about one and a half times the amount of work that the glaze kiln can fire. The firing takes about 10 hours to complete the cycle and about two days to cool down. Once it has been emptied the work is placed in the glaze room ready for you to decorate! Step Six – Glazing Decorating your work with colour can be a lot of fun – and time consuming! There are three main options for surface treatment at this stage: Oxide Washes Underglazes Glazes Washes and underglazes do not “glaze” the work – It will still need a layer of glaze to fully seal the clay (washes don’t need glaze on surfaces not designed for food or liquid as they can gloss up a little on their own). Underglazes are stable colourants that turn out pretty much how they look in the jar. They can be mixed with each other to form other colours and can be used like water colours to paint onto your work. Mostly they should have a clear glaze on top to seal them. Oxides are a different species – the pink oxide (cobalt) wash turns out bright blue for instance. They don’t always need a glaze on top, and some glazes can change the colour of the wash! The glazes need no other “glaze” on top! Be careful of unknown glaze interactions – you can put any combination of glaze in a bowl or on a plate, but only a single glaze on the outside of any vertical surface! Glazes are a chemical reaction under heat. We don’t know the exact chemicals in the Mayco glazes we use. I can guess by the way they interact with each other, however, on the whole, you need to test every idea you have, and not run the test on a vertical surface! Simply put, glaze is a layer of glass like substance that bonds with the clay underneath. Clay is made of silica, alumina and water. Glaze is made of mostly silica. Silica has a melting point of 1700°C and we fire to 1240°C. The silica requires a “flux” to help it melt at the lower temperature. Fluxes can be all sorts of chemicals – a common one is calcium – calcium has a melting point of 2500°C, however, together they both melt at a much lower temperature! Colourants are metal oxides like cobalt (blue), chrome (green through black), copper (green, blue, even red!), manganese (black, purple and pink) iron (red brown), etc. Different chemicals in the glaze can have dramatic effects. for example, barium carbonate (which we don’t use) turns manganese bright pink! Other elements can turn manganese dioxide brown, blue, purple and reddish brown. Manganese dioxide is a flux in and of itself as well. So, glazes that get their black and purple colours, often interact with other glazes and RUN! Our mirror black is a good example – it mixes really well with many glazes because it fluxes them – causes them to melt faster. It will also bring out many beautiful colours in the glazes because it’s black colouring most definitely comes from manganese dioxide! Glaze chemistry is a whole subject on it’s own! We use commercial Mayco glazes on purpose – for their huge range of colour possibilities, stability, cool interactions, artistic freedom with the ability to easily brush the glazes on and ease of use. We currently have almost 50 glazes on hand! A major project is to test the interactions of all glazes with each other. That is 2,500 test tiles!!!! I’m going to make the wall behind the wheels the feature wall of pretty colours! Step Seven – Glaze (Gloss or sometimes called “Glost”) Firing Most of the time this is the final stage of making your creation (but not always!) The glaze kiln goes to 1240°C. This is called cone 6, or midrange. It is the low end of stoneware temperatures. Stoneware clays and glazes are typically fired at cone 8 – 10, that is 1260 – 1290°C. The energy requirement to go from 1240°C to 1280°C is almost a 30% more! Our clay is formulated to vitrify (mature, turn “glass-like”) at 1240°, as are our glazes. A glaze kiln take around 12 hours to reach temperature and two to three days to cool down. Sometimes a third firing process is required – this is for decoration that is added to work after the glaze firing. For example – adding precious metals and lustres. this firing temperature is usually around 600 – 800°C depending upon the techniques being used. There are many students interested in gold and silver trims – we will be doing this third type of firing soon! After firing your work will be in the student finished work shelves. Remember to pay for it before you head out the door! There is a small extra charge for using porcelain clay (it’s more than twice the price of regular clay), and for any third firing process! Once your work has been fired it can not turn back into clay for millennia – so don’t fire it if you don’t like it! Put it in the bucket for recycling. https://firebirdstudios.com.au/the-process-of-making-pottery/ The bowl is an example of kitchenware used in the 19th century and still in use today.Bowl white ceramic. Crack on side. Badly stained.Backstamp very faint and unable to be read.flagstaff hill, warrnambool, shipwrecked-coast, flagstaff-hill, flagstaff-hill-maritime-museum, maritime-museum, shipwreck-coast, flagstaff-hill-maritime-village, mixing bowl, food preparation, kitchen equipment, ceramic -
 Flagstaff Hill Maritime Museum and Village
Domestic object - Bowl
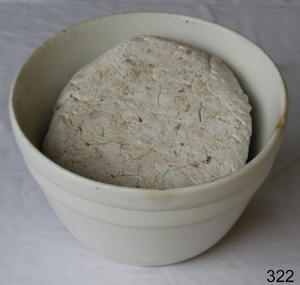
... technical stuff! Step One – Design There are SO many ideas out there for making stuff in clay! From delicate porcelain jewellery, through to heavy sculptural work and everything in between. Deciding your direction is sometimes not that easy – when you first start, try everything, you will naturally gravitate to the style that you enjoy! The options and variations are endless and can get a wee bit overwhelming too! Check in with me before you start to ensure your ideas will work, what order...technical stuff! Step One – Design There are SO many ideas out there for making stuff in clay! From delicate porcelain jewellery, through to heavy sculptural work and everything in between. Deciding your direction is sometimes not that easy – when you first start, try everything, you will naturally gravitate to the style that you enjoy! The options and variations are endless and can get a wee bit overwhelming too! Check in with me before you start to ensure your ideas will work, what order ...The Process of Making Pottery Decorating, Firing, Glazing, Making, Technical There is a rhythm and flow to clay. It can’t be done all at once! Even the making process! It can take weeks to get everything done, especially if you can only work on your pottery once a week! Even though we have three hour classes, it’s often just not enough time! Here is an overview of some of the processes so you have a bit more grasp on some of the technical stuff! Step One – Design There are SO many ideas out there for making stuff in clay! From delicate porcelain jewellery, through to heavy sculptural work and everything in between. Deciding your direction is sometimes not that easy – when you first start, try everything, you will naturally gravitate to the style that you enjoy! The options and variations are endless and can get a wee bit overwhelming too! Check in with me before you start to ensure your ideas will work, what order you might do things, how you could achieve the look you are seeking and any other technical data required! Step Two – Making Clay is thixotropic. This means that as you work with it, the clay first gets sloppier and wetter, before is begins to dry in the atmosphere. For most things, you simply can’t do all parts of the project at once. An example of work order might look like: Get last weeks work out from the shelves Prepare clay for today’s work – roll your clay, prepare balls for throwing, make the first stage of a pinch pot) Clean up last week’s work and put it on the shelf for bisque firing Check that you have any glazing to do – and do enough of it that you will have time to finish your main project Do the next step of your next project – there might be a further step that can’t be complete immediately, in that case, wrap your work well and put onto the shelves. Letting your work rest for a while can really help keep your work clean and professional looking. Many things require bagging under plastic to keep it ready for work the next week – put your name on the outside of the bag so you can find your work easily. We have stickers and markers. Consider how you want to decorate your work – coloured slip can be applied at a fairly wet stage (remembering that it will make your work even wetter!). Trying to apply slip to dry clay won’t work! If you want to do sgraffito – you will need to keep the work leather hard (a state of dryness where you can still work the clay with a little effort and a little water and care). Step Three – Drying Most of the time your work can go into the rack uncovered to let it dry out for the following week. If you want to continue forming or shaping you will need to double bag your work – put your work on a suitable sized bat and put the bat in a bag so the base of the bag is under the bat, then put another bag over the top of the work and tuck the top of the bag under the bat. If you want to trim (or turn) your thrown work the following week, it should also be double bagged. If your work is large, delicate, or of uneven thicknesses, you should lightly cover your work for drying. When considering the drying process, bare in mind the weather, humidity and wind! The hotter and dryer, the faster things dry and work can dry unevenly in the shelves – this can lead to cracking – another time to lightly cover your work for drying. Step Four – Trimming and Cleaning Up Your work is dry! It is called greenware now and it is at it’s most fragile! Handle everything with two hands. I often refer to soft hands – keep everything gentle and with your fingers spread as much as possible. Try to not pick up things like plates too much, and always with both hands! Before your work can be bisque fired it should be “cleaned up”. You work won’t go into the kiln if it has sharp edges – when glazed, sharp edges turn into razor blades! Use a piece of fly wire to rub the work all over – this will scratch a little so be light handed. Use a knife or metal kidney to scrape any areas that require a bit more dynamic treatment than the fly wire offers! Finally, a very light wipe over with a slightly damp sponge can help soften and soothe all of your edges and dags! Trimming thrown work: If you are planning to trim (or turn) your thrown work (and you should be), make sure you bag it well – your work should be leather hard to almost dry for easiest trimming. Use this step to finish the work completely – use a metal kidney to polish the surface, or a slightly damp sponge to give a freshly thrown look. Wipe the sponge around the rim after trimming, and check the inside of the pot for dags! Trimming slip cast work: Usually I will trim the rims of your work on the wheel the following day to make that stage easier, however you will still need to check your work for lumps and bumps. Last but not least – check that your name is still clearly on the bottom of your work. Step Five – Bisque Firing When the work is completely dry it can go into the bisque kiln. The bisque kiln is fired to 1000°C. This process burns off the water in the clay as well as some of the chemically bound water. The structure of the clay is not altered that much at this temperature. Inside the bisque kiln, the work is stacked a little, small bowl inside a larger bowl and onto a heavy plate. Smaller items like decorations or drink coasters might get stacked several high. Consideration is paid to the weight of the stack and shape of the work. A bisque kiln can fire about one and a half times the amount of work that the glaze kiln can fire. The firing takes about 10 hours to complete the cycle and about two days to cool down. Once it has been emptied the work is placed in the glaze room ready for you to decorate! Step Six – Glazing Decorating your work with colour can be a lot of fun – and time consuming! There are three main options for surface treatment at this stage: Oxide Washes Underglazes Glazes Washes and underglazes do not “glaze” the work – It will still need a layer of glaze to fully seal the clay (washes don’t need glaze on surfaces not designed for food or liquid as they can gloss up a little on their own). Underglazes are stable colourants that turn out pretty much how they look in the jar. They can be mixed with each other to form other colours and can be used like water colours to paint onto your work. Mostly they should have a clear glaze on top to seal them. Oxides are a different species – the pink oxide (cobalt) wash turns out bright blue for instance. They don’t always need a glaze on top, and some glazes can change the colour of the wash! The glazes need no other “glaze” on top! Be careful of unknown glaze interactions – you can put any combination of glaze in a bowl or on a plate, but only a single glaze on the outside of any vertical surface! Glazes are a chemical reaction under heat. We don’t know the exact chemicals in the Mayco glazes we use. I can guess by the way they interact with each other, however, on the whole, you need to test every idea you have, and not run the test on a vertical surface! Simply put, glaze is a layer of glass like substance that bonds with the clay underneath. Clay is made of silica, alumina and water. Glaze is made of mostly silica. Silica has a melting point of 1700°C and we fire to 1240°C. The silica requires a “flux” to help it melt at the lower temperature. Fluxes can be all sorts of chemicals – a common one is calcium – calcium has a melting point of 2500°C, however, together they both melt at a much lower temperature! Colourants are metal oxides like cobalt (blue), chrome (green through black), copper (green, blue, even red!), manganese (black, purple and pink) iron (red brown), etc. Different chemicals in the glaze can have dramatic effects. for example, barium carbonate (which we don’t use) turns manganese bright pink! Other elements can turn manganese dioxide brown, blue, purple and reddish brown. Manganese dioxide is a flux in and of itself as well. So, glazes that get their black and purple colours, often interact with other glazes and RUN! Our mirror black is a good example – it mixes really well with many glazes because it fluxes them – causes them to melt faster. It will also bring out many beautiful colours in the glazes because it’s black colouring most definitely comes from manganese dioxide! Glaze chemistry is a whole subject on it’s own! We use commercial Mayco glazes on purpose – for their huge range of colour possibilities, stability, cool interactions, artistic freedom with the ability to easily brush the glazes on and ease of use. We currently have almost 50 glazes on hand! A major project is to test the interactions of all glazes with each other. That is 2,500 test tiles!!!! I’m going to make the wall behind the wheels the feature wall of pretty colours! Step Seven – Glaze (Gloss or sometimes called “Glost”) Firing Most of the time this is the final stage of making your creation (but not always!) The glaze kiln goes to 1240°C. This is called cone 6, or midrange. It is the low end of stoneware temperatures. Stoneware clays and glazes are typically fired at cone 8 – 10, that is 1260 – 1290°C. The energy requirement to go from 1240°C to 1280°C is almost a 30% more! Our clay is formulated to vitrify (mature, turn “glass-like”) at 1240°, as are our glazes. A glaze kiln take around 12 hours to reach temperature and two to three days to cool down. Sometimes a third firing process is required – this is for decoration that is added to work after the glaze firing. For example – adding precious metals and lustres. this firing temperature is usually around 600 – 800°C depending upon the techniques being used. There are many students interested in gold and silver trims – we will be doing this third type of firing soon! After firing your work will be in the student finished work shelves. Remember to pay for it before you head out the door! There is a small extra charge for using porcelain clay (it’s more than twice the price of regular clay), and for any third firing process! Once your work has been fired it can not turn back into clay for millennia – so don’t fire it if you don’t like it! Put it in the bucket for recycling. https://firebirdstudios.com.au/the-process-of-making-pottery/ This bowl is an example of kitchenware used in the 19th century and still in use today.Bowl white ceramic plain that has two sets of edging around lip. Inside bowl has plaster designed to look like cooking mixture.flagstaff hill, warrnambool, shipwrecked-coast, flagstaff-hill, flagstaff-hill-maritime-museum, maritime-museum, shipwreck-coast, flagstaff-hill-maritime-village, kitchen equipment, ceramic -
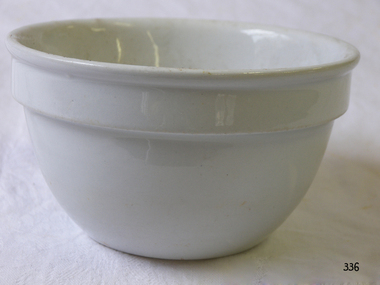 Flagstaff Hill Maritime Museum and Village
Domestic object - Bowl, J & G Meakin, Late 19th or early 20th Century
... technical stuff! Step One – Design There are SO many ideas out there for making stuff in clay! From delicate porcelain jewellery, through to heavy sculptural work and everything in between. Deciding your direction is sometimes not that easy – when you first start, try everything, you will naturally gravitate to the style that you enjoy! The options and variations are endless and can get a wee bit overwhelming too! Check in with me before you start to ensure your ideas will work, what order...technical stuff! Step One – Design There are SO many ideas out there for making stuff in clay! From delicate porcelain jewellery, through to heavy sculptural work and everything in between. Deciding your direction is sometimes not that easy – when you first start, try everything, you will naturally gravitate to the style that you enjoy! The options and variations are endless and can get a wee bit overwhelming too! Check in with me before you start to ensure your ideas will work, what order ...The Process of Making Pottery Decorating, Firing, Glazing, Making, Technical There is a rhythm and flow to clay. It can’t be done all at once! Even the making process! It can take weeks to get everything done, especially if you can only work on your pottery once a week! Even though we have three hour classes, it’s often just not enough time! Here is an overview of some of the processes so you have a bit more grasp on some of the technical stuff! Step One – Design There are SO many ideas out there for making stuff in clay! From delicate porcelain jewellery, through to heavy sculptural work and everything in between. Deciding your direction is sometimes not that easy – when you first start, try everything, you will naturally gravitate to the style that you enjoy! The options and variations are endless and can get a wee bit overwhelming too! Check in with me before you start to ensure your ideas will work, what order you might do things, how you could achieve the look you are seeking and any other technical data required! Step Two – Making Clay is thixotropic. This means that as you work with it, the clay first gets sloppier and wetter, before is begins to dry in the atmosphere. For most things, you simply can’t do all parts of the project at once. An example of work order might look like: Get last weeks work out from the shelves Prepare clay for today’s work – roll your clay, prepare balls for throwing, make the first stage of a pinch pot) Clean up last week’s work and put it on the shelf for bisque firing Check that you have any glazing to do – and do enough of it that you will have time to finish your main project Do the next step of your next project – there might be a further step that can’t be complete immediately, in that case, wrap your work well and put onto the shelves. Letting your work rest for a while can really help keep your work clean and professional looking. Many things require bagging under plastic to keep it ready for work the next week – put your name on the outside of the bag so you can find your work easily. We have stickers and markers. Consider how you want to decorate your work – coloured slip can be applied at a fairly wet stage (remembering that it will make your work even wetter!). Trying to apply slip to dry clay won’t work! If you want to do sgraffito – you will need to keep the work leather hard (a state of dryness where you can still work the clay with a little effort and a little water and care). Step Three – Drying Most of the time your work can go into the rack uncovered to let it dry out for the following week. If you want to continue forming or shaping you will need to double bag your work – put your work on a suitable sized bat and put the bat in a bag so the base of the bag is under the bat, then put another bag over the top of the work and tuck the top of the bag under the bat. If you want to trim (or turn) your thrown work the following week, it should also be double bagged. If your work is large, delicate, or of uneven thicknesses, you should lightly cover your work for drying. When considering the drying process, bare in mind the weather, humidity and wind! The hotter and dryer, the faster things dry and work can dry unevenly in the shelves – this can lead to cracking – another time to lightly cover your work for drying. Step Four – Trimming and Cleaning Up Your work is dry! It is called greenware now and it is at it’s most fragile! Handle everything with two hands. I often refer to soft hands – keep everything gentle and with your fingers spread as much as possible. Try to not pick up things like plates too much, and always with both hands! Before your work can be bisque fired it should be “cleaned up”. You work won’t go into the kiln if it has sharp edges – when glazed, sharp edges turn into razor blades! Use a piece of fly wire to rub the work all over – this will scratch a little so be light handed. Use a knife or metal kidney to scrape any areas that require a bit more dynamic treatment than the fly wire offers! Finally, a very light wipe over with a slightly damp sponge can help soften and soothe all of your edges and dags! Trimming thrown work: If you are planning to trim (or turn) your thrown work (and you should be), make sure you bag it well – your work should be leather hard to almost dry for easiest trimming. Use this step to finish the work completely – use a metal kidney to polish the surface, or a slightly damp sponge to give a freshly thrown look. Wipe the sponge around the rim after trimming, and check the inside of the pot for dags! Trimming slip cast work: Usually I will trim the rims of your work on the wheel the following day to make that stage easier, however you will still need to check your work for lumps and bumps. Last but not least – check that your name is still clearly on the bottom of your work. Step Five – Bisque Firing When the work is completely dry it can go into the bisque kiln. The bisque kiln is fired to 1000°C. This process burns off the water in the clay as well as some of the chemically bound water. The structure of the clay is not altered that much at this temperature. Inside the bisque kiln, the work is stacked a little, small bowl inside a larger bowl and onto a heavy plate. Smaller items like decorations or drink coasters might get stacked several high. Consideration is paid to the weight of the stack and shape of the work. A bisque kiln can fire about one and a half times the amount of work that the glaze kiln can fire. The firing takes about 10 hours to complete the cycle and about two days to cool down. Once it has been emptied the work is placed in the glaze room ready for you to decorate! Step Six – Glazing Decorating your work with colour can be a lot of fun – and time consuming! There are three main options for surface treatment at this stage: Oxide Washes Underglazes Glazes Washes and underglazes do not “glaze” the work – It will still need a layer of glaze to fully seal the clay (washes don’t need glaze on surfaces not designed for food or liquid as they can gloss up a little on their own). Underglazes are stable colourants that turn out pretty much how they look in the jar. They can be mixed with each other to form other colours and can be used like water colours to paint onto your work. Mostly they should have a clear glaze on top to seal them. Oxides are a different species – the pink oxide (cobalt) wash turns out bright blue for instance. They don’t always need a glaze on top, and some glazes can change the colour of the wash! The glazes need no other “glaze” on top! Be careful of unknown glaze interactions – you can put any combination of glaze in a bowl or on a plate, but only a single glaze on the outside of any vertical surface! Glazes are a chemical reaction under heat. We don’t know the exact chemicals in the Mayco glazes we use. I can guess by the way they interact with each other, however, on the whole, you need to test every idea you have, and not run the test on a vertical surface! Simply put, glaze is a layer of glass like substance that bonds with the clay underneath. Clay is made of silica, alumina and water. Glaze is made of mostly silica. Silica has a melting point of 1700°C and we fire to 1240°C. The silica requires a “flux” to help it melt at the lower temperature. Fluxes can be all sorts of chemicals – a common one is calcium – calcium has a melting point of 2500°C, however, together they both melt at a much lower temperature! Colourants are metal oxides like cobalt (blue), chrome (green through black), copper (green, blue, even red!), manganese (black, purple and pink) iron (red brown), etc. Different chemicals in the glaze can have dramatic effects. for example, barium carbonate (which we don’t use) turns manganese bright pink! Other elements can turn manganese dioxide brown, blue, purple and reddish brown. Manganese dioxide is a flux in and of itself as well. So, glazes that get their black and purple colours, often interact with other glazes and RUN! Our mirror black is a good example – it mixes really well with many glazes because it fluxes them – causes them to melt faster. It will also bring out many beautiful colours in the glazes because it’s black colouring most definitely comes from manganese dioxide! Glaze chemistry is a whole subject on it’s own! We use commercial Mayco glazes on purpose – for their huge range of colour possibilities, stability, cool interactions, artistic freedom with the ability to easily brush the glazes on and ease of use. We currently have almost 50 glazes on hand! A major project is to test the interactions of all glazes with each other. That is 2,500 test tiles!!!! I’m going to make the wall behind the wheels the feature wall of pretty colours! Step Seven – Glaze (Gloss or sometimes called “Glost”) Firing Most of the time this is the final stage of making your creation (but not always!) The glaze kiln goes to 1240°C. This is called cone 6, or midrange. It is the low end of stoneware temperatures. Stoneware clays and glazes are typically fired at cone 8 – 10, that is 1260 – 1290°C. The energy requirement to go from 1240°C to 1280°C is almost a 30% more! Our clay is formulated to vitrify (mature, turn “glass-like”) at 1240°, as are our glazes. A glaze kiln take around 12 hours to reach temperature and two to three days to cool down. Sometimes a third firing process is required – this is for decoration that is added to work after the glaze firing. For example – adding precious metals and lustres. this firing temperature is usually around 600 – 800°C depending upon the techniques being used. There are many students interested in gold and silver trims – we will be doing this third type of firing soon! After firing your work will be in the student finished work shelves. Remember to pay for it before you head out the door! There is a small extra charge for using porcelain clay (it’s more than twice the price of regular clay), and for any third firing process! Once your work has been fired it can not turn back into clay for millennia – so don’t fire it if you don’t like it! Put it in the bucket for recycling. https://firebirdstudios.com.au/the-process-of-making-pottery/This bowl was made by renowned pottery company J & G Meakin of England. The firm was established in the mid-1800's. The bowl is an example of kitchenware used in the 19th century and still in use today.Bowl; white ceramic, round and tapering inwards towards base. Made by J and G Meakin England.On base, 'Ironstone China Reg SOL 391413' with symbolflagstaff hill, flagstaff hill maritime museum and village, warrnambool, maritime museum, maritime village, great ocean road, shipwreck coast, mixing bowl, food preparation, j & g meakin, pottery, stoke-on-trent, kitchen equipment, ceramic -
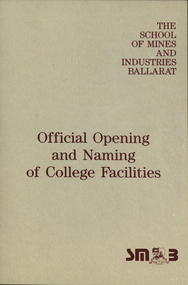 Federation University Historical Collection
Programme, Baxter & Stubbs, Invitation and Programme for the Official Opening of the Flecknoe Building, Barker Building and Steane Building, 1991, 10/08/1991
... Edward John Barker, O.A.M, Ballarat School of Mines Principal 1964-1976, Ballarat School of Mines Council President 1991 - Kenneth Joynson Flecknoe, Ballarat School of Mines Council President 1981-1988 Albert Whitelock Steane, Ballarat Junior Technical School Foundation Headmaster 1913-1942 ballarat school of mines e.j. barker ken flecknoe flecknoe albert w. steane steane flecknoe building barker building steane building peter shiells joan kirner bill gribble Invitation and Programme for the Official Opening of the Flecknoe Building, Barker Building and Steane Building printed on buff card with maroon ink. The card includes the order ...Edward John Barker, O.A.M, Ballarat School of Mines Principal 1964-1976, Ballarat School of Mines Council President 1991 - Kenneth Joynson Flecknoe, Ballarat School of Mines Council President 1981-1988 Albert Whitelock Steane, Ballarat Junior Technical School Foundation Headmaster 1913-1942Invitation and Programme for the Official Opening of the Flecknoe Building, Barker Building and Steane Building printed on buff card with maroon ink. The card includes the order of ceremony, and included introductory remarks by Bill Gribble; official opening and naming by the Honourable Joan Kirner, A.M., M.P., Premier of Victorian; and Peter Shiells, Director of the Ballarat School of Mines. ballarat school of mines, e.j. barker, ken flecknoe, flecknoe, albert w. steane, steane, flecknoe building, barker building, steane building, peter shiells, joan kirner, bill gribble -
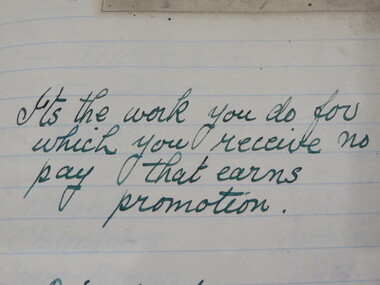 Federation University Historical Collection
Booklet, Ballarat School of Mines Examination Results by H.W. Goldsmith, 1939-1949
... Goldsmith taught Machine Shop Practice at the Ballarat School of Mines and the Ballarat Junior Technical School. ballarat school of mines ballarat junior technical school h.w. goldsmith machine shop trades leslie j. coulter glyn evans george hancock arthur e. tandy Small black hardcovered book with handwritten notes, quotes, students in class order, and their examination results Ballarat School of Mines Examination Results by H.W. ...H.W. Goldsmith taught Machine Shop Practice at the Ballarat School of Mines and the Ballarat Junior Technical School.Small black hardcovered book with handwritten notes, quotes, students in class order, and their examination resultsballarat school of mines, ballarat junior technical school, h.w. goldsmith, machine shop, trades, leslie j. coulter, glyn evans, george hancock, arthur e. tandy -
Federation University Historical Collection
Correspondence, Letter Concerning Potential R.A.A.F recruit, 1967, 18 August 1967
... Student seeking school assistance for recruitment to R.A.A.F. in order to complete a technical college diploma. The correspondence inquires as to whether the student is able to study to complete the new diploma of electronics rather than the common diploma of electrical engineering. ...Student seeking school assistance for recruitment to R.A.A.F. in order to complete a technical college diploma. The correspondence inquires as to whether the student is able to study to complete the new diploma of electronics rather than the common diploma of electrical engineering. recruiting qualifications technical college r.a.a.f. correspondence diploma in electronics (communication) diploma in engineering eletrical engineering k. murray gilbert bani Carbon copy of a typed Letter Letter Concerning Potential R.A.A.F recruit, 1967 Correspondence ...Student seeking school assistance for recruitment to R.A.A.F. in order to complete a technical college diploma. The correspondence inquires as to whether the student is able to study to complete the new diploma of electronics rather than the common diploma of electrical engineering. Carbon copy of a typed Letterrecruiting qualifications, technical college, r.a.a.f., correspondence, diploma in electronics (communication), diploma in engineering, eletrical engineering, k. murray, gilbert bani -
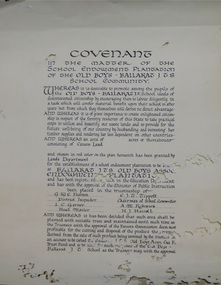 Federation University Historical Collection
Certificate, Ballarat Junior Technical School Old Boys Association Endowment Plantation, c1928, c1928
... order to establish their value as a teaching resource. Those not needed or that are unsuitable for teaching purposes for some reason, such as their location, should be terminated. Those planted to radiata pine that have limited value as a teaching resource although satisfactory for wood production may continue to be used for such production, but should be reviewed when the pines are harvested. (http://www.veac.vic.gov.au/reports/354-Ballarat-Study-Area.pdf, acccessed 30/03/2017) pine plantation alfred k. mcbain g.w.e. pearson i.c. garner a.m. robinson h.j. hassell ballarat junior technical ...The School Endowment Plantation Scheme was established in 1922 as a joint venture between the Education Department and the FCV. It was administered by the Education Department with technical supervision by the Commission. While some plantations were established on private land donated or leased for the purpose, most were established on Crown Lands or Reserved Forest made available, without cost, by the State. (https://www.victoriasforestryheritage.org.au/community/schools.html, accessed 26 September 2020) Throughout the Nerrina district numerous areas of public land were set aside as school endowment plantations as part of various schools’ educational resources. The plantations were initially established to instil through community involvement a love of forests and an appreciation of their value, and in fact many of them are well suited for regular use as a teaching resource of this nature. It was expected that this use will increase as courses embracing various aspects of environmental science are developed. Many school plantations have been planted to radiata pine, and revenue from the sale of produce used to provide amenities required by the schools. In some cases, however, these plantations have not been very successful in providing revenue, as the sites are unsuitable for economic growth or the plantations are too small or the location too far from processing centres to allow economic harvesting. In some instances, radiata pine plantations have failed due to poor management. In 1982 the Land Conservation Council believed that all the existing plantations should be assessed in order to establish their value as a teaching resource. Those not needed or that are unsuitable for teaching purposes for some reason, such as their location, should be terminated. Those planted to radiata pine that have limited value as a teaching resource although satisfactory for wood production may continue to be used for such production, but should be reviewed when the pines are harvested. (http://www.veac.vic.gov.au/reports/354-Ballarat-Study-Area.pdf, acccessed 30/03/2017)Covenant in the matter of the School Endowment Plantation of the Ballarat Junior Technical School Old Boys Association Endowment Plantation.pine plantation, alfred k. mcbain, g.w.e. pearson, i.c. garner, a.m. robinson, h.j. hassell, ballarat junior technical school old boys association endowment plantation, ballarat junior technical school, alumni
