Showing 358 items matching "australia - decorations "
-
 Flagstaff Hill Maritime Museum and Village
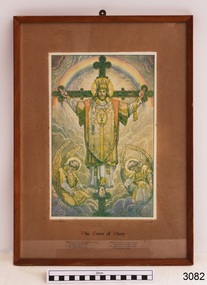
Print - Religious Print, T. Noyes Lewis, The Cross of Glory, Mid to late 19th century for the print, the reframing appears to date from the 1960's
The picture was framed by business, Leighton House, paint and art merchants at 346 Little Collins Street, Melbourne. It was made to order, number 6777. The business was also called The Leighton Gallery of Art and was owned by W & G Dean Pty Ltd. The phone number on the label "MU 8291" indicates that the picture was framed circa the 1960s or earlier, during the time that Melbourne was using 6-0digit alpha-numeric numbers. Below the picture is an excerpt of a hymn "The Head that Once was Crowned with Thorns" by Thomas Kelly: The head that once was crowned with thorns Is crowned with glory now; A royal diadem adorns The mighty Victor's brow. The Cross He bore is life and heath, Though shame and death to Him; His people's hope, his people's wealth, Their everlasting theme. This picture was part of the original furnishings of the St Nicholas' Mission to Seamen's Church at 139 Nelson Place, Williamstown, Victoria. THE MISSIONS TO SEAMEN (Brief History: for more, see our Reg. No. 611, Set of Pews) The Missions to Seamen, an Anglican charity, has served seafarers of the world since 1856 in Great Britain. It symbol is a Flying Angel, inspired by a Bible verse. Today there are centr4es in over 200 ports world-wide where seamen of all backgrounds are offered a warm welcome and provided with a wide range of facilities. In Victoria the orgainsation began in Williamstown in 1857. It was as a Sailors’ Church, also known as ‘Bethel’ or the ‘Floating Church’. Its location was an old hulk floating in Hobson’s Bay, Port of Melbourne. It soon became part of the Missions to Seamen, Victoria. In the year 2000 the organisation, now named Mission to Seafarers, still operated locally in Melbourne, Portland, Geelong and Hastings. The Ladies’ Harbour Lights Guild was formed in 1906 to support the Missions to Seamen in Melbourne and other centres such as Williamstown. Two of the most significant ladies of the Guild were founder Ethel Augusta Godfrey and foundation member Alice Sibthorpe Tracy (who established a branch of the Guild in Warrnambool in 1920). The Guild continued its work until the 1960s. In 1943 a former Williamstown bank was purchased for the Missions to Seaman Club. The chapel was named St Nicholas’ Seamen’s Church and was supported by the Ladies’ Harbour Lights Guild, the Williamstown Lightkeepers’ Auxiliary and the League of Soldiers’ and Sailors’ Friends. It ceased operation in 1966. A Missions to Seamen Chapel and Recreation Room was a significant feature of ports during the late 1800s and into the 1900s. It seemed appropriate for Flagstaff Hill to include such a representation within the new Maritime Village, so the Melbourne Board of Management of Missions to Seamen Victoria gave its permission on 21st May 1979 for the entire furnishings of the Williamstown chapel to be transferred to Flagstaff Hill. The St Nicholas Seamen’s Church was officially opened on October 11, 1981 and closely resembles the Williamstown chapel. This picture is significant through its association with the St Nicholas' Mission to Seamen Church in Williamstown, Melbourne, established in 1857. The items in our collection from the Missions to Seamen in Williamstown, Victoria, have historical and social significance. They show that people of the 1800s and 1900s cared about the seafarers’ religious, moral, and social welfare, no matter what the religion, social status or nationality. It had its origins in Bristol, England when a Seamen's Mission was formed in 1837. The first Australian branch was started in 1856 by the Rev. Kerr Johnston, a Church of England clergyman, and operated from a hulk moored in Hobson’s Bay; later the Mission occupied buildings in Williamstown and Port Melbourne. Picture, print of "The Cross of Glory", rectangular, framed print on matt. It depicts Jesus Christ on a cross with an angel on each side, at his feet. He is wearing priestly robes and a gold crown on top of thorns on his head. In the background there is a rainbow and clouds. The text below the picture includes "From the picture by T. Noyes Lewis". Lines from a hymn are also printed below the picture. The back of the picture has pencilled numbers in three places plus a printed label with the framer's details. "From the picture by T. Noyes Lewis". Backing paper has pencil "6777" in two places. Label has bencil "677-" flagstaff hill, warrnambool, shipwrecked coast, flagstaff hill maritime museum, maritime museum, shipwreck coast, flagstaff hill maritime village, great ocean road, the cross of glory, print, t. noyes lewis, leighton house, home decoration, religioius picture, church furnishing, w & g dean pty ltd, leighton gallery of art, religion, religious service, sailors rest, bethel sailors’ church, bethel floating church, ladies harbour light guild, missions to seamen victoria, mission to seafarers, flying angles club, st nicholas mission to seamen church williamstown, mission to seamen williamstown, st nicholas seamen’s church flagstaff hill, 139 nelson place williamstown -
 Flagstaff Hill Maritime Museum and Village
Marble Tile, circa 1878
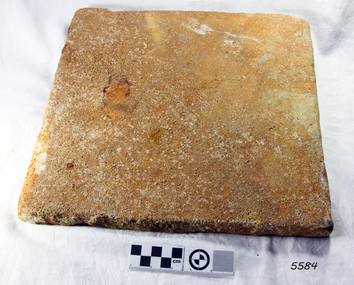
The artefact is a white marble tile raised from the wreck of the LOCH ARD (1878). The cargo manifest of the sunken vessel has the entry “Marble £400”. This is placed directly following the entry “Glass (604 cases)”. This conjunction suggests the marble tile was originally part of a consignment intended for use in a ‘high end’ residential or public building project in the gold and wool rich Colony of Victoria. Traditionally, white or cream marble was imported into Britain from the Mediterranean region of Europe, where beds of sedimentary limestone (calcium and magnesium carbonate) had been buried over a long geological period of time. Deep in the earth’s crust, it had been subjected to immense pressures and high temperatures, sufficient to completely re-crystallise the original deposits. Marble beds began as layers of sediment at the bottom of ancient tropical seas, forming from the skeletal remains of calcareous fossils, shell, and coral fragments. The metamorphic process of prolonged compression and heating recrystallised this skeletal material, destroying all signs of the original sedimentary fabric. The resulting ‘true’ marbles of, for example, White Carrara (Tuscany, Italy), Verdi (green) Antico (Thessaly, Greece), and Rouge (red) Languadoc (Carcassone, France), were highly prized in classical decoration (sculpture and friezes) and architecture (temples and arches). Marble was found in nineteenth century Australia, but in small, uneconomic deposits, not suitable for commercial quarrying. The comparative expense of imported marble restricted its use in colonial buildings to carved fireplaces and mantel pieces, or outdoor ornaments such as fountains, statuary and grave stones. If Carrara marble floor tiles were used, they were used sparingly, as an arresting feature in entrance halls for instance. However, most prominent private and public construction used timber flooring, waxed or ‘japanned’, with carpet runners and rugs (for example the Austin’s Barwon Park Mansion, 1871), or laid tessellated and ceramic tiles of baked clay infused with colour (for example the Chirnside’s Werribee Park Mansion, 1878). HISTORY OF THE LOCH ARD The LOCH ARD belonged to the famous Loch Line which sailed many ships from England to Australia. Built in Glasgow by Barclay, Curdle and Co. in 1873, the LOCH ARD was a three-masted square rigged iron sailing ship. The ship measured 262ft 7" (79.87m) in length, 38ft (11.58m) in width, 23ft (7m) in depth and had a gross tonnage of 1693 tons. The LOCH ARD's main mast measured a massive 150ft (45.7m) in height. LOCH ARD made three trips to Australia and one trip to Calcutta before its final voyage. LOCH ARD left England on March 2, 1878, under the command of Captain Gibbs, a newly married, 29 year old. She was bound for Melbourne with a crew of 37, plus 17 passengers and a load of cargo. The general cargo reflected the affluence of Melbourne at the time. On board were straw hats, umbrella, perfumes, clay pipes, pianos, clocks, confectionary, linen and candles, as well as a heavier load of railway irons, cement, lead and copper. There were items included that intended for display in the Melbourne International Exhibition in 1880. The voyage to Port Phillip was long but uneventful. At 3am on June 1, 1878, Captain Gibbs was expecting to see land and the passengers were becoming excited as they prepared to view their new homeland in the early morning. But LOCH ARD was running into a fog which greatly reduced visibility. Captain Gibbs was becoming anxious as there was no sign of land or the Cape Otway lighthouse. At 4am the fog lifted. A man aloft announced that he could see breakers. The sheer cliffs of Victoria's west coast came into view, and Captain Gibbs realised that the ship was much closer to them than expected. He ordered as much sail to be set as time would permit and then attempted to steer the vessel out to sea. On coming head on into the wind, the ship lost momentum, the sails fell limp and LOCH ARD's bow swung back. Gibbs then ordered the anchors to be released in an attempt to hold its position. The anchors sank some 50 fathoms - but did not hold. By this time LOCH ARD was among the breakers and the tall cliffs of Mutton Bird Island rose behind the ship. Just half a mile from the coast, the ship's bow was suddenly pulled around by the anchor. The captain tried to tack out to sea, but the ship struck a reef at the base of Mutton Bird Island, near Port Campbell. Waves broke over the ship and the top deck was loosened from the hull. The masts and rigging came crashing down knocking passengers and crew overboard. When a lifeboat was finally launched, it crashed into the side of LOCH ARD and capsized. Tom Pearce, who had launched the boat, managed to cling to its overturned hull and shelter beneath it. He drifted out to sea and then on the flood tide came into what is now known as LOCH ARD Gorge. He swam to shore, bruised and dazed, and found a cave in which to shelter. Some of the crew stayed below deck to shelter from the falling rigging but drowned when the ship slipped off the reef into deeper water. Eva Carmichael had raced onto deck to find out what was happening only to be confronted by towering cliffs looming above the stricken ship. In all the chaos, Captain Gibbs grabbed Eva and said, "If you are saved Eva, let my dear wife know that I died like a sailor". That was the last Eva Carmichael saw of the captain. She was swept off the ship by a huge wave. Eva saw Tom Pearce on a small rocky beach and yelled to attract his attention. He dived in and swam to the exhausted woman and dragged her to shore. He took her to the cave and broke open case of brandy which had washed up on the beach. He opened a bottle to revive the unconscious woman. A few hours later Tom scaled a cliff in search of help. He followed hoof prints and came by chance upon two men from nearby Glenample Station three and a half miles away. In a state of exhaustion, he told the men of the tragedy. Tom returned to the gorge while the two men rode back to the station to get help. By the time they reached LOCH ARD Gorge, it was cold and dark. The two shipwreck survivors were taken to Glenample Station to recover. Eva stayed at the station for six weeks before returning to Ireland, this time by steamship. In Melbourne, Tom Pearce received a hero's welcome. He was presented with the first gold medal of the Royal Humane Society of Victoria and a £1000 cheque from the Victorian Government. Concerts were performed to honour the young man's bravery and to raise money for those who lost family in the LOCH ARD disaster. Of the 54 crew members and passengers on board, only two survived: the apprentice, Tom Pearce and the young woman passenger, Eva Carmichael, who lost all of her family in the tragedy. Ten days after the LOCH ARD tragedy, salvage rights to the wreck were sold at auction for £2,120. Cargo valued at £3,000 was salvaged and placed on the beach, but most washed back into the sea when another storm developed. The wreck of LOCH ARD still lies at the base of Mutton Bird Island. Much of the cargo has now been salvaged and some was washed up into what is now known as LOCH ARD Gorge. Cargo and artefacts have also been illegally salvaged over many years before protective legislation was introduced. One of the most unlikely pieces of cargo to have survived the shipwreck was a Minton porcelain peacock - one of only nine in the world. The peacock was destined for the Melbourne International Exhibition in 1880. It had been well packed, which gave it adequate protection during the violent storm. Today, the Minton peacock can be seen at the Flagstaff Hill Maritime Museum in Warrnambool. From Australia's most dramatic shipwreck it has now become Australia's most valuable shipwreck artefact and is one of very few 'objects' on the Victorian State Heritage Register. The wreck of the LOCH ARD is of State significance — Victorian Heritage Register S417 Flagstaff Hill’s collection of artefacts from LOCH ARD is significant for being one of the largest collections of artefacts from this shipwreck in Victoria. It is significant for its association with the shipwreck, which is on the Victorian Heritage Register (VHR S417). The collection is significant because of the relationship between the objects, as together they have a high potential to interpret the story of the LOCH ARD. The LOCH ARD collection is archaeologically significant as the remains of a large international passenger and cargo ship. The LOCH ARD collection is historically significant for representing aspects of Victoria’s shipping history and its potential to interpret sub-theme 1.5 of Victoria’s Framework of Historical Themes (living with natural processes). The collection is also historically significant for its association with the LOCH ARD, which was one of the worst and best known shipwrecks in Victoria’s history. A square marble tile retrieved from the wreck of the LOCH ARD. Most of its surface is covered by a thin layer of limestone and marine growth encrustation that is stained rust-red. The tile is ‘rough-worked’, cut to shape and size, but not smoothed or polished. There is a companion tile in similar condition in the Flagstaff Hill collection. From visual observation of the original surface (at low magnification) the tile appears to be of white Carrara-type marble.flagstaff hill, warrnambool, shipwrecked coast, flagstaff hill maritime museum, maritime museum, shipwreck coast, flagstaff hill maritime village, great ocean road, loch line, loch ard, captain gibbs, eva carmichael, tom pearce, glenample station, mutton bird island, loch ard gorge, white marble, marble tile, carrara marble, imported marble, colonial architecture, victorian building materials -
 Flagstaff Hill Maritime Museum and Village
Marble Tile, circa 1878
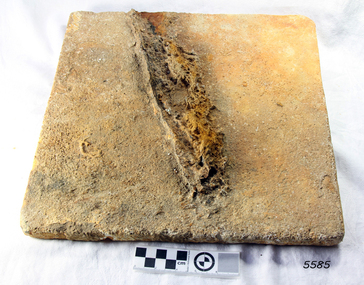
The artefact is a white marble tile raised from the wreck of the LOCH ARD (1878). The cargo manifest of the sunken vessel has the entry “Marble £400”. This is placed directly following the entry “Glass (604 cases)”. This conjunction suggests the marble tile was originally part of a consignment intended for use in a ‘high end’ residential or public building project in the gold and wool rich Colony of Victoria. Traditionally, white or cream marble was imported into Britain from the Mediterranean region of Europe, where beds of sedimentary limestone (calcium and magnesium carbonate) had been buried over a long geological period of time. Deep in the earth’s crust, it had been subjected to immense pressures and high temperatures, sufficient to completely re-crystallise the original deposits. Marble beds began as layers of sediment at the bottom of ancient tropical seas, forming from the skeletal remains of calcareous fossils, shell, and coral fragments. The metamorphic process of prolonged compression and heating recrystallised this skeletal material, destroying all signs of the original sedimentary fabric. The resulting ‘true’ marbles of, for example, White Carrara (Tuscany, Italy), Verdi (green) Antico (Thessaly, Greece), and Rouge (red) Languadoc (Carcassone, France), were highly prized in classical decoration (sculpture and friezes) and architecture (temples and arches). Marble was found in nineteenth century Australia, but in small, uneconomic deposits, not suitable for commercial quarrying. The comparative expense of imported marble restricted its use in colonial buildings to carved fireplaces and mantel pieces, or outdoor ornaments such as fountains, statuary and grave stones. If Carrara marble floor tiles were used, they were used sparingly, as an arresting feature in entrance halls for instance. However, most prominent private and public construction used timber flooring, waxed or ‘jappaned’, with carpet runners and rugs (for example the Austin’s Barwon Park Mansion, 1871), or laid tessellated and ceramic tiles of baked clay infused with colour (for example the Chirnside’s Werribee Park Mansion, 1878). HISTORY OF THE LOCH ARD The LOCH ARD belonged to the famous Loch Line which sailed many ships from England to Australia. Built in Glasgow by Barclay, Curdle and Co. in 1873, the LOCH ARD was a three-masted square rigged iron sailing ship. The ship measured 262ft 7" (79.87m) in length, 38ft (11.58m) in width, 23ft (7m) in depth and had a gross tonnage of 1693 tons. The LOCH ARD's main mast measured a massive 150ft (45.7m) in height. LOCH ARD made three trips to Australia and one trip to Calcutta before its final voyage. LOCH ARD left England on March 2, 1878, under the command of Captain Gibbs, a newly married, 29 year old. She was bound for Melbourne with a crew of 37, plus 17 passengers and a load of cargo. The general cargo reflected the affluence of Melbourne at the time. On board were straw hats, umbrella, perfumes, clay pipes, pianos, clocks, confectionary, linen and candles, as well as a heavier load of railway irons, cement, lead and copper. There were items included that intended for display in the Melbourne International Exhibition in 1880. The voyage to Port Phillip was long but uneventful. At 3am on June 1, 1878, Captain Gibbs was expecting to see land and the passengers were becoming excited as they prepared to view their new homeland in the early morning. But LOCH ARD was running into a fog which greatly reduced visibility. Captain Gibbs was becoming anxious as there was no sign of land or the Cape Otway lighthouse. At 4am the fog lifted. A man aloft announced that he could see breakers. The sheer cliffs of Victoria's west coast came into view, and Captain Gibbs realised that the ship was much closer to them than expected. He ordered as much sail to be set as time would permit and then attempted to steer the vessel out to sea. On coming head on into the wind, the ship lost momentum, the sails fell limp and LOCH ARD's bow swung back. Gibbs then ordered the anchors to be released in an attempt to hold its position. The anchors sank some 50 fathoms - but did not hold. By this time LOCH ARD was among the breakers and the tall cliffs of Mutton Bird Island rose behind the ship. Just half a mile from the coast, the ship's bow was suddenly pulled around by the anchor. The captain tried to tack out to sea, but the ship struck a reef at the base of Mutton Bird Island, near Port Campbell. Waves broke over the ship and the top deck was loosened from the hull. The masts and rigging came crashing down knocking passengers and crew overboard. When a lifeboat was finally launched, it crashed into the side of LOCH ARD and capsized. Tom Pearce, who had launched the boat, managed to cling to its overturned hull and shelter beneath it. He drifted out to sea and then on the flood tide came into what is now known as LOCH ARD Gorge. He swam to shore, bruised and dazed, and found a cave in which to shelter. Some of the crew stayed below deck to shelter from the falling rigging but drowned when the ship slipped off the reef into deeper water. Eva Carmichael had raced onto deck to find out what was happening only to be confronted by towering cliffs looming above the stricken ship. In all the chaos, Captain Gibbs grabbed Eva and said, "If you are saved Eva, let my dear wife know that I died like a sailor". That was the last Eva Carmichael saw of the captain. She was swept off the ship by a huge wave. Eva saw Tom Pearce on a small rocky beach and yelled to attract his attention. He dived in and swam to the exhausted woman and dragged her to shore. He took her to the cave and broke open case of brandy which had washed up on the beach. He opened a bottle to revive the unconscious woman. A few hours later Tom scaled a cliff in search of help. He followed hoof prints and came by chance upon two men from nearby Glenample Station three and a half miles away. In a state of exhaustion, he told the men of the tragedy. Tom returned to the gorge while the two men rode back to the station to get help. By the time they reached LOCH ARD Gorge, it was cold and dark. The two shipwreck survivors were taken to Glenample Station to recover. Eva stayed at the station for six weeks before returning to Ireland, this time by steamship. In Melbourne, Tom Pearce received a hero's welcome. He was presented with the first gold medal of the Royal Humane Society of Victoria and a £1000 cheque from the Victorian Government. Concerts were performed to honour the young man's bravery and to raise money for those who lost family in the LOCH ARD disaster. Of the 54 crew members and passengers on board, only two survived: the apprentice, Tom Pearce and the young woman passenger, Eva Carmichael, who lost all of her family in the tragedy. Ten days after the LOCH ARD tragedy, salvage rights to the wreck were sold at auction for £2,120. Cargo valued at £3,000 was salvaged and placed on the beach, but most washed back into the sea when another storm developed. The wreck of LOCH ARD still lies at the base of Mutton Bird Island. Much of the cargo has now been salvaged and some was washed up into what is now known as LOCH ARD Gorge. Cargo and artefacts have also been illegally salvaged over many years before protective legislation was introduced. One of the most unlikely pieces of cargo to have survived the shipwreck was a Minton porcelain peacock - one of only nine in the world. The peacock was destined for the Melbourne International Exhibition in 1880. It had been well packed, which gave it adequate protection during the violent storm. Today, the Minton peacock can be seen at the Flagstaff Hill Maritime Museum in Warrnambool. From Australia's most dramatic shipwreck it has now become Australia's most valuable shipwreck artefact and is one of very few 'objects' on the Victorian State Heritage Register. HISTORY OF THE LOCH ARD The LOCH ARD belonged to the famous Loch Line which sailed many ships from England to Australia. Built in Glasgow by Barclay, Curdle and Co. in 1873, the LOCH ARD was a three-masted square rigged iron sailing ship. The ship measured 262ft 7" (79.87m) in length, 38ft (11.58m) in width, 23ft (7m) in depth and had a gross tonnage of 1693 tons. The LOCH ARD's main mast measured a massive 150ft (45.7m) in height. LOCH ARD made three trips to Australia and one trip to Calcutta before its final voyage. LOCH ARD left England on March 2, 1878, under the command of Captain Gibbs, a newly married, 29 year old. She was bound for Melbourne with a crew of 37, plus 17 passengers and a load of cargo. The general cargo reflected the affluence of Melbourne at the time. On board were straw hats, umbrella, perfumes, clay pipes, pianos, clocks, confectionary, linen and candles, as well as a heavier load of railway irons, cement, lead and copper. There were items included that intended for display in the Melbourne International Exhibition in 1880. The voyage to Port Phillip was long but uneventful. At 3am on June 1, 1878, Captain Gibbs was expecting to see land and the passengers were becoming excited as they prepared to view their new homeland in the early morning. But LOCH ARD was running into a fog which greatly reduced visibility. Captain Gibbs was becoming anxious as there was no sign of land or the Cape Otway lighthouse. At 4am the fog lifted. A man aloft announced that he could see breakers. The sheer cliffs of Victoria's west coast came into view, and Captain Gibbs realised that the ship was much closer to them than expected. He ordered as much sail to be set as time would permit and then attempted to steer the vessel out to sea. On coming head on into the wind, the ship lost momentum, the sails fell limp and LOCH ARD's bow swung back. Gibbs then ordered the anchors to be released in an attempt to hold its position. The anchors sank some 50 fathoms - but did not hold. By this time LOCH ARD was among the breakers and the tall cliffs of Mutton Bird Island rose behind the ship. Just half a mile from the coast, the ship's bow was suddenly pulled around by the anchor. The captain tried to tack out to sea, but the ship struck a reef at the base of Mutton Bird Island, near Port Campbell. Waves broke over the ship and the top deck was loosened from the hull. The masts and rigging came crashing down knocking passengers and crew overboard. When a lifeboat was finally launched, it crashed into the side of LOCH ARD and capsized. Tom Pearce, who had launched the boat, managed to cling to its overturned hull and shelter beneath it. He drifted out to sea and then on the flood tide came into what is now known as LOCH ARD Gorge. He swam to shore, bruised and dazed, and found a cave in which to shelter. Some of the crew stayed below deck to shelter from the falling rigging but drowned when the ship slipped off the reef into deeper water. Eva Carmichael had raced onto deck to find out what was happening only to be confronted by towering cliffs looming above the stricken ship. In all the chaos, Captain Gibbs grabbed Eva and said, "If you are saved Eva, let my dear wife know that I died like a sailor". That was the last Eva Carmichael saw of the captain. She was swept off the ship by a huge wave. Eva saw Tom Pearce on a small rocky beach and yelled to attract his attention. He dived in and swam to the exhausted woman and dragged her to shore. He took her to the cave and broke open case of brandy which had washed up on the beach. He opened a bottle to revive the unconscious woman. A few hours later Tom scaled a cliff in search of help. He followed hoof prints and came by chance upon two men from nearby Glenample Station three and a half miles away. In a state of exhaustion, he told the men of the tragedy. Tom returned to the gorge while the two men rode back to the station to get help. By the time they reached LOCH ARD Gorge, it was cold and dark. The two shipwreck survivors were taken to Glenample Station to recover. Eva stayed at the station for six weeks before returning to Ireland, this time by steamship. In Melbourne, Tom Pearce received a hero's welcome. He was presented with the first gold medal of the Royal Humane Society of Victoria and a £1000 cheque from the Victorian Government. Concerts were performed to honour the young man's bravery and to raise money for those who lost family in the LOCH ARD disaster. Of the 54 crew members and passengers on board, only two survived: the apprentice, Tom Pearce and the young woman passenger, Eva Carmichael, who lost all of her family in the tragedy. Ten days after the LOCH ARD tragedy, salvage rights to the wreck were sold at auction for £2,120. Cargo valued at £3,000 was salvaged and placed on the beach, but most washed back into the sea when another storm developed. The wreck of LOCH ARD still lies at the base of Mutton Bird Island. Much of the cargo has now been salvaged and some was washed up into what is now known as LOCH ARD Gorge. Cargo and artefacts have also been illegally salvaged over many years before protective legislation was introduced. One of the most unlikely pieces of cargo to have survived the shipwreck was a Minton porcelain peacock - one of only nine in the world. The peacock was destined for the Melbourne International Exhibition in 1880. It had been well packed, which gave it adequate protection during the violent storm. Today, the Minton peacock can be seen at the Flagstaff Hill Maritime Museum in Warrnambool. From Australia's most dramatic shipwreck it has now become Australia's most valuable shipwreck artefact and is one of very few 'objects' on the Victorian State Heritage Register. The wreck of the LOCH ARD is of State significance — Victorian Heritage Register S417 Flagstaff Hill’s collection of artefacts from LOCH ARD is significant for being one of the largest collections of artefacts from this shipwreck in Victoria. It is significant for its association with the shipwreck, which is on the Victorian Heritage Register (VHR S417). The collection is significant because of the relationship between the objects, as together they have a high potential to interpret the story of the LOCH ARD. The LOCH ARD collection is archaeologically significant as the remains of a large international passenger and cargo ship. The LOCH ARD collection is historically significant for representing aspects of Victoria’s shipping history and its potential to interpret sub-theme 1.5 of Victoria’s Framework of Historical Themes (living with natural processes). The collection is also historically significant for its association with the LOCH ARD, which was one of the worst and best known shipwrecks in Victoria’s history. A square marble tile retrieved from the wreck of the LOCH ARD. Most of its surface is covered by a thin layer of limestone and marine growth encrustation that is stained rust-red. There is a piece of corroded iron encrusted at an oblique angle on the tile’s rear face. The tile is ‘rough-worked’, cut to shape and size, but not smoothed or polished. There is a companion tile in similar condition in the Flagstaff Hill collection. From visual observation of the original surface (at low magnification) the tile appears to be of white Carrara-type marble.flagstaff hill, warrnambool, shipwrecked coast, flagstaff hill maritime museum, maritime museum, shipwreck coast, flagstaff hill maritime village, great ocean road, loch line, loch ard, captain gibbs, eva carmichael, tom pearce, glenample station, mutton bird island, loch ard gorge, white marble, marble tile, carrara marble, colonial architecture, victorian building materials -
 Bendigo Military Museum
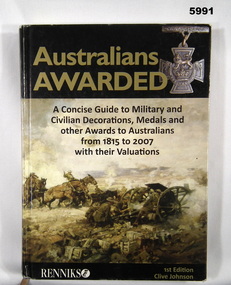
Book - BOOK, REFERENCE, Clive Johnson, " AUSTRALIANS AWARDED", April 2008
"AUSTRALIANS AWARDED" - "A concise guide to Military and/Civilian Decorations, Medals and/ other Awards to Australians/ from 1815 to 2007 with their Valuations" Peter Ball collection, refer Cat No 4704.Hardcover Book Cover - cardboard with adhered paper cover. Gold, black and white print on front. spine and back. Front and spine illustrated in colour - "First Australian Division Artillery going into 3rd Battle of Ypres" by Septimus H Power painting. Artillery guns, horses and soldiers in a battle scene. 359 pages - cut, plain, glossy white paper illustrated in colour - photographs of decorations, medals and awards. Handwritten - owner's name. Handwritten front end paper in blue ink "Peter C Ball" Opposite title page in black ink "Peter C Ball"books, reference guide, history, military warfare -
 Bendigo Military Museum
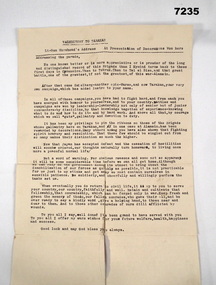
Literary work - VALEDICTORY TO TARAKAN, 1945
Item in a collection re VX35201 Edgar Martin COLLIHOLE. Enlisted 17.6.1940 age 25 years 7 months in the 2/24th Bn AIF. His overseas service is listed as; Middle East 16.11.1940 - 25.2.1943, New Guinea 1.8.1943 - 22.2.1944, Netherlands East Indies 8.4.1945 - 8..11.1945. 1286 days which includes embarking from Australia to disembarking back in Australia. Discharged with the rank of L/Cpl on 11.2.1946. Enlisted 28/6/40. Discharged 11/1/46. L/Cpl 2/24 Bn.Literary work - Paper, cream with black type written print - One page.“Lt. Gen Morshead's Address at Presentation of Decorations won here”lt.gen morshead, valedictory address, tarakan, e d collihole, ww2 -
 Bendigo Military Museum
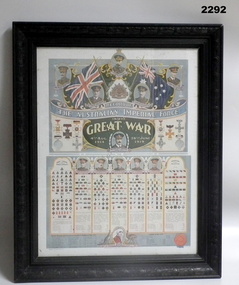
Poster - POSTER, FRAMED WW1, Osboldstone & Co Pty Ltd, Post WW1
Original Poster. Poster - colour print on paper. Top depicts British and Australian Flags with portraits of "H.M.KING GEORGE V" and four AIF Generals. Middle section - Honours and Decorations awarded to Members of the AIF with portrait of one AIF Major General. Lower Section - Portraits of five AIF Major Generals above seven columns of Unit Colour Patches of AIF Divisions, Corps, Troops and miscellaneous. Below - portrait of a Nurse within Kangaroo/emu emblem. Frame - timber with black/brown finish and decorative moulding. Glass front and brown paper backing over timber backing board.Heading on Poster - "RECORD OF/ THE AUSTRALIAN IMPERIAL FORCE/ IN THE/ GREAT WAR/ 4TH AUG/ 1914/ 28TH JUNE/ 1919" poster, framed accessories, ww1, aif -
 Bendigo Military Museum
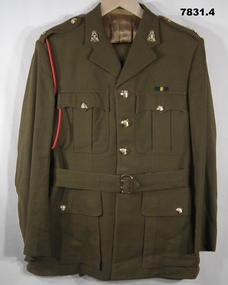
Uniform - SERVICE DRESS - ARMY
Ribbon - Efficiency decoration instituted in 1935 - Dec 1986. Uniform issued to "BUTTERWORTH/ 15280".Service dress style - khaki colour wool/polyester fabric jacket with belt and trousers. 1. Jacket collar, with two lapel badges, gold and silver crown and shield with cannons and lettering. "ROYAL AUSTRALIAN ARMY ORDNANCE CORPS" shoulder epaulettes with silver and red metal crown rank insignia = MAJOR. Four front pockets. Two top patch pockets with button and two metal press studs on flap. Green and yellow service Ribbon above left pocket. Two lower inset pockets with button down flap. Two metal belt keepers insitu. Buttons - gold colour plastic with shank and metal ring. Buttons have raised emblem - crown and shield with three cannons. Brown colour cotton sateen fabric lining. No manufacturers label. 2. Belt - fabric with gold colour plastic buckle, leather belt keepers and brown plastic buttons. 3.Trousers - fabric with fob pocket, two side pockets and one inset back pocket with concealed button down flap. Button missing. Green colour polyester fabric libning, cream colour cotton waistband lining. Metal zipper fly with plastic button. White cotton label on waistband. 4. Lanyard - red colour cotton cord with knots.3. White cotton label with black ink print "REGIMENTAL NO./NAME" on waistband lining - handwritten black ink 'BUTTERWORTH/ 155280/ 7/ COY".uniform, army, service dress, butterworth -
 Bendigo Military Museum
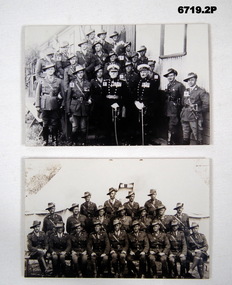
Photograph - PHOTOGRAPHS, 38TH BN, POST WW1, C. 1921 - 1940
Items in the "Swatton" collection. .1) Jack Swatton, 2nd from left front row. .2) front row 5th from the left. John (Jack) William Swatton. His first connection with the Australian Military is with the Universal Conscription scheme pre WW1. On 1.7.1913 he is alloted to D Coy 67th Bn (Bendigo) Regt No 671 as part of quota 1895 (Year of his birth) He then enlists in the AIF on 10.7.1915 No 4905 age 19 years in 15th Reinforcements 7th Bn AIF. Embark for Eygpt 7.3.1916, embark for France 2.6.1916, Transfer to 48th Bty 12 F.A.B 17.4.1916, transfer to 24th F.A.B 15.6.1916, Transfers to 43rd Bty 11th F.A.B 25.1.1917, detached to Ordnance Works Viviers Hill 15.2.1917, Promoted Bombadier 10.12.1917, attends 2nd Army Artillery School, promoted Corporal 16.3.1918, promoted Sgt 17.6.1918, promoted Bty Sgt Major 15.12.1918, awarded MID 31.12.1918, embark for Australia 11.5.1919, discharged from the AIF. Post WW1 he enlists in the 38th Bn (CMF Bendigo) in 1921, he is Commissioned as an Officer in Sept 1929, from that date till 1940 he is the CO of the BN. The same year he transfers to the 8th Bn CMF. Besides his Mention in Despatches (WW1) he is also awarded the Long Service and Efficiency decorations. On 25.4.1942 he enlists in VDC age 46 years No V362516 in the 15th BN Volunteer Defence Corp for part time duty with the rank of Lt Col, His appointment is terminated on 19.12.1945. In 1941 he is elected to the Committee of the Bendigo RSL, serves as Snr Vice President 1949 - 57 then President 1958 - 60. In 1962 he is made a life member of the RSL..1) Photograph B & W showing 21 Officers of the 38th BN standing outside a building. .2) Photograph sepia tone showing 20 Officers of the 38th Bn in three rows in front of a tent.photographs, 38th bn, post ww1, passchendaele barracks trust. -
 Warrnambool and District Historical Society Inc.
Certificate - Federation Celebration Rolfe invitation, 1901
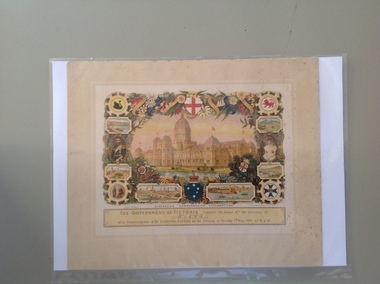
This invitation to a ‘Conversazione’ to celebrate the Federation of the six colonies in Australia into the six States of Australia in 1901 was sent to the invitees after the event to keep as a souvenir of the occasion. The event was hosted by the Government of Victoria. The certificate was designed by George Brougham Austin, a Melbourne architect and artist employed by the Victorian Department of Public Works. He also designed many of the public decorations displayed in Melbourne during the Federation celebrations. Austin’s original work was lithographed by an artist at Sands and McDougall, Melbourne. This particular invitation was sent to George Rolfe and his wife, Annie. George Rolfe (1836-1919), a tea merchant from Melbourne, began buying blocks of land near the mouth of the Hopkins River in Warrnambool in the 1870s. By the early 1880s he owned 50 acres of land in the town and some nearby farming properties. He used the building on the ]and near the mouth of the Hopkins River as holiday accommodation and called the property, Lyndoch. He improved the property with the additions of stables, jetty, boathouse, bone and chaff sheds, reservoir and windmill and extensive gardens. Rolfe spent most of his later life at Lyndoch. Today the property is the site of an Aged Care facility. This certificate is of considerable importance for two reasons: 1. It is an important and attractive memento of a signal event in the history of Australia – the Federation of the States in 1901. 2. The certificate was an invitation to Mr and Mrs George Rolfe. George Rolfe was a prominent Warrnambool person in the late 19th and early 20th centuries. This is a multi-coloured certificate printed on a cream-coloured card. The certificate has an image of the Exhibition Building surrounded by an ornate border of heraldic shields, portraits of the Duke and Duchess of Cornwall and York, views of the six capital cities of Australia, native flora and fauna, the Royal Crest and the Crest of Australia. The names of the invitees are handwritten in black ink. ‘United Australia 1901 One Flag One Hope One Destiny Australian Commonwealth Celebrations’ ‘The Government of Victoria requests the honor of the presence of Mr & Mrs G. Rolfe at a Conversazione in the Exhibition Building on the Evening of Tuesday 7th May 1901 at 8 p.m.’ george rolfe of lyndoch, warrnambool, federation of australia, history of warrnambool, george rolfe -
 Warrnambool and District Historical Society Inc.
Certificate - Royal Review 1901 G Rolfe, 1901
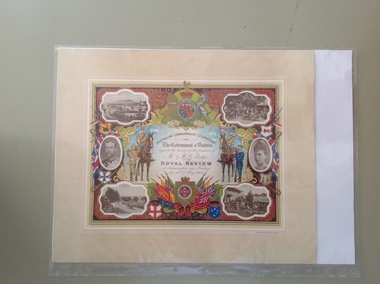
This certificate was sent to those who had been present at one of the celebrations in connection with the Federation of the six States of Australia in 1901 – The Royal Review at Flemington Racecourse on 10th May 1901. The invitation to attend the event was issued by the Government of Victoria. The certificate was intended to be kept as a souvenir of the event and framed. This particular certificate was issued to George Rolfe and his wife of Warrnambool. George Rolfe (1836-1919), a tea merchant from Melbourne, began buying blocks of land near the mouth of the Hopkins River in Warrnambool in the 1870s. By the early 1880s he had acquired 50 acres of land in the town and several farming properties. He used the buildings on the land near the mouth of the Hopkins River as holiday accommodation and called the property, Lyndoch. He improved the property by adding stables, chaff and bone sheds, jetty, boathouse, reservoir, water well and windmill and extensive gardens and he spent most of his later life in the Warrnambool area. Lyndoch today is the site of an aged care facility. This certificate is of considerable importance for two reasons: 1. It is an important memento of a signal event on Australia’s history – the Federation of the six States in 1901 and the subsequent celebrations. 2. The certificate was issued to a prominent Warrnambool person, George Rolfe and his wife.This is multi-coloured sheet of paper mounted on card. There are four black and white photographs of the Royal Review at Flemington and photographs of the Duke and Duchess of Cornwall and York. The images include the Royal Crest, the shields of the six Australian States, a shield of Victoria with a background of flags, cannon and ammunition, two mounted soldiers with a soldier and sailor standing nearby and swords and bayonets. There is also much colour decoration around the edges of the certificate. The names of Mr and Mrs Rolfe are handwritten in black ink. ‘Australian Commonwealth Celebrations’ ‘The Government of Victoria requests the honour of the presence of Mr & Mrs G. Rolfe at the Royal Review at Flemington on Friday the 10th of May 1901’ federation of australian states, george rolfe of lyndoch, history of warrnambool, george rolfe -
 Warrnambool and District Historical Society Inc.
Letter Opener, Ivory Carved, Early 20th century
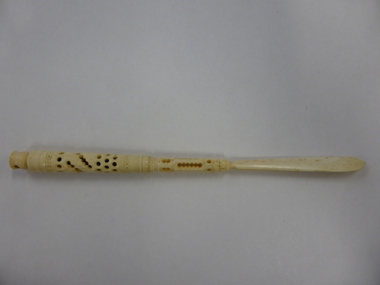
No specific information is available on this item. Household items made of ivory were common in the early 20th century and were often brought back to Australia from people returning from an overseas trip. Many of these types of items came from Asia. Letter openers are still is use today.This item is of interest as an example of the use of ivory in household items early in the 20th century. This use of ivory is in the main illegal today.This is a letter opener made of ivory. It has a plain blade with a rounded highly decorated handle. The decoration consists mainly of punched holes in geometrical patterns. The top has a hole for hanging up the item. There is a small split in the ivory in the middle of the handle. letter opener, warrnambool -
 Warrnambool and District Historical Society Inc.
China, Cup & Saucer, Eary 20th century
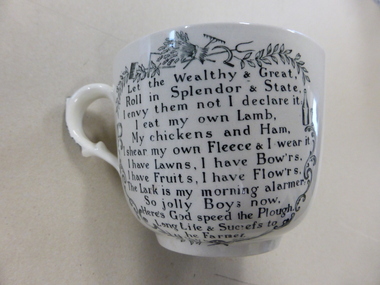
This is a porridge set which probably dates from the early years of the 20th century. Porridge bowls and cups were particularly popular in Scotland at that time and would have been used in households in Australia throughout the 19th and early 20th centuries. These items have no known local provenance but are of interest as an example of the household china that was in use 100 years ago and was still being used for many decades after that time. They are attractive items and will be useful for display. These two items are a large cup and saucer made of china and used for porridge. The cup has colour floral and leaf scroll decorations inside the top rim, a piece of verse extolling the farmer and surrounded by black and white patterns, including farming implements, on one side of the cup and coloured farming implements in circles with the same verses in larger circles with a colour wheat sheaf in the centre on the other side of the cup. The saucer, more in the shape of a soup bowl, has the same colour floral and leaf decorations around the rim and the same farming patterns and verses in the centre. The handle has a black and white floral decoration The maker’s mark and name are on the bottom of the cup and saucer. ‘In God is Our Trust’ ‘The Farmers Arms’ history of warrnambool, porridge bowls -
 Warrnambool and District Historical Society Inc.
China, Cup & Saucer, 1930s to early 1940s
These items were made in the 1930s or 1940s for sale as souvenirs of Empire Day in Victoria. As they were made by Royal Doulton of England they were high-quality souvenirs. Empire Day was established in 1905 to commemorate the reign of Queen Victoria and to promote and celebrate the importance of the British Empire in Britain and in the associated British Empire countries. It was celebrated on 24th May, the date of Queen Victoria’s birthday. In Victoria the day was celebrated with a school holiday and half-day business holiday, street and shop decorations, bonfires, concerts, processions etc. In 1958 Empire Day became known as Commonwealth Day. These items have no known local provenance but they were typical of the souvenirs that sold in the first half of the 20th century in Warnambool and all other parts of Australia around the time of Empire Day, May 24th . It will be useful for display. This cup and this saucer are made of white china with coloured images of Britannia, the rising sun, British flags, scrolls and the names of British Empire countries on each item. The cup rim and the saucer edge originally had gold trim but the gold has almost disappeared. The cup and the saucer have the name of the distributor and the maker on the base. ‘Empire Day, May 24th , Africa, Australasia, Canada, India’ empire day, history of warrnambool, empire day cup and saucer -
 Kiewa Valley Historical Society
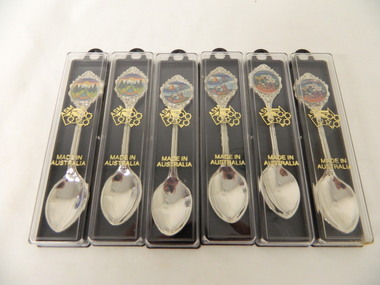
Spoons - Souvenir, Mt Beauty x6
Souvenirs are sold to tourists as a moment of their visit to Mt BeautyMt Beauty is a tourist town6 spoons - 2 of each with a different picture. Silver spoon in a plastic case. The case has a black side with a ring at the top and 2 small pieces that jut out from inside to hold the spoon. The clear front cover fits on and has gold embossing. The stem of the spoon is embossed with lines on the front. At the end there is a circular coloured picture with 'Mt Beauty' below surrounded by embossed decoration.Cover: Map of Auistralia with ASM along the W.A. side / Made in / Australia Spoon: top of handle - Mt Beauty. back of handle - embossed kangaroo. back of stem - 'Swann and Hudson Made in Australiamt beauty. souvenir. silver spoon. tourism. swann and hudson -
 Warrnambool and District Historical Society Inc.
Domestic object - Teapot, Mid 20th Century
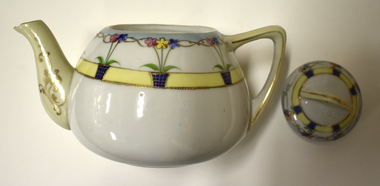
Tea has always been a common drink in Australia and before the introduction of tea bags a teapot such as this was used to infuse the tea leaves. This item is a decorative piece and would have been used for special occasions. The use of tea bags in both teapots and cups became widespread in the 1960s in Australia. Tea bags are the popular choice today for tea drinkers.This item has no known local provenance but is retained as a fine example of a vintage tea pot. This is a white china teapot with a lid which contains a steam hole and a handle. The spout has gold patterning. The handle is painted yellow with a gold strip. The lid has a yellow and blue decorative band and is decorated with flowers and gold pattern. The body of the teapot has the same decoration as the lid. The name of the country of origin and a number are on the base. Made in Japan tea pot, vintage domestic item, tea making in australia -
 Warrnambool and District Historical Society Inc.
Household, Union Jacks, 1950s
These Union Jack flags are believed to have been used in the celebrations in Warrnambool on the occasion in 1953 of the Coronation of Queen Elizabeth 11 (oral tradition only). Warrnambool celebrated with street parades, shop decorations and displays, concerts, church services and dinners. It was customary at the time to use the British flag more than the Australian one. These flags are retained because of their possible connection to mid 20th century Warrnambool celebrations (1953 Coronation of Queen Elizabeth 11).These are seven Union Jack flags made of cloth with red, white and blue colouring. The flags are pasted on to thin circular-shaped wooden sticks. The flags are a little worn, especially near the pasted sections and some of the colours are rubbed. coronation of queen elizabeth 11, history of warrnambool -
 Warrnambool and District Historical Society Inc.
7 Labels, DUIRS & WARRELL
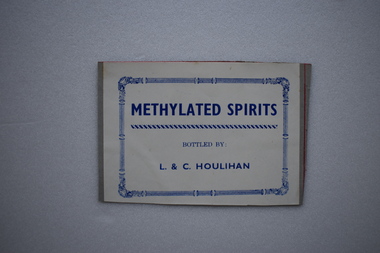
Duirs and Warrell (62-64 Liebig Street) was prominent in Warrnambool for many years. The business had the name of Duirs and Warrell for nearly 90 years but the store was first established by William Jamieson in 1857. It was then acquired by J.C.A. Kruger before being taken over by James Duirs in partnership with Warrell. The liquor licence of Duirs an Warrell passed to Dickins Supermarket and the shop closed in 1971.These are important labels as the firm Duirs and Warrell was prominent in Warrnambool for many years .1 White label with three straight sides and a curved top. It has gold and green shadow printed text, a drawing of an Irish harp, two star like decorations and a green border. It is stained in part. The label is adhered to a piece of pink card. .2 Rectangular white label with dark blue text and a decorative border of gold coloured vine leaves. It is adhered to a piece of pink card. .3 Rectangular white label with gold coloured text and decorative border. .4 Rectangular white label with gold coloured text and border with curved corners. .5 Rectangular label with gold coloured text and border with curved corners. .6 (two copies) White label with three straight sides and curved top. The label has gold and dark blue text. There is a coat of arms with a lion and a unicorn and at the base a ribbon bow. It is adhered to a piece of pink card..1 FINE OLD IRISH WHISKY BOTTLED BY DUIRS & WARRELL, WARRNAMBOOL .2 FINEST OLD RUM BOTTLED BY DUIRS & WARRELL,WARRNAMBOOL .3 BOTTLED BY DUIRS & WARRELL, LIEBIG STREET, WARRNAMBOOL .4 Fine OLD PORT BOTTLED BY DUIRS & WARRELL, LIEBIG STREET, WARRNAMBOOL .5 FINEST AUSTRALIAN WINE Frontignac. Bottled by DUIRS & WARRELL Liebig Street, Warrnambool .6 TRADE MARK Finest Old BRANDY BOTTLED BY DUIRS & WARRELL WARRNAMBOOL HONI SOIT QUI MALI PENSE DIEU ET MON DROIT duirs & warrell, spirts and wines, warrnambool -
 Warrnambool and District Historical Society Inc.
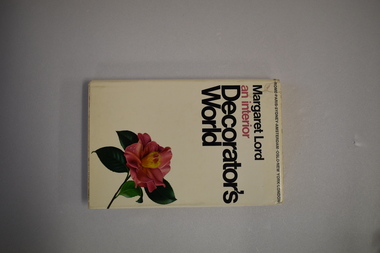
Book, An Interior Decorator’s World, 1969
This book is the autobiography of Margaret Lord, a noted Australian interior designer, journalist, colour consultant and author. Born in Warrnambool to Margaret and Henry Lord the author studied art in Melbourne and London and became an interior decorator. In the articles she wrote for the Australian Home Beautiful magazine she promoted Australian interior design and materials. Her 1924 book, ‘Interior Decoration – A Guide to Furnishing the Australian Home’, was the first Australian monograph on interior decorating. She was the first in Australia to establish the role of the interior designer consultant and in 1950 she was one of the founders of the Australian Society of Interior Designers. This book is of considerable importance as it is the autobiography of Margaret Lord, the noted Australian interior decorator and writer. She was born in Warrnambool and this is the only item we have that records her life achievement as a pioneer in Australia of interior design. This is a hard cover book of 215 pages. The hard cover is white with silver-coloured printing on the spine and the dust cover has a cream background with black and pink printing and the image of a pink rose. The pages contain an introduction, a preface, ten chapters of text and an appendix. margaret lord, interior designer, history of warrnambool, australian society of interior designers -
 Eltham District Historical Society Inc
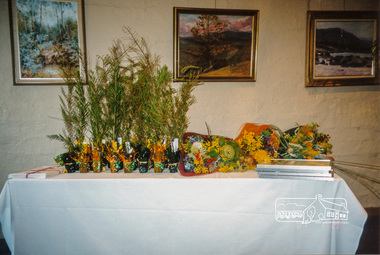
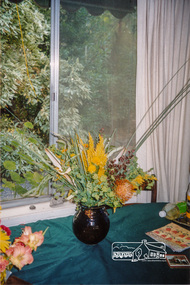
Photograph, Decorations at the celebration of Peter Bassett-Smith being named Eltham Citizen of the Year, 26 January 2001, 26/01/2001
Colour photographaustralia day awards, eltham citizen of the year, peter bassett-smith -
 Eltham District Historical Society Inc
Photograph, Decorations at the celebration of Peter Bassett-Smith being named Eltham Citizen of the Year, 26 January 2001, 26/01/2001
Colour photographaustralia day awards, eltham citizen of the year, peter bassett-smith -
 Marysville & District Historical Society
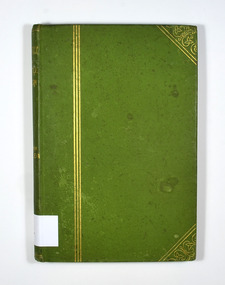
Book, Marion Miller Knowles, Shamrock and Wattle Bloom-A series of short tales and sketches, 1900
A series of short tales and sketches.Green front cover with some decoration in gold. Title and author in gold lettering on spine.fictionA series of short tales and sketches.short stories, sketches, australia, marion miller knowles -
 Bendigo Military Museum
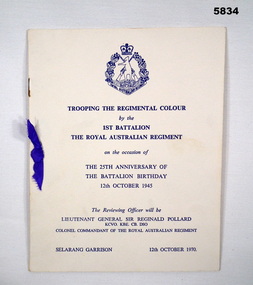
Programme - PROGRAMME, 25th ANNIVERSARY OF BATTALION OPENING, 1970
"TROOPING THE REGIMENTAL COLOUR/ by the/ 1ST BATTALION/ THE ROYAL AUSTRALIAN REGIMENT/ on the occasion of / THE 25th ANNIVERSARY OF THE BATTALION BIRTHDY/ 12th OCTOBER 1945"Programme - cover - cardboard, off white colour, dark blue print on front cover with Royal Australian Regiment Coat of Arms at top. 10 pages - cut, plain, glossy white paper. Illustrated in colour - two flags in centrefold. Stapled - metal, small purple ribbon decoration on front cover.souvenir, programme, military history, ceremonial, regimental colour -
 Bendigo Military Museum
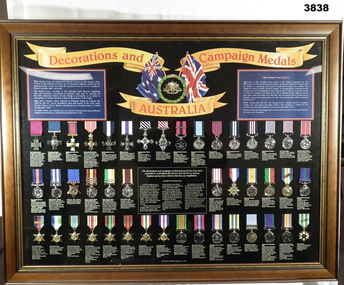
Poster - POSTER WITH MEDALS, FRAMED, Warwick, Cary & Co, Decorations and Campaign Medals Australia, 1984
... Decorations and Campaign Medals Australia... goldfields Framed item Medals Military Imperial Decorations ...Imperial Decorations and Campaign Medals. Poster - Paper with copies of Campaign Medals with ribbon mounted on black coloured background. Poster title printed in red on gold background. Information on individual medals printed in white print. 44 medals with ribbons mounted in colour. Frame - timber, with decorative edge, brown stain, with glass front and cardboard backing.framed item, medals, military -
 Lara RSL Sub Branch
Flag, Australian Flag (Union Jack) 1900
There is a Union Jack brought back from South Africa by 1229 Trooper Fredrick James Smith. Between 1899 and 1902, around 16,500 Australians served in South Africa during the Boer War. This was the largest international deployment of troops from the Australian Colonies before Australian Federation. Of the 16,500 men who served in South Africa, 606 were killed in action or died of diseases. The Australian War Memorial records that the fighting conditions in South Africa extremely hard on men and horses. Australians fighting in South Africa were doing so as part of Colony based Regiments such as the Victorian Mounted Rifles, New South Wales Lancers, Queensland Mounted Infantry as well as units from the other states. Australians were awarded six Victoria Crosses during the campaign along with many other decorations. In May of 1902 the treaty of Vereeniging was signed officially ending the Boer War. The Boer War is commemorated in many Towns and Cities around Australia. The Lara RSL Sub Branch holds some memorabilia from the Boer War. There is a Union Jack brought back from South Africa by 1229 Trooper Fredrick James Smith. He was a resident of Lara and was a member of the 5th Victorian Mounted Rifles. It was reported that he carried this flag into battle. The Lara RSL also holds the flag staff of the China, South African and Old Veterans Association. Both these items are of national significance. Both the flag and flag staff were used in marches in Geelong each year until 1916 when Anzac Day commenced. The flag and flag staff were donated to the Lara RSL sub Branch when he joined in 1928. Fredrick James Smith was born at Lara in 1879, the son of Mr/Mrs Smith from Lara. He was a farm hand from Horton Vale, Anakie when he joined F Company of the 5th Victorian Mounted Rifles at the beginning of February 1901. Two weeks later, he left for South Africa on the 15th February. Before leaving, he purchased the flag from W. Libby & Son Geelong. Frederick Left for South Africa on the 15 February 1901 on the Orient. He saw service between March 1901 - March 1902 in east Transvaal and Natal frontier under the British Major General S. Beatson then Pulteney, including the defeat at Wilmansrust where 18 soldiers were killed and 42 wounded (12th June 1901 - heaviest casualties of any Australian contingent,); and the successful intervention at Onverwacht on the 4th January 1902. The 5th Victorian Mounted Rifles suffered: 36 killed or died of wounds, 13 died of disease of a contingent of 46 Officers, 971 Other Ranks and 1099 horses. They returned to Australia on the 26th April 1902 on the Custodian after sailing from Point Natal in South Africa on the 5th April. On his return, Tropper Smith (Saddler Private) joined the South African Soldiers Association of Victoria – Geelong Branch, and after 1928, he joined the Lara RSL. He was buried in Western Cemetery on the 19th June 1968 at the age of 89. Enrolled February 1901 Departed for South Africa on 15 February 1901 Establishment: 46 Officers, 971 Other Ranks with 1099 horses Mobilised at Pretoria: 24 March -- 4 April 1901 Typical company: 1 Captain, 4 Lieutenants, 1 company sergeant-major, 1 company quartermaster-sergeant, 1 sergeant-farrier, 1 sergeant-saddler, 5 sergeants, 6 corporals, 3 shoeing-smiths, 3 saddlers, 1 bugler, 99 privates. Total in company: 126 with 131 horses. Engagements: Rhenoster Kop, Klippan, Kornfontein, Drivelfontein, Wilmansrust, Kambuladraai, H'Lobane, Luchiel's Nek, Loch's Kraal, Vryheid, Onverwacht, Johnston Hoek Killed in action (or died): six Officers, 48 Other Ranks VC Winner: Lieut. L. C. Maygar News article Leader (Melbourne) Saturday 31st May 1902, page 42 - Dear Cinderella. — This is the second time I have written to you. I was very sorry at not seeing my first letter in "The Leader". But I hope to say, that this one will be in. The last time I wrote to you I told you that my brother (Fredrick Smith) went to the Boer War in South Africa, and that he was supposed to be killed in the Wilmansrust disaster. But this time I am going to tell you about his return, and the grand welcome he got from the residents of Lara. Mother, Father, and my Brother, went down to Melbourne, to meet the boat. You can just imagine how rejoiced we all were to see him back again. The railway station was decorated some thing beautiful with flags of all description all the colours you could think of. He has bought a lot of Boer curios home and some Kaffir bracelets. They are such funny looking things. The residents of Lara, also gave my brother a grand social and ball there were over four hundred people present, They presented him with a hand some gold chain, and locket suitably inscribed, and a pair of gold sleeve links, they were magnificent. The ball was very nice. . I had a few dances. I enjoyed myself grand. I think this is all I can tell you this time. I must conclude with love. I remain yours sincerely - BESSIE SMITH. Age 14-years. This flag is of national significance as it was used in the Boer War by Private Fredrick James Smith (SN:1229) of the 5th Victorian Mounted Rifles, F Company in their deployment to South Africa between 1901 and 1902. The flag was taken into the Wilmansrust engagement in which 19 soldiers died and 41 were wounded. On return to Australia, the flag was used in marches by the South Africa, China Old Veterans Association - Geelong. This flag represents a unique part of Australian history from which the movie, Breaker Morant was taken. It is of spiritual significance as the Boer War was where the first Australian received the Imperial Victoria Cross, and the spirit of Anzac was conceived, giving birth in World War 1. The Flag represents the spirit of Australians who fought and died in South Africa.Cotton Union Jack flag approx 221cm wide by 109cm tall with small repair patches and center section cotton deteriorated.Has the word "Lara" inscribed in black on bottom part of the flag heading. Has the flag makers name "W.Libby & Son" on the top part of the flag heading.boer war, union jack flag, south africa, wilmansrust, 5th victorian mounted rifles, f coy, private fredrick james smith, service number 1229, february 1901, april 1902, south africa china old veterans association -
 Lara RSL Sub Branch
Chart of Honours, Decorations and Medals -- Australian Defence Force, Honours Decorations and Medals of the Australian Defence Force, 1986
... to be so warn. australian defence force honours,decorations ...Australian Defence Force ribbons representing medals that can be awarded.Collection of ribbons to be displayed in lieu of wearing full medals etc by soldiers of Australian Military Forces when entitled to be so warn.Chart - Honours Decorations and Medals of the Australian Defence Force. Display of ribbons representing medals that can be awarded to Australian Military Forces personnel.Sheet of Masonite with a printing of Honours Decorations and Medals of the Australian Defence Force - depicting ribbons for medals awarded to Australian Military Forces.australian defence force, honours,decorations and medals -
 Lara RSL Sub Branch
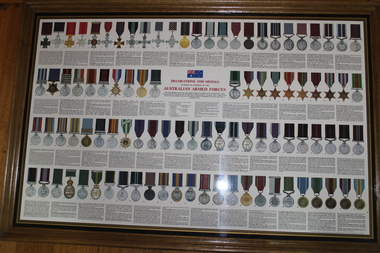
Photograph, Decorations and Medals of The Australian Armed Forces, 1985
... of The Australian Armed Forces. Decorations and Medals of The Australian ...Over 1,400,000 Australians have served in times of conflict, from the Boer War to Afghanistan. Receiving awards on recognition of their service, some Australians have earned prestigious awards for their valour and gallantry. These are soldiers that have overwhelmed their opponents. They've gone over the wall or held the line, at huge personal cost. They've contributed to landmark events that history will long remember.The Australian Defence Medal (ADM) has been established to recognise Australian Defence Force Regular and Reserve personnel who have demonstrated their commitment and contribution to the nation by serving for an initial enlistment period or four years service whichever is the lesser.Rectangular shaped glass covered Picture frame showing Decorations and Medals of The Australian Armed Forces.Decorations and Medals awarded to members of the Australian Armed Forces -
 Ballarat Clarendon College
Book, The land that is desolate: an account of a tour in Palestine
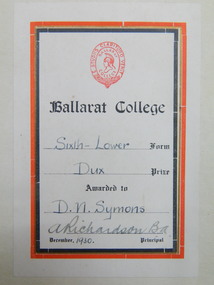
Awarded to Donald Neil Symons for excellence in Scripture during 1926 at Ballarat College. Neil was educated at Ballarat College (Dux 1933) and Ormond College, Melbourne University. He became a Clothing industry leader and was Fletcher Jones' distinguished successor as chief executive of the FJ organisation, and a prominent advocate for the Australian textile and clothing industries, decentralised industry and government support of employee share ownership schemes.Medium-sized, maroon, leather-bound book with gold-lettering and decoration on spine and gold school crest on front cover; bookplate inside front coverBookplate inside front cover: School crest / Ballarat College / Sixth-Lower Form / Dux Prize / Awarded to / D N Symons / A Richardson BA / December 1930 Principaldonald-neil-symons, dux, 1930s, fletcher jones -
 Bendigo Military Museum
Book - BOOK VIETNAM, I L Barnes, Gallant and Distinguished Service Vietnam 1962-1973, 1974
... page: “Australian Gallant and Distinguished Service Vietnam... and Foreign decorations Awarded to Australian Servicemen. Limited ....1) Hard cardboard cover, red buckram with gold print on front & spine. .2) Dust cover paper, off white background, black print on front & spine. Gold monochrome photo of 3 medals with ribbons on front, black & white photo on back. Inscription on title page. 154 pages, cut, plain, off white, illustrated black / white photos.Handwritten in black in on title page: “175 (Copy No 175 of 1000)” Dust cover spine: “Awards for Vietnam 1962 -73” Title page: “Australian Gallant and Distinguished Service Vietnam 1962 - 73. Being a record of British and Foreign decorations Awarded to Australian Servicemen. Limited Edition” book, awards, gallantry, vietnam -
 Bendigo Military Museum
Administrative record - COMPENDIUM WW1 - WW2, 4) A H Pettifer, Government Printer et al, 2) 14.2.1946; .3) 1.3.1919; .4) 30.11.1954 .5) 24.11.19? - WWI; .6) 31.10.1917; .7) 12.6.1917; .8) Page 1: 20.12.1915, Page 2: 10.12.1915, Page 6: 19.1915; .9) 10.9.1918; .10) 18.4.1919; .11) c.2.3.19?; .12) 18.9.1920; .14) post WWI; .15) 24.4.1920; .17) 18.4.1942; .18) 19.6.1943; .19) 18.3.1947; .20) 1944; .21) 1944; .23) 22.10.1941; .26) 13.9.1944; .27) 1.1944; .30) 7.3.1950; .31) 31.7.1944; .32) 16.4.1942; .33) 13.6.1946; .34) 6.5.1946; .36) a) & b) 3.11.1947; .37) 24.10.1951; .38) 24.9.1957; .39) 9.10.1957; .40) 19.2.1958; .41) 26.2.1958; .42) 1.3.1958; .43) & .44) 7.3.1958; .45) 25.2.1958; .46) 3.1.1948; .47) 26.2.1948; .48) 22.4.1958; .49) 24.2.1958; .50) 12.3.1958; .51) 6.1958; .52) c.Mar/Apr 1958; .53) 5.4.1958; .54) c.end WWII; .55) a.b. 13.6.1967; .56) 26.5.1967; .57) 18.2.1954
Herbert Trangmar Allan, refer 2755.4 for his extensive service history and wards. .2) Details gifting of a pair of Japanese binoculars to Col H T ALLAN by Pacific Island Regiment. .3) Certificate issued by Winston Churchill, Secretary of State for War (The War of 1914-1918), awarded to Capt H T ALLAN MC. .4) Herbert Trangman ALLAN born 5.1.1895 at Woolwich, NSW. Middle name misspelled, should be Trangmar not Trangman. .6) Congratulating H T ALLAN on receiving the Military Cross award for leading 2 companies which had lost officers during action on Passchendaele Ridge on 9.10.1917. .7) Describes life behind the lines whilst H T ALLAN's battalion has been resting for a month. Daily life consisted of training drills, sport & entertainment. Writer takes time to describe the countryside & weather. .8) Relate to H T ALLAN's military exam results & his promotion to 2nd Lieutenant in 1915. .9) To Herbert Allan's father, Mr P Allan detailing the citation for awarding of the Military Cross to Herbert ALLAN. Original citation appeared in the London Gazette,5.4.1918. .10) Form addressed to Capt H ALLAN MC, 17th Battalion stating his period of enlistment in the 1st AIF was to expire 26.5.1919. .11) Letter from Lord BIRDWOOD (General) to Herbert ALLAN in response to a letter received 19.11.19?. General BIRDWOOD expresses his opinions on difficulties the allied troops face in their fight against the Japanese. .12) Letter to Capt H T ALLAN advising of MID oak leaves sent to him. Details guidelines for attaching oak leaves to both the larger Victory Medal & the small service dress medal. .13) Form details H T ALLAN's WWII Army No, Rank, Unit & Decorations & Medals held. The form has not been signed & dated. .14) Details service record of Lt Col H T ALLAN NX12229. Includes military service from 1912 - 1944, schools & courses attended, decorations, promotions & overseas service. .16) Form issued to H T ALLAN on 15.12.1939 granting permission to leave New Guinea for Australia & return within a period of 12 months. Issued by Customs Office in Salamaua. Lists H T ALLAN's age as 44, height 5' 10" & occupation. .17) Letter from Major General MORSHEAD GOC, AIF (ME) to Major H T ALLAN, OBE, MC congratulating him on being awarded the OBE for outstanding service at Tobruch. .18) Letter from Major General MORSHEAD to Major H T ALLAN, OBE, MC replying to ALLAN's letter of 15.6.1943. MORSHEAD is congratulating ALLAN on his appointment to New Guinea Force, also acknowledges his excellent service record. .19) Letter acknowledges H T ALLAN's resignation from the Office of Production Member of the Australian New Guinea Production Control Board, effective from 28.8.1946. .20) Major General WINDEYER commanded the 20th Brigade from 1942-1946. .22) Card sent from the CO of the 3rd Australian Anti-Tank Regiment. .23) Menu for Farewell Dinner held in the Officer's Mess of the 20th Infantry Brigade, Tobruch on 22.10.1941. .24) Menu & Toast list for Farewell Dinner to Brigadier J J MURRAY DSO MC VD. Attended by H T ALLAN & held in the Officers Mess, 2/17 Australian Infantry Battalion on 22.12.1941. .25) Invitation to Col H T ALLAN by Lady Gowrie (wife of Governor General Baron Gowrie) to attend a Luncheon at Government House, Canberra, ACT. .26) Letter to Major (T/Lt Col) H T ALLAN from Major W A JENNER advising him of his secondment to 2/17 Australian Infantry Battalion & appointment to command 5 Aust Base Sub Area. .27) Application for Africa Star with Eighth Army Clasp signed by H T ALLAN & approved by Lt Colonel of 2/17 Australian Infantry Battalion. H T ALLAN held the rank of Major (substantive) at the time of qualification, 1.3.1942 - 11.1942. He held the rank of Lt Colonel at the time of application in 2.1944. .28) Detailing changes in command & promotions including that of Lt Col H T ALLAN, dated 1.4.19? .29) For Lt Col H T ALLAN detailing movements required by First Australian Army command. .30) Acknowledgement & confirmation of Col H T ALLAN's application for campaign awards for WWII. .31) Letter addressed to Lt Col H T ALLAN from Lt Gen Stanley Sauige requesting information on New Britain for a forthcoming visit. .32) Certificate was presented to H T ALLAN on 16.4.1942 when he was awarded an OBE by King George VI. .33) Document details H T ALLAN's relinguishing of Command of the HQ of Pacific Islands Regiment. ALLAN also relinguished the rank of temporary Colonel & was transferred to the Reserve of Officers with rank of substantive Lt Colonel. .35) Official letter to Colonel H T ALLAN from Joseph Francis, Minister for the Army. The letter acknowledges Col ALLAN's long & distinguished career during both peace & wartime. .36) a) & b) From H T ALLAN (assumed) to Prime Minister J B CHIFFLEY referring to the production of copra in New Guinea, the actions of the Commonwealth Bank in relation to planters & the collaboration of New Guinea natives with the Japanese. Assumed to be a copy of original. .37) Letter to H T ALLAN indicating he had been placed on the Retired List with the rank of Honorary Colonel. .38) Letter invites H T ALLAN to officially open the State Conference in Lae in late March or early April 1958. Invitation was extended due to H T ALLAN for distinguished service in PNG. .39) Letter to H T ALLAN thanking him for accepting the invitation to open the Papua & New Guinea State Conference in late March or early April 1958. .40) Letter from H T ALLAN to Lt Gen Sir Henry WELLS, Chief of the General Staff, Victoria Barracks, Melbourne. ALLAN requests permission to wear his uniform for official engagements during his upcoming visit to New Guinea. ALLAN also offers advice on how to deal with native troops including serving time with them, learning their language & studying their customs. He suggests that this would help quell & dissent & revolt. .41) Reply from Major General DALY to HT ALLAN thanking him for his offer to spend time with the CO of the Pacific Island Regiment to address concerns with that unit. This meeting would coincide with ALLAN's upcoming visit to PNG. .42) HT ALLAN's reply to Major General T J DALY's letter of 26.2.1958. ALLAN requests an opportunity to discuss PIR issues with Major General DALY prior to his visit to PNG. .43) Major General T J DALY's reply to HT ALLAN's request for a meeting to discuss ongoing issues with the Pacific Island Regiment. .44) Letter from HT ALLAN to Brigadier D M CLELAND notifying him that he will be staying in Port Moresby on his way to the RSS&AILA Congress in Lae. .45) Lieutenant Colonel MCGUINN writes to invite Colonel ALLAN to visit the PIR during his visit to New Guinea at the end of March of the beginning of April 1959. .46) Letter of appreciation to H T ALLAN thanking him for his efforts in presenting the case for the Territory of New Guinea during the post WWII transition period. .47) Letter to H T ALLAN from New Guinea Citizens Association, Lae Branch, thanking him for his service on behalf of the people of the Territory of New Guinea. The association offered to send ALLAN a suitable present in recognition of his service. .48) Major General T J DALY's reply to HT ALLAN's suggestions for handling disquiet amongst the native troops in the Pacific Island Regiment. .49) Reply from Lieutenant General WELLS to H T ALLAN granting him permission to wear his uniform on his forthcoming visit to New Guinea. WELLS also notes that he has passed other requests made by ALLAN to Major General DALY. .50) Copy of H T ALLAN's reply to Lieutenant General WELL's letter of 24.2.1958 [.49)]. .51) A written account of Colonel H T Blue ALLAN's visit to New Guinea in 3.1958. Article appeared on p.65 & 67 of the 6.1958 edition of Pacific Islands Monthly. .52) Newspaper account of Colonel H T Blue ALLAN's opening of the Rabaul Branch of the Native Ex Servicemen's Association. Colonel ALLAN spoke of the involvement of the Pacific Islands Regiment during WWII. .53) The Rabaul Times account of Colonel H T Blue ALLAN's opening of the Rabaul Branch of Native Ex Servicemen's Club. Featured on p1, concluded p3. .54) Biographical account of Colonel H T ALLAN's service in WWI & WWII. In addition an account of his success in New Guinea between the wars is included. .55) a.b. Biography of Colonel H T ALLAN written by R W Robson who was the founder of the Pacific Islands Monthly. Article was written following ALLAN's death on 23.5.1967 aged 72. This item is a pre publication copy of Robson's article which appeared in the Pacific Islands Monthly. .56) Text of a valedictory given at the funeral of Colonel Herbert Trangmar ALLAN OBE, MC, ED, NX12229 held 26.5.1967 following his death on 23.5.1967. The speech summarized his life in both wars & civilian life. 57) Invitation issued to Colonel H T & Mrs ALLAN to attend a Garden Party at Government House on 18.2.1954. At this function Colonel H T & Mrs ALLAN were to be presented to her Majesty Queen Elizabeth II.Herbert T ALLAN Collection. The contents are all of various size, the Album is the size documented. .1) Large teal green album containing 16 plastic pockets each with white card insert. Various documents & photos contained in each pocket. .2) Typed letter, black type on cream paper. .3) Certificate mounted on fawn card backed with dark brown veneer. Presented to Capt H T ALLAN MC for being mentioned in despatches on 7.11.1917. .4) New South Wales Birth Certificate extract, printed on pink paper with watermark. .5) Telegram on tissue paper to a sheet of cream paper. Pin located top L corner. Requests the attendance of Lt Herbert ALLAN, Russell Hotel, Russell Square. .6) Typed letter mounted on grey cardboard. .7) 2 page letter on foolscap paper, secured by pin top L corner. Written from France by Herbert (Bert) ALLAN & addressed to his father. .8) 11 pages secured with a clip top L corner. 1st document typed, 2nd handwritten, remainder printed. Relate to H T ALLAN's military exam results. .9) Typed letter from Department of Defence Base Records Office to P ALLAN. .10) Document, printed form to inform the recipient that their period of enlistment in the 1st AIF had expired. .11) 4 page handwritten letter on 2 sheets of paper. 1st page has a printed letterhead. .12) BR Form No 20. Typed formal letter from AIF Base Records Office to accompany Mentioned in Despatches oak leaves sent to the recipient. .13) Form AAFA36 used for recommending the awarding of an Efficiency Decoration. Form details service record & details of a serving soldier. .14) 1 large / 1 small page, numbered, detailing the service record of Lt Col H T ALLAN. Black type on cream paper. 2 pages are loose but evidence of attachment visible. .15) Bachelor of Arts Degree Certificate (testamur) granted by the University of Sydney, awarded to Herbert Trangmar ALLAN. Printed on cream parchment. .16) Proforma document issued by the Territory of New Guinea permitting leave & return to the Territory. Printed 2 sides, black type on cream paper. .17) Letter on Australian Imperial Force letterhead from Major General MORSHEAD to Major H T ALLAN. .18 Letter on HQ2 Aust Corps letterhead from Major General MORSHEAD to Major H T ALLAN. .19) Typed letter on External Territories letterhead from J R Halligan to H T ALLAN. .20) Cream Christmas card folded in 2, sent to H T ALLAN. On front in black lettering is HQ 20th Australian Infantry Brigade below black Rising Sun emblem. Inside in black lettering is With Best Wishes for Christmas and New Year. Christmas 1944. .21) Cream card folded in 2. Front illustration depicts a devil figure riding a platypus & carrying a pennant with 2/13 on it. The devil is depicted attacking a German & Japanese soldier. Below the devil is a boomerang with Greetings Xmas 1944 printed on it. Illustration is in green & black. Inside on LHS is a message from 2/13 Battalion. On RHS is a list of 2/13 battle honours from 1940-1943. On back in black print is 1944-1945 New Guinea Australia. .22) Cream Christmas card folded in 2. Front illustration in brown with word Greetings in green. RHS inside printing in green & brown letters. Artillery badge on back in brown. .23) Cream card folded in 2. Typed menu on cream paper attached inside. Front cover illustrated with 20th Infantry Brigade colour patch & a rat over a scroll with words - So What? .24) Cream card folded in 2. On front black printing accompanied by 2/17 Battalion colour patch that is black over green diamond shape. Inside a list of Toasts & Dinner Menu printed in black. Back page for autographs. .25) Cream invitation card. Black cursive script printing below gold crown on front. .26) Typed letter on cream paper. .27) Typed foolscap application form to claim the Africa Star. .28) & .29) Message form filled with typed orders. .30) Typed letter acknowledging an application for campaign medals & listing eligible awards. .31) Typed letter on bond paper. .32) Certificate on cream parchment. Black print in cursive script. Text details the awarding of an OBE to the recipient. .33) Typed text on Australian Military Forces letterhead. Cream paper. .34) Typed text. Temporary note for H T ALLAN's discharge from AMF. .35) Typed letter on Commonwealth of Australia, Minister for the Army letterhead. .36) a) & b) 2 page letter in black type on cream paper. Pages are loose, letter unsigned. .37) 1 page typed letter on Australian Military Forces letterhead. .38) & .39) 1 page typed letter on Return Sailors, Soldiers & Airmen's Imperial League of Australia, Papua & New Guinea Branch letterhead. .40) 1 page typed letter, unsigned. .41) Single sided typed letter on Australian Military Forces letterhead on cream paper. .42) 1 page typed letter, unsigned on cream paper. .43) Single sided typed letter on Australian Military Forces, Northern Command, Victoria Barracks, Brisbane letterhead on cream paper. .44) Single sided typed letter on cream paper. .45) 2 page typed letter on folded cream paper bearing the letterhead of the Pacific Islands Regiment. .46) 1 page typed letter on cream, lined paper. .47) 1 page typed letter on cream paper. .48) 1 page typed letter on Australian Military Forces, Northern Command Headquarters, Victoria Barracks, Brisbane letterhead on cream paper. .49) 1 page typed letter on Chief of General Staff, Australian Military Forces, Army Headquarters, Victoria Barracks, Melbourne letterhead on cream paper. .50) 1 page copy of an unsigned letter on cream paper. .51) Magazine article: Building a New Nation in New Guinea : Some advice from Colonel Blue ALLAN. Black & white article with a 2nd small section stapled to the main page. Large page features a black & white captioned photo of a group listening to a uniformed Officer deliver a speech. Also features advertising front & back. .52) Newspaper article: Official Opening of Native Ex Servicemen's Club. Black & white typed newspaper article featuring a captioned black & white photo of a uniformed Australian Officer & a group of New Guinea Ex Servicemen. .53) a. b. c. Newspaper article: Master Blue Came Back to the Islands: 4000 Attend Club Opening. 3 Section article cut from a newspaper. One part is the banner of the newspaper with date published. Other sections contain the text of the article. The larger section features a black & white photo of an Australian Army Officer in uniform. .54) Newspaper article, untitled. Black & white typed newspaper article with black & white caricature of an Australian Army Officer featured. .55) a. b. Magazine article: The Story of a Big Man who Loved Soldiering. 2 page black & white typed article with sub headings. .56) Text of a Speech. 2 page typed text written for a valedictory given at a funeral. Pages connected with a staple in the top L corner. .57) Printed, cream card invitation to a Garden Party for the recipient to meet Queen Elizabeth II & The Duke of Edinburgh. Text is in cursive script under the Coat of Arms of Her Majesty. .2) Signature ? Capt S C PIR. .4) Date of issue typed: 30.11.1954 Name of recipient: Herbert Trangman Allan Stamped: T Wells, Registrar General NSW .5) Handwritten: To Lt Herbert Allan, Russell Hotel, Russell Square. Typed: Buckingham Palace OHS. Your attendance is required at Buckingham Palace on Wednesday next the Twentyeighth inst (28.11.19?) at ten o'clock am service dress please telegraph acknowledgement Lord Chamberlain London. Stamped: Central District 24 NO 19. .6) Signed in pencil: W Birdwood. In pencil on back: 15 x 12. .8) p1: Handwritten signature. Copy dated 29.12.1915. p2 Handwritten in ink: P Allan Esq, Mount Hunter Hill. Military Examination. Copy dated 29.12.1915. Handwritten in pencil: Results: H T Allan. Tactics - Distinction 92% HE Barff p3 Underlined in ink: 38th Infantry Herbert Trangmar Allan to be 2nd Lieutenant (provisionally). Dated 16 June 1914. p5 Handwritten: Total 139. Lieut Allan tied with 15 others for 20 place. p7, 9, 10 & 11underlined in ink: H T Allan. p8 Underlined in ink: Allan HT. .9) & .10) Signature in black ink. .12) Handwritten signature in black ink: On back handwritten signature in black ink: Clive Wilkinson, Buddong, Robinson St, Chatswood. Also ? Rd, Cremorne Pt. .13) Handwritten in black ink: Details of HT Allan's Commission Service from 16.6.1914 - 18.2.1946. .15) Handwritten signature of the University Chancellor, Dean of Faculty of Arts & Registrar. Handwritten name of recipient. Seal of the University of Sydney imprinted bottom LHS. .16) Handwritten in black ink: Details of recipient. Stamped in red ink: New Guinea Customs. Stamped in blue ink: H M Customs, Cooktown, dated 17.12.1939. Handwritten on reverse: Signature. Stamped on reverse in red ink: New Guinea Customs, dated 15.12.1939. .17) & .18) Handwritten signature: Major General Morshead. .19) Handwritten signature in black ink: J R Halligan. .20) Handwritten inside in blue ink: Lt Col Allan. Good wishes from your many friends here. Signed by Major General Windeyer. .21) Inside LHS handwritten in blue ink: Lt Col Allan & an indecipherable signature. .22) Inside RHS handwritten: To Major (Blue) Allan OBE MC from Lt Col? .23) On front handwritten in blue ink: H T Allan?. Inside in black ink & pencil are 19 signatures. .24) On front: 3 signatures in black ink & pencil. On back: 36 signatures in black & blue ink & pencil. .25) On back handwritten in black ink: Colonel H T Allan OBE MC, with 3 ink lines below name. .26) Handwritten in blue/black ink: Signature. Handwritten in blue pencil top R corner: A32/3477. Handwritten in black ink bottom L corner: Cond (?) 15/9A. Handwritten in black ink: Signature. .27) Stamped top R corner: 2/17 Bn Received 9.2.1944. Signature in black ink: H T Allan. Signature in black ink: ? Lt Col 2/17 Aust Inf Bn 10.2.1944 Page bottom in pencil: Blue will keep 1 1/4 for you? .30) Handwritten: Details of eligible medals. Handwritten signature: J C K Miller Capt 7.3.50. Handwritten bottom L corner: Col H T Allan Bottom R corner: OBE, MC, 1914-19, Victory, ED, MID 1914-18, MID 1939-45 On back: Steak & Kidney Morris ) Clark ) Vowood ) 10/- 70215 Maughan ) Allan ) .31) Top of page: Imprinted Coat of Arms Top LHS in black ink: TOP SECRET AND PERSONAL Handwritten signature: Stanley Sauige .32) Embossed top L corner: Seal of the Most Excellent Order of the British Empire. Handwritten: Mary R. .32) Signed: Queen Mary, mother of George VI. .33) Handwritten signature. .34) Handwritten in blue ink: HERBERT TRANGMAR ALLAN 6 MAY 46 Handwritten signature. .35) Handwritten signature in blue ink: Joseph Francis, Minister for the Army. .37) Handwritten signature. .38) & .39) Handwritten signature: J W Knight. .41), .43) & .45) Handwritten signature in blue ink. .46) & .47) Handwritten signature in black ink: Henry G Eckhoff. .48) Handwritten signature in blue ink: With best wishes Yours sincerely T J Daly. .49) Handwritten signature in black ink: Yours sincerely H Wells. .57) Handwritten in black ink: Colonel & Mrs H T Allan.certificates, records, awards, administrative, compendium -
 Bendigo Military Museum
Book - BOOK, WW1, Ion L Idriess (Late Trooper 5th Light Horse AIF), The Desert Column, 1939
The Desert Column: Leaves from the diary of an Australian Trooper in Gallipoli, Sinai and Palestine.Hard, cardboard cover, grey buckram with black print on front & spine. Small decoration in black on front. 388 pages, cut, plain, white. Illustrated in black / white, sketch maps on front flyleaf & end paper, back flyleaf. Page removed. Inscription page facing title page. Diary.Handwritten in black ink on page facing title page: “Donated by Joy Wellings Re Stephen Langdon” “RSL stamp” Black felt tipped pen mark: “Lower edge of pages”book, desert column, idries