Showing 102 items
matching australian artillery regiment
-
 Montmorency–Eltham RSL Sub Branch
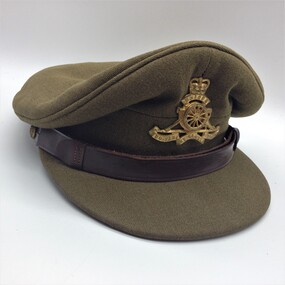
Cap, Peaked, Dress, Royal Australian Artillery, 1951, 1951
... Khaki cloth peaked cap with Royal Regiment of Australian... with Royal Regiment of Australian Artillery gilt cap badge (Queen's ...UK manufacture RAA cap for 1950s. Personal purchase?? Khaki cloth peaked cap with Royal Regiment of Australian Artillery gilt cap badge (Queen's crown) with brown leather chin strap and gilt AMF 12mm diameter buttons. Brown leather sweat band and tan plastic crown liner and khaki cloth liner. Manufacturer's, size and D^D stamp under crown. "Herbert Johnson (Bond Street) Ltd., 38 New Bond Street, London" "1951" "Size 6 7/8" "Made in England" "D^D" No personal I.D.headgear, cap -
 4th/19th Prince of Wales's Light Horse Regiment Unit History Room
Booklet, McLaren & Co Pty Ltd, Artillery Training Vol III Pam No 8 1942, 30 December 1942
Soft covered booklet with Australian Addendum No 1 covering co-operation with the RAF. Originally printed by Keliher, Hudson & Kearns Ltd, LondonNot to be publishedartillery training, raf co-operation, world war 2 -
4th/19th Prince of Wales's Light Horse Regiment Unit History Room
Booklet, Australian Military Forces The Division in Battle Pamphlet No 5 Artillery 1969, 1969
Soft covered booklet with amendments 1& 2 covering Artillery - its characteristics, role, equipment & ammunition, organisation, principles of employment, applications of fire etc. 3 copies7610-66-031-4752artillery command deployment -
4th/19th Prince of Wales's Light Horse Regiment Unit History Room
Booklet, Australian Army Manual of Land Warfare Part 2 Artillery Training Vol 4 Pam 1 Planning & Control of Air Defences 1980, 1980
Soft covered booklet providing doctrine on planning and control of air defences7610-66-106-0086artillery, air defence -
4th/19th Prince of Wales's Light Horse Regiment Unit History Room
Booklet, Australian Army Manual of Land Warfare Part 2 Artillery Training Vol 3 Pam 3 Gun Regiments Survey within the Unit 1983, 1983
Soft covered booklet describing the principles and process of battery survey in a field artillery battery and that within the regiment, and the role organisation duties and deployment of a regimental survey section 7610-66-108-8454artillery, survey -
4th/19th Prince of Wales's Light Horse Regiment Unit History Room
Booklet, Australian Army Manual of Land Warfare Part 2 Artillery Training Vol 3 Pam 6 Mortar Locating Troop 1980, 1980
Soft covered booklet providing information and doctrine for the Mortar Locating Troop, Divisional Locating Battery 7610-66-104-8349artillery, mortar locating -
4th/19th Prince of Wales's Light Horse Regiment Unit History Room
Booklet, Australian Army Manual of Land Warfare Part 2 Artillery Training Vol 1 Pam 5 Artillery Staff Duties 1984, 1984
Soft covered booklet to explain to officers of the RAA staff, duties particular to employment of artillery in battle. 2 copies7610-66-120-4339artillery, staff duties -
4th/19th Prince of Wales's Light Horse Regiment Unit History Room
Booklet, Australian Army Manual of Land Warfare Part 2 Vol 1 Pam No 1 Employment of Artillery (All Corps) 1984, 1984
A soft covered booklet describing the role and general principles of field artillery, its equipment and effects, command and communications administration and supply, planning and employment, air defence etc. 2 copies7610-66-118-5456artillery, employment -
 Flagstaff Hill Maritime Museum and Village
Weapon - Cannon, 1866
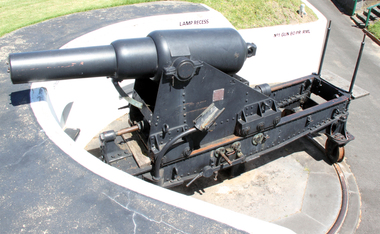
In the years following the Crimean War (1854-1857J) there was a great concern in the Colony that Imperial Russia would attempt an invasion. Coastal defences in the colony of Victoria were greatly strengthened by the Government as a result. Warrnambool was originally protected by cannons at Cannon Hill, approximately 1 kilometer west of the Flagstaff Hill Fortifications. These cannons included two 1866 guns, both 80 Pound Rifled Muzzle Loaders (RML) purchased by Victoria’s Colonial Government. They were part of a shipment of 26 such guns sent from England in December 1866. They are registered as No. 23 (80cwt-2qr-0lbs) - Gun 1, and No.13 (81cwt-1qr-12lbs) - Gun 2. They were cast at the Royal Gun Factory, Woolwich Arsenal, in 1866 and have a 6.3 inch bore. Both barrels carry the Royal Cypher of Queen Victoria, Insignia of the Royal Engineers, within the Garter and Motto surmounted by the Crown, with the Royal Cypher of Queen Victoria within the Garter (letters in centre “VR”, motto “HONI SOIT QUI MAL Y PENSE”, "Shame be to him who thinks evil of it."). The guns were originally supplied with wooden carriages. (The Royal Arsenal at Woolwich, England, was established eleven years after the Restoration of King Charles II. It was the principal supplier of armaments to the British and Empire Governments. At the height of its operations during World War One the factory covered 1300 acres and employed very nearly 80,000 workers. Woolwich was the Headquarters of the Royal Artillery since the raising of that Regiment in 1716. The Arsenal was closed in the late 1960’s.) These two cannons were transferred to the Warrnambool Garrison Artillery Battery Fortifications erected at Flagstaff Hill in 1887 as part of Victoria’s Coastal Defences. The original wooden carriages were subsequently replaced with the present iron garrison carriages in 1888. They are a “C” pivot. The ‘racers’ or curved track set into the floor of the gun emplacement (which enabled the guns to be traversed more quickly) are as specified for guns up to 10 inch, being of wrought iron 2.78 inches wide. A temporary third gun, now no longer on Flagstaff Hill’s site, was a 5 inch Rifled Breech Loading (BL) Armstrong gun mounted on an Elswick hydro pneumatic disappearing carriage It was faster to load and fire than the 80 pound RMLs and its arrival spelt the end of the older 80 pound guns’ useful life, apart from being used for practice sessions. The 5 inch BL gun was the main defensive weapon of the Warrnambool Battery until the Battery was downgraded in importance and the gun was recalled to Melbourne in 1910. The State of Victoria took over the ownership of the guns at the time of Australian Federation in 1901. In about 1901/1902 the Garrison Battery was converted to the Warrnambool Battery of the Australian Field Artillery (No 4 Field Battery). It was equipped with 4.7 inch naval guns mounted on field carriages. They were now a mobile unit but continued to use the Warrnambool Garrison area at Flagstaff Hill for practice. When the Fortifications were declared obsolete the two 80 Pounder RML were relocated to Cannon Hill in 1910. On the outbreak of World War One the 4.7 inch guns were recalled to Melbourne, and the Battery was disbanded. Most of the personnel probably re-enlisted in the local 4th Australian Light Horse Regiment. The two 80 Pounder RML were moved back to the Fortifications in 1973. They were both fully restored by Army First Year Apprentices at the Ordinance Factory in Bendigo in time for the centenary year of the fortifications in 1987. The guns are capable of firing 80 pound (32.3kg) armour piercing exploding shells 3.65kms out to sea. They were original manned by volunteers before a paid Garrison was established. Now the Guns are again fired by volunteers on Special Event days. Since restoration the Gun Number 1 had been fired on a regular basis but Gun Number 2 hadn’t been fired since the mid 1990’s. In April 2015 Gun Number 2 was serviced in preparation for the firing of both cannons on the ANZAC Centenary commemorations on April 25th 2015. Other guns from the original Cannon Hill location were obsolete by the time the 1887 Warrnambool Garrison Artillery Battery was built. These guns are (1) a 32 Pounder Muzzle Loading Smooth Bore (SB) cast in 1813 at the famous Carron Foundry, number 80837 and now located in the Warrnambool Botanic Gardens (2) a 68 Pounder Muzzle Loading Smooth Bore cast in 1861 at the equally august Low Moor Foundry, number 10310 and now located on the lawn area at the entrance to Flagstaff Hill Maritime Village. Both of these guns are mounted on their original wooden garrison carriages. There are only seven 32 Pounder SB made by Carron and fifteen 68 Pounder SB made at Low Moor known to exist in the State of Victoria (Conservation Management Plan for Victorian Guns and Cannon, South Western Victoria, May 2008, ref W/F/04)The Warrnambool Garrison has been added to the Victorian Heritage Register H1250 “for its intact battery and guns, a strong reminder of Victoria’s wealth and determination to protect itself from the perceived threat of invasion in the 1880’s.” The City of Warrnambool is one of several custodians of a collection of artillery pieces of heritage significance at a state, national and international level. These pieces are directly related to the defence of south-west Victoria in the 19th century. The care and preservation come under the Heritage Act 1995. Cannon. 80 Pounder Rifled Muzzle Loading (RML) Gun on iron carriage and slide, installed in the Battery at Flagstaff Hill’s Fortifications.. Made in 1866 at the Royal Gun Factory (R-G-F), Woolich, England. Gun Reg No - 23. Flagstaff Hill Garrison Gun 1 (Gun No. 1) Insignia of the Royal Engineers, and the weight of the gun, stamped on top of the gun’s barrel. There is a brass plate on the side of the gun with the details of 1987 restoration.Stamped on axle cover on side of barrel “R-G-F / No 23 / 1866”. Stamped into the metal on top of the barrel, Insignia of the Royal Engineers; Garter and Motto “HONI SOIT QUI MAL Y PENSE”, surmounted by the Crown, with the Royal Cypher of Queen Victoria “VR” within the Garter. Also stamped on top of the gun are 2 inward pointing arrows above the weight ”81-2-0”. Brass plate “RESTORATION / BY / FIRST YEAR / APPRENTICES / ORDANANCE FACTORY / BENDIGO 1987”flagstaff hill, warrnambool, shipwrecked coast, flagstaff hill maritime museum, maritime museum, shipwreck coast, flagstaff hill maritime village, great ocean road, cannon, 80 pounder, rifled muzzle, loading, royal gun factory, woolich -
 Flagstaff Hill Maritime Museum and Village
Weapon - Cannon, 1866
In the years following the Crimean War (1854-1857J) there was a great concern in the Colony that Imperial Russia would attempt an invasion. Coastal defences in the colony of Victoria were greatly strengthened by the Government as a result. Warrnambool was originally protected by cannons at Cannon Hill, approximately 1 kilometer west of the Flagstaff Hill Fortifications. These cannons included two 1866 guns, both 80 Pound Rifled Muzzle Loaders (RML) purchased by Victoria’s Colonial Government. They were part of a shipment of 26 such guns sent from England in December 1866. They are registered as No. 23 (80cwt-2qr-0lbs) - Gun 1, and No.13 (81cwt-1qr-12lbs) - Gun 2. They were cast at the Royal Gun Factory, Woolwich Arsenal, in 1866 and have a 6.3 inch bore. Both barrels carry the Royal Cypher of Queen Victoria, Insignia of the Royal Engineers, within the Garter and Motto surmounted by the Crown, with the Royal Cypher of Queen Victoria within the Garter (letters in centre “VR”, motto “HONI SOIT QUI MAL Y PENSE”, "Shame be to him who thinks evil of it."). The guns were originally supplied with wooden carriages. (The Royal Arsenal at Woolwich, England, was established eleven years after the Restoration of King Charles II. It was the principal supplier of armaments to the British and Empire Governments. At the height of its operations during World War One the factory covered 1300 acres and employed very nearly 80,000 workers. Woolwich was the Headquarters of the Royal Artillery since the raising of that Regiment in 1716. The Arsenal was closed in the late 1960’s.) These two cannons were transferred to the Warrnambool Garrison Artillery Battery Fortifications erected at Flagstaff Hill in 1887 as part of Victoria’s Coastal Defences. The original wooden carriages were subsequently replaced with the present iron garrison carriages in 1888. They are a “C” pivot. The ‘racers’ or curved track set into the floor of the gun emplacement (which enabled the guns to be traversed more quickly) are as specified for guns up to 10 inch, being of wrought iron 2.78 inches wide. A temporary third gun, now no longer on Flagstaff Hill’s site, was a 5 inch Rifled Breech Loading (BL) Armstrong gun mounted on an Elswick hydro pneumatic disappearing carriage It was faster to load and fire than the 80 pound RMLs and its arrival spelt the end of the older 80 pound guns’ useful life, apart from being used for practice sessions. The 5 inch BL gun was the main defensive weapon of the Warrnambool Battery until the Battery was downgraded in importance and the gun was recalled to Melbourne in 1910. The State of Victoria took over the ownership of the guns at the time of Australian Federation in 1901. In about 1901/1902 the Garrison Battery was converted to the Warrnambool Battery of the Australian Field Artillery (No 4 Field Battery). It was equipped with 4.7 inch naval guns mounted on field carriages. They were now a mobile unit but continued to use the Warrnambool Garrison area at Flagstaff Hill for practice. When the Fortifications were declared obsolete the two 80 Pounder RML were relocated to Cannon Hill in 1910. On the outbreak of World War One the 4.7 inch guns were recalled to Melbourne, and the Battery was disbanded. Most of the personnel probably re-enlisted in the local 4th Australian Light Horse Regiment. The two 80 Pounder RML were moved back to the Fortifications in 1973. They were both fully restored by Army First Year Apprentices at the Ordinance Factory in Bendigo in time for the centenary year of the fortifications in 1987. The guns are capable of firing 80 pound (32.3kg) armour piercing exploding shells 3.65kms out to sea. They were original manned by volunteers before a paid Garrison was established. Now the Guns are again fired by volunteers on Special Event days. Since restoration the Gun Number 1 had been fired on a regular basis but Gun Number 2 hadn’t been fired since the mid 1990’s. In April 2015 Gun Number 2 was serviced in preparation for the firing of both cannons on the ANZAC Centenary commemorations on April 25th 2015. Other guns from the original Cannon Hill location were obsolete by the time the 1887 Warrnambool Garrison Artillery Battery was built. These guns are (1) a 32 Pounder Muzzle Loading Smooth Bore (SB) cast in 1813 at the famous Carron Foundry, number 80837 and now located in the Warrnambool Botanic Gardens (2) a 68 Pounder Muzzle Loading Smooth Bore cast in 1861 at the equally august Low Moor Foundry, number 10310 and now located on the lawn area at the entrance to Flagstaff Hill Maritime Village. Both of these guns are mounted on their original wooden garrison carriages. There are only seven 32 Pounder SB made by Carron and fifteen 68 Pounder SB made at Low Moor known to exist in the State of Victoria (Conservation Management Plan for Victorian Guns and Cannon, South Western Victoria, May 2008, ref W/F/05)The Warrnambool Garrison has been added to the Victorian Heritage Register H1250 “for its intact battery and guns, a strong reminder of Victoria’s wealth and determination to protect itself from the perceived threat of invasion in the 1880’s.” The City of Warrnambool is one of several custodians of a collection of artillery pieces of heritage significance at a state, national and international level. These pieces are directly related to the defence of south-west Victoria in the 19th century. The care and preservation come under the Heritage Act 1995. Cannon. 80 Pound Rifled Muzzle Loading (RML) Gun on iron carriage and slide, installed in the Battery at Flagstaff Hill’s Fortifications. Made in 1866 at the Royal Gun Factory (R-G-F), Woolich, England. Gun Reg No 13. Flagstaff Hill Garrison Gun 2 (Gun No. 2). Insignia of the Royal Engineers, and the weight of the gun, stamped on top of the gun’s barrel. There is a brass plate on the side of the gun with the details of 1987 restoration.Stamped into the metal on top of the barrel, Insignia of the Royal Engineers; Garter and Motto “HONI SOIT QUI MAL Y PENSE”, surmounted by the Crown, with the Royal Cypher of Queen Victoria “VR” within the Garter. Also stamped on top of the gun are 2 inward pointing arrows above the weight ”81-1-12”. Brass plate “RESTORATION / BY / FIRST YEAR / APPRENTICES / ORDANANCE FACTORY / BENDIGO 1987”flagstaff hill, warrnambool, shipwrecked coast, flagstaff hill maritime museum, maritime museum, shipwreck coast, flagstaff hill maritime village, great ocean road, colonial defences, victoria’s coastal defences, warrnambool fortification, warrnambool garrison battery, warrnambool volunteer corps, ordinance, armaments, cannon hill fortifications, 4th australian light horse regiment, no 4 field battery, 80 pound cannon rifled muzzle loaders (rml), victorian colonial government, royal gun factory england, woolwich arsenal, royal cypher of queen victoria, garrison gun -
 Federation University Historical Collection
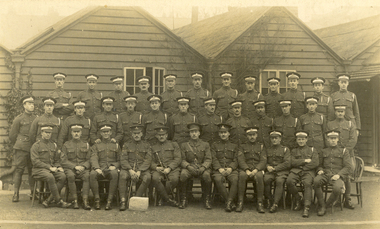
Postcard, "A" Squad Cadets, St John's Wood Barracks, 1917
St John's Wood is a district of north-west London, in the City of Westminster, and at the north-west end of Regent's Park. The King's Troop, Royal Horse Artillery formerly resided at St John's Wood Barracks. The regiment moved to Woolwich on 6 February 2012; the barracks is to be demolished and developed as housing. (http://en.wikipedia.org/wiki/St_John's_Wood)A number of uniformed men pose for a photograph in front of a weatherboard building. The image is of the "A" Squad Cadets at St John's Wood Barracks, London.This card was purchased by an Australian soldier, probably Henry Smerdon Holmes, during World War One. Verso: "A" Squad Cadets. St John's Wood Barracks, London, 12th March 1917chatham family collection, chatham, world, war, world war one, world war 1, world war i, france, harry holmes, holmes, st john's wood -
 Federation University Historical Collection
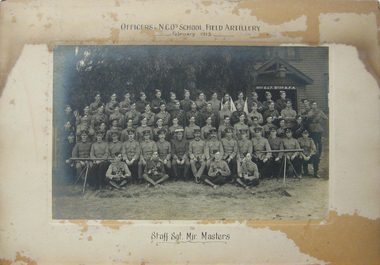
photograph - Black and White, Officers and Non-Commissioned Officers School, Field Artillery, February 1913, 02/1913
A mounted black and white photograph of uniformed men in front of a weatherboard building. They are officers and non commissioned officers of the Field Artillery School, February 1913, 6th and 7th batteries.To Staff Sgt Major Masters. army, field artillery, field artillery school, masters, staff sergeant major masters, volunteer regiment, major masters -
 Australian Commando Association - Victoria
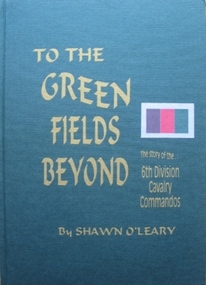
Book - 6th Div, Shawn OLeary, To The Green Fields Beyond:The story of the 6th Division Cavalry Commandos
The comprehensive history of the 6th Australian Division Cavalry Commandos – a (now out of print) reprint of one of the rarer Armoured unit history books. This is the story of one of Australia’s most famous fighting regiments during World War II. As an armoured cavalry unit it fought the Italians and Germans in the sands of the African desert and the Vichy French in the mountains of Syria. Later as a dismounted commando unit it fought the Japanese in the terrifying jungles of New Guinea. The heroism of the men in its ranks and the actions in which they engaged are portrayed in a way which makes battle deeds leap realistically from the pages. “To The Green Fields Beyond” is a documented and detailed book which is of value to everyone who is interested in Australia’s story. Seldom before has such a contribution been made to record of our national history. The book has been approved and sponsored by the Australian War Memorial. The 6th Division Cavalry Regiment was formed in November 1939 and, just two months later, was sent overseas to the Middle East in January 1940. Arriving in Egypt, the regiment immediately went to Palestine, where it joined the rest of the 6th Division and trained using machine-gun carriers and, from October, six old Vickers light tanks. At the end of the year the regiment moved into the Western Desert, where it joined British forces ready for the major offensive to commence on 9 December. Two days later the regiment became the first unit of the 2nd Australian Imperial Force (AIF) to go into action when one of its squadron fought a sharp action against the Italians holding Garn el Grein and Fort Maddalina on 11 and 12 December. By 21 December British forces had captured Sidi Barrrani and the desert was now open for the 6th Division’s advance along the Libyan coast. On 3 January 1941 the division attacked and captured the Italian fort of Bardia. The regiment’s A Squadron, under the command of Major Denzil Macarthur-Onslow, who went on to command the 4th Armoured Brigade, supported the attack. Tobruk was the next Italian fort to be captured, with the regiment again in support and covering the 19th Brigade’s advance. The regiment, though, was under-equipped and without its full compliment of vehicles, using only machine gun carriers. To compensate for this, A Squadron was parity re-equipped with captured Italian light tanks, which had large kangaroos painted on the hulls and turrets to distinguish them from enemy vehicles. After Tobruk, the regiment was used as part of the advance guard in the capture of Derna and then Benghazi. In April the unit moved to Helwan, where it was equipped with Vickers light tanks and machine-gun carriers, and operated with British troops in capturing Sollum. Towards the end of May the regiment moved to Palestine, where it came under the command of the 7th Division for the imminent invasion of Syria. The regiment experienced its heaviest fighting during the Syrian campaign, which began on 7 June. A Squadron was attached to the 21st Brigade and advanced along the coast, where the rugged hills made it difficult to manoeuvre the tanks and carriers. The squadron was relieved by one of the 9th Division Cavalry Regiment’s squadrons on 13 and 14 June. C Squadron, meanwhile, was with the 25th Brigade, and advanced along the Rosh Pinna road, engaging strong enemy defences at Fort Khirbe. C Squadron was relieved by B Squadron, which was later attacked by Vichy French tanks that were supported by heavy artillery and machine-gun fire, which forced the Australians to withdrawal. Always willing or needing to improvise during the campaign, A and B Squadrons both operated three captured French R35 Renault light tanks, while C Squadron provided personnel for a horse troop, quickly nicknamed the “Kelly Gang”, to patrol the high, rugged hills near the Mardjayoun–Banis Road. The regiment remained in Syria as part of the occupation force and returned to Australia in March 1942. It was sent to the Adelaide River, in the Northern Territory, and then later to Murgon, in Queensland. In 1943 and 1944 divisional cavalry regiments were reorganised into cavalry (commando) regiments. In January 1944 the 6th Division Cavalry Regiment became the 2/6th Cavalry (Commando) Regiment. The regiment lost its vehicles and became the administrative headquarters for the 2/7th, 2/9th, and 2/10th Commando Squadrons. The regiment remained with the 6th Division and participated in the Aitpae–Wewak campaign, in New Guinea, during 1945. Includes Nominal Rollnon-fictionThe comprehensive history of the 6th Australian Division Cavalry Commandos – a (now out of print) reprint of one of the rarer Armoured unit history books. This is the story of one of Australia’s most famous fighting regiments during World War II. As an armoured cavalry unit it fought the Italians and Germans in the sands of the African desert and the Vichy French in the mountains of Syria. Later as a dismounted commando unit it fought the Japanese in the terrifying jungles of New Guinea. The heroism of the men in its ranks and the actions in which they engaged are portrayed in a way which makes battle deeds leap realistically from the pages. “To The Green Fields Beyond” is a documented and detailed book which is of value to everyone who is interested in Australia’s story. Seldom before has such a contribution been made to record of our national history. The book has been approved and sponsored by the Australian War Memorial. The 6th Division Cavalry Regiment was formed in November 1939 and, just two months later, was sent overseas to the Middle East in January 1940. Arriving in Egypt, the regiment immediately went to Palestine, where it joined the rest of the 6th Division and trained using machine-gun carriers and, from October, six old Vickers light tanks. At the end of the year the regiment moved into the Western Desert, where it joined British forces ready for the major offensive to commence on 9 December. Two days later the regiment became the first unit of the 2nd Australian Imperial Force (AIF) to go into action when one of its squadron fought a sharp action against the Italians holding Garn el Grein and Fort Maddalina on 11 and 12 December. By 21 December British forces had captured Sidi Barrrani and the desert was now open for the 6th Division’s advance along the Libyan coast. On 3 January 1941 the division attacked and captured the Italian fort of Bardia. The regiment’s A Squadron, under the command of Major Denzil Macarthur-Onslow, who went on to command the 4th Armoured Brigade, supported the attack. Tobruk was the next Italian fort to be captured, with the regiment again in support and covering the 19th Brigade’s advance. The regiment, though, was under-equipped and without its full compliment of vehicles, using only machine gun carriers. To compensate for this, A Squadron was parity re-equipped with captured Italian light tanks, which had large kangaroos painted on the hulls and turrets to distinguish them from enemy vehicles. After Tobruk, the regiment was used as part of the advance guard in the capture of Derna and then Benghazi. In April the unit moved to Helwan, where it was equipped with Vickers light tanks and machine-gun carriers, and operated with British troops in capturing Sollum. Towards the end of May the regiment moved to Palestine, where it came under the command of the 7th Division for the imminent invasion of Syria. The regiment experienced its heaviest fighting during the Syrian campaign, which began on 7 June. A Squadron was attached to the 21st Brigade and advanced along the coast, where the rugged hills made it difficult to manoeuvre the tanks and carriers. The squadron was relieved by one of the 9th Division Cavalry Regiment’s squadrons on 13 and 14 June. C Squadron, meanwhile, was with the 25th Brigade, and advanced along the Rosh Pinna road, engaging strong enemy defences at Fort Khirbe. C Squadron was relieved by B Squadron, which was later attacked by Vichy French tanks that were supported by heavy artillery and machine-gun fire, which forced the Australians to withdrawal. Always willing or needing to improvise during the campaign, A and B Squadrons both operated three captured French R35 Renault light tanks, while C Squadron provided personnel for a horse troop, quickly nicknamed the “Kelly Gang”, to patrol the high, rugged hills near the Mardjayoun–Banis Road. The regiment remained in Syria as part of the occupation force and returned to Australia in March 1942. It was sent to the Adelaide River, in the Northern Territory, and then later to Murgon, in Queensland. In 1943 and 1944 divisional cavalry regiments were reorganised into cavalry (commando) regiments. In January 1944 the 6th Division Cavalry Regiment became the 2/6th Cavalry (Commando) Regiment. The regiment lost its vehicles and became the administrative headquarters for the 2/7th, 2/9th, and 2/10th Commando Squadrons. The regiment remained with the 6th Division and participated in the Aitpae–Wewak campaign, in New Guinea, during 1945. Includes Nominal Rollww2, australian commandos, australian special forces, world war 2 -
 Victorian Interpretive Projects Inc.
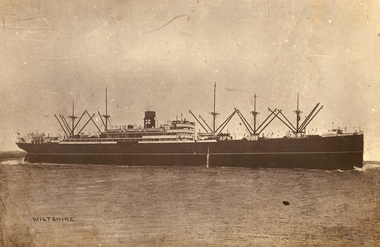
Photograph - Digital, Troopship Wiltshire, 1918, c1918
The HMAT A18 Wiltshire (1912-1922) weighed 10,390 tons with an average cruise speed of 13.5 knots or 25.00 kmph. Described as a refrigerated steamship it was b uilt 1912 by John Brown, Clydebank for the Federal S N Co Ltd, London and was propelled by a twin screw, quadruple expansion engine 2 x 4 cylinders each 6500 hp. Owned by the Commonwealth & Dominion Line Ltd, London, it was leased by the Commonwealth until 2 October 1917. It embarked from Egypt on 2 February 1918. On 18 October 1914 at Melbourne embarked the 4th Light Horse Regiment (Victoria) A, B & C squadron & their Machine Gun Section, the 2nd Field Ambulance (Victoria) First Division. The disembarked the 4th Light Horse Regiment in Egypt on 10 December 1914. On 01 November 1914 The Wiltshire assembled with the first convoy at King George's Sound, Albany Western Australia in transporting the first detachment of the Australian and New Zealand Imperial Expeditionary Forces. It completed nine transport voyages from Australia commencing 18 October 1914 until final voyage from Sydney 9th November 1918. During that time The Wiltshire carried the 4th Field Artillery Brigade (Victoria) 2nd Division Artillery and their 1st Reinforcements, 1st Division Ammunition Column 1st Division Artillery 4th Reinforcements, thirty-four Infantry Battalion Reinforcements, the 10th, 11th & 12th Field Artillery Battery (Victoria) 4th Field Artillery Brigades, the 4th Brigade Ammunition Column 4th Field Artillery Brigade, the 1st Siege Artillery Brigade 15th Reinforcements, the 4th Light Horse Regiment (Victoria) A, B & C squadron & their Machine Gun Section, six Light Horse Brigade Reinforcements, the 1st Veterinary Section (New South Wales) 11th Reinforcements, the 1st Mobile Veterinary Section (New South Wales) 1st Division 11th Reinforcements, the 2nd Mobile Veterinary Section (Victoria, New South Wales) 2nd Division 11th Reinforcements, the 1st Cyclist Battalion (New South Wales and Queensland) 3rd Reinforcements, the 2nd Field Ambulance (Victoria) First Division & Medical Officers. After the conclusion of World War One is was wrecked Rosalie Bay, Great Barrier Island New Zealand 31 May 1922 on passage London for Dunedin. Onboard was a crew of 103 plus 1 stowaway, and 10,000 ton of general cargo. No lives lost and is now a well frequented 'Dive' wrecksite. (http://www.flotilla-australia.com/hmat.htm#A18)Photographic postcard of the troopship Wiltshire out at sea.world war one, world war, wiltshire, troop ship, mmm -
 National Vietnam Veterans Museum (NVVM)
Plaque, 10 Medium Regiment
... Royal Regiment of Australian Artillery Ubique Quo Fas Et... Medium Regiment Royal Regiment of Australian Artillery Ubique Quo ...Wooden Shield with Copper Coloured Badge of Crown, Field Gun and ScrollsRoyal Regiment of Australian Artillery Ubique Quo Fas Et Gloria Duc Unt 10 Medium Regimentplaque, artillery, 10 medium regiment -
 National Vietnam Veterans Museum (NVVM)
Book, Lewis, Stephen, My Vietnam: Photograph by Australian eterans of the Vietnam conflict. (Copy 2)
... Australian National Serviceman Nui Dat 12th Field Regiment Royal ...My Vietnam is a pictorial journey seen through the cameras of over 80 Australian veterans of the Vietnam conflict.The book is signed by the author. The dustjacket is missing & the hard cover of the book is damaged along the edges & the top of the pages appears water damaged.My Vietnam is a pictorial journey seen through the cameras of over 80 Australian veterans of the Vietnam conflict. 1961-1975 - participation, australian, vietnam war, 1961- 1975 - pictorial works, australian national serviceman, nui dat, 12th field regiment, royal australian artillery -
 National Vietnam Veterans Museum (NVVM)
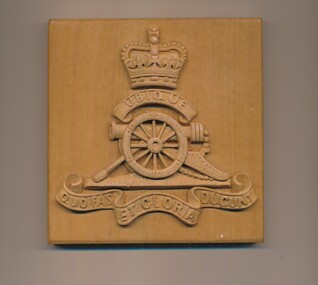
Plaque - Artillery plaque
... This carved emblem of the Royal Regiment of Australian... of Australian Artillery.... of the Royal Regiment of Australian Artillery was collected because ...This carved emblem of the Royal Regiment of Australian Artillery was collected because it commemorates the war in Vietnam.Small square wooden block carved with a crown/ artillery piece/ and Latin mottos is the shield of the Royal Regiment of Australian Artillery.Ubique/Quo Fas Et Gloria Ducuntaustralian army, arillery regiment, australia artillery -
 National Vietnam Veterans Museum (NVVM)
Book, Lewis, Stephen, My Vietnam: Photograph by Australian veterans of the Vietnam conflict. (Copy 1), 2002
... Australian National Serviceman 12th Field Regiment Royal Australian ...My Vietnam is a pictoria journey seen through the cameras of over 80 Australian veterans of the Vietnam conflict.The book is signed by the author. The dustjacket is missing & the hard cover of the book is damaged along the edges & the top of the pages appears water damaged.My Vietnam is a pictoria journey seen through the cameras of over 80 Australian veterans of the Vietnam conflict. 1961-1975 - participation, australian, vietnam war, 1961- 1975 - pictorial works, australian national serviceman, 12th field regiment, royal australian artillery -
 National Vietnam Veterans Museum (NVVM)
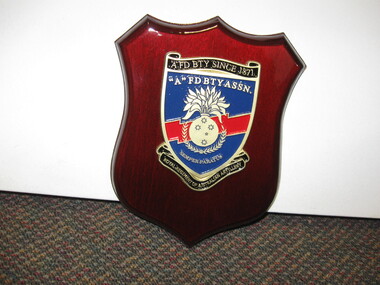
Plaque
... Royal Regiment Of Australian Artillery... Of Australian Artillery... of the insigna reads Royal Regiment Of Australian Artillery Plaque Plaque ...A wooden shield. In the midle there is an insignia with the following details. "AFD BTY SINCE 1871" ""A" FD BTY ASSN" On a blue and red background there is leaves in a bowl and under this reads "Semper Paratus" At the bottom of the insigna reads Royal Regiment Of Australian Artilleryshield, royal regiment of australian artillery -
 St Kilda Historical Society
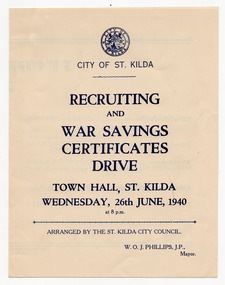
Ephemera - Program, Recruiting and War Savings Certificate Drive, 1940
Program for a rally arranged by the City of St Kilda on 26 June 1940 at St Kilda Town Hall to recruit numbers and raise war savings. Includes a detachable application form for War Savings Certificates on the back page. One of the speakers at the rally was Gunner Harold Holt MHR, who later served as Prime Minister in 1966-67. Holt was elected to Parliament in 1935 at the age of 27. He enlisted in the Militia in February 1939, joining a part-time artillery unit for businessmen and professionals and, May 1940, without resigning his seat, he enlisted in the Australian Imperial Force with the intent of becoming a full-time soldier. He was posted to the 2/4th Field Regiment, holding the rank of gunner. Within three months his brief military career came to an end when three senior government ministers died in a plane crash, an election was called, and he was given leave from the Army to campaign. He was re-elected and then resigned from the Army in October 1940 upon being sworn in as Minister for Labour and National Service.Cream coloured paper, printed in blue on both sides, folded and perforated at the fold city of st kilda, world war ii, wwii fund-raising, harold holt, arnold colman -
 Wangaratta RSL Sub Branch
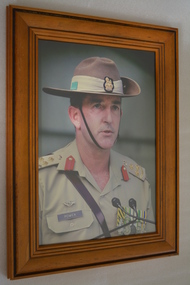
Photograph - Framed Photograph
... , graduating in 1978 into the Royal Regiment of Australian Artillery..., graduating in 1978 into the Royal Regiment of Australian Artillery ...Colour photograph of Lt General Brian Ashley "Ash" Power AO, CSC . Ash Power was born on the 20th of January 1957 in Wangaratta, Victoria. After completing his secondary education at Wangaratta High School, he entered the Royal Military College in 1975, graduating in 1978 into the Royal Regiment of Australian Artillery. His initial appointment was as a Section Commander in 4th Field Regiment. He further served in 4th Field Regiment as a Gun Position Officer, Assistant Adjutant, Adjutant, Operations Officer (BatteryCommander Headquarters Battery) and Commanding Officer.Ash has commanded the 1st Brigade, 1st Division and Training Command – Army. He has served on exchange at the Royal Military Academy Sandhurst, Camberley, United Kingdom and has had other training appointments at the School of Artillery, and the Royal Military College Duntroon. He also served as the Defence Attaché in Thailand. On operations Ash deployed to Bougainville on Operation BELISI as Chief of Staff in 1998 and in 1999, after a short period as Chief of Staff Deployable Joint Force Headquarters, was deployed as the Colonel Operations for INTERFET in East Timor. From June 2004 to July 2005 he was appointed as Director, Combined Planning Group, US Central Command, Tampa. He deployed as the Deputy Chief of Staff, Strategic Partnering Headquarters International Security Assistance Force, Kabul, Afghanistan in 2010-11. Lieutenant General Power retired from the Army on 19 July 2014, his final posting being the Chief of Joint OperationsBrown timber frame containing photograph of uniformed Army Officer ash power, australian army -
 Tramways/East Melbourne RSL Sub Branch - RSL Victoria Listing id: 27511
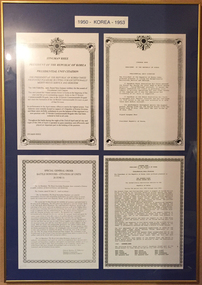
Memorabilia - Framed Citation for KOREA, 1950 - KOREA - 1953
Four framed pages detailing Citations given to units after the Korean Conflict. Top Left - 16th Field Regiment, Royal New Zealand Artillery for Meritorious Service and Heroism Top Right - 77 Squadron Royal Australian Air Force for Meritorious Service and Heroism Bottom Left - 3rd Battalion Royal Australian Regiment for deserved honour and distinction Botton Right - 7th Fleet, United States Navy for Meritorious Servicekorea, korean war, syngman rhee, 16th field regiment royal new zealand artillery, 77 squadron royal australian air force, 3rd battalion royal australian regiment, 7th fleet united states navy, citation -
 8th/13th Victorian Mounted Rifles Regimental Collection
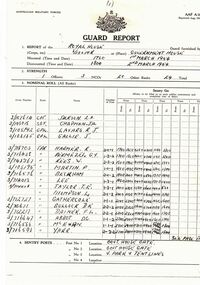
Document - Royal guard report, AAF A18 Guard Report, 2 March 1954
... were shared by 1st Battalion Royal Australian Regiment, 3rd... were shared by 1st Battalion Royal Australian Regiment, 3rd ...The 8th/13th Victorian Mounted Rifles was raised as a regiment of the Royal Australian Armoured Corps on 1 May 1948 with Headquarters in Melbourne and squadrons in Sale, Benalla/Wangaratta and Albury. In 1955 Regimental Headquarters moved to Wangaratta and a second squadron was located at Albury. The Sale squadron transferred to 4th/19th Prince of Wales’s Light Horse. In 1977 8/13 VMR Regiment was reduced to an independent squadron A Squadron 8th/13th Victorian Mounted Rifles and in 1991 was linked with 4th/19th Prince of Wales’s Light Horse forming the VMR Squadron of that regiment. The queen was resident at Government House Melbourne for nine days and during the time guard duties were shared by 1st Battalion Royal Australian Regiment, 3rd Division Royal Australian Artillery, 5th Infantry Battalion (Victorian Scottish), 6th Infantry Battalion (Royal Melbourne Regiment), 4th/19th Prince of Wales's Light Horse, 8th/13th Victorian Mounted Rifles, 2nd Medium Regiment, 22nd Field Regiment and Melbourne University Rifles. Rare document relating to guard duty at Government House Melbourne mounted by a unit of the Citizen Military Forces from Victoria during a royal visit .Photocopy of a three page report prepared for period 1/2 March 1954 when 8th/13th Victorian Mounted Rifles Regiment provided the guard at Government House Melbourne during the visit of Her Majesty Queen Elizabeth II. The report lists the officer, 4 non commissioned officers and 20 other ranks comprising the guard together with timings and locations of the sentry posts. Also details of the guard duties, the general remarks at the conclusion of the guard period and the signatures of the Guard Commander, Captain LA Jackson 8th/13th Victorian Mounted Rifles and the Relieving Guard Commander Captain EJ King, 2nd Medium Regiment. queen elizabeth ii, royal visit 1954, government house, melbourne, guard, vmr -
 8th/13th Victorian Mounted Rifles Regimental Collection
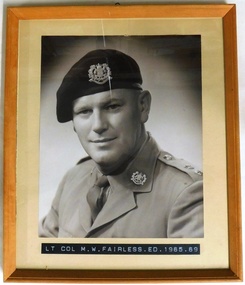
Photograph - Lt Col Fairless
Lieutenant Colonel MW Fairless transferred from the Royal Australian Artillery when he took up a posting in Albury with the Commonwealth Bank. He was Commanding Officer of 8/13 VMR 1965 - 1969. The 8th/13th Victorian Mounted Rifles was raised as a regiment of the Royal Australian Armoured Corps on 1 May 1948 with Headquarters in Melbourne and squadrons in Sale, Benalla/Wangaratta and Albury. In 1955 Regimental Headquarters moved to Wangaratta and a second squadron was located at Albury. The Sale squadron transferred to 4th/19th Prince of Wales’s Light Horse. In 1977 8/13 VMR Regiment was reduced to an independent squadron A Squadron 8th/13th Victorian Mounted Rifles and in 1991 was linked with 4th/19th Prince of Wales’s Light Horse forming the VMR Squadron of that regiment.One of a collection of photographic portraits of Commanding Officers and Officers Commanding of the regiment/independent squadron from its inception in 1947 to its linking with 4th/19th Prince of Wales’s Light Horse in 1991. Framed black and white photograph of officer wearing black beret with 8th/13th Victorian Mounted Rifles hat badge. Inscription on lower frame." Lt. Col. M.W. Fairless ED 1965 - 1969 "military, fairless, uniform, vmr -
 8th/13th Victorian Mounted Rifles Regimental Collection
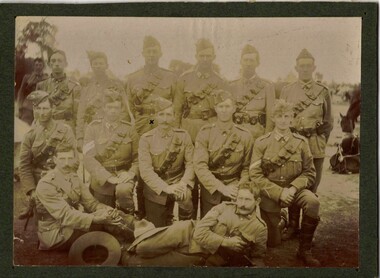
Photograph - Seymour Camp 1910
Seymour was selected as the site for a military training camp by General Kitchener during his 1909 visit to Australia to advise the government of defence needs. Space for light horse training and areas for artillery training were factors in the choice of location. Soldiers thought to be Beechworth Troop, 8th Light Horse (VMR). 8th Light Horse (VMR) was raised following Federation from companies of the colonial Victorian Mounted Rifles throughout North-east Victoria. 8th regiment was renumbered 16th Light Horse (Indi) in 1912 and reverted to 8th Light Horse (Indi) in 1920.Black and white photograph of thirteen members of a light horse troop at Kitchener Camp Seymour 1910 posed for photograph. Photograph is professionally mounted on card.In manuscript: "Kitchener Camp Seymour 1910"; faint ink stamp: " James Colquhoun / Photographer / Donald Street / Prahran"light horse, seymour, 8th, vmr, indi, beechworth, kitchener, uniform -
 Australian Army Museum of Western Australia
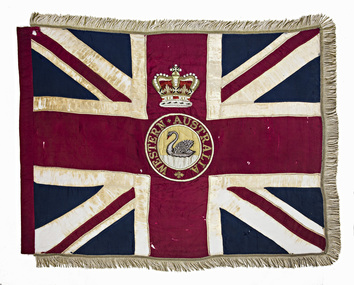
Queen's Colour - 1st Infantry Regiment (WA Volunteer Forces), 1895-96
Presented to 1st Infantry Regiment (WA Volunteer Forces) by HE the Governor of WA, Lt-Colonel Sir Gerard Smith, KCMG at a Queen's Birthday parade held on the Recreation Ground, Bazaar Terrace, Perth (now where the Esplanade is situated), on 28 May 1896. Consecrated by Senior Chaplain of the Forces, the Very Reverend Dean Goldsmith. Purchased by the WA Government, with the sanction of the Home Authorities, the colour was manufactured at the Pimlico Army Clothing Depot, London. It was the first Queen's Colour to be presented to a Western Australian Army unit. (A detailed description of this colour appeared in "The West Australian" of 23 May 1896) This colour was subsequently inherited by successor Militia units to the 1st Infantry Regiment, including 11th Australian Infantry Regiment (Perth Regiment), 88th (Perth) Infantry, 11th Battalion (The Perth Regiment) and 11th/16th Battalion. The colour was handed over to the Perth City Council at a special parade of the 11th/16th Battalion held in Forrest Place on 7 June 1930, and was laid up in the Council Chambers in Murray Street. Together with the other historic colours handed over at the time, this colour later went into storage when Council moved premises in the early 1960's. Perth City Council had some restoration work carried out on these colours in 1975 and later had them on display in their display room at Council House, St Georges Terrace. They were subsequently placed in storage again. Following negotiations by the Army Museum of WA Perth City Council passed on these Colours to the Museum in November 1993. Purchased by the WA Government, with the sanction of the Home Authorities, this was the first Queen's Colour to be presented to a Western Australian Army unit. (A detailed description of this colour appeared in "The West Australian" of 23 May 1896)Union flag with red and gold fringe. In the centre a circle inscribed "Western Australia", surmounted by a crown. Within the circle a black swan on gold background.military heraldry -
 Australian Army Museum of Western Australia
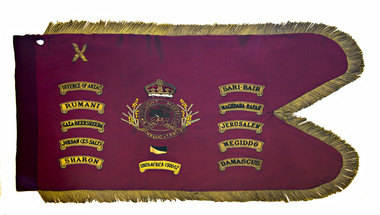
Guidon - 10th Light Horse Regiment
Presented to 10th Light Horse Regiment (West Australian Mounted Infantry) by Lt-General Sir Harry Chauvel, GCMG, KCB on the Esplanade, Perth, 10 March 1928. Consecrated by Senior Chaplain COL Riley, OBE, VD, DD. Later carried by the post-World War Two unit, 10th West Australian Mounted Infantry, raised as a CMF unit of the Royal Australian Armoured Corps in 1949 as a direct successor unit to the above light horse regiment. This unit was redesignated as 10th Light Horse in 1956. The Guidon was laid up at the State War Memorial, King's Park on 10 June 1967, following presentation of a new Guidon to 10th Light Horse in 1966. It was transferred to the Army Museum of WA in 1988 as part of the Bicentenary Colours Project. Crimson with gold fringes, swallow tailed end (traditional cavalry Guidon shape). In the centre a black swan within a circle inscribed "10th LIGHT HORSE (WAMI)", across the lower portion of the circle a scroll inscribed with the regimental motto "PERCUTE ET PERCUTE VELOCITER", the whole surrounded with a wreath of Australian wattle and surmounted by the Crown. In the upper canton the roman numeral "X" Below the whole centrepiece is the regimental colour patch in black over gold diagonals in a rectangle and below that is the battle honour SOUTH AFRICA 1900-02 . Emblazoned on either side of the centrepiece are ten selected battle honours from the Great War: DEFENCE OF ANZAC, SARI BAIR, RUMANI, MAGHDABA-RAFAH, GAZA-BEERSHEBA, JERUSALEM, JORDAN (ES SALT), MEGIDDO, SHARON, DAMASCUS. The battle honour for South Africa for unknown reasons was not included on the guidon when originally presented in 1928, and was not emblazoned on the Guidon until the early 1950's. Other related facts:- • The battle honour "South Africa 1900-02" was granted under MO 123/1908 to 18th Australian Light Horse Regiment which was the predecessor Militia Light Horse regiment existing at the time. • This battle honour appeared under 10th Light Horse Regiment in the Australian Army List from 1928 onwards. • Having the battle honour added at a later date would explain why this battle honour is positioned on the lower portion of the guidon in the centre. At the time of approving battle honours for the Great War, the authorised position for any pre-existing South Africa battle honour was in the top left corner of the Guidon or colour, followed by the battle honours of the Great War. (AAO 112/1927). -
 Australian Army Museum of Western Australia
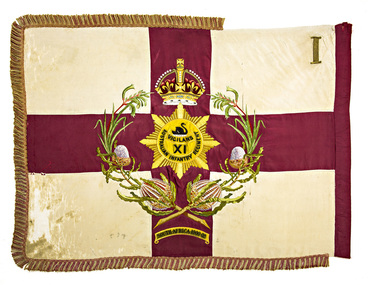
Regimental Colour - 1st Battalion, 11th Australian Infantry Regiment (Perth Regiment)
Purchased from Regimental funds in 1910 and presented by HE the Governor of WA Sir Gerald Strickland, KCMG, at a parade held on the Esplanade, Perth, 18 February 1911. Consecrated by the Right Reverend COL. Riley, DD, VD, Senior Chaplain of the Australian Commonwealth Military Forces. This colour was subsequently inherited by successor units to the 11th Australian Infantry Regiment (Perth Regiment), including 88th (Perth) Infantry, 11th Battalion (The Perth Regiment) and 11th/16th Battalion. The colour was handed over to the Perth City Council at a special parade of the 11th/16th Battalion held in Forrest Place on 2 June 1930, and was laid up in the Council Chambers in Murray Street. Together with the other historic colours handed over at the time, this colour later went into storage when Council moved premises in the early 1960's. Perth City Council had some restoration work carried out on these colours in 1975 and later had them on display in their display room at Council House, St Georges Terrace. They were subsequently placed in storage again. Following negotiations by the Army Museum of WA Perth City Council passed on these colours to the Museum in November 1993 Red George Cross on a white background with red and white fringe. In the centre the regimental badge in gold within a wreath of Western Australian kangaroo paw and banksia, surmounted by the Crown. Below the wreath is the Battle Honour "SOUTH AFRICA 1900-02". In the upper canton is the roman numeral "I" (Note:- The official Battle Honour for South Africa granted to 11th Australian Infantry Regiment under Military Order 123/1908 and subsequently published in the Australian Army List, was "South Africa 1899-1902") regimental colour, military heraldry, battle honour -
 Australian Army Museum of Western Australia
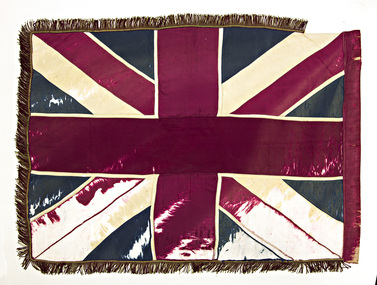
King's Banner - 1st Battalion, 11th Australian Infantry Regiment (Perth Regiment)
... to Australian Light Horse Regiments, Royal Australian Artillery... Regiments, Royal Australian Artillery and Australian Army Medical ...In 1909 His Majesty King Edward VII directed that honorary banners be presented to the Australian Infantry Regiments in commemoration of the services of their members who had volunteered for the South African War 1899-1902. (Promulgated under Military Order 132/1909). These would be similar to those presented to Australian Light Horse Regiments, Royal Australian Artillery and Australian Army Medical Corps in 1904. This Banner was presented to 1st Battalion, 11th Australian Infantry Regiment (Perth Regiment) by HE the Governor of WA Sir Gerald Strickland, KCMG, at a parade held on the Esplanade, Perth, 18 February 1911. Consecrated by the Right Reverend COL. Riley, DD, VD, Senior Chaplain of the Australian Commonwealth Military Forces. This banner was subsequently inherited by successor units to the 11th Australian Infantry Regiment (Perth Regiment), including 88th (Perth) Infantry, 11th Battalion (The Perth Regiment) and 11th/16th Battalion. The banner was handed over to the Perth City Council at a special parade of the 11th/16th Battalion held in Forrest Place on 2 June 1930, and was laid up in the Council Chambers in Murray Street. Together with the other historic colours handed over at the time (see Reference items 1 and 3), this banner later went into storage when Council moved premises in the early 1960's. Perth City Council had some restoration work carried out on these colours in 1975 and later had them on display in their display room at Council House, St Georges Terrace. They were subsequently placed in storage again. Following negotiations by the Army Museum of WA Perth City Council passed on these Colours to the Museum in November 1993. Plain Union flag with red and gold fringe. Red and gold chord and tassels. Pike with Royal Crest pike head. A silver plate attached to lower portion of pike inscribed as follows: "Presented by His Most Gracious Majesty The King Emperor to 1st Battalion, 11th Australian Infantry Regiment Perth Regiment formerly 1st and 2nd Battalions Western Australian Infantry in recognition of services rendered to the Empire in South Africa 1899-1902". -
 Australian Army Museum of Western Australia
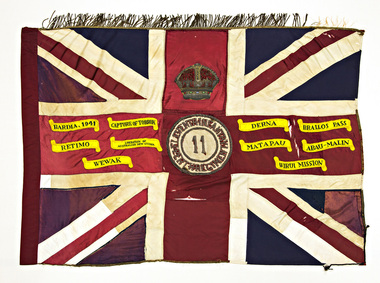
Queen's Colour - 11th Australian Infantry Regiment (Perth Regiment)
This former King's Colour was originally authorised by King George V in 1919 in recognition of services of 11th Battalion (AIF) during the Great War. Presented by HE the Governor General Sir Ronald Munro-Ferguson, PC, CGMG at a parade in King's Park on 2 October 1920 and handed over to 2nd Battalion, 11th Infantry Regiment (Perth Regiment) of the Citizen Forces. In 1921 this unit became re-designated 11th Battalion (The Perth Regiment) (The title was changed to "The City of Perth Regiment" in 1933). Subsequently consecrated by the Chaplain General, Archbishop COL Riley, OBE, VD, DD at a parade on the Esplanade, Perth, 15 November 1924. At the time of presentation this colour was a plain union flag with no central devices or other distinctions included on it. Following Military Board approval given in 1925 the centre circle and Crown were later added, in accordance with the approved design for a King's Colour. With the re-activation of the Citizen Military Forces (CMF) following the Second World War, the 11th/44th Infantry Battalion (The City of Perth Regiment) was raised as a linked battalion in 1948 to carry on the identity and traditions of the pre-war 11th and 44th Battalions respectively. The King's and Regimental Colours formerly held by these two battalions were passed on to the new battalion who paraded them in rotation on ceremonial occasions. With the accession of HM Queen Elizabeth II to the throne in 1953, all Colours that had originally been presented as King's Colours, and were still carried by units on the current Order of Battle, were automatically deemed to be Queen's Colours. Under major reorganisation of the CMF in 1960, all individual infantry battalions that existed at the time within each State were amalgamated to form State regiments, taking effect from 1 July 1960. Thus from that date the 11/44th, 16th and 28th Infantry Battalions were amalgamated to form The Royal Western Australia Regiment. In September 1960, at a ceremonial parade held at Northam Camp, the Colours carried by all former battalions were handed over for safe keeping by the new regiment. Battle Honours for the Second World War were promulgated under Australian Army Order 135/1961 and the 10 selected honours approved for emblazoning on the Queen's Colour were subsequently added in 1962 These former colours were subsequently laid up in the undercroft at the State War Memorial, King's Park on 29 November 1964. These were transferred to the Army Museum of WA in 1988 as part of the Bicentenary Colours Project. Union flag with gold fringes. In the centre the Arabic numeral "11" on a red background within a gold circle inscribed "ELEVENTH INFANTRY - PERTH REGIMENT", surmounted by the Crown. Emblazoned on the colour are the following Second World War Battle Honours:- BARDIA 1941, CAPTURE OF TOBRUK, DERNA, BRALLOS PASS, RETIMO, LIBERATION OF AUSTRALIAN NEW GUINEA, MATAPAU, ABAU-MALIN, WEWAK, WIRUI MISSION