Showing 53 items matching "low loader"
-
 Melbourne Tram Museum
Album - Photographs - Comeng Dandenong, 1980s - 1990s
... 0034 A B2 Class tram is on a low-loader multiwheel transport... 0034 A B2 Class tram is on a low-loader multiwheel transport ...In March 2024, Milissa Box (DTP) was at a trash and treasure market. She'd found a $5 photo album for sale with some photos that she thought might be of interest… From what I can gather it belonged to the gentleman pictured who was a worker at Dandenong in the Comeng and ABB eras. He appears to have worked on the Z3, A1/A2, B1/B2 class trams, Hong Kong LRVs, Comeng Melbourne suburban trains, and later the extra Victorian-purchased XP power cars and XAM sleepers to enable the Riverina XPT to be extended to Melbourne. It's clear he was very proud of the vehicles he'd helped to build. I have scanned a selection of the images, which appear to be a mix of official builder's portraits, team photos, and self-taken shots showing candid everyday scenes on the shop floor. There are also images of the launch of the XP power cars with then-Victorian Premier Joan Kirner; and some personal visits to see the Flying Scotsman, Victorian Goldfields Railway, Coal Creek, etc. Filename Description Date Comeng Scans 2024-03-05 0001 Three Comeng workers (including the photographer) stand in front of Comeng suburban train 697M (Chopper unit) c. June-July 1989 Comeng Scans 2024-03-05 0002 Three Comeng workers (including the photographer) stand in front of Comeng suburban train 697M (Chopper unit) c. June-July 1989 Comeng Scans 2024-03-05 0003 Hong Kong Light Rail Phase 1 LRV 1013 being lifted onto its transport loader c. 1987-88 Comeng Scans 2024-03-05 0004 Walter Wright transport truck (Mack) waits to draw a heavy transport platform out of a shed at Comeng Dandenong. Hong Kong Phase I LRV (1024) can be seen inside the shed c. 1988 Comeng Scans 2024-03-05 0005 Hong Kong Light Rail Phase 1 LRV 1013 on its transport loader in a shed at Comeng Dandenong ready for transport c. 1988 Comeng Scans 2024-03-05 0006 Hong Kong Light Rail Phase 1 LRV 1013 on its transport loader in a shed at Comeng Dandenong ready for transport c. 1988 Comeng Scans 2024-03-05 0007 The photographer is pictured fitting components to the cab of a Phase I Hong Kong LRV No 1026 c. 1988 Comeng Scans 2024-03-05 0008 Hong Kong Light Rail Phase 1 LRV 1013 on its transport loader at Comeng Dandenong ready for transport c. 1988 Comeng Scans 2024-03-05 0009 Hong Kong Light Rail Phase 1 LRV 1013 on its transport loader at Comeng Dandenong ready for transport c. 1988 Comeng Scans 2024-03-05 0010 Hong Kong Light Rail Phase 1 LRV 1013 on its transport loader at Comeng Dandenong ready for transport c. 1988 Comeng Scans 2024-03-05 0011 The photographer and a colleague are pictured in the car park posing for a photo at Comeng Dandenong c. 1988 Comeng Scans 2024-03-05 0012 The photographer and a colleague are pictured inside the cab of Comeng suburban train 697M, posing for a photo at Comeng Dandenong c. 1989 Comeng Scans 2024-03-05 0013 A stainless steel Hitachi train bodyshell is being transported on a truck-trailer. Possibly taken at Martin and King in Bayswater, under transport to the station for railing to Somerton for fitout. This is a later series M car with the rear-mounted pantograph (note the mounting lugs above the non-driving end) c. 1980 Comeng Scans 2024-03-05 0014 A shot at Comeng Dandenong of the onsite workforce standing in front of a Phase I Hong Kong LRV. c.1987-88 Comeng Scans 2024-03-05 0015 A shot at Comeng Dandenong of the onsite workforce standing in front of a Phase I Hong Kong LRV. c.1987-88 Comeng Scans 2024-03-05 0016 Hong Kong Light Rail Phase 1 LRV 1038 on its transport loader at Port of Melbourne ready for transport c. 1988 Comeng Scans 2024-03-05 0017 Three Comeng workers (including the photographer) stand in front of a workbench at Comeng Dandenong c. June-July 1989 Comeng Scans 2024-03-05 0018 A newly completed Comeng train (wearing VicRail teacup orange) on the factory access track at Comeng Dandenong c. 1981 Comeng Scans 2024-03-05 0019 A newly completed Z3 class tram on a transporter, with its bogie frames waiting transport to Preston Workshops for final fitout and commissioning c. 1981 Comeng Scans 2024-03-05 0020 A newly completed Comeng train (wearing VicRail teacup orange) on the factory access track at Comeng Dandenong c. 1981 Comeng Scans 2024-03-05 0021 A newly completed Z3 class tram on a transporter, with its bogie frames waiting transport to Preston Workshops for final fitout and commissioning c. 1981 Comeng Scans 2024-03-05 0022 A Comeng/ABB artist impression presumably part of their bid for the Double Decker demonstrator train for Melbourne. Note the similarity to similar Comeng sets constructed for Sydney. c. Nov 1989 – April 1990 Comeng Scans 2024-03-05 0023 Victorian Railways steam locomotive K 169 on static display at Coal Creek. c. 1980s Comeng Scans 2024-03-05 0024 Comeng suburban train carriage 1190T on a traverser in the yard at Comeng Dandenong. c. June-July 1989 Comeng Scans 2024-03-05 0025 Comeng suburban train carriages the yard at Comeng Dandenong. c. June-July 1989 Comeng Scans 2024-03-05 0026 Comeng suburban train carriages the yard at Comeng Dandenong. c. June-July 1989 Comeng Scans 2024-03-05 0027 Comeng suburban train carriages the yard at Comeng Dandenong. c. June-July 1989 Comeng Scans 2024-03-05 0028 Comeng suburban train carriages the yard at Comeng Dandenong. c. June-July 1989 Comeng Scans 2024-03-05 0029 Comeng suburban train in a shed at Comeng Dandenong. c. June-July 1989 Comeng Scans 2024-03-05 0030 Comeng suburban train carriage 1190T on a traverser in the yard at Comeng Dandenong – possible Factory Acceptance Inspection by the Met c. June-July 1989 Comeng Scans 2024-03-05 0031 Comeng suburban train carriage 1190T being tractor-shunted in the yard at Comeng Dandenong – possible Factory Acceptance Inspection by the Met c. June-July 1989 Comeng Scans 2024-03-05 0032 Two Comeng workers carry a train part (possibly a first aid kit) for fitting to a Comeng suburban train. c. June-July 1989 Comeng Scans 2024-03-05 0033 Comeng suburban train carriage 1190T on a traverser in the yard at Comeng Dandenong – possible Factory Acceptance Inspection by the Met. One of the Met staff appears to be giving one of the Comeng workers a kiss on the cheek. c. June-July 1989 Comeng Scans 2024-03-05 0034 A B2 Class tram is on a low-loader multiwheel transport trailer waiting transport to Preston Workshops; while what appears to be a classic AP6 Valiant Safari Wagon is in the foreground. c. June-July 1989 Comeng Scans 2024-03-05 0035 A B2 Class tram is on a low-loader multiwheel transport trailer waiting transport to Preston Workshops; while a worker poses for a photo with his hand on the rigging. c. June-July 1989 Comeng Scans 2024-03-05 0036 A B2 Class tram is on a low-loader multiwheel transport trailer waiting transport to Preston Workshops; An HT Holden Belmont sedan has been posed in front to appear as if it is towing the heavy vehicle. c. June-July 1989 Comeng Scans 2024-03-05 0037 A B2 Class tram is on a low-loader multiwheel transport trailer waiting transport to Preston Workshops; An HT Holden Belmont sedan has been posed in front to appear as if it is towing the heavy vehicle. c. June-July 1989 Comeng Scans 2024-03-05 0038 A1 Class tram 232 is pictured up on stands while various A/B class tram cab frames are in the foreground in various stages of assembly. Of note, 232 appears to have been returned to Dandenong for major repair or other work, and shows signs of having been in traffic for some time (weathering and wear) c. June-July 1989 Comeng Scans 2024-03-05 0039 various A/B class tram cab frames are in the foreground in various stages of assembly. c. June-July 1989 Comeng Scans 2024-03-05 0040 A group of Comeng Dandenong workers stopped on a tea break. c. June-July 1989 Comeng Scans 2024-03-05 0041 An A/B Class tram cab being fitted out with electronics and controls. c. June-July 1989 Comeng Scans 2024-03-05 0042 A new Comeng suburban train in Metropolitan Transit livery on the test track at Comeng Dandenong. c. mid 1980s Comeng Scans 2024-03-05 0043 A new Comeng suburban train in Metropolitan Transit livery on the test track at Comeng Dandenong. c. mid 1980s Comeng Scans 2024-03-05 0044 Interior shot of a new Comeng suburban train at Comeng Dandenong. c. mid 1980s Comeng Scans 2024-03-05 0045 Interior shot of a new Comeng suburban train at Comeng Dandenong. c. mid 1980s Comeng Scans 2024-03-05 0046 The exterior sign at Dandenong showing ABB brand. Early 1990s Comeng Scans 2024-03-05 0047 A B2 Class tram is on a low-loader multiwheel transport trailer waiting transport to Preston Workshops. Early 1990s Comeng Scans 2024-03-05 0048 The Brush generator and Paxman Valenta engine as fitted inside a new XP power car for NSW Countrylink (paid for by Victoria) c. 1992 Comeng Scans 2024-03-05 0049 An exterior shot of a new Countrylink XP power car for NSW under construction (paid for by Victoria) c. 1992 Comeng Scans 2024-03-05 0050 Two new XAM class XPT sleeper carriages under construction at Comeng Dandenong c. 1992 Comeng Scans 2024-03-05 0051 A B2 class tram under construction at Comeng Dandenong Early 1990s Comeng Scans 2024-03-05 0052 A B2 class tram under construction at Comeng Dandenong Early 1990s Comeng Scans 2024-03-05 0053 An exterior shot of a new Countrylink XP power car for NSW being moved out of the shed c. 1992 Comeng Scans 2024-03-05 0054 An exterior shot of a new Countrylink XP power car at Comeng Dandenong c. 1992 Comeng Scans 2024-03-05 0055 An exterior shot of a new Countrylink XP power car at Comeng Dandenong c. 1992 Comeng Scans 2024-03-05 0056 An exterior shot of a new Countrylink XP power car at Comeng Dandenong c. 1992 Comeng Scans 2024-03-05 0057 B2 class trams under construction at Comeng Dandenong Early 1990s Comeng Scans 2024-03-05 0058 An XP Powercar from NSW wearing the Intercity XPT Candy Livery at Comeng Dandenong. It is not known if this was originally painted in this livery (incorrectly) or if this was one of the first delivered series transported to Dandenong to aid the construction process of the four additional locomotives. Early 1990s Comeng Scans 2024-03-05 0059 Melbourne B2 Class tram B2.2100 (renumbered from 2102) painted in the distinctive Chocolate and Cream livery to mark the completion of 100 B2 class trams Early 1990s Comeng Scans 2024-03-05 0060 A factory forklift wearing a hand painted “We love Labo(u)r” cardboard sign, possibly in connection to a media event with the Victorian Premier onsite at Comeng Dandenong. c. 1992 Comeng Scans 2024-03-05 0061 An exterior shot of a new Countrylink XP power car at Comeng Dandenong c. 1992 Comeng Scans 2024-03-05 0062 Two new new Countrylink XP power cars under construction and final fitout at Comeng Dandenong c. 1992 Comeng Scans 2024-03-05 0063 An exterior shot of a new Countrylink XP power car on the traverser at Comeng Dandenong c. 1992 Comeng Scans 2024-03-05 0064 A B2 Class tram is on a low-loader multiwheel transport trailer waiting transport to Preston Workshops. A large banner is draped on the side explaining that this is the 106th vehicle delivered to the Public Transport Corporation (B2.2108). c. Oct 1992 (based on delivery date) Comeng Scans 2024-03-05 0065 Victorian Premier Joan Kirner addresses a group of dignitaries in front of an ABB banner inside the main administration building at Dandenong, on the occasion of the first XPT power car purchased by Victoria being unveiled at a media event c. 1992 Comeng Scans 2024-03-05 0066 An ABB executive addresses a group of dignitaries in front of an ABB banner inside the main administration building at Dandenong, on the occasion of the first XPT power car purchased by Victoria being unveiled at a media event c. 1992 Comeng Scans 2024-03-05 0067 Victorian Premier Joan Kirner addresses the media in front of a completed XP class XPT power car at Dandenong, on the occasion of the first XPT power car purchased by Victoria being unveiled at a media event c. 1992 Comeng Scans 2024-03-05 0068 An exterior shot of a new Countrylink XP power car at Comeng Dandenong c. 1992 Comeng Scans 2024-03-05 0069 A Melbourne B2 class tram undergoing testing on the test circuit at ABB Dandenong c. early 1990s Comeng Scans 2024-03-05 0070 An XPlorer type DMU emerges from a shed at ABB Dandenong c.1994 Comeng Scans 2024-03-05 0071 Voith final drive axle mounted units for XPlorer railcars waiting to be fitted at Dandenong. c.1994 Comeng Scans 2024-03-05 0072 A completed XAM class sleeper carriage at ABB Dandenong. c.1993 Comeng Scans 2024-03-05 0073 Completed XPlorer railcars wait transfer to South Dynon for bogie exchange and transfer to NSW at ABB Dandenong. c. 1994 Comeng Scans 2024-03-05 0074 A clipping from an ABB internal newsletter outlining the staff-led initiative to commemorate the 100th B2 class tram with a special livery c.1992 Has photographs of ABB, Steamrail tours, Castlemaine and Maldon Railway, Fying Scotsman 4472 visit and Puffing Billy.Yields information about the people and events at Commonwealth Engineering plant Dandenong and the activities of the unknown compiler.Album containing 40 leaves, photos in a heavy card 3 ring spring binder.comeng, commonwealth engineering co., tramcars, hong kong, nsw, sydney, melbourne, railways, the met, b class, cmr, steam engines, abb, asea brown boveri -
 Melbourne Tram Museum
Album - David Frost Slide Collection, David Frost
... Jan 1974 DFC32 VR 20 on a low loader en route to Bob... Jan 1974 DFC32 VR 20 on a low loader en route to Bob ...Photo - see pdf file for further information. Number Brief Description date DFC1 A general view from the former railway platform at Port Melb Station looking towards Station Pier on opening day 20-12-1987 DFC2 A2 285 in the Tramway Platform at Port Melbourne Station on opening Day 20-12-1987 DFC3 A2 285 in the Tramway Platform at Port Melbourne Station on opening Day 20-12-1987 DFC4 A2 285 in the Tramway Platform at Port Melbourne Station on opening Day 20-12-1987 DFC5 A2 273 at St Kilda Tramway Station on opening day 22-11-1987 DFC6 A2 273 turning from Fitzroy St into St Kilda Tramway Station on opening day 22-11-1987 DFC7 B1 2001 at St Kilda Tramway Station turning into Fitzroy St on opening day 22-11-1987 DFC8 B1 2002 enters St Kilda Tramway Station on opening day 22-11-1987 DFC9 An A2 approaches St Kilda Tramway Station on opening day 22-11-1987 DFC10 Concreting the connecting curve from Fitroy St into St Kilda Station c July 1987 DFC11 An MTA AEC MKVI bus in Grey St St Kilda at Dalgety St with Tramway works in the background c July 1987 DFC12 Grey St St Kilda at Dalgety St with Tramway works in the background in Fitzroy St c July 1987 DFC13 Concreting the connecting curve from Fitroy St into St Kilda Station c July 1987 DFC14 Restaurant Tram 442 in Fitzroy St at Grey St Passing MTA bus 59 outside St Kilda Station c1986 DFC15 Former VR tram stop sign painted on a pole at Glenhuntly Rd & Broadway DFC16 Former VR Elwood Tram Depot under demolition 1996 DFC17 Former VR Elwood Tram Depot under demolition 1996 DFC18 Former VR Elwood Tram Depot under demolition 1996 DFC19 Former VR Elwood Tram Depot under demolition 1996 DFC20 Former VR Elwood Tram Depot under demolition 1996 DFC21 Former VR Elwood Tram Depot under demolition 1996 DFC22 Former VR Elwood Tram Depot under demolition 1996 DFC23 Former VR Elwood Tram Depot under demolition 1996 DFC24 MTS Tower waggon in use at the former VR Elwood Tram Depot under demolition 1996 DFC25 A Sign advertising the sale of the Former VR Elwood Tram Depot – 10/8/1996 1996 DFC26 Former VR Elwood Tram Depot under demolition 1996 DFC27 Interior of a shed at the former VR Elwood Tram Depot under demolition 1996 DFC28 Former VR Elwood Tram Depot under demolition 1996 DFC29 Former VR Elwood Tram Depot under demolition 1996 DFC30 Former VR Elwood Tram Depot under demolition 1996 DFC31 VR 20, former breakdown car in Bob Prentice’s Back Yard Jan 1974 DFC32 VR 20 on a low loader en route to Bob Prentice’s for preservation 1959 DFC33 VR 20 as the breakdown car on the St Kilda Electric Street Railway c1955 DFC34 VR 39 waits in St Kilda St as breakdown car 20 enters Elwood Depot c1955 DFC35 VR 54 and 50 in the rear yard of Elwood Depot c1958 DFC36 VR 50 in the rear yard of Elwood Depot c1958 DFC37 VR 50 in the rear yard of Elwood Depot c1958 DFC38 VR 28 in St Kilda St outside Elwood depot after the line had been cut back to this point c1958 DFC39 VR 29 in St Kilda St outside Elwood depot after the line had been cut back to this point c1958 DFC40 VR 35 passes 28 on the St Kilda Electric Street Railway c1955 DFC41 VR 39 on the St Kilda Electric Street Railway c1955 DFC42 Y1 613 on a tour c1970 DFC43 VR 54 in St Kilda St outside Elwood Depot c1955 DFC44 VR 28 at Brighton Beach Terminus c1955 DFC45 VR 33 being washed in the wash bay at the rear of Elwood Depot c1955 DFC46 VR 20 breakdown car running into Elwood Depot c1955 DFC47 VR 3 in the rear yard at Elwood Depot c1955 DFC48 VR 51 on an AETA Tour running out of Elwood Depot c1958 DFC49 VR 28 on the St Kilda Electric Street Railway c1955 DFC50 VR 28 with crew in St Kilda St outside Elwood depot after the line had been cut back to this point 1959 DFC51 VR 52 in Grey St near Fitzroy St c1958 DFC52 VR 51 on a AETA Tour passes 33 in Grey St near Fitzroy St c1958 DFC53 VR 29 in Grey St near Fitzroy St c1958 DFC54 VR51 on an AETA Tour shunts as 52 waits on the St Kilda Electric Street Railway c1958 DFC55 VR 51 on the Black Rock Electric Street Railway c1955 DFC56 VR 28 in St Kilda St outside Elwood depot after the line had been cut back to this point c1958 DFC57 Combined Rail-Tram Tickets of the Black Rock Electric Street Railway Feb 1975 DFC58 Combined Rail-Tram Tickets of the St Kilda Electric Street Railway Feb 1975 DFC59 Electric Street Railway & Motor Coach Paper Tear off Tickets Feb 1975 DFC60 VR 52 & 53 on Rt 82 pass in Cordite Ave near Wests Rd Sept 1975 DFC61 Z 68 & 52 in East Preston Depot in M&MTB Livery c1977 DFC62 Copy photo of VR 18 in Elwood Depot c1910 DFC63 VR 51 as a one man car at Black Rock Terminus c1955 DFC64 VR 53 on Rt 82 in Droop St Footscray Jan 1974 DFC65 B2 2027 on Rt 96 in South Melb Station c1988 DFC66 VR 20 as preserved in Bob Prentice’s backyard High St Prahran Jan 1974 DFC67 VR 700 on Rt 82 in Droop St Footsray c1978 DFC68 VR 28 as the last car from ST Kilda Station 28-2-1959 DFC69 VR 700 at the Rt 82 Moonee Ponds Terminus c1978 DFC70 VR 52 waiting time at the Rt 82 Footscray Terminus, the driver intently stares at the bundy clock as the Braid and the Connie gossip Jul 1972 DFC71 VR 54 shunting outside Elwood Depot to return to St Kilda Station 1959 DFC72 SW6 969 in MTA Livery blocking the entrance to South Melb Depot presumably during the scratch ticket dispute Jan 1990 DFC73 VR 52 & 53 on Rt 82 pass in Droop St Footscray Sept 1975 DFC74 VR 700 after withdrawl in the Newport Railway museum in the process of a repaint c1985 DFC75 VR 700 after withdrawl in the Newport Railway museum in the process of a repaint c1985 DFC76 VR 700 on Rt 82 in Droop St Footsray at The Cresent c1978 DFC77 VR 700 on Rt 82 in Droop St Footsray c1978 DFC78 Former VR tram depot in use as an MTA Bus depot c1990 DFC79 VR 52 waiting time at the Rt 82 Footscray Terminus Jul 1972 DFC80 VR 52 waiting time at the Rt 82 Footscray Terminus with Connie changing the pole Jul 1972 DFC81 VR 52 at the Rt 82 Moonee Ponds Terminus with the crew chatting 7-12-1974 DFC82 VR 52 on Rt 82 on the reserved track in Raleigh Rd Ascot Vale Jan 1974 DFC83 VR 53 on Rt 82 in Leeds St Footscray about to turn into Hopkins St April 1976 DFC84 VR 53 on Rt 82 in Droop St Footsray Jan 1974 DFC85 VR 700 on Rt 82 in Droop St Footsray at Hopkins St c1978 DFC86 Z 52 in MTA livery on Rt 19 in Elizabeth St near Bourke St c1985 DFC87 VR 52 at the Rt 82 Moonee Ponds Terminus Jul 1972 DFC88 VR 53 at the Rt 82 Footscray Terminus Jan 1974 DFC89 VR 52 freshly outshopped from the workshops and W7 1011 at the Bourke St Terminus with 52 on display for the 1968 railway exhibition 1968 DFC90 Painting of W class 369 in Chocolate & Cream c1930 DFC91 Charing Cross, Bendigo at night c1965 DFC92 Ballarat ? c1965 DFC93 Bendigo 18 on an AETA tour in McCrae St near Tramway Ave c1965 DFC94 View from the roof of a tram in the body shop at Preston Workshops 1977 DFC95 View from the roof of a tram in the body shop at Preston Workshops 1977 DFC96 View from the roof of a tram in the body shop at Preston Workshops showing the panto on 546 1977 DFC97 Interior view of Carlton Control Centre showing desk and wall panel c1968 DFC98 W2 493 on Rt 55 in Kingsway outside South Melb Depot Aug 1973 DFC99 W2 496 in Sturt St at Kingsway on Rt 1 Jul 1973 DFC100 Z class truck c1975 DFC101 Z3 116 in Bourke St at King St as new c1979 DFC102 Bob Prentice on tour c1968 DFC103 SW6 900 as an advertising tram for Newsday at night 1969 DFC104 597 Jul 1973 DFC105 W2 480 on Rt 3 passing under the railway bridge at Caulfield Oct 1972 DFC106 Interior view of Carlton Control Centre showing desk c1968 DFC107 SW6 856 on Rt 77 at night Jul 1973 DFC108 W2 496 in Sturt St at Kingsway on Rt 1 Jul 1973 DFC109 PCC 980 on a tour at South Melb Depot c1968 DFC110 SW6 856 on Rt 77 at night Jul 1973 DFC111 View from the roof of a tram in the body shop at Preston Workshops showing the panto on 546 1977 DFC112 Dandenong Rd from Chapel St Nov 1968 DFC113 A Z class car turns from Gertrude into Nicholson St c1990 DFC114 SW6 900 as an advertising tram for Newsday at night 1969 DFC115 Port Melbourne Station showing Centennial bridge and station building prior to closure. 10-1987 DFC116 Port Melbourne station with train prior to closure, looking south 10-1987 Demonstrates the work of David Frost in photography and or collecting slides.Assembled album in a black presentation folder of 116 colour slides, 6 slide sleeves, collected or photographed by David Frost. Many are TMSV or Windsor Publications slides. All photographs have been scanned and placed on the Museum's G drive. A list of all photographs with details has been compiled. melbourne, tramways, trams, vr trams, elwood, st kilda light rail, port melbourne, opening, elwood depot, buses -
 Flagstaff Hill Maritime Museum and Village
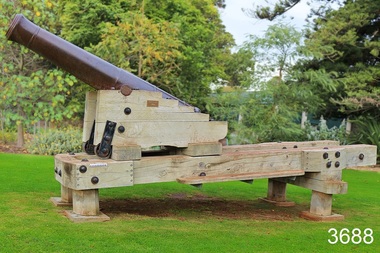
Gun Emplacement, 1890's
The Warrnambool Battery on Flagstaff Hill has embankments for 3 guns. Those on the left and right still have cannon in place but in the centre is an empty embankment, apart from this concrete ring with metal threaded studs. In 1898 a 5 inch breech loading gun (BL) was installed here. The gun had a hydro-pneumatic disappearing carriage (hence the sign on the concrete wall "5" BL HP").. This type of gun was faster to load and fire that the 80 pound RML’s installed on either side of it. Its arrival spelt the end of the 80 pound RML guns’ useful life, although they continued to be used for practice sessions. The 5 inch BL was the main defensive weapon of the Warrnambool Battery until the Battery was downgraded in importance. It was removed in 1904 and recalled to Melbourne in 1910. The gun emplacement ring is all that remains of the mounting for a 5 inch Armstrong rifled breech loading gun. HISTOR of the WARRNAMBOOL GUNS & CANNON In the years following the Crimean War (1854-1857J) there was a great concern in the Colony that Imperial Russia would attempt an invasion. Coastal defences in the colony of Victoria were greatly strengthened by the Government as a result. Warrnambool was originally protected by cannons at Cannon Hill, approximately 1 kilometer west of the Flagstaff Hill Fortifications. The cannons included two 1866 guns, both 80 Pound Rifled Muzzle Loaders (RML) purchased by Victoria’s Colonial Government. They were part of a shipment of 26 such guns sent from England in December 1866. They are registered as No. 23 (80cwt-2qr-0lbs) - Gun 1, and No.13 (81cwt-1qr-12lbs) - Gun 2. They were cast at the Royal Gun Factory, Woolwich Arsenal, in 1866 and have a 6.3 inch bore. Both barrels carry the Royal Cypher of Queen Victoria, Insignia of the Royal Engineers, within the Garter and Motto surmounted by the Crown, with the Royal Cypher of Queen Victoria within the Garter (letters in centre “VR”, motto “HONI SOIT QUI MAL Y PENSE”, "Shame be to him who thinks evil of it."). The guns were originally supplied with wooden carriages. (The Royal Arsenal at Woolwich, England, was established eleven years after the Restoration of King Charles II. It was the principal supplier of armaments to the British and Empire Governments. At the height of its operations during World War One the factory covered 1300 acres and employed very nearly 80,000 workers. Woolwich was the Headquarters of the Royal Artillery since the raising of that Regiment in 1716. The Arsenal was closed in the late 1960’s.) These two 80pdr cannons were transferred to the Warrnambool Garrison Artillery Battery Fortifications erected at Flagstaff Hill in 1887 as part of Victoria’s Coastal Defences. The original wooden carriages were subsequently replaced with the present iron garrison carriages in 1888. They are a “C” pivot. The ‘racers’ or curved track set into the floor of the gun emplacement (which enabled the guns to be traversed more quickly) are as specified for guns up to 10 inch, being of wrought iron 2.78 inches wide. A temporary third gun, now no longer on Flagstaff Hill’s site, was the 5 inch Rifled Breech Loading (BL) Armstrong gun mounted on an Elswick hydro pneumatic disappearing carriage and installed in this very concrete base or pad. The State of Victoria took over the ownership of the guns at the time of Australian Federation in 1901. In about 1901/1902 the Garrison Battery was converted to the Warrnambool Battery of the Australian Field Artillery (No 4 Field Battery). It was equipped with 4.7 inch naval guns mounted on field carriages. They were now a mobile unit but continued to use the Warrnambool Garrison area at Flagstaff Hill for practice. When the Fortifications were declared obsolete the two 80 Pounder RML were relocated to Cannon Hill in 1910. On the outbreak of World War One the 4.7 inch guns were recalled to Melbourne, and the Battery was disbanded. Most of the personnel probably re-enlisted in the local 4th Australian Light Horse Regiment. The two 80 Pounder RML were moved back to the Fortifications in 1973. They were both fully restored by Army First Year Apprentices at the Ordinance Factory in Bendigo in time for the centenary year of the fortifications in 1987. The guns are capable of firing 80 pound (32.3kg) armour piercing exploding shells 3.65kms out to sea. They were originally manned by volunteers before a paid Garrison was established. Now the Guns are again fired by volunteers on Special Event days. Since restoration the Gun Number 1 had been fired on a regular basis but Gun Number 2 hadn’t been fired since the mid 1990’s. In April 2015 Gun Number 2 was serviced in preparation for the firing of both cannons on the ANZAC Centenary commemorations on April 25th 2015. Other guns from the original Cannon Hill location were obsolete by the time the 1887 Warrnambool Garrison Artillery Battery was built. These guns are (1) a 32 Pounder Muzzle Loading Smooth Bore (SB) cast in 1813 at the famous Carron Foundry, number 80837 and now located in the Warrnambool Botanic Gardens. It is now mounted on a replica carriage due to the original carriage being in a fragile condition (the original carriage stored under cover at Flagstaff Hill). (2) a 68 Pounder Muzzle Loading Smooth Bore cast in 1861 at the equally august Low Moor Foundry, number 10310 and now located on the lawn area at the entrance to Flagstaff Hill Maritime Village. It is still mounted on its original wooden garrison carriage. Its wooden slide compressor mechanism is fragile and now kept in Flagstaff Hill’s storage. There are only seven 32 Pounder SB made by Carron and fifteen 68 Pounder SB made at Low Moor known to exist in the State of Victoria [references; Flagstaff Hill Maritime Village interpretation boards, information sheets and other documents; South Western Victoria Guns and Cannon report, May 2008, ref W/F/08] The Gun embankment is contained within the heritage listed Lady Bay Lighthouse Comples, on the Victorian Heritage Register VHR H1520. The gun emplacement base is evidence of the last defences installed on this stretch of coastline. The Warrnambool Garrison has been added to the Victorian Heritage Register H1250 “for its intact battery and guns, a strong reminder of Victoria’s wealth and determination to protect itself from the perceived threat of invasion in the 1880’s.” The City of Warrnambool is one of several custodians of a collection of artillery pieces of heritage significance at a state, national and international level. These pieces are directly related to the defence of south-west Victoria in the 19th century. The care and preservation come under the Heritage Act 1995. Gun emplacement; the remains of the mounting platform of a temporary third gun installed in 1898 in the centre of the battery. This consists of a circular concrete well or sump surrounded by two rings of mounting bolts, the inner of 10 and the outer of 20. The base once held a 5 inch Armstrong rifled breech loading gun with hydro-pneumatic disappearing. In the centre of the ring on the ground is a keyhole shaped space. The gun was removed in 1904. flagstaff hill, warrnambool, shipwrecked coast, flagstaff hill maritime museum, maritime museum, shipwreck coast, flagstaff hill maritime village, great ocean road, colonial defences, victoria’s coastal defences, warrnambool fortification, warrnambool garrison battery, warrnambool volunteer corps, ordinance, armaments, cannon hill fortifications, flagstaff hill fortifications, 4th australian light horse regiment, garrison gun, 5 inch breech loading gun, emplacement for hydro-pneumatic disappearing carriage, gun emplacement -
 Flagstaff Hill Maritime Museum and Village
Weapon - Cannon, 1813
This 1813 cannon is classified as a carronade, having been made by the Carron Ironworks foundry in Stirling, Scotland in 1813. It is a large calibre, short range, gun mainly used on ships. The carronade model of cannon was first used when introduced into the British Royal Navy in the American War of the Revolution (1775-1883). This cannon was originally a 28pdr, 48cwt, 8ft gun. The date ‘1837’ on the barrel probably indicates the date that the Board of Ordinance accepted the change in size to a 32pdr. It may originally have been a naval gun and the conversion undertaken when it was brought ashore. It is very probably one of the 15 guns that are known to have constituted the defences of Victoria in 1860. This group of 32pdrs was the shorter model of the 4800width and 8ft length cannon and as such are different from the 32pdrs found in NSW. It was originally located on Cannon Hill in Warrnambool when it was the site of the Warrnambool Battery Western Artillery, formed in 1866. It was obsolete by the time of the 1887 fortifications, and was moved from the Warrnambool Fortifications to the Botanic Gardens in 1910, when the Fortifications were declared obsolete. HISTORIC INFORMATION ABOUT THE CANNON IN THE WARRNAMBOOL AREA In the years following the Crimean War (1854-1857J) there was a great concern in the Colony that Imperial Russia would attempt an invasion. Coastal defences in the colony of Victoria were greatly strengthened by the Government as a result. Warrnambool was originally protected by cannons at Cannon Hill, approximately 1 kilometer west of the Flagstaff Hill Fortifications. The cannons included two 1866 guns, both 80 Pound Rifled Muzzle Loaders (RML) purchased by Victoria’s Colonial Government. They were part of a shipment of 26 such guns sent from England in December 1866. They are registered as No. 23 (80cwt-2qr-0lbs) - Gun 1, and No.13 (81cwt-1qr-12lbs) - Gun 2. They were cast at the Royal Gun Factory, Woolwich Arsenal, in 1866 and have a 6.3 inch bore. Both barrels carry the Royal Cypher of Queen Victoria, Insignia of the Royal Engineers, within the Garter and Motto surmounted by the Crown, with the Royal Cypher of Queen Victoria within the Garter (letters in centre “VR”, motto “HONI SOIT QUI MAL Y PENSE”, "Shame be to him who thinks evil of it."). The guns were originally supplied with wooden carriages. (The Royal Arsenal at Woolwich, England, was established eleven years after the Restoration of King Charles II. It was the principal supplier of armaments to the British and Empire Governments. At the height of its operations during World War One the factory covered 1300 acres and employed very nearly 80,000 workers. Woolwich was the Headquarters of the Royal Artillery since the raising of that Regiment in 1716. The Arsenal was closed in the late 1960’s.) The two 80pdr cannons were transferred to the Warrnambool Garrison Artillery Battery Fortifications erected at Flagstaff Hill in 1887 as part of Victoria’s Coastal Defences. The original wooden carriages were subsequently replaced with the present iron garrison carriages in 1888. They are a “C” pivot. The ‘racers’ or curved track set into the floor of the gun emplacement (which enabled the guns to be traversed more quickly) are as specified for guns up to 10 inch, being of wrought iron 2.78 inches wide. A temporary third gun, now no longer on Flagstaff Hill’s site, was a 5 inch Rifled Breech Loading (BL) Armstrong gun mounted on an Elswick hydro pneumatic disappearing carriage It was faster to load and fire than the 80 pound RMLs and its arrival spelt the end of the older 80 pound guns’ useful life, apart from being used for practice sessions. The 5 inch BL gun was the main defensive weapon of the Warrnambool Battery until the Battery was downgraded in importance and the gun was recalled to Melbourne in 1910. The gun emplacement still remains in place set between the 2 80pdr cannon. The State of Victoria took over the ownership of the guns at the time of Australian Federation in 1901. In about 1901/1902 the Garrison Battery was converted to the Warrnambool Battery of the Australian Field Artillery (No 4 Field Battery). It was equipped with 4.7 inch naval guns mounted on field carriages. They were now a mobile unit but continued to use the Warrnambool Garrison area at Flagstaff Hill for practice. When the Fortifications were declared obsolete the two 80 Pounder RML were relocated to Cannon Hill in 1910. On the outbreak of World War 1 the 4.7 inch guns were recalled to Melbourne, and the Battery was disbanded. Most of the personnel probably re-enlisted in the local 4th Australian Light Horse Regiment. The two 80 Pounder RML were moved back to the Fortifications in 1973. They were both fully restored by Army First Year Apprentices at the Ordinance Factory in Bendigo in time for the centenary year of the fortifications in 1987. The guns are capable of firing 80 pound (32.3kg) armour piercing exploding shells 3.65kms out to sea. They were original manned by volunteers before a paid Garrison was established. Now the Guns are again fired by volunteers on Special Event days. Since restoration the Gun Number 1 had been fired on a regular basis but Gun Number 2 hadn’t been fired since the mid 1990’s. In April 2015 Gun Number 2 was serviced in preparation for the firing of both cannons on the ANZAC Centenary commemorations on April 25th 2015. Other guns from the original Cannon Hill location were obsolete by the time the 1887 Warrnambool Garrison Artillery Battery was built. These guns are (1) a 32 Pounder Muzzle Loading Smooth Bore (SB) cast in 1813 at the famous Carron Foundry, number 80837 and now located in the Warrnambool Botanic Gardens. It is now mounted on a replica carriage due to the original carriage being in a fragile condition (the original carriage stored under cover at Flagstaff Hill). (2) a 68 Pounder Muzzle Loading Smooth Bore cast in 1861 at the equally august Low Moor Foundry, number 10310 and now located on the lawn area at the entrance to Flagstaff Hill Maritime Village. It is still mounted on its original wooden garrison carriage. Its wooden slide compressor mechanism is fragile and now kept in Flagstaff Hill’s storage. There are only seven 32 Pounder SB made by Carron and fifteen 68 Pounder SB made at Low Moor known to exist in the State of Victoria Plaque attached to the carriage “This replica carriage was constructed by the Warrnambool Tritan Woodworkers club in conjunction with the generosity of local businesses and the Warrnambool community. The original carriage (circa 1860) was removed for restoration and is now located at Flagstaff Hill Maritime Village. The timber used for the replica carriage is Monterey Cypress, which was an early planting in the gardens. 2010 marked the centenary of the cannon’s relocation in the Warrnambool Botanic Gardens.” (Reference; Victorian Guns and Cannons, South Western Victoria Assessment, May 2008, item W/B/01; Flagstaff Hill Maritime Village datasheets and archives). There are only seven 32 Pounder SB made by Carron known to exist in the State of Victoria and this is one of them. On a world level, this cannon represents a high level of rarity. Further, as it has been modified (bored up) it is representative of the historical process of amending artillery in order to ensure a longer usefulness of each piece despite rapidly advancing artillery technology. The number of surviving carriages with traversing slides in this group in South Western Victoria is unique in Australia and probably in the World. Out of 10 such platforms surviving in Australia, the South Western Victorian group has half. Several survive around the world but probably not in such a large group. The wooden sliding compressor mechanism belonging to this cannon is extremely rare, and the only one in this South Western Victorian group of Guns and Cannons. As a whole, this cannon has undergone very little restoration or modification, giving it a high level of integrity. The City of Warrnambool is one of several custodians of a collection of artillery pieces of heritage significance at a state, national and international level. These pieces are directly related to the defence of south-west Victoria in the 19th century. The care and preservation come under the Heritage Act 1995. (Reference; Victorian Guns and Cannons, South Western Victoria Assessment, May 2008).Cannon, or carronade, 32pdr with wheels. Muzzle loading smooth bore (SB) cannon. Cannon has original wooden Burmese Teak carriage and slide with wrought iron fittings and iron wheels. Manufactured by Carron in Scotland, in 1813. It has been converted from a 28pdr. There is a loop for a rope on the cascabel, which was part of the original casting. Re-bored in 1837. Marks include Serial Number, Royal Cypher of King George III, broad arrow of proofing, and numbers to represent the weight. NOTE: The cannon is displayed in the Warrnambool Botanic Gardens and is mounted on a replica wooden carriage; the original wooden carriage is now stored under cover at Flagstaff Hill Maritime Village. This carriage has 4 wheels on swivel attachments and a central gear that allows the wheels to turn on rails. Pressed into left trunnion “80837 / CARRON / 1813”, cast on barrel“symbol (Royal Cypher of King George III”, “symbol (broad arrow of proofing)” and numbers “45-3-24 / 1837” . Cascable “CV” and marks with gradations from nought to three in quarters on each side, On the carriage the end of one of the main slide members carries the mark “W symbol (broad arrow) D” incised into the timber. Plaque attached to the carriage by the Warrnambool Tritan Woodworkers club, 2010, marking the centenary of the cannon’s relocation in the Warrnambool Botanic Gardens and the addition of the replica carriage. flagstaff hill, warrnambool, shipwrecked coast, flagstaff hill maritime museum, maritime museum, shipwreck coast, flagstaff hill maritime village, great ocean road, victoria’s coastal defences, warrnambool fortification, warrnambool garrison battery, ordinance, armaments, cannon hill fortifications, victorian colonial government, carron ironwroks foundary, 32pdr smooth bore cannon, 28pdr smooth bore cannon, 1813 cannon, carronade -
 Flagstaff Hill Maritime Museum and Village
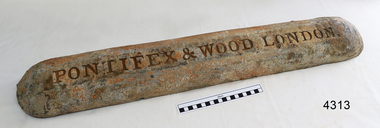
Functional object - Lead Ingot, circa 1878
This lead ingot was donated to Flagstaff Hill Maritime Village in January 2015 by local residents who discovered the ingot in their garden after they purchased the property about 12 months ago The LOCH ARD cargo manifest lists “Pig lead 50 tons” comprising “944 pig and 37 rolls”. Subsequent classification has rendered this section of cargo as “Lead Ballast”. This could be true. The international price per ton of lead ore plunged from a high point of £17 in 1853 to a low of £8 in 1882. The cheaper price of lead at the time of the vessel’s loading in early 1878 may have meant it was considered as an alternative to other ballast material (traditionally stone) for the journey to Melbourne. Loch Line ships generally returned to Britain laden with Australian wool. Even though wool bales were “screwed in” to the hold to less than half their “pressed weight”, they still made an awkwardly light cargo for the passage around the Horn. The concentrated weight of lead pigs along the keel line would help steady and centre the ship, and perhaps the artefacts in this case were to be retained for this purpose, rather than being sold on to the ready colonial market. However this is conjecture. Demand for building materials in the gold and wool rich Colony of Victoria was high in the 1870s, and much of the LOCH ARD cargo was intended for the Melbourne International Exhibition in 1880, which was another example of buoyant economic conditions. In the nineteenth century lead was valued for its density (high ratio of weight to volume), flexibility (relative softness for working into shape), and durability (corrosion resistant and waterproofing properties). It was used for pipes and water tanks, roof flashing and guttering, window sealing and internal plumbing. Many large private residences and new public buildings were at planning or construction stage in the colony during this period. The LOCH ARD lead ingots could equally have been destined for this ready market. HISTORY OF THE LOCH ARD The LOCH ARD belonged to the famous Loch Line which sailed many ships from England to Australia. Built in Glasgow by Barclay, Curdle and Co. in 1873, the LOCH ARD was a three-masted square rigged iron sailing ship. The ship measured 262ft 7" (79.87m) in length, 38ft (11.58m) in width, 23ft (7m) in depth and had a gross tonnage of 1693 tons. The LOCH ARD's main mast measured a massive 150ft (45.7m) in height. LOCH ARD made three trips to Australia and one trip to Calcutta before its final voyage. LOCH ARD left England on March 2, 1878, under the command of Captain Gibbs, a newly married, 29 year old. She was bound for Melbourne with a crew of 37, plus 17 passengers and a load of cargo. The general cargo reflected the affluence of Melbourne at the time. On board were straw hats, umbrella, perfumes, clay pipes, pianos, clocks, confectionary, linen and candles, as well as a heavier load of railway irons, cement, lead and copper. There were items included that intended for display in the Melbourne International Exhibition in 1880. The voyage to Port Phillip was long but uneventful. At 3am on June 1, 1878, Captain Gibbs was expecting to see land and the passengers were becoming excited as they prepared to view their new homeland in the early morning. But LOCH ARD was running into a fog which greatly reduced visibility. Captain Gibbs was becoming anxious as there was no sign of land or the Cape Otway lighthouse. At 4am the fog lifted. A man aloft announced that he could see breakers. The sheer cliffs of Victoria's west coast came into view, and Captain Gibbs realised that the ship was much closer to them than expected. He ordered as much sail to be set as time would permit and then attempted to steer the vessel out to sea. On coming head on into the wind, the ship lost momentum, the sails fell limp and LOCH ARD's bow swung back. Gibbs then ordered the anchors to be released in an attempt to hold its position. The anchors sank some 50 fathoms - but did not hold. By this time LOCH ARD was among the breakers and the tall cliffs of Mutton Bird Island rose behind the ship. Just half a mile from the coast, the ship's bow was suddenly pulled around by the anchor. The captain tried to tack out to sea, but the ship struck a reef at the base of Mutton Bird Island, near Port Campbell. Waves broke over the ship and the top deck was loosened from the hull. The masts and rigging came crashing down knocking passengers and crew overboard. When a lifeboat was finally launched, it crashed into the side of LOCH ARD and capsized. Tom Pearce, who had launched the boat, managed to cling to its overturned hull and shelter beneath it. He drifted out to sea and then on the flood tide came into what is now known as LOCH ARD Gorge. He swam to shore, bruised and dazed, and found a cave in which to shelter. Some of the crew stayed below deck to shelter from the falling rigging but drowned when the ship slipped off the reef into deeper water. Eva Carmichael had raced onto deck to find out what was happening only to be confronted by towering cliffs looming above the stricken ship. In all the chaos, Captain Gibbs grabbed Eva and said, "If you are saved Eva, let my dear wife know that I died like a sailor". That was the last Eva Carmichael saw of the captain. She was swept off the ship by a huge wave. Eva saw Tom Pearce on a small rocky beach and yelled to attract his attention. He dived in and swam to the exhausted woman and dragged her to shore. He took her to the cave and broke open case of brandy which had washed up on the beach. He opened a bottle to revive the unconscious woman. A few hours later Tom scaled a cliff in search of help. He followed hoof prints and came by chance upon two men from nearby Glenample Station three and a half miles away. In a state of exhaustion, he told the men of the tragedy. Tom returned to the gorge while the two men rode back to the station to get help. By the time they reached LOCH ARD Gorge, it was cold and dark. The two shipwreck survivors were taken to Glenample Station to recover. Eva stayed at the station for six weeks before returning to Ireland, this time by steamship. In Melbourne, Tom Pearce received a hero's welcome. He was presented with the first gold medal of the Royal Humane Society of Victoria and a £1000 cheque from the Victorian Government. Concerts were performed to honour the young man's bravery and to raise money for those who lost family in the LOCH ARD disaster. Of the 54 crew members and passengers on board, only two survived: the apprentice, Tom Pearce and the young woman passenger, Eva Carmichael, who lost all of her family in the tragedy. Ten days after the LOCH ARD tragedy, salvage rights to the wreck were sold at auction for £2,120. Cargo valued at £3,000 was salvaged and placed on the beach, but most washed back into the sea when another storm developed. The wreck of LOCH ARD still lies at the base of Mutton Bird Island. Much of the cargo has now been salvaged and some was washed up into what is now known as LOCH ARD Gorge. Cargo and artefacts have also been illegally salvaged over many years before protective legislation was introduced. One of the most unlikely pieces of cargo to have survived the shipwreck was a Minton porcelain peacock - one of only nine in the world. The peacock was destined for the Melbourne International Exhibition in 1880. It had been well packed, which gave it adequate protection during the violent storm. Today, the Minton peacock can be seen at the Flagstaff Hill Maritime Museum in Warrnambool. From Australia's most dramatic shipwreck it has now become Australia's most valuable shipwreck artefact and is one of very few 'objects' on the Victorian State Heritage Register. The shipwreck of the LOCH ARD is of State significance ― Victorian Heritage Register S417 Flagstaff Hill’s collection of artefacts from LOCH ARD is significant for being one of the largest collections of artefacts from this shipwreck in Victoria. It is significant for its association with the shipwreck, which is on the Victorian Heritage Register (VHR S417). The collection is significant because of the relationship between the objects, as together they have a high potential to interpret the story of the LOCH ARD. The LOCH ARD collection is archaeologically significant as the remains of a large international passenger and cargo ship. The LOCH ARD collection is historically significant for representing aspects of Victoria’s shipping history and its potential to interpret sub-theme 1.5 of Victoria’s Framework of Historical Themes (living with natural processes). The collection is also historically significant for its association with the LOCH ARD, which was one of the worst and best known shipwrecks in Victoria’s history. Lead ingots (sometimes referred to as ‘lead ballast’ or ‘lead pigs), salvaged from the wreck of the LOCH ARD. Grey metal bars with flat base, rising in a curved moulded shape to form a smooth rounded upper face. The imprint of the maker runs along the upper surface in clearly legible capital lettering (height 3cm). Durable and heavy, with some marine staining, but in good condition. Stamped along curved surface, within oval border, "PONTIFEX & WOOD LONDON."flagstaff hill, warrnambool, shipwrecked coast, flagstaff hill maritime museum, maritime museum, shipwreck coast, flagstaff hill maritime village, great ocean road, loch line, loch ard, captain gibbs, eva carmichael, tom pearce, glenample station, mutton bird island, loch ard gorge, lead pigs, lead ingots, lead ballast, pontifex and wood, london, lead smelters -
 4th/19th Prince of Wales's Light Horse Regiment Unit History Room
Photo Albums - set of two, c. 1919
Memorabilia of 908 Dvr Thomas Edward Whyte, 3rd Light Horse Field Ambulance, World War 1 READ THIS. During the last war I sent these pictures home through devious channels. When I lobbed back I found them all pasted in these albums by my young brother Billy. He was only a kid then! Nowadays he is serving up North. Went away with the original 9th Battn. Was in the Blitz on England and served in Libya, Tobruk, Greece, Crete and Palestine and was twice knocked. It's not long since the last upheaval 1914-18 and I wonder if these boys think as we did. This will be the last war? I sincerely hope so. TWSet of two photo albums. Photos pasted into albums with captions in white ink. Photo captions - Vol 1. (? = not legible) 1. Prisoners from ES SALT 2. Dust scene at AUJA FORD. 4th LH BDE 3. ? ? CHEOPS PYRAMID 4. Houses and domain WASSA battle 5 .Pontoon at SERAPELAI 6. SPINX (sic) & PYRAMID 7. The Nile floods occur once yearly and all irrigation centres are alternatively flooded 8. Pontoon bridge over SUEZ Canal at SERAPEUM . Constructed by Aust Engineers 9. The arrival of newspapers and mail 10. Lake IIMSAH-ISMALIA 11. Camp outside Jerusalem. Walls of old city easily discernible 12. Roman walls on beach at MONTAZEH 13. ? ? These boats are used for conveying between steamer & shore 14. Interest shown in the new issue. Through the scarcity of horses Batmen/Grooms and drivers ? allotted donkeys ? ? 15. DAMASCUS GATE JERUSALEM 16. Trumpeter ? 17 Indians making ? for railroad 18. 'SPELLO' Sinai Country 19. Police searching Egyptian labourer 20. Cavalry ?? SHA? 21. Entering ? WADI ? 22. Bedouins at ? 23 No caption 24 No caption 25 Bolar trees EZBEKIEH Gardens CAIRO 26 .Flamingos at NOUZEH Gardens ALEXANDRIA 27 BARAGE 28 KASR-ELNILL Bridge 29 NOUZEH GARDENS 30 AMGS on beach at ? 31 NOUZEH GARDENS - ALEX 32 Mascot of 7th M.V.G. 3RD ALHR 33 Printing on walls inside St Mary's Church. Depicting the Flight from Herod. (Corner torn off photo) 34 Inside Virgin Mary's Church at MATARA 35 ? painting in Church ?? 36 SUEZ Canal. Finish of Arab pony race. ZAL-A-ZIA 37 Admiralty offices at PORT SAID 38 A corner of CHEOP"s PYRAMID 39 The Spinx (sic). Nose was blown off by a shell from one of Napoleon's guns. 40 Monastry on the MT of TEMPTATION 41 Mess orderlies. Foodstuffs in locker given to troops by the AIF 42 Mid day meal on treck 43 Ambulance sand carts for conveying wounded and sick over desert sand 44 3rd ALHB 45 Kaisers Church JERUSALEM. Inside is a large painting figuring the Kaiser & Kaiserine holding a model church. 46 Bedouin women drawing water from well at EL-ARISH 47 2nd ALH BGDE doing route march on JERUSALEM-JERICHO ROAD 48 GEN HODSON GOC Anzac Mounted Divn presenting decorations & investitures on the sands at SHEIKS-ZOWAID 49 Armoured Car 50 Snow at the CEEDERS (sic) on Mt LEBANON 51 Compulsory phenyle bath for all troops in front line area 52 Austrian guns taken at point of bayonet by NZ & 2nd BGDE at GAZA 53 CACHOLETS for carrying wounded 54 The boys found some timber and made a spring board on SUEZ Canal 55 Bedouin wedding. The Bride travels in state amongst rubbish on top of camel. Her father leads conveyance. 56 Australian graves at SHALLAL 57 Camel Transport Company bring rations along beach 58 Billy the mascot holds an offensive & checks advancement 59 Exercising horses at HELMIEH Egypt 60 PONT-DE-QUOBBA Egypt. A suburb of well-to-do Egyptian merchants 61 Demolition stunt at ASLU. Bridge destroyed by Australian Engineers 62 Swimming horses in Great Bitter Lakes Egypt 63 On the move along Wadi 64 On the shores of the Bitter Lakes EL-EGYTE 65 A leave party waiting for the pontoon to swing into position 66 Carting grain 67 Egyptian Brass Band 68 French warboat (sic) in Canal 69 Russian Troops from Mesopotamia passing through SUEZ Canal 70 Prisoners coming in under escort. Turkish & German officers in lead mounted on ponies 71 Turkish prisoners 72 T.B.D in Canal 73 Old trenches on SUEZ CANAL near BITTER LAKES on W Bank 74 Monitor in Canal 75 Block house, trenches & entanglements near Post 62 76 A halt in an Egyptian village EL-MARO' 77 Mobile wireless plant 78 On the road from Canal to Railhead 79 Old Turkish guns in ancient fort at ALEXANDRIA 80 Francenia steaming through Canal 81 After MAGHDABA stunt. Convoy taking wounded form EL-ARISH to railway at 139 82 Indian Camelry 83 Virgin Mary's Church 84 Sluice gate at BARAGE Egypt 85 Hospital at lower W bank of Canal 86 Virgin Mary's tree 87 Sweetwater Canal at ISMAILIA Egypt 88 Halt and Feed. The A.M.C. attached to flying column. 89 Bringing stores ashore at JAFFA 90 H Videon & J Britton astride donks. Horses became scarce through casualties etc and units had donkeys issued to them 91 RAMLEH. The traditional burial place of St John the patron saint of England (sic). 92 Jewish Synagogue at RISHON-COUR-LE-LION (Richard the Lion Hearted) 93 Water tower at HELIOPOLIS 94 Portion of camp on HELIOPOLIS Racecourse 95 Arrival of papers 96 Sand sleigh 97 Boring plant & prisoners taken on the JIFF-JAFFA stunt. Two Austrian officers and party of Turks taken whilst building a concrete gun emplacement 98 The obelisk at MATARIA 99 In an avenue of Australian gums at ZEITOUA 100 Mountain battery gun 101 The 3rd ALH BGDE camped at HELIOPOLIS Racecourse 102 Captured Turkish guns 103 Turkish and Austrian prisoners. JORDAN VALLEY 104 The MT of Temptation Monastery built over spot where Christ spent his 40 days 105 Refugees from ES-SALT at JERICHO 106 3rd LHFA and 8th LH REGT at HELIOPOLIS 107 Fig trees at Roman Wells JIFF JAFFA 108 Inside the Blue Mosque CAIRO 109 Lagoon that was destroyed on JIFF JAFFA stunt 110 Section race at Brigade sports 111 Another tombstone at ALEX 112 Innoculating female date palm 113 Bronze tombstone in a cemetary at ALEXANDRIA 114 Luna Park at HELIOPOLIS 115 Egyptian water buffalo. Used by natives for ploughing etc 116 Russian church. Some call it the "Church of St Mary Magdelene" 117 At pyramids GIZA. Billingsley lost leg & McMullin KIA 118 Pontoon bridge over Suez Canal 119 DURBAN 120 Rescue work 121 Paddy Hanly 122 Motor train for conveying rations between Canal and Railhead. 123 At MUCKSHUBE ? 124 British ??? 125 Bedouins bringing in their harvest from the fields of ABBASSAN-EL-KEBIR Palestine 126 German HD QTRS BEERSHEBA 127 Date ? SINAI 128 Military railroad running through ? at EL-ARISH 129 Street scene at KHAN-YUNIS Palestine. Samson often called at this place to visit his girl. Napoleon narrowly escaped capture here during his ? in 1799 130 Date palms bearing fruit. These do not ? they are ?? 131 Motor ambulance convoy 132 Turkish hospital BEERSHEBA 133 MT CALVARY 134 Town Hall BEERSHEBA 135 Railway station BEERSHEBA 136 ASLUJ 137 Turkish depot MAGDABA 138 DURAN 139 3rd ALAB Hospital 140 Main Street PORT SAID 141 Stock Exchange ALEXANDRIA 142 The "Bull Ring" 14th AGH 143 (Double exposure) 144 Jewish School at DURAN Palestine 145 Damascus Gate JERUSALEM 146 Roller used for grinding clay for making bricks 147 The Harbour at ALEXANDRIA 148 Part of Napoleons Road along sea shore opposite BEELAH 149 Hotel at ALEX. Barred to the troops of course. 150 HELIOPOLIS 151 -153 ALEXANDRIA 154 Ambulance treck 155 Cacholets at the casually clearing station 156 Refugees from ES-SALT entering the Jordan Valley. Mts of MOAB in background 157 Cameliers bring in prisoners 158 The "Niagara". Casualties were from the front line by all descriptions of transport and passed through several field hospitals until they eventually reached the railway. They were sent to KANTARA by train. Despatched from there to PORT SAID by this boat 159 JERICHO 160 Turkish prisoners in JORDAN VALLEY 161 Bedouin nippers of SINAI 162 Bridge destroyed by ALH at ASLUJ 163 Railway sheds at BEERSHEBA. Portion was set afire by retreating Turks 164 ASLUJ Station 165 German Hospice 166 at ASLUJ 167 Suez Canal offices PORT SAID 168 MENA Village from top of Cheops. White lines at left are roads made by Australian troop. First Aust Contingent camped here. 169 A felukeh passing through gate at BARAGE 170 Military railway terminal EL ARISH 171 (No caption) 172 Egyptian family waiting for a train 173 Turkish prisoners and captured material coming in 174 Turkish wounded at BEERSHEBA awaiting removal 175 Two hospital ships at ALEXANDRIA 176 Some of the Bd boys 177 Race meeting 3rd ALHB at TRIPOLI- SYRIA 178 The blacksmith and Rodney Thomas swimming horse in SUEZ CANAL 179 Natives grinding grain 180 Thoroughbred 181 MUKATTAM HILLS 182 Trenches at JIFF JAFFA 183 MacBoyd as a Padre 184 Egyptian Syce having shave by travelling barber 185 The creek outside ALMINA 186 Cameliers 187 Clearing Station on beach at EL-ARISH 188 Wadi at TALLAT-EL-DUMM 189 Motor transport park 190 Some of the boys 191 Pompeys Pillar 192 at MAGHDABA 193 Hospital at JERUSALEM 194 Cheop's Pyramid 195 Golden Gate JERUSALEM 196 Hustling Turks through BEERSHEBA 197 Holy City 198 Mosque of Omar Jerusalem 199 Railway bridge destroyed by ALH at ASLUJ 200 Enemy material captured at SHERIA BEERSHEBA 201-3 These Mosques built with alabaster taken from pyramids at GIZA 204 Pontoon bridge built by our Engineers over RIVER JORDAN 205 3rd Bgde in Koil at MASAID 206 Billy McGhie throwing the weight 207 Nirazeh ? Gardens 208 Motor Ambulance Park 209 Bedouin women in Palestine village 210 ALEXANDRIA 211 Junction Stn 212 Indian Lancers 213 Motor convoy at ESSANI 214 A & B Sections 215 JERUSALEM. Once known as the 'City of Palms' and presented to Cleopatra by Anthony 216 Monastery on the Mount of Temptation. Situated on the Hills of Solomon on E side of Jordan Valley just behind JERICHO 217 DURAN A Jewish village in Palestine 218 One of our planes meets with a mishap on landing 219 Bedouin flocks around NABLUS 220 ES-SALT Road just above Jordan River 221 Halt! Action Front! Getting guns into action from pack 222 Village well 223 Gun inspection 224 WADI GHUZZEE Bridge 225-6 At GIZA Zoo Egypt 227 Syrians gathering olives 228 Smashed plane 229 MacBoyd 230 Bridge across Jordan at GORRONHOER 231 Competitors for Gretna Green. 3rd Bgde sports at TRIPOLIA 232 EL ARISH 233 Main street JAFFA 234 The beach at MARI-KHEB 235 Scene of old Cairo 236 Bedouin market 237 Bridge built over Wadi EL-ARISH. The biblical "River of Egypt". 238 Old water reservoir in native village 239 A "spello" on the track 240 Plane going out on reconnaissance 241 Bomb attached to carrier on a plane 242 Ancient Turkish gun at forts in TRIPOLI - SYRIA 243 Gun inspection 3rd AMGS 244 Old Turkish trenches outside GAZA 245 Wadi KHUZEL Bridge at SHALLA 246 BEERSHEBA 247 Street scene ZAG-A-ZIG 248 Spinx (sic) & Pyramid - GIZA 249 Egyptian Coastguards at ALEXANDRIA 250 A Palestine camp E Troop 3rd MG Sqn 251 B class horses killed in Syria 252 Scene from summit of Pyramid 253 Bert Richmond & an old Turkish Howitzer on MONTAZEH 254 LION'S WELL 255 Australian trenches outside Ferry's Post near Hill 70 256 A street scene in HELIO{PLIS 257 Electric trams at ALEXANDRIA 258 Cleaning harness 259 Swinging pontoon bridge into position at SERAPEUM 260 British Monitor in Suez Canal 261-2 Scenes of Turkish buildings at MAGHDABA. Taken by the ALH The first time in history mounted troops have attacked and taken entrenched positions 263 Aussies at Egypt's ancient monuments 264 Scenes of old CAIRO from MOKATTAM Hils 265 Bridge across canal at BARAGE, 16 miles outside CAIRO 266 Curly and Vic Norton 267 Stumpy McIntyre & Long Pikington 268 In Wadi GHUZZEL near TELL-EL-JEMM 269 Digging post holes for stables 270 Cameliers bring in prisoner. Austrian Officer in black 271 White washing mess shed 272 F Troop 3rd AMGS Sqn 273 Jews at Recruiting Depot at JERUSALEM, forming Jewish Battalion 274 In Jordan Valley, 3rd Machine Gunners have 8 horses killed by an aerial torpedo 275 Turkish prisoners 276 Cocos Island 277 Snow on the Lebanon Ranges 278 Egyptian Hotel 279 Gordon Wake. Note intruders 280 Electric trams at HELIOPOLIS Egypt. Heliopolis built by Belgian firm in 7 years 281 Sweetwater Canal at SERAPEUM 282 The ? wells at JIFF-JAFFA 283 Virgin Mary's well at MATARIA. Boyd, Simpkin & Crowley 284 Cricket for convalescents at MONTAREH 285 Indians working at cutting for military railway 286 Australian Hospital BEERSHEBA 287 Removing wrecked ambulance car from rail road 288 Engineers depot in ? at EL-ARISH 289 Water preservation scheme at SHALLAL 290 German Princes Palace at HELIOPOLOLIS 291 Some of the boys 292 Aussie aerodrome BEELAH 293 EL-JALLAH outside BETHLEHEM 294 Some of the gunners 295 Trying camels in gun carriages. Note sand caterpillar 296 Street outside old city JERUSALEM 297 D.H QRS In EL-ARISH. Hod 298 Cairo Museum 299 Wadi bridge built by Army Engineers 300 A two storied building at GALM used as German HQrs until reached by our guns 301-2 No caption 303 Ambulance with Flying Column 304 Jack Pegg 3 AMGS 305 KHAN YUNIS 306 In the Jewish village of "Rischon le Lion" 307 Wet Canteen BEELAH 308 Motor Transport LATRON 309 Gen Chauvel OC Desert Mounted Column 310 10th LH - Inverness Battery "Railhead" 311 3rd LHFA "SERAPIUM" 312 ESBEKIEN Gardens "LE CAIRE" 313 Camel training and wireless station Hill 60 314 ZAG-A-ZIG Rly Stn 315 One of the Irrigation Canal locks "HELOUAN" 316 Indian Camel Corps 317 Base at Hill 60 318 Aussie transport arriving "ALEXANDRIA" 319 3 ALHB at AL MINA 320 Main entry to city of JAFFA 321 Mosque at DAMASCUS 322 A Turk brought to earth by one of our patrols 323 Brigade boxing contrst 324 Ostrich farm ZEITOUN 325 MATERIA 326 No caption 327 Mail day 328 3rd LHFA entering HELIOPOLIS from MENA 329 M Boyd, L Simpkins, S Crowley 330 Stretcher bearers 331 French Hosp JERUSALEM 332 SERAPIUM 333 Gippo crushing wheel 334 On the move - bully and biscuits 335 V Morton, F Stokes, L Simpkins & Hanley 336 Turkish prisoners - SHERIA 337 Getting used to the mask J Antonio MM 338 Sand carts 339 Model house - MONTAZA Hospital 340 "Abdul" 341 Wood Depot "ESDUD" 342 On troop ship - from Syria 343 Turkish prisoners "JULIUS" 344 TRIPOLI 345 3rd AMGS cook house "BEELAH" 346 Breaking camp "ZEITOUN" 347 Turkish prisoners "GAZA" 348 One of our tanks. About nine were blown out of action at GAZA 349 Camp in HOD-EL-ARISH 350 German HQRS BEERSHEBA 351 Race Course TRIPOLI 352 A Locke & P Leeming 353 Sea planing in Suez Canal 354 MOASCR detail camp 355 KANTARE Suez Canal 356 Four boys of MG Sqn at cards while convalescing . Marked X was a prisoner of war for three days. Got him back with us when we countered. 357 Signal station at CANA 358 H Videon in german rig 359 ROD-EL-FARAC 360 Sweetwater Canal ZAG-A-ZOG 361 Hospital train on beach EL-ARISH 362 Jerusalem Road 363 Bedouin camel and young'un 364 Admiralty Offices, PORT SAID 365 Suez Canal PORT SAID 366 Taking wounded to clearing station 367 Hills of 10-60 MALHA 368 Junction Station 369 EL ARISH 370 Wine Distillery LATRON 371 White figures how entrance to Pyramid 372 RAPC Wireless Station 373 Sports in Canal. ANZAC Day 1916. Prince of Wales is aboard white launch. 374-5 Captured Austrian boat. 40,000 cases of benzine aboard. She was brought into Canal at Port Said. Spies set her afire. She burnt for some considerable time and eventually blew up. 376 Pumping water from Wadi on Muckshabee stunt 377 On trenches 378 Bringing in disabled battle plane 379 Giving a motor transport a lift 380 Old Turkish howitzer. MONTAZZA 381 Jerusalem country 382 Palm Hod in SINAI. Trees do not bear dates until 14 years old. No bees here. Palms innoculated by Bedouin. 383 Camel cacolets for conveying wounded 384 ESKBEKIEL Gardens Cairo 385 LAKE TIMBAH 386 Xmas dinner 1916 387 Gift billies from ACF 388 Section competition 389 In big marquees HELIOPOLIS 390 HM Landships 391 Capt Aberdeen inspecting horses 392 Football. Black vs White 393 The game 394 Old Napoleon fort. 10 mile along coast from ALEX 395 Jewish Cemetery AKRON 396 Ration fatigue 397 Blowing bottom out of Turkish Reservoir to allow soakage 398 Tilley & Farley - 14th AGH 399 At GIZA Zoo. Note height of giraffe 400 On this stunt we destroyed Turkish reservoir of 2 1/2 million gallons 401 Demolition party at wells MUCK-SHUBE 402 3rd ALH Bde HELIOPOLIS Race course 403 HMLS "Lady Wingate" 404 Turks blew out our tanks at GAZA 405 One of our aviators captured by German. Note German wearing Iron Cross. Snapped behind Turkish lines. Original of this snap was dropped at Aust aerodrome to let them know Aussie airman was alright and not killed in capture. Chivalry 406 Sausage observation balloon 407 READY 408 Bomb on carrier 409 Testing 410 B Richmond, Wireless Operator RAFC 411 Loading Bomb 412 Crash in desert 413 Bomb in YMCA at MAZRAR 414 No caption 415 LW Simpkin - Late 3LHFA 416 LEMNOS 417 Shelling the MARSDEN 418 Pontoon across Jordan River 419 Shells on Walkers Ridge 420 Sweetwater Canal 421 LAKE ISMAILIA 422 Indian Lancers on Canal 423 CAIRO Railway Station 424 Destroying Turkish water supplies. Explosives used for breaking clay at bottom of lagoon, help to absorb water 425 Exercising horses at ZEITOUN Egypt 426 In Wadi on MUG-SHUBEE stunt 427 Tractor drawing 60 lb gun towards front line 428 Sultan's mother's place at HELIOPOLIS = City of the Sun 429 Camped on the sands outside RAILHEAD, Jump off for SINAI campaign 430 G Turner & A Lockwood out for a camel ride. 431 GAZA and Nile floods from top of Pyramid 432 Baby refuses to carry his harness and his pal wears an astonished look 433 No caption 434 Turkish Officers 435 Regt HQRS at IBEETA 436 No caption 437 3rd Machine Gun Squadron 3rd ALH Bgde (my unit) 438 Camel Corps at dinner 439 KHEFREN Pyramid snapped from top of Cheops 440 CHEOPS 441 Pyramids 442 MENA from top of Pyramids 443 Snap from Pyramid showing MENA-CAIRO road running through Nile floods 444 MENA village from Pyramid 445 Band of British West Indies Regt 446 Gippo Band 447 Swimming on Med Sea 102 KmA 448 H Maddocks 449 Bedouin and Egyptians utilise any animals for their fields 450 Captured Turkish train - BEERSHEBA 451 Gardens ISMAILIA 452 Gippos used for horse lines etc 453 Canteens at HELIOPOLIS 454 3 ALHB watering in Wadi on ESSANI stunt 454 JAFFA 455 ALEX, Napoleon relics 456 Egyptian water wheel 457 SUEZ 458 WADI GHUZZEE 459 On Reconnaissance at 10-60 460 Goats and sheep captured from hostile Bedouins 461 Pontoon SERAPIUM 462 Aust trenches - Suez Canal. Turks attacked FEB 1916 463 Camel transport 464 3 ALHB Wireless Station. Col Scott 9 LH got DSO on this stunt (MUCK SHUBE) 465 ALEXANDRIA 466 Canal Hospital Ships 467 Ambulance - Sand cart 468 At old Cairo 469 No 1 Casualty Clearing Station 470 3rd Brigade on move 471 3rd LHFB- Making camp SERAPIUM 472 Watering horses 473 Moving up wadi 474 The wells at Wadi GHUZZEE 475 Camel transport SINAI 476 Turkish reservoir destroyed by ALH 477 Wall in a Luxor tomb 478 Entrance to "Temple of Bulls" 479 Bob White 480 Bedouin crops 481 Harem of Montazza, Turkish prince 482 Jack Holmes, Billy McGhee 483 MUDERIA, B Troop post 484 JIFF JAFFA 485 Natives on railroad construction 486 Aust graves SHALLAL 487 The Stumpy Mirror 488 R Nile at MANSUREH 489 Aust graves - BEELAH 490 NOUZEH Gardens - ALEXANDRIA 491 On issue from QMS. Take what comes. Fit does not matter 492 MATARA 493 German Yacht Club - ALEX 494 Old Turkish Howitzer and cannon ball 495 Field hospital 496 Gardens at BARAGE 497 A dispute's ending 498 Snow. MT LEBANON 499 Bedouin sheep 500 Combat in the air 501 no caption 502 Old Napoleon gun 503 Gordon Wake HQ car 504-5 Burying the dead at GAZA 506 Water Polo 507 Brigade boxing comp 508 Field cooker 509 Bridge on Jerusalem road, Blown up by Turks 510 Teaching horses to lay quiet. For protective purposes 511 "Major" and "Bitsy" 512 Bedouin Scarabs 513 Convalescent 514 1. W Billings. Returned to Aust 2. W McMahon KIA 515 Hospital 516 Coming good 517 1st day up - 14th AGH PORT SAID 518 Back again in Regt 519 Billy and Taffy 520 Stew 521 KHAN YUNIS 522 MENA 523 Casualties PORT SAID 524 Washing 525 Mail 526 Gun from the "Emden" mounted in Syney 527 MARSURES 528 Desert bivouac 529 HASSED 530 3RD ALH Bde. Good camp (Extra) All conv's 531 New issue 532 On to another camp (8 LH Regt) 533 Shore - JAFFA on MED SEA Photo Captions Volume 2 (Illegible = ?) 1 The Cedars on Mt Lebanon, according to tradition originated from the staves of the 12 Apostles 2000 years ago. 2 TIBERIUS taken 27th Sept '18 3 NAZARETH taken 20th Sept. German officer and Arab pony 4 TIBERIUS fell on 27th Sep. Von Saunders was the GOC of Turkish Forces in Palestine 5 Jordan Valley & Plains of Jericho run between Mts of Moab & Hills of Solomon. Distance across valley from foot of each range of hills abt 13 miles, looks ? 6 Storm on Sea of Galilee 7 DAMASCUS fell on 1st October. German vehicle park. 8 German funeral near Jerusalem 9 JENIN. German Headquarters. Fell 20th Sept. German field bakery 10 Three pages back will be seen a storm on GALILEE. Note now calm here. This photo taken near spot from which the previous one was taken. German motor launch on Galilee. 11 Captured intact on 20th Sept. German workshops JENIN 12 Turkish aerodrome captured here. Hostile aircraft landed whilst it was in our hands. Aviators greatly surprised and even indignant. Motor smash near EL FULE. 13 German Orderly Room (Ammunition box full of gold), DAMASCUS. All this gold Turkish coin secured by our troops. 14 German artillery on the way to the front near KENETRA. The ALH swooped down on the artillery around this vicinity & captured many field guns. 15 German Despatch Rider on the road to ES SALT. Unsuccessful raids carried out on ES SALT on 30th April & 4th May. This country was hard on men and horses. Goat tracks were used at times but horse were led most of the time. Stunt lasted 14 days in wet weather & horses were only unsaddled for about 2 hours during stunt. 16 Strand, ? , Tiberius, Gallilee 17 German workshop. Captured by ALH 18 One of the dead lying outside GAZA. Killed 19th April 17. We could not bury them before November 19 Some of the boys that fell in the charge at BEERSHEBA. Tibby Cotter 20 Collecting our dead for burial. They were K in A on the 19th April at GAZA. Buried seven months later, 23,000 casualties in one day 21 German U-Boat 22 Page of postage stamps and money - Struck to commemorate Gallipoli victory - Turkish war postage stamps - War duty - Turkish war bank notes 23 Pamphlet. With paper badges affixed These badges were worn by young Egyptian students. Arabic translation means "Egypt for Egyptians Long Live Egypt" This pamphlet was printed under German influence & distributed around ZAG-A-ZIG, the chief centre of hostilities during the recent Egyptian riots. The Young Egyptian Students influenced the Natives to oppose British Administration, what they called Tyranny. They professed to have sufficient competent educated men to govern their own affairs, but our Heads would not hear of it. Consequently the riots. Many ? and soldiers killed. All railways and communications disorganised. It took several months to bring things to their normal ? Pictures of medals 1. In honour of General Falkenhaugh GOC Turkish Forces 2. The Victorious Emperors of Germany, Austria and Turkey 3. Egypt Awakening 24 Those large photographs I sent you were procured for me by a pal who knew the chap that owned the negatives. The owner of these snaps belongs to the 5th Regiment of the 2nd Brigade, and he took the camera from a Turkish Officer. It had only 6 snaps of a spool of 10, and the BIll Jim finished off the spool by taking 4 of the special entry into Jerusalem. The cross indicates those taken by the Australian, the remainder were taken by the Jackos in the vicinity of BEERSHEBA and SHERIA Turkish field bakery 25 Cavalry going up to support their own line. However never had much action against the Turkish horsemen 26 Turkish Electricians in the field. I have an idea that this photo was taken to get the centre figure. He looks dinkum Australian. Note Australian leggings on Turk on the right 27 Turkish machine gunners ready for action. This is very much like the Beersheba country. Turkish officers on the right, and along side him is the range taker with his Barand Stroud. We use these instruments in the Sqn and they cost about 83 (Pound) 28 Turkish General Head Quarters just beyond SHERIA. Note hard rocky country 29 Turkish Cavalry watching a fight and getting ready to go into action. This is at SHERIA, and the heavy fighting lasted several days. Plenty of water and the Jacko's tried their hardest to hold on to this pozzie. Often our chaps met the gamer Turks in the dead of night, because both sides were on the same game, crawling down for water. This stunt is known as the Junction Fight. 30 Official entry Dec 11th. The official entry into Jerusalem. Sir G Allenby in the lead with his staff officers of the French and Italian troops accompanying him. Guard represents New Zealand, Australia, England Wales Scotland Ireland and India entering theJaffa Gate 31 Sir Ronald Storrs made Governor of JERU. Captured 9th Dec 17. Reading the Proclamation, General Allenby wearing white breeches. Troops of other nations were present, and the notables of Jerusalem. It was read from the foot of the Tower of David, a place that has been standing since the time of Christ 32 The first of the British troops entering Jerusalem. A few Turkish officers may b seen walking at the head of the column. Populace in a bad plight, very poor and no tucker, and all were greatly overjoyed at the ?? of the British Hundreds and kiddies ill treated ?? (Part of caption missing) 33 10th LH Regt first to enter JERUSALEM. Mounted officer on the right supposed to be the CO of the first troops to enter Jerusalem. Note mud on the horses. Had very wet and muddy weather 34 Dead Jacko 35 Turkish machine gun and crew 36 Hanging Armenian doctors who refused to join Turkish Army 37 Outside Damascus Gate Jerusalem 38 Turkish patrol lying outside trench at EL BUAJ 39 Burying Aussies at DAMASCUS 40 1. Djemel Pasha 2. General Limon Von Saunders GOC Turkish Forces in Palestine 41 One execution in Egypt. Executing an Egyptian offender 42 Turkish atrocities DAMASCUS 43 Turks occupying trenches outside JERICHO 44 On ASLUJ demolition stunt. Feeding and spelling. Arrived at Rendezvous too early 45 Turkish saw bayonet 46 Captured guns taken at BEERSHEBA & SHERIA 47 Our gunners obtained a direct hit on ammunition train 48 The large and small of the game. At GAZA. 74th CCS in background 49 Around JULIOUS. These Turkish shell dumps were very numerous around this vicinity 50 Captured Turkish Cavalry 51 Cavalry leaders 52 Turkish machine gun & crew 53 Enemy officers. One on left is wearing Iron Cross ribbon 54 Captured Austrian boat afire, Suez Canal Port Said. 40,000 cases of benzine aboard. Fire a mysterious outbreak 55 ? Hotchkiss gunners and enemy aircraft over ? TELL-EL-FARA 56 Types of enemy officers. One of our bikes in their possession. Recaptured later. The five pointed medals worn by these officers is called the Gallipoli Star. Issued to commemorate the Turkish victory at Gallipoli 57 Our batteries put in some good shooting amongst Turkish transport 58 Showing compactness of Turkish trenches 59 Desert homes. The only time we had cover in SINAI was when we camped near a Hod. Then we could use date palm leaves 60 JIFF JAFFA 61 ZAITZOUN 62 10th Regt MGS amongst hills outside JERUSALEM 63 Jews wailing place JERUSALEM 64-5 German post card characters 66 Post Card PHYLAE The Kiosk 67 Post Card Vue du Canal de Suez 68 Post Card No 93 Queen Street, Fort, Colombo 69 Snipers at NALIN Sth Syria. Lousy country for richochets. Nast wounds. (Aust War Memorial Melbourne) 70 Myself on Ginger. This little neddie is boshter jumper 71 Magazine cutting - Lt C H Vautin & German airman G Felmy 72 9th Regt 3rd LHB Judean Hills outside JERUSALEM. (Aust War memorial Melbourne) 73 Sand hills SINAI ? Desert (Aust War Memorial Melbourne) 74 3rd LHB spelling at GALILEE (AWM Melbourne) 75 Jordan Valley outside JERICHO (AWM Melbourne) - lovely Jordan Valley, dust and heat, 1280 ft below sea level 76 Copy of no 69 77 Watering at MATARIA 78 A desert grave - Tpr H R Olver MM 6th LH MGS Beneath this simple cross there lies a comrade true and tried He fought as fights a soldier And like a soldier died 79 B Section. When they first took our Stetsons and issued cumbersome helmets 80 Palestine types of Turkish and German officers 81 Some of the gunners amongst the snows in MT LEBANON 82 The country around JERUSALEM 83 JERUSALEM 84 Fishing ? ? at GALLILEE 85 Jerusalem taken Dec 9th. Official entry on the 11th. Jerusalem (showing) Holy City and Mosque of Omar 86 Turkish shell hits old tomb at ZERNUKAH. Capt Hurley official photographer - AWM Melbourne 87 14th AGH at PORT SAID 88 Human bones at Dead City ABBASSIA 89 3rd ALH Bde at HELIOPOLIS 90 Men wearing gloves 91 Wireless station in course of erection at MATARIA - 28 masts 92 Old slave market at ABBRASSIA. Many excavations performed on projecting wooden frame at corners 93 3rd guns on the move. The beautiful scenery between LATRON & JERUSALEM 94 Bedouin agents 95 Collecting captured enemy material 96 Captured double-engined plane 97 On the march. Country at Eastern SINAI 98 Anzac mosaic found at SHALLAL whilst trench digging now covered with gun etc ready for removal. Was sent to Canberra. 99 A Troop watering. A rotten job at a small well when horses are thirsty 100 The new Jericho road. Running through Hills of Solomon Valley in distance 101 Gun inspection 102 Draining pools at WADI AUJA. Keeping down Malaria carrying mosquitos 103 8th Regt and 3rd AMGS at BEELAH 104 A rendezvous in the Jordan Valley 105 2nd ALHB camped outside JERUSALEM 106 WADI AUJA in the Jordan Valley 107 Hospital train on the beach at EL -ARISH 108 Jacko's 109 Jerries 110 Stables of Turkish Headquarters SHALLAL 111 Early training. Every man to throw and quieten his horse for purpose of taking cover 112 A Troop 3rd Guns at TAALAT-EL-DUMM 113 Watering at WADI GHUZZEE 114 J Rushden KIA at ES-SALT 115 J Carling F Troop 3rd AMGS. Taken prisoner at EL-BURJ. Repatriated after Armistace 116 Captured enemy plane 117 Jacko gun 118 Brig-Gen Galloping Jack Royston. OC 3rd ALH Bde 119 Cleaning ammunition belts in the Hod at MASAID 120 Bringing up the fodder at ABBASSAN-EL-KEBIA 121 Some of the boys amongst the snow on MT LEBANON 122 Turkish barley crops at SHALLAL in Southern Palestine 123 The crops a few weeks after our horses had been in this vicinity 124 Clearing up after a stunt 125 On the move. 5 minute spells for the horses 126 In Jordan Valley. An airial torpedo lobbed amongst 3rd MG Transport horses & killed 28 127 Camel ration convoy coming along beach 128 Field Hospital at ET MALER 129 Desert graves at ROMANI 130 A day on the beach. Wash self, horse and clothing 131 Watering on the beach at BEELAH. Note how close fresh water is to the seashore 132 A patrol caught by a shell 133 Spello 134 Crossing the Wadi 135 Halt! Weights off and feed 136 Gas instruction 137 F Troop at TELL-EL-FARI 138 Xmas Dinner at MASAID 1916-17. Arrived back at this camp Xmas Eve after 5 nights & 4 days in saddle & the capture of MAGHDABA 139 Exercising along the beach at MARA-KHEB 140 Watering at a Bedouin well 141 At Sheikh's ZOWAID 142 3rd Gun Squadron at ABBASSAN-EL-KEBIR 143 Captured plane on its way to Australian Aerodrome 144 One of our planes about to pass over Hod 145 E & F Troop horse lines and horses 146 Sun set on Med Sea 147 Beach scene at EL-ARISH 148 Turkish transport. Small animals but they can pull big loads and they possess large hearts 149 The dressing station JIFF JAFFA ? 150-8 Types of Egyptian women - Nubian - Fellaheen - Sudanese - Low class Gippo - Egyptian - Middle Class -Egyptian Aristocracy - Turkish 159 French girls on beach at PORT SAID 160 Bedouin girls drawing water 161 Egyptian flappers at ALEXANDRIA 162 Post Card- Dame Turque 163 Post Card - Jeunne Fille Arabe 164 Graves of New Zealanders at RISCHON 165 Graves of Australians at DEIR-EL-BELAH 166 Race day. The saddling paddock 167 Bivouacs 168 3rd ALH Brigade at TRIPOLI 169 Advance party putting down horse lines at KHAN YURIS 170 Breaking the desert monotony 171 WADI QUELT. Taken from one of its precipitous banks 172 Turkish stores on N shore of DEAD SEA 173 Watering at Solomon's Pools 174 Waiting for action at - ES DUN (AWM Melbourne) 175 Camel Corps in action SINAI (AWM Melbourne) 176 ALH Time to Camp (part missing) (AWM Melbourne) 177 3rd Machine Gun Squadron IBU-HARITH, Lieut Breed, McLeod, Guppy, Whyte 178 Cartoon sketch - "A Digger" 179 Turkish Cavalry 180 Gun crew of No 2 Sub F Troop, 3rd Gun Sqdn 181 Operating base of JIFF JAFFA stunt 182 One of the British war boats that cooperated with the Land Force 183 Military railway line passing through a Hod in SINAI 184 AL-MINAH The sea port of Tripoli, Syria 185 NAZARETH Taken on 20 Sep 18 186 The Monastery on the Mt of Temptation, Taken from a cave on opposite hill. 187 JAFFA From the beach 188 In Monastery on the Mt of Temptation Rock on which Christ spent his 40 days 189 Cross indicates Garden of Gethsemane. Arrow at Russian Church of St Magdalene. MT of Olives on left 190 The Roman Bath at MONTAZAH. Hewn out of solid rock 191 Mine sweeper ashore near SHEIK'S ZOWAIL 192 Throwing "Chester" for an operation 193 The swimming pozzie at LAKE TIMSAH, ISMAILIA. Half a mile from MOASCAR, the Aust Training Depot 194 The remains of Napoleon's road. Portions can be seen running between BEELAH & GAZA 195 Camels utilised for ambulance work 196 TULKERAM taken on 19th Sep. This stunt started the previous night and this position fell to us the first day. About 60 miles from starting point 197 German officer at mess, JERUSALEM 198 German Headquarters SEMAK 199 TIBERIAS 200 Water preservation scheme at SHALLAL 201 A dip in the Jordan River. Crossed river on night 21-22 April 18 202 Watering and a wash up 203 JERICHO Taken on 21 Feb 18 204 Turkish graves 205 KHAN YUNIS. Southern Palestine, Note how sand ridges from the beach meet vegetation area. Fertile land 20 miles in width. the beginning of PHILISTIA 206 TAUBE-OVER 207 Drawing drinking water in Wadi GHUZZEE 208 The swimming pozzie in JORON 209 Landing stores at EL-ARISH 210 A camp near the wadi 211 Railway line and bridge crossing wadi above SHALLAL 212 The mid-day halt 213 Turks and Aussies at Dressing Station on beach 214 Washing day 215 Bringing supplies ashore 216 Trying mules in a 60 pounder 217 The desert winds have blown away and left this piece standing 218 Pontoons used by the Turks in their attempt to cross Suez Canal Feb 15 219 "HASSEIN" 220 "GIPPO" Mascot of 3rd AMG Sqdn 221 "Biddy" 222 Railhead camp 223 Typical Bedouin 224 Motor Submarine chaser dvr whyte, photos, ww1, light horse field ambulance -
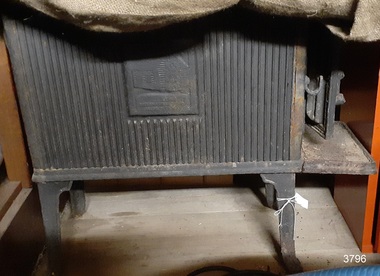 Flagstaff Hill Maritime Museum and Village
Domestic object - Wood Stove, circa 1880-1920
Stoves of this design are used for heating domestic places and were available in many designs and shapes. They commonly used wood as fuel and were not only used for heating but cooking as well. This stove was part of the original furnishings of the 1922 vessel 'Reginald M a South Australian costal trader it was made from material and fittings obtained from salvage yards. The vessel “Reginald M” was a two-masted coastal ketch, owned and built by Mr. Jack (John) Murch of Birkenhead, Port of Adelaide, South Australia. Its construction took approximately 6 months and it was launched at Largs Bay in 1922. Reginald M had a very shallow draft and a flat bottom that enabled it to come close to shore and to sit high and dry at low tide or to be beached on sand. The flat bottom was also to make the ship able to skim over reefs. Wagons could load and unload direct from her side. Her cargo included Guano, Barley, Wool, Horses, Cattle, Timber, Explosives, Potatoes, Shell Grit and Gypsum. On April 9th 1931Reginald M weathered a large storm in St Vincent Gulf, SA. The vessel suffered much damage; mast snapped and the crew labored for four hours to free her by chopping off the past and rigging. The crew patched her up and slowly returned to Port Adelaide with only a portion of the insured cargo being damaged. Her crew members at the time were owner Mr John H Murch of Wells Street Largs Bay, Skipper Mr R Murch John’s brother, Murray – son of Captain Murch and Seaman John Smith. Reg Webb purchased Carribie Station, at Marion in the Warooka District, south of Adelaide, in 1921. He cleared the land and farmed sheep and grain. In 1923 he shipped his own wool and grain from Marion Bay, having first carted 300 bags of the barley grain, 12 bags at a time, along the unmade track to the jetty. A photograph donated to Flagstaff Hill, dating about 1929 - 1942, shows two men on the Reginald M, holding between them their fishing catch of a large hammer shark. The photograph is stamped “GRENFELL STUDIO PORT LINCOLN PRINT” and titled “hammer shark caught on Reginald M”. The donor’s family lived on the Your Peninsular and dispatched their grain from a chute at Gleeson’s Landing to the awaiting transport vessel. Reg knew the Murch Brothers from Port Adelaide. The brothers had been using their ketch REGINALD M to ship Guano from the Islands, led by Captain Richard Murch. Reg approached them in 1934 about shipping grain from Marion Bay. The brothers visited the bay and thought it was an ideal place. They showed Reg where to stack his grain and they measured up the cliffs. When Reg was ready, they brought down and installed a ninety foot wooden chute. The bags of grain were then individually sent down the chute, landing in a waiting small boat then rowed to REGINALD M, 14 bags at a time. After 10 hours REGINALD M would be fully loaded with 1300 bags of grain and shipped to waiting ports. At one time a wild storm destroyed the chute but it was rebuilt and strengthened. REGINALD M was involved in shipping the grain from there until 1938. In 1940 Able Seaman Allan H Lucas served on Reginald M between September and December, being engaged and discharged from Port of Adelaide. His Certificate of Discharge was signed by ship’s Master W S Murch. It seems that at some stage Reginald M was used as a Customs vessel, as one photograph in Flagstaff Hill’s collection shows “H.M.C. No. 3, Pt Adelaide” on the bow. In 1969 the last freight left Marion Bay on the ketch REGINALD M carrying grain, wool and explosives. In late 1970 she was sold to the Mt. Lyell Mining and Railway Company and was used by them as a barge to carry explosives. In 1972 the Navy League of Strahan, Tasmania, purchased her for use by the Strahan Sea Cadet Unit to use at Macquarie Harbour and renamed her T.S. Macquarie. However this plan for use of Reginald M did not come to pass. In 1974 Mr. Andrew Rennie, of East Brighton, Melbourne, bought her for a similar purpose. , paying $5,000 and donating a ‘Cadet of the Year” trophy to the Sea Cadets. He sailed her from Strahan to Melbourne, planning to use her for pleasure sailing. In 1975 Reginald M was sold to Melbourne Ferry Company at auction. Later in 1975 the Reginald M was bought by Flagstaff Maritime Museum for $20,000 . She has been restored and is now one of the exhibits in the Village lagoon or lake. It was restored in 2006 using funds from a $4,000 government grant. Flagstaff Hill Maritime Village’s Collection holds several other artefacts associated with Reginald M. They include photographs of the Reginald M, including one photograph of her in Outer Harbour, S.A. dated 1947, with Skipper- R.F. Dale and Owner- John Murch. Another shows her docked at Port Adelaide, with the lettering H.M.C. No. 3 Pt ADEL (standing for His or Her Majesty’s Customs). The stove is significant as it represents the heating and cooking appliances used in late 19th and early 20th century, both on board vessels as well as for domestic purposes. The stove has additional significant for its association with the vessel "REGINALD M" a coastal trading ketch from South Australia built in 1922 at Largs Bay. It is one of very few sailing coastal trading vessels built in Australia with its flat bottom, single chine shape designed for navigating shallow water. See additional comments in the Production section this documents under Comments for further information regards the stove. Stove a cast-iron, rectangular, four-legged stove with a hinged front door. This stove was part of the original furnishings of the vessel 'Reginald M', built in Adelaide 1922. Image of a log cabin with an illegible inscription below it.flagstaff hil, warrnambool, flagstaff hill maritime museum, maritime museum, shipwreck coast, flagstaff hill maritime village, coastal trader, trading vessel, vessel reginald m, ketch, john murch ship builder, reg webb, carribie station, mt lyell copper company, queenstown navy league, andrew rennie, melbourne ferry company, r.f. dale, port adelaide vessel reginald m, macquarie training vessel, grenfell studio port lincoln, stove, domestic heating, domestic cooking, heater, cooking unit, wood fired stove, wood stove, wood-burning stove -
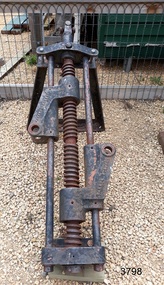 Flagstaff Hill Maritime Museum and Village
Machine - Steering Gear, Carron Ironworks foundry, before 1922
The ship's steering gear was used for steering and navigation of a vessel - it was a very important part of the ship's equipment. This steering gear was part of the original vessel 'Reginald M', which became part of the exhibitions at Flagstaff Hill Maritime Village. The steering gear was manufactured by the Carron Company. ABOUT THE CARRON COMPANY The Carron Company established its ironworks on the banks of the River Carron in Stirlingshire, Scotland, in 1759, and became an incorporated company in 1773. One of the notable items produced by the company was the Carronade, a short-barrelled naval cannon, being produced until the 1850s. The company was the largest ironworks in Europe during the 19th century. It supplied ammunition and armaments, steamboat engines, pig iron, cast iron goods such as balustrades fire grates and bath tugs, pillar boxes and telephone boxes, and even cast iron rings for underground tunnels. In 1982 it became insolvent and was taken over by the Franke Corporation, using the brand Carron Phoenix. ABOUT THE 'REGINALD M' The Reginald M’s purpose was to serve the coastal trade of South Australia, to carry cargo cheaply and efficiently. It is believed that the keel was in fact hewn from two telegraph poles! Its builder frequented all the salvage yards for materials and fittings. The vessel “Reginald M” was a two-masted coastal ketch, owned and built by Mr. Jack (John) Murch of Birkenhead, Port of Adelaide, South Australia. Its construction took approximately 6 months and it was launched at Largs Bay in 1922. Reginald M had a very shallow draft and a flat bottom that enabled it to come close to shore and to sit high and dry at low tide or to be beached on sand. The flat bottom was also to make the ship able to skim over reefs. Wagons could load and unload direct from her side. Her cargo included Guano, Barley, Wool, Horses, Cattle, Timber, Explosives, Potatoes, Shell Grit and Gypsum. On April 9th 1931Reginald M weathered a large storm in St Vincent Gulf, SA. The vessel suffered much damage; mast snapped and the crew laboured for four hours to free her by chopping off the past and rigging. The crew patched her up and slowly returned to Port Adelaide with only a portion of the insured cargo being damaged. Her crew members at the time were owner Mr John H Murch of Wells Street Largs Bay, Skipper Mr R Murch – John’s brother, Murray – son of Captain Murch and Seaman John Smith. Reg Webb purchased Carribie Station, at Marion in the Warooka District, south of Adelaide, in 1921. He cleared the land and farmed sheep and grain. In 1923 he shipped his own wool and grain from Marion Bay, having first carted 300 bags of the barley grain, 12 bags at a time, along the unmade track to the jetty. A photograph donated to Flagstaff Hill, dating about 1929 - 1942, shows two men on the Reginald M, holding between them their fishing catch of a large hammer shark. The photograph is stamped “GRENFELL STUDIO PORT LINCOLN PRINT” and titled “hammer shark caught on Reginald Emm”. The donor’s family lived on the Your Peninsular and despatched their grain from a chute at Gleeson’s Landing to the awaiting transport vessel. Reg knew the Murch Brothers from Port Adelaide. The brothers had been using their ketch REGINALD M to ship Guano from the Islands, led by Captain Richard Murch. Reg approached them in 1934 about shipping grain from Marion Bay. The brothers visited the bay and thought it was an ideal place. They showed Reg where to stack his grain and they measured up the cliffs. When Reg was ready, they brought down and installed a ninety foot wooden chute. The bags of grain were then individually sent down the chute, landing in a waiting small boat then rowed to REGINALD M, 14 bags at a time. After 10 hours REGINALD M would be fully loaded with 1300 bags of grain and shipped to waiting ports. At one time a wild storm destroyed the chute but it was rebuilt and strengthened. REGINALD M was involved in shipping the grain from there until 1938. In 1940 Able Seaman Allan H Lucas served on Reginald M between September and December, being engaged and discharged from Port of Adelaide. His Certificate of Discharge was signed by ship’s Master W S Murch. It seems that at some stage Reginald M was used as a Customs vessel, as one photograph in Flagstaff Hill’s collection shows “H.M.C. No. 3, Pt Adelaide” on the bow. In 1969 the last freight left Marion Bay on the ketch REGINALD M carrying grain, wool and explosives. In late 1970 she was sold to the Mt. Lyell Mining and Railway Company and was used by them as a barge to carry explosives. In 1972 the Navy League of Strahan, Tasmania, purchased her for use by the Strahan Sea Cadet Unit to use at Macquarie Harbour and renamed her T.S. Macquarie. However this plan for use of Reginald M did not come to pass. In 1974 Mr. Andrew Rennie, of East Brighton, Melbourne, bought her for a similar purpose. , paying $5,000 and donating a ‘Cadet of the Year” trophy to the Sea Cadets. He sailed her from Strahan to Melbourne, planning to use her for pleasure sailing. Also in 1975 Reginald M was sold to Melbourne Ferry Company at auction. Later in 1975 the Reginald M was bought by Flagstaff Maritime Museum for $20,000 . She has been restored and is now one of the exhibits in the Village lagoon or lake. It was restored in 2006 using funds from a $4,000 government grant. Flagstaff Hill Maritime Village’s Collection holds several other artefacts associated with Reginald M. They include photographs of the Reginald M, including one photograph of her in Outer Harbour, S.A. dated 1947, with Skipper- R.F. Dale and Owner- John Murch. Another shows her docked at Port Adelaide, with the lettering H.M.C. No. 3 Pt ADEL (standing for His/Her Majesty’s Customs). There is a black and white photo of her at a wharf and another showing a person on board.The steering gear is significant through its association with the Carron Company, the largest ironworks in Europe in the 19th century, and the manufacture of the short barrel, lightweight naval gun - the Carronade. The steering gear is significant for its association with the vessel REGINALD M is a coastal trading ketch from South Australia built in 1922. It is one of very few sailing coastal trading vessels still extant, and its flat bottom, single chine shape illustrates a very simple but robust method of construction, compared to other round bilged examples of trading vessels. She is now listed on the Australian Register of Historic Vessels (ARHV Number: HV000562.) Ship's steering gear that was part of the original vessel 'Reginald M', which was constructed in 1922. Inscription on both sides. Made by the Carron Company, UK."CARRON COMPANY"flagstaff hil, warrnambool, shipwrecked coast, flagstaff hill maritime museum, maritime museum, shipwreck coast, flagstaff hill maritime village, coastal trader, trading vessel, vessel reginald m, ketch, john murch ship builder, reg webb, carribie station, mt lyell copper company, queenstown navy league, andrew rennie, melbourne ferry company, r.f. dale, port adelaide vessel reginald m, macquarie training vessel, grenfell studio port lincoln, ship steering gear, metal steering gear, ship's gear, ship's navigation, carron company -
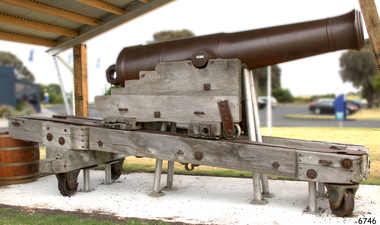 Flagstaff Hill Maritime Museum and Village
Weapon - Cannon, 1861
The artillery piece of the cannon was cast at the Low Moor foundry in England in 1861. It is a 68 pound muzzle loading cannon, capable of firing a 68 pound weight projectile. The arrow on the top of the barrel is the symbol of government ownership. It is probably one of the artillery pieces purchased by the Victorian government in response to the 1863 report by Captain Scratchley, which recommended 19 such artillery pieces be bought for the defence of Hobsons Bay, (Williamstown, Melbourne) (Billets p.12). It was possibly brought to Warrnambool in the late 1860s or the 1870s, to be used for training purposes by volunteers and local militia. The wrought iron runners were probably added to the slides at a later date. This model of carriage had been manufactured since 1855, and the traversing slide since 1860. The traversing slide of the wooden carriage absorbs the recoil when the gun is then returns to the gun to its original position for loading and re-firing. The properties of the timber (regarded as being Burmese teak) have helped to preserve these carriages in Australia. This particular carriage and traversing slide would have been manufactured about the same time as the gun (in 1861) in the Royal Carriage Department of the Royal Gun Factory in Woolwich, England. The gun would then have been assembled on the traversing slide of the carriage, then despatched as a unit. The wooden slide compressor mechanism that belongs to the cannon was used to limit the recoil when the cannon was fired. It is now stored separately for purposes of preservation. It is extremely rare, as it is the only one surviving in this group of South Western Victorian cannons.This 68 pdr cannon, mounted with its original wooden carriage, is part of the South Western Victoria collection of surviving 19th Century artillery pieces, item number W/F/02. It is rated as EXTREMELY RARE on a State, National and World level. The 68 pound smooth bore cannon of this period are not particularly rare either in Australia or overseas; its significance lies in its Victorian provenance and as an element in a major collection of 19th century cannon. The number of surviving carriages with traversing slides in this group in South Western Victoria is unique in Australia and probably in the World. Out of 10 such platforms surviving in Australia, the South Western Victorian group has half. Several survive around the world but probably not in such a large group. The wooden sliding compressor mechanism belonging to this cannon is extremely rare, and the only one in this South Western Victorian group of Guns and Cannons. As a whole, this cannon has undergone very little restoration or modification, giving it a high level of integrity.Warrnambool Garrison Cannon. 68pdr smoothbore, muzzle-loading, cast-iron cannon. Manufactured in Low Moor, 1861, No. 10310. Mounted on the wooden carriage with wrought iron traversing slide and wrought iron runners and fittings. The cannon's Cascabel is cast with a loop. The wooden slide Compressor Mechanism, or Recoil Mechanism, is extremely rare. This mechanism comprises two equal-sized sections of wood, one on each side of the centre, joined by metal rods. In the centre of this wooden platform, with openings, top and bottom is a 15cm diameter metal cylinder with two cusps on the edge of the top (this wood has split over time). Two parallel sides each have two 1cm thick metal "L' plates attached 15cm long and 8.5cm wide. With the unit is ‘ L’ bracket, curved bracket and bolt head.Cannon trunnion "LOW MOOR / 10310 / 1861" Top of the barrel "7045, (symbol of an arrow pointing up), 95 – 3 – 14, 1861, 209" Cascabel "CV / N / C" The rear of left-hand slide " "OD” “JW” “No 33” Side chock – “JW” twice. flagstaff hill, warrnambool, shipwrecked-coast, flagstaff-hill, flagstaff-hill-maritime-museum, maritime-museum, shipwreck-coast, flagstaff-hill-maritime-village, muzzle loading cannon, 68 pound cannon, low moor foundry, royal gun factory, warrnambool militia, warrnambool garrison volunteers, warrnambool fortifications, wooden sliding compression mechanism, carriage and traversing slide, 19th century cannon, traversing platform, garrison sliding carriage, 68 pounder -
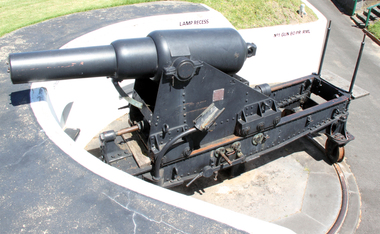 Flagstaff Hill Maritime Museum and Village
Weapon - Cannon, 1866
In the years following the Crimean War (1854-1857J) there was a great concern in the Colony that Imperial Russia would attempt an invasion. Coastal defences in the colony of Victoria were greatly strengthened by the Government as a result. Warrnambool was originally protected by cannons at Cannon Hill, approximately 1 kilometer west of the Flagstaff Hill Fortifications. These cannons included two 1866 guns, both 80 Pound Rifled Muzzle Loaders (RML) purchased by Victoria’s Colonial Government. They were part of a shipment of 26 such guns sent from England in December 1866. They are registered as No. 23 (80cwt-2qr-0lbs) - Gun 1, and No.13 (81cwt-1qr-12lbs) - Gun 2. They were cast at the Royal Gun Factory, Woolwich Arsenal, in 1866 and have a 6.3 inch bore. Both barrels carry the Royal Cypher of Queen Victoria, Insignia of the Royal Engineers, within the Garter and Motto surmounted by the Crown, with the Royal Cypher of Queen Victoria within the Garter (letters in centre “VR”, motto “HONI SOIT QUI MAL Y PENSE”, "Shame be to him who thinks evil of it."). The guns were originally supplied with wooden carriages. (The Royal Arsenal at Woolwich, England, was established eleven years after the Restoration of King Charles II. It was the principal supplier of armaments to the British and Empire Governments. At the height of its operations during World War One the factory covered 1300 acres and employed very nearly 80,000 workers. Woolwich was the Headquarters of the Royal Artillery since the raising of that Regiment in 1716. The Arsenal was closed in the late 1960’s.) These two cannons were transferred to the Warrnambool Garrison Artillery Battery Fortifications erected at Flagstaff Hill in 1887 as part of Victoria’s Coastal Defences. The original wooden carriages were subsequently replaced with the present iron garrison carriages in 1888. They are a “C” pivot. The ‘racers’ or curved track set into the floor of the gun emplacement (which enabled the guns to be traversed more quickly) are as specified for guns up to 10 inch, being of wrought iron 2.78 inches wide. A temporary third gun, now no longer on Flagstaff Hill’s site, was a 5 inch Rifled Breech Loading (BL) Armstrong gun mounted on an Elswick hydro pneumatic disappearing carriage It was faster to load and fire than the 80 pound RMLs and its arrival spelt the end of the older 80 pound guns’ useful life, apart from being used for practice sessions. The 5 inch BL gun was the main defensive weapon of the Warrnambool Battery until the Battery was downgraded in importance and the gun was recalled to Melbourne in 1910. The State of Victoria took over the ownership of the guns at the time of Australian Federation in 1901. In about 1901/1902 the Garrison Battery was converted to the Warrnambool Battery of the Australian Field Artillery (No 4 Field Battery). It was equipped with 4.7 inch naval guns mounted on field carriages. They were now a mobile unit but continued to use the Warrnambool Garrison area at Flagstaff Hill for practice. When the Fortifications were declared obsolete the two 80 Pounder RML were relocated to Cannon Hill in 1910. On the outbreak of World War One the 4.7 inch guns were recalled to Melbourne, and the Battery was disbanded. Most of the personnel probably re-enlisted in the local 4th Australian Light Horse Regiment. The two 80 Pounder RML were moved back to the Fortifications in 1973. They were both fully restored by Army First Year Apprentices at the Ordinance Factory in Bendigo in time for the centenary year of the fortifications in 1987. The guns are capable of firing 80 pound (32.3kg) armour piercing exploding shells 3.65kms out to sea. They were original manned by volunteers before a paid Garrison was established. Now the Guns are again fired by volunteers on Special Event days. Since restoration the Gun Number 1 had been fired on a regular basis but Gun Number 2 hadn’t been fired since the mid 1990’s. In April 2015 Gun Number 2 was serviced in preparation for the firing of both cannons on the ANZAC Centenary commemorations on April 25th 2015. Other guns from the original Cannon Hill location were obsolete by the time the 1887 Warrnambool Garrison Artillery Battery was built. These guns are (1) a 32 Pounder Muzzle Loading Smooth Bore (SB) cast in 1813 at the famous Carron Foundry, number 80837 and now located in the Warrnambool Botanic Gardens (2) a 68 Pounder Muzzle Loading Smooth Bore cast in 1861 at the equally august Low Moor Foundry, number 10310 and now located on the lawn area at the entrance to Flagstaff Hill Maritime Village. Both of these guns are mounted on their original wooden garrison carriages. There are only seven 32 Pounder SB made by Carron and fifteen 68 Pounder SB made at Low Moor known to exist in the State of Victoria (Conservation Management Plan for Victorian Guns and Cannon, South Western Victoria, May 2008, ref W/F/04)The Warrnambool Garrison has been added to the Victorian Heritage Register H1250 “for its intact battery and guns, a strong reminder of Victoria’s wealth and determination to protect itself from the perceived threat of invasion in the 1880’s.” The City of Warrnambool is one of several custodians of a collection of artillery pieces of heritage significance at a state, national and international level. These pieces are directly related to the defence of south-west Victoria in the 19th century. The care and preservation come under the Heritage Act 1995. Cannon. 80 Pounder Rifled Muzzle Loading (RML) Gun on iron carriage and slide, installed in the Battery at Flagstaff Hill’s Fortifications.. Made in 1866 at the Royal Gun Factory (R-G-F), Woolich, England. Gun Reg No - 23. Flagstaff Hill Garrison Gun 1 (Gun No. 1) Insignia of the Royal Engineers, and the weight of the gun, stamped on top of the gun’s barrel. There is a brass plate on the side of the gun with the details of 1987 restoration.Stamped on axle cover on side of barrel “R-G-F / No 23 / 1866”. Stamped into the metal on top of the barrel, Insignia of the Royal Engineers; Garter and Motto “HONI SOIT QUI MAL Y PENSE”, surmounted by the Crown, with the Royal Cypher of Queen Victoria “VR” within the Garter. Also stamped on top of the gun are 2 inward pointing arrows above the weight ”81-2-0”. Brass plate “RESTORATION / BY / FIRST YEAR / APPRENTICES / ORDANANCE FACTORY / BENDIGO 1987”flagstaff hill, warrnambool, shipwrecked coast, flagstaff hill maritime museum, maritime museum, shipwreck coast, flagstaff hill maritime village, great ocean road, cannon, 80 pounder, rifled muzzle, loading, royal gun factory, woolich -
 Flagstaff Hill Maritime Museum and Village
Weapon - Cannon, 1866
In the years following the Crimean War (1854-1857J) there was a great concern in the Colony that Imperial Russia would attempt an invasion. Coastal defences in the colony of Victoria were greatly strengthened by the Government as a result. Warrnambool was originally protected by cannons at Cannon Hill, approximately 1 kilometer west of the Flagstaff Hill Fortifications. These cannons included two 1866 guns, both 80 Pound Rifled Muzzle Loaders (RML) purchased by Victoria’s Colonial Government. They were part of a shipment of 26 such guns sent from England in December 1866. They are registered as No. 23 (80cwt-2qr-0lbs) - Gun 1, and No.13 (81cwt-1qr-12lbs) - Gun 2. They were cast at the Royal Gun Factory, Woolwich Arsenal, in 1866 and have a 6.3 inch bore. Both barrels carry the Royal Cypher of Queen Victoria, Insignia of the Royal Engineers, within the Garter and Motto surmounted by the Crown, with the Royal Cypher of Queen Victoria within the Garter (letters in centre “VR”, motto “HONI SOIT QUI MAL Y PENSE”, "Shame be to him who thinks evil of it."). The guns were originally supplied with wooden carriages. (The Royal Arsenal at Woolwich, England, was established eleven years after the Restoration of King Charles II. It was the principal supplier of armaments to the British and Empire Governments. At the height of its operations during World War One the factory covered 1300 acres and employed very nearly 80,000 workers. Woolwich was the Headquarters of the Royal Artillery since the raising of that Regiment in 1716. The Arsenal was closed in the late 1960’s.) These two cannons were transferred to the Warrnambool Garrison Artillery Battery Fortifications erected at Flagstaff Hill in 1887 as part of Victoria’s Coastal Defences. The original wooden carriages were subsequently replaced with the present iron garrison carriages in 1888. They are a “C” pivot. The ‘racers’ or curved track set into the floor of the gun emplacement (which enabled the guns to be traversed more quickly) are as specified for guns up to 10 inch, being of wrought iron 2.78 inches wide. A temporary third gun, now no longer on Flagstaff Hill’s site, was a 5 inch Rifled Breech Loading (BL) Armstrong gun mounted on an Elswick hydro pneumatic disappearing carriage It was faster to load and fire than the 80 pound RMLs and its arrival spelt the end of the older 80 pound guns’ useful life, apart from being used for practice sessions. The 5 inch BL gun was the main defensive weapon of the Warrnambool Battery until the Battery was downgraded in importance and the gun was recalled to Melbourne in 1910. The State of Victoria took over the ownership of the guns at the time of Australian Federation in 1901. In about 1901/1902 the Garrison Battery was converted to the Warrnambool Battery of the Australian Field Artillery (No 4 Field Battery). It was equipped with 4.7 inch naval guns mounted on field carriages. They were now a mobile unit but continued to use the Warrnambool Garrison area at Flagstaff Hill for practice. When the Fortifications were declared obsolete the two 80 Pounder RML were relocated to Cannon Hill in 1910. On the outbreak of World War One the 4.7 inch guns were recalled to Melbourne, and the Battery was disbanded. Most of the personnel probably re-enlisted in the local 4th Australian Light Horse Regiment. The two 80 Pounder RML were moved back to the Fortifications in 1973. They were both fully restored by Army First Year Apprentices at the Ordinance Factory in Bendigo in time for the centenary year of the fortifications in 1987. The guns are capable of firing 80 pound (32.3kg) armour piercing exploding shells 3.65kms out to sea. They were original manned by volunteers before a paid Garrison was established. Now the Guns are again fired by volunteers on Special Event days. Since restoration the Gun Number 1 had been fired on a regular basis but Gun Number 2 hadn’t been fired since the mid 1990’s. In April 2015 Gun Number 2 was serviced in preparation for the firing of both cannons on the ANZAC Centenary commemorations on April 25th 2015. Other guns from the original Cannon Hill location were obsolete by the time the 1887 Warrnambool Garrison Artillery Battery was built. These guns are (1) a 32 Pounder Muzzle Loading Smooth Bore (SB) cast in 1813 at the famous Carron Foundry, number 80837 and now located in the Warrnambool Botanic Gardens (2) a 68 Pounder Muzzle Loading Smooth Bore cast in 1861 at the equally august Low Moor Foundry, number 10310 and now located on the lawn area at the entrance to Flagstaff Hill Maritime Village. Both of these guns are mounted on their original wooden garrison carriages. There are only seven 32 Pounder SB made by Carron and fifteen 68 Pounder SB made at Low Moor known to exist in the State of Victoria (Conservation Management Plan for Victorian Guns and Cannon, South Western Victoria, May 2008, ref W/F/05)The Warrnambool Garrison has been added to the Victorian Heritage Register H1250 “for its intact battery and guns, a strong reminder of Victoria’s wealth and determination to protect itself from the perceived threat of invasion in the 1880’s.” The City of Warrnambool is one of several custodians of a collection of artillery pieces of heritage significance at a state, national and international level. These pieces are directly related to the defence of south-west Victoria in the 19th century. The care and preservation come under the Heritage Act 1995. Cannon. 80 Pound Rifled Muzzle Loading (RML) Gun on iron carriage and slide, installed in the Battery at Flagstaff Hill’s Fortifications. Made in 1866 at the Royal Gun Factory (R-G-F), Woolich, England. Gun Reg No 13. Flagstaff Hill Garrison Gun 2 (Gun No. 2). Insignia of the Royal Engineers, and the weight of the gun, stamped on top of the gun’s barrel. There is a brass plate on the side of the gun with the details of 1987 restoration.Stamped into the metal on top of the barrel, Insignia of the Royal Engineers; Garter and Motto “HONI SOIT QUI MAL Y PENSE”, surmounted by the Crown, with the Royal Cypher of Queen Victoria “VR” within the Garter. Also stamped on top of the gun are 2 inward pointing arrows above the weight ”81-1-12”. Brass plate “RESTORATION / BY / FIRST YEAR / APPRENTICES / ORDANANCE FACTORY / BENDIGO 1987”flagstaff hill, warrnambool, shipwrecked coast, flagstaff hill maritime museum, maritime museum, shipwreck coast, flagstaff hill maritime village, great ocean road, colonial defences, victoria’s coastal defences, warrnambool fortification, warrnambool garrison battery, warrnambool volunteer corps, ordinance, armaments, cannon hill fortifications, 4th australian light horse regiment, no 4 field battery, 80 pound cannon rifled muzzle loaders (rml), victorian colonial government, royal gun factory england, woolwich arsenal, royal cypher of queen victoria, garrison gun -
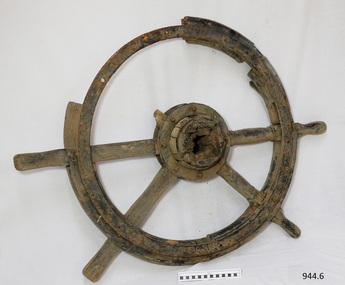 Flagstaff Hill Maritime Museum and Village
Equipment - Ship's Wheel, 1922
This ship's wheel was hand made from wood and metal using a recycled cart wheel. It originally belonged to the "Reginald M", a 2 masted, flat bottomed, coastal trading ketch with single chine. The REGINALD M The vessel “Reginald M” was a two-masted coastal ketch, owned and built by Mr. Jack (John) Murch of Birkenhead, Port of Adelaide, South Australia. Its construction took approximately 6 months and it was launched at Largs Bay in 1922. The Reginald M’s purpose was to serve the coastal trade of South Australia, to carry cargo cheaply and efficiently. It is believed that the keel was in fact hewn from two telegraph poles! Its builder frequented all the salvage yards for materials and fittings. Reginald M had a very shallow draft and a flat bottom that enabled it to come close to shore and to sit high and dry at low tide or to be beached on sand. The flat bottom was also to make the ship able to skim over reefs. Wagons could load and unload direct from her side. Her cargo included Guano, Barley, Wool, Horses, Cattle, Timber, Explosives, Potatoes, Shell Grit and Gypsum. On April 9th 1931Reginald M weathered a large storm in St Vincent Gulf, SA. The vessel suffered much damage; mast snapped and the crew laboured for four hours to free her by chopping off the past and rigging. The crew patched her up and slowly returned to Port Adelaide with only a portion of the insured cargo being damaged. Her crew members at the time were owner Mr John H Murch of Wells Street Largs Bay, Skipper Mr R Murch – John’s brother, Murray – son of Captain Murch and Seaman John Smith. Reg Webb purchased Carribie Station, at Marion in the Warooka District, south of Adelaide, in 1921. He cleared the land and farmed sheep and grain. In 1923 he shipped his own wool and grain from Marion Bay, having first carted 300 bags of the barley grain, 12 bags at a time, along the unmade track to the jetty. A photograph donated to Flagstaff Hill, dating about 1929 - 1942, shows two men on the Reginald M, holding between them their fishing catch of a large hammer shark. The photograph is stamped “GRENFELL STUDIO PORT LINCOLN PRINT” and titled “hammer shark caught on Reginald Emm”. The donor’s family lived on the Your Peninsular and despatched their grain from a chute at Gleeson’s Landing to the awaiting transport vessel. Reg knew the Murch Brothers from Port Adelaide. The brothers had been using their ketch REGINALD M to ship Guano from the Islands, led by Captain Richard Murch. Reg approached them in 1934 about shipping grain from Marion Bay. The brothers visited the bay and thought it was an ideal place. They showed Reg where to stack his grain and they measured up the cliffs. When Reg was ready, they brought down and installed a ninety foot wooden chute. The bags of grain were then individually sent down the chute, landing in a waiting small boat then rowed to REGINALD M, 14 bags at a time. After 10 hours REGINALD M would be fully loaded with 1300 bags of grain and shipped to waiting ports. At one time a wild storm destroyed the chute but it was rebuilt and strengthened. REGINALD M was involved in shipping the grain from there until 1938. In 1940 Able Seaman Allan H Lucas served on Reginald M between September and December, being engaged and discharged from Port of Adelaide. His Certificate of Discharge was signed by ship’s Master W S Murch. It seems that at some stage Reginald M was used as a Customs vessel, as one photograph in Flagstaff Hill’s collection shows “H.M.C. No. 3, Pt Adelaide” on the bow. In 1969 the last freight left Marion Bay on the ketch REGINALD M carrying grain, wool and explosives. In late 1970 she was sold to the Mt. Lyell Mining and Railway Company and was used by them as a barge to carry explosives. In 1972 the Navy League of Strahan, Tasmania, purchased her for use by the Strahan Sea Cadet Unit to use at Macquarie Harbour and renamed her T.S. Macquarie. However this plan for use of Reginald M did not come to pass. In 1974 Mr. Andrew Rennie, of East Brighton, Melbourne, bought her for a similar purpose. , paying $5,000 and donating a ‘Cadet of the Year” trophy to the Sea Cadets. He sailed her from Strahan to Melbourne, planning to use her for pleasure sailing. Also in 1975 Reginald M was sold to Melbourne Ferry Company at auction. Later in 1975 the Reginald M was bought by Flagstaff Maritime Museum for $20,000 . She has been restored and is now one of the exhibits in the Village lagoon or lake. It was restored in 2006 using funds from a $4,000 government grant. This ship's wheel is significant because of its association with the REGINALD M. REGNIALD M was a coastal trading ketch from South Australia built in 1922. It is one of very few sailing coastal trading vessels still extant, and its flat bottom, single chine shape illustrates a very simple but robust method of construction, compared to other round bilged examples of trading vessels. She is now listed on the Australian Register of Historic Vessels (ARHV Number: HV000562.)Ship’s wheel, also called a Helm, eight spoke design. Centre of wheel is handmade of wood and has iron rings around each side. The spokes are fitted into this wooden hub. The outer wheel has an iron ring on one side and sections of a wooden ring on the other. There are both original and modern bolt and screw fastenings. The wheel has remnants of black paint. This ship’s wheel was originally fitted to the ketch REGINALD M and removed during its restoration. flagstaff hill, warrnambool, shipwrecked-coast, flagstaff-hill, flagstaff-hill-maritime-museum, maritime-museum, shipwreck-coast, flagstaff-hill-maritime-village, ship's wheel, hand made ship's wheel, coastal trader, reginald m, ketch, john murch, ch murch, reg webb, carribie station, mt lyell copper company, queenstown navy league, andrew rennie, melbourne ferry company, r.f. dale -
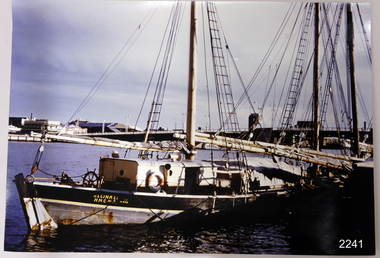 Flagstaff Hill Maritime Museum and Village
Photograph
This coloured photograph of the ketch Reginald M was taken when she was docked at Port Adelaide. The side of the vessel shows the letters "REGINALD M / H.M.C. No. 2 Pt ADEL" - (abbreviation H.M.C. meaning His/Her Majesty's Customs. HISTORY The Reginald M, a two-masted coastal ketch, was owned and built by Mr. Jack (John) Murch of Birkenhead, Port of Adelaide, South Australia to serve the coastal ports of South Australia. Its construction took approximately 6 months and it was launched at Largs Bay in 1922. Its purpose was to carry cargo cheaply and efficiently, and tradition has it that the keel was in fact hewn from two telegraph poles! Its builder frequented all the salvage yards for materials and fittings. The Reginald M had a very shallow draft and a flat bottom that enabled it to sit high and dry at low tide. The flat bottom was also to make the ship able to skim over reefs. Wagons were able to load and unload direct from her side. Her cargo included Guano, Barley, Wool, Horses, Cattle, Timber, Explosives, Potatoes, Shell Grit and Gypsum. In 1931 she weathered a large storm in St Vincents Gulf, SA. Her crew at the time were Owner Mr John H Murch, Wells St, Largs Bay, Skipper, John’s brother Mr R Murch, Murray, son of Mr R Murch and Seaman John Smith Reg Webb purchased Carribie Station, at Marion in the Warooka District, south of Adelaide, in 1921. He cleared the land and farmed sheep and grain. In 1923 he shipped his own wool and grain from Marion Bay, having first carted 300 bags of the barley grain, 12 bags at a time, along the unmade track to the jetty. A photograph dating about 1929 -1942 shows 2 men on the Reginald M, having just landed their fishing catch of a hammer shark. The photograph is stamped “GRENFELL STUDIO PORT LINCLON PRINT” and titled “hammer shark caught on Reginall Emm”. Reg Webb knew the Murch Brothers from Port Adelaide. The brothers had been using their ketch REGINALD M to ship Guano from the Islands, led by Captain Richard Murch. Reg approached them in 1934 about shipping grain from Marion Bay. The brothers visited the bay and thought it was an ideal place. They showed Reg where to stack his grain and they measured up the cliffs. When Reg was ready, they brought down and installed a ninety foot wooden chute. The bags of grain were then individually sent down the chute, landing in a waiting small boat then rowed to REGINALD M, 14 bags at a time. After 10 hours REGINALD M would be fully loaded with 1300 bags of grain and shipped to waiting ports. At one time a wild storm destroyed the chute but it was rebuilt and strengthened. REGINALD M was involved in shipping the grain from there until 1938. In 1940 Able Seaman Allan H Lucas served on Reginald M between September and December, being engaged and discharged from Port of Adelaide. His Certificate of Discharge was signed by ship’s Master W S Murch. It seems that at some stage Reginald M was used as a Customs vessel because a photograph in Flagstaff Hill’s collection shows the text “H.M.C. No. 3, Pt Adelaide” on the bow, the abbreviations standing for “His/Her Majesty’s Customs”. In 1969 the last freight left Marion Bay on the ketch REGINALD M carrying grain, wool and explosives. In late 1970 she was sold to the Mt. Lyell Copper Company, based in Queenstown, Tasmania, to carry explosives. In 1972 the Navy League of Strahan, Tasmania, purchased her for use by the Strahan Sea Cadet Unit and renamed her T.S. Macquarie. In 1974 Mr. Andrew Rennie, of East Brighton, Melbourne, bought her, paying $5,000 and donating a ‘Cadet of the Year” trophy to the Sea Cadets. He sailed her from Strahan to Melbourne, planning to use her for pleasure sailing. In 1975 Reginald M was sold to Melbourne Ferry Company at auction. In 1975 the Reginald M was bought by Flagstaff Maritime Museum for $20,000. She has been restored and is now one of the exhibits, tied up at the dock. Flagstaff Hill Maritime Village’s Collection holds several other artefacts associated with Reginald M. They include - Photographs of the Reginald M, including one photograph of her in Outer Harbour, S.A. dated 1947, with Skipper- R.F. Dale and Owner- John Murch. Another shows her docked at Port Adelaide, with the lettering H.M.C. No. 3 Pt ADEL (standing for His/Her Majesty’s Customs). There is a black and white photo of her at a wharf and another showing a person on board. - a lifebuoy, with Pt Adelaide on it. - a bullet found in pieces of timber when Reginald M was restored in 1979 (References: Flagstaff Hill Fact Sheet “Reginald M”, the book “The Reg Webb Story” compiled by the Warooka & District Museum. Reg Webb’s daughter Lily Ramsay (nee Webb) and her husband Howard, Lizzie Rennie (daughter of owner Andrew Rennie), brochure “Discover the Yorke Peninsula South Australia”, Ketch in Peril; Adelaide Chronicle 9 April 1931, K Gordon & Mary Filmer of Warooka; South Australian Maritime Museum) Thiis photograph is significant because of its connection to the history of the vessel REGINALD M is a coastal trading ketch from South Australia built in 1922. It is one of very few sailing coastal trading vessels still extant, and its flat bottom, single chine shape illustrates a very simple but robust method of construction, compared to other round bilged examples of trading vessels. She is now listed on the Australian Register of Historic Vessels (ARHV Number: HV000562.)Photograph of Reginald M at Port Adelaide. The side of the vessel shows the letters "REGINALD M / H.M.C. No. 2 Pt ADEL" - (abbreviation H.M.C. meaning His/Her Majesty's Customs. Painted on the side of the vessel "REGINALD M / H.M.C. No. 2 Pt ADEL" - flagstaff hill, warrnambool, shipwrecked-coast, flagstaff-hill, flagstaff-hill-maritime-museum, maritime-museum, shipwreck-coast, flagstaff-hill-maritime-village, reginald m, coastal trading ketch, trading vessel, john murch ship builder, port adelaide vessel reginald m, andrew rennie, macquarie training vessel, mt lyell copper company, queenstown navy league, ch murch, reg webb, carribie station, melbourne ferry company, grenfell studio port lincoln, vessel reginald m -
 Flagstaff Hill Maritime Museum and Village
Document - Certificate of Approval, Load Line, 25-02-1970
This Certificate, Load-Line, gave approval for the vessel Reginald M to load cargo up to a certain line, marked by a disc attached to the ship and inspected by the South Australian Harbors Board. The vessel had a long and varied life of service. This Certificate relates to early 1970, before the ship was sold to the Lyall Mining and Rail Company. The Load Line on the Reginald M was carved on the ship, inside the hull and not removeable. The REGINALD M - The vessel “Reginald M” was a two-masted coastal ketch, owned and built by Mr. Jack (John) Murch of Birkenhead, Port of Adelaide, South Australia. Its construction took approximately 6 months and it was launched at Largs Bay in 1922. The Reginald M’s purpose was to serve the coastal trade of South Australia, to carry cargo cheaply and efficiently. It is believed that the keel was in fact hewn from two telegraph poles! Its builder frequented all the salvage yards for materials and fittings. Reginald M had a very shallow draft and a flat bottom that enabled it to come close to shore and to sit high and dry at low tide or to be beached on sand. The flat bottom was also to make the ship able to skim over reefs. Wagons could load and unload direct from her side. Her cargo included Guano, Barley, Wool, Horses, Cattle, Timber, Explosives, Potatoes, Shell Grit and Gypsum. After a variety of services, in late 1970 Reginald M was sold to the Mt. Lyell Mining and Railway Company and was used by them as a barge to carry explosives. In 1972 the Navy League of Strahan, Tasmania, purchased her for use by the Strahan Sea Cadet Unit to use at Macquarie Harbour and renamed her T.S. Macquarie. However this plan for use of Reginald M did not come to pass. In 1974 Mr. Andrew Rennie, of East Brighton, Melbourne, bought her for a similar purpose. , paying $5,000 and donating a ‘Cadet of the Year” trophy to the Sea Cadets. He sailed her from Strahan to Melbourne, planning to use her for pleasure sailing. Also in 1975 Reginald M was sold to Melbourne Ferry Company at auction. Later in 1975 the Reginald M was bought by Flagstaff Maritime Museum for $20,000 . She has been restored and is now one of the exhibits in the Village lagoon or lake. It was restored in 2006 using funds from a $4,000 government grant.This Certificate is significant because of its association with the last working days of REGINALD M. REGNIALD M was a coastal trading ketch from South Australia built in 1922. It was one of very few sailing coastal trading vessels still existing until 2016, and its flat bottom, single chine shape illustrated a very simple but robust method of construction, compared to other round bilged examples of trading vessels. The vessel is listed on the Australian Register of Historic Vessels (ARHV Number: HV000562.)Certificate, rectangular, behind glass in wooden frame. Certificate is an official printed form, some information is over-typed, other information is hand written and signed. Frame has a central hole in top and bottom. The Certificate relates to Load Level of the vessel Reginald M and refers to the exact placement of a disc within the vessel that indicates the maximum load in fresh water. . Issued to the vessel 'Reginald M', Official Number 137228. . Issued by the Sough Australian Harbors Board . Valid from 25-02-1970 to 31-01-1974. . Signed by Neil Cormack, 25th February 1970Certificate of Approval - Load Line for sailing vessel Reginald M, Official Number 137228. Logo of the South Australian Harbors Board. Issued by Department of Marine & Harbors, Port Adelaide, 25th February 1970. In force until 31st January 1974. Signed by Neil William Cormack, authorised officer for Department of Marine & Harbors. Typed onto form: "AUX [SAILING SIP]" "REGINALD M" "137228" "1968" " Neil William Cormack" "Department of Marine & Harbors" "1 [foot] 3 [inches below the] main [deck]" "31st JANUARY 74" "25th FEBRUARY 70" Signature: "Neil W Cormack"flagstaff hill, warrnambool, maritime village, maritime museum, flagstaff hill maritime museum & village, shipwreck coast, great ocean road, coastal trader, reginald m, ketch, john murch, ch murch, reg webb, carribie station, mt lyell copper company, melbourne ferry company, certificate of approval, load line, 137228, load line disc, 25-02-1970, neil w cormack, neil william cormack, south australian harbors board, department of marine and harbors, harbours -
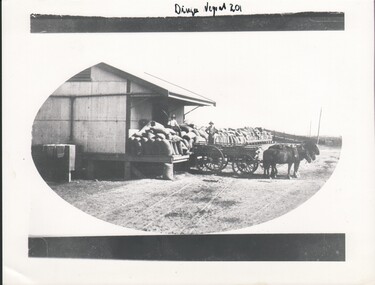 Bendigo Historical Society Inc.
Photograph - HARRY BIGGS COLLECTION: LOADING WHEAT
Photograph of two workers loading or unloading bags of grain (wheat?). There is a shed with a low Veranda extending from the front, there is a wagon drawn by two horses backed up[ to this Veranda. One man is standing in the wagon and the other is sitting on bags of grain on the veranda. There are numerous bags of grain on a low platform extending into the background. In the far background there is what appears to be a loading ramp. Written above the photo is Dingee negative 201topic, farming, loading wheat, dingee, loading wheat -
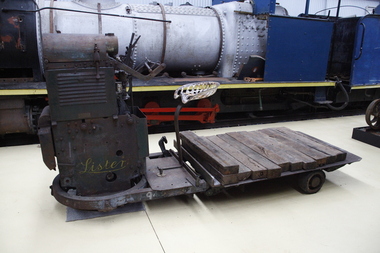 Puffing Billy Railway
Lister Auto Truck
The Lister Auto-Truck was a small monowheel tractor built for moving light loads around factories, railway yards and similar sites. They were built by R A Lister and Company of Dursley, Gloucestershire, well known for their range of small stationary engines The Auto-Truck was one of several monowheel tractors to appear in the 1920s and '30s, with the availability of small, reliable petrol engines, as developed for motorcycles and the stationary engines for which Lister were already known. These were tricycle vehicles, with the single leading wheel used for both drive and steering. Their simple construction carried most of the mechanism on this wheel as a single unit, the chassis with the trailing wheels being little more than a trailer for balance. Simplicity was a key feature. The engines were single-cylinder and air-cooled. Ignition was by magneto, rather than requiring a battery and electrical system. One of these designs was produced in the 1920s by George Grist of the Auto Mower Co., Norton St Philip, Somerset. The engine was a JAP 600 cc four-stroke air-cooled sidevalve, a typical small engine of the time. The Auto Mower Co. were Lister agents and when Lister heard of this 'Auto-Truck' they bought one for use in their own factory. It was used to carry heavy engine castings from the foundry to the machine shop. Lister customers saw them and there was such interest in wanting to buy them that Lister negotiated with Auto Mower to build them under licence. Although Lister were already well known for their small petrol stationary engines, these were heavy cast-iron engines with water hopper cooling and unsuitable for vehicle use. Lister remained with the JAP engine for the Auto-Truck. The Auto-Truck was designed for use in factories or other places with smooth surfaces of concrete or tarmac. This allowed the use of small solid-tyred wheels with only simple suspension, making the vehicle simple, cheap and lightweight. They had little ability on soft surfaces though and could even topple over if driven carelessly across slopes. Their design was a compromise between the top-heavy nature of the tall engine grouping above its wheel and a well thought-out chassis for stability. The bearing between them was a large diameter ring roller bearing, mounted at the lowest part of the chassis. This gave rigidity and stability, even after long wear. A ring of rolled channel girder was attached to the engine group and rollers on the chassis carried the load upon this. On early Auto-Trucks this bearing is set very low, in line with the chassis members, and is covered by thin steel plates. The front panel of the engine cover is distinctive with large ventilation holes and a Lister signature cut through it. Strangely this panel is made of thick cast iron, providing substantial weight high on the engine and only adding to its top heaviness. To improve visibility of moving vehicles in noisy factories, this panel was often painted white, the rest of the vehicle being Lister's usual brunswick green. The driver was seated on a Brooks bicycle saddle, which in recognition of the lack of vehicle suspension, was carried on the end of a cantilevered bar that acted as a leaf spring. A wide handlebar on the engine group was used for steering. A squeeze bar the width of this handlebar engaged the clutch. Controls included a hand throttle, a gear lever with two forward and one reverse gears, and a large handbrake lever. The engine unit rotated freely for a full 360° rotation. When used in reverse, the Auto-Truck could either be driven from the saddle, looking backwards over the driver's shoulder; or they could dismount, swivel the engine unit around and control it as a pedestrian-controlled truck from behind. Under the engine cover were two equal diameter tanks, a fuel tank for petrol and a shorter oil tank. Engine and chain-drive lubrication used a total-loss oil system, controlled by a small pump and needle valve. Info Ref: Lister Auto-Truck - Wikipedia https://en.wikipedia.org/wiki/Lister_Auto-TruckHistoric - Industrial monowheel tractor for moving light loads around factories, railway yards and similar sites.The Lister Auto-Truck - small monowheel tractor Made of steel with three wheels. Powered by a J.A.P single cylinder petrol motor which is Hand Cranked to start.Lister puffing billy, lister, lister auto truck, monowheel tractor -
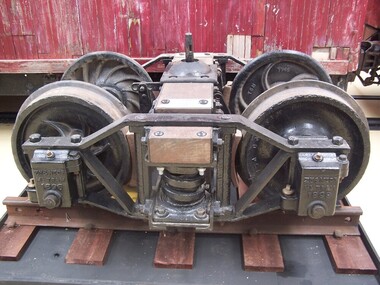 Puffing Billy Railway
Zeehan & North East Dundas Tramway Bogie 1896, wagon bogie, 1896
Zeehan & North East Dundas Tramway Bogie 1896 The North East Dundas Tramway (NEDT) was a 2 ft (610 mm) narrow gauge tramway on West Coast Tasmania that ran between Zeehan and Deep Lead (now Williamsford). It was part of Tasmanian Government Railways. The line was opened in 1896 to carry ore from the Williamsford mines to Zeehan where it would be loaded onto another train for shipment to Burnie. The narrow-gauge (2 ft) was chosen because of the extremely difficult terrain that the railway crossed, requiring several big trestle bridges, including one at the foot of Montezuma Falls. After some rain the engine and carriages would get soaked by spray from the falls. There was a break-of-gauge with the mainline 1,067 mm (3 ft 6 in) system at Zeehan. The railway was closed in 1932. The rolling stock for the Tramway was built in the Launceston Railway workshops, and comprised twenty five eight-wheel low-side trucks, tare 3 tons 1 cwt. 1 qr., load 10 tons; six eight-wheel flat trucks, tare 2 tons 18 cwt. 1 qr., load 10 tons; two four-wheel bolster trucks, for carrying long timber, tare 1 ton 19 cwt., load 5 tons; and four passenger cars, each with six cross-seats with reversible backs, to carry eighteen passengers, also a locker for mails and parcels. All trucks and cars have cast-steel wheels 21 inches in diameter and are fitted with automatic vacuum brakes. The trucks have side levers and the cars have hand-screw brakes. The vacuum brake can be worked from the engine or from the passenger cars, which act as brake vans. When this brake was introduced, one effect was to accelerate the journey speed by about 10 minutes owing to more even running on down gradients. Historic - Industrial Narrow Gauge railway - Bogie used on the Zeehan & North East Dundas Tramway, Tasmania, Australia Bogie made from steel, iron and wrought ironZN & NTDS ML TRAM 1896 Griffinpuffing billy, bogie, zeehan & north east dundas tramway bogie, zeehan & north east dundas tramway, industrial narrow gauge railway, gauge: 2' (610 mm) -
 Old Colonists' Association of Ballarat Inc.
Photograph - Image, Ballarat Old Colonists' Association Homes, 1925, 1925
The homes were presented by the donors for the use of the Old Colonists' Association of Ballarat. The homes fulfil the original 1888 aim of 'aid and assist indigent or suffering old colonists' and 'to provide the shelter of a home for old and indigent pioneers of the gold fields, their widows, or anyone connected with the association'. From the minute books: "Mr and Mrs F.J. Williams, both natives of Ballarat, offered to build a cottage on the Association's ground at Perry Park [now Charles Anderson Grove] something after a style of the Hassell Homes. That offer was immediately followed by another from Mr S.W.J. Clark, a member of the Council. Both offers were promptly and gratefully accepted." The Old Colonists' Association Ballarat Inc. is a not for profit charitable organisation providing accommodation for elderly people. It manages over 40 Home retirement village at Charles Anderson Grove Ballarat. Accommodation is offered at significantly below market rates. It has been providing low cost accommodation to the elderly since the 1920s. The Association Council overseas the running of this facility on a voluntary basis. One of the first objectives of the Association was "to provide the shelter of a hose for those Pioneers of the Goldfields whom the reverses of fortune have deprived of the means of procuring the comforts of life in their declining years." The first home at Charles Anderson Grove was built in 1925. Before that time the Association provided relief for needy pioneers. relief included monthly monetary payments, loads of firewood, medical assistance and distribution of Christmas boxed of groceries to deserving pensioners, and in some cases payment of burial costs. == Purposes == ::a) The dominant purpose of the Association is to give public benevolent relief as a charity, but providing independent living accommodation in our Retirement Village for person in need who are over 65. ::b) To raise funds by membership subscription, commercial and residential rents, donations, gifts and voluntary work, for the purpose of providing direct relief of poverty, distress, misfortune or helplessness. ::c) To maintain the important heritage and ongoing viability of the Old Colonists' Association.Two black and white images of Old Colonists' Association homes from a Special Christmas edition of the Courier in 1925. The top image shows 'Clark Cottage', erected by S.W.J. Clark, and the lower image shows the 'Williams Cottage' erected by Mr and Mrs F.J. Williams. The cottages are locate in Charles Anderson Grove, Ballarat. old colonists' association ballarat, old colonists' club, charles anderson grove, clark cottage, williams cottage, perry park, s.w.j. clark, f.j. williams, old colonists' assocoation -
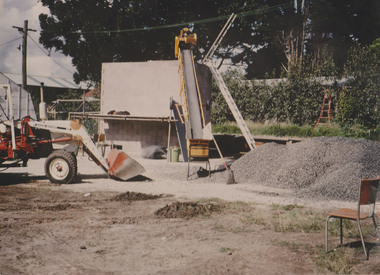 University of Melbourne, Burnley Campus Archives
Plan - Plans and photographs, Burnley Low Energy Greenhouse, c. 2008
Laminated plans for greenhouse (1) Burnley Low Energy Greenhouse, (2) Solar Boosted Heat Pump - Greenhouse Bench Heating System. C photographs pasted on cardboard and labelled (3) Loading 20 mm gravel into Rock pile. (4) Reinforcement at Bottom Gravel level. (5) Sealing the Top of the Rock pile. (6) Top of Rock pile Before A-Frame Construction. (7) Corner Detail of Portal Frame. (8) Glazing Frames for Solar Panels. (9) Structure Partially Clad, with Solar Panel Supports at Rear. (10) Back of Solar Panels in Place. Laminated C photographs pasted on cardboard and labelled. (11) Burnley Low Energy Greenhouse. (12) Greenhouse Covering Materials Burnley. Pamphlet (13) Burnley College Institute of Land and Food Resources (slightly damaged)burnley, greenhouse, solar energy, construction, pamphlet -
University of Melbourne, Burnley Campus Archives
Plan - Colour prints, Burnley Low Energy Greenhouse, c. 2008
Laminated plans for greenhouse (1) Burnley Low Energy Greenhouse, (2) Solar Boosted Heat Pump-Greenhouse Bench heating System. Photographs pasted on cardboard and labelled (3) Loading 20mm gravel into Rockpile. (4) Reinforcement at Bottom Gravel level. (5) Sealing the Top of the Rockpile. (6) Top of Rock pile Before A-Frame Construction. (7) Corner Detail of Portal Frame. (8) Glazing Frames for Solar Panels. (9) Structure Partially Clad, with Solar Panel Supports at Rear. (10) Back of Solar Panels in Place. Laminated photographs pated on cardboard and labelled. (11) Burnley Low Energy Greenhouse. (12) Greenhouse Covering Materials Burnley. Panphlet (13) Burnley College Institute of Land and Food Resources (slightly damaged)greenhouse, burnley, low energy greenhouse, solar boosted heat pump, greenhouses, bench heating system, rockpile -
 Glenelg Shire Council Cultural Collection
Artwork, other, BRIGIT THOMAS, Lady Nelson, c. 2015
From - theladynelson.org.au T The original Lady Nelson was built at Deptford, in England, in 1799, for service to the Transport Office on the River Thames. She was designed with sliding keels (centre boards), a device invented by Captain John Schank of the Royal Navy to allow surveying in rivers and shallow water ways. On completion she was selected for exploration services in the Colony of New South Wales and sailed for Port Jackson on 18 March 1800 under the command of Lieutenant James Grant. A brig of 60 tons, she carried a crew comprising the commander, two mates and twelve seaman. As she left the River Thames sailors on nearby ships ridiculed her because of her size and shape, calling her, as she sailed past, 'His Majesty's Tinderbox'. At Portsmouth on the 9th February 1800 she was fitted with four brass carriage guns, three to four pounders, in addition to the two guns already on board. Because of the heavy load she was carrying she was very low in the water, having only two feet nine inches freeboard amidships. The ship finally left Portsmouth on 17th March 1800 as part of an East Indian Convoy. From 1800 to 1825 the Lady Nelson operated around the Australian Coast and fulfilled a variety of roles including exploration, surveying, forming settlements, shifting goods and people around the colonies and capturing pirates. She played pivotal roles in the European settlement of Hobart, Northern Tasmania, Melbourne, Newcastle, Port Macquarie and Northern Territory. Those onboard charted much of Bass Strait, Port Philip, Newcastle, Port Macquarie and (with the Investigator) the coasts of northern New South Wales and southern Queensland. She also has links to other locations around the East Coast such as Trial Bay in NSW and the Mt Gambier area of SA. After 25 years of service while trading on the island of Baba the Lady Nelson was overrun by the islanders, the crew was killed and the ship stripped and later burnt and sunk. A replica of the Lady Nelson was built in the 1980s.Image of a tall ship in sail. The ship is flying both the Aboriginal flag and the Australian Flag. It sails on a calm sea. There are figures on the deck - four in total. The image is mounted on cream board and framed in dark timber. Etching, hand coloured,.Front: 'Lady Nelson A/P BT' - hand written, pencil in between etching and mount Back: Artist's business card glued to back of etching, lower left hand corner:ady nelson, femal artists, female artist, women -
Old Colonists' Association of Ballarat Inc.
Document, Clare Gervasoni, Williams Cottage Property Report - 3 Charles Anderson 2021, 2021
The Old Colonists' Association Ballarat Inc. (OCA) is a not-for-profit charitable organisation providing accommodation for those older Australians who are in financial need and risk, with no ingoing payment required and at a low rental. It manages a 42 Home retirement village at Charles Anderson Grove Ballarat. The village comprises single and double independent living units. Accommodation is offered at significantly below market rates. It has been providing low-cost accommodation to the elderly since the 1920s. The Association Council overseas the running of this facility on a voluntary basis. One of the first objectives of the Association was "to provide the shelter of a house for those Pioneers of the Goldfields whom the reverses of fortune have deprived of the means of procuring the comforts of life in their declining years." The first home at Charles Anderson Grove was built in 1925. Before that time the Association provided relief for needy pioneers. Relief included monthly monetary payments, loads of firewood, medical assistance and distribution of Christmas boxes of groceries to deserving pensioners, and in some cases payment of burial costs. A written report into the history of the Williams Cottage at 3 Charles Anderson 20213 charles anderson grove, charles anderson grove, williams cottage, property report, fred williams, matilda williams, philanthropy -
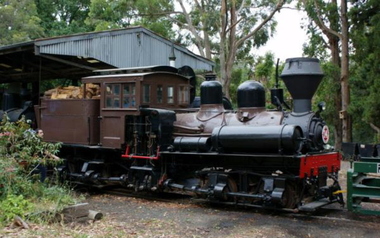 Puffing Billy Railway
Number 14 - Shay Locomotive (Builder’s Number 2549), 22 June 1912
geared steam locomotive Built by the Lima Locomotive Works, USA in 1912 (Builder’s Number 2549). “Class a” 13 Ton (13.3 tonne) . This locomotive hauled freight on the Ali-Shan Forest Railway in Taiwan and is capable of pulling 90 Tons (91.8 tone) loads over steep gradients at low speeds. . This A-type Shay locomotive was built by Lima Locomotive Works, Ohio (builder's number 2549 of 1912) for the Alishan Forest Railway, Taiwan. The Alishan Forest Railway featured a large fleet of Shay locomotives and many still survive, together with a portion of the railway which is now a tourist operation. Alishan Shay No.14 was gifted to the Puffing Billy railway in 1971 by the Alishan Forest Railway - Taiwan Government forest Bureau and arrived on the 12th October 1971 at the Puffing Billy Museum at Menzies Creek. Loco: Shay No.14 ( Shop Number 2549 ) Class: A 18-2 ( 2-cylinders / 2-trucks Class A ) Built for: Alishan Forest Railway Bulit by Lima Locomotive Corporation In service 22 June 1912 Samuels, Samuels & Co., Ltd. (D), Taipei, Formosa (Japan); For: Alishan Forest RY #14, Kirun (Keelung), Formosa, (Japan) (1945) Alishan Forest RY #14, Keelung (Chilung), Taiwan (12 Oct 1971) Puffing Billy RY #14, Belgrave, Victoria, Australia Gauge 30" Status Preserved - In Storage at Museum There is only one original LIMA mark left on any of the Alishan RY Shays and it has no number. All of their Shays have been re-built, changing much of the original Lima product. Most were renumbered for various reasons without regard to Lima Shop Numbers over the years. "Girder Type Frame" details from http://www.shaylocomotives.com/data/lima3354/sn-2549.htm Historic - Industrial Narrow Gauge Railway - Geared Steam Locomotive which worked on the Alishan Forest Railway, Taiwan.geared steam locomotive - Class: A 18-2 ( 2-cylinders / 2-trucks Class A ) - made of wood and iron and wrought iron, Glass14puffing billy, shay, geared locomotive, steam locomotive, industrial narrow gauge railway, 2'6", ali shan forest railway