Showing 171 items matching "signal light"
-
 City of Kingston
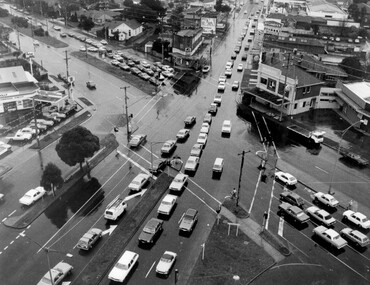
Photograph - Black and white, c. 1950
... in response to traffic light signals.... in response to traffic light signals. This image provides a strong ...The image shows a line of traffic travelling along South Road in response to traffic light signlas while an increasing number of cars are banking up along Nepean Highway, also in response to traffic light signals.This image provides a strong contrast to images from earlier eras of the same intersection. The amount of traffic has increased enormously as well as commercial development.Black and white photograph with an aerial view of the intersection of Nepean Highway and South Road, taken from above the Moorabbin Council Chambers.Handwritten in black ink Pic [indecipherable] / 1000 Handwritten in red ink: 150%moorabbin, traffic lights, cars, nepean highway -
 Wodonga & District Historical Society Inc
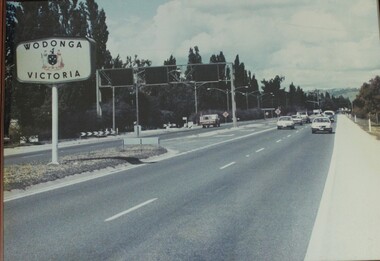
Photograph - Wodonga, Victoria sign and the Fruit Fly check point c1970s
... feature overhead signals and traffic light signs to control... hand side feature overhead signals and traffic light signs ...The permanent fruit fly road blocks in Victoria began in 1958. The first was set up on the Lincoln Causeway between Albury and Wodonga. The aim was to protect the Victorian fruit export industry, the largest in the country. Cars would be stopped and inspected when entering Victoria. At peaks periods, such as Easter and school holidays, there were up to 10 inspectors at the 24 hour checkpoint near the former butter factory on the Lincoln Causeway. Local residents could apply for a pass which would be displayed on their window, but were still subject to random checks. Hundreds of tonnes of fruit each week was confiscated and pulverised by Department of Agriculture staff. The road block was closed in 1980, partly due to the increased traffic flows and the cost of maintaining inspection points.This image reflects government measures taken to protect the fruit industry in Victoria.A large image of the LIncoln Causeway at the Victorian/NSW border at Wodonga. The southbound lanes on the right hand side feature overhead signals and traffic light signs to control traffic leading into the Fruit fly inspection checkpoint ahead. The photo is in a wooden frame.On right hand side: Border sign: Wodonga/Victoria and the Victorian State Coat of Arms.fruit fly control, victoria border, lincoln causeway wodonga -
 Puffing Billy Railway
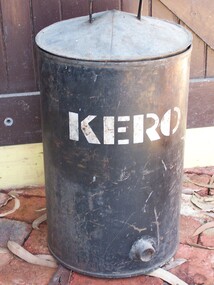
Equipment - Container
... Kerosene was used to light the signal lamps at night time...-valley-and-the-dandenong-ranges Kerosene was used to light ...Kerosene was used to light the signal lamps at night time on a railway, to ensure that a locomotive driver could see that the line was clear there was no danger of another train ahead. This container was used to store the in kerosene to fuel such lamps and was kept inside a lamp room until required for use.Victorian Railways - Keroseane Container Used in the storage of kerosene prior to use in lamps at stations.Large, cylindrical tin container with conical lid and wire handle. A small zinc spout is embedded in the lower quadrant. The word 'KERO' is stencilled in white across the front. Keropuffing billy, kerosene, fuel, combustible material, tin container, lamps -
 National Vietnam Veterans Museum (NVVM)
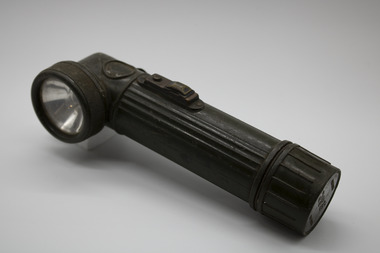
Functional Object - Torch, anglehead
... for constant light or signaling position. The bottom section has... for constant light or signaling position. The bottom section has ...Standard issue item, the torch could be clipped onto uniform or webbing leaving the soldier's hands free and used for constant light or signaling position. The bottom section has a compartment containing four different coloured filters /lenses that make the use of the torch at night less visible to enemy.Dark green coloured ribbed tube/handle with globe in right-angled section at top. Can be unscrewed at both ends and has metal clip to attach to webbing or uniform.62'30.89-910 5033torch, flashlight, angle head torch, vietnam war, tunnel rat, field torch -
 Ballarat Tramway Museum
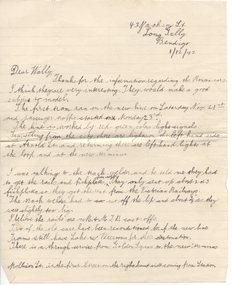
Document - Letter/s, Jim Goodman, 1/12/1942 12:00:00 AM
... of rails, timetable services on the line, colour light signals... of rails, timetable services on the line, colour light signals ...Handwritten letter from Jim Goodman of 43 Jackson St Long Gully, dated 1/12/1942, to Wal Jack. Gives details of the new line to North Bendigo, issues with construction, sources of rails, timetable services on the line, colour light signals. Also has notes regarding NSW and VR steam locomotives. Letter consists of three pages on light grey ruled or line paper. Contained originally within Reg Item 5623 at the front of this note book. For items see btm5623 loose items list.pdf.trams, tramways, bendigo, north bendigo, timetables -
 Ballarat Tramway Museum
Negative - Set of 3, Wal Jack, c1948
... - View Point section of track was not fitted with coloured light... with coloured light signals. Tram 22 (Reg Item 5533) entered service ...Yields information about staff or safeworking system in use at Ballarat up to the time of the introduction of the signal system. No information known at the time of cataloguing of the person in the photographs.Set of three Negative and Digital images of an unknown person: .1 - showing the hook and the section staff at the Ripon St - Sturt St corner. Alongside is an ESCo Electrical connection box or pillar. In the background is the shelter at this location. .2 - the same person handing the staff to a well loaded No. 22 (c1946) at Ripon St. Tram has a Regatta Auxiliary board. Has the Western Hotel in the background. .3 - the same person holding the Sturt St to Lake View Loop. .4 - close up of the staff. Note: The Ripon St - Lake View Loop - View Point section of track was not fitted with coloured light signals. Tram 22 (Reg Item 5533) entered service - 1945; post 1947, as side numbers (which can just be seen in image i2) were painted Oct. 1947 and was renumbered to 37, in Sept. 1952.trams, tramways, signals, staff, ripon st, view point, lake view, tram 22 -
 Federation University Historical Collection
Photograph, Noel L. Harvey, Yendon Railway Station, 1968, 03/12/1968
... for installation of flashing light signals.'... for installation of flashing light signals.' university of ballarat ...Buninyong had no railway station so residents would travel to Yendon to catch the train. The Yendon Railway Station building was demolished soon after this photograph was taken. The bluestone was purchased by John Vernon, and was used to construct retaining walls in a garden enclosure between the first two buildings at the new Ballarat Institute of Advanced Education campus at Mt Helen. This is now known as the courtyard between building 'F' and building 'G' at the University of Ballarat mt Helen Campus. The following article was published in the Ballarat Courier on 06 December 1968. 'Yendon Station to be demolished - The old bluestone railway station at Yendon is to be demolished. C.A.D. Fisken told Buninyong Shire Council of the proposal at its meeting yesterday. Fortunately, he said, the beautiful stonework would not be lost. It would be used and incorporated in the new School of Mines building at Mt Helen. the retention of the century-old building was the subject of representations by Council to the Railways following the closure of the station for goods traffic 'some time ago'. The building had also been noted by the National Trust as one of special interest. The Railways Department advised the meeting that an inspection had been made at the Yendon level crossing, but no recommendation could be made at present for installation of flashing light signals.'Bluestone building with dressed bluestone door and window jambs and chimney. The roof is corrugated iron. The platform edge is also of bluestone construction. The building is the former Yendon Railway Station (now demolished) on the Ballarat -Geelong main line (the original Melbourne to Ballarat mainline). When the line was opened, this station may have been originally called Buninyong as it was built a number of years before the Ballarat to Buninyong branch line was built. This this has subsequently caused some confusion. The station was later renamed Yendon. Verso in blue ballpoint pen 'No 47 Yendon Railway Stn' Stamped in purple ink 'N.L. Harvey & Son, Photographers, 131 Sturt Streeet Ballarat, Phone 25766, After hours 23397, Will photograph anywhere anytime any place. (in pen 3/12/68),university of ballarat, ballarat institute of advanced education, yendon, railway, bluestone, john vernon -
 Ballarat Tramway Museum
Slide - 35mm slide/s - set of 20, Noel Simons, 21/05/1971 12:00:00 AM
... turning from Bridge St. (White Hills Road). Note signal light... signal light for Bridge St. loop on pole corner of street. Photo ...Set of 20 transparencies taken on 21/5/1971 on Kodak mounts. 1197.1 - Bendigo No. 5 en route to Eaglehawk at Creeth St Long Gully. Tram has a SEC roof ad and Cinzano roof ad. 1197.2 - No 5 approaching Needle Loop between Long Gully and California Gully. On left hand side is the City of Bendigo sign, indicating city boundary. 1197.3 - As for 1197.2 but actually entering loop. Photo taken after tram has passed photographer. 1197.4 - No. 26 bound for Eaglehawk descending the railway bridge near Eaglehawk, at Jobs Gully. 1197.5 - as for 1197.4, but after crossing bridge, now ascending a hill. Photo taken after tram has passed photographer. 1197.6 - No. 26 climbing High St. hill Eaglehawk, nearing end of Double track, bound for Quarry Hill. Shows centre of the road poles. 1197.7 - As for 1197.6, with tram entering single track section. Photo taken after tram has passed photographer. Has a BP service station in the background. 1197.8 - No. 26 (bound for Quarry Hill) crossing No. 17 (Eaglehawk) at Job's Gully Loop. 1197.9 - No. 17 climbing railway bridge at Job's Gully, en route to Eaglehawk. Photo taken after tram has passed photographer. 1197.10 - No.26 bound for Quarry Hill, leaving Long Gully Loop? Has the Creeth St. church in l197.l in the far background. Photo taken after tram has passed photographer. 1197.11 - Tramway Point work at the northern end of Long Gully Loop. 1197.12 - No. 17 en route for Quarry Hill turning into View St. from Bamard St. Tram has SEC roof ads "Everything fine in my all electric Kitchen' and 'Electric Cooking is Matchless'. 1197.13 - as for 1197.12, but tram has turned into View St and about to enter the double line track. Photo taken after tram has passed photographer. 1197.14 - No. 21 enters Nolan St after turning from MacRae St. en route to Bendigo. Note sign on its own post noting tram turns "Beware Tram Turns" and stop sign on adjacent pole "Trams stop on Request". No. 21 has two SEC roof ads. 1197.15 - No. 21 in Nolan St. after turning from Bridge St. (White Hills Road). Note signal light for Bridge St. loop on pole corner of street. Photo taken after tram has passed photographer. 1197.16 - No. 2 bound for Eaglehawk at unknown location. 1197.17 - Tram stop sign on a pole "CARS STOP BY REQUEST" 1197.18 - No. 5 in Carpenter St.? en route to Quarry Hill. 1197.19 - No. 28 has just arrive at Golden Square terminus, passengers are disembarking and the trolley pole is being turned. Golden Square Hotel in the background. 1197.20 - No. 28 at Golden Square terminus. Has a "Nothing beats Briquettes for hear roof ad. Information written on in black ink and date stamped on purple ink. 1197.1 - "No. 5 at Creeth St. Long Gully" 1197.2 - "No. 5 approaching Needle Loop between Long Gully and California Gully" 1197.3 - "No. 5 at Needle Loop between Long Gully and California Gully" 1197.4 - "No. 26 crossing railway bridge at Job's Gully near Eaglehawk" 1197.5 - "No. 26 just after crossing railway bridge at Job's Gully near Eaglehawk/ 1197.6 - "No. 26 in High St. Eaglehawk" 1197.7 - "No. 26 at end of double track in High St. Eaglehawk" 1197.8 - "Nos. 26 and 17 crossing at Job's Gully Loop" 1197.9 - "No. 17 crossing railway bridge at Job's Gully near Eaglehawk". 1197.10 - "No. 26 at Long Gully" 1197.11 - 'Northern end of points at Long Gully Loop". 1197.12 - "No. 17 turning into View St. from Bamard St. Bendigo". 1197.13 -'No. 17 at beginning of double track in View St. after leaving Bamard St. Bendigo. 1197.14 - "No. 21 enters Nolan St. from MacRae St. Bendigo." 1197.15 - "No. 21 in Nolan St. Bendigo just after leaving White Hills Road." 1197.16 - "No. 2" 1197.18 - "No. 5" 1197.19 - "Birney car No. 28 at Golden Square Terminus" 1197.20 "Birney car No. 28 at Golden Square Terminus" tramways, trams, bendigo, long gully, railway bridge, jobs gully, trackwork, nolan st, quarry hill, tram stops, golden square, tram 2, tram 5, tram 17, tram 21, tram 26, tram 28 -
 Ballarat Tramway Museum
Film - Movie Film & Box, Kodak, 1960 to 1971
... with the Olympic monument in the background and the red signal light going... in the background and the red signal light going out. 03.31 - a lady ...Yields information in movie film format of Ballarat trams in 1960 through to 1971, how the system operated and was used by people, including special trams., Yields information in movie film format of Ballarat trams in 1960 through to 1971, how the system operated and was used by people, including special trams.Movie film - 8mm, approx. 15 mins, without leader strip on a plastic reel, within a clear plastic case - Standard 8, titled "Ballarat Trams". See Reg Item 4957 for DVD and Mini DVD. Has been transferred to DVD - see Reg item 4957 Made by Arthur Hill. Also transferred to DVD by Rod Cook Oct. 2015, via Roger Greenwood for use in his DVD, "The City of Ballarat Trams, Gardens & Gold" of 2016. See Reg Item 6883. In Arthur's letter - on file - Made between 1960 and August 1971. Synopsis: based on time. Between 1960 and 1968 0:00 Trams Ahead sign before the Victoria St terminus with 20 at terminus 0.14 - No. 20 leaving Victoria St terminus and being followed along Victoria St by car and then passengers jointing the tram at a tram stop. 00.40 - No. 12 (c1960) in bound along Lydiard St North and arriving in the Gregory St loop. 00.56 - No. 12 and 14 crossing at Gregory St. 01.20 - No. 33 and a bogie car crossing at depot loop. 01.31 - No. 18 travelling along Wendouree Parade with the Lake in the background. 01.42 - No 41 at depot junction and running into the depot No. 2 road with a short sequence of a tramway signal. 02.17 - SEC Sign at the depot gate, shot of 41 in No. 2 road, with the lights other way around, Caution beware of trams sign and a red signal. 02.31- Timetable sign at Gardens Loop 02.36 - No. 30 arriving at Loop and view of a signal with no lights showing. 02.48 - Destination roll being changed through a number of destinations. 03.26 - No. 20 arriving at Carlton St loop with the Olympic monument in the background and the red signal light going out. 03.31 - a lady standing at the front of No. 20, with an ice cream in hand, and No. 17 arriving at the Carlton St loop with a short sped up sequence and No. 20 departing from the loop, followed by No. 17 leaving the loop, heading into the city. 03.41 - No. 13 inbound from Sebastopol crossing Albert St and heading into the city. 04.12 - view of signal and contactor, the light going green and the tram passing underneath. 04.24 - No. 12 at the Sebastopol terminus and departing. 04.51 - No. 12 crossing Albert St Sebastopol. 05.16 - Following No. 12 along Albert St, with Borough Offices in background initially. 05.28 - No. 12 arriving at the Grey St loop with No. 14 arriving at the loop from the city and both trams departing. March 1971 05.58 - No. 30 being followed along Barkly St, Mt Pleasant and the pole being turned at the terminus 06.32 - No. 30 picking up a lady passenger. 06.38 - view from the front of a tram, with the drivers hand and a cigarette, view from the back of the tram, along the Mt Pleasant route and running through the loop and then turning into Main St - has the Ballarat (East) fire station in one sequence, and finally running along Main St. 07.35 - view from tram, with car turning into Bridge St. and then running into Sturt St passed the Parking Loop, and along Sturt St. 08.32 - Points at Drummond St North being changed, doors changed over and the tram running along Drummond St. North, through the Mill St loop and into Macarthur St and in Wendouree Parade, with the Lake Wendouree in view and crossing No. 12 at the Depot Loop, with crews chatting, past the depot, a lady passenger getting off the tram near Forest St., and arriving at Gardens Loop with the same lady passenger who got on in Barkly St, getting off the tram. 11.09 - view of No. 30 at Gardens Loop, departing the loop. August 1971 11.30 - R761 crossing Melton (Exford Wier) on the special train to Ballarat and then the bridge between Ballan and Gordon Stations. 12.16 - View from the front of a tram, following No. 26 along Lydiard St North, crossing at Gregory St and returning to the City. 12.39 - No. 14 and one other tram running along Albert St to Sebastopol, crossing No. 21 at Grey St and then to Sebastopol terminus, crossing Albert St and return and running along Albert St. 13.36 - No. 26, 39 crossing 13 at Gardens Loop. 14.00 - view looking across Lake Wendouree. 14.07 - 26 arriving at Victoria St, running part of Destination roll, passengers getting off with hotel in the background, trolley pole being turned and then with 39 following tram along Victoria St, crossing at the King St Loop. 15.07 - view of a trolley pole tracking through the overhead at curve 15.10 - end. Written labels giving title information on reel.trams, tramways, ballarat, sebastopol, lydiard st north, victoria st, mt pleasant, lake wendouree, depot, tram 12, tram 13, tram 14, tram 17, tram 18, tram 21, tram 26, tram 33, tram 39, tram 41 -
 4th/19th Prince of Wales's Light Horse Regiment Unit History Room
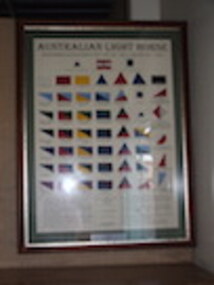
Colour Patch Display, Frontier Military History Services, Australian Light Horse Colour Patches of the 1st AIF 1915-1920 & AMF/CMF 1921-1940's, 24/07/2010
... Horse Field Ambulance 5th Light Horse Field Ambulance 4th Signal... Horse Field Ambulance 5th Light Horse Field Ambulance 4th Signal ...Display board of replica cloth colour patches, mounted in glass fronted wooden frame. Colour patches displayed are those of : 1st Cavalry Division HQ (CMF) Desert Mounted Corps HQ 2nd Cavalry Division HQ (CMF) HQ 1st Light Horse Brigade (AIF & CMF) HQ 2nd Light Horse Brigade (AIF & CMF) HQ 3rd Light Horse Brigade (AIF & CMF) HQ 4th Light Horse Brigade (AIF) HQ 5th Light Horse Brigade (AIF & CMF) HQ 4th Light Horse Brigade (CMF) HQ 6th Light Horse Brigade (CMF) 1st Light Horse Regiment / 1st Royal NSW Lancers 5th Light Horse Regiment / 5th Wide Bay & Burnett Light Horse 8th Light Horse Regiment / 8th Indi Light Horse Regiment 4th Light Horse Regiment / 4th Corangamite Light Horse Regiment 14th Light Horse Regiment / 14th West Moreton Light Horse Regiment 18th Adelaide Lancers 4th Light Horse Regiment / 1st Aust Div Mounted Regiment / 2nd ANZAC Mounted Regiment / 22nd Corps Mounted Regiment. 2nd Light Horse Regiment / 2nd Moreton Light Horse Regiment 6th Light Horse Regiment / 6th NSW Mounted Rifles 9th Light Horse Regiment / 9th Flinders Light Horse Regiment 11th Light Horse Regiment / 11th Darling Downs Light Horse Regiment 15th Light Horse Regiment / 15th Northern River Lancers 21st Riverina Light Horse 13th Light Horse Regiment / 2nd Aust Div Mounted Regiment / 1st ANZAC Mounted Regiment / Aust Corps Mounted Regiment / 13th Gippsland Light Horse Regiment 3rd Light Horse Regiment / 3rd South Australian Mounted Rifles 7th Light Horse Regiment / 7th Australian Horse 10th Light Horse Regiment / 10th Western Australian Mounted Infantry 12th Light Horse Regiment / 12th New England Light Horse Regiment 17th Prince of Wales Light Horse Regiment 22nd Tasmanian Mounted Infantry 11th Light Horse Regiment / 4th Aust Div Mounted Regiment / 24th Gwydir Light Horse Regiment 1st Machine Gun Squadron / 25th Light Horse (MG) 2nd Machine Gun Squadron / 16th Hunter River Lancers 3rd Machine Gun Squadron / 20th Victorian Mounted Rifles 4th Machine Gun Squadron / 26th Light Horse (MG) 5th Machine Gun Squadron / 19th Yarrowee Light Horse 23rd Barossa Light Horse Regiment 12th Light Horse Regiment / 5th Aust Div Mounted Regiment 1st Light Horse Field Ambulance 2nd Light Horse Field Ambulance 3rd Light Horse Field Ambulance 4th Light Horse Field Ambulance 5th Light Horse Field Ambulance 4th Signal Troop / 4th Light Horse brigade 6th Mobile Veterinary Section /1st Light Horse Brigade 7th Mobile Veterinary Section / 2nd Light Horse Brigade 8th Mobile Veterinary Section / 3rd Light Horse Brigade 9th Mobile Veterinary Section / 4th Light Horse brigade 10th Mobile Veterinary Section / 5th Light Horse Brigade 5th Signal Troop / 5th Light Horse Brigade 1st Signal Squadron / NZ & Aust Mounted Div Signal SquadronColour Patch Display No 39. Includes detailed notes about history, usage and design of colour patchesworld war one, ww1, army, aif, insignia, heraldry, light horse, militia, badges, colour patches, cmf -
 Flagstaff Hill Maritime Museum and Village
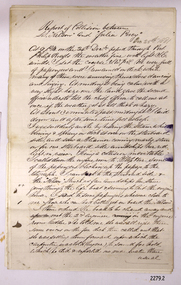
Document, 12-01-1882
... on their way. Julia Percy passed Cape Otway light afterwards... on their way. Julia Percy passed Cape Otway light afterwards ...This hand written letter, in black ink script on blue lined paper, is impressed with the official stamp of the Victoria Steam Navigation Board. The left margin has the reference “S82/12" It is transcribed: "Victoria Steam Navigation Board, Melbourne, January 12th 1882 To Frederick Chapman, Master, S.S. "Julia Percy" You are herewith furnished with a copy of the report of the Official Court which assembled to enquire into the circumstances attending the collision between the steamers "Julia Percy" and "Nelson" off Apollo Bay near Cape Otway on the morning of the 25th December 1881, and you are hereby expected to attend at the Board Room, Custom House, Melbourne, at 2pm, on 13th January instant to show cause why you should not be censured accordingly. [Signature] Secretary" This document refers to the matter of a collision between two steamships, the Julia Percy and the Nelson, on 25th December 1881. The Julia Percy was at that time owned by her first owners, the Warrnambool Steam Packet Company, and she sailed under the command of Captain Chapman. She had left Melbourne the evening of 24th December, with about 150 passengers, sailing in fine weather through Port Phillip Heads around 9pm. She was headed for Warrnambool, Belfast (now named Port Fairy) and Portland. The Julia Percy was off Apollo Bay when Captain Chapman was woken by the ship’s whistle after midnight, the steamer Nelson being on a collision course with the Julia Percy.[See Link.] The Nelson struck Julia Percy midship. Boats were lowered from the ship (apart from a damaged lifeboat) and about 30-40 of the passengers boarded the Nelson. The engine room and the forehold were checked and found clear of water. The company manager, Mr Evans, had been on the Nelson, so he boarded and inspected the Julia Percy and the decision was made to continue on to Warrnambool with the passengers as there appeared to be no immediate danger. However, Captain Thomas Smith said the Nelson was taking on water, so Julia Percy followed her for about an hour towards Melbourne on standby in case of need. Then Julia Percy turned around towards Warrnambool again. Shortly afterwards the Nelson turned to follow her, the ships stopped and passengers were returned to Julia Percy, and three from Julia Percy boarded the Nelson. Both ships proceeded on their way. Julia Percy passed Cape Otway light afterwards, signalling that there had been a collision. It was discovered later that one of the passengers was missing, then thought to have boarded the Nelson but later thought to have fallen into the sea and drowned while trying to jump from Julia Percy to Nelson. There had been 3 tickets purchased under the same name of that passenger “Cutler”; a father, son and friend named Wordsworth, which had caused quite some confusion. No further mishap occurred to either ship and both the Julia Percy and the Nelson reached their destinations safely. An enquiry was instigated by the Victoria Steam Navigation Board regarding the cause of the accident between the two steamships, in connection with the death of Cutler who was supposed to have lost his life by the collision. The enquiry resulted in the following decision: "The Victorian Steam Navigation Board having taken into consideration the points urged by Captain Thos [Thomas] Smith and also by his legal advisers, is of opinion that the charge prepared against him has been sustained, but taking into consideration Captain Smith’s previous good conduct and character, the board suspends his master’s certificate No 227 issued by this board for a period of six calendar months from this date – Robert Fullarton, Chairman. “The Victorian Steam Navigation Board having beard the statement of Captain Frederick Chapman urged in his defense to the charge of dereliction of duty as master of the Julia Percy, in having no standing order on board that vessel to be called in the event of any approaching steamer’s lights being seen, find such charge sustained, and censure him accordingly – Robert Fullarton, Chairman.” ABOUT “JULIA PERCY” The S.S. Julia Percy (later named Leeuwin ) was an iron passenger-cargo steam ship built in 1876. At one point in time the Julia Percy would sail from Warrnambool to Melbourne every Friday and return from Melbourne to Warrnambool every Tuesday. The cost of a return ticket for a Saloon Fare was £1.0.0. She would sail “if practical and weather permitting”. Shipping was the cheapest and most practical means of carrying produce and goods during the period 1840-1890. Regular domestic steamer services commenced in the Warrnambool district in the late 1850’s and by 1870 the passenger trade was booming. Produce was loaded from the jetty into ‘lighters’ (small boats), which took it to the ships at anchorage in the bay. Passengers were taken to the ship’s side then climbed aboard up ladders or gangways. The coming of the railway in October 1889 meant the gradual decline and end of the steam shipping era. The Julia Percy was built in Glasgow by Thomas Wingate & Company, Whiteinch, in 1876 for the Warrnambool Steam Packet Company, which commissioned her for trade in Victoria’s western district. She was first registered in Warrnambool, Victoria in 1876. The Julia Percy changed hands several times. Her next owner was the Western Steam Navigation Co (1887), managed by Mr. T.H. Osborne (the company’s office was on the corner of Timor and Liebig Streets, Its north-western wall is now part of the current Warrnambool Regional Art Gallery. ) The Melbourne Steamship Co became the next owners (1890), followed by William Howard Smith and Sons (1901) for use in Queensland coastal trades, then she was bought by George Turnbull in 1903 and used for local mail contract in Western Australia. The Julia Percy was sold to the Melbourne Steamship Company Ltd. (1906) and re-named the “Leeuwin” but continued in her Western Australian coastal run. She was converted into a coal hulk in Melbourne in 1910 as a result of damaged caused when she was driven against the jetty at Dongara during a gale. The ship was eventually dismantled and scuttled in Bass Strait on 28 December 1934. The document is significant for its association with the wreck of the Leeuwin (Julia Percy), which is on the Victorian Heritage Register, VHR S413. . It is historically significant for being a rare artefact that has potential to interpret aspects of Western Victoria’s 19th century steamship trade and Victorian cultural history. The Leeuwin (Julia Percy) is listed on the Victorian Heritage Register as being historically significant ‘as one of only four wrecks of steamships in Victorian waters associated with the western district of Victoria’s coastal steamship trade. Reports of Victoria Steam Navigation Board about the collision on 25th December 1881 between the steamers " Julia Percy" and "Nelson". Letter from Victoria Steam Navigation Board, Melbourne to Frederick Chapman, Master, S.S. "Julia Percy", dated January 12th 1882. reference on letter in left margin "S82/12"flagstaff hill, flagstaff hill –maritime museum, maritime museum, shipwreck coast, flagstaff hill maritime village, victoria steam navigation board, captain frederick chapman, captain thomas smith, thomas wingate & company, steamer julia percy, steamer leeuwin, steamer nelson, steam ship, warrnambool steam packet company, t. h. ostorne, western steam navigation co., charles cutler -
 Flagstaff Hill Maritime Museum and Village
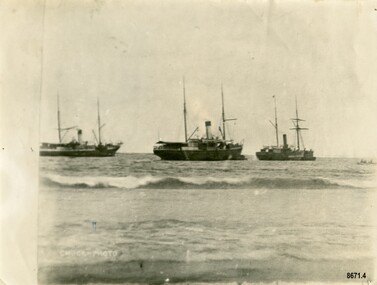
Photograph - Steamers - Julia Percy, Dawn and Coorong, Chuck Photo Ballarat, Circa 1885
... Percy passed Cape Otway light afterwards, signaling... Percy passed Cape Otway light afterwards, signaling ...This photograph was one of ten photographs donated to Flagstaff Hill Maritime Museum and Village by Fred Trewartha. Frederick John Fox Trewartha (Fred) was a well-known Warrnambool businessman. He was born in Beeac near Geelong in 1920 and came to Warrnambool with his family as a very young child. He was apprenticed to his father John, as a saddler and later opened his own shop on Raglan Parade. He then moved into working with tarpaulins and canvases for the trucking industry. Fred was keenly interested in photography (and was a member of the Warrnambool Cine Club), yachting and boat building. He kept his yacht moored at Port Fairy for many years and participated in sailing events locally and interstate. He also built boats with his sons. He had the opportunity to meet many older sailors and it's thought this photo (and others in the set) may have been given to him by one of these men. Fred Trewartha died in 2016 in Warrnambool. Shipping was the cheapest and most practical means of carrying produce and goods during the period 1840-1890. Regular domestic steamer services commenced in the Warrnambool district in the late 1850’s and by 1870 the passenger trade was booming. Four coastal traders made regular stops at Warrnambool in the 1880's - S. S. Julia Percy, S. S. Dawn, S. S. Nelson and S. S. Casino. The S.S. Julia Percy (later named Leeuwin) was an iron passenger-cargo steam ship built in 1876. At one point in time the Julia Percy would sail from Warrnambool to Melbourne every Friday and return from Melbourne to Warrnambool every Tuesday. The cost of a return ticket for a Saloon Fare was £1.0.0. The Julia Percy was built in Glasgow by Thomas Wingate & Company, Whiteinch, in 1876 for the Warrnambool Steam Packet Company, which commissioned it for trade in Victoria’s western district. It was first registered in Warrnambool, Victoria in 1876. Two steamships, the Julia Percy and the Nelson, collided on 25th December 1881. The Julia Percy was at that time owned by its first owners, the Warrnambool Steam Packet Company, and she sailed under the command of Captain Chapman. It had left Melbourne the evening of 24th December, with about 150 passengers, sailing in fine weather through Port Phillip Heads around 9pm. It was headed for Warrnambool, Belfast (now named Port Fairy) and Portland. The Julia Percy was off Apollo Bay when Captain Chapman was woken by the ship’s whistle after midnight, the steamer Nelson being on a collision course with the Julia Percy. The Nelson struck Julia Percy midship. Boats were lowered from the ship (apart from a damaged lifeboat) and about 30-40 of the passengers boarded the Nelson. The engine room and the forehold were checked and found clear of water. The company manager, Mr. Evans, had been on the Nelson, so he boarded and inspected the Julia Percy and the decision was made to continue on to Warrnambool with the passengers as there appeared to be no immediate danger. However, Captain Thomas Smith said the Nelson was taking on water, so Julia Percy followed it for about an hour towards Melbourne on standby in case of need. Then Julia Percy turned around towards Warrnambool again. Shortly afterwards the Nelson turned to follow her, the ships stopped and passengers were returned to Julia Percy, and three from Julia Percy boarded the Nelson. Both ships proceeded on their way. Julia Percy passed Cape Otway light afterwards, signaling that there had been a collision. It was discovered later that one of the passengers was missing, then thought to have boarded the Nelson but later thought to have fallen into the sea and drowned while trying to jump from Julia Percy to Nelson. There had been 3 tickets purchased under the same name of that passenger “Cutler”; a father, son and friend named Wordsworth, which had caused quite some confusion. No further mishap occurred to either ship and both the Julia Percy and the Nelson reached their destinations safely. An enquiry was instigated by the Victoria Steam Navigation Board regarding the cause of the accident between the two steamships, in connection with the death of Cutler who was supposed to have lost his life by the collision. The enquiry resulted in Captain Thomas Smith having his master's certificate suspended for six months. The Julia Percy changed hands several times. Its next owner was the Western Steam Navigation Co (1887), managed by Mr. T.H. Osborne (the company’s office was on the corner of Timor and Liebig Streets - its north-western wall is now part of the current Warrnambool Regional Art Gallery.) The Melbourne Steamship Co became the next owners (1890), followed by William Howard Smith and Sons (1901) for use in Queensland coastal trades and then it was bought by George Turnbull in 1903 and used for local mail contract in Western Australia. The Julia Percy was sold to the Melbourne Steamship Company Ltd. (1906) and re-named the “Leeuwin” but continued in her Western Australian coastal run. It was converted into a coal hulk in Melbourne in 1910 as a result of damaged caused when it was driven against the jetty at Dongara during a gale. The ship was eventually dismantled and scuttled off Port Phillip Heads on 28 December 1934. The steamship "Dawn" was a 522-ton coastal trader built in 1876 and the vessel operated around the Victorian west coast from 1877 until 1898 for the Portland & Belfast Steam Navigation Co. sailing between Melbourne and Portland, via Warrnambool. The vessel was then owned in October 1885 by the renamed company, Belfast & Koroit Steam Navigation Co., until March 1896 when its ownership moved to W Howard Smith & Sons Ltd. This Melbourne company used the ship to service most ports around Australia. Captain F. Chapman took over from Captain Jones and served on the SS Dawn from 1898 until 1900 when he took command of the SS Casino. On September 4th 1880, the three masted clipper ship, "Eric the Red" struck Otway Reef, near Cape Otway. The S. S. Dawn, under the command of Captain Jones, was returning to Warrnambool from Melbourne, its sailing time different to its usual schedule. The provedore of the Dawn, Benjamin Lear, heard cries of distress coming through the portholes of the saloon. He gave the alarm and the engines were stopped. Cries could be heard clearly, coming from the land. Captain Jones sent out crew in two boats, and fired off rockets and blue lights to illuminate the area. They picked up the three survivors who were in the long boat from "Eric the Red". Two men were picked up out of the water, one being the owner’s son who was clinging to floating kerosene boxes. At daylight the Dawn then rescued the 18 men from the floating portion of the deckhouse, which had drifted about 4 miles from where they’d struck the reef. Shortly after the rescue the deckhouse drifted onto breakers and was thrown onto rocks at Point Franklin, about 2 miles east of Cape Otway. Captain Jones had signalled to Cape Otway lighthouse the number of the Eric the Red and later signalled that there was a wreck at Otway Reef but there was no response from the lighthouse. The captain and crew of the Dawn spent several more hours searching unsuccessfully for more survivors, even going back as far as Apollo Bay. On board the Dawn the exhausted men received care and attention to their needs and wants, including much needed clothing. Four men (three crew and one passenger) died. A week after the shipwreck, the Australian Government had also conveyed its thanks to the Captain and crew of the S.S. Dawn - “Captain Griffith Jones, S.S. Dawn, The Hon. Mr Clark desires that the thanks of the Government should be conveyed to you for the prompt, persevering and seamanlike qualities displayed by you, your officers and crew in saving the number of lives you did on the occasion referred to. The Hon. The Commissioner has also been pleased to award you a souvenir in commemoration of the occasion, and a sum of 65 pounds to be awarded to your officers and crew according to annexed scale. I am, &c, W Collins Rees, for and in the absence of the Chief Harbour Master.” The Awards are as follows: - Crew of DAWN'S lifeboat-Chief Officer, Mr G. Peat, 15 pounds; boat's crew-G. Sterge, A.B., 5 pounds; T. Hammond, A.B., 5 pounds; J. Black, A.B., 5 pounds; H. Edwards, A.B., 5 pounds. Dinghy's Crew-Second Officer, Mr Christie, 10 pounds; boat's crew -F. Lafer, A.B., 5 pounds; W. Johnstone, A.B., 5 pounds; Mr Lear, provedore, 5 pounds; Mr Dove, purser, 5 pounds. Captain Jones receives a piece of plate. (from “Wreck of the ship Eric the Red” by Jack Loney). Medals of Bravery were awarded to the Captain and crew of the S.S. Dawn by the President of the United States, through the Consul-general (Mr Oliver M. Spencer), in July 1881 “ … in recognition of their humane efforts in rescuing the 23 survivors of the American built wooden sailing ship, the Eric the Red, on 4th September 1880.” The men were also presented with substantial monetary rewards and gifts. The city of Warrnambool’s care of the survivors was also mentioned by the President at the presentation, saying that “the city hosted and supported the crew ‘most graciously’. The Medal of Bravery awarded to Nelson Johnson is in the collection at Flagstaff Hill Maritime Museum and Village in Warrnambool. Prior to 1882, and the arrival of the S. S. Casino, the "Dawn" was the only steamer to be able to navigate up the Moyne River at Port Fairy and unload at the wharf. The other regular steamers had to anchor in the bay instead. In February 1891 (as reported in The Age newspaper) the "Dawn" became the first vessel to berth alongside the newly completed Warrnambool Breakwater. The occasion was celebrated with a number of prominent townspeople assembling on board to "participate of a glass of wine". In 1895 the owners of the S.S. Dawn, the Portland and Belfast Steam Navigation Co., wound up and sold out to the Belfast Company who took over the Dawn for one year before selling it to Howard Smith. It took over the Melbourne to Warrnambool run in 1906 when the S. S. Flinders was sold. The S. S. Dawn was condemned and sunk in Suva in 1928. The State Library of Victoria has a lithograph in its collection depicting the steamer Dawn and the shipwrecked men, titled. "Wreck of the ship Eric the Red, Cape Otway: rescue of the crew by the Dawn". The third ship depicted in the photograph was thought to be the S. S. Coorong but there was a question mark next to its name. The photograph was thought to have been taken in 1885 and it's possible the S.S. Coorong was working in Clarence River, N. S. W. by this time. The steamer "Coorong" was built in 1862 by J. G. Lawrie of Glasgow. It was an "iron screw" steamer of 304 tons. It had many owners including Joseph Darwent of Adelaide (1863 - 1871), McMeckan Blackwood and Company, Melbourne (1871 - 1877), Mount Gambier Steamship Company Ltd. (1877 - 1881). William Whineham, Port Adelaide (1882), John See and Company, Sydney (1884 - 1892) and the North Coast Steam Navigation Company Ltd, Sydney (1892 - 1910). In 1911 it was hulked in Sydney Harbour and in 1921 it was being used as a coal hulk at Sydney. It had been originally imported into South Australia for the Port Augusta trade (primarily transporting goods needed by the early settlers) however the owners recognized that it had too much space for that purpose, so it was moved to work on the Adelaide to Melbourne line. Its passenger accommodation was enlarged and it enjoyed a "first class reputation" and by 1874 had made 313 voyages between Melbourne and Adelaide. Its captains included Captain McLean, Captain Ashton and Captain Dowell. In 1867, when 25 miles west of Cape Otway, while travelling from Adelaide to Melbourne, it came across the crew of the schooner "Black Watch" who had abandoned ship after it began quickly taking on water. The crew (six men) were able to get away in a small boat with a compass, chart and few candles. They were "excessively cold from exposure to the weather" when the S. S. Coorong picked them up. In 1877 the Coorong ran aground when entering the Outer Harbour at Adelaide (but was not damaged) and in 1882 it was stranded (for a short time) near Curdies Inlet (Victoria) with some slight damage to its bottom plates. Note - A ship with the same name "Coorong" (a coal carrying barque) was often on the Newcastle / Wollongong to Adelaide route also stopped several times in Warrnambool in the mid 1880's. The photograph has the label "Chuck Photos" printed on the front. Thomas Foster Chuck (born 1826 in London) was a photographer and entrepreneur who arrived in Victoria in 1861. The following year he produced and toured a "Grand Moving Diarama" of dramatic painted scenes from the Burke and Wills expedition. By 1866 he had established a photography studio in Daylesford and later he returned to Melbourne where he opened a studio in the Royal Arcade. In 1874 a collection of Chuck's photographs won a gold medal at the Annual International Exhibition in London. Throughout the 1870's he took over 700 individual photographs of prominent citizens for his historical photographic montage titled "Historical Pictures of the Explorers and Early Colonists of Victoria" which is now in the collection of the National Library of Australia. By 1888 he had sold his Melbourne studio and had established a studio in Ballarat (with his son Thomas Henry Chuck). In 1886 they produced an album titled "Warrnambool and District 1886, Western Hotel - J. Fox proprietor" containing over sixty large photographs of local coastal scenes and seascapes, for the use of patrons of the Western Hotel. This photo (of the three steamers in Lady Bay) was taken at this time and is in the album. Thomas Chuck died on December 7th, 1898, in Albert Park, Melbourne and his son Thomas Henry continued to operate the photography studio in Ballarat into the 1920's.This photograph is a significant record of several of the well-known coastal traders (S. S. Julia Percy, S. S. Dawn and possibly S. S. Coorong) that sailed along the southwest coast of Victoria for many years - transporting goods and passengers between Melbourne and Warrnambool in the 1880's. They are also significant in the role they played in the history of Warrnambool and the other coastal ports they visited as well as being examples of the dangers and hazards associated with navigating the waters along the southern coast of Australia. It is also a good example of a photograph taken by a well-known and significant photographer of that era.Black and white photograph of three steam ships anchored in Lady Bay, Warrnambool. They each have a funnel and two masts and are side on to the beach. A small rowboat with a crew can be seen on the far right. The words "CHUCK-PHOTO" are on the bottom left of the photograph. On the back of the photograph is the name and telephone number of the donor (handwritten in black ball point pen) and the names of the three steamships and date written in uppercase letters in dark blue ink. There is a four-figure number stamped in the centre of the back.Front - "CHUCK-PHOTO" Back - Name of donor and telephone number "6944" "JULIA PERCY, DAWN & KOORONG(?) IN LADY BAY 1885"flagstaff hill maritime museum and village, warrnambool, great ocean road, fred trewartha, s. s. julia percy, s. s. dawn, s. s. nelson, s. s. casino, leeuwin, steamer, steamship, coastal trader, warrnambool steam packet company, captain chapman, victorian steam navigation board, western steam navigation company, melbourne steamship company, william howard smith and sons, portland and belfast steam navigation company, w howard smith and sons ltd, eric the red, captain jones, medal of bravery, rescue, moyne river, warrnambool breakwater, lady bay, s. s. coorong, mount gambier steamship company, black watch, thomas foster chuck, chuck photos, chuck photography -
 Ballarat Tramway Museum
Film - Movie Film & Box, Kodak, 1960
... the Depot, green light in signal can be seen. 5:43 28?, closely... Loop for the City via the Depot, green light in signal can ...Yields information in movie film format of Ballarat trams in 1960, how the system operated and was used by people., Yields information in movie film format of Ballarat trams in 1960, how the system operated and was used by people.Movie film - 8mm, approx. 30mins, with leader strip on a plastic reel, within a black and white plastic box, titled "Ballarat No. 1. 1960". Has been transferred to DVD - see Reg item 4100 as Segment No. 2. Made by Ben Parle. Also transferred to DVD by Rod Cook Oct. 2015, via Roger Greenwood for use in his DVD, "The City of Ballarat Trams, Gardens & Gold" of 2016. See Reg Item 6883. Synopsis: based on time. 0:00 View of typed introduction, noting that this is a pictorial record of Ballarat. 0:10 Title “The Tramways of Ballarat 1960, Part 1” 0:16 13, showing “View Point” at Stones Corner, Bridge St, east end, with trolley pole being turned, while another single trucker heads out towards Mt Pleasant. 0:25 13 leaving Stones Corner, short approach and then longer trailing shot of the tram going towards the City in Bridge St. 0:44 View out of front of tram in Bridge St heading towards the City, with cars in the photo, then passing through city Loop, no trams in the loop and running up to Lydiard St Nth and crossing the road. 1:22 Running up Sturt St from Armstrong St, passes over Dawson St X-over and up to the next intersection, Lyons St. 1:54 Title “The View Point Line” 1:59 19 inbound, in Ripon St, from crossing Mair St, towards camera and then passing away and turning into Sturt St. 2:49 View of a “Warning Oncoming Trams” sign 2:52 19 in Ripon St, going to View Point, crossing Webster St towards camera, then going away through the disconnected Victoria Ave loop, pass the “Warning Oncoming Trams” sign. Note very windy scene with people running across roads. 3:17 19 in Wendouree Parade, in bound, though showing destination View Point, going away from the camera, past the View Point Hotel. 3:39 19 coming towards camera near Excerpt or Devon St and then going away towards the terminus. 4:04 19 at the terminus, stationary, with a single trucker 3?, passing from Macarthur St into Wendouree Parade, behind 19. 4:20 33 coming towards camera in Wendouree Parade from St Aidans Drive, stopping to pick up passenger at Forest St and then going away towards the City, photographed from near the depot, on a wet and windy day. 4:54 35 in Wendouree Parade, coming towards the Camera from St Aidans Drive and then going away with the Gardens Loop area in the background. Tram stops at stop to let a passenger off. 5:28 21 leaving Gardens Loop for the City via the Depot, green light in signal can be seen. 5:43 28?, closely followed by 26 turn from Drummond St South into Sturt St. 6:18 Scene opens with shot of “Sebastopol” destination on a bogie tram. 6:21 Title “The Sebastopol Line” 6:24 21 turning from Sturt St into Drummond St Sth with destination of Bell St and then going away from the camera. 6:55 38 in Drummond St Sth, coming towards the camera and then passing the camera with Sturt St just in the view. 7:10 21, showing Gregory St, in Drummond St Sth, approaching and then going away, entering the Urquhart St Loop, 7:39 34 in Drummond St Sth (location check required (Latrobe?)), approaches camera, picks up passengers and the goes away. 8:09 39 at ? Street, turns from Drummond St Sth into Skipton St, after picking up and setting down passengers, bound for Sebastopol 8:55 35 inbound in Skipton St passes through the Bell Street Loop, and then goes away from the camera. 9:33 42 outbound in Skipton St, approaches the camera, passes and then crosses over the half the road into Albert St. 10:00 39 inbound in Albert St – location? 10:31 34 outbound for Sebastopol, approaches camera and just starts to pass by. 10:36 34 in Grey St crossing loop, crosses 42 inbound. 10:59 39 outbound in Albert St, with shopping centre in bound, approaches camera, passes and then crosses over Albert St. Mid morning scene. 11:39 39 inbound, Albert St south, approaches camera and then passes and the crosses over Albert St. 12:16 41 outbound in Albert St passes the camera, and pulls into the terminus with the conductor getting out on the back bumper to pull the pole down as the tram stops and a passenger walks into the Royal Hotel. 12:39 Title “The Lydiard Street North Line” 12:44 Filmed from the Hotel balcony, 21 inbound in Lydiard St Nth passes over Mair St, stops while 33 passes in the other direction. 13:18 With the red light showing on the Seymour St loop signal, 33 inbound for Sebastopol stops and picks up many passengers, passes the camera and runs past the VRI building in the background and through the loop. Possibly filmed on a Sunday given the ladies dresses and quieter streets. 14:01 30 outbound, passes the camera and stops at Macarthur St. Filmed alongside the brick wall of the cutting. 14:28 30 inbound arrives, passes through the Gregory St loop and then proceeds past the camera, making a stop to pick up passengers. 15:14 28 in Lydiard St Nth – location?, approaches and goes away from the camera, north of Gregory St. 15:34 28 ditto location? 15:53 21 arrives at the terminus with passengers getting on and off. 16:11 View of the a vertical positioned “End of Section” sign on a pole at the terminus and then lifting the camera to see the timetable board and the stop sign. 16:33 31 in Bridge St passing Morseheads and then turning into Sturt St, stops at the Grenville St stop, while another single trucker comes down to the stop from the City. 16:58 31 outbound in Bridge St, with destination of Victoria St. 17:14 Title “The Victoria Street Line” 17:18 31 outbound to Victoria St from Stones Corner. Starts with an overhead shot, shows clock at the Caltex service station,. 17:37 31 inbound approaching Bakery Hill and then descending to the junction after it passes camera. 18:09 25 climbing outbound in Victoria St, passing the camera, to then pass through the King St loop. 18:47 25 inbound in Victoria St, passing the camera, then pass through the King St loop, with St Alypius Church in the background. 19:36 14 approaching the rail bridge in Victoria St and stopping at the 2nd last stop to left of passengers. 20:01 14 leaving the terminus and approaching the camera and the a short sequence going away, to the next stop to pick up quite a few passengers. 20:14 “Trams Stop Here” sign, metal wrap around on a steel pole. 20:16 Title “The Mount Pleasant Line” 20:21 11 inbound in Main St, with a passenger leaping off the tramcar and another getting off just before the junction. 20:45 11 passes the junction and then proceeds away from the camera in Bridge St. 21:04 30 outbound in Main St, then turns into Barkly St, a bus (Eclipse Motors) passes in Main St just before the sequence ends. 21:31 30 inbound near Steinfield St. (exact location?) 21:49 25 approaches the camera, then proceeds away and passes through the Grant St. loop. 22:29 25 inbound, windy day, between Grant and Cobden, (exact location?), with a horse drawn bread van in the view and the breadman walking behind the tram as it passes. 23:02 11 outbound in Barkly St, (exact location?) 23:37 11 inbound in Barkly St (exact location?) 23:44 Mt Pleasant terminus signage 23:50 30 approaches the terminus and then stops with the conductor alighting turning the pole, passengers getting on and off and the driver appearing at the other end. 24:32 Title “The Gardens Via Sturt St. West Line” 24:35 21 outbound in Sturt St near Raglan St, approaches and passes the Camera. 25:09 12, showing City Oval, approaches and passes the camera, outbound near Windermere St. 25:33 13 showing View Point, goes away from the camera – location? 25:44 12 comes from St. West, inbound passes the camera and then stop as the next stop next Talbot St? 26:21 Short sequence of a “Warning Oncoming Trams” sign 26:28 42 inbound in Sturt St West, just before Ripon St, view coming towards camera and then going away to cross Ripon St. 27:10 34 passes through the Parker St loop 27:25 35 or 39 inbound past the college in Sturt St West 28:04 41 outbound at the Russell St curve, passes away from the camera. 28:11 35? inbound passes away from the camera through the Victoria Park or Morrison St loop, swinging out into the roadway. 28:29 View of timetable sign at Hamilton Ave. 28:37 35 turning from Sturt St West into Hamilton Ave, can see the conductor changing over the barrier rails. 29:11 42 inbound, crosses another bogie tram (35?) at Carlton St loop then passes the camera and goes past the Olympic rings monument. 29:42 12 approaches the Carlton St gates. 30:07 12 outbound, crosses a bogie tram in the loop with both trams then leaving the loop. 30:20 Title “End of Part One” Written labels giving title information on outside of box.trams, tramways, ballarat, sebastopol, lydiard st north, victoria st, mt pleasant, sturt st west -
 The Beechworth Burke Museum
Medal - Service Medal, c1948
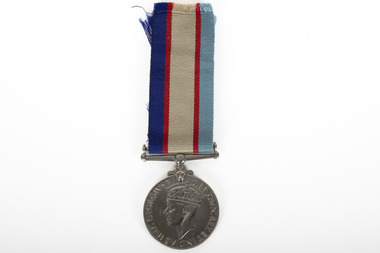
An Army Medal 1939 - 1945, issued to Corporal Joan Cahill. During her service, Joan serviced in the Signals Branch of the Australian Women's Army Service.A army service medal featuring a silver pendant and a light blue, dark blue, white, and red striped ribbonFRONT: 1939 / 1945 BACK: G:BR:OMN:REX ET INDIAE IMP: GEORGIV S VIburke museum, beechworth, army service, australian women's army service, army medal, ww2, wwii, world war two -
 Flagstaff Hill Maritime Museum and Village
Equipment - Flare, Mid-20th century
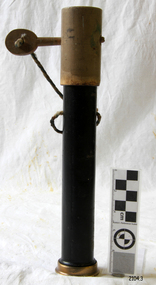
... . LSRC flare light safety equipment distress signal safety at sea ...This flare pictured is one of three lighting or signal flares. These are pyrotechnic devices used at sea, mainly as a distress signal. However, they have other meanings when used for naval purposes, such as the executive order to start a particular manoeuvre. These are usually packaged as part of a distress pack containing all necessary rockets or flares for immediate use, in any emergency, by ships and off-shore yachts. The inscribed numbers could possibly be the date packaged or the date of useful life i.e. 27-11-1955.This set of three flares is significant for its connection with local history, maritime history and marine technology. Lifesaving has been an important part of the services performed from Warrnambool's very early days, supported by State and Local Government, and based on the methods and experience of Great Britain. Hundreds of shipwrecks along the coast are evidence of the rough weather and rugged coastline. Ordinary citizens, the Harbour employees, and the volunteer boat and rescue crew, saved lives in adverse circumstances. Some were recognised as heroes, others went unrecognised. In Lady Bay, Warrnambool, there were around 16 known shipwrecks between 1850 and 1905. Many lives were saved but tragically, eight lives were lost.Flare (three), ; metal base, black cylinder, removeable wooden end cap that has a wooden key attached by string at centre. Inscribed "R↑L" on the cap and metal base. Inscribed: "R↑L", "27, 11, 55", "Long Lights"flagstaff hill maritime museum and village, flagstaff hill, maritime museum, maritime village, warrnambool, great ocean road, lady bay, warrnambool harbour, port of warrnambool, shipwreck, life-saving, lifesaving, rescue crew, rescue, rocket rescue, rocket crew, lifeboat men, beach rescue, line rescue, rescue equipment, rocket firing equipment, rocket rescue equipment, maritime accidents, shipwreck victim, rocket equipment, marine technology, rescue boat, lifeboat, life saving rescue crew, lifesaving rescue crew, rocket rescue method, rocket apparatus rescue, stranded vessel, mortar, life jacket, rocket machine, rocket line, rocket set, schermuly, harbour board, government of victoria, harbour master, armband, l.s.r.c., lsrc, flare, light, safety equipment, distress signal, safety at sea, emergency signal, broad arrow, communication signal, vingage, pyrotechnic flare -
 Flagstaff Hill Maritime Museum and Village
Equipment - Flare, Mid-20th century
... armband l.s.r.c. lsrc flare light safety equipment distress signal ...This flare pictured is one of three lighting or signal flares. These are pyrotechnic devices used at sea, mainly as a distress signal. However, they have other meanings when used for naval purposes, such as the executive order to start a particular manoeuvre. These are usually packaged as part of a distress pack containing all necessary rockets or flares for immediate use, in any emergency, by ships and off-shore yachts.This set of three flares is significant for its connection with local history, maritime history and marine technology. Lifesaving has been an important part of the services performed from Warrnambool's very early days, supported by State and Local Government, and based on the methods and experience of Great Britain. Hundreds of shipwrecks along the coast are evidence of the rough weather and rugged coastline. Ordinary citizens, the Harbour employees, and the volunteer boat and rescue crew, saved lives in adverse circumstances. Some were recognised as heroes, others went unrecognised. In Lady Bay, Warrnambool, there were around 16 known shipwrecks between 1850 and 1905. Many lives were saved but tragically, eight lives were lost.Flare; mushroom coloured cylinder, metal base with wooden top joined to it. Base has removable cap with metal encased wooden fuse attached, which holds seven removeable pegs and rings. String threaded through top holes has a wooden peg attached. Top also has holes drilled on opposing sides through which the peg would fit. Inscriptions stamped in black on base, and impressed into cap. Stamped black: "I" Impressed into cap: ""I", "R↑L" (inside oval).flagstaff hill maritime museum and village, flagstaff hill, maritime museum, maritime village, warrnambool, great ocean road, lady bay, warrnambool harbour, port of warrnambool, shipwreck, life-saving, lifesaving, rescue crew, rescue, rocket rescue, rocket crew, lifeboat men, beach rescue, line rescue, rescue equipment, rocket firing equipment, rocket rescue equipment, maritime accidents, shipwreck victim, rocket equipment, marine technology, rescue boat, lifeboat, life saving rescue crew, lifesaving rescue crew, rocket rescue method, rocket apparatus rescue, stranded vessel, mortar, life jacket, rocket machine, rocket line, rocket set, schermuly, harbour board, government of victoria, harbour master, armband, l.s.r.c., lsrc, flare, light, safety equipment, distress signal, safety at sea, emergency signal, broad arrow, communication signal, vingage, pyrotechnic flare -
 Frankston RSL Sub Branch
Stand, Tripod, Puddefoot Bowers & Simonett Limited, ca 1940
A portable, three legged stand in the form of a tripod, used by Australian and British Commonwealth military forces for mounting the standard issue signaling lamp and heliograph. The three collapsible, metal tipped, wooden legs are joined by hinge fittings to a brass collar with a threaded mount at one end (the head). The mounting thread is approximately 38mm diameter and fitted with a protective cap which can be removed for use, the cap being retained by a length of light chain. The stand is complete with a leather and webbing carrying strap attached to the head fitting of the stand with a leather sleeve at the other end which fits over the free end of the legs when folded.The brass collar and mount is stamped: "STAND LAMP OR HELIO A MKlll" the manufacturer "P.M.G. VIC" and "1941"military, tripod, ww2, world war 2, signalling, heliograph, stand -
 Bendigo Military Museum
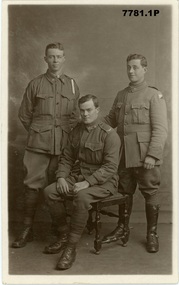
Postcard - POSTCARDS, PHOTOGRAPHIC WW1, Edgar Dawson collection : Battalion comrades
This six-postcard group is the second in a series of records of items in the collection of Edgar Dawson DCM. Dawson was the Regimental Sergeant Major of 57th Battalion, AIF. The 57th had a company of men largely from Bendigo and Eaglehawk. These postcards are from his personal album. Many are annotated in Dawson's hand with explanatory notes on the subject. Refer to Cat No 893 for his service details. Items originally in album cat. no. 207P Service details available through the NAA. Collection of six black and white postcards: 1. Photographic portrait from left William George Saville 4182, Alexander Pollock 3587 57th Btn, and unidentified trooper, possible 4th Light Horse Regiment. 2. Photographic portrait of Light Horse trooper. 3. Photographic portrait of William Tamlyn Curnow, 5078, 57th Btn 4. Photographic portrait of "Jim", 5. Photographic portrait of Septimus Fletcher, 4485, 57th Btn 6. Photographic portrait of Robert Gamble, 4644, 57th Btn 2. Card is addressed to "1904 L.Cpl W.W. Martin, D Cpy 57th Batt". Martin was 2150, KIA 26th September 1917. 3. On front "Sincerely, W. T. Curnow". On verso, "To Hec, from his old pal Curnow Sgt" 'Hec' was Dawson's nickname. 4. On front "Yours sincerely Jim". On verso, card addressed "350 Pte Melen, R. C., 15th Field Ambulance, via Manners St Maryborough Victoria" The 15th Field Ambulance Cpy, supported the 57th and other battalions of the 15th Brigade. 5. On verso "This is an Eaglehawk boy Septimus Fletcher, he came over with me and was with us a long time, but is on Division now" 6. On verso "This is our signal Cpl wearing his military medal for keeping communication at Bullecourt". Gamble won the MM for his actions 13th May 1917.57th battalion, postcards, album dawson dcm, edgar dawson dcm -
 Bendigo Military Museum
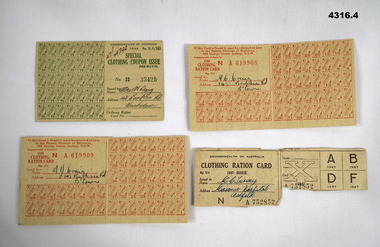
Accessory - CLOTHING COUPONS, Commonwealth Govt of Australia, 1947, 1948
All the cards are various sizes with numbers of coupons/rations having been used. Items in a collection relating to Malcolm and Margaret Craig. Malcom James Craig initially enlisted in the CMF No N261604 then transferred to the 2nd AIF No NX170489 on 4.6.1942 age 18 years. Served in New Guinea. Discharged on 18.6.1946 with the rank of Driver in 52 Comp A/A Signals section..1) Clothing coupon green No 33425, 1948, issued by the Commonwealth Govt of Australia, hand written on. .2) Clothing ration red No A619909, 1948, issued by the Commonwealth Govt of Australia, hand written on. .3) Clothing ration red No A619908, 1948, issued by the Commonwealth Govt of Australia, hand written on. .4) Clothing ration light khaki No A752852, 1947, issued by the Commonwealth Govt of Australia, hand written on.Hand written on in pen. .1) "47/49792, Mrs M Craig 148 Banksia Rd Bankstown". .2) M.J. Craig 148 Banksia Rd B'town". .3) M.C. Craig 148 Banksia Rd B'town" .4) M.C.Turvey Masonic Hospital Ashfield".accessory, clothing, coupons, rations -
 Lara RSL Sub Branch
Photograph, Set 4 photographs. and others for Torquay Light Horse camp, 1940
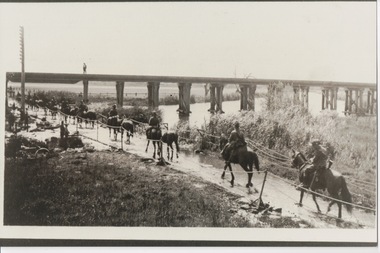
These images capture for all time Light Horsemen travelling through Geelong on their way to camp at Torquay for the last Group meeting in Australia . information following - details obtained from .........https://torquayhistory.com/light-horse-brigade/ On Australia Day, 1997, Sir John Young unveiled this plaque on Point Danger, Torquay. Torquay history, Light Horse Training Camp, WW2 Plaque at Pt. Danger Note----- (See images to view plaque) The plaque identifies a significant event in Torquay’s history and the sentiments of ‘change’ for the Light Horse Brigade – from horses to machines. In 1940 the four Light Horse Regiments (4th, 8th, 13th and 20th), some 5000 Light Horse and 2000 horses camped and trained at Torquay. Three other regiments, formerly mounted on horses, were also at Torquay ‘mounted’ on privately owned trucks and cars. Division troops included Artillery, Engineers, Signals, Field Ambulance and other branches of the Army necessary to enable a Division to function. It wasn’t just the sheer numbers of men coming to this little town that made the event significant, it was also the fact that the men of the Light Horse were dramatic, almost glamorous figures and it is easy to see their exploits as some splendid adventure. Horses have played a special role in the story of Australia. They were the only means of transport across this huge country, so it was necessary for everyone to have the ability to ride a horse. When war broke out in 1899 between Britain and the Boers of South Africa (“Boer” was Dutch for “farmer”) Australia sent troops to fight. At first Britain was wary of using untried, unprofessional colonial cavalrymen but soon saw that the slouch-hatted Australian “bushmen” were a match for the fast-moving and unconventional mounted commandos of the Boers. The Australians proved themselves to be expert rough-riding horsemen and good shots. Bush life had hardened them to go for long periods with little food and water. They also showed remarkable ability to find their way in a strange country and use its features for cover, in both attack and defence. By 1914, when Australia joined the war against Germany, there were 23 Light Horse regiments of militia volunteers. Many men from these units joined the Light Horse regiments of the Australian Imperial Force (AIF). Men were given remounts (if not using their own horses) – army horses bought by Commonwealth purchasing officers from graziers and breeders. These were called “walers” because they were a New South Wales stockhorse type – strong, great-hearted animals with the strains of the thoroughbred and semi-draught to give them speed, strength and stamina. On 1st November, 1914, Australia’s First Infantry Division and the first four Light Horse regiments sailed for England in a fleet of transport ships. The first of the Light Horse arrived at Gallipoli in May without their horses. Back with their horses after Gallipoli, they were formidable combatants across the Sinai and Palestine. Some British commanders observed that the light horseman moved with a “lazy, slouching gait, like that of a sleepy tiger” but described how the promise of battle “changes that careless gait, into a live athletic swing that takes him over the ground much quicker than other troops”. They had Light Horse, Torquay, training campdeveloped a reputation as formidable infantrymen. The Turks called them “the White Ghurkas” – a reference to their deadly skill with the bayonet. The Arabs called them “The Kings of the Feathers”. The plume had originally been a battle honour of the Queensland Mounted Infantry for their work in the shearer’s strike of 1891. During WW1 it was adopted by almost all the Light Horse Regiments. It was the proud badge of the light horseman. The most famous of their battles was the attack on Beersheba- the charge of the 4th Light Horse Brigade. Mounted infantrymen and their superb walers had carried out one of the most successful cavalry charges in history – against what seemed impossible odds. They surprised the Turks by charging cavalry-style, when they would normally have ridden close to an objective then dismounted to fight. The fall of Beersheba swung the battle tide against the Turks in Palestine; and changed the history of the Middle East. While 19 men from the Surf Coast Shire served with the 4th Light Horse over the course of WW1, only four were involved in the charge of Beersheba- John GAYLARD, Philip QUINN.(Winchelsea); Wallace FINDLAY (Anglesea); Harry TRIGG (Bambra). After the war, Light Horse units played a key role in the Australian Government’s compulsory military training programme. The Citizen Military Forces (C.M.F.) thrived on the glamour of the wartime Light Horse tradition, ignoring the possibility that motor vehicles would soon replace the horses. When training was no longer compulsory, the C.M.F. regiments declined and horses became more of a luxury during the 1930s depression years of poverty and unemployment. Some regiments were motorised. Then, in 1939, Australia joined Britain in another world war. Training was increased for the militia at both home bases and regional training camps. The camp at Torquay in 1940, commanded by Major General Rankin, was at Divisional strength. By the end of the camp some felt that the Division was ready for active service. Gradually, over the next four years, the Australian Light Horse units were mounted on wheels and tracks and the horses were retired. Six men enlisted at the Torquay camp and another 57 men and women enlisted at Torquay for service in WW2. Those who served in the Militia provided valuable Officers and NCOs and men for the armed services during the war. Each infantry division of the 2nd AIF had a Light Horse regiment attached to it. But the day of the Australian mounted soldier hadn’t quite passed. During World War II, Australia’s 6th Cavalry Regiment formed a mounted unit they called “The Kelly Gang” which did valuable scouting work. In New Guinea, a mounted Light Horse Troop did patrol duty and helped carry supplies. Some fully equipped walers were flown into Borneo for reconnaissance in rugged mountain country. But by the end of the war, in 1945, the horse had disappeared from the Australian Army. References: Australian Light Horse Association www.lighthorse.org.au National Australia Archives Australian War Memorial Surf Coast Shire WW1 memorials www.togethertheyserved.com The Light horse- a Cavalry under Canvas Light Horse, Training Camp, Torquay, WW2 Late in 1939 it was decided to set up a Lighthorse training camp in Torquay to train both men and horses for the battles of the Second World War. Horses, men and equipment came on special trains from all over Victoria and NSW, and as you would expect horseman came from areas such as Omeo and Sale, the Wimmera and the Western District. They arrived at the Geelong racecourse for watering in the Barwon River and then were ridden across the ford at the breakwater and began their 11 mile trek to Torquay. Light Horse, Training Camp, Torquay, WW2 Tent city By the end of January 1940 the camp at Torquay accommodated some 5000 men and 2500 horses of the Second Cavalry Division. The rows of horses, tents and huts near Blackgate Road were quite a sight. While the cavalrymen engaged in exercises on the land and on the beaches, many of the troops took over the Torquay School for special training of men and officers. Mr Bob Pettit local farmer and Councillor for the Barrabool Shire, wrote about the Light horse in the Surf Coast Community News in 1985 saying “They used to travel about the district riding four abreast in one long convoy. To my annoyance they went through my property and shut all the gates behind them. I had certain gates open to let stock in to the water holes and it would take me three -quarters of an hour to follow the horsemen up and put all the gates right again” he continued “the men from the Light Horse were here when the fire went through in March 1940. He recalled an incident when early one morning, as some one blew the bugle, a soldier putting a white sheet on the line frightened the horses. They panicked and ran off in all directions. Six went over the cliff near Bird Rock, five were never found, and the rest were gathered up after nearly a fortnight in the bush around Addiscott and Anglesea" Light Horse, Training Camp, Torquay, WW2, Geelong Parade Geelong parade The training camp culminated in a parade through the streets of Geelong on March 12th 1940. The salute was given at the Town Hall and the troops continued on a route to the You Yang’s for a training exercise. Note-----(see media section for photograph) The Camp was abandoned in mid 1940 as it was deemed unsuitable for training during winter and the cost of a permanent camp could not be justified if it could not be used all year. Historic.......Rare,,,Interpretive.Sepia photographs.set of four ....post card size ....Horses &LighthorsemenNo 1, Lighthorsemen Regiment Geelong 1940......No 2 Light Horse at Breakwater Geelong 1938 to 1940....No 3 Light Horse at Breakwater Geelong 1938 to 1940.....No 4 Light Horse crossing Breakwater camped at Geelong Showgrounds. These markings are on reverse of photographs.light horsemengeelong 1940., world war 2 -
 Lara RSL Sub Branch
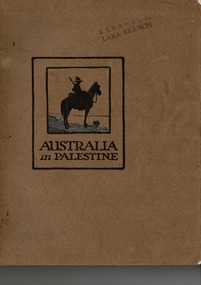
Book, Australia in Palestine, 1919
A soldier's book produced almost entirely by soldiers in the field under active service conditions to send to their friends in Australia and abroad. Australian Lighthorse men is a type peculiar his own and has no counterpart in h is NZ brother. His fearlessness, initiative and endurance, and his adaptability to almost any task, are due to the adventurous life he leads in his own country where he has been accustomed to long hours in the saddle, day and night, and to facing danger of all sorts from his earliest youth.Brown front and back hardcover with dark brown text 'Australia in Palestine' with a light horseman framed in centre of front cover. The spine is green with text Australia in Palestine, Angus and Robertson bottom of spine. Evidence of water on front cover. Silverfish have eaten top right hand corner of first two pages. Farm scene in four boxes with AR in the lower corner of each square. Inside front and back covers are illustrations of a camel train and came corps in the desert with the rising sun in the background with a mountain. There is a grave and white cross in their foreground right lower corner Illustrations, photographs, poems, short stories, Centre foldout of the Battle for Richon Le Zion and Battle of Beersheba and after the Battle of Bir El Abed To the memory of fallen comrades. Pen mark inside W. Mathews Larabattle of beersheba, battle of richon ze zion, battle of bir er abd, camel corps, lighthorse, slush light, sir h.g. chauvel, mounted division at kantara, medical services, signal engineers, katia oasis, new zealand mounted troops, sir edmund h allenby, walers story, 5th lighthorse, romani, ww1, world war 1, australian army -
 Bendigo Military Museum
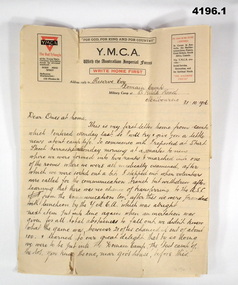
Letter - LETTERS PERSONAL AND AWARD, 1916 - 1918
The 3 letters were sent home by Joseph Stanley FERRIS to his Family in Terrick near Pyramid Hill Victoria. He enlisted No 3142 age 25 years in the 8th reinforcements 60th Bn AIF on 25.9.1916, embarked for England 16.12.1916, disembarked 16.2.1917, to hospital 18.2.1917, discharged 24.2.1917, attends Signal School Codford, posted on strength A.A.M.C 18.12.1917, embark for France 27.12.1917, posted to staff SMO 15.6.1918, disembark England 18.1.1919, RTA 10.4.1919, Discharged from the AIF 8.8.1919.Three letters from Joseph Stanley Ferris. .1) Letter hand written in ink dated 31.10.1916 from Domain Camp Melbourne on light brown YMCA stationary. .2) Letter hand written in ink dated Dec 30th 1917 from France on yellowed Australian Military Church stationary. .3) Typed document re the award of the DFC to Capt Reginald George David Francis. At bottom in pencil a short note from Stanley re the award.letters, stationary, military -
 Bendigo Military Museum
Memorabilia - TEASPOONS, SOUVENIR, c.1914 possible
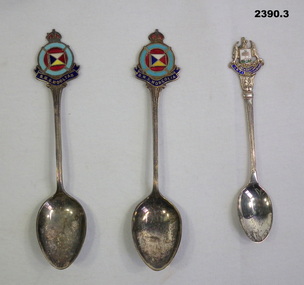
.1) Metal spoon, silver, enamelled design at top, surmounted by a crown. The motif has a light blue life buoy surrounding a square signal flag. The flag is divided 2 ways diagonally with colours of dark blue, white, red, & yellow. Dark blue banner at the bottom of the motif with encryption. .2) Same as above except the inscription on the banner. .3) Silver metal tea spoon, silver & enamel badge on top. The motif has a small shield in center with a tree on the shield. The shield is supported with a fish on each side, blue enamel worded banner at the bottom..1) “PMS MOOLTAN” .2) “RMS MONGOLIA” .3) “LET GLASGOW FLOURISH”domestic items-cutlery, military history - souvenirs -
 Bendigo Military Museum
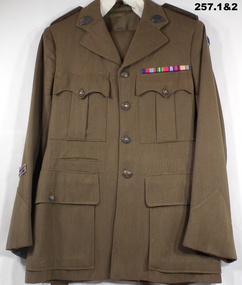
Uniform - UNIFORM, ARMY, 1939-45
Uniform belonged to Lt. J.K. GRIFFEN 2nd AIF, VX83853, 19th LOC SIGNALS.1) Jacket, Service Dress, Serge, khaki, Winter, 2 x Australia Badges, 2 x Rising Sun Lapel badges, 4 x Lieut badges (2 on each shoulder), 2 x Colour patches rectangular shape, white, light & dark blue with grey surround, 2 x service chevrons on right sleeve (pinned on), 4 x service ribbons WW2, metal buttons, 4 pockets. .2) Trousers, Service Dress, Serge, khaki, winter, plastic buttons, 3 pockets. .3) Peak cap, khaki, with leather band, small Rising Sun badge, grey leather inner lining. .4) Tie, cotton, khaki. .5) Braces - stripped, elastic, leather attachments..3) Inside lining maker appears to be “Tru Form”uniforms - military - army, wwii -
Frankston RSL Sub Branch
Stand, Tripod, Puddefoot Bowers & Simonett Limited, ca 1940
A portable, three legged stand in the form of a tripod, used by Australian and British Commonwealth military forces for mounting the standard issue signaling lamp and heliograph. The three collapsible, metal tipped, wooden legs are joined by hinge fittings to a brass collar with a threaded mount at one end (the head). The mounting thread is approximately 38mm diameter and fitted with a protective cap which can be removed for use, the cap being retained by a length of light chain. The stand is complete with a leather and webbing carrying strap attached to the head fitting of the stand with a leather sleeve at the other end which fits over the free end of the legs when folded.The brass collar and mount is stamped : "STAND LAMP OR HELIO A MKlll" and has the manufacturer "PUDDEFOOT, BOWERS & SIMONETT LTD, LONDON, 1940". Serial number 47064. Each of the wooden legs are stamped with the Australian Department of Defence "DɅD" symbol.military, tripod, ww2, world war 2, signalling, heliograph, stand -
 4th/19th Prince of Wales's Light Horse Regiment Unit History Room
Book, Army History Unit, Australian Army Tactical & Instructional Pamphlets & Books - A Bibliography, 2017
This second edition charts the evolution of doctrine development in the Australian Army by detailing a list of instructional and tactical literature of the Army and its precursor pre-Federation Australian colonies. The bibliography demonstrates the range of subject areas that Army has addressed over its history, including such esoteric issues as censorship, the evolution of Signals training, accreditation of war correspondents & the management of enemy POW and repatriation of Australians taken POW.ISBN 978-0-9946046-8-2bibliography, tactical & instructional pamphlets & books, military education -
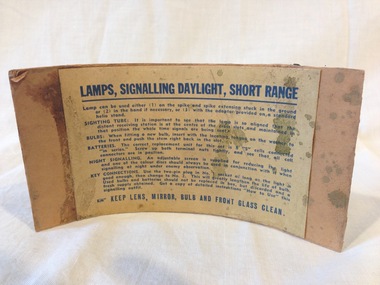 Montmorency–Eltham RSL Sub Branch
Equipment - Instruction Card, Lamps, Signalling Daylight, Short Range, MK II, PMG 1942, 1942
Dark blue printed instructions on paper mounted on a buff coloured cardboard card.LAMPS, SIGNALLING DAYLIGHT, SHORT RANGE Lamp can be used either (1) on the spike and spike extension stuck in the ground or (2) in the hand if necessary, or (3) withe the adaptor provided on a standard helio stand. SIGHTING TUBE: It is important to see that the lamp is so aligned that the distant receiving station is at the centre of the cross slots and maintained in that position the whole time that signals are being sent. BULBS: when fitting a new bulb, insert the locating tongue on the washer to the front and push the stem right back in the slot. BATTERIES: The correct replacment unit for this set is 8 "S" cells connected "in series". Screw up both terminal nuts tightly, ans see thar all connectors are in position. NIGHT SIGNALLING: An adjustable screen is supplied for reducing the light and one of the colour discs should always be used in conjunction with it when signalling at night under enemy observation. KEY CONNECTIONS. Use the two-pin plug in No.1 socket as long as the light is good enough, then cahnge to No.2. This will greatly lengthen the life of bulb. Used bulbs and batteries should not be relaced in the box, but discarded and a fresh supply obtained. Get a copy of detailed instructions "How to Use" this signalling outfit. KEEP LENS, MIRROR, BULB AND FRONT GLASS CLEAN.instructions, lamp, signalling, daylight, short range -
 Mission to Seafarers Victoria
Book, D. A. Moore, International Light, Shape and Sound Signals, 1976
... melbourne donation International Light, Shape and Sound Signals Book ...non-fictiondonation -
4th/19th Prince of Wales's Light Horse Regiment Unit History Room
Message Form, 1940's
Four, paper, small message forms that were adopted in Sep 1943Army Form C2136 Small Message Formsignals, forms, message -
4th/19th Prince of Wales's Light Horse Regiment Unit History Room
Book, Modern Printing Pty Ltd, Signals Training Vol II Part II 1937 - Supplement, 1936
A hard covered book dealing with skip distances of short wave signals, with graphs.signals, short wave, skip distances