Showing 488 items
matching rear light
-
 Bendigo Historical Society Inc.
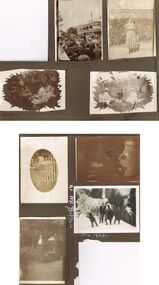
Photograph - HILDA HILL COLLECTION: BLACK AND WHITE PHOTOS, 1918-1923
Series of Black & White Photos of Hill Family and Friends during the war and post war life. Total 8 Photos. Welcome Parade General Pa n Bendigo October 21, 1918, tram wiring post in street, large two storey building in the background named Stanley's Coffee palace at corner of Mitchell and Mollison streets, Large crowd on roadway, Covered wagon among crowd with Good Shepherd laundry written on the side, foreground shows General Pau being driven through the crowd, General Pan is wearing a Napoleon style hat. Doreen dressed in a light coloured dress with white collar standing before a hedge, at rear is part of a corrugated iron roof gable, S.H.L.C. 27 September 1918. Group of four ladies three dressed in white and other a darker colour all seated on the ground, distant background a row of trees along a fence line, tea time Hibernian picnic Axedale 13 November 1918. Three women and young boy all seated on the ground, the ladies are all in white and two wearing white hats, young boy is dressed in suit with white shirt and dark tie and his right hand is pointing to his open mouth, to their right is a wooden structure and distant background more people can be seen, dinner time Hibernian picnic Axedale 13 November 1918. Overdeveloped photo of two young men standing between two shrubs and in front of a full length external window blind, 'The Ranche' February 1918. Group of four males dressed in dark coats and grey trouser at the snow Mt. Buffalo July 1923. Baby Irene clothed in white with bonnet seated in an English style pram with large wheels, picket fence and shrubbery in background, may 1918. Gert dressed in white shirt dark cardigan and dark skirt standing in front of hedged garden and trees, a small part of a roof can be seen between the trees, Railway Reserve 1918.Hilda Hill Personal Collectionaustralia, history, post war life -
 Bendigo Historical Society Inc.
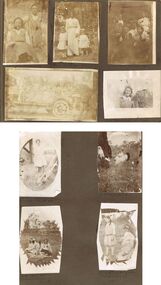
Photograph - HILDA HILL COLLECTION: BLACK AND WHITE PHOTOS, 1918
Series of black and white photos depicting The Hill family and friends during the post war years. Total number 9 photos. Two young ladies one seated in a deck chair and the other to the right standing with her right arm on the back of the chair, both girls wearing pinafores and white blouses at Brighton January 1918. Mog and two small girls all wearing white standing in front of a wooden structure and garden in background, Bendigo 1918. group of four girls and four boys, three of the girls are dressed in white and the fourth in a darker colour, one of the boys is wearing a white shirt and waistcoat two of them are in white shirts, two in middle background are indistinct, 17 Clive road January 1918. Double exposure gives the outline of a car in front of a white picket fence, right foreground at rear of car there is a group of adults and children that is indistinct for details, St Patrick's procession 1918 and family car. Rosa in light coloured dress with white collar, garden setting 'Moorilim' October 1918.Unnamed girl 'a Vision' wearing a white dress sitting on a wooden stump that is part of a building support, to left is a man in dark waistcoat and trousers with a white shirt sitting on the ground with his back to an axle with two large wheels, and a building support, Hibernian Picnic Axedale November 13 1918. Two ladies in foreground both wearing white, one also wears black hat and scarf, to left on stump is a light coloured hat and white coat, background has girl dressed in white blouse and dark skirt and further back can be seen more people, Hibernian Picnic 13 November 1918. 'three Merry maids' sitting on blanket on the ground two dressed in full white and third white top and dark dress, more people in the far background, Hibernian picnic Axedale 13 November 1918. Mrs Cavagna and Carmy, young girl dressed white dress with black belt and long white socks and black shoes, seated lady in white dress and dark hat with black veil, number of people in the far background, Hibernian picnic 13 November 1918.Hilda Hill Personal Collectionaustralia, history, post war life -
 Bendigo Historical Society Inc.
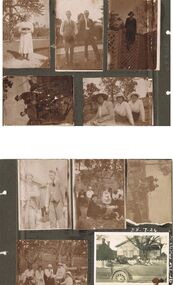
Photograph - HILDA HILL COLLECTION: BLACK AND WHITE PHOTOS, 1919-1924
Black & White Photographs Series of 10 depicting life for the Hill Family in 1919, young lady standing near large tree wearing a white dress with black waist sash and dark stockings rear background shows the gable roof and 4 chimneys all behind a large hedge, Durvol December 14 1919 In garden setting man on left wearing grey trousers and what appears to be a bag attached via a string to his waist, grey waistcoat white shirt and dark tie, other gentleman is wearing a dark suit white shirt and dark tie,background shows a hedge and tops of trees, a gable roofed building looms above hedge to centre right, Durvol December 14 1919. Dark photo shows a young lady sitting at the top of a trellis fence, she is wearing dark clothing, her blouse has a white collar, hat with bow above her right shoulder, background shows the tops of two trees, Durvol August 1919. 1 man dressed in dark suit and hat, one boy sitting on the seat, both boys are wearing dark clothing and the boy standing is also wearing long dark socks and boots, the large two wheeled carriage, to the right is a gable roofed shed and top right background a large tree branch, Durvol August 3 1919. 3 ladies seated on the ground first lady on left wears a large brimmed hat with light coloured clothing, other 2 ladies are wearing white blouses and dark skirts each with a light coloured hats. 3 men 2 facing the camera and the other facing to the rear, the front 2 are wearing grey trousers and waistcoats man on right has dark tie and smoking a pipe, man facing the rear wears a hat and grey suit, gable roof of a building is in the background November 29 1919. Group of men and women enjoying a picnic two of the men are seated and both wear dark hats and dark suits with white shirts and dark ties, all of the ladies are wearing hats white blouses, one a light coloured skirt and other 2 dark skirts, bush setting with hill in background, Hibernian Picnic 1919. Four wheeled carriage drawn by one dark horse, the two passengers are dressed in dark suits and hats, a whip is mounted in the front foot well, right background is a standing lady dressed in a white blouse and dark skirt, also tree in left background, 25 July 1924. Group of ladies seated two wearing light coloured hats and all wearing white blouses four are in dark skirts, background is wooded area right background is a post and rail fence, Hibernian Picnic 1919. Old vehicle with five passengers, two ladies in the front one driving and a man and two more ladies in the rear seat, all are wearing dark clothing, gabled roof house in background with white picket fence, left background shows another gable roofed building two chimneys dark appearance.Hilda Hill Personal Collectionaustralia, history, post war life -
 Bendigo Historical Society Inc.
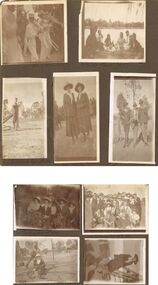
Photograph - HILDA HILL COLLECTION: BLACK AND WHITE PHOTOS, 1920
Hilda Hill collection. Combination of Sepia & Black & White Photos Total of 9. Photos. Five boys all dressed in white and wearing white boaters playing instruments in a band, left foreground Tuba, two in centre playing trombones, man in background playing smaller tuba like instrument, Clem Easter Fair procession1920. Four young ladies and four young men sharing a picnic at the lake, (Weeroona?), ladies wearing white or light coloured outfits and the men and boys all dressed in darker clothing, background left building on far side of the lake, at the lake 'Hungry' January 1920. Ken at Lockwood April 25th 1920, wearing white shirt dark waistcoat and trousers, left arm on top of gate post, two stays for the gate post and dry tree limb on ground, background open paddock with trees further in the background. Babe & Hilda at the Easter Fair 1920, Both wearing broad brimmed hats, one light the other dark, dark coat and skirt combinations with white accessories. 'the Three Graces' Queen street, April 25th 1920, 1 wearing dark suit and hat with white shirt and dark tie, centre wearing grey suit hat white shirt and dark tie also holding a ball his left hand round the shoulder of the man to his left, man on right wearing dark coat grey trousers white shirt and dark tie his left hand is holding round stick. Group of seated ladies, lady to left wearing light broad brimmed hat and white blouse holding bunch of leaves, next lady also wearing light broad brimmed hat dark dress white blouse with large collars folded over the coat lapel, and glasses, next at rear of group lady in hat white dress and dark coat left hand on shoulder of person left front of herself, This lady wearing dark wide broad brimmed hat dark coat and skirt with white blouse and also holding a bunch of leaves, last lady on right wearing a floppy brimmed hat with white blouse and dark coloured outfit with light coloured lapels, One Tree Hill April 18th 1920. Family group Lockwood April 25th 1920,some of the males are wearing hats others not, most are in dark coloured suits with or without coats, all of the ladies are wearing hats of varying kinds, all appear to have white blouses on with dark skirts or dresses, photo in open paddock with trees in the background. Girlie & Frank Queen street April 25th 1920, Girlie in foreground seated on rug of which more next to her is where Frank may sit, to her wearing glasses dark dress with white blouse and white hat, Frank wearing grey suit and hat is holding an object over the head of Girlie,background left a suitcase on the ground, centre background is a slim tree, right background house with gabled roof and bull nose verandah, high picket fence, trees on footpath. Left side buildings fronting the footpath. Babe seated on the hand rail at the bottom of wooden stair case, wearing broad brimmed hat dark dress and white blouse, shadow in foreground of the photographer and assistant, left is wire fence with wooden posts and top rail, April 1920.australia, history, post war life -
 Bendigo Historical Society Inc.
Administrative record - Receipt book
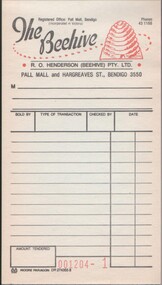
... Streets, Bendigo. Undated. Light paper cover, rear card cover... Streets, Bendigo. Undated. Light paper cover, rear card cover ...Beehive buildings. This was originally the Sandhust Mining Exchange and as such was the oldest purpose built exchange in Australia and was one of only two in regional Australia. It was initially established in the 1850's to service the miners of the area. It's first double story incarnation as the Bendigo Stock Exchange, contained up to 2000 stockbrokers and 5000 shareholders. In 1871 the building burnt to the ground and the new and current building was completed in 1872. The modern building was designed by Charles Webb, who was also responsible for the Royal Arcade in Melbourne. and features a pitched glass roof similar to the Royal Arcade, Melbourne.Unused Beehive Store receipt book (nos. 001204-1 to 50). Owner R.O. Henderson (Beehive) Pty Ltd, Pall Mall and Hargreaves Streets, Bendigo. Undated. Light paper cover, rear card cover, bound book. Four unused envelopes, with Beehive \ letterhead in upper left-hand corner.Receipt book nos. 001204-1 to 50the beehive, invoice -
 Kyneton RSL Sub Branch
Framed photograph, HMAS Australia
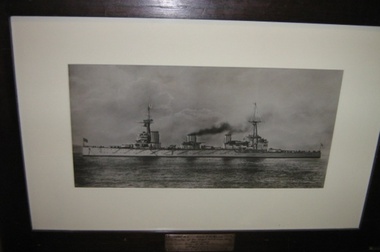
The Australian Navy's first flagship, the battle cruiser HMAS Australia (I) was the centrepiece of the 'Fleet Unit', whose acquisition signalled the RAN's arrival as a credible ocean-going force. The Commonwealth Government decided upon the name Australia, and it proved a popular choice, carefully avoiding any suggestion of favouritism towards any one Australian State. Notwithstanding some construction delays, John Brown delivered Australia £295 000 under budget. Following successful gun, torpedo and machinery trials she commissioned as an Australian unit at Portsmouth, England, on 21 June 1913 under the command of Captain Stephen H. Radcliffe, RN. Two days later the ship hoisted the flag of Rear Admiral George Edwin Patey, MVO (later Vice Admiral Sir George Patey, KCMG, KCVO), who had been selected to command the Australian Fleet. In company with the new light cruiser HMAS Sydney (I), Australia sailed from Portsmouth on 21 July 1913, and their voyage home was seen as a further opportunity to stimulate public awareness and naval sentiment around the British Empire. Arrangements were made at the first opportunity for the flagship to visit many of the principal Australian ports. On the outbreak of World War I Australia (I) operated (with other ships of the Australian Fleet) as a counter to the German East Asiatic Cruiser Squadron under Admiral Graf von Spee. On 11 November 1918, the signing of the Armistice brought the fighting in Europe to an end. On 21 November, the Grand Fleet came out from the Firth-of-Forth in two divisions to meet the German High Seas Fleet steaming across the North Sea to be interned at Scapa Flow. Australia (I) had the honour of leading the port line at the head of her squadron. After returning home Australia (I) resumed the role of RAN flagship. A year later she played the leading part in the naval activities associated with the visit of the Prince of Wales in HMS Renown, but her time was rapidly running out. In November 1921 she returned to Sydney and the following month was paid off into reserve on 12 December 1921. Less than three years later she was prepared for scuttling to comply with the terms of the Washington Naval Treaty of 1922, which provided for a reduction in naval strengths. The RAN had already removed some of the ship's equipment for use in other warships, and now began the deliberate scrapping of Australia (I) by extracting piping and other small fittings. She was towed to sea by tugs and sunk along with her main armament in position 095 degrees, 24 miles from Inner South Head, Sydney, on 12 April 1924. Extracts from http://www.navy.gov.au/HMAS_Australia_(I)Teak frame photograph Metal Plaque on frame: HMAS Australia First flagship of the Royal Australian Navy 1913-1920 Sunk under terms of the Washington Treaty 12th April 1924 navy, world war one, australia, war, wwi, flagship, hmas australia, ran -
 Ballarat Tramway Museum
Drawing, State Electricity Commission of Victoria (SECV), "Tramcar tail lamp installation relay modification", 15/11/1949
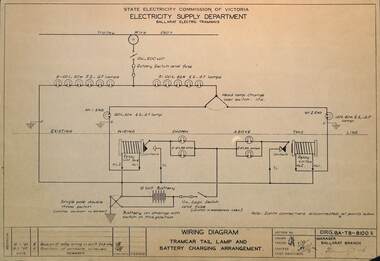
... to provide a rear tail light and lights when at a terminus. tramcars ...Set of two drawings (BA-T8-8100/1 and BA-T8-8100B) showing the installation of tail lights on SEC tramcars and modifications to the battery/trolley pole relay and battery. Both are dated 15/11/1949 and signed by the Manager Ballarat Branch. The actual relay used later was a Post Office type relay contained within a wooden box.Yields information about the modifications proposed to the tramcars to provide a rear tail light and lights when at a terminus.Drawing - dyeline print on plain papertramcars, safety, tail lights, lights, ballarat -
 Bendigo Historical Society Inc.
Ephemera - Advertising flyer for J.H. Abbott & Co., Pall Mall, Bendigo
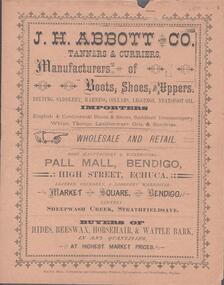
Light tan colour, brown text, one page advertising flyer for J.H. Abbott & Co., Tanners and Curriers, Manufacturers of Boots, Shoes and Uppers, belting, saddlery, harness, collars, leggings, neatsfoot oil. J.H. Abbott & co., also at High Street, Echuca, Market Square, Bendigo and Sheepwash Creek, Strathfieldsaye.. On rear of document, special hard wear boots are advertised with a black line image of an elephant endeavouring to pull apart one of 'Abbott's' boots.j.h. abbott & co., shoes, tanners and curriers, boots, market square, bendigo, echuca, manufacturing -
 Ballarat Tramway Museum
Book - Instruction, Westinghouse Traction Brake Co, "Westinghouse - T5001-1 Straight-Air Brake Equipment", March 1923
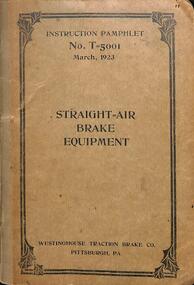
Has a table of contents, outlines the rules of operating brake equipment fitted to tramcars, the SM3, SX2 brake valve, locomotive straight air, installation piping, wiring, maintenance - piston travel, lubrication, car tests, hints to Motormen and Conductors and General Hints. Schedule for SM-1 and featherweight equipment. Includes instructions on compressors, air intakes, valves, cylinders and governors.Provides instructions about Westinghouse air brake equipment used on tramcars around the world.Instruction - 48 pages + light brown card cover centre stapled with cloth binding on outer edge + 13 fold out drawings inside the rear cover, titled "Westinghouse - T5001-1 Straight-Air Brake Equipment". Dated March 1923. On first page a signature in ink - "W. Armstrong"?brakes, electrical engineering, •electrical equipment, •westinghouse, •air compressors, •instructions, •maintenance -
 Ballarat Tramway Museum
Ephemera - Tour Ticket - Yapper Tours, April 1989
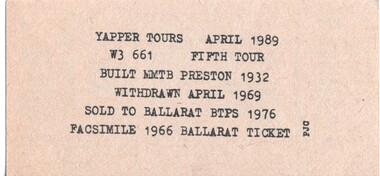
Ticket for the 5th tour in Melbourne operated by Yapper Tours, (sometimes spelled Yappa), using Ballarat Tramway Preservation Society tramcar W3 661. The reference gives the date as 6/5/1989, the background to its operation in Melbourne and the tram itself. Has the initials PJC on the side of the ticket. On the rear is a facsimile 1966 SEC dual currency ticket. Demonstrates tram tour tickets and yields information about the style of SEC Tour tickets.Tour Ticket - Yapper Tours - April 1989 - printed on light card with a facsimile of a 1966 SEC 8c or 10d SEC ticket on the rear.tram tours, w3 class trams, yappa tours, yapper tours, tram 661, tickets, dual currency tickets, btps -
 Ballarat Tramway Museum
Memorabilia - Cigarette card - Ballarat, WD HO Wills, 1920s
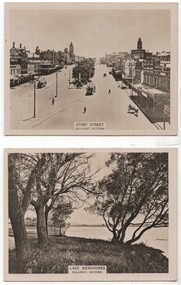
Cigarette cards were used as a stiffening when cigarettes were sold as separate or loose items. See reference. Sturt St - Victorian Railways photo - mid 1920s with two ESCo trams in the view. Both trams have been fitted with windscreens. The rear of the card gives details of Ballarat and is No. 43 in a series of 100 card of the Australian Scenic Series. Lake Wendouree - looking east with Mt Warrenheip in the view. No. 26 of the series, also a VR photo.Demonstrates the type of card that were made by cigarette companies as collector items and to assist their sales.Set of two WD HO Wills Cigarette photo cards using a light card.ballarat, lake wendouree, sturt street, victorian railways, cigarette cards, wd ho wills -
 Ballarat Tramway Museum
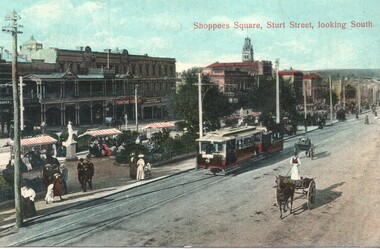
Postcard, "Shoppees Square Sturt Street looking South", c1905
The photograph used in a postcard appears to be taken from the hotel balcony (Golden City) on the corner of Sturt and Dawson Streets, looking northeast. The tram is towing a former horse-drawn tram shortly after opening as no roof destination boxes on the tramcar in Sturt St. Many people promenading in the median strip with covered awnings over the seats, indicating summertime with two horse-drawn vehicles adjacent to the tram, one going either way in Surt St. south side, indicating traffic arrangements at the time. Has a Furniture Crockery store, Lesters Hotel and George Crocker Draper Hotel. Yields infomation about Sturt St and Shoppees Square c1905Postcard - coloured - Sturt St, card printed in Germany and number B377 10, with light brown ruled lines on rear.On rear is a letter to a lady in Adelaide with a 1d Victorian stampballarat, tramcars, esco, sturt st, shoppee's square, trailers, horse trams, dawson st -
 Ballarat Tramway Museum
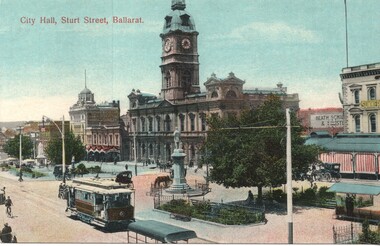
Postcard, "City Hall, Sturt Street, Ballarat", c1910
The image is of an ESCo tram just to the west of the Armstrong and Sturt St. intersection with the Ballarat Town Hall, the National Mutual building in the background. Tram traveling east. Tram has a destination box on the roof, but no driver's windows, say 1906 - 1912 or 1910c. Some horse-drawn vehicles in the image. Snows has a "Summer Clearance" sign on the building. From Reg Item 5129, appears to be tram No. 5. See also 8890, 8414 for other versions of this image.Yields infomation about Sturt St and ESCo tramsPostcard - coloured - Sturt St, card printed in Germany and number B374 19, with light brown ruled lines on rear.On rear is a letter to a lady in Adelaide with a 1d Victorian stamp, possibly during 1911ballarat, tramcars, esco, sturt st, town hall, tram 5 -
 Ballarat Tramway Museum
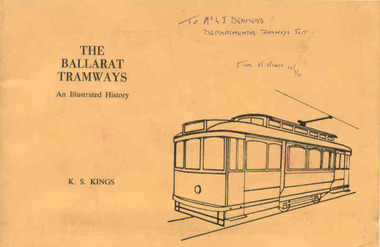
Book, Keith Kings, "The Ballarat Tramways", Sep. 1971
Yields information about the history of the Ballarat Tramways from horse to the closure of the electric trams in 1971. Gives a good understanding of the development and operation of the tramways. Has a strong association with the author.Book, 64 pages, gloss art paper, in black ink with a light brown card cover in green ink, centre stapled, titled "The Ballarat Tramways" Details history of Ballarat tramways, its tramcars and the involvement of the various operators. Has maps and photographs. Written by Keith Kings and published by the Victorian Division of the Australian Railway Historical Society at the time of the closure of the Ballarat system. Inside front cover is a typed sheet of amendments for the book - typed on Charles Martin Watermarked paper. Has details of the various organisations that published the book on the rear cover. 114.2 - as for 114.1 - but with many hand written notes etc. 114.3 - as for 114.1 - but with "City of Ballarat" stamped on front cover. 114.4 - as for 114.1 - but with "To Mr. L. J. Denmead, Departmental Tramways Supt. from K. Kings 12/9/1971" handwritten on front cover. For entire book see pdf images i1 to i3.114.2 - notes on pages 7, 10, 17, 18, 21, 22, 23, 25, 26, 29, 36, 49 and 63 - has in blue or black ink, many notes, corrections and additions. 114.3 - "City of Ballaarat" stamped in red on top right hand corner. 114.4 - "To Mr. L. J. Denmead, Departmental Tramways Supt. from K. Kings 12/9/1971" handwritten on front cover in blue ink and on title page (page 1) in red ink "Mr. L. J. Denmead / Dear Les, / Best Wishes for the future! / Bob Prentice" and on same page, in blue stamp "L.J. Denmead".trams, tramways, ballarat tramways, history, tramcars of ballarat -
 Ballarat Tramway Museum
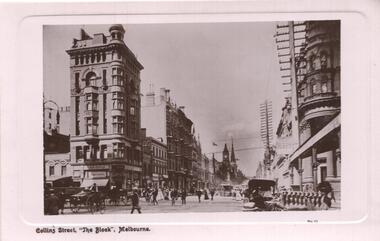
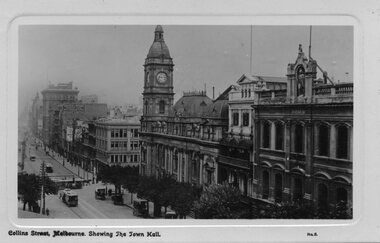
Postcard, GPC Depot Melbourne, Collins St. Melbourne
Glossy postcard with edges raised above the photograph itself of Collins St. Melbourne looking east along Collins St towards the NE corner of the intersection with Elizabeth St. Cable trams in distance with many horse drawn vehicles on both sides of street and pole lines with wires. B.H.Alston building features. Some motor cars in photo. On base of card is title & in bottom RH corner is 'No. 10'. On rear are areas for Address and Correspondence. Title is 'Collins St. 'The Block' Melbourne'. On rear as well is publisher details with Melbourne mis-spelt. Rear of card is finished off white , while front has a light pink finish. Photo printed using photographic paper. Printed in Great Britain. trams, tramways, melbourne, collins st., cable trams -
 Ballarat Tramway Museum
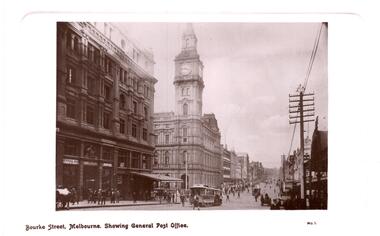
Postcard, GPC Depot Melbourne, Bourke St c1900 to 1910
333.1: Glossy postcard with the edges raised above the photo, of Bourke St c1900 to 1910? of Bourke St. looking east at GPO, on corner of Bourke and Elizabeth Streets. Cable trams and horse drawn vehicles in photo as is pole lines for telephones, with multi core cables . On base of card is title 'Bourke St. Melbourne, showing General Post Office'. In bottom RH corner is 'No. 1'. 333.2 Copy of above. On rear are areas for Address and Correspondence. On rear side is Publisher details (GPC Depot Melbourne) with Melbourne misspelt. Rear is finished in off white card, while front has a light pink finish. Photo printed using a photographic paper. 333.2 - a copy photo of 333.1, can embossed surround - same size, plain back. trams, tramways, melbourne, cable trams, bourke st., gpo -
 Ballarat Tramway Museum
Postcard, GPC Depot Melbourne, Bourke St., looking north west
Glossy postcard with the edges raised above the photo of Bourke St., looking north west at southern face of town hall. Has cable trams and horse drawn vehicles in photo. Also has facade of 'Atheneum' Theatre. On base is title 'Collins Street Melbourne showing The Town Hall' and in RH corner 'No. 3' On rear are areas for Address and Correspondence. On rear side is Publisher details. Rear is finished in off-white card, while front has a light pink finish. Photo printed using a photographic paper.trams, tramways, melbourne, collins st., cable trams, melbourne town hall -
 Kew Historical Society Inc
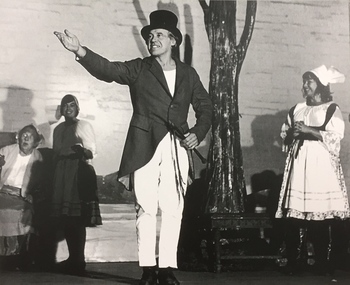
Photograph, The "Q" Theatre Guild, The Bartered Bride / by Smetana, 1970s
The donor, Rosemary Lade, was a member of the Q Theatre Guild for a short period in the 1970s when this photo of a performance of The Bartered Bride was taken. The Q Theatre Guild had previously evolved out of the Kew Light Opera Company that had been formed in 1953. The first performances of the Guild occurred in the Kew Recreation Hall in Wellington Street. From 1960, the Guild performed at the new Kew Civic (later City) Hall. During the 1970s, the donor participated in performances of The Bartered Bride by Bedřich Smetana, The Gypsy Baron by Johan Strauss II, and Amahl and the Night Visitors by Gian Carlo Menotti.Photograph of a performance of Smetana's Bartered Bride in the Kew City Hall in the 1970s. The performance was given by the "Q" Theatre Guild."The Bartered Bride" Smetana. Q Theatre Guild 1970s.Left Rear - Molly Stillwell (seated) Rosemary Lademolly stilwell, rosemary lade, "q" theatre guild, kew civic hall, performing arts -- kew (vic.), smetana -- the bartered bride -
 8th/13th Victorian Mounted Rifles Regimental Collection
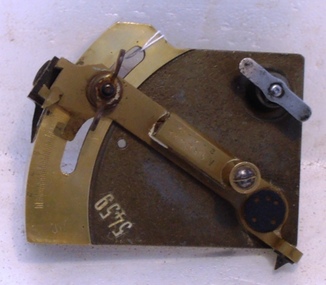
Weapon - Gun sight, 1916 circa
This gun sight was brought home from WWI (1914-1918) by members of the 13th Battery 5th Field Artillery Brigade (Albury Battery) as a souvenir of its action in the first battle of Bullecourt April 1917. On one occasion during the battle the Battery was surrounded by a German counter attack. They dragged their guns out of the gun pits and continued firing to the flanks and rear and supported the Australian counter penetration attack which restored the situation. After the war a recreational reserve in Albury NSW was named Noreuil Park after the French village near where the action occurred.A rare object with significant connection to Albury NSW and its citizen soldiers who served with the AIF in WWI (1914-1918). The engraving gives it close association with the recreational park in Albury named after the French village of Noreuil and honouring the soldiers who fought there with great courage. Range drum portion of the sighting mechanism from an 18 Pounder field gun made of brass and other metals. The object is engraved with the word NOREUIL and the date 2.4.17.Serial No 5459; and NOREUIL 2.4.17gun sight, noreuil, albury, 13th battery -
 8th/13th Victorian Mounted Rifles Regimental Collection
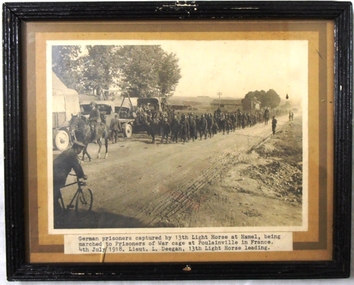
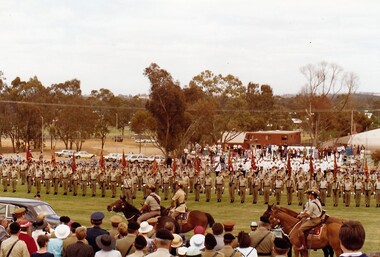
Photograph - 13th ALH WWI, 1918
The 13th Light Horse was the Corps Cavalry of the Australian Corps. One role of the Corps Cavalry was the escort of prisoners-of-war from the front line to POW compounds in the rear area. Lieutenant Leslie Deegan was a 36 year-old Company secretary of Melbourne with service in the Boer War when he enrolled in the 13th Light Horse AIF. He embarked as Squadron sergeant-major of C Squadron of the regiment and was later commissioned as a lieutenant.Rare photograph of Australian Light Horse escorting prisoners-of-war in large numbers in France during WWI. Officer named has connection to other items in collection.Framed black and white photograph showing long column of German prisoners-of-war led by mounted Australian officer and flanked by mounted Australian soldiers passing along a village road. Several onlookers, one on bicycle. light wooden frame painted black.German prisoners captured by 13th Light Horse at Hamel being marched to Prisoner of War cage at Poulainville in France, 4th July 1918. Lieut. L Deegan 13th Light Horse leading.13th light horse, hamel, deegan leslie lieutenant, prisoner-of-war -
 8th/13th Victorian Mounted Rifles Regimental Collection
Photograph - 'C' Sqn 8LH 1915, 1914 circa
The 8th Light Horse Regiment AIF was raised at Broadmeadows Victoria in September 1914 under the command of Lieutenant Colonel Alexander White and formed part of the 3rd Light Horse Brigade. The regiment served at Gallipoli where in a courageous, but ill-fated charge at the Nek on 7 August 1915, it suffered horrendous casualties including Lieutenant Colonel White. Rebuilt in Egypt under the command of Lieutenant Colonel Leslie Maygar VC the regiment went on the serve throughout the Middle East Campaign. Lieutenant Colonel Maygar died of wounds at Beersheba when the regiment was attacked by enemy aircraft while waiting to follow up the successful charge of the 4th LH Brigade on 30 October 1917. Returning to Australia after the war, the 8th Light Horse AIF was disbanded in 1921, but soon after re-raised as the 8th (Indi) Light Horse in the Citizen Military Forces.Rare professional photograph of a light horse squadron prior to their departure for overseas in 1914.Black and white photograph of 6 ranks of soldiers arranged in tiers being " C " Squadron 8th Light Horse, shortly before departure to the Middle East. Photograph is mounted on card.Soldiers are wearing bandoliers and peaked caps.On face of image - " 'C' Squad 8th Light Horse" and " Darge Copyright". On rear of mounting card " No.378/2nd Regx? 3rd Top"8th light horse regiment, world war one (1914-1918) -
 8th/13th Victorian Mounted Rifles Regimental Collection
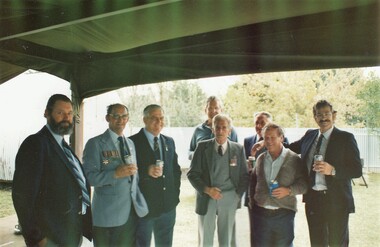
Photograph - ex-VMR group 1990
Pictured from left to right are: Mick Hudson, Vern Martin, Viv Schmidt, Jack Hodda, Daryl Conway, Joe Richter, Rear Ned Ziebell, Les Coward.Coloured photograph of group of former members of 8 /13 Victorian Mounted Rifles at Buna Barracks,Albury 29 April 1990.buna barracks, vmr, hudson, martin, schmidt, hodda, conway, richter, ziebell, coward -
 8th/13th Victorian Mounted Rifles Regimental Collection
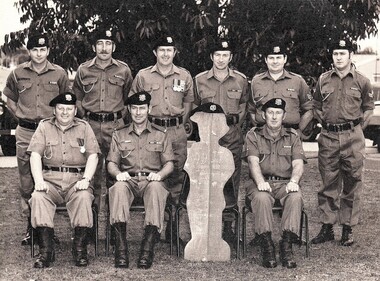
Photograph
Cadre staff were regular soldiers posted to CMF Regiments for instructional purposes.Rare photo of the Cadre staff togetherBlack and White photograph of nine soldiers and one ' cut out ' being the 8th/13th Victorian Mounted Rifles Cadre staff. All are dressed in summer wear ' greens ', berets, belts, boots and gaiters. All are wearing medals or service ribbonsCadre staff: Front: WO11 Ford,, RSM Harris, WO1 Richards. Rear: Cpl. Plunkett, WO11 Woods, WO 11 Davis, WO11 Twomey, SGT Harmer, Cpl Johnson. " -
 8th/13th Victorian Mounted Rifles Regimental Collection
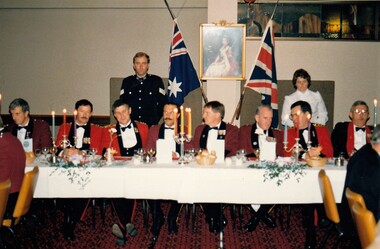
Photograph
This dinner commemorated the 40th Anniversary of the raising of 8th/13th Victorian Mounted Rifles Regiment which linked 8th, 13th, and 20th Light Horse Regiments.Two colour photographs of group of officers in mess uniform seated at table at a formal dinner at Commercial Club Albury 30 April 1988..“At rear: Sergeant R Ellison, Corporal Carr. From left: Major J Gay, Colonel C Brewer Area Commander AWMA, Brigadier D Perry Commander 4th Task Force, Major R Morrison Officer Commanding ‘A’ Squadron 8/13 Victorian Mounted Rifles, Colonel Howard Director Royal Australian Armoured Corps, Colonel John Neale Honorary Colonel 8/13 Victorian Mounted Rifles, Colonel G Garde, Colonel P Tremaine” military, officers, mess, uniform, dinner -
 8th/13th Victorian Mounted Rifles Regimental Collection
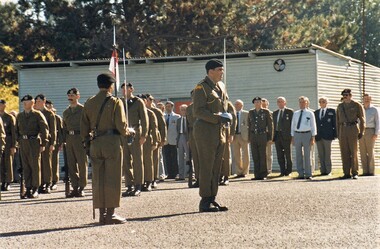
Photograph
‘A’ Squadron 8/13 Victorian Mounted Rifles conducted a parade at Buna Barracks, Albury on Sunday 1 May 1988 to mark the 103rd Anniversary of the formation of the Victorian Mounted Rifles and the 40th Anniversary of the linking of the 8th (Indi), 13th (Gippsland) and 20th (Victorian Mounted Rifles) Light Horse Regiments to form the 8th/13th Victorian Mounted Rifles. Colonel G K Howard, Director of the Royal Australian Armoured Corps was the Reviewing Officer. The Pipes and Drums of the 5th/6th Battalion Royal Victorian Regiment provided the music for the occasion. Following the parade Colonel Howard officially opened the Regimental Museum.Squadron Commander Major R. Morrison takes the parade from Adjutant Captain P. Williams. Members of the Regimental Association are formed up at the rear of parade ground. -
 8th/13th Victorian Mounted Rifles Regimental Collection
Photograph
The Light horse Heritage Troop of the 8th/13th Victorian Mounted Rifles provided mounted escort to the Royal couple, HRH Prince Charles and HRH Princess Diana. In 1985, the portion of Puckapunyal Army Camp housing the Armoured School and Corps Museum underwent a major rebuild. The new facility named Hopkins Barracks was officially opened by HRH . Prince Charles on 31 October 1985. Prince Charles, who was accompanied by his wife HRH Princess Diana, is Colonel in Chief of the Royal Australian Armoured Corps (RAAC). The Barracks is named to honour Major General R N L Hopkins who was instrumental in the development of the RAAC and is affectionally known as the ‘father of the Corps’.Part of collection of photographs of a rare event on the Australian military calendar, the opening of Hopkins Barracks Puckapunyal by HRH Prince Charles, Colonel-in-Chief of the Royal Australian Armoured Corps (RAAC) on 31 October 1985.Colour photograph of rear section of the mounted escort drawn from Light Horse Heritage Troop 8/13 Victorian Mounted Rifles at puckapunyal. -
 Stawell Historical Society Inc
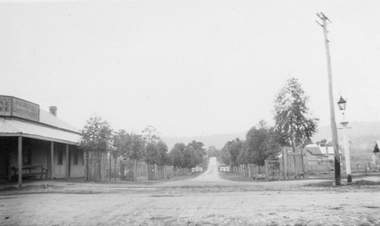
Photograph, Landsborough Scene -- McKenzie Street 1924
B/W photo of Landsborough McKenzie Street scene taken 1924. Tree lined street wooden building with verandah on left Telegraph pole and light on right.Black and White Photograph Postcard of a tree lined street - wooden building with veranda on the left - on the right telegraph pole. also a light pole. Two (2) Photographs, One Postcard and one enlargementon Rear: Post Card Correspondence Address Only In Grey Print Kodak Australia forming a square, Kodak top and Bottom, Australia Left and Right. In blue ink hand written "Landsborough looking up towards the school 1924 with 1924 Underlined. Bottom right " Coffee Palace"commercial -
 Surrey Hills Historical Society Collection
Photograph, 5 York Street, Mont Albert, May 1985 (1), 1985
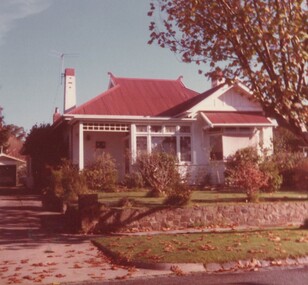
This is the home of Ernest Augustus Young (1891-1985) and Ruby Nichell Whitby (1892-1984) and their son Ernest Lance Young. Lance was born 24 March 1915 in Surrey Hills; after he married Beryl Mair. Electoral roll for 1937 gives the house name as 'Whitby Lodge'. Ernest and Ruby also had twins Clive and James who died in infancy. Buried at Box Hill Cemetery - M-*-0867 (family plot) This is part of a large collection relating to the Mair, Deakin and Young families. REF: Memoir of Laurie Newton (nee Young) - Her grandfather bought the land and had the house built. She remembers it as having pressed ceilings in some rooms and ornate fireplaces and tiles and leadlight windows in some rooms and doors with leadlight panels. Her grandfather was a keen gardener with an ornamental front garden and many vegetables and fruit trees in the back yard. Her grandfather sold the adjoining block (No 3 York Street), which had been used for growing flowers and vegetables, to John and Edna Jean. Reid. She also remembered that he extended the house and divided it into 2 flats, renting out the northern side for 20 years. Sold by Jellis Craig on 24 December 2010 - With formal living, dining, 3 bedrooms, 2 bathrooms, garage/ample OSP. Land: 18.2m x 40.8m (60' x 134') approx. Large 2 storey house replaced the house.Colour photo of the street view of 5 York Street, Mont Albert. The house is Edwardian in style, constructed from weatherboard painted white with a red corrugated iron roof with simple finials. There is a small veranda with simple fretwork, lead-light feature windows to one, possibly two front rooms, one of which has a bay window. There is a garage set back at the side of the house with a concrete driveway on the south side of the house towards Mont Albert Road. The fence is low and constructed from roughly faced stone. The garden contains mature shrubs.In blue biro on rear: "1985 / POP'S" ; "5 YORK ST / E.A. YOUNG". Red photographic processing stamp "PROCESSED BY / KODAK / MAY 85M"ernest augustus young, ruby nichell whitby, ruby nichell young, ernest lance young, box hill cemetery, whitby lodge, house names, mont albert -
 Surrey Hills Historical Society Collection
Photograph, 5 York Street, Mont Albert, November 1999 (2), 1999
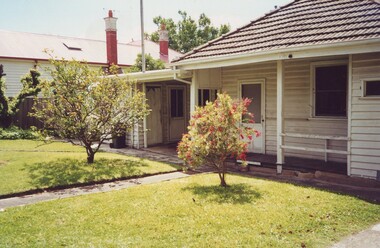
This is the home of Ernest Augustus Young (1891-1985) and Ruby Nichell Whitby (1892-1984) and their son Ernest Lance Young. Lance was born 24 March 1915 in Surrey Hills; after he married Beryl Mair. Electoral roll for 1937 gives the house name as 'Whitby Lodge'. Ernest and Ruby also had twins Clive and James who died in infancy. Buried at Box Hill Cemetery - M-*-0867 (family plot) This is part of a large collection relating to the Mair, Deakin and Young families. REF: Memoir of Laurie Newton (nee Young) - Her grandfather bought the land and had the house built. She remembers it as having pressed ceilings in some rooms and ornate fireplaces and tiles and leadlight windows in some rooms and doors with leadlight panels. Her grandfather was a keen gardener with an ornamental front garden and many vegetables and fruit trees in the back yard. Her grandfather sold the adjoining block (No 3 York Street), which had been used for growing flowers and vegetables, to John and Edna Jean. Reid. She also remembered that he extended the house and divided it into 2 flats, renting out the northern side for 20 years. Sold by Jellis Craig on 24 December 2010 - With formal living, dining, 3 bedrooms, 2 bathrooms, garage/ample OSP. Land: 18.2m x 40.8m (60' x 134') approx. Large 2 storey house replaced the house. Adjacent house (No 7 York Street) has been renovated. This is part of a large collection relating to the Mair, Deakin and Young families. Colour photo of the street view of 5 York Street, Mont Albert. Taken from the rear of the house verge, it is a good view of the front of the house. The house is weatherboard with a red corrugated iron roof with simple finials. It is Edwardian in style with simple chimneys in brick and stucco. There is a small veranda with simple fretwork on the southern corner of the house and a bay window to one of the front rooms. There are striped canvas blinds, which are down, on the windows of the 2 front rooms, above which are small lead light windows. The house is partly screened by a mature shrubs. The garden is set behind a fence low fence and constructed from dressed stone. In black permanent marker on rear: "5 YORK ST / NOV. 1999" ernest augustus young, ruby nichell whitby, ruby nichell young, ernest lance young, box hill cemetery, whitby lodge, house names, mont albert -
 Surrey Hills Historical Society Collection
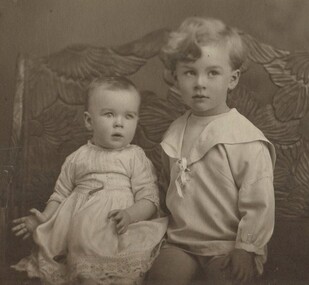
Photograph, Beryl and Geoffrey Mair, 1916, 1916
David Miller (Dave) Mair (1879-1938) married Lily Vipond Deakin (1890-1945) in 1910. They had 5 children: Geoffrey David (1913-1970), Beryl (1916-1976), Gwynneth (1917-1997), Isabel Lillian (1921-1997) and Shirley Inez (1928-1968). His parents were Isabella Brown (1856-1944) and William Mair (1850-1924). Personal communication from Laurie Newton, Beryl's daughter: Dave and Beryl initially lived in East Melbourne after they married. Geoffrey, Beryl and Gwynneth were born in East Melbourne. They subsequently moved to Louise Avenue, Mont Albert and Isabel may have been born while they were there. Later they purchased 20 Barton Street, Mont Albert. Shirley was born after they moved to Barton Street. The children attended Mont Albert Central School. Dave was an extremely keen sportsman (particularly bowls and cricket). He started the Kangaroo Cricket Club and worked for the Melbourne Cricket Club.This is part of a large donation related to the Deakin, Mair and Young families with connections to the Surrey Hills / Mont Albert area.A sepia coloured post card photo of (?) a studio portrait with a cream border of 2 children sitting on a couch. The infant is in a light-coloured dress with a lacy border along the hemline and lace embellishments to the sleeves and bodice. The top of the boy's shirt has a 'sailor' collar.REAR: In black ink - "Beryl taken at 8 months / Geoff " " (taken at) 3 years. / 10 Nov. 1916" Handwriting is thought to that of Lily Vipond Mair (nee Deakin). beryl mair, geoffrey david mair, children