Showing 6352 items
matching no. 17
-
 Flagstaff Hill Maritime Museum and Village
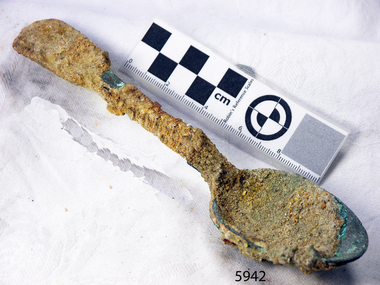
Spoon, circa 1878
These medium-sized dessert spoons are from the wreck of the LOCH ARD, a Loch Line ship of 1,693 tons which sailed from Gravesend, London, on 2 March 1878 with 17 passengers and a crew of 36 under Captain George Gibbs. “The intention was to discharge cargo in Melbourne, before returning to London via the Horn with wool and wheat”. Instead, on 1 June 1878, after 90 days at sea, she struck the sandstone cliffs of Mutton Bird Island on the south west coast of Victoria, and sank with the loss of 52 lives and all her cargo. The manifest of the LOCH ARD listed an array of manufactured goods and bulk metals being exported to the Colony of Victoria, with a declared value of £53,700. (202 bills of lading show an actual invoice value of £68, 456, with insurance underwriting to £30,000 of all cargo). Included in the manifest is the item of “Tin hardware & cutlery £7,530”. These dessert spoons are some of 482 similar items of electro-plated cutlery from the LOCH ARD site, comprising spoons and forks of various sizes but all sharing the same general shape or design and metallic composition. 49 of these pieces display a legible makers’ mark — the initials “W” and “P” placed within a raised diamond outline, which is in turn contained within a sunken crown shape — identifying the manufacturer as William Page & Co of Birmingham. An electroplater’s makers’ marks, unlike sterling silver hallmarks, are not consistent identifiers of quality or date and place of manufacture. A similar line of five impressions was usually made to impress the consumer with an implication of industry standards, but what each one actually signified was not regulated and so they varied according to the whim of the individual foundry. In this case, the maker’s marks are often obscured by sedimentary accretion or removed by corrosion after a century of submersion in the ocean. However sufficient detail has survived to indicate that these samples of electro-plated cutlery probably originated from the same consignment in the LOCH ARD’s cargo. The generally common range of marks are drawn from 255 tea spoons, 125 dessert spoons, and 99 table forks. These marks are clearly visible in 66 instances, while the same sequence of general outlines, or depression shapes, is discernible in another 166 examples. Suggested trade names for William Page & Co’s particular blend of brass plating are ‘roman silver’ or ‘silverite’. This copper alloy polishes to a lustrous gold when new, discolouring to a murky grey with greenish hue when neglected. HISTORY OF THE LOCH ARD The LOCH ARD belonged to the famous Loch Line which sailed many ships from England to Australia. Built in Glasgow by Barclay, Curdle and Co. in 1873, the LOCH ARD was a three-masted square rigged iron sailing ship. The ship measured 262ft 7" (79.87m) in length, 38ft (11.58m) in width, 23ft (7m) in depth and had a gross tonnage of 1693 tons. The LOCH ARD's main mast measured a massive 150ft (45.7m) in height. LOCH ARD made three trips to Australia and one trip to Calcutta before its final voyage. LOCH ARD left England on March 2, 1878, under the command of Captain Gibbs, a newly married, 29 year old. She was bound for Melbourne with a crew of 37, plus 17 passengers and a load of cargo. The general cargo reflected the affluence of Melbourne at the time. On board were straw hats, umbrella, perfumes, clay pipes, pianos, clocks, confectionary, linen and candles, as well as a heavier load of railway irons, cement, lead and copper. There were items included that intended for display in the Melbourne International Exhibition in 1880. The voyage to Port Phillip was long but uneventful. At 3am on June 1, 1878, Captain Gibbs was expecting to see land and the passengers were becoming excited as they prepared to view their new homeland in the early morning. But LOCH ARD was running into a fog which greatly reduced visibility. Captain Gibbs was becoming anxious as there was no sign of land or the Cape Otway lighthouse. At 4am the fog lifted. A man aloft announced that he could see breakers. The sheer cliffs of Victoria's west coast came into view, and Captain Gibbs realised that the ship was much closer to them than expected. He ordered as much sail to be set as time would permit and then attempted to steer the vessel out to sea. On coming head on into the wind, the ship lost momentum, the sails fell limp and LOCH ARD's bow swung back. Gibbs then ordered the anchors to be released in an attempt to hold its position. The anchors sank some 50 fathoms - but did not hold. By this time LOCH ARD was among the breakers and the tall cliffs of Mutton Bird Island rose behind the ship. Just half a mile from the coast, the ship's bow was suddenly pulled around by the anchor. The captain tried to tack out to sea, but the ship struck a reef at the base of Mutton Bird Island, near Port Campbell. Waves broke over the ship and the top deck was loosened from the hull. The masts and rigging came crashing down knocking passengers and crew overboard. When a lifeboat was finally launched, it crashed into the side of LOCH ARD and capsized. Tom Pearce, who had launched the boat, managed to cling to its overturned hull and shelter beneath it. He drifted out to sea and then on the flood tide came into what is now known as LOCH ARD Gorge. He swam to shore, bruised and dazed, and found a cave in which to shelter. Some of the crew stayed below deck to shelter from the falling rigging but drowned when the ship slipped off the reef into deeper water. Eva Carmichael had raced onto deck to find out what was happening only to be confronted by towering cliffs looming above the stricken ship. In all the chaos, Captain Gibbs grabbed Eva and said, "If you are saved Eva, let my dear wife know that I died like a sailor". That was the last Eva Carmichael saw of the captain. She was swept off the ship by a huge wave. Eva saw Tom Pearce on a small rocky beach and yelled to attract his attention. He dived in and swam to the exhausted woman and dragged her to shore. He took her to the cave and broke open case of brandy which had washed up on the beach. He opened a bottle to revive the unconscious woman. A few hours later Tom scaled a cliff in search of help. He followed hoof prints and came by chance upon two men from nearby Glenample Station three and a half miles away. In a state of exhaustion, he told the men of the tragedy. Tom returned to the gorge while the two men rode back to the station to get help. By the time they reached LOCH ARD Gorge, it was cold and dark. The two shipwreck survivors were taken to Glenample Station to recover. Eva stayed at the station for six weeks before returning to Ireland, this time by steamship. In Melbourne, Tom Pearce received a hero's welcome. He was presented with the first gold medal of the Royal Humane Society of Victoria and a £1000 cheque from the Victorian Government. Concerts were performed to honour the young man's bravery and to raise money for those who lost family in the LOCH ARD disaster. Of the 54 crew members and passengers on board, only two survived: the apprentice, Tom Pearce and the young woman passenger, Eva Carmichael, who lost all of her family in the tragedy. Ten days after the LOCH ARD tragedy, salvage rights to the wreck were sold at auction for £2,120. Cargo valued at £3,000 was salvaged and placed on the beach, but most washed back into the sea when another storm developed. The wreck of LOCH ARD still lies at the base of Mutton Bird Island. Much of the cargo has now been salvaged and some was washed up into what is now known as LOCH ARD Gorge. Cargo and artefacts have also been illegally salvaged over many years before protective legislation was introduced. One of the most unlikely pieces of cargo to have survived the shipwreck was a Minton porcelain peacock - one of only seven in the world. The peacock was destined for the Melbourne International Exhibition in 1880. It had been well packed, which gave it adequate protection during the violent storm. Today, the Minton peacock can be seen at the Flagstaff Hill Maritime Museum in Warrnambool. From Australia's most dramatic shipwreck it has now become Australia's shipwreck artefact and is one of very few 'objects' on the Victorian State Heritage Register most valuable. The LOCH ARD shipwreck is of State significance – Victorian Heritage Register S 417. Flagstaff Hill’s collection of artefacts from LOCH ARD is significant for being one of the largest collections of artefacts from this shipwreck in Victoria. It is significant for its association with the shipwreck, which is on the Victorian Heritage Register (VHR S417). The collection is significant because of the relationship between the objects, as together they have a high potential to interpret the story of the LOCH ARD. The LOCH ARD collection is archaeologically significant as the remains of a large international passenger and cargo ship. The LOCH ARD collection is historically significant for representing aspects of Victoria’s shipping history and its potential to interpret sub-theme 1.5 of Victoria’s Framework of Historical Themes (living with natural processes). The collection is also historically significant for its association with the LOCH ARD, which was one of the worst and best known shipwrecks in Victoria’s history. Unrestored dessert spoons from the wreck of the LOCH ARD. The spoon design has a flattened fiddle-back handle, with a thin stem or shank, flared collar, and a shallow rounded bowl. The spoons metallic composition is a thin layer of brass alloy which has partially corroded back to a nickel-silver base metal. Some verdigris and heavy concretion on spoon bowl and handle. 2 spoons in group.flagstaff hill, warrnambool, shipwrecked coast, flagstaff hill maritime museum, maritime museum, shipwreck coast, flagstaff hill maritime village, great ocean road, loch line, loch ard, captain gibbs, eva carmichael, tom pearce, glenample station, mutton bird island, loch ard gorge, electroplated cutlery, loch ard shipwreck, william page and co, birmingham brass plating, dessert spoons -
 Flagstaff Hill Maritime Museum and Village
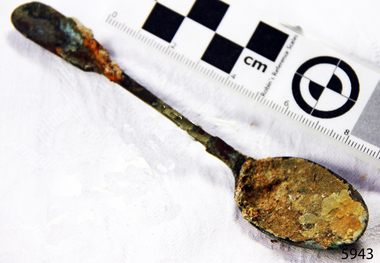
Spoon, circa 1878
This sugar spoon is from the wreck of the LOCH ARD, a Loch Line ship of 1,693 tons which sailed from Gravesend, London, on 2 March 1878 with 17 passengers and a crew of 36 under Captain George Gibbs. “The intention was to discharge cargo in Melbourne, before returning to London via the Horn with wool and wheat”. Instead, on 1 June 1878, after 90 days at sea, she struck the sandstone cliffs of Mutton Bird Island on the south west coast of Victoria, and sank with the loss of 52 lives and all her cargo. The manifest of the LOCH ARD listed an array of manufactured goods and bulk metals being exported to the Colony of Victoria, with a declared value of £53,700. (202 bills of lading show an actual invoice value of £68, 456, with insurance underwriting to £30,000 of all cargo). Included in the manifest is the item of “Tin hardware & cutlery £7,530”. This sugarspoon is one of 482 similar items of electro-plated cutlery from the LOCH ARD site, comprising spoons and forks of various sizes but all sharing the same general shape or design and metallic composition. 49 of these pieces display a legible makers’ mark — the initials “W” and “P” placed within a raised diamond outline, which is in turn contained within a sunken crown shape — identifying the manufacturer as William Page & Co of Birmingham. An electroplater’s makers’ marks, unlike sterling silver hallmarks, are not consistent identifiers of quality or date and place of manufacture. A similar line of five impressions was usually made to impress the consumer with an implication of industry standards, but what each one actually signified was not regulated and so they varied according to the whim of the individual foundry. In this case, the maker’s marks are often obscured by sedimentary accretion or removed by corrosion after a century of submersion in the ocean. However sufficient detail has survived to indicate that these samples of electro-plated cutlery probably originated from the same consignment in the LOCH ARD’s cargo. The generally common range of marks are drawn from 255 tea spoons, 125 dessert spoons, and 99 table forks. These marks are clearly visible in 66 instances, while the same sequence of general outlines, or depression shapes, is discernible in another 166 examples. Suggested trade names for William Page & Co’s particular blend of brass plating are ‘roman silver’ or ‘silverite’. This copper alloy polishes to a lustrous gold when new, discolouring to a murky grey with greenish hue when neglected. HISTORY OF THE LOCH ARD The LOCH ARD belonged to the famous Loch Line which sailed many ships from England to Australia. Built in Glasgow by Barclay, Curdle and Co. in 1873, the LOCH ARD was a three-masted square rigged iron sailing ship. The ship measured 262ft 7" (79.87m) in length, 38ft (11.58m) in width, 23ft (7m) in depth and had a gross tonnage of 1693 tons. The LOCH ARD's main mast measured a massive 150ft (45.7m) in height. LOCH ARD made three trips to Australia and one trip to Calcutta before its final voyage. LOCH ARD left England on March 2, 1878, under the command of Captain Gibbs, a newly married, 29 year old. She was bound for Melbourne with a crew of 37, plus 17 passengers and a load of cargo. The general cargo reflected the affluence of Melbourne at the time. On board were straw hats, umbrella, perfumes, clay pipes, pianos, clocks, confectionary, linen and candles, as well as a heavier load of railway irons, cement, lead and copper. There were items included that intended for display in the Melbourne International Exhibition in 1880. The voyage to Port Phillip was long but uneventful. At 3am on June 1, 1878, Captain Gibbs was expecting to see land and the passengers were becoming excited as they prepared to view their new homeland in the early morning. But LOCH ARD was running into a fog which greatly reduced visibility. Captain Gibbs was becoming anxious as there was no sign of land or the Cape Otway lighthouse. At 4am the fog lifted. A man aloft announced that he could see breakers. The sheer cliffs of Victoria's west coast came into view, and Captain Gibbs realised that the ship was much closer to them than expected. He ordered as much sail to be set as time would permit and then attempted to steer the vessel out to sea. On coming head on into the wind, the ship lost momentum, the sails fell limp and LOCH ARD's bow swung back. Gibbs then ordered the anchors to be released in an attempt to hold its position. The anchors sank some 50 fathoms - but did not hold. By this time LOCH ARD was among the breakers and the tall cliffs of Mutton Bird Island rose behind the ship. Just half a mile from the coast, the ship's bow was suddenly pulled around by the anchor. The captain tried to tack out to sea, but the ship struck a reef at the base of Mutton Bird Island, near Port Campbell. Waves broke over the ship and the top deck was loosened from the hull. The masts and rigging came crashing down knocking passengers and crew overboard. When a lifeboat was finally launched, it crashed into the side of LOCH ARD and capsized. Tom Pearce, who had launched the boat, managed to cling to its overturned hull and shelter beneath it. He drifted out to sea and then on the flood tide came into what is now known as LOCH ARD Gorge. He swam to shore, bruised and dazed, and found a cave in which to shelter. Some of the crew stayed below deck to shelter from the falling rigging but drowned when the ship slipped off the reef into deeper water. Eva Carmichael had raced onto deck to find out what was happening only to be confronted by towering cliffs looming above the stricken ship. In all the chaos, Captain Gibbs grabbed Eva and said, "If you are saved Eva, let my dear wife know that I died like a sailor". That was the last Eva Carmichael saw of the captain. She was swept off the ship by a huge wave. Eva saw Tom Pearce on a small rocky beach and yelled to attract his attention. He dived in and swam to the exhausted woman and dragged her to shore. He took her to the cave and broke open case of brandy which had washed up on the beach. He opened a bottle to revive the unconscious woman. A few hours later Tom scaled a cliff in search of help. He followed hoof prints and came by chance upon two men from nearby Glenample Station three and a half miles away. In a state of exhaustion, he told the men of the tragedy. Tom returned to the gorge while the two men rode back to the station to get help. By the time they reached LOCH ARD Gorge, it was cold and dark. The two shipwreck survivors were taken to Glenample Station to recover. Eva stayed at the station for six weeks before returning to Ireland, this time by steamship. In Melbourne, Tom Pearce received a hero's welcome. He was presented with the first gold medal of the Royal Humane Society of Victoria and a £1000 cheque from the Victorian Government. Concerts were performed to honour the young man's bravery and to raise money for those who lost family in the LOCH ARD disaster. Of the 54 crew members and passengers on board, only two survived: the apprentice, Tom Pearce and the young woman passenger, Eva Carmichael, who lost all of her family in the tragedy. Ten days after the LOCH ARD tragedy, salvage rights to the wreck were sold at auction for £2,120. Cargo valued at £3,000 was salvaged and placed on the beach, but most washed back into the sea when another storm developed. The wreck of LOCH ARD still lies at the base of Mutton Bird Island. Much of the cargo has now been salvaged and some was washed up into what is now known as LOCH ARD Gorge. Cargo and artefacts have also been illegally salvaged over many years before protective legislation was introduced. One of the most unlikely pieces of cargo to have survived the shipwreck was a Minton porcelain peacock - one of only seven in the world. The peacock was destined for the Melbourne International Exhibition in 1880. It had been well packed, which gave it adequate protection during the violent storm. Today, the Minton peacock can be seen at the Flagstaff Hill Maritime Museum in Warrnambool. From Australia's most dramatic shipwreck it has now become Australia's shipwreck artefact and is one of very few 'objects' on the Victorian State Heritage Register most valuable. The LOCH ARD shipwreck is of State significance – Victorian Heritage Register S 417. Flagstaff Hill’s collection of artefacts from LOCH ARD is significant for being one of the largest collections of artefacts from this shipwreck in Victoria. It is significant for its association with the shipwreck, which is on the Victorian Heritage Register (VHR S417). The collection is significant because of the relationship between the objects, as together they have a high potential to interpret the story of the LOCH ARD. The LOCH ARD collection is archaeologically significant as the remains of a large international passenger and cargo ship. The LOCH ARD collection is historically significant for representing aspects of Victoria’s shipping history and its potential to interpret sub-theme 1.5 of Victoria’s Framework of Historical Themes (living with natural processes). The collection is also historically significant for its association with the LOCH ARD, which was one of the worst and best known shipwrecks in Victoria’s history. Unrestored sugar spoon from the wreck of the LOCH ARD. The spoon design has a flattened fiddle-back handle, with a thin stem or shank, flared collar, and a shallow rounded bowl. The spoons metallic composition is a thin layer of brass alloy which has partially corroded back to a nickel-silver base metal. 40% concretion on spoon bowl and handle. Spoon is bent and only a small amount of the original plate remains. No visible makers marks.flagstaff hill, warrnambool, shipwrecked coast, flagstaff hill maritime museum, maritime museum, shipwreck coast, flagstaff hill maritime village, great ocean road, loch line, loch ard, captain gibbs, eva carmichael, tom pearce, glenample station, mutton bird island, loch ard gorge, electroplated cutlery, loch ard shipwreck, nickel silver, william page and co, birmingham brass plating, makers marks -
 Flagstaff Hill Maritime Museum and Village
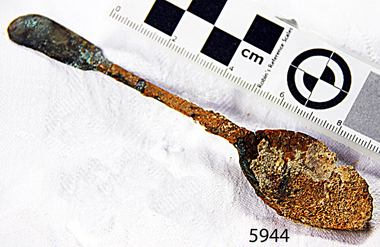
Spoon, circa 1878
This sugar spoon is from the wreck of the LOCH ARD, a Loch Line ship of 1,693 tons which sailed from Gravesend, London, on 2 March 1878 with 17 passengers and a crew of 36 under Captain George Gibbs. “The intention was to discharge cargo in Melbourne, before returning to London via the Horn with wool and wheat”. Instead, on 1 June 1878, after 90 days at sea, she struck the sandstone cliffs of Mutton Bird Island on the south west coast of Victoria, and sank with the loss of 52 lives and all her cargo. The manifest of the LOCH ARD listed an array of manufactured goods and bulk metals being exported to the Colony of Victoria, with a declared value of £53,700. (202 bills of lading show an actual invoice value of £68, 456, with insurance underwriting to £30,000 of all cargo). Included in the manifest is the item of “Tin hardware & cutlery £7,530”. This sugarspoon is one of 482 similar items of electro-plated cutlery from the LOCH ARD site, comprising spoons and forks of various sizes but all sharing the same general shape or design and metallic composition. 49 of these pieces display a legible makers’ mark — the initials “W” and “P” placed within a raised diamond outline, which is in turn contained within a sunken crown shape — identifying the manufacturer as William Page & Co of Birmingham. An electroplater’s makers’ marks, unlike sterling silver hallmarks, are not consistent identifiers of quality or date and place of manufacture. A similar line of five impressions was usually made to impress the consumer with an implication of industry standards, but what each one actually signified was not regulated and so they varied according to the whim of the individual foundry. In this case, the maker’s marks are often obscured by sedimentary accretion or removed by corrosion after a century of submersion in the ocean. However sufficient detail has survived to indicate that these samples of electro-plated cutlery probably originated from the same consignment in the LOCH ARD’s cargo. The generally common range of marks are drawn from 255 tea spoons, 125 dessert spoons, and 99 table forks. These marks are clearly visible in 66 instances, while the same sequence of general outlines, or depression shapes, is discernible in another 166 examples. Suggested trade names for William Page & Co’s particular blend of brass plating are ‘roman silver’ or ‘silverite’. This copper alloy polishes to a lustrous gold when new, discolouring to a murky grey with greenish hue when neglected. HISTORY OF THE LOCH ARD The LOCH ARD belonged to the famous Loch Line which sailed many ships from England to Australia. Built in Glasgow by Barclay, Curdle and Co. in 1873, the LOCH ARD was a three-masted square rigged iron sailing ship. The ship measured 262ft 7" (79.87m) in length, 38ft (11.58m) in width, 23ft (7m) in depth and had a gross tonnage of 1693 tons. The LOCH ARD's main mast measured a massive 150ft (45.7m) in height. LOCH ARD made three trips to Australia and one trip to Calcutta before its final voyage. LOCH ARD left England on March 2, 1878, under the command of Captain Gibbs, a newly married, 29 year old. She was bound for Melbourne with a crew of 37, plus 17 passengers and a load of cargo. The general cargo reflected the affluence of Melbourne at the time. On board were straw hats, umbrella, perfumes, clay pipes, pianos, clocks, confectionary, linen and candles, as well as a heavier load of railway irons, cement, lead and copper. There were items included that intended for display in the Melbourne International Exhibition in 1880. The voyage to Port Phillip was long but uneventful. At 3am on June 1, 1878, Captain Gibbs was expecting to see land and the passengers were becoming excited as they prepared to view their new homeland in the early morning. But LOCH ARD was running into a fog which greatly reduced visibility. Captain Gibbs was becoming anxious as there was no sign of land or the Cape Otway lighthouse. At 4am the fog lifted. A man aloft announced that he could see breakers. The sheer cliffs of Victoria's west coast came into view, and Captain Gibbs realised that the ship was much closer to them than expected. He ordered as much sail to be set as time would permit and then attempted to steer the vessel out to sea. On coming head on into the wind, the ship lost momentum, the sails fell limp and LOCH ARD's bow swung back. Gibbs then ordered the anchors to be released in an attempt to hold its position. The anchors sank some 50 fathoms - but did not hold. By this time LOCH ARD was among the breakers and the tall cliffs of Mutton Bird Island rose behind the ship. Just half a mile from the coast, the ship's bow was suddenly pulled around by the anchor. The captain tried to tack out to sea, but the ship struck a reef at the base of Mutton Bird Island, near Port Campbell. Waves broke over the ship and the top deck was loosened from the hull. The masts and rigging came crashing down knocking passengers and crew overboard. When a lifeboat was finally launched, it crashed into the side of LOCH ARD and capsized. Tom Pearce, who had launched the boat, managed to cling to its overturned hull and shelter beneath it. He drifted out to sea and then on the flood tide came into what is now known as LOCH ARD Gorge. He swam to shore, bruised and dazed, and found a cave in which to shelter. Some of the crew stayed below deck to shelter from the falling rigging but drowned when the ship slipped off the reef into deeper water. Eva Carmichael had raced onto deck to find out what was happening only to be confronted by towering cliffs looming above the stricken ship. In all the chaos, Captain Gibbs grabbed Eva and said, "If you are saved Eva, let my dear wife know that I died like a sailor". That was the last Eva Carmichael saw of the captain. She was swept off the ship by a huge wave. Eva saw Tom Pearce on a small rocky beach and yelled to attract his attention. He dived in and swam to the exhausted woman and dragged her to shore. He took her to the cave and broke open case of brandy which had washed up on the beach. He opened a bottle to revive the unconscious woman. A few hours later Tom scaled a cliff in search of help. He followed hoof prints and came by chance upon two men from nearby Glenample Station three and a half miles away. In a state of exhaustion, he told the men of the tragedy. Tom returned to the gorge while the two men rode back to the station to get help. By the time they reached LOCH ARD Gorge, it was cold and dark. The two shipwreck survivors were taken to Glenample Station to recover. Eva stayed at the station for six weeks before returning to Ireland, this time by steamship. In Melbourne, Tom Pearce received a hero's welcome. He was presented with the first gold medal of the Royal Humane Society of Victoria and a £1000 cheque from the Victorian Government. Concerts were performed to honour the young man's bravery and to raise money for those who lost family in the LOCH ARD disaster. Of the 54 crew members and passengers on board, only two survived: the apprentice, Tom Pearce and the young woman passenger, Eva Carmichael, who lost all of her family in the tragedy. Ten days after the LOCH ARD tragedy, salvage rights to the wreck were sold at auction for £2,120. Cargo valued at £3,000 was salvaged and placed on the beach, but most washed back into the sea when another storm developed. The wreck of LOCH ARD still lies at the base of Mutton Bird Island. Much of the cargo has now been salvaged and some was washed up into what is now known as LOCH ARD Gorge. Cargo and artefacts have also been illegally salvaged over many years before protective legislation was introduced. One of the most unlikely pieces of cargo to have survived the shipwreck was a Minton porcelain peacock - one of only seven in the world. The peacock was destined for the Melbourne International Exhibition in 1880. It had been well packed, which gave it adequate protection during the violent storm. Today, the Minton peacock can be seen at the Flagstaff Hill Maritime Museum in Warrnambool. From Australia's most dramatic shipwreck it has now become Australia's shipwreck artefact and is one of very few 'objects' on the Victorian State Heritage Register most valuable. The LOCH ARD shipwreck is of State significance – Victorian Heritage Register S 417. Flagstaff Hill’s collection of artefacts from LOCH ARD is significant for being one of the largest collections of artefacts from this shipwreck in Victoria. It is significant for its association with the shipwreck, which is on the Victorian Heritage Register (VHR S417). The collection is significant because of the relationship between the objects, as together they have a high potential to interpret the story of the LOCH ARD. The LOCH ARD collection is archaeologically significant as the remains of a large international passenger and cargo ship. The LOCH ARD collection is historically significant for representing aspects of Victoria’s shipping history and its potential to interpret sub-theme 1.5 of Victoria’s Framework of Historical Themes (living with natural processes). The collection is also historically significant for its association with the LOCH ARD, which was one of the worst and best known shipwrecks in Victoria’s history. Unrestored sugar spoon from the wreck of the LOCH ARD. The spoon design has a flattened fiddle-back handle, with a thin stem or shank, flared collar, and a shallow rounded bowl. The spoons metallic composition is a thin layer of brass alloy which has partially corroded back to a nickel-silver base metal. 80% of surface are is covered by sediment. Bowl is split and broken. Some verdigris on exposed portion of base metal. No makers marks are visible. flagstaff hill, warrnambool, shipwrecked coast, flagstaff hill maritime museum, maritime museum, shipwreck coast, flagstaff hill maritime village, great ocean road, loch line, loch ard, captain gibbs, eva carmichael, tom pearce, glenample station, mutton bird island, loch ard gorge, electroplated cutlery, loch ard shipwreck, nickel silver, william page and co, birmingham brass plating, makers marks -
 Flagstaff Hill Maritime Museum and Village
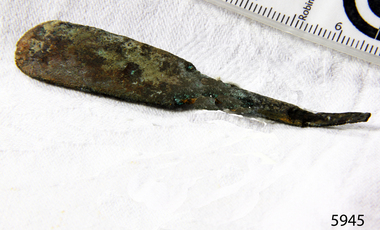
Spoon Handle
This upper portion of a brass plated spoon is from the wreck of the LOCH ARD, a Loch Line ship of 1,693 tons which sailed from Gravesend, London, on 2 March 1878 with 17 passengers and a crew of 36 under Captain George Gibbs. “The intention was to discharge cargo in Melbourne, before returning to London via the Horn with wool and wheat”. Instead, on 1 June 1878, after 90 days at sea, she struck the sandstone cliffs of Mutton Bird Island on the south west coast of Victoria, and sank with the loss of 52 lives and all her cargo. The manifest of the LOCH ARD listed an array of manufactured goods and bulk metals being exported to the Colony of Victoria, with a declared value of £53,700. (202 bills of lading show an actual invoice value of £68, 456, with insurance underwriting to £30,000 of all cargo). Included in the manifest is the item of “Tin hardware & cutlery £7,530”. This spoon handle is one of 482 similar items of electro-plated cutlery from the LOCH ARD site, comprising spoons and forks of various sizes but all sharing the same general shape or design and metallic composition. 49 of these pieces display a legible makers’ mark — the initials “W” and “P” placed within a raised diamond outline, which is in turn contained within a sunken crown shape — identifying the manufacturer as William Page & Co of Birmingham. An electroplater’s makers’ marks, unlike sterling silver hallmarks, are not consistent identifiers of quality or date and place of manufacture. A similar line of five impressions was usually made to impress the consumer with an implication of industry standards, but what each one actually signified was not regulated and so they varied according to the whim of the individual foundry. In this case, the maker’s marks are often obscured by sedimentary accretion or removed by corrosion after a century of submersion in the ocean. However sufficient detail has survived to indicate that these samples of electro-plated cutlery probably originated from the same consignment in the LOCH ARD’s cargo. The generally common range of marks are drawn from 255 tea spoons, 125 dessert spoons, and 99 table forks. These marks are clearly visible in 66 instances, while the same sequence of general outlines, or depression shapes, is discernible in another 166 examples. Suggested trade names for William Page & Co’s particular blend of brass plating are ‘roman silver’ or ‘silverite’. This copper alloy polishes to a lustrous gold when new, discolouring to a murky grey with greenish hue when neglected. HISTORY OF THE LOCH ARD The LOCH ARD belonged to the famous Loch Line which sailed many ships from England to Australia. Built in Glasgow by Barclay, Curdle and Co. in 1873, the LOCH ARD was a three-masted square rigged iron sailing ship. The ship measured 262ft 7" (79.87m) in length, 38ft (11.58m) in width, 23ft (7m) in depth and had a gross tonnage of 1693 tons. The LOCH ARD's main mast measured a massive 150ft (45.7m) in height. LOCH ARD made three trips to Australia and one trip to Calcutta before its final voyage. LOCH ARD left England on March 2, 1878, under the command of Captain Gibbs, a newly married, 29 year old. She was bound for Melbourne with a crew of 37, plus 17 passengers and a load of cargo. The general cargo reflected the affluence of Melbourne at the time. On board were straw hats, umbrella, perfumes, clay pipes, pianos, clocks, confectionary, linen and candles, as well as a heavier load of railway irons, cement, lead and copper. There were items included that intended for display in the Melbourne International Exhibition in 1880. The voyage to Port Phillip was long but uneventful. At 3am on June 1, 1878, Captain Gibbs was expecting to see land and the passengers were becoming excited as they prepared to view their new homeland in the early morning. But LOCH ARD was running into a fog which greatly reduced visibility. Captain Gibbs was becoming anxious as there was no sign of land or the Cape Otway lighthouse. At 4am the fog lifted. A man aloft announced that he could see breakers. The sheer cliffs of Victoria's west coast came into view, and Captain Gibbs realised that the ship was much closer to them than expected. He ordered as much sail to be set as time would permit and then attempted to steer the vessel out to sea. On coming head on into the wind, the ship lost momentum, the sails fell limp and LOCH ARD's bow swung back. Gibbs then ordered the anchors to be released in an attempt to hold its position. The anchors sank some 50 fathoms - but did not hold. By this time LOCH ARD was among the breakers and the tall cliffs of Mutton Bird Island rose behind the ship. Just half a mile from the coast, the ship's bow was suddenly pulled around by the anchor. The captain tried to tack out to sea, but the ship struck a reef at the base of Mutton Bird Island, near Port Campbell. Waves broke over the ship and the top deck was loosened from the hull. The masts and rigging came crashing down knocking passengers and crew overboard. When a lifeboat was finally launched, it crashed into the side of LOCH ARD and capsized. Tom Pearce, who had launched the boat, managed to cling to its overturned hull and shelter beneath it. He drifted out to sea and then on the flood tide came into what is now known as LOCH ARD Gorge. He swam to shore, bruised and dazed, and found a cave in which to shelter. Some of the crew stayed below deck to shelter from the falling rigging but drowned when the ship slipped off the reef into deeper water. Eva Carmichael had raced onto deck to find out what was happening only to be confronted by towering cliffs looming above the stricken ship. In all the chaos, Captain Gibbs grabbed Eva and said, "If you are saved Eva, let my dear wife know that I died like a sailor". That was the last Eva Carmichael saw of the captain. She was swept off the ship by a huge wave. Eva saw Tom Pearce on a small rocky beach and yelled to attract his attention. He dived in and swam to the exhausted woman and dragged her to shore. He took her to the cave and broke open case of brandy which had washed up on the beach. He opened a bottle to revive the unconscious woman. A few hours later Tom scaled a cliff in search of help. He followed hoof prints and came by chance upon two men from nearby Glenample Station three and a half miles away. In a state of exhaustion, he told the men of the tragedy. Tom returned to the gorge while the two men rode back to the station to get help. By the time they reached LOCH ARD Gorge, it was cold and dark. The two shipwreck survivors were taken to Glenample Station to recover. Eva stayed at the station for six weeks before returning to Ireland, this time by steamship. In Melbourne, Tom Pearce received a hero's welcome. He was presented with the first gold medal of the Royal Humane Society of Victoria and a £1000 cheque from the Victorian Government. Concerts were performed to honour the young man's bravery and to raise money for those who lost family in the LOCH ARD disaster. Of the 54 crew members and passengers on board, only two survived: the apprentice, Tom Pearce and the young woman passenger, Eva Carmichael, who lost all of her family in the tragedy. Ten days after the LOCH ARD tragedy, salvage rights to the wreck were sold at auction for £2,120. Cargo valued at £3,000 was salvaged and placed on the beach, but most washed back into the sea when another storm developed. The wreck of LOCH ARD still lies at the base of Mutton Bird Island. Much of the cargo has now been salvaged and some was washed up into what is now known as LOCH ARD Gorge. Cargo and artefacts have also been illegally salvaged over many years before protective legislation was introduced. One of the most unlikely pieces of cargo to have survived the shipwreck was a Minton porcelain peacock - one of only seven in the world. The peacock was destined for the Melbourne International Exhibition in 1880. It had been well packed, which gave it adequate protection during the violent storm. Today, the Minton peacock can be seen at the Flagstaff Hill Maritime Museum in Warrnambool. From Australia's most dramatic shipwreck it has now become Australia's shipwreck artefact and is one of very few 'objects' on the Victorian State Heritage Register most valuable. The LOCH ARD shipwreck is of State significance – Victorian Heritage Register S 417. Flagstaff Hill’s collection of artefacts from LOCH ARD is significant for being one of the largest collections of artefacts from this shipwreck in Victoria. It is significant for its association with the shipwreck, which is on the Victorian Heritage Register (VHR S417). The collection is significant because of the relationship between the objects, as together they have a high potential to interpret the story of the LOCH ARD. The LOCH ARD collection is archaeologically significant as the remains of a large international passenger and cargo ship. The LOCH ARD collection is historically significant for representing aspects of Victoria’s shipping history and its potential to interpret sub-theme 1.5 of Victoria’s Framework of Historical Themes (living with natural processes). The collection is also historically significant for its association with the LOCH ARD, which was one of the worst and best known shipwrecks in Victoria’s history. Spoon handle and bent part of stem. Some encrustation and Silver Oxide. Recovered from the Loch Ard wreck.flagstaff hill, warrnambool, shipwrecked coast, flagstaff hill maritime museum, maritime museum, shipwreck coast, flagstaff hill maritime village, great ocean road, loch line, loch ard, captain gibbs, eva carmichael, tom pearce, glenample station, mutton bird island, loch ard gorge, electroplated cutlery, handle, spoon, loch ard shipwreck -
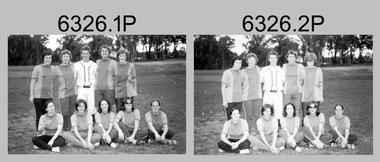 Bendigo Military Museum
Photograph - Flag Day – Softball, Army Survey Regiment Verses School of Military Survey, Bendigo, Flag Day – Softball, Army Survey Regiment Verses School of Military Survey, Bendigo, c1977
These 25 photographs of softball team and sports action were taken on Flag Day, an annual sports competition between the Army Survey Regiment (ASR) and the School of Military Survey (SMS), at Bendigo in circa 1977. This event was held at Beischer Park, Strathdale. The two RA Svy units took turns each year to host the event. The day competition usually comprised basketball, cross country, golf, sailing, squash softball, tennis, rifle shooting, touch football, tug-of-war and volleyball. The evening competition often included darts, carpet bowls, hookey, quoits and snooker. See item 6025.15P for photos of golf, sailing, rifle shooting and squash teams and sports action taken on the day. This is a set of 25 photographs of softball team and sports action was taken on Flag Day, Army Survey Regiment (ASR) versus the School of Military Survey (SMS), at Bendigo in circa 1977. The photographs were printed on photographic paper and are part of the Army Survey Regiment’s Collection. The 35mm positive photographic proofs were scanned at 600 dpi. .1) & 2) - Photo, black & white, c1977, ASR Softball Team - L to R: Tracy (Beckwith) Phillips, unidentified, Gary Ames, Zoe (Lisiewich) Ames, Verity Dixon. Front row L to R: Sue (Nilon) Marner, Chris (Modrow) Stewart, unidentified, Di Chalmers, Lorraine ‘Snoopy’ (Daly) Talbot-Smith. .3) - Photo, black & white, c1977, SMS Softball Team: unidentified participants. .4) & 5) - Photo, black & white, c1977, Softball action: unidentified participants. .6) - Photo, black & white, c1977, Softball action L to R: unidentified (x2), Zoe (Lisiewich) Ames, Chris (Modrow) Stewart, unidentified (x3), Tracy (Beckwith) Phillips. .7) - Photo, black & white, c1977, Softball action L to R: unidentified, Di Chalmers. .8) - Photo, black & white, c1977, Softball action background L to R: unidentified, Ian Belmont, CO LTCOL Bob Skitch, Chris Carter. .9) - Photo, black & white, c1977, Softball action, Chris (Modrow) Stewart. .10) to 12) - Photo, black & white, c1977, Softball action: unidentified participants. .13) - Photo, black & white, c1977, Softball action: L to R: unidentified (x3), Lorraine ‘Snoopy’ (Daly) Talbot-Smith. .14) - Photo, black & white, c1977, Softball action: unidentified participants. .15) - Photo, black & white, c1977, Softball action: L to R: unidentified (x2), Lorraine ‘Snoopy’ (Daly) Talbot-Smith. .16) - Photo, black & white, c1977, Softball action: L to R: Sue (Nilon) Marner, unidentified, Lorraine ‘Snoopy’ (Daly) Talbot-Smith, unidentified. .17) - Photo, black & white, c1977, Softball action: unidentified participants, spectators L to R: unidentified, Peter Dew, Trevor Pearson, Alan Staley, Gavin Neilson, Ian Belmont, unidentified, Chris Carter. .18) - Photo, black & white, c1977, Softball action: unidentified participants and spectators. .19) & .20) - Photo, black & white, c1977, Softball action: unidentified participants, catcher Lorraine ‘Snoopy’ (Daly) Talbot-Smith. .21) - Photo, black & white, c1977, Softball action L to R: unidentified (x2), Chris (Modrow) Stewart, Tracy (Beckwith) Phillips, Lorraine ‘Snoopy’ (Daly) Talbot-Smith. .22) - Photo, black & white, c1977, Softball action: unidentified participants. .23) - Photo, black & white, c1977, Softball action L to R: Frank Lenane, Di Chalmers, Lorraine ‘Snoopy’ (Daly) Talbot-Smith, Zoe (Lisiewich) Ames, unidentified (x2). .24) & .25) - Photo, black & white, c1977, Softball action: unidentified participants..1P to .25P –No personnel are identified.royal australian survey corps, rasvy, army survey regiment, army svy regt, school of military survey, fortuna, asr, flag day -
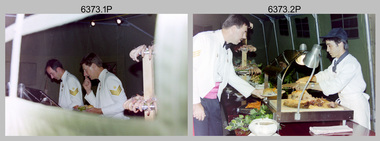 Bendigo Military Museum
Photograph - Army Survey Regiment Summer Ball - Dinner, Staff and Entertainment, 1995
This is a set of 36 photographs taken at the combined Officer, Warrant Officer and Sergeant’s Mess Summer Ball held at the Army Survey Regiment (ASR), Fortuna Villa on the 25th of February 1995. The Summer Ball was one of the last large scale formal functions held at Fortuna Villa before ASR’s closure the following year. Photos of personnel and their guests was taken on their arrival near the Pompeii Fountain in the gardens at the front of the main building. The Ball and Dinner was held at the rear of Fortuna Villa in temporary 20’ x 30’ Army tents set up on the roadway in front of the transport compound. SERCO contract staff provided the catering and the ASR’s Other Ranks performed stewarding and kitchen hand duties. Refer to item 6347 for information on the administrative file held in the collection and items 6370.23P, 6371.33P and 6372.25P for additional photographs taken at the Summer Ball.This is a set of 36 photographs taken at the Officer, Warrant Officer and Sergeant’s Summer Ball held at the Army Survey Regiment, Fortuna Villa on the 25th of February 1995. The colour photographs are on 35mm negative film and are part of the Army Survey Regiment’s Collection. The photographs were scanned at 96 dpi. .1) - Photo, colour, 1995. L to R: Rod Skidmore, Bob Thrower. .2) - Photo, colour, 1995. L to R: Jim Ash, unidentified SERCO-GM staff. .3) - Photo, colour, 1995. L to R: Helen Drummond, Stan Vote, Steve Drummond. .4) - Photo, colour, 1995. L to R: Helen Drummond, Steve Drummond, unidentified, Stan Vote, .5) - Photo, colour, 1995. Sherri and Steve Burke .6) - Photo, colour, 1995. L to R: Dale Hudson and partner. .7) - Photo, colour, 1995. L to R: Alan Dudley, Glenda Stear, Doug Carswell, unidentified, Chris Carswell, John Stear, Angela Dudley, Tony Harder (background). .8) - Photo, colour, 1995. L to R: John Phillips, Maria Harder. .9) - Photo, colour, 1995. L to R: Tracey Phillips, Peter Peterson. .10) - Photo, colour, 1995. L to R: John South, Tracey Phillips, Peter Peterson, John Bath (background), Miss Delfine. .11) - Photo, colour, 1995. Jo and Peter Peterson. .12) - Photo, colour, 1995. Colin Davidson, Jason Selman, Martin Evans (background). .13) - Photo, colour, 1995. L to R: Bill Griggs (background), Colin Cuskelly. .14) - Photo, colour, 1995. Marzipan sculpture of Australia’s Coat of Arms animals surround RA Svy Corps badge. ‘53’ denoted the number of years of RA Svy occupancy since 1942. .15) - Photo, colour, 1995. L to R: unidentified (x3), Sandra Burns, Brianna Burgin (steward in background). .16) - Photo, colour, 1995. L to R: Mrs Willis, Dave and Sue Stephenson, Corey Hill (steward in background), unidentified, Ros and Wolfgang Effenberg, Doug Willis, unidentified, Simon Lemon (background). .17) - Photo, colour, 1995. unidentified SERCO-GM staff. .18) - Photo, colour, 1995. L to R: Hayden Beer, Duncan Burns (background), Simon Lemon, unidentified SERCO staff (x2). .19) & .20) - Photo, colour, 1995. L to R: Duncan Burns, unidentified SERCO-GM staff. .21) - Photo, colour, 1995. L to R: Mrs Willis, Greg Byers. .22) - Photo, colour, 1995. L to R: Brian Sloan, unidentified. .23) - Photo, colour, 1995. Justine (Sachs) Rainey - steward. .24) - Photo, colour, 1995. Marty Stradbrook- steward. .25) - Photo, colour, 1995. Unidentified guests, Corey Hill - steward. .26) - Photo, colour, 1995. L to R: Troy Larkins, Ken Labouchardiere, Marty Stradbrook, Lance Hillier, unidentified. .27) - Photo, colour, 1995. L to R: Glen Norrell, Trevor King, Troy Larkins. .28) to .31) - Photo, colour. 1995. Unidentified string quartet musicians. .32) to .36P) - Photo, colour. 1995, Fortuna Pipes and Drums musicians..1P to .36P There are no personnel or civilians identified.royal australian survey corps, rasvy, army survey regiment, army svy regt, fortuna, asr -
 Eltham District Historical Society Inc
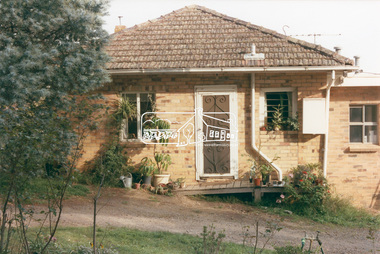
Photograph, 218 Pitt Street, Eltham, c.1985, 1985c
House was rented by Kim Tarpey between October 1983 and June 1985. It was one of the buildings originally part of Birds Orchard. Harold Bird was her landlord, a retired primary school teacher who, when she knew him was driving the mobile library bus. Her partner had him as a teacher at Montmorency Primary in grade 4. The house was next door to what is now a bushland reserve near the Pauline Toner Reserve. It was on the corner of Pitt and Arthur St - the driveway was near the roundabout and went off to the right of the driveway that now belongings to 220 Pitt street and which was bushland at the time. It was sold in 1985 and consequently demolished, a large house has replaced it. It was situated approximately where the front door of No. 218 is nowadays with the facade roughly in line with the now garage wall to the left of this front door.Digital file only - scanned from personal photo album on loan (27 images) List of images EDHS_04644-1.tif Kitchen window looking towards Eucalyptus Road, 218 Pitt Street, Eltham, c.1985 EDHS_04644-2.tif 218 Pitt Street, Eltham, c.1985 EDHS_04644-3.tif 218 Pitt Street, Eltham, c.1985 EDHS_04644-4.tif Kitchen looking towards Pitt Street Reserve, 218 Pitt Street, Eltham, c.1985 EDHS_04644-5.tif 218 Pitt Street, Eltham, c.1985 EDHS_04644-6.tif Bathroom walkway/laundry, 218 Pitt Street, Eltham, c.1985 EDHS_04644-7.tif 218 Pitt Street, Eltham, c.1985 EDHS_04644-8.tif 218 Pitt Street, Eltham, c.1985 EDHS_04644-9.tif 218 Pitt Street, Eltham, c.1985 EDHS_04644-10.tif 218 Pitt Street, Eltham, c.1985 EDHS_04644-11.tif 218 Pitt Street, Eltham, c.1985 EDHS_04644-12.tif 218 Pitt Street, Eltham, c.1985 EDHS_04644-13.tif 218 Pitt Street, Eltham, c.1985 EDHS_04644-14.tif 218 Pitt Street, Eltham, c.1985 EDHS_04644-15.tif 218 Pitt Street, Eltham, c.1985 EDHS_04644-16.tif 218 Pitt Street, Eltham, c.1985 EDHS_04644-17.tif Lounge window looking towards Mount Pleasant Road, 218 Pitt Street, Eltham, c.1985 EDHS_04644-18.tif Fire place in lounge, 218 Pitt Street, Eltham, c.1985 EDHS_04644-19.tif Fire place in lounge, 218 Pitt Street, Eltham, c.1985 EDHS_04644-20.tif View from lounge room window looking towards corner of Eucalyptus and Mount Pleasant roads, 218 Pitt Street, Eltham, c.1985 EDHS_04644-21.tif View from lounge room window looking towards corner of Eucalyptus and Mount Pleasant roads, 218 Pitt Street, Eltham, c.1985 EDHS_04644-22.tif View from lounge room looking towards Pitt Street and Wattle Grove, 218 Pitt Street, Eltham, c.1985 EDHS_04644-23.tif View from lounge room looking towards Pitt Street and Wattle Grove, 218 Pitt Street, Eltham, c.1985 EDHS_04644-24.tif 218 Pitt Street, Eltham, c.1985 EDHS_04644-25.tif Back garden showing previous tank stumps. There was a hole in the wall where a possum got through, 218 Pitt Street, Eltham, c.1985 EDHS_04644-26.tif View from back fence looking towards Pitt Street and Wattle Grove, 218 Pitt Street, Eltham, c.1985 EDHS_04644-27.tif View from back fence on to Eucalyptus Road. Pitt Street Reserve to the right, 18 Pitt Street, Eltham, c.1985218 pitt street, eltham, houses, birds orchard, harold bird, kim tarpey, eucalyptus road -
 Bendigo Historical Society Inc.
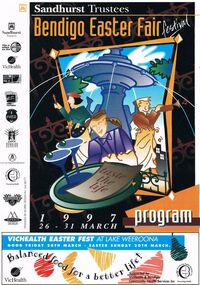
Document - BENDIGO EASTER FAIR FESTIVAL PROGRAM 1997, 26 March 1997
Bendigo Easter Fair Festival Program, 26-31 March, 1997. Festival Features, Evening of Art & Classical Music, Rotary Club of Bendigo. VicHealth Easter Fest, Victorian Health Promotion Foundation & Bendigo Community Health Services. Fine Food Fest. Free Stage. Free Evening Concert & Fireworks, Zaire. Torchlight Procession, sponsored by Prime TV & Coca Cola, Bendigo Market Place. Fireworks Spectacular, Sponsored by Bendigo Market Place & Prime TV. Street Fiesta, sponsored by Arts Victoria. Street Extravaganza, Coca Cola Carnival, Sponsored by Coca Cola. Star for a Day, Power Audio Visual & Prime Television. Handcraft Bazaar, Rotary Club of Bendigo Sandhurst Art & Craft Market. Cosmopolitan Street Café, Arts Victoria. Awakening of the Dragon, Bendigo Chinese Association. Gala Parade, Prime Television & Coca Cola. Firewalking by the Australian Skeptics, Discovery Science & Technology Centre. Up In Flames, Discovery Science & Technology Centre. Barry Kenny's Country Roundup, Nadort Promotions. School's Day. Teddy Bear's Picnic, Dragon City Marshals. Fire Brigades Children's Carnival. Family Event, Bendigo Minister's Fellowship. Bendigo Easter Antique Fair. Historic Photographic Exhibition, Burt Sargent Circa 1900. Open Garden at Nanga Gnulle (''nanga nully''). A parade of Quilts, Strathdale Bendigo Quilters Inc. Tasting the Life, Gail Tavener Studio. Snakes Alive Dangerous Australians, BRIT. Y's Men's Club of Bendigo Book Fair, YMCA. Bendigo Camera Club, BRIT. Bendigo Woodcraft Exhibition, Woodturners Bendigo Inc. Autumn Bonsai, Bendigo Bonsai Club. Convocation, National Trust Bendigo. Arms & Collectables, Golden City Collectors Assoc. In. Rotary Art Show. Rotary Pottery Exhibition. Women's Vision For The Church, Provincial Council of Mothers Union. Historic Toorak House, Lioness Club of Golden City Bendigo. White Hills Cemetery. Bendigo Cemetery. Festival of Flowers, Craft & Garden, Bendigo Jockey Club. Shannons Corporation Motorfest, City Drive Through, Static Display, Motorkhana, Time Trial. Bendigo Bank Dragon Mile. Volkswagen Car Show, a part of the 28th National Bug-In. Repco Cycles, Australian Veteran Cycling Council Inc. Championships. Under 17 Australian Badminton Championships. Palm Sunday, Bendigo Symphony Orchestra. Way of the Cross, Bendigo's Combined Churches. The Easter Story, Kangfluca Music. Sunrise Church Service, Bendigo Ministers' Fellowship. Map of CBD Advertisements: Bendigo Easter Antique Fair. Austar. Bendigo Art Gallery. Bendigo Visitor Information Centre. Prime. Golden Dragon Museum Inc. Bendigo Heritage Tours. Discovery Science & Technology Centre Bendigo. Sponsors: Sandhurst Trustees, Prime, Vic Health, ABC Radio, Arts Victoria, Coca Cola, Events Bendigo, City Of Greater Bendigo, Bendigo Community Health Services, Shannons., Morris Design PH 5448 8777Morris Designevent, easter fair, bendigo easter fair, bendigo easter fair festival program, 26-31 march, 1997. festival features, evening of art & classical music, easter fest, . fine food fest. free stage. free evening concert & fireworks. torchlight procession. fireworks spectacular, street fiesta, street extravaganza, coca cola carnival, star for a day, handcraft bazaar, art & craft market. cosmopolitan street café, awakening of the dragon. gala parade, firewalking australian skeptics, discovery science & technology centre. up in flames, barry kenny's country roundup, nadort promotions. school's day. teddy bear's picnic, fire brigades children's carnival. family event, bendigo minister's fellowship. antique fair. photographic exhibition, burt sargent circa 1900. open garden nanga gnulle a parade of quilts, strathdale bendigo quilters inc. tasting the life, gail tavener studio. snakes alive dangerous australians, brit. book fair, ymca. bendigo camera club, brit. bendigo woodcraft exhibition, woodturners bendigo inc. autumn bonsai, bendigo bonsai club. convocation, national trust bendigo. arms & collectables, golden city collectors assoc. art show. pottery exhibition. women's vision for the church, provincial council of mothers union. historic toorak house, lioness club. white hills cemetery. bendigo cemetery. festival of flowers, craft & garden, bendigo jockey club. motorfest, drive through, static display, motorkhana, time trial. dragon mile. volkswagen car show, national bug-in. repco cycles, australian veteran cycling council inc. championships. under 17 australian badminton championships. palm sunday, bendigo symphony orchestra. way of the cross, bendigo's combined churches. the easter story, kangfluca music. sunrise church service, bendigo ministers' fellowship. map of cbd advertisements: antique fair. golden dragon museum inc. bendigo heritage tours. discovery science & technology centre bendigo. sponsors: sandhurst trustees, vic health, abc radio, arts victoria, coca cola, events bendigo, city of greater bendigo, bendigo community health services, shannons., morris design. prime tv. austar. bendigo art gallery. bendigo visitor information centre. prime, victorian health promotion foundation, zaire, sponsored by bendigo market place & prime tv, sponsored by arts victoria, sponsored coca cola, power audio visual, rotary club of bendigo sandhurst, bendigo chinese association, y's men's club of bendigo -
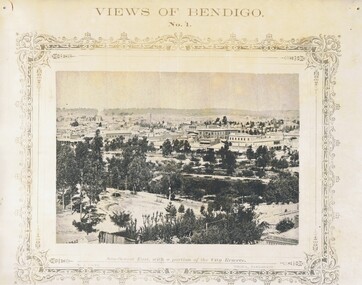 Bendigo Historical Society Inc.
Photograph - NICHOLAS CAIRE VIEWS OF BENDIGO
Full set (52 photos) of Nicholas Caire ''Views of Bendigo'' photographs. 1) Sandhurst East with a portion of the City Reserve. 2) New Chum line of reef. 3) Sandhurst-North part as seen from the top of the Masonic Hall. 4) The Hustler's line of reef seen from Redan Hill. 5) Battery of stampers for crushing quartz 6) View of Sandhurst as seen from the top of the New Masonic Hall. 7) Excavation of quartz reef near Ironbark Hill. 8) St. Paul's Church, tower and belfry. 9) View of the Camp Reserve as seen from the Court House. 10) View of North Old Chum showing surface excavations. 11) View as seen from the Camp Hill near the lodge. 12) Garden Gully amalgamated claims. 13) Shamrock Hotel, Sandhurst. 14) View as seen from Court House showing the willows & East Pall Mall. 15) Wesleyan Church, Golden Square. 16) Savings bank, Sandhurst. 17) The Bendigo district hospital. 18) Interior of the Wesleyan Church, Golden Square. 19) View of Golden Square township. 20) The Town Hall, City of Sandhurst. 21) The City Hotel, Sandhurst. 22) Pall Mall, Sandhurst. 23) Sandhurst City Market. 24) Pall Mall, Sandhurst looking west. 25) View from Camp Hill looking north - east 26) View of Charing Cross, Sandhurst. 27) View of Sandhurst as seen from Knipe's Castle. 28) Township of Long Gully. 29) View taken from St. Paul's tower. 30) View of the Sandhurst cemetery at back creek. 31) Kock's pioneer quartz crushing plant, Long Gully. 32) The New Masonic Hall, Sandhurst. 33) The Bendigo benevolent asylum and industrial school. 34) Bendigo flat as seen from Wattle Hill. 35) View of Old Chum Hill. 36) New Chum Gully as seen from Specimen Hill. 37) Township of Eaglehawk. 38) View from St. Paul's tower looking south west. 39) View of the railway tunnel through the Big Hill, near Mt. Herbert. 40) View taken from St. Paul's looking south. 41) Scene taken from St. Paul's tower looking eastward. 42) View of Sandhurst from St. Paul's tower looking north-west. 43) The great extended Hustler's co's. quartz mining claim. 44) View from the Big Hill showing the line of railway to Melbourne. 45) View from St. Paul's Church tower looking westward. 46) View from St. Paul's Church tower looking north-west. 47) Scene near the Big Hill ranges taken from Mr. Buick's residence. 48) View from St. Paul's Church tower looking north eastward. 49) Township of Eaglehawk 50) View of Mitchell Street, Sandhurst. 51) Botanical gardens near the White Hills. 52) View Point, Sandhurst.bendigo, streetscape, various views, nicholas cairne -
 Moorabbin Air Museum
Document (item) - Roland Jahne Collection - See Description for details
-
Moorabbin Air Museum
Document (item) - Roland Jahne Collection - See Description for details
-
 Victorian Aboriginal Corporation for Languages
Book, Harold Koch, Aboriginal placenames : naming and re-naming the Australian landscape, 2009
"Aboriginal approaches to the naming of places across Australia differ radically from the official introduced Anglo-Australian system. However, many of these earlier names have been incorporated into contemporary nomenclature, with considerable reinterpretations of their function and form. Recently, state jurisdictions have encouraged the adoption of a greater number of Indigenous names, sometimes alongside the accepted Anglo-Australian terms, around Sydney Harbour, for example. In some cases, the use of an introduced name, such as Gove, has been contested by local Indigenous people." "The 19 studies brought together in this book present an overview of current issues involving Indigenous placenames across the whole of Australia, drawing on the disciplines of geography, linguistics, history, and anthropology. They include meticulous studies of historical records, and perspectives stemming from contemporary Indigenous communities. The book includes a wealth of documentary information on some 400 specific placenames, including those of Sydney Harbour, the Blue Mountains, Canberra, western Victoria, the Lake Eyre district, the Victoria River District, and southwestern Cape York Peninsula." -- Publisher description. Contents: Introduction: Old and new aspects of Indigenous place-naming /? Harold Koch and Luise Hercus NSW &? ACT: 1. Aboriginal placenames around Port Jackson and Botany Bay, New South Wales, Australia: sources and uncertainties /? Val Attenbrow 2. Reinstating Aboriginal placenames around Port Jackson and Botany Bay /? Jakelin Troy and Michael Walsh 3. The recognition of Aboriginal placenames in New South Wales /? Greg Windsor 4. New insights into Gundungurra place naming /? Jim Smith 5. The methodology of reconstructing Indigenous placenames: Australian Capital Territory and south-eastern New South Wales /? Harold Koch Victoria: 6. Toponymic books and the representation of Indigenous identities /? Laura Kostanski 7. Reviving old Indigenous names for new purposes /? Laura Kostanski and Ian D. Clark 8. Reconstruction of Aboriginal microtoponymy in western and central Victoria: case studies from Tower Hill, the Hopkins River, and Lake Boga /? Ian Clark South Australia &? Central Australia: 'Aboriginal names of places in southern South Australia': placenames in the Norman B.Tindale collection of papers /? Paul Monaghan 10. Why Mulligan is not just another Irish name: Lake Callabonna, South Australia /? J.C. McEntee 11. Murkarra, a landscape nearly forgotten: the Arabana country of the noxious insects, north and northwest of Lake Eyre /? Luise Hercus 12. Some area names in the far north-east of South Australia /? Luise Hercus 13. Placenames of central Australia: European records and recent experience /? Richard Kimber Northern Australia: 14. Naming Bardi places /? Claire Bowern 15. Dog-people: the meaning of a north Kimberley story /? Mark Clendon 16. 'Where the spear sticks up': the variety of locatives in placenames in the Victoria River District, Northern Territory /? Patrick McConvell 17. 'This place already has a name' /? Melanie Wilkinson, Dr R. Marika and Nancy M. Williams 18. Manankurra: what's in a name? placenames and emotional geographies /? John J. Bradley and Amanda Kearney 19. Kurtjar placenames /? Paul Black.Maps, b&w photographs, tables, word listsaustralian placenames, sociolinguistics, linguistics, anthropology, sydney harbour placenames, blue mountains placenames, canberra placenames, western victoria placenames, lake eyre placenames, victoria river district placenames, cape york peninsula placenames -
Ballarat Tramway Museum
Memorabilia - Exhibition Material, Warren Doubleday, "gold!, Gold!, GOLD! and Trams", 29/01/2003 12:00:00 AM
Two photos and thirty captions or label cards used in the Museum's exhibition entitled "gold!, Gold!, GOLD! and Trams". Printed on a colour laser jet, 200 gsm card, unless noted otherwise. Most cards have two Velcro dots on rear, except larger ones which may have three or four. .1 151 x 210 Opening Tram Leonora Tramways - supplied by the Perth Electric Tramway Society .2 210 x 292 Kalgoorlie Electric Tramways Limited trams No. 19 and 13 - ex PETS .3 210 x 297 Gold and Tramways of Ballarat - text card.. .4 210 x 297 text card - 2nd card. .5 130 x 210 Acknowledgements card. .6 - .8 97 x 297 - "GOLD!" on each card, with a heavier font each time. .9 172 x 297 "and trams" .10 136 x 297 "Painted to Celebrate" .11 383 x 80 "At first horses" .12 62 x 472 "Then came Electric" - Two pieces of card joined together, stored folded. .13 65 x 557 "and other Golden Cities" - Two pieces of card joined together, stored folded. .14 68 x 550 "For the City of Ballarat" - Two pieces of card joined together, stored folded. .15 47 x 385 "To Ballarat East as well" .16 45 x 90 "Main St" / "Photo Wal Jack 1963 btm362" .17 46 x 194 "Main and Victoria Sts" / "Photo Ron Fluck 1950 btm870" .18 69 x 126 "1964 Sebastopol" / "Photo Tramway Museum Society of Victoria" .19 66 x 99 "1951 Ballarat / Photo Keith Kings btm1378" .20 45 x 102 "Bendigo N.J. Simons Collection btm 1205.7" .21 68 x 106 "2001 Ballarat / Photo Warren Doubleday" .22 43 x 157 "To Sebastopol / From E.D. Jenkins book, Sebastopol Victoria 1864-1964 btm1090" .23 43 x 158 "From the City / Charles Rudd photograph, State Library of Victoria btm 1113i" .24 43 x 271 "Electric Power for Industry / BTM Collection btm 698i" .25 47 x 160 "To the Gardens / From Geo Rose stereo pair. Donated by Bacchus Marsh Blacksmith Cottage and Forge btm1257" .26 41 x 96 "Leonora / Courtesy Perth Electric Tramway Society" .27 45 x 117 "Bridge St / Postcard from Norm DePomeroy collection btm 841" .28 46 x 169 "Transport for all / Postcard from Norm DePomeroy collection btm837" .29 44 x 89 "Main St / Photo Ron Fluck 1962 btm867" .30 41 x 117 "Kalgoorlie / Courtesy Perth Electric Tramway Society" .31 46 x 150 "1905 Opening / BTM Collection btm482" .32 52 x 404 "Ballarat Trams are Ballarat History"trams, tramways, btm, exhibitions, gold!, gold!, gold! and trams, gold tram -
 Melbourne Tram Museum
Document - Photo Album, Graeme Breydon, "Tickets and Postal Covers", c1970 to 1990
Photo Album - dark blue plastic covers with the letters "photo album" in raised letters, stippled finish containing 10 leaves ring bound with an adhesive surface with clear plastic sheet on each cover. Page 1 – set of 8 Last day tram tickets – 16/4/1972 and four SEC tickets rear. Page 2 – set of 10 SEC tickets and 2 backs Page 3 – 2 BTPS 10c tickets, MMTB 25c, 3 Brisbane City Council tickets, two Trittons furnishings, one WCC (Wellington?) cable car and two MMTB City Concession tickets Page 4 – Set of 9 MMTB tickets 4d, 7d city, 7d, 8d, 1/-, 1/ 4, 2/- or 20c, 2/6 and one Pensioner’s check ticket. Page 5 – Set of 9 MMTB tickets, 4c, 8c, 9c, 10c, 30c, Pensioner’s concession, two $1 City concession cards, city concession check ticket and two machine issued tickets 1c and 15c. Page 6 – set of 16 MMTB tickets that have been recovered from within trams, very dirty, check tickets, value tickets and advertising on the rear. Page 7 – various special train tickets – Stainless steel train, ARHS tours, TMSV, ARHS Farewell, ARHS SA Mile End, Ballarat trams x 2, Crich exhibition ticket and one MTT (Tas?) 30c. Page 8 – VR Windsor to Melbourne Quarterly 1940, 7 VR various country and suburban tickets and two VR Motor coach services tickets. Page 9 – two interstate reserved seat tickets, Brisbane suburban ticket and 8 various values QR Parcel tickets – very dirty. Page 10 – Two Puffing Billy guest passes, 10th anniversary ticket, 10 various card tickets for Puffing Billy and tours. Page 11 – 6 + others MTT Adelaide value tickets with adverts on rear and four AETM St Kilda Museum tickets. Page 12 – four Red Bus Rover London tickets, four Peak Tramways tickets, one toll bridge, 6 London machine issued tickets. Page 13 – One San Francisco Municipal Railway ticket, one LlafrairPG platform ticket and two MMTB Machine tickets. Page 14 – One $1 MMTB city concession card and one Parramatta Park tramway ticket issued for COTMA during 1976. Page 15 – One Emerald Park vehicle entry ticket and one PBPS opening day of the extension to Lakeside in 1975 with certificate. Page 16 – One PBPS Notice. Page 17 – not used. Page 18 – three commemorative envelopes – WA Railway Centenary, Standard Gauge to Melbourne, and Sydney to Perth. Page 19 – Brisbane tramways last day, two Last day envelopes for Ballarat and Bendigo. Page 20 – three different St Kilda Centenary – Adelaide. Contained within the album was loose tickets - see Reg Item 3970 and a pamphlet for the opening of the Transport Mural at Spencer St Station on 30 Jan. 1978.has a label on the side in punched letters on a green tape "Tickets and Postal Covers"trams, tramways, tickets, secv, mmtb, adelaide, brisbane, arhs, aetm, aeta, pbps, cotma, tmsv, victorian railways, vr, post office, envelopes, post office -
 Melbourne Tram Museum
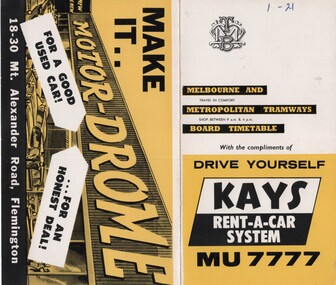
Ephemera - Timetable/s, Melbourne & Metropolitan Tramways Board (MMTB), "MMTB Timetables set of 39", 1960
Set of 39 MMTB Tram timetables, 2 fold sheets, , providing timetables for specific routes, route numbers, day of week giving information on tram times at departure time points, sections and fares, where applicable all night bus services. All signed by B. H. Misson, Traffic Manager. All sponsored by Kays Rent a Car and Motor Drome, 18-30 Mount Alexander Road, Flemington. The only one missing is Point Ormond. Not dated, based on fares - 1960 and possibly after Point Ormond had closed. .1 - Route 1, 21 - East Coburg - City .2 - Route 4, 4A, 4B - Carnegie - City .3 - Route 4D, 14 - East Malvern - City .4 - Route 5, 5A - Malvern Burke Road - City .5 - Route 6, 6A, 6B - Glen Iris - City .6 - Route 7, 7A, 7B, 7D - Camberwell - City .7 - Route 8, 8A - Toorak - City .8 - Route 9, 9A - Northcote via St Georges Road - City .9 - Route 9, 9B, 10, 12 - Sth Melbourne Beach, St Kilda Beach - City .10 - Route 10,11 - West Preston - City .11 - Route 15, 16 - St Kilda Beach - City .12 - Route 15, 22 - Moreland - City .13 - Route 18, 19, 20 - North Coburg - City .14 - Route 27, 28 - Hawthorn - Spencer St .15 - Route 42, 44, 45 - Mont Albert - City .16 - Route 48, 40, 41 - North Balwyn - Spencer St .17 - Route 49 - Essendon (Matthews Ave) - City .18 - Route 50, 54, 57, 58, 60 - West Maribyrnong - City .19 - Route 55, 56 - West Coburg - City .20 - Route 59 - Essendon Aerodrome - City .21 - Route 61, 62, 64, 65 - East Brighton - City .22 - Route 69 - Kew Cotham Road - St Kilda Beach .23 - Route 70, 71, 76 - Wattle Park - City .24 - Route 74, 75, 76 - Burwood - City .25 - Route 77, 80 - Prahran - City .26 - Route 78, 79 - North Richmond - Prahran .27 - Route 82 - Moonee Ponds - Footscray .28 - Williamstown Road - Footscray - Tram and bus .29 - Ballarat Road - Footscray - Tram and bus .30 - Russell St - - Footscray - Tram and bus .31 - East Brunswick - City .32 - Domain Road - City .33 - West Heidelberg - City .34 - Sunshine - City via Ballarat and Footscray Roads .35 - Sunshine - City via South and Dynon Roads .36 - Sunshine Park - City .37 - Garden City - City (Victoria St) .38 - Queens Bridge - Fisherman's Bend via Ingles St .39 - Queens Bridge - Fisherman's Bend via Lorimer St and Princes Bridge - Fisherman's Bend via Williamstown Rd.All have the route number in ink on the front cover - see image 5691i.jpg for standard cover.trams, tramways, mmtb, timetables, melbourne, fares, route 1, route 22, route 4, route 4a, route 4b, route 4d, route 14, route 5, route 5a, route 6, route 6a, route 6b, route 7, route 7a, route 7b, route 7d, route 8, route 8a, route 9, route 9a, route 9b, route 10, route 11, route 12, route 15, route 16, route 22, route 18, route 19, route 20, route 27, route 28, route 42, route 45, route 44, route 48, route 40, route 41, route 49, route 50, route 54, route 57, route 58, route 60, route 52, route 56, route 59, route 61, route 62, route 64, route 65, route 69, route 70, route 71, route 76, route 74, route 75, route 76, route 77, route 80, route 78, route 79, route 82, williamstown rd, ballarat rd, russell st, route 96, domain rd, west heidelberg, sunshine, garden city, queens bridge, fishermen's bend -
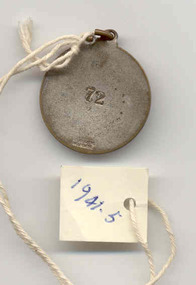 Ballarat Tramway Museum
Badge - SEC pass - set of 27, AMOR, c1950?
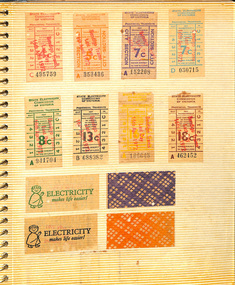
Set of 27 Stamped enamelled round brass pieces with a hole stamped at the top and ring placed through. Used as a SEC tramways employees pass for either all Provincial tramways, Ballarat or Bendigo only. All badges have the SEC logo in the centre, organisational name (State Electricity Commission of Victoria) in white enamel and outer ring the words "Electricity Supply Department, Provincial Tramways", or "Electric Tramways Ballarat" or "Electric Tramways Bendigo". This is in blue enamel. On the rear are stamped numbers and manufacturers name - "AMOR" or "AMOR MELB" or "STOKES & SONS MELBOURNE" in the bottom portion of the pass. Items .1 -> .10, .12, .13 individually tagged. Item .11 not tagged Item .13 -> .27, single tagged, tied together with a length of string. 1941.1 - Bendigo - No. 9 - Stokes - silver background instead of gold, appears to have been used. .2 - Bendigo - No. 43 - Stokes - has been used - partially worn, has additional clip joined to main ring. .3 - Ballarat - No. 51 - Stokes - has been used, worn and chipped under main ring. .4 - Ballarat - No. 61 - Stokes - has been used, worn, and chipped on blue enamel in at least two places. .5 - Ballarat - No. 72 - Stokes - has been used, worn and chipped on blue enamel in many places - btm1941i1 for reverse side. .6 - Ballarat - No. 86 - Stokes - has been used, worn, dirt on rear - see image btm1941i2 for front side. .7 - Bendigo - No. 107 - Stokes - appears not to have been used - see image btm1941i3 for front side .8 - Bendigo - No. 108 - Stokes - ditto, but gold by SEC shield is discoloured - see image btm1941i4. .9 - Bendigo - No. 121 - Stokes - appears to have been used, more silver than 1941.8 .10 - Provincial - No. 124 - AMOR - may have been used - see image 1941i5 for front side .11 - Provincial - No. 156 - AMOR - small clip broken off at top, has been used, worn (Not tagged) .12 - Provincial - No. 306 - AMOR - no larger ring, has been used, worn and discoloured .13 - Provincial - No. 656 - AMOR MELB - has not been used, no larger ring, see image 1941i6 for back side. .14 - Provincial - No. 642 - AMOR MELB - has not been used. .15 - Provincial - No. 644 - ditto .16 - Provincial - No. 645 - ditto .17 - Provincial - No. 646 - ditto .18 - Provincial - No. 647 - ditto .19 - Provincial - No. 648 - ditto .20 - Provincial - No. 649 - ditto .21 - Provincial - No. 650 - ditto .22 - Provincial - No. 651 - ditto .23 - Provincial - No. 652 - ditto .24 - Provincial - No. 653 - ditto .25 - Provincial - No. 654 - ditto - to A. Reither for 21st from BTM 2/8/03 - see attached image btm1941i7 .26 - Provincial - No. 655 - ditto - to P.Mong for 21st from BTM 2/8/03 - see ditto .27 - Provincial - No. 564 - ditto - added 21/1/2007 from somewhere - at WAD's house 12/2006. .28 - Provincial - No. 589 - ditto - dittotramways, trams, employees pass, tickets, provincial tramways, badges -
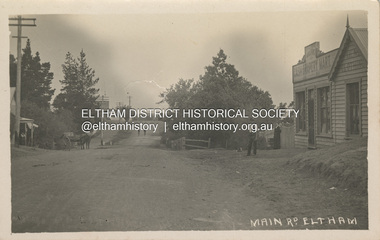 Eltham District Historical Society Inc
Photograph, Main Road, Eltham, looking south from Bridge Street, c.1906-1907
Birthday greetings sent by Mary and Ada Shillinglaw from their home, 'Wattle Brae' at Eltham to their sister Carrie (Watson). Carrie was born 29 Feb 1876. Whilst the postcard was dated 1917, the actual photo is dated between 1906 and 1907. ""Wattle Brae" Eltham 28/2/17 Dear Carrie Wishing you a Bright and a happy birthday. With love from Mary & Ada" See also SEPP_0624 Looking south along Main Road from the south side of the intersection of Bridge Street with Main Road. Anne Hunniford's Post Office and Burgoyne's store on left. Miss Harriet (Minnie) Williams's Cash Drapery Mart (est. 1902 and enlarged in 1906), also known as Eltham House on the right. Harriet (Minnie) Williams was born London, 1857, the daughter of George John Williams (1812-1895) and Jane Mansfield (1812-1895). In September 1885 she was operating Williams’s Drapery Establishment in premises on Main Road owned by R. Wallis who advertised them to let in September 1885. In 1902 she opened Williams’s Cash Drapery Mart at the southwest corner of Bridge Street and Main Road (opposite the Post Office), owned by W.J. Taylor. In 1906 she bought the premises and one quarter acre of land and expanded the business with a re-opening in April 1906. Harriet was also well-known and esteemed as an active worker in Methodist circles and also Superintendent of the Sunday School. Harriet fell ill in August 1907 and died 15 August. She is buried in Eltham Cemetery with her good friend Ada Ford. Evelyn Observer and Bourke East Record (Vic. : 1902 - 1917), Friday 30 March 1906, page 5 ________________________________________ ELTHAM. (FROM OUR OWN CORRESPONDENT.) For over three years Miss Williams has carried on a drapery business in very small and inconvenient premises opposite the Eltham post-office. Recently she bought the building and a quarter-acre of land from Mr. W. J. Taylor. Thus having a free hand, she at once matured plans to enlarge and improve the premises to make them suitable for her growing business. The result being that she consulted Mr Roach, contractor, of Heidelberg, put the matter in his hands, and now he has completed in a very satisfactory manner and up-to-date style extensive improvements. A large addition, of very neat and attractive design, with three large windows, has been built right along the front of the old building, and the counters and inside fittings are very neat and convenient, harmonizing well with the attractive outside appearance. Miss Williams has now got in a large now stock of goods, and is making extensive arrangements for a “reopening week," commencing 2nd April, during which time she will make 10 per cent reduction on all cash purchases in the form of gifts of that value. Miss Williams has gone to considerable expense and liability both, in the enlargement and improvement of the premises and in purchasing additional stock. We therefore trust that the public will stand by her by heartily and en masse patronizing her re-opening effort to show their appreciation of pluck in this advance movement. Google Street View Feb 2017: https://www.google.com.au/maps/@-37.7191341,145.1462046,3a,50.5y,191.91h,88.27t/data=!3m6!1e1!3m4!1sARwwqEQfMSfH9oTWWapPgQ!2e0!7i13312!8i6656 POSTCARD 1905-1940s Like the carte-de-visite, postcards enjoyed a collecting craze by large numbers of people, and were often kept in albums through which the interested visitor could browse. Postcards were posted or exchanged in huge numbers. Postal authorities in Australia only allowed the private printing of postcards from 1898. At this time the back of the card was reserved for the address and postage stamp, and the front was used for the message and a picture. In 1902 British authorities allowed a "divided back", so that the left side could be used for the message, the right side for the address and stamp, and the whole of the front was devoted to the picture. France followed suit in 1904, Germany and Australia in 1905, and the United States in 1907. - Frost, Lenore; Dating Family Photos 1850-1920; Valiant Press Pty. Ltd., Berwick, Victoria 1991marg ball collection, postcard, 1906, 1917, ada maria chrisfield (nee shillinglaw) 1889-1974, ada maria shillinglaw (1889-1974), caroline (carrie) watson (nee shillinglaw 1876-1956), cash drapery mart, eltham, eltham hotel, main road, mary ann shillinglaw (1880-1963), shillinglaw cottage, watsons hotel, wattle brae -
 Eltham District Historical Society Inc
Document - Folder, Orford family
The Orford family, a pioneer family remained continuously living and working in Eltham for 170 years from 1854 to 2024. James and Sarah Orford arrived in Sydney in 1839 aboard the ship “Orestes”; they had several children there before settling in Eltham in 1854. Three children, James Mathias, Sarah Amelia and Thomas Henry initially remained in the Eltham area. James eventually moved to Brunswick. Sarah married Arthur Butler Young and finally lived in Bunyip. Thomas who was six years old when the family arrived in 1854 remained in Eltham, married Helen Logan who died, leaving a large family. They lived in a slab hut by the Yarra at Laughing Waters and Thomas managed the Panton Park Estate, a selection owned by Magistrate Thomas Panton. Thomas’s son, Ernest Orford was born 1892 at Pitt Street, Eltham and also lived his entire life in Eltham working as a labourer, orchardist and later as a gardener and grounds keeper for Sir William Irvine, a former Chief Justice and Premier of Victoria. Ernest married Kate Thomas; their two sons Ron and Doug stayed in the area. Another of Thomas' sons, Arthur, also lived in Eltham. Four Orford generations attended Eltham schools. Doug Orford was born on the kitchen table (reference, son Ted Orford) of the family home at the corner of Reynolds Road and Mount Pleasant Road. Doug married Gwen and they established a family however Gwen died at a young age from cancer. Doug eventually remarried another Gwen and they lived for several decades in Napoleon Street, Eltham. Doug was actively involved in EDHS over many years, including serving as a committee member and vice president. Contributions by Doug and Gwen, his wife, assisted EDHS to continue to develop as a not-for-profit group intent on promoting and preserving our local history. Both Doug and Gwen were made Life Members of EDHS. His significant work with assisting to establish our valued Local History Centre helped develop our home base and supported the continued growth of our society. Doug’s local knowledge, suggestions and family connections were highly valued, Until recent times, he continued to regularly attend our Collections Team workshops providing his insights and historical information about photographs and society records. Doug died peacefully July 8, 2024, and represents the last link in the Orford Eltham chain which spanned 170 years. His funeral was held Thursday, July 18, 2024, at Le Pine Funerals, 848 Main Road, Eltham. Contents: Typed notes, no date: Memories of Ernest Orford [taped 1979] about his school days. Handwritten notes, no date: History of Ernie Orford Typed notes, no date: History of Thomas Henry Orford and family. Photocopy: Shire of Eltham General Rate Receipts. Received from D Orford 7 June 1923 and Received from E F Orford, 4 August 1924. Letter, no date: Nillumbik Shire to Russell Yeoman, Gwen Orford to receive Volunteer Recognition Award. Newsletter article: "The Orford Family, Eltham", Shire of Eltham Historical Society, No.80 September 1991. History of Orford family. Handwritten notes: 21 March 2011, genealogy of George Orford. On reverse Melways map makred with Orford and other land ownerships. Newspaper advertisement, 21 March 2011: "264 Reynolds Road, South Eltham", property for sale [land in ownership of Orford family]. Letter: St Margaret's Anglican Church Eltham to Doug Orford, 17 November 2011, Extracts from church records relative to Orford family. Newspaper article: "Timely facelift at war memorials', Diamond Valley Leader, 30 April 2024, Nillumbik war memorial will have some work and a bronze plaque will be installed at the Eltham Avenue of Honour, Wingrove Park; photograph of Doug Orford Newsletter item: "Welcome home medal", Eltham District Historical Society newsletter no.216 May 2014, World War I two 'Welcome Home Medals' in ownership of local men, being Harry Gilham and Doug Orford. Order of Service, Le Pine Funerals (Eltham), In Loving Memory of Douglas Frederick Orford 22nd August 1929 - 8th July 2024Newspaper clippings, A4 photocopies, etcdoug orford, harry gilham, welcome home medal, eltham avenue of honour, nillumbik war memorial, wingrove park, henry dendy, alfred armstrong, james orford, 264 reynolds road south eltham, george orford, george joseph orford, maryanne george joseph, thomas henry orford, ernest orford, e f orford, eltham cemetery, helen orford, joseph panton, panton park, gordon lyon, banyule estate heidelberg, james matthias orford, wurundjeri, constable peter lawlor, george hill, franklin street eltham, ronald orford, eltham primary school, john brown, robert gamble school inspector, sarah orford, mary ann orford, james mathias orford, sarah amelia orford, james peet, arthur butler young, watsons creek victoria, kangaroo ground victoria, helen logan, william orford, jane orford, arthur orford, frederick orford, florrie orford, victor orford, chem orford, sunnymede eltham, panton hill estate, sir william irvine, gordon lyons, kate thomas, north eltham gospel church, harold clapp, eltham cricket club, research primary school, dalton street school eltham, keith banks, betty banks, benjamine boyd, laughing waters road eltham, freddie gilsinen, douglas frederick orford, eltham district historical society, funeral service, le pine funeral home, life member, order of service -
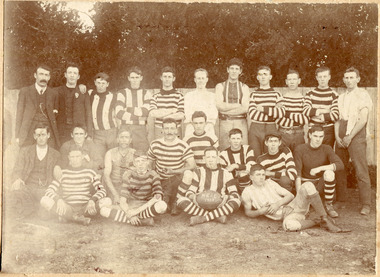 City of Moorabbin Historical Society (Operating the Box Cottage Museum)
Photograph, 1903 or 1908 Moorabbin Football Club, 1903 or 1908 Moorabbin Football Club, 1903 or 1908
1903 or 1908 Moorabbin Australian Rules Football Club. Philip Jones, a relative of James Jones who was a pioneer settler in Moorabbin Shire, is holding the football. In the late 1850s Melbourne's schools are first recorded organising football games modeled on precedents at English schools The earliest known such match was played on 15 June 1858 between Scotch College and Melbourne Grammar School on the St Kilda foreshore. On 10 July 1858, the Melbourne-based Bell's Life in Victoria and Sporting Chronicle published a letter by prominent Victorian cricketer Tom Wills, calling for the formation of a "foot-ball club" with a "code of laws" to keep cricketers fit during winter. The Melbourne Football Club's rules of 1859 are the oldest surviving set of laws for Australian football. The ten simple rules were drawn up on 17 May at a meeting chaired by Tom Wills and in attendance were journalists W. J. Hammersley and J. B. Thompson, and Thomas H. Smith. The rules were signed by Tom Wills, William Hammersley, J. Sewell, J. B. Thompson, Alex Bruce, T. Butterworth and Thomas H. Smith. Importantly, the rules were widely publicised and distributed. Having been codified in 1859, this means that Australian football is an older sport than most other football codes in the world, including soccer. As Geoffrey Blainey states, "soccer has no club that matches the antiquity of the early Victorian clubs." In 1859 several new football clubs formed including the Castlemaine Football Club, Geelong Football Club and the Melbourne University Football Club. The first football match played at the Melbourne Cricket Ground (MCG) was not until 1876. Cricket authorities soon saw the opportunity to capitalise on the rapid growth of Australian football, however, and soon most grounds in Victoria were expanded to accommodate the dual purpose, a situation that continues to this day. Football matches between 1859 and 1899 were played in a 20-per-side format. n 1896, delegates from the stronger and wealthier Victorian Football Association clubs—Carlton, Collingwood, Essendon, Fitzroy, Geelong, Melbourne, St Kilda and South Melbourne—met to form a breakaway competition and in 1897, the Victorian Football League (VFL), was born as an eight-team competition. Popularity of the VFL grew rapidly and by 1925 with 12 teams, had become the most prominent league in the game and would dominate so many aspects of the sport from that point on. Moorabbin Football Club, nicknamed the Kangaroos, was the name of two distinct Australian rules football clubs which played in the Victorian Football Association (VFA). The first club, founded in the early 20th century, joined the VFA in 1951 and played there until 1963 with great success; they played home matches at Moorabbin Oval and wore royal blue and white hooped jerseys. The second club played in the VFA from 1983 to 1987. Moorabbin played initially in the Federal Football League, making their debut in 1909 and competing until 1950. During this time the club won 12 premierships, including winning all six premierships staged over the nine years between 1940 and 1948 (the competition was in recess from 1942 until 1944). The club entered the VFA in 1951. Its Federal League home ground, the Dane Road Reserve, was not up to VFA standards; so, in 1951 the club played at Cheltenham, and in 1952 moved into the Moorabbin Oval, which the Moorabbin Council had developed during 1951. The Kangaroos made the 1954 and 1955 finals series without success but in 1957 they helped eliminate premiership favourite Williamstown after defeating them by two points in the Semi Final. Moorabbin, who were coached by Bill Faul, took on Port Melbourne in the Grand Final, whom they had not once beaten since joining the league. In another upset, Moorabbin won comfortably to claim their maiden VFA premiership. In the early 1960s, the Moorabbin Council was very keen to bring a Victorian Football League team to Moorabbin Oval. 1964, the Moorabbin City Council secured a deal with St Kilda, who moved to Moorabbin Oval starting in 1965. The club originally intended to seek readmission for the 1965 season, but in July the club committee decided to withdraw permanently from the Association,and disbanded.Photograph is Black and White. Three rows of Australian Rules Football players in a typical team photograph. Some are wearing striped jumpers, either the stripes are going horizontal or parallel. There is a known man in this photo, named Philip Jones, who is holding the football in front row. There are two men wearing suits at the left, on the end of the third row. Hewitt, Photographer, 92 Regent St. North Richmond.moorabbin, football club, 1903, 1908, philip jones, james jones, early settlers, market gardeners, pioneers, herron john, australian rules foorball, victorian footbal league, victorian football association, moorabbin city council, moorabbin shire, city of moorabbin, st kilda football club, -
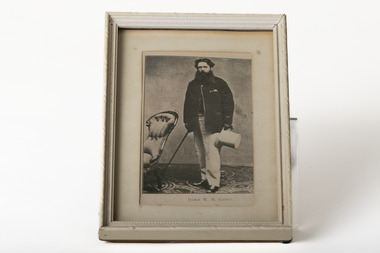 Chiltern Athenaeum Trust
Photograph, JUDGE W. H. GAUNT
This photograph is a copy displayed in the Australian Dictionary of Biography. The original photograph is in the La Trobe Collection in the State Library of Victoria. William Henry Gaunt (1830-1905), judge, was born on 27 July 1830 at Leek, Staffordshire, England, son of John Gaunt, banker, and his wife Mary, née Bakewell. Educated at Leek Grammar School and Whitchurch, Salop, he migrated to Melbourne, and entered the Victorian public service and was rapidly promoted. By March 1854 he was chief clerk at Beechworth, the administrative centre of the Ovens goldfield. In July 1855 the resident warden commended Gaunt as 'a highly valuable public servant' with an intimate knowledge of the district and the 'temper and disposition of the miners'. Appointed sub-warden in the Beechworth district in January 1856 and a Chinese protector in August, he was given control of the extensive Woolshed district. When European miners attacked a party of Chinese at the Buckland River diggings in May 1857 Gaunt was sent to restore order. One of his proclamations, issued in Chinese characters, concluded 'W. H. Gaunt, your protector—tremble and obey!' In June he was appointed a police magistrate and next month was sent to take charge at the Buckland where the Chinese had been expelled from the diggings; the police force assisting him was led by Robert O'Hara Burke. In January 1858 Gaunt was appointed a warden, in November was transferred to Chiltern, north of Beechworth, and in August 1859 was made a commissioner of crown lands. In February 1860 Gaunt was appointed a coroner of Victoria, acting at Indigo, near Chiltern. In April 1865 he was transferred to Beechworth, became visiting justice of the gaol and later moved to Sandhurst. In January 1869 he was appointed returning officer for the mining district of Ballarat and visiting justice of the gaol. He was associated with this area for the rest of his life and won high repute for his integrity. In 1874 he chaired the inaugural meeting of the first Australian competitive swimming club. For years he studied law and was called to the Bar in December 1873. He was one of the many public servants dismissed by Graham Berry on 9 January 1878 (Black Wednesday). After petitioning the Queen in vain over his dismissal he began practice in Ballarat as a barrister. He soon became a leading authority on mining laws; one of the cases in which he was involved was the lengthy inquest on the bodies of the twenty-two miners drowned in the New Australasian mine disaster at Creswick in 1882. He was appointed a temporary judge of the Insolvency Court in 1889 and a County Court judge in 1891. In 1900 he was chairman of the royal commission which considered Metropolitan Board of Works matters, and in 1902 was president of the inquiry into the unification of municipalities in Victoria. In 1860 Gaunt married Elizabeth Mary, the youngest daughter of Frederick Palmer; they had nine children. Of the surviving five sons and two daughters, Ernest Frederick Augustus and Guy Reginald Archer both became admirals and were knighted; Cecil Robert became a lieutenant-colonel, Clive Herbert a government advocate in Rangoon and Mary (Mrs H. L. Miller) one of the first women students to enrol at the University of Melbourne (1881), although she did not complete her degree; she became a successful novelist. Gaunt died on 5 October 1905. An anonymous colleague said: 'I don't think he was ever excelled as a police magistrate, and during the many years he was on the County Court bench he earned the highest regard. His capacities were as unquestioned as his integrity, and more could not be said of any judge'. Select Bibliography Votes and Proceedings (Legislative Assembly, Victoria), 1878, 3, (58) Government Gazette (Victoria), 22 Feb, 15 Aug 1856, 30 June 1857, 5 Jan 1858, 16 Aug 1859, 3 Feb 1860, 7 Mar, 11 Oct 1862, 28 Mar, 4 Apr 1865, 17 May 1867, 9 June 1868, 22, 29 Jan 1869 Ovens and Murray Advertiser, 21 May 1857, 11 Mar 1865 Colonial Secretary's in-letters, goldfields, 25 Mar 1854, 21 July, 18 Nov 1855, 22 Aug 1857 (Public Record Office Victoria) scrapbook and newsclippings (privately held). Related Entries in NCB Sitesview family tree Gaunt, Mary Eliza (daughter)go to ADB entryPhotograph of Judge W. H. Gaunt standing beside chair holding top hat and cane, under glass, in cream frame with cream matte.Printed name underneath: JUDGE W. H. GAUNT -
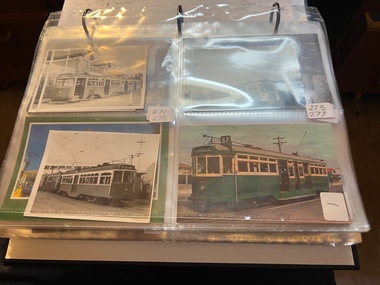 Melbourne Tram Museum
Album - Charles Craig - part 2 of 2, 1950s to 1970s
Photo - see pdf file for further information. Number Brief Description CC271 Y1 610 and another at Camberwell depot CC272 Ditto CC273 Y1 613 at Batman Ave CC274 Y1 611 Peel St North Melbourne CC275 Y 469 Camberwell depot CC276 Ditto CC277 Postcard – L104 – MMTB CC278 L103, Hawthorn Road CC279 L103, Hawthorn Road CC280 L103 Dandenong Road CC281 L103 and w5 847 Dandenong Road CC282 L104 on Preston Workshops traverser CC283 Flinders St station with Ws CC284 Flinders St looking south along St Kilda Road to Shrine CC285 Postcard – Nu Color vue – Flinders St CC286 Postcard – Valentines – Flinders St No. 13 CC287 Postcard – Rose Series – 13595 – has been trimmed CC288 Postcard – Rose Series – 10660 – Princes Bridge and Flinders St yard CC289 Postcard – Rose but has been trimmed of Flinders St CC290 Postcard – same as CC285 CC291 SW6 914 and another car in Swanston St by Flinders St CC292 SW6 903 and bus 436 with Flinders St Station in background CC293 W5 776 at Flinders St Station CC294 W2 596 at Flinders St Station CC295 L101 and W2 Swanston St by Ian Brady CC296 Postcard - Biscay BG 250 – A 281 - CC297 W5 779 Maribyrnong River CC298 SW5 787 Queensbridge St CC299A Duplicate copy CC299 Ditto CC300 W5 812 St Kilda Junction CC301 W5 721 Carnegie? - CC302 W5 817 Elliot Ave – see also CC150 CC303 CW5 682 CC304 CW5 682 Dandenong Road CC305 SW6 855 Power St Hawthorn CC306 Argus photo same as CC8A CC307 Freight car 19 leaving South Melbourne depot CC308 Freight car 19 at South Melbourne depot CC309 Cleaner 7 CC310 W2 295 and 8 at South Melbourne Depot CC311 Cleaners 5, 8 and 7 and S or T at South Melbourne depot CC312 Freight car 17 with crew member CC313 Cleaners 5, 8 and 7 along with a tower truck and another road motor CC314 Wheel Transport car 16 at Preston CC315 Cleaner 7 CC316 Cleaner 6 Brunswick Depot R Hudson and Bob Prentice CC317 SW6 867 in Swanston at Flinders CC318 SW6 850 at Chapel and Brighton Road CC319 SW6 914 at Batman Ave CC320 SW6 963 and W5 826 in Collins St near Spencer St CC321 Sw6 923 RAAF tram CC322 Same image at 318, but better has initials T McC (Tom McCaw) CC323 Sw6 963 In Collins at Spencer St CC324 SW6 947 in Collins at Spencer St CC325 Ditto with crew CC326 SW6 850 at Preston Workshop – Argus photo CC327 SW5 843 at Swan and church, severely derailed – Herald photo CC328 SW6 886 in Victoria Parade near La Trobe CC329 SW6 948 turning from Union St into Maribyrnong Road – single curve CC330 W5 731 CC331 SW5 on a 4D – Herald WT photo CC332 Sw6 867 Swanston St with driver carrying handles etc CC333 SW6 954 – Truganini Cres CC334 SW6 915 illuminated for Christmas, the CDA father Xmas special CC335 SW6 850 on route 77 side on view CC336 Sydney R class 1845 on trailer in a busy road CC337 Sydney R class 1845 on trailer CC338 Ditto CC339 Ditto – on trailer turning from a local street CC340 MMTB Emergency van CC341 Ditto CC342 Welding truck – Hopkins and Leeds CC343 Welding truck – Hopkins and Leeds CC344 Welding truck in Hopkins St Footscray CC345 Negative – Hobart tram 103 CC346 Launceston tram CC347 Trackwork – East Kew CC348 Trackwork and a W2 East Kews CC349 SW6 892 and trackwork – East Kew CC350 W4 670 – FRONT ON CC351 W3 654 – Brunswick Depot CC352 W3 666 – St Kilda Road and High St Demonstrates the work of Charles Craig in photography and collection of prints.Assembled album in a black presentation folder of 80 photographs from the Charles Craig Collection - 31 sleeves - part 2 of 2. All photographs have been scanned and placed on the Museum's G drive. A list of all photographs with details where possible has been compiled. Victorian Provincial, Launceston, Hobart and Sydney tram photos have been transferred to other Museums, image files retained.melbourne, tramways, tramcars, trams, charles craig -
 Ballarat Tramway Museum
Document - Folder with papers, State Electricity Commission of Victoria (SECV), 1960's
Yields information about the drawings that were used by the depot or workshop staff as reference drawings. Has a strong association with the depot workshop staff. Yields information about equipment on Ballarat tramcars and Signalling.Folder containing 46 blueprints or Dyeline prints of SEC tram equipment drawings. Front of folder made from a cloth back sheet of paper extended to secure to a thick cardboard runner. Rear of folder made from an old tram advertising panel or cardboard sheet, cut to size and secured to a thick cardboard runner with a cloth backing on both sides. Sheets secured with three brass screwed clips. Front cover damaged in bottom right hand corner. Rear cover breaking apart on outside around cloth binding. Heavy dirt marks from “grease” on bottom half of rear cover. Contains 46 drawings which have been individually catalogued and numbered on the rear of each drawing within the folder. Some of the drawings have been folded. Reg Item Micro Film No. Old BTPS No. SEC Drawing No Title 4807 42/4 1 VB4/8103C Westinghouse T1F Controller Main Cylinder Segments. 4867 47/2 2 BA-T8-8128 Westinghouse 225N Motor Case Bolt 4830 22/3 B 3 BA-T7-7666 Half Ball Brake Hanger Link, Driving Wheel, Brill Maximum Traction Truck 22E 4868 44/3A 4 BA-T8-8113 Split Suspension Bearing for Type W225 Motor (Westinghouse) 4869 52/2 5 BA-T8-8158 Contact Tips for G.E. Compressor Controller 4818 52/3 6 BA-T8-8159 GE B-23 Contact Finger Tips for G.E. Type ‘B’ Main Cylinder 4870 6/1 7A BA-T3-6734 Brass Nut for Switch Mechanism 4829 6/2 7B BA-T3-6735 Tongue Clip Link for Switch Mechanism 4871 6/3 7C BA-T3-6736 Fulcrum for Switch Mechanism 4872 6/4 7D BA-T3-6737 Plunger for Switch Mechanism 4832 7/6 8 BA-T3-6754 Pivot for Switch Mechanism No numbers 9 or 10 4873 17/5 11 BA-T7-7639 Detail of Motor Pinion for Brill Cars 4831.2 21/4 B 12 BA-T7-7661A Half Ball Hanger Links – single bogie trucks 4874 21/6 13A BA-T7-7663 Axle Box Inner Spring Driving Wheels Maximum Traction Truck 22E 4875 22/1 13B BA-T7-7664 Axle Box Outer Spring Driving Wheels Maximum Traction Truck 22E 4876 22/2 14 BA-T7-7665 Body Spring Brill Maximum Traction Truck 22E 4830.2 22/3B 15 BA-T7-7666A Half Ball Brake Hanger Link Driving Wheel Brill Maximum Traction Truck 22E 4877 22/4 16 BA-T7-7667 Body Spring, Brush Maximum Traction Truck 22E 4820.2 22/6 A 17 BA-T7-7669 Wear cups for Half Ball Brake Hanger Links, Single & Double Bogie Trucks 4878 50/5 18 BA-T8-8149 Connections of Line Breaker and Ratchet Switch for use with Drum Controller 4879 74/6 19 BA-T13-8757/9 Signal boxes, Back of Panel Wiring and External Connections 4880 45/1 20 BA-T8-8116 Trolley Harp 4806 15/3 21 BA-T7-7625 Equalizing Lever, Fulcrum, Brill 21 E truck 4881 15/5 22 BA-T7-7626A Brake Beam Fulcrum Brill 21E truck 4808 16/1 23 BA-T7-7628 Pinion Remover, GE 201G and GE 202 motors 4882 16/3 24 BA-T7-7630 Spring Posts, Brill 21E Truck 4883 21/3 25 BA-T7-7660 Brake Shoe Holder, Driving Wheel, Maximum Traction Truck Brill 22E 4884 21/5 26 BA-T7-7662 Brake Rod Guide, Single Bogie Trucks 4885 22/5 27 BA-T7-7668 Brake Shoe Holder, Pony Wheel, Maximum Traction Truck Brill 22E 4809 42/2 B 28 BA-T8-8101 Trolley Wheel and Axle 4815 42/1 B 29 BA-T8-8102A Motor Suspension Bearing, GE 202 Motor 4796.2 42/5 30 BA-T8-8104 Connection Diagram WH 225N Motor 4886 42/6 B 31 BA-T8-8105B Motor Suspension Bearing, GE 201 Motor 4797.2 48/6 32 BA-T8-8137 WH T1F Controllers 4816 49/2 33 BA-T8-8138 Connection Diagram GE 202 Motor 4887 49/3 34 BA-T8-8139 Connection Diagram K-36-J Controller 4888 50/3 35 BA-T8-8146 GE K-36-JR Controllers, with line breaker (Connection diagram) 4889 50/6 36 BA-T8-8150 Commutator for Westinghouse 225N Motor 4846 51/1 37 BA-T8-8151A Armature Bearing Lining, Commutator End, Type GE 201G Motor 4813 51/2 38 BA-T8-8152 Armature Winding Diagram Westinghouse 225 Motor 4840.2 51/40 39 BA-T8-8154A Armature Bearing Lining, Pinion End, Type GE201G Motor 4890 51/6 40 BA-T8-8156 Armature Bearing Lining, Pinion End, Type GE202A Motor 4891 52/1 41 BA-T8-8157A Armature Bearing Lining, Commutator End, Type GE202A Motor 4892 64/5 42A BA-T9-8392A Step Hangers, Single and Double Bogie Trucks, Hinged Type 4785.2 64/6B 42B BA-T9-8392/1A Step Hangers, Single and Maximum Traction Trucks, Fixed Type 4812.2 43/1 43 BA-T8-8106B GE K36J Controller, Main Cylinder Segments 4893 50/2 44 BA-T8-8145A GE B23E Controller, Main Cylinder Segments 4816 65/2 45 BA-T9-8394B Door Lock for Motorman’ Cabin Maximum Traction Trucks. 4810 73/3 46 BA-T13-8757 Ballarat Electric Tramways Signalling System, Arrangements & Details of Box.On front cover of folder, "1 - 46"trams, tramways, drawings, ballarat, sec, depot, workshops -
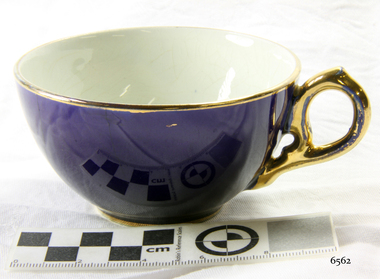 Flagstaff Hill Maritime Museum and Village
Ceramic - Teacup, 1920s
This teacup is part of a four-piece place setting, comprising a teacup, saucer and plates, from a tea set. The tea set was given by Eva Carmichael, a survivor of the ship Loch Ard which was wrecked near Port Campbell in 1878, to Jane Shields, the young woman who supported Eva during her recovery from the ordeal. Ms Shields was Eva’s close companion while she was convalescing at Glenample Homestead. The friendship between the two women continued after Eva Carmichael returned to her home in Britain, became Mrs Townsend, and had three sons. Jane Shields also married, becoming Mrs John Osborne and bearing four daughters and two sons. In 1926-27, almost forty-eight years after the shipwreck, one of Jane’s daughters (Ella Marie Schulby nee Osborne) visited Eva in England. Eva gave her the tea set to take back home to her mother. Jane died in 1932 and her tea set was inherited by her daughters, who divided it between themselves, a four-piece place setting for each of them. A brief history of the Loch Ard: - The Loch Ard was named after a Scottish lake. It was one of the famous Loch Line of ships that sailed the long voyage from England to Australia. Barclay, Curdle and Co. built the three-masted iron ship in Glasgow in 1873. It had sailed three trips to Australia and one trip to Calcutta before its fateful voyage. Loch Ard left England on March 2, 1878, under the command of recently married, 29-year-old Captain Gibbs, bound for Melbourne with a crew of 37, plus 17 passengers. The general cargo reflected the affluence of Melbourne at the time. Onboard were straw hats, umbrellas, perfumes, clay pipes, pianos, clocks, confectionery, linen and candles, and a heavier load of railway irons, cement, lead and copper. Other cargo included items intended for display in the Melbourne International Exhibition of 1880. The Loch Ard had been sailing for three months and was close to its destination. At 3 am on June 1, 1878, Captain Gibbs expected to see land, but the Loch Ard ran into a fog that greatly reduced visibility. Captain Gibbs became anxious as there was no sign of land or the Cape Otway lighthouse. The fog lifted at 4 am. A lookout announced that he could see breakers. The sheer cliffs of Victoria's west coast came into view; the ship was much closer to them than Captain Gibbs expected. It was not long before the Loch Ard's bow swung towards land. Although the Captain tried to manage the vessel, his attempts didn’t work and the ship struck a reef at the base of Mutton Bird Island, near Port Campbell. The top deck became loosened from the hull, and the masts and rigging crashed down, knocking passengers and crew overboard. The lifeboat was launched by Tom Pearce but crashed into the side of Loch Ard and capsized. Tom Pearce managed to cling to the lifeboat’s overturned hull and shelter beneath it. He drifted out to sea and the tide brought him back to what is now called Loch Ard Gorge. He swam to shore and found a cave for shelter. A passenger, Eva Carmichael, had raced onto the deck to find out what was happening and was confronted by towering cliffs above the ship. She was soon swept off the ship by a huge wave. Eva saw Tom Pearce on a small rocky beach and yelled to attract his attention. He swam to the exhausted woman and dragged her to shore and to the shelter of the cave. He revived Eva with a bottle of brandy from a case that had washed up on the beach. Tom scaled a cliff in search of help and followed some horse hoof prints. He came from two men from Glenample Station, three and a half miles away. He told the men of the tragedy and then returned to the gorge while the two men rode back to the station to get help. They reached Loch Ard Gorge and took the two shipwreck survivors to Glenample Station to recover. Eva stayed at the station for six weeks before returning to Ireland by steamship. In Melbourne, Tom Pearce received a hero's welcome and was presented with a medal and some money. Of the 54 crew members and passengers on board, only two survived: the apprentice, Tom Pearce and the young woman passenger, Eva Carmichael, who lost her family in the tragedy.This blue china tea set, comprising a teacup, saucer and two plates, is of high significance as it is closely connected to the wreck of the Loch Ard, and to one of only two survivors, Eva Carmichael. Memorabilia connected to Eva Carmichael are precious and rare. The Loch Ard shipwreck is significant for Victoria and is registered on the Victorian Heritage Register (S 417). Flagstaff Hill has a varied collection of artefacts from Loch Ard and its collection is significant for being one of the largest accumulations of artefacts from this notable Victorian shipwreck. The group gives a snapshot of history, enabling us to interpret the story of this tragic event and the lives of the people involved. The collection is also archaeologically significant as it represents aspects of Victoria's shipping history that allow us to interpret Victoria's social and historical themes of the time. The collection's historical significance is that it is associated unfortunately with the worst and best-known shipwreck in Victoria's history.The teacup is part of a china tea set place setting, which comprises the teacup, a saucer and two plates of slightly different sizes. The cup is a royal blue outer, white inside with gold lip, a gold ring around the base and a gold handle. flagstaff hill, warrnambool, flagstaff hill maritime museum and village, shipwreck coast, great ocean road, china tea set, tea set, royal blue china, tom pearce, eva carmichael, jane shields, glenample, loch ard, place setting, teacup -
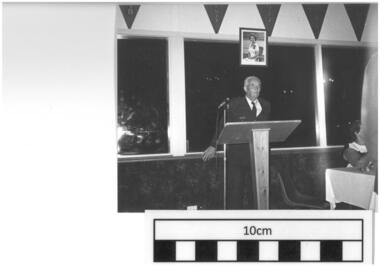 Wangaratta Urban Fire Brigade
1987 presentation dinner, photographs
All photographs taken at the 1997 presentation dinner at the Wangaratta Rovers football club. Wangaratta Brigade members and partners and guests from other brigades and their partners along with 'guests' were always invited. .1 - Trevor Poulter (Chairman) .2 - L - R - ???, Arthur Haynes (regional officer), Tess Haynes .4 - L-R - ???, Trevor Poulter, David Allen (representing council) .5 - L-R - David Allen (representing council, Allan Mills .6 L-R - Brian Potter, Cyril Davidson .7 L-R - Kevin Howard, Brian Humphries (station officer) .8 L-R - Brian Potter, Cyril Davidson .9 L-R - June Poulter, Trevor Poulter, Jack Prendegast, Heinz Baytala .10 L-R - Brian Potter, Pat Briese .11 L-R - Jack Prendegast, Craig Musselwhite (junior) .12 L-R - Barrie Sanders, Brian Potter (giving award to Barrie) .13 L-R - John Rosser, Brian Potter, (35 yr long service medal to John) (Band members in background) .14 L-R - Peter Bell (when was a volunteer), Brian Potter .15 L-R - Jack Prendegast, Craig Musslewhite .16 L-R - Joan Rosser, Gail Humphries .17 L-R - Barrie Sanders (speaking), Brian Potter .18 L-R - Jack Prendergast, Heinz Baytala (winner of the reserve fireman) .19, .20, .21, Members and guests doing the 'progressive barn dance' .22, .23, .24, .25, .26, .27 Wangaratta running team members (end of competition season) - L-R - Eric Lawn, ???, Ron Webb, To Philp, ??? .28, .29 L-R - Aileen Sanders (12yr badge), Elaine Graham (20yr badge) .30 Jon Briese 35yrs and Cyril Davidson 40 and John Kerr 25yrs - long service awards .31 - S. Poulter + wife posing for the camera whilst on the dance floor, with several other people and part of the band in the background .32 - T.Poulter (brigade chairman) standing at the lecturn/microphone speaking - there are 2 others (1 male, 1 female) seated to the right of him at a table .33 - Front L- R - Dorothy Wise (with her back to us), ?, T Poulter. Back L-R - Fire officer(unknown), Dianne Mills .34 - Alex Carmody and wife Judy Carmody .35 - Front R around table to front L - ? , ? , Dianne Mills, Angie Sheetz, Ron Webb, ? , Maxine Webb, Steve Allan .36 - Chief Officer Brian Potter (speaking at lecturn), Arthur Haynes and wife Tess Haynes (seated in background) .37 - L to R around table - Cyril Davidson, Alec Carmody, Judy Carmody, Margaret Howard, Kevin Howard .38 - L to R Rhonda Allan, Jan Marshall (back to us), Stewart Marshall, Steve Allan .39 - L to R Tess Haynes, Arthur Haynes(standing), (Pat Rooks - a guest from Whitfield??), Trevor Poulter, June Poulter, Val Gleeson, Kevin Gleeson (mayor of Wangaratta at the time), Aileen Sanders, Elaine Graham 40 - a 'head and shoulders' photo of S/O Brian Humpfreys. In the photo is also a lady standing on his right - but her head is cut off so cant be identified .41 - Jan Marshall kissing Stewart Marshall S/O (various other members , guest and band in background) .42 - Back L - R - Trevour Poulter, Craig Mussellwhite, Brian Potter (Chief officer), Middle - Elaine Graham, Aileen Sanders Front L - R- Peter Bell, John Briese, Cyril Davidson .43 - L -R around table - Stewart Marshall S/O, Jan Marshall, Tracey Collier, Dianne Mills, ??? (standing), ???, Brendan Collier??, Gayle Humphreys, Brian Humphreys S/O .44 - L to R S/O Stewart Marshall, S/O Brian Humpreys, Jan Marshall (sitting with her head back laughing) .45 - all 3 standing side by side L to R Craige Musselwhite (reserve fireman of the year), Peter Bell (fireman of the year - holding the perpetual trophy shield), Trevor Poulter (runner up fireman of the year) .46 - Steven Poulter and wife .47- A. Hynes standing at lecturn speaking. 47 various photographs from the 1987 presentation dinner at Rovers.1- Nov 1987 Presentation Dinner Chairman Trevor Poulter .2- Nov 1987 Presentation Dinner .3 - Nov 1987 Presentation Dinner L to R S/O Allan S/O Grenfell Chairman Trevor Poulter .29- Nov 1987 Presentation Dinner .30 - Nov 1987 Presentation Dinner L to R FIREMAN JOHN BREEZE, CIRIL DAVIDSON JOHN KERR .31 - Nov 1987 Presentation Dinner S. Poulter + missus .32 - Nov 1987 Presentation Dinner T. Poulter chairman .33 - Presentation Dinner 1987 .34 - Nov 1987 Presentation Dinner .35 - Nov 1987 Presentation Dinner .36 - Nov 1987 Presentation Dinner .37 - Nov 1987 Presentation Dinner .38 - Nov 1987 Presentation Dinner .39 - Nov 1987 Presentation Dinner .40- Nov 1987 Presentation Dinner .41 - Presentation Dinner 1987 Nov S/O Stewart Marshall .42 - Presentation Dinner 1987 Nov S/O Brian Humpreys .44 - Nov 1987 Presentation dinner L to R S/O Stewart Marshal, " Brian Humpreys Jan Marshal .45 - Nov 1987 Presention dinner L to R Craige Musselwhite (reserve fireman of the year) Peter Bell (fireman of the year) Trevor Poulter (runner up) .46 - 1987 Nov. Presentation Dinner Steven Poulter and wife .47 - Nov 1987 Presentation Dinner A.C.O A. Hynesaileen sanders, elaine graham, eric lawn, ron webb, tom philp, jack prendergast, heinz baytala, barrie sanders, brian potter, joan rosser, gail humphries, craig musselwhite, peter bell, john rosser, pat briese, june poulter, trevor poulter, cyril davidson, kevin howard, brian humphries, david allen, allen mills, arthur haynes, tess haynes, john jerr, stephen poulter, alex carmody, judy carmody, dianne mills, angie sheetz, maxine webb, steve allan, jan marshall, a. hynes, margaret howard, rhonda allan, stewart marshall, val gleeson, kevin gleeson, john briese, tracey collier, brendan collier -
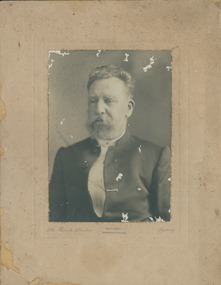 Uniting Church Archives - Synod of Victoria
Photograph, Before 1919
B. 1835 England, D. 1919 Christchurch NZ. Methodist minister. Chronicle 17 May 1919, p.43: Deep regret will be felt in South Aus-tralia at the passing away of the Rev. Samuel Knight, one of the best-known and most loved of the earlier ministers of the Wesleyan Methodist Church in Australia. The announcement of the death of Mr. Knight, who was in his 85th year, was received by cable on May 11 from Christ-church, New Zealand, where he had re-sided during the last few years with his only son, the Rev. Percy N. Knight, B.A. The veteran preacher spent over twenty years of his busy and useful life in this State. His last visit to Adelaide was in July, 1915, and it was through his agency and influence that £1,150 was raised for the reduction of the debt on the Archer-street Methodist Church. At that time, except for his head being crowned with snow-white hair, there was little in Mr. Knight's appearance to indicate his great age. He was obviously perfectly happy, and was still the tender shepherd who was so well beloved by his flock when he labored in South Australia. The older members of the Methodist Church remember well the splendid work he did more than half a century ago. He won similarly widespread respect in Vic-toria when he was transferred to the Con-ference there. He had charge of the prin-cipal circuits in both States, and he was equally successful as an eloquent preacher, a sympathetic and an assiduous pastor, and a wise and prudent administrator. His presence in the pulpit was always greeted by a large congregation, and the earnest-ness and spiritually of his discourses never failed to impress them. He was imbued with the true spirit of Methodism, and he had a firm and confident belief in the doctrines which he inculcated with such emotional fervor. Mr. Knight was a broad-minded, genial man with a keen sense of humor, and he shone on the platform. A true Christian, he was also a man of the world, and he could, when appealed to, give valuable counsel. He was a friend to be trusted, and he was ever ready to help those in need of his practical sympathy or his well-considered advice. He lived in an era of great Australian Methodists, and he was one of the greatest among them. Mr. Knight was an indefatigable worker, and under his control all the institutions of the circuits in which he worked nourished abundantly. He was a guide, philosopher, and friend to the younger ministers and exercised a great influence for good in Conference. Mr. Knight was born in Liverpool in 1834 and came to Australia in 1854. After spending several years in Victoria he arrived in Adelaide in 1867 to take charge of the Pirie-street Church. He received three ap-pointments as pastor at Pirie-street, two at Kent Town, and two at North Ade-laide (Archer-street), and he was also at Burra, Gawler, and Moonta. He was president of the Wesleyan Methodist Con-ference in 1877. In 1889 he returned to Victoria, and among the circuits of which he had charge at different times were Brunswick-st (Melbourne), St. Kilda, Ballarat, and Geelong. His activities by no means ceased after he went on the supernumerary list. For some years he was connected with Queen's College (Uni-versity of Melbourne), for which he col-lected a large sum for the liquidation of certain liabilities. The Samuel Knight scholarship was founded last year at Queen's College in his honor. Mr. Knight had taken up in recent years the work of establishing ministers in new circuits and of helping struggling churches. He undertook an energetic campaign of attack upon the debts on various churches that, recognising what his personality could do for them, had appealed to him for assistance, and achieved remarkable success in placing the finances on a sounder footing. A considerable portion of his own income in recent years was devoted to the assistance of young ministers, and to aug-menting the stipends that could be offered by newly established circuits in various parts of Victoria. Mr. Knight had been a widower for many years. His only daughter, Dr. Adela Knight, who appeared to have a brilliant career before her in medicine, died in Vienna about 25 years ago. The Rev. Samuel Knight was for many years a close personal friend of the late Sir Samuel Way, with whom he always stayed when visiting Adelaide. His death was a subject of reference at a number of Methodist churches in and around Ade-laide.B & W head & shoulders studio portrait of Rev. Samuel Knight, mounted on buff card.Rev. S. Knightknight, samuel, rev. -
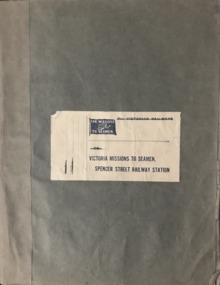 Mission to Seafarers Victoria
Book (Item) - Scrapbook, Edith E Hitchcock, Victoria Missions to Seamen, Spencer Street Railway Station, 1931-1943
The scrapbook, compiled by Edith E Hitchcock, displays a variety of newspaper clippings with photographs relating to ships, sailors, their hobbies, Padre Oliver. Page 1 - Map of the British Empire Page 3 - Newspaper clipping with photographs: "Happy Sailors Lads" onboard the CB Pedersen C.1935 Page 5 - Photograph depicting three children watching of a ship at sea Page 7 - 1937: article: with photograph"Sea Captain and Artist": Captain A.C.G. Dreillek, Swedish ship Yngaren (similar photo published in 1937 in the Courier Mail Brisbane) Page 9 - 1935: "Reunited": Dog Patsy with ship Pegasus crew members / "Sydney Harbour Bridge": Phillip Vanderhill, Cook of the Kota Inter and its sitar creation Page 11: Mr G. Gatty and Tim, the cat from the Esperance Bay / Herbert the hen, pet on the ship King Arthur / Frank Simpson, quartermaster and painter from the ship City of Dieppe. Page 13: Conway Seymour and shipmate aboard the Orford. Page 15: 3 photographs of French sailors from the cruiser Rigault de Grenouilly in 1936. Page 16: Photograph of A.J. Kramer working on a ship model aboard the Dutch ship, Kota Inten. Page 17: 1936: Photographs of sailors from the French ship Rigault de Grenouilly and the American ship: California State berthed in Prince's Pier. (plus two large loose clippings with portraits of same sailors). Page 18: 1934: Ball on the Manunda to raise funds for the Mission: photograph of Captain Robert Sunter, Padre Oliver, Moira Oliver, Mrs Harold Clapp. Page 19: Photograph of French sailors from the Rigault de Grenouilly in a bus en route to the Dandenong Ranges. Page 21: Photographs of a shipwreck (probably Kakariki in 1938, see next page). Page 23: Aerial photograph of the shipwreck Kakariki in Hobson's Bay in 1937 Page 25: Photograph of the shipwreck Kakariki in Hobson's Bay in 1937. Page 26: Photograph of the shipwreck Kakariki in Hobson's Bay in 1937. Page 27: Photograph of the survivors from the shipwreck Kakariki in the Mission in 1937: A. Bunyard, W. Fisk, J. Greene, L. Tarlington, J. McInnes, G. Coote, G. Sugar. Page 28: Photograph of the survivors from the shipwreck Kakariki in the Caradale in 1937: W. Fisk, T.W. White. Page 29: Missioneers talk to Firemen: Padre Oliver and his assistant, L.V. Owen talking to ship's firemen.(the Argus, 24 July 1931) Page 31: 3 articles with photographs: American cadets from the California State / Governor's Surprise Visit: Lord Huntingfield visiting Padre Oliver in the Mission (the Argus, 19 May 1936) / Sea Scouts on Liner: Padre Oliver on the P&O Cathay (the Argus, 16 June 1936) Page 33: Harbour Lights: padre Oliver, Lord Somers and Rev. R. Kerdell / Visit of the Duchess to the Mission (the Argus, 26 february 1945). Page 34: Photograph titled "An old salt still yearns for the sea- 369 miles away". Page 35: two clippings : Presentation of cheques for Merchant Navy: Betty Raymond giving a cheque to Padre L.L. Elliott / A cheque for the Seamen's Mission: Photograph of Padre Oliver with a cheque. Page 37: 4 clippings with photographs: Padre Oliver playing the piano for the cadets of the C.B. Pedersen / Miss Gladys Grant with parcels (from the Age 10 November 1943) / All Nations' Dance / Christmas at the Flinders Street mission, Padre Oliver cutting the cake (The Age, 15 December 1942) Page 39: Unveiling of the Memorial window to Captain Robert Sunter in 1936. Page 41: 2 clippings: At the Seamen's Mission: photographs of J. W. Neill and Padre Oliver / Married: Albert Robertson and Beryl Landrigan / Postcard of the St Peter Chapel. Page 43: 2 postcards: The Cloisters / The Mission view from Flinders Street. Page 45: Postcard of the windvane. / clipping of Sailors from the Zealandic. Page 46: 2 clippings: Virtually a Man without a country: Frans Nobel on the ship Milleeta / Seaman, Soldier, Waiter, Singer, Cook Finds Peace (Frans Nobel).(1939) Page 47: That Land Looks Good: two seamen from the tanker British Fame Page 48: large clipping of the C.B. Pedersen "Like a page from the past".(april-May 1935) Page 49: Photograph of Padre Oliver in his army uniform.This scrapbook is significant because it makes reference to contemporaneous events related to the Mission to Seafarers. On the inside cover is the name Edith E. Hitchcock.edith e. hitchcock, scrapbooks, c.b. pedersen, hobbies, ship models, painting, frank leslie oliver, mv manunda, captain robert sunter, windvane, rigault de genouilly, french, german, california, kakariki, ship pegasus, sydney harbour bridge, sugar, kota inten, philip vanderhill, lord somers, reverend r. kerdell, r.m.s. moldavia, victoria dock, ww2, pets, bird, dog, cat, gladys grant, alphonse polo, eugene emonin, raoul gannson, esperance bay, g. gatty, captain a. macwhirter, frank simpson, city of dieppe, conway seymour, orford, a.j. kramer, dutch, moira bird oliver (nee good), mrs harold clapp, caradale, 3uz radio, betty raymond, l.l. elliott, j.h. bustard, merchant navy patriotic fund, g.h. martin, j.w. neill, albert robertson, beryl landrigan, zealandic, frans nobel, milleeta, british fame -
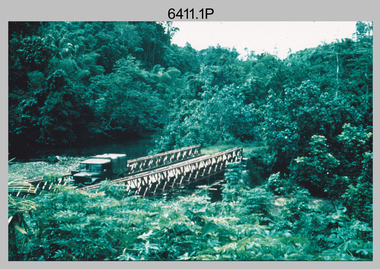 Bendigo Military Museum
Photograph - Royal Australian Survey Corps Surveyors in the Field – Project Cutlass, New Guinea, 1956 – 1957
This is a set of 23 photographs of surveyors and support staff in the field undertaking tasks in New Guinea 1956 – 1957. The surveyors were employed in the establishment of mapping and geodetic control for Project Cutlass, the “Ship-Shore” survey of the New Ireland province. In this survey operation surveyors used theodolites to observe horizontal and vertical angles and chains to measure base line distances between survey stations. Bob Skitch shown in photo .7P was in the 2nd year of his career in the Australian Army. He achieved the rank of Lieutenant-Colonel, and his last appointment was the CO of the Army Survey Regiment from 1976 to 1980.This is a set of 23 photographs of surveyors and support staff in the field undertaking duties during Project Cutlass located in New Ireland, New Guinea 1956 – 1957. The photographs were printed on photographic paper and are part of the Army Survey Regiment’s Collection. The photographs were scanned at 300 dpi. .1) - Photo, colour, 1956. Surveyors travelling main road from Kavieng to Namatanai, New Ireland. .2) - Photo, colour, 1956. Unidentified surveyors assessing recovery of their vehicle after bridge collapsed on west side of New Ireland. .3) - Photo, colour, 1956. Unidentified surveyors assessing recovery of their vehicle after bridge collapsed over flooded creek on west side of New Ireland. .4) - Photo, colour, 1956. Survey personnel L to R: Bev Uwins, John Lambie, Bob Thompson, New Ireland. .5) - Photo, colour, 1956. Survey base camp, New Ireland. .6) - Photo, black & white, 1956-1957. Geoff Helsham with possible human remains, New Ireland. .7) - Photo, black & white, 1956-1957. Bob Skitch undertaking survey observations using Wild T2 theodolite, New Ireland. .8) - Photo, black & white, 1956-1957. Chas Beach undertaking survey observations using Wild T2 theodolite, New Ireland. .9) & .10) - Photo, black & white, 1956-1957. Kev Parker (cook) New Ireland. .11) - Photo, colour, 1957. Brian Berkery taking a break, Top Manor Island, Lihir Island Group off New Ireland. Latitude -2° 46”, Longitude 152° 40”. .12) - Photo, colour, 1957. Survey base camp L to R: Chas Beach, Bev Uwins, Feni Islands, New Ireland. Latitude -4° 05”, Longitude 153° 45”. .13) - Photo, colour, 1957. A Hous Kiap. (Kiaps, known formally as district officers and patrol officers, were travelling representatives of the British and Australian governments), New Ireland. .14) & .15) - Photo, colour, 1957. L to R: Joe Farrington, Tom Royle Bob undertaking survey observations using theodolites from an improvised timber tower, New Ireland. .16) & .17) - Photo, colour, 1957. US Army ship FS216 used for ship-to-shore triangulation docked at Rabaul, New Britain. .18) - Photo, colour, 1957. US Army ship FS216 used for ship-to-shore triangulation docked at Kavieng, New Ireland. Sight target on top of mast. .19) - Photo, colour, 1957. Survey personnel onboard US Army ship FS392, L to R: Peter Frodsham, Bob Thompson, Doc Reid, John Underwood, remainder unidentified, New Ireland. .20) - Photo, colour, 1957. Survey base line party heading ashore, New Ireland. .21) - Photo, colour, 1957. Survey personnel rowing US Army assault boat L to R: Kev Parker, Chas Beach, folded up survey beacons overhanging stern, New Ireland. .22) - Photo, colour, 1957. Les Bailey onboard US Army ship departing Rabaul, New Britain for Brisbane. .23) - Photo, colour, 1957. Ron Newman onboard US Army ship departing Rabaul, New Britain for Brisbane. Active volcano in background..1P to .23P annotated on back – ‘Operation Cutlass’, personnel names, the year and the location. royal australian survey corps, rasvy, army survey regiment, fortuna, a, army svy regt, asr, surveying -
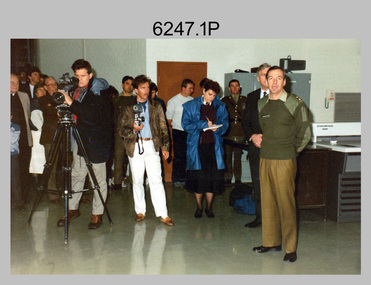 Bendigo Military Museum
Photograph - Speedmaster Printing Press Media Announcement and Army Survey Regiment Open Day, Fortuna Villa, Bendigo, 1990
The first photograph was probably taken at a media event announcing the introduction of the Heidelberg Speedmaster printing press in late 1990. LTCOL Rene van den Tol was the CO of the Army Survey Regiment from 1989 to 1991. Partly obscured behind the CO was Mr Bruce Reid, who was the newly elected federal member for Bendigo. The media event was held in Wayzgoose Hall, Lithographic Squadron’s new purpose-built building constructed to house the Speedmaster 102 printing press. The remaining 29 photographs were taken at an Army Survey Regiment Open Day at Fortuna Villa, Bendigo on the 24th of February 1990. This occasion was one of several events held to commemorate the 75th anniversary of the formation of the Royal Australian Survey Corps. Although historical tours of Fortuna occurred on a regular basis, this was the first technical open day since 1972. The Royal Australian Survey Corps recognised that an Open Day was the best way for the local community in Bendigo to gain an insight into the unit’s important role as Defence’s map production agency, its technical equipment, and its economic importance to Bendigo. It also gave them an opportunity to tour through historic Fortuna Villa. This occasion is covered in more detail in page 143 of Valerie Lovejoy’s book 'Mapmakers of Fortuna – A history of the Army Survey Regiment’ ISBN: 0-646-42120-4. Refer to Item 6291.6P for more photos of the Open Day.The first photograph was probably taken at a media event announcing the introduction of the Speedmaster printing press at Army Survey Regiment Fortuna Villa, Bendigo in late 1990. The remaining 29 photographs were taken at an Open Day on the 24th of February 1990. The colour and black & white photographs were printed on photographic paper and are part of the Army Survey Regiment’s Collection. The photographs were scanned at 300 dpi. .1) - Photo, colour, 1990. L to R: Unidentified civilian visitor/media, SSGT Ian Nichols, unidentified (x2), SGT Dale Hudson (white top), unidentified (x2), MAJ John South, MHR Mr. Bruce Reid, CO LTCOL Rene van den Tol. .2) - Photo, black & white, 1990. WO1 Gary Warnest, civilian visitors. .3) to .4) - Photo, colour, 1990. WO2 Adrian 'Charlie' Creedy, civilian visitors. .5) - Photo, colour, 1990. Civilian visitors. .6) to .7) - Photo, colour, 1990. Civilian visitors, CPL Peter Peterson. .8) - Photo, black & white, 1990. L to R: LCPL Sandy Winn, civilian visitor. .9) - Photo, colour, 1990. L to R: CPL Steve McGuiness, civilian visitors. .10) - Photo, black & white, 1990. Display of digital storage media. .11) - Photo, colour, 1990. L to R: Mr Pat Thwaites outlining utilisation of satellite imagery to civilian visitors. .12) - Photo, colour, 1990. MAJ Peter Clarke with civilian visitors. .13) - Photo, colour, 1990. Unidentified technician with civilian visitors. .14) - Photo, colour, 1990. SGT Barry Hogan with civilian visitors. .15) - Photo, colour, 1990. SPR Ian Baldwin with civilian visitors. .16) - Photo, black & white, 1990. SPR Ian Baldwin with civilian visitors. .17) - Photo, black & white, 1990. SGT Sherri (Dally) Burke with civilian visitors. .18) - Photo, colour, 1990. L to R: SPR Jeanette (Lane) Dury-Lane, CPL Diane (Thomas) Soutar with civilian visitors. .19) - Photo, colour, 1990. L to R: unidentified technician, CPL Col McInnes, LCPL Charmian McKean. .20) - Photo, black & white, 1990. CAPT Peter Parkes. .21) - Photo, black & white, 1990. L to R: LCPL Janet Murray, MAJ Bob Coote, SPR Gary Lord. .22) - Photo, black & white, 1990. LT Marty Lyons with civilian visitors. .23) - Photo, colour, 1990. LT Marty Lyons with civilian visitors. .24) - Photo, black & white, 1990. SSGT Ian Nichols, CPL Dale Hudson, Planeta printing press, with civilian visitors. .25) - Photo, colour, 1990. Cars parked in Chum Street outside entrance to Fortuna Villa. .26) - Photo, colour, 1990. Civilian visitors near Fortuna Villa’s front door viewed from back gate. .27) - Photo, colour, 1990. Civilian visitors enjoying views of the garden from Fortuna Villa’s rooftop. .28) - Photo, colour, 1990. Civilian visitors enjoying views of the garden from Fortuna Villa’s verandah and rooftop. .29) - Photo, colour, 1990. Civilian visitors enjoying BBQ cooked by CPL Paul Baker and SPR Shona Hastie outside Lithographic Squadron. .30) - Photo, colour, 1990. BBQ cooked by CPL Paul Baker outside Lithographic Squadron..1P to .30P – no annotationsroyal australian survey corps, rasvy, army survey regiment, army svy regt, fortuna, asr, printing, litho -
Federation University Historical Collection
Document - Outreach Program, Federation University Australia, Regional Schools outreach Program (RSOP) Federation University, 2008 - 2017
Regional Schools Outreach Program is a Federation University Program in conjunction with the Australian Government.1 Student Action Plan A4 Sheet .2 Regional Schools Outreach Program informations sheet A4 .3 VTAC information sheet 2014 A4 .4 Special Entry Access Scheme (SEAS) information sheet A4 .5 Open Days 2014 A4 flyer .6 VCAL snapshot A4 flyer .7 4 page booklet titled University, put yourself in the picture. .8 From High School to University - Making the transistion A4 flyer .9 I don't know what I want to do! A4 Flyer .10 Bridging Courses and Pathway Programs A4 Flyer .11 FedUni Schools Outreach - Focus on your Future A4 Flyer .12 60 page A4 booklet Regional Schools outreach Program 2008 - 2013 Evaluation Report .13 9 Page A4 Booklet Excite explore Empower - Evaluation of Federation University Australia Regional Schools Outreach Program - Summary of 2008 - 2013 Evaluation Findings and Conclusions .14 Key Dates list 2016 - 2017 .15 Student Guide - Year 10 - Course and Career Options A4 Booklet - 13 Pages .16 Univeristy - Year 10 - Put yourself in the picture A4 Flyer .17 Year 9 Teacher's Guide - Focus on your future - A4 Booklet 13 page booklet .18a Focus on Your Future - Year 9 - Student Workbook 2015 - A4 Booklet 12 pages .18b Focus on your Future - Year 9 - Teacher's Guide 2015 - A4 Booklet 12 pages .19 Focus on their future - Parent's Guide 2015 - A4 Booklet 8 page booklet .20 Focus on your Future - A Parent's Guide 2013 - A4 Booklet 8 Pages .21 The Future is Now - Year 8 - Teacher's Guide 2014 - A4 Booklet 12 pages .22 a & b - The future is now - Year 8 - Student Workbook 2014 - A4 Booklets 12 pages .23 Dream Makers - Grade 5/6 a Parents guide - A5 8 page Booklet .24a & b Stepping Up reach for the stars - Grade 5/6 Parent's Guide - A5 8 page Booklet .25a & b Regional Schools Outreach Program Grade 5/6 Stepping up Workshop - Teacher's Resource - 3 page A4 document .26a & b Stepping up reach for th stars - Student Workbook - A4 12 page Booklet x 2 .27a & b Grade 5/6 Building your Future - A Parent's guide - 4 page A5 Booklet .28 Building your future - Grade 5/6 A Student's Guide - A4 8 page booklet .29 Joining the dots from secondary school to University - Course and career options - Beyond secondary school - a guide to future career options 2013 .30 Later years Students - University - How to Make it Happen 2014 - A4 Booklet 16 pages .31a & b Scholarships and SEAS Applications - Year 12 Guide - 4 page A4 document .32 Student Guide - Later Years - University how to make it happen - A4 Booklet 16 pages .33 Regional Schools Outreach Program - Putting Regional Students in the picture for University - A4 4 page pamphlet regional schools outreach program, federation university, student guide, later years, scholarships, seas, special entry access scheme, university how to make it happen, course and career options, building your future, grade 5/6, stepping up, parent's guide, reach for the stars, workshop, teachers resource, dream makers, the future is now, year 8, teacher's guide, focus on your future, focus on their future, year 9, student workbook, year 10, put yourself in the picture, what do you know about uni?, key dates, excite explore empower, evaluation findings and conclusions, evaluation report, fed uni schools outreach, bridging courses, pathway programs, i don't know what i want to do., support services, picture the possibilities, booklet, vcal, snapshot, vce, open days 2014, vtac, student action plan -
 Federation University Historical Collection
Newspaper - Newsclippings, Tantanoola Tiger Newsclippings
In the early 1880s a small circus travelled between Millicent and Mt Gambier, South Australia. After camping overnight they discovered their Bengal Tiger at escaped and disappeared into dense scrub. After searching for hours they continued to Mt Gambier and reported the loss of the tiger to police. Police and local volunteers continued the search for the escaped tiger, but no sighting were made. In the early 1890s sheep in the Tantanoola area started to disappear with the still unsighted tiger being blamed. In 1893 reports of an unusual animal in the Tantanoola area started, with many describing the animal as the missing tiger, or a large dog. One eye witness claimed to have seen the animal carrying a full grown sheep in its mouth. The reports grew in number and exaggeration with sightings from Robe to Bendigo. In the Tantanoola district children were escorted with shotgun guards to and from school, with many homes keeping guns at the ready in case the tiger suddenly appeared. In August 1895 Tom Donovan shot the "Tantanoola Tiger" on Mt Salt Station, around 20 kms south of Tantanoola. The corpse was taken to Marks, a Mount Gambier taxidermist, at which time the animal was identified as an Assyrian or Northern Russian Wolf. Donovan displayed the animal far and wide. Despite the animal's death sheep continued to disappear from properties in the district over many years. It was of particular concern between 1909 and 1910. At that time Herbert Allchurch, an Adelaide detective, was sent to solve the mystery. A few days after his arrival Allchruch went to the front bar of the Tiger Hotel and arrested local rabbit shooter and trapper, Charlie Edmunson, with sheep stealing. After his 1911 trial Edmunson admitted to stealing over 4,000 sheep during the previous 20 years. He was gaoled for six years with hard-labour in January 1911. Edmunson had been selling the skins of the stolen sheep, leaving the carcusses to rot. He earned around five pounds per week during the 1990s and early 1900s, a time when the economy was depressed. It is not known had the animal known as the Tantanoola Tiger came to Australia, but it is believed it survived one of three ships wrecked of the coast between 1890 and 1893, making it to shore along with some of the shipwrecked passengers. (From a card produced by the Tantanoola Tiger Hotel, where the 'tiger' is on display.)A collection of Newsclippings from 1892 - 1895 photocopied onto A4 white paper. The clippings relate to the Tantanoola Tiger. Clippings include: * Border Watch 1892 - Tantanoola Tiger Reward * Sydney Morning Herald, 04/07/1857 - Animals in Zoological Gardens, including a number of large cats. * Claims the Tantanoola Tiger was an escaped circus animal (ie The Advertiser [Adelaide], 31 October 1893) * Search parties for the Tantanoola Tiger (ie Barrier Miner 19/05/1893; Barrier Miner 03/1081893) * Thylacine claim (ie Morning Bulletin [Rockhampton] 11/03/1895 * Afghan and Indian Hunters (ie Barrier Miner 07/02/1895) * Sighting by John Bird of Scarsdale - Wanganui Herald 15/12/1900. " ... Mr Bird was travelling on foot along a lonely track through very dense scrub, when he was stricken with amazement to see a full-grown tiger standing in a small dam about 30ft away, and holding in its jaws the carcass of a newly-killed lamb. He remained long enough to thoroughly take in the animals appearance, and then beat a hasty retreat unmolested. His description of the animal is as follows: A tawny-coloured creature, with a dirty mottled skin; in general appearance like an immense cat; body 4ft long, and of a uniform thickness from shoulder to hindquarters; in bulk equal to a very large pig. The legs were hidden in the water. A similar animal is reported to gave been seen near Canico, some miles away. ..." * Victorian country sightings # Bullarto - Argus 06/05/1905 # Dean - Launceston Examiner 28/01/1895 # Bendigo - Hobart Mercury 15/03/1895 # Ballan - Launceston Examiner 03/08/1895 * South Australian register 17/06/1885 " There is a tiger or panther wandering at large in Victoria, according to a rumour. It has taken the place of the Bunyip, whom hundreds have seen but none captured. This tiger is supposed to have broken loose from a travelling menagerie in the North-eastern district. At the beginning we should like it roved that such an escape ever took place. Perhaps the showmen were afraid to report the fact to the police; at any rate they did not do so. The first story about the tiger being seen came from the neighborhood of Wangaratta, 60 miles from the place where it is said to have commenced business on its own account. He was followed, but vanished among trees. Next we hear of a strange animal, bigger than a St Bernard's dog, but shorter legged, having appeared at least 150 miles from Wangaratta. Between Lilydale and Wangaratta there is a dividing range 2,000 feet high in the lowest past, besides several large rivers. An finally, the tiger - changed from a panther - is reported as having been seen within the suburban circle, about 8 miles from the general Post Office. They show you footprints, and point to the carcasses of mangled cows and calves. Casts have been taken of the footprints for examination by scientific men, who pronounce them doglike, and yet not doglike, but panther-like, which gives a nervous turn, for the panther may take up killing children and grown-up people. One tiger will not account for so many apparitions. There must have been a general strike among the menageries, and a breaking-up companies. ... * Research article by Philip A. Clarke "Indigenous Spirit and Ghost Folklore of 'Settled' Australia. australian animal folklore collection, tantanoola tiger, tom donovan, herbert allchurch, charles edmunson, sheep, charlie edmunson, mythical, myth, folklore