Showing 7064 items
matching 17
-
 Flagstaff Hill Maritime Museum and Village
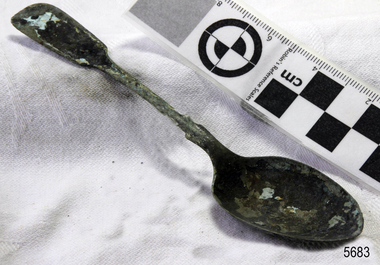
Spoon, circa 1878
This tea spoon is from the wreck of the LOCH ARD, a Loch Line ship of 1,693 tons which sailed from Gravesend, London, on 2 March 1878 with 17 passengers and a crew of 36 under Captain George Gibbs. “The intention was to discharge cargo in Melbourne, before returning to London via the Horn with wool and wheat”. Instead, on 1 June 1878, after 90 days at sea, she struck the sandstone cliffs of Mutton Bird Island on the south west coast of Victoria, and sank with the loss of 52 lives and all her cargo. The manifest of the LOCH ARD listed an array of manufactured goods and bulk metals being exported to the Colony of Victoria, with a declared value of £53,700. (202 bills of lading show an actual invoice value of £68, 456, with insurance underwriting to £30,000 of all cargo). Included in the manifest is the item of “Tin hardware & cutlery £7,530”. This teaspoon is one of 482 similar items of electro-plated cutlery from the LOCH ARD site, comprising spoons and forks of various sizes but all sharing the same general shape or design and metallic composition. 49 of these pieces display a legible makers’ mark — the initials “W” and “P” placed within a raised diamond outline, which is in turn contained within a sunken crown shape — identifying the manufacturer as William Page & Co of Birmingham. An electroplater’s makers’ marks, unlike sterling silver hallmarks, are not consistent identifiers of quality or date and place of manufacture. A similar line of five impressions was usually made to impress the consumer with an implication of industry standards, but what each one actually signified was not regulated and so they varied according to the whim of the individual foundry. In this case, the maker’s marks are often obscured by sedimentary accretion or removed by corrosion after a century of submersion in the ocean. However sufficient detail has survived to indicate that these samples of electro-plated cutlery probably originated from the same consignment in the LOCH ARD’s cargo. The following descriptions of maker’s marks are drawn from 255 tea spoons, 125 dessert spoons, and 99 table forks. These marks are clearly visible in 66 instances, while the same sequence of general outlines, or depression shapes, is discernible in another 166 examples. 1. A recessed Crown containing a raised Diamond outline and the initials “W” and “P” (the recognised trademark of William Page & Co) 2. An impressed Ellipse containing a raised, pivoted, Triangle in its lower part and bearing a Resurrection Cross on its upper section (a possible dissenting church symbol reflecting religious affiliation); OR a rounded Square impression containing a raised, ‘lazy’, letter “B” (possibly mimicking sterling silver hallmark signifying city of manufacture i.e. Birmingham) 3. An impressed rounded Square filled with a raised Maltese Cross (the base metal composite of nickel silver was also known as ‘German silver’ after its Berlin inventors in 1823) 4. A recessed Circle containing a Crab or Scarab Beetle image; OR a recessed Circle containing a rotated ‘fleur de lys’ or ‘fasces’ design 5. A depressed Diamond shape enclosing a large raised letter “R” and a small raised letter “D” (mimicking the U.K. Patent Office stamp which abbreviated the term ‘registered’ to “RD”, but also included date and class of patent) Suggested trade names for William Page & Co’s particular blend of brass plating are ‘roman silver’ or ‘silverite’. This copper alloy polishes to a lustrous gold when new, discolouring to a murky grey with greenish hue when neglected. HISTORY OF THE LOCH ARD The LOCH ARD belonged to the famous Loch Line which sailed many ships from England to Australia. Built in Glasgow by Barclay, Curdle and Co. in 1873, the LOCH ARD was a three-masted square rigged iron sailing ship. The ship measured 262ft 7" (79.87m) in length, 38ft (11.58m) in width, 23ft (7m) in depth and had a gross tonnage of 1693 tons. The LOCH ARD's main mast measured a massive 150ft (45.7m) in height. LOCH ARD made three trips to Australia and one trip to Calcutta before its final voyage. LOCH ARD left England on March 2, 1878, under the command of Captain Gibbs, a newly married, 29 year old. She was bound for Melbourne with a crew of 37, plus 17 passengers and a load of cargo. The general cargo reflected the affluence of Melbourne at the time. On board were straw hats, umbrella, perfumes, clay pipes, pianos, clocks, confectionary, linen and candles, as well as a heavier load of railway irons, cement, lead and copper. There were items included that intended for display in the Melbourne International Exhibition in 1880. The voyage to Port Phillip was long but uneventful. At 3am on June 1, 1878, Captain Gibbs was expecting to see land and the passengers were becoming excited as they prepared to view their new homeland in the early morning. But LOCH ARD was running into a fog which greatly reduced visibility. Captain Gibbs was becoming anxious as there was no sign of land or the Cape Otway lighthouse. At 4am the fog lifted. A man aloft announced that he could see breakers. The sheer cliffs of Victoria's west coast came into view, and Captain Gibbs realised that the ship was much closer to them than expected. He ordered as much sail to be set as time would permit and then attempted to steer the vessel out to sea. On coming head on into the wind, the ship lost momentum, the sails fell limp and LOCH ARD's bow swung back. Gibbs then ordered the anchors to be released in an attempt to hold its position. The anchors sank some 50 fathoms - but did not hold. By this time LOCH ARD was among the breakers and the tall cliffs of Mutton Bird Island rose behind the ship. Just half a mile from the coast, the ship's bow was suddenly pulled around by the anchor. The captain tried to tack out to sea, but the ship struck a reef at the base of Mutton Bird Island, near Port Campbell. Waves broke over the ship and the top deck was loosened from the hull. The masts and rigging came crashing down knocking passengers and crew overboard. When a lifeboat was finally launched, it crashed into the side of LOCH ARD and capsized. Tom Pearce, who had launched the boat, managed to cling to its overturned hull and shelter beneath it. He drifted out to sea and then on the flood tide came into what is now known as LOCH ARD Gorge. He swam to shore, bruised and dazed, and found a cave in which to shelter. Some of the crew stayed below deck to shelter from the falling rigging but drowned when the ship slipped off the reef into deeper water. Eva Carmichael had raced onto deck to find out what was happening only to be confronted by towering cliffs looming above the stricken ship. In all the chaos, Captain Gibbs grabbed Eva and said, "If you are saved Eva, let my dear wife know that I died like a sailor". That was the last Eva Carmichael saw of the captain. She was swept off the ship by a huge wave. Eva saw Tom Pearce on a small rocky beach and yelled to attract his attention. He dived in and swam to the exhausted woman and dragged her to shore. He took her to the cave and broke open case of brandy which had washed up on the beach. He opened a bottle to revive the unconscious woman. A few hours later Tom scaled a cliff in search of help. He followed hoof prints and came by chance upon two men from nearby Glenample Station three and a half miles away. In a state of exhaustion, he told the men of the tragedy. Tom returned to the gorge while the two men rode back to the station to get help. By the time they reached LOCH ARD Gorge, it was cold and dark. The two shipwreck survivors were taken to Glenample Station to recover. Eva stayed at the station for six weeks before returning to Ireland, this time by steamship. In Melbourne, Tom Pearce received a hero's welcome. He was presented with the first gold medal of the Royal Humane Society of Victoria and a £1000 cheque from the Victorian Government. Concerts were performed to honour the young man's bravery and to raise money for those who lost family in the LOCH ARD disaster. Of the 54 crew members and passengers on board, only two survived: the apprentice, Tom Pearce and the young woman passenger, Eva Carmichael, who lost all of her family in the tragedy. Ten days after the LOCH ARD tragedy, salvage rights to the wreck were sold at auction for £2,120. Cargo valued at £3,000 was salvaged and placed on the beach, but most washed back into the sea when another storm developed. The wreck of LOCH ARD still lies at the base of Mutton Bird Island. Much of the cargo has now been salvaged and some was washed up into what is now known as LOCH ARD Gorge. Cargo and artefacts have also been illegally salvaged over many years before protective legislation was introduced. One of the most unlikely pieces of cargo to have survived the shipwreck was a Minton porcelain peacock - one of only seven in the world. The peacock was destined for the Melbourne International Exhibition in 1880. It had been well packed, which gave it adequate protection during the violent storm. Today, the Minton peacock can be seen at the Flagstaff Hill Maritime Museum in Warrnambool. From Australia's most dramatic shipwreck it has now become Australia's most valuable shipwreck artefact and is one of very few 'objects' on the Victorian State Heritage Register. The LOCH ARD shipwreck is of State significance – Victorian Heritage Register S 417. Flagstaff Hill’s collection of artefacts from LOCH ARD is significant for being one of the largest collections of artefacts from this shipwreck in Victoria. It is significant for its association with the shipwreck, which is on the Victorian Heritage Register (VHR S417). The collection is significant because of the relationship between the objects, as together they have a high potential to interpret the story of the LOCH ARD. The LOCH ARD collection is archaeologically significant as the remains of a large international passenger and cargo ship. The LOCH ARD collection is historically significant for representing aspects of Victoria’s shipping history and its potential to interpret sub-theme 1.5 of Victoria’s Framework of Historical Themes (living with natural processes). The collection is also historically significant for its association with the LOCH ARD, which was one of the worst and best known shipwrecks in Victoria’s history. Unrestored tea spoon from the wreck of the LOCH ARD. The spoon design has a flattened fiddle-back handle, with a thin stem or shank, flared collar, and elongated bowl. The spoons metallic composition is a thin layer of brass alloy which has partially corroded back to a nickel-silver base metal. Only 30% of original electroplating remains with some verdigris. Outlines of five makers marks are visible on lower rear of handle.flagstaff hill, warrnambool, shipwrecked coast, flagstaff hill maritime museum, maritime museum, shipwreck coast, flagstaff hill maritime village, great ocean road, loch line, loch ard, captain gibbs, eva carmichael, tom pearce, glenample station, mutton bird island, loch ard gorge, electroplated cutlery, loch ard shipwreck, nickel silver, william page & co, birmingham, brass plating, makers marks -
 Flagstaff Hill Maritime Museum and Village
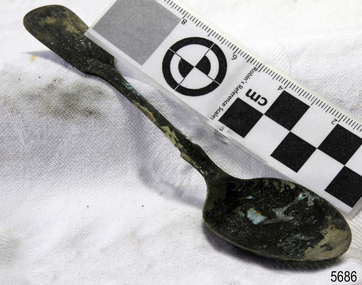
Spoon, circa 1878
This tea spoon is from the wreck of the LOCH ARD, a Loch Line ship of 1,693 tons which sailed from Gravesend, London, on 2 March 1878 with 17 passengers and a crew of 36 under Captain George Gibbs. “The intention was to discharge cargo in Melbourne, before returning to London via the Horn with wool and wheat”. Instead, on 1 June 1878, after 90 days at sea, she struck the sandstone cliffs of Mutton Bird Island on the south west coast of Victoria, and sank with the loss of 52 lives and all her cargo. The manifest of the LOCH ARD listed an array of manufactured goods and bulk metals being exported to the Colony of Victoria, with a declared value of £53,700. (202 bills of lading show an actual invoice value of £68, 456, with insurance underwriting to £30,000 of all cargo). Included in the manifest is the item of “Tin hardware & cutlery £7,530”. This teaspoon is one of 482 similar items of electro-plated cutlery from the LOCH ARD site, comprising spoons and forks of various sizes but all sharing the same general shape or design and metallic composition. 49 of these pieces display a legible makers’ mark — the initials “W” and “P” placed within a raised diamond outline, which is in turn contained within a sunken crown shape — identifying the manufacturer as William Page & Co of Birmingham. An electroplater’s makers’ marks, unlike sterling silver hallmarks, are not consistent identifiers of quality or date and place of manufacture. A similar line of five impressions was usually made to impress the consumer with an implication of industry standards, but what each one actually signified was not regulated and so they varied according to the whim of the individual foundry. In this case, the maker’s marks are often obscured by sedimentary accretion or removed by corrosion after a century of submersion in the ocean. However sufficient detail has survived to indicate that these samples of electro-plated cutlery probably originated from the same consignment in the LOCH ARD’s cargo. The following descriptions of maker’s marks are drawn from 255 tea spoons, 125 dessert spoons, and 99 table forks. These marks are clearly visible in 66 instances, while the same sequence of general outlines, or depression shapes, is discernible in another 166 examples. 1. A recessed Crown containing a raised Diamond outline and the initials “W” and “P” (the recognised trademark of William Page & Co) 2. An impressed Ellipse containing a raised, pivoted, Triangle in its lower part and bearing a Resurrection Cross on its upper section (a possible dissenting church symbol reflecting religious affiliation); OR a rounded Square impression containing a raised, ‘lazy’, letter “B” (possibly mimicking sterling silver hallmark signifying city of manufacture i.e. Birmingham) 3. An impressed rounded Square filled with a raised Maltese Cross (the base metal composite of nickel silver was also known as ‘German silver’ after its Berlin inventors in 1823) 4. A recessed Circle containing a Crab or Scarab Beetle image; OR a recessed Circle containing a rotated ‘fleur de lys’ or ‘fasces’ design 5. A depressed Diamond shape enclosing a large raised letter “R” and a small raised letter “D” (mimicking the U.K. Patent Office stamp which abbreviated the term ‘registered’ to “RD”, but also included date and class of patent) Suggested trade names for William Page & Co’s particular blend of brass plating are ‘roman silver’ or ‘silverite’. This copper alloy polishes to a lustrous gold when new, discolouring to a murky grey with greenish hue when neglected. HISTORY OF THE LOCH ARD The LOCH ARD belonged to the famous Loch Line which sailed many ships from England to Australia. Built in Glasgow by Barclay, Curdle and Co. in 1873, the LOCH ARD was a three-masted square rigged iron sailing ship. The ship measured 262ft 7" (79.87m) in length, 38ft (11.58m) in width, 23ft (7m) in depth and had a gross tonnage of 1693 tons. The LOCH ARD's main mast measured a massive 150ft (45.7m) in height. LOCH ARD made three trips to Australia and one trip to Calcutta before its final voyage. LOCH ARD left England on March 2, 1878, under the command of Captain Gibbs, a newly married, 29 year old. She was bound for Melbourne with a crew of 37, plus 17 passengers and a load of cargo. The general cargo reflected the affluence of Melbourne at the time. On board were straw hats, umbrella, perfumes, clay pipes, pianos, clocks, confectionary, linen and candles, as well as a heavier load of railway irons, cement, lead and copper. There were items included that intended for display in the Melbourne International Exhibition in 1880. The voyage to Port Phillip was long but uneventful. At 3am on June 1, 1878, Captain Gibbs was expecting to see land and the passengers were becoming excited as they prepared to view their new homeland in the early morning. But LOCH ARD was running into a fog which greatly reduced visibility. Captain Gibbs was becoming anxious as there was no sign of land or the Cape Otway lighthouse. At 4am the fog lifted. A man aloft announced that he could see breakers. The sheer cliffs of Victoria's west coast came into view, and Captain Gibbs realised that the ship was much closer to them than expected. He ordered as much sail to be set as time would permit and then attempted to steer the vessel out to sea. On coming head on into the wind, the ship lost momentum, the sails fell limp and LOCH ARD's bow swung back. Gibbs then ordered the anchors to be released in an attempt to hold its position. The anchors sank some 50 fathoms - but did not hold. By this time LOCH ARD was among the breakers and the tall cliffs of Mutton Bird Island rose behind the ship. Just half a mile from the coast, the ship's bow was suddenly pulled around by the anchor. The captain tried to tack out to sea, but the ship struck a reef at the base of Mutton Bird Island, near Port Campbell. Waves broke over the ship and the top deck was loosened from the hull. The masts and rigging came crashing down knocking passengers and crew overboard. When a lifeboat was finally launched, it crashed into the side of LOCH ARD and capsized. Tom Pearce, who had launched the boat, managed to cling to its overturned hull and shelter beneath it. He drifted out to sea and then on the flood tide came into what is now known as LOCH ARD Gorge. He swam to shore, bruised and dazed, and found a cave in which to shelter. Some of the crew stayed below deck to shelter from the falling rigging but drowned when the ship slipped off the reef into deeper water. Eva Carmichael had raced onto deck to find out what was happening only to be confronted by towering cliffs looming above the stricken ship. In all the chaos, Captain Gibbs grabbed Eva and said, "If you are saved Eva, let my dear wife know that I died like a sailor". That was the last Eva Carmichael saw of the captain. She was swept off the ship by a huge wave. Eva saw Tom Pearce on a small rocky beach and yelled to attract his attention. He dived in and swam to the exhausted woman and dragged her to shore. He took her to the cave and broke open case of brandy which had washed up on the beach. He opened a bottle to revive the unconscious woman. A few hours later Tom scaled a cliff in search of help. He followed hoof prints and came by chance upon two men from nearby Glenample Station three and a half miles away. In a state of exhaustion, he told the men of the tragedy. Tom returned to the gorge while the two men rode back to the station to get help. By the time they reached LOCH ARD Gorge, it was cold and dark. The two shipwreck survivors were taken to Glenample Station to recover. Eva stayed at the station for six weeks before returning to Ireland, this time by steamship. In Melbourne, Tom Pearce received a hero's welcome. He was presented with the first gold medal of the Royal Humane Society of Victoria and a £1000 cheque from the Victorian Government. Concerts were performed to honour the young man's bravery and to raise money for those who lost family in the LOCH ARD disaster. Of the 54 crew members and passengers on board, only two survived: the apprentice, Tom Pearce and the young woman passenger, Eva Carmichael, who lost all of her family in the tragedy. Ten days after the LOCH ARD tragedy, salvage rights to the wreck were sold at auction for £2,120. Cargo valued at £3,000 was salvaged and placed on the beach, but most washed back into the sea when another storm developed. The wreck of LOCH ARD still lies at the base of Mutton Bird Island. Much of the cargo has now been salvaged and some was washed up into what is now known as LOCH ARD Gorge. Cargo and artefacts have also been illegally salvaged over many years before protective legislation was introduced. One of the most unlikely pieces of cargo to have survived the shipwreck was a Minton porcelain peacock - one of only seven in the world. The peacock was destined for the Melbourne International Exhibition in 1880. It had been well packed, which gave it adequate protection during the violent storm. Today, the Minton peacock can be seen at the Flagstaff Hill Maritime Museum in Warrnambool. From Australia's most dramatic shipwreck it has now become Australia's most valuable shipwreck artefact and is one of very few 'objects' on the Victorian State Heritage Register. The LOCH ARD shipwreck is of State significance – Victorian Heritage Register S 417. Flagstaff Hill’s collection of artefacts from LOCH ARD is significant for being one of the largest collections of artefacts from this shipwreck in Victoria. It is significant for its association with the shipwreck, which is on the Victorian Heritage Register (VHR S417). The collection is significant because of the relationship between the objects, as together they have a high potential to interpret the story of the LOCH ARD. The LOCH ARD collection is archaeologically significant as the remains of a large international passenger and cargo ship. The LOCH ARD collection is historically significant for representing aspects of Victoria’s shipping history and its potential to interpret sub-theme 1.5 of Victoria’s Framework of Historical Themes (living with natural processes). The collection is also historically significant for its association with the LOCH ARD, which was one of the worst and best known shipwrecks in Victoria’s history. Unrestored tea spoon from the wreck of the LOCH ARD. The spoon design has a flattened fiddle-back handle, with a thin stem or shank, flared collar, and elongated bowl. The spoons metallic composition is a thin layer of brass alloy which has partially corroded back to a nickel-silver base metal. Traces of original electroplating remain (15%) with some verdigris (15%). Spoon has worn edges.flagstaff hill, warrnambool, shipwrecked coast, flagstaff hill maritime museum, maritime museum, shipwreck coast, flagstaff hill maritime village, great ocean road, loch line, loch ard, captain gibbs, eva carmichael, tom pearce, glenample station, mutton bird island, loch ard gorge, electroplated cutlery, loch ard shipwreck, nickel silver, william page & co, birmingham, brass plating, makers marks -
 Flagstaff Hill Maritime Museum and Village
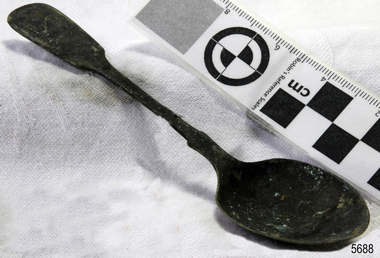
Spoon, circa 1878
This tea spoon is from the wreck of the LOCH ARD, a Loch Line ship of 1,693 tons which sailed from Gravesend, London, on 2 March 1878 with 17 passengers and a crew of 36 under Captain George Gibbs. “The intention was to discharge cargo in Melbourne, before returning to London via the Horn with wool and wheat”. Instead, on 1 June 1878, after 90 days at sea, she struck the sandstone cliffs of Mutton Bird Island on the south west coast of Victoria, and sank with the loss of 52 lives and all her cargo. The manifest of the LOCH ARD listed an array of manufactured goods and bulk metals being exported to the Colony of Victoria, with a declared value of £53,700. (202 bills of lading show an actual invoice value of £68, 456, with insurance underwriting to £30,000 of all cargo). Included in the manifest is the item of “Tin hardware & cutlery £7,530”. This teaspoon is one of 482 similar items of electro-plated cutlery from the LOCH ARD site, comprising spoons and forks of various sizes but all sharing the same general shape or design and metallic composition. 49 of these pieces display a legible makers’ mark — the initials “W” and “P” placed within a raised diamond outline, which is in turn contained within a sunken crown shape — identifying the manufacturer as William Page & Co of Birmingham. An electroplater’s makers’ marks, unlike sterling silver hallmarks, are not consistent identifiers of quality or date and place of manufacture. A similar line of five impressions was usually made to impress the consumer with an implication of industry standards, but what each one actually signified was not regulated and so they varied according to the whim of the individual foundry. In this case, the maker’s marks are often obscured by sedimentary accretion or removed by corrosion after a century of submersion in the ocean. However sufficient detail has survived to indicate that these samples of electro-plated cutlery probably originated from the same consignment in the LOCH ARD’s cargo. The following descriptions of maker’s marks are drawn from 255 tea spoons, 125 dessert spoons, and 99 table forks. These marks are clearly visible in 66 instances, while the same sequence of general outlines, or depression shapes, is discernible in another 166 examples. 1. A recessed Crown containing a raised Diamond outline and the initials “W” and “P” (the recognised trademark of William Page & Co) 2. An impressed Ellipse containing a raised, pivoted, Triangle in its lower part and bearing a Resurrection Cross on its upper section (a possible dissenting church symbol reflecting religious affiliation); OR a rounded Square impression containing a raised, ‘lazy’, letter “B” (possibly mimicking sterling silver hallmark signifying city of manufacture i.e. Birmingham) 3. An impressed rounded Square filled with a raised Maltese Cross (the base metal composite of nickel silver was also known as ‘German silver’ after its Berlin inventors in 1823) 4. A recessed Circle containing a Crab or Scarab Beetle image; OR a recessed Circle containing a rotated ‘fleur de lys’ or ‘fasces’ design 5. A depressed Diamond shape enclosing a large raised letter “R” and a small raised letter “D” (mimicking the U.K. Patent Office stamp which abbreviated the term ‘registered’ to “RD”, but also included date and class of patent) Suggested trade names for William Page & Co’s particular blend of brass plating are ‘roman silver’ or ‘silverite’. This copper alloy polishes to a lustrous gold when new, discolouring to a murky grey with greenish hue when neglected. HISTORY OF THE LOCH ARD The LOCH ARD belonged to the famous Loch Line which sailed many ships from England to Australia. Built in Glasgow by Barclay, Curdle and Co. in 1873, the LOCH ARD was a three-masted square rigged iron sailing ship. The ship measured 262ft 7" (79.87m) in length, 38ft (11.58m) in width, 23ft (7m) in depth and had a gross tonnage of 1693 tons. The LOCH ARD's main mast measured a massive 150ft (45.7m) in height. LOCH ARD made three trips to Australia and one trip to Calcutta before its final voyage. LOCH ARD left England on March 2, 1878, under the command of Captain Gibbs, a newly married, 29 year old. She was bound for Melbourne with a crew of 37, plus 17 passengers and a load of cargo. The general cargo reflected the affluence of Melbourne at the time. On board were straw hats, umbrella, perfumes, clay pipes, pianos, clocks, confectionary, linen and candles, as well as a heavier load of railway irons, cement, lead and copper. There were items included that intended for display in the Melbourne International Exhibition in 1880. The voyage to Port Phillip was long but uneventful. At 3am on June 1, 1878, Captain Gibbs was expecting to see land and the passengers were becoming excited as they prepared to view their new homeland in the early morning. But LOCH ARD was running into a fog which greatly reduced visibility. Captain Gibbs was becoming anxious as there was no sign of land or the Cape Otway lighthouse. At 4am the fog lifted. A man aloft announced that he could see breakers. The sheer cliffs of Victoria's west coast came into view, and Captain Gibbs realised that the ship was much closer to them than expected. He ordered as much sail to be set as time would permit and then attempted to steer the vessel out to sea. On coming head on into the wind, the ship lost momentum, the sails fell limp and LOCH ARD's bow swung back. Gibbs then ordered the anchors to be released in an attempt to hold its position. The anchors sank some 50 fathoms - but did not hold. By this time LOCH ARD was among the breakers and the tall cliffs of Mutton Bird Island rose behind the ship. Just half a mile from the coast, the ship's bow was suddenly pulled around by the anchor. The captain tried to tack out to sea, but the ship struck a reef at the base of Mutton Bird Island, near Port Campbell. Waves broke over the ship and the top deck was loosened from the hull. The masts and rigging came crashing down knocking passengers and crew overboard. When a lifeboat was finally launched, it crashed into the side of LOCH ARD and capsized. Tom Pearce, who had launched the boat, managed to cling to its overturned hull and shelter beneath it. He drifted out to sea and then on the flood tide came into what is now known as LOCH ARD Gorge. He swam to shore, bruised and dazed, and found a cave in which to shelter. Some of the crew stayed below deck to shelter from the falling rigging but drowned when the ship slipped off the reef into deeper water. Eva Carmichael had raced onto deck to find out what was happening only to be confronted by towering cliffs looming above the stricken ship. In all the chaos, Captain Gibbs grabbed Eva and said, "If you are saved Eva, let my dear wife know that I died like a sailor". That was the last Eva Carmichael saw of the captain. She was swept off the ship by a huge wave. Eva saw Tom Pearce on a small rocky beach and yelled to attract his attention. He dived in and swam to the exhausted woman and dragged her to shore. He took her to the cave and broke open case of brandy which had washed up on the beach. He opened a bottle to revive the unconscious woman. A few hours later Tom scaled a cliff in search of help. He followed hoof prints and came by chance upon two men from nearby Glenample Station three and a half miles away. In a state of exhaustion, he told the men of the tragedy. Tom returned to the gorge while the two men rode back to the station to get help. By the time they reached LOCH ARD Gorge, it was cold and dark. The two shipwreck survivors were taken to Glenample Station to recover. Eva stayed at the station for six weeks before returning to Ireland, this time by steamship. In Melbourne, Tom Pearce received a hero's welcome. He was presented with the first gold medal of the Royal Humane Society of Victoria and a £1000 cheque from the Victorian Government. Concerts were performed to honour the young man's bravery and to raise money for those who lost family in the LOCH ARD disaster. Of the 54 crew members and passengers on board, only two survived: the apprentice, Tom Pearce and the young woman passenger, Eva Carmichael, who lost all of her family in the tragedy. Ten days after the LOCH ARD tragedy, salvage rights to the wreck were sold at auction for £2,120. Cargo valued at £3,000 was salvaged and placed on the beach, but most washed back into the sea when another storm developed. The wreck of LOCH ARD still lies at the base of Mutton Bird Island. Much of the cargo has now been salvaged and some was washed up into what is now known as LOCH ARD Gorge. Cargo and artefacts have also been illegally salvaged over many years before protective legislation was introduced. One of the most unlikely pieces of cargo to have survived the shipwreck was a Minton porcelain peacock - one of only seven in the world. The peacock was destined for the Melbourne International Exhibition in 1880. It had been well packed, which gave it adequate protection during the violent storm. Today, the Minton peacock can be seen at the Flagstaff Hill Maritime Museum in Warrnambool. From Australia's most dramatic shipwreck it has now become Australia's most valuable shipwreck artefact and is one of very few 'objects' on the Victorian State Heritage Register. The LOCH ARD shipwreck is of State significance – Victorian Heritage Register S 417. Flagstaff Hill’s collection of artefacts from LOCH ARD is significant for being one of the largest collections of artefacts from this shipwreck in Victoria. It is significant for its association with the shipwreck, which is on the Victorian Heritage Register (VHR S417). The collection is significant because of the relationship between the objects, as together they have a high potential to interpret the story of the LOCH ARD. The LOCH ARD collection is archaeologically significant as the remains of a large international passenger and cargo ship. The LOCH ARD collection is historically significant for representing aspects of Victoria’s shipping history and its potential to interpret sub-theme 1.5 of Victoria’s Framework of Historical Themes (living with natural processes). The collection is also historically significant for its association with the LOCH ARD, which was one of the worst and best known shipwrecks in Victoria’s history. Unrestored tea spoon from the wreck of the LOCH ARD. The spoon design has a flattened fiddle-back handle, with a thin stem or shank, flared collar, and elongated bowl. The spoons metallic composition is a thin layer of brass alloy which has partially corroded back to a nickel-silver base metal. Only 15% of original electroplating remains with bright vertigris on 5% of spoon surface.flagstaff hill, warrnambool, shipwrecked coast, flagstaff hill maritime museum, maritime museum, shipwreck coast, flagstaff hill maritime village, great ocean road, loch line, loch ard, captain gibbs, eva carmichael, tom pearce, glenample station, mutton bird island, loch ard gorge, electroplated cutlery, loch ard shipwreck, nickel silver, william page & co, birmingham, brass plating, makers marks -
 Flagstaff Hill Maritime Museum and Village
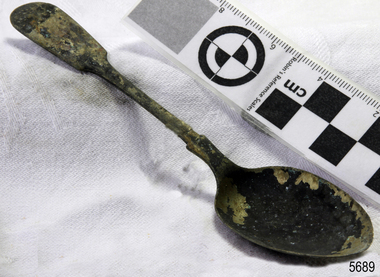
Domestic object - Spoon, circa 1878
This tea spoon is from the wreck of the LOCH ARD, a Loch Line ship of 1,693 tons which sailed from Gravesend, London, on 2 March 1878 with 17 passengers and a crew of 36 under Captain George Gibbs. “The intention was to discharge cargo in Melbourne, before returning to London via the Horn with wool and wheat”. Instead, on 1 June 1878, after 90 days at sea, she struck the sandstone cliffs of Mutton Bird Island on the south west coast of Victoria, and sank with the loss of 52 lives and all her cargo. The manifest of the LOCH ARD listed an array of manufactured goods and bulk metals being exported to the Colony of Victoria, with a declared value of £53,700. (202 bills of lading show an actual invoice value of £68, 456, with insurance underwriting to £30,000 of all cargo). Included in the manifest is the item of “Tin hardware & cutlery £7,530”. This teaspoon is one of 482 similar items of electro-plated cutlery from the LOCH ARD site, comprising spoons and forks of various sizes but all sharing the same general shape or design and metallic composition. 49 of these pieces display a legible makers’ mark — the initials “W” and “P” placed within a raised diamond outline, which is in turn contained within a sunken crown shape — identifying the manufacturer as William Page & Co of Birmingham. An electroplater’s makers’ marks, unlike sterling silver hallmarks, are not consistent identifiers of quality or date and place of manufacture. A similar line of five impressions was usually made to impress the consumer with an implication of industry standards, but what each one actually signified was not regulated and so they varied according to the whim of the individual foundry. In this case, the maker’s marks are often obscured by sedimentary accretion or removed by corrosion after a century of submersion in the ocean. However sufficient detail has survived to indicate that these samples of electro-plated cutlery probably originated from the same consignment in the LOCH ARD’s cargo. The following descriptions of maker’s marks are drawn from 255 tea spoons, 125 dessert spoons, and 99 table forks. These marks are clearly visible in 66 instances, while the same sequence of general outlines, or depression shapes, is discernible in another 166 examples. 1. A recessed Crown containing a raised Diamond outline and the initials “W” and “P” (the recognised trademark of William Page & Co) 2. An impressed Ellipse containing a raised, pivoted, Triangle in its lower part and bearing a Resurrection Cross on its upper section (a possible dissenting church symbol reflecting religious affiliation); OR a rounded Square impression containing a raised, ‘lazy’, letter “B” (possibly mimicking sterling silver hallmark signifying city of manufacture i.e. Birmingham) 3. An impressed rounded Square filled with a raised Maltese Cross (the base metal composite of nickel silver was also known as ‘German silver’ after its Berlin inventors in 1823) 4. A recessed Circle containing a Crab or Scarab Beetle image; OR a recessed Circle containing a rotated ‘fleur de lys’ or ‘fasces’ design 5. A depressed Diamond shape enclosing a large raised letter “R” and a small raised letter “D” (mimicking the U.K. Patent Office stamp which abbreviated the term ‘registered’ to “RD”, but also included date and class of patent) Suggested trade names for William Page & Co’s particular blend of brass plating are ‘roman silver’ or ‘silverite’. This copper alloy polishes to a lustrous gold when new, discolouring to a murky grey with greenish hue when neglected. HISTORY OF THE LOCH ARD The LOCH ARD belonged to the famous Loch Line which sailed many ships from England to Australia. Built in Glasgow by Barclay, Curdle and Co. in 1873, the LOCH ARD was a three-masted square rigged iron sailing ship. The ship measured 262ft 7" (79.87m) in length, 38ft (11.58m) in width, 23ft (7m) in depth and had a gross tonnage of 1693 tons. The LOCH ARD's main mast measured a massive 150ft (45.7m) in height. LOCH ARD made three trips to Australia and one trip to Calcutta before its final voyage. LOCH ARD left England on March 2, 1878, under the command of Captain Gibbs, a newly married, 29 year old. She was bound for Melbourne with a crew of 37, plus 17 passengers and a load of cargo. The general cargo reflected the affluence of Melbourne at the time. On board were straw hats, umbrella, perfumes, clay pipes, pianos, clocks, confectionary, linen and candles, as well as a heavier load of railway irons, cement, lead and copper. There were items included that intended for display in the Melbourne International Exhibition in 1880. The voyage to Port Phillip was long but uneventful. At 3am on June 1, 1878, Captain Gibbs was expecting to see land and the passengers were becoming excited as they prepared to view their new homeland in the early morning. But LOCH ARD was running into a fog which greatly reduced visibility. Captain Gibbs was becoming anxious as there was no sign of land or the Cape Otway lighthouse. At 4am the fog lifted. A man aloft announced that he could see breakers. The sheer cliffs of Victoria's west coast came into view, and Captain Gibbs realised that the ship was much closer to them than expected. He ordered as much sail to be set as time would permit and then attempted to steer the vessel out to sea. On coming head on into the wind, the ship lost momentum, the sails fell limp and LOCH ARD's bow swung back. Gibbs then ordered the anchors to be released in an attempt to hold its position. The anchors sank some 50 fathoms - but did not hold. By this time LOCH ARD was among the breakers and the tall cliffs of Mutton Bird Island rose behind the ship. Just half a mile from the coast, the ship's bow was suddenly pulled around by the anchor. The captain tried to tack out to sea, but the ship struck a reef at the base of Mutton Bird Island, near Port Campbell. Waves broke over the ship and the top deck was loosened from the hull. The masts and rigging came crashing down knocking passengers and crew overboard. When a lifeboat was finally launched, it crashed into the side of LOCH ARD and capsized. Tom Pearce, who had launched the boat, managed to cling to its overturned hull and shelter beneath it. He drifted out to sea and then on the flood tide came into what is now known as LOCH ARD Gorge. He swam to shore, bruised and dazed, and found a cave in which to shelter. Some of the crew stayed below deck to shelter from the falling rigging but drowned when the ship slipped off the reef into deeper water. Eva Carmichael had raced onto deck to find out what was happening only to be confronted by towering cliffs looming above the stricken ship. In all the chaos, Captain Gibbs grabbed Eva and said, "If you are saved Eva, let my dear wife know that I died like a sailor". That was the last Eva Carmichael saw of the captain. She was swept off the ship by a huge wave. Eva saw Tom Pearce on a small rocky beach and yelled to attract his attention. He dived in and swam to the exhausted woman and dragged her to shore. He took her to the cave and broke open case of brandy which had washed up on the beach. He opened a bottle to revive the unconscious woman. A few hours later Tom scaled a cliff in search of help. He followed hoof prints and came by chance upon two men from nearby Glenample Station three and a half miles away. In a state of exhaustion, he told the men of the tragedy. Tom returned to the gorge while the two men rode back to the station to get help. By the time they reached LOCH ARD Gorge, it was cold and dark. The two shipwreck survivors were taken to Glenample Station to recover. Eva stayed at the station for six weeks before returning to Ireland, this time by steamship. In Melbourne, Tom Pearce received a hero's welcome. He was presented with the first gold medal of the Royal Humane Society of Victoria and a £1000 cheque from the Victorian Government. Concerts were performed to honour the young man's bravery and to raise money for those who lost family in the LOCH ARD disaster. Of the 54 crew members and passengers on board, only two survived: the apprentice, Tom Pearce and the young woman passenger, Eva Carmichael, who lost all of her family in the tragedy. Ten days after the LOCH ARD tragedy, salvage rights to the wreck were sold at auction for £2,120. Cargo valued at £3,000 was salvaged and placed on the beach, but most washed back into the sea when another storm developed. The wreck of LOCH ARD still lies at the base of Mutton Bird Island. Much of the cargo has now been salvaged and some was washed up into what is now known as LOCH ARD Gorge. Cargo and artefacts have also been illegally salvaged over many years before protective legislation was introduced. One of the most unlikely pieces of cargo to have survived the shipwreck was a Minton porcelain peacock - one of only seven in the world. The peacock was destined for the Melbourne International Exhibition in 1880. It had been well packed, which gave it adequate protection during the violent storm. Today, the Minton peacock can be seen at the Flagstaff Hill Maritime Museum in Warrnambool. From Australia's most dramatic shipwreck it has now become Australia's most valuable shipwreck artefact and is one of very few 'objects' on the Victorian State Heritage Register. The LOCH ARD shipwreck is of State significance – Victorian Heritage Register S 417. Flagstaff Hill’s collection of artefacts from LOCH ARD is significant for being one of the largest collections of artefacts from this shipwreck in Victoria. It is significant for its association with the shipwreck, which is on the Victorian Heritage Register (VHR S417). The collection is significant because of the relationship between the objects, as together they have a high potential to interpret the story of the LOCH ARD. The LOCH ARD collection is archaeologically significant as the remains of a large international passenger and cargo ship. The LOCH ARD collection is historically significant for representing aspects of Victoria’s shipping history and its potential to interpret sub-theme 1.5 of Victoria’s Framework of Historical Themes (living with natural processes). The collection is also historically significant for its association with the LOCH ARD, which was one of the worst and best known shipwrecks in Victoria’s history. Unrestored tea spoon from the wreck of the LOCH ARD. The spoon design has a flattened fiddle-back handle, with a thin stem or shank, flared collar, and elongated bowl. The spoons metallic composition is a thin layer of brass alloy which has partially corroded back to a nickel-silver base metal. Only 15% of original electroplating remains with verdigris on 5% of spoon surface. Outlines of five makers marks are visible but details are obscured.flagstaff hill maritime museum, shipwreck coast, great ocean road, loch line, loch ard, mutton bird island, loch ard gorge, electroplated cutlery, loch ard shipwreck, nickel silver, william page & co, birmingham, brass plating, makers marks -
 Flagstaff Hill Maritime Museum and Village
Spoon, circa 1878
This tea spoon is from the wreck of the LOCH ARD, a Loch Line ship of 1,693 tons which sailed from Gravesend, London, on 2 March 1878 with 17 passengers and a crew of 36 under Captain George Gibbs. “The intention was to discharge cargo in Melbourne, before returning to London via the Horn with wool and wheat”. Instead, on 1 June 1878, after 90 days at sea, she struck the sandstone cliffs of Mutton Bird Island on the south west coast of Victoria, and sank with the loss of 52 lives and all her cargo. The manifest of the LOCH ARD listed an array of manufactured goods and bulk metals being exported to the Colony of Victoria, with a declared value of £53,700. (202 bills of lading show an actual invoice value of £68, 456, with insurance underwriting to £30,000 of all cargo). Included in the manifest is the item of “Tin hardware & cutlery £7,530”. This teaspoon is one of 482 similar items of electro-plated cutlery from the LOCH ARD site, comprising spoons and forks of various sizes but all sharing the same general shape or design and metallic composition. 49 of these pieces display a legible makers’ mark — the initials “W” and “P” placed within a raised diamond outline, which is in turn contained within a sunken crown shape — identifying the manufacturer as William Page & Co of Birmingham. An electroplater’s makers’ marks, unlike sterling silver hallmarks, are not consistent identifiers of quality or date and place of manufacture. A similar line of five impressions was usually made to impress the consumer with an implication of industry standards, but what each one actually signified was not regulated and so they varied according to the whim of the individual foundry. In this case, the maker’s marks are often obscured by sedimentary accretion or removed by corrosion after a century of submersion in the ocean. However sufficient detail has survived to indicate that these samples of electro-plated cutlery probably originated from the same consignment in the LOCH ARD’s cargo. The following descriptions of maker’s marks are drawn from 255 tea spoons, 125 dessert spoons, and 99 table forks. These marks are clearly visible in 66 instances, while the same sequence of general outlines, or depression shapes, is discernible in another 166 examples. 1. A recessed Crown containing a raised Diamond outline and the initials “W” and “P” (the recognised trademark of William Page & Co) 2. An impressed Ellipse containing a raised, pivoted, Triangle in its lower part and bearing a Resurrection Cross on its upper section (a possible dissenting church symbol reflecting religious affiliation); OR a rounded Square impression containing a raised, ‘lazy’, letter “B” (possibly mimicking sterling silver hallmark signifying city of manufacture i.e. Birmingham) 3. An impressed rounded Square filled with a raised Maltese Cross (the base metal composite of nickel silver was also known as ‘German silver’ after its Berlin inventors in 1823) 4. A recessed Circle containing a Crab or Scarab Beetle image; OR a recessed Circle containing a rotated ‘fleur de lys’ or ‘fasces’ design 5. A depressed Diamond shape enclosing a large raised letter “R” and a small raised letter “D” (mimicking the U.K. Patent Office stamp which abbreviated the term ‘registered’ to “RD”, but also included date and class of patent) Suggested trade names for William Page & Co’s particular blend of brass plating are ‘roman silver’ or ‘silverite’. This copper alloy polishes to a lustrous gold when new, discolouring to a murky grey with greenish hue when neglected. HISTORY OF THE LOCH ARD The LOCH ARD belonged to the famous Loch Line which sailed many ships from England to Australia. Built in Glasgow by Barclay, Curdle and Co. in 1873, the LOCH ARD was a three-masted square rigged iron sailing ship. The ship measured 262ft 7" (79.87m) in length, 38ft (11.58m) in width, 23ft (7m) in depth and had a gross tonnage of 1693 tons. The LOCH ARD's main mast measured a massive 150ft (45.7m) in height. LOCH ARD made three trips to Australia and one trip to Calcutta before its final voyage. LOCH ARD left England on March 2, 1878, under the command of Captain Gibbs, a newly married, 29 year old. She was bound for Melbourne with a crew of 37, plus 17 passengers and a load of cargo. The general cargo reflected the affluence of Melbourne at the time. On board were straw hats, umbrella, perfumes, clay pipes, pianos, clocks, confectionary, linen and candles, as well as a heavier load of railway irons, cement, lead and copper. There were items included that intended for display in the Melbourne International Exhibition in 1880. The voyage to Port Phillip was long but uneventful. At 3am on June 1, 1878, Captain Gibbs was expecting to see land and the passengers were becoming excited as they prepared to view their new homeland in the early morning. But LOCH ARD was running into a fog which greatly reduced visibility. Captain Gibbs was becoming anxious as there was no sign of land or the Cape Otway lighthouse. At 4am the fog lifted. A man aloft announced that he could see breakers. The sheer cliffs of Victoria's west coast came into view, and Captain Gibbs realised that the ship was much closer to them than expected. He ordered as much sail to be set as time would permit and then attempted to steer the vessel out to sea. On coming head on into the wind, the ship lost momentum, the sails fell limp and LOCH ARD's bow swung back. Gibbs then ordered the anchors to be released in an attempt to hold its position. The anchors sank some 50 fathoms - but did not hold. By this time LOCH ARD was among the breakers and the tall cliffs of Mutton Bird Island rose behind the ship. Just half a mile from the coast, the ship's bow was suddenly pulled around by the anchor. The captain tried to tack out to sea, but the ship struck a reef at the base of Mutton Bird Island, near Port Campbell. Waves broke over the ship and the top deck was loosened from the hull. The masts and rigging came crashing down knocking passengers and crew overboard. When a lifeboat was finally launched, it crashed into the side of LOCH ARD and capsized. Tom Pearce, who had launched the boat, managed to cling to its overturned hull and shelter beneath it. He drifted out to sea and then on the flood tide came into what is now known as LOCH ARD Gorge. He swam to shore, bruised and dazed, and found a cave in which to shelter. Some of the crew stayed below deck to shelter from the falling rigging but drowned when the ship slipped off the reef into deeper water. Eva Carmichael had raced onto deck to find out what was happening only to be confronted by towering cliffs looming above the stricken ship. In all the chaos, Captain Gibbs grabbed Eva and said, "If you are saved Eva, let my dear wife know that I died like a sailor". That was the last Eva Carmichael saw of the captain. She was swept off the ship by a huge wave. Eva saw Tom Pearce on a small rocky beach and yelled to attract his attention. He dived in and swam to the exhausted woman and dragged her to shore. He took her to the cave and broke open case of brandy which had washed up on the beach. He opened a bottle to revive the unconscious woman. A few hours later Tom scaled a cliff in search of help. He followed hoof prints and came by chance upon two men from nearby Glenample Station three and a half miles away. In a state of exhaustion, he told the men of the tragedy. Tom returned to the gorge while the two men rode back to the station to get help. By the time they reached LOCH ARD Gorge, it was cold and dark. The two shipwreck survivors were taken to Glenample Station to recover. Eva stayed at the station for six weeks before returning to Ireland, this time by steamship. In Melbourne, Tom Pearce received a hero's welcome. He was presented with the first gold medal of the Royal Humane Society of Victoria and a £1000 cheque from the Victorian Government. Concerts were performed to honour the young man's bravery and to raise money for those who lost family in the LOCH ARD disaster. Of the 54 crew members and passengers on board, only two survived: the apprentice, Tom Pearce and the young woman passenger, Eva Carmichael, who lost all of her family in the tragedy. Ten days after the LOCH ARD tragedy, salvage rights to the wreck were sold at auction for £2,120. Cargo valued at £3,000 was salvaged and placed on the beach, but most washed back into the sea when another storm developed. The wreck of LOCH ARD still lies at the base of Mutton Bird Island. Much of the cargo has now been salvaged and some was washed up into what is now known as LOCH ARD Gorge. Cargo and artefacts have also been illegally salvaged over many years before protective legislation was introduced. One of the most unlikely pieces of cargo to have survived the shipwreck was a Minton porcelain peacock - one of only seven in the world. The peacock was destined for the Melbourne International Exhibition in 1880. It had been well packed, which gave it adequate protection during the violent storm. Today, the Minton peacock can be seen at the Flagstaff Hill Maritime Museum in Warrnambool. From Australia's most dramatic shipwreck it has now become Australia's most valuable shipwreck artefact and is one of very few 'objects' on the Victorian State Heritage Register. The LOCH ARD shipwreck is of State significance – Victorian Heritage Register S 417. Flagstaff Hill’s collection of artefacts from LOCH ARD is significant for being one of the largest collections of artefacts from this shipwreck in Victoria. It is significant for its association with the shipwreck, which is on the Victorian Heritage Register (VHR S417). The collection is significant because of the relationship between the objects, as together they have a high potential to interpret the story of the LOCH ARD. The LOCH ARD collection is archaeologically significant as the remains of a large international passenger and cargo ship. The LOCH ARD collection is historically significant for representing aspects of Victoria’s shipping history and its potential to interpret sub-theme 1.5 of Victoria’s Framework of Historical Themes (living with natural processes). The collection is also historically significant for its association with the LOCH ARD, which was one of the worst and best known shipwrecks in Victoria’s history. Unrestored tea spoon from the wreck of the LOCH ARD. The spoon design has a flattened fiddle-back handle, with a thin stem or shank, flared collar, and elongated bowl. The spoons metallic composition is a thin layer of brass alloy which has partially corroded back to a nickel-silver base metal. Only 10% of original electroplating remains as a dull bronze colour. Outlines of five makers marks are visible.flagstaff hill, warrnambool, shipwrecked coast, flagstaff hill maritime museum, maritime museum, shipwreck coast, flagstaff hill maritime village, great ocean road, loch line, loch ard, captain gibbs, eva carmichael, tom pearce, glenample station, mutton bird island, electroplated cutlery, loch ard shipwreck, nickel silver, william page & co, birmingham, brass plating, makers marks -
 Flagstaff Hill Maritime Museum and Village
Spoon, circa 1878
This tea spoon is from the wreck of the LOCH ARD, a Loch Line ship of 1,693 tons which sailed from Gravesend, London, on 2 March 1878 with 17 passengers and a crew of 36 under Captain George Gibbs. “The intention was to discharge cargo in Melbourne, before returning to London via the Horn with wool and wheat”. Instead, on 1 June 1878, after 90 days at sea, she struck the sandstone cliffs of Mutton Bird Island on the south west coast of Victoria, and sank with the loss of 52 lives and all her cargo. The manifest of the LOCH ARD listed an array of manufactured goods and bulk metals being exported to the Colony of Victoria, with a declared value of £53,700. (202 bills of lading show an actual invoice value of £68, 456, with insurance underwriting to £30,000 of all cargo). Included in the manifest is the item of “Tin hardware & cutlery £7,530”. This teaspoon is one of 482 similar items of electro-plated cutlery from the LOCH ARD site, comprising spoons and forks of various sizes but all sharing the same general shape or design and metallic composition. 49 of these pieces display a legible makers’ mark — the initials “W” and “P” placed within a raised diamond outline, which is in turn contained within a sunken crown shape — identifying the manufacturer as William Page & Co of Birmingham. An electroplater’s makers’ marks, unlike sterling silver hallmarks, are not consistent identifiers of quality or date and place of manufacture. A similar line of five impressions was usually made to impress the consumer with an implication of industry standards, but what each one actually signified was not regulated and so they varied according to the whim of the individual foundry. In this case, the maker’s marks are often obscured by sedimentary accretion or removed by corrosion after a century of submersion in the ocean. However sufficient detail has survived to indicate that these samples of electro-plated cutlery probably originated from the same consignment in the LOCH ARD’s cargo. The following descriptions of maker’s marks are drawn from 255 tea spoons, 125 dessert spoons, and 99 table forks. These marks are clearly visible in 66 instances, while the same sequence of general outlines, or depression shapes, is discernible in another 166 examples. 1. A recessed Crown containing a raised Diamond outline and the initials “W” and “P” (the recognised trademark of William Page & Co) 2. An impressed Ellipse containing a raised, pivoted, Triangle in its lower part and bearing a Resurrection Cross on its upper section (a possible dissenting church symbol reflecting religious affiliation); OR a rounded Square impression containing a raised, ‘lazy’, letter “B” (possibly mimicking sterling silver hallmark signifying city of manufacture i.e. Birmingham) 3. An impressed rounded Square filled with a raised Maltese Cross (the base metal composite of nickel silver was also known as ‘German silver’ after its Berlin inventors in 1823) 4. A recessed Circle containing a Crab or Scarab Beetle image; OR a recessed Circle containing a rotated ‘fleur de lys’ or ‘fasces’ design 5. A depressed Diamond shape enclosing a large raised letter “R” and a small raised letter “D” (mimicking the U.K. Patent Office stamp which abbreviated the term ‘registered’ to “RD”, but also included date and class of patent) Suggested trade names for William Page & Co’s particular blend of brass plating are ‘roman silver’ or ‘silverite’. This copper alloy polishes to a lustrous gold when new, discolouring to a murky grey with greenish hue when neglected. HISTORY OF THE LOCH ARD The LOCH ARD belonged to the famous Loch Line which sailed many ships from England to Australia. Built in Glasgow by Barclay, Curdle and Co. in 1873, the LOCH ARD was a three-masted square rigged iron sailing ship. The ship measured 262ft 7" (79.87m) in length, 38ft (11.58m) in width, 23ft (7m) in depth and had a gross tonnage of 1693 tons. The LOCH ARD's main mast measured a massive 150ft (45.7m) in height. LOCH ARD made three trips to Australia and one trip to Calcutta before its final voyage. LOCH ARD left England on March 2, 1878, under the command of Captain Gibbs, a newly married, 29 year old. She was bound for Melbourne with a crew of 37, plus 17 passengers and a load of cargo. The general cargo reflected the affluence of Melbourne at the time. On board were straw hats, umbrella, perfumes, clay pipes, pianos, clocks, confectionary, linen and candles, as well as a heavier load of railway irons, cement, lead and copper. There were items included that intended for display in the Melbourne International Exhibition in 1880. The voyage to Port Phillip was long but uneventful. At 3am on June 1, 1878, Captain Gibbs was expecting to see land and the passengers were becoming excited as they prepared to view their new homeland in the early morning. But LOCH ARD was running into a fog which greatly reduced visibility. Captain Gibbs was becoming anxious as there was no sign of land or the Cape Otway lighthouse. At 4am the fog lifted. A man aloft announced that he could see breakers. The sheer cliffs of Victoria's west coast came into view, and Captain Gibbs realised that the ship was much closer to them than expected. He ordered as much sail to be set as time would permit and then attempted to steer the vessel out to sea. On coming head on into the wind, the ship lost momentum, the sails fell limp and LOCH ARD's bow swung back. Gibbs then ordered the anchors to be released in an attempt to hold its position. The anchors sank some 50 fathoms - but did not hold. By this time LOCH ARD was among the breakers and the tall cliffs of Mutton Bird Island rose behind the ship. Just half a mile from the coast, the ship's bow was suddenly pulled around by the anchor. The captain tried to tack out to sea, but the ship struck a reef at the base of Mutton Bird Island, near Port Campbell. Waves broke over the ship and the top deck was loosened from the hull. The masts and rigging came crashing down knocking passengers and crew overboard. When a lifeboat was finally launched, it crashed into the side of LOCH ARD and capsized. Tom Pearce, who had launched the boat, managed to cling to its overturned hull and shelter beneath it. He drifted out to sea and then on the flood tide came into what is now known as LOCH ARD Gorge. He swam to shore, bruised and dazed, and found a cave in which to shelter. Some of the crew stayed below deck to shelter from the falling rigging but drowned when the ship slipped off the reef into deeper water. Eva Carmichael had raced onto deck to find out what was happening only to be confronted by towering cliffs looming above the stricken ship. In all the chaos, Captain Gibbs grabbed Eva and said, "If you are saved Eva, let my dear wife know that I died like a sailor". That was the last Eva Carmichael saw of the captain. She was swept off the ship by a huge wave. Eva saw Tom Pearce on a small rocky beach and yelled to attract his attention. He dived in and swam to the exhausted woman and dragged her to shore. He took her to the cave and broke open case of brandy which had washed up on the beach. He opened a bottle to revive the unconscious woman. A few hours later Tom scaled a cliff in search of help. He followed hoof prints and came by chance upon two men from nearby Glenample Station three and a half miles away. In a state of exhaustion, he told the men of the tragedy. Tom returned to the gorge while the two men rode back to the station to get help. By the time they reached LOCH ARD Gorge, it was cold and dark. The two shipwreck survivors were taken to Glenample Station to recover. Eva stayed at the station for six weeks before returning to Ireland, this time by steamship. In Melbourne, Tom Pearce received a hero's welcome. He was presented with the first gold medal of the Royal Humane Society of Victoria and a £1000 cheque from the Victorian Government. Concerts were performed to honour the young man's bravery and to raise money for those who lost family in the LOCH ARD disaster. Of the 54 crew members and passengers on board, only two survived: the apprentice, Tom Pearce and the young woman passenger, Eva Carmichael, who lost all of her family in the tragedy. Ten days after the LOCH ARD tragedy, salvage rights to the wreck were sold at auction for £2,120. Cargo valued at £3,000 was salvaged and placed on the beach, but most washed back into the sea when another storm developed. The wreck of LOCH ARD still lies at the base of Mutton Bird Island. Much of the cargo has now been salvaged and some was washed up into what is now known as LOCH ARD Gorge. Cargo and artefacts have also been illegally salvaged over many years before protective legislation was introduced. One of the most unlikely pieces of cargo to have survived the shipwreck was a Minton porcelain peacock - one of only seven in the world. The peacock was destined for the Melbourne International Exhibition in 1880. It had been well packed, which gave it adequate protection during the violent storm. Today, the Minton peacock can be seen at the Flagstaff Hill Maritime Museum in Warrnambool. From Australia's most dramatic shipwreck it has now become Australia's most valuable shipwreck artefact and is one of very few 'objects' on the Victorian State Heritage Register. The LOCH ARD shipwreck is of State significance – Victorian Heritage Register S 417. Flagstaff Hill’s collection of artefacts from LOCH ARD is significant for being one of the largest collections of artefacts from this shipwreck in Victoria. It is significant for its association with the shipwreck, which is on the Victorian Heritage Register (VHR S417). The collection is significant because of the relationship between the objects, as together they have a high potential to interpret the story of the LOCH ARD. The LOCH ARD collection is archaeologically significant as the remains of a large international passenger and cargo ship. The LOCH ARD collection is historically significant for representing aspects of Victoria’s shipping history and its potential to interpret sub-theme 1.5 of Victoria’s Framework of Historical Themes (living with natural processes). The collection is also historically significant for its association with the LOCH ARD, which was one of the worst and best known shipwrecks in Victoria’s history. Unrestored tea spoon from the wreck of the LOCH ARD. The spoon design has a flattened fiddle-back handle, with a thin stem or shank, flared collar, and elongated bowl. The spoons metallic composition is a thin layer of brass alloy which has partially corroded back to a nickel-silver base metal. 50% of original electroplating remains. Two of five makers marks are legible: (1) Trade Mark (4) Crab Designflagstaff hill, warrnambool, shipwrecked coast, flagstaff hill maritime museum, maritime museum, shipwreck coast, flagstaff hill maritime village, great ocean road, loch line, loch ard, captain gibbs, eva carmichael, tom pearce, glenample station, mutton bird island, loch ard gorge, electroplated cutlery, loch ard shipwreck, nickel silver, william page & co, birmingham, brass plating, makers marks -
 Bendigo Military Museum
Photograph - Lithographic Squadron Personnel and Equipment, Army Survey Regiment, Fortuna, Bendigo, 1992
This collection of 34 photos of Lithographic Squadron personnel and equipment was taken in at the Army Survey Regiment, Fortuna, Bendigo, in 1992. The photos were mainly taken in the Camera, Contacting, Printing, BARCRO and Production Control work areas, as well as outside Fortuna’s buildings. Although these photos are not annotated most personnel are positively identified. This is a set of 34 photographs of Lithographic Squadron personnel and equipment at the Army Survey Regiment, Fortuna, Bendigo, 1992. Photographs .1P to .32P are on 35mm negative film and scanned at 96 dpi. Colour photos .33P and .34P are on photographic paper and scanned at 300 dpi. They are part of the Army Survey Regiment’s Collection. .1) - Photo, black & white, 1992, back row L to R: Andrew Arman, unidentified Mark McCulloch, Dale Hudson, front row L to R: Daryl South, unidentified (x2). Janet Murray, LT Dave Weston. .2) - Photo, black & white, 1992, back row L to R: unidentified, CPL Paul Baker, Shona Hastie, front row L to R: LT Craig Hersant, Darren Maher, Chad Hardwick, Rob Jones. .3) - Photo, black & white, 1992, WO2 Steve Egan. .4) - Photo, black & white, 1992, LT Craig Hersant. .5)- Photo, black & white, 1992, CPL Warren Shirley, Jeff Willey, Gary Kerr. .6) - Photo, black & white, 1992, L to R: CPL Penny Knott, Janet Murray, Shona Hastie. .7) - Photo, black & white, 1992, L to R: MAJ Terry Edwards, LT David Weston. .8) - Photo, black & white, 1992, Frank Lenane, WO1 Trevor Osborne. .9) - Photo, black & white, 1992, L to R: WO2 Rob Bogumil, WO2 Steve Egan. .10) - Photo, black & white, 1992, back row L to R: Terry Winzar, Roy Hicks Marty Stradbrook, Janet Murray, Nick Vanderzwan, Mark Bird, front row L to R: SGT Dale Hudson, SSGT Russ Mollenhauer, Ross Anza, SGT Kim Reynolds, SGT Stuart Ridge, WO2 Jeff Willey, Peter Hamilton, Garry Lord, Gavin McLean, unidentified. .11) - Photo, black & white, 1992, Janet Murray, Mick Muzeen. .12) and .13) - Photo, black & white, 1992, Janet Murray. .14) to.16) - Photo, black & white, 1992, SPR Scott Cameron, CPL Warren Shirley. .17) - Photo, black & white, 1992, L to R: SPR Shane Campbell, SGT Brian Paul. .18) - Photo, black & white, 1992, LCPL John Bragg. .19) - Photo, black & white, 1992, SPR Allison (Ottaway) Wooldrage. .20) - Photo, black & white, 1992, map inspection station, LT Colin Davidson. .21) - Photo, black & white, 1992, map inspection station. .22) - Photo, black & white, 1992, map inspection station, LT Colin Davidson. .23) and .24) - Photo, black & white, 1992, map inspection station, SPR Nicole Midgley. .25) - Photo, black & white, 1992, map inspection station. .26) - Photo, black & white, 1992, map inspection station, unidentified. .27) - Photo, black & white, 1992, CPL Penny Knott. .28) - Photo, black & white, 1992, CPL Ken Peters. .29) - Photo, black & white, 1992, WO2 Rob Bogumil. .30) - Photo, black & white, 1992, L to R: WO2 Peter Imeson, WO2 Rob Bogumil. .31) and .32) - Photo, black & white, 1992, L to R: SGT Brian Fauth. .33) - Photo, colour, 1992, Klimch Camera, CPL Damien Cole. .34) - Photo, colour, 1992, Speedmaster Printing Press, L to R: SGT Gary Kerr, unidentified, SGT Kim Reynolds, SPR Shane Campbell.No personnel are identified.royal australian survey corps, rasvy, army survey regiment, army svy regt, fortuna, asr, litho -
 Federation University Historical Collection
Music Scores, Boosey & Hawkes Ltd, Handwritten sheet music, mid twentieth century
Frank Wright was a renown resident of Smeaton, where he was born on 2 August 1901. He lived at Laura Villa, and attended Smeaton State School. His father William was a gold miner and his mother's name was Sarah. Their family won many singing and instrumental awards. Frank was tutored by Percy Code and was awarded a gold medal for the highest marks in the ALCM examinations in the British Colonies at the age of seventeen years. He became the Australian Open Cornet Champion by the age of eighteen. A year later, Frank conducted the City of Ballarat Band, and later the Ballarat Soldiers’ Memorial Band. He formed the Frank Wright Frisco Band and Frank Wright and his Coliseum Orchestra. These bands won many South Street awards, and Frank as conductor won many awards in the Australian Band Championship contest. In 1933 Frank Wright sailed to England to conduct the famous St Hilda’s Band and was later appointed Musical Director of the London County Council, where he organized many amazing concerts in parks, in and around the London district. He was made Professor of Brass and Military Band Scoring and conducted at the Guildhall of Music and Drama. Frank was often invited to adjudicate Brass Band Championships around Europe, in Australia, including South Street and in New Zealand. The Frank Wright Medal at the Royal South Street competition is awarded to an individual recognized as making an outstanding contribution to brass music in Australia.Handwritten music scores by Frank Wright, some in his hand. 1). 'The Merry Peasant' by Schumann and arranged in parts for brass band by Frank Wright - 3 pages. 2). 'Threshold' by Frank Wright -9 pages. 3). 'Around the Campfire' in parts - 10 pages. 4).'March (Judas Maccabaeus) by Handel and arranged by Frank Wright for the Boys Brigade (a) is written by Frank in pencil, (b) is written in pen with a brown paper cover. 5). 'Anthony & Cleopatra' arranged for the Boys Brigade (a) in written in pencil, (b) is written in pen. 6). 'O Give Me the Hills' written in pencil - 2 pages 7). 'Beneath this Turf' music by Frank Wright and words written in 1842 by Unknown Author - 3 pages. 8). 'If When that Hour Recalling' music by Frank Wright and poem by Thomas Moore, written in pen for 4 brass parts plus violin - 6 pages. 9). 'So Long', Brass Band arrangement by Frank Wright, written in pencil - 2 pages. 10). 'Gluck: March' arrangement by Frank Wright and written in pencil - 2 pages. 11). 'Occasional March' by Handel, arrangement by Frank Wright and written in pen - 5 pages (3 pages of band parts plus a separate Solo Cornet page). 12). 'Bugle Command: Ceremonial March for Bugles and Brass Band' written by Frank Wright - (a) 6 pages of bands parts plus a separate Solo Cornet page written in pen (b) 4 pages written in pencil and pen. 13). 'Scena' & 'Idyll' - Grade 4 Trombone written by Frank Wright in pen - 2 pages. 14). 'Green Corn' Brass Band arrangement by Frank Wright, written in pencil - 1 page. 15). 'Syrian Air' by Geoffrey Allen and arrangement by Frank Wright, with a buff cover (a) written in pencil - 2 pages (b) photo copy of parts - 2 pages (c) single sheet of music written in pencil, blue pen and red pen with some sections crossed out. 16). 'Gavotte: from the Opera "Rodrigo"' by Handel and arrangement by Frank Wright with a brown paper cover (a) 3 pages written in pencil (b) 3 pages written in pen. 17). 'Tales of Hoffman' arranged by Frank Wright for Brass Band 32 page printed booklet in a buff envelope. 18). 'Will Your Anchor Hold' arranged by Frank Wright for The Boy's Brigade - (a) 2 pages written in pencil with a buff cover plus a page with both pen and pencil notes (b) 2 pages written in pen plus a photo copied page for Solo Cornet. 19). Buff folder of 3 pieces of music written in pen - '1. Riverside', '2. Cenotaph' & '3. London Lights' - 7 pages. 20). 'Preludio Marziale (Martial Prelude)' by Frank Wright (a) written in pencil - 2 pages (b) written in pen - 7 pages (c) 7 page printed copy 21). 'Rondo Theme' (a) music written in pencil on the front of a buff envelope (b) 1 page written in pencil 22). Buff folder with two poems set to music by Frank Wright and written in pen - (a) 'My Heart and Lute' by Thomas Moore - 3 pages plus another 3 pages which may be part of this piece (b) 'The Rose' by Thos Croft (bart) - 3 pages. (c) a Musical Pitch Relation Chart for Pipe Organ. 23). 'Purcellian Suite', Purcell arranged by Frank Wright - 3 pages written in pencil and 4 photocopied pages 24). 'G's pl piano study 27/2/52All hand written 8). Written in pencil on front - You can return this score. Keep parts. 9). Notes to musicians written in pen on page 1. 11). Notes to musicians in pencil on page 4. 13). a correction written in red pencil. -
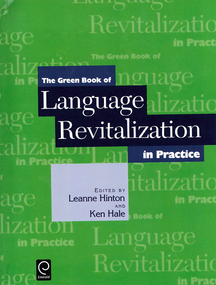 Victorian Aboriginal Corporation for Languages
Book, Leanne Hinton, The green book of Language revitalization in practice, 2008
1. Language Revitalization: An Overview /? Leanne Hinton 2. Diversity in Local Language Maintenance and Restoration: A Reason For Optimism /? Anna Ash, Jessie Little Doe Fermino and Ken Hale 3. Federal Language Policy and Indigenous Languages in the United States /? Leanne Hinton 4. "... To Help Assure the Survival and Continuing Vitality of Native American Languages" /? Robert D. Arnold 5. Language Planning /? Leanne Hinton Introduction to the Pueblo Languages /? Leanne Hinton 6. Native Language Planning: A Pilot Process in the Acoma Pueblo Community /? Christine P. Sims 7. The Key To Cultural Survival: Language Planning and Revitalization in the Pueblo de Cochiti /? Regis Pecos and Rebecca Blum-Martinez The Navajo Language: I /? Ken Hale 8. Navajo Head Start Language Study /? Paul R. Platero 9. Introduction to Revitalization of National Indigenous Languages /? Leanne Hinton Introduction to the Welsh Language /? Leanne Hinton 10. Welsh: A European Case of Language Maintenance /? Gerald Morgan Introduction to the Maori Language /? Ken Hale 11. Te Kohanga Reo: Maori Language Revitalization /? Jeanette King An Introduction to the Hawaiian Language /? Leanne Hinton 12. The Movement to Revitalize Hawaiian Language and Culture /? Sam L. No'Eau Warner 13. "Mai Loko Mai O Ka 'I'ini: Proceeding from a Dream": The 'Aha Punana Leo Connection in Hawaiian Language Revitalization /? William H. Wilson and Kauanoe Kamana 14. Teaching Methods /? Leanne Hinton The Karuk Language /? Leanne Hinton 15. Teaching Well, Learning Quickly: Communication-Based Language Instruction /? Terry Supahan and Sarah E. Supahan The Navajo Language: II /? Ken Hale 16. Tsehootsooidi Olta'gi Dine Bizaad Bihoo'aah: A Navajo Immersion Program at Fort Defiance, Arizona /? Marie Arviso and Wayne Holm 17. The Master-Apprentice Language Learning Program /? Leanne Hinton 18. Linguistic Aspects of Language Teaching and Learning in Immersion Contexts /? Ken Hale 19. New Writing Systems /? Leanne Hinton An Introduction to Paiute /? Leanne Hinton and Ken Hale 20. Language Revitalization in the San Juan Paiute Community and the Role of a Paiute Constitution /? Pamela Bunte and Robert Franklin 21. Audio-Video Documentation /? Leanne Hinton Australian Languages /? Ken Hale 22. Strict Locality in Local Language Media: An Australian Example /? Ken Hale The Arapaho Language /? Ken Hale 23. Reflections on the Arapaho Language Project, or When Bambi Spoke Arapaho and Other Tales of Arapaho Language Revitalization Efforts /? Stephen Greymorning Irish /? Ken Hale 24. Continuity and Vitality: Expanding Domains through Irish-Language Radio /? Colleen Cotter The Mono Language /? Ken Hale 25. On Using Multimedia in Language Renewal: Observations from Making the CD-ROM Taitaduhaan /? Paul V. Kroskrity and Jennifer F. Reynolds 26. Can the Web Help Save My Language? /? Laura Buszard-Welcher 27. Training People to Teach Their Language /? Leanne Hinton Inuttut and Innu-aimun /? Ken Hale 28. The Role of the University in the Training of Native Language Teachers: Labrador /? Alana Johns and Irene Mazurkewich Languages of Arizona, Southern California, and Oklahoma /? Leanne Hinton 29. Indigenous Educators as Change Agents: Case Studies of Two Language Institutes /? Teresa L. McCarty, Lucille J. Watahomigie and Akira Y. Yamamoto /? [et al.] The Navajo Language: III /? Ken Hale 30. Promoting Advanced Navajo Language Scholarship /? Clay Slate 31. Sleeping Languages: Can They Be Awakened? /? Leanne Hinton 32. The Use of Linguistic Archives in Language Revitalization: The Native California Language Restoration Workshop /? Leanne Hinton The Ohlone Languages /? Leanne Hinton 33. New Life for a Lost Language /? Linda Yamane.Maps, b&w photographs, tables, word listslanguage policy, language planning, language maintenance, language revitalization, language immersion, language literacy, media and technology, language education and training, sleeping languages, navajo, arapaho -
University of Melbourne, Burnley Campus Archives
ALbum - Colour prints, Victorian College of Agriculture and Horticulture, Staff Photographs
Collection of photographs of staff and some Research Fellows. These have been scanned but not added to Media. Some labelled with position at the time and some identified by Ala Shtrauser (former Asst. Librarian), Andrew Smith, Ross Payne. (1-4) Ross Payne (Engineering Technician). (5-6) Ed Smart (Lecturer). (7-8) James Will (Lecturer). (9) Mark McNamara (Librarian.) (10) Rosemary McConnell (Librarian). (11Kevin Blaze (Lecturer). (12-13) David Aldous Lecturer). (14) Peter McSweeney (Senior Lecturer, Co-ordinator of BAS(H)). (15) Andrew Smith (Gardener). (16) Dr. Cassandra McLean (Senior Lecturer). (17) Sally Cullwick (Librarian). (18) Kat Frame (Librarian). (19) Michael Nechwatal (Handy Person). (20) Ala Hires (Shtrauser) (Library Assistant). (21-22) Peter May (Deputy Head of Campus). (23-25) Geoff Connellan (Senior Lecturer, Horticultural Engihneering, Co-ordinator MAS(H)). (26-27) John Rayner (Lecturer). (28) Jamie Pearson (Lecturer). (30) Graham Sterry (Printer). (31) Michael Green (Lecturer). (32) Suzanne Trajstman (Counsellor). (33) Greg Moore (Principal). (34-35) Greg Moore, Peter May, Geoff Connellan. (36) Greg Moore, Peter May, David Aldous. ((37-38) John Brereton (Lecturer, Co-ordinator AC(H)). (39-41) Nick Bailey (Lecturer).(42) Karen Van Laak (Admin). (43) Ruth Beilin (Lecturer). (44-46) Clive Sorrell (Lecturer). (47) Jayne Lindholm (Lab. Asst.). (48-49) Phil Kenyon (Arboriculture Lecturer). (50-51) Ross Hall (Lecturer). (52-55) Catherine Jaggs (Admin. Officer).(56) Robin Haylett (Gardener, Amrad). (57-59) Robina Duygen (Office Manager). (60) Julie Cocksedge (Nursery). (61) David Morales (Landscape)? (Tony Westmore (Lecturer). (63-64) Stuart Miller (IT). (65) Trish Mooney (Gardener) (66) Michael Looker (Lecturer). (67) Kerry Howard (Lecturer). (68) Alan Shaanks (Nursery, Field Station Tractor Driver). (69) Brian Shields (Lecturer). (70-73) Ian Winstone (Lecturer). 74 Tom Karapidis (Cleaner). (75-76) Ken James (Lecturer). (77-79) Jim Stafford (Property & Services Manager).(80) Kelvin McKenzie (Carpenter). (81-85) Kylie Cannon (General Administrative Officer). (86) Melanie Conomikes (Lecturer). (87 Dr. Sally Stewart-Wade (Lecturer). (88) Geraldine Fay (EH & S Administrator). (89) Rowan Reid (Lecturer). (90) Romduol Buruma (Finance Officer). (91) David Morales (Cleaner). (2) Tony Westmore (Lecturer). (93) Clare Scott. (94) Bata Thomas (Caretaker). (95-96) Nicholas Osborne (Nursery Assistant). ((7) John Hensley (Cleaner). (98) Jill Kellow (Environmental Horticulturer Technician). (99) Nicky Jacobs (Counsellor). (100-102) John Delpratt (Lecturer). (103-105) Alex Campbell (Nursery Technician). (106) Christine Gregory (Clerical Assistant). Stamped, "Victorian College of Agriculture & Horticulture-Burnley, Burnley Gardens, Swan St., Richmond Vic 3121 2/1984." (107) Jenny Wilson (Typist) Stamped as previous "2/84" b/w. (108-112) Unidentified. (116) Dr Yue Wang (Research Fellow). (117) Simon Murphy (Senior Forest Researcher). (118) ? (119) Carmel McPhee at Como. Includes 2 different Staff Listings, 1 dated 03 January 1990 with years employed and Last Position.staff, research fellows, ala shtrauser, andrew smith, ross payne, ed smart, james will, mark mcnamara, rosemary mcconnell, kevin blaze, david aldous, peter mcsweeney, cassandra mclean, sally cullwick, kat frame, michael nechwata, peter may, geoff connellan, john rayner, jamie pearson, graham sterry, michael green, suzanne trajstman, greg moore, john brereton, nick bailey, karen van laak, ruth beilin, clive sorrell, jayne lindholm, phil kenyon, ross hall, catherine jaggs, robin haylett, robina duygen, julie cocksedge, david morales, tony westmore stuart miller, trish mooney, michael looker, kerry howard, alan shaanks, brian shields, ian winstone, tom karapidis, ken james, jim stafford, kelvin mckenzie, kylie cannon, melanie conomikes, sally stewart-wade, geraldine fay, rowan reid, romduol buruma, tony westmore, clare scott, bata thomas, nicholas osborne, john hensley, jill kellow, nicky jacobs, john delpratt, alex campbell, christine gregory, vcah, burnley gardens, jenny wilson, yue wang, simon murphy, carmel mcphee, como house -
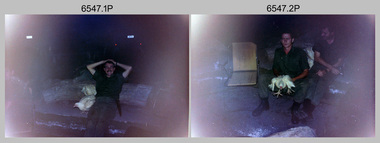 Bendigo Military Museum
Photograph - 4th Field Survey Squadron Adventurous Training, Mount Remarkable National Park, Flinders Ranges, SA, 4th Field Survey Squadron Adventurous Training, Mount Remarkable National Park, SA, 1987
This is a set of 40 photographs of 4th Field Survey Squadron undergoing adventurous training at Mount Remarkable National Park, South Australia in May 1987. It is evident the training focussed on teamwork, leadership, abseiling, rock climbing, field craft and living off the land survival skills. Elements from units of the Army Reserve also participated in the training. Refer to items 6546.42P and 6548.14P for additional photographs taken during the adventurous training.This is a set of 40 photographs of 4th Field Survey Squadron undergoing adventurous training at Mount Remarkable National Park, South Australia in May 1987. The colour photographs are on 35mm negative film and are part of the Army Survey Regiment’s Collection. The photographs were scanned at 96 dpi. .1) - Photo, colour, 1987. Camp activities, unidentified soldier. .2) - Photo, colour, 1987. Camp activities, unidentified personnel. .3) & .4) - Photo, colour, 1987. Hootchie set-up. .5) - Photo, colour, 1987. Camp activities, unidentified personnel. .6) - Photo, colour, 1987. Hootchie set-up. .7) - Photo, colour, 1987. Camp activities. .8) - Photo, colour, 1987. Hootchie set-up, unidentified officer. .9) - Photo, colour, 1987. Camp activities. Results from foraging the forest for food. .10) - Photo, colour, 1987. Camp set-up. .11) - Photo, colour, 1987. Camp activities. .12) - Photo, colour, 1987. Camp activities. L to R: CPL Jeff Prince, unidentified (x3). .13) to .16) - Photo, colour, 1987. Camp activities. .17) & .18) - Photo, colour, 1987. Mount Remarkable National Park terrain. .19) - Photo, colour, 1987. Hootchie set-up. L to R: unidentified, CPL Jeff Prince, SPR Perry Langeberg, unidentified (x3). .20) - Photo, colour, 1987. Camp activities. .21) - Photo, colour, 1987. Camp activities, unidentified personnel. .22) & .23) - Photo, colour, 1987. Camp set-up. .24) - Photo, colour, 1987. Hootchie set-up. .25) - Photo, colour, 1987. Hootchie set-up, unidentified personnel. .26) - Photo, colour, 1987. Camp activities. L to R: CPL Jeff Prince, SPR Steve Ellis, SGT Peter Imeson, CPL Neale ‘Tex’ Houston, SPR Perry Langeberg, unidentified exchange officer, WO2 Russ Larsen. .27) - Photo, colour, 1987. Hootchie set-up. .28) - Photo, colour, 1987. Camp activities. L to R: SPR Bruce Graham, LT Geoff ‘GT’ Ford, CPL Jamie ‘Fish’ McRae, SGT Wally Chilcott, SPR Shaun Hynes, CPL Kevin Whitty. .29) - Photo, colour, 1987. Camp activities. L to R: unidentified, SPR Todd Hayley, unidentified, WO2 Peter Symmans, SSGT Cam Chapman, CPL Dave Irving. .30) - Photo, colour, 1987. Camp activities. L to R: unidentified (x2), LT Greg Oaten, unidentified (x2), CPL Peter Hardy, unidentified. .31) - Photo, colour, 1987. Camp activities. L to R: CPL Roger Graf, WO2 Bob Rogister, SSM WO1 Bill Griggs, unidentified officer, SPR Simon Reynolds, SPR John Keely. .32) - Photo, colour, 1987. Camp activities. L to R: unidentified, SPR Steve Nokes, SGT Stu Symonds, WO2 Brett ‘Dutchy’ Van Leeuwen, unidentified (x3). .33) - Photo, colour, 1987. Camp activities. L to R: unidentified, SGT Derek Stanmore, CAPT Danny Galbraith, unidentified in foreground. .34) - Photo, colour, 1987. Camp activities. L to R: unidentified (x3), SGT Derek Stanmore, CAPT Danny Galbraith. .35) - Photo, colour, 1987. Camp activities. .36) - Photo, colour, 1987. Camp activities. OC MAJ Peter Cates. .37) - Photo, colour, 1987. Camp activities. L to R: unidentified, CPL Dave Longbottom. .38) - Photo, colour, 1987. Camp activities, unidentified personnel. .39) & .40) - Hootchie set-up..1P to .40P – There are no personnel identified. ‘1987 ADV TRAINING’ annotated on negatives sleeve.royal australian survey corps, rasvy, 4 fd svy sqn -
 Flagstaff Hill Maritime Museum and Village
Equipment - Standard measure, Mid to late 19th Century
The beginning of standardised weights and measures began In Victoria when the Melbourne Observatory received sets of standard weights and measures, which had been tested in Britain against the then British Imperial standards. These included the primary standard yard and pound for the Colony of Victoria. Other standards of weights and measure held by shires and the administrative body's within the colony could then be compared to these primary standards. A Weights and Measures Act was passed in Victoria in 1862, establishing local inspectors throughout the colony. By the 1870s each local council and shire in Victoria held a set of standards that were used to test scales, weights and dry measures used by wholesalers, factories and shops. Every ten years the councils’ standards would themselves need to be rechecked against the Victorian Standards. The checking was done by the Victorian Customs Department in the 19th century, but with the transfer of responsibility for customs to the Federal Government in 1901, weights and measures function was retained by the Victorian Government and was shifted to the Melbourne Observatory. In 1904, a new building was erected at the south end of the Great Melbourne Telescope House, where the standard weights and measures and testing equipment was installed. This room had a large whirling apparatus for testing air meters and became known as the Whirling Room. When the Melbourne Observatory closed in 1944, the Weights and Measures Branch was formed to continue and this branch remained at the Observatory site unit until 1995. J & M Ewan History: J&M Ewan was a Melbourne firm that began by selling retail furniture and wholesale ironmongery. They had substantial warehouses situated at the intersection of 81-83 Elizabeth and Little Collins Streets, the business was established by James M Ewan in 1852. Shortly afterwards he went into partnership with William Kerr Thomson and Samuel Renwick. When Ewan died in 1868 his partners carried on and expanded the business under his name J & M Ewan. The business was expanded to provide a retail shop, counting-house and private offices. Wholesale warehouses adjoined these premises at 4, 6 and 10 Little Collins Street, West. This company provided and sold a large and varied amount of imported goods into the colony that consisted of agriculture equipment, building materials, mining items as well as steam engines, tools of all types and marble fireplaces. They also supplied the Bronze measuring containers in the Flagstaff Hill collection and the probability is that these containers were obtained by the local Melbourne authority that monitored weights and measures in the mid to late 19th century. The company grew to employ over 150 people in Melbourne and opened offices at 27 Lombard St London as well as in New Zealand and Fiji. The company also serviced the Mauritius islands and the pacific area with their steamship the Suva and a brig the Shannon, the company ceased trading in 1993. Robert Bate History: Robert Brettell Bate (1782-1847) was born in Stourbridge, England, one of four sons of Overs Bate, a mercer (a dealer in textile fabrics, especially silks, velvet's, and other fine materials)and banker. Bate moved to London, and in 1813 was noticed for his scientific instrument making ability through the authority of the “Clockmakers Company”. Sometime in the year 1813 it was discovered that one Robert Brettell Bate, regarded as a foreigner in London had opened a premises in the Poultry selling area of London. He was a Mathematical Instrument maker selling sundials and other various instruments of the clock making. In 1824, Bate, in preparation for his work on standards and weights, leased larger premises at 20 and 21 Poultry, London, at a rental of four hundred pounds per annum. It was there that Bate produced quality metrological instruments, which afforded him the recognition as one of one of the finest and principal English metrological instrument-makers of the nineteenth century. English standards at this time were generally in a muddle, with local standards varying from shire to shire. On 17 June 1824, an Act of Parliament was passed making a universal range of weights, measures, and lengths for the United Kingdom, and Bate was given the job of crafting many of the metrological artifacts. He was under instruction from the renown physicist Henry Kater F.R.S. (1777-1835) to make standards and to have them deposited in the principal cities throughout the United Kingdom and colonies. Bate experimented with tin-copper alloys to find the best combination for these items and by October 1824, he had provided Kater with prototypes to test troy and avoirdupois pounds, and samples with which to divide the troy into grams. Bate also cast the standard for the bushel, and by February 1825, had provided all the standards required of him by the Exchequer, Guildhalls of Edinburgh, and Dublin. In 1824, he also made a troy pound standard weight for the United States, which was certified for its accuracy by Kater and deposited with the US Mint in 1827. Kater, in his address to the Royal Society of London, acknowledged Bate's outstanding experimentation and craftsmanship in producing standards of weights, measures, and lengths. An example of a dry Bronze measuring container made specifically for J & M Ewan by possibly the most important makers of measurement artefacts that gives us today a snapshot of how imperial weights and measures were used and how a standard of measurement for merchants was developed in the Australian colonies based on the Imperial British measurement system. The container has social significance as an item retailed by J & M Ewan and used in Victoria by the authorities who were given legal responsibility to ensure that wholesalers and retailers of dry goods sold in Victoria were correct. The container was a legal standard measure so was also used to test merchants containers to ensure that their distribution of dry goods to a customer was correct.Maker Possibly Robert Brettell Blake or De Grave, Short & Co Ltd both of LondonContainer bronze round shape for measuring dry quantities has brass handles & is a 'half-bushel' measurement"IMPERIAL STANDARD HALF BUSHEL" engraved around the top of the container. VICTORIA engraved under "J & M Ewan & Co London and Melbourne" engraved around the bottom of the container.flagstaff hill, warrnambool, shipwrecked-coast, flagstaff-hill, flagstaff-hill-maritime-museum, maritime-museum, shipwreck-coast, flagstaff-hill-maritime-village, standard measure, bronze, peck measurement, j & m ewan, victorian standard dry measurement, bronze container, victorian standards, melbourne observatory, robert brettell bate -
 Flagstaff Hill Maritime Museum and Village
Timer, 1940s
Australia's first telephone exchange was opened in Melbourne in August 1880. It was operated by the Melbourne Telephone Exchange Company. Owned by W. H. Masters and T. T. Draper, the Manager of the Company was H. Byron Moore. This was only two years after the world's first exchange in the United States, and just four years after Bell first spoke on a telephone. The exchange was located in the old Stock Exchange building at 367 Collins Street, a site now occupied by the Commonwealth Bank. In 1884, the operations of the Company, by then known as the Victorian Telephone Exchange Company, had grown considerably and were transferred to Wills Street, Melbourne. Private ownership of this company continued until 1887 when it was bought out by the Victorian Colonial Government. Other colonial governments followed this example. By 1910, the growth in telephone services made additional accommodation necessary. This could not be provided in the existing building in Wills Street and arrangements were made for a new exchange in Lonsdale Street. Alexander Graham Bell visited Australia in 1910 to advise the Federal Government's Postal Commission. Telephone exchanges were established in Adelaide with (48 subscribers), Hobart (10 subscribers) and Launceston (35 subscribers). The first exchange in Western Australia was established in 1887 and located in a small three-room cottage in Wellington Street, Perth with 17 subscribers. The year 1888 marked the opening of the Fremantle exchange in a small room at the rear of the Town Hall. There were nine subscribers. Australia's first automatic exchange was installed in the GPO in Sydney, in 1911, for internal use. But the first automatic exchange for public use was opened at Geelong in Victoria in the next year July 1912 with 800 subscribers. Melbourne's first automatic exchange was opened in the suburb of Brighton in 1914; the first public automatic exchange in NSW began operating at Newtown, Sydney in 1915; and Queensland's first was installed at South Brisbane in 1925. 1929 saw the opening of Tasmania's first automatic exchange in Hobart. an automatic telephone service. In June 1977, the manual telephone exchange at Swansea was replaced with an automatic service and made Tasmania the first State in Australia to have a fully automatic net work. The half-century following Federation saw the growth of the automatic operation; a great extension of trunk line services; The automatic telephone contributed greatly to the early popularity of telephones in Australia. It was a quicker and more convenient way of communicating with another person on the same exchange — instead of having to go through tedious processes with the operator. From its introduction, the number of automatic telephones in operation grew to a remarkable extent. In 1886, the first trunk link of 16 km was connected to the exchanges of Adelaide and Port Adelaide in South Australia. Then, in 1907, the first inter-capital telephone trunk line was opened between Sydney and Melbourne. It was followed by a line between Melbourne and Adelaide in 1914. Sydney and Brisbane were linked in 1923, and Perth and Adelaide in 1930. In 1930, the first overseas calls from Australia came possible with the introduction of a radio telephone service to England, and through there to Europe and America. A similar service opened to New Zealand in the same year. Initially, trunk channels linked different manual trunk exchanges. It was necessary for a succession of trunk operators to connect the appropriate channels, one after the other until the connection was made. As trunk traffic grew. the system became increasingly unsuitable. More trunk operators had to be employed and so labour costs increased. It was a tedious and slow way of making a long-distance call, and it was sometimes hard to hear, particularly when several exchanges were linked With technical advances, trunk switching moved from manual operation through a partly automatic phase. Automatic transit switching equipment was used and only a single operator was required to connect a trunk call to a wanted automatic subscriber. Until well beyond the middle of this century, the majority of trunk traffic went through this single telephonist control. In 1953, the number of telephones in use in Australia passed the one million mark. By then, the need for improvement in the automatic exchanges was be coming well recognised. The need was for a telephone switching system which would do a better job more economically than the conventional step-by-step ex-change. This led to the adoption of the Crossbar system as the standard in automatic telephone exchanges in 1960. The introduction of Crossbar switching was a big step forward in the automation of trunk calls. It substituted automatic switching and charging equipment for the originating trunk operator, and improved the quality of the system radically. Before the introduction of the Crossbar system there were often very long delays in obtaining a booked trunk call, and the quality of sound was often very poor. With Crossbar, Subscriber Trunk Dialing (STD) became a reality. A trunk call by STD was as easy to make and almost as fast to connect as a local call.The item was made around the 1940s and used up until the 1970s in manual cord telephone exchanges as a way to time and charge users for trunk calls made over the telecom system of the time. Post Master General dept. - Trunk Call Timer.Inscribed PMG, C. of A, 37. Bell chimes at 3 min increments.flagstaff hill, warrnambool, shipwrecked-coast, flagstaff-hill, flagstaff-hill-maritime-museum, maritime-museum, shipwreck-coast, flagstaff-hill-maritime-village, timer, trunk call, telephone, cord exchange -
 Flagstaff Hill Maritime Museum and Village
Equipment - Standard measure, Mid to late 19th Century
The beginning of standardised weights and measures began In Victoria when the Melbourne Observatory received sets of standard weights and measures, which had been tested in Britain against the then British Imperial standards. These included the primary standard yard and pound for the Colony of Victoria. Other standards of weights and measure held by shires and the administrative body's within the colony could then be compared to these primary standards. A Weights and Measures Act was passed in Victoria in 1862, establishing local inspectors throughout the colony. By the 1870s each local council and shire in Victoria held a set of standards that were used to test scales, weights and dry measures used by wholesalers, factories and shops. Every ten years the councils’ standards would themselves need to be rechecked against the Victorian Standards. The checking was done by the Victorian Customs Department in the 19th century, but with the transfer of responsibility for customs to the Federal Government in 1901, weights and measures function was retained by the Victorian Government and was shifted to the Melbourne Observatory. In 1904, a new building was erected at the south end of the Great Melbourne Telescope House, where the standard weights and measures and testing equipment was installed. This room had a large whirling apparatus for testing air meters and became known as the Whirling Room. When the Melbourne Observatory closed in 1944, the Weights and Measures Branch was formed to continue and this branch remained at the Observatory site unit until 1995. J & M Ewan History: J&M Ewan was a Melbourne firm that began by selling retail furniture and wholesale ironmongery. They had substantial warehouses situated at the intersection of 81-83 Elizabeth and Little Collins Streets, the business was established by James M Ewan in 1852. Shortly afterwards he went into partnership with William Kerr Thomson and Samuel Renwick. When Ewan died in 1868 his partners carried on and expanded the business under his name J & M Ewan. The business was expanded to provide a retail shop, counting-house and private offices. Wholesale warehouses adjoined these premises at 4, 6 and 10 Little Collins Street, West. This company provided and sold a large and varied amount of imported goods into the colony that consisted of agriculture equipment, building materials, mining items as well as steam engines, tools of all types and marble fireplaces. They also supplied the Bronze measuring containers in the Flagstaff Hill collection and the probability is that these containers were obtained by the local Melbourne authority that monitored weights and measures in the mid to late 19th century. The company grew to employ over 150 people in Melbourne and opened offices at 27 Lombard St London as well as in New Zealand and Fiji. The company also serviced the Mauritius islands and the pacific area with their steamship the Suva and a brig the Shannon. Robert Bate History: Robert Brettell Bate (1782-1847) was born in Stourbridge, England, one of four sons of Overs Bate, a mercer (a dealer in textile fabrics, especially silks, velvet's, and other fine materials)and banker. Bate moved to London, and in 1813 was noticed for his scientific instrument making ability through the authority of the “Clockmakers Company”. Sometime in the year 1813 it was discovered that one Robert Brettell Bate, regarded as a foreigner in London had opened a premises in the Poultry selling area of London. He was a Mathematical Instrument maker selling sundials and other various instruments of the clock making. In 1824, Bate, in preparation for his work on standards and weights, leased larger premises at 20 and 21 Poultry, London, at a rental of four hundred pounds per annum. It was there that Bate produced quality metrological instruments, which afforded him the recognition as one of one of the finest and principal English metrological instrument-makers of the nineteenth century. English standards at this time were generally in a muddle, with local standards varying from shire to shire. On 17 June 1824, an Act of Parliament was passed making a universal range of weights, measures, and lengths for the United Kingdom, and Bate was given the job of crafting many of the metrological artifacts. He was under instruction from the renown physicist Henry Kater F.R.S. (1777-1835) to make standards and to have them deposited in the principal cities throughout the United Kingdom and colonies. Bate experimented with tin-copper alloys to find the best combination for these items and by October 1824, he had provided Kater with prototypes to test troy and avoirdupois pounds, and samples with which to divide the troy into grams. Bate also cast the standard for the bushel, and by February 1825, had provided all the standards required of him by the Exchequer, Guildhalls of Edinburgh, and Dublin. In 1824, he also made a troy pound standard weight for the United States, which was certified for its accuracy by Kater and deposited with the US Mint in 1827. Kater, in his address to the Royal Society of London, acknowledged Bate's outstanding experimentation and craftsmanship in producing standards of weights, measures, and lengths. An example of a dry Bronze measuring container made specifically for J & M Ewan by possibly the most important makers of measurement artifacts that gives us today a snapshot of how imperial weights and measures were used and how a standard of measurement for merchants was developed in the Australian colonies based on the Imperial British measurement system. The container has social significance as an item retailed by J & M Ewan and used in Victoria by the authorities who were given legal responsibility to ensure that wholesalers and retailers of dry goods sold in Victoria were correct. The container was a legal standard measure so was also used to test merchants containers to ensure that their distribution of dry goods to a customer was correct. Bronze round container with brass two handles used as a legal standard for measuring dry quantities & is a 'peck' measurement. "IMPERIAL STANDARD PECK" engraved around top of container with " VICTORIA" engraved under.flagstaff hill, warrnambool, shipwrecked-coast, flagstaff-hill, flagstaff-hill-maritime-museum, maritime-museum, shipwreck-coast, flagstaff-hill-maritime-village, standard measure, bronze, peck measurement, j & m ewan, victorian standard dry measurement, bronze container, victorian standards, melbourne observatory, robert bettell bate -
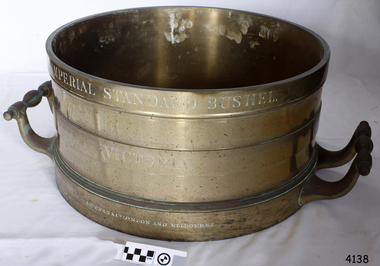 Flagstaff Hill Maritime Museum and Village
Equipment - Standard measure, Mid to Late 19th Century
The beginning of standardised weights and measures began In Victoria when the Melbourne Observatory received sets of standard weights and measures, which had been tested in Britain against the then British Imperial standards. These included the primary standard yard and pound for the Colony of Victoria. Other standards of weights and measure held by shires and the administrative body's within the colony could then be compared to these primary standards. A Weights and Measures Act was passed in Victoria in 1862, establishing local inspectors throughout the colony. By the 1870s each local council and shire in Victoria held a set of standards that were used to test scales, weights and dry measures used by wholesalers, factories and shops. Every ten years the councils’ standards would themselves need to be rechecked against the Victorian Standards. The checking was done by the Victorian Customs Department in the 19th century, but with the transfer of responsibility for customs to the Federal Government in 1901, weights and measures function was retained by the Victorian Government and was shifted to the Melbourne Observatory. In 1904, a new building was erected at the south end of the Great Melbourne Telescope House, where the standard weights and measures and testing equipment was installed. This room had a large whirling apparatus for testing air meters and became known as the Whirling Room. When the Melbourne Observatory closed in 1944, the Weights and Measures Branch was formed to continue and this branch remained at the Observatory site unit until 1995. J & M Ewan History: J&M Ewan was a Melbourne firm that began by selling retail furniture and wholesale ironmongery. They had substantial warehouses situated at the intersection of 81-83 Elizabeth and Little Collins Streets, the business was established by James M Ewan in 1852. Shortly afterwards he went into partnership with William Kerr Thomson and Samuel Renwick. When Ewan died in 1868 his partners carried on and expanded the business under his name J & M Ewan. The business was expanded to provide a retail shop, counting-house and private offices. Wholesale warehouses adjoined these premises at 4, 6 and 10 Little Collins Street, West. This company provided and sold a large and varied amount of imported goods into the colony that consisted of agriculture equipment, building materials, mining items as well as steam engines, tools of all types and marble fireplaces. They also supplied the Bronze measuring containers in the Flagstaff Hill collection and the probability is that these containers were obtained by the local Melbourne authority that monitored weights and measures in the mid to late 19th century. The company grew to employ over 150 people in Melbourne and opened offices at 27 Lombard St London as well as in New Zealand and Fiji. The company also serviced the Mauritius islands and the pacific area with their steamship the Suva and a brig the Shannon. Robert Bate History: Robert Brettell Bate (1782-1847) was born in Stourbridge, England, one of four sons of Overs Bate, a mercer (a dealer in textile fabrics, especially silks, velvet's, and other fine materials)and banker. Bate moved to London, and in 1813 was noticed for his scientific instrument making ability through the authority of the “Clockmakers Company”. Sometime in the year 1813 it was discovered that one Robert Brettell Bate, regarded as a foreigner in London had opened a premises in the Poultry selling area of London. He was a Mathematical Instrument maker selling sundials and other various instruments of the clock making. In 1824, Bate, in preparation for his work on standards and weights, leased larger premises at 20 and 21 Poultry, London, at a rental of four hundred pounds per annum. It was there that Bate produced quality metrological instruments, which afforded him the recognition as one of one of the finest and principal English metrological instrument-makers of the nineteenth century. English standards at this time were generally in a muddle, with local standards varying from shire to shire. On 17 June 1824, an Act of Parliament was passed making a universal range of weights, measures, and lengths for the United Kingdom, and Bate was given the job of crafting many of the metrological artifacts. He was under instruction from the renown physicist Henry Kater F.R.S. (1777-1835) to make standards and to have them deposited in the principal cities throughout the United Kingdom and colonies. Bate experimented with tin-copper alloys to find the best combination for these items and by October 1824, he had provided Kater with prototypes to test troy and avoirdupois pounds, and samples with which to divide the troy into grams. Bate also cast the standard for the bushel, and by February 1825, had provided all the standards required of him by the Exchequer, Guildhalls of Edinburgh, and Dublin. In 1824, he also made a troy pound standard weight for the United States, which was certified for its accuracy by Kater and deposited with the US Mint in 1827. Kater, in his address to the Royal Society of London, acknowledged Bate's outstanding experimentation and craftsmanship in producing standards of weights, measures, and lengths. An example of a dry Bronze measuring container made specifically for J & M Ewan by possibly the most important makers of measurement artefacts that gives us today a snapshot of how imperial weights and measures were used and how a standard of measurement for merchants was developed in the Australian colonies based on the Imperial British measurement system. The container has social significance as an item retailed by J & M Ewan and used in Victoria by the authorities who were given legal responsibility to ensure that wholesalers and retailers of dry goods sold in Victoria were correct. The container was a legal standard measure so was also used to test merchants containers to ensure that their distribution of dry goods to a customer was correct.Maker Possibly Robert Brettell Blake or De Grave, Short & Co Ltd both of LondonContainer brass round for measuring quantities- Has brass handles & is a 'Bushel' measurement. 'Imperial Standard Bushel Victoria' engraved around container. Container bronze round shape for measuring dry quantities has brass handles & is a 'Bushel' measurement"IMPERIAL STANDARD BUSHEL" engraved around the top of the container. VICTORIA engraved under "J & M Ewan & Co London and Melbourne" engraved around the bottom of the container.flagstaff hill, warrnambool, shipwrecked-coast, flagstaff-hill, flagstaff-hill-maritime-museum, maritime-museum, shipwreck-coast, flagstaff-hill-maritime-village, standard measure, bushel, bushel measurement, j & m ewan, dry measurement, victorian measurement standard, bronze container, melbourne observatory, robert brettell bate -
 Eltham District Historical Society Inc
Film - Video (VHS), Nillumbik Shire Council, The Nillumbik Story, 1996
PART 1 – NILLUMBIK (00:00-07:17) Opening features various scenes around Nillumbik Shire. For 40,000 years Nillumbik was the home of the Wurundjeri people. Robert Hoddle gave the district its name. Jock Ryan, then president of Nillumbik Historical Society discusses the names Nillumbik and Diamond Creek. In the late 1830s white occupation began with gold found in Warrandyte in 1851 and 12 years later at Diamond Creek -the Diamond Reef which led to the Caledonian gold rush. Jock Ryan discusses the Diamond Creek mine, which was thriving until it burnt out in 1915. Large numbers of workmen moved into area in late 1870s to construct the Maroondah Aqueduct. With growing population of Melbourne, the nearby Yan Yean system had severely disrupted the flow of the Plenty River, forcing the closure of three flour mills there. The aqueduct came to the rescue carrying water 66km from Healesville to Preston. When the Diamond Creek gold mine burnt down the local economy suffered but fruit growing industry had already been established and Diamond Creek became a thriving fruit growing centre. Interview with Jack Powell, a long-time fruiterer at St Andrews market, his family had lived in the area for a hundred years, 3 to 4 generations, “a lot of hard work”. By the time the railway arrived fruit growing was no longer competitive. The railway brought the city closer and day trippers. The Green Wedge separates the shire from the more densely developed neighbours such as Whittlesea, Doncaster, Templestowe, Bulleen and Greensborough. Population at the time (1996) was 19,000 but links to the past remain strong. Mudbrick houses along the Heritage Trail The saving of Shillinglaw Cottage from demolition in 1963 and relocation brick by brick. PART 2 – ENVIRONMENT (07:18-14:44) Peter Brock (with Bev Brock in background) at St Andrews market discusses his childhood growing up in the district and the environment and the values it instilled upon him and his own family. The Brocks have been in the district since the 1860s. Nillumbik Shire responsible for managing three catchment areas; Diamond Creek, Arthurs Creek and Watsons Creek. Follows the course of the Diamond Creek commencing in Kinglake through the district to its confluence with the Yarra River at Eltham at Eltham Lower Park. Highlights Eltham Lower Park community revegetation program and the newly constructed (1996) viewing platform built of new and recycled timbers at the confluence of the Diamond Creek and Yarra River. Also featured are outdoor recreation on the river and at Eltham Lower Park including the Diamond Valley miniature railway. Sugarloaf reservoir and recreational activities and fishing. Aerial view of Memorial Park and Shire of Eltham War Memorial tower at Garden Hill, Kangaroo Ground. Significant tourism opportunities for the shire with 3 million potential day-trippers in metropolitan Melbourne. Council and community working together to find a way to promote the shires natural and artistic assets. At Arthurs Creek, the Brock family and neighbours working together to take care of their waterway. Peter Brock’s uncle, Sandy Brock talks about environmental management and the Arthurs Creek Landcare group and actions to eradicate blackberry problem. Having previously planted Cypress rows they are replacing them with indigenous species to improve the water supply, keeping cattle out of the creek bed to improve the quality downstream flowing into the Yarra. Eltham East Primary School Band playing “All things bright and beautiful” merges into scenes of the bushland sanctuary set aside by the school in 1980 with unidentified teacher discusses the sanctuary and their education program and school children’s comments. Plight of a family of Wedgetail eagles nesting in the path of a developer’s bulldozer at North Warrandyte and actions to save their nesting areas. PART 3 – ARTS (14:45-22:00) Arts and Jazz festival at Montsalvat featuring interviews with Sigmund Jorgensen discussing Montsalvat and its principles. Also Matcham Skipper. Clifton Pugh’s funeral at Montsalvat and his legacy at Dunmoochin near Cottlesbridge with artists in residence, at the time, Chicago artist Charles Reddington who discusses the benefits of the experience. An unidentified female artist also talks about the program and why people are drawn to the area. Unidentified man on street talking about the amount of talent in the area, artists, poets, musicians, authors. Artist Ming Mackay (1918-2009) interviewed talking about the people she mixes with on “the Hill”. Works of local artists are displayed Eltham Library Community Gallery and Wiregrass gallery with a new coffee shop at the Wiregrass making it an even more popular destination. Music at St Andrews Hotel (may be a little bit country) and the Saturday market where likely to hear anything. Sellers and patrons at the market asked about what attracts them to the market and where they came from. Scenes of poets/authors giving readings. CREDITS Music by John Greenfield from the CD Sweet Rain “The Snow Tree”, Uncle Music UNC 2001 Cameras - David Mirabella and Peter Farragher Editor – Olwyn Jones Written and Produced by Jason Cameron A Jason Cameron Proction for Nillumbik ShireProvides a record of the relatively newly created Shire of Nillumbik at the time and the features and attactions of the shire in its people arts, culture and environmentVHS Cassette (five copies) DVD (one copy) Converted to MP4 file format 0:22:00, 1.60GBvideo recording, arthurs creek, arthurs creek landcare group, artists, artists in residence, arts, arts festival, authors, blackberry, brock family, bulldozer, bulleen, bushland sanctuary, caledonian gold rush, charles reddington, clifton pugh, cottlesbridge, cypress rows, developer, diamond creek, diamond creek mine, diamond reef, diamond valley miniature railway, doncaster, dunmoochin, education program, eeps, eltham, eltham east primary school, eltham east primary school band, eltham library community gallery, eltham lower park, environment, fishing, flour mill, fruit growing, fruiterer, garden hill, gold mining, green wedge, greensborough, heritage trail, hurstbridge railway line, jazz festival, jock ryan, kangaroo ground, kangaroo ground tower, kinglake, maroondah aqueduct, matcham skipper, memorial park, ming mackay (1918-2009), montsalvat, mudbrick houses, music, musicians, nesting area, nillumbik historical society, nillumbik shire, north warrandyte, old timer, orchards, peter brock, plenty river, poets, population, recreation, recreational activities, revegetation, robert hoddle, sandy brock, shillinglaw cottage, shire of eltham war memorial, sigmund jorgensen, st andrews hotel, st andrews market, sugarloaf reservoir, templestowe, the hill, tourism, viewing platform, warrandyte, water catchment area, watsons creek, wedgetail eagle, whittlesea, wiregrass gallery, wurundjeri, yarra river, jack powell -
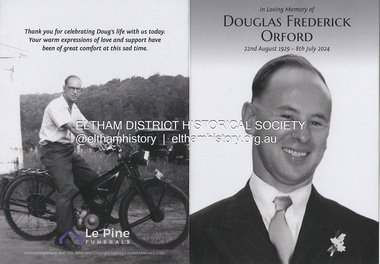 Eltham District Historical Society Inc
Document - Folder, Orford family
The Orford family, a pioneer family remained continuously living and working in Eltham for 170 years from 1854 to 2024. James and Sarah Orford arrived in Sydney in 1839 aboard the ship “Orestes”; they had several children there before settling in Eltham in 1854. Three children, James Mathias, Sarah Amelia and Thomas Henry initially remained in the Eltham area. James eventually moved to Brunswick. Sarah married Arthur Butler Young and finally lived in Bunyip. Thomas who was six years old when the family arrived in 1854 remained in Eltham, married Helen Logan who died, leaving a large family. They lived in a slab hut by the Yarra at Laughing Waters and Thomas managed the Panton Park Estate, a selection owned by Magistrate Thomas Panton. Thomas’s son, Ernest Orford was born 1892 at Pitt Street, Eltham and also lived his entire life in Eltham working as a labourer, orchardist and later as a gardener and grounds keeper for Sir William Irvine, a former Chief Justice and Premier of Victoria. Ernest married Kate Thomas; their two sons Ron and Doug stayed in the area. Another of Thomas' sons, Arthur, also lived in Eltham. Four Orford generations attended Eltham schools. Doug Orford was born on the kitchen table (reference, son Ted Orford) of the family home at the corner of Reynolds Road and Mount Pleasant Road. Doug married Gwen and they established a family however Gwen died at a young age from cancer. Doug eventually remarried another Gwen and they lived for several decades in Napoleon Street, Eltham. Doug was actively involved in EDHS over many years, including serving as a committee member and vice president. Contributions by Doug and Gwen (Treasurer/Membership Secretary), his wife, assisted EDHS to continue to develop as a not-for-profit group intent on promoting and preserving our local history. Both Doug and Gwen were made Life Members of EDHS. They also acted as EDHS delegates to the Eastern Region of Historical Societies. His significant work with assisting to establish our valued Local History Centre helped develop our home base and supported the continued growth of our society. Doug’s local knowledge, suggestions and family connections were highly valued, Until recent times, he continued to regularly attend our Collections Team workshops providing his insights and historical information about photographs and society records. Doug died peacefully July 8, 2024, and represents the last link in the Orford Eltham chain which spanned 170 years. His funeral was held Thursday, July 18, 2024, at Le Pine Funerals, 848 Main Road, Eltham. Contents: Typed notes, no date: Memories of Ernest Orford [taped 1979] about his school days. Handwritten notes, no date: History of Ernie Orford Typed notes, no date: History of Thomas Henry Orford and family. Photocopy: Shire of Eltham General Rate Receipts. Received from D Orford 7 June 1923 and Received from E F Orford, 4 August 1924. Letter, no date: Nillumbik Shire to Russell Yeoman, Gwen Orford to receive Volunteer Recognition Award. Newsletter article: "The Orford Family, Eltham", Shire of Eltham Historical Society, No.80 September 1991. History of Orford family. Handwritten notes: 21 March 2011, genealogy of George Orford. On reverse Melways map makred with Orford and other land ownerships. Newspaper advertisement, 21 March 2011: "264 Reynolds Road, South Eltham", property for sale [land in ownership of Orford family]. Letter: St Margaret's Anglican Church Eltham to Doug Orford, 17 November 2011, Extracts from church records relative to Orford family. Newspaper article: "Timely facelift at war memorials', Diamond Valley Leader, 30 April 2024, Nillumbik war memorial will have some work and a bronze plaque will be installed at the Eltham Avenue of Honour, Wingrove Park; photograph of Doug Orford Newsletter item: "Welcome home medal", Eltham District Historical Society newsletter no.216 May 2014, World War I two 'Welcome Home Medals' in ownership of local men, being Harry Gilham and Doug Orford. Order of Service, Le Pine Funerals (Eltham), In Loving Memory of Douglas Frederick Orford 22nd August 1929 - 8th July 2024 Doug Orford Reminiscences (2002) in conjunction with Jock Read and Peter Bassett Smith; 4 pages - 3 typed, 1 handwritten possibly transcribed from an audio tape recording (location unknown). New word file and associated pdf created [\Dropbox\EDHS DATA\DOCUMENTS\COLLECTION CATALOGUE DOCUMENTS AND PDFs\2-2 Family Folders\EDHS_06110-2 Doug Orford reminiscences 2002.docx - 1 April 2025]Newspaper clippings, A4 photocopies, etcdoug orford, harry gilham, welcome home medal, eltham avenue of honour, nillumbik war memorial, wingrove park, henry dendy, alfred armstrong, james orford, 264 reynolds road south eltham, george orford, george joseph orford, maryanne george joseph, thomas henry orford, ernest orford, e f orford, eltham cemetery, helen orford, joseph panton, panton park, gordon lyon, banyule estate heidelberg, james matthias orford, wurundjeri, constable peter lawlor, george hill, franklin street eltham, ronald orford, eltham primary school, john brown, robert gamble school inspector, sarah orford, mary ann orford, james mathias orford, sarah amelia orford, james peet, arthur butler young, watsons creek victoria, kangaroo ground victoria, helen logan, william orford, jane orford, arthur orford, frederick orford, florrie orford, victor orford, chem orford, sunnymede eltham, panton hill estate, sir william irvine, gordon lyons, kate thomas, north eltham gospel church, harold clapp, eltham cricket club, research primary school, dalton street school eltham, keith banks, betty banks, benjamine boyd, laughing waters road eltham, freddie gilsinen, douglas frederick orford, eltham district historical society, funeral service, le pine funeral home, life member, order of service, 1934 flood, 1939 bushfires, alcock & pierce, ansell, associated schools sports, blacksmith shop, boakes, bridge street, bryce family, bullock track, butcher, catholic church, cliff lester, cliffy green, daisy smith, dave lyon, diamond creek, diana bassett smith, dick tooth, dr. frank may, eltham higher elementary school, ernie andrew, fire station, flower stall, fodder business, fruit shop, furniture store, gahan family, garni burges, greensborough, harold norman, harry hawker, hat factory, hawker & owen, hay and com store, henry hawker, henry street, j .harry butherway, jack burgoyne, jack ryan, jock read, john lyon, junk yard, kevin gahan, kilpatricks, len parsons, lyon family, machine factory, mc leans, memorial, metery road, miss reynolds, monteith 's bus, mr. gadd, mrs. bird, mrs. morrison, napoleon street, peter bassett smith, peter's gahan, plenty river, plumridge, produce store, public hall, rechabite hall, reynolds road, roger bird, rutter family, ryan family, shoe factory., staffs produce store, studley cairn gahan, sweeneys lane, swimming pool, taylor street, tennis court, warren family, wooden bridge, yarra brae road -
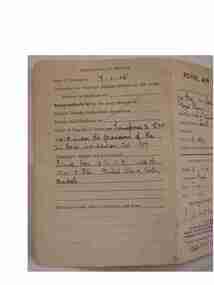 Red Cliffs Military Museum
Discharge Paper WW1, Copy of WW1 Discharge Paper in cover, (estimated); 1921
This is a part of the A.J. Roddy Collection. The Family have glued a piece on the envelope which says, "Dad's Discharge Paper/ Royal Irish Rifles & Royal Flying Corps./ 7-1-1915 to Dec 1921. Copy a the Discharge paper of Pte2 James Roddy, Royal Irish Rifles & Royal Flying Corps RAF 7-1-1915 to Dec 1921 and CoverCover: Cover for Certificates/ and other Documents of a/ soldier on Demobilization or Transfer to the Reseve/ or Discharge.// Front of Paper: Top right: Form 2067/ Royal Air Force/ Serial No/ Character Certificate of No 133458/ Rank Pte2 Name Roddy James/ Royal Flying Corp (Regiment (crossed out))/ Born in the Parish of / near the Town of South in the / County of ......... on the / Date 11.7.1897/ Trade as stated by him on Enlistment Postman/ 2 parallel lines/ * Description on Leaving the Colours/ Heoght 5ft 6in. Identification Marks:-/ Complexion Fresh Scar above 1st Lumbar/ Eyes Grey. Vertibrae/ Hair Brown/ Signature of Soldier/ (was signed J. Roddy/ * To prevent impersonation/ In the event of any doubt arising as to the bona fidis of the/ bearer, the above description and signature should be carefully compared with present appearance and hand writing. (16:957) WT 3183C/1875 5m.17/18. P&P Ltd/ Photostat copy of Original Opening the paper inside: The character here given is based on continous records of the holder's conduct and / employment throughout his Military Career./ This is to Certify that No 133458 Rank Pte2 Name Roddy James/ has served with the colours in the Royal Irish Rifles & Royal Flying Corps for 3 83/365 years. 1915-18/ Serving in the Royal Flying Corps as a Batman, and during/ the whole of this period carrying out his duites in a/ satisfactory manner/ There is no record of him having incurred any service/ entries on his conduct sheet during this period./ for service in the R.A.F. see form 280/ Signature ..... Squadron Leader/ Date December 1921 Commanding R.A.F. Records Ruislip/ If further particulars as to his character and record of service are required within three years of above date, apply to/ where he is registered for Civil Employment,/ afterwards to the Officer in Charge of Records./ * This space is intended to be filled in by any organisation which has registered the man's name and is prepared to/ supply further information.// Back of paper: Particulars of Service/ Date of Enlistement 7.1.15/ Preceeded on Furlough pending Transfer to the Army/ Reserve, or Discharge on... passed medically fit for the Army Reserve on/ Due for Final Discharge on../ Cause of Transfer or Discharge - Transferred to R.A.F. 1-4-18. under the provisions of the/ Air Force (Constitution) Act Oct. 1917./ Campaigns, Medals and Decorations/ France from 15.6.15 to 3.12.16/ 1914-15 Star, British War & Victory/ Medals. /Education and other Certificates and dates/corps, ww1, collection, royal, a j, roddy, flying, irish, rifles, pte2, james, 1915 -
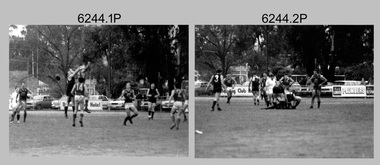 Bendigo Military Museum
Photograph - Army Survey Regiment’s Fortuna Lions Football Club Grand Finals, Seymour, Victoria, 1983
This is a set of 27 black & white photographs of Army Survey Regiment’s Australian Rules football team – the Fortuna Lions aka “Fortuna Fumblers”, taken at Seymour Victoria in 1983. The Fortuna Lions competed in the Puckapunyal Area Football Association for several years from 1978 to 1984 and in 1983, fielded a great team it managed to reach the Grand Final. Held at the neutral ground at Kings Park, Seymour, the match was an incredibly exciting and bruising contest played in damp conditions and ended in a draw. Dave Lawler’s spectacular mark was a highlight. Due to heavy rain during the following week, the Grand Final replay was held the following week in even heavier conditions. The Fortuna Lions prevailed in the replay with an emphatic victory. The team’s leaders were Eddie Jacobs (coach), Rhys De Laine (captain), Greg Else (vice-captain), and Ken Slater (manager). See item 6274.7P for more photographs taken at the two grand finals, team photo. See item 6245.26P for colour photos of the finals, the team photo with names and a photo of the premiership banner. The team changed its name to the Fortuna Falcons and its guernsey to gold with a blue ‘V’ in 1988 and continued to compete in the competition up to 1995. This is a set of 27 black and white photographs of Army Survey Regiment’s Australian Rules football team – the Fortuna Lions aka “Fortuna Fumblers”, taken at Seymour Victoria in 1983. The photographs were printed on photographic paper and are part of the Army Survey Regiment’s Collection. The photographs were scanned at 300 dpi. Players named below are in Fitzroy jumpers. .1) - Photo, black and white. 1983. L to R: Mick Hogan, Peter Jones (ruck), Rod Skidmore (No.14), Greg Else, Stu Ridge (No.2). .2) - Photo, black and white. 1983. L to R: Rhys De Laine, Doug Home, Mick Hogan (no.12), Rod Skidmore. .3) - Photo, black and white. 1983. L to R: unidentified (x2), Keith Quinton, Doug Home, Mick Hogan. .4) - Photo, black and white. 1983. L to R: Rod Skidmore, Greg Byers, Rhys De Laine, Rhys De Laine, Jim Ash. .5) - Photo, black and white. 1983. L to R: Stu Ridge (No.2) Peter Jones (ruck No.5), Mick Hogan. .6) - Photo, black and white. 1983. L to R: Keith Quinton (No.3), unidentified (No.8), Dennis Learmonth, Greg Byers. .7) - Photo, black and white. 1983. L to R: Greg Byers, Greg Higgins, Stu Ridge, Dennis Learmonth (No.10), Keith Quinton. .8) - Photo, black and white. 1983. L to R: Bob Thrower (No.21), Peter Jones, Dennis Learmonth (No.10). .9) - Photo, black and white. 1983. L to R: all unidentified. .10) - Photo, black and white. 1983. L to R: Mick Hogan (no.12), Doug Home, Peter Jones (No.5), Greg Else, Jim Ash. .11) - Photo, black and white. 1983. L to R: Dennis Learmonth, Keith Quinton. .12) - Photo, black and white. 1983. L to R: unidentified, Eddie Jacobs (No.16), Greg Higgins (No.20). .13) - Photo, black and white. 1983. L to R: all unidentified. .14) - Photo, black and white. 1983. L to R: Rod Skidmore, Jim Ash. .15) - Photo, black and white. 1983. L to R: Greg Else (No.6), Mick Hogan (No.12), Alan Staley, unidentified. .16) - Photo, black and white. 1983. L to R: unidentified, Peter Jones, Rhys De Laine. .17) - Photo, black and white. 1983. L to R: Eddie Jacobs, Greg Else. .18) - Photo, black and white. 1983. L to R: Keith Quinton (No.3), Rod Skidmore, Eddie Jacobs, Dave Lawler. .19) - Photo, black and white. 1983. L to R: Doug Home, Greg Byers, Bob Thrower, Rod Skidmore, unidentified. .20) - Photo, black and white. 1983. L to R: Stu Ridge (No.2), Greg Higgins (No.20), unidentified (No.8). .21) - Photo, black and white. 1983. L to R: all unidentified. .22) - Photo, black and white. 1983. L to R: Peter Jones (no.5), Greg Byers (No.19), unidentified (x2). .23) - Photo, black and white. 1983. L to R: unidentified. .24) - Photo, black and white. 1983. L to R: Mick Hogan, unidentified (no.13), Rhys De Laine, Jim Ash, Keith Quinton (No.3). .25) - Photo, black and white. 1983. L to R: Steve Burke, Peter Dillon, Jim Ash, Dave Lawler, Paul Baker, Tracy Ash, unidentified, Warren Hall. In far-right background: Greg Else, Megan Reynolds. .26) - Photo, black and white. 1983. L to R: Warren Hall, Ken Slater, Cliff Webb, shirtless Glen Cannon. .27) - Photo, black and white. 1983. L to R: Warren Hall, unidentified..1P to .27P – no annotationsroyal australian survey corps, rasvy, army survey regiment, army svy regt, fortuna, asr -
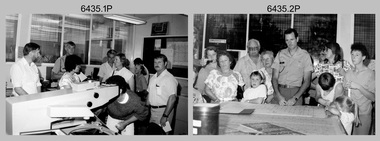 Bendigo Military Museum
Photograph - Army Survey Regiment Open Day - Map Production, Fortuna, Bendigo, 1990
These 35 photographs were taken at an Army Survey Regiment Open Day at Fortuna Villa, Bendigo on the 24th of February 1990. This occasion was one of several events held to commemorate the 75th anniversary of the formation of the Royal Australian Survey Corps. Although historical tours of Fortuna occurred on a regular basis, this was the first technical open day since 1972. The Royal Australian Survey Corps recognised that an Open Day was the best way for the local community in Bendigo to gain an insight into the unit’s important role as Defence’s map production agency, its technical equipment, and its economic importance to Bendigo. It also gave them an opportunity to tour through historic Fortuna Villa. This occasion is covered in more detail in page 143 of Valerie Lovejoy’s book 'Mapmakers of Fortuna – A history of the Army Survey Regiment’ ISBN: 0-646-42120-4. Refer to items 6434.27P and 6436.18P for more photos of the Open Day taken inside Fortuna, the garden areas and production areas of Lithographic Squadron. Photo prints of some of these photos were scanned and catalogued in items 6247.30P and 6291.6P.These 35 photographs were taken at an Army Survey Regiment Open Day held at Fortuna, Bendigo on the 24th of February 1990. The 35mm colour and black & white negatives photographs were scanned at 96 dpi and are part of the Army Survey Regiment’s Collection. .1) - Photo, black & white, 1990. CPL Neale ‘Tex’ Houston with visitors in Aerotriangulation Section. .2) - Photo, black & white, 1990. L to R: MAJ Peter Clark and WO2 Neil ‘Ned’ Kelly with visitors in Aerotriangulation Section. .3) - Photo, black & white, 1990. SGT Bruce Hammond with visitors in Aerotriangulation Section. .4) - Photo, colour, 1990. SGT Bruce Hammond with visitors in Aerotriangulation Section. .5) - Photo, colour, 1990. SGT Steve Gloster with visitors in Aerotriangulation Section. .6) - Photo, colour, 1990. L to R: CPL Noel Brinsmead and CPL Darren Wilkinson with visitors in Aerotriangulation Section. .7) - Photo, colour, 1990. L to R: CPL Noel Brinsmead with visitors in Aerotriangulation Section. .8) - Photo, colour, 1990. MAJ Peter Clark with visitors in Aerotriangulation Section. .9) - Photo, colour, 1990. CPL Mark Lander with visitors in Plotting Section. .10) - Photo, colour, 1990. SSGT Andy Boath with visitors in Plotting Section. .11) - Photo, colour, 1990. SPR Stuart Bowd with visitors in Plotting Section. .12) - Photo, colour, 1990. CAPT Roger Hancock with visitors in Plotting Section. .13) & .14) - Photo, colour, 1990. AUTOMAP 2 - CPL Peter Peterson with visitors. .15) - Photo, colour, 1990, AUTOMAP 2 - L to R: SSGT Graham Johnston, SPR Grant Davis with civilian visitors. .16) - Photo, colour, 1990, AUTOMAP 2 - L to R: CPL Steve McGuiness, SSGT Graham Johnston with civilian visitors. .17) - Photo, colour, 1990, AUTOMAP 2 - civilian visitors. .19) - Photo, colour, 1990, AUTOMAP 2 - L to R: unidentified, SPR Tony Jackson, CPL Mark Westbrook, SSGT Bob Bright, with civilian visitors. .20) - Photo, colour, 1990, AUTOMAP 2 - L to R: WO2 Adrian ‘Charlie’ Creedy, CPL Mark Westbrook, SPR Mick Duggan with civilian visitors. .21) - Photo, colour, 1990, AUTOMAP 2 - L to R: SPR Mick Duggan, CO LTCOM Rene van den Tol, SSGT Bob Bright, CPL Mark Westbrook with civilian visitors. .22) - Photo, colour, 1990, AUTOMAP 2 - L to R: SPR Damien Nolan, unidentified, SPR Peter Smyth with civilian visitors. .23) - Photo, black & white, 1990, AUTOMAP 2 - L to R: SPR Peter Smyth, CAPT Steve Hledik, SGT Martin Evans, MAJ Neil Taylor with civilian visitors. .24) - Photo, black & white, 1990, AUTOMAP 2 - L to R: SPR Mick Duggan, CPL Mark Westbrook with civilian visitors. .25) - Photo, black & white, 1990, AUTOMAP 2 – LCPL Sandy Winn with civilian visitor. .26) - Photo, black & white, 1990. Display of digital storage media. .27) & .28) - Photo, colour, 1990. Cartography - SPR Ian Baldwin with civilian visitors. .29) - Photo, black & white, 1990. Cartography - SPR Ian Baldwin with civilian visitors. .30) - Photo, black & white, 1990. Cartography - SGT Sherri (Dally) Burke with civilian visitors. .31) - Photo, colour, 1990. Cartography - L to R: SGT Sherri (Dally) Burke, SSGT Dennis Learmonth with civilian visitors. .32) - Photo, colour, 1990. Cartography – SGT Barry Hogan with civilian visitors. .33) & .34) - Photo, colour, 1990. Cartography – CPL Dan Cirsky with civilian visitors. .35) - Photo, colour, 1990. Cartography – L to R: SPR Jeanette (Lane) Dury-Lane, CPL Diane (Thomas) Soutar with civilian visitors..1P to .35P – no annotationsroyal australian survey corps, rasvy, army survey regiment, army svy regt, fortuna, asr, automap 2 -
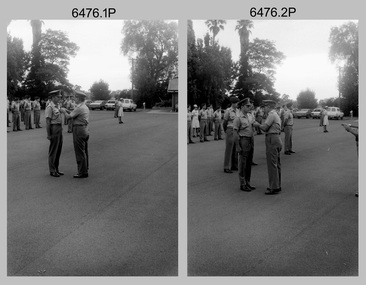 Bendigo Military Museum
Photograph - Army Survey Regiment – CO’s Parade and Defence Force Service Medal Presentations, Fortuna, Bendigo, 1985
This set of 20 photographs were taken at a CO’s parade at the Army Survey Regiment, Bendigo in 1985. CO LTCOL Jorge Gruszka presented the Defence Force Service Medal to personnel in recognition of 15 years of efficient remunerated service, or the Clasp for 5 years of additional service. WO2 Russ Larsen’s Warrant was also presented at the parade. This is a set of 20 photographs of a CO’s parade and the presentation of the Defence Force Service Medal, at the Army Survey Regiment, Bendigo in April 1985. The black & white photographs are on 35mm negative film and are part of the Army Survey Regiment’s Collection. The photographs were scanned at 96 dpi. .1) - Photo, black & white, 1985. CO LTCOL Jorge Gruszka presents medal to MAJ Bob Roche. .2) - Photo, black & white, 1985. CO LTCOL Jorge Gruszka presents medal to WO2 Brian Partridge. In foreground L to R: SSGT Doug Gay, SSGT Peter Tangey, SGT Wally Chilcott. In background L to R: CPL Dan Cirsky, SPR Steve Coulson. .3) & .4) - Photo, black & white, 1985. CO LTCOL Jorge Gruszka presents medal to RSM WO1 Bob Mason. In foreground L to R: WO1 Dave Thomson, unidentified (x2), far right: CPL Paul Baker. In background L to R: CPL Ian Bowes, CPL Dan Cirsky, SPR Steve Coulson, MAJ Roger Rix. .5) & .6) - Photo, black & white, 1985. CO LTCOL Jorge Gruszka presents medal to WO1 Dave Thomson. In foreground: unidentified. In background L to R: CPL Ian Bowes, SPR Scott Payne, CPL Dan Cirsky, SPR Steve Coulson, MAJ Roger Rix. .7) & .8) - Photo, black & white, 1985. CO LTCOL Jorge Gruszka presents medal to WO1 Noel ‘Nesty’ Coulthard. In foreground L to R: WO2 Kevin Quinnell, WO2 Brian Partridge, SSGT Doug Gay, SSGT Peter Tangey, SGT Greg Anderson, SGT Wally Chilcott. .9) & .10) - Photo, black & white, 1985. CO LTCOL Jorge Gruszka presents medal to WO1 Bill Griggs. In foreground L to R: WO2 Kevin Quinnell, WO2 Brian Partridge, SSGT Doug Gay, SSGT Peter Tangey, SGT Greg Anderson, SGT Wally Chilcott. .11) & .12) - Photo, black & white, 1985. CO LTCOL Jorge Gruszka presents medal to WO2 Kevin Quinnell. In foreground L to R: WO2 Brian Partridge, SSGT Doug Gay, SSGT Peter Tangey, SGT Greg Anderson, SGT Wally Chilcott. .13) & .14) - Photo, black & white, 1985. CO LTCOL Jorge Gruszka presents medal to SSGT Doug Gay. In foreground L to R: SSGT Peter Tangey, SGT Greg Anderson, SGT Wally Chilcott. .15) & .16) - Photo, black & white, 1985. CO LTCOL Jorge Gruszka presents medal to SSGT Peter Tangey. In foreground: L to R: SGT Greg Anderson, SGT Wally Chilcott. .17) - Photo, black & white, 1985. CO LTCOL Jorge Gruszka presents medal to SGT Greg Anderson. In foreground: SGT Wally Chilcott. In background L to R: SPR Eric Nicholson, CPL Ian Bowes, SPR Scott Payne CPL Dan Cirsky, SPR Steve Coulson. .18) - Photo, black & white, 1985. CO LTCOL Jorge Gruszka presents medal to SGT Wally Chilcott. In background L to R: SPR Eric Nicholson, CPL Ian Bowes, SPR Scott Payne CPL Dan Cirsky, MAJ Roger Rix. .19) - Photo, black & white, 1985. CO LTCOL Jorge Gruszka presents medal to unidentified recipient. In background L to R: SPR Scott Payne CPL Dan Cirsky, SPR Steve Coulson, MAJ Roger Rix. .20) - Photo, black & white, 1985. CO LTCOL Jorge Gruszka presents Warrant to WO2 Russ Larsen. In background L to R: unidentified, SPR Eric Nicholson, CPL Ian Bowes, CPL Dan Cirsky, SPR Steve Coulson, MAJ Roger Rix. Far right foreground: RSM WO1 Bob Mason.There are no personnel identified. Date and occasion annotated on film negative sleeve.royal australian survey corps, rasvy, army survey regiment, army svy regt, fortuna, asr -
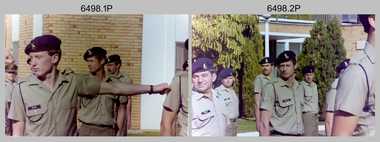 Bendigo Military Museum
Photograph - 4th Field Survey Squadron OC’s Parades and Defence Force Service Medal Presentations, Keswick Barracks, Adelaide SA, 1986
This is a set of 27 photographs of a 4th Field Survey Squadron OC’s parade at Keswick Barracks, Adelaide SA in 1986. The OC - MAJ Don Taylor presented the Defence Force Service Medal to personnel in recognition of 15 years of efficient remunerated service, or the Clasp for 5 years of additional service. Photos .22P to .27P were taken on a separate OC’s Parade. OC MAJ Don Taylor is seen in photo .27P congratulating WO2 Russell ‘Rusty Williams, probably on his promotion to WO1. This is a set of 27 photographs of a 4th Field Survey Squadron OC’s parade and the presentation of the Defence Force Service Medal, at Keswick Barracks, Adelaide SA in 1986. The colour photographs are on 35mm negative film and are part of the Army Survey Regiment’s Collection. The photographs were scanned at 96 dpi. .1) - Photo, colour, 1986. L to R: WO2 Gary Warnest in background, SPR Steve Ellis, CPL John Ratcliffe, SPR John Keely. .2) - Photo, colour, 1986. L to R: CPL Jeff Prince, SPR Bruce Graham, SGT Stuart Symonds, CPL John Ratcliffe, SGT Peter Imeson. .3) - Photo, colour, 1986. 4 Fd Svy Sqn at ease. Centre rank L to R: SPR Steve Wainwright, CPL Jeff Prince, CPL Peter Hardy. Front rank L to R: SPR Todd Hayley, SPR Steve Ellis, CPL Dave Irving, SPR Richard Cocker, SPR Damien Killeen, remainder unidentified. .4) to .6) - Photo, colour, 1986. Parade handover L to R: SSM WO1 Bill Griggs, 2IC CAPT Steve Cooper. .7) - Photo, colour, 1986. Parade handover L to R: 2IC CAPT Steve Cooper, OC MAJ Don Taylor. .8) - Photo, colour, 1986. Parade handover L to R: OC MAJ Don Taylor, 2IC CAPT Steve Cooper. .9) - Photo, colour, 1986. Inspection L to R: CPL Jeff Prince, CPL John Ratcliffe, CPL Peter Hardy, OC MAJ Don Taylor, 2IC CAPT Steve Cooper, SSM WO1 Bill Griggs. .10) - Photo, colour, 1986. Inspection L to R: WO2 Gary Warnest, WO2 Bob Rogister, WO2 Russell ‘Rusty' Williams, OC MAJ Don Taylor, SSM WO1 Bill Griggs, SGT Wally Chilcott. .11) - Photo, colour, 1986. Inspection L to R: WO2 P. Symmans, WO2 Gary Warnest, 2IC CAPT Steve Cooper, OC MAJ Don Taylor, SGT Wally Chilcott. .12) & .13 - Presentations L to R: SPR Simon Reynolds, OC MAJ Don Taylor. .14) & .15) - Photo, colour, 1986. Presentations: SSM WO1 Bill Griggs. .16) & .17) - Photo, colour, 1986. Presentations L to R: WO2 Russell ‘Rusty' Williams, OC MAJ Don Taylor, SPR Simon Reynolds. .18) - Photo, colour, 1986. Presentations: WO2 Russell ‘Rusty' Williams. .19) - Photo, colour, 1986. Presentations L to R: unidentified (x2), CPL Terry ‘TJ’ Wicker. .20) - Photo, colour, 1986. Presentations L to R: CPL Terry ‘TJ’ Wicker, OC MAJ Don Taylor, SPR Simon Reynolds, 2IC CAPT Steve Cooper. .21) - Photo, colour, 1986. Presentations L to R: CPL Terry ‘TJ’ Wicker, OC MAJ Don Taylor. 22) & .23) - Photo, colour, 1986. Parade right dress. Centre rank L to R: SPR Steve Wainwright, SPR Peter Tuddenham, CPL Jeff Prince, remainder unidentified. Front rank L to R: SPR Todd Hayley, CPL Chris ‘Charlie’ Brown, SPR Richard Cocker, unidentified, SPR Steve Nokes, CPL Dave Irving, SPR Steve Ellis remainder unidentified. .24) - Photo, colour, 1986. Presentations L to R: SPR Simon Reynolds, 2IC CAPT Steve Cooper, OC MAJ Don Taylor, CPL Dave Longbottom. .25) - Photo, colour, 1986. Presentations: CPL John Ratcliffe. .26) - Photo, colour, 1986. Presentations L to R: CPL John Ratcliffe, WO2 Russell ‘Rusty' Williams. .27) - Photo, colour, 1986. Presentations L to R: SPR Steve Ellis, unidentified, WO2 Russell ‘Rusty' Williams, SSM WO1 Bill Griggs, OC MAJ Don Taylor..1P to .27P – There are no personnel identified. ‘1986 Presentations’ annotated on negatives sleeve.royal australian survey corps, rasvy, 4 fd svy sqn -
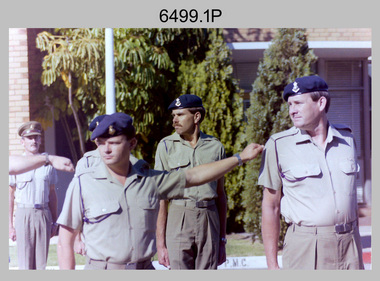 Bendigo Military Museum
Photograph - 4th Field Survey Squadron OC’s Parades and Defence Force Service Medal Presentations, Keswick Barracks, Adelaide SA, 1986
This is a set of 30 photographs of a 4th Field Survey Squadron OC’s parade at Keswick Barracks, Adelaide SA in 1986. The OC - MAJ Don Taylor presented the Defence Force Service Medal to personnel in recognition of 15 years of efficient remunerated service, or the Clasp for 5 years of additional service. This is a set of 30 photographs of a 4th Field Survey Squadron OC’s parade and the presentation of the Defence Force Service Medal, at Keswick Barracks, Adelaide SA in 1986. The colour photographs are on 35mm negative film and are part of the Army Survey Regiment’s Collection. The photographs were scanned at 96 dpi. .1) - Photo, colour, 1986. L to R: WO2 Bob Rogister in background, SPR Bruce Graham, SGT Stu Symonds, SGT Bob Croxton. .2) - Photo, colour, 1986. SGT Bob Croxton. .3) - Photo, colour, 1986. Parade handover L to R: OC MAJ Don Taylor, 2IC CAPT Steve Cooper, unidentified. .4) - Photo, colour, 1986. Inspection L to R: SSM WO1 Bill Griggs, CAPT 2IC Steve Cooper, OC MAJ Don Taylor , unidentified, SSGT Brett ‘Dutchy’ Van Leeuwen, SGT Mick ‘Hoges’ Hogan, SGT Peter Imeson, SGT H. ‘Jock’ Young, PTE Paul Simpson, CPL Neale ‘Tex’ Houston. .5) - Photo, colour, 1986. Inspection L to R: SSM WO1 Bill Griggs, 2IC CAPT Steve Cooper, OC MAJ Don Taylor, PTE Paul Simpson, CPL Neale CPL Neale ‘Tex’ Houston. .6) - Photo, colour, 1986. Presentations L to R: SPR Todd Hayley, SGT Bob Croxton. .7) - Photo, colour, 1986. Presentations L to R: OC MAJ Don Taylor, SGT Bob Croxton. In background L to R: SSM WO1 Bill Griggs, SPR Todd Hayley. .8) - Photo, colour, 1986. Presentations: SGT Bob Croxton. In background: CPL Dave Irving. .9) - Photo, colour, 1986. Presentations L to R: SPR Simon Reynolds, 2IC CAPT Steve Cooper, OC MAJ Don Taylor, SGT Stu Symonds. In background: SSM WO1 Bill Griggs. .10) - Photo, colour, 1986. Presentations L to R: OC MAJ Don Taylor, SGT Stu Symonds. In background: SSM WO1 Bill Griggs. .11) - Photo, colour, 1986. Presentations: SGT Stu Symonds. In background L to R: SSM WO1 Bill Griggs, CPL Dave Irving. .12) - Photo, colour, 1986. Presentations: SGT Stu Symonds. In background: CPL Dave Irving. .13) - Photo, colour, 1986. Presentations L to R: SPR Simon Reynolds, OC MAJ Don Taylor, WO2 Gary Warnest. In background L to R: SPR Todd Hayley, CPL Dave Irving, remainder unidentified. .14) - Photo, colour, 1986. Presentations L to R: OC MAJ Don Taylor, WO2 Gary Warnest. .15) - Photo, colour, 1986. Presentations: WO2 Gary Warnest. In background: SSM WO1 Bill Griggs. .16) & .17) - Photo, colour, 1986. Presentations: WO2 Gary Warnest. In background: SPR Todd Hayley, CPL Dave Irving, CPL S. Asley. .18) - Photo, colour, 1986. L to R: SGT Stu Symonds, SGT Bob Croxton. .19) - Photo, colour, 1986. L to R: SPR Bruce Graham, SGT Stu Symonds, SGT Bob Croxton. .20) - Photo, colour, 1986. Parade handover L to R: 2IC CAPT Steve Cooper, OC MAJ Don Taylor. .21) - Photo, colour, 1986. Parade handover L to R: 2IC CAPT Steve Cooper, SSM WO1 Bill Griggs. In background L to R: SPR Todd Hayley, CPL Dave Irving. .22) & .23) - Photo, colour, 1986. SGT Bob Croxton. .24) & .25) - Photo, colour, 1986. SGT Stu Symonds. .26) & .27) - Photo, colour, 1986. WO2 Gary Warnest. .28) to .30) - Photo, colour, 1986. L to R: SGT Stu Symonds, WO2 Gary Warnest. SGT Bob Croxton..1P to .30P – There are no personnel identified. ‘1986 Presentations’ annotated on negatives sleeve.royal australian survey corps, rasvy, 4 fd svy sqn -
 Melbourne Tram Museum
Ephemera - Ticket/s, Melbourne & Metropolitan Tramways Board (MMTB), "Cable Tram Conductor's Ticket Pins", c1930
Poster - featuring a photo of a cable tram in Elizabeth St at Pelham St, 12 small cable tram tickets and four bell punch tickets, along with a leather button ticket pin holder and four safety pins. Items placed on a large sheet of cardboard with a green overlay. The photo, pin holder and four small tickets and the bell punch strip tickets glued onto a off white sheet with brass folded pins securing the items to the green card. The rest of the tickets glued to the green card. Underneath is a small sign with the words in blue and red colours "Cable Tram Conductor's Ticket Pins". Photo - grip car - well loaded showing destination of Brunswick and a sign on the side "Direct to Football". Behind the Gripman is a conductor. Bogie cable trailer 480. In the background is the building on the corner of Elizabeth St and Pelham St (still there in 2018) and in the background is Evan Evans the flag makers building. 192H x 248W - has silver fish damage along top edge, lifting in the top left hand corner from the backing sheet and minor edge damage. Dirt marks Small Tickets from Top left hand to Bottom right hand. Tickets 1, 4 to 8 - torn from a strip - pre-purchased? Tickets 9 to 12, torn from a block. Each Ticket has been separately imaged. T1 - 1 1/2d City Tram ticket - Trip Slip -MTO-Co - pink card with purple ink - faded, punched - 27H x 59W T2 - Transfer, MMTB, from Carlton and Prahran lines to other lines as indicated by punch marks with times by the quarter hour - green print on off white card - 31H x 71W - faded. T3 - as above - but not so faded, part town in bottom left hand corner. T4 - 1 1/2d - cable tram section ticket - MMTB - brown print on yellow card - not punched - 24H x 58W T5 - as for 1 - but MMTB - green print on yellow card - heavily creased - 26H x 57W T6 - similar to 5, smaller dimensions and not heavily creased. T7 - 1 1/2d general ticket - detailing lines or section - red ink on pink card - 26H x 56W T8 - 2d - MTCo - Adult or two children under 12, single, black ink on blue card - 24H x 58W T9 - Prahran and Toorak cable tramways check ticket - transfer - conditions on ticket - has 114 in top right hand corner, orange paper, black ink, MMTB - 36H x 67W. T10 - Carlton and Prahran - as for 9, with 17 in top right hand corner, grey paper with black printing - 38H x 65W. T11 - Carlton, N. Carlton, Prahran, St Kilda - as above - 105, brown paper, black ink - 38H x 65W T12 - as for 9, but with 74 in top right hand corner - 35H x 71W Strip tickets - left to right S1 - 1 1/2D, bell punch type - 15 fares - purple card black printing - Up ticket - 182H x 39W S2 - ditto - down direction, no conductor details - 182H x 37W S3 - ditto - 3d, Up direction, orange card, black print - 182H x 39W - has some dirt marks S4 - ditto - 3d down direction - 138H x 38W - has some dirt marks. Leather buckle - cut leather with a strip to secure the pins - button hole on the base with four safety pins placed into it. Pins have rust marks and general deterioration. Leather - 90H x 45W, pins - 3 about 90H x 25W and one 55H x 16W. See Reg Item 1923 for the use of the pins and leather buckle.trams, tramways, cable trams, brunswick, elizabeth st, football, tickets, conductors, mmtb, mto co, transfer tickets, tram 480, trip slips -
 Melbourne Tram Museum
Document - Personal Papers, Melbourne Tramways Trust (MTT), "Notice Papers for 'The Melbourne Tramways Trust' meetings", 1884 -1885
Set of 33 Notice Paper or Meeting Agendas - sent to Trust Members and others for The Melbourne Tramways Trust for period March 1884 to Feb. 1885. Printed by Ferguson and Moore for the Trust. Signed by the Secretary. Covers construction arrangements, appointments, financial, loans, debentures, legislation, arrangements with the Melbourne Tramway and Omnibus Company and other organisations including banks. Notes are the principal items shown in the Orders of the Day. Printed by Fergusson and Moore Meeting No. Date Notes 1 14/3/1884 Appointment of Solicitor, E. G. Fitz Gibbon interim Secretary 2 21/3/1884 Appointment of Solicitors and Bankers 4 4/4/1884 Confer with MTOC and appointment of an Engineer. Signed by Hugh T. Jordan as clerk. 6 18/4/1884 Consider different routes, elect a Works Committee 7 25/4/1884 Confer with Mr. G. Duncan. 8 2/5/1884 Report from Legislative Committee, appointment of Mr. Duncan as Engineer to the Trust. 2nd copy has handwritten note regarding confirmation of the appointment. 9 9/5/1884 Consideration of amendments to the Act. 10 16/5/1884 Authorisation of borrowing of #500,00 and appointment of a Secretary. 11 23/5/1884 Finance report. 12 30/5/1884 Meet with deputation to have Lygon St line extended to Brunswick and payment of accounts. 13 6/6/1884 Applications for Secretary, and petition for Lygon St extension. 14 13/6/1884 Legislative committee report 15 20/6/1884 Advance to MTOC and assist bill through Parliament 16 27/6/1884 Works committee report. Signed by T. Hamilton as Secretary. 17 4/7/1884 Payment of accounts, including G. Duncan and office accounts. 18 11/7/1884 Construction of one line of tramway and another attempt for the Lygon St tramway again. 19 16/7/1884 Reduction of debenture interest rate to 4% and paying for cutting down of Swanston St. 20 1/8/1884 Interest fixed at 4.5%, accounts, construction of Richmond line, and meeting dates. 21 15/8/1884 Payments to MTCo re cost of original Acts. 22 29/8/1884 Sealing of Debentures to England, and accounts 23 5/9/1884 Re amendments to Bill for Tramway Act and payment for patents. 24 19/9/1884 Accounts, overhang of tramcars, completion of tramways. 25 26/9/1884 Tenders for works, finance report, payment of MTT expenses by MTOC. 26 10/10/1884 Works committee Report – copy in file – payments of accounts and recommend acceptance of Duncan’s plans and Richmond line by public tender. 27 Special 20/10/1884 Letter from MTOC re possible delays in the Bill – additional Branches bill. 28 24/10/1884 Finance – debentures now in England, appointment of H. Jordan as Treasurer and accounts. 29 7/11/1884 Works committee and accounts, purchase of cement, letter from Mr. Pyman re rejection of petition. 30 21/11/1884 Shows chairman’s name – Thomas O’Grady, approval of plans etc for the Richmond line. 31 5/12/1884 Works committee, accounts, payment to Mr. Pyman, purchase of equipment and engines for the Northern lines and appointment of an inspecting Engineer in England. Queries from England re sufficiency of the guarantee on the debentures. 32 19/12/1884 Finance Committee report – accounts. 33 9/1/1885 Finance and works – accounts, tenders for cement etc, appoint of an inspector of works, authorise plans for Brunswick, Fitzroy and Spencer St and Collingwood and Nicholson St. 34 23/1/1885 Finance and works – accounts, report on tenders. 35 6/2/1885 Committee reports, accounts, land purchase, appoint of Mr. Carruthers as inspecting Engineer in England – 1% of value of work. For a word version - see: \dbtext\hawthtramcoll\images\htd2001doc.doctrams, tramways, mtt, cable trams, melbourne tramways trust, construction, finances, mto co -
Melbourne Tram Museum
Newspaper, The Age, “Trams may join trains in huge strike action” "Pay row to hit trams" "Trams to stop as drivers plan strike action" "Rail strike cancelled" "More tram strife on the cards as pay dispute drags on" "Tram strife to restart" "Tram driver pay figures disputed", 2/07/2019 12:00:00 AM
Newspaper clippings titled: 1 - “Trams may join trains in huge strike action” Newspaper clipping from the Age 2/7/2019 by Timna Jacks More than 1500 Yarra Trams drivers, authorised officers and customer service staff may join Metro train staff in strike action in late July. The Rail, Tram and Bus Union is negotiating with public transport operators over its next enterprise bargaining agreement. 2 - “Pay row to hit trams” Newspaper clipping from the Age 15/8/2019 by Timna Jacks Tram services could be hit with a wave of cancellations and delays after about 1500 Yarra Tram drivers and customer service personnel voted to launch work bans on Monday 26 August. 3 - “Trams to stop as drivers plan strike action” Newspaper clipping from the Age 17/8/2019 by Timna Jacks Trams staff will stop work for 4 hours between 10am and 2pm on Friday August 30. 4 - “Rail strike cancelled” Newspaper clipping from the Age 20/8/2019 by Timna Jacks Train strike cancelled but tram strike will go ahead on Friday August 30. 5 - “Final bid to avert train, tram strikes” Newspaper clipping from the Age 9/8/2019 by Timna Jacks Yarra tram drivers and customer service staff have joined rail workers in taking industrial action against Yarra Trams. 6 - "Industrial Action Starts This Week" - 26 August 2019 PDF of notice from Rail Tram and Bus Union advising of disruptions to tram services. 7 - "Industrial action affecting Yarra Trams on Friday, 30 August 2019" PDF of email from PTV advising of disruptions to tram services. 8 - "Upcoming Industrial Action - Uniform Ban Cancelled" - 22 August 2019 PDF of notice from Rail Tram and Bus Union advising of cancellation of uniform ban. 9 - "Upcoming Industrial Action" - 14 August 2019 PDF of notice from Rail Tram and Bus Union advising of uniform ban and disruptions to tram services. 10 - "More tram strife on the cards as pay dispute drags on" - 31 August 2019 About 1500 tram workers stopped work yesterday for 4 hours. Negotiations to resume in the Fair Work Commission on Monday. The union wants a 6% annual pay rise over 3 years but Yarra Trams offering 3% over 4 years. 11 - Tram strikes to Restart - Nov and Dec. 2019 Newspaper clipping from the Age - by Timna Jacks Strike action to continue on 28 November and 5 December. 12 - "Tram driver pay figures disputed" - 7 December 2019 Newspaper clipping from the Age, by Noel Towell Tram drivers on strike again on Thursday 5 December 2019. Yarra Trams claim wage demand would result in drivers on average pay of $114K at end of 4 year deal, but union dispute these figures. 13 - "Tram strikes called off" - 26 February 2020 Newspaper clipping from the Age - by Timna Jacks Tram strikes scheduled for the grand prix called off after the government intervened to end the industrial dispute. 14 - "Pay rise for tram drivers" - 29 February 2020 Newspaper clipping from the Age - by Timna Jacks Tram drivers will get a 3.5% a year pay rise and Yarra Trams will employ fewer part timers than planned. Under the first 2 years of the contract, this would rise to 6%, then to 8% in 3rd year and 10% in the final year of new wage deal. Part time workers guaranteed minimum of 23 hours per week. 15 - "Bid to halt grand prix tram strike" - 21 February 2020 Newspaper clipping from the Age - by Sumeyya Ilanbey Government call on the Fair Work Commission to intervene to stop a tram strike during the grand prix.trams, tramways, public transport, unions, keolis downer, yarra trams -
 Ringwood and District Historical Society
Booklet, City of Ringwood 1989 Community Information Guide, 1989
Community information booklet issued by City of Ringwood for 1989 - covering the facilities and activities of the Ringwood Council and other local organisations and associations. Cover photographs: Front - Fern Gully at Ringwood Lake, Poppett Head at rear of Lake, Athletics Track. Back - Highland Carnival, Wombalano Park, Miners Cottage at Ringwood Lake, Bike Path, Water Cascade at rear of Lake.CONTENTS: (page no.) 1. COUNCIL SERVICES After School Activities Programme 29 Aged Services 31, 32 & 33 Aquatic Centre 20 & 21 Budget 14 Building Information 16 By-Laws 26 Chief Executive's Message 9 Children's Services 29 Civic Centre 4 Committees of Council 5 Common Questions 36 Community Plan 10 & 11 Council Meeting Dates 4 Council Representatives 8 Councillors 6 & 7 Dogs 26 Dual Occupancy 12 Emergency Telephone Numbers 63 Family Day Care 29 Fire Hazards 27 Garbage 34 & 35 Golf Course 24 Home Handyman Services 31 Home Help 31 Incinerators 26 Knaith Road Child Care Centre 29 Library 23 Maternal and Child Health 28 Mayoral Message – Cr. R. Gardini 3 Meals on Wheels 31 Members of Parliament 62 Parks and Gardens 18 Rates 25 Residential Development Provisions 12 & 13 Ringwood Bypass Road 13 Ringwood Convention Centre & Performing Arts Centre 22 Ringwood District Centre 14 Staff 10 Town Planning 17 Works Depot 30 Youth Outreach Worker 33 2. LOCAL COMMUNITY SERVICES Accommodation 37 Alcoholism 37 Birthright 38 Blind 38 Care Force 39 Catholic Family Welfare Bureau 39 Central Ringwood Community Centre 39 Childbirth and Parenting Association 39 & 40 Churches 40 & 41 Community Services Victoria 42 Day Centres and Drop In Centres 43 Do Care 43 Drugs 43 Elderly Day Care 44 Emergency Housing 45 Family Planning Services 45 Financial Counselling 46 Hearing Aid Service 47 Hospitals 47 Housing 48 Information 48 Legal 49 Literacy 50 Lone Parents 50 Marriage Celebrants 50 Maroondah Social Health Centre 51 Neighbourhood Mediation Centre - Outer East 51 North Ringwood Community House 52 Nursing 52 Optometric Services 52 Playgroups 53 Podiatry 53 Pre-Schools 54 Red Cross 55 Retirement 55 Ringwood Croydon Advisory Service 55 Schools 56 & 57 Senior Citizens' Centres 58 Transport 59 Twins 59 Unemployment 60 Volunteering 60 Youth Accommodation Project (Maroondah). 60 Youth Emergency Accommodation Services... 60 rinx -
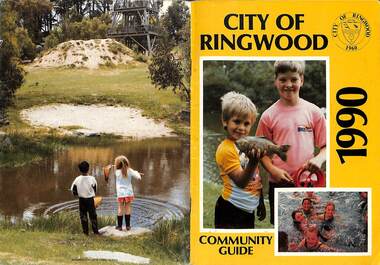 Ringwood and District Historical Society
Booklet, City of Ringwood 1990 Community Guide, 1990
Community information booklet issued by City of Ringwood for 1990 - covering the facilities and activities of the Ringwood Council and other local organisations and associations.CONTENTS: (page no.) 1. COUNCIL SERVICES After School Programme 33 Aged Services 33, 34,35 Aquatic Centre 15,16,17 Aquatic Centre Bonus Vouchers 17 Biological Wasp Control 24 Budget 13,14 Building information 26 By-Laws 29 Chief Executive's Message 9 Children's Services 44 Citizenship 35 Civic Centre 4 Committees of Council 5 Common Questions 39 Council Meeting Dates 4 Council Representatives 8 Councillors 6,7 Dogs 29 Emergency Telephone Numbers 67 Family Day Care 32 Fire Hazards 29 Garbage 37 Golf Course 19 Health and Environmental Services 24 Home Handyman Services 54 Home Help 33 Immunisation 25 incinerators 29 Knaith Road Child Care Centre 32 Library 22 Library Service Senior Citizens 34 Maternal and Child Health 31 Mayoral Message - Cr. Lillian Rosewarne 3 Meals on Wheels 33 Members of Parliament 40 Parks and Gardens 22,23 Rates 28 Residential Development Provisions 12 Ringwood Bypass Road 11 Ringwood Convention Centre & Performing Arts Centre 20 Ringwood District Centre 13 Ringwood Festival 21 Shopping Bus 34 Staff 10 Town Planning 26 Works Depot 36 Youth Outreach Worker 36 2. LOCAL COMMUNITY SERVICES Accommodation 42 Aged Accommodation 42 Alcoholism 42 Arthritis Foundation 43 Arts and Crafts 43 Blind 43 Care Force 43 Catholic Family Welfare Bureau 43 Central Ringwood Community Centre 43 Childbirth and Parenting Association 44 Churches 45 Community Services Victoria 47 Day Centres and Drop-in Centres 48 Disabled Facilities 49 Do Care 50 Drugs 50 Elderly Day Care 50 Emergency Housing 51 Family Planning Services 51 Financial Counselling 52 Hearing Aid Service 53 Hospitals 54 Housing 54 Information 55 Legal 55 Literacy 55 Lone Parents 57 Marriage Celebrants 57 Maroondah Social Health Centre 57 Neighbourhood Mediation Centre - Outer East 57 North Ringwood Community House 53 Nursing 59 Optometric Services 59 Playgroups 60 Pre-Schools 60 Red Cross 61 Retirement 62 Ringwood Croydon Advisory Service 62 Schools 63 Senior Citizens' Centres 65 Transport 66 Twins 66 Unemployment 66 Volunteering 66 Youth Accommodation Project (Maroondah) 67 Youth Emergency Services 67 rinx -
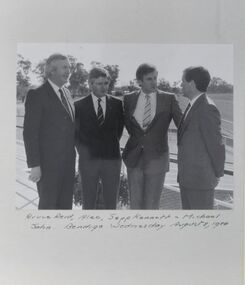 City of Greater Bendigo - Civic Collection
Album - Collection of black and white photographs, Alec and Helen Sandner, 1984 - 86
Alec Sandner was a Strathfieldsaye Shire Councillor from 1982 -1987, Strathfieldsaye Shire President from 1985 – 86 and Mayor of Bendigo 2011 - 2012.Bound, fourteen page 'sticky' photo album with yellow vinyl cover containing thirty six black and white commercially produced photographs capturing activities and events attended by Alec Sandner during his time as Councillor and Shire President with the Shire of Strathfieldsaye. Each photograph has handwritten annotation with details including date, event and people present. Alec Sandner was a Strathfieldsaye Shire Councillor from 1982 -1987, Strathfieldsaye Shire President from 1985 – 86 and Mayor of Bendigo 2011 - 2012.0135b Alec – planting a tree at / Flora Hill High School – Arbor Week / 12th April, 1984 0135c Alec – Michael John / May 7, 1984 0135d Mr Sinclair, Jeff Kennett, Michael John and Alec / inspecting Sinclair Foundry / May 17, 1984 0135e Alec – christening ‘Eugene Sandner’ scull / Bendigo rowing Club / Sunday, June 24, 1984 0135f Alec (standing) with Micahel John, / Andrew Peacock – Marisa D’Agnostina / Bendigo – Thursday August 2, 1984 0135g Bruce Reid, Alec, Jeff Kennett and Michael / John. Bendigo Wednesday August 8, 1984 0135h Mr Alan Hunt M.L.C, Michael John, Bill Ebery and alec / Sunday Sept 9, 1984 0135i t; Alec – Prue Sibree, Castlemaine, Oct . 84 m; Jeff Kennett, Alec and Bill Ebery / 1984 l; Belinda John, Mr Hunt, Alec & Bruce Reid 0135m Max Drechsler, Alec, David Wright / Statutory Meeting / Strathfieldsaye Shire Wed 7th August / 1985 0135n Wendy Drechsler, Helen / Statutory Meeting / Strathfieldsaye Shire / Wed 7th August / 1985 0135o Doug Stevenson, Alec, Joan Kirner, David Kennedy / Strathdale Community Centre / Thursday 8th August 1985 0135p Alec with members Bendigo Pony / Club – Spring Gully / Saturday 17th August 1985 0135q Alec / Opening Strathfield -/ saye bowling / Club / Sunday October 13, / 1985 0135r Honor Walters and Helen (President / Laura Clarke Auxiliary / Tuesday, October 29, 1985 0135s Mirridon Christmas Part 1985 / Aux. L to R Tilly Aston, Bendigo, Laura Clarke. / Mirr. Social Club, Strathfieldsaye, Huntly, Mc Ivor 0135t Alec presenting Atsuko Yajima / with spoons. / Bendigo Advertiser, Mon Jan 27, 1986 0135u Alec with Thomas / Bendigo Advertiser / Fri June 27, 1986 0135v Alec & Helen with / Emma Kelcher – Hannah Every / Flower Girls / Shire Presidents Ball / June 20, 1986 0135w Alec & Cr Ron Alexander, adressing (sic) / Public Meeting, Sat 19th July, 1986 0135x Alec, Wendy Drechsler & Helen / Red Cross Centre, July 1986 0135y t; Alec – Final Council Meeting / July 1987 0135z Alec – Merv Trimper / Shire of Strathfieldsaye / March 20, 1988 sandner collection, shire of strathfieldsaye, president of strathfieldsaye shire, alec and helen sander -
 Flagstaff Hill Maritime Museum and Village
Book, The Sealskin Cloak
Rolf Boldrewood (1826-1915) ‘Rolf Boldrewood’ is the pen-name used by Thomas Alexander Browne as a writer. Browne was the eldest child of Captain Sylvester John Brown and Elizabeth Angell nee Alexander. He was born in London on 6th August 1826 and arrived in Australia with his parents and siblings when he was 5 years old and grew up in Sydney. In the 1860’s Browne added the ‘e’ to his surname. As a 17-year-old Browne took up land in the Western District of Victoria between Portland and Port Fairy on a property named “Squattlesea Mere”. He remained there until 1858, enjoying the squatters’ life on his 32,000-acre property, growing potatoes and running cattle and horses. He sold in 1858 and purchased a sheep station on the Murray River near Swan Hill. He later sold this and bought another sheep station near Narrandera until bad seasons and severe droughts eventually caused him to change his career after 25 years as a squatter. Over the next 25 years, Browne held the position of Police Magistrate and as a gold commissioner in various locations. His third career as an author lasted approximately 40 years. In 1865 he wrote two articles on pastoral life while he was recovering from a riding accident. In the 1870s his writing was bringing in the income to support his family, changing his focus to the writing of novels. A series of these were written for the Australian market and published in The Sydney Mail and the Centennial Magazine. His later novels were aimed at the overseas markets. His best-known novel “Robbery Under Arms” was written from 1882 to 1883 and has been serialised on the radio in Australia and Britain. The novel was filmed in 1907, 1920 and 1957, and in 1985 it was made into a television series. It is now an Australian Classic. He also wrote short stories, several nonfiction graziers’ guides, and an autobiography named “Old Melbourne Memories” in 1884. [This information has been taken from Wikipedia; Australian Authors-Perry Meddlemiss; Australian Dictionary of Biography, Browne, Thomas Alexander (1826-1915)] WARRNAMBOOL PUBLIC LIBRARY The Warrnambool Mechanics’ Institute (WMI) was formed by a voluntary community group in 1863, within six years of Warrnambool’s beginnings, and its Reading Room opened in 1854. The WMI operated until 1963, at which time it was one of the oldest Mechanics’ Institutes in Victoria. Mechanics’ Institutes offered important services to the public including libraries, reading rooms and places to display and store collections of all sorts such as curiosities and local historical relics. In 1886 a Museum and Fine Arts Gallery were added to the WMI and by the beginning of the 20th century, there was also a billiards room and a School of Art. By this time all Mechanics’ Institutes in country Victoria had museums attached. Over the years the Warrnambool Mechanics’ Institute Library was also known as the Warrnambool Public Library the Warrnambool Library and the Free Library. Early funding from the government was for the “Free Library”. The inscription in a book “Science of Man” was for the “Warrnambool Public Library”, donated by Joseph Archibald in 1899. Another inscription in the book “Catalogue of Plants Under Cultivation in the Melbourne Botanic Gardens 1 & 2, 1883” was presented to the “Warrnambool Library” and signed by the author W.R. Guilfoyle. In 1903 the Warrnambool Public Library decided to add a Juvenile Department to library and stock it with hundreds of books suitable for youth. In 1905 the Public Library committee decided to update the collection of books and added 100 new novels plus arrangements for the latest novels to be included as soon as they were available in Victoria. In July 1911 the Warrnambool Council took over the management of the Public Library, Art Gallery, Museum and Mechanics’ Institute and planned to double the size of the then-current building. In 1953, when Mr R. Pattison was Public Librarian, the Warrnambool Public Library’s senior section 10,000 of the 13,000 books were fiction. The children’s section offered an additional 3,400 books. The library had the equivalent of one book per head of population and served around 33 per cent of the reading population. The collection of books was made up of around 60 per cent reference and 40 per cent fiction. The library was lending 400 books per day. In 1963 the Warrnambool City Council allocated the site of the Mechanics’ Institute building, which included the Public Library, Museum and Art Gallery, for the new Municipal Offices and the Collections were dispersed until 1971. The Warrnambool Library took over the Mechanics’ Institute Library’s holdings on behalf of the Warrnambool City Council. Since the closure of the Warrnambool Mechanics’ Institute the exact location and composition of the original WMI books and items have become unclear. Other materials have been added to the collection, including items from Terang MI, Warrnambool Court House and Customs House. Many of the books have been identified as the Pattison Collection, named after the Librarian who catalogued and numbered the books during his time as Warrnambool Public Librarian in the time before the Mechanics’ Institute closed. It seems that when Warrnambool became part of the Corangamite Regional Library some of the books and materials went to its head office in Colac and then back to Warrnambool where they were stored at the Art Gallery for quite some time. Some then went to the Warrnambool Historical Society, some stayed at the Art Gallery and some were moved to Flagstaff Hill Maritime Village. The various stamps and labels on the books held at Flagstaff Hill show the variety of the collection’s distribution and origin. The books in the collection at Flagstaff Hill Maritime Village date from the 1850s to the late 1950s and include rare and valuable volumes. Many of the books are part of the “Pattison Collection” after the Warrnambool’s Public Librarian, Mr R. Pattison. Warrnambool Public Library The Warrnambool Mechanics' Institute Collection is primarily significant in its totality, rather than for the individual objects it contains. Its contents are highly representative of the development of Mechanics' Institute libraries across Australia, particularly Victoria. A diversity of publications and themes has been amassed, and these provide clues to our understanding of the nature of and changes in the reading habits of Victorians from the 1850s to the middle of the 20th century. The collection also highlights the Warrnambool community’s commitment to the Mechanics’ Institute, and to reading, literacy and learning in the regions, and proves that access to knowledge was not impeded by distance. These items help to provide a more complete picture of our community’s ideals and aspirations. As with many Mechanics' Institutes in Australia, the one which operated in Warrnambool was established and overseen for many years by key individuals associated with the development of the city itself. The WMI publication collection is historically significant because of its association with local people, places and the key historical themes in the development of Warrnambool of rural development, industry, farming, education, and community. The collection documents and illustrates the changing interests, focus and tastes of Victorians, especially those in regional cities. Generally, the individual items in the collection are not particularly rare, as examples of all probably exist in other public collections in Victoria. It is primarily because there are so very few surviving Mechanics' Institute collections in Victoria, which lends this overall collection its significance. Many items in the WMI Collection have the potential to support further research, both as individual objects and through the collection in its entirety. This material is significant for its ability to assist in the interpretation of the history of the area and adds to the general understanding of the development of the township. Many components of the WMI publication collection complement and reinforce the Flagstaff Hill Maritime Museum Collection, the Warrnambool Art Gallery Collection, and that in the Warrnambool Historical Society, and also contribute to a clearer understanding of the original Warrnambool Mechanics' Institute collections. This will greatly enhance the appreciation of the few surviving Mechanics' Institute collections across Victoria, and also in New South Wales. The similarities and differences between the small number of collections that have survived can provide further insights into how the people of Victoria in general, and Warrnambool in particular, constructed a civic culture of adult learning to foster an informed citizenry. The Warrnambool Mechanics' Institute publication collection is of both local and state significance. The Sealskin Cloak Author: Rolf Boldrewood Publisher: MacMillan & Co Date: 1896 The label on the spine with typed text R.A. 823-8 BOL Pastedown front endpaper has a sticker from Warrnambool Public Librarywarrnambool, shipwrecked-coast, flagstaff-hill, flagstaff-hill-maritime-museum, maritime-museum, shipwreck-coast, flagstaff-hill-maritime-village, shipwrecked-artefact, great ocean road, book, warrnambool library, warrnambool mechanics’ institute, mechanics’ institute library, victorian library board, warrnambool books and records, warrnambool children’s library, warrnambool public library, the sealskin cloak, rolf boldrewood