Showing 7065 items
matching 17
-
 Flagstaff Hill Maritime Museum and Village
Book, The Sealskin Cloak
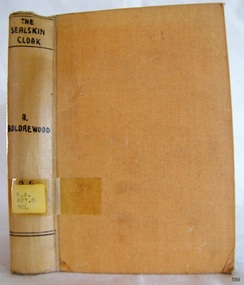
Rolf Boldrewood (1826-1915) ‘Rolf Boldrewood’ is the pen-name used by Thomas Alexander Browne as a writer. Browne was the eldest child of Captain Sylvester John Brown and Elizabeth Angell nee Alexander. He was born in London on 6th August 1826 and arrived in Australia with his parents and siblings when he was 5 years old and grew up in Sydney. In the 1860’s Browne added the ‘e’ to his surname. As a 17-year-old Browne took up land in the Western District of Victoria between Portland and Port Fairy on a property named “Squattlesea Mere”. He remained there until 1858, enjoying the squatters’ life on his 32,000-acre property, growing potatoes and running cattle and horses. He sold in 1858 and purchased a sheep station on the Murray River near Swan Hill. He later sold this and bought another sheep station near Narrandera until bad seasons and severe droughts eventually caused him to change his career after 25 years as a squatter. Over the next 25 years, Browne held the position of Police Magistrate and as a gold commissioner in various locations. His third career as an author lasted approximately 40 years. In 1865 he wrote two articles on pastoral life while he was recovering from a riding accident. In the 1870s his writing was bringing in the income to support his family, changing his focus to the writing of novels. A series of these were written for the Australian market and published in The Sydney Mail and the Centennial Magazine. His later novels were aimed at the overseas markets. His best-known novel “Robbery Under Arms” was written from 1882 to 1883 and has been serialised on the radio in Australia and Britain. The novel was filmed in 1907, 1920 and 1957, and in 1985 it was made into a television series. It is now an Australian Classic. He also wrote short stories, several nonfiction graziers’ guides, and an autobiography named “Old Melbourne Memories” in 1884. [This information has been taken from Wikipedia; Australian Authors-Perry Meddlemiss; Australian Dictionary of Biography, Browne, Thomas Alexander (1826-1915)] WARRNAMBOOL PUBLIC LIBRARY The Warrnambool Mechanics’ Institute (WMI) was formed by a voluntary community group in 1863, within six years of Warrnambool’s beginnings, and its Reading Room opened in 1854. The WMI operated until 1963, at which time it was one of the oldest Mechanics’ Institutes in Victoria. Mechanics’ Institutes offered important services to the public including libraries, reading rooms and places to display and store collections of all sorts such as curiosities and local historical relics. In 1886 a Museum and Fine Arts Gallery were added to the WMI and by the beginning of the 20th century, there was also a billiards room and a School of Art. By this time all Mechanics’ Institutes in country Victoria had museums attached. Over the years the Warrnambool Mechanics’ Institute Library was also known as the Warrnambool Public Library the Warrnambool Library and the Free Library. Early funding from the government was for the “Free Library”. The inscription in a book “Science of Man” was for the “Warrnambool Public Library”, donated by Joseph Archibald in 1899. Another inscription in the book “Catalogue of Plants Under Cultivation in the Melbourne Botanic Gardens 1 & 2, 1883” was presented to the “Warrnambool Library” and signed by the author W.R. Guilfoyle. In 1903 the Warrnambool Public Library decided to add a Juvenile Department to library and stock it with hundreds of books suitable for youth. In 1905 the Public Library committee decided to update the collection of books and added 100 new novels plus arrangements for the latest novels to be included as soon as they were available in Victoria. In July 1911 the Warrnambool Council took over the management of the Public Library, Art Gallery, Museum and Mechanics’ Institute and planned to double the size of the then-current building. In 1953, when Mr R. Pattison was Public Librarian, the Warrnambool Public Library’s senior section 10,000 of the 13,000 books were fiction. The children’s section offered an additional 3,400 books. The library had the equivalent of one book per head of population and served around 33 per cent of the reading population. The collection of books was made up of around 60 per cent reference and 40 per cent fiction. The library was lending 400 books per day. In 1963 the Warrnambool City Council allocated the site of the Mechanics’ Institute building, which included the Public Library, Museum and Art Gallery, for the new Municipal Offices and the Collections were dispersed until 1971. The Warrnambool Library took over the Mechanics’ Institute Library’s holdings on behalf of the Warrnambool City Council. Since the closure of the Warrnambool Mechanics’ Institute the exact location and composition of the original WMI books and items have become unclear. Other materials have been added to the collection, including items from Terang MI, Warrnambool Court House and Customs House. Many of the books have been identified as the Pattison Collection, named after the Librarian who catalogued and numbered the books during his time as Warrnambool Public Librarian in the time before the Mechanics’ Institute closed. It seems that when Warrnambool became part of the Corangamite Regional Library some of the books and materials went to its head office in Colac and then back to Warrnambool where they were stored at the Art Gallery for quite some time. Some then went to the Warrnambool Historical Society, some stayed at the Art Gallery and some were moved to Flagstaff Hill Maritime Village. The various stamps and labels on the books held at Flagstaff Hill show the variety of the collection’s distribution and origin. The books in the collection at Flagstaff Hill Maritime Village date from the 1850s to the late 1950s and include rare and valuable volumes. Many of the books are part of the “Pattison Collection” after the Warrnambool’s Public Librarian, Mr R. Pattison. Warrnambool Public Library The Warrnambool Mechanics' Institute Collection is primarily significant in its totality, rather than for the individual objects it contains. Its contents are highly representative of the development of Mechanics' Institute libraries across Australia, particularly Victoria. A diversity of publications and themes has been amassed, and these provide clues to our understanding of the nature of and changes in the reading habits of Victorians from the 1850s to the middle of the 20th century. The collection also highlights the Warrnambool community’s commitment to the Mechanics’ Institute, and to reading, literacy and learning in the regions, and proves that access to knowledge was not impeded by distance. These items help to provide a more complete picture of our community’s ideals and aspirations. As with many Mechanics' Institutes in Australia, the one which operated in Warrnambool was established and overseen for many years by key individuals associated with the development of the city itself. The WMI publication collection is historically significant because of its association with local people, places and the key historical themes in the development of Warrnambool of rural development, industry, farming, education, and community. The collection documents and illustrates the changing interests, focus and tastes of Victorians, especially those in regional cities. Generally, the individual items in the collection are not particularly rare, as examples of all probably exist in other public collections in Victoria. It is primarily because there are so very few surviving Mechanics' Institute collections in Victoria, which lends this overall collection its significance. Many items in the WMI Collection have the potential to support further research, both as individual objects and through the collection in its entirety. This material is significant for its ability to assist in the interpretation of the history of the area and adds to the general understanding of the development of the township. Many components of the WMI publication collection complement and reinforce the Flagstaff Hill Maritime Museum Collection, the Warrnambool Art Gallery Collection, and that in the Warrnambool Historical Society, and also contribute to a clearer understanding of the original Warrnambool Mechanics' Institute collections. This will greatly enhance the appreciation of the few surviving Mechanics' Institute collections across Victoria, and also in New South Wales. The similarities and differences between the small number of collections that have survived can provide further insights into how the people of Victoria in general, and Warrnambool in particular, constructed a civic culture of adult learning to foster an informed citizenry. The Warrnambool Mechanics' Institute publication collection is of both local and state significance. The Sealskin Cloak Author: Rolf Boldrewood Publisher: MacMillan & Co Date: 1896 The label on the spine with typed text R.A. 823-8 BOL Pastedown front endpaper has a sticker from Warrnambool Public Librarywarrnambool, shipwrecked-coast, flagstaff-hill, flagstaff-hill-maritime-museum, maritime-museum, shipwreck-coast, flagstaff-hill-maritime-village, shipwrecked-artefact, great ocean road, book, warrnambool library, warrnambool mechanics’ institute, mechanics’ institute library, victorian library board, warrnambool books and records, warrnambool children’s library, warrnambool public library, the sealskin cloak, rolf boldrewood -
 Flagstaff Hill Maritime Museum and Village
Book, My Run Home
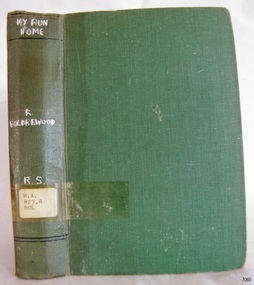
Rolf Boldrewood (1826-1915) ‘Rolf Boldrewood’ is the pen-name used by Thomas Alexander Browne as a writer. Browne was the eldest child of Captain Sylvester John Brown and Elizabeth Angell nee Alexander. He was born in London on 6th August 1826 and arrived in Australia with his parents and siblings when he was 5 years old and grew up in Sydney. In the 1860’s Browne added the ‘e’ to his surname. As a 17-year-old Browne took up land in the Western District of Victoria between Portland and Port Fairy on a property named “Squattlesea Mere”. He remained there until 1858, enjoying the squatters’ life on his 32,000-acre property, growing potatoes and running cattle and horses. He sold in 1858 and purchased a sheep station on the Murray River near Swan Hill. He later sold this and bought another sheep station near Narrandera until bad seasons and severe droughts eventually caused him to change his career after 25 years as a squatter. Over the next 25 years, Browne held the position of Police Magistrate and as a gold commissioner in various locations. His third career as an author lasted approximately 40 years. In 1865 he wrote two articles on pastoral life while he was recovering from a riding accident. In the 1870s his writing was bringing in the income to support his family, changing his focus to the writing of novels. A series of these were written for the Australian market and published in The Sydney Mail and the Centennial Magazine. His later novels were aimed at the overseas markets. His best-known novel “Robbery Under Arms” was written from 1882 to 1883 and has been serialised on the radio in Australia and Britain. The novel was filmed in 1907, 1920 and 1957, and in 1985 it was made into a television series. It is now an Australian Classic. He also wrote short stories, several nonfiction graziers’ guides, and an autobiography named “Old Melbourne Memories” in 1884. [This information has been taken from Wikipedia; Australian Authors-Perry Meddlemiss; Australian Dictionary of Biography, Browne, Thomas Alexander (1826-1915)] WARRNAMBOOL PUBLIC LIBRARY The Warrnambool Mechanics’ Institute (WMI) was formed by a voluntary community group in 1863, within six years of Warrnambool’s beginnings, and its Reading Room opened in 1854. The WMI operated until 1963, at which time it was one of the oldest Mechanics’ Institutes in Victoria. Mechanics’ Institutes offered important services to the public including libraries, reading rooms and places to display and store collections of all sorts such as curiosities and local historical relics. In 1886 a Museum and Fine Arts Gallery were added to the WMI and by the beginning of the 20th century, there was also a billiards room and a School of Art. By this time all Mechanics’ Institutes in country Victoria had museums attached. Over the years the Warrnambool Mechanics’ Institute Library was also known as the Warrnambool Public Library the Warrnambool Library and the Free Library. Early funding from the government was for the “Free Library”. The inscription in a book “Science of Man” was for the “Warrnambool Public Library”, donated by Joseph Archibald in 1899. Another inscription in the book “Catalogue of Plants Under Cultivation in the Melbourne Botanic Gardens 1 & 2, 1883” was presented to the “Warrnambool Library” and signed by the author W.R. Guilfoyle. In 1903 the Warrnambool Public Library decided to add a Juvenile Department to library and stock it with hundreds of books suitable for youth. In 1905 the Public Library committee decided to update the collection of books and added 100 new novels plus arrangements for the latest novels to be included as soon as they were available in Victoria. In July 1911 the Warrnambool Council took over the management of the Public Library, Art Gallery, Museum and Mechanics’ Institute and planned to double the size of the then-current building. In 1953, when Mr R. Pattison was Public Librarian, the Warrnambool Public Library’s senior section 10,000 of the 13,000 books were fiction. The children’s section offered an additional 3,400 books. The library had the equivalent of one book per head of population and served around 33 per cent of the reading population. The collection of books was made up of around 60 per cent reference and 40 per cent fiction. The library was lending 400 books per day. In 1963 the Warrnambool City Council allocated the site of the Mechanics’ Institute building, which included the Public Library, Museum and Art Gallery, for the new Municipal Offices and the Collections were dispersed until 1971. The Warrnambool Library took over the Mechanics’ Institute Library’s holdings on behalf of the Warrnambool City Council. Since the closure of the Warrnambool Mechanics’ Institute the exact location and composition of the original WMI books and items have become unclear. Other materials have been added to the collection, including items from Terang MI, Warrnambool Court House and Customs House. Many of the books have been identified as the Pattison Collection, named after the Librarian who catalogued and numbered the books during his time as Warrnambool Public Librarian in the time before the Mechanics’ Institute closed. It seems that when Warrnambool became part of the Corangamite Regional Library some of the books and materials went to its head office in Colac and then back to Warrnambool where they were stored at the Art Gallery for quite some time. Some then went to the Warrnambool Historical Society, some stayed at the Art Gallery and some were moved to Flagstaff Hill Maritime Village. The various stamps and labels on the books held at Flagstaff Hill show the variety of the collection’s distribution and origin. The books in the collection at Flagstaff Hill Maritime Village date from the 1850s to the late 1950s and include rare and valuable volumes. Many of the books are part of the “Pattison Collection” after the Warrnambool’s Public Librarian, Mr R. Pattison. Warrnambool Public Library The Warrnambool Mechanics' Institute Collection is primarily significant in its totality, rather than for the individual objects it contains. Its contents are highly representative of the development of Mechanics' Institute libraries across Australia, particularly Victoria. A diversity of publications and themes has been amassed, and these provide clues to our understanding of the nature of and changes in the reading habits of Victorians from the 1850s to the middle of the 20th century. The collection also highlights the Warrnambool community’s commitment to the Mechanics’ Institute, and to reading, literacy and learning in the regions, and proves that access to knowledge was not impeded by distance. These items help to provide a more complete picture of our community’s ideals and aspirations. As with many Mechanics' Institutes in Australia, the one which operated in Warrnambool was established and overseen for many years by key individuals associated with the development of the city itself. The WMI publication collection is historically significant because of its association with local people, places and the key historical themes in the development of Warrnambool of rural development, industry, farming, education, and community. The collection documents and illustrates the changing interests, focus and tastes of Victorians, especially those in regional cities. Generally, the individual items in the collection are not particularly rare, as examples of all probably exist in other public collections in Victoria. It is primarily because there are so very few surviving Mechanics' Institute collections in Victoria, which lends this overall collection its significance. Many items in the WMI Collection have the potential to support further research, both as individual objects and through the collection in its entirety. This material is significant for its ability to assist in the interpretation of the history of the area and adds to the general understanding of the development of the township. Many components of the WMI publication collection complement and reinforce the Flagstaff Hill Maritime Museum Collection, the Warrnambool Art Gallery Collection, and that in the Warrnambool Historical Society, and also contribute to a clearer understanding of the original Warrnambool Mechanics' Institute collections. This will greatly enhance the appreciation of the few surviving Mechanics' Institute collections across Victoria, and also in New South Wales. The similarities and differences between the small number of collections that have survived can provide further insights into how the people of Victoria in general, and Warrnambool in particular, constructed a civic culture of adult learning to foster an informed citizenry. The Warrnambool Mechanics' Institute publication collection is of both local and state significance. My Run Home Author: Rolf Boldrewood 1st Published in 1874 This book does not have a flypaper The label on the spine with typed text RA 823.8 BOL Pastedown front endpaper has a sticker from Warrnambool Public Librarywarrnambool, shipwrecked-coast, flagstaff-hill, flagstaff-hill-maritime-museum, maritime-museum, shipwreck-coast, flagstaff-hill-maritime-village, shipwrecked-artefact, great ocean road, book, warrnambool library, warrnambool mechanics’ institute, mechanics’ institute library, victorian library board, warrnambool books and records, warrnambool children’s library, warrnambool public library, my run home, rolf boldrewood -
 Eltham District Historical Society Inc
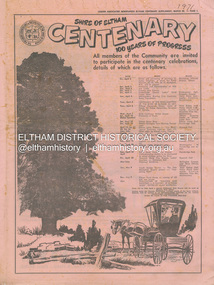
Newspaper - Supplement, Leader Associated Newspapers, Shire of Eltham Centenary; 100 Years of Progress, March 30, 1971
Poduced as a supplement to the Diamond Valley News in celebration of the centenary of the Shire of Eltham in 1971. Contains stories of historical note about people and places of the shire as well as numerous advertisng by local businsesses. Also on page 1 lists the program of events commencing Friday, April 2 commencing with a dinner and previewing of paintings by Justus Jorgensen at Montsalvat attended by the Prime Minister, the Rt. Hon. W. H. McMahon running through to the publication of Pioneers & Painters edited by Alan Marshall. Contents: Page 1 Program of Events Page 2 Wingrove . . man of Eltham Page 3 Council people of 100 years Page 5 Capt. Sweeney, Eltham’s first Irish settler Page 6 Station a tribute to ex-concillor Page 7 Eltham 25 Years Ago just a street Page 9 Kangaroo Ground – once the hub of the shire Page 10 Festival of Arts and Crafts at Montsalvat Page 11 Obelisk honours their memory Page 11 Henry Dendy – an Eltham venture Page 12 Free by rail – if they worked Page 12 The long shadow of Ween Cameron Page 13 McMahon’s – a momentous era Page 14 50 Years Ago . . . Lyon Bros Ford Page 15 Beer at 3d. a pint Page 17 Oldest Home Built in 1850 Page 19 History in black and white . . . . Page 20 Historical Pigeon Bank Page 22 Bridge over log crossing Page 22 Pioneer shot by outlaw Page 23 Milestone for Smith Family Page 24 The Eltham Chamber of Commerce Mardi Gras Advertisers: F.J. & R. Favier (Butcher & Delicatessen Lower Plenty) Eltham Hotel Country Art Store (Eltham) A.R. Warren (Eltham) Heidelberg Travel Service Williams Butcher (Lower Plenty) Greensborough Bulk Store Mac’s Meats (Eltham) Buxton Garden Ornaments (Eltham) Hugh Fisher Photographer (Eltham) Para (Mach. Trading Co. (Greensborough) Westfield Shoppingtown (Doncaster) Clinton’s (Eltham) Gillespie & Lewis P/L (Soft Furnishings Greensborough) T. Hutchinson’s Engineers (Greensborough) Knox & Hellemons Pty Ltd (Builders) Angliss Butchers (Eltham) Rainbow Real Estate (Research) Research Licensed Supermarket Gibsons Research Meat Supply Owen Holmes Motors (Greensborough) Research Pharmacy R. & P. Humphries Delicatessen (Eltham) Montsalvat Eltham Apex Mowerama (Eltham) R.H. Dean & Son Real Estate (Greensborough) L.J. & J.D. Avery Butchers (Eltham) Deylen & Torikov (Motor Engineers Eltham) George Lovitt & Co. Pty Ltd Precision Engineers and Toolmakers Montmorency) Fred’s Mower Repairs (Lower Plenty) Gray’s Milk Bar (Montmorency) Maranne Beauty Salon (Montmorency) Evans Bros. & Newell Pty Ltd (Printing Greensborough) La Ronde Restaurant (Eltham) Terry & Margaret’s Garage (Caltex Lower Plenty) Kevin Dawson Building & Joinery Contractors (Eltham) Montmorency Authorised Newsagency Eltham Produce Store (W.J. Cameron) Consolidated Aluminium (Aust.) Pty Ltd (Eltham) Briar Hill Timber & Trading Co. Pty Ltd Diamond Valley Coaches (Eltham) Lyon Bros Ford (Eltham) The Natural Development Association (Eltham Shire) Alan Whitmore R.E.S.I. (Eltham) Keith Wilkie’s Mensland (Montmorency) Eltham Home Supplies (Eltham) Safeway (Greensborough) Lower Plenty Fish Supply Blue Gum Milk Bar (Eltham) W. Hutchinson Sand Soil & Gravel Suppliers (Greensborough) Keyzers Milk Bar (Greensborough) P.J. Timber & Trading Pty Ltd (Eltham) Diamond Valley Motocycles (Honda Macleod) Neville F. Emerson Real Estate (Lower Plenty) Edon Engineering (Eltham) Mobil Service Centre (Eltham) C.A. & J.M. Kohlman (Panton Hill General Store) C.A. & J.M. Kohlman (Smiths Gully General Store) ANZ (Eltham) Diamond Valley Demolition (Eltham) Volkswagen Specialists (D. Young Greensborough) N.F. Thorpe Pty Ltd Precision Engineers (Briar Hill) Ashley’s Milk Bar (Montmorency) J. Turnbull (General Blacksmith Greensborough) Airlook Service Station (Montmorency) A. & L. Mallios (Grocer Hurstbridge) United Refrigeration Pty Ltd (Greensborough) Peter McDougall & Associates Real Estate (Eltham) Hurstbridge Bus & Taxi Service Pty Ltd Browne Bros. Safeway (Eltham) St Andrews Hotel Eltham Real Estate Pty Ltd Eltham Chamber of Commerce B.P. Evergreen Service Station (Eltham) A.R. Warren Fuel Merchant (Eltham) W. Penna Chemist (Eltham) PPH Produce Paint Hardware (Eltham) Eltham Cake Kitchen (Eltham) Fred Ramak Continental Hairdresser (Eltham) Clinton’s (Eltham) Thompson’s Pharmacy (Eltham) Tillings Timber Supermarket (Eltham) Lyon Bros Ford (Eltham) Bob Clarke’s Men’s Wear (Eltham) Eltham Glen Service Station (Eltham) Miss V. Rampton Naturopath (Eltham) Eltham South Milk Bar (Eltham) Eltham Jewellers (Eltham) Baines Supa-Valu Supermarket (Eltham) Sibbel Builders P/L (Eltham) G. & E. Reivers Fly and Shower Screens (Eltham) Kenton Shoeland (Eltham) Eltham Newsagency (Eltham)One copy marked '1971' on fronta. & l. mallios (grocer hurstbridge), a.r. warren (eltham), a.r. warren fuel merchant (eltham), airlook service station (montmorency), alan whitmore r.e.s.i. (eltham), angliss butchers (eltham), anz (eltham), ashley’s milk bar (montmorency), b.p. evergreen service station (eltham), baines supa-valu supermarket (eltham), blue gum milk bar (eltham), bob clarke’s men’s wear (eltham), briar hill timber & trading co. pty ltd, browne bros. safeway (eltham), buxton garden ornaments (eltham), c.a. & j.m. kohlman (panton hill general store), c.a. & j.m. kohlman (smiths gully general store), clinton’s (eltham), consolidated aluminium (aust.) pty ltd (eltham), country art store (eltham), deylen & torikov (motor engineers eltham), diamond valley coaches (eltham), diamond valley demolition (eltham), diamond valley motocycles (honda macleod), edon engineering (eltham), eltham apex, eltham cake kitchen (eltham), eltham chamber of commerce, eltham glen service station (eltham), eltham home supplies (eltham), eltham hotel, eltham jewellers (eltham), eltham newsagency (eltham), eltham produce store (w.j. cameron), eltham real estate pty ltd, eltham south milk bar (eltham), evans bros. & newell pty ltd (printing greensborough), f.j. & r. favier (butcher & delicatessen lower plenty), fred ramak continental hairdresser (eltham), fred’s mower repairs (lower plenty), g. & e. reivers fly and shower screens (eltham), george lovitt & co. pty ltd precision engineers and toolmakers montmorency), gibsons research meat supply, gillespie & lewis p/l (soft furnishings greensborough), gray’s milk bar (montmorency), greensborough bulk store, heidelberg travel service, hugh fisher photographer (eltham), hurstbridge bus & taxi service pty ltd, j. turnbull (general blacksmith greensborough), keith wilkie’s mensland (montmorency), kenton shoeland (eltham), kevin dawson building & joinery contractors (eltham), keyzers milk bar (greensborough), knox & hellemons pty ltd (builders), l.j. & j.d. avery butchers (eltham), la ronde restaurant (eltham), lower plenty fish supply, lyon bros ford (eltham), mac’s meats (eltham), maranne beauty salon (montmorency), miss v. rampton naturopath (eltham), mobil service centre (eltham), montmorency authorised newsagency, montsalvat, mowerama (eltham), n.f. thorpe pty ltd precision engineers (briar hill), neville f. emerson real estate (lower plenty), owen holmes motors (greensborough), p.j. timber & trading pty ltd (eltham), para (mach. trading co. (greensborough), peter mcdougall & associates real estate (eltham), pph produce paint hardware (eltham), r. & p. humphries delicatessen (eltham), r.h. dean & son real estate (greensborough), rainbow real estate (research), research licensed supermarket, research pharmacy, safeway (greensborough), shire of eltham centenary, sibbel builders p/l (eltham), st andrews hotel, t. hutchinson’s engineers (greensborough), terry & margaret’s garage (caltex lower plenty), the natural development association (eltham shire), thompson’s pharmacy (eltham), tillings timber supermarket (eltham), united refrigeration pty ltd (greensborough), volkswagen specialists (d. young greensborough), w. hutchinson sand soil & gravel suppliers (greensborough), w. penna chemist (eltham), westfield shoppingtown (doncaster), williams butcher (lower plenty), a. roy ford, a.g. thomas, agnes bell, albert h. price, andrew ross, anton w. brinkkotter, arthur brindley, b. bessant, b.w. plant, bell family, charles wingrove, culla hill, dave lyon, david w. bell, e.j. andrew, edwin smith, eltham court house, eltham obelisk, ewen hugh cameron, f.e. griffith, f.v. squire, frank mcmahon, george green, george stebbing, h. eric rundle, harold e. bartlett, henry dendy, henry hurst, henry stooke, herbert a. davies, herbert hewitt, i.g. smedley, j.a. mcdonald, jack baker, jack williams, james k. brice, james rossiter, john lyon, john s. smedley, justus jorgensen, kangaroo ground, larry burke, martin mcmahon, menzies jackson, mott family, mrs andrew, mrs harper, p. harmer, p.j. lester, patrick joseph mcmahon, r.j. galbraith, robert burke, robert charles harris, rosehill, s. willey, shillinglaw cottage, shire of eltham war memorial tower, thomas sweeney, tiny carroll, tom orford, w.b. thomas, william morris -
 Eltham District Historical Society Inc
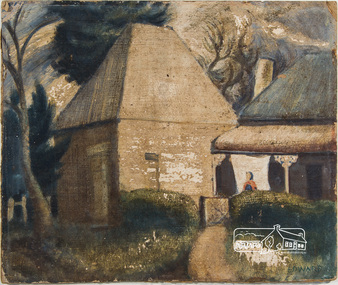
Painting, Lindsay Edward, The Malt House, 1942c
Artist Lindsay Edward and wife Jan built a house designed by Alistair Knox at 151 Old Eltham Road, Lower Plenty. See article on home designed by Alistair Knox for Lindsay Edward, teacher, at 151 Old Eltham Road, Lower Plenty. The home was originally featured on the cover of the January 1953 issue of Home Beautiful magazine and was revisited in the March 1969 issue. See registration record No. 01649. Lindsay Edward Biography: 1919: 26 August Lindsay Maurice Edward was born in Melbourne. 1937: 4 – 9 May Exhibition - Heidelberg art exhibition (SLV collection) 1939: Art student at the National Gallery of Victoria 1940: 7-14 October Exhibition Heidelberg art exhibition. (SLV collection) 1941: November - Exhibition Heidelberg Art Exhibition 1942: Lindsay was an art student living at this 14 Park Cres. Fairfield. Occupation Art student. He most likely painted this painting around this time. c.1942 – 1944: Enlistment for military service in World War 2 in Casino, NSW. 1944: Rank of Sergeant. 1944: Exhibition Seddon Galleries (Melbourne) 1945: Exhibition Seddon Galleries 1946: Exhibition Exhibition of Past Students of the National Gallery of Victoria 1947: Submitted “Self- portrait in the Archibald Prize, Art Gallery of NSW 1948: Lived in London for a year and married a fellow artist ? Knox. 1949: Returned from London 1949: Electoral Roll Residence– 16 Mount Street, Ivanhoe 1950: October Exhibition Stanley Coe Galleries, 435 Bourke Street, Melbourne 1951: 19 Nov. - 9 Dec. Exhibition An exhibition of present day art of Victoria Victorian 1951 Commemoration Committee in conjunction with the Victorian Artists' Society, 1951: (SLV Collection) 1953: October Exhibition Melbourne Contemporary Artists Exhibiton 1954: Exhibition Melbourne Contemporary Artists Exhibition 1958: Victorian artist and educator Lindsay Edward won the £500 prize for the wall decoration of the Queensland Library - . Edward was born in 1919 and had studied at the National Gallery of Victoria. In 1958 he was head of the painting section of the Royal Melbourne Technical College (now RMIT) and had only recently begun experimenting with mosaic. The Centennial mosaic covers a wall 68 feet (20.72 metres) in length and 14 feet (4.26 metres) high. In a Melbourne Age article in July 1958 Edward described the mural as ‘not a literal subject’ rather as ‘a basic formation of organic forms indicating growth and development’. 1960: Exhibition Eltham Art Show (SLV collection) 1963: Exhibition October 28-November 17 - Argus Gallery, 290 Latrobe Street, Melbourne and at Hassall's Roadside Gallery, Eltham and at Gallery A and at Russell Davis Art Gallery. (SLV Collection) 1963, 1967, 1977 and 1980: Electoral Rolls – Residence Old Eltham Road, Lower Plenty. Occupation Teacher 1966: Exhibition Art Show -Austin Hospital Appeal (Heidelberg) (SLV collection) 1970s: Head of Art Department RMIT where he established a fine art collection. 1982: Exhibition Bolitho Gallery Canberra http://nla.gov.au/nla.news-article116467780 1988: 28 July – Exhibition Recent Paintings Darwin Performing Arts Centre (SLV Collection) 1993: Exhibition Solander Gallery, Canberra 2007: January Died and is buried in Eltham Cemetery 2007: Obituary in Age Jun 2, 2007 - LINDSAY Edward's retirement as head of the fine art department at RMIT in August 1979 signalled the end of an important chapter in the art Sources: ART CONTEST. (1939, March 2). The Argus (Melbourne, Vic. : 1848 - 1957), p. 8. Retrieved October 16, 2016, from http://nla.gov.au/nla.news-article12103185 ART EXHIBITION AT HEIDELBERG (1941, November 25). The Argus (Melbourne, Vic. : 1848 - 1957), p. 6. Retrieved October 16, 2016, from http://nla.gov.au/nla.news-article8218682 ART EXHIBITIONS (1945, October 3). The Age (Melbourne, Vic. : 1854 - 1954), p. 7. Retrieved October 16, 2016, from http://nla.gov.au/nla.news-article205639922 EX-GALLERY STUDENTS' SHOW (1946, October 15). The Argus (Melbourne, Vic. : 1848 - 1957), p. 3. Retrieved October 16, 2016, from http://nla.gov.au/nla.news-article22386440 https://www.artgallery.nsw.gov.au/prizes/archibald/1947/ Art World Busy (1949, February 26). The Argus (Melbourne, Vic. : 1848 - 1957), p. 12. Retrieved October 16, 2016, from http://nla.gov.au/nla.news-article22706197 http://nla.gov.au/nla.news-article22781141 ART NOTES (1953, October 13). The Age (Melbourne, Vic. : 1854 - 1954), p. 2. Retrieved October 16, 2016, from http://nla.gov.au/nla.news-article206462733 Design, color in art show (1954, October 5). The Argus (Melbourne, Vic. : 1848 - 1957), p. 9. Retrieved October 16, 2016, from http://nla.gov.au/nla.news-article23453359 https://artcollection.its.rmit.edu.au/?p=rmit-gallery-about Cinema (1993, October 7). The Canberra Times (ACT : 1926 - 1995), p. 7 (Good Times). Retrieved October 16, 2016, from http://nla.gov.au/nla.news-article127509819 Queensland Centenary Artwork (includes image) http://queenswharf.org/places/former-queensland-state-library-wall-decoration-and-sculpture/ Eltham Cemetery http://www.elthamcemetery.com/index.php/search oil on paper board 31.5 x 37.5 cm signed "Edward" lower rightInscribed on back "The Malt House Lindsay Edward 15 Park Cres Fairfield"fairfield, malt house, lindsay edward, home beautiful, home beautiful magazine, alistair knox -
 Flagstaff Hill Maritime Museum and Village
Weapon - Knife, Made on or before September 1891
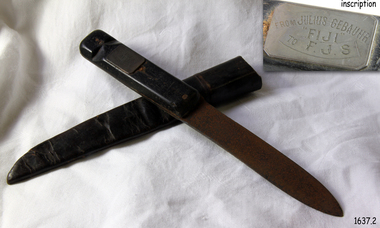
This sheath knife belonging originally to German seaman Julius Gebauhr and an artifact associated with the story of the survivors of the wreck of Fiji. A three-masted iron barque Fiji had been built in Belfast, Ireland, in 1875 by Harland and Wolfe for a Liverpool based shipping company. The ship departed Hamburg on 22nd May 1891 bound for Melbourne, under the command of Captain William Vickers with a crew of 25. The ship’s manifest shows that she was loaded with a varied cargo consisting of cases of dynamite, pig iron, steel goods, various spirits, sailcloth, tobacco, coiled fencing wire, concrete, 400 German pianos and other musical instruments. On September 5th, one hundred days out from Hamburg in a squally and boisterous south-west wind, the Cape Otway light was sighted on a bearing differing from Captain Vickers' calculation of his position. At about 2:30 am, Sunday 6th September 1891 land was reported 4-5 miles off the port bow. The captain tried to put the ship on the other tack, but she would not respond. He then tried to turn her the other way but just as the manoeuvre was being completed Fiji struck rock only 274 meters from shore. The place is known as Wreck Bay, Moonlight Head. Efforts were made to lower boats but all capsized or became swamped two of the younger crewmen volunteered to swim for the shore, taking a line. One, a Russian named Daniel Carkland, drowned after the line broke. The other, 17-year-old able seaman Julius Gebauhr, a German, reached shore safely on his second attempt without a line, which he had cut loose with his sheath-knife when it becomes tangled in kelp. He rested on the beach a while then climbed the cliffs in search of help. At about 10 am on Sunday a party of land selectors including F. J. Stanmore, Leslie Dickson found Gebauer. They were on their travels back from Princetown towards Moonlight Head. Gebauer was lying in the scrub in a poor state, bleeding and dressed only in a singlet, socks, belt and his sheath-knife. His rescues gave him food and brandy and some clothing and gain information about the wreck. Some of the men took him to Rivernook, a nearby guest house owned by John Evans, where he was cared for. Stanmore and Dickson rode off to try and summon help. Messages for rescuing the rest of the crew were sent both to Port Campbell for the rocket rescue crew and to Warrnambool for the lifeboat. The S.S. Casino sailed from Portland towards the scene. After travelling the 25 miles to the scene, half of the Port Campbell rocket crew and equipment arrived and was set up on the beach below the cliffs. By this time the crew of Fiji had been clinging to the jib-boom for almost 15 hours. Mr Tregear from the Rocket Crew fired the line the light line broke and the rocket was carried away. A second line was successfully fired across the ship and made fast. The anxious sailors then attempted to come ashore along the line but, as many as five at a time, however, some were washed off. Only 14 of the 24 men who had remained on the ship made it to shore. Many onlookers on the beach took it in turns to go into the surf and drag half-drowned seamen to safety. The wreck of Fiji has smashed apart within 20 minutes of the last man being brought ashore, and it settled in about 6 m of water. Of the 26 men on Fiji, 11 in total lost their lives. The remains of 7 bodies were washed onto the beach. They were buried on the clifftop above the wreck. Captain Vickers was severely reprimanded for his mishandling of the ship and his Masters Certificate was suspended for 12 months. At the time there was a great deal of public criticism at the slow and disorganised rescue attempt to save those on board. The important canvas ‘breech buoy’ or ‘bucket chair’ and the heavy line from the Rocket Rescue was in the half of the rocket outfit that didn’t make it in time for the rescue: they had been delayed at the Gellibrand River ferry. Communications to Warrnambool were down so the call for help didn’t get through on time and the two or three boats that had been notified of the wreck failed to reach it in time. Captain Vickers presented Bill Robe who had dragged the captain out of the surf with his silver cased pocket watch, the only possession that he had left, as a token for having saved his life and the lives of some of the crew. Years later Bill passed the watch to his brother in law Gilbert Hulands as payment of a debt. Since that time it has been passed down the family to Gilbert Hulands’ grandson, John Hulands. Seaman Julius Gebauhr later gave his knife, in its hand crafted leather sheath, to F. J. Stanmore for caring for him when he came ashore. The knife handle has a personal inscription on it. A marble headstone on the 200 m high cliffs overlooking Wreck Beach, west of Moonlight Head, paying tribute to the men who lost their lives when Fiji ran aground. The scene of the wreck is marked by the anchor from the Fiji, erected by Warrnambool skin divers in 1967. Amongst the artefacts salvaged from the Fiji are china miniature animals, limbs from small china dolls, rubber balls, a glass bottle, sample of rope from the distress rocket and a candlestick holder. These items are now part of the Fiji collection at Flagstaff Hill Maritime Museum, along with this sheath knife and Captain Vickers’ pocket watch. Flagstaff Hill’s collection from the wreck of the Fiji and Julius Gebauhr knife is of historical significance at a State level because of its association with the vessel, which is on the Victorian Heritage Register (VHR S 259). The Fiji is archaeologically significant as the wreck of a typical 19th-century international sailing ship with cargo. It is educationally and recreationally significant as one of Victoria's most spectacular historic shipwreck dive sites with structural features and remains of the cargo still evident. Also the story of the heroic attempt by many to save the crew of the Fiji. The knife also represents an aspect of shipping history and fits in well with Victoria's framework of historical themes of living with natural processes as items such as these contribute to a better understanding of Victoria’s cultural history.Knife, metal with black wooden handle. Handle is riveted to knife in 3 places, with shaft of knife between the 2 parts of the handle. The handle also has a carved ring around the end, possibly for attaching a wrist strap. Knife blade is pointed in the centre of the tip and is rusty. The knife has a rectangular metal plaque on handle with inscription. The hand crafted dark brown, soft leather sheath is shaped to fit the knife and joined at the back with cross stitching. The sheath also has a leather belt strap that has come away from the sheath at one end.Metal plaque “FROM JULIUS GEBAUHR/”FIJI” /TO F.J.S.” (F J Standmore recipient)1891, shipwrecked coast, flagstaff hill, flagstaff hill maritime museum, maritime museum, shipwrecked artefact, flagstaff hill maritime village, shipwreck coast, warrnambool, knife, fiji, pocket watch, moonlight head, gebauhr, stansmore, wreck bay, sheath knife -
 Flagstaff Hill Maritime Museum and Village
Ceramic - Tile, circa 1878
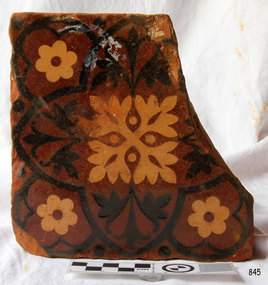
This Minton floor tile is from the wreck of the LOCH ARD along with other examples of this manufacture recovered from the wreck site and form part of the collection at Flagstaff Hill. The iron-hulled clipper ship from the Loch Line was heading for Port Phillip from London when it ran into the cliffs of Mutton Bird Island near Port Campbell and was wrecked on June 1st, 1878. The LOCH ARD was laden with high-value cargo including luxury goods intended for display at the Melbourne International Exhibition in 1880. One notable survivor from the ship’s freight manifest was the well-packed Minton porcelain peacock, a two-metre-high ceramic masterpiece of vivid glazed colours. The almost total loss of life and property from the LOCH ARD registered as a shocking tragedy for the Colony of Victoria, at a time when social confidence and economic optimism were otherwise high. The wealth generated from Gold and Wool was increasingly being spent on grandiose private residences and imposing public buildings. The demand for quality furnishings and fittings was therefore strong. Among the products consigned to burgeoning colonial markets by the Milton Pottery at Stoke upon Trent, were their new range of colourfully patterned but very durable floor tiles – ideal for the high-traffic spaces in the large civic buildings then being constructed in Australia and America. These new floor tiles were “encaustic”, meaning that their designs and colours were encased “within” the depth of the tile. Rather than their decorative patterns being glazed onto the surface of the tile, their inlaid designs were created during the manufacturing process, as “coloured slips” (or liquid clay) were poured into a deep pre-moulded casting. When fired, the resulting tile was colour-fast and design-fast. A brief history of the Loch Ard (1873-1878): - The sailing ship Loch Ard was one of the famous Loch Line ships that sailed from England to Australia. Barclay, Curdle and Co. built the three-masted iron vessel in Glasgow in 1873. It had sailed three trips to Australia and one trip to Calcutta before its fateful voyage. Loch Ard left England on March 2, 1878, under the command of recently married, 29-year-old Captain Gibbs. It was bound for Melbourne with a crew of 37, plus 17 passengers. The general cargo reflected the affluence of Melbourne at the time. Onboard were straw hats, umbrellas, perfumes, clay pipes, pianos, clocks, confectionery, linen and candles, and a heavier load of railway irons, cement, lead and copper. Other cargo included items intended for display in the Melbourne International Exhibition of 1880. The Loch Ard had been sailing for three months and was close to its destination on June 1, 1878. Captain Gibbs had expected to see land at about 3 am but the Loch Ard ran into a fog that greatly reduced visibility and there was no sign of land or the Cape Otway lighthouse. The fog lifted at 4 am and the sheer cliffs of Victoria's west coast were much closer to them than Captain Gibbs expected. He tried to manage the vessel but failed and the ship struck a reef at the base of Mutton Bird Island, near Port Campbell. The top deck loosened from the hull, and the masts and rigging crashed down, knocking passengers and crew overboard. The lifeboat was launched by Tom Pearce but crashed into the side of Loch Ard and capsized. He clung onto its overturned hull and sheltered under it. He drifted out to sea and the tide brought him back to what is now called Loch Ard Gorge. He swam to shore and found a cave for shelter. A passenger, Eva Carmichael, had raced onto the deck to find out what was happening and was confronted by towering cliffs above the ship. She was soon swept off the ship by a huge wave. Eva saw Tom Pearce on a small rocky beach and yelled to attract his attention. He swam out and dragged her to the shelter of the cave. He revived her with a bottle of brandy from a case that had washed up on the beach. Tom scaled a cliff in search of help and followed some horse hoof prints. He came from two men from Glenample Station, three and a half miles away. He told the men of the tragedy and then returned to the gorge while the two men rode back to the station to get help. They reached Loch Ard Gorge and took the two shipwreck survivors to Glenample Station to recover. Eva stayed at the station for six weeks before returning to Ireland by steamship. In Melbourne, Tom Pearce received a hero's welcome and was presented with a medal and some money. Of the 54 crew members and passengers on board, only two survived: the apprentice, Tom Pearce and the young woman passenger, Eva Carmichael, who lost her family in the tragedy. One of the most unlikely pieces of cargo to have survived the shipwreck was a Minton porcelain peacock - one of only nine in the world. The peacock was destined for the Melbourne International Exhibition in 1880. It had been well packed, which gave it adequate protection during the violent storm. Today, the Minton peacock can be seen at the Flagstaff Hill Maritime Museum in Warrnambool. From Australia's most dramatic shipwreck, it has now become Australia's most valuable shipwreck artefact and is one of very few 'objects' on the Victorian State Heritage Register. The Minton floor tile is significant for its hard-wearing yet attractive design. The shipwreck of the LOCH ARD is of State significance. Victorian Heritage Register S417. Flagstaff Hill’s collection of artefacts from LOCH ARD is significant for being one of the largest collections of artefacts from this shipwreck in Victoria. It is significant for its association with the shipwreck, which is on the Victorian Heritage Register (VHR S417). The collection is significant because of the relationship between the objects, as together they have a high potential to interpret the story of the LOCH ARD. The LOCH ARD collection is archaeologically significant as the remains of a large international passenger and cargo ship. The LOCH ARD collection is historically significant for representing aspects of Victoria’s shipping history and its potential to interpret sub-theme 1.5 of Victoria’s Framework of Historical Themes (living with natural processes). The collection is also historically significant for its association with the LOCH ARD, which was one of the worst and best-known shipwrecks in Victoria’s history. A square Minton floor tile with a black and apricot pattern against a chocolate brown background. There is a large chip missing. This decorative floor tile was recovered from the shipwreck of the LOCH ARD. On the back, or base, of the tile is inscribed the number “46” and the letters “Minton & Co Patent Stoke upon Trent”.flagstaff hill, warrnambool, shipwrecked coast, flagstaff hill maritime museum, maritime museum, shipwreck coast, flagstaff hill maritime village, great ocean road, loch line, loch ard, captain gibbs, eva carmichael, tom pearce, glenample station, mutton bird island, loch ard gorge, encaustic tile, melbourne international exhibition, floor tile, minton floor tile -
 Flagstaff Hill Maritime Museum and Village
Functional object - Crucible, The Patent Plumbago Crucible Company, circa 1878
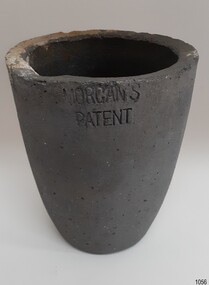
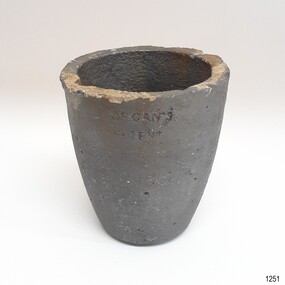
This crucible was raised from the wreck of the LOCH ARD. It is one of six similar relics, in a range of sizes, now in the Flagstaff Hill collection. All bear markings to indicate their manufacture by the Morgan brothers of Battersea, trading as the Patent Plumbago Crucible Co. A crucible is a container used for purifying and melting metals so that they can be cast in a mould to a predetermined shape and use. They must withstand extremely high temperatures, and abrupt cooling, and shed their contents with minimal adherence. The addition of graphite to the traditional firing clays greatly enhanced the durability of industrial crucibles in mid-Victorian Britain, a significant technological advance at a time of great activity in foundries and expansion of demand for refined metals. The Morgans first noticed the advantages of graphite crucibles at the Great Exhibition held in London in 1851. Initially, they contracted to be sole selling agents for the American-made products of Joseph Dixon and Co. from New Jersey, but in 1856 they obtained that firm’s manufacturing rights and began producing their own graphite crucibles from the South London site. The Morgans imported crystalline graphite in 4-5 cwt casks from the British colony of Ceylon (now Sri Lanka) and mixed it with conventional English (Stourbridge) clays to be fired in kilns. Their products were purchased by the Royal Mints in London and India, and exported to official mints in France and Germany. They were successful exhibitors of their crucibles and furnaces at the London Exhibition held in 1861 (Class 1, Mining, quarrying, metallurgy and mineral products, Exhibit 265, Patent Plumbago Crucible Co). The range of sizes represented by the six crucibles retrieved from the LOCH ARD, suggests they may have been part of a sample shipment intended for similar promotion in the Australian colonies ― at Melbourne’s International Exhibition to be held in 1880. The summary of the LOCH ARD cargo manifest, by Don Charlwood in ‘Wrecks and Reputations’, does not mention any crucibles, implying that they were not a large consignment of uniform items. A newspaper account of an 1864 tour of the Morgan brothers’ ‘Black Potteries’ at Battersea indicates: “All the pots were numbered according to their contents, each number standing for one kilogram, or a little over two pounds; a No. 2 crucible contains two kilogrammes; a No. 3, three kilogrammes, and so on.” These numbers are obscured by marine sediment on three of the crucibles in the Flagstaff Hill collection, but those legible on the remaining three are 5, 6, and 8. None of the six is of the same size from a visual appraisal. A brief history of the Loch Ard (1873-1878): - The sailing ship Loch Ard was one of the famous Loch Line of ships that sailed the long voyage from England to Australia. Barclay, Curdle and Co. built the three-masted iron vessel in Glasgow in 1873. It had sailed three trips to Australia and one trip to Calcutta before its fateful voyage. Loch Ard left England on March 2, 1878, under the command of recently married, 29-year-old Captain Gibbs. It was bound for Melbourne with a crew of 37, plus 17 passengers. The general cargo reflected the affluence of Melbourne at the time. Onboard were straw hats, umbrellas, perfumes, clay pipes, pianos, clocks, confectionery, linen and candles, and a heavier load of railway irons, cement, lead and copper. Other cargo included items intended for display in the Melbourne International Exhibition of 1880. The Loch Ard had been sailing for three months and was close to its destination on June 1, 1878. Captain Gibbs had expected to see land at about 3 am but the Loch Ard ran into a fog that greatly reduced visibility and there was no sign of land or the Cape Otway lighthouse. The fog lifted at 4 am and the sheer cliffs of Victoria's west coast were much closer to them than Captain Gibbs expected. He tried to manage the vessel but failed and the ship struck a reef at the base of Mutton Bird Island, near Port Campbell. The top deck loosened from the hull, and the masts and rigging crashed down, knocking passengers and crew overboard. The lifeboat was launched by Tom Pearce but crashed into the side of Loch Ard and capsized. He clung onto its overturned hull and sheltered under it. He drifted out to sea and the tide brought him back to what is now called Loch Ard Gorge. He swam to shore and found a cave for shelter. A passenger, Eva Carmichael, had raced onto the deck to find out what was happening and was confronted by towering cliffs above the ship. She was soon swept off the ship by a huge wave. Eva saw Tom Pearce on a small rocky beach and yelled to attract his attention. He swam out and dragged her to the shelter of the cave. He revived her with a bottle of brandy from a case that had washed up on the beach. Tom scaled a cliff in search of help and followed some horse hoof prints. He came from two men from Glenample Station, three and a half miles away. He told the men of the tragedy and then returned to the gorge while the two men rode back to the station to get help. They reached Loch Ard Gorge and took the two shipwreck survivors to Glenample Station to recover. Eva stayed at the station for six weeks before returning to Ireland by steamship. In Melbourne, Tom Pearce received a hero's welcome and was presented with a medal and some money. Of the 54 crew members and passengers on board, only two survived: the apprentice, Tom Pearce and the young woman passenger, Eva Carmichael, who lost her family in the tragedy. The shipwreck of the LOCH ARD is of State significance ― Victorian Heritage Register S417. Flagstaff Hill’s collection of artefacts from LOCH ARD is significant for being one of the largest collections of artefacts from this shipwreck in Victoria. It is significant for its association with the shipwreck, which is on the Victorian Heritage Register (VHR S417). The collection is significant because of the relationship between the objects, as together they have a high potential to interpret the story of the LOCH ARD. The LOCH ARD collection is archaeologically significant as the remains of a large international passenger and cargo ship. The LOCH ARD collection is historically significant for representing aspects of Victoria’s shipping history and its potential to interpret sub-theme 1.5 of Victoria’s Framework of Historical Themes (living with natural processes). The collection is also historically significant for its association with the LOCH ARD, which was one of the worst and best-known shipwrecks in Victoria’s history.A Morgan’s Patent graphite crucible No.8 (i.e. 8kgs capacity), one of a set. It was recovered from the wreck of the LOCH ARD. It is in its original grey colouring with minimal sediment accretion on the top rim. It rises in a slight curve from a flat circular base to a wider rim with a pouring lip. Maker’s marks on the side of the container clearly identify the manufacturer. The maker's details are stamped into the base around and within a circle. A white sticker is attached. Made by the Patent Plumbago Crucible Company at the Battersea Works in London. Number “8”. Letters “MORGAN’S PATENT”. Details on the base "MORGAN'S PATENT" "THE PATENT PLUMBAGO CRUCIBLE COMPANY" Symbol [8] above "BATTERSEA WORKS LONDON" Handwritten on a white sticker in black pen "LA/89"flagstaff hill, warrnambool, maritime museum, shipwreck coast, great ocean road, loch line, loch ard, captain gibbs, eva carmichael, tom pearce, glenample station, mutton bird island, loch ard gorge, graphite crucible, plumbago crucible, morgans crucible company, flagstaff hill maritime museum and village, fluxing pots, crucible, morgan’s patent, morgan brothers, patent plumbago crucible co, battersea works, london, port campbell -
 Flagstaff Hill Maritime Museum and Village
Functional object - Crucible, The Patent Plumbago Crucible Company, circa 1878
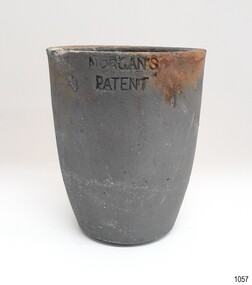
This crucible was raised from the wreck of the LOCH ARD. It is one of six similar relics, in a range of sizes, now in the Flagstaff Hill collection. All bear markings to indicate their manufacture by the Morgan brothers of Battersea, trading as the Patent Plumbago Crucible Co. A crucible is a container used for purifying and melting metals so that they can be cast in a mould to a predetermined shape and use. They must withstand extremely high temperatures, and abrupt cooling, and shed their contents with minimal adherence. The addition of graphite to the traditional firing clays greatly enhanced the durability of industrial crucibles in mid-Victorian Britain, a significant technological advance at a time of great activity in foundries and expansion of demand for refined metals. The Morgans first noticed the advantages of graphite crucibles at the Great Exhibition held in London in 1851. Initially, they contracted to be sole selling agents for the American-made products of Joseph Dixon and Co. from New Jersey, but in 1856 they obtained that firm’s manufacturing rights and began producing their own graphite crucibles from the South London site. The Morgans imported crystalline graphite in 4-5 cwt casks from the British colony of Ceylon (now Sri Lanka) and mixed it with conventional English (Stourbridge) clays to be fired in kilns. Their products were purchased by the Royal Mints in London and India, and exported to official mints in France and Germany. They were successful exhibitors of their crucibles and furnaces at the London Exhibition held in 1861 (Class 1, Mining, quarrying, metallurgy and mineral products, Exhibit 265, Patent Plumbago Crucible Co). The range of sizes represented by the six crucibles retrieved from the LOCH ARD, suggests they may have been part of a sample shipment intended for similar promotion in the Australian colonies ― at Melbourne’s International Exhibition to be held in 1880. The summary of the LOCH ARD cargo manifest, by Don Charlwood in ‘Wrecks and Reputations’, does not mention any crucibles, implying that they were not a large consignment of uniform items. A newspaper account of an 1864 tour of the Morgan brothers’ ‘Black Potteries’ at Battersea indicates: “All the pots were numbered according to their contents, each number standing for one kilogram, or a little over two pounds; a No. 2 crucible contains two kilogrammes; a No. 3, three kilogrammes, and so on.” These numbers are obscured by marine sediment on three of the crucibles in the Flagstaff Hill collection, but those legible on the remaining three are 5, 6, and 8. None of the six is of the same size from a visual appraisal. A brief history of the Loch Ard (1873-1878): - The sailing ship Loch Ard was one of the famous Loch Line of ships that sailed the long voyage from England to Australia. Barclay, Curdle and Co. built the three-masted iron vessel in Glasgow in 1873. It had sailed three trips to Australia and one trip to Calcutta before its fateful voyage. Loch Ard left England on March 2, 1878, under the command of recently married, 29-year-old Captain Gibbs. It was bound for Melbourne with a crew of 37, plus 17 passengers. The general cargo reflected the affluence of Melbourne at the time. Onboard were straw hats, umbrellas, perfumes, clay pipes, pianos, clocks, confectionery, linen and candles, and a heavier load of railway irons, cement, lead and copper. Other cargo included items intended for display in the Melbourne International Exhibition of 1880. The Loch Ard had been sailing for three months and was close to its destination on June 1, 1878. Captain Gibbs had expected to see land at about 3 am but the Loch Ard ran into a fog that greatly reduced visibility and there was no sign of land or the Cape Otway lighthouse. The fog lifted at 4 am and the sheer cliffs of Victoria's west coast were much closer to them than Captain Gibbs expected. He tried to manage the vessel but failed and the ship struck a reef at the base of Mutton Bird Island, near Port Campbell. The top deck loosened from the hull, and the masts and rigging crashed down, knocking passengers and crew overboard. The lifeboat was launched by Tom Pearce but crashed into the side of Loch Ard and capsized. He clung onto its overturned hull and sheltered under it. He drifted out to sea and the tide brought him back to what is now called Loch Ard Gorge. He swam to shore and found a cave for shelter. A passenger, Eva Carmichael, had raced onto the deck to find out what was happening and was confronted by towering cliffs above the ship. She was soon swept off the ship by a huge wave. Eva saw Tom Pearce on a small rocky beach and yelled to attract his attention. He swam out and dragged her to the shelter of the cave. He revived her with a bottle of brandy from a case that had washed up on the beach. Tom scaled a cliff in search of help and followed some horse hoof prints. He came from two men from Glenample Station, three and a half miles away. He told the men of the tragedy and then returned to the gorge while the two men rode back to the station to get help. They reached Loch Ard Gorge and took the two shipwreck survivors to Glenample Station to recover. Eva stayed at the station for six weeks before returning to Ireland by steamship. In Melbourne, Tom Pearce received a hero's welcome and was presented with a medal and some money. Of the 54 crew members and passengers on board, only two survived: the apprentice, Tom Pearce and the young woman passenger, Eva Carmichael, who lost her family in the tragedy. The shipwreck of the LOCH ARD is of State significance ― Victorian Heritage Register S417 Flagstaff Hill’s collection of artefacts from LOCH ARD is significant for being one of the largest collections of artefacts from this shipwreck in Victoria. It is significant for its association with the shipwreck, which is on the Victorian Heritage Register (VHR S417). The collection is significant because of the relationship between the objects, as together they have a high potential to interpret the story of the LOCH ARD. The LOCH ARD collection is archaeologically significant as the remains of a large international passenger and cargo ship. The LOCH ARD collection is historically significant for representing aspects of Victoria’s shipping history and its potential to interpret sub-theme 1.5 of Victoria’s Framework of Historical Themes (living with natural processes). The collection is also historically significant for its association with the LOCH ARD, which was one of the worst and best-known ahipwrecks in Victoria’s history.A Morgan’s Patent graphite crucible No.4 (i.e. 4kgs capacity), one of a set of three. It was recovered from the wreck of the LOCH ARD. It is in its original grey colouring with minimal sediment accretion on the top rim. It rises in a slight curve from a flat circular base to a wider rim with a pouring lip. Maker’s marks on the side of the container clearly identify the manufacturer. The maker's details are stamped into the base around and within a circle. A white sticker is attached. Made by the Patent Plumbago Crucible Company at the Battersea Works in London.Number or. Letters “MORGAN’S PATENT”. Details on the base "MORGAN'S PATENT" "THE PATENT PLUMBAGO CRUCIBLE COMPANY" Symbol [4] above "BATTERSEA WORKS LONDON" Handwritten on a white sticker in black pen "L89"flagstaff hill, warrnambool, flagstaff hill maritime museum, maritime museum, shipwreck coast, flagstaff hill maritime village, great ocean road, loch line, loch ard, captain gibbs, eva carmichael, tom pearce, glenample station, mutton bird island, loch ard gorge, graphite crucible, plumbago crucible, morgan's crucible company, flagstaff hill maritime museum and village, fluxing pots, crucible, morgan’s patent, morgan brothers, patent plumbago crucible co, battersea works, london, port campbell -
 Flagstaff Hill Maritime Museum and Village
Functional object - Crucible, The Patent Plumbago Crucible Company, circa 1873
Crucibles are used for heating and pouring molten metal. The set of six crucibles was raised from the wreck of the Loch Ard and includes a range of sizes, now in the Flagstaff Hill collection. All were manufactured by the Morgan brothers who founded the Patent Plumbago Crucible Company in 1856, making crucibles in a small factory in Battersea London. A crucible is a container used for purifying and melting metals so that they can be cast in a mould to a predetermined shape and use. They must withstand extremely high temperatures, and abrupt cooling, and shed their contents with minimal adherence. The addition of graphite to the traditional firing clays greatly enhanced the durability of industrial crucibles this technique was pioneered by the Morgan Bros thereby making a significant technological advance in foundry technology and metallurgy. The Morgans first noticed the advantages of graphite crucibles at the Great Exhibition held in London in 1851. Initially, they contracted to be sole selling agents for the American-made products of Joseph Dixon and Co. from New Jersey, but in 1856 they obtained that firm's manufacturing rights and began producing their graphite crucibles from the South London site. The Morgans imported crystalline graphite in 4-5 cwt casks from the British colony of Ceylon (now Sri Lanka) and mixed it with conventional English (Stourbridge) clays to be fired in kilns. Their products were purchased by the Royal Mints in London and India and exported to official mints in France and Germany. They were successful exhibitors of their crucibles and furnaces at the London Exhibition held in 1861 (Class 1, Mining, quarrying, metallurgy and mineral products, Exhibit 265, Patent Plumbago Crucible Co). The range of sizes represented by the six crucibles retrieved from the Loch Ard suggests they may have been part of a sample shipment intended for similar promotion in the Australian colonies or at Melbourne's International Exhibition to be held in 1880. A newspaper account of an 1864 tour of the Morgan brothers' 'Black Potteries' at Battersea indicates: "All the pots were numbered according to their contents, each number standing for one kilogram or a little over two pounds; a No. 2 crucible contains two kilograms; a No. 3, three kilograms, and so on." These numbers are obscured by marine sediment on three of the crucibles in the Flagstaff Hill collection, but those legible on the remaining three are 5, 6, and 8. None of the six is of the same size. A brief history of the Loch Ard (1873-1878): - The sailing ship Loch Ard was one of the famous Loch Line of ships that sailed the long voyage from England to Australia. Barclay, Curdle and Co. built the three-masted iron vessel in Glasgow in 1873. It had sailed three trips to Australia and one trip to Calcutta before its fateful voyage. Loch Ard left England on March 2, 1878, under the command of recently married, 29-year-old Captain Gibbs. It was bound for Melbourne with a crew of 37, plus 17 passengers. The general cargo reflected the affluence of Melbourne at the time. Onboard were straw hats, umbrellas, perfumes, clay pipes, pianos, clocks, confectionery, linen and candles, and a heavier load of railway irons, cement, lead and copper. Other cargo included items intended for display in the Melbourne International Exhibition of 1880. The Loch Ard had been sailing for three months and was close to its destination on June 1, 1878. Captain Gibbs had expected to see land at about 3 am but the Loch Ard ran into a fog that greatly reduced visibility and there was no sign of land or the Cape Otway lighthouse. The fog lifted at 4 am and the sheer cliffs of Victoria's west coast were much closer to them than Captain Gibbs expected. He tried to manage the vessel but failed and the ship struck a reef at the base of Mutton Bird Island, near Port Campbell. The top deck loosened from the hull, and the masts and rigging crashed down, knocking passengers and crew overboard. The lifeboat was launched by Tom Pearce but crashed into the side of Loch Ard and capsized. He clung onto its overturned hull and sheltered under it. He drifted out to sea and the tide brought him back to what is now called Loch Ard Gorge. He swam to shore and found a cave for shelter. A passenger, Eva Carmichael, had raced onto the deck to find out what was happening and was confronted by towering cliffs above the ship. She was soon swept off the ship by a huge wave. Eva saw Tom Pearce on a small rocky beach and yelled to attract his attention. He swam out and dragged her to the shelter of the cave. He revived her with a bottle of brandy from a case that had washed up on the beach. Tom scaled a cliff in search of help and followed some horse hoof prints. He came from two men from Glenample Station, three and a half miles away. He told the men of the tragedy and then returned to the gorge while the two men rode back to the station to get help. They reached Loch Ard Gorge and took the two shipwreck survivors to Glenample Station to recover. Eva stayed at the station for six weeks before returning to Ireland by steamship. In Melbourne, Tom Pearce received a hero's welcome and was presented with a medal and some money. Of the 54 crew members and passengers on board, only two survived: the apprentice, Tom Pearce and the young woman passenger, Eva Carmichael, who lost her family in the tragedy. The shipwreck of the Loch Ard is of significance for Victoria and is registered on the Victorian Heritage Register ( S 417). Flagstaff Hill has a varied collection of artefacts from Loch Ard and its collection is significant for being one of the largest accumulation of artefacts from this notable Victorian shipwreck of which the subject items are a small part. The collection's objects give us a snapshot of how we can interpret the story of this tragic event. The collection is also archaeologically significant as it represents aspects of Victoria's shipping history that allows us to interpret Victoria's social and historical themes of the time. Through is associated with the worst and best-known shipwreck in Victoria's history.This crucible is the smallest of three nested crucibles, or fluxing pots, numbered according to their size. These containers rise slightly from a smaller flat base to a wider open top with a lip for pouring. They were recovered from the wreck of the Loch Ard. The crucibles have a coating of sediment that obscures some of their numerical specifications of size and capacity. Made by the Patent Plumbago Crucible Company at the Battersea Works in London. The number on this crucible is obscured by the sticker.Stamped into side "MORGAN'S PATENT" Stemped into base "MORGAN'S PATENT" "THE PATENT PLUMBAGO CRUCIBLE COMPANY" Sticker "L 96"flagstaff hill, warrnambool, graphite crucible, plumbago crucible, morgan's crucible company, loch ard, morgan potteries, crucible, fluxing pot, nested crucibles, heat proof container, metal worker, maritime museum, shipwreck coast, flagstaff hill maritime village, great ocean road, loch line, morgans crucible company, flagstaff hill maritime museum and village, fluxing pots, morgan’s patent, morgan brothers, patent plumbago crucible co, battersea works, london, loch ard gorge, port campbell -
 Moorabbin Air Museum
Photograph (series) - (SP) Lindsay Walker collection of photographs, slides and documents. Various aircraft as described in Context. Many Ansett historic items
-
Bendigo Historical Society Inc.
Document - ROYAL PRINCESS THEATRE COLLECTION: A SEQUEL TO MARJORIE IN WONDERLAND, 1st September, 1917
Royal Princess Theatre - A Sequel to Marjorie in Wonderland. Saturday, 1st September, 1917. Australian Children's Pantomime. Price of Programme, One Penny. Matinee Performance. In aid of 'Fruit & Vegetables Fund For Our Soldiers In The Trenches.' Produced by Miss Girlie Mackay and Miss Norma Moorhead. Musical Director: Mr Stanley Upton. Stage Manager: Mr J Dunphy. Lighting Effects: Mr W Wenborn. Hon. Sec.: Mr Norman Howell. Inside cover Synopsis of Pantomime. The First act is Marjorie's Dream of Fairyland. The curtain rises showing Marjorie asleep in cot from which Brownies entice her away. The curtain is. . . . Sale of Sweets supervised by Miss Nita E Weller and Assistants Rose by Mrs A T Mackay. Dresses disigned and made by Mrs McQuie, Misses Lena Weller, Norma Moorhead, Girlie Mackay, assisted by Mrs Ralph Ross, Mrs Robert Mackay, and the Misses May Germann, Carola Iser and Hilda Meurer. Programme. Songs sung throughout Performance. Overture-'Marjorie in Wonderland; Specially arranged by Mr Upton. Overture Synopsis-This is descriptive of Marjorie's Dream of Fairyland; at first mystic and subdued, tending to convey the impression of the mysterious movements of the Spirits of the Night intermingled with the occasional calls of birds, a vision of elfland; from that the music develops in an expression of the coming of morn, and the stirrring of forest nature into the active life of day, with the distant sounds of the anvil and of bells; and as the day wears on, the chiming of the hours again denote the approach of eventide, the melody throughout being that of the song 'Marjorie Sunbeam.' Instrumental Soloists are Messrs. J Collins & H M Hall. Act 1. 'Moonstruck' Myrtle Glanville. 2 Moonboat, by the Fairies. 3 'Fairy Revel' by the Bunnies. 4 'Bunnies Adventure' by the Bunnies.5 'Catching Birds' by the Goblins. 7 'Fairyland' Ruthie Murphy. Act 2. 1 'Fairy Song'. 2 'Kookaburra Mel Wearne. 3 'Marjorie Sunbeam' the Brownies. 4 'Kangaroo' the brownies. 5 'Autumn Winds' 6 'As I went o'er the Paddocks' Jean Walker. 7 'Sea Serpent' Jim Walker & Jim Long. 8 Swing Song, The Playmates. 9 'Belle Bird' Jean & Jim Walker. 10 'Baby Bear' Stella Coghlan. 11 'Coo-ee' Myrtle Glanville & Marie Hamilton. 12 Butterfly Dance Sheila Shannon.13 'The Mushroom Affair' Ruthie Murphy & Jim Nabbs. 14 'Corroboree' by the Aboriginals. 15 'The Boomerang' Ken McQuie. 16 Chorus-Wattle. 17 'In Two's & Three's' Brownies & Goblins. 18 'Bull Frog & Coon Stella Cook & Sid Whitelaw. 19 In a Fairy Boat' Rose Murphy. 20 Chorus-'Good Night'. _God Bless Our Splendid Men_ Cast of Characters: Jean Walker, Myrtle Glanville, Marie Hamilton, Thelma Thomas, Stella Coghlan, Jim Long, Jim Walker, Enid Webster, Lily Brown, Una Grelis, Biddie Bulley, Ellie Colcough, Dorothy Fullerton, Maud Clark, Una Leggo, Sheila Shannon, Ken Skewes, Jack Long, Bruce Barnier, Roger Horbury, Douglas Pain, Tom Henderson, Ruthie Murphy, Jim Nabbs, Tom Green, Douglas McQuie, Mel Wearne, Laurence Skewes, Sid Whitelaw, Ken Moore, Alma Jorgenson, Geoff Schultz, Doris Reed, Nancy Cahill, Hugh Long, Edna Spencer, Don Walker, Jack Schultz, Ken McQuie, Jack Weddell, Berni and Allan Monaghan, Reg Trevean, Stella Cook, Joyce Ross, Margaret Long, Olive Thomas, Margaret Macqie, Rose Murphy, Molly Robertson, Lorna Weddell, Minnie Harley, Jean Moran, Merle Nagel, Decima Hotorf, Myra Greasley, Vera Arundel, Joyce Long, Elma Jordan, Gwen Morley, Emmie Arthur, Lorna Parker, Ziska Ross, Ena Wright, Mary Rymer, Cecil Gleeson, Thelma Cairns, Dorothy Batchelder, Maudie Ferguson, Marion Henderson, Lorna Cattran, Alice Murphy, Essie Whitelaw, Eileen Coghlin, Thelma Ross, Jean Miller, Mavis Tozer, Monnie Fattorini, Vivian Reed, Lily O'Connor, Alice Evans, Jean Barlow (Names of parts were included). Columbine Ballet: Alma Day, Kathleen Smithwick, Margery Greaves, Wilma Martin, Roma Cook, Dot Cravino, Alma Reardon, Jean Cairns.Cambridge Press, Print.program, theatre, royal princess theatre -
Bendigo Historical Society Inc.
Document - A SOUVENIR OF 'THE GLAMOUR GIRLS' REVUE 'THEN AND NOW' 1944, 1944
A Souvenir of 'The Glamour Girls' Revue 'Then and Now' 1944. From Mr & Mrs C Clark. Page 1, Bendigo presents 'The Glamour Girls' in Their Hit Revue 'Then & Now' a Pot Pourri of Dances and Fun, Produced and created by the Team Spirit of Peggy Hinsley, Elaine O'Shea, Joan Albert, Gladys Jordon, Amba Harrington, Moira Knowles. Doris Clow, Betty Angel, Cath Mc Queenie, Thelma Cochrane, Mona Roberts. Under Direction of C Clark. Musical Direction, Edward Thomas. Accompaniste, Leila Camp, Vida Roberts. Violinists, Honor Allfrey, Edgar Jarrett. Drums, Frank Kennedy, Andy Beattie. Costumes, Tivoli Theatres. Page 3/ In lending your personality, your charm and your talent to help raise Funds for the Returned Soldiers' Relief Appeal, you have given not only to the soldiers, but to the Nation a great service. As the producer and originator of the 'Glamour Girl Revue' I wish to place on record my personal thanks to the noble part you have played in making this show the financial success it has proved to be. You will appreciate that no remuneration has given by the Committee for your services, with this decision I am sure you fully concur. I would however, like you to accept this souvenir as a small token of gratitude for the great pleasure it has given my wife and I to have been associated with each and everyone of you as a team. May we have future successes in our services to those in need. Yours truly, (signed) C Clark. Page 5/ Photograph of Mr and Mrs C Clark signed; Sincerely M & C Clark. Extra page has been added here and a black and white photograph of the cast on stage attached using photograph corners. Page 5/ Photo of Peggy. Page 7. Page 9 photo of Elaine. Page 11 photo Joan. Page 13 Gladys. Page 15 Amba. Page 17 Moira. Page 19 Doris. Page 21 Betty. Page 23 Cath. Page 25 Thelma. Page 27 Mona. Page 29 Autographs: Betty Angell, Thelma Crochrane, S M Grossmann, Vida Roberts, Mona Roberts, G E Thomas, J Albert, H M Allfrey, J J Monte, Elaine O'Shea, Andrew Beattie, Moira Knowle, Teen Armstrong, C M McQueenie, Peg Hainsly, Doris Blow, Amba Harrington, J N Armstrong, M Clark, C Clark (autographs in copy A only.) Page 31. ''1940 - Never have so many owed so much to so few.'' - Winston Churchill. A Friend Who Understands. You've shared the joys and troubles The Laughter and the tears, And you've given loyal friendship Through the Changing Varied years, Your voice has been beside me Whispering courage for the day, And you've helped and blessed and cheered me Making glad the uphill way, And of all the many blessings That have reached me from God's hands, There's no gift more sweet and precious Than the Friend - who understands. 1944 ''Never have so few needed so much from so many'' - Returned Soldiers' Relief Appeal. Copy A/ Inscription on front cover To 'YACK'. Signed on page 3, C Clark. Signed on page 5 Sincerely M & C Clark. Page 29 Autographs: Betty Angell, Thelma Crochrane, S M Grossmann, Vida Roberts, Mona Roberts, G E Thomas, J Albert, H M Allfrey, J J Monte, Elaine O'Shea, Andrew Beattie, Moira Knowle, Teen Armstrong, C M McQueenie, Peg Hainsly, Doris Blow, Amba Harrington, J N Armstrong, M Clark, C Clark. Orange ribbon is faded. Copy B/ markings: front cover - Royal Historical Society of Victoria Bendigo Branch stamp, sticker - D1729. Cover and white sticker with D1729 on top right corner. First 2 sheets are torn at top hole punch. Orange ribbon is worn at the back.program, theatre, the glamour girls, a souvenir of 'the glamour girls' revue 'then and now' 1944. from mr & mrs c clark. their hit revue 'then & now' a pot pourri of dances and fun, produced and created peggy hinsley, elaine o'shea, joan albert, gladys jordon, amba harrington, moira knowles. doris clow, betty angel, cath mc queenie, thelma cochrane, mona roberts. under direction of c clark. musical direction, edward thomas. accompaniste, leila camp, vida roberts. violinists, honor allfrey, edgar jarrett. drums, frank kennedy, andy beattie. costumes, tivoli theatres. raise funds for the returned soldiers' relief appeal. as the producer and originator my personal thanks to the part you have this show a success. no remuneration has given by for your services. accept this souvenir as a token of. c clark. photograph of mr and mrs c clark signed; sincerely m & c clark. black and white photograph of the cast, peggy, elaine, joan, gladys, amba, moira, doris, betty, cath, thelma, mona, autographs: betty angell, thelma crochrane, s m grossmann, vida roberts, mona roberts, g e thomas, j albert, h m allfrey, j j monte, elaine o'shea, andrew beattie, moira knowle, teen armstrong, c m mcqueenie, peg hainsly, doris blow, amba harrington, j n armstrong, m clark, c clark. 'yack'. -
 Bendigo Historical Society Inc.
Document - LANSELL RELATED DOCUMENTS
Document.Copy of Williamstown Historical Society Newsletter No 17 (1977).On the second and third page of this Newsletter is an article entitled ''The guns of the 'Nelson''', written by Doug Mills, Castlemaine. The Warship NELSON underwent alterations in 1860, including cut down to two decks and lengthened, her armaments reduced to 72 guns. Two 7inch 68 pounder guns were added to her armament. In February 7 1867 she was officially given to the Colony of Victoria by the Imperial Government. At the time her Commander was Captain Charles B. Payne. The Warship reached Melbourne in 4th February 1868. Relics of the NELSON were auctioned at Williamstown Victoria Naval Depot, and her two anchors are preserved for public display at Williamstown. An active demand for a share of the guns from various towns in the State. Ballarat received four (4) guns, Bendigo and Castlemaine two (2) each, while one has been given to each of the following towns: - Ararat, Tarnagulla, Hamilton, Bacchus Marsh, Echuca and Geelong. Collection of Lansell related documents: a. Copy of photograph - Lansell's Big 180 Victoria Hill - early 1870s - New Chum Hill in background. B. Lansell Estate mines - compiled from the annual report of the Hon Minister of Mines for Victoria, 1906. A listing of the George Lansell Mining Company interests at the time of his death. These were, New Moon Co, N.L., Clarence, New Prince Of Wales Co. N.L., Virginia G. M. Co., Catherine Reef United Co N.L., Great Northern Co N.L., Williams United, McDuff Amalgamated Co, South Mungo Co, South Prince Of Wales Consolidated, Constellation Co. Golden Pyke Co, Johnson's Reef Extended Company, Golden Age Co., Princess Dagmar Co, New St Mungo Co, Johnson's Reef Co, North Johnson's Co, Collman and Tacchi Co, Confidence Extended Co, G. Lansell Sandhurst Mines, Pearl Co., Windmill Hill Co., United Hustlers and Redan, Koch's Pioneer Co., Hercules and Energetic Co., Lansell's Comet, Cornish United Co., Ironbark Co., Hustler's Reef Co., and No. 1 Lansell's 83, Carlisle Co., Great Extended Hustler's Co., Victoria Consolidated Co., Great Central Victoria Co., Victoria Quartz Co., Victory and Pandora , Lansell's Big 180, Tambour Major, New Chum and Victoria Co., Garden Gully United Co., G. Lansell, Lansell's 222, Lazarus Co., Sea Amalgamated Co., Hustler's Royal Reserve Co., Horwood and Burrowe's Co., New Chum Consolidated Co., G Lansell's Sheepshead, Gariboldi Co., Londonderry Co., Shamrock Co., Great Britain Co., Fortuna Hustler's Co., Eureka Extended Co., G. Lansell's G.V.L., New Red White and Blue Consolidated, Great Southern Co., Lansell's Concord Mines, True Blue Co., G. G. Consolidated Co., Extended Red White and Blue Co., Great Columbian, Sedgwick and New Birthday. Also, a listing: ''Among the biggest yields to ate (sic) (date?) in ozs or Pounds were''; New Moon.Co. N.L. 180,087 ounces, Clarence £303,932, Catherine Reef United N.L. £762,815, Great Northern Co Ltd £394,525, Johnson's Reef Co 277,320ounces, Windmill Hill Co. 113,842ounces, Hustler's Reef Co. And No.1 1,144,923ounces, Carlisle Co 307,835ounces, Great Extended Hustlers Co £1,038,125, Garden Gully United Co. £1,653,900, Great Southern 97,752ounces, New Chum Consolidated 89,526ounces. This part (b) has handwritten inscription ''compiled by J Sarvaas MCE(??) Certified Mining Surveyor; 22/8/06''; c. Copy of Deed dated Dec 1886 between George Lansell, Wooten Lansell and the Bank of New South Wales relating to a wall and windows and openings etc etc. (3 pages of legalese!!!!!). Also, a (related?) page copy of a Grant -by purchase to the Bank of New South Wales with a date of August 1855 on it ''Enrolled in the Office of the Registrar of the Supreme Court of the Colony of Victoria - signed by Acting Registrar.document, gold, mines -
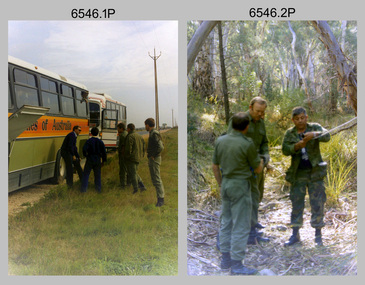 Bendigo Military Museum
Photograph - 4th Field Survey Squadron Adventurous Training Mount Remarkable National Park, SA, 4th Field Survey Squadron Adventurous Training, Mount Remarkable National Park, SA, 1987
This is a set of 42 photographs of 4th Field Survey Squadron undergoing adventurous training at Mount Remarkable National Park, South Australia in May 1987. It is evident the training focussed on teamwork, leadership, abseiling, rock climbing, field craft and living off the land survival skills. Elements from units of the Army Reserve also participated in the training. Refer to items 6547.40P and 6548.14P for additional photographs taken during the adventurous training.This is a set of 42 photographs of 4th Field Survey Squadron undergoing adventurous training at Mount Remarkable National Park in May 1987. The colour photographs are on 35mm negative film and are part of the Army Survey Regiment’s Collection. The photographs were scanned at 96 dpi. .1) - Photo, colour, 1987. L to R: unidentified bus drivers, CAPT Danny Galbraith, unidentified, SGT Stu Symonds. .2) - Photo, colour, 1987. L to R: OC MAJ Peter Cates, SSM WO1 Bill Grigg, unidentified exchange officer. .3) - Photo, colour, 1987. Squadron briefing. .4) - Photo, colour, 1987. Endurance march L to R: unidentified (x4), LCPL Peter McCurdy, unidentified (x3), SPR Damien Killeen, unidentified. .5) - Photo, colour, 1987. Unidentified personnel taking a break during or at end Endurance march. SPR John Keely at far right. .6) - Photo, colour, 1987. Mount Remarkable National Park terrain. .7) - Photo, colour, 1987. Mount Remarkable National Park terrain. SGT Peter Imeson. .8) - Photo, colour, 1987. Mount Remarkable National Park terrain. CPL Jeff Prince. .9) - Photo, colour, 1987. Camp activities. CPL Dave Irving. .10) - Photo, colour, 1987. Camp activities. L to R: unidentified, SPR Perry Langeberg, unidentified (x2), CPL Neale ‘Tex’ Houston, SPR Steve Ellis. .11) to .13) - Photo, colour, 1987. Mount Remarkable National Park terrain. .14) - Photo, colour, 1987. Camp activities. Unidentified. .15) - Photo, colour, 1987. Camp activities. L to R: PTE P. Simpson, SPR Steve Ellis. .16) - Photo, colour, 1987. Hootchie set-up. Unidentified personnel. .17) - Photo, colour, 1987. Hootchie set-up. .18) - Photo, colour, 1987. Camp activities. Unidentified. .19) - Photo, colour, 1987. Camp activities. L to R: SPR Todd Hayley, CPL Jamie McRae. .20) - Photo, colour, 1987. Camp activities. L to R: unidentified, CPL Neale ‘Tex’ Houston, unidentified. .21) - Photo, colour, 1987. Camp activities. L to R: CPL Dave Longbottom, WO2 Brett ‘Dutchy’ Van Leeuwen. .22) - Photo, colour, 1987. Hootchie set-up. .23) - Photo, colour, 1987. Hootchie set-up. CPL Dave Irving. .24) - Photo, colour, 1987. Mount Remarkable National Park terrain. Possibly OC MAJ Peter Cates. .25) - Photo, colour, 1987. Mount Remarkable National Park terrain. .26) & .27) - Photo, colour, 1987. Hootchie set-up. .28) - Photo, colour, 1987. Camp activities. CPL Roger Graf. .29) - Photo, colour, 1987. Camp activities. Possibly water sterilisation. .30) - Photo, colour, 1987. Camp set-up. Unidentified. .31) - Photo, colour, 1987. Hootchie interior. .32) - Photo, colour, 1987. CAPT Danny Galbraith. .33) - Photo, colour, 1987. Camp activities. L to R: LCPL Peter Tuddenham, SPR Todd Hayley, CPL Dave Longbottom, CPL John Ratcliffe, CPL Dave Irving. .34) - Photo, colour, 1987. Hootchie set-up. .35) - Photo, colour, 1987. Hootchie set-up. CPL Peter Hardy. .36) - Photo, colour, 1987. Camp activities. L to R: unidentified (x2), CPL Peter Hardy, LT Greg Oaten. .37) - Photo, colour, 1987. Camp activities. L to R: SPR Shaun Hynes, LT Geoff ‘GT’ Ford, SPR Bruce Graham, unidentified (x2). .38) - Photo, colour, 1987. Camp activities. L to R: SPR Shaun Hynes, LT Geoff ‘GT’ Ford, unidentified, SPR Bruce Graham, in background - CPL Dave Irving. .39) - Photo, colour, 1987. Hootchie set-up. Unidentified. .40) - Photo, colour, 1987. Camp activities. WO2 Brett ‘Dutchy’ Van Leeuwen. .41) & .42) - Photo, colour, 1987. Camp activities. Results from foraging the forest for food..1P to .42P – There are no personnel identified. ‘1987 ADV TRAINING’ annotated on negatives sleeve.royal australian survey corps, rasvy, 4 fd svy sqn -
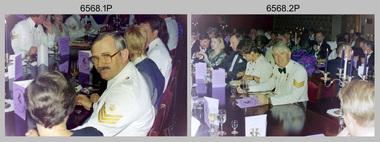 Bendigo Military Museum
Photograph - 4th Field Survey Squadron Corps Day Formal Dinner, Keswick Barracks, Adelaide SA, 1994
This is a set of photographs of a 4th Field Survey Squadron Officers, Warrant Officers and Sergeants Corps Day Formal Dinner held at Keswick Barracks, Adelaide SA in July 1994. It is apparent there were visiting personnel from the Army Survey Regiment and other unidentified units. This is a set of 26 photographs of a 4th Field Survey Squadron Officer, Warrant Officer and Sergeant’s Formal Dinner held at Keswick Barracks, Adelaide SA in July 1994. The colour photographs are on 35mm negative film and are part of the Army Survey Regiment’s Collection. The photographs were scanned at 96 dpi. .1) - Photo, colour, 1994. Facing camera – SSGT Brian Collings. .2) - Photo, colour, 1994. L to R: facing camera – John Jones, Sharon Jones, Peter ‘Jack’ Elverd, Julie Elverd, SGT Martin Evans, remainder unidentified. .3) - Photo, colour, 1994. Unidentified guests. .4) - Photo, colour, 1994. L to R: facing camera – unidentified (x2), SSGT A. Simcock, SGT Peter Hardy, unidentified, MAJ Bob Williams. .5) - Photo, colour, 1994. L to R: facing camera – unidentified (x2), SSGT Pat ‘Fuji’ Drover, unidentified guests (x2), Ian Belmont, unidentified. .6) - Photo, colour, 1994. L to R: facing camera – unidentified (x4), Allan Adsett, Judyne Adsett, unidentified, LT Andrew Caudle, unidentified. .7) - Photo, colour, 1994. L to R: facing camera – unidentified (x7), Allan Adsett. SPR Chris Pearse (steward), Eddie Jacobs (in background). .8) - Photo, colour, 1994. John Zuringer (flower in lapel) remainder unidentified. .9) - Photo, colour, 1994. L to R: facing camera – unidentified, LTCOL George Ricketts (Ret), remainder unidentified. .10) - Photo, colour, 1994. Head table facing camera L to R: unidentified (x2), OC MAJ Peter Demaine, unidentified, WO2 Peter Hammer, SSGT Lynn Johnson, DSVY-A COL Simon Lemon. .11) - Photo, colour, 1994. Food preparation. L to R: LCPL Mitch Oake, unidentified. .12) - Photo, colour, 1994. Dixie bashing. L to R: CPL Brett Parkin, remainder unidentified. .13) - Photo, colour, 1994. Locker art. .14) - Photo, colour, 1994. Dixie bashing. SPR Mark McInerney. .15) - Photo, colour, 1994. L to R: facing camera – unidentified, Bob Williams, unidentified (x3), SGT Mark Donnelly (in background). .16) - Photo, colour, 1994. L to R: facing away from camera – LTCOL George Ricketts (Ret), unidentified. Facing camera - unidentified (x9), Allan Adsett, Judyne Adsett, unidentified, LT Andrew Caudle, unidentified(x2). .17) - Photo, colour, 1994. L to R: facing away from camera – LTCOL George Ricketts (Ret), unidentified. Facing camera - unidentified (x9), Allan Adsett, Judyne Adsett. .18) - Photo, colour, 1994. Head table facing camera L to R: SSGT Lynn Johnson (edge of photo), DSVY-A COL Simon Lemon, unidentified, CAPT Chris Topovsek, unidentified in foreground, WO1 Stevo Hinic. .19) - Photo, colour, 1994. Head table facing camera L to R: unidentified, OC MAJ Peter Demaine, unidentified, WO2 Peter Hammer, unidentified (x2) in foreground. .20) - Photo, colour, 1994. L to R: facing camera – unidentified (x4), WO1 Mick Sarson, unidentified (x2). .21) - Photo, colour, 1994. L to R: facing camera – unidentified, SSGT Brian Collings, unidentified, WO2 Roger Rees, unidentified (x3), CAPT Tony Stephens. .22) - Photo, colour, 1994. L to R: facing camera – unidentified, SSGT A. Simcock. .23) - Photo, colour, 1994. L to R: facing camera – unidentified, SSGT A. Simcock, SGT Peter Hardy. .24) - Photo, colour, 1994. L to R: facing camera – Lorraine Talbot-Smith (edge of photo), WO2 Ken Talbot-Smith, unidentified, WO2 Simon ‘Andy’ Capp, unidentified, Eddie Jacobs. .25) - Photo, colour, 1994. L to R: facing camera – unidentified, SGT H. Evertz, Pat Belmont, Ian Belmont. .26) - Photo, colour, 1994. L to R: facing camera – unidentified, CAPT Tony Stephens, unidentified..1P to .26P – There are no personnel identified. ‘1994 CORPS BIRTHDAY’ annotated on negatives sleeve.royal australian survey corps, rasvy, 4 fd svy sqn -
 Melbourne Tram Museum
Album - Photo Album, John Etkins, Ray Marsh, 1990's
Photo Album - 48 sheets bound with a white circular metal/plastic spiral bound within a heavy duty cardboard cover, with glued cover pages, plastic covered with an index sheet. Allows for three photographs per page. Not known whether the plastic envelope for each photograph is of archival quality. No Manufacture detail, though has a bar code on the bottom left hand corner of the rear cover. Cover is a reproduction from a painted art piece. Listing of photographs given on htd1800-RayMarshalbum.pdf Dates given when written on the rear of the photograph. Compiled by John Etkins from photographs given to him by Ray Marsh. 1990's to 1993 generally. Page Tram/s Notes – dates given when on rear of photograph. 1 226 Loading passengers – ex MMTB Annual Report? 1 957 City Circle 1 “hands off our trams” protest march 2 2100, 231 South Melbourne Depot – 10-4-1993 2 676 And many others – Hawthorn Depot 2 217 Princes Bridges 3 380, 104 St Kilda Road 3 106, 104 Essendon Depot 3 431 As a W1 4 1011 Fresh fruit tram, Preston Depot 6-12-1992, 4 824 Day in Day out, Brunswick and Victoria Parade 29-4-1993 4 722 Art tram 5 ? Advert tram – Imperial China 5 237 Stubbsy tram – TrippleM? 6 856 City Circle – with gas and fuel building – 31-7-1994 6 925 City Circle - with gas and fuel building – 31-7-1994 6 728 City Circle – 10-8-1994 7 246 Navy tram x three pics – July 1992 8 ? Gold tram advertising Georges 8 990 Advertising Telstra– 29-4-1993 8 749 Art tram? 9 990 NRMA - 1-3-1994 9 727, 215 Public Transport 9 920 Advert tram with a picket fence 10 Bendigo 21 Preston Workshops 11-3-1993 10 774? W5 being rebuilt at Preston – 21-10-1991 11 ? Bogie cable trailer at Preston – 29-4-1993 11 922 Interior view of a tram – being modernised – 11-3-1993 11 922 Preston Workshops 29-4-1993 12 1018 Workcare tram at Preston 1994 – 11-8-1994 12 774 Preston Workshops – 20-12-1993 12 8 Preston Workshops – 1-10-1992 13 380 Preston Workshops 13 8 Preston Workshops 13 20, 8 Preston Workshops 14 721 Preston Workshops 20-12-1993 14 ? Tramways painted artist tram featuring a driver and workshop 14 Traverser Preston Workshops 15 2110, 2106 Preston Workshops 15 ? Preston Workshops 15 2130 Interior Preston Workshops 20-12-1993 16 Set of three pics Elizabeth St floods – 17-2-1972 17 Set of three pics Elizabeth St floods – 17-2-1972 18 676 Turning into Swanston St from Batman Ave 18 676 Kew Depot – 10-11-1991 18 237, 676, 611 Kew Depot – 10-11-1991 19 214, 676 South Melbourne Depot – Kingsway 19 217 Spencer St 19 214 Advertising Kew Depot Open Day -8-12-1991 20 231, 676 Advertising Kew Depot Open Day -8-12-1991 20 Zoo tram, 256 Outside Kew Depot 20 214 Hawthorn Open Day with band 21 Zoo tram x 3 pics And horses, Kew Open day 22 231, 431 Kew Depot 22 892, 214 Kew Depot 75 years, Postcard – 1991 22 282 Kew Depot – with the name Monique on the tram and a lady standing alongside 23 238, 233 Kew Depot 23 236, 892, 282 Kew Depot – 25-4-1992 23 232, 236, 282 Kew Depot 24 2112 Port Melbourne line – with long grass – 11-4-1993 24 469, 2037, ? 2015 South Melbourne Depot 24 1018 or 976? Advertising a PTC Open Day – 20-10-1991 – In Swanston St - see Reg Item 1845 25 250 Bourke St 25 2100 Running into Preston Workshops 25 282, 1003 Collins St in the rain 26 Logo PMTT 26 Point cover With P&MTT cast into the cover 26 Foundation Stone Person reblocking in gold, a PMTT Foundation Stone 27 Logo Tramway Board 27 Logo MMTB logo 27 Logo Footscray Tramways Trust 28 217 And 2’gauge W2 – South Melbourne Depot – 20-10-1991 28 164 Somewhere? 28 1018 Advert tram – “Moro”, Preston flyover 29 V214 x 3 pics Kew Depot 30 611 Whitehorse Road, Balwyn 5-10-1991 30 976 x 2 pics Advert tram – have a red instead 31 610 Malvern Depot 31 138 (max tract) Flinders St 31 138 (max tract) Bourke into Spencer 32 844 Victoria Parade with R10 behind 32 264 With a TV interview being undertaken 32 2066 Elizabeth St – 29-4-1993 33 255 x 2 pics Derailed at Kew Depot 33 253 Derailed outside the Beehive Hotel 34 214, 892, 611 Re-enactment of Victoria Bridge to Esplanade service – 10-11-91 34 726 Art tram? – Swanston St with overhead trucks in background 34 10W Reblocking scrubber car at Brunswick Depot 1999 35 2085 At Preston workshops over an inspection track section 35 731 St Georges Road, road being rebuilt – Nov. 1991 35 Preston Jtn Junction at Workshops being relaid 36 1003 St Georges Road, Nov. 1991 trackworks 36 St Georges Rd Track being rebuilt – Nov. 1991 has temp track cross over 36 Victoria St Victoria St being reconstructed 6-9-1992 37 East Burwood Extension works – 18-2-1993 37 East Burwood Re-building crossover – 18-2-1993 37 Victoria St Victoria St being reconstructed 6-9-1992 38 19W, 16W Bylands – 5-12-1993 38 R10 Kew Depot 38 Workers Kew Depot pushing on a post 39 R10 R10 towing a B class tram- Royal Parade? 39 11W, 10W? South Melbourne Depot 39 Overhead Overhead truck at Kew Depot 40 Kew Depot Demolition works opposite depot 40 613? Malvern Depot on special tram 40 256 zoo tram Royal Park tram at Kew Depot 41 B class Bundoora line 1993 41 231, 611 Kew depot 75th anniversary tram 41 469, 287 Kew depot 42 510 Spring St into Bourke St – 28-4-1993. “42nd street promotion. 42 153 High St Northcote, Bundoora 42 611 Kew Depot, Nov. 1991 43 195? Simpson St siding – 25-4-1993 – 7 trams in all 43 646 Route 12, with fire station in background – Gisborne and Victoria 43 961 Burke Road, Camberwell, 10-8-1994 44 760 Art tram 44 938 Sam the tram, Flinders St 44 1014 Gilbert Road, West Preston, June 1994, advert for AGC 45 965 Daimaru advert tram, Swanston St 45 1018 Express post advert tram, Swanston St. 45 1024 Advert – lego exhibition – Swanston St 46 104 Camberwell depot 46 611 Looking towards driver’s controls from interior. 46 W1 Interior photo showing tip over seats 47 Cable car Interior photo – could be zoo tram 47 510 Interior, 28-4-1993 47 214 Kew Depot, night shot, Oct. 1991 48 246, 237 Kew depot, 13-9-1993 – Stubbsy and Energy Victoria advert 48 246, 231, 237 Kew depot, Navy, 75th anniversary of Kew and Fox Fm advert 48 2014, 2072 South Melbourne – tt line? Advert tram 49 59 And six other trams in front of Preston Workshops 49 1024 MMTB Christmas Tram, 1970 49 2001 Camberwell Depot 50 725 Preston depot area – tram has a red upper half 50 725 South Melbourne depot – now has Xmas decorations 50 1026 Bourke St, Christmas 6-12-1993 51 933 Victoria Parade shunt and other A class tram – Autumn 51 829 Art tram 51 39 Advert tram – Crime prevention 52 Connie Connie at night = has jeans on 52 1?? Has a MET inspector standing in front of number – Latrobe uni tram 52 611 Kew Depot 53 237 Fox FM Black Thunder tram at Kew Depot, August 1992 53 237, 611, 892 Victoria Bridge re-enactment – 10-11-1991 53 237 At Kew depot with 4 people, including Hugh Waldron 53 442, 10W South Melbourne Restaurant tram and works car 53 W2 At Wattle Park 53 School art Photo of students holding artwork on the zoo tram 256 at Kew 54 138 And many others 54 469 Launch of the Melbourne Tram by the PTC 54 School art Photo of students holding artwork on the zoo tram 256 at Kew 55 B2 Elizabeth St terminus, Christmas 1994 55 8 Z8 Swanston St, April 1993 55 504 Clifton Pugh – Preston Workshops 56 138, 180, 214 Hawthorn Depot display 56 650, 510 Hawthorn Depot 56 469 Camberwell 57 568 Bridge Road Richmond by cable tram depot 57 ? Advert tram – Falls Creek 57 995 Malvern Road, 18-5-1992 58 457, 217 etc Swanston St display 58 231, 611 Kew 75th Anniversary 58 682 Artist tram at Malvern Depot – 18-5-1992 59 1018 Country Road advert tram 59 8 Z class – decorated tram – Essendon Depot 59 947 Metland Safety Express – safety tram – Kew depot 60 101 x 2pics Decorated for RAAF 70th Anniversary 60 2082 Near East Preston Depot, with destination “Next Stop Mill Park” 61 475 After sale and disposal 61 585 After sale and disposal 61 651 After sale and disposal – Diamond Creek – 9-8-1994 62 386 After sale and disposal – Sunbury 62 590 After sale and disposal – Hall ACT 62 476 After sale and disposal – Kinglake 63 11W Bundoora Extension – track being opened 63 947 Metland Safety Express – safety tram – Kew depot 63 Model 2,3 2’ gauge model trams 64 Model 2 Ditto 64 250 After sale and disposal 64 293 After sale and disposal – Diamond Ck – 9-8-1994 65 246, 231, 237 Kew depot, Navy, 75th anniversary of Kew and Fox Fm advert 65 1002 Advert tram – Salvation Army 65 231, 29 Kew Depot 66 246, 231, 237 Kew depot, Navy, 75th anniversary of Kew and Fox Fm advert 66 646, 935, 1002 Kew depot 66 220, 60 Preston Workshops? 67 851, 814 Malvern Depot 3-9-1992 67 726 Malvern Rd at Glenferrie Road – 18-5-1992 67 237, 133 Victoria Parade 1996 68 814 and others Interior Malvern Depot – 18-5-1992 68 231 75th Kew depot anniversary at depot 68 231 75th Kew depot anniversary at depot 69 1024 Malvern Depot 10-11-1991 69 1011 Advert tram Melbourne City Toyota 69 106, 180 Swanston St 70 190, 568 Camberwell Depot 70 431 Flinders St – tram event 70 20, 138 Camberwell Depot 71 431 Flinders St – tram event 71 237 Fox FM Thunder Tram 71 2057, 2014 Elizabeth St, Vic Market 29-4-1993 72 676, 611, 892 Victoria Bridge re-enactment – 10-11-1991 72 Ceremony Victoria Bridge – mayor and others event 72 214 214 on the bridge 73 164 Lygon St – former outer circle line level crossing in view 73 841 Swanston Walk 29-4-1993 74 821 St Georges Road, April 1993 74 431, 231 Victoria Parade 74 217, 676 Passing Camberwell Depot 75 Oporto 018 Clarendon St 6-3-2003 75 3007 Albert Park – 7-3-2003 75 3001, 018, 3502 Docklands – 10-3-2003 76 Oporto 018 Docklands – 16-1-2003 76 Oporto 018 Flinders St 7-3-2003 76 3502 Swanston St at Flinders St -8-3-2003 77 16 Kew Depot, Jan 1991 77 112, 110 Bundoora 4-9-1992 77 738 Camberwell Feb 1991 78 1011 Thornbury Jan 1991 advert for City Toyota 78 101 Bundoora – RAAF tram 4-9-1992 78 814 Art tram – Swanston St August 1992 79 1024, 469, Z3 Preston Workshops – 469 as the Melbourne Tram – 9-9-1992 79 961 Malvern Depot 3-9-1992 79 242 Single line working in Victoria St 6-9-1992 80 781 Thornbury, the hump, Preston Workshops Jan 1991 80 2104 Preston Workshops 9-9-1992 80 2100 Launch, Preston Workshops 9-9-1992 81 5W + 1A 5 x W at Kew Depot 3-2-1991 81 676 Kew Depot 21-2-1991 81 873, 2016 Brunswick depot 2-3-1991 82 231 Kew Depot Yard – 21-1-1991 82 157, 158 Brunswick Depot – 2-3-1991 82 2057, 873, 158 Brunswick Depot – 2-3-1991 83 802 Art Tram - Franklin St from the signal box 2-3-1991 83 990 990 Evian advert tram, Franklin St signal box 2-3-1991 83 920 GIO Advert Tram with Bushels tea and Yellow Pages? Adverts 84 721 Art Tram, Franklin St signal box 84 976 St Georges Road, Jan 1991 – advert tram Capital society 84 731 St Georges Road, Jan. 1991 Art tram 85 10W Victoria Parade, Brunswick St, 1/3/1991 85 10W, 9 or 11W South Melbourne depot 85 10W Bundoora Terminus 4-2-1991 86 11W City Baths 86 10, 16 Camberwell Depot 6-12-1990 86 944 Glenhuntly Depot 18-2-1991 87 2011 Spring St – Princess Theatre, March 1990 87 294, 239, 277, 243, 259, 280 Kew Depot 87 296 Kew Depot 88 1015, 16 Batman Ave 19-1-1991 88 963, 948, 935, 996, 892 Kew Depot 3-2-1991 88 Victoria St Victoria St Richmond Reconstruction 6-2-1992 89 1014, 990 Batman Ave 19-1-1991 (Image added i5 and rear view added 23-12-2018, scanned for Dale Budd. 89 920 920 – GIO advert tram, 760 art Tram Collins at Spencer 17-10-1990 89 610, 611 Kooyong Station level crossing 30-12-1990 90 95 Royal Park, 15-2-1991 90 2057, 873, 158 Brunswick Depot – 2-3-1991 90 10 Camberwell Depot 6-12-1990 91 Bendigo 44 In Prahran and Malvern Tramways Trust Colours 1986 –Black and white photo. Listed 5-11-2016See note page 1 and on image 3trams, tramways, album, photo album, tramcars, the met, yarra trams, kew depot, brunswick depot, advertising trams, transporting art, preston depot, hawthorn, bundoora, st georges rd, victoria st, camberwell depot, tram r10, 8, 10w, 10, 11w, 16, 16w, oporto 018, 19w, 20, bendigo 21, 29, 39, bendigo 44, 59, 60, 95, 101, 104, 106, 110, 112, 133, 138, 153, 157, 158, 164, 180, 190, 195?, 214, 215, 217, 220, 226, 231, 232, 233, 236, 237, 238, 239, 242, 243, 246, 250, 253, 255, 256, 259, 264, 277, 280, 282, 287, 293, 294, 296, 380, 386, 431, 442, 457, 469, 475, 476, 504, 510, 568, 585, 590, 610, 611, 613?, 646, 651, 676, 682, 721, 722, 725, 726, 727, 728, 731, 738, 749, 760, 774, 781, 802, 814, 821, 824, 829, 841, 844, 851, 856, 873, 892, 920, 922, 925, 933, 935, 938, 944, 947, 948, 957, 961, 963, 965, 976, 990, 995, 996, 1002, 1003, 1011, 1014, 1015, 1018, 1024, 1026, 2001, 2011, 2014, 2015, 2016, 2037, 2057, 2057, 2066, 2072, 2082, 2085, 2100, 2104, 2106, 2112, 2130, 3001, 3007, 3502 -
Federation University Historical Collection
Magazine - Emagazine, Fedpress Magazine, 2016-2019
Formerly known as Hotch Potch, FedPress is the student publication of Federation University Australia. FedPress is a space for students to showcase their written and visual talents. The editorial team aim to inform, inspire, and entertain. We are looking for a range of different creative individuals — journalists, reviewers, poets, designers, artists, and photographers — to submit content. FedPress Magazine prints four issues a year and is distributed across FedUni's Ballarat, Wimmera and Gippsland campuses. PDFs of the Federation University Magazine 'fedpress'. Hardcopy of the following years: Issue No 3, October 2014 (Rianh Silvertree, Mathew Lambrou, India McGee, Kayla Elizabeth Stone, Amber Dance, Australian University Games,Amphipipolis Tomb) Issue 4, February 2015 (Kayla Elizabeth Stone. Clubs and Societies, Monash University Gippsland Student Union, Federation University Football Club, Student Senate, Student Connect, Kaitlyn Ashmore, Issue 5, April 2015 (Ellen Sabo, Sexual Education, Gippsland Campus, Monash Campus, Sammy Desai, Zach Mullane, Feduni Living Kakoda Trek) Issue 6, 2015 (Southern University Games, Student Senate, Memories of War Project, Survivors of Suicide, Gippsland Campus, Lucinda Horrocks, Exam Information For Students, Tania McMullenNational Student Leadership Workshop, Mining Games, AUSIMM, The History of MMO, FEdUnied Soccer) Issue 7, July 2015 (PASS - Peer Assisted Study Sessions, Mad Swan Productions, Student Senate, Adam Bignold, Rainh Silvertree, Rebecca Fletcher, Pietro Angeli) Issue 9, October 2015 (Student Senate, Jeannie King, Australian Space Agency, S. Hooley, Rebecca Fletcher, Animal Rights, Breanna Alexander, Pietro Angeli, Jody Dontje, Amanda Mill, Frank Gartlan. Joel King) Issue No 10, 2016 (Unibar, Stone Cutters, Australian Hospitality, Jogy Dontje, Jess Kelly, Pietro Angeli, Getting Through Semester One, Online Student understanding, Liana Skewes, Brianna MacDonald, Student Services, Student Senate, S. Hooley, HECS Help, Ashleigh Dyer, Six things that can cost you easy marks, Laura McLachlan, Surviving grief, Theahna CoburnTenneill Pearl, Rochelle Jardine, Zach Mullane, Dakota Richards, Survival Guide, Scarlette Baum) Issue No 11, May 2016 (Rebecca Fletcher, Joshua Paddon, Hooliganism, Catherine Elliott, Fedpress School of Rock, Dakota Richards, Zach Mullane, Scalette Baum, Clubs, Societies, Sport, FedUni Ultimate Frisbie Club, Geolgoy, Dean DiQuinzio, FedUni Geology Society, Sebastian Wolfe) Issue No 12, 2016 (Crows, Joshua Paddon, Sarah McLean, Fandom, Learn Another Language, Laura McLachlan, Planes, Pietro Angel, Cover Co, mpetition, Megan Corder, Jess Kelly, The Secret Life of Post-Grad Students, Cale Hellyer, What I hate about Facebook, Damian Brown, National Student Vounteer Week, Premnath Chakarvarty, Selin Kasif, Brendan Caffrey, Senate Six, Fed United, Awards, Ultimate Frisbee, Ashleigh Dyer, Cassandra Lovett, Rochelle Jardine, Dakota Richards, Freya Fogliani) Issue No 13, 2016 Issue No. 14, February 2017 Issue No. 15, May 2017 (James Charlton, Rebecca Fletcher, Timothy Kirkham, Mohammad Sami Baardarani, Lajan Maharjan, Jennifer Pont, Kate Williams, Damian Brown, Matthew James, Zoe Ormiston, Freya Fogliani, Myles Hema, Jess Powell) Issue No. 17, October 2017 (Jack Barnes, Damian, Syed Zain Ali, Molly Irvine, Rebecca Fletcher) Issue No. 18, February 2018 (Submission Dates, Guidance for the Shell-Shocked Graduates, Pills, Shark, How to be a Writer, Climate Summit) Issue No. 21, October 2018 (Bianca Bedford, Kelsey Knight, Laura Benney, Rainbow Collective, Smartphone, Sarah McLean, Monique Stephens, Clare Hartigan, Liam Carter) Issue No. 22, March (2018) 2019 (Elizabeth McCracken, Troy Anthony Platt, Liam Carter, O.R. Brayne, Dakota Powell, Elizabeth McCracken, Dan Schweinzer, Jordyn Presley, Sarah McLean, Bianca Bedford, Bronwyn Nel, Beck Small, Tara Parada) Issue No. 23, July 2019 (Beck Small, Jasmyne Tziziras, Jodie Flower-Russell, Maxwell Waterhouse, Dhogaluxmi Chemen, Alisha Hendrick, Elizabeth McCraken, Trent Bowes, Will La Grue, Laura Benney, Sir Troy Anthony Platt, Harrod Boadie, Kathryn Drum, Jordyn Presley, Bianca Bedford, Bronwyn Nel, Olly Brayne, Cherise Oosthuizen, Chloe Waddell, Nyalat Pel Kun, Autism Issue No 25 (April 2021) (Jesse Noonan-Wade, Laura Wilson, Chloe Hopkins, Jordyn Presley, Ruby Sait, Lauren Johnson, Kymberley Loats, Darren Rout, Maddison Gill, Baklava, Covid-19 pandemic, exercisefedpress, brad paisley, selin kasif, dakota richards, emma gamble, damian brown, clare hartigan, tanya bird, freya fogliani, scarlett baum, amanda mill, jess powell, feduni quidditch, rebecca fletcher, bridget o'brien, lisa tops, jordyn presley, jack barnes, emma-lee winters, brook forrest, bianca bedford, jessica rae, laura wilson, laura benney, monique stephens, kelsey knight, sarah mclean, liam carter, bronwynn nel, olly brayne, cherise oosthuizen, chloe waddell, nyalet pel kun, trent bowes, elizabeth mccracken, beck small, jasmine tzaitziras, jodi flower-russell, will la grue, laura benny, maxwell waterhouse, sir troy anthony platt, dhogaluxmi chemen, jarrod boadle, alisha hendrick, autism -
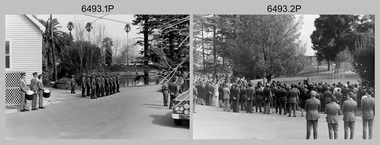 Bendigo Military Museum
Photograph - Military Funeral for SSGT Peter Dew, Army Survey Regiment, Fortuna, Bendigo, 1977
This is a set of 29 black & white photographs of troops from the Army Headquarters Survey Regiment undertaking ceremonial drill at the military funeral for SSGT Peter Dew on the 28th of September 1977. The location of the funeral service was at Fortuna, Bendigo. He was buried at Bendigo Cemetery in Quarry Hill. Peter Dew died in a tragic accident at home. He was fondly remembered as one of Lithographic Squadron’s colourful personalities. See item 6243.7P for photos of Peter Dew at work in Lithographic Squadron. The "Super Animal of the Year" Peter Dew Memorial Award was an award presented to a member of the squadron for a crude act. To view a photo of this award, refer to item 6230 of the Victorian Collections. Some photos in this set were also printed on photo paper and catalogued under item 6335.5P.This is a set of 29 black & white photographs of troops from the Army Headquarters Survey Regiment undertaking ceremonial drill at the military funeral for SSGT Peter held in 1977. The photographs are on 35mm negative film and scanned at 96 dpi. They are part of the Army Survey Regiment’s Collection. .1) - Photo, black & white, 1977. Rifle party commander: CPL Greg Kidman. Right file right marker: SPR Russ Mollenhauer, unidentified soldiers and civilians. .2) - Photo, black & white, 1977. Unidentified soldiers and civilians. .3) - Photo, black & white, 1977. R to L: SSGT Alan Adsett, WO2 John McCulloch, SGT Graeme Jeffers in foreground holding hats. Remainder unidentified. .4) to .6) - Photo, black & white, 1977. Unidentified soldiers and civilians. R to L: SSGT Alan Adsett, WO2 John McCulloch, unidentified soldiers and civilians. .7) - Photo, black & white, 1977. Pall bearers position the coffin onto the gun carriage. Rifle party commander: CPL Greg Kidman. Right file right marker: SPR Russ Mollenhauer. Seen in background to the right of pall bearers: L to R: CPL Ian Belmont, unidentified, facing away- PTE Le-anne (Smallshaw) Shirley, CPL Di Chalmers, unidentified soldiers and civilians. .8) - Photo, black & white, 1977. Rifle party rear rank right marker: Russ Mollenhauer. Front rank rifle party commander next to right marker: Greg Kidman. Pall bearers in front of vehicle L to R: Dave Miles, Dick Barwald. Remainder unidentified. .9) - Photo, black & white, 1977. In position at beginning of funeral procession, unidentified soldiers and civilians. .10) & .11) - Photo, black & white, 1977. Rifle party commander: CPL Greg Kidman and the rifle party slow march past the front of Fortuna Villa. .12) - Photo, black & white, 1977. The rifle party slow march past the front of Fortuna Villa. Rifle party commander: Greg Kidman. Right file front to back: SPR Russ Mollenhauer, SPR Peter Breukel, SPR Bill Jones, SPR John Anderson. Remainder unidentified. Left file front to back: SPR Jeff Willey, unidentified, SPR Rhys De Laine, SPR Frank Lenane, SPR Josh Degroot, SPR Gary Drummond. .13) - Photo, black & white, 1977. The rifle party slow march past the front of Fortuna Villa. Rifle party commander: Greg Kidman. Right file: SPR Russ Mollenhauer, Left file: SPR Jeff Willey, remainder unidentified. .14) - Photo, black & white, 1977. The rifle party march at quick time towards the entry gate. .15) - Photo, black & white, 1977. The rifle party march at quick time past the front of Fortuna Villa. Rifle party commander: Greg Kidman. Right file: SPR Russ Mollenhauer, Left file: SPR Jeff Willey, remainder unidentified. .16) - Photo, black & white, 1977. The procession marches at quick time towards the entry gate. .17) - Photo, black & white, 1977. The procession departs the entry gate. .18) to .21)- Photo, black & white, 1977. The procession passes through the cemetery. .22) - Photo, black & white, 1977. The procession passes through the cemetery. RSM Wo1 Aub Harvey at far left. Remainder unidentified. .23) - Photo, black & white, 1977. Pallbearers carry Peter Dew’s coffin to the grave site. .24) - Photo, black & white, 1977. The rifle party in position at ‘rest on arms reverse’. .25) - Photo, black & white, 1977. Service at grave site. Left of minister: SGT Alan Toogood. On right of tree L to R: WO2 Max Neil, WO2 Bob Hayden, WO1 Dave Malligan, PTE Le-Anne (Smallshaw) Shirley, CAPT Stan Vote. Remainder unidentified. .26) - Photo, black & white, 1977. The rifle party fire volleys. .27) - Photo, black & white, 1977. The rifle party presents arms. .28) - Photo, black & white, 1977. Service at grave site. SGT Greg Francis-Wright 4th from right. .29) - Photo, black & white, 1977. Outside Litho’s proofing hut at Fortuna. WO1 Darby Munro stands in contemplation next to the collection of flowers.There are no personnel identified. royal australian survey corps, rasvy, army survey regiment, army svy regt, fortuna, asr, litho sqn -
Bendigo Historical Society Inc.
Document - SPECIMEN COTTAGE COLLECTION: VARIOUS DOCUMENTS
In 1853, Bendigo Miners protested against the 30 shilling miners licence the had to pay the government. They wore red ribbons to show their protest and shopkeepers hung red ribbons outside their premises in support. Thousands of miners signed a petition to Governor LaTrobe to no avail. A protest gathering in Pall Mall marched to the Government camp on Camp Hill but this was a peaceful event again to no real avail.Various documents. The topics are: 1. Public donations and organised charities in Bendigo (1850's to 1900's by Carol Holsworth. 2. The spirit of Bendigo R711 and the loco driver on the return trip from Bendigo by Rod Giri, also several photographs of the train. 3. Diary of a new chum - Johnny Greenfield Gill. 4. Family history by Pat Hocking. 5. The story of the Gaylards as told by Ella Gaylard. 6. Journalism- History first draft by Wayne Gregson. 7. List of residents of Thistle Street, Bendigo approx. 1950's compiled by Cynthia Stringer. 8. Sandhurst club history by David Cotton. 9. Sandhurst boys centre compiled by Brian Dillon. 10. Lily Street Walk 24/04/2018 notes by Jim Evans. 11. Document - All things Bendigo, wine food and music fest. 12. White Hills Sandhurst copies of maps and two pages of district directory1908. 13. Draft report of interview with Noel Smith of 5 Summit Drive, Kennington. 14. Three brothers from Scotland by Rae Alexander Anderson. Also, seven newspaper articles by James Lerk on William, Alexander Rae and John Rae. 15. St. John Presbyterian church, Bendigo. Historical record. 16. Journal of Thomas Llewellyn Raston. 17. Recollections of Sandhurst in the 1850's - Joseph Anderson Panton, 22 segments from Panton manuscript by Terry Davidson. Also, a photographs of a portrait of Joseph Panton. 18. Photocopy of letter of Chinese storekeepers, miners and residents to Joseph Anderson Panton esquire, resident warden of Bendigo dated August 28th, 1858, with transcription and the reply from Esquire Panton dated 29 August, 1858. 19. View street reborn, tours of inspection ''welcome to View Street'' view Street properties part of stage 1 of the project: National Trust Chambers, Temperance Hall, Art Gallery Annexe, Trades Hall, Bendigo Regional Arts Centre, Bendigo Regional Performing Arts Centre, Dudley House. 20. View Street early 1900's in between and now. From handwritten notes by Mr. Bob Carr written in 1989. The handwriting has been transcribed by Beverly Ellis. 21. Transcription of ''Diary of a voyage to the colony of Victoria and back'' June1856-September 1858 by Charles Groves. 22. Adelaide Vale historic homestead built by Cr. John Harney. Tour notes prepared by the Central Victorian Branch of the National Trust. 23. Four pages essay titled Spanish Tomato Growers. 24. Eight pages of notes compiled by Leonard Henderson title: Trade token issuers of Bendigo district. The issuers mentioned are: Grieve, Hodgson, Stead and Williams. 25. City of Bendigo tourist promotion Committee. Eight pages document describing the formation of committee for the promotion of tourism in the City of Bendigo. 26. Article ''The Birdman of Bendigo'' Bendigo Advertiser 17th January 1968 detailing the life of Mr. Redvers James Eddy. 27. Speech presented by Miss Margaret Brennan on the occasion of the Drechsler family reunion, Sunday 5th April 1987. 28. Robert Gray Ford - A man before his time! Talk by James Lerk to the Bendigo Historical Society 3 February 2006. 29. Copy of an article from The Bendigonian Annual from November 16, 1910. The demand for good music, how a Bendigo firm has met it. The article is about the life of Oscar Flight. 30. Five photocopies of the Bendigonian masthead showing the changes through the years, plus the notice of the final issue on April 8th, 1920. 31. The red ribbon rebellion & the Bendigo petition, a proposal to commemorate a significant event in Bendigo. Also three different sizes poster for the August 26, 2016 re-enactment and two invitations to join the red ribbon agitation memorial. 32. Two handwritten pages of notes on the red ribbon rebellion. 33. Three pages of typewritten notes on the Creeth and Howie families. 34. An Australian Edward Medallist - Joseph Davies honoured by Paul Street. 35. A. H. Chisholm obituary. 36. Catalogue auction sale of the entire collection of antique furniture, objects d'art etc of Mr. and Mrs S. Cragg. 37. two coloured photographs of Cherry Tree Hotel in Melbourne Road just north of Tuckerman's lane, Big Hill. Photos taken March 2000 by Joan Paynter. -
 University of Melbourne, Burnley Campus Archives
Photograph - Black and white prints, Publicity Branch Victorian Department of Agriculture et al, Plants, 1957-1963
Black and white photographs, many labelled. Flowers, trees, propagation, signs, etc. Some for Journal articles. Publicity Branch Victorian Department of Agriculture: (1) 2 copies, C.1768A "Camellias Geraniums." (2) c.1262D "Anemone japonica." ((4) c.1262K "Hibiscus Wilder's White." (5) "Peace." (7) D521A Fruit tree. (8) c.1262E "Helenium autumnale." (9) c.1262I "Gerri Hock?" (12) c.1262F "Golden Ash. " (13) Struck cuttings 05 7.6.57. (14) "Kumquat." (15) Path to Principal's Residence. (16) A479 "Thujopsis dolobrata. Make an excellent tub specimen of the spreading type." (17) A477 "Aucuba japonica variegata. A very good foliage shrub for tubs. Sept '63 Jnl." (18) Struck cutting. (19-22) Arum, different views. (23) 2 copies ? (24) "June garden notes," small tree with roots. (25, 26) Different views ? (27)Pittosporum crassifolium. (28) "For Dec article (This is the one to use) Polyanthus are attractive & easily managed pot plants. (29) 2 copies ? (30) ? (31) Tubers. (32) "Oct Jnl" "Dividing the tubers. This is necessary to ensure that one eye is left etc." (33) Divided tuber. (34) Aucuba in pot. (35) ? (36) "Thuja plicata aurea a good tub plant of pyramid form." (37) "Buxus sempervirens. he English Box makes a neat, compact, low hedge." (38) "Cupressus torulosa is useful for a high narrow hedge for screening." (39) Sign giving information about different fertilizer treatments. (40) Sign comparing yield of Jonathons & Democrats with fertilzers. (41) "Russell Lupins." (42, 43) Different views ? (44) Soil profile in hole. (45) "Cyclamen is a good subject flowering over winter period." (46) "Cyclamen." (47) "Chabbads? & Malmaisons are suitable for bedding & make good cut flowers." (48) A478 "Seedlings." (49) A487 2 copies Roses in vase. (50) C.1767.E "Angophora 5-6 years." (51) C.1769.C "Jan '60 Jul. Ginko biloba Maidenhair Tree." (52) C.1768.C "Thuja plicata aurea, Golden Willow, Pinus radiata." (53) C.1762.I Vegetables. (54) A512 ?. (55) C.1767.C 2 copies "Eucalyptus torquata." (56) C.1769C 2 copies "Eucalyptus ficifolia." (57) C.1769.C 2 copies "Callistemon lanceolata( Bottle Brush.) (59) C.1769.B 2 copies "Pepperomias." (58) C.1769.F 2 copies "Melaleuca styphelioides (Paper Bark Tree.) (60) C.1769.D 2 copies "African Violets." (61) C.1768.F 2 copies "Pelargonium." (62) C.1768.B 2 copies "Tilia europea (Linden Tree.) Department of Agriculture Biology Branch: (6) Neg No 06 24.11.59 "A struck cutting of Rhododendron var. Alice. For a rhododendron this popular & beautiful variety strikes readily." (13) 05 5.6.57 Struck cuttings. No provenance: (3) "Araucaria excelsa, ?, ?, Metrosideros tomentosa." (10) "Thuja rheingold." (11) "Border of Geraniums (zonal Pelargoniums." (14) "Kumquat." (15) Path to Principal's Residence." (18) Struck cuttings. (19-22) Different views of Arum. (23) 2 copies ? (24-26) "June garden notes." Small tree with roots. (27) "Pittosporum crassifolium." (28) "For Dec article (This is the one to use) Polyanthus are attractive & easily managed pot plants." (29) 2 copies ? (30) ? (31) Tubers. (32) "Oct Jnl Dividing the the tubers. This is necessary to ensure that one eye is left etc." (33) Divided tuber. (34) Aucuba in pot. (35) ? (36) "Thuja plicata aurea a good tub plant of pyramid form. (37) "Buxus sempervirens. The English Box makes a neat, compact, low hedge." (38) Cupressus torulosa is useful for a high narrow hedge for screening." (39) Sign in Orchard giving information about different fertilizer treatments. (40) Sign in Orchard comparing yield of Jonathans and Democrats with fertilizers used. (41) "Russell lupins. (42-43) Different views ? (44) Soil profile in hole. (45) "Cyclamen is a good subject flowering over Winter period." (46) Cyclamen. (47) "Chabbads? & Malmaisons are suitable for bedding & make good cut flowers." flowers, trees, propagation, signs, camellias, geraniums, anemone japonica, hibiscus, fruit trees, principal's residence -
 National Wool Museum
Photo Album, 1930-1934
The Photo Album was created by Hans Beck, who interned with the donor's father (Wilhelm Eckels). The Photo Album depicts wool buying and sheep station related life between 1927-1939. Each photograph has been individually labelled.Straw coloured booklet with gold cursive writing on front cover spelling 'Photo Album'. Inside are 18 pages containing 63 photographs, each individually captioned. Internal pages show signs of age with discolouration, particularly in areas of previous adhesive application.Lettering, Front: Historic Interest Before WME arrived - 1930-1934 Wool & Sheep Photo Album Lettering, Internal by Page: Page 1 - Bottom Left Conner: Table from right:/ O. Hilbert sen. / WW. Richter, W. Ehrig/ Sampler: C. McCarthy/ at desk: E.S. Bottom Right Corner: 1927/ Wool Sample Room/ O. Hilbert/ Terranora Buildings/ Reiby Lane Page 2 - Bottom Middle: 1931/ Opening Sale/ Sydney Page 3 - Bottom Middle: 1934/ Opening Sale/ Sydney Page 4 - Bottom Middle: 1933/ Wool Auctions/ Brisbane Page 5 - Top Left Corner: 1930 Escapade/ Sydney to CAIRNS/ via Bourke, Central/ Queensland, Hinter-/ land & Atherton/ Table Lands Top Right Corner: Dubbo: Main Street/ (1st Night)/ 31.7.1930 Middle Right: 1st Night-"OUT"/ Stranded 11 miles/ from Bourke. (Red/ Dust in Carburettor Bottom Right Corner: Our "ERSKINE'/ hits Culvert &/ breaks both King-/pins. 1 1/2 miles from/ CUNNAMULLA SW-Q. Page 6 - Top Right Corner: "Rosevale Station"/ via Cunnamulla SWQ/ "Gidgi" country/ Gidgi Creak &/ Warrigo R. Middle Left: STAN HILL Page 7 - Middle Top: Blackhall/ Tattersall's Hotel/ Yarning at Cross-/roads. Middle Left: FO Wool Sales/ 22 Horse team Middle Right: Roadsign to:/ ISIS DOWNS &/ Homestead (Fart Page 8 - Middle Top: Muster: 3000 sheep/ Semi-circular/ Shearing shed/ ISIS DOWNS Page 9 - Middle Top: Shearer/ Water Tower/ Counting out/ pens Middle Bottom: Shearers Cook/ Hot Water & Soup/ Cake for Shearing/ Shed Charity Ball Page 10 - Middle Left: Isis Downs Home-/ stead with fire// flood Lookout./ Artesian Borewell Bottom Right: Manager: Moore/ & Alfred Loh-/ mann with kills/ Ducks & Emus Page 11 - Top Middle: PORTLAND DOWNS/ Muster: 10,000/ Sheep Bottom Left: Manager:/ Mr. Luck/ with A.L./Moore Page 12 - Middle Top: ROOKWOOD Station/ near/ HUGHENDEN/ Central NWQ Page 13 - Top Middle: 'HINTERLAND"/ Cattle country/ Spear Grass/ Tracks Bottom Middle: Crossings:/ Creeks: Quick/ Sand/ Rivers: rocky Page 14 - Middle Right: Lyndhurst stat/tion/ Head Stockman Middle Left: -Valley of la-/goons/ Station Bottom Right Corner: Master Atkinson/ saves/ Petrol shortage Page 15 - Top Middle: ATHERTON TABLELANDS/ LAKE BERRINE Middle Centre: Tropical Rainforest/ near/ Lake Berrine Page 16 - Top Middle: ATHERTON TABLELANDS/ Timber Country Bottom Middle Edge: CAIRNS/ Imperial Hotel Page 17 - Hans Beck with/ Betty Hilbert/ Lapstone Hill 1931 wool - transportation, wool sales, wool growing, wool growing agriculture farming, wool industry, wool sales - sydney, wool sales - brisbane, dubbo, 1930, bourke, cunnamulla, isis downs, shearing, shearing - lifestyle, portland downs, muster, hughenden, hinterland, lake berrine, cairns -
 Flagstaff Hill Maritime Museum and Village
Photograph
HISTORY OF THE LOCH ARD The LOCH ARD belonged to the famous Loch Line which sailed many ships from England to Australia. Built in Glasgow by Barclay, Curdle and Co. in 1873, the LOCH ARD was a three-masted square rigged iron sailing ship. The ship measured 262ft 7" (79.87m) in length, 38ft (11.58m) in width, 23ft (7m) in depth and had a gross tonnage of 1693 tons. The LOCH ARD's main mast measured a massive 150ft (45.7m) in height. LOCH ARD made three trips to Australia and one trip to Calcutta before its final voyage. LOCH ARD left England on March 2, 1878, under the command of Captain Gibbs, a newly married, 29 year old. She was bound for Melbourne with a crew of 37, plus 17 passengers and a load of cargo. The general cargo reflected the affluence of Melbourne at the time. On board were straw hats, umbrella, perfumes, clay pipes, pianos, clocks, confectionary, linen and candles, as well as a heavier load of railway irons, cement, lead and copper. There were items included that intended for display in the Melbourne International Exhibition in 1880. The voyage to Port Phillip was long but uneventful. At 3am on June 1, 1878, Captain Gibbs was expecting to see land and the passengers were becoming excited as they prepared to view their new homeland in the early morning. But LOCH ARD was running into a fog which greatly reduced visibility. Captain Gibbs was becoming anxious as there was no sign of land or the Cape Otway lighthouse. At 4am the fog lifted. A man aloft announced that he could see breakers. The sheer cliffs of Victoria's west coast came into view, and Captain Gibbs realised that the ship was much closer to them than expected. He ordered as much sail to be set as time would permit and then attempted to steer the vessel out to sea. On coming head on into the wind, the ship lost momentum, the sails fell limp and LOCH ARD's bow swung back. Gibbs then ordered the anchors to be released in an attempt to hold its position. The anchors sank some 50 fathoms - but did not hold. By this time LOCH ARD was among the breakers and the tall cliffs of Mutton Bird Island rose behind the ship. Just half a mile from the coast, the ship's bow was suddenly pulled around by the anchor. The captain tried to tack out to sea, but the ship struck a reef at the base of Mutton Bird Island, near Port Campbell. Waves broke over the ship and the top deck was loosened from the hull. The masts and rigging came crashing down knocking passengers and crew overboard. When a lifeboat was finally launched, it crashed into the side of LOCH ARD and capsized. Tom Pearce, who had launched the boat, managed to cling to its overturned hull and shelter beneath it. He drifted out to sea and then on the flood tide came into what is now known as LOCH ARD Gorge. He swam to shore, bruised and dazed, and found a cave in which to shelter. Some of the crew stayed below deck to shelter from the falling rigging but drowned when the ship slipped off the reef into deeper water. Eva Carmichael had raced onto deck to find out what was happening only to be confronted by towering cliffs looming above the stricken ship. In all the chaos, Captain Gibbs grabbed Eva and said, "If you are saved Eva, let my dear wife know that I died like a sailor". That was the last Eva Carmichael saw of the captain. She was swept off the ship by a huge wave. Eva saw Tom Pearce on a small rocky beach and yelled to attract his attention. He dived in and swam to the exhausted woman and dragged her to shore. He took her to the cave and broke open case of brandy which had washed up on the beach. He opened a bottle to revive the unconscious woman. A few hours later Tom scaled a cliff in search of help. He followed hoof prints and came by chance upon two men from nearby Glenample Station three and a half miles away. In a state of exhaustion, he told the men of the tragedy. Tom returned to the gorge while the two men rode back to the station to get help. By the time they reached LOCH ARD Gorge, it was cold and dark. The two shipwreck survivors were taken to Glenample Station to recover. Eva stayed at the station for six weeks before returning to Ireland, this time by steamship. In Melbourne, Tom Pearce received a hero's welcome. He was presented with the first gold medal of the Royal Humane Society of Victoria and a £1000 cheque from the Victorian Government. Concerts were performed to honour the young man's bravery and to raise money for those who lost family in the LOCH ARD disaster. Of the 54 crew members and passengers on board, only two survived: the apprentice, Tom Pearce and the young woman passenger, Eva Carmichael, who lost all of her family in the tragedy. Ten days after the LOCH ARD tragedy, salvage rights to the wreck were sold at auction for £2,120. Cargo valued at £3,000 was salvaged and placed on the beach, but most washed back into the sea when another storm developed. The wreck of LOCH ARD still lies at the base of Mutton Bird Island. Much of the cargo has now been salvaged and some was washed up into what is now known as LOCH ARD Gorge. Cargo and artefacts have also been illegally salvaged over many years before protective legislation was introduced. One of the most unlikely pieces of cargo to have survived the shipwreck was a Minton porcelain peacock - one of only nine in the world. The peacock was destined for the Melbourne International Exhibition in 1880. It had been well packed, which gave it adequate protection during the violent storm. Today, the Minton peacock can be seen at the Flagstaff Hill Maritime Museum in Warrnambool. From Australia's most dramatic shipwreck it has now become Australia's most valuable shipwreck artefact and is one of very few 'objects' on the Victorian State Heritage Register. Flagstaff Hill’s collection of artefacts from LOCH ARD is significant for being one of the largest collections of artefacts from this shipwreck in Victoria. It is significant for its association with the shipwreck, which is on the Victorian Heritage Register (VHR S417). The collection is significant because of the relationship between the objects, as together they have a high potential to interpret the story of the LOCH ARD. The LOCH ARD collection is archaeologically significant as the remains of a large international passenger and cargo ship. The LOCH ARD collection is historically significant for representing aspects of Victoria’s shipping history and its potential to interpret sub-theme 1.5 of Victoria’s Framework of Historical Themes (living with natural processes). The collection is also historically significant for its association with the LOCH ARD, which was one of the worst and best known shipwrecks in Victoria’s history. Photograph of Loch Ard Gorge. Photograph taken some distance from the Gorge. Three men in the Gorge and outlines of steps can be seen. Right hand side of the photograph is written "Loch Ard Gorge"flagstaff hill, warrnambool, shipwrecked coast, flagstaff hill maritime museum, maritime museum, shipwreck coast, flagstaff hill maritime village, great ocean road, loch line, loch ard, captain gibbs, eva carmichael, tom pearce, glenample station, mutton bird island, loch ard gorge, photograph of loch ard gorge, photograph -
 Flagstaff Hill Maritime Museum and Village
Painting
HISTORY OF THE LOCH ARD The LOCH ARD belonged to the famous Loch Line which sailed many ships from England to Australia. Built in Glasgow by Barclay, Curdle and Co. in 1873, the LOCH ARD was a three-masted square rigged iron sailing ship. The ship measured 262ft 7" (79.87m) in length, 38ft (11.58m) in width, 23ft (7m) in depth and had a gross tonnage of 1693 tons. The LOCH ARD's main mast measured a massive 150ft (45.7m) in height. LOCH ARD made three trips to Australia and one trip to Calcutta before its final voyage. LOCH ARD left England on March 2, 1878, under the command of Captain Gibbs, a newly married, 29 year old. She was bound for Melbourne with a crew of 37, plus 17 passengers and a load of cargo. The general cargo reflected the affluence of Melbourne at the time. On board were straw hats, umbrella, perfumes, clay pipes, pianos, clocks, confectionary, linen and candles, as well as a heavier load of railway irons, cement, lead and copper. There were items included that intended for display in the Melbourne International Exhibition in 1880. The voyage to Port Phillip was long but uneventful. At 3am on June 1, 1878, Captain Gibbs was expecting to see land and the passengers were becoming excited as they prepared to view their new homeland in the early morning. But LOCH ARD was running into a fog which greatly reduced visibility. Captain Gibbs was becoming anxious as there was no sign of land or the Cape Otway lighthouse. At 4am the fog lifted. A man aloft announced that he could see breakers. The sheer cliffs of Victoria's west coast came into view, and Captain Gibbs realised that the ship was much closer to them than expected. He ordered as much sail to be set as time would permit and then attempted to steer the vessel out to sea. On coming head on into the wind, the ship lost momentum, the sails fell limp and LOCH ARD's bow swung back. Gibbs then ordered the anchors to be released in an attempt to hold its position. The anchors sank some 50 fathoms - but did not hold. By this time LOCH ARD was among the breakers and the tall cliffs of Mutton Bird Island rose behind the ship. Just half a mile from the coast, the ship's bow was suddenly pulled around by the anchor. The captain tried to tack out to sea, but the ship struck a reef at the base of Mutton Bird Island, near Port Campbell. Waves broke over the ship and the top deck was loosened from the hull. The masts and rigging came crashing down knocking passengers and crew overboard. When a lifeboat was finally launched, it crashed into the side of LOCH ARD and capsized. Tom Pearce, who had launched the boat, managed to cling to its overturned hull and shelter beneath it. He drifted out to sea and then on the flood tide came into what is now known as LOCH ARD Gorge. He swam to shore, bruised and dazed, and found a cave in which to shelter. Some of the crew stayed below deck to shelter from the falling rigging but drowned when the ship slipped off the reef into deeper water. Eva Carmichael had raced onto deck to find out what was happening only to be confronted by towering cliffs looming above the stricken ship. In all the chaos, Captain Gibbs grabbed Eva and said, "If you are saved Eva, let my dear wife know that I died like a sailor". That was the last Eva Carmichael saw of the captain. She was swept off the ship by a huge wave. Eva saw Tom Pearce on a small rocky beach and yelled to attract his attention. He dived in and swam to the exhausted woman and dragged her to shore. He took her to the cave and broke open case of brandy which had washed up on the beach. He opened a bottle to revive the unconscious woman. A few hours later Tom scaled a cliff in search of help. He followed hoof prints and came by chance upon two men from nearby Glenample Station three and a half miles away. In a state of exhaustion, he told the men of the tragedy. Tom returned to the gorge while the two men rode back to the station to get help. By the time they reached LOCH ARD Gorge, it was cold and dark. The two shipwreck survivors were taken to Glenample Station to recover. Eva stayed at the station for six weeks before returning to Ireland, this time by steamship. In Melbourne, Tom Pearce received a hero's welcome. He was presented with the first gold medal of the Royal Humane Society of Victoria and a £1000 cheque from the Victorian Government. Concerts were performed to honour the young man's bravery and to raise money for those who lost family in the LOCH ARD disaster. Of the 54 crew members and passengers on board, only two survived: the apprentice, Tom Pearce and the young woman passenger, Eva Carmichael, who lost all of her family in the tragedy. Ten days after the LOCH ARD tragedy, salvage rights to the wreck were sold at auction for £2,120. Cargo valued at £3,000 was salvaged and placed on the beach, but most washed back into the sea when another storm developed. The wreck of LOCH ARD still lies at the base of Mutton Bird Island. Much of the cargo has now been salvaged and some was washed up into what is now known as LOCH ARD Gorge. Cargo and artefacts have also been illegally salvaged over many years before protective legislation was introduced. One of the most unlikely pieces of cargo to have survived the shipwreck was a Minton porcelain peacock - one of only nine in the world. The peacock was destined for the Melbourne International Exhibition in 1880. It had been well packed, which gave it adequate protection during the violent storm. Today, the Minton peacock can be seen at the Flagstaff Hill Maritime Museum in Warrnambool. From Australia's most dramatic shipwreck it has now become Australia's most valuable shipwreck artefact and is one of very few 'objects' on the Victorian State Heritage Register. Flagstaff Hill’s collection of artefacts from LOCH ARD is significant for being one of the largest collections of artefacts from this shipwreck in Victoria. It is significant for its association with the shipwreck, which is on the Victorian Heritage Register (VHR S417). The collection is significant because of the relationship between the objects, as together they have a high potential to interpret the story of the LOCH ARD. The LOCH ARD collection is archaeologically significant as the remains of a large international passenger and cargo ship. The LOCH ARD collection is historically significant for representing aspects of Victoria’s shipping history and its potential to interpret sub-theme 1.5 of Victoria’s Framework of Historical Themes (living with natural processes). The collection is also historically significant for its association with the LOCH ARD, which was one of the worst and best known shipwrecks in Victoria’s history. Painting of The Loch Ard oil on board depicting wreck. It shows stormy sea and coastline in background. Ship appears to be capsized.flagstaff hill, warrnambool, shipwrecked coast, flagstaff hill maritime museum, maritime museum, shipwreck coast, flagstaff hill maritime village, great ocean road, loch line, loch ard, captain gibbs, eva carmichael, tom pearce, glenample station, mutton bird island, loch ard gorge, painting -
 Flagstaff Hill Maritime Museum and Village
Photograph
HISTORY OF THE LOCH ARD The LOCH ARD belonged to the famous Loch Line which sailed many ships from England to Australia. Built in Glasgow by Barclay, Curdle and Co. in 1873, the LOCH ARD was a three-masted square rigged iron sailing ship. The ship measured 262ft 7" (79.87m) in length, 38ft (11.58m) in width, 23ft (7m) in depth and had a gross tonnage of 1693 tons. The LOCH ARD's main mast measured a massive 150ft (45.7m) in height. LOCH ARD made three trips to Australia and one trip to Calcutta before its final voyage. LOCH ARD left England on March 2, 1878, under the command of Captain Gibbs, a newly married, 29 year old. She was bound for Melbourne with a crew of 37, plus 17 passengers and a load of cargo. The general cargo reflected the affluence of Melbourne at the time. On board were straw hats, umbrella, perfumes, clay pipes, pianos, clocks, confectionary, linen and candles, as well as a heavier load of railway irons, cement, lead and copper. There were items included that intended for display in the Melbourne International Exhibition in 1880. The voyage to Port Phillip was long but uneventful. At 3am on June 1, 1878, Captain Gibbs was expecting to see land and the passengers were becoming excited as they prepared to view their new homeland in the early morning. But LOCH ARD was running into a fog which greatly reduced visibility. Captain Gibbs was becoming anxious as there was no sign of land or the Cape Otway lighthouse. At 4am the fog lifted. A man aloft announced that he could see breakers. The sheer cliffs of Victoria's west coast came into view, and Captain Gibbs realised that the ship was much closer to them than expected. He ordered as much sail to be set as time would permit and then attempted to steer the vessel out to sea. On coming head on into the wind, the ship lost momentum, the sails fell limp and LOCH ARD's bow swung back. Gibbs then ordered the anchors to be released in an attempt to hold its position. The anchors sank some 50 fathoms - but did not hold. By this time LOCH ARD was among the breakers and the tall cliffs of Mutton Bird Island rose behind the ship. Just half a mile from the coast, the ship's bow was suddenly pulled around by the anchor. The captain tried to tack out to sea, but the ship struck a reef at the base of Mutton Bird Island, near Port Campbell. Waves broke over the ship and the top deck was loosened from the hull. The masts and rigging came crashing down knocking passengers and crew overboard. When a lifeboat was finally launched, it crashed into the side of LOCH ARD and capsized. Tom Pearce, who had launched the boat, managed to cling to its overturned hull and shelter beneath it. He drifted out to sea and then on the flood tide came into what is now known as LOCH ARD Gorge. He swam to shore, bruised and dazed, and found a cave in which to shelter. Some of the crew stayed below deck to shelter from the falling rigging but drowned when the ship slipped off the reef into deeper water. Eva Carmichael had raced onto deck to find out what was happening only to be confronted by towering cliffs looming above the stricken ship. In all the chaos, Captain Gibbs grabbed Eva and said, "If you are saved Eva, let my dear wife know that I died like a sailor". That was the last Eva Carmichael saw of the captain. She was swept off the ship by a huge wave. Eva saw Tom Pearce on a small rocky beach and yelled to attract his attention. He dived in and swam to the exhausted woman and dragged her to shore. He took her to the cave and broke open case of brandy which had washed up on the beach. He opened a bottle to revive the unconscious woman. A few hours later Tom scaled a cliff in search of help. He followed hoof prints and came by chance upon two men from nearby Glenample Station three and a half miles away. In a state of exhaustion, he told the men of the tragedy. Tom returned to the gorge while the two men rode back to the station to get help. By the time they reached LOCH ARD Gorge, it was cold and dark. The two shipwreck survivors were taken to Glenample Station to recover. Eva stayed at the station for six weeks before returning to Ireland, this time by steamship. In Melbourne, Tom Pearce received a hero's welcome. He was presented with the first gold medal of the Royal Humane Society of Victoria and a £1000 cheque from the Victorian Government. Concerts were performed to honour the young man's bravery and to raise money for those who lost family in the LOCH ARD disaster. Of the 54 crew members and passengers on board, only two survived: the apprentice, Tom Pearce and the young woman passenger, Eva Carmichael, who lost all of her family in the tragedy. Ten days after the LOCH ARD tragedy, salvage rights to the wreck were sold at auction for £2,120. Cargo valued at £3,000 was salvaged and placed on the beach, but most washed back into the sea when another storm developed. The wreck of LOCH ARD still lies at the base of Mutton Bird Island. Much of the cargo has now been salvaged and some was washed up into what is now known as LOCH ARD Gorge. Cargo and artefacts have also been illegally salvaged over many years before protective legislation was introduced. One of the most unlikely pieces of cargo to have survived the shipwreck was a Minton porcelain peacock - one of only nine in the world. The peacock was destined for the Melbourne International Exhibition in 1880. It had been well packed, which gave it adequate protection during the violent storm. Today, the Minton peacock can be seen at the Flagstaff Hill Maritime Museum in Warrnambool. From Australia's most dramatic shipwreck it has now become Australia's most valuable shipwreck artefact and is one of very few 'objects' on the Victorian State Heritage Register. Flagstaff Hill’s collection of artefacts from LOCH ARD is significant for being one of the largest collections of artefacts from this shipwreck in Victoria. It is significant for its association with the shipwreck, which is on the Victorian Heritage Register (VHR S417). The collection is significant because of the relationship between the objects, as together they have a high potential to interpret the story of the LOCH ARD. The LOCH ARD collection is archaeologically significant as the remains of a large international passenger and cargo ship. The LOCH ARD collection is historically significant for representing aspects of Victoria’s shipping history and its potential to interpret sub-theme 1.5 of Victoria’s Framework of Historical Themes (living with natural processes). The collection is also historically significant for its association with the LOCH ARD, which was one of the worst and best known shipwrecks in Victoria’s history. Photograph of Loch Ard Gorge c1900flagstaff hill, warrnambool, shipwrecked coast, flagstaff hill maritime museum, maritime museum, shipwreck coast, flagstaff hill maritime village, great ocean road, loch line, loch ard, captain gibbs, eva carmichael, tom pearce, glenample station, mutton bird island, loch ard gorge, photograph of loch ard gorge, photograph -
 Flagstaff Hill Maritime Museum and Village
Calendar
HISTORY OF THE LOCH ARD The LOCH ARD belonged to the famous Loch Line which sailed many ships from England to Australia. Built in Glasgow by Barclay, Curdle and Co. in 1873, the LOCH ARD was a three-masted square rigged iron sailing ship. The ship measured 262ft 7" (79.87m) in length, 38ft (11.58m) in width, 23ft (7m) in depth and had a gross tonnage of 1693 tons. The LOCH ARD's main mast measured a massive 150ft (45.7m) in height. LOCH ARD made three trips to Australia and one trip to Calcutta before its final voyage. LOCH ARD left England on March 2, 1878, under the command of Captain Gibbs, a newly married, 29 year old. She was bound for Melbourne with a crew of 37, plus 17 passengers and a load of cargo. The general cargo reflected the affluence of Melbourne at the time. On board were straw hats, umbrella, perfumes, clay pipes, pianos, clocks, confectionary, linen and candles, as well as a heavier load of railway irons, cement, lead and copper. There were items included that intended for display in the Melbourne International Exhibition in 1880. The voyage to Port Phillip was long but uneventful. At 3am on June 1, 1878, Captain Gibbs was expecting to see land and the passengers were becoming excited as they prepared to view their new homeland in the early morning. But LOCH ARD was running into a fog which greatly reduced visibility. Captain Gibbs was becoming anxious as there was no sign of land or the Cape Otway lighthouse. At 4am the fog lifted. A man aloft announced that he could see breakers. The sheer cliffs of Victoria's west coast came into view, and Captain Gibbs realised that the ship was much closer to them than expected. He ordered as much sail to be set as time would permit and then attempted to steer the vessel out to sea. On coming head on into the wind, the ship lost momentum, the sails fell limp and LOCH ARD's bow swung back. Gibbs then ordered the anchors to be released in an attempt to hold its position. The anchors sank some 50 fathoms - but did not hold. By this time LOCH ARD was among the breakers and the tall cliffs of Mutton Bird Island rose behind the ship. Just half a mile from the coast, the ship's bow was suddenly pulled around by the anchor. The captain tried to tack out to sea, but the ship struck a reef at the base of Mutton Bird Island, near Port Campbell. Waves broke over the ship and the top deck was loosened from the hull. The masts and rigging came crashing down knocking passengers and crew overboard. When a lifeboat was finally launched, it crashed into the side of LOCH ARD and capsized. Tom Pearce, who had launched the boat, managed to cling to its overturned hull and shelter beneath it. He drifted out to sea and then on the flood tide came into what is now known as LOCH ARD Gorge. He swam to shore, bruised and dazed, and found a cave in which to shelter. Some of the crew stayed below deck to shelter from the falling rigging but drowned when the ship slipped off the reef into deeper water. Eva Carmichael had raced onto deck to find out what was happening only to be confronted by towering cliffs looming above the stricken ship. In all the chaos, Captain Gibbs grabbed Eva and said, "If you are saved Eva, let my dear wife know that I died like a sailor". That was the last Eva Carmichael saw of the captain. She was swept off the ship by a huge wave. Eva saw Tom Pearce on a small rocky beach and yelled to attract his attention. He dived in and swam to the exhausted woman and dragged her to shore. He took her to the cave and broke open case of brandy which had washed up on the beach. He opened a bottle to revive the unconscious woman. A few hours later Tom scaled a cliff in search of help. He followed hoof prints and came by chance upon two men from nearby Glenample Station three and a half miles away. In a state of exhaustion, he told the men of the tragedy. Tom returned to the gorge while the two men rode back to the station to get help. By the time they reached LOCH ARD Gorge, it was cold and dark. The two shipwreck survivors were taken to Glenample Station to recover. Eva stayed at the station for six weeks before returning to Ireland, this time by steamship. In Melbourne, Tom Pearce received a hero's welcome. He was presented with the first gold medal of the Royal Humane Society of Victoria and a £1000 cheque from the Victorian Government. Concerts were performed to honour the young man's bravery and to raise money for those who lost family in the LOCH ARD disaster. Of the 54 crew members and passengers on board, only two survived: the apprentice, Tom Pearce and the young woman passenger, Eva Carmichael, who lost all of her family in the tragedy. Ten days after the LOCH ARD tragedy, salvage rights to the wreck were sold at auction for £2,120. Cargo valued at £3,000 was salvaged and placed on the beach, but most washed back into the sea when another storm developed. The wreck of LOCH ARD still lies at the base of Mutton Bird Island. Much of the cargo has now been salvaged and some was washed up into what is now known as LOCH ARD Gorge. Cargo and artefacts have also been illegally salvaged over many years before protective legislation was introduced. One of the most unlikely pieces of cargo to have survived the shipwreck was a Minton porcelain peacock - one of only nine in the world. The peacock was destined for the Melbourne International Exhibition in 1880. It had been well packed, which gave it adequate protection during the violent storm. Today, the Minton peacock can be seen at the Flagstaff Hill Maritime Museum in Warrnambool. From Australia's most dramatic shipwreck it has now become Australia's most valuable shipwreck artefact and is one of very few 'objects' on the Victorian State Heritage Register. Flagstaff Hill’s collection of artefacts from LOCH ARD is significant for being one of the largest collections of artefacts from this shipwreck in Victoria. It is significant for its association with the shipwreck, which is on the Victorian Heritage Register (VHR S417). The collection is significant because of the relationship between the objects, as together they have a high potential to interpret the story of the LOCH ARD. The LOCH ARD collection is archaeologically significant as the remains of a large international passenger and cargo ship. The LOCH ARD collection is historically significant for representing aspects of Victoria’s shipping history and its potential to interpret sub-theme 1.5 of Victoria’s Framework of Historical Themes (living with natural processes). The collection is also historically significant for its association with the LOCH ARD, which was one of the worst and best known shipwrecks in Victoria’s history. Calendar printed by Terang Express for December 1923 with picture of Loch Ard Gorge and survivors of wreck and also story of the episode. Has some large tears in it.flagstaff hill, warrnambool, shipwrecked coast, flagstaff hill maritime museum, maritime museum, shipwreck coast, flagstaff hill maritime village, great ocean road, loch line, loch ard, captain gibbs, eva carmichael, tom pearce, glenample station, mutton bird island, loch ard gorge, calendar, terang express -
 Flagstaff Hill Maritime Museum and Village
Book, A Sydney-Side Saxon
Pattison Collection This item is from the ‘Pattison Collection’, a collection of books and records that was originally owned by the Warrnambool Mechanics’ Institute, which was founded in Warrnambool in 1853. By 1886 the Warrnambool Mechanics’ Institute (WMI) had grown to have a Library, Museum and Fine Arts Gallery, with a collection of “… choice productions of art and valuable specimens in almost every branch and many wonderful national curiosities are now to be seen there, including historic relics of the town and district.” It later included a School of Design. Although it was very well patronised, the lack of financial support led the WMI in 1911 to ask the City Council to take it over. In 1935 Ralph Pattison was appointed as City Librarian to establish and organise the Warrnambool Library as it was then called. When the WMI building was pulled down in 1963 a new civic building was erected on the site and the new Warrnambool Library, on behalf of the City Council, took over all the holdings of the WMI. At this time some of the items were separated and identified as the ‘Pattison Collection’, named after Ralph Pattison. Eventually, the components of the WMI were distributed from the Warrnambool Library to various places, including the Art Gallery, Historical Society and Flagstaff Hill. Later some were even distributed to other regional branches of Corangamite Regional Library and passed to and fro. It is difficult now to trace just where all of the items have ended up. The books at Flagstaff Hill Maritime Village generally display stamps and markings from Pattison as well as a variety of other institutions including the Mechanics’ Institute itself. RALPH ERIC PATTISON Ralph Eric Pattison was born in Rockhampton, Queensland, in 1891. He married Maude Swan from Warrnambool in 1920 and they set up home in Warrnambool. In 1935 Pattison accepted a position as City Librarian for the Warrnambool City Council. His huge challenge was to make a functional library within two rooms of the Mechanics’ Institute. He tirelessly cleaned, cleared and sorted a disarrayed collection of old books, jars of preserved specimens and other items reserved for exhibition in the city’s museum. He developed and updated the library with a wide variety of books for all tastes, including reference books for students; a difficult task to fulfil during the years following the Depression. He converted all of the lower areas of the building into a library, reference room and reading room for members and the public. The books were sorted and stored using a cataloguing and card index system that he had developed himself. He also prepared the upper floor of the building and established the Art Gallery and later the Museum, a place to exhibit the many old relics that had been stored for years for this purpose. One of the treasures he found was a beautiful ancient clock, which he repaired, restored and enjoyed using in his office during the years of his service there. Ralph Pattison was described as “a meticulous gentleman whose punctuality, floorless courtesy and distinctive neat dress were hallmarks of his character, and ‘his’ clock controlled his daily routine and his opening and closing of the library’s large heavy doors to the minute.” Pattison took leave from 1942 to 1945 to serve in the Royal Australian Navy, Volunteer Reserve as Lieutenant. A few years later he converted one of the Museum’s rooms into a Children’s Library, stocking it with suitable books for the younger generation. This was an instant success. In the 1950’s he had the honour of being appointed to the Victorian Library Board and received more inspiration from the monthly conferences in Melbourne. He was sadly retired in 1959 after over 23 years of service, due to the fact that he had gone over the working age of council officers. However, he continued to take a very keen interest in the continual development of the Library until his death in 1969. Rolf Boldrewood (1826-1915) ‘Rolf Boldrewood’ is the pen-name used by Thomas Alexander Browne as a writer. Browne was the eldest child of Captain Sylvester John Brown and Elizabeth Angell nee Alexander. He was born in London on 6th August 1826 and arrived in Australia with his parents and siblings when he was 5 years old and grew up in Sydney. In the 1860’s Browne added the ‘e’ to his surname. As a 17-year-old Browne took up land in the Western District of Victoria between Portland and Port Fairy on a property named “Squattlesea Mere”. He remained there until 1858, enjoying the squatters’ life on his 32,000-acre property, growing potatoes and running cattle and horses. He sold in 1858 and purchased a sheep station on the Murray River near Swan Hill. He later sold this and bought another sheep station near Narrandera until bad seasons and severe droughts eventually caused him to change his career after 25 years as a squatter. Over the next 25 years, Browne held the position of Police Magistrate and as a gold commissioner in various locations. His third career as an author lasted approximately 40 years. In 1865 he wrote two articles on pastoral life while he was recovering from a riding accident. In the 1870s his writing was bringing in the income to support his family, changing his focus to the writing of novels. A series of these were written for the Australian market and published in The Sydney Mail and the Centennial Magazine. His later novels were aimed at the overseas markets. His best-known novel “Robbery Under Arms” was written from 1882 to 1883 and has been serialised on the radio in Australia and Britain. The novel was filmed in 1907, 1920 and 1957, and in 1985 it was made into a television series. It is now an Australian Classic. He also wrote short stories, several nonfiction graziers’ guides, and an autobiography named “Old Melbourne Memories” in 1884. [This information has been taken from Wikipedia; Australian Authors-Perry Meddlemiss; Australian Dictionary of Biography, Browne, Thomas Alexander (1826-1915)] The Pattison Collection, along with other items at Flagstaff Hill Maritime Village, was originally part of the Warrnambool Mechanics' Institute’s collection. The Warrnambool Mechanics’ Institute Collection is primarily significant in its totality, rather than for the individual objects it contains. Its contents are highly representative of the development of Mechanics' Institute libraries across Australia, particularly Victoria. A diversity of publications and themes has been amassed, and these provide clues to our understanding of the nature of and changes in the reading habits of Victorians from the 1850s to the middle of the 20th century. The collection also highlights the Warrnambool community’s commitment to the Mechanics’ Institute, reading, literacy and learning in the regions, and proves that access to knowledge was not impeded by distance. These items help to provide a more complete picture of our community’s ideals and aspirations. The Warrnambool Mechanics Institute book collection has historical and social significance for its strong association with the Mechanics Institute movement and the important role it played in the intellectual, cultural and social development of people throughout the latter part of the nineteenth century and the early twentieth century. The collection of books is a rare example of an early lending library and its significance is enhanced by the survival of an original collection of many volumes. The Warrnambool Mechanics' Institute’s publication collection is of both local and state significance. A Sydney-Side Saxon Auhor: Rolf Boldrewood Publisher: MacMillan & Co Date: 1891The label on the spine with typed text 899.3 BOL Pastedown front endpaper has a sticker from Warrnambool Public Librarybook, a sydney-side saxon, rolf boldrewood, shipwrecked-coast, flagstaff-hill, flagstaff-hill-maritime-museum, warrnambool, maritime-museum, shipwreck-coast, flagstaff-hill-maritime-village, shipwrecked-artefact, pattison collection, warrnambool library, warrnambool mechanics’ institute, ralph eric pattison, corangamite regional library service, warrnambool city librarian, mechanics’ institute library, victorian library board, warrnambool books and records, warrnambool children’s library, great ocean road -
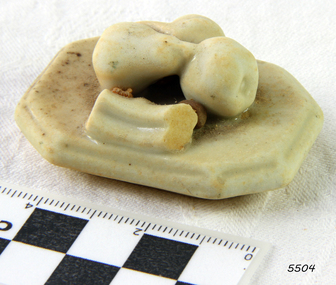 Flagstaff Hill Maritime Museum and Village
Lid
Ref: LA 2 29 274 HISTORY OF THE LOCH ARD The LOCH ARD belonged to the famous Loch Line which sailed many ships from England to Australia. Built in Glasgow by Barclay, Curdle and Co. in 1873, the LOCH ARD was a three-masted square rigged iron sailing ship. The ship measured 262ft 7" (79.87m) in length, 38ft (11.58m) in width, 23ft (7m) in depth and had a gross tonnage of 1693 tons. The LOCH ARD's main mast measured a massive 150ft (45.7m) in height. LOCH ARD made three trips to Australia and one trip to Calcutta before its final voyage. LOCH ARD left England on March 2, 1878, under the command of Captain Gibbs, a newly married, 29 year old. She was bound for Melbourne with a crew of 37, plus 17 passengers and a load of cargo. The general cargo reflected the affluence of Melbourne at the time. On board were straw hats, umbrella, perfumes, clay pipes, pianos, clocks, confectionary, linen and candles, as well as a heavier load of railway irons, cement, lead and copper. There were items included that intended for display in the Melbourne International Exhibition in 1880. The voyage to Port Phillip was long but uneventful. At 3am on June 1, 1878, Captain Gibbs was expecting to see land and the passengers were becoming excited as they prepared to view their new homeland in the early morning. But LOCH ARD was running into a fog which greatly reduced visibility. Captain Gibbs was becoming anxious as there was no sign of land or the Cape Otway lighthouse. At 4am the fog lifted. A man aloft announced that he could see breakers. The sheer cliffs of Victoria's west coast came into view, and Captain Gibbs realised that the ship was much closer to them than expected. He ordered as much sail to be set as time would permit and then attempted to steer the vessel out to sea. On coming head on into the wind, the ship lost momentum, the sails fell limp and LOCH ARD's bow swung back. Gibbs then ordered the anchors to be released in an attempt to hold its position. The anchors sank some 50 fathoms - but did not hold. By this time LOCH ARD was among the breakers and the tall cliffs of Mutton Bird Island rose behind the ship. Just half a mile from the coast, the ship's bow was suddenly pulled around by the anchor. The captain tried to tack out to sea, but the ship struck a reef at the base of Mutton Bird Island, near Port Campbell. Waves broke over the ship and the top deck was loosened from the hull. The masts and rigging came crashing down knocking passengers and crew overboard. When a lifeboat was finally launched, it crashed into the side of LOCH ARD and capsized. Tom Pearce, who had launched the boat, managed to cling to its overturned hull and shelter beneath it. He drifted out to sea and then on the flood tide came into what is now known as LOCH ARD Gorge. He swam to shore, bruised and dazed, and found a cave in which to shelter. Some of the crew stayed below deck to shelter from the falling rigging but drowned when the ship slipped off the reef into deeper water. Eva Carmichael had raced onto deck to find out what was happening only to be confronted by towering cliffs looming above the stricken ship. In all the chaos, Captain Gibbs grabbed Eva and said, "If you are saved Eva, let my dear wife know that I died like a sailor". That was the last Eva Carmichael saw of the captain. She was swept off the ship by a huge wave. Eva saw Tom Pearce on a small rocky beach and yelled to attract his attention. He dived in and swam to the exhausted woman and dragged her to shore. He took her to the cave and broke open case of brandy which had washed up on the beach. He opened a bottle to revive the unconscious woman. A few hours later Tom scaled a cliff in search of help. He followed hoof prints and came by chance upon two men from nearby Glenample Station three and a half miles away. In a state of exhaustion, he told the men of the tragedy. Tom returned to the gorge while the two men rode back to the station to get help. By the time they reached LOCH ARD Gorge, it was cold and dark. The two shipwreck survivors were taken to Glenample Station to recover. Eva stayed at the station for six weeks before returning to Ireland, this time by steamship. In Melbourne, Tom Pearce received a hero's welcome. He was presented with the first gold medal of the Royal Humane Society of Victoria and a £1000 cheque from the Victorian Government. Concerts were performed to honour the young man's bravery and to raise money for those who lost family in the LOCH ARD disaster. Of the 54 crew members and passengers on board, only two survived: the apprentice, Tom Pearce and the young woman passenger, Eva Carmichael, who lost all of her family in the tragedy. Ten days after the LOCH ARD tragedy, salvage rights to the wreck were sold at auction for £2,120. Cargo valued at £3,000 was salvaged and placed on the beach, but most washed back into the sea when another storm developed. The wreck of LOCH ARD still lies at the base of Mutton Bird Island. Much of the cargo has now been salvaged and some was washed up into what is now known as LOCH ARD Gorge. Cargo and artefacts have also been illegally salvaged over many years before protective legislation was introduced. One of the most unlikely pieces of cargo to have survived the shipwreck was a Minton porcelain peacock - one of only nine in the world. The peacock was destined for the Melbourne International Exhibition in 1880. It had been well packed, which gave it adequate protection during the violent storm. Today, the Minton peacock can be seen at the Flagstaff Hill Maritime Museum in Warrnambool. From Australia's most dramatic shipwreck it has now become Australia's most valuable shipwreck artefact and is one of very few 'objects' on the Victorian State Heritage Register. Flagstaff Hill’s collection of artefacts from LOCH ARD is significant for being one of the largest collections of artefacts from this shipwreck in Victoria. It is significant for its association with the shipwreck, which is on the Victorian Heritage Register (VHR S417). The collection is significant because of the relationship between the objects, as together they have a high potential to interpret the story of the LOCH ARD. The LOCH ARD collection is archaeologically significant as the remains of a large international passenger and cargo ship. The LOCH ARD collection is historically significant for representing aspects of Victoria’s shipping history and its potential to interpret sub-theme 1.5 of Victoria’s Framework of Historical Themes (living with natural processes). The collection is also historically significant for its association with the LOCH ARD, which was one of the worst and best known shipwrecks in Victoria’s history. Lid from child's tea set. Porcelain. Lid has small chip and some slight iron stains. Recovered from the wreck of the Loch Ard. Artefact reg No LA/16.flagstaff hill, warrnambool, shipwrecked-coast, flagstaff-hill, flagstaff-hill-maritime-museum, maritime-museum, shipwreck-coast, flagstaff-hill-maritime-village -
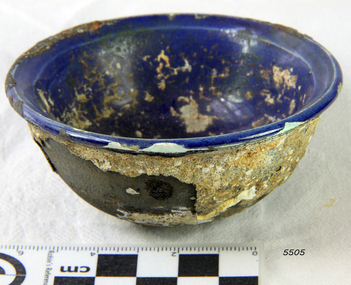 Flagstaff Hill Maritime Museum and Village
Deflector
HISTORY OF THE LOCH ARD The LOCH ARD belonged to the famous Loch Line which sailed many ships from England to Australia. Built in Glasgow by Barclay, Curdle and Co. in 1873, the LOCH ARD was a three-masted square rigged iron sailing ship. The ship measured 262ft 7" (79.87m) in length, 38ft (11.58m) in width, 23ft (7m) in depth and had a gross tonnage of 1693 tons. The LOCH ARD's main mast measured a massive 150ft (45.7m) in height. LOCH ARD made three trips to Australia and one trip to Calcutta before its final voyage. LOCH ARD left England on March 2, 1878, under the command of Captain Gibbs, a newly married, 29 year old. She was bound for Melbourne with a crew of 37, plus 17 passengers and a load of cargo. The general cargo reflected the affluence of Melbourne at the time. On board were straw hats, umbrella, perfumes, clay pipes, pianos, clocks, confectionary, linen and candles, as well as a heavier load of railway irons, cement, lead and copper. There were items included that intended for display in the Melbourne International Exhibition in 1880. The voyage to Port Phillip was long but uneventful. At 3am on June 1, 1878, Captain Gibbs was expecting to see land and the passengers were becoming excited as they prepared to view their new homeland in the early morning. But LOCH ARD was running into a fog which greatly reduced visibility. Captain Gibbs was becoming anxious as there was no sign of land or the Cape Otway lighthouse. At 4am the fog lifted. A man aloft announced that he could see breakers. The sheer cliffs of Victoria's west coast came into view, and Captain Gibbs realised that the ship was much closer to them than expected. He ordered as much sail to be set as time would permit and then attempted to steer the vessel out to sea. On coming head on into the wind, the ship lost momentum, the sails fell limp and LOCH ARD's bow swung back. Gibbs then ordered the anchors to be released in an attempt to hold its position. The anchors sank some 50 fathoms - but did not hold. By this time LOCH ARD was among the breakers and the tall cliffs of Mutton Bird Island rose behind the ship. Just half a mile from the coast, the ship's bow was suddenly pulled around by the anchor. The captain tried to tack out to sea, but the ship struck a reef at the base of Mutton Bird Island, near Port Campbell. Waves broke over the ship and the top deck was loosened from the hull. The masts and rigging came crashing down knocking passengers and crew overboard. When a lifeboat was finally launched, it crashed into the side of LOCH ARD and capsized. Tom Pearce, who had launched the boat, managed to cling to its overturned hull and shelter beneath it. He drifted out to sea and then on the flood tide came into what is now known as LOCH ARD Gorge. He swam to shore, bruised and dazed, and found a cave in which to shelter. Some of the crew stayed below deck to shelter from the falling rigging but drowned when the ship slipped off the reef into deeper water. Eva Carmichael had raced onto deck to find out what was happening only to be confronted by towering cliffs looming above the stricken ship. In all the chaos, Captain Gibbs grabbed Eva and said, "If you are saved Eva, let my dear wife know that I died like a sailor". That was the last Eva Carmichael saw of the captain. She was swept off the ship by a huge wave. Eva saw Tom Pearce on a small rocky beach and yelled to attract his attention. He dived in and swam to the exhausted woman and dragged her to shore. He took her to the cave and broke open case of brandy which had washed up on the beach. He opened a bottle to revive the unconscious woman. A few hours later Tom scaled a cliff in search of help. He followed hoof prints and came by chance upon two men from nearby Glenample Station three and a half miles away. In a state of exhaustion, he told the men of the tragedy. Tom returned to the gorge while the two men rode back to the station to get help. By the time they reached LOCH ARD Gorge, it was cold and dark. The two shipwreck survivors were taken to Glenample Station to recover. Eva stayed at the station for six weeks before returning to Ireland, this time by steamship. In Melbourne, Tom Pearce received a hero's welcome. He was presented with the first gold medal of the Royal Humane Society of Victoria and a £1000 cheque from the Victorian Government. Concerts were performed to honour the young man's bravery and to raise money for those who lost family in the LOCH ARD disaster. Of the 54 crew members and passengers on board, only two survived: the apprentice, Tom Pearce and the young woman passenger, Eva Carmichael, who lost all of her family in the tragedy. Ten days after the LOCH ARD tragedy, salvage rights to the wreck were sold at auction for £2,120. Cargo valued at £3,000 was salvaged and placed on the beach, but most washed back into the sea when another storm developed. The wreck of LOCH ARD still lies at the base of Mutton Bird Island. Much of the cargo has now been salvaged and some was washed up into what is now known as LOCH ARD Gorge. Cargo and artefacts have also been illegally salvaged over many years before protective legislation was introduced. One of the most unlikely pieces of cargo to have survived the shipwreck was a Minton porcelain peacock - one of only nine in the world. The peacock was destined for the Melbourne International Exhibition in 1880. It had been well packed, which gave it adequate protection during the violent storm. Today, the Minton peacock can be seen at the Flagstaff Hill Maritime Museum in Warrnambool. From Australia's most dramatic shipwreck it has now become Australia's most valuable shipwreck artefact and is one of very few 'objects' on the Victorian State Heritage Register. Flagstaff Hill’s collection of artefacts from LOCH ARD is significant for being one of the largest collections of artefacts from this shipwreck in Victoria. It is significant for its association with the shipwreck, which is on the Victorian Heritage Register (VHR S417). The collection is significant because of the relationship between the objects, as together they have a high potential to interpret the story of the LOCH ARD. The LOCH ARD collection is archaeologically significant as the remains of a large international passenger and cargo ship. The LOCH ARD collection is historically significant for representing aspects of Victoria’s shipping history and its potential to interpret sub-theme 1.5 of Victoria’s Framework of Historical Themes (living with natural processes). The collection is also historically significant for its association with the LOCH ARD, which was one of the worst and best known shipwrecks in Victoria’s history. Small Porcelain Heat Deflector from a kero lamp,deflector is blue inside. Outside has some encrustation. Artefact reg no LA/15. Recovered from the wreck of the Loch Ard.flagstaff hill, warrnambool, shipwrecked coast, flagstaff hill maritime museum, maritime museum, shipwreck coast, flagstaff hill maritime village, great ocean road, loch line, loch ard, captain gibbs, eva carmichael, tom pearce, glenample station, mutton bird island, loch ard gorge, porcelain heat deflector, heat deflector -
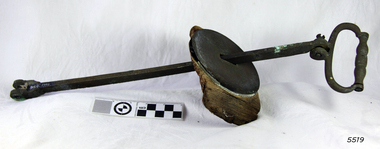 Flagstaff Hill Maritime Museum and Village
Pump
HISTORY OF THE LOCH ARD The LOCH ARD belonged to the famous Loch Line which sailed many ships from England to Australia. Built in Glasgow by Barclay, Curdle and Co. in 1873, the LOCH ARD was a three-masted square rigged iron sailing ship. The ship measured 262ft 7" (79.87m) in length, 38ft (11.58m) in width, 23ft (7m) in depth and had a gross tonnage of 1693 tons. The LOCH ARD's main mast measured a massive 150ft (45.7m) in height. LOCH ARD made three trips to Australia and one trip to Calcutta before its final voyage. LOCH ARD left England on March 2, 1878, under the command of Captain Gibbs, a newly married, 29 year old. She was bound for Melbourne with a crew of 37, plus 17 passengers and a load of cargo. The general cargo reflected the affluence of Melbourne at the time. On board were straw hats, umbrella, perfumes, clay pipes, pianos, clocks, confectionary, linen and candles, as well as a heavier load of railway irons, cement, lead and copper. There were items included that intended for display in the Melbourne International Exhibition in 1880. The voyage to Port Phillip was long but uneventful. At 3am on June 1, 1878, Captain Gibbs was expecting to see land and the passengers were becoming excited as they prepared to view their new homeland in the early morning. But LOCH ARD was running into a fog which greatly reduced visibility. Captain Gibbs was becoming anxious as there was no sign of land or the Cape Otway lighthouse. At 4am the fog lifted. A man aloft announced that he could see breakers. The sheer cliffs of Victoria's west coast came into view, and Captain Gibbs realised that the ship was much closer to them than expected. He ordered as much sail to be set as time would permit and then attempted to steer the vessel out to sea. On coming head on into the wind, the ship lost momentum, the sails fell limp and LOCH ARD's bow swung back. Gibbs then ordered the anchors to be released in an attempt to hold its position. The anchors sank some 50 fathoms - but did not hold. By this time LOCH ARD was among the breakers and the tall cliffs of Mutton Bird Island rose behind the ship. Just half a mile from the coast, the ship's bow was suddenly pulled around by the anchor. The captain tried to tack out to sea, but the ship struck a reef at the base of Mutton Bird Island, near Port Campbell. Waves broke over the ship and the top deck was loosened from the hull. The masts and rigging came crashing down knocking passengers and crew overboard. When a lifeboat was finally launched, it crashed into the side of LOCH ARD and capsized. Tom Pearce, who had launched the boat, managed to cling to its overturned hull and shelter beneath it. He drifted out to sea and then on the flood tide came into what is now known as LOCH ARD Gorge. He swam to shore, bruised and dazed, and found a cave in which to shelter. Some of the crew stayed below deck to shelter from the falling rigging but drowned when the ship slipped off the reef into deeper water. Eva Carmichael had raced onto deck to find out what was happening only to be confronted by towering cliffs looming above the stricken ship. In all the chaos, Captain Gibbs grabbed Eva and said, "If you are saved Eva, let my dear wife know that I died like a sailor". That was the last Eva Carmichael saw of the captain. She was swept off the ship by a huge wave. Eva saw Tom Pearce on a small rocky beach and yelled to attract his attention. He dived in and swam to the exhausted woman and dragged her to shore. He took her to the cave and broke open case of brandy which had washed up on the beach. He opened a bottle to revive the unconscious woman. A few hours later Tom scaled a cliff in search of help. He followed hoof prints and came by chance upon two men from nearby Glenample Station three and a half miles away. In a state of exhaustion, he told the men of the tragedy. Tom returned to the gorge while the two men rode back to the station to get help. By the time they reached LOCH ARD Gorge, it was cold and dark. The two shipwreck survivors were taken to Glenample Station to recover. Eva stayed at the station for six weeks before returning to Ireland, this time by steamship. In Melbourne, Tom Pearce received a hero's welcome. He was presented with the first gold medal of the Royal Humane Society of Victoria and a £1000 cheque from the Victorian Government. Concerts were performed to honour the young man's bravery and to raise money for those who lost family in the LOCH ARD disaster. Of the 54 crew members and passengers on board, only two survived: the apprentice, Tom Pearce and the young woman passenger, Eva Carmichael, who lost all of her family in the tragedy. Ten days after the LOCH ARD tragedy, salvage rights to the wreck were sold at auction for £2,120. Cargo valued at £3,000 was salvaged and placed on the beach, but most washed back into the sea when another storm developed. The wreck of LOCH ARD still lies at the base of Mutton Bird Island. Much of the cargo has now been salvaged and some was washed up into what is now known as LOCH ARD Gorge. Cargo and artefacts have also been illegally salvaged over many years before protective legislation was introduced. One of the most unlikely pieces of cargo to have survived the shipwreck was a Minton porcelain peacock - one of only nine in the world. The peacock was destined for the Melbourne International Exhibition in 1880. It had been well packed, which gave it adequate protection during the violent storm. Today, the Minton peacock can be seen at the Flagstaff Hill Maritime Museum in Warrnambool. From Australia's most dramatic shipwreck it has now become Australia's most valuable shipwreck artefact and is one of very few 'objects' on the Victorian State Heritage Register. Flagstaff Hill’s collection of artefacts from LOCH ARD is significant for being one of the largest collections of artefacts from this shipwreck in Victoria. It is significant for its association with the shipwreck, which is on the Victorian Heritage Register (VHR S417). The collection is significant because of the relationship between the objects, as together they have a high potential to interpret the story of the LOCH ARD. The LOCH ARD collection is archaeologically significant as the remains of a large international passenger and cargo ship. The LOCH ARD collection is historically significant for representing aspects of Victoria’s shipping history and its potential to interpret sub-theme 1.5 of Victoria’s Framework of Historical Themes (living with natural processes). The collection is also historically significant for its association with the LOCH ARD, which was one of the worst and best known shipwrecks in Victoria’s history. Part of a pump system. Has been attached to a piece of wood. Possibly a cistern plunger. From the Loch Ard.flagstaff hill, warrnambool, shipwrecked coast, flagstaff hill maritime museum, maritime museum, shipwreck coast, flagstaff hill maritime village, great ocean road, loch line, loch ard, captain gibbs, eva carmichael, tom pearce, glenample station, mutton bird island, loch ard gorge, pump system, pump -
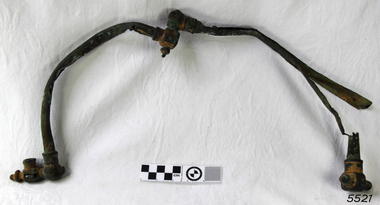 Flagstaff Hill Maritime Museum and Village
Functional object - Gas Fitting
This gas fitting was recovered from the wreck of the Loch Ard circa 1970, at the time of the discovery of the wreck. HISTORY OF THE LOCH ARD: - The LOCH ARD belonged to the famous Loch Line which sailed many ships from England to Australia. Built in Glasgow by Barclay, Curdle and Co. in 1873, the LOCH ARD was a three-masted square rigged iron sailing ship. The ship measured 262ft 7" (79.87m) in length, 38ft (11.58m) in width, 23ft (7m) in depth and had a gross tonnage of 1693 tons. The LOCH ARD's main mast measured a massive 150ft (45.7m) in height. LOCH ARD made three trips to Australia and one trip to Calcutta before its final voyage. LOCH ARD left England on March 2, 1878, under the command of Captain Gibbs, a newly married, 29 year old. She was bound for Melbourne with a crew of 37, plus 17 passengers and a load of cargo. The general cargo reflected the affluence of Melbourne at the time. On board were straw hats, umbrella, perfumes, clay pipes, pianos, clocks, confectionary, linen and candles, as well as a heavier load of railway irons, cement, lead and copper. There were items included that intended for display in the Melbourne International Exhibition in 1880. The voyage to Port Phillip was long but uneventful. At 3am on June 1, 1878, Captain Gibbs was expecting to see land and the passengers were becoming excited as they prepared to view their new homeland in the early morning. But LOCH ARD was running into a fog which greatly reduced visibility. Captain Gibbs was becoming anxious as there was no sign of land or the Cape Otway lighthouse. At 4am the fog lifted. A man aloft announced that he could see breakers. The sheer cliffs of Victoria's west coast came into view, and Captain Gibbs realised that the ship was much closer to them than expected. He ordered as much sail to be set as time would permit and then attempted to steer the vessel out to sea. On coming head on into the wind, the ship lost momentum, the sails fell limp and LOCH ARD's bow swung back. Gibbs then ordered the anchors to be released in an attempt to hold its position. The anchors sank some 50 fathoms - but did not hold. By this time LOCH ARD was among the breakers and the tall cliffs of Mutton Bird Island rose behind the ship. Just half a mile from the coast, the ship's bow was suddenly pulled around by the anchor. The captain tried to tack out to sea, but the ship struck a reef at the base of Mutton Bird Island, near Port Campbell. Waves broke over the ship and the top deck was loosened from the hull. The masts and rigging came crashing down knocking passengers and crew overboard. When a lifeboat was finally launched, it crashed into the side of LOCH ARD and capsized. Tom Pearce, who had launched the boat, managed to cling to its overturned hull and shelter beneath it. He drifted out to sea and then on the flood tide came into what is now known as LOCH ARD Gorge. He swam to shore, bruised and dazed, and found a cave in which to shelter. Some of the crew stayed below deck to shelter from the falling rigging but drowned when the ship slipped off the reef into deeper water. Eva Carmichael had raced onto deck to find out what was happening only to be confronted by towering cliffs looming above the stricken ship. In all the chaos, Captain Gibbs grabbed Eva and said, "If you are saved Eva, let my dear wife know that I died like a sailor". That was the last Eva Carmichael saw of the captain. She was swept off the ship by a huge wave. Eva saw Tom Pearce on a small rocky beach and yelled to attract his attention. He dived in and swam to the exhausted woman and dragged her to shore. He took her to the cave and broke open case of brandy which had washed up on the beach. He opened a bottle to revive the unconscious woman. A few hours later Tom scaled a cliff in search of help. He followed hoof prints and came by chance upon two men from nearby Glenample Station three and a half miles away. In a state of exhaustion, he told the men of the tragedy. Tom returned to the gorge while the two men rode back to the station to get help. By the time they reached LOCH ARD Gorge, it was cold and dark. The two shipwreck survivors were taken to Glenample Station to recover. Eva stayed at the station for six weeks before returning to Ireland, this time by steamship. In Melbourne, Tom Pearce received a hero's welcome. He was presented with the first gold medal of the Royal Humane Society of Victoria and a £1000 cheque from the Victorian Government. Concerts were performed to honour the young man's bravery and to raise money for those who lost family in the LOCH ARD disaster. Of the 54 crew members and passengers on board, only two survived: the apprentice, Tom Pearce and the young woman passenger, Eva Carmichael, who lost all of her family in the tragedy. Ten days after the LOCH ARD tragedy, salvage rights to the wreck were sold at auction for £2,120. Cargo valued at £3,000 was salvaged and placed on the beach, but most washed back into the sea when another storm developed. The wreck of LOCH ARD still lies at the base of Mutton Bird Island. Much of the cargo has now been salvaged and some was washed up into what is now known as LOCH ARD Gorge. Cargo and artefacts have also been illegally salvaged over many years before protective legislation was introduced. One of the most unlikely pieces of cargo to have survived the shipwreck was a Minton porcelain peacock - one of only nine in the world. The peacock was destined for the Melbourne International Exhibition in 1880. It had been well packed, which gave it adequate protection during the violent storm. Today, the Minton peacock can be seen at the Flagstaff Hill Maritime Museum in Warrnambool. From Australia's most dramatic shipwreck it has now become Australia's most valuable shipwreck artefact and is one of very few 'objects' on the Victorian State Heritage Register. Flagstaff Hill’s collection of artefacts from LOCH ARD is significant for being one of the largest collections of artefacts from this shipwreck in Victoria. It is significant for its association with the shipwreck, which is on the Victorian Heritage Register (VHR S417). The collection is significant because of the relationship between the objects, as together they have a high potential to interpret the story of the LOCH ARD. The LOCH ARD collection is archaeologically significant as the remains of a large international passenger and cargo ship. The LOCH ARD collection is historically significant for representing aspects of Victoria’s shipping history and its potential to interpret sub-theme 1.5 of Victoria’s Framework of Historical Themes (living with natural processes). The collection is also historically significant for its association with the LOCH ARD, which was one of the worst and best known shipwrecks in Victoria’s history. Copper gas pipe and fitting. Tow C-shaped pipes with fittings at each end. One end of each pipe is joined to the other pipe, making a U-shape. It was recovered from the 1878 wreck of the ship Loch Ard in the 1970s. flagstaff hill, warrnambool, shipwrecked coast, flagstaff hill maritime museum, maritime museum, shipwreck coast, flagstaff hill maritime village, great ocean road, loch line, loch ard, captain gibbs, eva carmichael, tom pearce, glenample station, mutton bird island, loch ard gorge, copper gas pipe and fitting, copper gas pipe