Showing 142 items matching "field gun"
-
 8th/13th Victorian Mounted Rifles Regimental Collection
Booklet - 30 cal MG
... FIELD Manual Browning Machine Gun Caliber .30 HB M1919A4... FIELD Manual Browning Machine Gun Caliber .30 HB M1919A4 ...The .30 caliber Browning Machine gun was the basic machine gun of US forces and became more common in British and Australian armoured when US tanks were adopted.Representative of US training manuals in WW11.Natural coloured covered booklet " War Department Basic FIELD Manual Browning Machine Gun Caliber .30 HB M1919A4 ( mounted in Combat Vehicles ) August 12, 1942."military, world war two, wwii, us, machine gun -
 Bendigo Military Museum
Photograph - PHOTOGRAPHS, GRINTON COLLECTION, FRAMED, 2008 - 2009
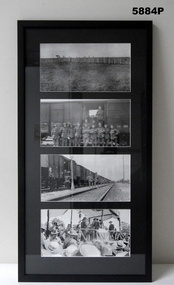
... and under heavy fire silenced a field gun which was firing over open... and under heavy fire silenced a field gun which was firing over open ...Frame 5. Photo 1. Lonely graves on a battlefield. This has been identified as "Vaire Wood cemetery" just south of the Somme at Vaire-sous-Corbie. Some 28 diggers from Vaire Wood were later reburied at Crucifix Corner Cemetery at Villers Bretonneux. Photo 2 and 3. Two photos, troop train luxury travel. This is possibly 45th quota men 'en route' from Gamaches to Havre in early 1919. From Havre they sailed for England on the "Prince George". Photo 4. Bert Grinton receiving his "DCM" from Lady Denman for actions around Clery on 31/8/1918. His CITATION reads: For conspicuous gallantry and devotion to duty near Clery on 31st August 1918. he became detached from his Company and joined another party in the advance. mainly through his assistance with a Lews Gun, they cleared an enemy trench, killing about 30 and capturing several machine guns. he got on top of the trench and under heavy fire silenced a field gun which was firing over open sights. This is from the official records in his service documents. Refer Cat No. 5880P for exhibition details. Refer Cat No. 1280 for Jack GRINTON Service Records.Photographs - black and white on paper. 4 photographs top to bottom. 1. Graves on a battlefield. 2 x 2. Troops in front of a rail wagon. View of rail wagons and troops. 3. Soldier receiving an award. Frame - timber with black colour paint, glass front, mount black colour cardboard. Backing cardboard with handwritten notation.Backing cardboard - handwritten, blue felt tip pen "5."framed photographs, grinton collection, ww1, 38th -
 National Vietnam Veterans Museum (NVVM)
Equipment - Equipment, Army, Long Tan Firing Pin
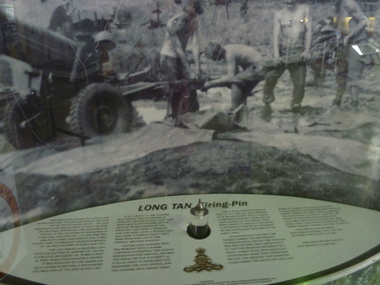
... of Long Tan Cross and Memorial Service. No.4 Delta Gun, 106 Field... Field Battery 4th Field Regiment No.4 Delta Gun Glass fronted ...Glass fronted exhibit featuring Long Tan Firing Pin with description of its importance. Complete with Photograph of the Battle of Long Tan Cross and Memorial Service. No.4 Delta Gun, 106 Field Battery, 4th Field Regiment.long tan, firing pin, 106 field battery, 4th field regiment, no.4 delta gun -
 National Vietnam Veterans Museum (NVVM)
Photograph, Gateway to Ngok Tavak, 1/05/1968 12:00:00 AM
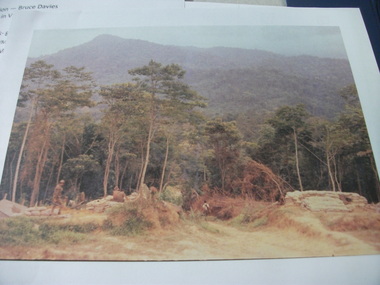
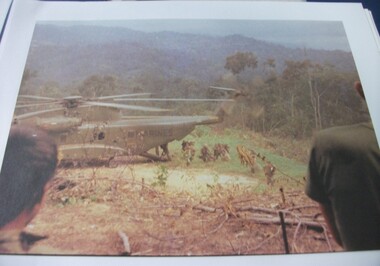
... Group) and two 105mm Howitzer field guns arrived... Group) and two 105mm Howitzer field guns arrived ...In May 1968, in the western jungle of Vietnam near Laos, led by Australian Captain J White, 11th Mobile Strike Force Company (MSF) occupied an old French fort on a hill named Ngok Tavak tasked with improving allied intelligence-gathering capabilities in the area. However, with enemy activity increasing, on May 4th, 44 US Marines, 35 CIDG (Civilian Irregular Defence Group) and two 105mm Howitzer field guns arrived as reinforcement from the Special Forces base at Kham Duc. By May 9th, Captain White’s company numbered about 200 men. Although in a good defensive position, coming towards them was the Iron Brigade of the 2nd Division of the North Vietnamese Army (NVA). At 03:00 on May 10th, the attack on Ngok Tavak began. The NVA, led by Major Dang Ngoc Mai, poured through the entrance at the eastern wall quickly occupying most of the fort. By midday the next day, Captain White had lost 40 Nung soldiers and 11 Marines with over 70 others badly wounded. Realising he could not withstand another attack, Captain White decided to abandon Ngok Tavak. Once the wounded were evacuated, Captain White ordered strike aircraft to blast a ‘corridor’ through the surrounding enemy cordon using napalm. By early afternoon, what remained of the defenders escaped through the ‘corridor’ and helicopters eventually flew them to Kham Duc. Colour image of edge of Ngok Tavak fort with soldiers sitting on & walking around sand-bagged foxholes. Jungle & mountains in background.battle of ngok tavak, john white -
 National Vietnam Veterans Museum (NVVM)
Photograph, Marines arrive at Ngok Tavak 04/05/1968
... Group) and two 105mm Howitzer field guns arrived... Group) and two 105mm Howitzer field guns arrived ...In May 1968, in the western jungle of Vietnam near Laos, led by Australian Captain J White, 11th Mobile Strike Force Company (MSF) occupied an old French fort on a hill named Ngok Tavak tasked with improving allied intelligence-gathering capabilities in the area. However, with enemy activity increasing, on May 4th, 44 US Marines, 35 CIDG (Civilian Irregular Defence Group) and two 105mm Howitzer field guns arrived as reinforcement from the Special Forces base at Kham Duc. By May 9th, Captain White’s company numbered about 200 men. Although in a good defensive position, coming towards them was the Iron Brigade of the 2nd Division of the North Vietnamese Army (NVA). At 03:00 on May 10th, the attack on Ngok Tavak began. The NVA, led by Major Dang Ngoc Mai, poured through the entrance at the eastern wall quickly occupying most of the fort. By midday the next day, Captain White had lost 40 Nung soldiers and 11 Marines with over 70 others badly wounded. Realising he could not withstand another attack, Captain White decided to abandon Ngok Tavak. Once the wounded were evacuated, Captain White ordered strike aircraft to blast a ‘corridor’ through the surrounding enemy cordon using napalm. By early afternoon, what remained of the defenders escaped through the ‘corridor’ and helicopters eventually flew them to Kham Duc. Colour image of U.S. soldiers disembarking from a helicopter in a clearing in the jungle. Foreground is rear of two soldiers watching. Background is mountains.united states - marine corps, battle of ngok tavak, john white, ngok tavak -
 Federation University Historical Collection
Photograph - Photo-montage, Officers of Forces in South Africa (Boer War), c1900
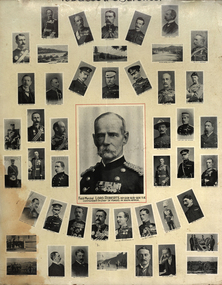
... , Howitzer Gun, Field Artillery. The poster produced..., Royal Horse Artillery, Johannesburg Fort, Howitzer Gun, Field ...The Boer War was fought from 1899 to 1901.Black and white printed photo montage of Officers who served in the South African Forces during the Boer War. Portraits are supplemented with views of: Modder River, Ladysmith, Railway Bridge of Tugela, 4.7 naval gun, Royal Horse Artillery, Johannesburg Fort, Howitzer Gun, Field Artillery. The poster produced as an advertising medium for Wills Tobacco and Cigarettes using the Transvaal Series of cards.boer war, south african war, armed services, lord roberts, weapons, alfred milner, cecil rhodes, w.p. schreiner, w. hely hutchinson, w.p. symons, general mildyard, a. hunter, holled smith, dick-cunnynghame, f. roberts, charles warren, brabazon, a.g. wauchope, kelly-kenny, hector mcdonald, baden-powell, lord methuen, f. carrington, n.g. lyttleton, f. howard, j.d.f. french, w.f. gatacre, h.s. rawlinson, eyre crabbe, alderson, kekewich, a. fitzroy hart, g. white, lord kitchener, lord dundonald, plumer, h.m.l. rundle, w.h. mackinnon, h.e. colville, f. forestier walker, r. clements, redvers buller, h. chermside, g. lyttelton -
 National Vietnam Veterans Museum (NVVM)
Photograph, Gibbons, Denis, Parade Ground Order 3
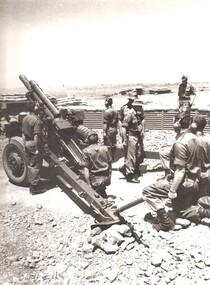
... Royal New Zealand Artillery attached to 1st Australian Field... Battery 161 battery RNZA 1st Australian Field Regiment Gunner ...Denis Gibbons (1937 – 2011) Trained with the Australian Army, before travelling to Vietnam in January 1966, Denis stayed with the 1st Australian Task Force in Nui Dat working as a photographer. For almost five years Gibbons toured with nine Australian infantry battalions, posting compelling war images from within many combat zones before being flown out in late November 1970 after sustaining injuries. The images held within the National Vietnam Veterans Museum make up the Gibbons Collection. A black and white photograph of Gunners of 161 Battery Royal New Zealand Artillery attached to 1st Australian Field Regiment prepare their gun in parade ground order to carry out a copy book gun drill and firing for visiting NZ politicians (circa Feb 1967)photograph, 161 battery, 161 battery rnza, 1st australian field regiment, gunner, gibbons collection catalogue, nz politicians, denis gibbons -
 National Vietnam Veterans Museum (NVVM)
Photograph, Gibbons, Denis, Parade Ground Order 1
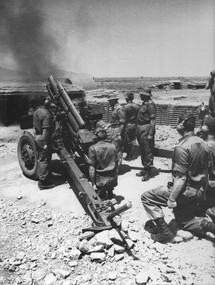
... Royal New Zealand Artillery, attached to 1st Australian Field..., attached to 1st Australian Field Regiment, fire their gun ...Denis Gibbons (1937 – 2011) Trained with the Australian Army, before travelling to Vietnam in January 1966, Denis stayed with the 1st Australian Task Force in Nui Dat working as a photographer. For almost five years Gibbons toured with nine Australian infantry battalions, posting compelling war images from within many combat zones before being flown out in late November 1970 after sustaining injuries. The images held within the National Vietnam Veterans Museum make up the Gibbons Collection.A black and white photograph of Gunners of 161 Battery Royal New Zealand Artillery, attached to 1st Australian Field Regiment, fire their gun, in parade ground order to carry out a "copy book" gun drill and firing for visiting New Zealand Ppoliticians (Circa Feb 1967)photograph, 161 battery rnza, 1st australian field regiment, new zealand, nui dat, gibbons collection catalogue, gunners, 161 battery royal new zealand artillery, visiting politicans, denis gibbons -
 Bendigo Military Museum
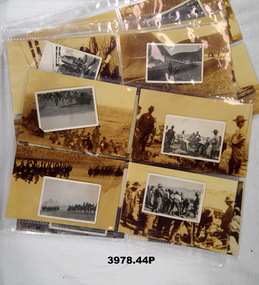
Photograph - PHOTOGRAPHS WW1, Originals: 1915
... Field Gun Australian Artillery. .7) 'Come to the Cook House...) 18 Pounder Field Gun Australian Artillery. .7) 'Come ...The photos in the collection relate to Thomas Robert JONES No 1982 AIF. Refer Reg No 1377 for his service details..1) - .22) Photos, black / white, showing men, training, the desert, Dardanelles, Turkish prisoners, leaving Egypt. .23) - .44) Enlargement copies of photos .1) - .22), sepia.Hand written on the rear in pen: .1) Housing parade on the desert Egypt, bugler band 6th Battalion. .2) Australian Field Artillery exercising horses near the pyramids. .3) Some of the buglers of the 6th Battalion with their identification disks as eyeglasses. .4) Serving out rations. .5) 6th Battalion having a short halt during a route march on the desert. .6) 18 Pounder Field Gun Australian Artillery. .7) 'Come to the Cook House Door' 6th Battalion AIF. .8) Lieut WATSON - Machine Gun being vaccinated by Lieut BALFE A Coy. Both these Officers are amongst the fallen. .9) 6th Battalion AIF preparing to leave Mena Camp for the Dardanelles. .10) A Turk captured on the morning of 25th April 1915 on board the troop ship Galeka. .11) Wounded alongside of hospital ship Galeka. .12) HMS Vengeance at the Dardanelles. .13) Hospital ship Sudan off Gaba Tepe. .14) Observation balloon off Cape Helles. .15) British Destroyer off Cape Helles. .16) Cape Helles, Dandanelles. .17) Turkish prisoners captured at the Suez _ _ _ Barracks, Cairo. .18) Turkish prisoners. .19) <> Guides near pyramids Mena. .20) Method of irrigation on the Nile, Egypt. .21) Going on leave into Cairo. .22) View of Cairo mosques in foreground taken from the Citadel. .23) - .44) On rear in stamp form: Dennis Major, 7 Bancroft St Bendigo Vic 3550. Tel & fax 03 544 2445 photography, military, ww1 -
 Eltham District Historical Society Inc
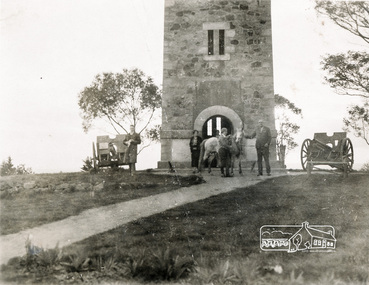
Photograph, Memorial Tower, Kangaroo Ground c.1934, 1934c
... field guns have been identified as of German origin, Krupp 77 mm... field guns have been identified as of German origin, Krupp 77 mm ...Sepia photograph of Joyce McMahon and 'Tiny' Carroll at the War Memorial Tower, Kangaroo Ground c.1934. The guns were installed in 1934 and removed in 1942. Taken in the early 1930s, the photograph ... shows the Kangaroo Ground Tower of Remembance with Joyce McMahon, daughter-in-law of Mr. P. J.McMahon, the then Shire of Eltham Secretary, her horse and a very tall person patting the horse. He is ex-serviceman W. "Tiny" Caroll who was the council's caretaker of the surrounding War Memorial Park. He lived in the stone cottage which still stands in the park. "Tiny" is seen as the fictional character "Tiny Bourke" who, in author Alan Marshall's book "This is the Grass", "was a giant of a man, well over six feet high, with huge hands that completely encircled the cup of tea". The bronze casting, which shows the 79 names of those who paid the "supremen sacrifice" in World War 1 (1914-1918), was erecfed above the entrance to the Tower in September, 1930. The Monterey cypress trees which now form the windbreak around the park's fenceline, were just knee high in this photograph. They were planted in August 1926, with all the plantings paid for, and done, by the public as the Tower was being erected. The two field guns have been identified as of German origin, Krupp 77 mm calibre captured on October 4, 1918 at Geneve, France. They were removed in 1943/44 as a wartime requirement of the Australian Govenment. A public notice dated October 16, 1926 by Cr. H Rutter, Chairman of the Eltham Soldiers War Memorial League stated: "On the summit of that central and conspicuous landmark, Garden Hill, there is being erected a massive memorial tower which will, for all time, remind every passerby of the part played by the men of the Shire of Eltham in the Great War. The work has been undertaken by the people of the Shire a a tribute of love and admiration for those who were known and dear to use in the days of their youth and early manhood, who went out from amongst us, never to return, and whose self-sacrifice has made us, each and all, thier ever-lasting debtors" Harry Gilham, Eltham District Historical Society Kangaroo Ground Tower of Remembrance, A Journey in Time: a column about Nillumbik's history, Nillumbik Mail, 9th August, 2000 Since that research the following has been sourced from Eltham and Whittlesea Shires Advertiser and Diamond Creek Valley Advocate, April 8, 1921, p. 3 Retrieved April 25, 2020, from http://nla.gov.au/nla.news-article57639687 Eltham Shire Council From Town Clerk, Melbourne, stating that a light machine-gun captured by the 22nd battalion, A.I.F. at La Motte Farm, near Beaurvoir, on Oct. 3rd, 1918, during the operations which won the Beauvoir line and completed the smashing of the great Hindenburg defence-system, has been alloted to the Shire of Eltham. - On the motion of Crs Hubbard and Smedley, it was decided to have the gun placed in the Memorial Park. Sepia Photographgarden hill, gun, joyce mcmahon, kangaroo ground, memorial tower, shire of eltham war memorial tower, tiny carroll, war memorials, war trophy, william carroll -
 Melbourne Legacy
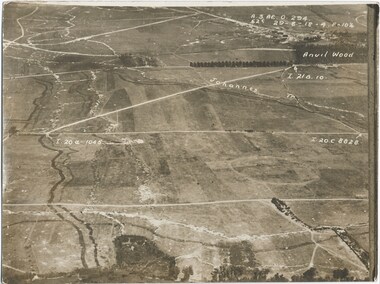
Photograph - Photo, Aerial view of the Somme
... approaches to Peronne were covered by numerous field and machine-guns... approaches to Peronne were covered by numerous field and machine-guns ...An aerial photo of the Somme in France during World War One. There are coordinates or numbers in some areas. Also labelled are the Johannes and Anvil Wood. Was with 11 other photos of World War One that had been mounted on board for display at Legacy House at some stage. When they were taken off display they were put in the archive cabinets. The founding legatees all served in World War One so these photos would have been of significant places for them. (see 01888 to 01899). From the AWM: Anvil Wood was a small wood to the north of Peronne that marked the centreline of an attack by the 14th Brigade on the morning of 1 September 1918. The northern approaches to Peronne were covered by numerous field and machine-guns, but the leading battalions of the brigade - the 53rd and 54th - pushed their attack home with determination, and sent the German defenders fleeing back to Peronne. The attack opened the way for the 14th Brigade to advance on to Peronne itself and break into the town's northern defences.Photos from World War One that would have been significant to the founding legatees.Sepia photo of the Somme battlefield in France during World War One.world war one, france, somme -
 Warrnambool and District Historical Society Inc.
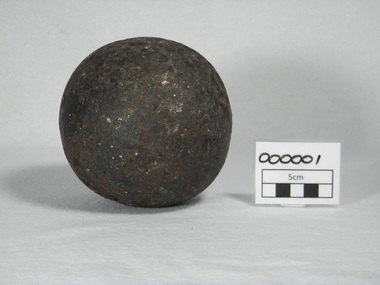
Weapon - Artefact, Cannon ball, pre 1830
... calibre cannon, which were used only on ships. (12 calibre guns... calibre cannon, which were used only on ships. (12 calibre guns ...This cannon ball formed the basis of a discussion with artillerist Peter Webster and historical society members in 2011. The following ideas were put forward. It was approximately 5 inches in diameter and weighed 10lb, Such cannon balls were used in an 18 calibre cannon, which were used only on ships. (12 calibre guns were field artillery). Australia was behind England in its artillery use and used hand me downs. In the 1800's Australia did an audit of artillery and cleared out those no longer in use. By the time of the 1830's 18lb cannons were largely obsolete and removed from service Australia used 18 calibre cannons in Northern Australia at Port Essington and Fort Dundas (Melville Island) Perhaps this cannon ball has no real connection with Australia and came as ballast from some other country.This is one of the more interesting items in our collection and there has been much conjecture over the years as to the story of how it ended up in Warrnambool. In that way it has built its own mystery and provenanceRound metal ball measuring 5 inches in diameter, weighing 10lb. The surface is pitted with the original surface visible in some parts.defence, war, ships, cannon ball, exploration, warrnambool, warrnambool history, warrnambool cannonball -
 Wangaratta RSL Sub Branch
Photograph - Framed Photograph
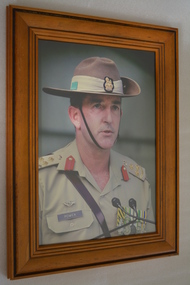
... Field Regiment. He further served in 4th Field Regiment as a Gun... Field Regiment. He further served in 4th Field Regiment as a Gun ...Colour photograph of Lt General Brian Ashley "Ash" Power AO, CSC . Ash Power was born on the 20th of January 1957 in Wangaratta, Victoria. After completing his secondary education at Wangaratta High School, he entered the Royal Military College in 1975, graduating in 1978 into the Royal Regiment of Australian Artillery. His initial appointment was as a Section Commander in 4th Field Regiment. He further served in 4th Field Regiment as a Gun Position Officer, Assistant Adjutant, Adjutant, Operations Officer (BatteryCommander Headquarters Battery) and Commanding Officer.Ash has commanded the 1st Brigade, 1st Division and Training Command – Army. He has served on exchange at the Royal Military Academy Sandhurst, Camberley, United Kingdom and has had other training appointments at the School of Artillery, and the Royal Military College Duntroon. He also served as the Defence Attaché in Thailand. On operations Ash deployed to Bougainville on Operation BELISI as Chief of Staff in 1998 and in 1999, after a short period as Chief of Staff Deployable Joint Force Headquarters, was deployed as the Colonel Operations for INTERFET in East Timor. From June 2004 to July 2005 he was appointed as Director, Combined Planning Group, US Central Command, Tampa. He deployed as the Deputy Chief of Staff, Strategic Partnering Headquarters International Security Assistance Force, Kabul, Afghanistan in 2010-11. Lieutenant General Power retired from the Army on 19 July 2014, his final posting being the Chief of Joint OperationsBrown timber frame containing photograph of uniformed Army Officer ash power, australian army -
 4th/19th Prince of Wales's Light Horse Regiment Unit History Room
Photo Albums - set of two, c. 1919
... on the artillery around this vicinity & captured many field guns. 15... field guns. 15 German Despatch Rider on the road to ES SALT ...Memorabilia of 908 Dvr Thomas Edward Whyte, 3rd Light Horse Field Ambulance, World War 1 READ THIS. During the last war I sent these pictures home through devious channels. When I lobbed back I found them all pasted in these albums by my young brother Billy. He was only a kid then! Nowadays he is serving up North. Went away with the original 9th Battn. Was in the Blitz on England and served in Libya, Tobruk, Greece, Crete and Palestine and was twice knocked. It's not long since the last upheaval 1914-18 and I wonder if these boys think as we did. This will be the last war? I sincerely hope so. TWSet of two photo albums. Photos pasted into albums with captions in white ink. Photo captions - Vol 1. (? = not legible) 1. Prisoners from ES SALT 2. Dust scene at AUJA FORD. 4th LH BDE 3. ? ? CHEOPS PYRAMID 4. Houses and domain WASSA battle 5 .Pontoon at SERAPELAI 6. SPINX (sic) & PYRAMID 7. The Nile floods occur once yearly and all irrigation centres are alternatively flooded 8. Pontoon bridge over SUEZ Canal at SERAPEUM . Constructed by Aust Engineers 9. The arrival of newspapers and mail 10. Lake IIMSAH-ISMALIA 11. Camp outside Jerusalem. Walls of old city easily discernible 12. Roman walls on beach at MONTAZEH 13. ? ? These boats are used for conveying between steamer & shore 14. Interest shown in the new issue. Through the scarcity of horses Batmen/Grooms and drivers ? allotted donkeys ? ? 15. DAMASCUS GATE JERUSALEM 16. Trumpeter ? 17 Indians making ? for railroad 18. 'SPELLO' Sinai Country 19. Police searching Egyptian labourer 20. Cavalry ?? SHA? 21. Entering ? WADI ? 22. Bedouins at ? 23 No caption 24 No caption 25 Bolar trees EZBEKIEH Gardens CAIRO 26 .Flamingos at NOUZEH Gardens ALEXANDRIA 27 BARAGE 28 KASR-ELNILL Bridge 29 NOUZEH GARDENS 30 AMGS on beach at ? 31 NOUZEH GARDENS - ALEX 32 Mascot of 7th M.V.G. 3RD ALHR 33 Printing on walls inside St Mary's Church. Depicting the Flight from Herod. (Corner torn off photo) 34 Inside Virgin Mary's Church at MATARA 35 ? painting in Church ?? 36 SUEZ Canal. Finish of Arab pony race. ZAL-A-ZIA 37 Admiralty offices at PORT SAID 38 A corner of CHEOP"s PYRAMID 39 The Spinx (sic). Nose was blown off by a shell from one of Napoleon's guns. 40 Monastry on the MT of TEMPTATION 41 Mess orderlies. Foodstuffs in locker given to troops by the AIF 42 Mid day meal on treck 43 Ambulance sand carts for conveying wounded and sick over desert sand 44 3rd ALHB 45 Kaisers Church JERUSALEM. Inside is a large painting figuring the Kaiser & Kaiserine holding a model church. 46 Bedouin women drawing water from well at EL-ARISH 47 2nd ALH BGDE doing route march on JERUSALEM-JERICHO ROAD 48 GEN HODSON GOC Anzac Mounted Divn presenting decorations & investitures on the sands at SHEIKS-ZOWAID 49 Armoured Car 50 Snow at the CEEDERS (sic) on Mt LEBANON 51 Compulsory phenyle bath for all troops in front line area 52 Austrian guns taken at point of bayonet by NZ & 2nd BGDE at GAZA 53 CACHOLETS for carrying wounded 54 The boys found some timber and made a spring board on SUEZ Canal 55 Bedouin wedding. The Bride travels in state amongst rubbish on top of camel. Her father leads conveyance. 56 Australian graves at SHALLAL 57 Camel Transport Company bring rations along beach 58 Billy the mascot holds an offensive & checks advancement 59 Exercising horses at HELMIEH Egypt 60 PONT-DE-QUOBBA Egypt. A suburb of well-to-do Egyptian merchants 61 Demolition stunt at ASLU. Bridge destroyed by Australian Engineers 62 Swimming horses in Great Bitter Lakes Egypt 63 On the move along Wadi 64 On the shores of the Bitter Lakes EL-EGYTE 65 A leave party waiting for the pontoon to swing into position 66 Carting grain 67 Egyptian Brass Band 68 French warboat (sic) in Canal 69 Russian Troops from Mesopotamia passing through SUEZ Canal 70 Prisoners coming in under escort. Turkish & German officers in lead mounted on ponies 71 Turkish prisoners 72 T.B.D in Canal 73 Old trenches on SUEZ CANAL near BITTER LAKES on W Bank 74 Monitor in Canal 75 Block house, trenches & entanglements near Post 62 76 A halt in an Egyptian village EL-MARO' 77 Mobile wireless plant 78 On the road from Canal to Railhead 79 Old Turkish guns in ancient fort at ALEXANDRIA 80 Francenia steaming through Canal 81 After MAGHDABA stunt. Convoy taking wounded form EL-ARISH to railway at 139 82 Indian Camelry 83 Virgin Mary's Church 84 Sluice gate at BARAGE Egypt 85 Hospital at lower W bank of Canal 86 Virgin Mary's tree 87 Sweetwater Canal at ISMAILIA Egypt 88 Halt and Feed. The A.M.C. attached to flying column. 89 Bringing stores ashore at JAFFA 90 H Videon & J Britton astride donks. Horses became scarce through casualties etc and units had donkeys issued to them 91 RAMLEH. The traditional burial place of St John the patron saint of England (sic). 92 Jewish Synagogue at RISHON-COUR-LE-LION (Richard the Lion Hearted) 93 Water tower at HELIOPOLIS 94 Portion of camp on HELIOPOLIS Racecourse 95 Arrival of papers 96 Sand sleigh 97 Boring plant & prisoners taken on the JIFF-JAFFA stunt. Two Austrian officers and party of Turks taken whilst building a concrete gun emplacement 98 The obelisk at MATARIA 99 In an avenue of Australian gums at ZEITOUA 100 Mountain battery gun 101 The 3rd ALH BGDE camped at HELIOPOLIS Racecourse 102 Captured Turkish guns 103 Turkish and Austrian prisoners. JORDAN VALLEY 104 The MT of Temptation Monastery built over spot where Christ spent his 40 days 105 Refugees from ES-SALT at JERICHO 106 3rd LHFA and 8th LH REGT at HELIOPOLIS 107 Fig trees at Roman Wells JIFF JAFFA 108 Inside the Blue Mosque CAIRO 109 Lagoon that was destroyed on JIFF JAFFA stunt 110 Section race at Brigade sports 111 Another tombstone at ALEX 112 Innoculating female date palm 113 Bronze tombstone in a cemetary at ALEXANDRIA 114 Luna Park at HELIOPOLIS 115 Egyptian water buffalo. Used by natives for ploughing etc 116 Russian church. Some call it the "Church of St Mary Magdelene" 117 At pyramids GIZA. Billingsley lost leg & McMullin KIA 118 Pontoon bridge over Suez Canal 119 DURBAN 120 Rescue work 121 Paddy Hanly 122 Motor train for conveying rations between Canal and Railhead. 123 At MUCKSHUBE ? 124 British ??? 125 Bedouins bringing in their harvest from the fields of ABBASSAN-EL-KEBIR Palestine 126 German HD QTRS BEERSHEBA 127 Date ? SINAI 128 Military railroad running through ? at EL-ARISH 129 Street scene at KHAN-YUNIS Palestine. Samson often called at this place to visit his girl. Napoleon narrowly escaped capture here during his ? in 1799 130 Date palms bearing fruit. These do not ? they are ?? 131 Motor ambulance convoy 132 Turkish hospital BEERSHEBA 133 MT CALVARY 134 Town Hall BEERSHEBA 135 Railway station BEERSHEBA 136 ASLUJ 137 Turkish depot MAGDABA 138 DURAN 139 3rd ALAB Hospital 140 Main Street PORT SAID 141 Stock Exchange ALEXANDRIA 142 The "Bull Ring" 14th AGH 143 (Double exposure) 144 Jewish School at DURAN Palestine 145 Damascus Gate JERUSALEM 146 Roller used for grinding clay for making bricks 147 The Harbour at ALEXANDRIA 148 Part of Napoleons Road along sea shore opposite BEELAH 149 Hotel at ALEX. Barred to the troops of course. 150 HELIOPOLIS 151 -153 ALEXANDRIA 154 Ambulance treck 155 Cacholets at the casually clearing station 156 Refugees from ES-SALT entering the Jordan Valley. Mts of MOAB in background 157 Cameliers bring in prisoners 158 The "Niagara". Casualties were from the front line by all descriptions of transport and passed through several field hospitals until they eventually reached the railway. They were sent to KANTARA by train. Despatched from there to PORT SAID by this boat 159 JERICHO 160 Turkish prisoners in JORDAN VALLEY 161 Bedouin nippers of SINAI 162 Bridge destroyed by ALH at ASLUJ 163 Railway sheds at BEERSHEBA. Portion was set afire by retreating Turks 164 ASLUJ Station 165 German Hospice 166 at ASLUJ 167 Suez Canal offices PORT SAID 168 MENA Village from top of Cheops. White lines at left are roads made by Australian troop. First Aust Contingent camped here. 169 A felukeh passing through gate at BARAGE 170 Military railway terminal EL ARISH 171 (No caption) 172 Egyptian family waiting for a train 173 Turkish prisoners and captured material coming in 174 Turkish wounded at BEERSHEBA awaiting removal 175 Two hospital ships at ALEXANDRIA 176 Some of the Bd boys 177 Race meeting 3rd ALHB at TRIPOLI- SYRIA 178 The blacksmith and Rodney Thomas swimming horse in SUEZ CANAL 179 Natives grinding grain 180 Thoroughbred 181 MUKATTAM HILLS 182 Trenches at JIFF JAFFA 183 MacBoyd as a Padre 184 Egyptian Syce having shave by travelling barber 185 The creek outside ALMINA 186 Cameliers 187 Clearing Station on beach at EL-ARISH 188 Wadi at TALLAT-EL-DUMM 189 Motor transport park 190 Some of the boys 191 Pompeys Pillar 192 at MAGHDABA 193 Hospital at JERUSALEM 194 Cheop's Pyramid 195 Golden Gate JERUSALEM 196 Hustling Turks through BEERSHEBA 197 Holy City 198 Mosque of Omar Jerusalem 199 Railway bridge destroyed by ALH at ASLUJ 200 Enemy material captured at SHERIA BEERSHEBA 201-3 These Mosques built with alabaster taken from pyramids at GIZA 204 Pontoon bridge built by our Engineers over RIVER JORDAN 205 3rd Bgde in Koil at MASAID 206 Billy McGhie throwing the weight 207 Nirazeh ? Gardens 208 Motor Ambulance Park 209 Bedouin women in Palestine village 210 ALEXANDRIA 211 Junction Stn 212 Indian Lancers 213 Motor convoy at ESSANI 214 A & B Sections 215 JERUSALEM. Once known as the 'City of Palms' and presented to Cleopatra by Anthony 216 Monastery on the Mount of Temptation. Situated on the Hills of Solomon on E side of Jordan Valley just behind JERICHO 217 DURAN A Jewish village in Palestine 218 One of our planes meets with a mishap on landing 219 Bedouin flocks around NABLUS 220 ES-SALT Road just above Jordan River 221 Halt! Action Front! Getting guns into action from pack 222 Village well 223 Gun inspection 224 WADI GHUZZEE Bridge 225-6 At GIZA Zoo Egypt 227 Syrians gathering olives 228 Smashed plane 229 MacBoyd 230 Bridge across Jordan at GORRONHOER 231 Competitors for Gretna Green. 3rd Bgde sports at TRIPOLIA 232 EL ARISH 233 Main street JAFFA 234 The beach at MARI-KHEB 235 Scene of old Cairo 236 Bedouin market 237 Bridge built over Wadi EL-ARISH. The biblical "River of Egypt". 238 Old water reservoir in native village 239 A "spello" on the track 240 Plane going out on reconnaissance 241 Bomb attached to carrier on a plane 242 Ancient Turkish gun at forts in TRIPOLI - SYRIA 243 Gun inspection 3rd AMGS 244 Old Turkish trenches outside GAZA 245 Wadi KHUZEL Bridge at SHALLA 246 BEERSHEBA 247 Street scene ZAG-A-ZIG 248 Spinx (sic) & Pyramid - GIZA 249 Egyptian Coastguards at ALEXANDRIA 250 A Palestine camp E Troop 3rd MG Sqn 251 B class horses killed in Syria 252 Scene from summit of Pyramid 253 Bert Richmond & an old Turkish Howitzer on MONTAZEH 254 LION'S WELL 255 Australian trenches outside Ferry's Post near Hill 70 256 A street scene in HELIO{PLIS 257 Electric trams at ALEXANDRIA 258 Cleaning harness 259 Swinging pontoon bridge into position at SERAPEUM 260 British Monitor in Suez Canal 261-2 Scenes of Turkish buildings at MAGHDABA. Taken by the ALH The first time in history mounted troops have attacked and taken entrenched positions 263 Aussies at Egypt's ancient monuments 264 Scenes of old CAIRO from MOKATTAM Hils 265 Bridge across canal at BARAGE, 16 miles outside CAIRO 266 Curly and Vic Norton 267 Stumpy McIntyre & Long Pikington 268 In Wadi GHUZZEL near TELL-EL-JEMM 269 Digging post holes for stables 270 Cameliers bring in prisoner. Austrian Officer in black 271 White washing mess shed 272 F Troop 3rd AMGS Sqn 273 Jews at Recruiting Depot at JERUSALEM, forming Jewish Battalion 274 In Jordan Valley, 3rd Machine Gunners have 8 horses killed by an aerial torpedo 275 Turkish prisoners 276 Cocos Island 277 Snow on the Lebanon Ranges 278 Egyptian Hotel 279 Gordon Wake. Note intruders 280 Electric trams at HELIOPOLIS Egypt. Heliopolis built by Belgian firm in 7 years 281 Sweetwater Canal at SERAPEUM 282 The ? wells at JIFF-JAFFA 283 Virgin Mary's well at MATARIA. Boyd, Simpkin & Crowley 284 Cricket for convalescents at MONTAREH 285 Indians working at cutting for military railway 286 Australian Hospital BEERSHEBA 287 Removing wrecked ambulance car from rail road 288 Engineers depot in ? at EL-ARISH 289 Water preservation scheme at SHALLAL 290 German Princes Palace at HELIOPOLOLIS 291 Some of the boys 292 Aussie aerodrome BEELAH 293 EL-JALLAH outside BETHLEHEM 294 Some of the gunners 295 Trying camels in gun carriages. Note sand caterpillar 296 Street outside old city JERUSALEM 297 D.H QRS In EL-ARISH. Hod 298 Cairo Museum 299 Wadi bridge built by Army Engineers 300 A two storied building at GALM used as German HQrs until reached by our guns 301-2 No caption 303 Ambulance with Flying Column 304 Jack Pegg 3 AMGS 305 KHAN YUNIS 306 In the Jewish village of "Rischon le Lion" 307 Wet Canteen BEELAH 308 Motor Transport LATRON 309 Gen Chauvel OC Desert Mounted Column 310 10th LH - Inverness Battery "Railhead" 311 3rd LHFA "SERAPIUM" 312 ESBEKIEN Gardens "LE CAIRE" 313 Camel training and wireless station Hill 60 314 ZAG-A-ZIG Rly Stn 315 One of the Irrigation Canal locks "HELOUAN" 316 Indian Camel Corps 317 Base at Hill 60 318 Aussie transport arriving "ALEXANDRIA" 319 3 ALHB at AL MINA 320 Main entry to city of JAFFA 321 Mosque at DAMASCUS 322 A Turk brought to earth by one of our patrols 323 Brigade boxing contrst 324 Ostrich farm ZEITOUN 325 MATERIA 326 No caption 327 Mail day 328 3rd LHFA entering HELIOPOLIS from MENA 329 M Boyd, L Simpkins, S Crowley 330 Stretcher bearers 331 French Hosp JERUSALEM 332 SERAPIUM 333 Gippo crushing wheel 334 On the move - bully and biscuits 335 V Morton, F Stokes, L Simpkins & Hanley 336 Turkish prisoners - SHERIA 337 Getting used to the mask J Antonio MM 338 Sand carts 339 Model house - MONTAZA Hospital 340 "Abdul" 341 Wood Depot "ESDUD" 342 On troop ship - from Syria 343 Turkish prisoners "JULIUS" 344 TRIPOLI 345 3rd AMGS cook house "BEELAH" 346 Breaking camp "ZEITOUN" 347 Turkish prisoners "GAZA" 348 One of our tanks. About nine were blown out of action at GAZA 349 Camp in HOD-EL-ARISH 350 German HQRS BEERSHEBA 351 Race Course TRIPOLI 352 A Locke & P Leeming 353 Sea planing in Suez Canal 354 MOASCR detail camp 355 KANTARE Suez Canal 356 Four boys of MG Sqn at cards while convalescing . Marked X was a prisoner of war for three days. Got him back with us when we countered. 357 Signal station at CANA 358 H Videon in german rig 359 ROD-EL-FARAC 360 Sweetwater Canal ZAG-A-ZOG 361 Hospital train on beach EL-ARISH 362 Jerusalem Road 363 Bedouin camel and young'un 364 Admiralty Offices, PORT SAID 365 Suez Canal PORT SAID 366 Taking wounded to clearing station 367 Hills of 10-60 MALHA 368 Junction Station 369 EL ARISH 370 Wine Distillery LATRON 371 White figures how entrance to Pyramid 372 RAPC Wireless Station 373 Sports in Canal. ANZAC Day 1916. Prince of Wales is aboard white launch. 374-5 Captured Austrian boat. 40,000 cases of benzine aboard. She was brought into Canal at Port Said. Spies set her afire. She burnt for some considerable time and eventually blew up. 376 Pumping water from Wadi on Muckshabee stunt 377 On trenches 378 Bringing in disabled battle plane 379 Giving a motor transport a lift 380 Old Turkish howitzer. MONTAZZA 381 Jerusalem country 382 Palm Hod in SINAI. Trees do not bear dates until 14 years old. No bees here. Palms innoculated by Bedouin. 383 Camel cacolets for conveying wounded 384 ESKBEKIEL Gardens Cairo 385 LAKE TIMBAH 386 Xmas dinner 1916 387 Gift billies from ACF 388 Section competition 389 In big marquees HELIOPOLIS 390 HM Landships 391 Capt Aberdeen inspecting horses 392 Football. Black vs White 393 The game 394 Old Napoleon fort. 10 mile along coast from ALEX 395 Jewish Cemetery AKRON 396 Ration fatigue 397 Blowing bottom out of Turkish Reservoir to allow soakage 398 Tilley & Farley - 14th AGH 399 At GIZA Zoo. Note height of giraffe 400 On this stunt we destroyed Turkish reservoir of 2 1/2 million gallons 401 Demolition party at wells MUCK-SHUBE 402 3rd ALH Bde HELIOPOLIS Race course 403 HMLS "Lady Wingate" 404 Turks blew out our tanks at GAZA 405 One of our aviators captured by German. Note German wearing Iron Cross. Snapped behind Turkish lines. Original of this snap was dropped at Aust aerodrome to let them know Aussie airman was alright and not killed in capture. Chivalry 406 Sausage observation balloon 407 READY 408 Bomb on carrier 409 Testing 410 B Richmond, Wireless Operator RAFC 411 Loading Bomb 412 Crash in desert 413 Bomb in YMCA at MAZRAR 414 No caption 415 LW Simpkin - Late 3LHFA 416 LEMNOS 417 Shelling the MARSDEN 418 Pontoon across Jordan River 419 Shells on Walkers Ridge 420 Sweetwater Canal 421 LAKE ISMAILIA 422 Indian Lancers on Canal 423 CAIRO Railway Station 424 Destroying Turkish water supplies. Explosives used for breaking clay at bottom of lagoon, help to absorb water 425 Exercising horses at ZEITOUN Egypt 426 In Wadi on MUG-SHUBEE stunt 427 Tractor drawing 60 lb gun towards front line 428 Sultan's mother's place at HELIOPOLIS = City of the Sun 429 Camped on the sands outside RAILHEAD, Jump off for SINAI campaign 430 G Turner & A Lockwood out for a camel ride. 431 GAZA and Nile floods from top of Pyramid 432 Baby refuses to carry his harness and his pal wears an astonished look 433 No caption 434 Turkish Officers 435 Regt HQRS at IBEETA 436 No caption 437 3rd Machine Gun Squadron 3rd ALH Bgde (my unit) 438 Camel Corps at dinner 439 KHEFREN Pyramid snapped from top of Cheops 440 CHEOPS 441 Pyramids 442 MENA from top of Pyramids 443 Snap from Pyramid showing MENA-CAIRO road running through Nile floods 444 MENA village from Pyramid 445 Band of British West Indies Regt 446 Gippo Band 447 Swimming on Med Sea 102 KmA 448 H Maddocks 449 Bedouin and Egyptians utilise any animals for their fields 450 Captured Turkish train - BEERSHEBA 451 Gardens ISMAILIA 452 Gippos used for horse lines etc 453 Canteens at HELIOPOLIS 454 3 ALHB watering in Wadi on ESSANI stunt 454 JAFFA 455 ALEX, Napoleon relics 456 Egyptian water wheel 457 SUEZ 458 WADI GHUZZEE 459 On Reconnaissance at 10-60 460 Goats and sheep captured from hostile Bedouins 461 Pontoon SERAPIUM 462 Aust trenches - Suez Canal. Turks attacked FEB 1916 463 Camel transport 464 3 ALHB Wireless Station. Col Scott 9 LH got DSO on this stunt (MUCK SHUBE) 465 ALEXANDRIA 466 Canal Hospital Ships 467 Ambulance - Sand cart 468 At old Cairo 469 No 1 Casualty Clearing Station 470 3rd Brigade on move 471 3rd LHFB- Making camp SERAPIUM 472 Watering horses 473 Moving up wadi 474 The wells at Wadi GHUZZEE 475 Camel transport SINAI 476 Turkish reservoir destroyed by ALH 477 Wall in a Luxor tomb 478 Entrance to "Temple of Bulls" 479 Bob White 480 Bedouin crops 481 Harem of Montazza, Turkish prince 482 Jack Holmes, Billy McGhee 483 MUDERIA, B Troop post 484 JIFF JAFFA 485 Natives on railroad construction 486 Aust graves SHALLAL 487 The Stumpy Mirror 488 R Nile at MANSUREH 489 Aust graves - BEELAH 490 NOUZEH Gardens - ALEXANDRIA 491 On issue from QMS. Take what comes. Fit does not matter 492 MATARA 493 German Yacht Club - ALEX 494 Old Turkish Howitzer and cannon ball 495 Field hospital 496 Gardens at BARAGE 497 A dispute's ending 498 Snow. MT LEBANON 499 Bedouin sheep 500 Combat in the air 501 no caption 502 Old Napoleon gun 503 Gordon Wake HQ car 504-5 Burying the dead at GAZA 506 Water Polo 507 Brigade boxing comp 508 Field cooker 509 Bridge on Jerusalem road, Blown up by Turks 510 Teaching horses to lay quiet. For protective purposes 511 "Major" and "Bitsy" 512 Bedouin Scarabs 513 Convalescent 514 1. W Billings. Returned to Aust 2. W McMahon KIA 515 Hospital 516 Coming good 517 1st day up - 14th AGH PORT SAID 518 Back again in Regt 519 Billy and Taffy 520 Stew 521 KHAN YUNIS 522 MENA 523 Casualties PORT SAID 524 Washing 525 Mail 526 Gun from the "Emden" mounted in Syney 527 MARSURES 528 Desert bivouac 529 HASSED 530 3RD ALH Bde. Good camp (Extra) All conv's 531 New issue 532 On to another camp (8 LH Regt) 533 Shore - JAFFA on MED SEA Photo Captions Volume 2 (Illegible = ?) 1 The Cedars on Mt Lebanon, according to tradition originated from the staves of the 12 Apostles 2000 years ago. 2 TIBERIUS taken 27th Sept '18 3 NAZARETH taken 20th Sept. German officer and Arab pony 4 TIBERIUS fell on 27th Sep. Von Saunders was the GOC of Turkish Forces in Palestine 5 Jordan Valley & Plains of Jericho run between Mts of Moab & Hills of Solomon. Distance across valley from foot of each range of hills abt 13 miles, looks ? 6 Storm on Sea of Galilee 7 DAMASCUS fell on 1st October. German vehicle park. 8 German funeral near Jerusalem 9 JENIN. German Headquarters. Fell 20th Sept. German field bakery 10 Three pages back will be seen a storm on GALILEE. Note now calm here. This photo taken near spot from which the previous one was taken. German motor launch on Galilee. 11 Captured intact on 20th Sept. German workshops JENIN 12 Turkish aerodrome captured here. Hostile aircraft landed whilst it was in our hands. Aviators greatly surprised and even indignant. Motor smash near EL FULE. 13 German Orderly Room (Ammunition box full of gold), DAMASCUS. All this gold Turkish coin secured by our troops. 14 German artillery on the way to the front near KENETRA. The ALH swooped down on the artillery around this vicinity & captured many field guns. 15 German Despatch Rider on the road to ES SALT. Unsuccessful raids carried out on ES SALT on 30th April & 4th May. This country was hard on men and horses. Goat tracks were used at times but horse were led most of the time. Stunt lasted 14 days in wet weather & horses were only unsaddled for about 2 hours during stunt. 16 Strand, ? , Tiberius, Gallilee 17 German workshop. Captured by ALH 18 One of the dead lying outside GAZA. Killed 19th April 17. We could not bury them before November 19 Some of the boys that fell in the charge at BEERSHEBA. Tibby Cotter 20 Collecting our dead for burial. They were K in A on the 19th April at GAZA. Buried seven months later, 23,000 casualties in one day 21 German U-Boat 22 Page of postage stamps and money - Struck to commemorate Gallipoli victory - Turkish war postage stamps - War duty - Turkish war bank notes 23 Pamphlet. With paper badges affixed These badges were worn by young Egyptian students. Arabic translation means "Egypt for Egyptians Long Live Egypt" This pamphlet was printed under German influence & distributed around ZAG-A-ZIG, the chief centre of hostilities during the recent Egyptian riots. The Young Egyptian Students influenced the Natives to oppose British Administration, what they called Tyranny. They professed to have sufficient competent educated men to govern their own affairs, but our Heads would not hear of it. Consequently the riots. Many ? and soldiers killed. All railways and communications disorganised. It took several months to bring things to their normal ? Pictures of medals 1. In honour of General Falkenhaugh GOC Turkish Forces 2. The Victorious Emperors of Germany, Austria and Turkey 3. Egypt Awakening 24 Those large photographs I sent you were procured for me by a pal who knew the chap that owned the negatives. The owner of these snaps belongs to the 5th Regiment of the 2nd Brigade, and he took the camera from a Turkish Officer. It had only 6 snaps of a spool of 10, and the BIll Jim finished off the spool by taking 4 of the special entry into Jerusalem. The cross indicates those taken by the Australian, the remainder were taken by the Jackos in the vicinity of BEERSHEBA and SHERIA Turkish field bakery 25 Cavalry going up to support their own line. However never had much action against the Turkish horsemen 26 Turkish Electricians in the field. I have an idea that this photo was taken to get the centre figure. He looks dinkum Australian. Note Australian leggings on Turk on the right 27 Turkish machine gunners ready for action. This is very much like the Beersheba country. Turkish officers on the right, and along side him is the range taker with his Barand Stroud. We use these instruments in the Sqn and they cost about 83 (Pound) 28 Turkish General Head Quarters just beyond SHERIA. Note hard rocky country 29 Turkish Cavalry watching a fight and getting ready to go into action. This is at SHERIA, and the heavy fighting lasted several days. Plenty of water and the Jacko's tried their hardest to hold on to this pozzie. Often our chaps met the gamer Turks in the dead of night, because both sides were on the same game, crawling down for water. This stunt is known as the Junction Fight. 30 Official entry Dec 11th. The official entry into Jerusalem. Sir G Allenby in the lead with his staff officers of the French and Italian troops accompanying him. Guard represents New Zealand, Australia, England Wales Scotland Ireland and India entering theJaffa Gate 31 Sir Ronald Storrs made Governor of JERU. Captured 9th Dec 17. Reading the Proclamation, General Allenby wearing white breeches. Troops of other nations were present, and the notables of Jerusalem. It was read from the foot of the Tower of David, a place that has been standing since the time of Christ 32 The first of the British troops entering Jerusalem. A few Turkish officers may b seen walking at the head of the column. Populace in a bad plight, very poor and no tucker, and all were greatly overjoyed at the ?? of the British Hundreds and kiddies ill treated ?? (Part of caption missing) 33 10th LH Regt first to enter JERUSALEM. Mounted officer on the right supposed to be the CO of the first troops to enter Jerusalem. Note mud on the horses. Had very wet and muddy weather 34 Dead Jacko 35 Turkish machine gun and crew 36 Hanging Armenian doctors who refused to join Turkish Army 37 Outside Damascus Gate Jerusalem 38 Turkish patrol lying outside trench at EL BUAJ 39 Burying Aussies at DAMASCUS 40 1. Djemel Pasha 2. General Limon Von Saunders GOC Turkish Forces in Palestine 41 One execution in Egypt. Executing an Egyptian offender 42 Turkish atrocities DAMASCUS 43 Turks occupying trenches outside JERICHO 44 On ASLUJ demolition stunt. Feeding and spelling. Arrived at Rendezvous too early 45 Turkish saw bayonet 46 Captured guns taken at BEERSHEBA & SHERIA 47 Our gunners obtained a direct hit on ammunition train 48 The large and small of the game. At GAZA. 74th CCS in background 49 Around JULIOUS. These Turkish shell dumps were very numerous around this vicinity 50 Captured Turkish Cavalry 51 Cavalry leaders 52 Turkish machine gun & crew 53 Enemy officers. One on left is wearing Iron Cross ribbon 54 Captured Austrian boat afire, Suez Canal Port Said. 40,000 cases of benzine aboard. Fire a mysterious outbreak 55 ? Hotchkiss gunners and enemy aircraft over ? TELL-EL-FARA 56 Types of enemy officers. One of our bikes in their possession. Recaptured later. The five pointed medals worn by these officers is called the Gallipoli Star. Issued to commemorate the Turkish victory at Gallipoli 57 Our batteries put in some good shooting amongst Turkish transport 58 Showing compactness of Turkish trenches 59 Desert homes. The only time we had cover in SINAI was when we camped near a Hod. Then we could use date palm leaves 60 JIFF JAFFA 61 ZAITZOUN 62 10th Regt MGS amongst hills outside JERUSALEM 63 Jews wailing place JERUSALEM 64-5 German post card characters 66 Post Card PHYLAE The Kiosk 67 Post Card Vue du Canal de Suez 68 Post Card No 93 Queen Street, Fort, Colombo 69 Snipers at NALIN Sth Syria. Lousy country for richochets. Nast wounds. (Aust War Memorial Melbourne) 70 Myself on Ginger. This little neddie is boshter jumper 71 Magazine cutting - Lt C H Vautin & German airman G Felmy 72 9th Regt 3rd LHB Judean Hills outside JERUSALEM. (Aust War memorial Melbourne) 73 Sand hills SINAI ? Desert (Aust War Memorial Melbourne) 74 3rd LHB spelling at GALILEE (AWM Melbourne) 75 Jordan Valley outside JERICHO (AWM Melbourne) - lovely Jordan Valley, dust and heat, 1280 ft below sea level 76 Copy of no 69 77 Watering at MATARIA 78 A desert grave - Tpr H R Olver MM 6th LH MGS Beneath this simple cross there lies a comrade true and tried He fought as fights a soldier And like a soldier died 79 B Section. When they first took our Stetsons and issued cumbersome helmets 80 Palestine types of Turkish and German officers 81 Some of the gunners amongst the snows in MT LEBANON 82 The country around JERUSALEM 83 JERUSALEM 84 Fishing ? ? at GALLILEE 85 Jerusalem taken Dec 9th. Official entry on the 11th. Jerusalem (showing) Holy City and Mosque of Omar 86 Turkish shell hits old tomb at ZERNUKAH. Capt Hurley official photographer - AWM Melbourne 87 14th AGH at PORT SAID 88 Human bones at Dead City ABBASSIA 89 3rd ALH Bde at HELIOPOLIS 90 Men wearing gloves 91 Wireless station in course of erection at MATARIA - 28 masts 92 Old slave market at ABBRASSIA. Many excavations performed on projecting wooden frame at corners 93 3rd guns on the move. The beautiful scenery between LATRON & JERUSALEM 94 Bedouin agents 95 Collecting captured enemy material 96 Captured double-engined plane 97 On the march. Country at Eastern SINAI 98 Anzac mosaic found at SHALLAL whilst trench digging now covered with gun etc ready for removal. Was sent to Canberra. 99 A Troop watering. A rotten job at a small well when horses are thirsty 100 The new Jericho road. Running through Hills of Solomon Valley in distance 101 Gun inspection 102 Draining pools at WADI AUJA. Keeping down Malaria carrying mosquitos 103 8th Regt and 3rd AMGS at BEELAH 104 A rendezvous in the Jordan Valley 105 2nd ALHB camped outside JERUSALEM 106 WADI AUJA in the Jordan Valley 107 Hospital train on the beach at EL -ARISH 108 Jacko's 109 Jerries 110 Stables of Turkish Headquarters SHALLAL 111 Early training. Every man to throw and quieten his horse for purpose of taking cover 112 A Troop 3rd Guns at TAALAT-EL-DUMM 113 Watering at WADI GHUZZEE 114 J Rushden KIA at ES-SALT 115 J Carling F Troop 3rd AMGS. Taken prisoner at EL-BURJ. Repatriated after Armistace 116 Captured enemy plane 117 Jacko gun 118 Brig-Gen Galloping Jack Royston. OC 3rd ALH Bde 119 Cleaning ammunition belts in the Hod at MASAID 120 Bringing up the fodder at ABBASSAN-EL-KEBIA 121 Some of the boys amongst the snow on MT LEBANON 122 Turkish barley crops at SHALLAL in Southern Palestine 123 The crops a few weeks after our horses had been in this vicinity 124 Clearing up after a stunt 125 On the move. 5 minute spells for the horses 126 In Jordan Valley. An airial torpedo lobbed amongst 3rd MG Transport horses & killed 28 127 Camel ration convoy coming along beach 128 Field Hospital at ET MALER 129 Desert graves at ROMANI 130 A day on the beach. Wash self, horse and clothing 131 Watering on the beach at BEELAH. Note how close fresh water is to the seashore 132 A patrol caught by a shell 133 Spello 134 Crossing the Wadi 135 Halt! Weights off and feed 136 Gas instruction 137 F Troop at TELL-EL-FARI 138 Xmas Dinner at MASAID 1916-17. Arrived back at this camp Xmas Eve after 5 nights & 4 days in saddle & the capture of MAGHDABA 139 Exercising along the beach at MARA-KHEB 140 Watering at a Bedouin well 141 At Sheikh's ZOWAID 142 3rd Gun Squadron at ABBASSAN-EL-KEBIR 143 Captured plane on its way to Australian Aerodrome 144 One of our planes about to pass over Hod 145 E & F Troop horse lines and horses 146 Sun set on Med Sea 147 Beach scene at EL-ARISH 148 Turkish transport. Small animals but they can pull big loads and they possess large hearts 149 The dressing station JIFF JAFFA ? 150-8 Types of Egyptian women - Nubian - Fellaheen - Sudanese - Low class Gippo - Egyptian - Middle Class -Egyptian Aristocracy - Turkish 159 French girls on beach at PORT SAID 160 Bedouin girls drawing water 161 Egyptian flappers at ALEXANDRIA 162 Post Card- Dame Turque 163 Post Card - Jeunne Fille Arabe 164 Graves of New Zealanders at RISCHON 165 Graves of Australians at DEIR-EL-BELAH 166 Race day. The saddling paddock 167 Bivouacs 168 3rd ALH Brigade at TRIPOLI 169 Advance party putting down horse lines at KHAN YURIS 170 Breaking the desert monotony 171 WADI QUELT. Taken from one of its precipitous banks 172 Turkish stores on N shore of DEAD SEA 173 Watering at Solomon's Pools 174 Waiting for action at - ES DUN (AWM Melbourne) 175 Camel Corps in action SINAI (AWM Melbourne) 176 ALH Time to Camp (part missing) (AWM Melbourne) 177 3rd Machine Gun Squadron IBU-HARITH, Lieut Breed, McLeod, Guppy, Whyte 178 Cartoon sketch - "A Digger" 179 Turkish Cavalry 180 Gun crew of No 2 Sub F Troop, 3rd Gun Sqdn 181 Operating base of JIFF JAFFA stunt 182 One of the British war boats that cooperated with the Land Force 183 Military railway line passing through a Hod in SINAI 184 AL-MINAH The sea port of Tripoli, Syria 185 NAZARETH Taken on 20 Sep 18 186 The Monastery on the Mt of Temptation, Taken from a cave on opposite hill. 187 JAFFA From the beach 188 In Monastery on the Mt of Temptation Rock on which Christ spent his 40 days 189 Cross indicates Garden of Gethsemane. Arrow at Russian Church of St Magdalene. MT of Olives on left 190 The Roman Bath at MONTAZAH. Hewn out of solid rock 191 Mine sweeper ashore near SHEIK'S ZOWAIL 192 Throwing "Chester" for an operation 193 The swimming pozzie at LAKE TIMSAH, ISMAILIA. Half a mile from MOASCAR, the Aust Training Depot 194 The remains of Napoleon's road. Portions can be seen running between BEELAH & GAZA 195 Camels utilised for ambulance work 196 TULKERAM taken on 19th Sep. This stunt started the previous night and this position fell to us the first day. About 60 miles from starting point 197 German officer at mess, JERUSALEM 198 German Headquarters SEMAK 199 TIBERIAS 200 Water preservation scheme at SHALLAL 201 A dip in the Jordan River. Crossed river on night 21-22 April 18 202 Watering and a wash up 203 JERICHO Taken on 21 Feb 18 204 Turkish graves 205 KHAN YUNIS. Southern Palestine, Note how sand ridges from the beach meet vegetation area. Fertile land 20 miles in width. the beginning of PHILISTIA 206 TAUBE-OVER 207 Drawing drinking water in Wadi GHUZZEE 208 The swimming pozzie in JORON 209 Landing stores at EL-ARISH 210 A camp near the wadi 211 Railway line and bridge crossing wadi above SHALLAL 212 The mid-day halt 213 Turks and Aussies at Dressing Station on beach 214 Washing day 215 Bringing supplies ashore 216 Trying mules in a 60 pounder 217 The desert winds have blown away and left this piece standing 218 Pontoons used by the Turks in their attempt to cross Suez Canal Feb 15 219 "HASSEIN" 220 "GIPPO" Mascot of 3rd AMG Sqdn 221 "Biddy" 222 Railhead camp 223 Typical Bedouin 224 Motor Submarine chaser dvr whyte, photos, ww1, light horse field ambulance -
 Orbost & District Historical Society
magazine, Aussie, March 18, 1918
Alexander Butters enlisted on 12 November 1914 as a gunner. He was awarded a Meritorious Service medal for his "determination and courage .....setting a splendid example to his men..." on the SOMME. 'Aussie' (1918- circa 1929) was a commercial magazine of opinion, review and entertainment. It was edited by Phillip Harris and published in France 1918 - 1919 on a small printing press that Harris brought with him to France. Initially the print run was only 10,000 copies, but soon it reached 60,000 and later 100,000. The magazine celebrated a distinctive 'Aussie' identity through language, humour and imagery. It distributed news, provided light-hearted ways of seeing the war experience and gave soldiers an outlet to express dissent or dissatisfaction. It also provided a voice for Australian authors such as Banjo Paterson, C.J. Dennis and Bernard O'Dowd. (Ref Museum Victoria)This magazine provides an Australian soldiers' view of the political and world climate during World War I, and also represents the bond between Australian soldiers. The magazine celebrated a distinctive ?Aussie? identity, through language, humour and their assertion of what it meant to be an Australian. It allowed news to be distributed, gave the soldiers an outlet to express any dissent or dissatisfaction, thus preventing any greater form of rebellion and promoted Australian authors like Banjo Paterson, C.J. Dennis and Bernard O'Dowd. (Ref. Museum Victoria)A thin black and white paper magazine called "Aussie". This is Volume 3. The magazine contains stories, illustrations, songs and poetry from the First World War. On the front cover the title is printed across the centre, with a drawing of a soldier in uniform standing sideways, and holding a gun. Four drawings within circles are positioned in each corner, joined by a wreath and ribbons bearing the names of the war fields. His head is in the shape of the map of Australia. On front cover - From Alexandy Butters with best wishesmagazine ww1 aussie military -
 Orbost & District Historical Society
black and white photographs, September 1914
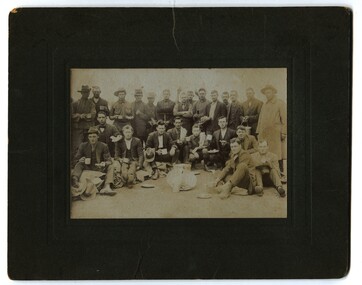
Broadmeadows was home to the major army training camp for the Australian Imperial Force. The land was previously known as Mornington Park. It was a wide field, suitable for military practice, including training for the Light Horse regiments. It is the current location of the Maygar Army Barracks on Camp Road in Broadmeadows. To reach the camp, soldiers marched from Victoria Barracks in St Kilda Road and headed north up Sydney Road, only resting near Fawkner Cemetery. Soldiers slept in tents and food was basic. Training was hard, but it did not prepare soldiers for a modern war with machine guns, gas, shells and aeroplanes – technology that did not exist in previous wars. Some men only completed a few months training before departing on troopships from Port Melbourne. Once overseas, some soldiers received further training in Egypt. It is likely that these men are associated with the Orbost district.This photograph is a reminder of the personal stories of those who were involved in WW1.Two copies of a black / white photograph on dark grey buff cards. The photos show a group of soldiers having a meal. Some are sitting on the ground with others standing behind them.on back of 989.1 - "Sept 14 Broadmeadows"w.w.1 broadmeadows-army-training-camp -
 Flagstaff Hill Maritime Museum and Village
Gun Emplacement, 1890's
... track set into the floor of the gun emplacement (which enabled... track set into the floor of the gun emplacement (which enabled ...The Warrnambool Battery on Flagstaff Hill has embankments for 3 guns. Those on the left and right still have cannon in place but in the centre is an empty embankment, apart from this concrete ring with metal threaded studs. In 1898 a 5 inch breech loading gun (BL) was installed here. The gun had a hydro-pneumatic disappearing carriage (hence the sign on the concrete wall "5" BL HP").. This type of gun was faster to load and fire that the 80 pound RML’s installed on either side of it. Its arrival spelt the end of the 80 pound RML guns’ useful life, although they continued to be used for practice sessions. The 5 inch BL was the main defensive weapon of the Warrnambool Battery until the Battery was downgraded in importance. It was removed in 1904 and recalled to Melbourne in 1910. The gun emplacement ring is all that remains of the mounting for a 5 inch Armstrong rifled breech loading gun. HISTOR of the WARRNAMBOOL GUNS & CANNON In the years following the Crimean War (1854-1857J) there was a great concern in the Colony that Imperial Russia would attempt an invasion. Coastal defences in the colony of Victoria were greatly strengthened by the Government as a result. Warrnambool was originally protected by cannons at Cannon Hill, approximately 1 kilometer west of the Flagstaff Hill Fortifications. The cannons included two 1866 guns, both 80 Pound Rifled Muzzle Loaders (RML) purchased by Victoria’s Colonial Government. They were part of a shipment of 26 such guns sent from England in December 1866. They are registered as No. 23 (80cwt-2qr-0lbs) - Gun 1, and No.13 (81cwt-1qr-12lbs) - Gun 2. They were cast at the Royal Gun Factory, Woolwich Arsenal, in 1866 and have a 6.3 inch bore. Both barrels carry the Royal Cypher of Queen Victoria, Insignia of the Royal Engineers, within the Garter and Motto surmounted by the Crown, with the Royal Cypher of Queen Victoria within the Garter (letters in centre “VR”, motto “HONI SOIT QUI MAL Y PENSE”, "Shame be to him who thinks evil of it."). The guns were originally supplied with wooden carriages. (The Royal Arsenal at Woolwich, England, was established eleven years after the Restoration of King Charles II. It was the principal supplier of armaments to the British and Empire Governments. At the height of its operations during World War One the factory covered 1300 acres and employed very nearly 80,000 workers. Woolwich was the Headquarters of the Royal Artillery since the raising of that Regiment in 1716. The Arsenal was closed in the late 1960’s.) These two 80pdr cannons were transferred to the Warrnambool Garrison Artillery Battery Fortifications erected at Flagstaff Hill in 1887 as part of Victoria’s Coastal Defences. The original wooden carriages were subsequently replaced with the present iron garrison carriages in 1888. They are a “C” pivot. The ‘racers’ or curved track set into the floor of the gun emplacement (which enabled the guns to be traversed more quickly) are as specified for guns up to 10 inch, being of wrought iron 2.78 inches wide. A temporary third gun, now no longer on Flagstaff Hill’s site, was the 5 inch Rifled Breech Loading (BL) Armstrong gun mounted on an Elswick hydro pneumatic disappearing carriage and installed in this very concrete base or pad. The State of Victoria took over the ownership of the guns at the time of Australian Federation in 1901. In about 1901/1902 the Garrison Battery was converted to the Warrnambool Battery of the Australian Field Artillery (No 4 Field Battery). It was equipped with 4.7 inch naval guns mounted on field carriages. They were now a mobile unit but continued to use the Warrnambool Garrison area at Flagstaff Hill for practice. When the Fortifications were declared obsolete the two 80 Pounder RML were relocated to Cannon Hill in 1910. On the outbreak of World War One the 4.7 inch guns were recalled to Melbourne, and the Battery was disbanded. Most of the personnel probably re-enlisted in the local 4th Australian Light Horse Regiment. The two 80 Pounder RML were moved back to the Fortifications in 1973. They were both fully restored by Army First Year Apprentices at the Ordinance Factory in Bendigo in time for the centenary year of the fortifications in 1987. The guns are capable of firing 80 pound (32.3kg) armour piercing exploding shells 3.65kms out to sea. They were originally manned by volunteers before a paid Garrison was established. Now the Guns are again fired by volunteers on Special Event days. Since restoration the Gun Number 1 had been fired on a regular basis but Gun Number 2 hadn’t been fired since the mid 1990’s. In April 2015 Gun Number 2 was serviced in preparation for the firing of both cannons on the ANZAC Centenary commemorations on April 25th 2015. Other guns from the original Cannon Hill location were obsolete by the time the 1887 Warrnambool Garrison Artillery Battery was built. These guns are (1) a 32 Pounder Muzzle Loading Smooth Bore (SB) cast in 1813 at the famous Carron Foundry, number 80837 and now located in the Warrnambool Botanic Gardens. It is now mounted on a replica carriage due to the original carriage being in a fragile condition (the original carriage stored under cover at Flagstaff Hill). (2) a 68 Pounder Muzzle Loading Smooth Bore cast in 1861 at the equally august Low Moor Foundry, number 10310 and now located on the lawn area at the entrance to Flagstaff Hill Maritime Village. It is still mounted on its original wooden garrison carriage. Its wooden slide compressor mechanism is fragile and now kept in Flagstaff Hill’s storage. There are only seven 32 Pounder SB made by Carron and fifteen 68 Pounder SB made at Low Moor known to exist in the State of Victoria [references; Flagstaff Hill Maritime Village interpretation boards, information sheets and other documents; South Western Victoria Guns and Cannon report, May 2008, ref W/F/08] The Gun embankment is contained within the heritage listed Lady Bay Lighthouse Comples, on the Victorian Heritage Register VHR H1520. The gun emplacement base is evidence of the last defences installed on this stretch of coastline. The Warrnambool Garrison has been added to the Victorian Heritage Register H1250 “for its intact battery and guns, a strong reminder of Victoria’s wealth and determination to protect itself from the perceived threat of invasion in the 1880’s.” The City of Warrnambool is one of several custodians of a collection of artillery pieces of heritage significance at a state, national and international level. These pieces are directly related to the defence of south-west Victoria in the 19th century. The care and preservation come under the Heritage Act 1995. Gun emplacement; the remains of the mounting platform of a temporary third gun installed in 1898 in the centre of the battery. This consists of a circular concrete well or sump surrounded by two rings of mounting bolts, the inner of 10 and the outer of 20. The base once held a 5 inch Armstrong rifled breech loading gun with hydro-pneumatic disappearing. In the centre of the ring on the ground is a keyhole shaped space. The gun was removed in 1904. flagstaff hill, warrnambool, shipwrecked coast, flagstaff hill maritime museum, maritime museum, shipwreck coast, flagstaff hill maritime village, great ocean road, colonial defences, victoria’s coastal defences, warrnambool fortification, warrnambool garrison battery, warrnambool volunteer corps, ordinance, armaments, cannon hill fortifications, flagstaff hill fortifications, 4th australian light horse regiment, garrison gun, 5 inch breech loading gun, emplacement for hydro-pneumatic disappearing carriage, gun emplacement -
 Flagstaff Hill Maritime Museum and Village
Weapon - Cannon, 1813
... the end of the older 80 pound guns’ useful life, apart from being... the end of the older 80 pound guns’ useful life, apart from being ...This 1813 cannon is classified as a carronade, having been made by the Carron Ironworks foundry in Stirling, Scotland in 1813. It is a large calibre, short range, gun mainly used on ships. The carronade model of cannon was first used when introduced into the British Royal Navy in the American War of the Revolution (1775-1883). This cannon was originally a 28pdr, 48cwt, 8ft gun. The date ‘1837’ on the barrel probably indicates the date that the Board of Ordinance accepted the change in size to a 32pdr. It may originally have been a naval gun and the conversion undertaken when it was brought ashore. It is very probably one of the 15 guns that are known to have constituted the defences of Victoria in 1860. This group of 32pdrs was the shorter model of the 4800width and 8ft length cannon and as such are different from the 32pdrs found in NSW. It was originally located on Cannon Hill in Warrnambool when it was the site of the Warrnambool Battery Western Artillery, formed in 1866. It was obsolete by the time of the 1887 fortifications, and was moved from the Warrnambool Fortifications to the Botanic Gardens in 1910, when the Fortifications were declared obsolete. HISTORIC INFORMATION ABOUT THE CANNON IN THE WARRNAMBOOL AREA In the years following the Crimean War (1854-1857J) there was a great concern in the Colony that Imperial Russia would attempt an invasion. Coastal defences in the colony of Victoria were greatly strengthened by the Government as a result. Warrnambool was originally protected by cannons at Cannon Hill, approximately 1 kilometer west of the Flagstaff Hill Fortifications. The cannons included two 1866 guns, both 80 Pound Rifled Muzzle Loaders (RML) purchased by Victoria’s Colonial Government. They were part of a shipment of 26 such guns sent from England in December 1866. They are registered as No. 23 (80cwt-2qr-0lbs) - Gun 1, and No.13 (81cwt-1qr-12lbs) - Gun 2. They were cast at the Royal Gun Factory, Woolwich Arsenal, in 1866 and have a 6.3 inch bore. Both barrels carry the Royal Cypher of Queen Victoria, Insignia of the Royal Engineers, within the Garter and Motto surmounted by the Crown, with the Royal Cypher of Queen Victoria within the Garter (letters in centre “VR”, motto “HONI SOIT QUI MAL Y PENSE”, "Shame be to him who thinks evil of it."). The guns were originally supplied with wooden carriages. (The Royal Arsenal at Woolwich, England, was established eleven years after the Restoration of King Charles II. It was the principal supplier of armaments to the British and Empire Governments. At the height of its operations during World War One the factory covered 1300 acres and employed very nearly 80,000 workers. Woolwich was the Headquarters of the Royal Artillery since the raising of that Regiment in 1716. The Arsenal was closed in the late 1960’s.) The two 80pdr cannons were transferred to the Warrnambool Garrison Artillery Battery Fortifications erected at Flagstaff Hill in 1887 as part of Victoria’s Coastal Defences. The original wooden carriages were subsequently replaced with the present iron garrison carriages in 1888. They are a “C” pivot. The ‘racers’ or curved track set into the floor of the gun emplacement (which enabled the guns to be traversed more quickly) are as specified for guns up to 10 inch, being of wrought iron 2.78 inches wide. A temporary third gun, now no longer on Flagstaff Hill’s site, was a 5 inch Rifled Breech Loading (BL) Armstrong gun mounted on an Elswick hydro pneumatic disappearing carriage It was faster to load and fire than the 80 pound RMLs and its arrival spelt the end of the older 80 pound guns’ useful life, apart from being used for practice sessions. The 5 inch BL gun was the main defensive weapon of the Warrnambool Battery until the Battery was downgraded in importance and the gun was recalled to Melbourne in 1910. The gun emplacement still remains in place set between the 2 80pdr cannon. The State of Victoria took over the ownership of the guns at the time of Australian Federation in 1901. In about 1901/1902 the Garrison Battery was converted to the Warrnambool Battery of the Australian Field Artillery (No 4 Field Battery). It was equipped with 4.7 inch naval guns mounted on field carriages. They were now a mobile unit but continued to use the Warrnambool Garrison area at Flagstaff Hill for practice. When the Fortifications were declared obsolete the two 80 Pounder RML were relocated to Cannon Hill in 1910. On the outbreak of World War 1 the 4.7 inch guns were recalled to Melbourne, and the Battery was disbanded. Most of the personnel probably re-enlisted in the local 4th Australian Light Horse Regiment. The two 80 Pounder RML were moved back to the Fortifications in 1973. They were both fully restored by Army First Year Apprentices at the Ordinance Factory in Bendigo in time for the centenary year of the fortifications in 1987. The guns are capable of firing 80 pound (32.3kg) armour piercing exploding shells 3.65kms out to sea. They were original manned by volunteers before a paid Garrison was established. Now the Guns are again fired by volunteers on Special Event days. Since restoration the Gun Number 1 had been fired on a regular basis but Gun Number 2 hadn’t been fired since the mid 1990’s. In April 2015 Gun Number 2 was serviced in preparation for the firing of both cannons on the ANZAC Centenary commemorations on April 25th 2015. Other guns from the original Cannon Hill location were obsolete by the time the 1887 Warrnambool Garrison Artillery Battery was built. These guns are (1) a 32 Pounder Muzzle Loading Smooth Bore (SB) cast in 1813 at the famous Carron Foundry, number 80837 and now located in the Warrnambool Botanic Gardens. It is now mounted on a replica carriage due to the original carriage being in a fragile condition (the original carriage stored under cover at Flagstaff Hill). (2) a 68 Pounder Muzzle Loading Smooth Bore cast in 1861 at the equally august Low Moor Foundry, number 10310 and now located on the lawn area at the entrance to Flagstaff Hill Maritime Village. It is still mounted on its original wooden garrison carriage. Its wooden slide compressor mechanism is fragile and now kept in Flagstaff Hill’s storage. There are only seven 32 Pounder SB made by Carron and fifteen 68 Pounder SB made at Low Moor known to exist in the State of Victoria Plaque attached to the carriage “This replica carriage was constructed by the Warrnambool Tritan Woodworkers club in conjunction with the generosity of local businesses and the Warrnambool community. The original carriage (circa 1860) was removed for restoration and is now located at Flagstaff Hill Maritime Village. The timber used for the replica carriage is Monterey Cypress, which was an early planting in the gardens. 2010 marked the centenary of the cannon’s relocation in the Warrnambool Botanic Gardens.” (Reference; Victorian Guns and Cannons, South Western Victoria Assessment, May 2008, item W/B/01; Flagstaff Hill Maritime Village datasheets and archives). There are only seven 32 Pounder SB made by Carron known to exist in the State of Victoria and this is one of them. On a world level, this cannon represents a high level of rarity. Further, as it has been modified (bored up) it is representative of the historical process of amending artillery in order to ensure a longer usefulness of each piece despite rapidly advancing artillery technology. The number of surviving carriages with traversing slides in this group in South Western Victoria is unique in Australia and probably in the World. Out of 10 such platforms surviving in Australia, the South Western Victorian group has half. Several survive around the world but probably not in such a large group. The wooden sliding compressor mechanism belonging to this cannon is extremely rare, and the only one in this South Western Victorian group of Guns and Cannons. As a whole, this cannon has undergone very little restoration or modification, giving it a high level of integrity. The City of Warrnambool is one of several custodians of a collection of artillery pieces of heritage significance at a state, national and international level. These pieces are directly related to the defence of south-west Victoria in the 19th century. The care and preservation come under the Heritage Act 1995. (Reference; Victorian Guns and Cannons, South Western Victoria Assessment, May 2008).Cannon, or carronade, 32pdr with wheels. Muzzle loading smooth bore (SB) cannon. Cannon has original wooden Burmese Teak carriage and slide with wrought iron fittings and iron wheels. Manufactured by Carron in Scotland, in 1813. It has been converted from a 28pdr. There is a loop for a rope on the cascabel, which was part of the original casting. Re-bored in 1837. Marks include Serial Number, Royal Cypher of King George III, broad arrow of proofing, and numbers to represent the weight. NOTE: The cannon is displayed in the Warrnambool Botanic Gardens and is mounted on a replica wooden carriage; the original wooden carriage is now stored under cover at Flagstaff Hill Maritime Village. This carriage has 4 wheels on swivel attachments and a central gear that allows the wheels to turn on rails. Pressed into left trunnion “80837 / CARRON / 1813”, cast on barrel“symbol (Royal Cypher of King George III”, “symbol (broad arrow of proofing)” and numbers “45-3-24 / 1837” . Cascable “CV” and marks with gradations from nought to three in quarters on each side, On the carriage the end of one of the main slide members carries the mark “W symbol (broad arrow) D” incised into the timber. Plaque attached to the carriage by the Warrnambool Tritan Woodworkers club, 2010, marking the centenary of the cannon’s relocation in the Warrnambool Botanic Gardens and the addition of the replica carriage. flagstaff hill, warrnambool, shipwrecked coast, flagstaff hill maritime museum, maritime museum, shipwreck coast, flagstaff hill maritime village, great ocean road, victoria’s coastal defences, warrnambool fortification, warrnambool garrison battery, ordinance, armaments, cannon hill fortifications, victorian colonial government, carron ironwroks foundary, 32pdr smooth bore cannon, 28pdr smooth bore cannon, 1813 cannon, carronade -
 Bendigo Military Museum
Literary work - STORY BOARD - FRAMED - WW1, Bendigo & District RSL Sub Branch et al, C.2008/09
Jack Grinton. Refer Cat No.1280 for his service history.Story board - framed. Story Board - black print on white and pale blue background on synthetic paper adhered to backing board. Frame - metal with wood backing board." A CAMERA ON THE SOMME' "The Burden of War". Photographs top left - "Damaged windmill, France or Belgium 1916-1919" Top right "Guns and human bones marking field graves, France or Belgium 1916-1919" Middle right "Bomb damaged cathedral, France or Belgium 1916-19" Bottom right "Military Cemetery, France 1919" framed accessories, camera on the somme, ww1, 38th bn, grinton -
 Eltham District Historical Society Inc
Folder, Commercial Bank of Australia Eltham Branch Hold-Up, 15 December 1949
Thursday, December 15, 1949, the quiet little bank was embroiled in an infamous wild shoot-out between a daring thief and two bank officers. Today, the building still carries the scars ; a bullet hole remains visible in a cedar bench testifying to the events that played out that day. 3.30 a.m., Friday, December 9. The manager of the Commercial Bank branch at Greensborough, Mr Harry Wallace and his wife are asleep in their bedroom of the little house behind the branch. Harry is awakened by a noise and sees an intruder in a corner of the bedroom. He calls out but the intruder who has switched off the power in anticipation flees through a side door and scarpers down Main Street. Harry summons the police but a search by First Constable Thomas of the Greensborough Police assisted by a wireless patrol car is unsuccessful. A report is filed noting the theft of a .25 calibre pistol from the wardrobe. Thursday, December 15th. It is 1pm and the Commercial Bank has just opened. The branch is only open Mondays and Thursdays from 1-3pm. The morning started off a little cool with some scattered showers but it has fined up and the temperature is now around 61 degrees (16 C). A new grey Singer sports car with soft-top pulls up on the opposite side of the road and a young man, neatly dressed in a dark blue suit, wearing a grey hat and carrying a brief case exits the vehicle. He looks around then crosses the road and walks up the steps and through the door into the bank. There are three people inside; Mr. Jack Burgoyne whose grocery store is situated just 50 yards up the road, Mr. Lindsay A. Spears, the Eltham Agency Receiving Officer and by chance, Mr Harry Wallace, manager of the Greensborough branch. Jack Burgoyne takes note of the young stranger; thinking to himself he appears nervous. The man approaches the counter and introduces himself as John Henderson of Greensborough and explains that he wishes to open a new account. He places his hat and £3 on the counter. Mr Spears attends to the paperwork. He asks the young man to sign two forms, which he does but then he withdraws from the counter and starts walking towards the door. Suddenly he spins around pulling an automatic pistol from his right-hand pocket. He exclaims forcefully; “The game’s on! I’ll take the lot!” Spears appears to comply by pretending to open a drawer. The man shouts loudly, “Keep your hand away from that drawer.” Spears instead reaches for a pistol in his pocket and challenges the man, “Here it is. Come and get it!” At the same time, Harry Wallace pulls a pistol from his pocket as well. The bandit fires a shot but misses, the bullet striking the counter. Both Spears and Wallace open fire and Jack Burgoyne ducks for cover. As the bandit turns and runs for the door leaving his £3 behind, he fires another shot, which strikes the ceiling. Spears fires back, and thinks he may have hit him in the foot. The bandit flees the bank and heads for the grey Singer car, registration NO-106, parked opposite. Wallace and Spears pursue him to the door and open fire again, striking the car three times around the driver’s door. Spears lets off eight shots and Wallace, seven before his gun jams. The getaway car initially heads slowly down Main Road towards Bridge Street. About 100 yards down the road, Dave Adams, a PMG employee, who has heard the shots, throws a steel manhole step at the driver. It hits the roof of the car nine inches above the driver’s head and tears the hood. Another witness claims to have seen the door blow open and the driver raise his hand. The car gathers speed and swings left into Bridge Street racing along at about 60 miles an hour careering recklessly past council employee, Mr. Percy Williams, who is driving a dray along Smarts Road [believed to be Bridge Street]. At the end of the road the Singer fails to get round the sharp turn and crashes into an embankment skidding to a stop outside the home of Mr John Clifford. One side of the car is wrecked. Mr Clifford, an aircraft engineer hears the fast travelling car bump heavily into the road bank at about 1.25 p.m. Hearing the whine of an engine he goes outside to find the grey Singer parked at the side of the road. Jack George also lives at the corner and hears the car crash. “The bandit opened the car door, ran 50 yards, and suddenly turned back,” exclaims Jack. “He took something from the car. It might have been a gun.” In his haste, the bandit drops his grey felt hat, size 6 7/8, on the road and dashes up Sherbourne Road for about 200 yards then disappears into the scrub carrying a brief case and a bundle in which a sailor’s cap can be seen. About 3 p.m., Mr H.D. Pettie of Mountain View Road, Montmorency is looking through his field glasses and notices a young man walking through thick scrub on private property some distance from his house. The man is wearing a sailor’s cap and disappears along the railway track toward Montmorency. As the day progresses, ten police cars, one motor cycle, and about 40 police led by Det. Sgt. McMennemin of Malvern CIB are searching for him. They believe he is hiding in thick scrub along the bank of the creek about half-a-mile outside Eltham township. Wireless patrol cars, four mobile traffic cars and the CIB area cars from Malvern and Kew are taking part. Police check the thief’s car and discover it was stolen from Helen Baxter, of Doncaster Road, North Balwyn from outside Victoria Barracks. Harry Wallace informs the police that he believes he recognised the bandit as the man who took his pistol from his bedroom the previous Friday morning. As night falls, armed police are posted at strategic points in the Eltham-Greensborough district. Police in cars are watching the roads. Others are searching the bush and checking passengers on trains. Little do they realise the young man has already slipped out of the net. SEQUEL YOUTH OF 19 CHARGED WITH ATTEMPTED ARMED ROBBERY OF BANK AT ELTHAM Weekly Times, Wednesday 15 February 1950, page 6 Detectives who raided a house in Bell St., Coburg, Melbourne, charged a 19-year-old youth, of South Yarra, with attempted armed robbery at the Commercial Bank’s Eltham (Vic.) receiving depot on Dec. 15. Police say they recovered a loaded automatic pistol, diamond and signet rings worth more than £200, a complete set of house-breaking instruments, a sailor’s uniform, and chloroform gauze in the raid. The youth was charged that while armed with an offensive weapon, he attempted to rob Lindsay George Spears of a sum of money. He was further charged on six counts of breaking, entering and stealing. Police allege that the person who tried to hold up Mr Spears in the Commercial Bank receiving depot at Eltham on December 15. escaped in a stolen car, after Mr Spears and Mr Henry Wallace, manager of the bank’s Greensborough branch, had fired at him. After the car crashed, he escaped into thick scrub and is alleged to have changed into a sailor’s uniform. On December 9 an automatic pistol was stolen from Mr Wallace’s bedroom at the Greensborough bank. The chloroform pad recovered is alleged to have been stolen from the Dental Supply Company, Plenty Road, Preston. The rings are alleged to have been taken in a £513 burglary from the shop of James Paton. Sydney Road, Coburg. Det. Sgt. H. McMennemin conducted the investigations with Senior Dets. R. Newton and M Downie, Detectives l. Dent, R. Rayner, P. Pedersen and M. Handley and First Constable A. Thomas. The youth will appear at Eltham Court on February 22. Manager’s Gun Used in Holdup at Bank The Age, Thursday 23 February 1950, page 4 It was stated in Eltham court yesterday that a youth who robbed a bank manager of his pistol, later used it in an attempt to hold-up the bank. Kay Arthur Morgan, 19, draftsman, of Castle-street, South Yarra, was committed for trial on charges of breaking and entering, and stealing a pistol and attempted robbery while armed with an offensive weapon. He pleaded guilty. The manager of Eltham branch of the Commercial Bank of Australia Ltd., Henry Clifton Cabot Wallace, said he disturbed someone in the bedroom, in which he and his wife were sleeping, at 3 a.m. on December. 9, 1949. Later he found that his automatic- pistol was missing. On December 15 a youth, who said his name was John Henderson, entered the bank and opened a new account. As the youth was leaving the bank he turned round with a pistol in his hand and said: — “I want the lot.” Spear indicated a drawer under the counter; and said.— “Here it is. Come and get it.” The youth said:— “Keep your hand away from that drawer.” Witness said Spear then drew his pistol from his hip pocket. The youth fired at them, and Spear returned the fire. “I pulled my pistol and fired, too” said witness. The youth fired again, ran out to a car and drove off. Witness and Spear fired several shots at the car. The youth was the accused Morgan, sitting in court, witness said. Evidence was given that one bullet was found in the celling and the other in the bank. Morgan was allowed £100 bail on each charge. Morgan ended up serving three years for the failed armed robbery and became a notorious criminal. He had twin sons, Peter and Doug and even though only ten years old, Morgan would get his sons to act as lookouts whilst he committed burglaries. The lads became building contractors but when the industry suffered a downturn in 1977 and they were short on cash, they returned to the family business. Over the following 23 months they undertook 24 raids on country and outer-suburban TABs and banks. Whilst robbing one country bank for the third time, just like their father, it all went wrong ending up with a police officer shot. They were nick-named the “After-dark” bandits and are considered to be Australia’s last bushrangers. They were convicted and served 17 years in prison.5 x A4 photocopied pagesbank hold-up, cba bank, det sgt mcmennemin, eltham, h.d. pettie, harry wallace, jack burgoyne, kay arthur morgan, lindsay a. spears, main road -
 Lara RSL Sub Branch
booklet Infantry Training, Infantry Training, 1967
Australian Military Forces - infantry Training - The Platoon Australian Military Forces - infantry Training - The BattalionPrinted in 1967 Restricted 1. Infantry Training Volume 4 Part 1 The Battalion (1967) 2. Infantry Training Volume 4 Part 2 The Platoon (1967) 3. Elementary Field Defences All Arms (1969) Three copies 4. Infantry Training Volume 1 Fieldcraft and Target Detection (All Arms) 1967 5. Infantry Training Volume 1 Infantry Platoon Weapons Pamphlet 3C The Automatic Rifle - M16 (1966) Two Copies 6. Infantry Training Volume 1 Infantry Platoon Weapons Pamphlet 7 Grenades and Pyrotechnics (All Arms) 1970 7. Infantry Training Volume 1 Infantry Platoon Weapons Pamphlet 12 Theory of Small Arms Fire & Training the Battle shot (All Arms) 1967 Two Copies. 8. Infantry Training Volume 1 Infantry Platoon Weapons Pamphlet 13 Gun, Anti-Tank, 84 mm, L14A1 (1966)noneaustralian military forces, infantry training volume 1 -
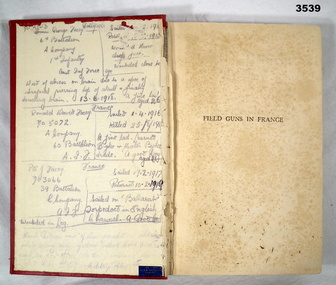 Bendigo Military Museum
Book - BOOK, WW1, Hutchinson & Co (Publishers) Ltd, Field Guns in France, c.1922 - Forword dated 1.1922
... goldfields Book field guns france Handwritten in faded blue ink ...Hard cardboard cover, red buckram with black print on spine, black outline on front. 255 pages, cut, plain, beige. Illustrated with black & red print folded maps attached at back of book. Inscriptions & markings throughout the book, too numerous to document. Found on front end paper & other pages. Attached to p92 are 2 newspaper clippings.Handwritten in faded blue ink: “Many notations on front end paper & numerous other pages”book, field guns, france -
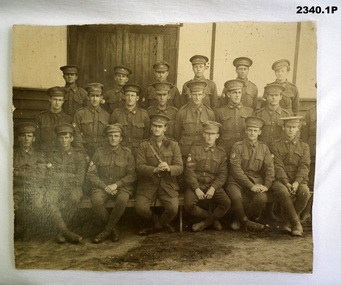 Bendigo Military Museum
Photograph - PHOTOGRAPH & POSTCARDS, 2) 17/02/1916
.1) Albert BOLDISTON, No. 747 enlisted 02/11/1916 ANZAC cyclist Batt. then 37th Bn. Discharged 29/01/1919. .2) Letter is to "Mr & Mrs DILLON from Pte. J. BURKE No. 3477 21st Batt. A.I.F", dated 17/02/1916. .3)-.10) These are "Daily mail official war pictures". Series 18. Albert Boldiston No 747 enlisted in the AIF in reinforcements 7 Anzac Cyclist Batt on 2.11.1916 age 24 years. Embarked for England 16.12.1916, transfer to 8th Batt 7.3.1917, embark for France 14.6.1917, transfer to 37th Batt 29.6.1917, hospital accidental injury (sprained ankle) 5.7.1917, rejoin unit 10.9.1917, hospital 18.11.1917 with Trench Feet, rejoin unit 13.6.1918, WIA 10.8.1918 GSW left wrist (through the joint) return to Australia 20.10.1918, discharged from the AIF 29.1.1919. Joseph Martin Burke No 3477 enlisted in the AIF in 8th reinforcements 21st Batt on 16.7.1915 age 21 years 4 months. Embark for Egypt 29.12.1915, transfer to 60th Batt 26.2.1916, then 57th 21.3.1916, then 13th FAB (Artillery) 27.3.1916, embark for France 16.6.1916, transfer to 25th FAB 9.7.1916 then 13th FAB 24.1.1917, hospital England while on leave 29.10.1918 with Influenza, return to Australia 21.12.1918 re the Influenza for discharge, discharged from the AIF 21.3.1919..1) Photo, B&W on cardboard, group of soldiers (20) seated outside building. Albert BOLDISTON is on 2nd left front row. .2) Postcard photo, B&W, soldier in peak cap standing. Letter on rear in ink from J.M. BURKE. .3) Postcard photo, B&W featuring "King George" in a gun pit. .4) Postcard photo, B&W featuring "Australian heavy gun at work". .5) Postcard photo, B&W featuring "Australians loading a trench mortar". .6) Postcard photo, B&W showing a camouflaged troopship. .7) Postcard photo, B&W, soldier keeping a lookout in trench. .8) Postcard photo, B&W showing "An observation balloon". .9) Postcard photo, B&W showing wounded waiting for the field ambulance. .10) Postcard photo, B&W showing "Australian gunners at work". .11) Card, yellow with black print both sides relating to a 37th Batt. 1st & 2nd A.I.F reunion "Whippbang 1950"..5) "Troopship in port".photography-photographs, military history - army -
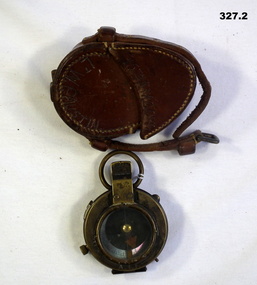 Bendigo Military Museum
Equipment - COMPASS & POVAT, S. Morgan & co, 1918
The engraving possibly relates to William Piercy Austin No 618. Enlisted 17.8.14 in 5th Batt Machine Gun Sect age 22 years 3 months. Embarked for Egypt 21.10.14 then for Gallipoli and the landing. promoted to L/Cpl 9.5.15, hospital 1.9.15 with Dysentry and then Debility. Transfer to 57th Batt 24.5.16, embark for France 21.6.16, detached to 5th Div MG School, hospital 5.7.16 with Scabies, return to duty 21.7.16, posted on strength of 15th MG Coy 4.11.16, Promoted to Sgt 4.1.17, detached to 58th Batt, promoted to Lieut 29.1.17 and transfers to 60th Batt, hospital 19.2.17 with Trench Feet, while in England recovering hospital with Abcess, rejoin unit in the field, 8.8.17, transfer to 5th MG Batt 30.5.18, discharged from the AIF 21.6.19..1) Compass, Magnetic Prismatic. Serial No 97299 .2) Povat, leather, belt mounted .1) Engraved “15th MGC AIF Lt W. P. AUSTIN”compass, leather case, military -
Frankston RSL Sub Branch
Belt, Ammunition, September 1938
Part of Vickers machine gun ammunition belt of 250 rounds, stripless type that was factory filled & meant to be discarded on use.The vickers machine gun was in general use by British & Commonwealth forces during WW2 & Korea.Fabric belt for Vickers machine gun, manuafactured by Thomas French & Sons Ltd in September 1938, mark 3 "stripless". Belts held 250 rounds but this one has been cut short. there were 2 types of belts; initially refillable in the field and later stripless that were discarded when used.T F & S Ltd Sept 1938 III 250 M/G PATd on brass header strip..ww2, vickers machine gun -
4th/19th Prince of Wales's Light Horse Regiment Unit History Room
Booklet, Artillery Training Vol I Pam No 3 1941 Application of Fire, 1941
Soft covered booklet, supersedes the 1938 edition. Covers application of fire of Field, Medium, Heavy Artillery, Anti-Tank and Anti-Aircraft gunsNot to be publishedgunnery, artillery, training -
4th/19th Prince of Wales's Light Horse Regiment Unit History Room
Booklet, Australian Army Manual of Land Warfare Part 2 Artillery Training Vol 3 Pam 3 Gun Regiments Survey within the Unit 1983, 1983
Soft covered booklet describing the principles and process of battery survey in a field artillery battery and that within the regiment, and the role organisation duties and deployment of a regimental survey section 7610-66-108-8454artillery, survey -
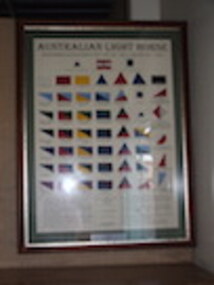 4th/19th Prince of Wales's Light Horse Regiment Unit History Room
Colour Patch Display, Frontier Military History Services, Australian Light Horse Colour Patches of the 1st AIF 1915-1920 & AMF/CMF 1921-1940's, 24/07/2010
Display board of replica cloth colour patches, mounted in glass fronted wooden frame. Colour patches displayed are those of : 1st Cavalry Division HQ (CMF) Desert Mounted Corps HQ 2nd Cavalry Division HQ (CMF) HQ 1st Light Horse Brigade (AIF & CMF) HQ 2nd Light Horse Brigade (AIF & CMF) HQ 3rd Light Horse Brigade (AIF & CMF) HQ 4th Light Horse Brigade (AIF) HQ 5th Light Horse Brigade (AIF & CMF) HQ 4th Light Horse Brigade (CMF) HQ 6th Light Horse Brigade (CMF) 1st Light Horse Regiment / 1st Royal NSW Lancers 5th Light Horse Regiment / 5th Wide Bay & Burnett Light Horse 8th Light Horse Regiment / 8th Indi Light Horse Regiment 4th Light Horse Regiment / 4th Corangamite Light Horse Regiment 14th Light Horse Regiment / 14th West Moreton Light Horse Regiment 18th Adelaide Lancers 4th Light Horse Regiment / 1st Aust Div Mounted Regiment / 2nd ANZAC Mounted Regiment / 22nd Corps Mounted Regiment. 2nd Light Horse Regiment / 2nd Moreton Light Horse Regiment 6th Light Horse Regiment / 6th NSW Mounted Rifles 9th Light Horse Regiment / 9th Flinders Light Horse Regiment 11th Light Horse Regiment / 11th Darling Downs Light Horse Regiment 15th Light Horse Regiment / 15th Northern River Lancers 21st Riverina Light Horse 13th Light Horse Regiment / 2nd Aust Div Mounted Regiment / 1st ANZAC Mounted Regiment / Aust Corps Mounted Regiment / 13th Gippsland Light Horse Regiment 3rd Light Horse Regiment / 3rd South Australian Mounted Rifles 7th Light Horse Regiment / 7th Australian Horse 10th Light Horse Regiment / 10th Western Australian Mounted Infantry 12th Light Horse Regiment / 12th New England Light Horse Regiment 17th Prince of Wales Light Horse Regiment 22nd Tasmanian Mounted Infantry 11th Light Horse Regiment / 4th Aust Div Mounted Regiment / 24th Gwydir Light Horse Regiment 1st Machine Gun Squadron / 25th Light Horse (MG) 2nd Machine Gun Squadron / 16th Hunter River Lancers 3rd Machine Gun Squadron / 20th Victorian Mounted Rifles 4th Machine Gun Squadron / 26th Light Horse (MG) 5th Machine Gun Squadron / 19th Yarrowee Light Horse 23rd Barossa Light Horse Regiment 12th Light Horse Regiment / 5th Aust Div Mounted Regiment 1st Light Horse Field Ambulance 2nd Light Horse Field Ambulance 3rd Light Horse Field Ambulance 4th Light Horse Field Ambulance 5th Light Horse Field Ambulance 4th Signal Troop / 4th Light Horse brigade 6th Mobile Veterinary Section /1st Light Horse Brigade 7th Mobile Veterinary Section / 2nd Light Horse Brigade 8th Mobile Veterinary Section / 3rd Light Horse Brigade 9th Mobile Veterinary Section / 4th Light Horse brigade 10th Mobile Veterinary Section / 5th Light Horse Brigade 5th Signal Troop / 5th Light Horse Brigade 1st Signal Squadron / NZ & Aust Mounted Div Signal SquadronColour Patch Display No 39. Includes detailed notes about history, usage and design of colour patchesworld war one, ww1, army, aif, insignia, heraldry, light horse, militia, badges, colour patches, cmf -
4th/19th Prince of Wales's Light Horse Regiment Unit History Room
Field Sketch, The Battle of Beersheba, c. 31 Oct 1917
O Hewett was a NZ Sergeant attached to the ANZAC Mounted Division HQA field sketch, by Sgt Otho Hewett, looking toward Beersheba from the south-east from Khaslim Zana (a wadi). The sketch shows the position of 20th Corps Infantry, the rail bridge, various buildings within the town, the Gaza-Beersheba & Hebron roads, the aerodrome, the position of 4 Turkish guns and Tel el Saba trenchesbeersheba -
4th/19th Prince of Wales's Light Horse Regiment Unit History Room
Field Sketch, The Field of Battle for Richon Le Zion Morning 15th Nov, Morning of 15 Nov 1917
A field sketch by Sgt Otho Hewett of ANZAC HQ showing the features, Turkish positions and positions of the NZ Mounted Regt as well as the placement of the machine guns of NZ MR and Auckland MR.sketch, richon le zion