Showing 2292 items
matching william whitely
-
 Supreme Court of Victoria Library
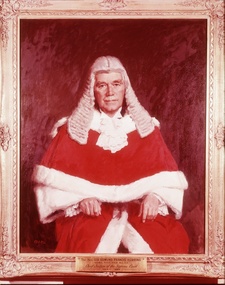
Portrait, Sir Edmund Herring, 1964
The portrait of Chief Justice Sir Edmund Herring is significant because of whom it portrays and who painted it. Sir Edmund Herring (1892-1982), had a military career before becoming the Chief Justice of Victoria in 1944. Sir Edmund served as an artillery officer with the British Army in World War One and was awarded the Military Cross. While he returned to the Law between the wars, becoming Kings Counsel in 1936, he continued his military associations through the Australian Militia forces rising to colonel by the start of the Second World War. At the outset of World War Two Herring was appointed as Commander of the Royal Artillery for the Australian Sixth Division. Herring saw service in North Africa and Greece and was in charge of Australian Northern forces in 1942, afterwards working with General Blamey in Papua New Guinea. It was at this time that Herring confirmed the death sentences of 22 Papuans who had been found guilty of murder and treason. Sir Edmund was appointed Chief Justice, straight from his army command in 1944. As Chief Justice he quickly established the Law Reform Committee and after the war oversaw the extension of the Supreme Court buildings, with the creation of new Courts. He was considered an able administrator, but his refusal to appoint Joan Rosanove a Queen’s Counsel throughout the 1950s, did not sit well with many legal practitioners. After his retirement from the Bench, he continued in his many public activities, including trustee of the Shrine of Remembrance and the Australian War Memorial and a member of the Melbourne Grammar School Council, as well as Lieutenant Governor of the State of Victoria a position he held from 1945 to 1972. Herring was also an outspoken social critic, between the wars he had been a member of the White Guard, who were a far right group acting against communism. During the Cold War period of the 1950s, Herring spoke out in favour of the British Empire and the American alliance. The portrait of Chief Justice Sir Edmund Herring is significant because of whom it portrays and who painted it. The portrait of Sir Edmund Herring is the second one that Sir William Dargie (1912-2003), completed of Sir Edmund, his first effort in 1944/45 won the Archibald prize. Dargie won the Archibald prize a record eight times.Portrait in oils of Sir Edmund Herring, Chief Justice of the Supreme Court of Victoria (1944-1964). Sir Edmund is seated, this is a half portrait, dressed in his red judicial robes. The sitter takes up most of the frame and there is very little extra information in the picture. signed lower left "Dargie'. Plaque with the following details : Sir Edmund Francis Herring, KCMG, KBE, DSO, MC, ED. Chief Justice of the Supreme Court, 1944-1964.judges, herring -
 Phillip Island and District Historical Society Inc.
Photograph, Debutante Ball 1949 and names of debutantes, 1949
The origin of debutante balls was that the woman was old enough to be married, and part of the purpose of her coming out was to display her to eligible bachelors and their families with a view to marriage within a select circle. These balls were popular on the Island and held at the Shire Hall in Thompson Ave.HistoricalBlack and white photo of group of debutantes in white gowns with posies, dance instructor and Mrs Leggatt, wife of local MP Sir William Leggatt. Allan Murray was the photographer.List of names of debutantes, dance instructor, dignitary and photographer. Also notes re problems with photos from the night.Charlotte Cleeland's deb photo 1949. also names as above.photograph, charlotte cleeland, debutantes phillip island, allan murray, john claringbold, val spokes, joan westley, ruth grayden, heather burton, gwen jackson, margery forrest, fay redpath, mrs mcadie, mrs dorothy leggatt, verna gawith, eileen jones, mrs anderson -
 Flagstaff Hill Maritime Museum and Village
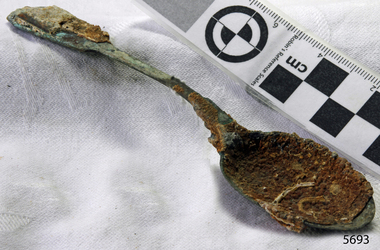
Spoon, circa 1878
This tea spoon is from the wreck of the LOCH ARD, a Loch Line ship of 1,693 tons which sailed from Gravesend, London, on 2 March 1878 with 17 passengers and a crew of 36 under Captain George Gibbs. “The intention was to discharge cargo in Melbourne, before returning to London via the Horn with wool and wheat”. Instead, on 1 June 1878, after 90 days at sea, she struck the sandstone cliffs of Mutton Bird Island on the south west coast of Victoria, and sank with the loss of 52 lives and all her cargo. The manifest of the LOCH ARD listed an array of manufactured goods and bulk metals being exported to the Colony of Victoria, with a declared value of £53,700. (202 bills of lading show an actual invoice value of £68, 456, with insurance underwriting to £30,000 of all cargo). Included in the manifest is the item of “Tin hardware & cutlery £7,530”. This teaspoon is one of 482 similar items of electro-plated cutlery from the LOCH ARD site, comprising spoons and forks of various sizes but all sharing the same general shape or design and metallic composition. 49 of these pieces display a legible makers’ mark — the initials “W” and “P” placed within a raised diamond outline, which is in turn contained within a sunken crown shape — identifying the manufacturer as William Page & Co of Birmingham. An electroplater’s makers’ marks, unlike sterling silver hallmarks, are not consistent identifiers of quality or date and place of manufacture. A similar line of five impressions was usually made to impress the consumer with an implication of industry standards, but what each one actually signified was not regulated and so they varied according to the whim of the individual foundry. In this case, the maker’s marks are often obscured by sedimentary accretion or removed by corrosion after a century of submersion in the ocean. However sufficient detail has survived to indicate that these samples of electro-plated cutlery probably originated from the same consignment in the LOCH ARD’s cargo. The following descriptions of maker’s marks are drawn from 255 tea spoons, 125 dessert spoons, and 99 table forks. These marks are clearly visible in 66 instances, while the same sequence of general outlines, or depression shapes, is discernible in another 166 examples. 1. A recessed Crown containing a raised Diamond outline and the initials “W” and “P” (the recognised trademark of William Page & Co) 2. An impressed Ellipse containing a raised, pivoted, Triangle in its lower part and bearing a Resurrection Cross on its upper section (a possible dissenting church symbol reflecting religious affiliation); OR a rounded Square impression containing a raised, ‘lazy’, letter “B” (possibly mimicking sterling silver hallmark signifying city of manufacture i.e. Birmingham) 3. An impressed rounded Square filled with a raised Maltese Cross (the base metal composite of nickel silver was also known as ‘German silver’ after its Berlin inventors in 1823) 4. A recessed Circle containing a Crab or Scarab Beetle image; OR a recessed Circle containing a rotated ‘fleur de lys’ or ‘fasces’ design 5. A depressed Diamond shape enclosing a large raised letter “R” and a small raised letter “D” (mimicking the U.K. Patent Office stamp which abbreviated the term ‘registered’ to “RD”, but also included date and class of patent) Suggested trade names for William Page & Co’s particular blend of brass plating are ‘roman silver’ or ‘silverite’. This copper alloy polishes to a lustrous gold when new, discolouring to a murky grey with greenish hue when neglected. HISTORY OF THE LOCH ARD The LOCH ARD belonged to the famous Loch Line which sailed many ships from England to Australia. Built in Glasgow by Barclay, Curdle and Co. in 1873, the LOCH ARD was a three-masted square rigged iron sailing ship. The ship measured 262ft 7" (79.87m) in length, 38ft (11.58m) in width, 23ft (7m) in depth and had a gross tonnage of 1693 tons. The LOCH ARD's main mast measured a massive 150ft (45.7m) in height. LOCH ARD made three trips to Australia and one trip to Calcutta before its final voyage. LOCH ARD left England on March 2, 1878, under the command of Captain Gibbs, a newly married, 29 year old. She was bound for Melbourne with a crew of 37, plus 17 passengers and a load of cargo. The general cargo reflected the affluence of Melbourne at the time. On board were straw hats, umbrella, perfumes, clay pipes, pianos, clocks, confectionary, linen and candles, as well as a heavier load of railway irons, cement, lead and copper. There were items included that intended for display in the Melbourne International Exhibition in 1880. The voyage to Port Phillip was long but uneventful. At 3am on June 1, 1878, Captain Gibbs was expecting to see land and the passengers were becoming excited as they prepared to view their new homeland in the early morning. But LOCH ARD was running into a fog which greatly reduced visibility. Captain Gibbs was becoming anxious as there was no sign of land or the Cape Otway lighthouse. At 4am the fog lifted. A man aloft announced that he could see breakers. The sheer cliffs of Victoria's west coast came into view, and Captain Gibbs realised that the ship was much closer to them than expected. He ordered as much sail to be set as time would permit and then attempted to steer the vessel out to sea. On coming head on into the wind, the ship lost momentum, the sails fell limp and LOCH ARD's bow swung back. Gibbs then ordered the anchors to be released in an attempt to hold its position. The anchors sank some 50 fathoms - but did not hold. By this time LOCH ARD was among the breakers and the tall cliffs of Mutton Bird Island rose behind the ship. Just half a mile from the coast, the ship's bow was suddenly pulled around by the anchor. The captain tried to tack out to sea, but the ship struck a reef at the base of Mutton Bird Island, near Port Campbell. Waves broke over the ship and the top deck was loosened from the hull. The masts and rigging came crashing down knocking passengers and crew overboard. When a lifeboat was finally launched, it crashed into the side of LOCH ARD and capsized. Tom Pearce, who had launched the boat, managed to cling to its overturned hull and shelter beneath it. He drifted out to sea and then on the flood tide came into what is now known as LOCH ARD Gorge. He swam to shore, bruised and dazed, and found a cave in which to shelter. Some of the crew stayed below deck to shelter from the falling rigging but drowned when the ship slipped off the reef into deeper water. Eva Carmichael had raced onto deck to find out what was happening only to be confronted by towering cliffs looming above the stricken ship. In all the chaos, Captain Gibbs grabbed Eva and said, "If you are saved Eva, let my dear wife know that I died like a sailor". That was the last Eva Carmichael saw of the captain. She was swept off the ship by a huge wave. Eva saw Tom Pearce on a small rocky beach and yelled to attract his attention. He dived in and swam to the exhausted woman and dragged her to shore. He took her to the cave and broke open case of brandy which had washed up on the beach. He opened a bottle to revive the unconscious woman. A few hours later Tom scaled a cliff in search of help. He followed hoof prints and came by chance upon two men from nearby Glenample Station three and a half miles away. In a state of exhaustion, he told the men of the tragedy. Tom returned to the gorge while the two men rode back to the station to get help. By the time they reached LOCH ARD Gorge, it was cold and dark. The two shipwreck survivors were taken to Glenample Station to recover. Eva stayed at the station for six weeks before returning to Ireland, this time by steamship. In Melbourne, Tom Pearce received a hero's welcome. He was presented with the first gold medal of the Royal Humane Society of Victoria and a £1000 cheque from the Victorian Government. Concerts were performed to honour the young man's bravery and to raise money for those who lost family in the LOCH ARD disaster. Of the 54 crew members and passengers on board, only two survived: the apprentice, Tom Pearce and the young woman passenger, Eva Carmichael, who lost all of her family in the tragedy. Ten days after the LOCH ARD tragedy, salvage rights to the wreck were sold at auction for £2,120. Cargo valued at £3,000 was salvaged and placed on the beach, but most washed back into the sea when another storm developed. The wreck of LOCH ARD still lies at the base of Mutton Bird Island. Much of the cargo has now been salvaged and some was washed up into what is now known as LOCH ARD Gorge. Cargo and artefacts have also been illegally salvaged over many years before protective legislation was introduced. One of the most unlikely pieces of cargo to have survived the shipwreck was a Minton porcelain peacock - one of only seven in the world. The peacock was destined for the Melbourne International Exhibition in 1880. It had been well packed, which gave it adequate protection during the violent storm. Today, the Minton peacock can be seen at the Flagstaff Hill Maritime Museum in Warrnambool. From Australia's most dramatic shipwreck it has now become Australia's most valuable shipwreck artefact and is one of very few 'objects' on the Victorian State Heritage Register. The LOCH ARD shipwreck is of State significance – Victorian Heritage Register S 417. Flagstaff Hill’s collection of artefacts from LOCH ARD is significant for being one of the largest collections of artefacts from this shipwreck in Victoria. It is significant for its association with the shipwreck, which is on the Victorian Heritage Register (VHR S417). The collection is significant because of the relationship between the objects, as together they have a high potential to interpret the story of the LOCH ARD. The LOCH ARD collection is archaeologically significant as the remains of a large international passenger and cargo ship. The LOCH ARD collection is historically significant for representing aspects of Victoria’s shipping history and its potential to interpret sub-theme 1.5 of Victoria’s Framework of Historical Themes (living with natural processes). The collection is also historically significant for its association with the LOCH ARD, which was one of the worst and best known shipwrecks in Victoria’s history Unrestored tea spoon from the wreck of the LOCH ARD. The spoon design has a flattened fiddle-back handle, with a thin stem or shank, flared collar, and elongated bowl. The spoons metallic composition is a thin layer of brass alloy which has partially corroded back to a nickel-silver base metal. 40% of spoon surface is encrusted with red and white sediment and 40% shows verdigris. Makers marks are obscured.flagstaff hill, warrnambool, shipwrecked coast, flagstaff hill maritime museum, maritime museum, shipwreck coast, flagstaff hill maritime village, great ocean road, loch line, loch ard, captain gibbs, eva carmichael, tom pearce, glenample station, mutton bird island, loch ard gorge, electroplated cutlery, loch ard shipwreck, nickel silver, william page & co, birmingham, brass plating, makers marks -
 Flagstaff Hill Maritime Museum and Village
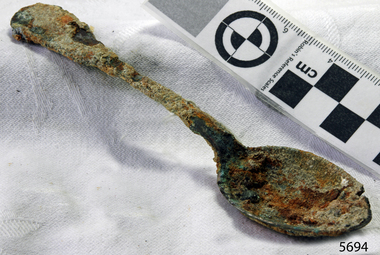
Spoon, circa 1878
This tea spoon is from the wreck of the LOCH ARD, a Loch Line ship of 1,693 tons which sailed from Gravesend, London, on 2 March 1878 with 17 passengers and a crew of 36 under Captain George Gibbs. “The intention was to discharge cargo in Melbourne, before returning to London via the Horn with wool and wheat”. Instead, on 1 June 1878, after 90 days at sea, she struck the sandstone cliffs of Mutton Bird Island on the south west coast of Victoria, and sank with the loss of 52 lives and all her cargo. The manifest of the LOCH ARD listed an array of manufactured goods and bulk metals being exported to the Colony of Victoria, with a declared value of £53,700. (202 bills of lading show an actual invoice value of £68, 456, with insurance underwriting to £30,000 of all cargo). Included in the manifest is the item of “Tin hardware & cutlery £7,530”. This teaspoon is one of 482 similar items of electro-plated cutlery from the LOCH ARD site, comprising spoons and forks of various sizes but all sharing the same general shape or design and metallic composition. 49 of these pieces display a legible makers’ mark — the initials “W” and “P” placed within a raised diamond outline, which is in turn contained within a sunken crown shape — identifying the manufacturer as William Page & Co of Birmingham. An electroplater’s makers’ marks, unlike sterling silver hallmarks, are not consistent identifiers of quality or date and place of manufacture. A similar line of five impressions was usually made to impress the consumer with an implication of industry standards, but what each one actually signified was not regulated and so they varied according to the whim of the individual foundry. In this case, the maker’s marks are often obscured by sedimentary accretion or removed by corrosion after a century of submersion in the ocean. However sufficient detail has survived to indicate that these samples of electro-plated cutlery probably originated from the same consignment in the LOCH ARD’s cargo. The following descriptions of maker’s marks are drawn from 255 tea spoons, 125 dessert spoons, and 99 table forks. These marks are clearly visible in 66 instances, while the same sequence of general outlines, or depression shapes, is discernible in another 166 examples. 1. A recessed Crown containing a raised Diamond outline and the initials “W” and “P” (the recognised trademark of William Page & Co) 2. An impressed Ellipse containing a raised, pivoted, Triangle in its lower part and bearing a Resurrection Cross on its upper section (a possible dissenting church symbol reflecting religious affiliation); OR a rounded Square impression containing a raised, ‘lazy’, letter “B” (possibly mimicking sterling silver hallmark signifying city of manufacture i.e. Birmingham) 3. An impressed rounded Square filled with a raised Maltese Cross (the base metal composite of nickel silver was also known as ‘German silver’ after its Berlin inventors in 1823) 4. A recessed Circle containing a Crab or Scarab Beetle image; OR a recessed Circle containing a rotated ‘fleur de lys’ or ‘fasces’ design 5. A depressed Diamond shape enclosing a large raised letter “R” and a small raised letter “D” (mimicking the U.K. Patent Office stamp which abbreviated the term ‘registered’ to “RD”, but also included date and class of patent) Suggested trade names for William Page & Co’s particular blend of brass plating are ‘roman silver’ or ‘silverite’. This copper alloy polishes to a lustrous gold when new, discolouring to a murky grey with greenish hue when neglected. HISTORY OF THE LOCH ARD The LOCH ARD belonged to the famous Loch Line which sailed many ships from England to Australia. Built in Glasgow by Barclay, Curdle and Co. in 1873, the LOCH ARD was a three-masted square rigged iron sailing ship. The ship measured 262ft 7" (79.87m) in length, 38ft (11.58m) in width, 23ft (7m) in depth and had a gross tonnage of 1693 tons. The LOCH ARD's main mast measured a massive 150ft (45.7m) in height. LOCH ARD made three trips to Australia and one trip to Calcutta before its final voyage. LOCH ARD left England on March 2, 1878, under the command of Captain Gibbs, a newly married, 29 year old. She was bound for Melbourne with a crew of 37, plus 17 passengers and a load of cargo. The general cargo reflected the affluence of Melbourne at the time. On board were straw hats, umbrella, perfumes, clay pipes, pianos, clocks, confectionary, linen and candles, as well as a heavier load of railway irons, cement, lead and copper. There were items included that intended for display in the Melbourne International Exhibition in 1880. The voyage to Port Phillip was long but uneventful. At 3am on June 1, 1878, Captain Gibbs was expecting to see land and the passengers were becoming excited as they prepared to view their new homeland in the early morning. But LOCH ARD was running into a fog which greatly reduced visibility. Captain Gibbs was becoming anxious as there was no sign of land or the Cape Otway lighthouse. At 4am the fog lifted. A man aloft announced that he could see breakers. The sheer cliffs of Victoria's west coast came into view, and Captain Gibbs realised that the ship was much closer to them than expected. He ordered as much sail to be set as time would permit and then attempted to steer the vessel out to sea. On coming head on into the wind, the ship lost momentum, the sails fell limp and LOCH ARD's bow swung back. Gibbs then ordered the anchors to be released in an attempt to hold its position. The anchors sank some 50 fathoms - but did not hold. By this time LOCH ARD was among the breakers and the tall cliffs of Mutton Bird Island rose behind the ship. Just half a mile from the coast, the ship's bow was suddenly pulled around by the anchor. The captain tried to tack out to sea, but the ship struck a reef at the base of Mutton Bird Island, near Port Campbell. Waves broke over the ship and the top deck was loosened from the hull. The masts and rigging came crashing down knocking passengers and crew overboard. When a lifeboat was finally launched, it crashed into the side of LOCH ARD and capsized. Tom Pearce, who had launched the boat, managed to cling to its overturned hull and shelter beneath it. He drifted out to sea and then on the flood tide came into what is now known as LOCH ARD Gorge. He swam to shore, bruised and dazed, and found a cave in which to shelter. Some of the crew stayed below deck to shelter from the falling rigging but drowned when the ship slipped off the reef into deeper water. Eva Carmichael had raced onto deck to find out what was happening only to be confronted by towering cliffs looming above the stricken ship. In all the chaos, Captain Gibbs grabbed Eva and said, "If you are saved Eva, let my dear wife know that I died like a sailor". That was the last Eva Carmichael saw of the captain. She was swept off the ship by a huge wave. Eva saw Tom Pearce on a small rocky beach and yelled to attract his attention. He dived in and swam to the exhausted woman and dragged her to shore. He took her to the cave and broke open case of brandy which had washed up on the beach. He opened a bottle to revive the unconscious woman. A few hours later Tom scaled a cliff in search of help. He followed hoof prints and came by chance upon two men from nearby Glenample Station three and a half miles away. In a state of exhaustion, he told the men of the tragedy. Tom returned to the gorge while the two men rode back to the station to get help. By the time they reached LOCH ARD Gorge, it was cold and dark. The two shipwreck survivors were taken to Glenample Station to recover. Eva stayed at the station for six weeks before returning to Ireland, this time by steamship. In Melbourne, Tom Pearce received a hero's welcome. He was presented with the first gold medal of the Royal Humane Society of Victoria and a £1000 cheque from the Victorian Government. Concerts were performed to honour the young man's bravery and to raise money for those who lost family in the LOCH ARD disaster. Of the 54 crew members and passengers on board, only two survived: the apprentice, Tom Pearce and the young woman passenger, Eva Carmichael, who lost all of her family in the tragedy. Ten days after the LOCH ARD tragedy, salvage rights to the wreck were sold at auction for £2,120. Cargo valued at £3,000 was salvaged and placed on the beach, but most washed back into the sea when another storm developed. The wreck of LOCH ARD still lies at the base of Mutton Bird Island. Much of the cargo has now been salvaged and some was washed up into what is now known as LOCH ARD Gorge. Cargo and artefacts have also been illegally salvaged over many years before protective legislation was introduced. One of the most unlikely pieces of cargo to have survived the shipwreck was a Minton porcelain peacock - one of only seven in the world. The peacock was destined for the Melbourne International Exhibition in 1880. It had been well packed, which gave it adequate protection during the violent storm. Today, the Minton peacock can be seen at the Flagstaff Hill Maritime Museum in Warrnambool. From Australia's most dramatic shipwreck it has now become Australia's most valuable shipwreck artefact and is one of very few 'objects' on the Victorian State Heritage Register. The LOCH ARD shipwreck is of State significance – Victorian Heritage Register S 417. Flagstaff Hill’s collection of artefacts from LOCH ARD is significant for being one of the largest collections of artefacts from this shipwreck in Victoria. It is significant for its association with the shipwreck, which is on the Victorian Heritage Register (VHR S417). The collection is significant because of the relationship between the objects, as together they have a high potential to interpret the story of the LOCH ARD. The LOCH ARD collection is archaeologically significant as the remains of a large international passenger and cargo ship. The LOCH ARD collection is historically significant for representing aspects of Victoria’s shipping history and its potential to interpret sub-theme 1.5 of Victoria’s Framework of Historical Themes (living with natural processes). The collection is also historically significant for its association with the LOCH ARD, which was one of the worst and best known shipwrecks in Victoria’s history Unrestored tea spoon from the wreck of the LOCH ARD. The spoon design has a flattened fiddle-back handle, with a thin stem or shank, flared collar, and elongated bowl. The spoons metallic composition is a thin layer of brass alloy which has partially corroded back to a nickel-silver base metal. 80% of the spoon surface is encrusted with red and white sediment. The bowl is corroded and chipped. Makers marks are obscured.flagstaff hill, warrnambool, shipwrecked coast, flagstaff hill maritime museum, maritime museum, shipwreck coast, flagstaff hill maritime village, great ocean road, loch line, loch ard, captain gibbs, eva carmichael, tom pearce, glenample station, mutton bird island, loch ard gorge, electroplated cutlery, loch ard shipwreck, nickel silver, william page & co, birmingham, brass plating, makers marks -
 Flagstaff Hill Maritime Museum and Village
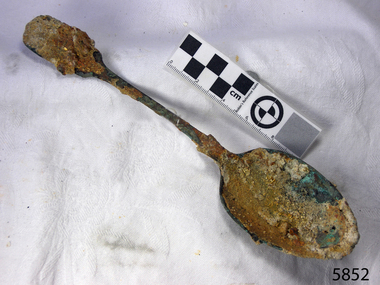
Domestic object - Spoon, circa 1878
This dessert spoon is from the wreck of the LOCH ARD, a Loch Line ship of 1,693 tons which sailed from Gravesend, London, on 2 March 1878 with 17 passengers and a crew of 36 under Captain George Gibbs. “The intention was to discharge cargo in Melbourne, before returning to London via the Horn with wool and wheat”. Instead, on 1 June 1878, after 90 days at sea, she struck the sandstone cliffs of Mutton Bird Island on the south west coast of Victoria, and sank with the loss of 52 lives and all her cargo. The manifest of the LOCH ARD listed an array of manufactured goods and bulk metals being exported to the Colony of Victoria, with a declared value of £53,700. (202 bills of lading show an actual invoice value of £68, 456, with insurance underwriting to £30,000 of all cargo). Included in the manifest is the item of “Tin hardware & cutlery £7,530”. This dessert spoon is one of 482 similar items of electro-plated cutlery from the LOCH ARD site, comprising spoons and forks of various sizes but all sharing the same general shape or design and metallic composition. 49 of these pieces display a legible makers’ mark — the initials “W” and “P” placed within a raised diamond outline, which is in turn contained within a sunken crown shape — identifying the manufacturer as William Page & Co of Birmingham. An electroplater’s makers’ marks, unlike sterling silver hallmarks, are not consistent identifiers of quality or date and place of manufacture. A similar line of five impressions was usually made to impress the consumer with an implication of industry standards, but what each one actually signified was not regulated and so they varied according to the whim of the individual foundry. In this case, the maker’s marks are often obscured by sedimentary accretion or removed by corrosion after a century of submersion in the ocean. However sufficient detail has survived to indicate that these samples of electro-plated cutlery probably originated from the same consignment in the LOCH ARD’s cargo. The generally common range of marks are drawn from 255 tea spoons, 125 dessert spoons, and 99 table forks. These marks are clearly visible in 66 instances, while the same sequence of general outlines, or depression shapes, is discernible in another 166 examples. Suggested trade names for William Page & Co’s particular blend of brass plating are ‘roman silver’ or ‘silverite’. This copper alloy polishes to a lustrous gold when new, discolouring to a murky grey with greenish hue when neglected. HISTORY OF THE LOCH ARD The LOCH ARD belonged to the famous Loch Line which sailed many ships from England to Australia. Built in Glasgow by Barclay, Curdle and Co. in 1873, the LOCH ARD was a three-masted square rigged iron sailing ship. The ship measured 262ft 7" (79.87m) in length, 38ft (11.58m) in width, 23ft (7m) in depth and had a gross tonnage of 1693 tons. The LOCH ARD's main mast measured a massive 150ft (45.7m) in height. LOCH ARD made three trips to Australia and one trip to Calcutta before its final voyage. LOCH ARD left England on March 2, 1878, under the command of Captain Gibbs, a newly married, 29 year old. She was bound for Melbourne with a crew of 37, plus 17 passengers and a load of cargo. The general cargo reflected the affluence of Melbourne at the time. On board were straw hats, umbrella, perfumes, clay pipes, pianos, clocks, confectionary, linen and candles, as well as a heavier load of railway irons, cement, lead and copper. There were items included that intended for display in the Melbourne International Exhibition in 1880. The voyage to Port Phillip was long but uneventful. At 3am on June 1, 1878, Captain Gibbs was expecting to see land and the passengers were becoming excited as they prepared to view their new homeland in the early morning. But LOCH ARD was running into a fog which greatly reduced visibility. Captain Gibbs was becoming anxious as there was no sign of land or the Cape Otway lighthouse. At 4am the fog lifted. A man aloft announced that he could see breakers. The sheer cliffs of Victoria's west coast came into view, and Captain Gibbs realised that the ship was much closer to them than expected. He ordered as much sail to be set as time would permit and then attempted to steer the vessel out to sea. On coming head on into the wind, the ship lost momentum, the sails fell limp and LOCH ARD's bow swung back. Gibbs then ordered the anchors to be released in an attempt to hold its position. The anchors sank some 50 fathoms - but did not hold. By this time LOCH ARD was among the breakers and the tall cliffs of Mutton Bird Island rose behind the ship. Just half a mile from the coast, the ship's bow was suddenly pulled around by the anchor. The captain tried to tack out to sea, but the ship struck a reef at the base of Mutton Bird Island, near Port Campbell. Waves broke over the ship and the top deck was loosened from the hull. The masts and rigging came crashing down knocking passengers and crew overboard. When a lifeboat was finally launched, it crashed into the side of LOCH ARD and capsized. Tom Pearce, who had launched the boat, managed to cling to its overturned hull and shelter beneath it. He drifted out to sea and then on the flood tide came into what is now known as LOCH ARD Gorge. He swam to shore, bruised and dazed, and found a cave in which to shelter. Some of the crew stayed below deck to shelter from the falling rigging but drowned when the ship slipped off the reef into deeper water. Eva Carmichael had raced onto deck to find out what was happening only to be confronted by towering cliffs looming above the stricken ship. In all the chaos, Captain Gibbs grabbed Eva and said, "If you are saved Eva, let my dear wife know that I died like a sailor". That was the last Eva Carmichael saw of the captain. She was swept off the ship by a huge wave. Eva saw Tom Pearce on a small rocky beach and yelled to attract his attention. He dived in and swam to the exhausted woman and dragged her to shore. He took her to the cave and broke open case of brandy which had washed up on the beach. He opened a bottle to revive the unconscious woman. A few hours later Tom scaled a cliff in search of help. He followed hoof prints and came by chance upon two men from nearby Glenample Station three and a half miles away. In a state of exhaustion, he told the men of the tragedy. Tom returned to the gorge while the two men rode back to the station to get help. By the time they reached LOCH ARD Gorge, it was cold and dark. The two shipwreck survivors were taken to Glenample Station to recover. Eva stayed at the station for six weeks before returning to Ireland, this time by steamship. In Melbourne, Tom Pearce received a hero's welcome. He was presented with the first gold medal of the Royal Humane Society of Victoria and a £1000 cheque from the Victorian Government. Concerts were performed to honour the young man's bravery and to raise money for those who lost family in the LOCH ARD disaster. Of the 54 crew members and passengers on board, only two survived: the apprentice, Tom Pearce and the young woman passenger, Eva Carmichael, who lost all of her family in the tragedy. Ten days after the LOCH ARD tragedy, salvage rights to the wreck were sold at auction for £2,120. Cargo valued at £3,000 was salvaged and placed on the beach, but most washed back into the sea when another storm developed. The wreck of LOCH ARD still lies at the base of Mutton Bird Island. Much of the cargo has now been salvaged and some was washed up into what is now known as LOCH ARD Gorge. Cargo and artefacts have also been illegally salvaged over many years before protective legislation was introduced. One of the most unlikely pieces of cargo to have survived the shipwreck was a Minton porcelain peacock - one of only seven in the world. The peacock was destined for the Melbourne International Exhibition in 1880. It had been well packed, which gave it adequate protection during the violent storm. Today, the Minton peacock can be seen at the Flagstaff Hill Maritime Museum in Warrnambool. From Australia's most dramatic shipwreck it has now become Australia's shipwreck artefact and is one of very few 'objects' on the Victorian State Heritage Register most valuable. The LOCH ARD shipwreck is of State significance – Victorian Heritage Register S 417. Flagstaff Hill’s collection of artefacts from LOCH ARD is significant for being one of the largest collections of artefacts from this shipwreck in Victoria. It is significant for its association with the shipwreck, which is on the Victorian Heritage Register (VHR S417). The collection is significant because of the relationship between the objects, as together they have a high potential to interpret the story of the LOCH ARD. The LOCH ARD collection is archaeologically significant as the remains of a large international passenger and cargo ship. The LOCH ARD collection is historically significant for representing aspects of Victoria’s shipping history and its potential to interpret sub-theme 1.5 of Victoria’s Framework of Historical Themes (living with natural processes). The collection is also historically significant for its association with the LOCH ARD, which was one of the worst and best known shipwrecks in Victoria’s history. Unrestored dessert spoon from the wreck of the LOCH ARD. The spoon design has a flattened fiddle-back handle, with a thin stem or shank, flared collar, and a shallow rounded bowl. The spoons metallic composition is a thin layer of brass alloy which has partially corroded back to a nickel-silver base metal. Approximately 85% of spoon surface area bears red/white encrustation and balance has verdigris.Spoon is bent out of shape.flagstaff hill maritime museum, shipwreck coast, great ocean road, loch line, loch ard, mutton bird island, loch ard gorge, electroplated cutlery, loch ard shipwreck, william page and co, birmingham brass plating, dessert spoons -
 Flagstaff Hill Maritime Museum and Village
Domestic object - Spoon, circa 1878
This table spoon is from the wreck of the LOCH ARD, a Loch Line ship of 1,693 tons which sailed from Gravesend, London, on 2 March 1878 with 17 passengers and a crew of 36 under Captain George Gibbs. “The intention was to discharge cargo in Melbourne, before returning to London via the Horn with wool and wheat”. Instead, on 1 June 1878, after 90 days at sea, she struck the sandstone cliffs of Mutton Bird Island on the south west coast of Victoria, and sank with the loss of 52 lives and all her cargo. The manifest of the LOCH ARD listed an array of manufactured goods and bulk metals being exported to the Colony of Victoria, with a declared value of £53,700. (202 bills of lading show an actual invoice value of £68, 456, with insurance underwriting to £30,000 of all cargo). Included in the manifest is the item of “Tin hardware & cutlery £7,530”. This table spoon is one of 482 similar items of electro-plated cutlery from the LOCH ARD site, comprising spoons and forks of various sizes but all sharing the same general shape or design and metallic composition. 49 of these pieces display a legible makers’ mark — the initials “W” and “P” placed within a raised diamond outline, which is in turn contained within a sunken crown shape — identifying the manufacturer as William Page & Co of Birmingham. An electroplater’s makers’ marks, unlike sterling silver hallmarks, are not consistent identifiers of quality or date and place of manufacture. A similar line of five impressions was usually made to impress the consumer with an implication of industry standards, but what each one actually signified was not regulated and so they varied according to the whim of the individual foundry. In this case, the maker’s marks are often obscured by sedimentary accretion or removed by corrosion after a century of submersion in the ocean. However sufficient detail has survived to indicate that these samples of electro-plated cutlery probably originated from the same consignment in the LOCH ARD’s cargo. The generally common range of marks are drawn from 255 tea spoons, 125 dessert spoons, and 99 table forks. These marks are clearly visible in 66 instances, while the same sequence of general outlines, or depression shapes, is discernible in another 166 examples. Suggested trade names for William Page & Co’s particular blend of brass plating are ‘roman silver’ or ‘silverite’. This copper alloy polishes to a lustrous gold when new, discolouring to a murky grey with greenish hue when neglected. HISTORY OF THE LOCH ARD The LOCH ARD belonged to the famous Loch Line which sailed many ships from England to Australia. Built in Glasgow by Barclay, Curdle and Co. in 1873, the LOCH ARD was a three-masted square rigged iron sailing ship. The ship measured 262ft 7" (79.87m) in length, 38ft (11.58m) in width, 23ft (7m) in depth and had a gross tonnage of 1693 tons. The LOCH ARD's main mast measured a massive 150ft (45.7m) in height. LOCH ARD made three trips to Australia and one trip to Calcutta before its final voyage. LOCH ARD left England on March 2, 1878, under the command of Captain Gibbs, a newly married, 29 year old. She was bound for Melbourne with a crew of 37, plus 17 passengers and a load of cargo. The general cargo reflected the affluence of Melbourne at the time. On board were straw hats, umbrella, perfumes, clay pipes, pianos, clocks, confectionary, linen and candles, as well as a heavier load of railway irons, cement, lead and copper. There were items included that intended for display in the Melbourne International Exhibition in 1880. The voyage to Port Phillip was long but uneventful. At 3am on June 1, 1878, Captain Gibbs was expecting to see land and the passengers were becoming excited as they prepared to view their new homeland in the early morning. But LOCH ARD was running into a fog which greatly reduced visibility. Captain Gibbs was becoming anxious as there was no sign of land or the Cape Otway lighthouse. At 4am the fog lifted. A man aloft announced that he could see breakers. The sheer cliffs of Victoria's west coast came into view, and Captain Gibbs realised that the ship was much closer to them than expected. He ordered as much sail to be set as time would permit and then attempted to steer the vessel out to sea. On coming head on into the wind, the ship lost momentum, the sails fell limp and LOCH ARD's bow swung back. Gibbs then ordered the anchors to be released in an attempt to hold its position. The anchors sank some 50 fathoms - but did not hold. By this time LOCH ARD was among the breakers and the tall cliffs of Mutton Bird Island rose behind the ship. Just half a mile from the coast, the ship's bow was suddenly pulled around by the anchor. The captain tried to tack out to sea, but the ship struck a reef at the base of Mutton Bird Island, near Port Campbell. Waves broke over the ship and the top deck was loosened from the hull. The masts and rigging came crashing down knocking passengers and crew overboard. When a lifeboat was finally launched, it crashed into the side of LOCH ARD and capsized. Tom Pearce, who had launched the boat, managed to cling to its overturned hull and shelter beneath it. He drifted out to sea and then on the flood tide came into what is now known as LOCH ARD Gorge. He swam to shore, bruised and dazed, and found a cave in which to shelter. Some of the crew stayed below deck to shelter from the falling rigging but drowned when the ship slipped off the reef into deeper water. Eva Carmichael had raced onto deck to find out what was happening only to be confronted by towering cliffs looming above the stricken ship. In all the chaos, Captain Gibbs grabbed Eva and said, "If you are saved Eva, let my dear wife know that I died like a sailor". That was the last Eva Carmichael saw of the captain. She was swept off the ship by a huge wave. Eva saw Tom Pearce on a small rocky beach and yelled to attract his attention. He dived in and swam to the exhausted woman and dragged her to shore. He took her to the cave and broke open case of brandy which had washed up on the beach. He opened a bottle to revive the unconscious woman. A few hours later Tom scaled a cliff in search of help. He followed hoof prints and came by chance upon two men from nearby Glenample Station three and a half miles away. In a state of exhaustion, he told the men of the tragedy. Tom returned to the gorge while the two men rode back to the station to get help. By the time they reached LOCH ARD Gorge, it was cold and dark. The two shipwreck survivors were taken to Glenample Station to recover. Eva stayed at the station for six weeks before returning to Ireland, this time by steamship. In Melbourne, Tom Pearce received a hero's welcome. He was presented with the first gold medal of the Royal Humane Society of Victoria and a £1000 cheque from the Victorian Government. Concerts were performed to honour the young man's bravery and to raise money for those who lost family in the LOCH ARD disaster. Of the 54 crew members and passengers on board, only two survived: the apprentice, Tom Pearce and the young woman passenger, Eva Carmichael, who lost all of her family in the tragedy. Ten days after the LOCH ARD tragedy, salvage rights to the wreck were sold at auction for £2,120. Cargo valued at £3,000 was salvaged and placed on the beach, but most washed back into the sea when another storm developed. The wreck of LOCH ARD still lies at the base of Mutton Bird Island. Much of the cargo has now been salvaged and some was washed up into what is now known as LOCH ARD Gorge. Cargo and artefacts have also been illegally salvaged over many years before protective legislation was introduced. One of the most unlikely pieces of cargo to have survived the shipwreck was a Minton porcelain peacock - one of only seven in the world. The peacock was destined for the Melbourne International Exhibition in 1880. It had been well packed, which gave it adequate protection during the violent storm. Today, the Minton peacock can be seen at the Flagstaff Hill Maritime Museum in Warrnambool. From Australia's most dramatic shipwreck it has now become Australia's shipwreck artefact and is one of very few 'objects' on the Victorian State Heritage Register most valuable The LOCH ARD shipwreck is of State significance – Victorian Heritage Register S 417. Flagstaff Hill’s collection of artefacts from LOCH ARD is significant for being one of the largest collections of artefacts from this shipwreck in Victoria. It is significant for its association with the shipwreck, which is on the Victorian Heritage Register (VHR S417). The collection is significant because of the relationship between the objects, as together they have a high potential to interpret the story of the LOCH ARD. The LOCH ARD collection is archaeologically significant as the remains of a large international passenger and cargo ship. The LOCH ARD collection is historically significant for representing aspects of Victoria’s shipping history and its potential to interpret sub-theme 1.5 of Victoria’s Framework of Historical Themes (living with natural processes). The collection is also historically significant for its association with the LOCH ARD, which was one of the worst and best known shipwrecks in Victoria’s history. Unrestored table spoon from the wreck of the LOCH ARD. The spoon design has a flattened fiddle-back handle, with a thin stem or shank, flared collar, and a shallow rounded bowl. The spoons metallic composition is a thin layer of brass alloy which has partially corroded back to a nickel-silver base metal. Approximately 25% of original plate remains, 20% bears sediment, and 15% is covered by blue-tinged white powdery substance. Outlines of four makers marks are visible but details are unclear. flagstaff hill maritime museum, shipwreck coast, great ocean road, loch line, loch ard, mutton bird island, loch ard gorge, electroplated cutlery, loch ard shipwreck, william page and co, birmingham brass plating, table spoons -
 Flagstaff Hill Maritime Museum and Village
Book, White Ladies
Pattison Collection This item is from the ‘Pattison Collection’, a collection of books and records that was originally owned by the Warrnambool Mechanics’ Institute, which was founded in Warrnambool in 1853. By 1886 the Warrnambool Mechanics’ Institute (WMI) had grown to have a Library, Museum and Fine Arts Gallery, with a collection of “… choice productions of art, and valuable specimens in almost every branch and many wonderful national curiosities are now to be seen there, including historic relics of the town and district.” It later included a School of Design. Although it was very well patronised, the lack of financial support led the WMI in 1911 to ask the City Council to take it over. In 1935 Ralph Pattison was appointed as City Librarian to establish and organise the Warrnambool Library as it was then called. When the WMI building was pulled down in 1963 a new civic building was erected on the site and the new Warrnambool Library, on behalf of the City Council, took over all the holdings of the WMI. At this time some of the items were separated and identified as the ‘Pattison Collection’, named after Ralph Pattison. Eventually the components of the WMI were distributed from the Warrnambool Library to various places, including the Art Gallery, Historical Society and Flagstaff Hill. Later some were even distributed to other regional branches of Corangamite Regional Library and passed to and fro. It is difficult now to trace just where all of the items have ended up. The books at Flagstaff Hill Maritime Village generally display stamps and markings from Pattison as well as a variety of other institutions including the Mechanics’ Institute itself. RALPH ERIC PATTISON Ralph Eric Pattison was born in Rockhampton, Queensland, in 1891. He married Maude Swan from Warrnambool in 1920 and they set up home in Warrnambool. In 1935 Pattison accepted a position as City Librarian for the Warrnambool City Council. His huge challenge was to make a functional library within two rooms of the Mechanics’ Institute. He tirelessly cleaned, cleared and sorted a disarrayed collection of old books, jars of preserved specimens and other items reserved for exhibition in the city’s museum. He developed and updated the library with a wide variety of books for all tastes, including reference books for students; a difficult task to fulfil during the years following the Depression. He converted all of the lower area of the building into a library, reference room and reading room for members and the public. The books were sorted and stored using a cataloguing and card index system that he had developed himself. He also prepared the upper floor of the building and established the Art Gallery and later the Museum, a place to exhibit the many old relics that had been stored for years for this purpose. One of the treasures he found was a beautiful ancient clock, which he repaired, restored and enjoyed using in his office during the years of his service there. Ralph Pattison was described as “a meticulous gentleman whose punctuality, floorless courtesy and distinctive neat dress were hallmarks of his character, and ‘his’ clock controlled his daily routine, and his opening and closing of the library’s large heavy doors to the minute.” Pattison took leave during 1942 to 1942 to serve in the Royal Australian Navy, Volunteer Reserve as Lieutenant. A few years later he converted one of the Museum’s rooms into a Children’s Library, stocking it with suitable books for the younger generation. This was an instant success. In the 1950’s he had the honour of being appointed to the Victorian Library Board and received more inspiration from the monthly conferences in Melbourne. He was sadly retired in 1959 after over 23 years of service, due to the fact that he had gone over the working age of council officers. However he continued to take a very keen interest in the continual development of the Library until his death in 1969. WARRNAMBOOL MECHANICS’ INSTITUTE Warrnambool's Mechanics' Institute (or Institution as it was sometimes called) was one of the earliest in Victoria. On 17th October 1853, a meeting was held where it was resolved to request the Lieutenant Governor of the Colony to grant land for the erection of a Mechanics' Institutes building. A committee was formed at the meeting and Richard Osburne chaired the first meeting of this committee. The land on the North West corner of Banyan and Merri Streets was granted but there were no funds to erect the building. The Formal Rights of the Warrnambool Mechanics' Institute's encompassed its aims and these were officially adopted in1859; "This Institution has for its object the diffusion of literary, scientific, and other useful knowledge amongst its members, excluding all controversial subjects, religious or political. These objects are sought to be obtained by means of a circulating library, a reading room, the establishment of classes, debates, and the occasional delivery of lectures on natural and experimental philosophy, mechanics, astronomy, chemistry, natural history, literature, and the useful and ornamental arts, particularly those which have a more immediate reference to the colony." The Warrnambool Mechanics' Institute opened its first reading room in November 1884 in the National School building at the corner of Banyan and Timor Streets. The Institute was funded by member subscription, payable on a quarterly, half-yearly or yearly basis. Samuel Hannaford, the Manager of the Warrnambool Bank of Australasia, was the first Honorary Secretary of the Mechanics' Institutes, and an early President and Vice-President. He also gave several of the early lectures in the Reading Room. Another early Secretary, Librarian and lecturer was Marmaduke Fisher, the teacher at the National School. Lecture topics included The Poets and Poetry of Ireland', 'The Birth and Development of the Earth', 'The Vertebrae - with Remarks on the pleasures resulting from the study of Natural History' and 'Architecture'. In 1856 the Reading Room was moved to James Hider's shop in Timor Street, and by 1864 it was located in the bookshop of Davies and Read. In the 1860's the Mechanics' Institute struggled as membership waned but in 1866, after a series of fundraising efforts, the committee was able to purchase land in Liebig Street, on a site then called Market Square, between the weighbridge and the fire station. A Mechanics' Institute building was opened at this site in August 1871. The following year four more rooms were added to the main Reading Room and in 1873 the Artisan School of Design was incorporated into the Institute. The same year Joseph Archibald established a Museum; however, it deteriorated when he was transferred to Bendigo in 1877. In 1880, with Archibald's return to Warrnambool, the Museum was re-established, and in 1885 a new building was built at the back of the Institute to accommodate the re-created School of Design, the Art Gallery and the Museum. In 1887 the Museum section was moved to the former courthouse in Timor Street (for some time the walls of the building formed part of the TAFE cafeteria but all is now demolished)). In 1911 the Museum was transferred back to the original building and the management of the Mechanics' Institute was handed over to the Warrnambool City Council. The Museum and Art Gallery became one and housed many fine works of art, and the Library continued to grow. The building was well patronised, with records showing that at the beginning of the 20th century there were between 500 and 800 visitors. During World War One the monthly figures were in the thousands, with 3,400 people visiting in January 1915. The Museum was a much - loved Institution in Warrnambool until the contents of the Museum and Art Gallery were removed to make room for the Warrnambool City Council Engineers' Department. The contents were stored but many of the items were scattered or lost. When the original building was demolished the site became occupied by the Civic Centre, which included the new City Library. (The library was temporarily located in the old Palais building in Koroit Street.) In the process of reorganisation the Collection was distributed amongst the community groups: -The new City Library took some of the historical books and some important documents, historic photographs and newspapers. -The Art Gallery kept the 19th Century art collection and some of the artefacts from the museum. -The Historical Society has some items -The State Museum has some items -Some items were destroyed -Flagstaff Hill Maritime Village has old newspapers, Government Gazettes, most of the Mechanics' Institute Library, ledgers and documents connected to the Mechanics' Institute Library, some framed and unframed artworks and some photographs. The Warrnambool Mechanics' Institute Library book collection is deemed to be of great importance because it is one of the few collections in an almost intact state, and many of the books are now very rare and of great value. The Pattison Collection, along with other items at Flagstaff Hill Maritime Village, was originally part of the Warrnambool Mechanics' Institute’s collection. The Warrnambool Mechanics’ Institute Collection is primarily significant in its totality, rather than for the individual objects it contains. Its contents are highly representative of the development of Mechanics' Institute libraries across Australia, particularly Victoria. A diversity of publications and themes has been amassed, and these provide clues to our understanding of the nature of and changes in the reading habits of Victorians from the 1850s to the middle of the 20th century. The collection also highlights the Warrnambool community’s commitment to the Mechanics’ Institute, reading, literacy and learning in the regions, and proves that access to knowledge was not impeded by distance. These items help to provide a more complete picture of our community’s ideals and aspirations. The Warrnambool Mechanics Institute book collection has historical and social significance for its strong association with the Mechanics Institute movement and the important role it played in the intellectual, cultural and social development of people throughout the latter part of the nineteenth century and the early twentieth century. The collection of books is a rare example of an early lending library and its significance is enhanced by the survival of an original collection of many volumes. The Warrnambool Mechanics' Institute’s publication collection is of both local and state significance. White Ladies Author: Francis Brett Young Publisher: William Heinemann Ltd Date: 1935 The label on the spine with the typed text PAT FIC YOU Pastedown front endpaper has a sticker from Warrnambool Mechanics Institute and Free Library covered by a sticker from Corangamite Regional Library Service Front loose endpaper has a stamp from Corangamite Regional Library Service Front loose endpaper has a sticker from Warrnambool Mechanics Institute book, white ladies, francis brett young, shipwrecked-coast, flagstaff-hill, flagstaff-hill-maritime-museum, warrnambool, maritime-museum, shipwreck-coast, flagstaff-hill-maritime-village, shipwrecked-artefact, pattison collection, warrnambool library, warrnambool mechanics’ institute, ralph eric pattison, corangamite regional library service, warrnambool city librarian, mechanics’ institute library, victorian library board, warrnambool books and records, warrnambool children’s library, great ocean road -
 Orbost & District Historical Society
black and white photograph, late 19th century - early 20th century
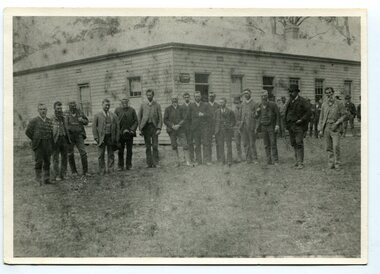
Probably taken 1890's before Orbost was separated from Tambo. The Shire of Tambo was a local government area about 320 kilometres east of Melbourne. The shire covered an area of 3,506.86 square kilometres and existed from 1882 until 1994. Tambo was first incorporated as a shire on 6 January 1882, splitting away from the Shire of Bairnsdale. On 30 May 1892 it lost three-quarters of its land area when the Shire of Orbost was incorporated. A small amount was re-annexed as Cunninghame Riding on 3 January 1913. On 2 December 1994, the Shire was abolished, and merged with the City and Shire of Bairnsdale, Shire of Orbost, most of the Shire of Omeo and the Boole Boole Peninsula from Shire of Rosedale into the Shire of East Gippsland. ( more information Newsletter July 2010). This photograph is of Tambo Shire Council meeting at Faithful's Hotel, Nowa Nowa. It includes Snowy River Riding councillors. Mary Stirling, wife of Shire Secretary Thomas Telfer Stirling, took over the Nowa Nowa Hotel from Moses Faithful in 1895. Photograph includes: John Butter BESLEY, John William BORLAND, Charles Begg IRVINE, William J. LAMBOURN, James LARKIN, Ronald McDOUGALL, Donald McRAE, William ROADKNIGHT jnr., David WILLIAMS, James CAMERON, Charles Henry GROVE. (info. John Phillips) This item is associated with the Tambo Shire Council, a local government which no longer exists.A black / white photograph of a group of men standing in a line outside a large timber building.on back - "Tambo Shire Council . Meeting at Nowa Nowa - Stirling's Hotel"tambo-shire-council faithful's-hotel-nowa-nowa local-government -
 Orbost & District Historical Society
black and white photograph, early 20th century
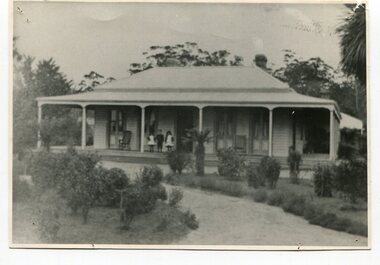
The McLeods, were the original holders of the Orbost station. Sir William Clarke bought the station from McLeod Bros. Sir William was a very fine man and noted for his philanthropic actions. He finally cut up and sold the Orbost station and presented 10 acres of land to the people of Orbost for a show and recreation ground. Sir William Clarke had taken over the Orbost run from the McLeods in 1870. (more info. July 2006 Newsletter) When Sir William died the property was owned by his son, Rupert who offered the land for sale at 4 pounds per acre. No sale resulted and the property was leased for a few years until in 1898 it was subdivided and sold to many of Orbost's first families. (info. from In Times Gone By- Deborah Hall) This house was located on the western side of Forest Road. Orbost.This is a pictorial record of one of the first residences in Orbost.A black/ white photograph of a large wooden house. It has a verandah at the front and sides. There are three children two girls and a boy - standing on the verandah to the left of the door. The house is surrounded by gardens.on front - Orbost Home Stationorbost-station clarke-william clarke-rupert -
 Orbost & District Historical Society
black and white photograph, first half 20th century
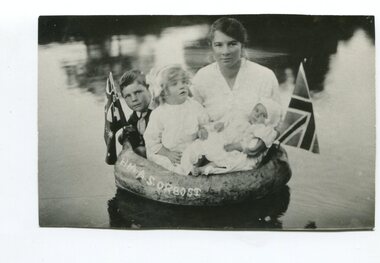
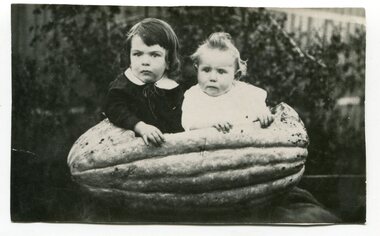
This photograph shows Ina Warren with Jack warren, Linda Warren and Cora Lynn. The photographer was Warren, Helena (1871-1962) who was a self-taught photographer who became both the local press correspondent and a producer of humorous trompe l'oeil postcard images. Helena Warren was a thirty-two year old settler living on a small mixed farm with her husband, William, at Newmerella, near Orbost in Gippsland, Victoria, when she bought her first camera, an Austral Box quarter-plate. Her family says she was entirely self-taught, like many women photographers who started out with nothing but the instructions on the packets of film and chemicals. In over fifty years practice she graduated from the total novice, who opened all her first mail order plates in bright sunlight and ruined them, to a competent photographer who became both the local press correspondent and an inveterate producer of humorous trompe l’oeil postcard images. Helena Francis Warren (nee McKeown) was married to William John Warren and lived in Newmerella. She supplied the photos for the Back-To-Orbost celebration book in 1937 and also designed the Back-To-Orbost badge. She was known for her soft toy making. (by Ivy Rodwell in from Personalities and Stories of the Early Orbost District by Mary Gilbert). This photograph has significance in its association with Helen Frances Warren, a popular Orbost identity who was well known as an accomplished photographer and needleworker,A black / white photograph of a woman with three small children sitting in a pumpkin on water . There are small flags (Australian and British) at each end. On the pumpkin is "HMAS ORBOST".pumpkins-orbost warren-helena-photographer -
 Orbost & District Historical Society
black and white photographs, Warren, Mrs H, early 20th century
This photograph shows Percy De Forest and his brother, Alfred of McLeod Street, Orbost. The photographer was Warren, Helena (1871-1962) who was a self-taught photographer who became both the local press correspondent and a producer of humorous trompe l'oeil postcard images. Helena Warren was a thirty-two year old settler living on a small mixed farm with her husband, William, at Newmerella, near Orbost in Gippsland, Victoria, when she bought her first camera, an Austral Box quarter-plate. Her family says she was entirely self-taught, like many women photographers who started out with nothing but the instructions on the packets of film and chemicals. In over fifty years practice she graduated from the total novice, who opened all her first mail order plates in bright sunlight and ruined them, to a competent photographer who became both the local press correspondent and an inveterate producer of humorous trompe l’oeil postcard images. Helena Francis Warren (nee McKeown) was married to William John Warren and lived in Newmerella. She supplied the photos for the Back-To-Orbost celebration book in 1937 and also designed the Back-To-Orbost badge. She was known for her soft toy making. (by Ivy Rodwell in from Personalities and Stories of the Early Orbost District by Mary Gilbert). This photograph has significance in its association with Helen Frances Warren, a popular Orbost identity who was well known as an accomplished photographer and needleworker,Two black / white photograohs of two small children sitting in a large pumpkin on water.on front - An Orbost Pumpkinpumpkins-orbost de-forest warren-helena-photography -
 Orbost & District Historical Society
black and white photograph, Warren, Mrs H, first half 20th century
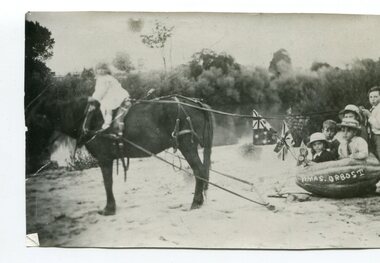
The photograph shows Linda Warren, Enid Eaton, Jim Trewin and Jim Nixon. The photographer was Warren, Helena (1871-1962) who was a self-taught photographer who became both the local press correspondent and a producer of humorous trompe l'oeil postcard images. Helena Warren was a thirty-two year old settler living on a small mixed farm with her husband, William, at Newmerella, near Orbost in Gippsland, Victoria, when she bought her first camera, an Austral Box quarter-plate. Her family says she was entirely self-taught, like many women photographers who started out with nothing but the instructions on the packets of film and chemicals. In over fifty years practice she graduated from the total novice, who opened all her first mail order plates in bright sunlight and ruined them, to a competent photographer who became both the local press correspondent and an inveterate producer of humorous trompe l’oeil postcard images. Helena Francis Warren (nee McKeown) was married to William John Warren and lived in Newmerella. She supplied the photos for the Back-To-Orbost celebration book in 1937 and also designed the Back-To-Orbost badge. She was known for her soft toy making. (by Ivy Rodwell in from Personalities and Stories of the Early Orbost District by Mary Gilbert). This photograph has significance in its association with Helen Frances Warren, a popular Orbost identity who was well known as an accomplished photographer and needleworker,A black / white photograph of a young girl on a horse pulling a group of children in a large pumkin. On the side of the pumpkin is "HMAS ORBOST"pumpkins-orbost warren-helena nixon-jim trewin-jim warren-linda eaton-enid -
 Orbost & District Historical Society
black and white photograph, Warren, Mrs H, first half 20th century
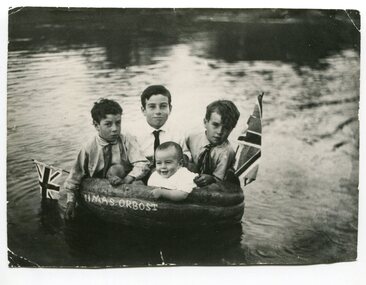
This is a photograph of Alan, Keith, Preston and Jim Nixon. George Nixon (1862-1941) selected land in Bete Bolong in the 1890's. He married Emily Warren in 1889 in Orbost. He was a shire councillor. He was a prominent breeder of Clydesdales and after a serious fall off a horse walked with a walking stick and special boot for the rest of his life. He was well-known for his interest in cars, horse-racing and politics.He was married to Emily Warren in 1889 in Orbost. Mrs Nixon (Emily)was the first Red Cross president during WW1. They had ten children.both George and Emily are buried in the Orbost Cemetery. (ref:From White Knowle to Pumpkin Point by Hon Peter Nixon A.O.) The photographer was Warren, Helena (1871-1962) who was a self-taught photographer who became both the local press correspondent and a producer of humorous trompe l'oeil postcard images. Helena Warren was a thirty-two year old settler living on a small mixed farm with her husband, William, at Newmerella, near Orbost in Gippsland, Victoria, when she bought her first camera, an Austral Box quarter-plate. Her family says she was entirely self-taught, like many women photographers who started out with nothing but the instructions on the packets of film and chemicals. In over fifty years practice she graduated from the total novice, who opened all her first mail order plates in bright sunlight and ruined them, to a competent photographer who became both the local press correspondent and an inveterate producer of humorous trompe l’oeil postcard images.This photograph has significance in its association with Helen Frances Warren, a popular Orbost identity who was well known as an accomplished photographer and needleworker, This item is also associated with a prominent Orbost family. George Nixon was the son of James and Alice Nixon. The Nixon families were among the earliest settlers on the Snowy River. It is an example of the early book-keeping of an Orbost business in the early 20th century.A black / white photograph of three boys and a baby in a carved out pumpkin with a flag at each end and "HMAS ORBOST" carved in the front.warren-helena pumpkins nixon -
 Orbost & District Historical Society
black and white photograph, late 19th century - early 20th century
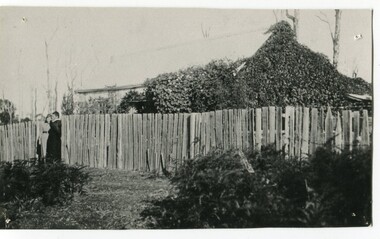
This house belonged to the Ashby family. Roy Ashby, son of James Rowland Ashby and Edith Annie Hall, was born on 21 Nov 1892 in Orbost. Victoria. Australia and died in 1942 in Orbost. Victoria. Australia at age 50. Roy married Elsie May Stephens, daughter of James Stephens and Sarah Taylor, in 1920 in Victoria.Australia. Elsie was born on 15 Sep 1898 in Beaconsfield Tasmania.Australia and died in 1974 in Orbost Australia at age 76. Their children were: Roy Ashby, William Henry Ashby, Cordelia Valma Ashby and Edith Ashby. .The Ashby family was one of the early settlers in Orbost at Newmerella.A black / white photograph of a house surrounded by a tall timber fence with. The house has vegetation growing over it. There are two people standing against the fence.ashby-orbost -
 Orbost & District Historical Society
black and white photograph, 1994
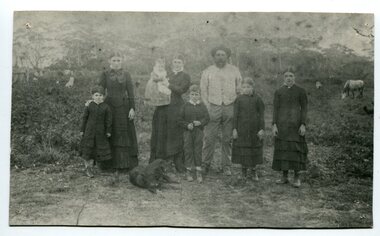
The Roadknight family settled on Ewing's Marsh on what is now known as the Old Station In 1850. The Lakes Entrance run was occupied by the late Thomas Roadknight. In 1852 his brother William took charge. Soon after this Corringle Station was occupied by the late T. T. Stirling. William was born at Collingwood, the son of William Roadknight and Jane Stirling. The Roadknight family came from Colac on board the Enterprise to their new home at Cunninghame. The house on the hill, now Pine Hill was named Merrangbaur (home of the lyrebird). William held the Lake Tyers and Snowy River run in partnership with Thomas Telfer Stirling who took up the eastern end of the run on the west bank of the Snowy River. The run included Ewing‟s Marsh — the Ewing brothers were earlier landowners but had no formal run in this area. William served four terms on the Tambo Shire Council as a representative of the Bendoc Riding despite not being a resident of the Riding. He was then elected to the Orbost Shire as a West Riding councillor in 1896-97, 1897-98 and was Shire President in his final year 1898-99 This item is associated with Roadknight family who were early settlers in the Orbost district.A black / white photograph of a family group of mother, father and six children standing outdoor. There is a dog lying in front .roadknight-william ewing's-marsh old-station-orbost -
 Ringwood and District Historical Society
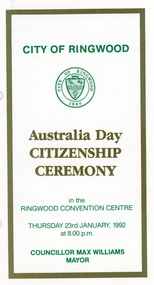
Booklet - Programme, City of Ringwood, Australia Day Citizenship Ceremony 1992, 23rd. January 1992
Used on 23rd. January 1992 at the Ringwood Convention Centre with the order of proceedings, names of candidates for Citizenship, Parliamentary Representatives, Federal and State, and list of members of the Ringwood City CouncilWhite A5 bifold card programme white , with gold and green printing, gold frame on front with City of Ringwood 1960 logo. +Additional Keywords: WIlliams, Max, mayorCANDIDATES FOR CITIZENSHIP Mortimer ANGUS Alberto MARTINEZ Mohammad ARAGHIZADEH Andrew MAXWELL Mane ARAGHIZADEH Susan MAXWELL Mavis BELL Ian MILLER Caroline BENETATOS Bronwynn NOTHNAGEL Habibe BILGIC Sandra OSWALD Fiona BIRCH Anthony PIETERSEN Joseph BOMNICI liana PIETERSEN James BREMNER Margaret PIETERSEN Maria BREMNER Tanya PIETERSEN Bridget BROWNE Ankia PIETERSEN Robert G BROWNE Sascha PIETERSEN Cora BROWNE Serge PRATESI Robert E BROWNE Sotiris PTOCHOPOULLOS Eileen BROWNE Bridget QUINN Colm BROWNE Gerard QUINN Lesley CASSIDY Danielle QUINN Leah CASSIDY Edel QUINN Li Ping CHIANG Judith RABI Colette CORE-PHILPOT Elizabeth RIVETT Mala DE SILVA Catherine ROBERTSON Saman DE SILVA Erzsebet SARI Manarangi DE SILVA MihalySARI Shalendra DEO Dominiua SARI Martin FOREMAN Benedek SARI Milan GOJIC Peter SKINNER MIra GOJIC Jenny MAN-YING SO Snezana GOJIC Andrew WAI-YING SO Silviu GRECEA Zdzislawa STANGIERSKA On IM Kenneth STEVENS Roshan IRANI Katalin SZALLASI Ronald JOHNSTON Kirsty SZIRQN George KAPPAS Sakan TEK Henry KARCZMARCZUK Steven TOWNEND Dorota KOLACZ Stanley WAIGHT Martin KULIC Karen WALKER Muhammad LAHZA William WALKER Valerie LESTER John WELLER Lajos LEVAI Maureen WELLER Louise LITTLE Freda WHITAKER -
 Ringwood and District Historical Society
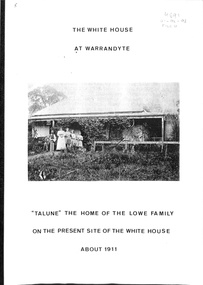
Book, The White House At Warrandyte, 1988
The first known residents were Mr and Mrs Walter Pretty and their family who moved there in 1856. Mr William Collins took out a miner's right in 1886 and Mr and Mrs Frank Lowe bought the freehold when the site was auctioned in 1930.History of families associated with the property originally leased on a miner's right near the corner of Yarra Street and Cemetery Road circa 1850s, and later had a frontage to the Main Road with access from to Taroona Avenue. -
 Bendigo Military Museum
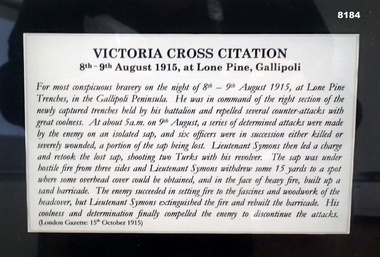
Print - FRAMED PRINT, LT SYMONS VC, Unknown
Lieutenant William Symons VC. Refer to photo for his citation. This item is on display in the Bendigo District RSL Havilah Road.Photograph framed, timber frame brown colour, dark background with central photo in an oval shape of a soldier in a side on portrait position, an inset on white is his name and unit, under that the Rising Sun Badge left, centre is the citation re the award of the Victoria Cross, on the right is an image of a VC.“W SYMONS VC 7th Infantry Bn 1st AIF (Eaglehawk)”brsl, smirsl, bdrslinc, symons, vc -
 Bendigo Military Museum
Postcard - POSTCARDS, PHOTOGRAPHIC WW1, Edgar Dawson collection : Battalion comrades
This six-postcard group is the second in a series of records of items in the collection of Edgar Dawson DCM. Dawson was the Regimental Sergeant Major of 57th Battalion, AIF. The 57th had a company of men largely from Bendigo and Eaglehawk. These postcards are from his personal album. Many are annotated in Dawson's hand with explanatory notes on the subject. Refer to Cat No 893 for his service details. Items originally in album cat. no. 207P Service details available through the NAA. Collection of six black and white postcards: 1. Photographic portrait from left William George Saville 4182, Alexander Pollock 3587 57th Btn, and unidentified trooper, possible 4th Light Horse Regiment. 2. Photographic portrait of Light Horse trooper. 3. Photographic portrait of William Tamlyn Curnow, 5078, 57th Btn 4. Photographic portrait of "Jim", 5. Photographic portrait of Septimus Fletcher, 4485, 57th Btn 6. Photographic portrait of Robert Gamble, 4644, 57th Btn 2. Card is addressed to "1904 L.Cpl W.W. Martin, D Cpy 57th Batt". Martin was 2150, KIA 26th September 1917. 3. On front "Sincerely, W. T. Curnow". On verso, "To Hec, from his old pal Curnow Sgt" 'Hec' was Dawson's nickname. 4. On front "Yours sincerely Jim". On verso, card addressed "350 Pte Melen, R. C., 15th Field Ambulance, via Manners St Maryborough Victoria" The 15th Field Ambulance Cpy, supported the 57th and other battalions of the 15th Brigade. 5. On verso "This is an Eaglehawk boy Septimus Fletcher, he came over with me and was with us a long time, but is on Division now" 6. On verso "This is our signal Cpl wearing his military medal for keeping communication at Bullecourt". Gamble won the MM for his actions 13th May 1917.57th battalion, postcards, album dawson dcm, edgar dawson dcm -
 Bendigo Military Museum
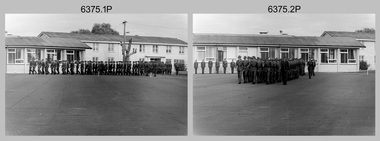
Photograph - Army Survey Regiment – Corps Day Parade and Defence Force Service Medal Presentations, Fortuna Villa, Bendigo, 1987
This set of 36 photographs were taken at a Corps Day Parade held at the Army Survey Regiment, Bendigo on the 1st of July 1987. The Parade Commander was CO LTCOL Don Swiney MBE, and the Reviewing Officer was the Colonel Commandant (honorary appointment) of the Survey Corps - COL Clem Sargent (Retd). The Corps Day Parade was held to commemorate the 72nd anniversary of the formation of the Royal Australian Survey Corps. It was an occasion for great celebration at the Regiment. After 45 years in Bendigo, its future was finally secure. At the traditional anniversary parade, the Colonel Commandant COL Clem Sargent praised the efforts of the Regiment and led the soldiers in three cheers for the record production of the previous 12 months. More information is provided in page 140 of Valerie Lovejoy’s book 'Mapmakers of Fortuna – A history of the Army Survey Regiment’ ISBN: 0-646-42120-4. This set of photos cover the start of the Corps Day Parade, drill movements of the four Squadrons forming up on the parade ground and the formal arrival of the Reviewing Officer. See Item 6376.18P for additional photographs taken at the Corps Day Parade, comprising inspections of the Regiment’s four squadrons, presentations of the Defence Force Service Medal in recognition of 15 years of efficient remunerated service to SSGT Phil Meagher and SGT Wayne Rothwell; and formal group photos of each of the four Squadrons, Officers, and Warrant Officers/Sergeants.This is a set of 36 photographs of a Corps Day Parade held at the Army Survey Regiment, Fortuna, Bendigo in July 1987. The black & white photographs are on 35mm negative film and are part of the Army Survey Regiment’s Collection. The photographs were scanned at 96 dpi. .1) - Photo, black & white, July 1987. Unidentified personnel marching onto parade ground. .2) - Photo, black & white, July 1987. Squadrons marching on parade ground. 1st rank L to R: LCPL Ken Dempster, unidentified (x2), WO2 Neville Stone, remainder unidentified. .3) - Photo, black & white, July 1987. Right file L to R: WO2 George Graham, WO2 Dave Miles, remainder unidentified. .4) - Photo, black & white, July 1987. L to R: WO1 Stevo Hinic, 1st rank – unidentified, CPL Max Watson, unidentified, WO2 Peter Tangey. .5) - Photo, black & white, July 1987. L to R: WO2 Ralph Chant, CPL Gary Drummond, SGT Gary Kerr, unidentified, CPL Dale Hudson, unidentified, LCPL Daryl South, CPL Kerron South, CPL Peter Dillon, SGT Brian Fauth, SGT Graham Johnston, CPL Peter Swandale, CPL Jim Ash, unidentified, CPL Gary Tremain, unidentified, unidentified UK exchange, unidentified WO1 Ken Slater, WO1 Doug Arman. .6) - Photo, black & white, July 1987. L to R: WO2 Alan Bunn, CPL Bob Thrower, SGT Kevin Boehm, CPL Peter Coles, CPL John ‘JJ’ Smith, CPL Laurie Justin, LCPL Bob Sheppard, CPL Steve McGuiness, SGT Bob Garritty, SPR Jim Humphrey, unidentified (x2), SSGT Greg Gilbert, unidentified, WO2 George Graham. .7) - Photo, black & white, July 1987. L to R: CPL Rod Skidmore, SSGT Phil Meagher, WO1 Colin Cuskelly, unidentified, CPL Colin McInnes, unidentified, CPL Jeff Le Fe-Fevre, SPR Richard Arman, CPL Dan Cirsky, CPL Michelle Griffith, LCPL Tom Bloxham, SPR Ailsa (Sorby) Miller, CPL Peter Johnson, unidentified, LCPL Ken Dempster, unidentified (x2), WO2 Neville Stone. .8) - Photo, black & white, July 1987. L to R: CPL Bob Thrower, unidentified (x2), SGT Kevin Boehm, CPL Peter Coles, SGT John ‘Stormy’ Tempest, CPL John ‘JJ’ Smith, unidentified CPL Laurie Justin, unidentified, WO2 Alan Bunn, unidentified (x2), LCPL Bob Sheppard, unidentified, CPL Steve McGuiness, unidentified, SGT Bob Garritty, unidentified, SPR Jim Humphrey. .9) - Photo, black & white, July 1987. Foreground – Acting RSM WO1 Dave Thompson, background L to R: MAJ Daryl Hockings CSM, CAPT Bob Williams, CAPT Laurie Newton, ADJT CAPT Andrew McLoud, MAJ Bob McHenry, CAPT Peter ‘Blue’ Blaskett, MAJ Mick Byrne, MAJ Roger Rix. .10) - Photo, black & white, July 1987. Officers ready to take posts. Background L to R: MAJ Daryl Hockings CSM, CAPT Bob Williams, CAPT Laurie Newton, ADJT CAPT Andrew McLoud, MAJ Bob McHenry, CAPT Peter ‘Blue’ Blaskett, MAJ Mick Byrne, MAJ Roger Rix, LT Vicky Thompson, Foreground – 2IC MAJ Terry Edwards, Acting RSM WO1 Dave Thompson, WO2 Alan Bunn, CPL Bob Thrower, SGT Kevin Boehm, CPL Peter Coles, CPL John ‘JJ’ Smith, CPL Laurie Justin, LCPL Bob Sheppard. .11) to .13) - Photo, black & white, July 1987. Officers ready to take posts. L to R: MAJ Daryl Hockings CSM, CAPT Bob Williams, CAPT Laurie Newton, ADJT CAPT Andrew McLoud, MAJ Bob McHenry, CAPT Peter ‘Blue’ Blaskett, MAJ Mick Byrne, MAJ Roger Rix, LT Vicky Thompson, CAPT John South. .14) - Photo, black & white, July 1987. L to R: WO2 Alan Bunn, MAJ Roger Rix. .15) - Photo, black & white, July 1987. L to R: unidentified personnel, CAPT Laurie Newton, unidentified, CAPT Bob William, MAJ Mick Byrne, WO2 Dave Miles. .16) &.17) - Photo, black & white, July 1987. L to R: 2IC MAJ Terry Edwards handing Parade over to CO LTCOL Don Swiney MBE. .18) - Photo, black & white, July 1987. Arrival of Reviewing Officer- COL COMDT COL Clem Sargent. Saluted by CPL Kevin ‘Chuck’ Berry. .19) - Photo, black & white, July 1987. Arrival of Reviewing Officer- COL COMDT COL Clem Sargent. Saluted by CPL Kevin ‘Chuck’ Berry. MAJ Duncan Burns on right departing vehicle. .20) - Photo, black & white, July 1987, Reviewing Officer - COL COMDT COL Clem Sargent returning salute from CO LTCOL Don Swiney MBE. .21) - Photo, black & white, July 1987, Headquarters Squadron approaching the Dias. L to R: CAPT John South, unidentified, MAJ Roger Rix, unidentified, SPR Tracy (Parker) Ash, unidentified, T Vicky Thompson, CPL Bob Thrower, SGT Kevin Boehm, CPL Peter Coles, CPL John ‘JJ’ Smith, CPL Laurie Justin, LCPL Bob Sheppard, remainder partially obscured, CO LTCOL Don Swiney MBE, COL COMDT COL Clem Sargent. .22) - Photo, black & white, July 1987, Headquarters Squadron’s MAJ Roger Rix salutes the Reviewing Officer. L to R: CAPT John South, MAJ Roger Rix, unidentified, SPR Tracy (Parker) Ash, unidentified, Vicky Thompson, CPL Bob Thrower, SGT Kevin Boehm, CPL Peter Coles, CPL John ‘JJ’ Smith, CPL Laurie Justin, LCPL Bob Sheppard, CPL Steve McGuiness, SGT Bob Garritty, SPR Jim Humphrey, WO2 George Graham. .23) - Photo, black & white, July 1987, Headquarters Squadron’s MAJ Roger Rix salutes the Reviewing Officer. L to R: CAPT John South, MAJ Roger Rix, unidentified, SPR Tracy (Parker) Ash, unidentified, Vicky Thompson, CPL Bob Thrower, SGT Kevin Boehm, CPL Peter Coles, CPL John ‘JJ’ Smith, CPL Laurie Justin, LCPL Bob Sheppard, CPL Steve McGuiness, SGT Bob Garritty, SPR Jim Humphrey, WO2 George Graham, CO LTCOL Don Swiney MBE, COL COMDT COL Clem Sargent, .24) - Photo, black & white, July 1987, Headquarters Squadron continues past the Dias. L to R: unidentified (x3), Vicky Thompson, unidentified, CPL Bob Thrower, SGT Kevin Boehm, CPL Peter Coles, CPL John ‘JJ’ Smith, CPL Laurie Justin, LCPL Bob Sheppard, CPL Steve McGuiness, SGT Bob Garritty, SPR Jim Humphrey, WO2 George Graham. .25) - Photo, black & white, July 1987, Army Survey Regiment senior officers and Air Survey Squadron approaching the Dias. L to R: 2IC MAJ Terry Edwards, ADJT CAPT Andrew McLeod, OC MAJ Daryl Hockings CSM, acting RSM WO1 Dave Thompson, centre file marker CPL Max Watson, right marker CPL Perry Burt, CAPT Bob Williams, remainder unidentified, CO LTCOL Don Swiney MBE, COL COMDT COL Clem Sargent. .26) - Photo, black & white, July 1987, Army Survey Regiment senior officers and Air Survey Squadron salute the Reviewing Officer. L to R: 2IC MAJ Terry Edwards, ADJT CAPT Andrew McLeod, OC MAJ Daryl Hockings CSM, acting RSM WO1 Dave Thompson, centre file marker CPL Max Watson, right marker CPL Perry Burt, CAPT Bob Williams, remainder unidentified, CO LTCOL Don Swiney MBE, COL COMDT COL Clem Sargent. .27) - Photo, black & white, July 1987, Army Survey Regiment senior officers and Air Survey Squadron salute the Reviewing Officer. L to R: 2IC MAJ Terry Edwards, ADJT CAPT Andrew McLeod, unidentified, OC MAJ Daryl Hockings CSM, acting RSM WO1 Dave Thompson, unidentified, SGT Barrie Craymer, CAPT Bob Williams, centre file marker CPL Max Watson, right marker CPL Perry Burt, remainder unidentified, CO LTCOL Don Swiney MBE, COL COMDT COL Clem Sargent. .28) - Photo, black & white, July 1987, Air Survey Squadron salutes the Reviewing Officer. L to R: CPL Steve Hill OAM CSM, unidentified, SSGT Neil ‘Ned’ Kelly, WO2 Peter Tangey, WO1 Dennis Marshall. Followed by Lithographic Squadron L to R: SGT Graham Johnston, SGT Bryan Fauth, CPL Jim Ash, CPL Peter Swandale, CPL Roy Hicks, remainder unidentified. .29) - Photo, black & white, July 1987, Lithographic Squadron’s MAJ Mick Byrne salutes the Reviewing Officer. L to R: WO1 Dennis Marshall (Air Svy Sqn), SGT Graham Johnston, SGT Bryan Fauth, MAJ Mick Byrne, CPL Jim Ash, CPL Peter Swandale, unidentified (x2), CPL Lance Strudwick, CPL John ‘Flash’ Anderson, SGT Alan Virtue, CPL Greg Rowe, unidentified (x2), CPL Graham Hales, unidentified, CPL Paul Baker, SPR Colin Yeats, unidentified, WO1 Ken Slater, WO1 Doug Arman. .30) to .31) - Photo, black & white, July 1987, Lithographic Squadron’s MAJ Mick Byrne salutes the Reviewing Officer. L to R: SGT Graham Johnston, SGT Bryan Fauth, MAJ Mick Byrne, CPL Jim Ash, CPL Peter Swandale, unidentified (x2), CPL Lance Strudwick, CPL John ‘Flash’ Anderson, SGT Alan Virtue, CPL Greg Rowe, unidentified (x2), CPL Graham Hales, unidentified, CPL Paul Baker, SPR Colin Yeats, unidentified, WO1 Ken Slater, WO1 Doug Arman. .32) to .35) - Photo, black & white, July 1987, Cartographic Squadron’s MAJ Bob McHenry salutes the Reviewing Officer. L to R: MAJ Bob McHenry, CAPT Peter ‘Blue Blaskett, left file L to R: SPR Ross Collishaw, SPR Ben Lucas, centre file L to R: SGT Martin Evans, SSGT Ian ‘Rock’ Thistleton, SGT Eddy Jacobs, right file L to R: CPL Rod Skidmore, SSGT Phil Meagher, SPR Craig Kellet, unidentified, CPL Col McInnes, SPR Nick Cowan, unidentified, CPL Jeff Le-Fevre, SPR Richard Arman, CPL Dan Cirsky, SPR Tom Bloxham, CPL Peter Johnson, unidentified, LCPL Kenne Dempster. .36) - Photo, black & white, July 1987, Reviewing Officer - COL COMDT COL Clem Sargent returns salute..1P to .36P – There are no personnel identified.royal australian survey corps, rasvy, army survey regiment, army svy regt, fortuna, asr -
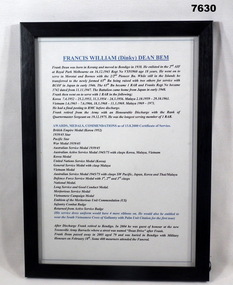 Bendigo Military Museum
Document - DOCUMENT, FRAMED, Soldiers Memorial Museum, "FRANCIS WILLIAM (Dinky) DEAN BEM", 2021
"FRANCIS WILLIAM (Dinky) DEAN BEM". Refer to Cat no 124.2 For Service History.Document, white paper with blue and black print, biographical information of "FRANCIS WILLIAM (Dinky) DEAN BEM". Documents, service history, awards, medals and commendations. This framed document is used for display purposes along with a framed photographic collection. Frame, black plastic frame, with glass front and MDF board back.framed accessories, documents, biography, francis william (dinky) dean bem -
 Bendigo Military Museum
Photograph - PHOTOGRAPH, FRAMED, Soldiers Memorial Museum, "FRANCIS WILLIAM (Dinky) DEAN BEM" 1943 - 1975, 2021
"FRANCIS WILLIAM (DINKY) DEAN BEM" Refer to Cat. No. 124.2 for Service History.Photograph collection white paper facsimile copy of eleven photographs. Nine photographs, in black and white, from World War Two through to 1975. Two photographs in colour taken at 1 RAR Reunions. This framed photographic collection is used for display purposes along with a framed document. Frame, black plastic frame, with glass front and MDF board back.framed accessories, photographs, biography, francis william (dinky) dean bem -
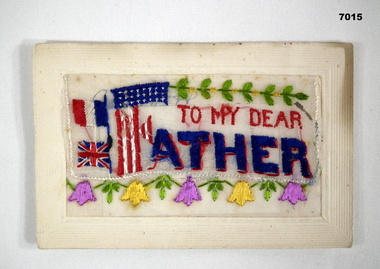 Bendigo Military Museum
Postcard - POSTCARD WW1, EMBROIDERED, 1917-18
Sent by Cpl William Edward WENNERBOM Reg'n 2249, 3 October 1918. E. Coy, 12th Battn, Oct 1914, Discharged Dec 1919.Postcard - Cream cardboard, coloured thread embroidery, red, blue, white, green, yellow, purple.“To My Dear Father” French, British, American Flags, Flowers, Leaves.postcard, ww1 -
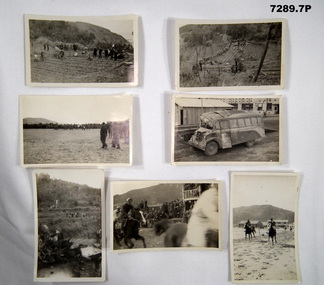 Bendigo Military Museum
Photograph - PHOTOGRAPHS BCOF
Various photos of Japanese scenes in relation to 1946-52 Occupation Forces. Items in the collection of RICHARD WILLIAM McGILVERY, RAAF. Refer Cat No. 7287P for Service details, photos and awards.Small black and white photos of Japan. 1. People standing around in a field. 2. People standing around inspecting a rice paddy field. 3. Photo of a parade ground with a band marching with some soldiers watching. 4. Picture of a parked bus with roof crushed in, in an urban setting, 5. Portrait photo of machine wreckage (possible a plane) with people in background. 6. Photo of a horse race with people watching. 7. Photo of a horse race with buildings in background.japan occupational forces, photos, richard william mcgilvery -
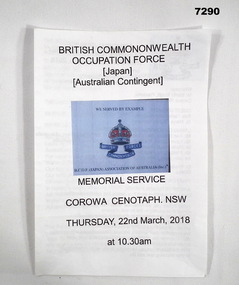 Bendigo Military Museum
Programme - PROGRAMME, BCOF
For Memorial Service held at Corowa Cenotaph of Thursday 22 March 2018 to Celebrate the Australian Contingent of BCOF in occupying Japan Post WW2. Items in the collection of Richard William McGILVERY, RAAF. refer Cat No. 7287P for his service details, photos and awards. Folded white paper, A5 size of programme for memorial service at Corowa Cenotaph NSW. Black writing on front and inside. Blue square in middle of front with British Forces Commonwealth Emblem. Emblem is "British Forces Commonwealth" written on a dark blue ribbon with a blue and red crown on top.Header - "British Commonwealth Occupation Forces (Japan) Australian Contingent. Bottom '(Memorial Service Corowa Cenotaph, NSW. Thursday 22 March 2018 at 10.30 pm).bcof, japanese occupational forces -
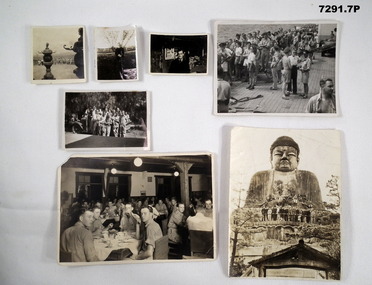 Bendigo Military Museum
Photograph - PHOTOGRAPHS BCOF
Various photos taken by Richard McGilvery of the transfer to Japan of the while part of BCOF. Item in the collection of RICHARD WILLIAM McGILVERY, RAAF. Refer Cat No. 7287P for his service. Details photos and awards.Black and white photos of various sizes. 1. Photo of various service personnel at a lookout point. Looking over a landscape. 2. Image of a man in civilian clothes standing in front of a tree. 3. Image of man standing in front of a kitchen, possible R. McGilvery in civilian clothes. 4. Picture of service men and women on board HMAS Kanimbla off Samarai on 24/4/47 at sea. 5. Picture of various men, two in uniform, rest in civvies sitting in or leaning against a vehicle. 6. Various service personnel sitting around tables in a mess. 7. Group of large No. of Service men and women posted in front of a giant statue of Buddha.2. No. “939” written on the back. 4. On back is written "HMAS KANIMBLA off Samarai 24/4/47". 5. No. “256” Stamped on back. bcof, japanese occupations -
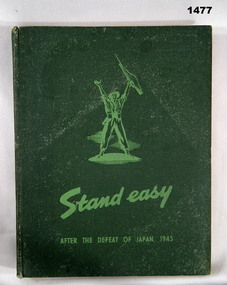 Bendigo Military Museum
Book - BOOK - BCOF, Captain R.V. Kneale, Lieutenant E.E. Smith, Lieutenant R.F. O'Malley, STAND EASY AFTER THE DEFEAT OF JAPAN 1945, c1945
Book - item in the collection of Richard William McGILVERY, RAAF. Refer Cat. No. 7287P for his service details, photo, awards.Hard cover book. Cover - cardboard with adhered green colour buckram. Light green print on front and spine. Small illustration on front - soldier with hands raised. 208 pages - cut, plain, off-white paper. Illustrated - black and white sepia and colour photographs, maps, sketches and cartoons. End papers - illustrated, green and cream, stylized pattern of uniforms.history, books, ww2, bcof -
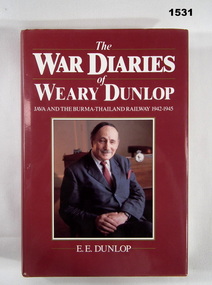 Bendigo Military Museum
Book - BOOK - AUTOBIOGRAPHY, Sir Edward Dunlop, "THE WAR DIARIES OF WEARY DUNLOP", First published 1986. reprinted 1986, 1987
"THE/ WAR DIARIES/ OF/ WEARY DUNLOP/ JAVA AND THE BURMA - THAILAND RAILWAY 1942 - 1945" Book - item in the collection of Richard William McGILVERY, RAAF. Refer Cat. No. 7287P for his service details, photo, awards, HARD COVER BOOK WITH DUST COVER. Hard cover - cardboard with adhered red buckram, gold print on spine. Dust cover - paper, white print on front, spine and back on red background. Folded flaps with black print on beige background. Illustrated - front - colour seated portrait of Sir Edward Dunlop. Back - copy in colour of watercolour painting of "Weary Dunlop" operating in a jungle hospital by "Jack Chalker". 401 pages - cut, plain, off white paper. Illustrated black and white photographs and sketches.history, books, ww2, autobiography -
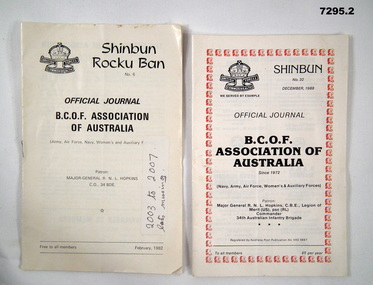 Bendigo Military Museum
Booklet - BOOKLETS - BCOF, BCOF Association of Australia, 1. "SHINBUN ROCKU BAN" 2. "SHIBUN', 1982 and 1988
Booklets are the "OFFICIAL JOURNAL/ B.C.O.F. ASSOCIATION OF AUSTRALIA / since 1972/ Navy, Army, Air Force, Woman's & Auxiliary Forces." BOOKLETS - Items in the Collection of Richard William McGILVERY, RAAF. refer Cat No. 7287P for his service details, photo, awards.SOFT COVER BOOKLET. Cover - paper, black print on front and back on white paper. 2, Red print decorative frame/ border. Illustrated with the "BRITISH COMMONWEALTH FORCES", logo with crown. 1. 14 pages - cut, plain, white paper. Illustrated black and white photographs. 2. 40 pages, cut, plain, white paper. Illustrated - black and white photographs and cartoons.1. Front cover - white adhesive label, handwritten black ink "2003 to 2007/ lots missing". 1. "Shinbun Rocku Ban" No. 6 February 1982. 2. "Shinbun" No. 32 December 1988.history, booklets, bcof -
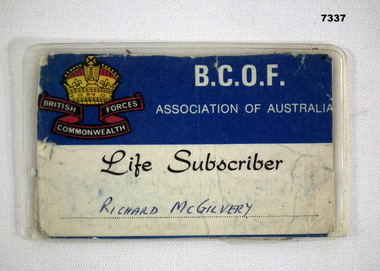 Bendigo Military Museum
Card - CARD, BCOF SUBSCRIBER
Australian Membership card Occupational Forces from Commonwealth in Japan. A life Subscriber was a person who paid many years of membership ahead usually at a cheaper membership amount. Re collection of Richard William McGILVERY, RAAF. Refer Cat No.7287P for his service details, photos and awards.Small card, blue and white on front, wrapped in hard plastic. On front emblem of British Forces Commonwealth. Richard McGILVERY name on front. On back - membership No. and name and address of Mrs. W.E. McGILVERY and her signature.Titles "BCOF Association of Australia, Life Subscriber" and Richard McGILVERY's name. On back membership No. 16343.bcof, japan, richard william mcgilvery