Showing 691 items matching "knife"
-
 Flagstaff Hill Maritime Museum and Village
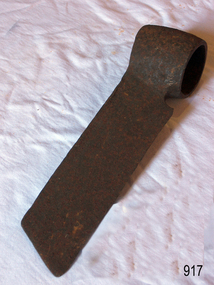
Tool - Froe, Late 19th to Early 20th century
A froe was used for splitting, or riving, wood in the early days and was a skill practiced by craftsmen who made boards, shingles, c lapboards, fences, basket splints, chair parts, wagon spokes, lath, and more. Our ancestors used axes, gluts or wedges, froes, draw knives and spelk planes for splitting wood. The froe was designed in many sizes and designs for splitting timber. It is typically an L-shaped tool made up of a wedge-shaped blade with a dull, but not blunt, knife edge and a wood handle. Blades were usually straight with a socket forged at one end for a handle, but curved blades were also made. Most handles were round and tapered and were inserted up through this socket. But some froes had eyes similar to those on axes for handles that were wedged. The froe handle is held in an upright position in one hand while the other hand drives the top of the blade downward with a wood froe club or mallet. After a split is started, the froe is wiggled downward to lengthen it until the split is complete. Most old froes were hand forged, but they were also available in many catalogues. The 1873 D.R. Barton American catalogue offered straight froes at 12 1/2 cents per inch. You can still buy new froes from many tool manufacturers today.A tool that has not changed in design or use since its inception several hundred years ago to split timber for various uses.Froe, also called cooper's froe or stave froe, without handle.Noneflagstaff hill, warrnambool, flagstaff-hill, flagstaff-hill-maritime-museum, maritime-museum, shipwreck-coast, flagstaff-hill-maritime-village, froe, cooper's froe, stave froe, wood splitter, carpenders tools, coopers tool, splitting timber -
 Flagstaff Hill Maritime Museum and Village
Bottle, circa 1885 - 1891
This bottle was one of the items salvaged from the wreck of the Fiji in 1891. Joseph Bosisto began manufacturing Eucalyptus Oil in Australia from 1854. This bottle is marked ‘J. BOSISTO”, which probably dates it from 1885 when the company J. Bosisto & Co. was formed. The marking on the bottom of the bottle “GERMAN/B_ _ E” could mean that the bottle was imported by J. Bosisto from Germany. In the early years bottles were imported from overseas countries including England and Germany. In 1872 the Melbourne Bottle Works was established to supply the bottles locally and more cheaply but had difficulty keeping up with the supply. From 1865 Australian-made Bosisto’s Eucalyptus Oil began to be exported to England then later to Germany and other countries. Bosisto’s Eucalyptus Oil won many prizes at exhibitions between 1854 – 1891. The three-masted iron barque Fiji had been built in Belfast, Ireland, in 1875 by Harland and Wolfe for a Liverpool based shipping company. The ship departed Hamburg on 22nd May 1891 bound for Melbourne, under the command of Captain William Vickers with a crew of 25. The ship’s manifest shows that she was loaded with a cargo of 260 cases of dynamite, pig iron, steel goods, spirits (whisky, schnapps, gin, brandy), sailcloth, tobacco, coiled fencing wire, concrete, 400 German pianos (Sweet Hapsburg), concertinas and other musical instruments, artists supplies including brushes, porcelain, furniture, china, and general cargo including candles. There were also toys in anticipation for Christmas, including wooden rocking horses, miniature ships, dolls with china limbs and rubber balls. On September 5th, one hundred days out from Hamburg in squally and boisterous south west winds the Cape Otway light was sighted on a bearing differing from Captain Vickers’ calculation of his position. At about 2:30am, Sunday 6th September 1891 land was reported 4-5 miles off the port bow. The captain tried to put the ship on the other tack, but she would not respond. He then tried to turn her the other way but just as the manoeuvre was being completed the Fiji struck rock only 300 yards (274 metres) from shore. The place is known as Wreck Bay, Moonlight Head. Blue lights were burned and rockets fired whilst an effort was made to lower boats but all capsized or swamped and smashed to pieces. Two of the younger crewmen volunteered to swim for the shore, taking a line. One, a Russian named Daniel Carkland, drowned after he was swept away when the line broke. The other, 17 year old able seaman Julius Gebauhr, a German, reached shore safely on his second attempt but without the line, which he had cut lose with his sheath-knife when it become tangled in kelp. He rested on the beach a while then climbed the steep cliffs in search of help. At about 10am on the Sunday morning a party of land selectors - including F. J. Stansmore, Leslie Dickson (or Dixon) and Mott - found Gebauhr. They were near Ryans Den, on their travels on horseback from Princetown towards Moonlight Head, and about 5km from the wreck. Gebauhr was lying in the scrub in a poor state, bleeding and dressed only in singlet, socks and a belt with his sheath-knife, ready for all emergencies. At first they were concerned about his wild and shaggy looking state and what seemed to be gibberish speech, taking him to be an escaped lunatic. They were reassured after he threw his knife away and realised that he was speaking half-English, half-German. They gave him food and brandy and some clothing and were then able to gain information about the wreck. Some of the men took him to Rivernook, a nearby guest house owned by John Evans, where he was cared for. Stansmore and Dickson rode off to try and summon help. Others went down to the site of the wreck. Messages for rescuing the rest of the crew were sent both to Port Campbell for the rocket rescue crew and to Warrnambool for the lifeboat. The S.S. Casino sailed from Portland towards the scene. After travelling the 25 miles to the scene, half of the Port Campbell rocket crew and equipment arrived and set up the rocket tripod on the beach below the cliffs. By this time the crew of the Fiji had been clinging to the jib-boom for almost 15 hours, calling frantically for help. Mr Tregear from the Rocket Crew fired the line. The light line broke and the rocket was carried away. A second line was successfully fired across the ship and made fast. The anxious sailors then attempted to come ashore along the line but, with as many as five at a time, the line sagged considerably and some were washed off. Others, nearly exhausted, had to then make their way through masses of seaweed and were often smothered by waves. Only 14 of the 24 who had remained on the ship made it to shore. Many onlookers on the beach took it in turns to go into the surf and drag half-drowned seamen to safety. These rescuers included Bill (William James) Robe, Edwin Vinge, Hugh Cameron, Fenelon Mott, Arthur Wilkinson and Peter Carmody. (Peter Carmody was also involved in the rescue of men from the Newfield.) Arthur Wilkinson, a 29 year old land selector, swam out to the aid of one of the ship’s crewmen, a carpenter named John Plunken. Plunken was attempting to swim from the Fiji to the shore. Two or three times both men almost reached the shore but were washed back to the wreck. A line was thrown to them and they were both hauled aboard. It was thought that Wilkinson struck his head on the anchor before s they were brought up. He remained unconscious. The carpenter survived this ordeal but Wilkinson later died and his body was washed up the next day. It was 26 year old Bill Robe who hauled out the last man, the captain, who had become tangled in the kelp. The wreck of the Fiji was smashed apart within 20 minutes of the last man being brought ashore, and it settled in about 6m of water. Of the 26 men on the Fiji, 11 in total lost their lives. The remains of 7 bodies were washed onto the beach and their coffins were made from timbers from the wrecked Fiji. They were buried on the cliff top above the wreck. The survivors were warmed by fires on the beach then taken to Rivernook and cared for over the next few days. Funds were raised by local communities soon after the wreck in aid of the sufferers of the Fiji disaster. Captain Vickers was severely reprimanded for his mishandling of the ship. His Masters Certificate was suspended for 12 months. At the time there was also a great deal of public criticism at the slow and disorganised rescue attempt to save those on board. The important canvas ‘breech buoy’ or ‘bucket chair’ and the heavy line from the Rocket Rescue was in the half of the rocket outfit that didn’t make it in time for the rescue: they had been delayed at the Gellibrand River ferry. Communications to Warrnambool were down so the call for help didn’t get through on time and the two or three boats that had been notified of the wreck failed to reach it in time. Much looting occurred of the cargo that washed up on the shore, with nearly every visitor leaving the beach with bulky pockets. One looter was caught with a small load of red and white rubber balls, which were duly confiscated and he was ‘detained’ for 14 days. Essence of peppermint mysteriously turned up in many settlers homes. Sailcloth was salvaged and used for horse rugs and tent flies. Soon after the wreck “Fiji tobacco” was being advertised around Victoria. A Customs officer, trying to prevent some of the looting, was assaulted by looters and thrown over a steep cliff. He managed to cling to a bush lower down until rescued. In 1894 some coiled fencing wire was salvaged from the wreck. Hundreds of coils are still strewn over the site of the wreck, encrusted and solidified. The hull is broken but the vessel’s iron ribs can be seen along with some of the cargo of concrete and pig iron. Captain Vickers presented Bill Robe with his silver-cased pocket watch, the only possession that he still had, as a token for having saved his life and the lives of some of the crew. (The pocket watch came with 2 winding keys, one to wind it and one to change the hands.) Years later Bill passed the watch to his brother-in-law Gib (Gilbert) Hulands as payment of a debt and it has been passed down the family to Gilbert Hulands’ grandson, John Hulands. Seaman Julius Gebauhr later gave his knife, in its hand crafted leather sheath, to F. J. Stansmore for caring for him when he came ashore. The knife handle had a personal inscription on it. A marble headstone on the 200m high cliffs overlooking Wreck Beach, west of Moonlight Head, paying tribute to the men who lost their lives when Fiji ran aground. The scene of the wreck is marked by the anchor from the Fiji, erected by Warrnambool skin divers in 1967. Amongst the artefacts salvaged from the Fiji are china miniature animals, limbs from small china dolls, rubber balls, this glass bottle, sample of rope from the distress rocket and a candlestick holder. These items are now part of the Fiji collection at Flagstaff Hill Maritime Museum, along with Captain Vickers’ pocket watch and Julius Gebauhr’s sheath knife. The glass bottle is registered as “Artefact Reg No Fiji/1”. Flagstaff Hill’s Fiji collection is of historical significance at a State level because of its association with the wreck Fiji, which is on the Victorian Heritage Register VHR S259. It also represents aspects of Victoria’s shipping history and its potential to interpret sub-theme 1.5 of Victoria’s Framework of Historical Themes (living with natural processes). The Fiji collection meets the following criteria for assessment: Criterion A: Importance to the course, or pattern, of Victoria’s cultural history. Criterion B: Possession of uncommon, rare or endangered aspects of Victoria’s cultural history Criterion C: Potential to yield information that will contribute to an understanding of Victoria’s cultural history. Clear glass oval medical bottle with rounded corners and flattened sides on front and back surfaces. Opening of bottle has a lip around it and could have been sealed with a stopper. There is a chip in the lip. One face of the bottle has a rectangular border with a name embossed vertically on it, “J. BOSISTO / RICHMOND”. The oval base of the bottle also has letters embossed on it “GE_ _AN” “B _ _ _ _ _”. There is also a large chip out of the base. The sides of the bottle have a vertical joining line. The bottle was recovered from the wreck of the Fiji.Flat side of bottle has rectangular border with “J BOSISTO / RICHMOND” embossed in the centre. The base of the bottle has “G E . . A N/B . . . . . .” embossed on it. Other letters have been removed with the chip. (probable wording was ‘GERMAN/BOTTLE)warrnambool, shipwrecked coast, flagstaff hill, flagstaff hill maritime museum, maritime museum, shipwreck coast, flagstaff hill maritime village, shipwrecked artefact, fiji, 1891, glass bottle, medicine bottle, bosistos, j bosistos, german bottle -
 National Wool Museum
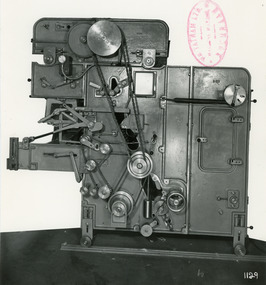
Photograph - Product Photograph, Patent Automatic Feed Machine
These are sales photographs for William Tatham Ltd. of Rochdale. These photographs are taken in the fitting shop at William Tatham Ltd. where final assembly would have taken place. An Automatic Feeding Machine automatically and sequentially supplies uncarded wool to carding machines, The photographed machine was made by William Tatham Ltd, a textile engineering company based in Rochdale, UK. Established in 1866 Tatham developed innovative textile machinery and send their products to Australia and other countries around the world.A black and white photo of a Patent Automatic Feed Machine in a portrait format. Black wiritng on the rear, typed with a typewriter.Front - mid left corner - Wm. TATHAM Ltd. ROCHDALE. Machine Maker Front bottom right corner - 1129 Rear - Patent Automatic Feed with Extended Hopper fitted with balanced pressure plate which operates through Variable Speed Device to regulate speed of spiked lattice in accordance with material in Hopper. Electro-Magnetic Clutch Drive to spiked lattice controlled by Mercery Switch on scale arm. Diagonal Scale Pan with improved knife edge suspension. Dual Trap Doors over Pan actuated by Solenoid. Automatic device to slow spiked lattice just prior to weigh being obtained. Ball or roller bearings to main shaft, combs and other parts. Self-aligning bearing to timing shaft etc.textile machinery, tatham, wool manufacture, carding, automatic feeding machine, wool -
 City of Moorabbin Historical Society (Operating the Box Cottage Museum)
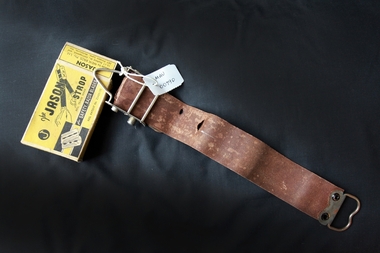
Personal Effects, leather strop 'Jason', c1940
A razor strop (or razor strap) is a flexible strip of leather or canvas used to straighten and polish the blade of a straight razor, a knife, or a woodworking tool like a chisel. Unlike honing or sharpening a blade, in which a whetstone removes metal bent out of alignment from the blade's edge, stropping the blade re-aligns the indentations without removing any material. The strop may be a hanging strop or a hand-held paddle. Various abrasive compounds may be applied to the strop to aid in polishing the blade while stropping to obtain a mirror-like finish. The properties of the compound applied will alter the polishing result. Jeweller's rouge is a very fine abrasive compound. The green Chromium(III) oxide compound is most often used as an abrasive compound. Sprays containing diamond particles are another option. Stropping is primarily done with straight razors, used for shaving, as these are the thinnest blades in everyday use, and require stropping at each use, due to the thinness of the blade Two points are key to stropping: Draw the blade spine-first along the strop. By contrast, honing is done edge-first. When you turn the blade at the end of a stroke, turn it over the spine, so the edge moves away from the strop and faces you, and the spine rests on the strop. This preserves the edge – if the blade is turned over with the edge against the strop, this will roll the blade edge, defeating the purpose of stropping As the use of safety razors increased in popularity this 'Jason' strop prolonged the life of each razor blade thus making them economical.A leather 'Jason' strop, for sharpening safety shaving razor blades, with box. Top of Box: J / The JASON / STROP/ Reg. Trade Mark / for SAFETY RAZOR BLADES / Reg. Patent No. 25435/35 ; Back : How to operate the JASON STROP ( instructions) Side: JASON / Razor Strop Dressing / A keen smooth blade will always be assured by the / occasional use of JASON RAZOR STROP DRESSING/ Side: FIFTY SHAVES WITH ONE BLADE ! / by using - JASON and JASON / Razor Blade Strop Razor Blade Dressing. End: JASON / Made by MEIK BROS. Pty. Ltd. / 15-17 Bedford St., Collingwood, and / 287 Flinders Lane, Melbourne, Vic. End: JASON / SAFETY RAZOR BLADE STROP.safety razors, the jason strop, shaving equipment, personal effects, strops, meik bros pty ltd, gillette, collingwood melbourne -
 Flagstaff Hill Maritime Museum and Village
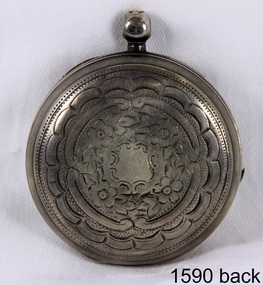
Instrument - Fob watch, 1882
The watch was given to William James Robe by the captain of the barque Fiji as a token for helping to save his life and that of the crew on September 6th 1891 when the steel barque Fiji had foundered off “wreck beach" near Moonlight Head Warrnambool during a voyage from Hamburg to Melbourne. William or Bill as he was called was the one who had hauled out the last man, the captain, after he had become tangled in the kelp. William along with many other onlookers on the beach at the time had taken it in turns to go into the surf and drag half-drowned seamen to safety. These rescuers along with William James Robe, included Edwin Vinge, Hugh Cameron, Fenelon Mott, Arthur Wilkinson and Peter Carmody. Years later Bill passed the watch on to his brother-in-law Gilbert Hulands as payment of a debt. The grandson of Gilbert Hulands, John Hulands, has donated this watch to Flagstaff Hill Maritime Museum. The Fiji Wreck: The three-masted iron barque Fiji had been built in Belfast, Ireland, in 1875 by Harland and Wolfe for a Liverpool based shipping company. The ship departed Hamburg on 22nd May 1891 bound for Melbourne, under the command of Captain William Vickers with a crew of 25. On September 5th, one hundred days out from Hamburg in squally and boisterous south-west winds the Cape Otway light was sighted on a bearing differing from Captain Vickers' calculation of his position. At about 2:30 am, Sunday 6th September 1891 land was reported 4-5 miles off the port bow. The captain tried to put the ship on the other tack, but she would not respond. He then tried to turn her the other way but just as the manoeuvre was being completed Fiji struck rock only 274 metres from shore. The place is known as Wreck Bay, Moonlight Head. Blue lights were burned and rockets fired whilst an effort was made to lower boats but all capsized or swamped and smashed to pieces. Two of the younger crewmen volunteered to swim for the shore, taking a line. One, a Russian named Daniel Carkland, drowned after he was swept away when the line broke. The other, 17-year-old able seaman Julius Gebauhr, a German, reached shore safely on his second attempt but without the line, which he had cut loose with his sheath-knife when it becomes tangled in kelp. He rested on the beach a while then climbed the cliffs in search of help. At about 10 am on Sunday a party of land selectors - including F. J. Stanmore, Leslie Dickson (or Dixon) and Mott - found Gebauhr. They were near Ryans Den, on their travels on horseback from Princetown towards Moonlight Head, and about 5km from the wreck. They found Gebauhr lying in scrub and a poor state, bleeding and scantly dressed and with a sheath-knife. At first, they were concerned about his appearance and gibberish speech, taking him to be an escaped lunatic. They were reassured after Gebauhr threw his knife away realising he was speaking half-English, half-German. They gave him food and brandy and some clothing and were then able to gain information about the wreck. Some of the men took him to Rivernook, a nearby guest house owned by John Evans, where he was cared for. Stansmore and Dickson rode off to try and summon help. Others went down to the site of the wreck. Messages for rescuing the rest of the crew were sent both to Port Campbell for the rocket rescue crew and to Warrnambool for the lifeboat. The S.S. Casino sailed from Portland towards the scene. After travelling the 25 miles to the scene, half of the Port Campbell rocket crew and equipment arrived and set up the rocket tripod on the beach below the cliffs. By this time the crew of Fiji had been clinging to the jib-boom for almost 15 hours, calling frantically for help. Mr Tregear from the Rocket Crew fired the line. The light line broke and the rocket was carried away. A second line was successfully fired across the ship and made fast. The anxious sailors then attempted to come ashore along the line but, with as many as five at a time, the line sagged considerably and some were washed off. Others, nearly exhausted, had to then make their way through masses of seaweed and were often smothered by waves. Only 14 of the 24 who had remained on the ship made it to shore. Many onlookers on the beach took it in turns to go into the surf and drag half-drowned seamen to safety. One of the rescuers Arthur Wilkinson, a 29-year-old land selector, swam out to the aid of one of the ship's crewmen, a carpenter named John Plunken who was attempting to swim to shore. Two or three times both men almost reached the shore but were washed back to the wreck, a line was thrown to them. It was thought that Wilkinson had struck his head on the anchor during the rescue and had remained unconscious, the carpenter survived this ordeal but Wilkinson died and his body was washed up the next day. The wreck of Fiji smashed apart within 20 minutes of the captain being brought ashore, and it finally settling in 6m of water. Of the 26 men on Fiji, 11 in total lost their lives. The remains of 7 bodies were washed onto the beach. They were buried on the clifftop above the wreck. Captain Vickers was severely reprimanded for his mishandling of the ship and his is Masters Certificate was suspended for 12 months. At the time there was also a great deal of public criticism at the slow and disorganised rescue attempt to save those on board. The important canvas ‘breech buoy’ or ‘bucket chair’ and the heavy line from the Rocket Rescue was in the half of the rocket outfit that didn’t make it in time for the rescue: they had been delayed at the Gellibrand River ferry. Communications to Warrnambool were down so the call for help didn’t get through on time and the two or three boats that had been notified of the wreck failed to reach it in time. Much looting occurred of the cargo that washed up on the shore, with nearly every visitor leaving the beach with bulky pockets. One looter was caught with a small load of red and white rubber balls, which were duly confiscated and he was 'detained' for 14 days. The essence of peppermint mysteriously turned up in many settlers homes. Sailcloth was salvaged and used for horse rugs and tent flies. Soon after the wreck "Fiji tobacco" was being advertised around Victoria. A Customs officer, trying to prevent some of the looting, was assaulted by looters and thrown over a cliff. He managed to cling to a bush lower down until rescued. Seaman Julius Gebauhr later gave his knife, in its hand crafted leather sheath, to F. J. Stansmore for caring for him when he came ashore. Flagstaff Hill’s Fiji collection is of historical significance at a State level because of its association with the wreck Fiji, which is on the Victorian Heritage Register (S 259). The collection also represents key aspects of Victoria’s shipping history and its items offer the potential to interpret maritime historical events and social history of the time. Along with the potential to yield information that will contribute to an understanding of Victoria’s cultural history.Sterling silver fob watch Fusee movement face has a white background with black Roman numerals on it. The minute hand is gold coloured with a leaf shape. Seconds dial is inset at position 6, with Arabic numerals around it. Watch has machine engraving flower pattern front and back. The spherical winder has a number and a symbol on the upper face and a hole through the centre, the ring for the chain is missing. Back of a the watch opens to reveal a concave cover with a winding hole, which has a border of overlapping crescent-shapes. Inside cover a diamond with initials “JR”(John Rotherham) inside, a date letter “G” (1882) with a Lion Passant (Sterling Silver) also 3 numbers “8 1 9“embossed beside each other. The clock face has “Rotherhams / London” printed on it. The winder is also marked with a maker and sterling silver mark. “Y” and numbers “688” “3 CI A” “3309” “819” “555 A” and other numbers including a set engraved around the edge possibly jewelers marks who did repairs or maintenance on the item over the years.1891, shipwrecked coast, flagstaff hill, flagstaff hill maritime museum, maritime museum, shipwrecked artefact, flagstaff hill maritime village, shipwreck coast, warrnambool, fiji, pocket watch, william vickers, william robe, bill robe, fiji watch -
 Flagstaff Hill Maritime Museum and Village
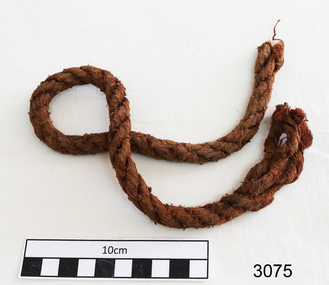
Souvenir - Rope Sample, before September 1891
The rope was part of the distress rocket used during the time that the sailing ship Fiji was in distress, before it became a wreck. The three-masted iron barque Fiji had been built in Belfast, Ireland, in 1875 by Harland and Wolfe for a Liverpool based shipping company. The ship departed Hamburg on 22nd May 1891 bound for Melbourne, under the command of Captain William Vickers with a crew of 25. The ship’s manifest shows that she was loaded with a cargo of 260 cases of dynamite, pig iron, steel goods, spirits (whisky, schnapps, gin, brandy), sailcloth, tobacco, coiled fencing wire, concrete, 400 German pianos (Sweet Hapsburg), concertinas and other musical instruments, artists supplies including brushes, porcelain, furniture, china, and general cargo including candles. There were also toys in anticipation for Christmas, including wooden rocking horses, miniature ships, dolls with china limbs and rubber balls. On September 5th, one hundred days out from Hamburg in squally and boisterous south west winds the Cape Otway light was sighted on a bearing differing from Captain Vickers’ calculation of his position. At about 2:30am, Sunday 6th September 1891 land was reported 4-5 miles off the port bow. The captain tried to put the ship on the other tack, but she would not respond. He then tried to turn her the other way but just as the manoeuvre was being completed the Fiji struck rock only 300 yards (274 metres) from shore. The place is known as Wreck Bay, Moonlight Head. Blue lights were burned and distress rockets fired whilst an effort was made to lower boats but all capsized or swamped and smashed to pieces. Two of the younger crewmen volunteered to swim for the shore, taking a line. One, a Russian named Daniel Cartland, drowned after he was swept away when the line broke. The other, 17 year old able seaman Julius Gebauhr, a German, reached shore safely on his second attempt but without the line, which he had cut lose with his sheath-knife when it become tangled in kelp. He rested on the beach a while then climbed the steep cliffs in search of help. At about 10am on the Sunday morning a party of land selectors - including F. J. Stansmore, Leslie Dickson (or Dixon) and Mott - found Gebauhr. They were near Ryan's Den, on their travels on horseback from Princetown towards Moonlight Head, and about 5km from the wreck. Gebauhr was lying in the scrub in a poor state, bleeding and dressed only in singlet, socks and a belt with his sheath-knife, ready for all emergencies. At first they were concerned about his wild and shaggy looking state and what seemed to be gibberish speech, taking him to be an escaped lunatic. They were reassured after he threw his knife away and realised that he was speaking half-English, half-German. They gave him food and brandy and some clothing and were then able to gain information about the wreck. Some of the men took him to River nook, a nearby guest house owned by John Evans, where he was cared for. Stansmore and Dickson rode off to try and summon help. Others went down to the site of the wreck. Messages for rescuing the rest of the crew were sent both to Port Campbell for the rocket rescue crew and to Warrnambool for the lifeboat. The S.S. Casino sailed from Portland towards the scene. After travelling the 25 miles to the scene, half of the Port Campbell rocket crew and equipment arrived and set up the rocket tripod on the beach below the cliffs. By this time the crew of the Fiji had been clinging to the jib-boom for almost 15 hours, calling frantically for help. Mr Tregear from the Rocket Crew fired the line. The light line broke and the rocket was carried away. A second line was successfully fired across the ship and made fast. The anxious sailors then attempted to come ashore along the line but, with as many as five at a time, the line sagged considerably and some were washed off. Others, nearly exhausted, had to then make their way through masses of seaweed and were often smothered by waves. Only 14 of the 24 who had remained on the ship made it to shore. Many onlookers on the beach took it in turns to go into the surf and drag half-drowned seamen to safety. These rescuers included Bill (William James) Robe, Edwin Vinge, Hugh Cameron, Fenelon Mott, Arthur Wilkinson and Peter Carmody. (Peter Carmody was also involved in the rescue of men from the Newfield.) Arthur Wilkinson, a 29 year old land selector, swam out to the aid of one of the ship’s crewmen, a carpenter named John Plunken. Plunken was attempting to swim from the Fiji to the shore. Two or three times both men almost reached the shore but were washed back to the wreck. A line was thrown to them and they were both hauled aboard. It was thought that Wilkinson struck his head on the anchor before s they were brought up. He remained unconscious. The carpenter survived this ordeal but Wilkinson later died and his body was washed up the next day. It was 26 year old Bill Robe who hauled out the last man, the captain, who had become tangled in the kelp. The wreck of the Fiji was smashed apart within 20 minutes of the last man being brought ashore, and it settled in about 6m of water. Of the 26 men on the Fiji, 11 in total lost their lives. The remains of 7 bodies were washed onto the beach and their coffins were made from timbers from the wrecked Fiji. They were buried on the cliff top above the wreck. The survivors were warmed by fires on the beach then taken to River nook and cared for over the next few days. Funds were raised by local communities soon after the wreck in aid of the sufferers of the Fiji disaster. Captain Vickers was severely reprimanded for his mishandling of the ship. His Masters Certificate was suspended for 12 months. At the time there was also a great deal of public criticism at the slow and disorganised rescue attempt to save those on board. The important canvas ‘breech buoy’ or ‘bucket chair’ and the heavy line from the Rocket Rescue was in the half of the rocket outfit that didn’t make it in time for the rescue: they had been delayed at the Gellibrand River ferry. Communications to Warrnambool were down so the call for help didn’t get through on time and the two or three boats that had been notified of the wreck failed to reach it in time. Much looting occurred of the cargo that washed up on the shore, with nearly every visitor leaving the beach with bulky pockets. One looter was caught with a small load of red and white rubber balls, which were duly confiscated and he was ‘detained’ for 14 days. Essence of peppermint mysteriously turned up in many settlers homes. Sailcloth was salvaged and used for horse rugs and tent flies. Soon after the wreck “Fiji tobacco” was being advertised around Victoria. A Customs officer, trying to prevent some of the looting, was assaulted by looters and thrown over a steep cliff. He managed to cling to a bush lower down until rescued. In 1894 some coiled fencing wire was salvaged from the wreck. Hundreds of coils are still strewn over the site of the wreck, encrusted and solidified. The hull is broken but the vessel’s iron ribs can be seen along with some of the cargo of concrete and pig iron. Captain Vickers presented Bill Robe with his silver-cased pocket watch, the only possession that he still had, as a token for having saved his life and the lives of some of the crew. (The pocket watch came with 2 winding keys, one to wind it and one to change the hands.) Years later Bill passed the watch to his brother-in-law Gib (Gilbert) Hulands as payment of a debt and it has been passed down the family to Gilbert Hulands’ grandson, John Hulands. Seaman Julius Gebauhr later gave his knife, in its hand crafted leather sheath, to F. J. Stansmore for caring for him when he came ashore. The knife handle had a personal inscription on it. A marble headstone on the 200m high cliffs overlooking Wreck Beach, west of Moonlight Head, paying tribute to the men who lost their lives when Fiji ran aground. The scene of the wreck is marked by the anchor from the Fiji, erected by Warrnambool skin divers in 1967.This rope is part of the collection of artefacts from the wreck of the Fiji. Flagstaff Hill’s Fiji collection is of historical significance at a State level because of its association with the wreck Fiji, which is on the Victorian Heritage Register VHR S259. The Fiji is archaeologically significant as the wreck of a typical 19th century international sailing ship with cargo. It is educationally and recreationally significant as one of Victoria's most spectacular historic shipwreck dive sites with structural features and remains of the cargo evident. It also represents aspects of Victoria’s shipping history and its potential to interpret sub-theme 1.5 of Victoria’s Framework of Historical Themes (living with natural processes).Rope, plaited, brown in colour, cut straight at one end, and the other end is separated into 3 pieces, from distress rockets used during the wreck of the sailing ship Fiji. Rope was in envelope printed with an address, and a description, and there was a display card with further details on it. Printed on the envelope: "Shire of Hampden / PO Box 84, Camperdown 3260" Hand written "rope of wreck of Fiji / 7cm / Mr Wm "Boyce" Display card with rope includes words "Piece of Rope from the Fiji distress rockets and was donated to Flagstaff Hill by a private donor in 1989"flagstaff hill, warrnambool, shipwrecked coast, flagstaff hill maritime museum, maritime museum, shipwreck coast, flagstaff hill maritime village, great ocean road, rope, the fiji, william boyce, distress signal, rocket rescue, life saving equipment -
 Kew Historical Society Inc
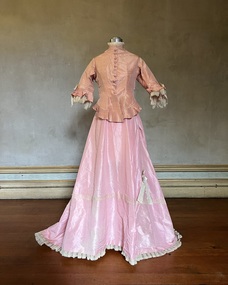
Clothing - Two-piece pink silk afternoon outfit, 1875
This afternoon dress was owned and first worn in 1875 by Alice (Henty) Hindson, the daughter of Francis Henty and Mary Ann (Lawrence) Henty. The outfit was worn in the same year as Alice's marriage to John Hindson at Trinity Church, East Melbourne, and may have formed part of her trousseau. Alice's father, Francis Henty, was the youngest son of Thomas Henty, who with his family, their retainers and property moved to the Australian colonies between 1829 and 1832. In 1834, Francis’ older brother, Edward, sailed from Launceston in Van Diemen’s Land to what was to become Portland in the western part of Port Phillip District [Victoria]. Francis, together with the first flock of Merino sheep [in Victoria], followed some months later. The first and second generations of the Henty family established vast pastoral properties in the Western part of the Port Phillip District. Francis Henty managed ‘Merino Downs’ near Casterton, while also living in his retirement at ‘Field Place' in Kew. The Henty Collection of nineteenth and twentieth century clothing, including outerwear and underwear, was collected, stored and exhibited over time by female family members descended from Francis and Mary Ann Henty. During the twentieth century, items from the collection were modelled in two fashion parades by various descendants [1937, 1959]. The items in the collection are historically and aesthetically significant, with provenance provided by oral and written tradition within or held by the family. A number of the items in the collection are very rare survivors, and provide researchers with the evidence needed to reconstruct the lives of notable women in the Port Phillip District [later Victoria] during the nineteenth and early twentieth century.Alice (Henty) Hindson's afternoon dress is a two-piece, two-toned pink ensemble made of silk taffeta. The detailing is done with fine knife-pleated trims piped in ivory satin and decorated with ivory silk moiré bows on the bodice and skirt. The panelled peplum jacket is boned and the front button closure has hand-embroidered buttonholes with handmade covered buttons. The gathered full buttoned skirt falls into a train. The skirt is decorated with rows of ivory tulle corded lace and the hemline is edged with crisp fluted organza and tatted lace. Measurements (mm): BODICE: Girth - Neck 355.6, Chest 863.6, Waist 685.8, Hip 787.4, Cuff 304.8, Hem circumference 1422.4. Vertical - From neck to hem 546.1, Front waist to hem 241.3, Back neck to hem 609.6, Back waist to hem 355.6, Sleeve length 330.2. Horizontal - Neck to sleeve head 60, Underarm to underarm 419.1. SKIRT Girth - Waist 558.8, Hip 1473.2, Hem circumference 3911.6. Vertical - Front waist to hem 1092.2, Back waist to hem 1524. fashion -- 1870s, afternoon dresses, alice (henty) hindson, women's clothing -
 Flagstaff Hill Maritime Museum and Village
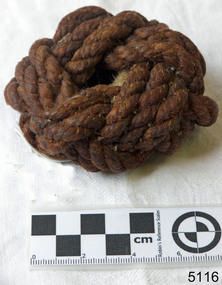
Textile - Rope Sample, After September 1891
The light line or rope used to construct this Turk’s Head knot was part of the line line-throwing apparatus used by the Rocket Rescue Crew. In normal operation a rocket carrying the line was fired over a ship, fastened to the ship, then hauled by the crew to pull a heavier rope from shore, which would have a canvas ‘breaches buoy’ attached to it. A tripod or triangle would be used to keep it free from breakers and rocks. One by one the crew on the wreck would sit in the buoy and be hauled safely back to shore. The three-masted iron barque Fiji had been built in Belfast, Ireland, in 1875 by Harland and Wolfe for a Liverpool based shipping company. The ship departed Hamburg on 22nd May 1891 bound for Melbourne, under the command of Captain William Vickers with a crew of 25. The ship’s manifest shows that she was loaded with a cargo of 260 cases of dynamite, pig iron, steel goods, spirits (whisky, schnapps, gin, brandy), sailcloth, tobacco, coiled fencing wire, concrete, 400 German pianos (Sweet Hapsburg), concertinas and other musical instruments, artists supplies including brushes, porcelain, furniture, china, and general cargo including candles. There were also toys in anticipation for Christmas, including wooden rocking horses, miniature ships, dolls with china limbs and rubber balls. On September 5th, one hundred days out from Hamburg in squally and boisterous south west winds the Cape Otway light was sighted on a bearing differing from Captain Vickers’ calculation of his position. At about 2:30am, Sunday 6th September 1891 land was reported 4-5 miles off the port bow. The captain tried to put the ship on the other tack, but she would not respond. He then tried to turn her the other way but just as the manoeuvre was being completed the Fiji struck rock only 300 yards (274 metres) from shore. The place is known as Wreck Bay, Moonlight Head. Blue lights were burned and rockets fired whilst an effort was made to lower boats but all capsized or swamped and smashed to pieces. Two of the younger crewmen volunteered to swim for the shore, taking a line. One, a Russian named Daniel Carkland, drowned after he was swept away when the line broke. The other, 17 year old able seaman Julius Gebauhr, a German, reached shore safely on his second attempt but without the line, which he had cut lose with his sheath-knife when it become tangled in kelp. He rested on the beach a while then climbed the steep cliffs in search of help. At about 10am on the Sunday morning a party of land selectors - including F. J. Stansmore, Leslie Dickson (or Dixon) and Mott - found Gebauhr. They were near Ryans Den, on their travels on horseback from Princetown towards Moonlight Head, and about 5km from the wreck. Gebauhr was lying in the scrub in a poor state, bleeding and dressed only in singlet, socks and a belt with his sheath-knife, ready for all emergencies. At first they were concerned about his wild and shaggy looking state and what seemed to be gibberish speech, taking him to be an escaped lunatic. They were reassured after he threw his knife away and realised that he was speaking half-English, half-German. They gave him food and brandy and some clothing and were then able to gain information about the wreck. Some of the men took him to Rivernook, a nearby guest house owned by John Evans, where he was cared for. Stansmore and Dickson rode off to try and summon help. Others went down to the site of the wreck. Messages for rescuing the rest of the crew were sent both to Port Campbell for the rocket rescue crew and to Warrnambool for the lifeboat. The S.S. Casino sailed from Portland towards the scene. After travelling the 25 miles to the scene, half of the Port Campbell rocket crew and equipment arrived and set up the rocket tripod on the beach below the cliffs. By this time the crew of the Fiji had been clinging to the jib-boom for almost 15 hours, calling frantically for help. Mr Tregear from the Rocket Crew fired the line. The light line broke and the rocket was carried away. A second line was successfully fired across the ship and made fast. The anxious sailors then attempted to come ashore along the line but, with as many as five at a time, the line sagged considerably and some were washed off. Others, nearly exhausted, had to then make their way through masses of seaweed and were often smothered by waves. Only 14 of the 24 who had remained on the ship made it to shore. Many onlookers on the beach took it in turns to go into the surf and drag half-drowned seamen to safety. These rescuers included Bill (William James) Robe, Edwin Vinge, Hugh Cameron, Fenelon Mott, Arthur Wilkinson and Peter Carmody. (Peter Carmody was also involved in the rescue of men from the Newfield.) Arthur Wilkinson, a 29 year old land selector, swam out to the aid of one of the ship’s crewmen, a carpenter named John Plunken. Plunken was attempting to swim from the Fiji to the shore. Two or three times both men almost reached the shore but were washed back to the wreck. A line was thrown to them and they were both hauled aboard. It was thought that Wilkinson struck his head on the anchor before s they were brought up. He remained unconscious. The carpenter survived this ordeal but Wilkinson later died and his body was washed up the next day. It was 26 year old Bill Robe who hauled out the last man, the captain, who had become tangled in the kelp. The wreck of the Fiji was smashed apart within 20 minutes of the last man being brought ashore, and it settled in about 6m of water. Of the 26 men on the Fiji, 11 in total lost their lives. The remains of 7 bodies were washed onto the beach and their coffins were made from timbers from the wrecked Fiji. They were buried on the cliff top above the wreck. The survivors were warmed by fires on the beach then taken to Rivernook and cared for over the next few days. Funds were raised by local communities soon after the wreck in aid of the sufferers of the Fiji disaster. Captain Vickers was severely reprimanded for his mishandling of the ship. His Masters Certificate was suspended for 12 months. At the time there was also a great deal of public criticism at the slow and disorganised rescue attempt to save those on board. The important canvas ‘breech buoy’ or ‘bucket chair’ and the heavy line from the Rocket Rescue was in the half of the rocket outfit that didn’t make it in time for the rescue: they had been delayed at the Gellibrand River ferry. Communications to Warrnambool were down so the call for help didn’t get through on time and the two or three boats that had been notified of the wreck failed to reach it in time. Much looting occurred of the cargo that washed up on the shore, with nearly every visitor leaving the beach with bulky pockets. One looter was caught with a small load of red and white rubber balls, which were duly confiscated and he was ‘detained’ for 14 days. Essence of peppermint mysteriously turned up in many settlers homes. Sailcloth was salvaged and used for horse rugs and tent flies. Soon after the wreck “Fiji tobacco” was being advertised around Victoria. A Customs officer, trying to prevent some of the looting, was assaulted by looters and thrown over a steep cliff. He managed to cling to a bush lower down until rescued. In 1894 some coiled fencing wire was salvaged from the wreck. Hundreds of coils are still strewn over the site of the wreck, encrusted and solidified. The hull is broken but the vessel’s iron ribs can be seen along with some of the cargo of concrete and pig iron. Captain Vickers presented Bill Robe with his silver-cased pocket watch, the only possession that he still had, as a token for having saved his life and the lives of some of the crew. (The pocket watch came with 2 winding keys, one to wind it and one to change the hands.) Years later Bill passed the watch to his brother-in-law Gib (Gilbert) Hulands as payment of a debt and it has been passed down the family to Gilbert Hulands’ grandson, John Hulands. Seaman Julius Gebauhr later gave his knife, in its hand crafted leather sheath, to F. J. Stansmore for caring for him when he came ashore. The knife handle had a personal inscription on it. A marble headstone on the 200m high cliffs overlooking Wreck Beach, west of Moonlight Head, paying tribute to the men who lost their lives when Fiji ran aground. The scene of the wreck is marked by the anchor from the Fiji, erected by Warrnambool skin divers in 1967.This rope is part of the collection of artefacts from the wreck of the Fiji. Flagstaff Hill’s Fiji collection is of historical significance at a State level because of its association with the wreck Fiji, which is on the Victorian Heritage Register VHR S259. The Fiji is archaeologically significant as the wreck of a typical 19th century international sailing ship with cargo. It is educationally and recreationally significant as one of Victoria's most spectacular historic shipwreck dive sites with structural features and remains of the cargo evident. It also represents aspects of Victoria’s shipping history and its potential to interpret sub-theme 1.5 of Victoria’s Framework of Historical Themes (living with natural processes). The Fiji collection meets the following criteria for assessment: Criterion A: Importance to the course, or pattern, of Victoria’s cultural history. Criterion B: Possession of uncommon, rare or endangered aspects of Victoria’s cultural history Criterion C: Potential to yield information that will contribute to an understanding of Victoria’s cultural history. Rope salvaged from the distress rocket rope line used in the rescue of the crew of the sailing ship “Fiji”. The light-weight brown rope has been crafted into a decorative 'Monkey fist' or 'Turk’s head' knot using three interwoven strands. 1891, shipwrecked coast, flagstaff hill, flagstaff hill maritime museum, maritime museum, shipwrecked artefact, flagstaff hill maritime village, shipwreck coast, warrnambool, rope, moonlight head, wreck bay, distress rocket, line, light line, rocket rescue apparatus, rocket equipment, rocket line -
 Bendigo Historical Society Inc.
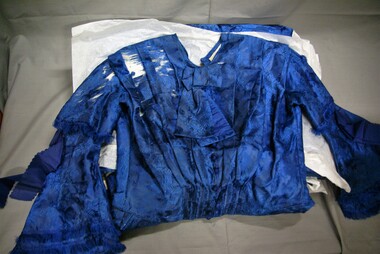
Clothing - ROYAL BLUE SILK DRESS, 1850's
BHS CollectionFull length royal blue silk embroidered fabric dress with bodice and long sleeves, fully lined with ivory cotton fabric. Hand made. Front of bodice has round neck and dips to a deep V at waistline. Twelve decorative fabric covered buttons from neckline to lower V that taper to stitched down pleats at waistline. Fabric bow at centre front of neckline lined with blue satin. Long sleeves have short capped layer over a flared layer underneath. Top section edged with one row of royal blue cotton fringeing. Lower flared section edged with two rows of royal blue cotton fringeing. Large royal blue fabric bow attached at each elbow. Back of bodice made of six panels to waistline. Centre panel on each side is edged with cotton fringeing. Centre back opening to waist with nineteen hooks and eyes, only one eye remaining. Piping around waistline. Full skirt knife pleats at front below waist. Hemline edged with blue ribbed cotton ribbon. Card inside box with ''Wedding Gown Circa 1850's".costume, female, royal blue silk dress -
 Flagstaff Hill Maritime Museum and Village
Domestic object - Plate, c. 1850's
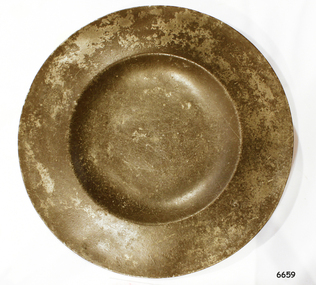
In the words of the donor, Betty Stone, "This pewter plate belonged to Joshua and Susan Chamberlain. They, with their family, arrived in Australia as assisted migrants in January 1855. Our Chamberlain family was among those chosen to participate in a Bounty Scheme and on 24 October 1854 embarked on SS Shand to begin their journey. A few years later they set up a home on a small farming property in Wangoom, Warrnambool with the possessions they had brought with them from the village of Thriplow, Cambridgeshire, England. Amongst those household possessions was this plate. During the first half of the nineteenth century, a Bounty scheme was introduced to encourage migrants to Australia to work on properties granted or sold to settlers. Agents in England were engaged to select suitable emigrants; applicants had to be "sober, industrious and of good moral character....and married men over the age of forty-eight were only eligible to receive the bounty if they had five or more children over the age of ten years'. The successful applicant also had to pay one pound sterling for each adult, and ten shillings for each child between the ages of one and fourteen years. This payment covered the cost of a mattress, bolster, blanket, small box, knife and fork, two spoons, metal plate, and drinking mug, all of which became the emigrant's property on arrival in the colony. The pewter plate, handed down from one generation to the next, was always valued by members of the family as an important artefact. The plate has a mark stamped on the back which is almost indecipherable." (Reference- Brown Martyn- Australia Bound! The story of West Country connections 1688- 1888 Bradford on Avon Wiltshire Ex Libris Press 1988 p 112.) (Note: For additional information please refer to Betty Stone’s book “Pioneers and Places - A History of three Warrnambool Pioneering Families” ie. Chamberlain, Dale and Lees Families)This item is associated with the families of Chamberlain, Dale and Lees. These families are listed in the "Pioneers' Register" for Warrnambool Township and Shire, 1835-1900, published by A.I.G.S. Warrnambool Branch. The plate is an example of the goods emigrants brought to Australia under the Bounty Scheme in the 1850s.Pewter plate: metal plate with a wide rim and shallow bowl. The top has a gold-brown colour, underside is grey with a red-brown mark. Made c. 1850. The plate has an Inscription stamped on the back and front.It is part of the 'Chamberlain, Dale and Lees Collection' Maker's Mark on back: 'rectangle with rounded corners / T H all within a circle' almost indecipherable. Mark heavily stamped on front: 'L / T M'flagstaff hill, warrnambool, shipwrecked coast, flagstaff hill maritime museum, maritime museum, shipwreck coast, flagstaff hill maritime village, great ocean road, chamberlain, dale, lees, stone, betty stone, warrnambool pioneers, pewter plate, emigration, bountey system, dinner ware, joshua chamberlain, susan chamberlain, 1855, emigrant, assisted migrant, ss shand, wangoom, triplow, cambridgeshire -
 Wodonga & District Historical Society Inc
Functional object - Scissors - Princess Alexandra opens Pollard Archway, Wodonga
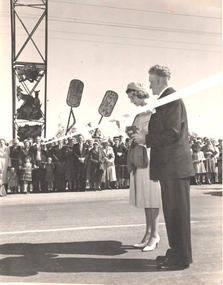
In 1959 Princess Alexandra of Kent visited Australia as the representative of Queen Elizabeth II for the Queensland Centenary Celebrations. Her six week visit began with her arrival in Canberra on 14th August 14 and she departed from Canberra on 26th September. Time spent in Australia included 3 weeks in Queensland. Her Royal Highness' visits to New South Wales and Victoria were comparatively brief and informal. In New South Wales she made two country visits including to Albury and a night spent at Bungowannah Park near Jindera. Her visit to Victoria began in Wodonga where she officially opened the Pollard Archway over the Causeway. She received an enthusiastic welcome as she approached the Archway accompanied by a motorcycle escort. As Princess Alexander stepped forward to take the scissors from a red plush case, her Lady-in- Waiting, Lady Moyra Hamilton, tugged at the Princess' sleeve, whispered and gave her a coin. The Princess handed the coin a halfpenny to the Wodonga Shire President, Cr J. S. Hore, saying: "I must give you this, otherwise it might be unlucky." (The halfpenny "gift" stems from an old English superstition that a "sharp" gift such as a knife or scissors must be dulled with copper or else a friendship will be lost. After cutting the ribbon and declaring the Pollard Arch, named in honour of Councillor Charles Pollard M.B.E. she was presented with a bouquet by 10-year old Leslie McLeod. Princess Alexandra led by a pipe band was driven along the Hume Highway and High Street which were lined by thousands of people including school children. After a short trip along High Street and Elgin Street to the Railway Station she departed from protocol to speak to the many children who had crossed the barricade. Princess Alexandra then boarded the Royal Train for her journey to Melbourne.This item is significant because it represents the visit to Wodonga of Princess Alexandra in 1959.A pair of scissors in a red box. The bottom of the box is lined with red cloth and the lid is lined with white silk bearing the trademark "Jewelcrest". The scissors are engraved with the maker's mark for GIESEN & FORSTHOFF/ SOLINGEN GERMANYOn top of Box. The Official Opening by Her Royal Highness Princess Alexandra of Kent 0f the Cr C F Pollard MBE Archway Wodonga 16th Sept 1959 On Scissors: GIESEN & FORSTHOFF/ SOLINGEN GERMANY TIMOR SOLINGENprincess alexandra, pollard arch -
 Melbourne Tram Museum
Document - Personal Papers, Alexander Cameron, 1920
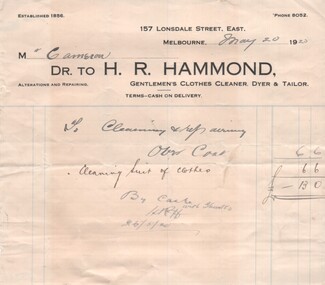
Set of nine dockets, notes that were located in a plastic container - see history of object: 1 - docket - H R Hammond, Gentlemen's clothes cleaner, dyer and tailor - 20/5/1920 - cleaning 13/- 2 - ditto 6/5/1920 - 6/6d 3 - written note to Alex Cameron from F J Smith (?), regarding a book title 22/3/1920 4 - docket from Norman Bros Stationers, for a paper knife, 1/9d, 7/5/1920 5 - docket from Miss Allpress Registry office sending a Mr William Spencer, dated 23/4/1920 - has the address details on rear and those of H. S Dix. 6 - note - possibly arising from a meeting, undated, about the northern suburbs. 7 - Handwritten note dated 23/6/1920 about a person (cant make out name) knocked down in Flinders St at Spencer St - received two pounds compensation 8 - Receipt for a subscription to Science and industry journal for 12 issues, 1920 - from the Commonwealth Institute of Science and Industry. 9 - Docket or receipt for purchases during 1919 and 1920 from McEwans of Elizabeth St Melbourne.trams, tramways, mmtb, chairman, accidents -
 Flagstaff Hill Maritime Museum and Village
Tool - Spokeshave, Mathieson and Son, 1860 to 1910
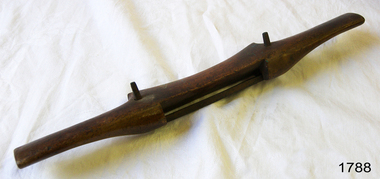
A spokeshave is a hand tool used to shape and smooth woods in woodworking jobs such as making cart wheel spokes, chair legs, paddles, bows, and arrows. The tool consists of a blade fixed into the body of the tool, which has a handle for each hand. Historically, a spokeshave was made with a wooden body and metal cutting blade. With industrialization metal bodies displaced wood in mass-produced tools. Being a small tool, spokeshaves are not suited to working large surfaces. The name spokeshave dates back to at least the 16th century, though the early history of the tool is not well documented. The name spokeshave reflects the early use of the tool by wheel wrights. The first spokeshaves were made of wood usually beech with steel blades, before being largely superseded by the development of metal-bodied spokeshaves in the latter half of the 19th century, though many woodworkers still use wooden spokeshaves. Due to their widespread use and versatility vintage wooden spokeshaves remain commonly available and relatively low in price. Spokeshaves consist of a blade or iron secured to the body or stock of the tool, which has two handles – one for each hand. The bottom surface of the tool is called the sole. The blade can be removed for sharpening, and adjusted to vary the depth of the cut. An early design consisted of a metal blade with a pair of tangs to which the wooden handles were attached, as with a draw knife. Unlike a draw knife, but like a plane, spokeshaves typically have a sole plate that fixes the angle of the blade relative to the surface being worked. There are a wide variety of different types of spokeshave, suited to different trades and applications. Company History: The firm of Alexander Mathieson & Sons was one of the leading makers of hand tools in Scotland. Its success went hand in hand with the growth of the shipbuilding industries on the Firth of Clyde in the nineteenth century and the emergence of Glasgow regarded as the "second city of the Empire". It also reflected the firm's skill in responding to an unprecedented demand for quality tools by shipyards, cooperage's and other industries, both locally and far and wide. The year 1792 was deemed by the firm to be that of its foundation it was in all likelihood the year in which John Manners had set up his plane-making workshop on Saracen Lane off the Gallowgate in the heart of Glasgow, not far from the Saracen's Head Inn, where Dr Johnson and James Boswell had stayed on their tour of Scotland in 1773. Alexander Mathieson (1797–1851) is recorded in 1822 as a plane-maker at 25 Gallowgate, but in the following year at 14 Saracen's Lane, presumably having taken over the premises of John Manners. The 1841 national census described Alexander Mathieson as a master plane-maker at 38 Saracen Lane with his son Thomas Adam working as a journeyman plane-maker. In 1849 the firm of James & William Stewart at 65 Nicolson Street, Edinburgh was taken over and Thomas was put in charge of the business, trading under the name Thomas A. Mathieson & Co. as plane and edge-tool makers. Thomas's company acquired the Edinburgh edge-tool makers Charles & Hugh McPherson and took over their premises in Gilmore Street. The Edinburgh directory of 1856/7 the business is recorded as being Alexander Mathieson & Son, plane and edge-tool makers at 48 Nicolson Street and Paul's Work, Gilmore Street. The 1851 census records indicate that Alexander was working as a tool and plane-maker employing eight men. Later that year Alexander died and his son Thomas took over the business. Under the heading of an edge-tool maker in the 1852/3 (Post-Office Glasgow Annual Directory) the firm is now listed as Alexander Mathieson & Son. By the early 1850s, the business had moved to 24 Saracen Lane. The directory for 1857/8 records that the firm had moved again only a few years later to East Campbell Street, also off the Gallowgate, and that through further diversification was also manufacturing coopers' and tin men's tools. The ten-yearly censuses log the firm's growth and in 1861 Thomas was a tool manufacturer employing 95 men and 30 boys; in 1871 he had 200 men working for him and in 1881 300 men. By 1899 the firm had been incorporated as Alexander Mathieson & Sons Ltd, even though only Alexander's son Thomas appears ever to have joined the firm.A vintage tool made by a well-known firm made for other firms and individuals that worked in wood. The tool was used to shape various items mainly in use by wheel wrights. A significant vintage item from the mid to late 19th century that today is quite sought after by collectors. It gives us a snapshot of how trade people predominately worked materials such as wood by hand and with tools that were themselves hand made shows the craftsman's art of the time. Spokeshave with blade 4 inches wide.Mathieson and Son Glasgow. flagstaff hill, warrnambool, shipwrecked-coast, flagstaff-hill, flagstaff-hill-maritime-museum, maritime-museum, shipwreck-coast, flagstaff-hill-maritime-village, spokeshave, mathieson and son, carpentry tools, wheel wright tools -
 Tramways/East Melbourne RSL Sub Branch - RSL Victoria Listing id: 27511
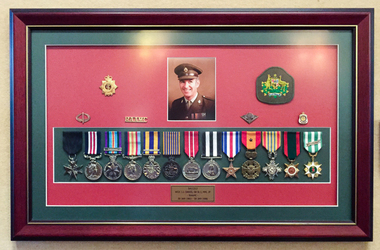
Memorabilia - Medal Board, Ceremonial Medal Board for JJ Davis, 2001
John James Davis (J.J. Davis) was Australia's most decorated NCO in the Vietnam conflict. This plaque commemorates the deeds he performed and medals received.Framed ceremonial medal board for JJ Davis. The piece includes a service photograph of JJ Davis in uniform, a fabric patch with the Australian Coat of Arms, five metal pins and 13 replica medals as listed below. The information plaque states '5411313 WO1 J.J. DAVIS, SB St J, MM, JP - RAAMC - 30 JAN 1963 - 30 JAN 1986. The five metal pins are: 1. Returned Services League Australia 2. Returned Active Service 3. RAAMC 4. Royal Australian Army Medical Corps 5. Knife surrounded by laurel leaves. Replica medals included are: 1. Military Medal 2. Australian Active Service Medal 1945-75, Vietnam 3. Vietnam Medal 4. Defence Force Medal with 1st Clasp 5. National Medal 6. Australian Defence Medal 7. St John 12 Year Long Service Medal with five year clasp 8. Silver Star (Unites States of America) 9. Gallantry Cross with Bronze Star (South Vietnam) 10. The Armed Forces Honour Medal (2nd Class) (South Vietnam) 11. Civil Action Medal (2nd Class) (South Vietnam) 12. Vietnamese Campaign Medal 13. ACT Emergency Service Medal (2003 Bushfires) john jams davis, john james davis, j j davis, vietnam, nco, photographs, portraits, badges, medals -
 Wodonga & District Historical Society Inc
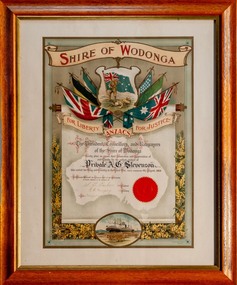
Certificate - WW1 Private A. G. Stevenson
Arthur Edward Stevenson enlisted on 17 September 1914 and served with the 14th Battalion of the AIF. He was killed in action at Gallipoli on 20 August 1915 at age 28. His personal effects of a belt, hairbrush, knife, postcards and photos were returned to his brother John in June 1916. Later that year, John Stevenson wrote to the Officer in Charge of base records, asking for confirmation of his brother’s death, as he had received a letter from Arthur dated 27 August 1915, seven days later than the date on which he was reportedly killed. The Army confirmed that Arthur had in fact died, and concluded that he had likely misdated his letter. In 1920, Arthur’s sister Rachel wrote to the Department of Defence, asking whether her brother’s grave had been located and again querying the date of his death. Later, she completed a form that was sent to next of kin seeking information on deceased soldiers for the Australian War Memorial’s Roll of Honour. Arthur Stevenson’s death is recorded at the Lone Pine Memorial on the Gallipoli Peninsula. Honour Certificates WW1 - From 1915 onwards, recruits in many shires and towns in eastern Australia were honoured by local government authorities. A common form of recognition was the award of honour certificates. The first honour certificates were presented in 1915 and 1916 to men who had yet to leave Australia. The designers and publishing companies solicited business directly from councils. Publishers began to print two different types of certificates: honour certificates to thank soldiers who had survived and memorial certificates to commemorate the dead. D.W. Paterson, a Melbourne publishing firm, claimed they had supplied certificates to over 150 cities and shires in Victoria and New South Wales, including the Shire of Wodonga. Paterson also had the widest range of designs The certificate signified that the officials of the community recognised and shared the family's pride and grief. The certificate was signed by S. T Parker, Shire President and R. H. Murphy, Council Secretary on 4th August 1919.This certificate is significant as it recognises service given to Australia by Arthur Edward Stevenson. Coloured certificate presented to the family of Arthur Ernest Stevenson by Wodonga Shire Council. The certificate is mounted behind glass in a wooden frame.gallipoli, world war 1, arthur edward stevenson -
 Bendigo Historical Society Inc.
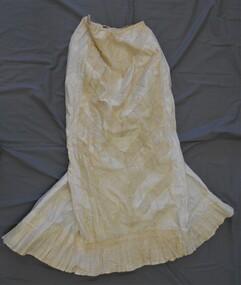
Clothing - MAGGIE BARBER COLLECTION: CRINOLETTE, 1870's
Clothing. Cream polished cotton, full length half slip petticoat. Plackett at the back, fastens with two metal hooks, and hand-stitched loops. The back features a 'crinolette', where two rows of tapes are gathered in to give volume to the back of the garment. As the crinoline started to subside at the end of the 1860's. The centre front panel features 6 angled bands of lace 4.5 cm wide and angled to form a V shape. (1) A 9.5 cm band of pleated linen gauze-like fabric, edged with a 5 cm band of linen lace. (2) A 15 cm double layered frill-top layer 2 cm wide silk like pleats, lined with linen muslin type fabric, and an under frill of polished cotton, pleated in one cm wide knife pleats. The top frill is of fine cream cotton lace. At the top edge is a 3.5 cm wide band of floral cotton lace, and adjoined at the lower edge with a 9 cm deep pleated trim of exquisite cotton "floral and swirls" lace. The top frill is 42 cm wide, and extends over the centre front panel only. A cotton covered " stiffening- possibly bamboo or whale bone, extends 31.5 cm ;long at the crinolette. An unusual 'pocket like bag' is sewn into the right side seam 14 cm below the waist. This has rounded corners, and is 8 cm wide at the top, 17.5 cm wide at the lower edge, which is then rounded slightly. Overall length of the 'pocket' is 38 cms.costume, female, crinolette full length half slip -
 The Beechworth Burke Museum
Geological specimen - Coorongite
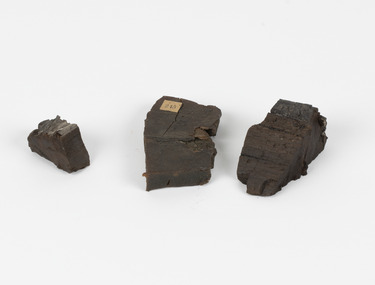
Coorongite is a dark, rubber-like, highly resilient structureless algal deposit. In the Coorong district of South Australia it occurs in moderate quantities associated with the coastal swamps and sand dunes which extend for a considerable distance east of the mouth of the Murray. This particular specimen was recovered from the south of the Coorong River, South Australia. A type of sediment rich in organic matter, Coorongite is the unlithified end-member of the sapropelic coal series. The members of the sapropelic coal series can be ranked in order as sapropel (the unlithified form), sapropelic-lignite, and sapropelic-coal (the lithified forms) based on increasing carbon content and decreasing volatile content. Sapropel (Coorongite) is an unlithified dark, pulpy, fine organic mud containing concentrations of algae and miospores that are more or less identifiable. Coorongite is typically found as an algae like substance, that can be found in irregular size pieces. Coorongite was believed to be dried up oil due to its rubber-like texture. The Coorongite is also soft to the point where it can be cut into with a knife or it can be broken and torn by hand. Otherwise known as 'Kurangk', the Coorong River is home to the Ngarrindjeri people, which acts as both a place for gathering food and a spiritual place. In 1852 the first sight of Coorongite was found along the Coorong River. The finders mistook the Coorongite for dried up oil, which lead to the belief that there were oil reserves under the Coorong River. Between the 1860s and the 1930s the Coorong River became a place where mining oil and Coorongite became precedent. Nowadays, the local council and the South Australian Government are working together with the Ngarrindjeri people to sustain and preserve the Coorong River and the culture that is with it. Soon after gold was discovered in 1851, Victoria’s Governor La Trobe wrote to the Colonial Office in London, urging ‘the propriety of selecting and appointing as Mineral Surveyor for this Colony a gentleman possessed of the requisite qualifications and acquaintance with geological science and phenomena’. Alfred Selwyn was appointed geological surveyor in Australia in 1852 which began the Geological Survey of Victoria. Selwyn went on to collect geological samples and catalogue thousands of specimens around Australia. In 1853-69 the Geological Survey issued under Selwyn's direction sixty-one geological maps and numerous reports; they were of such high standard that a writer in the Quarterly Journal of the Geological Society of London bracketed the survey with that of the United States of America as the best in the world. During his years spent in Australia, Selwyn collected numerous significant geological specimens, examples of which are held in collections such as the Burke Museum.Coorongite is considered to be a mineral with a unique texture, where it can be both hard and soft. Coorongite can also be considered to be a rare mineral, as it is only located along the Coorong River and due to the mining of it, has left very few sources. It was believed at one point that Coorongite could be used to replace oil. This specimen is part of a larger collection of geological and mineral specimens collected from around Australia (and some parts of the world) and donated to the Burke Museum between 1868-1880. A large percentage of these specimens were collected in Victoria as part of the Geological Survey of Victoria that begun in 1852 (in response to the Gold Rush) to study and map the geology of Victoria. Collecting geological specimens was an important part of mapping and understanding the scientific makeup of the earth. Many of these specimens were sent to research and collecting organisations across Australia, including the Burke Museum, to educate and encourage further study.Three solid varyingly hand-sized pieces of wooden appearing organic matter derived from the river in the Coorong District in South Australia. A rubber-like, highly resilient structureless algal deposit.Specimen 245 page 69 / in Descriptive Register / "Elcestic Bitumen, / Coorangite" South of / Coorung River, South Australia . / C. WIllman / 15/4/21burke museum, beechwoth, indigo shire, beechworth museum, geological, geological specimen, mineraology, coorong, coorong river, kurangk, ngarrindjeri, south australia, coorongite, coorongite specimen -
 Mission to Seafarers Victoria
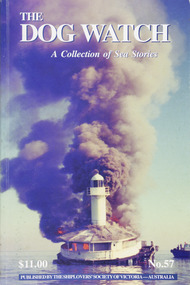
Journal (item) - Periodicals-Annual, Shiplovers' Society of Victoria, The Annual Dog Watch
This journal provides the reader with glimpses of the adventures and hardships of a seaman's life. Many of the stories are of sailing ships.Contributes to our knowledge of the importance of shipping and places on record those stories of the sea which would otherwise be lost.Contents Editorial - Harrow Morgan - 5 Sentinel’s of Gellibrand’s Point - Cliff Gibson - 6 Australia Day - C H Longstaff - 15 Capt. Joseph Ferrell Colton - Kenneth Shewan - 16 James Craig — A unique ship for the Southern Hemisphere - Hugh Lander - 20 The Wreck of the Isis - Margaret Grice - 29 Unusual Maritime Hazards - Capt. J Abernethy - 33 Crewing in Endeavour - Phoenix Arrien - 34 Finished With Engines - Ian L Barton - 45 Lighterage on Norfolk Island - Harrow Morgan - 53 Ship-owners Liability - ‘Flinders Bar’- 59 Nelson -Dr J H Leavesley - 61 The Knife Sheath - W P Shemmeld - 66 A Surfeit of Adventure - Stan Evans - 70 Cook’s Island - Jeremy Gadd - 75 Pig Overboard - Alf (Bluey) Thornton - 80 Educated - Noel Smith - 83 Jack Of All Trades - ‘Flinders Bar’ - 90 Tacking Ship Off Shore - Walter Frederick Stevens - 93 Australia’sMost Inland Shipwreck - Roy Stuart - 95 The Barwon Beer Crisis - R N Theile - 97 New Year Fireworks - Kenneth Shewan - 102 The Philadelphia Story - John Thompson - 104 AB Nuisance — Conclusion - Mick Hardware - 107 SSV Officers & TDW Editors - Kenneth Shewan - 108 Book Reviews - - 111sailing ships, steamships, shipping, seafaring life, shiplovers' society of victoria, dog watch -
 University of Melbourne, Burnley Campus Archives
Photograph - Black and white photographs, James (Jim) Pleasance, Pruning Display
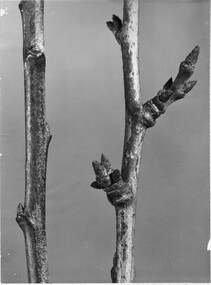
Black and white photographs of various sizes pasted on cardboard for display purposes. Some annotated. (1) (2) Difference between leaf and fruit buds. (3) "The 'rod' or whip is most suitable plant to commence training." (4) Planted and pruned fruit tree. "School of Horticulture and Primary Agriculture Burnley B. 1 " stamped on reverse. (5) "Pear Tree-Unpruned (1) June." (6) "Same Pear Tree-Pruned (2) June." (7) Young unpruned "William bon Chretien". Reverse, Burnley Stamp. (8) Same tree pruned. Reverse, Burnley Stamp. (9) Unpruned pear tree. (10) "Narrabben" plum before inserting branch spreaders. (11) With branch spreaders. (12) Close up of some of its branches without spreaders. (13) Close up of branch with seaders. (14) Plum tree with spreaders. (16) Close up of fruiting spurs. (17) "Apple Blossom Oct. Reverse, p 163(Oct." )(18) Same photograph enlarged. (20) Close up of fruiting buds. (21) Old unpruned apricot tree. (22) "Unpruned branch of apricot tree." (23) Close up of apricot branch. (24) "Same branch-apricot-pruned June Reverse, p99 (June)."(25) Pruned branch stump of mature fruit tree.(26) "Clean saw cuts with sharp knife." (27) "Treat all large wounds on trees to avoid infection by wood rotting fungus." (28) "Apply coating of lead paint or grafting mastic." (29) "Branch of lemon-unpruned Aug. Reverse, p157 (Sept.)." (30) "Same branch of lemon-pruned Aug. Reverse, p 157 Aug."(31) "Young climbing rose-ready for planting-July." (32, 33) Grape vine before pruning. (34) Same vine pruned and trained. (35) Older vine pruned.fruit bud, rod, whip, school of horticulture and primary agriculture, burnley, pear tree, spreaders, plum tree, apricot tree, fungus, lead paint, lemon, roses, grape vine, leaf bud, training, fruiting spurs, apple blossom, grafting mastic, teaching, a w jessep -
 Flagstaff Hill Maritime Museum and Village
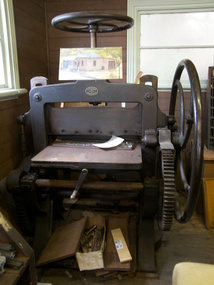
Machine - Guillotine, c. 1880's
This guillotine is a hand operated machine specifically designed to cut through multiple sheets of paper or card. It has a very heavy and sharp single blade knife mounted between vertical guides or runners. The main users of a machine like this is in by the printing and publication binding industry. Book binding companies use a guillotine to evenly trim the pages of a book after it has been bound. The way the guillotine is used is - paper or card is stacked squarely on the flat table and pushed firmly against the back guide - the handle below the table at the front of the machine is wound around, which brings the back guide forward, pushing the paper stack forward and positioning the centre of the stack below the vertical frame - the upper wheel is wound around, which brings the clamp and firmly in position on top of the paper, to hold it very firmly - the large wheel on the side of the machine is turned around to lower the long sharp blade down onto the pages and cut them through. The sharp edge of the blade is protected somewhat from becoming blunt; a block of wood sits in the table under the stack of paper An early model of a guillotine was patented in 1837 by Thirault, who built a model with a fixed blade. Guillotines similar in principal to this one were patented by Guillaume Massiquot in 1844 and 1852. Over the years many improvements have been made and operation has moved from man power to electricity. Oscar Friedheim Ltd. was the importer and wholesaler of a large range of machinery and equipment for the printing and bookbinding industry. He sold most of his equipment under his own name. On this guillotine or paper cutter he refers to the origin of the guillotine’s manufacture only as “German Manufacrure”. A reference book “Commercial Bookbinding: a description of the processes and the various machines used" by Geo. Stephen, 1910, recommends Oscar Friedheim, amongst others, for the supply of “reliable cutting machines for hand or power”. It also recommends Oscar Friedheim’s for a wide range of other printing machinery and processes. OSCAR FRIEDHEIM LIMITED, LONDON Oscar Friedheim Ltd. was established in 1884 and operated from Ludgate in London. The company was an importer and wholesale supplier in the 1880’s, offering machinery and equipment for the printing and packaging industry for the UK and Ireland. The company became incorporated in 1913. An advertisement of 1913 includes a telegraphic code plus two telephone numbers for Oscar Friedheim Ltd and invites readers to call at the Ludgate, London, showrooms to see the machines working. The company later became Friedheim International Ltd. The book titled “Friedheim, A Century of Service 1884-1984 by Roy Brewer, celebrates Oscar Friedheim’s achievements. Friedheim International currently operates from Hemel Hempstead, on the northern outskirts of London UK. It promotes itself as “… the leading supplier of finishing, converting and packaging machinery to the printing, graphic arts, and highly varied packaging industries in the UK and Ireland. The company’s policy is simple – “employ the best people, work with the best equipment manufacturers in the world, and treat our customers as partners!” The company still sells guillotines. The guillotine is significant for its ability to represent aspects of the printing trade in Warrnambool and in a typical port town circa 1850 to 1910. It represents communication methods and processes used in the time before electrically powered equipment became common in industry.Guillotine (or paper cutter), hand operated. Metal framework with vertical guides, stand and metal mechanical parts including wheels and gears. Table with back guide; handle below front of table winds to move the back guide. A wheel at top of machine winds to adjust pressure of the clamp on the work on the table below it. The cutting blade fits between vertical guides; a timber insert in the table below the blade helps minimise the loss of sharpness of the blade. A handle on the side of the machine turns a large spoked wheel, which rotates a large gear, causing the blade to move up and down. Makers details are on a small oval plaque with embossed maker’s details is screwed onto main body. Maker is O Friedheim, London, and the machine is of German manufacture, circa late 1880’s.Maker’s plaque inscribed "O. FRIEDHEIM / London / German Manufacture"flagstaff hill, warrnambool, shipwrecked coast, flagstaff hill maritime museum, maritime museum, shipwreck coast, flagstaff hill maritime village, great ocean road, printing machinery, printer’s guillotine, paper guillotine, paper cutter machine, oscar friedheim ltd london, friedheim international ltd, bookbinding industry, printing industry -
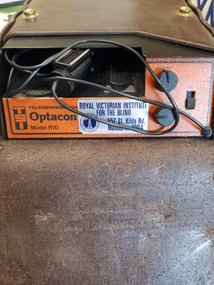 Vision Australia
Equipment - Object, Telesensory Systems, Optacon, 1974
The Optacon OPtical-to-TActile-CONverter is a compact, portable reading aid for the blind. It is about the size of a textbook, and weighs less than 2kg. It works by converting a printed image into a tactile image that a blind person can feel with one finger. After a period of training and practice, a blind person can use the Optacon to read ordinary books, magazines, newspapers, and other printed materials. The Optacon was developed after intensive research at Standford University, California, USA and was trialed by clients of the Royal Victorian Institute for the Blind (now part of Vision Australia) in 1973. It has three main sections: 1 a miniature camera, 2 an electronics section, and 3 a tactile stimulator array. The miniature camera, about the size of a pocket knife, is mounted in a housing that has rollers for easy movement along a line of print. The camera is connected to the electronics section by a lightweight cable. The electronics section and the tactile stimulator array are in the main chassis. The array consists of 144 tiny metal rods arranged in six vertical columns and 24 horizontal rows. Each of the rods can vibrate independently. The tips of these rods protrude through holes in a concave finger plate where the index finger is placed flat in order to read. These three components act together to convert the image of a printed letter or other shape into a pattern of vibrating rods, a tactile image of the letter or shape. The letter shape is tactually perceived as an image that moves from right to left on the finger, showing the left or leading edge of the letter first. Letters are felt sequentially rather than all at once, and the image should be kept moving. The Optacon converts a printed O into a tactile form that resembles a crater with a vibrating rim -- a completed circle. C would have a gap or opening on the right side of the curve. The letter F would be felt, sequentially, as a vertical line with two trailing horizontal lines. Because it can convert any ordinary printed image into a corresponding tactile image, the Optacon is not restricted to any special typestyle or language. The camera has a zoom lens that compensates for differences in the size of type. The standard Optacon lens can accommodate type sizes from 6 point to 20 point. With the optional F4A magnifier lens, type sizes as small as 4 point can be read. Powered by a rechargeable battery, and comes with its own battery charger. The battery is contained within the main chassis, and is not removable by the user. There are four basic controls on the Optacon: the Magnification Adjustment zoom button located on the camera section on the side opposite the rollers; and the On-Off switch, the Stimulator Intensity Adjustment knob, and the Threshold Adjustment knob located on the right side of the front panel. The Circuit Breaker protrudes from the right-hand wall inside the chassis compartment. From left to right when the back panel is facing you, are located: the jack for connecting the battery charger; the Battery Check button; the Normal-Invert switch; and the Input/Output I/O connector for use with the Visual Display, when using the Repeater Cable to connect two Optacons to one another or with other accessories. Designed not be removed from the leather case during normal operation, the On-Off switch is a slide switch located on the right side of the front panel. It slides up and snaps into place in the on position. 1 black with orange front, rectangular device in leather case assistive devices, audio equipment -
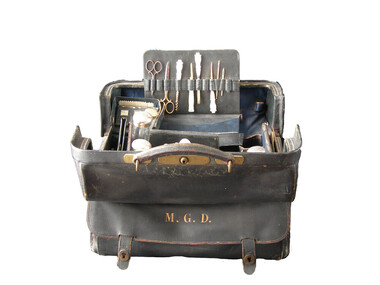 Warrnambool and District Historical Society Inc.
Domestic object - Dressing bag, Mary Glass Dickson, Circa1885
John Glass Cramond 1829 and James Dickson 1831-1910 were founders of a large drapery store. Both were Scots and both came separately to Australia in 1852. Cramond initially came for gold but soon opened a store in St Kilda with a post Office attached and he was the first post master there. Dickson was a farmer’s son but became a draper and while he was unsuccessful on the Bendigo diggings and then returned to Melbourne where he met Cramond and soon after they opened a store on Lonsdale Street. They opened their business in Warrnambool in 1855 as a general store with groceries, drapery and ironmongery. Both partners were involved with the community and James Dickson was an original director of the Warrnambool Woollen Mill 1909 and the Warrnambool Cheese and butter factory. He also served on the committee of management of Warrnambool Base Hospital. This case was a wedding gift from James Dickson Jnr to his wife Mary Glass Cramond on the occasion of their wedding. This item has significance on a number of levels. It belonged to a member of one of Warrnambool’s earliest pioneering families and it marks the occasion when the two families of Cramond and Dickson were linked through the marriage of James Dickson jnr and Mary Glass Cramond. The firm played a significant part in the development of the city and traded for nearly 150 years. It therefore has social significance to Warrnambool. The item is well provenance with the case initialed and items within the case monogrammed. The case and its items are aesthetically quite beautiful as well as being typical of travelling or dressing cases of the more well to do, of the time. Mappin & Webb were manufacturers of some standing with the Mappin name appearing in manufacturing as early as 1775.The company has held a royal warrant as silversmiths since 1897 to the present day and as crown jeweler since 2012. Throughout this time, they have manufactured quality items for the luxury market. It provides an insight into the way ladies travelled and the items which they considered essential. This consists of a black leather with leather handle attached with brass fittings. Middle opening with side pocket on one side with metal catches. Inside has removable sections for holding the numerous containers and items belonging to the case. Interior of the case is dark blue satin. The items contained within the case are as follows: 321.1 Luggage case 321.2 Glass bottle rectangular, silver monogrammed lid, empty. 321.3 Tall round glass bottle, silver monogrammed lid, empty. 321.4 Small glass bottle with pink powder, silver monogrammed lid. 321.5 Small multi sided bottle with stopper and brass hinged lid. 321.6 Tall round bottle with silver monogrammed lid. 321.7 Tall thin multi sided bottle with brass lid. 321.8 Cream coloured monogrammed jar cotton wool inside. 321.9 Clothes brush rectangular cream back. 321.10.1Glove stretcher bone coloured .10.2 Case black leather. 321.11.1 hair comb cream with silver edge .11.2 Case black leather 321.12 Hair brush cream handle 321.13Spatula cream monogrammed 321.14 Mirror, silver round with handle. 321.15 Writing compendium .1 Case black leather .2 Pen with nib .3 Lead pencil .4 Navy satin covered blotting book 321.16 Inkwell glass bottle in small black leather case. 321.17 Match striker in leather case. 321.18 Mirror in black leather case rectangular 321.19 Small case for visiting cards. 321.20Sewing kit rectangular, contains threads and needles pkts x 3 321.21Container, small, hinged tortoise shell patterned. 321.22.1 Manicure set .2 Scissors small .3 Scissors large .4Corkscrew with Mother of pearl handle .5 Pocket knife with Mother of pearl handle .6Tweezers with Mother of pearl handle .7 File with Mother of pearl handle .8 Fine hook Mother of pearl handle .9 Bodkin .10 Bodkin 321.23 Hairbrush oval silver backed 321.24 Mirror silver handled hand mirror. 321.25 Hairbrush wooden handled with Mother of pearl inlay. 321.26 Cylinder, silver with removable lid and small phial of iodine labelled Felton’s pocket iodine. 321.27 Phial small glass with gold decorations. 321.28 Inhaler with insert 321.29 Thimble, metal. 321.30 Silver backed hair brush 321.31 silver backed clothes brushEngraved on side pocket: M.G.D. Mappin and Webb Sheffield and London. Some of the items are monogrammed as per the list above. A number of the glass bottles have lids hallmarked Mappin & Webb London and Sheffield makers stamped inside lid with hall marks history of warrnambool, cramond and dickson, mary glass cramond, dressing bag, woman's toiletry bag 1880 -
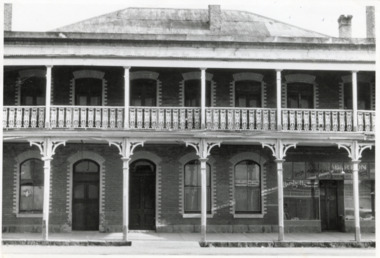 The Beechworth Burke Museum
Photograph - Two Photographs, Saunders, 1864-1972
Taken some time after 1864, these photographs depict the Star Hotel both directly (8674.1) and from the Hotel north west down Ford Street (8674.2). The images depict the building with its modern exterior, having settled for this brick form after several other building designs. The Star Hotel was the first hotel opened in Beechworth, and would go through a series of dramatic changes under its first three owners. The original timber structure was built by W.H. Neuber, though at the time it was only known as ‘The Beechworth Hotel’. The site was later purchased in 1855 by mining entrepreneur, and prolific business owner, John Alston “Six Stars” Wallace. He would go on to extend the established hotel, rebuilding much of it with weatherboard and a shingled roof, adding a two storey structure with a verandah and a theatre capable of supporting 400-500 people, which was often used for international performances. Renamed as the Star Hotel, it was the second in a chain franchise, eventually leading to the “Six Stars” moniker Wallace went by, with hotels at Rutherglen, Chiltern, Yackandandah, Bright, Snake Valley, and of course, Beechworth. Under his ownership, it developed into a popular location for merchants, wayfarers, and locals alike, with the help of his brother Peter as manager. Situated on a road once synonymous with Melbourne to Sydney roadtrips, and the allure of the gold mines, the popularity of the Star drew all manner of clientele from across the country. As such a central hub, the ‘Star Assembly Rooms’ were used as a meeting place for debates, discussions, festivities, and problem solving among the various working sects of the area. These meetings included shareholder discussions for prospecting companies, railway planning, council meetings, and discussions surrounding the interactions between European and Chinese miners, both good and bad. By late 1856, John had the Beechworth at auction through J.H. Grey & Co. It was most likely due to the high profile murder of the manager, Robert Murdoch, during an altercation in relation to a dine and dash event by a Swedish miner, Charles Jansen, who had been ‘excited by drink’ on November 17th. He had refused to pay for his meal and waiter James Mitchell failed to persuade him otherwise. Mitchell, or possibly Murdoch himself, forced him out as tempers and threats escalated. As the photos tell, there are a number of doors which may be entered through, and Jansen used an alternate entrance to access the building. Murdoch was investigating the noise when he encountered the furious man. He was subsequently stabbed with no warning by a small clasp knife, as he tried to stop the intrusion. His exclamations, "I’m stabbed, I’m stabbed!” alerting other occupants, and Jansen was restrained and arrested. Murdoch died the next day from his injuries, with the inquest carried out on the theatre stage. Some 3000 members of the town attended the funeral, and the Star hung black cloth in memory of Robert and his death. Afterwards, an auction caw the property pass to Messrs Robertson and Quirk, though would return shortly thereafter to Six Stars’ portfolio. Six Stars would later sell off his properties from 1862, with the Beechworth Star purchased by 1864 by John Sitch Clark. This allowed Clark to redevelop a significant portion of the Hotel, stripping a central section and constructing the brick structure that survives today, reopening the Star in July that year. It was after this time that our photographs were taken. Clark would later sell the property to Frank Mitchell, shortly before his own death. The next owner, Frederick Allen, lived on the property before the deed was sold to him in the 1880s. He would later sell the property to William Carroll in 1890, with proprietorship eventually moving to Mr. W.H. Porter, and transferring to a Mr. Marendaz by 1913 and Mr. Holly in 1915. Licensing disputes would arise 1917 between Margaret Carroll and a Mrs. McDonald, before it became delicenced some years prior to 1935. It was around this year that the property was bought by Mr. W.J. Pemberton at the meagre price of £500, down from the £13,000 Six Stars originally auctioned it for. It served as a Youth Hostel for a period of time around 1972, and currently the building serves as a private accommodation on the second floor, with shops taking up the ground floor level.These photographs of the Beechworth Star Hotel as they depict a form of Beechworth's first hotel, and also the site of a high profile murder. Two black and white rectangular photographs printed on matte photographic paper.8674.1 (reverse) Beechworth/ 734/ Tanswell’s Hotel [crossed out]/? Old Star/ Hotel,/[small pencil scratching]/ Saunders/ BMM 8674.1 8674.2 (reverse) Beechworth/ 60%[circled]/ Old Star Hotel/Building etc.,/ 12 ½ cm/ 3"[circled, arrows extending horizontally to edges]/[arrows extending top to bottom mid-right of reverse]/ Saunders/ 734[circled]/ BMM 867.2,/ [thin scribbled bordering around top, right, and bottom edges]star hotel, beechworth hotel, john alston wallace, ja wallace, john sitch clark, frederick allen, robert murdoch, meeting place, tragedy, theatre, mining town -
 Ballarat Tramway Museum
Book, Australian Commonwealth Engineering Standards Association, "Flame proof air break switches for Voltages Not Exceeding 600Volts"s", 1926-1932
.1 - Book - 20 pages + grey covers, side stapled, issued by the Australian Commonwealth Engineering Standards Association, Tentative Australian Standard - "Air-break knife switches and laminated brush switches for voltages not exceeding 660Volts" - C23 - 1926, August 1926" .2 - Book - 24 pages + grey covers, side stapled, issued by the Australian Commonwealth Engineering Standards Association, Tentative Australian Standard - "Flame proof air break switches for Voltages Not Exceeding 600Volts", C25-1926, October 1926. .3 - Book - 24 pages + grey covers, side stapled, issued by the Australian Commonwealth Engineering Standards Association, Tentative Australian Standard - "Flame proof air break circuit breakers for Voltages Not Exceeding 600Volts", C26-1926, October 1926. .4 - Book - 24 pages + grey covers, side stapled, issued by the Australian Commonwealth Engineering Standards Association, Tentative Australian Standard - "Totally Enclosed air-break Circuit Breakers for Voltages not exceeding 660 Volts" - C27 - 1926, September 1926. .5 - Book - 24 pages + grey covers, side stapled, issued by the Australian Commonwealth Engineering Standards Association, Tentative Australian Standard - "Totally Enclosed air-break Switches for Voltages not exceeding 660 Volts" - C28 - 1926, December 1926. .6 - Book - 24 pages + grey covers, side stapled, issued by the Australian Commonwealth Engineering Standards Association, Tentative Australian Standard "Metallic Resistance Materials for Electrical Purposes" - C29-1926, November 1926. .7 - Book - 28 pages + grey covers, side stapled, issued by the Australian Commonwealth Engineering Standards Association, Tentative Australian Standard - "Face Plate controllers and resistances for use therewith Electric Motors (DC and AC Slip ring)" - C31-1926 - December 1926. .8 - Book - 28 pages + grey covers, side stapled, issued by the Australian Commonwealth Engineering Standards Association, Australian Standard "Contactor Controllers and Resistances for use therewith Electric Motors (DC and AC Slip ring)" - C32-1926 - December 1926. .9 Book - 36 pages + grey covers, side stapled, issued by the Australian Commonwealth Engineering Standards Association, Tentative Australian Standard - "Electrical Performance of Industrial Electric Motors and Generators with class A insulation" - C34-1927, October 1927 with a green label dated September 1932 advised that the tentative standard has been endorsed as a Standard with amendment. .10 - Book - 56 pages + grey covers, side stapled, issued by the Australian Commonwealth Engineering Standards Association, Tentative Australian Standard - "Electrical Performance of Large Electric Generators and Motors - Rating permitting overloads" - C35-1927, April 1927 with a green label dated September 1932 advised that the tentative standard has been endorsed as a Standard with amendment. On top right hand corner has the date stamp of the "The Electric Supply Co. of Victoria Ltd Ballarat" trams, tramways, power station, standards, materials, electrical systems -
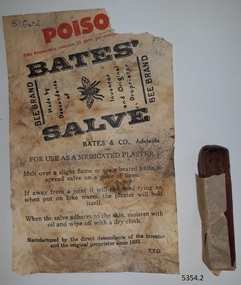 Flagstaff Hill Maritime Museum and Village
Article - Ointment, Bates & Co. (William Usher), 1851 - mid-1900s
Bates' Salve has been used as a home remedy for the treatment of boils, skin infections, splinters, pimples and insect bites for decades, from the mid-1800s to the mid-1900s. It is a drawing application for bringing out foreign bodies and pusses from a wound. There are still many families who remember using it and others who have been using it and are down to their last ‘inch’. One comment from a reader from Queensland tells how his Dad was a sleeper cutter in the 1950s and on school holidays his brother and he used to help their Dad. When doing this task after a wet season they would be confronted with spear grass about a metre high. Sometimes the spears would enter their skin, and when the spears were wet they would screw like a corkscrew into their flesh. If they left them for too long it was impossible to dig them out with a needle. That's when the Bates Salve was put into action to draw the spearhead out. "It worked wonders. It was a marvellous invention." Many people say that they would love to be able to purchase more of it today and hope that someone will produce a ‘safe’ version of it. There are several versions of a recipe for the salve available online. It appears that the salve is named after Daisy Bates, wife of the Bates’ Salve proprietor, William Usher. William’s son Victor continued making Bates’ Salve well into the mid-1900s, with the business being carried on by Victor’s only son, Alan. There are still descendants in the family home in Norwood, Adelaide. William’s great-grandchild has stated that, despite being subject to the salve during childhood, there have been no noticeable ill effects. A small notice in the Adelaide Advertiser in 1915 made a suggestion “It is said that Bates’ Salve is the popular line with OUR BOYS in Gallipoli. They recently sent to the Adelaide Red Cross for a supply, so it would be a good line to put in soldiers’ Christmas Billies.“ Over 700 ‘Christmas Billies’ were sent from generous Warrnambool citizens to our soldiers in the trenches in Gallipoli. The average cost of filling a billy with gifts was Ten Shillings, calculated at about Fifty-four Dollars in 2021. The contents included Christmas puddings and tobacco. The huge project was coordinated by a local Committee and involved generous businesses and hundreds of kind-hearted community members, with recognition sown by naming many of those involved in an article in the Warrnambool Standard. The project’s idea was initiated by Australia’s Department of Defence and all states were involved in supporting the soldiers in this way. Mr Bates (Theopholis) of Hull, England, was the original owner of the Bates’ Salve recipe. When he died he left his business to William Usher, his son-in-law. William arrived in South Australia in 1851 after he had sold his recipe to an English firm, giving them the rights to make and sell it all over the world, except in Australia. Bates then became the registered proprietor of Bates’ Salve for the Commonwealth and still had a large market for his product. William Usher made the salve at his Norwood home, in a wood-fired copper in the garden within a three-sided enclosure. The ointment was then taken to a room in the house where it was divided, labelled and packaged. It was then sent to Faulding’s Wholesale Chemist for distribution. William and his wife May (or Mary) had three children; Jack, Victor and Ivy. When May died, William married Mary Williams (May’s maid, from Tasmania, twenty years younger than William) and had seven more children. The treatment’s packaging labels it as a POISON. It seems that its active ingredient was lead oxide (22 per cent), which is no longer considered unsafe. A member of the public mentioned that in 2016 they found some Bates’ Salve in an old family medicine chest. Its label stated that the product “contains a minimum of 25.8 per cent of red lead oxide”. That particular sample was made at 470 Wallon Road, West Molesey, Surrey, England. Some people would love to be able to use the product still and even take the risk of poisoning. Instructions for its use are included on the wrapper. Here is a transcription - "Bates' Salve. Bee Brand. POISON. This Preparation contains 22 parts per centum [lead oxide]… Made by Descendants of the Inventor and Original Proprietor. For use as a medicated plaster. Melt over a slight flame or use a heated knife to spread the salve on a piece of linen. If away from a joint it will not need tying as, when put on lukewarm, the plaster will hold itself. When the salve adheres to the skin moisten it with oil and wipe it off with a dry cloth. Manufactured by the direct descendants of the inventor and the original proprietor since 1833."This package of Bates' Salve has been used as a home remedy since the mod-1800s and even up to now in 2019 by those who consider themselves lucky to still have some at home. It was promoted as a 'cure all' treatment and kept handy for use at home and away. It represents our early industry and health management when medical treatment was often difficult to access. The product is the part of many childhood memories of those alive today.Bates’ Salve ointment; oblong stick of firm, brown waxy substance wrapped in waxed paper, with an outer printed wrapper. Text on wrapper warns that it is POISON and includes instructions for use as a medicated plaster, to be heated and spread onto linen then applied to the injury. Made by Bates & Co., Adelaide. The wrapper shows an emblem of a bee. The formula has been used since 1833.Text on wrapper includes "POISO[N]", "BATES' SALVE", "BEE BRAND", "BATES & CO., ADELAIDE". "This Preparation contains 22 parts per centum [lead oxide]" There is an emblem of a bee with wings outstretched.flagstaff hill, warrnambool, shipwrecked-coast, flagstaff-hill, flagstaff-hill-maritime-museum, maritime-museum, shipwreck-coast, flagstaff-hill-maritime-village, bates’ salve, bates’ salve medicated plaster, bates and co adelaide, bee brand, medicated plaster, medical treatment, remedy, drawing treatment for infection, medicine cabinet, home remedy, pharmacy treatment, mid 1800s – mid 1900s remedy, topical application, treatment for boils, bites, splinters and infections, poison, preparation for treatment, ointment -
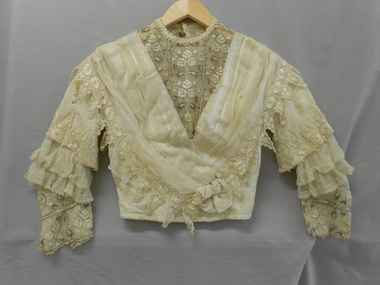 Bendigo Historical Society Inc.
Clothing - HELEN MUSK COLLECTION: WEDDING BODICE AND SKIRT
Ivory coloured waist length silk wedding bodice with front opening. Silk fabric has alternating striped pattern of chequerboard pattern, running stitch pattern and diagonal woven pattern. The bodice is made of two layers of the silk fabric with cotton fabric lining. The front inner layer has two darts from the waistline. The back inner layer has a centre seam and three darts from the waist on either side. The outer layer on both front and back has three knife pleats falling from the shoulders creating a gathered effect. These side panels of pleated fabric create a deep V neckline by crossing over 5cm above the waist. The V shape neckline is filled with an insert of cream and dark green lace with a floral pattern. The lace insert extends to the throat to form a high round neckline. The neckline is edged with cream coloured woven cotton braid. The side edges of the outer layers are trimmed with cream lace with a floral pattern and 5cm zig zag peaked edges that extends from centre waist at the front, over the shoulders and to the crossover section at centre back where there is a decorative silk fabric flower stitched at the crossover point just above the waist. The front opening is fastened with fourteen hooks and eyes plus another hook and eye offset 5 cm above the waist at the crossover point. Set in long sleeves are in two sections. An inner layer of silk fabric widens to the elbow where two five cm frills of gathered tulle are attached. Each frill is edged with a row of silk stitching. Attached below the frills are two 7 cm strips of lace stitched together to form the lower part of the sleeve. The edge of the lace forms the hem at the wrist. Each sleeve has a 5 cm hemmed V shaped split from the hem at the wrist. The outer layer of the sleeve is bell shaped falling from the shoulder to the elbow. This section of the sleeve is edged with cream lace with a floral pattern and 5cm zig zag peaked edges that are stitched to the fabric of the sleeve. Ivory coloured full-length wedding skirt with train. The skirt is made in two layers. The under layer is made from cotton from the waist with a wide border of silk fabric - 18 cm wide at centre front, widening to 37 cm at the side seams. The back of this skirt extends to a train and the border widens to 48 cm. The border section is lined with cotton fabric. At the centre back, the border has two godet inserts to create fullness in the train. The outer layer of the skirt is of ivory silk fabric with alternating vertical stripes of a chequerboard pattern, a running stitch pattern and a diagonal woven pattern. The lower edge of the skirt is edged with an 18 cm border of lace patterned with embroidered circles. The edge of the lace forms a zig zag pattern of elongated V shaped peaks (7 cm). The front of the skirt dips to a V shape at centre front with the point of the V reaching the hemline. The back of the skirt dips below the front hemline in a U shape over the train. The waist band is made of cotton tape. The centre front of the waistband has an embroidered pattern in silk thread. The centre back opening is fastened with seven metal hooks with six cotton loops plus one metal eye on the waistband. There are two cotton tape hanging loops on either side of the inner waistband. Hand and machine stitched.costume, female ceremonial, wedding bodice -
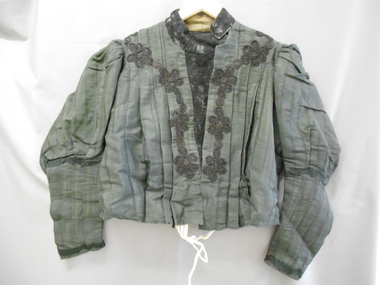 Bendigo Historical Society Inc.
Clothing - ANDREW - MONSANT COLLECTION: LADIES DRESS - BODICE AND SKIRT, 1909
BHS CollectionWaist length dark green cotton bodice. Fabric has alternating stripes of pulled thread pattern and wider stripes of small dot pattern. Front opening with deep V to waist with lined lace insert extending from throat to waist. LHS of bodice fastened to lace insert with five press studs. Stand up collar of lined black lace (%cm) fastened with two hook and eyes. The bodice is made from five pieces. The two front sections have three knife pleats facing out and falling from the shoulder. The pleats are stitched down for twenty cms from the shoulders. On either side of the front opening is decorative embroidered black lace that extends across the shoulders to the back of the collar. There are two side panels from under the arm. The back section has three box pleats falling from the collars and tapering to the waist. The hem of the bodice is fastened with black cotton tape. Leg of mutton sleeves are trimmed with black embroidered brais at elbow and wrist. Lower sleeves have pintucks from elbow to wrist. The sleeves are lined with black cotton fabric. The back of the bodice is lined with black cotton fabric almost to the hem. A three cm piece of white and blue cotton tape is attached across the lower back with cotton ties at either end. The underarm panels are lined with brown cotton fabric and green satin inserted sections. The front has a separate lining with front opening and shaped with darts. Fastened with six buttons and buttonholes. Two shoulder pads on each side- one white piece under the shoulder and a green satin piece under the gathered section of each sleeve. Dark green full length skirt. Cotton fabric with alternating stripes of pulled thread pattern and wider stripe of small dot pattern. Skirt is made of three sections. Centre front panel widens slightly to hemline. Side panels continue around to join at centre back. Darts at both hips to shape sides. Panels widen to hemline. Inverted pleats at either side of back opening create fullness. Back opening(30cm) has insert of black satin joined to LHS of opening to enlarge the opening. Insert attached to waist band with two press studs. Two other press studs attach skirt to RHS of insert. Brown cotton waistband hand stitched to skirt. Ties attached to waistband at back opening- one cotton tape, one satin ribbon. Front centre panel has a piece of black satin stitched as lining from eighteen cm below waist (57cm deep). Stitched across and attached to side seams. Lower edge trimmed with black lace. Second piece of satin lining stitched to centre seam and stitched around the hip to partway across back.(Looks like a nylon petticoat cut in two pieces and stitched inside skirt as a lining). Hemline has fifteen cm piece of cotton lining attached and lower edge of hem has fringed cotton binding attached.. Side seams of front panel have decorative trim of embroidered braid extending seventy-six cms from waist. Braid then turned ninety degrees and continued in a horizontal zig zag line around to centre back seam (both sides) twenty cms above hem. Hand and machine stitched.costume, female, ladies dress- bodice. -
 Ballarat Heritage Services
Photograph - Photograph - Colour, Sunnyside Mill Bridge over the Yarrowee, Hill Street, Ballarat, 2016, 17/09/2016
"A joint meeting of city and town ratepayers, convened by Messrs Francis Jago and Henry Johns, interested in the formation of a cart bridge in Hill street, over the Yarrowee Creek, was held on Saturday evening, in the Societies Hall, corner of Skipton and South streets, with the view of taking united action in the matter. Mr Morris was voted to the chair, : and about 60 persons were present. The chairman stated that the object of the meeting was that united influence should be brought to bear upon the City and Town Councils, so that a cartbridge should be erected. He said that Mount Pleasant would no doubt be thickly populated in a few years, and the bridge would prove a great boon to the inhabitants of the locality. By means of a cart bridge drays, would be enabled to save on their journeys to and fro between the mount and the batteries, at least a mile and a half each time. He hoped that the councillors for the south ward would assist them in this matter. Mr Jago, as one of the conveners of the meeting, said that united action on the part of both eastern and western ratepayers was requisite, so as to exert a strong pressure upon the City and Town Councils, in order that the work should be carried but. Mr Grainger moved the first resolution as follows;—“ That the construction of a cart bridge over the Yarrowee Creek at Sunnyside, to facilitate communication between the residents of the city and town, is urgently necessary, and that in the interests of both municipalities the two councils be asked to at once jointly carry out the work. In doing so he said that the necessity of a cart-bridge for the residents of Mount Pleasant would be apparent when the number of batteries, tanneries, and also the Woollen Mill, in the district were considered. The place was of growing import ance, and ready communication should at once be established. Another reason was that an immense saving in time would be effected. It was quite a common occurrence to see one, two, or three drays stuck in the bed of the creek which had gone that way to make a short cut. Now, what with the horses floundering about and breaking their harness, it seemed a wonder to him that life had not been destroyed before now, just through the want of a cartbridge. Mr Johns seconded the resolution. Mr Robert Calvert supported the resolution, and said that it was disgraceful action on the part of the representatives of the south ward that the work had not been executed long ago. They should come together like men and demand that the work should be done, and if not done they should not pay rates until it was. (A voice—“But they’ll make us.” Laughter.) The wooden footbridge across the creek was “only a wooden fabric, not fit for a Christian to walk across, and steps should be taken to remedy this also. Mr Blight, a resident of Mount Pleasant, said that, in common with others, he had been opposed to the erection of the bridge two years ago, but his views had since been altered. Cr. Morrison, who was present, said that the fault of the cartbridge not being erected over the Yarrowee at Hill street lay not with the City Council, but with their neighbors, who had always been opposed to its erection there. In 1874 a motion was carried at a meeting of ‘the City Council" by which the sum of £5OO had been voted to carry but the work. As the bridges over the Yarrowee were joint undertakings of the city and town, they had, by the provisions of an act of Parliament, called upon the Town Council to assist them in the erection of the bridge. In consequence, a conference of the two corporate bodies had taken place, when a motion was moved by Cr Howard, the representative of the south ward, and seconded by Cr Turpie, of Ballarat East—“ That the bridge should be erected at Hill street.” The motion was rejected, principally through the eastern representatives, who wanted the bridge lower down. Since then the two councils had often met to consider, the question of bridges over the Yarrowee Creek, but nothing had been done at the meetings, as the Eastern Council wanted the bridge in one place and the City Council in another. He had himself, when first elected to the council, given notice of motion affirming the desirability of a bridge, at the place now fixed upon. The Woollen Company was growing in importance, and a direct, road to its works would greatly advance its interests. For the working, expenses of each ward £400 was annually, appropriated; and this amount would not be sufficient carry out the work. They would have to obtain a special grant of about £900, as Hill street would require a culvert to be erected therein, as now it was virtually an open drain which carried the drainage of the western plateau to the Yarrowee. He advised that strong pressure should be exerted, specially upon the Eastern Council, and then the work might be carried out. He thought that if the foot bridge was repaired, and large stones thrown into the creek, it would do until the bridge could be erected. The chairman then put the resolution, and it was unanimously carried. Mr Hamilton moved the second resolution— “That Messrs Fern, Greenwood, Peirce, and Jago be deputed by the meeting to wait upon the City and Town Councils and present the first resolution; also that petitions in its favor be signed by all ratepayers interested.” Mr Haigh seconded the resolution, which was carried. Votes of thanks to Cr Morrison for his attendance, and to the chairman for presiding, were passed, and the proceedings terminated." (Ballarat Star, 9 August 1881, page 3) "WOOLLEN MILL BRIDGE YARROWEE IMPROVEMENTS Though brief the official ceremony of opening the bridge across the Yarrowee Creek, near the Sunnyside Woollen Mills, was of an interesting character. It took place at noon yesterday in the presence of the Mayors and councillors of the City and Town. Hon. F. Hagel thorn (Minister of Agriculture).Hon Brawn. M.L.C., Lt-Col Morton (Acting City Clerk). Mr J. Gent (Town Clerk of Ballarat East), Mr A. Farrer (City Engineer), Lt. L. Finch (who is about to leave for the Front, and who assisted Messrs A. Farrer and G. Maughan in carrying out the project, Mr W. Hurdsfield (Clerk of Works) and others. An apology was received from Mr J. McClelland, contractor for the work. Mayor Hill expressed pleasure in Introducing Mr Hagelthorn, who had at great personal sacrifice and inconvenience come from Melbourne to perform the opening ceremony of that beautiful bridge, which was of great improvements that had been effected.When Mr Hagelthorn was Minister of Pubic works he visited Ballarat specially to see the condition of the creek, which at that time was in a disgusting state from a sanitary standpoint. After viewing the position, and realising the justice of the claim. Mr Hagelthorn made strong representations to the Government of which the was a member with the result that it voted £17,000 for the work. That action had been the means of turning a plague spot into a thing of beauty. They therefore owed a deep debt of gratitude to Mr Hagelthorn and the Government of which he was a member, and they were particular grateful to Mr Hagelthorn for coming to Ballarat to perform the open ceremony. Mayor Levy said he could bear testimony to the good work Mr Hagelthorn had always done for Ballarat. In him Ballarat and district always had a good friend. He thought Mr Hagelthorn would feel amply gratified at seeing the good work that had been done. It would serve as some reward for the expenditure, on behalf of the residents of Bal larat, of the amount of money made available through Mr Hagelthorn's instrumentality for the two municipalities. Otherwise the City and Town councils would not have been able to carry out so necessary and so beneficial a work. There was a great amount of work yet to be done, and when the financial market became low stringent Mr Hagelthorn would no doubt be pleased to take the necessary steps to have money provided for further works which could not be undertaken at the present time. The adjacent woollen mill was a standing monument to what was being done in Ballarat, and what ever the City and Town Councils or the Government could do to encourage such manufacturing enterprise should be done, and he was glad to be able to say that was being done as far as finances would permit. He concluded by presenting Mr Hagelthorn with a gold mounted pocket-knife with which to cut the ribbon stretched across the centre of the structure as a bar to traffic. The Hon. F. Hagelthorn, who was greeted with applause said before him was a good work well done in the interests of the public. Real prosperity could only be achieved by a movement carried out by the people to increase natural productiveness. Most of them had been made aware, on account of the war par tiularly, that the people who were best equipped, the industries that were best organised, and the Governments that were most intelligently controlled would get the most of this world's goods and some of its luxuries that Would be denied other people less efficient. Any thing the Government could do to promote industry and to increase the reward of those engaged in it, both employer and employee, would be done. Most Governments would do but little in that regard. ... " (Ballarat Courier, 13 September 1916, page 4)Bluestone and iron bridge over the Yarrowee River at Hill Street, Ballarat.sunnyside mill, sunnyside woollen mill, ballarat woollen mill, bridge, yarrowee creek, francis jago, mount pleasant, yarrowee river, robert calvert -
 Flagstaff Hill Maritime Museum and Village
Domestic object - Bowl, Late 19th or early 20th Century
The Process of Making Pottery Decorating, Firing, Glazing, Making, Technical There is a rhythm and flow to clay. It can’t be done all at once! Even the making process! It can take weeks to get everything done, especially if you can only work on your pottery once a week! Even though we have three hour classes, it’s often just not enough time! Here is an overview of some of the processes so you have a bit more grasp on some of the technical stuff! Step One – Design There are SO many ideas out there for making stuff in clay! From delicate porcelain jewellery, through to heavy sculptural work and everything in between. Deciding your direction is sometimes not that easy – when you first start, try everything, you will naturally gravitate to the style that you enjoy! The options and variations are endless and can get a wee bit overwhelming too! Check in with me before you start to ensure your ideas will work, what order you might do things, how you could achieve the look you are seeking and any other technical data required! Step Two – Making Clay is thixotropic. This means that as you work with it, the clay first gets sloppier and wetter, before is begins to dry in the atmosphere. For most things, you simply can’t do all parts of the project at once. An example of work order might look like: Get last weeks work out from the shelves Prepare clay for today’s work – roll your clay, prepare balls for throwing, make the first stage of a pinch pot) Clean up last week’s work and put it on the shelf for bisque firing Check that you have any glazing to do – and do enough of it that you will have time to finish your main project Do the next step of your next project – there might be a further step that can’t be complete immediately, in that case, wrap your work well and put onto the shelves. Letting your work rest for a while can really help keep your work clean and professional looking. Many things require bagging under plastic to keep it ready for work the next week – put your name on the outside of the bag so you can find your work easily. We have stickers and markers. Consider how you want to decorate your work – coloured slip can be applied at a fairly wet stage (remembering that it will make your work even wetter!). Trying to apply slip to dry clay won’t work! If you want to do sgraffito – you will need to keep the work leather hard (a state of dryness where you can still work the clay with a little effort and a little water and care). Step Three – Drying Most of the time your work can go into the rack uncovered to let it dry out for the following week. If you want to continue forming or shaping you will need to double bag your work – put your work on a suitable sized bat and put the bat in a bag so the base of the bag is under the bat, then put another bag over the top of the work and tuck the top of the bag under the bat. If you want to trim (or turn) your thrown work the following week, it should also be double bagged. If your work is large, delicate, or of uneven thicknesses, you should lightly cover your work for drying. When considering the drying process, bare in mind the weather, humidity and wind! The hotter and dryer, the faster things dry and work can dry unevenly in the shelves – this can lead to cracking – another time to lightly cover your work for drying. Step Four – Trimming and Cleaning Up Your work is dry! It is called greenware now and it is at it’s most fragile! Handle everything with two hands. I often refer to soft hands – keep everything gentle and with your fingers spread as much as possible. Try to not pick up things like plates too much, and always with both hands! Before your work can be bisque fired it should be “cleaned up”. You work won’t go into the kiln if it has sharp edges – when glazed, sharp edges turn into razor blades! Use a piece of fly wire to rub the work all over – this will scratch a little so be light handed. Use a knife or metal kidney to scrape any areas that require a bit more dynamic treatment than the fly wire offers! Finally, a very light wipe over with a slightly damp sponge can help soften and soothe all of your edges and dags! Trimming thrown work: If you are planning to trim (or turn) your thrown work (and you should be), make sure you bag it well – your work should be leather hard to almost dry for easiest trimming. Use this step to finish the work completely – use a metal kidney to polish the surface, or a slightly damp sponge to give a freshly thrown look. Wipe the sponge around the rim after trimming, and check the inside of the pot for dags! Trimming slip cast work: Usually I will trim the rims of your work on the wheel the following day to make that stage easier, however you will still need to check your work for lumps and bumps. Last but not least – check that your name is still clearly on the bottom of your work. Step Five – Bisque Firing When the work is completely dry it can go into the bisque kiln. The bisque kiln is fired to 1000°C. This process burns off the water in the clay as well as some of the chemically bound water. The structure of the clay is not altered that much at this temperature. Inside the bisque kiln, the work is stacked a little, small bowl inside a larger bowl and onto a heavy plate. Smaller items like decorations or drink coasters might get stacked several high. Consideration is paid to the weight of the stack and shape of the work. A bisque kiln can fire about one and a half times the amount of work that the glaze kiln can fire. The firing takes about 10 hours to complete the cycle and about two days to cool down. Once it has been emptied the work is placed in the glaze room ready for you to decorate! Step Six – Glazing Decorating your work with colour can be a lot of fun – and time consuming! There are three main options for surface treatment at this stage: Oxide Washes Underglazes Glazes Washes and underglazes do not “glaze” the work – It will still need a layer of glaze to fully seal the clay (washes don’t need glaze on surfaces not designed for food or liquid as they can gloss up a little on their own). Underglazes are stable colourants that turn out pretty much how they look in the jar. They can be mixed with each other to form other colours and can be used like water colours to paint onto your work. Mostly they should have a clear glaze on top to seal them. Oxides are a different species – the pink oxide (cobalt) wash turns out bright blue for instance. They don’t always need a glaze on top, and some glazes can change the colour of the wash! The glazes need no other “glaze” on top! Be careful of unknown glaze interactions – you can put any combination of glaze in a bowl or on a plate, but only a single glaze on the outside of any vertical surface! Glazes are a chemical reaction under heat. We don’t know the exact chemicals in the Mayco glazes we use. I can guess by the way they interact with each other, however, on the whole, you need to test every idea you have, and not run the test on a vertical surface! Simply put, glaze is a layer of glass like substance that bonds with the clay underneath. Clay is made of silica, alumina and water. Glaze is made of mostly silica. Silica has a melting point of 1700°C and we fire to 1240°C. The silica requires a “flux” to help it melt at the lower temperature. Fluxes can be all sorts of chemicals – a common one is calcium – calcium has a melting point of 2500°C, however, together they both melt at a much lower temperature! Colourants are metal oxides like cobalt (blue), chrome (green through black), copper (green, blue, even red!), manganese (black, purple and pink) iron (red brown), etc. Different chemicals in the glaze can have dramatic effects. for example, barium carbonate (which we don’t use) turns manganese bright pink! Other elements can turn manganese dioxide brown, blue, purple and reddish brown. Manganese dioxide is a flux in and of itself as well. So, glazes that get their black and purple colours, often interact with other glazes and RUN! Our mirror black is a good example – it mixes really well with many glazes because it fluxes them – causes them to melt faster. It will also bring out many beautiful colours in the glazes because it’s black colouring most definitely comes from manganese dioxide! Glaze chemistry is a whole subject on it’s own! We use commercial Mayco glazes on purpose – for their huge range of colour possibilities, stability, cool interactions, artistic freedom with the ability to easily brush the glazes on and ease of use. We currently have almost 50 glazes on hand! A major project is to test the interactions of all glazes with each other. That is 2,500 test tiles!!!! I’m going to make the wall behind the wheels the feature wall of pretty colours! Step Seven – Glaze (Gloss or sometimes called “Glost”) Firing Most of the time this is the final stage of making your creation (but not always!) The glaze kiln goes to 1240°C. This is called cone 6, or midrange. It is the low end of stoneware temperatures. Stoneware clays and glazes are typically fired at cone 8 – 10, that is 1260 – 1290°C. The energy requirement to go from 1240°C to 1280°C is almost a 30% more! Our clay is formulated to vitrify (mature, turn “glass-like”) at 1240°, as are our glazes. A glaze kiln take around 12 hours to reach temperature and two to three days to cool down. Sometimes a third firing process is required – this is for decoration that is added to work after the glaze firing. For example – adding precious metals and lustres. this firing temperature is usually around 600 – 800°C depending upon the techniques being used. There are many students interested in gold and silver trims – we will be doing this third type of firing soon! After firing your work will be in the student finished work shelves. Remember to pay for it before you head out the door! There is a small extra charge for using porcelain clay (it’s more than twice the price of regular clay), and for any third firing process! Once your work has been fired it can not turn back into clay for millennia – so don’t fire it if you don’t like it! Put it in the bucket for recycling. https://firebirdstudios.com.au/the-process-of-making-pottery/ The bowl is an example of kitchenware used in the 19th century and still in use today.Bowl white ceramic. Crack on side. Badly stained.Backstamp very faint and unable to be read.flagstaff hill, warrnambool, shipwrecked-coast, flagstaff-hill, flagstaff-hill-maritime-museum, maritime-museum, shipwreck-coast, flagstaff-hill-maritime-village, mixing bowl, food preparation, kitchen equipment, ceramic -
 Flagstaff Hill Maritime Museum and Village
Domestic object - Bowl
The Process of Making Pottery Decorating, Firing, Glazing, Making, Technical There is a rhythm and flow to clay. It can’t be done all at once! Even the making process! It can take weeks to get everything done, especially if you can only work on your pottery once a week! Even though we have three hour classes, it’s often just not enough time! Here is an overview of some of the processes so you have a bit more grasp on some of the technical stuff! Step One – Design There are SO many ideas out there for making stuff in clay! From delicate porcelain jewellery, through to heavy sculptural work and everything in between. Deciding your direction is sometimes not that easy – when you first start, try everything, you will naturally gravitate to the style that you enjoy! The options and variations are endless and can get a wee bit overwhelming too! Check in with me before you start to ensure your ideas will work, what order you might do things, how you could achieve the look you are seeking and any other technical data required! Step Two – Making Clay is thixotropic. This means that as you work with it, the clay first gets sloppier and wetter, before is begins to dry in the atmosphere. For most things, you simply can’t do all parts of the project at once. An example of work order might look like: Get last weeks work out from the shelves Prepare clay for today’s work – roll your clay, prepare balls for throwing, make the first stage of a pinch pot) Clean up last week’s work and put it on the shelf for bisque firing Check that you have any glazing to do – and do enough of it that you will have time to finish your main project Do the next step of your next project – there might be a further step that can’t be complete immediately, in that case, wrap your work well and put onto the shelves. Letting your work rest for a while can really help keep your work clean and professional looking. Many things require bagging under plastic to keep it ready for work the next week – put your name on the outside of the bag so you can find your work easily. We have stickers and markers. Consider how you want to decorate your work – coloured slip can be applied at a fairly wet stage (remembering that it will make your work even wetter!). Trying to apply slip to dry clay won’t work! If you want to do sgraffito – you will need to keep the work leather hard (a state of dryness where you can still work the clay with a little effort and a little water and care). Step Three – Drying Most of the time your work can go into the rack uncovered to let it dry out for the following week. If you want to continue forming or shaping you will need to double bag your work – put your work on a suitable sized bat and put the bat in a bag so the base of the bag is under the bat, then put another bag over the top of the work and tuck the top of the bag under the bat. If you want to trim (or turn) your thrown work the following week, it should also be double bagged. If your work is large, delicate, or of uneven thicknesses, you should lightly cover your work for drying. When considering the drying process, bare in mind the weather, humidity and wind! The hotter and dryer, the faster things dry and work can dry unevenly in the shelves – this can lead to cracking – another time to lightly cover your work for drying. Step Four – Trimming and Cleaning Up Your work is dry! It is called greenware now and it is at it’s most fragile! Handle everything with two hands. I often refer to soft hands – keep everything gentle and with your fingers spread as much as possible. Try to not pick up things like plates too much, and always with both hands! Before your work can be bisque fired it should be “cleaned up”. You work won’t go into the kiln if it has sharp edges – when glazed, sharp edges turn into razor blades! Use a piece of fly wire to rub the work all over – this will scratch a little so be light handed. Use a knife or metal kidney to scrape any areas that require a bit more dynamic treatment than the fly wire offers! Finally, a very light wipe over with a slightly damp sponge can help soften and soothe all of your edges and dags! Trimming thrown work: If you are planning to trim (or turn) your thrown work (and you should be), make sure you bag it well – your work should be leather hard to almost dry for easiest trimming. Use this step to finish the work completely – use a metal kidney to polish the surface, or a slightly damp sponge to give a freshly thrown look. Wipe the sponge around the rim after trimming, and check the inside of the pot for dags! Trimming slip cast work: Usually I will trim the rims of your work on the wheel the following day to make that stage easier, however you will still need to check your work for lumps and bumps. Last but not least – check that your name is still clearly on the bottom of your work. Step Five – Bisque Firing When the work is completely dry it can go into the bisque kiln. The bisque kiln is fired to 1000°C. This process burns off the water in the clay as well as some of the chemically bound water. The structure of the clay is not altered that much at this temperature. Inside the bisque kiln, the work is stacked a little, small bowl inside a larger bowl and onto a heavy plate. Smaller items like decorations or drink coasters might get stacked several high. Consideration is paid to the weight of the stack and shape of the work. A bisque kiln can fire about one and a half times the amount of work that the glaze kiln can fire. The firing takes about 10 hours to complete the cycle and about two days to cool down. Once it has been emptied the work is placed in the glaze room ready for you to decorate! Step Six – Glazing Decorating your work with colour can be a lot of fun – and time consuming! There are three main options for surface treatment at this stage: Oxide Washes Underglazes Glazes Washes and underglazes do not “glaze” the work – It will still need a layer of glaze to fully seal the clay (washes don’t need glaze on surfaces not designed for food or liquid as they can gloss up a little on their own). Underglazes are stable colourants that turn out pretty much how they look in the jar. They can be mixed with each other to form other colours and can be used like water colours to paint onto your work. Mostly they should have a clear glaze on top to seal them. Oxides are a different species – the pink oxide (cobalt) wash turns out bright blue for instance. They don’t always need a glaze on top, and some glazes can change the colour of the wash! The glazes need no other “glaze” on top! Be careful of unknown glaze interactions – you can put any combination of glaze in a bowl or on a plate, but only a single glaze on the outside of any vertical surface! Glazes are a chemical reaction under heat. We don’t know the exact chemicals in the Mayco glazes we use. I can guess by the way they interact with each other, however, on the whole, you need to test every idea you have, and not run the test on a vertical surface! Simply put, glaze is a layer of glass like substance that bonds with the clay underneath. Clay is made of silica, alumina and water. Glaze is made of mostly silica. Silica has a melting point of 1700°C and we fire to 1240°C. The silica requires a “flux” to help it melt at the lower temperature. Fluxes can be all sorts of chemicals – a common one is calcium – calcium has a melting point of 2500°C, however, together they both melt at a much lower temperature! Colourants are metal oxides like cobalt (blue), chrome (green through black), copper (green, blue, even red!), manganese (black, purple and pink) iron (red brown), etc. Different chemicals in the glaze can have dramatic effects. for example, barium carbonate (which we don’t use) turns manganese bright pink! Other elements can turn manganese dioxide brown, blue, purple and reddish brown. Manganese dioxide is a flux in and of itself as well. So, glazes that get their black and purple colours, often interact with other glazes and RUN! Our mirror black is a good example – it mixes really well with many glazes because it fluxes them – causes them to melt faster. It will also bring out many beautiful colours in the glazes because it’s black colouring most definitely comes from manganese dioxide! Glaze chemistry is a whole subject on it’s own! We use commercial Mayco glazes on purpose – for their huge range of colour possibilities, stability, cool interactions, artistic freedom with the ability to easily brush the glazes on and ease of use. We currently have almost 50 glazes on hand! A major project is to test the interactions of all glazes with each other. That is 2,500 test tiles!!!! I’m going to make the wall behind the wheels the feature wall of pretty colours! Step Seven – Glaze (Gloss or sometimes called “Glost”) Firing Most of the time this is the final stage of making your creation (but not always!) The glaze kiln goes to 1240°C. This is called cone 6, or midrange. It is the low end of stoneware temperatures. Stoneware clays and glazes are typically fired at cone 8 – 10, that is 1260 – 1290°C. The energy requirement to go from 1240°C to 1280°C is almost a 30% more! Our clay is formulated to vitrify (mature, turn “glass-like”) at 1240°, as are our glazes. A glaze kiln take around 12 hours to reach temperature and two to three days to cool down. Sometimes a third firing process is required – this is for decoration that is added to work after the glaze firing. For example – adding precious metals and lustres. this firing temperature is usually around 600 – 800°C depending upon the techniques being used. There are many students interested in gold and silver trims – we will be doing this third type of firing soon! After firing your work will be in the student finished work shelves. Remember to pay for it before you head out the door! There is a small extra charge for using porcelain clay (it’s more than twice the price of regular clay), and for any third firing process! Once your work has been fired it can not turn back into clay for millennia – so don’t fire it if you don’t like it! Put it in the bucket for recycling. https://firebirdstudios.com.au/the-process-of-making-pottery/ This bowl is an example of kitchenware used in the 19th century and still in use today.Bowl white ceramic plain that has two sets of edging around lip. Inside bowl has plaster designed to look like cooking mixture.flagstaff hill, warrnambool, shipwrecked-coast, flagstaff-hill, flagstaff-hill-maritime-museum, maritime-museum, shipwreck-coast, flagstaff-hill-maritime-village, kitchen equipment, ceramic