Showing 3368 items
matching 5 photos
-
 Bendigo Military Museum
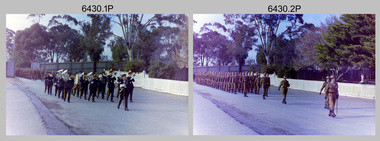
Photograph - Army Headquarters (AHQ) Survey Regiment Freedom of Entry Parade, Bendigo CBD, 1970
... to City of Bendigo. .5) to .6) - Photo, colour, 1970. AHQ Survey...) to .2) - Photo, colour, 1970. AHQ Survey Regiment marches ...The Freedom of Entry to the City was an honour conferred by the Bendigo City Council to the AHQ Survey Regiment on the 20th of April 1970. The unit was granted for the first time the privilege of marching into the city with swords drawn, bayonets fixed and drums beating. The honour is usually bestowed upon local regiments, in recognition of their dedicated service, and it is common for military units to periodically exercise their freedom by arranging a parade through the city. The Freedom of Entry Parade occurred on the 14th of June 1970 led by the Regiment’s CO – LTCOL Bill Sprenger MID, MBE; the unit marched up View St in the CBD to the Queen Elizabeth II Oval. The ceremonial parade followed with a march past the guests of honour, Mayor of Bendigo Councillor Clark Jeffrey and military dignitaries. The parade concluded after formal inspections of the troops. A ceremonial scroll was presented to the Bendigo City Council to the AHQ Survey Regiment citing the occasion and was proudly displayed in the entry foyer to Fortuna Villa up to October 2008. The Regiment continued to exercise its Freedom of Entry with anniversary parades in 1977, 1980, 1985, 1990 and 1995. Refer to item 6020.8P for another set of photos of this event scanned from photographic prints.This set of 39 colour photographs were taken on the occasion of the Army Headquarters (AHQ) Survey Regiment’s Freedom of Entry parade to the City of Bendigo on the 14th of June 1970. The photographs are on 35mm negative film. They are part of the Army Survey Regiment’s Collection. The photographic negatives were scanned at 96 dpi. .1) to .2) - Photo, colour, 1970. AHQ Survey Regiment marches to Queen Elizabeth Oval entry, led by CO LTCOL Lionel Sprenger MBE, MID, unidentified 2IC and RSM WO1 John Hogan. .3) to .4) - Photo, colour, 1970. AHQ Survey Regiment at entry to Queen Elizabeth Oval, exercising its right of entry to City of Bendigo. .5) to .6) - Photo, colour, 1970. AHQ Survey Regiment marches down View St in the City of Bendigo. .7) to .11) - Photo, colour, 1970. AHQ Survey Regiment marches up View St in the City of Bendigo. .12) to .13) - Photo, colour, 1970. AHQ Survey Regiment enters Queen Elizabeth Oval, led by CO LTCOL Lionel Sprenger MBE, MID, unidentified 2IC and RSM WO1 John Hogan. .14) - Photo, colour, 1970. One of AHQ Survey Regiment’s squadrons enters Queen Elizabeth Oval. .15) to .19) - Photo, colour, 1970. AHQ Survey Regiment forms up on Queen Elizabeth Oval awaiting arrival of dignitaries. .20) - Photo, colour, 1970. AHQ Survey Regiment inspected by dignitaries. L to R: Director of the Survey Corps COL Frank Buckland OBE, MID; Colonel Commandant BRIG Don Macdonald AM, MID; unidentified General, CO LTCOL Lionel Sprenger MBE, MID, Mayor of Bendigo Councillor Clark Jeffrey, unidentified personnel. .21) to .23) - Photo, colour, 1970. AHQ Survey Regiment inspected by dignitaries. Director of the Survey Corps COL Frank Buckland OBE, MID; Colonel Commandant BRIG Don Macdonald AM, MID; unidentified General, CO LTCOL Lionel Sprenger MBE, MID, Mayor of Bendigo Councillor Clark Jeffrey. WRAAC personnel centre rank - PTE Desi Asaris, rear rank L to R: unidentified, PTE Pat Lumsden, PTE Heather (Turnbull) Slater, SGT Irene (Rankins) Saunders. .24) to .27) - Photo, colour, 1970. Band inspected by dignitaries. Director of the Survey Corps COL Frank Buckland OBE, MID; Colonel Commandant BRIG Don Macdonald AM, MID; unidentified General, CO LTCOL Lionel Sprenger MBE, MID, Mayor of Bendigo Councillor Clark Jeffrey. .28) to .30) - Dignitaries return to dias. Director of the Survey Corps COL Frank Buckland OBE, MID; Colonel Commandant BRIG Don Macdonald AM, MID; unidentified General, CO LTCOL Lionel Sprenger MBE, MID, Mayor of Bendigo Councillor Clark Jeffrey.Director of the Survey Corps COL Frank Buckland OBE, MID; Colonel Commandant BRIG Don Macdonald AM, MID; unidentified General, CO LTCOL Lionel Sprenger MBE, MID, Mayor of Bendigo Councillor Clark Jeffrey. .31) - Photo, colour, 1970. Unidentified Padre’s Freedom of Entry parade address. .32) - Photo, colour, 1970. AHQ Survey Regiment during the unidentified Padre’s Freedom of Entry parade address. .33) to .35) - Photo, colour, 1970. AHQ Survey Regiment led by CO LTCOL Lionel Sprenger MBE, MID, unidentified 2IC and RSM WO1 John Hogan march past the dais to salute the parade dignitaries. .36) - Photo, colour, 1970. Parade dignitaries at the dais: unidentified councillor, Mayor of Bendigo Councillor Clark Jeffrey. Colonel Commandant BRIG Don Macdonald AM, MID; unidentified General. .37) to .38) - Photo, colour, 1970. AHQ Survey Regiment squadrons march past the dais to salute the parade dignitaries. .39) - Photo, colour, 1970. AHQ Survey Regiment WRAAC personnel march past the dais to salute the parade dignitaries. L to R: unidentified (x2), CPL Beryl Parkinson, unidentified (x2), PTE Robyn (Marsh) Kemsley, unidentified, WO2 Marj Knight, PTE Desi Asaris, PTE Heather (Turnbull) Slater, SGT Irene (Rankins) Saunders..1P to .3P – no annotationsroyal australian survey corps, rasvy, army survey regiment, army svy regt, fortuna, asr -
 Bendigo Military Museum
Photograph - Army Survey Regiment Freedom of Entry Parade Rehearsal, Fortuna. Bendigo, 1980
... Linane, SPR Jamie McRae, unidentified (x2). .5) - Photo, black... Linane, SPR Jamie McRae, unidentified (x2). .5) - Photo, black ...This set of 38 black and white photographs were taken at the Army Survey Regiment’s parade rehearsal held at Fortuna, Bendigo in 1980. The rehearsal was for the Freedom of Entry parade held 1-2 weeks later in 1980. The exact date for the Freedom of Entry parade is not known. The Freedom of Entry to the City of Bendigo was an honour first conferred by the Bendigo City Council to the Army Survey Regiment in 1970. The Freedom of Entry parade in 1980 was the fourth time the unit exercised its right of freedom of entry. The Regiment also exercised its Freedom of Entry with anniversary parades in 1977, 1980 and 1995. Refer to items 6020.8P, 6021.25P, 6248P, 6266, 6409.2, 6430.39P, 6490.53P and 6491.21P for more Army Survey Regiment Freedom of Entry photographs, documents and certificates. See item 6471.2P for photos of Lithographic Squadron taken on the same day of this parade rehearsal. This set of 38 black and white photographs of the Army Survey Regiment (Army Svy Regt) were taken in a rehearsal for the Freedom of Entry parade to the City of Bendigo, held 1-2 weeks later in 1980. The photographs are on 35mm negative film and were scanned at 96 dpi. They are part of the Army Survey Regiment’s Collection. .1) - Photo, black & white, 1980. WO1 John McCulloch observes the rehearsal. .2) - Photo, black & white, 1980. RSM WO1 Aub Harvey, WO1 Dave Thomson and WO1 Roger Rix observe the rehearsal. .3) - Photo, black & white, 1980. Under command of SSM WO1 Bob Mason, Air Survey Squadron marches onto the parade ground - Front rank L to R: SPR Peter Jones, SPR Barry Miller, CPL Alan Hawkins. .4) - Photo, black & white, 1980. Air Survey Squadron marches on the parade ground - L to R: SPR Peter Jones, CPL Lyall Camp, SPR Barry Miller, SPR Geoff Havelberg, unidentified, CPL Alan Hawkins, CPL Peter Treble, unidentified (x2), SGT Mick Hogan, SGT Bruce Hammond, unidentified, SPR Steve Linane, SPR Jamie McRae, unidentified (x2). .5) - Photo, black & white, 1980. Air Survey Squadron formed up – CAPT Peter Ralston on far left. .6) - Photo, black & white, 1980. Air Survey Squadron inspection – L to R: CAPT Peter Ralston, CPL Alan Hawkins, CO LTCOL Bob Skitch, SGT Mick Hogan, SGT Bruce Hammond, SPR Jamie McRae. .7) - Photo, black & white, 1980. Air Survey Squadron inspection – L to R: SPR Peter Jones, unidentified, CPL Paul Hopes, unidentified, SGT Rick van der Bom, LTCOL Bob Skitch, SPR Steve Linane, CPL Mick Minchin, unidentified, SPR Gae (Robinson) Amato, unidentified, SPR Chris ‘CPL Peter Treble, Charlie’ Brown, SPR Ginny (Turner) Rowe. .8) - Photo, black & white, 1980. Lithographic Squadron marches onto the parade ground - Front rank L to R: SPR Brian Fauth, SPR Roy Hicks, SPR Per Andersen, commanded by LT Steve Cooper. .9) - Photo, black & white, 1980. Lithographic Squadron marches onto the parade ground - L to R: SSM WO1 Ken Slater, Front rank SPR Brian Fauth, SPR Roy Hicks, SPR Per Andersen, LT Steve Cooper. .10) - Photo, black & white, 1980. Lithographic Squadron inspection - L to R: CAPT Stan Vote, LT Steve Cooper, CO LTCOL Bob Skitch, SPR Neville Carr, SPR Laurie Justin, SPR Keith Quinton. .11) - Photo, black & white, 1980. Lithographic Squadron inspection - L to R: unidentified, LT Steve Cooper, CPL Frank Lenane, CPL Mick ‘Buddha’ Ellis, SPR Martin van de Maele, CO LTCOL Bob Skitch, unidentified (x2), SPR Garry Hudson, remainder unidentified. .12) - Photo, black & white, 1980. Lithographic Squadron inspection - L to R: LT Steve Cooper, CPL Rob Bogumil, unidentified, CO LTCOL Bob Skitch, CPL Bill Jones, CPL John ‘Flash’ Anderson, CPL Warren ‘Waldo’ Shirley, unidentified. .13) - Photo, black & white, 1980. Lithographic Squadron inspection - L to R: unidentified (x4), CO LTCOL Bob Skitch, unidentified, CPL Bill Jones, LT Steve Cooper, CPL Warren ‘Waldo’ Shirley. .14) - Photo, black & white, 1980. Lithographic Squadron performs form - right file L to R: SPR Brian Fauth, SPR Roy Hicks, SPR Per Andersen. .15) - Photo, black & white, 1980. Lithographic Squadron completes form at the halt. .16) - Photo, black & white, 1980. Lithographic Squadron marches in column of route – right file L to R: SPR Keith Quinton, SPR John Whaling, SPR Martin van de Maele, SPR John Whaling, SPR Garry Hudson, unidentified. Centre marker: CPL Warren ‘Waldo’ Shirley, remainder unidentified. .17) - Photo, black & white, 1980. Lithographic Squadron marches in column of route – right file L to R: SPR John Whaling, SPR Martin van de Maele, SPR John Whaling, SPR Garry Hudson, unidentified. Centre marker CPL Warren ‘Waldo’ Shirley, remainder unidentified. .18) - Photo, black & white, 1980. Lithographic Squadron marches in column of route – L to R: SPR Per Andersen, CPL Josh Degroot, SPR Neville Carr, SPR Laurie Justin, SPR Keith Quinton, SPR John Whaling, SPR Martin van de Maele, SPR John Whaling, SPR Garry Hudson, unidentified. .19) - Photo, black & white, 1980. Lithographic Squadron marches in column of route – L to R: SPR Per Andersen, CPL Josh Degroot, SPR Neville Carr, SPR Laurie Justin, SPR Keith Quinton, SPR Martin van de Maele, SPR John Whaling, SPR Garry Hudson, unidentified (x2), CPL Warren ‘Waldo’ Shirley, unidentified. .20) - Photo, black & white, 1980. Lithographic Squadron rehearses ‘rest on arms reverse.’ .21) - Photo, black & white, 1980. Cartographic Squadron marches onto the parade ground in column of route - L to R: SPR Cheryl Lofthouse, unidentified, SSM WO1 Gordon Lowery, unidentified, SPR Megan (McBurney) Reynolds, unidentified (x6), SPR Peter Main, CPL Stu Symonds, SPR Greg Else, SPR Rod Skidmore. .22) - Photo, black & white, 1980. Cartographic Squadron marches onto the parade ground in column of route - L to R: SPR Rod Skidmore, SPR Greg Else, CPL Phil McGuire, CPL Dennis Learmonth, CPL Brad Peppler, CPL Trevor Bottomley, SPR Gina (Coore) Neilson, SPR Carla Dell, CPL Lynn Johnson, commanded by CAPT Bob Williams. .23) - Photo, black & white, 1980. Cartographic Squadron inspection - L to R: unidentified officer, CAPT Bob Williams, SPR Greg Else, CO LTCOL Bob Skitch, CPL Phil McGuire, CPL Dennis Learmonth, CPL Brad Peppler, CPL Trevor Bottomley. .24) - Photo, black & white, 1980. Cartographic Squadron inspection - L to R: RSM WO1 Aub Harvey, unidentified officer, CAPT Bob Williams, CO LTCOL Bob Skitch. Front rank L to R: SPR Rod Skidmore, CPL Phil McGuire, CPL Dennis Learmonth, CPL Brad Peppler, CPL Trevor Bottomley, SPR Gina (Coore) Neilson, SPR Carla Dell, CPL Lynn Johnson. Centre rank L to R: CPL Terry Danger, SPR John Martin, SPR Bob Sheppard. SPR Megan (McBurney) Reynolds. .25) - Photo, black & white, 1980. Cartographic Squadron inspection - Front rank L to R: CPL Phil McGuire, CAPT Bob Williams, CPL Brad Peppler, CO LTCOL Bob Skitch, CPL Trevor Bottomley, SPR Gina (Coore) Neilson, SPR Carla Dell, CPL Lynn Johnson. .26) - Photo, black & white, 1980. Cartographic Squadron inspection - L to R: WO1 Roger Rix, RSM WO1 Aub Harvey, unidentified officer. Front rank L to R: SPR Rod Skidmore, SPR Greg Else, CPL Phil McGuire, CPL Brad Peppler, CPL Trevor Bottomley, SPR Gina (Coore) Neilson, SPR Carla Dell, CPL Lynn Johnson. Centre rank L to R: CPL Terry Danger, SPR John Martin, SPR Bob Sheppard. SPR Megan (McBurney) Reynolds. .27) - Photo, black & white, 1980. Cartographic Squadron inspection - L to R: CPL Dennis Learmonth, CPL Brad Peppler, CO LTCOL Bob Skitch, CPL Trevor Bottomley, SPR Gina (Coore) Neilson, SPR Carla Dell, CPL Lynn Johnson. .28) - Photo, black & white, 1980. Cartographic Squadron inspection - L to R: CAPT Bob Williams, unidentified, CO LTCOL Bob Skitch, SPR John Martin, SPR Bob Sheppard, SPR Megan (McBurney) Reynolds, rear rank L to R: SPR Peter Main, unidentified (x3). .29) - Photo, black & white, 1980. Cartographic Squadron rehearses ‘reverse arms’ - L to R: SPR Peter Main, CPL Stu Symonds, SPR Rod Skidmore, SPR Greg Else, remainder unidentified. .30) - Photo, black & white, 1980. Cartographic Squadron rehearses ‘rest on arms reverse.’ - Front rank L to R: SPR Rod Skidmore, SPR Greg Else, CPL Phil McGuire, CPL Dennis Learmonth, CPL Brad Peppler, CPL Trevor Bottomley. remainder unidentified. Centre rank L to R: unidentified (x2), SPR John Martin, SPR Bob Sheppard, SPR Megan (McBurney) Reynolds. Rear rank L to R: unidentified (x3), SPR Carla Dell on far right. .31) - Photo, black & white, 1980. Cartographic Squadron marches in column of route. .32) - Photo, black & white, 1980. Cartographic Squadron marches in column of route. Left file L to R: SPR Rod Skidmore, SPR Greg Else, CPL Phil McGuire, CPL Dennis Learmonth, CPL Brad Peppler, CPL Trevor Bottomley, SPR Gina (Coore) Neilson, SPR Carla Dell, CPL Lynn Johnson. Centre file L to R: unidentified (x2), SPR Dan Cirsky, SPR Bob Sheppard. Commanded by CAPT Bob Williams (foreground). .33) - Photo, black & white, 1980. Cartographic Squadron rehearses ‘order arms.’ Front rank L to R: SPR Rod Skidmore, SPR Greg Else, CPL Phil McGuire, CPL Dennis Learmonth, CPL Brad Peppler, CPL Trevor Bottomley, SPR Gina (Coore) Neilson, SPR Carla Dell, CPL Lynn Johnson. Centre rank L to R: unidentified (x2), SPR Dan Cirsky, SPR Megan (McBurney) Reynolds, SPR Ilen Isaac. Rear rank L to R: SPR Cathy Regan, unidentified, SPR Cheryl Lofthouse. .34) - Photo, black & white, 1980. Cartographic Squadron rehearses ‘right dress.’ Front rank L to R: SPR Rod Skidmore, SPR Greg Else, CPL Phil McGuire, CPL Dennis Learmonth, CPL Brad Peppler, CPL Trevor Bottomley, SPR Gina (Coore) Neilson, SPR Carla Dell, CPL Lynn Johnson. Centre rank L to R: SPR John Martin, SPR Bob Sheppard. SPR Megan (McBurney) Reynolds, SPR Ilen Isaac. Rear rank L to R: unidentified (x2), SPR Cathy Regan, unidentified, SPR Cheryl Lofthouse. Commanded by CAPT Bob Williams (far left). 35) - Photo, black & white, 1980. Air Survey Squadron section rehearses marching with reverse arms. L to R: SPR Bob Hopper, CPL Rick Downie, CPL Paul Hopes, unidentified (x2, SGT Rick van der Bom, SPR Steve Hilton, CPL Peter Treble, unidentified, SPR John Lane, remainder unidentified. .36) - Photo, black & white, 1980. Air Survey Squadron section rehearses marching with reverse arms. L to R: CPL Alan Hawkins, CPL John Smith, SPR Dave Jobe, unidentified (x2), SGT Mick Hogan, SPR Barry Miller, WO1 Dave Thomson. .37) - Photo, black & white, 1980. Cartographic Squadron sections practice drill. .38) - Photo, black & white, 1980. Air Survey Squadron rest break from drill practice. L to R: unidentified (x2), CPL Noel McNamara, SSGT Peter Warwick, SSGT Greg Buckingham (facing away), SGT Jim Beard, unidentified, SPR Sharon (Jones) Treble (foreground), unidentified, SGT Bruce Gordon, SPR Kristin (Isaac) Skidmore.There are no personnel identified. royal australian survey corps, rasvy, army survey regiment, army svy regt, fortuna, asr -
 Bendigo Military Museum
Administrative record - FOLDER AND RECORDS
... Section with black & white ID photo. .5) Enlarged photocopy of ID... with black & white ID photo. .5) Enlarged photocopy of ID photos ...For historical information refer to notes attached to Cat No 2755.4 See attached sheets for the remainder of pages.Black plastic folder, ring binding with 20 clear plastic sleeves. .1) Photocopy of cover for personnel documents for Herbert Trangmar ALLAN, MC, NX12229, N60005, Captain 2nd Garrison Battalion. A4 page size. .2) Photocopy of WWII attestation form dated 2.5.1940 for NX12229, Herbert Trangmar ALLAN. .3) Photocopy of Medical Exam Section. .4) Photocopy of Medical Exam Section with black & white ID photo. .5) Enlarged photocopy of ID photos of Herbert Trangmar ALLAN. .6) Photocopy of Mobilization attestation form dated 6.10.39 for Herbert Trangmar ALLAN. .7) Photocopy of Termination of Officer's Appointment dated 2.4.1946 for Herbert Trangmar ALLAN, OBE, NX12229. .8) Photocopy of Officers Record of Service for Herbert Trangmar ALLAN. Address at time was Wali, New Guinea .9) Photocopy of Officers Record of Suc for Herbert Trangmar ALLAN OBE MC ED NX12229. Address at time was Wali, New Guinea. First entry: 16.6.1914. Last entry: 1.11.1945. .10) Photocopy of Officers Record of Service, dated 29.8.1950. For NX12229 Herbert Trangmar ALLAN MC OBE ED. Last address Watsons Bay NSW. .11) Photocopy of Determination of Demobilization Priority for NX12229 Herbert Trangmar ALLAN. Dated 5.10.1945. .12) Photocopy of sheet showing service early WWII for Herbert Trangmar ALLAN. .13) Photocopy of sheet showing early WWII service of N60005, Herbert Trangmar ALLAN. .14) Photocopy of Officer's Record of Service sheet for Herbert Trangmar ALLAN OBE MC NX12229. First entry: 17/2/1943. Last entry: 24.8.1944. .15) Photocopy of Record of Service sheet. First entry: 28.9.1944. Last entry: 25.5.1945. .16) Photocopy of Officer's Record of Service for Herbert Trangmar ALLAN OBE MC NX12229. First entry: 1.6.1945. Last entry: 14.3.1946. .17) Photocopy of Record of Service sheet. Mentions MID in SWPA & rank changes. First entry: 21.3.1946. Last entry: 30.9.1950. .18) Photocopy of Officer's Record of Service sheet for NX12229 Herbert Trangmar ALLAN 2nd Garrison Battalion. First entry: 6.9.1944. Last entry: 7.5.1946 .19) Photocopy of Recommendation for an OBE for NX12229 Herbert Trangmar ALLAN MC Major. Tobruk period April / October 1941. .20) Photocopy of a sheet showing medals & awards for N60005 NX12229 Herbert Trangmar ALLAN OBE MC ED MID. .21) Photocopy of a letter to Deputy Commissioner - Repatriation on AIF letterhead. Re: Captain ALLAN H T 17 Battalion. .22) Photocopy of an AIF letterhead Canberra dated 1.5.1950. To Secretary HQ Repat Commission. Re: Capt ALLAN H T 17 Battalion. .23) Photocopy of a sheet showing telephone note re awards, dated 2.7.1955. Re: ALLAN H T. Address Mullaway, Woolgoolga, NSW. .24) Photocopy of ranks & dates for ALLAN H T NX12229. DOB 5.1.1895. Served in 14-18 Yes. First entry: 16.6.1914. Last entry: 29.1.1944. .25) Photocopy of ranks & dates for above. First entry: 13.2.1942. Last entry: 1.4.1945. .26) Photocopy of ranks & dates for ALLAN H T NX12229. DOB 5.1.1895. OBE MC. First entry: 23.7.1945. Last entry: 15.8.1951. .27) Photocopy of a note showing Colonel H T ALLAN, address Mullaway, Woolgoolga, NSW. Written on a note pad with British Aluminium stamped on it. .28) Typed sheet showing a brief (biography) story of the life of Herbert Trangmar ALLAN (Blue). .29) Colour top view photo on A4 paper showing a huge pair of Japanese binoculars mounted on a tripod. .30) Colour R side view photo on A4 paper of Japanese binoculars. .31) Colour rear view photo of huge Japanese binoculars. .32) Colour front view photo on A4 paper of huge Japanese binoculars mounted on a tripod. .33) Colour L side view photo of huge Japanese binoculars. .34) Colour photo of tripod with timber legs & brace to suit binoculars above. .35) Black & white photo of a manufacturers plate featuring Japanese writing & numbers. .36) Colour photo on A4 paper showing manufacturers plate on rear of support brace on the tripod head. .37) Copy of WM Collection photo number 058101 showing an Australian soldier looking into the binoculars, Finschafen New Guinea .38) Menu card. TobrukDay Dinner 2/17th Sgts Mess. Dated Wed 19.11.1941. .39) Christmas card with red ribbon in its fold. Shows a signpost Syria - Australia - & a Rising Sun, a kangaroo with smoke & fire, a laughing kookaburra on a sign post. Stamp. HQ 20 Aust Inf Bde AIF. .38) On rear: Two autographs. .39) Inside: “Best wishes for year 1942-1943 from Brig W (T) V Windeyer and staff”recorrds, certificcats, folders -
 Bendigo Military Museum
Photograph - Visit by Thailand’s Director of Education to the Army Survey Regiment, Fortuna, Bendigo, c1977-1979
... Collection. Photographs .1P to .26P are on three photo proof sheets... Collection. Photographs .1P to .26P are on three photo proof sheets ...This is a set of 28 photographs of a visit to the Army Survey Regiment, Bendigo circa 1977-1979 by LT GEN Bulrit, who was Thailand’s Director of Education. It’s evident in these photos he was taken on a tour through the production areas of the Army Survey Regiment. The escorting Australian General is unidentified. LTCOL Bob Skitch was the CO of the Army Survey Regiment from 1976 to 1980.This is a set of 28 photographs of a visit to the Army Survey Regiment, Bendigo circa 1977-1979 by LT GEN Bulrit, who was Thailand’s Director of Education. The photographs were printed on photographic paper and are part of the Army Survey Regiment’s Collection. Photographs .1P to .26P are on three photo proof sheets and were scanned at 400 dpi. Photographs .27P and .28P were scanned at 300 dpi. .1) - Photo, black and white, c1977-1979. L to R: unidentified (x3), back of CO LTCOL Bob Skitch, unidentified, LT GEN Bulrit Thai Army, back of RSM WO1 Aub Harvey, unidentified. CO LTCOL Jorge Gruszka, unidentified, D-SVY COL Alex Laing, unidentified (x3). .2) to .4) - Photo, black and white, c1977-1979. L to R: CO LTCOL Bob Skitch, LT GEN Bulrit Thai Army. .5) to .6) - Photo, black and white, c1977-1979. L to R: MAJ Peter Eddy, LTCOL Bob Skitch, LT GEN Bulrit Thai Army. .7) - Photo, black and white, c1977-1979. L to R: unidentified (x2), MAJ Peter Eddy, LT GEN Bulrit Thai Army, unidentified. .8) - Photo, black and white, c1977-1979. L to R: unidentified Australian General, unidentified (x3), LT GEN Bulrit Thai Army, MAJ Peter Eddy. .9) - Photo, black and white, c1977-1979. L to R: unidentified (x4), LT GEN Bulrit Thai Army, unidentified Australian General. .10) - Photo, black and white, c1977-1979. L to R: unidentified (x2), LT GEN Bulrit Thai Army, MAJ Peter Eddy. .11) - Photo, black and white, c1977-1979. L to R: CAPT Bob Roche, unidentified, LT GEN Bulrit Thai Army. .12) - Photo, black and white, c1977-1979. L to R: CAPT Bob Roche, unidentified (x2), LT GEN Bulrit Thai Army. .13) - Photo, black and white, c1977-1979. L to R: unidentified Australian General, CO LTCOL Bob Skitch, LT GEN Bulrit Thai Army, unidentified (x2). .14) - Photo, black and white, c1977-1979. L to R: CAPT Bob Roche, LT GEN Bulrit Thai Army, unidentified. .15) - Photo, black and white, c1977-1979. L to R: LT GEN Bulrit Thai Army, MAJ Peter Eddy. .16) - Photo, black and white, c1977-1979. L to R: MAJ Peter Eddy, LT GEN Bulrit Thai Army, unidentified Australian General, unidentified. .17) - Photo, black and white, c1977-1979. L to R: MAJ Peter Eddy, LT GEN Bulrit Thai Army, unidentified Australian General. .18) - Photo, black and white, c1977-1979. L to R: LT GEN Bulrit Thai Army, unidentified, Mr M. Frazer, unidentified, CAPT Bob Roche, unidentified Australian General, unidentified. .19) - Photo, black and white, c1977-1979. L to R: LT GEN Bulrit Thai Army, unidentified Australian General, Miss Pochana, CO LTCOL Bob Skitch. .20) - Photo, black and white, c1977-1979. L to R: LT GEN Bulrit Thai Army, MAJ Sam Schwartz EXCH-US. .21) - Photo, black and white, c1977-1979. L to R: Miss Pochana, unidentified, MAJ Sam Schwartz EXCH-US, LT GEN Bulrit Thai Army. .22) - Photo, black and white, c1977-1979. L to R: LT GEN Bulrit Thai Army, MAJ Sam Schwartz EXCH-US, unidentified Australian General, CO LTCOL Bob Skitch, unidentified. .23) - Photo, black and white, c1977-1979. L to R: LT GEN Bulrit Thai Army, MAJ Sam Schwartz EXCH-US, unidentified (x2), unidentified Australian General, CAPT Terry Edwards, unidentified. .24) - Photo, black and white, c1977-1979. L to R: LT GEN Bulrit Thai Army, MAJ Sam Schwartz EXCH-US, unidentified (x3), unidentified Australian General. .25) - Photo, black and white, c1977-1979. LT GEN Bulrit Thai Army. .26) - Photo, black and white, c1977-1979. L to R: unidentified, LT GEN Bulrit Thai Army, MAJ Sam Schwartz EXCH-US. .27) - Photo, black and white, c1977-1979. L to R: unidentified, LT GEN Bulrit Thai Army, CAPT Bob Roche, unidentified Australian General, Miss Pochana, CO LTCOL Bob Skitch, SSGT Dick Manley. .28) - Photo, black and white, c1977-1979. L to R: CO LTCOL Bob Skitch, LT GEN Bulrit Thai Army, Miss Pochana, Mr M. Frazer..1P to .27P – no annotations .28P – ‘Lt. Gen Bulrit Director of Education THAI ARMY is greeted by MISS POTCHANA a ROTARY EXCHANGE student accompanied by MR M FRAZER’royal australian survey corps, rasvy, army survey regiment, army svy regt, fortuna, asr -
 Ballarat Tramway Museum
Slide - 35mm slide/s - set of 32, Noel Simons, 25/02/1971 12:00:00 AM
... as for 1201.2, but with No. 5 descending the street. Photo taken after... photo showing surrounds 1201.17 - No. 5 en route for Quarry ...Set of 31 transparencies taken on 25/2/1972 on Kodak mounts. 1201.1 - Bendigo No. 26 in Bond St. just after leaving Long Gully en route for Quarry Hill. Has Norris Supermarket in background. Has two SEC roof ads. 1201.2 - No. 26 climbing View St. from Charing Cross en route to Eaglehawk. Has ANZ bank and AMOCO service station in background. 1201.3 - as for 1201.3, but after tram has passed photographer. Has buildings west of Mackenzie St. in photograph. 1201.4 - Tram stop and centre of the road pole with two "CARS STOP BY REQUEST" signs mounted on pole at the corner of Mackenzie St. 1201.5 - same position as for 1201.3, but with No. 5 descending the street. 1201.6 - same position as for 1201.2, but with No. 5 descending the street. Photo taken after tram has passed photographer. 1201.7 - No. 7 in Nolan St. from across the park at Lake Weeroona. 1201.8 - No. 7 entering McCrae St from Nolan St. - distant view. Note "TRAM "sign on left hand side under tree and overhead in McCrae St. from former track that once was in this street. 1201.9 - No. 7 in High St. with Cathedral in background. Tram en route to North Bendigo. Note scaffolding around Cathedral main spire area. 1201.10 - No. 7 crossing Bendigo Creek bridge in High St. near Golden Square. Has a Caltex Service station in the background. 1201.11 - No. 7 at Golden Square terminus with Sunburst Fruit Juices and a Peters Ice cream delivery vans alongside. 1201.12 - as for 1201.11 but photo taken from behind tram, with the end of the rails in the photograph. 1201.13 - No. 7 and 21 in Pall Mall at Charing Cross with No. 5 in the background. Taken some distance away from the location. 1201.14 - No. 7 at Golden Square terminus, taken a short distance from the tram terminus. Shows Milk Bar on right hand side and the hotel on the left hand side. Taken from the south side of the roadway. 1201.15 - as from 1201.14 but taken from the north side of the roadway. 1201.16 - No 5 waiting at California Gully loop. Distant photo showing surrounds 1201.17 - No. 5 en route for Quarry Hill crossing No. 26 at California Gully. 1201.18 - No. 26 at Eaglehawk terminus with Eaglehawk Town Hall and Post Office in background. 1201.19 - No. 21 arriving at Charing Cross en route to North Bendigo. Has Alexandra Fountain in the background, ANZ bank RACV building, and other buildings on the north side of Pall Mall or Nolan St. 1201.20 - No. 26 en route for Quarry Hill at Charing Cross, with crew standing by front door. Has Colonial Mutual life building, Armstrong Tyre Service (Firestone) and a sign for Cohns Drinks in the background. 1201.21 - as for 1201.20 but with No. 5 en route to Eaglehawk now in photograph. 1201.22 - No. 26 at Quarry Hill terminus. 1201.23 - No. 26 at Quarry Hill terminus, view of front portion of tram only from a gate at the Bendigo cemetery. 1201.24 - Track at the end of the Quarry Hill line showing the point blades of the former "Y" terminus and the overhead for this. 1201.25 - No. 2 at the Quarry Hill terminus, looking along the former Trackwork. 1201.26 - as for 1201.25 1201.27 - number not used. 1201.28 - Golden Square terminus from some distance from the actual terminus, showing the Warning sign "TRAM" for motorists from the south. No. 7 at the terminus. 1201.29 - No. 7 passing through the Golden Square shopping centre. Numerous cars and pedestrians. Tram en route for North Bendigo. 1201.30 - No. 7 in High St. Golden Square, en route for North Bendigo. Photo taken after tram has passed photographer. 1201.31 - No. 7 in High St. just past Wattle St. with the Cathedral in the background. Tram has two SEC roof ads good side on photo, 'Everything's fine in my all electric kitchen' and 'Electrical cooking - clean, quick, economical'. 1201.32 - No. 7 in High St. nearing Wattle St. Has Cathedral in the background. Photo taken after tram has passed photographer.Information written on in black ink and date stamped on purple ink. 1201.1 - "No. 26 in Bond St just after leaving Long Gully" 1201.2 - "No. 26 climbing View St. from Charing Cross" 1201.3 - "No. 26 ascending View St. from Charing Cross (At Mackenzie St.)" 1201.4 - "View St. & Mackenzie St." 1201.5 - "No. 5 in View St. near Mackenzie St." 1201.6 - "No. 5 in View St. nearing Charing Cross." 1201.7 - "No. 7 in Nolan St. seen from Lake Weeroona Park." 1201.8 - "No. 7 entering McRae St. from Nolan St. Note "TRAM" warning sign on left. 1201.9 - "No. 7 in High St. passing Short St." 1201.10 - "No. 7 crossing Bendigo Creek bridge in High St. near Golden Square." 1201.11 - "No. 7 at Golden Square terminus" 1201.12 - "No. 7 at Golden Square terminus" 1201.13 - "No 7, 21 and 5 at Charing Cross" 1201.14 - "No. 7 at Golden Square terminus" 1201.15 - "No. 7 at Golden Square terminus" 1201.16 - "No 5 waiting at California Gully loop." 1201.17 - "Nos. 5 and 26 crossing at California Gully loop" 1201.18 - "No. 26 at Eaglehawk terminus" 1201.19 - "No. 21 arriving at Charing Cross from Golden Square" 1201.20 - "No. 26 at Charing Cross" 1201.21 - "Nos. 5 and 26 at Charing Cross." 1201.22 - "No. 26 at Quarry Hill terminus" 1201.23 - "No. 26 at Quarry Hill terminus seen through the gates of the Bendigo Cemetery." 1201.24 - "Quarry Hill terminus showing remains for former double track layout abandoned before 1964." 1201.25 - "No. 2 at Quarry Hill terminus" 1201.26 - "No. 2 at Quarry Hill terminus" 1201.28 - "The Southern approach to Golden Square with No. 7 standing at the terminus, "TRAM" warning sign on the left. 1201.29 - "No. 7 passing through Golden Square Shopping Centre" 1201.30 - "No. 7 in High St. Golden Square" 1201.31 - "No. 7 in High St. passing Wattle St." 1201.32 - "No. 7 in High St. nearing Wattle St."tramways, trams, bendigo, bond st., view st., nolan st., high st., eaglehawk, california gully, charing cross, quarry hill, trackwork, tram 2, tram 5, tram 7, tram 21, tram 26 -
 Bendigo Military Museum
Photograph - Army Survey Regiment – Commanding Officer Handover Parade, Fortuna, Bendigo, 1980
... officer, unidentified (x3), RSM WO1 Aub Harvey. .5) - Photo, black.... .5) - Photo, black & white, 1980. Officers salute before ...This photograph was taken at a Commanding Officer Handover Parade at the Army Survey Regiment, Bendigo in 1980. LTCOL Bob Skitch was the CO from 1976 to 1980 and handed over LTCOL Frank Thorogood SB St J. LTCOL Thorogood’s appointment was from 1980 to 1981.This is a set of 45 photographs taken at a Commanding Officer Handover Parade at the Army Survey Regiment, Bendigo in 1980. The photographs are on 35mm negative film and were scanned at 96 dpi. Photograph .34P is an enlargement printed on photographic paper and scanned at 300 dpi. They are part of the Army Survey Regiment’s Collection. .1) - Photo, black & white, 1980. Led by HQ Squadron, Army Survey Regiment marches onto the parade ground. .2) - Photo, black & white, 1980. Army Survey Regiment marches onto the parade ground. Drummers L to R: SSGT George Austen, CPL Di Chalmer, CPL Tony Lawler. .3) - Photo, black & white, 1980. Air Survey Squadron formed up. SSM WO1 Bob Mason at front. L to R: unidentified (x9), SPR Kristin (Isaac) Skidmore, unidentified, SPR Scheryl Delforce, unidentified (x2), SSGT Russell ‘Rusty’ Williams, SSGT Peter Warwick, SSGT Greg Buckenham, SGT Cliff Webb, SSGT Alan Derby, SSGT John Bennett, SSGT Bruce Gordon. .4) - Photo, black & white, 1980. Officers formed up before taking posts. L to R: CAPT Peter Searle - UK Exchange, unidentified, LT Ozzy Slade, CAPT Peter ‘Blue’ Blaskett, unidentified (x4), CAPT Bob Williams, MAJ David Bowen - US Exchange officer, unidentified (x3), RSM WO1 Aub Harvey. .5) - Photo, black & white, 1980. Officers salute before taking posts. L to R: CAPT Peter Searle - UK Exchange, unidentified, LT Ozzy Slade, CAPT Peter ‘Blue’ Blaskett, unidentified (x4), CAPT Bob Williams, MAJ David Bowen - US Exchange officer, unidentified (x3). .6) - Photo, black & white, 1980. Officers march to their posts. L to R: CAPT Bob Cooper, CAPT Mick Byrne, MAJ Robin Blackburn, unidentified. .7) & .8) - Photo, black & white, 1980. L to R: 2IC MAJ Don Swiney MBE hands over parade to CO LTCOL Bob Skitch. Cartographic Squadron - Centre rank L to R: CPL Paul Richards, SPR Megan (McBurney) Reynolds, SPR Jan (Crighton) Minchin, SPR Ilen Isaac, CPL Lynn Johnson, remainder unidentified. Front rank L to R: CPL Dennis Learmonth, CPL Roger Pearson, SPR Rod Skidmore, SPR John Martin, SGT Bob Bright, CPL Trevor Bottomley, SPR Gerry Gates, remainder unidentified, OC CAPT Bob Williams, Officer in far right: CAPT Bob Cooper. .9) - Photo, black & white, 1980. L to R: CO LTCOL Bob Skitch salutes reviewing officer - Commander 3MD BRIG Geoffrey Cohen AM. Cartographic Squadron in background L to R: CPL Trevor Bottomley, SPR Gerry Gates, SPR Peter Main, CPL John ‘Stormy’ Tempest, unidentified, OC CAPT Bob Williams, SSGT Gary Warnest. .10) - Photo, black & white, 1980. HQ Squadron inspection - L to R: unidentified (x5), CAPT Paddy Strunks, SPR Chris Ebeling, CO LTCOL Bob Skitch, BRIG Geoffrey Cohen AM, unidentified (x7), in foreground MAJ David Bowen - US Exchange officer, unidentified, CPL Phil McGuire, WO2 Ted Burgess. .11) - Photo, black & white, 1980. HQ Squadron in foreground L to R: MAJ David Bowen - US Exchange officer, unidentified, CPL Phil McGuire, WO2 Ted Burgess. Lithographic Squadron inspection L to R: CPL Paul Davis, CPL Le-Anne (Smallshaw) Shirely, CO LTCOL Bob Skitch, unidentified, OC MAJ Robin Blackburn, BRIG Geoffrey Cohen AM, SPR Jim Ash, unidentified, unidentified UK Exchange SNCO, SSGT Greg Francis-Wright, WO1 Doug Malligan, drummers SSGT George Austen, CPL Di Chalmer, CPL Tony Lawler, unidentified (x2). .12) - Photo, black & white, 1980. Air Survey Squadron inspection - L to R: LT Ozzy Slade, CAPT Peter ‘Blue’ Blaskett, unidentified officer, front rank L to R: SGT Cliff Webb, CO LTCOL Bob Skitch, CAPT Peter Searle - UK Exchange, unidentified, centre rank L to R: unidentified, SSGT Greg Buckingham, SSGT John Bennett, rear rank L to R: unidentified (x4), SPR Sharon (Jones) Treble, CPL Marrianne (Van De Zee) De Groot, SPR Ginny (Turner) Rowe, SSGT Kevin Kennedy, unidentified, SSGT Alan Derby. .13) - Photo, black & white, 1980. Air Survey Squadron inspection - Centre rank: SSGT John Bennett, CO LTCOL Bob Skitch, CAPT Peter Searle - UK Exchange, BRIG Geoffrey Cohen AM, rear rank L to R: SPR Ginny (Turner) Rowe, SSGT Kevin Kennedy, unidentified, SSGT Alan Derby, SSGT Bruce Gordon, supernumerary rank L to R: SSM WO1 Bob Mason, WO1 Bob Hayden, WO2 Peter Colwell, WO1 Chris Parkinson. Unidentified. .14) - Photo, black & white, 1980. Air Survey Squadron inspection - Centre rank: SSGT John Bennett, CO LTCOL Bob Skitch, CAPT Peter Searle - UK Exchange, BRIG Geoffrey Cohen AM, rear rank L to R: SPR Ginny (Turner) Rowe, SSGT Kevin Kennedy, unidentified, SSGT Alan Derby, SSGT Bruce Gordon, supernumerary rank L to R: SSM WO1 Bob Mason, WO1 Bob Hayden, WO2 Peter Colwell. .15) - Photo, black & white, 1980. Cartographic Squadron inspection – L to R: OC CAPT Bob Williams, CO LTCOL Bob Skitch, BRIG Geoffrey Cohen AM. Front rank L to R: CPL John ‘Stormy’ Tempest, unidentified (x2), SSGT Allan Adsett, SSGT Gary Warnest. Centre rank L to R: SPR Ilen Isaac, CPL Sue (Fryer) Bottomley, SPR Gina (Coore) Neilson, SPR Carla Dell, CPL Lynn Johnson, SPR Cathy Regan, unidentified, SSGT John ‘JB’ Barrie, SSGT Bob Scaddan. Rear rank L to R: CPL Terry Danger, CPL Brad Peppler. .16) & .17) - Photo, black & white, 1980. Cartographic Squadron inspection – L to R: OC CAPT Bob Williams, CO LTCOL Bob Skitch, BRIG Geoffrey Cohen AM. Front rank L to R: CPL Dennis Learmonth, CPL Roger Pearson, SPR Rod Skidmore, SPR John Martin, SGT Bob Bright, CPL Trevor Bottomley, SPR Gerry Gates, CPL John ‘Stormy’ Tempest, unidentified (x2), SSGT Allan Adsett, SSGT Gary Warnest. CO LTCOL Bob Skitch, CAPT Bob Cooper, BRIG Geoffrey Cohen AM. Centre rank L to R: SPR Ilen Isaac, CPL Sue (Fryer) Bottomley, SPR Gina (Coore) Neilson, SPR Carla Dell, SPR Cathy Regan, SSGT John ‘JB’ Barrie, SSGT Bob Scaddan. Rear rank L to R: CPL Terry Danger, CPL Brad Peppler, SGT Stu Thaxter, SGT Colin Cuskelly, SGT Bill Friswell. Far right: CAPT Peter Searle - UK Exchange, WO1 Jim ‘JJJ’ Jefferies. .18) - Photo, black & white, 1980. Cartographic Squadron inspection – Front rank: SSGT Gary Warnest. L to R: CO LTCOL Bob Skitch, CAPT Bob Cooper, BRIG Geoffrey Cohen AM. Centre rank L to R: SPR Ilen Isaac, CPL Sue (Fryer) Bottomley, SPR Gina (Coore) Neilson, SPR Carla Dell, SPR Cathy Regan, SSGT John ‘JB’ Barrie, SSGT Bob Scaddan. Rear rank L to R: CPL Terry Danger, CPL Brad Peppler, SGT Stu Thaxter, SGT Colin Cuskelly, SGT Bill Friswell. SSM WO1 Gordon Lowery. Far right: WO1 Jim ‘JJJ’ Jefferies, CAPT Peter Searle - UK Exchange, CAPT Peter ‘Blue’ Blaskett, LT Ozzy Slade. .19) - Photo, black & white, 1980. Medal presentation - L to R: CO LTCOL Bob Skitch, CAPT Bob Cooper. Cartographic Squadron – Front rank L to R: CPL Dennis Learmonth, CPL Roger Pearson, SPR Rod Skidmore, SGT Bob Bright, CPL Trevor Bottomley, SPR Gerry Gates, SPR Peter Main, CPL John ‘Stormy’ Tempest. Centre rank L to R: CPL Paul Richards, SPR Jan (Crighton) Minchin, SPR Ilen Isaac, SPR Carla Dell, CPL Lynn Johnson, SPR Cathy Regan. .20) - Photo, black & white, 1980. Medal presentation - L to R: CAPT Bob Cooper, BRIG Geoffrey Cohen AM. Cartographic Squadron – Front rank L to R: CPL Dennis Learmonth, CPL Roger Pearson, SPR Rod Skidmore, SPR John Martin, SGT Bob Bright, SPR Peter Main, CPL John ‘Stormy’ Tempest, SSGT Allan Adsett, SSGT Gary Warnest. Centre rank L to R: CPL Paul Richards, SPR Jan (Crighton) Minchin, SPR Ilen Isaac, CPL Sue (Fryer) Bottomley, SPR Gina (Coore) Neilson. .21) - Photo, black & white, 1980. Medal presentation - L to R: CAPT Bob Cooper, BRIG Geoffrey Cohen AM. Cartographic Squadron – Front rank L to R: CPL Dennis Learmonth, CPL Roger Pearson, SPR Rod Skidmore, SPR John Martin, SGT Bob Bright, SPR Peter Main, CPL John ‘Stormy’ Tempest, SSGT Gary Warnest. Centre rank L to R: CPL Paul Richards, SPR Jan (Crighton) Minchin, SPR Ilen Isaac, CPL Sue (Fryer) Bottomley. .22) - Photo, black & white, 1980. Medal presentation - L to R: CO LTCOL Bob Skitch, CAPT Bob Cooper, BRIG Geoffrey Cohen AM. Cartographic Squadron – Front rank L to R: CPL Dennis Learmonth, CPL Roger Pearson, SPR Rod Skidmore, SPR John Martin, SGT Bob Bright CPL Trevor Bottomley, SPR Gerry Gates, SPR Peter Main, CPL John ‘Stormy’ Tempest, CAPT Bob Williams, SSGT Allan Adsett. Centre rank L to R: CPL Paul Richards, SPR Jan (Crighton) Minchin, SPR Gina (Coore) Neilson, SPR Carla Dell, CPL Lynn Johnson, SPR Cathy Regan, unidentified, SSGT Bob Scaddan. Rear rank: CPL Stu Symonds. .23) - Photo, black & white, 1980. Presentation - L to R: CO LTCOL Bob Skitch, BRIG Geoffrey Cohen AM, ADJT CAPT John Harrison. Cartographic Squadron – Front rank L to R: CPL Dennis Learmonth, CPL Roger Pearson, SPR Rod Skidmore, SPR John Martin, SGT Bob Bright CPL Trevor Bottomley, SPR Gerry Gates, unidentified, CAPT Bob Williams, SSGT Allan Adsett, CAPT Bob Cooper. Centre rank L to R: SPR Jan (Crighton) Minchin, CPL Sue (Fryer) Bottomley, SPR Carla Dell, CPL Lynn Johnson, SPR Cathy Regan, unidentified, SSGT Bob Scaddan. .24) - Photo, black & white, 1980. Presentation - L to R: CO LTCOL Bob Skitch, BRIG Geoffrey Cohen AM, ADJT CAPT John Harrison. Cartographic Squadron – Front rank L to R: SPR Rod Skidmore, SPR John Martin, SGT Bob Bright CPL Trevor Bottomley, SPR Gerry Gates, unidentified, CAPT Bob Williams, CAPT Bob Cooper. Centre rank L to R: SPR Jan (Crighton) Minchin, CPL Sue (Fryer) Bottomley, SPR Carla Dell, CPL Lynn Johnson, SPR Cathy Regan, unidentified, SSGT Bob Scaddan. .25) - Photo, black & white, 1980. Presentation - L to R: CO LTCOL Bob Skitch, BRIG Geoffrey Cohen AM, ADJT CAPT John Harrison. Cartographic Squadron – Front rank L to R: CPL Roger Pearson, SPR Rod Skidmore, SPR John Martin, SGT Bob Bright CPL Trevor Bottomley, unidentified, CAPT Bob Williams, SSGT Allan Adsett, SSGT Gary Warnest. CAPT Bob Cooper, Centre rank L to R: CPL Sue (Fryer) Bottomley, SPR Gina (Coore) Neilson, SPR Carla Dell, CPL Lynn Johnson. .26) to .28) - Photo, black & white, 1980. Presentation - L to R: MAJ Robin Blackburn, BRIG Geoffrey Cohen AM, ADJT CAPT John Harrison. .29) to .31) - Photo, black & white, 1980. Presentation - L to R: SPR Penny Knott, CO LTCOL Bob Skitch. .32) - Photo, black & white, 1980. CO Handover - L to R: LTCOL Bob Skitch, LTCOL Frank Thorogood SB St J. Cartographic Squadron – Front rank L to R: CPL Dennis Learmonth, CPL Roger Pearson, SPR Rod Skidmore, SPR John Martin SPR Gerry Gates, SPR Peter Main, CPL John ‘Stormy’ Tempest, unidentified, CAPT Bob Williams, SSGT Allan Adsett, SSGT Gary Warnest. Centre rank L to R: SPR Ilan Isaac, CPL Sue (Fryer) Bottomley, SPR Gina (Coore) Neilson, SSGT Bob Scaddan at end. .33) & .34) - Photo, black & white, 1980. CO Handover - L to R: LTCOL Bob Skitch, LTCOL Frank Thorogood SB St J. Cartographic Squadron – Front rank L to R: CPL Dennis Learmonth, CPL Roger Pearson, SPR Rod Skidmore, SPR John Martin, SGT Bob Bright, SPR Gerry Gates, SPR Peter Main, CPL John ‘Stormy’ Tempest, unidentified, CAPT Bob Williams, SSGT Allan Adsett. Centre rank L to R: SPR Ilen Isaac, CPL Sue (Fryer) Bottomley, SPR Gina (Coore) Neilson, SSGT Bob Scaddan at end. .35) - Photo, black & white, 1980. CO Handover – March past L to R: BRIG Geoffrey Cohen AM, ADJT CAPT John Harrison. LTCOL Frank Thorogood SB St J, CO LTCOL Bob Skitch. L to R: RSM WO1 Aub Harvey, 2IC MAJ Don Swiney MBE. .36) - Photo, black & white, 1980. CO Handover March past L to R: BRIG Geoffrey Cohen AM, ADJT CAPT John Harrison. LTCOL Frank Thorogood SB St J, CO LTCOL Bob Skitch. HQ Squadron march past L to R: unidentified officer, MAJ MAJ David Bowen - US Exchange officer, CAPT Paddy Strunks. .37) - Photo, black & white, 1980. CO Handover March past L to R: BRIG Geoffrey Cohen AM, ADJT CAPT John Harrison. LTCOL Frank Thorogood SB St J, CO LTCOL Bob Skitch. HQ Squadron march past L to R: unidentified, SGT Rick Warren, remainder unidentified. .38) - Photo, black & white, 1980. CO Handover March past L to R: BRIG Geoffrey Cohen AM, ADJT CAPT John Harrison. LTCOL Frank Thorogood SB St J, CO LTCOL Bob Skitch. Cartographic Squadron march past L to R: CLP Paul Richards, CPL Dennis Learmonth, CAPT Bob Williams, CAPT Bob Cooper. .39) - Photo, black & white, 1980. CO Handover March past L to R: BRIG Geoffrey Cohen AM, ADJT CAPT John Harrison. LTCOL Frank Thorogood SB St J, CO LTCOL Bob Skitch. Cartographic Squadron march past L to R: SPR Greg Else, SPR Jan (Crighton) Minchin, SPR Rod Skidmore, unidentified, SPR Megan (McBurney) Reynolds, CPL Roger Pearson, CPL Stu Symonds, CPL Paul Richards. .40) - Photo, black & white, 1980. CO Handover March past L to R: BRIG Geoffrey Cohen AM, ADJT CAPT John Harrison. LTCOL Frank Thorogood SB St J, CO LTCOL Bob Skitch. Cartographic Squadron march past L to R: CPL Terry Danger, CPL Lynn Johnson, SPR Peter Main, unidentified, SPR Carla Dell, SPR Gerry Gates, SPR Bob Sheppard, SPR Gina (Coore) Neilson, CPL Trevor Bottomley, SPR Ian Fitzgerald, CPL Sue (Fryer) Bottomley, unidentified. .41) - Photo, black & white, 1980. CO Handover March past L to R: BRIG Geoffrey Cohen AM, ADJT CAPT John Harrison. LTCOL Frank Thorogood SB St J, CO LTCOL Bob Skitch. Lithographic Squadron march past L to R: CAPT Mick Byrne, MAJ Robin Blackburn. .42) - Photo, black & white, 1980. CO Handover March past L to R: BRIG Geoffrey Cohen AM, ADJT CAPT John Harrison. LTCOL Frank Thorogood SB St J, CO LTCOL Bob Skitch. Lithographic Squadron march past L to R: CPL Gary Kerr, SPR Brian Paul, SPR Brian Fauth, CPL Roy Hicks, SPR Per Andersen, CAPT Mick Byrne. .43) & .44) - Photo, black & white, 1980. CO Handover March past L to R: BRIG Geoffrey Cohen AM, ADJT CAPT John Harrison. LTCOL Frank Thorogood SB St J, CO LTCOL Bob Skitch. Lithographic Squadron march past. .45) - Photo, black & white, 1980. CO Handover March past L to R: BRIG Geoffrey Cohen AM, ADJT CAPT John Harrison. LTCOL Frank Thorogood SB St J, CO LTCOL Bob Skitch. Officer march past L to R: unidentified, CAPT Peter Searle - UK Exchange.No personnel are identified. Photo .34P is annotated on back ‘1981 LTCOL Bob Skitch handed over to LTCOL Thorogood.’ *Date is incorrect.royal australian survey corps, rasvy, army survey regiment, army svy regt, fortuna, asr -
 Eltham District Historical Society Inc
Document - Property Binder, 895 Main Road, Eltham
... Duncan, Diamond Valley News, November 5, 1997, p3 (includes photo... Duncan, Diamond Valley News, November 5, 1997, p3 (includes photo ...Folder: 895 Main Road, Eltham Contents Listing 1. Certificate of Title; Vol. 8424, Fol. 334, 5 February 1963 2. Certificate of Title; Lot 2, Plan of Subdivision No. 63242, Parish of Nillumbik, Vol. 8479, Fol. 283, 18 May 1964 (Eltham War Memorial Trust) 3. Newspaper article: Extensions to shire offices will benefit all, by Fab Calafuri, Diamond Valley News, Tuesday, July 8, 1986, p6 [Reverse side, p5, Residents rally to save dam by Helen Gillman about Peck’s Dam in Napier Street, Montmorency] 4. Office memo: Temporary Shutdown of Water Supply Shire Offices – Tuesday 9 March 1993; Anthony Guzzo, 5 March 1993 – Melbourne Water advice due to works on new library 5. Plan of Old Municipal Offices, date and creator unknown 6. Newspaper clipping: Move to convert shire office for police use, by Jodie Haythorne, Diamond Valley News, May 1995 7. Newspaper clipping: Sale of Eltham office / Removal of Question time; Nillumbik Happenings, Mountain Views, 15 May 1995 8. Newspaper clipping: Bid for TAFE campus, Mountain Views, 25 September 1995, p8 9. Newspaper clipping: Will the former Shire of Eltham offices become a TAFE college?, The Advertiser, circa September 1995 [Reverse side; Jezza! Photo of football legend Alex Jesaulenko at Watsonia RSL also Advertisement: Maternal and Child Health Centre Timetable] 10. Newspaper clipping: Eltham may get TAFE campus in shire offices, by Fiona Kaegi and Natalie Town, and Nillumbik set for rate cuts, Diamond Valley News, circa September 1995 [Reverse side; Art for hope – article about artist Damien Curtain at Hurstbridge Primary School] 11. Newspaper clipping: More talks on TAFE, The Advertiser, Tuesday, October 17, 1995, p3 – includes photos of Nillumbik Chief Commissioner Don Cordell, Box Hill College of TAFE Executive Director Andrew Jackson and Niillumbik CEO Barry Rochford; Eltham MP Wayne Phillips with Eltham Chamber of Commerce President Norm Williams and Rotary Club of Eltham President Peter Bishop; Eltham College principal John Brennan with St Helena Secondary College head Ken Cunningham and Eltham High School principal Ron Edwards. [On reverse, p4, Sorry sag of botched relations, Jock Kyme] 12. Newspaper clipping: Eltham hails TAFE take-over, by Fiona Kaegi and Council to hold regular briefings, Diamond Valley News, 18 October 1995 13. Newspaper clipping (photocopy): Why no council office at Eltham?, Mark Burns, Letters, Diamond Valley News, 18 October 1995 14. Newspaper clipping: Future of Eltham office?, Mountain Views, Monday, October 23, 1995, p8 15. Newspaper clipping: Council seeks opinions on former shire offices, by Fiona Kaegi, Diamond Valley News, 25 October 1995 16. Newspaper clipping: Shire office move, The Advertiser, December 1995 17. Newspaper clipping: Former shire offices up for sale; possibly Diamond Valley News, December 1995 18. Newspaper clipping: Agents to sell shire office, Mountain Views, Monday, December 18, 1995, p8 19. Newspaper clipping: Advertisement; Nillumbik Shire Council Proposed Sale or Lease of Eltham Municipal Offices, Diamond Valley News, 10 January 1996 20. Newspaper clipping: No Submissions on Eltham Shire Offices, Diamond Valley-Whittlesea Advertiser, 30 January 1996, p1 21. Photocopy: Minutes of Ordinary Council Meeting, 31 January 1996, 7.4 Sale or Lease of Former Eltham Municipal Offices 22. Photocopy: Letter HTW Valuers to Nillumbik Shire Council, Valuation of former Eltham Municipal Offices at $1.45 million, 31 January 1996 23. Newspaper clipping: New G’boro, Eltham places, Diamond Valley-Whittlesea Advertiser, Tuesday, March 26, 1996, p4 [on reverse, p3, ALP Faithful at Montsalvat] 24. Newspaper clipping: Legal costs a hurdle for action group, by Laeta Antonysen, Diamond Valley News, 16 April 1996 25. Photocopy (91 pages): Tender Documents for purchase of Former Eltham Shire Offices 895 Main Road, Eltham, Prepared for Nillumbik Shire Council, Maddock Lonie & Chisholm, Melbourne. Tenders close at 3.00pm on 24 April 1996 26. Newspaper clipping (Photocopy): Building’s asbestos riddle. By Fiona Kaegi, Diamond Valley News, 26 June 1996 27. Photocopy: Minutes of Ordinary Council Meeting, 26 June 1996, 11.43/96 Sale of Eltham Offices, Main Road, Eltham 28. Media Release (Photocopy of facsimile from Barry Rochford, CEO): Community Facilities in New Gateway to Eltham, 28 June 1996 29. Photocopy (A3): TPA1 – Site Plan 1:200 Proposed Convenience Centre At Main Road Eltham, Baldasso Cortese Pty Ltd Architects, Collingwood, July 1996 30. Newspaper clipping: ‘Whopper’ For Eltham?, Letters, Sigmund Jorgensen, The Advertiser, Tuesday, July 2, 1996, p3 31. Newspaper clipping: Ex-shire offices to go, by Fiona Kaegi, Diamond Valley News, 3 July 1996, p1 32. Photocopy Newspaper clipping: Unsuccessful bidders criticise sale of offices, by Fiona Kaegi, Diamond Valley News, 10 July 1996 33. Newspaper clipping: Insensitive proposal, Sue Dyet, Letters, Diamond Valley Newsm 17 July 1996 34. Photocopy: Minutes of Ordinary Council Meeting, 17 July 1996, 7.116/96 Sale of Eltham Offices, Main Road, Eltham 35. Newspaper clipping: Former shire office sale angers residents, Diamond Valley News, 30 July 1996, p3 36. Newspaper clipping: Eltham Offices Demolition, ‘You can’t demolish city hall’, The Advertiser, Tuesday, July 30, 1996, pp14-15 features photos of Eltham protestors, Thelma Barkway, Harry Gilham, Jenni Mitchell, Jock Kyme and David Essex 37. Photocopy (A3): TPA1 – Site Plan Proposed Convenience Centre, Main Road, Eltham, Graeme Bentley Landscape Architects, August 1996 38. Newspaper clipping (Photocopy): Letters; Disbelief at plans, Margaret Jennings; Lack of respect, Mike Jansz; Community opinion, Sigmund Jorgensen, Diamond Valley News, circa August 1996 39. Newspaper clipping (Photocopy): ‘There was no conflict of interest’, The Advertiser, Tuesday, August 4, 1996 40. Newspaper clipping: Chamber supports plans, by Jodie Guest, Diamond Valley News, 7 August 1996 41. Newspaper clipping (Photocopy): Letters; Adding to the price, Kelly Fitzpatrick; Area being torn apart, Jenni Bundy, Diamond Valley News, 7 August 1996 42. Newspaper clipping: Labor joins battle to save offices, by Fiona Kaegi, Diamond Valley News, (7?) August 1996 43. Newspaper clipping: Letters to the Editor; ‘Atrocious assault of commercialism’, Lois Loftus-Hills, The Advertiser, Tuesday, August 13, 1996, p9 44. Newspaper clipping: Letters; Roll up for the show, Kahn Franke; Thanks for turn-out, Margaret Jennings; Way past time, Jenni Bundy; Angry at the vandalism (continued p13 missing), Diamond Valley News, August 14, 1996, p12 45. Newspaper clipping: ‘Enough is enough’ states John Cohen; Letters to the Editor, Diamond Valley-Whittlesea Advertisers, Tuesday, August 20, 1996, p2 [Reverse, p1, Trade boost at Diamond Creek] 46. Newspaper clipping: Public viewing, Diamond Valley News, 4 September 1996, p 47. Newspaper clipping: Letters; Chiefs must resign, Gayle Blackwood; Time to have your say, Margaret Jennings; Sensible balance, Gwen Jakins; Recycling: a fine example, Grace Mitchell; Limits on site use, Stephen Clendinnen; Diamond Valley News, 4 September 1996, p4 48. Newspaper clipping: Letters; A lasting memorial, Ken and Laurel Eckersell; Stripping assets, Jack Lawson; Diamond Valley News, 4 September 1996, p29 49. Newspaper clipping: Letters; Nillumbik: in the eye of the beholder, Sigmund Jorgensen; ‘Crying inside’ over Eltham Shire office, Grace Mitchell; The Advertiser, Tuesday, September 10, 1996, 2 50. Newspaper clipping: Public Notice; Notice of an Application for Planning Permit, Dallas price Homes Pty Ltd, Diamond Valley News, 11 September 1996 51. Newspaper clipping (Photocopy): Timing was the problem: chief, by Laeta Antonysen, Diamond Valley News, 11 September 1996 52. Newspaper clipping: Letters; Architectural monstrosity, Jenni Bundy; Bargain price, Gavin Gray; Paying for road works, Sue Dyet; Diamond Valley News, 11 September 1996 [ on reverse, articles on Queen’s Guide Nicola Blay (photo) and Plenty River and Diamond Creek waterways] 53. Newspaper clipping: Eltham Hub Plans on Show, The Advertiser, Tuesday, September 17, 1996, p1 54. Newspaper clipping: Bleeding halted: Commish and Letters; Sigmund’s credibility gap, David Nolte; ‘Double standards’, Ros Harris, The Advertiser, Tuesday, September 17, 1996, p3 55. Newspaper clipping: Gateway to the future; Plans on display, public comments sought, by Laeta Antonysen, Diamond Valley News, September 18, 1996, p8 [Reverse, p7, Policy limits event signs, and, Council ‘arrogant’ on ward option: MP] 56. Newspaper clipping (Photocopy): 19 on council inquiry list, by Jodie Guest, Diamond Valley News, 18 September 1996 – about council listing 19 people who are only to be dealt with directly by CEO, Barry Rochford 57. Newspaper clipping (Photocopy): Eltham is wonderful, Sigmund Jorgensen, Letters, The Advertiser, Tuesday, September 24, 1996, p4 58. Objection to Grant of Planning Permit (Photocopy): Russell Yeoman per Eltham District Historical Society Inc. re application 960376 for petrol station, convenience shop, retail shop, etc to be issued to Dallas price Homes Pty Ltd, 25 September 1996 59. Newspaper clipping (Photocopy): Public meeting, Eltham Gateway Action Group – to discuss latest plans to develop former shire office site on Sunday 4 September 1996; publication unknown, possibly Diamond Valley News 60. Newspaper clipping: Minister orders sale probe, by Jodie Guest, Diamond Valley News, Wednesday, October 12, 1996, p1 61. Newspaper clipping: Letters; Headline could mislead, Wayne Phillips, Member for Eltham, The Advertiser, Tuesday, October 8, 1996, p3 62. Newspaper clipping: Letters; Few jobs for young, Margaret Jennings; The whole truth, Alan Ramsay, Diamond Valley News, October 9, 1996, p12 63. Newspaper clipping: Public outcry at Abbott veto with ‘reserve power’; 200 residents yell abuse as commissioners give ok to Eltham service station, The Advertiser, Tuesday, October 15, 1996, p1 64. Newspaper clipping: Letters; Eltham Hub briochure has ‘trees that are a fiction’, Lois Lofus-Hills, The Advertiser, Tuesday, October 15, 1996, p2 65. Newspaper clipping: Shrewd tactics row, by Jodie Guest, Diamond Valley News, Wednesday, October 16, 1996, p1 66. Newspaper clipping: Residents have their say on former shire offices, by Jodie Guest, and, Anger over reserve power, by Laeta Antonysen, Diamond Valley News, Wednesday, October 16, 1996, p9 67. Newspaper clipping: Office sale report will not be made public, Diamond Valley News, October 23, 1996 [Reverse, article featuring Youth development officer, Ian Patching] 68. Newspaper clipping: Letters; Happening in a hurry, Peter Dodds; Development unsuitable, Mark Burns; Vale those dreamers, Sigmund Jorgensen, Diamond Valley News, October 23, 1996, two pages unidentified 69. Newspaper clipping: Group to fight council decision on office site, by Laeta Antonysen, Diamond Valley News, October 26, 1996 – re Eltham Gateway Action Group taking Council to the Administrative Appeal Tribunal over approval of controversial development [Reverse, article on Bend of Islands place name] 70. Newspaper clipping: Three days allowed to hear objection, by John Dubois, Diamond Valley New, December 4, 1996 71. Newspaper clipping: Letters; Site traffic dangers, Frank Burgoyne; Thanks for support, Margaret Jennings, Diamond Valley News, noted in pen as 8 December 1996 though probably 11 December 1996 [Reverse, What about that link, asks council, by Natalie Town – about ring road between Greensborough and Ringwood] 72. Newspaper clipping: Minister to rule on proposal, by Fiona Kaegi, Diamond Valley News, December 18, 1996 73. Report (Photocopy, 31 pages): Convenience Centre Development Proposal: Italian Cypress at Former Eltham Shire Offices Site, Main Rd. Eltham, Graeme Butler & Associates, 1997 74. Newspaper clipping: People unite to battle project, by Fiona Kaegi, Diamond Valley News, February 19, 1997 75. Letter (Photocopy): Ms B Martin to Fiona Kaegi to be submitted for Letters to the Editor, Diamond Valley News 26 March 1996 edition 76. Letter (Photocopy): Thelma Barkway to Fiona Kaegi to be submitted for Letters to the Editor, Diamond Valley News 26 March 1996 edition 77. Newspaper clipping: Legal Battle, by Fiona Kaegi, Diamond Valley News, Wednesday, April 2, 1997 78. Newspaper clipping: Site Row Saga, by Laeta Antonysen, Diamond Valley News, Wednesday, April 9, 1997 79. Newspaper clipping: Community fears loss of heritage, by Laeta Antonysen, Diamond Valley News, April 9, 1997 80. Newspaper clipping: Debate erupts over service station plan, by Laeta Antonysen, Diamond Valley News, April 9, 1997 [Reverse, ‘No’ to rates hike proposal] 81. Newspaper clipping: Letter to the Editor; “Your front-page last week is considerable inaccurate … a surplus of $14,000 is expected at 30 June 1977.”, Robert Marshall, The Advertiser, April 28, 1997, p1 82. Newspaper clipping: $1.1m Debt Plan, by Fiona Keagi, Diamond Valley News, Wednesday, April 23, 1997, p1 and continued on p24, Shire to defer works programs 83. Newspaper clipping: Blast for Council, by Laeta Antonysen, Diamond Valley News, Wednesday, April 30, 1997, p1 and continued on p7, ‘Experts’ oppose plans for shire site. 84. Newspaper clipping: Photo – Uncertainty: the future of the former Eltham Shire office site is still to be decided by Planning Minister Rob Maclellan., Diamond Valley News, April 30, 1997 [ Reverse; Not your average convenience store, by Laeta Antonysen] 85. Newspaper clipping: Shire site decision soon, Diamond Valley News, May 28, 1997 86. Newspaper clipping: Letters to the Editor; Features to protect, Ken Eckersell, Diamond Valley News, June 4, 1997 87. Newspaper clipping: Costly bun fight over shire offices, by Laeta Antonysen, Diamond Valley News, July 2, 1997 [reverse, Montsalvat plans season of festivals, by Fiona Kaegi] 88. Newspaper clipping: Shire office shemozzle, Diamond Valley News, July 2, 1997 – provides a brief timeline of events June 1996 to April 22, 1997 89. Newspaper clipping: Law Suit Threat, by Fiona Kaegi and Laeta Antonysen, Diamond Valley News, Wednesday, July 9, 1997, p1 90. Newspaper clipping: Report rejects store plan, and, Residents with panel, Diamond Valley News, Wednesday, July 9, 1997 91. Newspaper clipping: Councillors meet Shell developer, by Laeta Antonysen, Diamond Valley News, July 30, 1997 92. Newspaper clipping: Deadline extended to allow more talks, by Fiona Kaegi, Diamond Valley News, August 8, 1997. Also Curves to stay in link road about Nillumbik’s realignment plans for Diamond Creek’s ‘windy mile’ [Reverse, Shire tightens grants scheme] 93. Newspaper clipping: $10m option for shire office site, by Laeta Antonysen, Diamond Valley News, September 10, 1997 94. Newspaper clipping: New plan for shire office site, by Laeta Antonysen, and , Council refuses to do trade with developer, Diamond Valley News, September 17, 1997, p12 [ Reverse, p11, Mixed reaction to kangaroo culling] 95. Newspaper clipping: Gateway plan review, by Laeta Antonysen, Diamond Valley News, October 22, 1997, p3 96. Newspaper clipping: Top planner calls for rethink on office site, by Jodie Guest, Diamond Valley News (includes photo of John Pizzey) 97. Newspaper clipping: Opposition offers help on planning, by Jamie Duncan, Diamond Valley News, November 5, 1997, p3 (includes photo of Opposition Leader John Brumby and Nillumbik Shire President Robert Marshall at the Eltham Gateway site) 98. Letter (Photocopy): Russell Yeoman, Secretary, Eltham District Historical SAociety to Mr B. Rochford, CEO, Nillumbik Shire Council, 15 November 1997 with specific reference to the health of the three “Shillinglaw” trees 99. Newspaper clipping: Puzzlement over delay on office site, by Laeta Antonysen, Diamond Valley News, November 19, 1997 100. Newspaper clipping: Developer pulls out, by Laeta Antonysen, Diamond Valley News, December 10, 1997, p3, and, Council uproar over officers [Reverse, p4, Final victory – announcing resignation of Jenni Mitchell as president of Etham Gateway Action Group] 101. Newspaper clipping: Letters; Asset of pride, Sigmund Jorgensen, Diamond Valley News, January 14, 1998 102. Newspaper clipping: Minister ‘no’ to plan, by Laeta Antonysen, Diamond Valley News, February 11, 1998, p3 103. Newspaper clipping: Shell shocked as Eltham planning protest is upheld, by Gabrielle Costa, date and publication unknown; possibly The Age, February 1998 104. Newspaper clipping: Land review, by Laeta Antonysen, Diamond Valley News, April 1, 1998 105. Newspaper clipping: Bid to move shire offices to new site, by Laeta Antonysen, Diamond Valley News not specifically about 895 Main Road but former Diamond Valley Shire Offices at Civic Drive, Greensborough, circa June 1998 106. Newspaper clipping: Letters; What about us?, Gayle Blackwood, Diamond Valley News, circa June 10, 1998 107. Letter (Photocopy): Sigmund Jorgensen to Kahn Franke, 1 July 1998 re advertisement and list of contributors 108. Advertisement (Photocopy): Show that democracy is not dead in Nillumbik !!!, Saturday 17 Oct. 1998 109. Newspaper clipping: Arts dream shattered, by Natalie Birch, Diamond Valley Leader, July 17, 2002, p3 – Council about to dump plans for an arts centre on former office site 110. Newspaper clipping: Letters; This site belongs to the people, John Cohen; Pro-development, Jenni Bundy, Diamond Valley Leader, May 21, 2003 111. Discussion Paper: Community Use of Site, 895 Main Road Eltham, 8 pages, Gayle Blackwood, Sue Dyet, Ken Eckersell, 25 August 2003 with supporting drafts dated August 5 and 6. 112. Newspaper clipping: Shire plan ‘sacrilegious’; Residents fight war memorial sale, by Dave Cropssthwaite, Diamond Valley Leader, Nillumbik Edition, Wednesday, August 18, 2004, p1 – about council plans to sell Eltham War memorial and former Shire Office sites 113. Newspaper clipping: Land sales to come under more debate, by Dave Crossthwaite, Diamond Valley Leader, September 15, 2004, p5 114. Newspaper clipping: Council saves ex-office site, axes club plan, Diamond Valley Leader, March 30, 2005 115. Newspaper clipping: Letters; Ask the people, John Cohen, Diamond Valley Leader, April 6, 2005, p20 116. Newspaper clipping: Shire moving for public use zoning on Eltham landmark sites, Diamond Valley Leader, October 25, 2006 117. Newspaper clipping: Letters; Consultation a sham, Carol Doherty; Civic centre excellent, Marguerite Marshall; Only Eltham counts, Carmel Jacobsen, Diamond Valley Leader, May 22, 2007 [Reverse, Disability a test for councillor (Bo Bendtsen)] 118. Newspaper clipping: Advertisement; Nillumbik Planning Scheme, Approval of Amendment C49 – rezoning of 895 and 903-907 Main Road, Diamond Valley Leader, September 5, 2007, p7 119. Newspaper clipping: Illustration; An artist’s impression of the proposed Nillumbik civic centre in Main Rd., Diamond Valley Leader, June 25, 2008 [Reverse, City link with learning – about Eltham College setting up a city campus for Year 9 students, with photo featuring principal Dr David Warner and students] 120. Newspaper clipping: Civic centre forecast withdrawn, Diamond Valley Leader, July 2, 2008 121. Letter: Nillumbik Shire Council, 5 September 2008, re Civic Future Project 122. Letter: Nillumbik Shire Council to EDHS, 5 October 2008, re Civic Future Project 123. Letter (Copy): Mrs D. Bassett-Smith to Mayor and Councillors, 17 April 2009 re former shire office site and future community use 124. Letter (Copy): Eltham District Historical Society to Bill Forrest, CEO, Nillumbik Shire Council, 1 August 2009, in support of D. Bassett-Smith letter of 17 April 2009 and response from Council, 12 August 2009 125. Newspaper clipping: Hotel mooted for site, by Brittany Shanahan, Diamond Valley Leader, July 5, 2017 126. Newspaper clipping: Letters; Fury, surprise and support for Eltham development; Re: Grand plan for Eltham’s jewel (February 7), Cath McLardy, Diamond Valley Leader, February 14, 2008, p14 [Reverse, p13, Learning from the fateful day; the devastation on that day in 2009 will always stay in Steve Warrington’s mind. He recalls the tragedy] 127. Newspaper clipping: Letters; Plan to fight council on land sell-off, Jennifer Ambrudge and others, Diamond Valley Leader, February 14, 2018, p15 – about council plan to sell off reserves and shire office site and Eltham War Memorial 128. Newspaper clipping: Plans for site urged, by Brittany Shanahan, Diamond Valley Leader, September 5, 2018 129. Newspaper clipping: Approach under fire; Council plans for historic shire site raises eyebrows, by Brittany Shanahan, Diamond Valley Leader, September 19, 2018 130. Newspaper clipping: Advertisement; Our plan for a revitalised Eltham, Nillumbik Shire Council, Diamond Valley Leader, Wednesday, October 3, 2018, p7 131. Notice: Eltham Community Town Meeting, Saturday 134th October 2018 – about council plans to sell off community reserves and assets – along with flyer for Eltham Community Action Group 132. Essay A4 18 pages: An essay addressed to the Councillors of Nillumbik Shire, October 2018 (with addendum 7 November), Andrew Lemon 133. Photocopy Marked Up Flyer: The story behind 895 and 903-907 Main Road, Eltham – the heart of Eltham’s Town Centre, with marked up comments by Eltham Community Action Group, collected 9 December 2018 134. Newspaper clipping: Calls to fix ‘outdated’ site; negotiations cease with developers amid renewed push to improve civic space at Main St. Eltham, by Anthony Plovesan, Diamond Valley Leader, May 29, 2019, p5 135. Newspaper clipping: Ex-council site flagged for hospital; Councillor suggests former Eltham headquarters would be ideal spot, by Anthony Plovesan, Diamond Valley Leader, October 30, 2019, p3 136. Concept plan: Proposal; Nillumbik Cultural Gallery with Art Cinema, Restaurant, Tourism, Preliminary Sketch Design G, Barry Pearce Architect and Designer, 8 April 2022, 8 pagesmain road, eltham, property, houses, shops, businesses, shillinglaw trees, eltham shire offices site -
 Melbourne Tram Museum
Album - Photo Album, John Etkins, Ray Marsh, 1990's
... –Black and white photo. Listed 5-11-2016.... Listed 5-11-2016 Ray Marsh Album Photo Album John Etkins Ray ...Photo Album - 48 sheets bound with a white circular metal/plastic spiral bound within a heavy duty cardboard cover, with glued cover pages, plastic covered with an index sheet. Allows for three photographs per page. Not known whether the plastic envelope for each photograph is of archival quality. No Manufacture detail, though has a bar code on the bottom left hand corner of the rear cover. Cover is a reproduction from a painted art piece. Listing of photographs given on htd1800-RayMarshalbum.pdf Dates given when written on the rear of the photograph. Compiled by John Etkins from photographs given to him by Ray Marsh. 1990's to 1993 generally. Page Tram/s Notes – dates given when on rear of photograph. 1 226 Loading passengers – ex MMTB Annual Report? 1 957 City Circle 1 “hands off our trams” protest march 2 2100, 231 South Melbourne Depot – 10-4-1993 2 676 And many others – Hawthorn Depot 2 217 Princes Bridges 3 380, 104 St Kilda Road 3 106, 104 Essendon Depot 3 431 As a W1 4 1011 Fresh fruit tram, Preston Depot 6-12-1992, 4 824 Day in Day out, Brunswick and Victoria Parade 29-4-1993 4 722 Art tram 5 ? Advert tram – Imperial China 5 237 Stubbsy tram – TrippleM? 6 856 City Circle – with gas and fuel building – 31-7-1994 6 925 City Circle - with gas and fuel building – 31-7-1994 6 728 City Circle – 10-8-1994 7 246 Navy tram x three pics – July 1992 8 ? Gold tram advertising Georges 8 990 Advertising Telstra– 29-4-1993 8 749 Art tram? 9 990 NRMA - 1-3-1994 9 727, 215 Public Transport 9 920 Advert tram with a picket fence 10 Bendigo 21 Preston Workshops 11-3-1993 10 774? W5 being rebuilt at Preston – 21-10-1991 11 ? Bogie cable trailer at Preston – 29-4-1993 11 922 Interior view of a tram – being modernised – 11-3-1993 11 922 Preston Workshops 29-4-1993 12 1018 Workcare tram at Preston 1994 – 11-8-1994 12 774 Preston Workshops – 20-12-1993 12 8 Preston Workshops – 1-10-1992 13 380 Preston Workshops 13 8 Preston Workshops 13 20, 8 Preston Workshops 14 721 Preston Workshops 20-12-1993 14 ? Tramways painted artist tram featuring a driver and workshop 14 Traverser Preston Workshops 15 2110, 2106 Preston Workshops 15 ? Preston Workshops 15 2130 Interior Preston Workshops 20-12-1993 16 Set of three pics Elizabeth St floods – 17-2-1972 17 Set of three pics Elizabeth St floods – 17-2-1972 18 676 Turning into Swanston St from Batman Ave 18 676 Kew Depot – 10-11-1991 18 237, 676, 611 Kew Depot – 10-11-1991 19 214, 676 South Melbourne Depot – Kingsway 19 217 Spencer St 19 214 Advertising Kew Depot Open Day -8-12-1991 20 231, 676 Advertising Kew Depot Open Day -8-12-1991 20 Zoo tram, 256 Outside Kew Depot 20 214 Hawthorn Open Day with band 21 Zoo tram x 3 pics And horses, Kew Open day 22 231, 431 Kew Depot 22 892, 214 Kew Depot 75 years, Postcard – 1991 22 282 Kew Depot – with the name Monique on the tram and a lady standing alongside 23 238, 233 Kew Depot 23 236, 892, 282 Kew Depot – 25-4-1992 23 232, 236, 282 Kew Depot 24 2112 Port Melbourne line – with long grass – 11-4-1993 24 469, 2037, ? 2015 South Melbourne Depot 24 1018 or 976? Advertising a PTC Open Day – 20-10-1991 – In Swanston St - see Reg Item 1845 25 250 Bourke St 25 2100 Running into Preston Workshops 25 282, 1003 Collins St in the rain 26 Logo PMTT 26 Point cover With P&MTT cast into the cover 26 Foundation Stone Person reblocking in gold, a PMTT Foundation Stone 27 Logo Tramway Board 27 Logo MMTB logo 27 Logo Footscray Tramways Trust 28 217 And 2’gauge W2 – South Melbourne Depot – 20-10-1991 28 164 Somewhere? 28 1018 Advert tram – “Moro”, Preston flyover 29 V214 x 3 pics Kew Depot 30 611 Whitehorse Road, Balwyn 5-10-1991 30 976 x 2 pics Advert tram – have a red instead 31 610 Malvern Depot 31 138 (max tract) Flinders St 31 138 (max tract) Bourke into Spencer 32 844 Victoria Parade with R10 behind 32 264 With a TV interview being undertaken 32 2066 Elizabeth St – 29-4-1993 33 255 x 2 pics Derailed at Kew Depot 33 253 Derailed outside the Beehive Hotel 34 214, 892, 611 Re-enactment of Victoria Bridge to Esplanade service – 10-11-91 34 726 Art tram? – Swanston St with overhead trucks in background 34 10W Reblocking scrubber car at Brunswick Depot 1999 35 2085 At Preston workshops over an inspection track section 35 731 St Georges Road, road being rebuilt – Nov. 1991 35 Preston Jtn Junction at Workshops being relaid 36 1003 St Georges Road, Nov. 1991 trackworks 36 St Georges Rd Track being rebuilt – Nov. 1991 has temp track cross over 36 Victoria St Victoria St being reconstructed 6-9-1992 37 East Burwood Extension works – 18-2-1993 37 East Burwood Re-building crossover – 18-2-1993 37 Victoria St Victoria St being reconstructed 6-9-1992 38 19W, 16W Bylands – 5-12-1993 38 R10 Kew Depot 38 Workers Kew Depot pushing on a post 39 R10 R10 towing a B class tram- Royal Parade? 39 11W, 10W? South Melbourne Depot 39 Overhead Overhead truck at Kew Depot 40 Kew Depot Demolition works opposite depot 40 613? Malvern Depot on special tram 40 256 zoo tram Royal Park tram at Kew Depot 41 B class Bundoora line 1993 41 231, 611 Kew depot 75th anniversary tram 41 469, 287 Kew depot 42 510 Spring St into Bourke St – 28-4-1993. “42nd street promotion. 42 153 High St Northcote, Bundoora 42 611 Kew Depot, Nov. 1991 43 195? Simpson St siding – 25-4-1993 – 7 trams in all 43 646 Route 12, with fire station in background – Gisborne and Victoria 43 961 Burke Road, Camberwell, 10-8-1994 44 760 Art tram 44 938 Sam the tram, Flinders St 44 1014 Gilbert Road, West Preston, June 1994, advert for AGC 45 965 Daimaru advert tram, Swanston St 45 1018 Express post advert tram, Swanston St. 45 1024 Advert – lego exhibition – Swanston St 46 104 Camberwell depot 46 611 Looking towards driver’s controls from interior. 46 W1 Interior photo showing tip over seats 47 Cable car Interior photo – could be zoo tram 47 510 Interior, 28-4-1993 47 214 Kew Depot, night shot, Oct. 1991 48 246, 237 Kew depot, 13-9-1993 – Stubbsy and Energy Victoria advert 48 246, 231, 237 Kew depot, Navy, 75th anniversary of Kew and Fox Fm advert 48 2014, 2072 South Melbourne – tt line? Advert tram 49 59 And six other trams in front of Preston Workshops 49 1024 MMTB Christmas Tram, 1970 49 2001 Camberwell Depot 50 725 Preston depot area – tram has a red upper half 50 725 South Melbourne depot – now has Xmas decorations 50 1026 Bourke St, Christmas 6-12-1993 51 933 Victoria Parade shunt and other A class tram – Autumn 51 829 Art tram 51 39 Advert tram – Crime prevention 52 Connie Connie at night = has jeans on 52 1?? Has a MET inspector standing in front of number – Latrobe uni tram 52 611 Kew Depot 53 237 Fox FM Black Thunder tram at Kew Depot, August 1992 53 237, 611, 892 Victoria Bridge re-enactment – 10-11-1991 53 237 At Kew depot with 4 people, including Hugh Waldron 53 442, 10W South Melbourne Restaurant tram and works car 53 W2 At Wattle Park 53 School art Photo of students holding artwork on the zoo tram 256 at Kew 54 138 And many others 54 469 Launch of the Melbourne Tram by the PTC 54 School art Photo of students holding artwork on the zoo tram 256 at Kew 55 B2 Elizabeth St terminus, Christmas 1994 55 8 Z8 Swanston St, April 1993 55 504 Clifton Pugh – Preston Workshops 56 138, 180, 214 Hawthorn Depot display 56 650, 510 Hawthorn Depot 56 469 Camberwell 57 568 Bridge Road Richmond by cable tram depot 57 ? Advert tram – Falls Creek 57 995 Malvern Road, 18-5-1992 58 457, 217 etc Swanston St display 58 231, 611 Kew 75th Anniversary 58 682 Artist tram at Malvern Depot – 18-5-1992 59 1018 Country Road advert tram 59 8 Z class – decorated tram – Essendon Depot 59 947 Metland Safety Express – safety tram – Kew depot 60 101 x 2pics Decorated for RAAF 70th Anniversary 60 2082 Near East Preston Depot, with destination “Next Stop Mill Park” 61 475 After sale and disposal 61 585 After sale and disposal 61 651 After sale and disposal – Diamond Creek – 9-8-1994 62 386 After sale and disposal – Sunbury 62 590 After sale and disposal – Hall ACT 62 476 After sale and disposal – Kinglake 63 11W Bundoora Extension – track being opened 63 947 Metland Safety Express – safety tram – Kew depot 63 Model 2,3 2’ gauge model trams 64 Model 2 Ditto 64 250 After sale and disposal 64 293 After sale and disposal – Diamond Ck – 9-8-1994 65 246, 231, 237 Kew depot, Navy, 75th anniversary of Kew and Fox Fm advert 65 1002 Advert tram – Salvation Army 65 231, 29 Kew Depot 66 246, 231, 237 Kew depot, Navy, 75th anniversary of Kew and Fox Fm advert 66 646, 935, 1002 Kew depot 66 220, 60 Preston Workshops? 67 851, 814 Malvern Depot 3-9-1992 67 726 Malvern Rd at Glenferrie Road – 18-5-1992 67 237, 133 Victoria Parade 1996 68 814 and others Interior Malvern Depot – 18-5-1992 68 231 75th Kew depot anniversary at depot 68 231 75th Kew depot anniversary at depot 69 1024 Malvern Depot 10-11-1991 69 1011 Advert tram Melbourne City Toyota 69 106, 180 Swanston St 70 190, 568 Camberwell Depot 70 431 Flinders St – tram event 70 20, 138 Camberwell Depot 71 431 Flinders St – tram event 71 237 Fox FM Thunder Tram 71 2057, 2014 Elizabeth St, Vic Market 29-4-1993 72 676, 611, 892 Victoria Bridge re-enactment – 10-11-1991 72 Ceremony Victoria Bridge – mayor and others event 72 214 214 on the bridge 73 164 Lygon St – former outer circle line level crossing in view 73 841 Swanston Walk 29-4-1993 74 821 St Georges Road, April 1993 74 431, 231 Victoria Parade 74 217, 676 Passing Camberwell Depot 75 Oporto 018 Clarendon St 6-3-2003 75 3007 Albert Park – 7-3-2003 75 3001, 018, 3502 Docklands – 10-3-2003 76 Oporto 018 Docklands – 16-1-2003 76 Oporto 018 Flinders St 7-3-2003 76 3502 Swanston St at Flinders St -8-3-2003 77 16 Kew Depot, Jan 1991 77 112, 110 Bundoora 4-9-1992 77 738 Camberwell Feb 1991 78 1011 Thornbury Jan 1991 advert for City Toyota 78 101 Bundoora – RAAF tram 4-9-1992 78 814 Art tram – Swanston St August 1992 79 1024, 469, Z3 Preston Workshops – 469 as the Melbourne Tram – 9-9-1992 79 961 Malvern Depot 3-9-1992 79 242 Single line working in Victoria St 6-9-1992 80 781 Thornbury, the hump, Preston Workshops Jan 1991 80 2104 Preston Workshops 9-9-1992 80 2100 Launch, Preston Workshops 9-9-1992 81 5W + 1A 5 x W at Kew Depot 3-2-1991 81 676 Kew Depot 21-2-1991 81 873, 2016 Brunswick depot 2-3-1991 82 231 Kew Depot Yard – 21-1-1991 82 157, 158 Brunswick Depot – 2-3-1991 82 2057, 873, 158 Brunswick Depot – 2-3-1991 83 802 Art Tram - Franklin St from the signal box 2-3-1991 83 990 990 Evian advert tram, Franklin St signal box 2-3-1991 83 920 GIO Advert Tram with Bushels tea and Yellow Pages? Adverts 84 721 Art Tram, Franklin St signal box 84 976 St Georges Road, Jan 1991 – advert tram Capital society 84 731 St Georges Road, Jan. 1991 Art tram 85 10W Victoria Parade, Brunswick St, 1/3/1991 85 10W, 9 or 11W South Melbourne depot 85 10W Bundoora Terminus 4-2-1991 86 11W City Baths 86 10, 16 Camberwell Depot 6-12-1990 86 944 Glenhuntly Depot 18-2-1991 87 2011 Spring St – Princess Theatre, March 1990 87 294, 239, 277, 243, 259, 280 Kew Depot 87 296 Kew Depot 88 1015, 16 Batman Ave 19-1-1991 88 963, 948, 935, 996, 892 Kew Depot 3-2-1991 88 Victoria St Victoria St Richmond Reconstruction 6-2-1992 89 1014, 990 Batman Ave 19-1-1991 (Image added i5 and rear view added 23-12-2018, scanned for Dale Budd. 89 920 920 – GIO advert tram, 760 art Tram Collins at Spencer 17-10-1990 89 610, 611 Kooyong Station level crossing 30-12-1990 90 95 Royal Park, 15-2-1991 90 2057, 873, 158 Brunswick Depot – 2-3-1991 90 10 Camberwell Depot 6-12-1990 91 Bendigo 44 In Prahran and Malvern Tramways Trust Colours 1986 –Black and white photo. Listed 5-11-2016See note page 1 and on image 3trams, tramways, album, photo album, tramcars, the met, yarra trams, kew depot, brunswick depot, advertising trams, transporting art, preston depot, hawthorn, bundoora, st georges rd, victoria st, camberwell depot, tram r10, 8, 10w, 10, 11w, 16, 16w, oporto 018, 19w, 20, bendigo 21, 29, 39, bendigo 44, 59, 60, 95, 101, 104, 106, 110, 112, 133, 138, 153, 157, 158, 164, 180, 190, 195?, 214, 215, 217, 220, 226, 231, 232, 233, 236, 237, 238, 239, 242, 243, 246, 250, 253, 255, 256, 259, 264, 277, 280, 282, 287, 293, 294, 296, 380, 386, 431, 442, 457, 469, 475, 476, 504, 510, 568, 585, 590, 610, 611, 613?, 646, 651, 676, 682, 721, 722, 725, 726, 727, 728, 731, 738, 749, 760, 774, 781, 802, 814, 821, 824, 829, 841, 844, 851, 856, 873, 892, 920, 922, 925, 933, 935, 938, 944, 947, 948, 957, 961, 963, 965, 976, 990, 995, 996, 1002, 1003, 1011, 1014, 1015, 1018, 1024, 1026, 2001, 2011, 2014, 2015, 2016, 2037, 2057, 2057, 2066, 2072, 2082, 2085, 2100, 2104, 2106, 2112, 2130, 3001, 3007, 3502 -
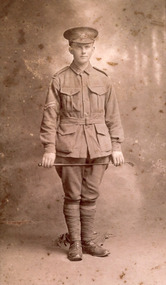 The Beechworth Burke Museum
Photograph, 1916-17
Portrait of William Edward Peach in First World War military uniform, holding a crop in front of his thighs with military kit on the ground behind him. A Beechworth postal employee who enlisted in 1915, this photograph is probably taken in 1917, as he is a corporal in the photo and was promoted to this rank in May 1917. This photograph is of historic significance as it depicts William Edward Peach, a Beechworth postal assistant who enlisted in the Australian Imperial Force (AIF) on his nineteenth birthday, 5 August 1915, which required his parents' permission. He was decorated with the military medal for his courage in battle 4/5 October 1917 at the Battle of Broodseinde Ridge near Ypres, the most successful allied attack of the Third Battle of Ypres (31 July to 10 November 1917), also known as the Battle of Paschendale, which saw the greatest loss of human life during World War One, with almost half a million lives were lost on all sides. According to the recommendation for his military medal, Peach 'displayed conspicuous courage and initiative', taking charge after his platoon commander became a casualty, handling the men 'under heavy fire with great skill'. He also assisted the Company Commander in reorganising their military objectives. The photograph is of social as well as historic significance for the Beechworth community, because it provides a direct link between local, national and international histories in relation to Australia' s participation in one of WWI's best-known battles. The record has strong research potential given the ongoing public and scholarly interest in war, history, and especially the ANZAC legend, which is commemorated annually on 25 April, known as ANZAC Day. Peach is also one of the diarists of WWI, including of this significant period of Australian military history, from 1916 to 18, which can be accessed via the Australian War Memorial. Sepia rectangular photograph printed on gloss Kodak photographic paper mounted on board. Reverse: BMM 8779 item catalogue number pencilled in right-hand bottom corner.military medal, defending australia and victoria, military service, hmat a64 demosthenes, wipers, anzac, burke museum, beechworth, ypres, australian military services, beechworth post office, first world war, wartime, our boys, belgium, flanders fields, ww1, british war medal, victory medal, broodseinde, third battle of ypres -
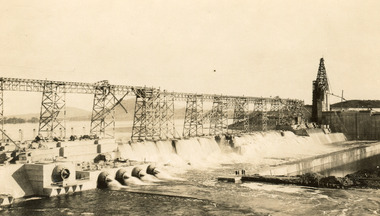 The Beechworth Burke Museum
Photograph
Taken on 25 October 1930, various houses with the Hume Dam under construction are depicted in the background. The construction of the Hume Dam took place from 1919 to 1936. At the time of construction, it was the second largest dam in the world. It was also one of the earliest civil projects developed after the Federation. Some of the Dam workers consisted of World War I veterans. Dam workers often settled their families in Mitta Junction Village and Wodonga. Archaeological surveys were completed by Austral Archaeology, which was done when the Department of Land & Water Conservation was doing work to improve Hume Dam. The archaeological report that came out of the survey recommended three sites of interest where archaeological excavation should be done: Camp Ganger’s Quarters, Stableman’s Quarters, and the Industrial Dump. The excavation uncovered artefacts. Mitta Mitta: Mitta Mitta is situated between Mount Welcome and Mount Misery. It is named after the river that explorers Hume and Hovell discovered in 1824. The town would eventually become a huge gold mining town. Mitta Mitta is called Midamodunga by the local Indigenous peoples Wodonga: Wodonga is situated on the Murray River and is part of North East Victoria. Hume and Hovell: Hamilton Hume (1979-1873) and William Hilton Hovell (1786-1875). W. H. Hovell was born in Norfolk England and Hume was born in Parramatta, New South Wales Hovell and Hume undertook an exploration journey in 1824 and thought they discovered a river, which turned out to be the Murray River. They returned home in 1825, but returned to the area in 1826 and discovered coal in the area. This photo is historically significant as it shows the Hume Dam under construction in 1930. The Dam was named after Hamilton Hume, who is an important historical figure for this area as he helped discover the area where resources were found.Sepia rectangular photograph printed unmountedReverse: 84-19-5 / 1997.3185/ Values & spillway. / When completed the wall / will be as high as the / scaffolding. [featuring trademark: kodak print]construction, houses, veterans, mitta junction village, hume dam, world war i, federation, wodonga, archaeological survey, excavation, austral archaeology, department of land & water conservation, camp ganger's quarter's, stableman's quarters, industrial dump, artefacts, mitta mitta, mount welcome, mount misery, murray river, hamilton hume, william hilton hovell, hume and hovell expedition -
 The Beechworth Burke Museum
Photograph, 1960s
This photograph was taken in the 1960s at Lake Sambell and is a view across the lake from the east side, the photo was taken during a period of improvements to the lake and surrounding area. Lake Sambell is an artificial lake that was created on the site of the old Rocky Mountain Mining Company workings and was officially opened by Minister for Lands, Mr Baily, on October 5, 1928. The disused and unattractive remains of the mine were converted into a recreational area intended for swimming, boating, and fishing. The lake is named after Mr L.H. Sambell, shire engineer and secretary of the Forward Beechworth Committee, who advocated for the enhancement of Beechworth into a tourist destination and was central to the planning and establishment of the lake. Funding for the project was raised through both competition funds and donations. Since the construction in 1928 several engineering issues have arisen. In 1939 the water levels were low, and the lake was considered both an eyesore and ‘mudhole’, Beechworth Shire Council sort funding to raise the height of the lake six feet to improve the quality of water. Throughout the 1940s the Beechworth Swimming Club sort to address the structural engineering issues and improve swimming facilities at the lake. R.E. Carter, similar to L.H. Sambell, was a shire engineer who advocated the importance of positioning Beechworth as a tourist destination. Carter held the position of shire engineer from 1954-63 and organised many improvements to the Lake Sambell area including the caravan park in 1959, the lake swimming pool in 1961, water skiing and boating facilities, and increased the lake surface area in 1964. These improvements to the lake also reflect an increase in leisure time and access to travel during a period of post-war prosperity in Australia during the 1950s and 60s. This photograph is of historical significance as it documents Lake Sambell in the 1960s after a series of enhancements to the lake area to improve its appearance and usability for both the people of Beechworth and tourists. It is also of social significance in providing an insight into the increase in leisure time and access to travel during a period of post-war prosperity. Black and white rectangle photograph printed on photographic paper and unmounted.Reverse: 3534 C798lake sambell, l.h. sambell, r.e. carter, rocky mountain mining company, forward beechworth committee, beechworth swimming club, wallace park lake sambell development scheme, lake sambell caravan park, beechworth 1960s, lake sambell swimming pool, lake sambell boating, lake sambell fishing, swimming, boating, water skiing, fishing, post-war prosperity, minister of lands, artificial lake, open cut sluice mine, lake -
 The Beechworth Burke Museum
Photograph, 1960s
This photo was taken in the 1960s from a northeast position looking down towards Lake Sambell, the caravan park, and the surrounding area. This photo was taken during a period of rejuvenation for the lake area including the opening of the caravan park in 1959 and the swimming pool area in 1961 (this pool is just visible in the centre of the photo). The popularity of caravanning in Australia exploded during this post-war period of the late 1950s and 1960’s. This popularity was driven by multiple factors, including: the stopping of fuel rations, the accessibility of car ownership through the manufacturing of affordable cars, technological developments in caravan design, and the increase in prosperity and leisure time for many Australians. Lake Sambell is an artificial lake that was developed on the previous site of the Rocky Mountain Mining Company workings and was officially opened by Minister for Lands, Mr Baily, on October 5, 1928. The disused and unattractive remains of the mine were converted into a recreational area intended for swimming, boating, and fishing. The lake is named after Mr L.H. Sambell, shire engineer and secretary of the Forward Beechworth Committee, who advocated for the enhancement of Beechworth into a tourist destination and was central to the planning and establishment of the lake. Funding for the project was raised by both competition funds and donations. Since the construction in 1928 several engineering issues have arisen. In 1939 the water levels were low, and the lake was considered both an eyesore and ‘mudhole’, Beechworth Shire Council sort funding to raise the height of the lake six feet to improve the quality of water. Throughout the 1940s the Beechworth Swimming Club tried to raise awareness and funds to address the structural engineering issues and improve swimming facilities at the lake. R.E. Carter, similar to L.H. Sambell, was a shire engineer who advocated the importance of positioning Beechworth as a tourist destination. Carter held the position from 1954-63 and organised many improvements to the Lake Sambell area including the caravan park in 1959, the lake swimming pool in 1961, water skiing and boating facilities, and increased the lake surface are in 1964. These improvements were financed mainly by grants from the Tourist Development Authority. This photograph is of historical significance as it documents Lake Sambell and the surrounding area in the 1960s after a phase of enhancements to improve the appearance and usability for both the people of Beechworth and tourists. It is also of social significance in providing an insight into the increase in leisure time and access to travel during a period of post-war prosperity.Black and white rectangle photograph printed on matte photographic paper and unmounted.Reverse: 1 / [logo KODAK/ VELOX/ PAPER] / C798 / 3535lake sambell, lake sambell caravan park, lake sambell swimming pool, caravan park, caravanning 1960s, rocky mountain mining company, l.h. sambell, r.e. carter, beechworth swimming club, forward beechworth committee, minister of lands, tourist development authority, lake swimming, swimming, boating, fishing, water skiing, beechworth 1960s, lake sambell fishing, lake sambell boating -
 The Beechworth Burke Museum
Photograph - Carte de Visite, James Bray, 1870
This photograph was taken in c.1870 and depicts Aaron Sherrtt who is best known for his involvements with, and eventual assassination by, the Kelly gang. He stands upright in the image with his arm leaning on a podium which reaches his hip. He is wearing an outfit for which he was infamous. Richard Warren, son of the proprietor of the Ovens and Murray Advertiser once stated that “anyone seeing [Aaron] coming down Ford Street would ask, “Who the hell’s this? Some advance agent for the circus?”’. The outfit Aaron wore for this particular photoshoot is reminiscent of this quote. He wears an unusual spotted shirt with a waistcoat and a sash is tied at his waist. He wears boots which turn up slightly at the toes. The hat is a “pork pie” hat which is worn in the typical “Greta Mob” style with the chinstrap under the nose. Aaron Sherritt was born in 1854 in Prahran, Melbourne, to Irish Protestant parents John and Anne. Sherritt stood at 5 foot 10. He had hazel eyes, dark brown hair and pale olive skin. Sherritt was childhood friends with Kelly Gang member, Joe Byrne, having previously attended the same school. Both men had a reputation for stealing horses and on one occasion, after stealing and butchering a cow, Sherritt and Byrne were convicted to six months in Beechworth Gaol (1876). Sherritt, along with Byrne, were reportedly recruited by Ned Kelly in 1877 in stealing stock; however, Sherritt never became a fully-fledged member of the Kelly Gang. Nevertheless, Sherritt scouted for the Kelly Gang in 1878. He later struck a deal with the police (specifically, with Chief Commissioner Standish) to save Joe Byrne's life in exchange for leading the police to the other members of the Gang. From then on, Aaron Sherritt lived the dangerous life of a double agent, providing police with what is assumed today to have been outdated or incorrect information in return for money. On the 26th of June 1880, Aaron Sherritt was murdered in the Woolshed Valley. He was approximately 23-25 years old at death. This event marked the start of the Kelly gang’s last days. Sherritt was murdered by Byrne in front of his wife, 15 year old and heavily pregnant Ellen “Belle” Sherritt and her mother Ellen Barry. Also in the Sherritt dwelling on this particular night were four policemen. The intention behind Sherritt’s murder was for the police to send word to Melbourne that the Kelly gang had murdered Sherritt and a police train would be sent to Glenrowan where the rest of the Kelly gang were waiting. This plan did not go as predicted and ultimately the Kelly gang fell at Glenrowan in 1880. This photograph was taken by James Bray who worked as a professional photographer in Camp Street Beechworth from 1870-1891. He was one of four men who photographed the Kelly Gang after the siege in Glenrowan in 1880. He is also renowned for his previous work photographing members of the Kelly gang. This photograph is part of the Burke Museum "Kelly album" which includes a significant collection of photographs and artefacts connected to Ned Kelly and the Kelly Gang. Ned Kelly and his gang have become ingrained in Australian popular culture and thus many museums, art galleries and private collections house material connected to the Kelly story which allows the events and people to be researched and interpreted. Artefacts and photographs pertaining to the Kelly gang are particularly valuable for Australian museums. This particular photograph is significant for its connection to Beechworth photographer James Bray who is responsible for many images depicting members of the Kelly Gang. The photograph is also of artistic significance as an example of a Carte de Viste dating to 1880 and it's connection to Aaron Sherritt.Sepia rectangular photograph printed on card. Obverse: J.E.Bray./ Photo/ Beechworth Reverse: Portrait & Landscape/ Photographer 5/ Aaron Sherritt J E Bray Signature Beechworth/ Victoria Beware (almost erased out) Negatives Kept. Copies 5I/.Each May/ Be Had By Forwarding Name And Address/ Accompanied With Remittance To/ The Amount Of Order/ Photographs Coloured In Water Colours 10237. kelly album, woolshed valley, 1870s, kelly gang, joe byrne, ned kelly, aaron sherritt, james bray, beechworth, burke museum -
 The Beechworth Burke Museum
Photograph, Beechworth Candid Photos, Unknown c1869-1940
... Reverse: Beechworth Candid Photos/ Phone 281570/ 5 Finch... Beechworth Reverse: Beechworth Candid Photos/ Phone 281570/ 5 Finch ...The Powder Magazine was built in 1859 by T Dawson and Company for fifteen hundred pounds and was restored in 1966 by the National Trust. The building was constructed to store black-powder used by miners on the goldfields for blasting for mining and quarrying as legally, miners had to leave bulk gunpowder the Powder Magazine overnight. Due to the passing of an 1857 act regulating the importation, transportation and importation of black powder, several Powder Magazines like the Beechworth Powder Magazine were constructed. The Magazine Powder is uniquely designed to ensure that in the chance of an explosion, the explosion is minimalized by travelling vertically rather than horizontally. The Powder Magazine was constructed using granite, slate roofing and a high stone wall and includes several safety features including wooden nails, lightning rod and a solid outer wall. This photograph is historically significant as it documents the development of laws related to mining, the actions taken to ensure the safety of those nearby potentially dangerous equipment and the architectural skills to design a storage facility to minimize damage caused by a potential explosion. A sepia toned rectangular photograph printed on matte paper.Reverse: Beechworth Candid Photos/ Phone 281570/ 5 Finch Street 3747/historic building, beechworth historic building, powder magazine, beechworth -
 The Beechworth Burke Museum
Photograph, 1886
Photograph of the winners of the six-men hose and reel event in Sandhurst on the 10th March 1886. There are 5 men pictured in the photograph all wearing dress uniforms and medals posing with a hand-drawn hose reel and stand pipe. Pictured from left to right: J. Scott / G. Duncan / C. Ellen / J. Anderson / F. Lloyd /. This photograph was take by James E. Bray (1832-1891).Sepia rectangular photograph printed on photographic paper and mounted on cardObverse: Winners of the six-men hose and reel event, Sandhurst, March 10th 1986 / Prize: Fifty Guinea Hose Reel/ J.E Bray Photo / J.Payne (absent) , J. Scott / G. Duncan / C. Ellen / J. Anderson / F. Lloyd / Reverse: 97.22 / 84-253-1 / BMMA3123 Members of Beechwoth Fire Brigade 1886emergency services, beechworth, sandhurst, burke museum, photograph, fire brigade, fire -
 The Beechworth Burke Museum
Postcard
Taken on an unknown date, depicted is a full-length portrait of a young, unidentified male soldier. He is dressed in an Australian military uniform. It is believed that this soldier was part of The Australian Imperial Force during World War I. This can be inferred by the 'Rising Sun' collar badge on his coat. Australia, unlike most other Commonwealth countries, did not adopt metal regimental badges during the First World War. All units were issued with the Australian Army General Service Badge, better known as the 'Rising Sun’ badge. This insignia is almost always identified with the Australian Imperial Force.The record is historically significant due to its connection to World War I. This conflict is integral to Australian culture as it was the single greatest loss of life and the greatest repatriation of casualties in the country's history. Australia’s involvement in the First World War began when the Australian government established the Australian Imperial Force (AIF) in August 1914. Immediately, men were recruited to serve the British Empire in the Middle East and on the Western Front. The first significant Australian action of the war was the Australian Naval and Military Expeditionary Force’s (ANMEF) landing on Rabaul on 11 September 1914. The ANMEF took possession of German New Guinea at Toma on 17 September 1914 and of the neighbouring islands of the Bismarck Archipelago in October 1914. On 25 April 1915, members of the AIF landed on Gallipoli in Turkey with troops from New Zealand, Britain, and France. This specific event holds very strong significance within Australian history. The record has strong research potential. This is due to the ongoing public and scholarly interest in war, history, and especially the ANZAC legend, which is commemorated annually on 25 April, known as ANZAC Day.Black and white postcard printed on card.Reverse: BMM 2640 / POST CARD / KODAK / 5 CORRESPONDENCE / ADDRESS ONLY / AUSTRAL / AUSTRAL / KODAK / R. McGEEHAN, PHOTO, 57 ELM GROVE RIPPONLEA, / EXTRA COPIES & ENLARGEMENTS OBTAINABLE. /military album, military, war, world war i, wwi, australian imperial force, aif, rising sun, uniform, portrait -
 Ringwood and District Historical Society
Photograph, Waters Grove, Heathmont - Collection of Photos showing bush damage during construction (Formerly Park St). c1973-5
Set of 23 Colour photographs showing bush damage along Waters Grove, Heathmont. Waters Grove runs between Marlborough and Waterloo Streets. This was formerly Park Road (1973 Melways) and Waters Grove from 1974 Melways. Photos are undated, but likely to be around 1974. -
 Phillip Island and District Historical Society Inc.
Photograph - Post Card, Family Group, possibly the Smith family
... Sepia photo of a 5 men and 1 woman standing in a garden... photographs william smith Sepia photo of a 5 men and 1 woman standing ...Sepia photo of a 5 men and 1 woman standing in a garden near a weatherboard house.local identities, phillip island, photographs, william smith -
 Phillip Island and District Historical Society Inc.
Certificate - Certificates, Volunteer Award Certificates Janet Crilly, 1990s
Janet was a long standing member of Phillip Island Red Cross Branch, being awarded a 30 year service awardA framed award certificate, 4 photocopied volunteer award certificates, 1 letter and 5 photocopied articles from the AdvertiserInternational Year of Older Persons 1999 Commonwealth Recognition Award for Senior Australians, awarded to Janet May Crilly for the Flinders Electorate. Shire of Phillip Island Volunteer Service awards for invaluable service as a volunteer to the community of Phillip Island for 1992, 1994, 1995 Photos and articles of Red Cross volunteers and long service awards, approximately mid 1990sjanet crilly, red cross, trophies & awards -
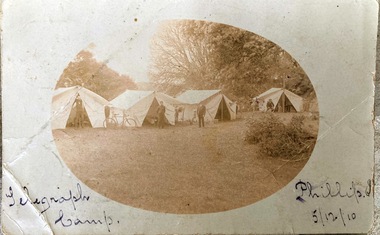 Phillip Island and District Historical Society Inc.
Photograph, Telegraph camp, Phillip Island 5/12/1910, 1910
Card was possibly sent by Bert Finlay to Albert [Bert] West. HistoricalSepia photo of 4 canvas tents with trees in background. 4 men standing outside each tent. Also a bicycle and items inside tents.Telegraph camp. Phillip Is. 5/12/10 With best wishes for a bright & happy Xmas 1910. From Bert F. Addressed to Mr A. West.Cowes P. O. Phillip Islandbert west, sepia photograph, camping, bert finlay -
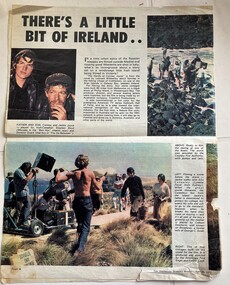 Phillip Island and District Historical Society Inc.
Article, "There's a little bit of Ireland '- The Hands of Cormac Joyce, April 1972
The Hands of Cormac Joyce is from a novel by Leonard Wibberley about the families in the Aran islands of Galway, Ireland. The film was made by Crawford Productions for the NBC network.HistoricalLarge magazine article with coloured photos from The Australian Women's Weekly April 26, 1972. Pages 4-5There's a little bit of Ireland ...in Westernport Bay, Vic."the hands of cormac joyce" film, crawford productions, film making -
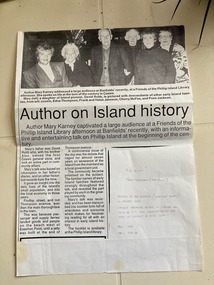 Phillip Island and District Historical Society Inc.
Article, Mary Karney on Island history, Mid 1970s
... Photocopy of a newspaper article which includes a photo... of a newspaper article which includes a photo of 6 people, 5 women ...Mary Karney's father was David Robb, who owned Cowes's first general store. The talk was for the Friends of the Phillip Island Library.HistoricalPhotocopy of a newspaper article which includes a photo of 6 people, 5 women and one man in the middle. Mary Karney, Edna Thompson, Frank & Helen Jansson, Cherry McFee and Poss Jackson.Author on Island historymary karney, david robb, local history, cowes, cherry mcfee, edna thompson, frank jansson, poss jackson -
 Phillip Island and District Historical Society Inc.
Postcard, Beauty spots in Victoria
Tourist photographs of Phillip IslandHistoricalSmall black and white photos of scenes of Phillip Island including the jetty, beach, Nobbies and ferries. Enclosed in a beige paper envelope.Beauty spots in Victoria. 12 Real Photographs for your Snapshot Album. Produced in Australia by The Rose Stereograph Co. Price 1/6 1. The Pier, Cowes, 2. Front beach, Cowes, 3. Alvina & Genista at pier, $. Koala in tree, 5. beach near Nobbies, 6. The Nobbies, 7. The Pinnacles, 8. Looking out at Forest caves, 9. Lovers Walk - Cowes, 10. Forest Cave, 11. The road to back beach, 12. The beach & pier, Cowes.the nobbies, ferries, cowes jetty, forrest caves, phillip island, black & white postcard copy, photographs -
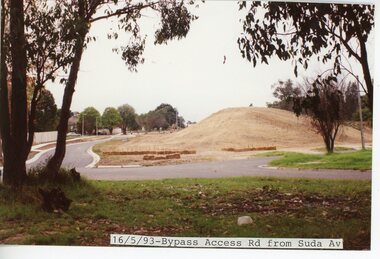 Ringwood and District Historical Society
photograph, Eastlink Ringwood Bypass Construction-Bypass Access Rd fromSuda Av 16/5/93
Colour photographWritten on back of photo: " Bypass access road from Suda Av 10/5/93" -
 Ringwood and District Historical Society
photograph, Eastlink Ringwood Bypass Construction-Bypass from Warrandyte Rd 17/5/95
Colour photographWritten on back of photo: "Ringwood Bypass-From Warrandyte Rd -
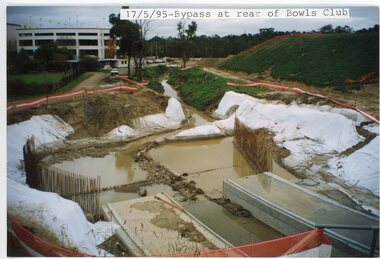 Ringwood and District Historical Society
photograph, Eastlink Ringwood Bypass Construction-Bypass at rear of Bowls Club 17/5/95
Colour photographWritten on back of photo: "Mullum Ck Diversion-at rear of Bowls Club" -
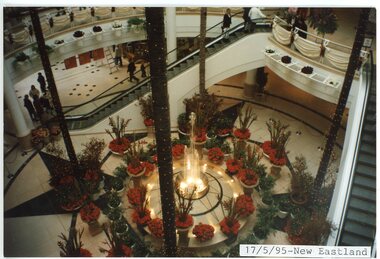 Ringwood and District Historical Society
photograph, Eastlink Ringwood Bypass Construction - Eastland interior escalators 17/5/95
Colour photographWritten on back of photo: "New Eastland-Town Centre 17/5/95" -
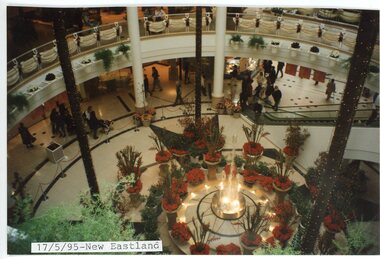 Ringwood and District Historical Society
photograph, Eastlink Ringwood Bypass Construction - Eastland interior escalators 17/5/95
Colour photographWritten on back of photo: "New Eastland-Town Centre 17/5/95" -
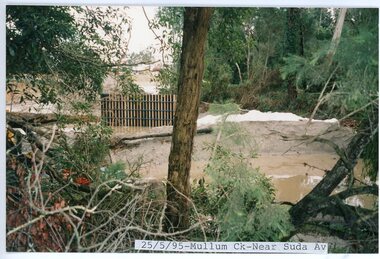 Ringwood and District Historical Society
photograph, Eastlink Ringwood Bypass Construction-Mullum Ck-Near Suda Av 25/5/95
Colour photographWritten on back of photo: "Mullum Ck Diversion_Near Suda Av 25/5/95" -
 Ringwood and District Historical Society
photograph, Eastlink Ringwood Bypass Construction-Mullum Ck-Near Suda Av 25/5/95
Colour photographWritten on back of photo: "Mullum Ck Diversion-Near Suda Av 25/5/95"