Showing 2879 items
matching wellington
-
 Melbourne Tram Museum
Document - Photo Album, Graeme Breydon, "Tickets and Postal Covers", c1970 to 1990
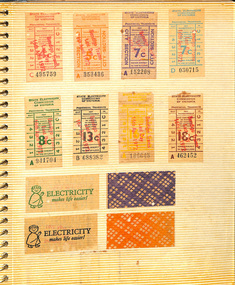
Photo Album - dark blue plastic covers with the letters "photo album" in raised letters, stippled finish containing 10 leaves ring bound with an adhesive surface with clear plastic sheet on each cover. Page 1 – set of 8 Last day tram tickets – 16/4/1972 and four SEC tickets rear. Page 2 – set of 10 SEC tickets and 2 backs Page 3 – 2 BTPS 10c tickets, MMTB 25c, 3 Brisbane City Council tickets, two Trittons furnishings, one WCC (Wellington?) cable car and two MMTB City Concession tickets Page 4 – Set of 9 MMTB tickets 4d, 7d city, 7d, 8d, 1/-, 1/ 4, 2/- or 20c, 2/6 and one Pensioner’s check ticket. Page 5 – Set of 9 MMTB tickets, 4c, 8c, 9c, 10c, 30c, Pensioner’s concession, two $1 City concession cards, city concession check ticket and two machine issued tickets 1c and 15c. Page 6 – set of 16 MMTB tickets that have been recovered from within trams, very dirty, check tickets, value tickets and advertising on the rear. Page 7 – various special train tickets – Stainless steel train, ARHS tours, TMSV, ARHS Farewell, ARHS SA Mile End, Ballarat trams x 2, Crich exhibition ticket and one MTT (Tas?) 30c. Page 8 – VR Windsor to Melbourne Quarterly 1940, 7 VR various country and suburban tickets and two VR Motor coach services tickets. Page 9 – two interstate reserved seat tickets, Brisbane suburban ticket and 8 various values QR Parcel tickets – very dirty. Page 10 – Two Puffing Billy guest passes, 10th anniversary ticket, 10 various card tickets for Puffing Billy and tours. Page 11 – 6 + others MTT Adelaide value tickets with adverts on rear and four AETM St Kilda Museum tickets. Page 12 – four Red Bus Rover London tickets, four Peak Tramways tickets, one toll bridge, 6 London machine issued tickets. Page 13 – One San Francisco Municipal Railway ticket, one LlafrairPG platform ticket and two MMTB Machine tickets. Page 14 – One $1 MMTB city concession card and one Parramatta Park tramway ticket issued for COTMA during 1976. Page 15 – One Emerald Park vehicle entry ticket and one PBPS opening day of the extension to Lakeside in 1975 with certificate. Page 16 – One PBPS Notice. Page 17 – not used. Page 18 – three commemorative envelopes – WA Railway Centenary, Standard Gauge to Melbourne, and Sydney to Perth. Page 19 – Brisbane tramways last day, two Last day envelopes for Ballarat and Bendigo. Page 20 – three different St Kilda Centenary – Adelaide. Contained within the album was loose tickets - see Reg Item 3970 and a pamphlet for the opening of the Transport Mural at Spencer St Station on 30 Jan. 1978.has a label on the side in punched letters on a green tape "Tickets and Postal Covers"trams, tramways, tickets, secv, mmtb, adelaide, brisbane, arhs, aetm, aeta, pbps, cotma, tmsv, victorian railways, vr, post office, envelopes, post office -
 Melbourne Tram Museum
Magazine, Yarra Trams, "The Wire", 5/2011 to 1/2015
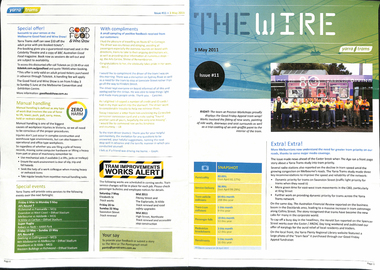
0 - No 9 - 1/4/2011 - Rhinos on skateboards, Did you know, Spencer St works, .1 - No. 11 of 3/5/2011 with the revised Yarra trams logo, traffic priority, work over Easter in Spencer St at Bourke and Collins St, Good Friday appeal, safety, passenger feedback and future works. .2 - No. 13 - 31/5/2011 - new uniform, cleaning, CEPR, trackwork - Fitzroy St, Northcote, Rhino, Carlton Control. .3 - No. 14 - 15/6/2011 - Haymarket Roundabout, accessibility, maintenance, CSE. .4 - No. 17 - 2/8/2011 - High St Westgarth trackwork, Swanston St, IMF CEO visit .5 - No. 18 - 16/8/2011 - Performance benchmarks met, Preston Workshops, repairs to 3018, tram signal priority. .6 - No . 19 - 30/8/2011 - New E class trams, routes "a" or "d", TramTracker in shelters, police, fare evasion .7 - No. 20 - 15/9/2011 - Football trams, Superstops, Bridge Road, Rhinos. .8 - No. 21 - 27/9/2011 - CEO's journey to work, accessibility, increased patronage, E class. .8a - No. 22 - 11/10/2011 - Minister Mulder visit, E class, Customer experience, Elizabeth Kerdelhue Corporate Affairs Director, flood indicator in Wellington Parade, Keolis - Orleans and PTV coming your way. .9 - No. 23 - 25/10/2011 - forthcoming royal visit, opening for Footscray Road extension, Rhinos, Stockholm .10 - No. 24 - 8/11/2011- Royal visit, photos, Z3 158, route 86 works in High St. (see htd5043i21 for a image from an unknown newspaper of the actual event - features Z3 158.) .11 - No. 25 - 22/11/2011 - new staff guide, Gold Coast tram line, Macarthur St, overhead, fund raising, route numbering update. .12 - No. 26 - 6/12/2011 - Swanston St Superstops, Newmarket bridge strikes, rhinos. .13 - No. 27 - 20/12/2011 - Christmas carnival, Lenny Bates, portable crossover, uniforms. .14 - No. 28 - 17/1/2012 - Passing of Len Bates, Myki, Gardiner railway station. .15 - No. 30 - 15/2/2012 - visit of Keolis, SNCF people, list of Executive leadership team with photos, Swanston St works, Myki introduction. .16 - No. 31 - 29/2/2012 - patronage up, tram postage stamps, Myki, rhinos. .17 - No. 32 - 14/3/2012 - St Kilda Rd trackwork, fund raising, Southbank Depot extensions, Myki, driving conditions, grand prix. .18 - No. 33 - 30/3/2012 - introduction of the PTV, end of MetLink and Transport Ticketing Authority, changes in management structure, trackwork, Gold Coast tramway and Keolis. .19 - No. 34 - Dr Jake - Royal children's Hospital super stop, route 96 - Premium line. .20 - No. 35, 2/5/2012 - Revision of Rules, trackwork in St Kilda Road and Elizabeth St, Myki, safety - Zero Harm. .21 - No. 69 - 25/9/2013 - Passengers paying their way, E class update, Mal Ashworth retires, progress report, feedback, new chime on trams. .22 - No. 70 - 9/10/2013 - Art comes alive, tram 925, driver simulator at Preston Workshops, E class project, 90th Glen Huntly. .23 - No. 83 - 23/4/2014 - Screen time for trams, new PIDs on B class, assistance animals, Operations Centre, Preston Workshops, Electrical log sheets to SLV. .24 - No. 89 - 23/7/2014 - punctuality, refresh of network map (fold-out map), women drivers. .25 - No. 97 - 19/11/2014 - Revitalising route 96, Keolis news, free tram zone, guide dogs. .26 - No. 99 - 17/12/2014 - Accessibility week, new uniform top for CSE's, free tram zone, world trade centre stop upgrade, heat stress, Art tram 158. .27 - No. 100 - 14/1/2015 - Route 96 complete, New Years eve free travel, fare compliance, patronage down, Demonstrates Yarra trams staff newsletters.Set of 22 Yarra Trams internal newsletter "The Wire", All A4, printed in full colour. All four pages unless noted otherwise, full colour, performance snapshot on front cover.trams, tramways, yarra trams, traffic control, trackwork, spencer st, fund raising, operations, rhinos, carlton control, high st, haymarket, preston workshops, e class, route numbers, bridge road, wellington parade, ptv, royal visit, footscray road, new tramway, gold coast, macarthur st, swanston st, superstops, newmarket, gardiner, burke road, level crossings, railway squares, myki, metlink, tickets, route 96, rules, st kilda road, elizabeth st, tram 158, tram 925, glen huntly depot, simulator, b class, opeations centre, art trams, patronage -
 Flagstaff Hill Maritime Museum and Village
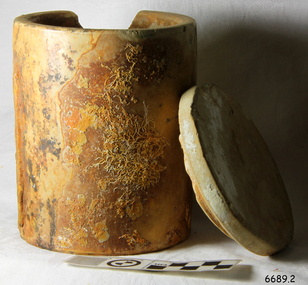
Ceramic - Container
When the Schomberg was launched in 1855, she was considered the "Noblest” ship that ever floated on the water. Schomberg's owners, the Black Ball Line had commissioned the ship for their fleet of passenger liners. She was built by Alexander Hall of Aberdeen for £43,103 and constructed with 3 skins. One planked fore and aft and two diagonally planked, fastened together with screw-threaded trunnels (wooden rails). Her First Class accommodation was simply luxurious with velvet pile carpets, large mirrors, rosewood, birds-eye maple and mahogany timbers throughout, soft furnishings of satin damask, and oak-lined library with a piano. Overall she had accommodation for 1000 passengers. At the launch, the Schomberg's 34-year-old master, Captain 'Bully' Forbes, had promised to reach Melbourne in sixty days stating, "with or without the help of God." Captain James Nicol Forbes was born in Aberdeen in 1821 and rose to fame with his record-breaking voyages on the famous Black Ball Line ships; Marco Polo and Lightning. In 1852 in the Marco Polo, he made the record passage from London to Melbourne in 68 days. Unfortunately, there were 53 deaths on the voyage, but the great news was off the record passage by Captain Forbes. In 1854 he took the clipper “Lighting” to Melbourne in 76 days and back in 63 days, this record was never beaten by a sailing ship. He often drove his crew and ship to breaking point to beat his previous records. He cared little for the comfort of the passengers. On this, the Schomberg's maiden voyage, he was determined to break existing records. Schomberg departed Liverpool on her maiden voyage on 6th October 1855 flying a sign that read "Sixty Days to Melbourne". She departed with 430 passengers and 3000 tons cargo including iron rails and equipment intended to build the Melbourne to Geelong Railway and a bridge over the Yarra from Melbourne to Hawthorn. She also carried a cow for fresh milk, pens for fowls and pigs, 90,000 gallons of water for washing and drinking. She also carried 17,000 letters and 31,800 newspapers. The ship and cargo were insured for $300,000 a fortune for the time. The winds were poor as she sailed across the equator, slowing Schomberg's journey considerably. The land was first sighted on Christmas Day, at Cape Bridgewater near Portland, Captain Forbes followed the coastline towards Melbourne. Forbes was said to be playing cards when called by the third mate Henry Keen, who reported land about 3 miles off. Due in large part to the captain's regarding a card game as more important than his ship, it eventually ran aground on a sand spit near Curdie's Inlet (about 56 km west of Cape Otway) on 26th December 1855, 78 days after leaving Liverpool. The sand spit and the currents were not marked on Forbes's map. Overnight, the crew launched a lifeboat to find a safe place to land the ship’s passengers. The scouting party returned to Schomberg and advised Forbes that it was best to wait until morning because the rough seas could easily overturn the small lifeboats. The ship’s Chief Officer spotted the SS Queen at dawn and signalled the steamer. The master of the Queen approached the stranded vessel and all of Schomberg’s passengers and crew disembarked safely. The Black Ball Line's Melbourne agent sent a steamer to retrieve the passengers' baggage from the Schomberg. Other steamers helped unload her cargo until the weather changed and prevented the salvage teams from accessing the ship. Later one plunderer found a case of Wellington boots, but alas, all were for the left foot. Local merchants Manifold & Bostock bought the wreck and cargo but did not attempt to salvage the cargo still on board the ship. They eventually sold it on to a Melbourne businessman and two seafarers. In 1864 after two of the men drowned when they tried to reach Schomberg, salvage efforts were abandoned. In 1870, nearly 15 years after the wreck parts of the Schomberg had washed ashore on the south island of New Zealand. The wreck now lies in 825 metres of water and although the woodwork is mostly disintegrated the shape of the ship can still be determined due to the remaining railway irons, girders and the ship’s frame. A variety of goods and materials can be seen scattered about nearby. There have been many other artefacts salvaged from the wreck include ship fittings and equipment, personal effects, a lithograph, tickets and photographs from the Schomberg. This ceramic container was retrieved from the shipwreck site during early salvage efforts on the vessel. And was donated to the Flagstaff Hill collection of Schomberg shipwreck artefacts.The ceramic container is particularly significant in that along with other items from the wreck have helped in part to having legislation changed to protect shipwrecks, with far tighter controls being employed to oversee the salvaging of wreck sites. This item forms part of the Schomberg collection at Flagstaff Hill maritime museum. The collection as a whole is of historical and archaeological significance at a State level. Flagstaff Hill’s collection of artefacts from the Schomberg is also significant for its association with the Victorian Heritage Registered Schomberg shipwreck (VHR S 612). The collection is of additional significance because of the relationship between the objects salvaged, as together they help us to interpret the story of the Schomberg. The collection as a whole is historically significant for representing aspects of Victoria's maritime history and its potential to interpret social and historical themes from society at the time of the wreck.Stoneware Container with lid, white in colour,Noneflagstaff hill, warrnambool, shipwrecked-coast, flagstaff-hill, flagstaff-hill-maritime-museum, maritime-museum, shipwreck-coast, flagstaff-hill-maritime-village, container, shipwrecked-artefact, schomberg, clipper ship, black ball line, 1855 shipwreck, aberdeen clipper ship, captain forbes, peterborough shipwreck, ss queen -
 Flagstaff Hill Maritime Museum and Village
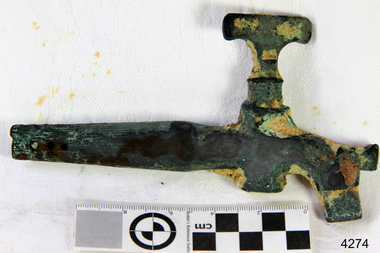
Functional object - Keg Spigot/Tap, Circa 1855
When the Schomberg was launched in 1855, she was considered the "Noblest” ship that ever floated on the water. Schomberg's owners, the Black Ball Line had commissioned the ship for their fleet of passenger liners. She was built by Alexander Hall of Aberdeen for £43,103 and constructed with 3 skins. One planked fore and aft and two diagonally planked, fastened together with screw-threaded trunnels (wooden rails). Her First Class accommodation was simply luxurious with velvet pile carpets, large mirrors, rosewood, birds-eye maple and mahogany timbers throughout, soft furnishings of satin damask, and oak-lined library with a piano. Overall she had accommodation for 1000 passengers. At the launch, the Schomberg's 34-year-old master, Captain 'Bully' Forbes, had promised to reach Melbourne in sixty days stating, "with or without the help of God." Captain James Nicol Forbes was born in Aberdeen in 1821 and rose to fame with his record-breaking voyages on the famous Black Ball Line ships; Marco Polo and Lightning. In 1852 in the Marco Polo, he made the record passage from London to Melbourne in 68 days. Unfortunately, there were 53 deaths on the voyage, but the great news was off the record passage by Captain Forbes. In 1854 he took the clipper “Lighting” to Melbourne in 76 days and back in 63 days, this record was never beaten by a sailing ship. He often drove his crew and ship to breaking point to beat his previous records. He cared little for the comfort of the passengers. On this, the Schomberg's maiden voyage, he was determined to break existing records. Schomberg departed Liverpool on her maiden voyage on 6th October 1855 flying a sign that read "Sixty Days to Melbourne". She departed with 430 passengers and 3000 tons cargo including iron rails and equipment intended to build the Melbourne to Geelong Railway and a bridge over the Yarra from Melbourne to Hawthorn. She also carried a cow for fresh milk, pens for fowls and pigs, 90,000 gallons of water for washing and drinking. She also carried 17,000 letters and 31,800 newspapers. The ship and cargo were insured for $300,000 a fortune for the time. The winds were poor as she sailed across the equator, slowing Schomberg's journey considerably. The land was first sighted on Christmas Day, at Cape Bridgewater near Portland, Captain Forbes followed the coastline towards Melbourne. Forbes was said to be playing cards when called by the third mate Henry Keen, who reported land about 3 miles off. Due in large part to the captain's regarding a card game as more important than his ship, it eventually ran aground on a sand spit near Curdie's Inlet (about 56 km west of Cape Otway) on 26th December 1855, 78 days after leaving Liverpool. The sand spit and the currents were not marked on Forbes's map. Overnight, the crew launched a lifeboat to find a safe place to land the ship’s passengers. The scouting party returned to Schomberg and advised Forbes that it was best to wait until morning because the rough seas could easily overturn the small lifeboats. The ship’s Chief Officer spotted the SS Queen at dawn and signalled the steamer. The master of the Queen approached the stranded vessel and all of Schomberg’s passengers and crew disembarked safely. The Black Ball Line's Melbourne agent sent a steamer to retrieve the passengers' baggage from the Schomberg. Other steamers helped unload her cargo until the weather changed and prevented the salvage teams from accessing the ship. Later one plunderer found a case of Wellington boots, but alas, all were for the left foot. Local merchants Manifold & Bostock bought the wreck and cargo but did not attempt to salvage the cargo still on board the ship. They eventually sold it on to a Melbourne businessman and two seafarers. In 1864 after two of the men drowned when they tried to reach Schomberg, salvage efforts were abandoned. In 1870, nearly 15 years after the wreck parts of the Schomberg had washed ashore on the south island of New Zealand. The wreck now lies in 825 metres of water and although the woodwork is mostly disintegrated the shape of the ship can still be determined due to the remaining railway irons, girders and the ship’s frame. A variety of goods and materials can be seen scattered about nearby. There have been many other artefacts salvaged from the wreck include ship fittings and equipment, personal effects, a lithograph, tickets and photographs from the Schomberg. This item was retrieved from the shipwreck site during early salvage efforts on the vessel. And was donated to the Flagstaff Hill collection of Schomberg shipwreck artefacts.This artifact is particularly significant in that along with other items salvaged from the wreck have helped in part to having legislation changed to protect shipwrecks, with far tighter controls being employed to oversee the salvaging of wreck sites. This item forms part of the Schomberg collection at Flagstaff Hill maritime museum. The collection as a whole is of historical and archaeological significance at a State level. Flagstaff Hill’s collection of artefacts from the Schomberg is also significant for its association with the Victorian Heritage Registered Schomberg shipwreck (VHR S 612). The collection is of additional significance because of the relationship between the objects salvaged, as together they help us to interpret the story of the Schomberg. The collection as a whole is historically significant for representing aspects of Victoria's maritime history and its potential to interpret social and historical themes from society at the time of the wreck. Brass keg spigot valve/tap, Schomberg Artifact Reg No S/94.Nonewarrnambool, flagstaff-hill, flagstaff-hill-maritime-museum, maritime-museum, shipwreck-coast, flagstaff-hill-maritime-village, schomberg, shipwrecked-artefact, clipper ship, black ball line, 1855 shipwreck, aberdeen clipper ship, captain forbes, peterborough shipwreck, ss queen, keg tap, brass keg tap -
 Melbourne Tram Museum
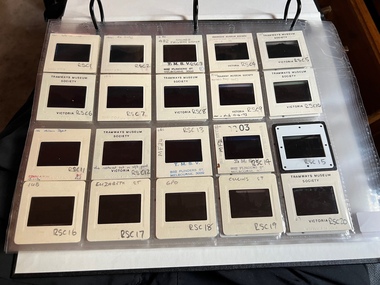
Album - Ron Scholten Slide Collection, Ron Scholten
Photo - see pdf file for further information. Number Brief Description RSC1 PCC 1041 at the gates of Preston Workshops on a test run without it’s trolley retriever RSC2 PCC 1041 in Glenhuntly Road on Route 67 en route to Carnegie crossing the Railway Gates at Glenhuntly Station RSC3 W2 482 stored at Malvern Depot with Olympic Park on the Destination RSC4 Cable Car Set 64 in Swanston St outside Princess Bridge Station in Bound with open top Double Deck Bus, Trak Motors ? Departing from Flinders St Station RSC5 W3 669 in St George Rd at Sumner St en route to Preston Workshops for scrapping RSC6 Cable Car in Lygon St en route to Carlton RSC7 PCC 1041 turning from St Georges Rd into Miller St to enter Preston Workshops RSC8 Flinders St Station with cable cars RSC9 PCC 1041 in strife on it’s maiden day in service. Trams on route 88 delayed in Queens Parade Clifton Hill RSC10 Flinders St at William St with Cable Cars RSC11 L 104 on the fan of the new shed at Malvern Depot on a TMSV tour RSC12 Cable Set 1 after it’s restoration at Preston Workshops on the fan near the front gate RSC13 X1 466 at a suburban terminus of the Footscray System RSC14 X2 680 at Point Ormond Terminus RSC15 An ex Launceston Tram at the outside terminus of the Penny Royal Complex Tramway in Launceston RSC16 Q 148 at Preston Workshops awaiting disposal RSC17 Elizabeth St with Cable Cars RSC18 Elizabeth and Bourke St corner outside the GPO with cable cars RSC19 Collins St with Cable Cars RSC20 A photo taken from the observation deck of the ICI building showing a view of Parliament house with a w class tram in Nicholson St RSC21 Auburn Horse car with a posed photo of all the tramwaymen employed RSC22 Cheltenham Double Deck Horsecar with a full load of passengers RSC23 City of Northcote cable trailer 3 at a terminus RSC24 City of Northcote Cable cars passing in High St Northcote RSC25 St Kilda Rd at Princes Bridge with Cable Cars RSC26 Flinders St with Cable Cars RSC27 Cable Cars RSC28 Bourke St looking towards Elizabeth St from Queen St RSC29 Cable cars in Bourke St at Elizabeth St looking East RSC30 Cable cars in Elizabeth St at the terminus at Flinders St RSC31 Cable cars in Bourke St at Swanston St looking west RSC32 Cable cars in Swanston St at Flinders St looking North RSC33 Cable cars in Collins St near Russell St RSC34 Cable cars in Elizabeth St at Bourke St RSC35 Cable cars in Collins St at Elizabeth St RSC36 Cable Cars in Swanston St at Flinders St RSC37 Cable cars in Collins St RSC38 Cable Cars RSC39 Cable cars in St Kilda Rd near Princes Bridge RSC40 Cable cars in Collins St East of Swanston St RSC41 Cable cars in Spring St outside Parliament house RSC42 K 92 in M&MTB Chocolate and cream livery but with a P&MTT Destination box on Route 14 RSC43 Thornbury depot viewed from Miller St and St Georges rd. Two W2 class cars are laying over between the peaks RSC44 Z3 201 in Met Livery passes D1 3510 in new M Tram livery. A Staff member in uniform stands in the doorway. Dandenong Rd RSC45 D1 3530 advertising Heinekin Super Golf on Route 55 in Royal Park RSC46 D1 3504 in M Tram livery on the reserved track in Matthews Ave near Essendon Airport showing Route 81 Travancore . I suspect it is a private enthusiasts charter due to the Malvern W class run number in the rear windscreen RSC47 D1 3504 on Route 64 in Dandenong Rd in M Tram Livery RSC48 D1 3504 in M Tram Livery at Airport West Terminus RSC49 D1 3504 in M Tram Livery in Union Rd outside the Showgrounds RSC50 D1 3504 at West Maribyrnong Terminus in M Tram Livery RSC51 D1 3503 in M Tram Livery in Malvern Depot RSC52 SW6 960 and VR 53 in Harbour Esplanade for the NMEL&T Co Centenary RSC53 Hawthorn Tramways Trust 32 in Harbour Esplanade for the NMEL&T Co Centenary RSC54 VR 53 & B 2042 in Harbour Esplanade for the NMEL&T Co Centenary RSC55 VR 53 & C 3016 in Harbour Esplanade for the NMEL&T Co Centenary RSC56 NMEL&T Co 13 usually V214 in Harbour Esplanade for the NMEL&T Co Centenary RSC57 NMEL&T Co 13 usually V214 at Preston Workshops for the NMEL&T Co Centenary RSC58 Hawthorn Tramways Trust Lettering on HTT 32 in Harbour Esplanade for the NMEL&T Co Centenary RSC59 Hawthorn Tramways Trust 32 in Harbour Esplanade for the NMEL&T Co Centenary RSC60 Hawthorn Tramways Trust 32in Harbour Esplanade for the NMEL&T Co Centenary RSC61 Hawthorn Tramways Trust 32 in Harbour Esplanade for the NMEL&T Co Centenary RSC62 NMEL&T Co 13 usually V214 at Preston Workshops for the NMEL&T Co Centenary RSC63 W2 516 and another on route 59 wait to shunt at Essendon Airdrome Terminus as W2 571 on route 49 departs. This was the last day of operation. RSC64 Australia’s First Electric Tram at Box Hill with Tramwaymen including H J Hilton who is in the centre RSC65 W2 484 en route to St Kilda Junction and another wait for passengers after a race meeting at Caulfield Racecourse RSC66 X1 463 on the Footscray system en route to Russell St RSC67 Geelong 35 on Chilwell Route, Formerly HTT 13, M&MTB 119, then Bendigo 1 and Ballarat 37 RSC68 P&MTT 4 on Opening Day of the system in Glenferrie Rd RSC69 Bendigo 6 in McCrae St near the Depot end route to North Bendigo RSC70 P&MTT 4 in Glenferrie on opening day of the System RSC71 Scrubber 3 stripped and awaiting scrapping at Preston Workshops RSC72 Scrubber 4 at South Melbourne Depot RSC73 Q 191 & 139 at Preston Workshops awaiting scrapping RSC74 Rail Grinder 3 at Preston Workshops as purchased from Sydney RSC75 Y 469 waits to shunt at Wattle Park Terminus as Y1 613 departs on driver training duties RSC76 VR 53 on the outside roads at Essendon Depot RSC77 W5 796 with three doors and square windows running out of Brunswick Depot in Cameron St, with a supplementary destination board showing “City via Swanston St” RSC78 W2 258 on the wheel grinder road at Brunswick depot RSC79 X2 676 on a TMSV tour, W5 817 & 836 & VR 53 on the open roads at Essendon Depot RSC80 PCC 1041 on test, passes W71035 in High St Preston RSC81 D1 class production number 7 as delivered on test in Matthews Ave RSC82 W2 383 on route 5 turning from the reserved track in Dandenong Rd into St Kilda Rd at St Kilda Junction RSC83 Z3 204 as advertising tram for Vodaphone Grand Prix running into Malvern Depot new shed RSC84 Z1 4 on test in St Georges Rd RSC85 PCC 1041 on Route 96 in Burke St near Exhibition St RSC86 Z1 3 without numbers on test turning from Miller St in St Georges Rd RSC87 Track components stored in Coldblo Rd at Malvern Depot with Z class cars adjacent RSC88 D1 3501 in M Tram Livery on Route 55 in Peel St at Franklin St RSC89 C 3001 in Yarra Trams Livery Porto 018 & D13502 in M Tram Livery on Display in Harbourside Esplanade RSC90 D1 class tram production number 7, in as delivered condition on test in Matthews Ave RSC91 D1 3503 inside Malvern Depot RSC92 SW6 955 and W6 974 in St Kilda at City Rd at Dusk RSC93 Freight Car 19 at Preston Workshops in green Livery RSC94 Rail Grinder 3 in green Livery at South Melb Per Way Yard RSC95 A SW6 class car on route 50 shunting at Elizabeth St Terminus at night, taken from Flinders St Station RSC96 W2 588 & 435 in St Kilda Rd at Batman Ave RSC97 Y1 613 in service at Wattle Park Terminus RSC98 W2 588 in Wellington Parade en-route to the City with a Grand Final Load of passengers followed closely by 384 RSC99 W2 558 on a MCG Footy Special entering the Simpson St sidings RSC100 W3 657 & an L Class in the new shed at Malvern Depot RSC101 Y1 613 in St Kilda Rd on an enthusiasts tour in St Kilda Rd south of St Kilda jun RSC102 Y1 613 on an enthusiasts tour in Clarendon St with the two extra tracks on the Viaduct under construction RSC103 W6 976 on the fan of the new shed at Malvern Depot RSC104 W7 1024 as an advertising car for Bank of NSW at the route 1 terminus at South Melb Beach RSC105 PCC 980 on route 96 in Nicholson St near North Fitzroy Depot RSC106 SW6 890 with dash canopy lighting in Market St on the opening day of William St Services RSC107 W2 444 with big numbers heads a line of footy specials in Simpson St Sidings RSC108 Cable Cars in Elizabeth St RSC109 NMEL&T co 2 with a trailer outside the power station in Mount Alexander Rd RSC110 Alf Twentyman’s cable car set in his Northcote backyard RSC111 Cable Cars in Queens Parade Clifton Hill RSC112 Cable cars in Collins St outside the Townhall RSC113 PCC 1041 at Carnegie terminus RSC114 Cable cars in Elizabeth St RSC115 Cable cars in Collins St near Swanston St RSC116 HTT 19 turns from Riversdale Rd into Camberwell Rd at Camberwell Junction RSC117 W1 419 official builders photo of first car of the class RSC118 Cable car with a full load of passengers RSC119 W1 422 illuminated for the visit of T.R.H. The Duke and Duchess of York RSC120 PCC 1041 in strife on it’s maiden day in service. Trams on route 88 delayed in Queens Parade Clifton Hill RSC121 Bendigo birney in Finn St near North Bendigo terminus RSC122 SW6 in St Kilda Rd at Domain Rd at night RSC123 All 3 of Alf Twentyman’s cable cars in his Northcote backyard RSC124 Cable trailer 256 being unloaded into the shed at Bylands RSC125 Cable grip car 1 being removed from the Melbourne Museum RSC126 Alf Twentyman's cable cars in his Northcote Backyard RSC127 Alf Twentyman's cable cars in his Northcote Backyard RSC128 Alf Twentyman's cable cars in his Northcote Backyard RSC129 Alf Twentyman's cable cars in his Northcote Backyard RSC130 W class car in Swanston St at Collins St RSC131 Y1 469, L & W3 on the run out of Glenhuntly Depot on a tour RSC132 W7 1024 as an advertising tram for Bank of NSW at Clifton Hill RSC133 W2 496 on a footy special in Simpson St Sidings RSC134 W2 as originally converted to a test car at Preston Workshops RSC135 W3 667 in Brunswick Depot with Ellen Butland at the controls RSC136 W3 669 on it’s final run at Victoria Prd & Brunswick St RSC137 W2 571 in Wellington Prd at Clarendon St with a Footy Final load of Passengers RSC138 Y1 613 shunts at Spencer St Terminus as X217 waits on Australia Day Pageant RSC139 PCC 1041 on Rt 96 in Burke St outside the Southern Cross Hotel RSC140 890 with accident damage on the outside roads at Preston Workshops c1978 RSC141 535 on Rt 4 at the old St Kilda Jun c1967 RSC142 1041 on Rt 88 turns from Bourke St into Spring St 1973 RSC143 102 on a tour at Albert Park Beach Terminus Feb 1972 RSC144 833, 835 & 834 in the shed at Malvern Depot c1976 RSC145 281 in Wellington Parade on a football very crowded special c1974 RSC146 464 Ballarat Rd 1960 RSC147 181 Explosives Fty - at Footscray Station - July 1960 RSC148 181 Williamstown Road 1960 RSC149 Cable car set at Alf Twentyman’s c1970 RSC150 X 217 at Malvern Depot c1970 RSC151 X1 465 and T181 Footscray Football ground in Barkly St. c1960 RSC152 Scrubber 5 at South Melbourne depot c1960 RSC153 X1 465 Footscray to Russell St, c1960 RSC154 X1 467 Leeds St Footscray 1960 RSC155 PMTT 4 Glenferrie Road, 1910 RSC156 S 164 at Malvern Depot c1970 RSC157 T178 Footscray c1960 RSC158 Cleaner No. 7 at South Melbourne depot c1960 RSC159 Two Y classes at Princes Bridge / Batman Ave mid 1950s RSC160 Swanston St – Nu color vue slide – M142 Demonstrates the work of Ron Scholten in photography, collection and/or production of duplicate slidesAssembled album in a black presentation folder of 160 colour slides, 8 slide sleeves, collected or produced by Ron Scholten. Many are TMSV or Windsor Publications slides. All photographs have been scanned and placed on the Museum's G drive. A list of all photographs with details has been compiled. melbourne, tramways, trams, cable trams -
 Flagstaff Hill Maritime Museum and Village
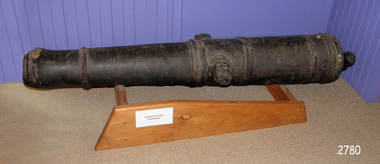
Weapon - Cannon, Alexander Hall and Son, c. 1855
The Schomberg Cannon was recovered from the 1855 wreck of the SCHOMBERG in 1974 by Flagstaff Hill divers Peter Ronald, Colin Goodall and Gary Hayden. The wreck site was discovered in August 1973 by Stan McPhee and John Laidlaw. ABOUT THE SCHOMBERG When SCHOMBERG was launched in 1855, she was considered the “Noblest ship that ever floated on water.” SCHOMBERG’s owners, the Black Ball Line, commissioned the ship for their fleet of passenger liners. The ship was built by Alexander Hall of Aberdeen at a cost of £43,103. It was constructed with three skins: one planked fore and aft and two diagonally planked, fastened together with screw-threaded trunnels (wooden rails). Its first-class accommodation was simply luxurious; velvet pile carpets, large mirrors, rosewood, birds-eye maple, mahogany, soft furnishings of satin damask; an oak-lined library and a piano. Overall she had accommodation for 1000 passengers. At the launch, the SCHOMBERG’s 34-year-old master, Captain ‘Bully’ Forbes, had promised Melbourne in 60 days, "with or without the help of God." James Nicol Forbes was born in Aberdeen in 1821 and rose to fame with his record-breaking voyages on the famous Black Ball Line ships; MARCO POLO and LIGHTNING. In 1852 in the MARCO POLO he made the record passage from London to Melbourne in 68 days. There were 53 deaths on the voyage but the great news was of the record passage by the master. In 1954 Captain Forbes took the clipper LIGHTNING to Melbourne in 76 days and back in 63 days, this was never beaten by a sailing ship. He often drove his crew and ship to breaking point to beat his own records. He cared little for the comfort of the passengers. On this, the SCHOMBERG’s maiden voyage, he was going to break records. SCHOMBERG departed Liverpool on her maiden voyage on 6 October 1855 flying the sign “Sixty Days to Melbourne”. The ship departed with 430 passengers and 3000 tons of cargo including iron rails and equipment intended to build the Melbourne to Geelong Railway and a bridge over the Yarra from Melbourne to Hawthorn. She also carried a cow for fresh milk, pens for fowls and pigs, and 90,000 gallons of water for washing and drinking. It also carried 17,000 letters and 31,800 newspapers. The ship and the cargo was insured for $300,000, a fortune in those times. The winds were poor as she sailed across the equator, slowing SCHOMBERG’s journey considerably. Land was first sighted on Christmas Day, at Cape Bridgewater near Portland, and Captain Forbes followed the coastline towards Melbourne. Forbes was said to be playing cards when called by the Third Mate Henry Keen, who reported land about 3 miles off, Due in large part to the captain's regarding a card game as more important than his ship, it eventually ran aground on a sand spit near Curdie's Inlet (about 56 km west of Cape Otway) on 26 December 1855, 78 days after leaving Liverpool. The sand spit and the currents were not marked on Forbes’s map. Overnight, the crew launched a lifeboat to find a safe place to land the ship’s passengers. The scouting party returned to SCHOMBERG and advised Forbes that it was best to wait until morning because the rough seas could easily overturn the small lifeboats. The ship’s Chief Officer spotted SS QUEEN at dawn and signalled the steamer. The master of the SS QUEEN approached the stranded vessel and all of SCHOMBERG’s passengers and crew were able to disembark safely. The SCHOMBERG was lost and with her, Forbes’ reputation. The Black Ball Line’s Melbourne agent sent a steamer to retrieve the passengers’ baggage from the SCHOMBERG. Other steamers helped unload her cargo until the weather changed and prevented the salvage teams from accessing the ship. Later one plunderer found a case of Wellington boots, but alas, all were for the left foot! Local merchants Manifold & Bostock bought the wreck and cargo, but did not attempt to salvage the cargo still on board the ship. They eventually sold it on to a Melbourne businessman and two seafarers. In 1864 after two of the men drowned when they tried to reach SCHOMBERG, salvage efforts were abandoned. Parts of the SCHOMBERG were washed ashore on the south island of New Zealand in 1870, nearly 15 years after the wreck. The wreck now lies in 825 metres of water. Although the woodwork is mostly disintegrated the shape of the ship can still be seen due to the remaining railway irons, girders and the ship’s frame. A variety of goods and materials can be seen scattered about nearby. Flagstaff Hill holds many items salvaged from the SCHOMBERG including a ciborium (in which a diamond ring was concealed), communion set, ship fittings and equipment, personal effects, a lithograph, tickets and a photograph from the SCHOMBERG. One of the SCHOMBERG bells was in the old Warrnambool Library. The Schomberg cannon is currently on loan to the Port Campbell Visitor Information Centre.The SCHOMBERG collection is of historical and archaeological significance at a State level, listed on the Victorian Heritage Register VHR S612. Flagstaff Hill’s collection of artefacts from the SCHOMBERG is significant for its association with the Victorian Heritage Registered shipwreck. The collection is primarily significant because of the relationship between the objects, as together they have a high potential to interpret the story of the SCHOMBERG. The SCHOMBERG collection is archaeologically significant as the remains of an international passenger ship. The shipwreck collection is historically significant for representing aspects of Victoria’s shipping history and its potential to interpret sub-theme 1.5 of Victoria’s Framework of Historical Themes (living with natural processes). The collection is also historically significant for its association with the shipwreck and the ship, which was designed to be the fastest and most luxurious of its day. The SCHOMBERG collection meets the following criteria for assessment: Criterion A: Importance to the course, or pattern, of Victoria’s cultural history. Criterion B: Possession of uncommon, rare or endangered aspects of Victoria’s cultural history. Criterion C: Potential to yield information that will contribute to an understanding of Victoria’s cultural history.Cannon; 6-POUNDER (6pdr) smooth bore cannon, mounted on a wooden frame. The cannon has a metal lug on each side. It is commonly known as the Schomberg cannon. It was recovered from the wreck of the Schomberg in 1974.warrnambool, flagstaff-hill, flagstaff-hill-maritime-museum, maritime-museum, shipwreck-coast, flagstaff-hill-maritime-village, schomberg, shipwrecked-artefact, clipper ship, black ball line, 1855 shipwreck, aberdeen clipper ship, captain forbes, peterborough shipwreck, ss queen, cannon, the schomberg cannon, schomberg cannon, peterborough, 1855, sailing ship -
 Flagstaff Hill Maritime Museum and Village
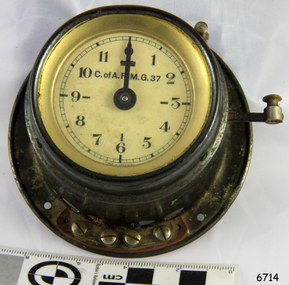
Timer, 1940s
Australia's first telephone exchange was opened in Melbourne in August 1880. It was operated by the Melbourne Telephone Exchange Company. Owned by W. H. Masters and T. T. Draper, the Manager of the Company was H. Byron Moore. This was only two years after the world's first exchange in the United States, and just four years after Bell first spoke on a telephone. The exchange was located in the old Stock Exchange building at 367 Collins Street, a site now occupied by the Commonwealth Bank. In 1884, the operations of the Company, by then known as the Victorian Telephone Exchange Company, had grown considerably and were transferred to Wills Street, Melbourne. Private ownership of this company continued until 1887 when it was bought out by the Victorian Colonial Government. Other colonial governments followed this example. By 1910, the growth in telephone services made additional accommodation necessary. This could not be provided in the existing building in Wills Street and arrangements were made for a new exchange in Lonsdale Street. Alexander Graham Bell visited Australia in 1910 to advise the Federal Government's Postal Commission. Telephone exchanges were established in Adelaide with (48 subscribers), Hobart (10 subscribers) and Launceston (35 subscribers). The first exchange in Western Australia was established in 1887 and located in a small three-room cottage in Wellington Street, Perth with 17 subscribers. The year 1888 marked the opening of the Fremantle exchange in a small room at the rear of the Town Hall. There were nine subscribers. Australia's first automatic exchange was installed in the GPO in Sydney, in 1911, for internal use. But the first automatic exchange for public use was opened at Geelong in Victoria in the next year July 1912 with 800 subscribers. Melbourne's first automatic exchange was opened in the suburb of Brighton in 1914; the first public automatic exchange in NSW began operating at Newtown, Sydney in 1915; and Queensland's first was installed at South Brisbane in 1925. 1929 saw the opening of Tasmania's first automatic exchange in Hobart. an automatic telephone service. In June 1977, the manual telephone exchange at Swansea was replaced with an automatic service and made Tasmania the first State in Australia to have a fully automatic net work. The half-century following Federation saw the growth of the automatic operation; a great extension of trunk line services; The automatic telephone contributed greatly to the early popularity of telephones in Australia. It was a quicker and more convenient way of communicating with another person on the same exchange — instead of having to go through tedious processes with the operator. From its introduction, the number of automatic telephones in operation grew to a remarkable extent. In 1886, the first trunk link of 16 km was connected to the exchanges of Adelaide and Port Adelaide in South Australia. Then, in 1907, the first inter-capital telephone trunk line was opened between Sydney and Melbourne. It was followed by a line between Melbourne and Adelaide in 1914. Sydney and Brisbane were linked in 1923, and Perth and Adelaide in 1930. In 1930, the first overseas calls from Australia came possible with the introduction of a radio telephone service to England, and through there to Europe and America. A similar service opened to New Zealand in the same year. Initially, trunk channels linked different manual trunk exchanges. It was necessary for a succession of trunk operators to connect the appropriate channels, one after the other until the connection was made. As trunk traffic grew. the system became increasingly unsuitable. More trunk operators had to be employed and so labour costs increased. It was a tedious and slow way of making a long-distance call, and it was sometimes hard to hear, particularly when several exchanges were linked With technical advances, trunk switching moved from manual operation through a partly automatic phase. Automatic transit switching equipment was used and only a single operator was required to connect a trunk call to a wanted automatic subscriber. Until well beyond the middle of this century, the majority of trunk traffic went through this single telephonist control. In 1953, the number of telephones in use in Australia passed the one million mark. By then, the need for improvement in the automatic exchanges was be coming well recognised. The need was for a telephone switching system which would do a better job more economically than the conventional step-by-step ex-change. This led to the adoption of the Crossbar system as the standard in automatic telephone exchanges in 1960. The introduction of Crossbar switching was a big step forward in the automation of trunk calls. It substituted automatic switching and charging equipment for the originating trunk operator, and improved the quality of the system radically. Before the introduction of the Crossbar system there were often very long delays in obtaining a booked trunk call, and the quality of sound was often very poor. With Crossbar, Subscriber Trunk Dialing (STD) became a reality. A trunk call by STD was as easy to make and almost as fast to connect as a local call.The item was made around the 1940s and used up until the 1970s in manual cord telephone exchanges as a way to time and charge users for trunk calls made over the telecom system of the time. Post Master General dept. - Trunk Call Timer.Inscribed PMG, C. of A, 37. Bell chimes at 3 min increments.flagstaff hill, warrnambool, shipwrecked-coast, flagstaff-hill, flagstaff-hill-maritime-museum, maritime-museum, shipwreck-coast, flagstaff-hill-maritime-village, timer, trunk call, telephone, cord exchange -
 Flagstaff Hill Maritime Museum and Village
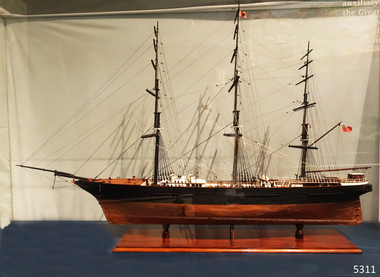
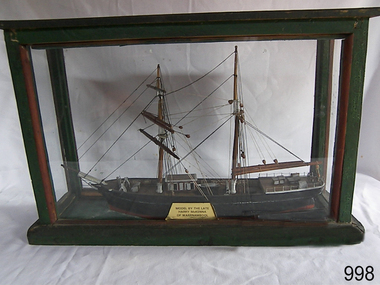
Craft - Ship Model, S.S. Schomberg, 1988
This model of the clipper ship SS Schomberg was researched and constructed to a scale of 1:64 by David Lumsden in 1988. When the Schomberg was launched in 1855, she was considered the "Noblest” ship that ever floated on the water. Schomberg's owners, the Black Ball Line had commissioned the ship for their fleet of passenger liners. She was built by Alexander Hall of Aberdeen for £43,103 and constructed with 3 skins. One planked fore and aft and two diagonally planked, fastened together with screw-threaded trunnels (wooden rails). Her First Class accommodation was simply luxurious with velvet pile carpets, large mirrors, rosewood, birds-eye maple and mahogany timbers throughout, soft furnishings of satin damask, and oak-lined library with a piano. Overall she had accommodation for 1000 passengers. At the launch, the Schomberg's 34-year-old master, Captain 'Bully' Forbes, had promised to reach Melbourne in sixty days stating, "with or without the help of God." Captain James Nicol Forbes was born in Aberdeen in 1821 and rose to fame with his record-breaking voyages on the famous Black Ball Line ships; Marco Polo and Lightning. In 1852 in the Marco Polo, he made the record passage from London to Melbourne in 68 days. Unfortunately, there were 53 deaths on the voyage, but the great news was off the record passage by Captain Forbes. In 1854 he took the clipper “Lighting” to Melbourne in 76 days and back in 63 days, this record was never beaten by a sailing ship. He often drove his crew and ship to breaking point to beat his previous records. He cared little for the comfort of the passengers. On this, the Schomberg's maiden voyage, he was determined to break existing records. Schomberg departed Liverpool on her maiden voyage on 6th October 1855 flying a sign that read "Sixty Days to Melbourne". She departed with 430 passengers and 3000 tons cargo including iron rails and equipment intended to build the Melbourne to Geelong Railway and a bridge over the Yarra from Melbourne to Hawthorn. She also carried a cow for fresh milk, pens for fowls and pigs, 90,000 gallons of water for washing and drinking. She also carried 17,000 letters and 31,800 newspapers. The ship and cargo were insured for $300,000 a fortune for the time. The winds were poor as she sailed across the equator, slowing Schomberg's journey considerably. The land was first sighted on Christmas Day, at Cape Bridgewater near Portland, Captain Forbes followed the coastline towards Melbourne. Forbes was said to be playing cards when called by the third mate Henry Keen, who reported land about 3 miles off. Due in large part to the captain's regarding a card game as more important than his ship, it eventually ran aground on a sand spit near Curdie's Inlet (about 56 km west of Cape Otway) on 26th December 1855, 78 days after leaving Liverpool. The sand spit and the currents were not marked on Forbes's map. Overnight, the crew launched a lifeboat to find a safe place to land the ship’s passengers. The scouting party returned to Schomberg and advised Forbes that it was best to wait until morning because the rough seas could easily overturn the small lifeboats. The ship’s Chief Officer spotted the SS Queen at dawn and signaled the steamer. The master of the Queen approached the stranded vessel and all of Schomberg’s passengers and crew disembarked safely. The Black Ball Line's Melbourne agent sent a steamer to retrieve the passengers' baggage from the Schomberg. Other steamers helped unload her cargo until the weather changed and prevented the salvage teams from accessing the ship. Later one plunderer found a case of Wellington boots, but alas, all were for the left foot. Local merchants Manifold & Bostock bought the wreck and cargo but did not attempt to salvage the cargo still on board the ship. They eventually sold it on to a Melbourne businessman and two seafarers. In 1864 after two of the men drowned when they tried to reach Schomberg, salvage efforts were abandoned. In 1870, nearly 15 years after the wreck parts of the Schomberg had washed ashore on the south island of New Zealand. The wreck now lies in 825 metres of water and although the woodwork is mostly disintegrated the shape of the ship can still be determined due to the remaining railway irons, girders and the ship’s frame. A variety of goods and materials can be seen scattered about nearby. There have been many other artefacts salvaged from the wreck include ship fittings and equipment, personal effects, a lithograph, tickets and photographs from the Schomberg. This item was retrieved from the shipwreck site during early salvage efforts on the vessel. And was donated to the Flagstaff Hill collection of Schomberg shipwreck artefacts.This artifact is particularly significant in that along with other items salvaged from the wreck have helped in part to having legislation changed to protect shipwrecks, with far tighter controls being employed to oversee the salvaging of wreck sites. This item forms part of the Schomberg collection at Flagstaff Hill maritime museum. The collection as a whole is of historical and archaeological significance at a State level. Flagstaff Hill’s collection of artefacts from the Schomberg is also significant for its association with the Victorian Heritage Registered Schomberg shipwreck (VHR S 612). The collection is of additional significance because of the relationship between the objects salvaged, as together they help us to interpret the story of the Schomberg. The collection as a whole is historically significant for representing aspects of Victoria's maritime history and its potential to interpret social and historical themes from society at the time of the wreck.Wooden model of the clipper ship SS Schomberg. The three masts are rigged with lines but have no sails. The model is mounted on pedestals on a timber board, exhibited in a glass case. The scale of this model is 1:64.Noneflagstaff hill, warrnambool, shipwrecked-coast, flagstaff-hill, flagstaff-hill-maritime-museum, maritime-museum, shipwreck-coast, flagstaff-hill-maritime-village, ship model, schomberg ship model, 1855, david lumsden, ship model maker, clipper ship, black ball line, 1855 shipwreck, aberdeen clipper ship, captain forbes, peterborough shipwreck, ss queen -
 Flagstaff Hill Maritime Museum and Village
Craft - Ship Model, Mary Campbell, circa 1940
This ship model is of the sailing brigantine MARY CAMPBELL, which once belonged to Captain James Arthur Robilliard. The model was made by Harry McKenna, a well-known ship model maker and Warrnambool resident. CAPTAIN ROBILLIARD James Arthur Robilliard, sea captain and tent maker, was born in 19th April 1843 in St. Helier, Jersey, Channel Islands. He trained there in his father’s sail loft as a sail maker. He later became a skipper. His first job as a sailor was achieved in Liverpool, England. In 1875 James Robilliard migrated to Australia as mate on the “E.M. Young”. Captain Robilliard and his family were amongst the early settlers along the Curdies River in the Heytesbury district. In 1877 he became a Captain. On 14th November 1879 Captain Robilliard married Helen Beckett. James and Helen had ten children; James Arthur (Jnr), Henry William, Nellie Jessie, Alfred Albert, Rubena Nellie, De Jersy Norman, Clifford Beckett, Olive Ida, Frances Ridley Havergal and Nellie Elvie, all born in Victoria. THE MARY CAMPBELL The ship “Mary Campbell” was built by Alexander Newton Jnr. She was carvel planked, of iron bark and blue gum timber. The family shipyard was at Pelican, on the Manning River, NSW, and “Mary Campbell” was first launched by her builder in 1869 as “The Son”. Three months later she was renamed “Mary Campbell’ by her purchaser J. Campbell in Sydney. She was used to carry equipment for the Sydney Sugar Refinery’s Mill in Southgate, NSW. She then traded for the next 20 years between Australian ports and rivers along the east coast as well as regular ports in New Zealand. She was “recognised as one of the best carrying little vessels in the timber trade” (Sydney Morning Herald). She had several owners over this time, the last one being Captain James A. Robilliard. On 29th April 1889 “Mary Campbell”, in the charge of her owner, Captain James A Robilliard, was on her way from Clarence River, NSW to Melbourne, Victoria with a cargo of railway girders for the Melbourne Harbour Trust. Captain Robilliard encountered a storm off Port Macquarie. He sailed the vessel south to 25 miles (about 40km) east of Cape Hawke, near Tuncurry and Forster. At 7pm, he discovered that the cargo had shifted during the stormy seas and the heavy girders had damaged the hull, causing a leak. The pumps were inadequate to stem the fast flowing leak and over a meter of water filled the hull during the next 2 hours. Some of the crew began throwing the cargo overboard to lighten the vessel, hoping to keep it afloat until daylight. When the water reached over 2 meters in the hull they realised their efforts were in vain. At 1:30am on 30th April 1889 the crew left the vessel. They stood by in the lifeboat until 3am. The ship was sinking fast, so they left for the shore, looking for a safe place to beach their boat. While still miles off Cape Hawke all 7 crew members, including the Captain, were rescued by the Government Tug “Rhea” and taken to Port Macquarie hospital then returned to Sydney in the “Wellington”. Captain Robilliard managed to rescue his ship’s compass but no cargo was saved from the vessel. It had been under-insured, only covered for half its value, due to lack of funds. Many years later, in 1976, an anchor was caught up in the net of a trawler south of Forster and thought to be from the “Mary Campbell”. It was donated and installed in the Great Lakes Museum, Tuncurry, NSW. (The same museum also has a half-model of the hull of “Mary Campbell”.) The name of the last ship Captain Robilliard sailed is currently unknown, however he sailed that ship from the port of Marlborough, Queensland, carting steel railway girders for the Geelong-to-Camperdown line. On one trip it hit a storm, the cargo shifted and the ship was wrecked along the NSW coast. After this, Captain Robilliard exchanged sea life for farming in Peterborough. In about 1897, verging on retirement, Capt. Robiilliard superintended the Melbourne Sailors’ Home in Spencer Street, Melbourne, before being asked to leave this position in 1902 for trying to shut down the local hotel! At this time the Melbourne Sailors’ Home was about to change its location. On 6th May 1917 Captain James Arthur Robilliard J.P. died at Blackwood Park, in the Cobden district of Brucknell, which is now considered the first official Robilliard family homestead in Australia. He was buried in the Melbourne General Cemetery, Victoria. His wife Helen passed away in 1947. The Becket and Robilliard family names continue to be well known in the Western District Flagstaff Hill Maritime Village also has a ship’s compass in the collection that was also owned by Capt. J. Robilliard and was used on the ship Mary Campbell.This ship model of the MARY CAMPBELL is of local significance for its association with well known Warrnambool resident and ship model maker. The model is also significant for its association with the brigantine MARY CAMPBELL, a trading vessel that brought railway girders to the Melbourne Harbour Trust.Ship model "Mary Campbell", a two-masted vessel with black hull, brown masts and black rigging. In glass case with timber frame painted green. Painted on the bow in white “MARY CAMPBELL” Gold label with black print attached to display case “MODEL BY THE LATE HARRY McKENNA OF WARRNAMBOOL”flagstaff hill, warrnambool, shipwrecked coast, flagstaff hill maritime museum, maritime museum, shipwreck coast, flagstaff hill maritime village, great ocean road, marine artwork, model making, captain james arthur robilliard, j.a. robilliard, vessel mary campbell, ship mary campbell, melbourne sailors home, vessels, harry mckenna -
 Flagstaff Hill Maritime Museum and Village
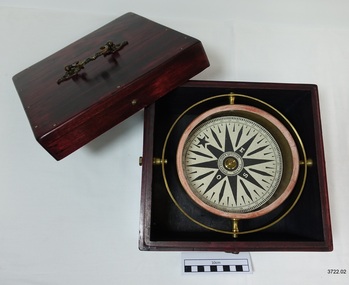
Functional object - Compass, mid-19th Century
Captain Robilliard: James Arthur Robilliard was a sea captain and tentmaker, born on the 19th April 1843 at Saint Helier, Jersey. He trained there in his father's sail loft as a sailmaker. His first job as a sailor was in Liverpool, England and 1875 James Robilliard migrated to Australia as mate on the "E.M. Young". James Robilliard and his family were amongst the early settlers that arrived along the Curdies River in the Heytesbury district of Western Victoria. In 1877 he became a Captain and would have used his compass from ship to ship. On 28th May 1877 in that same district a small 3-masted, schooner the "Young Australian" was wrecked. This schooner had been built 1864 at Jervis Bay, NSW. She had been on her way from Maryborough Queensland to Adelaide, under the command of Captain Whitfield, when she lost her mainmast in a heavy gale. She was beached at Curdies Inlet in Peterborough, Victoria, Captain Robilliard was placed in charge of the salvaging operation and recovered a good portion of the cargo. Not long after this incident a Warrnambool shop owner David Evans found employment for James Robilliard with Evan Evans, who produced tents, sails, tarpaulins and similar goods; James already had the necessary skills for this work. Evan Evans was the same sailor rescued from the “Young Australian” soon after his rescue Evan recalled he had a relative in Australia in a town called Warrnambool and while walking in Timor Street, Warrnambool, he saw a sign over a shop that said “David Evans” and once the two men met, Evan was warmly welcomed. David then helped his relative to establish a tent and tarpaulin-making business there. Evan later transferred his successful business to a shop in Elizabeth St, Melbourne, under the name Evan Evans Pty. Ltd.) James Robilliard, a committed Christian, and accredited Lay Preacher with the Methodist Church. He travelled around the local district leading the settlers in worship. On 14th November 1879, Captain Robilliard married Helen Beckett. Alfred and Selina Beckett and their family all attended the church at Brucknell where Captain Robilliard preached. He was said to have been taken by their young daughter Helen. James and Helen had ten children; James Arthur (Jnr), Henry William, Nellie Jessie, Alfred Albert, Rubena Nellie, De Jersy Norman, Clifford Beckett, Olive Ida, Frances Ridley Havergal and Nellie Elvie, all born in Victoria. In the 1880s James Robilliard captained the cutter "Hannah Thompson" into Port Campbell, Victoria. This vessel was the first coastal trader to operate between Melbourne and Port Campbell. At one time Captain Robilliard had to beach the "Hannah Thompson" for repairs. In 1923 she was blown ashore in a gale and wrecked at Oberon Bay, at Wilson's Promontory. In 1889 the compass was saved by Captain James Arthur Robilliard from his sinking brigantine "Mary Campbell" in 1889. This vessel was used to carry equipment for the Sydney Sugar Refinery's Mill in Southgate, NSW. The ship had been built in 1869 and traded for the next 20 years between Australian ports and rivers along the east coast as well as regular ports in New Zealand. She was recognised by the Sydney Morning Herald as one of the best "carrying vessel in the timber trade". She had several owners over this time, the last one being Captain James A. Robilliard. On 29th April 1889 the "Mary Campbell", with Captain James A Robilliard as captain and owner, was on her way from Clarence River, NSW to Melbourne, Victoria with a cargo of railway girders for the Melbourne Harbour Trust. Captain Robilliard encountered a storm off Port Macquarie. He sailed the vessel south to about 40km east of Cape Hawke, near Tuncurry. At around 7 pm, he discovered that the cargo had shifted during the storm and the heavy girders had damaged the hull, causing a leak. The pumps were inadequate to stem the fast-flowing leak water soon filled the hull during the next two hours. Some of the crew began throwing the cargo overboard to lighten the vessel, hoping to keep it afloat until daylight. When the water reached over 2 meters in the hull they realised their efforts were in vain. On the 30th April 1889, the crew left the vessel the ship was sinking fast, so they made for the shore. While still miles off Cape Hawke all seven crew members, including the Captain, were rescued by the Government Tug "Rhea" and taken to Port Macquarie Hospital and later returned to Sydney in the vessel "Wellington". No cargo had been saved and the consignment had been under-insured, only covered for half its value. The name of the last ship Captain Robilliard sailed is currently unknown, however, he sailed that ship from the port of Marlborough, Queensland, carting steel railway girders for the Geelong-to-Camperdown railway line. On this trip the ship hit a storm, the cargo shifted and the ship was wrecked along the NSW coast. After this, Captain Robilliard retired from the sea and began farming in Peterborough. In about 1897, verging on retirement, Capt. Robilliard superintended the Melbourne Sailors’ Home in Spencer Street, Melbourne, before being asked to leave this position in 1902 for trying to shut down a local hotel. On 6th May 1917 Captain James Arthur Robilliard J.P. died at Blackwood Park, in the Cobden district of Brucknell, the first Robilliard family homestead in Australia. He was buried in the Melbourne General Cemetery, Victoria. His wife Helen passed away in 1947. This compass, once belonging to Captain James Arthur Robilliard, is of local and state historical significance for its use by the Captain with his vessel the "Mary Campbell", a trading vessel that was bringing railway girders to the Melbourne Harbour Trust. He also used this compass on the "Hannah Thompson", listed on the Victorian Heritage Register and known as being the first coastal trader to operate between Melbourne and Port Campbell. The compass is also a very fine example of maritime navigational instruments manufactured and used in the mid-19th century. Marine compass, brass, in wooden box with separate, fitted lid. The compass card has sixteen points. The four principal points are marked; North with a star shaped, South with an “S”, East with and “E” and West with an “O” (French word OUEST). Each quadrant of the circle is numbered from 0 – 90 degrees. The card is floating in a liquid. The compass gimbal is attached to the sides of the box and to the front and back of the compass’ cylindrical brass frame. The mahogany coloured timber storage box is joined with brass nails. The centre of the lid has a folding decorative brass handle. The lid fits over base and closes with a brass screw and hook on both front and back. Maker; Dubas Watchmaker Optician, Nantes, France, c 1860-1870. Compass came from the ship “Mary Campbell”, which sank off the NSW coast in 1889, near Forster. The compass, as well as the ship, belonged to Captain James Arthur Robilliard and was donated by his family. “DUBAS MANTES” stamped into side of gimbal. “DUBAS HORLOGER OPTICIEN. NANTES.” printed around centre of card. flagstaff hill, warrnambool, shipwrecked coast, flagstaff hill maritime museum, maritime museum, shipwreck coast, flagstaff hill maritime village, great ocean road, marine compass, navigation instrument 19th century, marine instruments, dubas mantes, captain james arthur robilliard, j.a. robilliard, helen beckett, ship young australian, ship young australia(n), ship hannah thompson, ship mary campbell, melbourne sailors home, david evans, evan evans, curdies inlet, brucknell church, curdies railway, great lakes museum -
 Flagstaff Hill Maritime Museum and Village
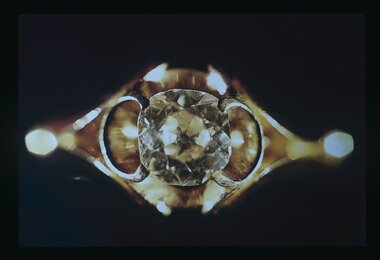
Accessory - Diamond ring, about 1855
In 1975, 120 years after the sailing ship Schomberg was wrecked, Flagstaff Hill divers (Peter Ronald, Colin Goodall and Gary Hayden) found an ornate communion set amongst the wreckage. The set comprised a jug, ciborium, lid, chalice and plate. The items, apart from the lid, were then displayed at Flagstaff Hill Maritime Village. The lid had etchings that did not match the chalice and sat in storage for several years. Then in 1978, while the marine concretion inside the lid was being examined, a surface layer came loose and revealed a glint of gold that was assumed to be a piece of brass. The layers of concretion were carefully removed and a ring-like band emerged. Further treatment exposed a 'large faceted stone in an intricate gold setting. Weeks later a detailed examination estimated the value of the ring, known as the Schomberg Diamond, to be $7000. When the Schomberg was launched in 1855, she was considered the "Noblest” ship that ever floated on the water. Schomberg's owners, the Black Ball Line had commissioned the ship for their fleet of passenger liners. She was built by Alexander Hall of Aberdeen at a cost of £43,103 and constructed with 3 skins. One planked fore and aft and two diagonally planked, fastened together with screw-threaded trunnels (wooden rails). Her First Class accommodation was simply luxurious with velvet pile carpets, large mirrors, rosewood, birds-eye maple and mahogany timbers throughout, soft furnishings of satin damask, an oak-lined library with a piano. Overall she had accommodation for 1000 passengers. At the launch, the Schomberg's 34-year-old master, Captain 'Bully' Forbes, had promised to reach Melbourne in sixty days stating, "with or without the help of God." Captain James Nicol Forbes was born in Aberdeen in 1821 and rose to fame with his record-breaking voyages on the famous Black Ball Line ships; Marco Polo and Lightning. In 1852 in the Marco Polo, he made the record passage from London to Melbourne in 68 days. Unfortunately there were 53 deaths on the voyage, but the great news was off the record passage by Captain Forbes. In 1854 he took the clipper “Lighting” to Melbourne in 76 days and back in 63 days, this record was never beaten by a sailing ship. He often drove his crew and ship to breaking point to beat his previous records. He cared little for the comfort of the passengers. On this, the Schomberg's maiden voyage, he was determined to break existing records. Schomberg departed Liverpool on her maiden voyage on 6th October 1855 flying a sign that read "Sixty Days to Melbourne". She departed with 430 passengers and 3000 tons cargo including iron rails and equipment intended to build the Melbourne to Geelong Railway and a bridge over the Yarra from Melbourne to Hawthorn. She also carried a cow for fresh milk, pens for fowls and pigs, 90,000 gallons of water for washing and drinking. She also carried 17,000 letters and 31,800 newspapers. The ship and cargo were insured for $300,000 a fortune for the time. The winds were poor as she sailed across the equator, slowing Schomberg's journey considerably. Land was first sighted on Christmas Day, at Cape Bridgewater near Portland, Captain Forbes followed the coastline towards Melbourne. Forbes was said to be playing cards when called by the third mate Henry Keen, who reported land about 3 miles off. Due in large part to the captain's regarding a card game as more important than his ship, it eventually ran aground on a sand spit near Curdie's Inlet (about 56 km west of Cape Otway) on 26th December 1855, 78 days after leaving Liverpool. The sand spit and the currents were not marked on Forbes's map. Overnight, the crew launched a lifeboat to find a safe place to land the ship’s passengers. The scouting party returned to Schomberg and advised Forbes that it was best to wait until morning because the rough seas could easily overturn the small lifeboats. The ship’s Chief Officer spotted the SS Queen at dawn and signaled the steamer. The master of the Queen approached the stranded vessel and all of Schomberg’s passengers and crew disembarked safely. The Black Ball Line's Melbourne agent sent a steamer to retrieve the passengers' baggage from the Schomberg. Other steamers helped unload her cargo until the weather changed and prevented the salvage teams from accessing the ship. Later one plunderer found a case of Wellington boots, but alas, all were for the left foot. Local merchants Manifold & Bostock bought the wreck and cargo but did not attempt to salvage the cargo still on board the ship. They eventually sold it on to a Melbourne businessman and two seafarers. In 1864 after two of the men drowned when they tried to reach Schomberg, salvage efforts were abandoned. In 1870, nearly 15 years after the wreck parts of the Schomberg had washed ashore on the south island of New Zealand. The wreck now lies in 825 meters of water and although the woodwork is mostly disintegrated the shape of the ship can still be determined due to the remaining railway irons, girders and the ship’s frame. A variety of goods and materials can be seen scattered about nearby. The actual lid in which the ring was found has not yet been completely identified and could belong to a coffee pot, sugar bowl or maybe a jug or something similar. Although all survived the wreck no-one came forward to claim the valuable diamond. The Schomberg Diamond is currently on display in the Great Circle Gallery. Flagstaff Hill Maritime Village along with the rest of the communion set. Other artefacts salvaged from the wreck include ship fittings and equipment, personal effects, a lithograph, tickets and photographs from the Schomberg. One of the Schomberg bells is in the Warrnambool Library.The Schomberg Diamond is particularly significant in that it played a crucial part in having the legislation changed to protect shipwrecks, with far tighter control over the salvaging of items from wreck sites. This ring is registered as Artefact S/105 in the Schomberg collection, the Schomberg collection as a whole is of historical and archaeological significance at a State level. Flagstaff Hill’s collection of artefacts from the Schomberg is also significant for its association with the Victorian Heritage Registered shipwreck (VHR S 612). The collection is of prime significant because of the relationship between the objects salvaged, as together they help us to interpret the story of the Schomberg. The collection as a whole is historically significant for representing aspects of Victoria's maritime history and its potential to interpret social and historical themes. A mid-Victorian gentleman's solitaire diamond dress ring with a Brazilian cut diamond (cushion cut), one and one-third carat set within an 18 carat yellow gold ring consisting of four claws within an open scroll setting and a divided scroll shank. Colour is classified as 'J', clarity SII. The setting is handmade. warrnambool, shipwrecked-coast, flagstaff-hill, flagstaff-hill-maritime-museum, maritime-museum, shipwreck-coast, flagstaff-hill-maritime-village, schomberg, shipwrecked-artefact, clipper ship, black ball line, 1855 shipwreck, aberdeen clipper ship, captain forbes, peterborough shipwreck, ss queen, ciborium, ring, schomberg-diamond, schomberg-ring, gentleman's ring, dress ring -
 Ballarat Base Hospital Trained Nurses League
Priscilla Wardle - Trainee Ballarat District Hospital, 27/02/1905 to 01/03/1908 and WW1 Nurse. Also Edith Popplewell & Lily MacKenzie
No 1: Matron Eagleton with Nursing Staff, Ballarat & District Hospital. Priscilla Wardle, far right - trainee nurse 1905-1908. No 2: This could be a group of trainee nurses at Ballarat Hospital. Circa 1906/1907. The nurses with the grey looking sleeves in this black and white photograph may be wearing the lilac uniform of Trainee nurses. The sitting nurse on the far right may already be qualified because she appears to be wearing the white of a trained nurse. Sitting in the middle with the cheeky grin could be Priscilla and the standing nurse on the far left could be Edith Popplewell. No 3: This photograph is labelled 1907 and Priscilla would have just commenced her training. She appears to be “fanning” a female patient presumably to cool her down. This could be upstairs in the Queen Victoria’s Women’s Ward. Priscilla graduated as a nurse in 1908. In this photograph Priscilla was at age 23 years. No 5: Sheila Kelly (left) and Priscilla Wardle. This photograph is labelled 1909 and shows Priscilla in an all white uniform indicating she has qualified as a nurse. Sheila Kelly appears to have darker sleeves/blouse (lilac) and may still be a trainee. No 6: There is a very good chance that this photograph is Edith Popplewell, standing left, Lily MacKenzie , standing on the right and Priscilla seated. Writing in her album is very hard to read but it appears to be “Pop McK & I”. The arm bands with the St John Cross denote they are “charge nurses” maybe in charge of a ward. Taking all this into account the photograph could be circa 1909/1910. No 8 & 9: Priscilla painting what appears to be a gate while wearing her nurse uniform. She has a big grin on her face. Together with Lily MacKenzie they were the principals in the Mount Stuart Private Hospital at 18 Duke Street. Daylesford. This property is now known as Mount Stuart House. Priscilla appears to be on Central Spring Road with the Daylesford Post Office in the background. Photograph 9 is labelled 1914 which would make it near the end of their tenancy between 1911 and 1914. No 10: This photograph raises some questions. Priscilla appears to have darker sleeves /blouse (lilac) which may indicate she is still a trainee however Priscilla is also wearing a “charge nurse” arm band. While my research shows trainee nurses can be a “charge nurse” this is not common practise. The scene appears to be at the door of a house/home. I am not sure if the children’s ward/orphanage at the Ballarat Hospital at this time was in such a building. It could be that it is at the Mount Stuart Hospital but this would mean Priscilla and Lily have duplicated the wearing of the “charge nurse” arm band. The St John’s logo looks different too. Priscilla Isabel “Pearl” Wardle (1884-1967). The armband indicates Priscilla is a Charge Nurse at the Ballarat Hospital. Nothing else known. No 11: Mary & I at Mount Stuart – House Daylesford – This is probably the nursery at the Mount Stuart House Private Hospital being run by Priscilla Isabel “Pearl” Wardle (1884 – 1967) and Selina Lily (Lil) MacKenzie or McKenzie (1882 – 1975) between 1910 and 1914. Mary is certainly Mary Young MacKenzie or McKenzie (1865- 1942) Lily’s stepsister who trained at Ballarat Hospital as “Mary Young “at the same time as Priscilla and Lily. Mount Stuart House still stands at 18 Duke Street Daylesford. Photo date 1912. No 12: Priscilla wearing her distinctive Queen Alexandra’s Imperial Military Nursing Service Reserve cape and badge. Possibly while nursing in London for a month in 1919 after the war. No 12A: Priscilla Wardle - WW1 Diary, OCR enabled. No 13: Priscilla and friends at No. 7 General Hospital, Malassises, Saint Omer, France in July 1915 The old monastery being used as a hospital can be seen in the background. The tents are the nurses quarters. This photograph may have been taken at the same time as the group photograph on page 250 of the diary transcription. Priscilla is thought to be the nurse at the centre in the QAIMNSR uniform. The nurses quarters at the No 7 General Hospital in Saint Omer in France where Priscilla worked for most of the first year of her Diary. Their Monastery (Hospital) at Malassises can be seen in the background. No 15: Priscilla is an Acting Sister working at the 2nd General Hospital for Officers in Havre, France, between March and July 1918. The nurses were enjoying their “tea party”. (see also page 253 of the Diary transcription) No 17: Priscilla at Havre - at 2nd General Hospital (Officers Hospital) in Havre., France Friday 29 March 1918 to Monday 29 July 1918 note the two dark bands on her right sleeve denoting that she is an “Acting Sister”. Priscilla is 34 years of age in this picture and in the three weeks prior to this posting she met Cyril Terence Charles Kirby (1892-1968) her future husband at the 42nd Stationary Hospital in Flixecourt while he was serving with the British Army during the battle and evacuation of Amiens. No 18: Priscilla Wardle at No 8 Stationary Hospital Wimereux, France - from Saturday 24 June 1916 to Tuesday 18 September 1917, Priscilla worked at this hospital for 15 months her longest time in one hospital. during the war. While at Wimereux on Sunday 1 July 1917 she was appointed an Acting Sister. Priscilla once said she disliked nursing in her cape and badges and here she is in her favourite “uniform” for work “the robe” as she called it. She may be leaving the “operating theatre” at Wimereux in this photograph. No 19: Priscilla worked in various operating theatres throughout France. This could be after she became an anaesthetist in 1918 and worked with this team. She is wearing her favourite uniform which is more comfortable. She did not like the collars and capes that were required to be worn. No 20: Priscilla and Sister Michael Meeke? (details not found) are having a quiet drink at the 2nd General Hospital for Officers in Havre, France. Note the dark bands on their sleeves denote their rank as nursing “Sisters”. While it looks like they are smoking look more closely they are in fact holding a “flute” style probably “cocktail” glass. Tea parties and cocktails, Havre could almost have been fun. No 22: 1913 – Ballarat nurse Priscilla Isabell “Pearl” Wardle (1884-1967) in Cannes on the French Riviera during leave from between Friday 20 February 1918 and Friday 6 March 1918.Priscilla is second from the left wearing her distinctive QAIMNSR cape of grey with dark “wine” coloured border. The other nurses are wearing their “travelling” army uniform. They were rudely called “Salvation Army Lassies” by American nurses for the way they were dressed. (see page 232 of Priscilla’s War Diary) The description of 1913 on this photograph is confusing. No 23: Priscilla with her best friend Edith Victoria Donaldson somewhere in the “mysterious far east” on their trip on the Orontes. Priscilla is second from left - this may have been taken at Durban during Priscilla's return to Australia in 1919. No 25: Priscilla Wardle, Ballarat nurse in her Queen Alexandra’s Imperial Military Nursing Service Reserve (QAIMNSR) uniform. Notice the distinctive grey cape with “wine coloured” border Priscilla is also wearing her QAIMNSR qualification badge (medal) on the right side. Because she has no dark (wine coloured) bands on her sleeves so this photograph may be before 1 July 1918. No 26: Priscilla met her husband to be English army Lieutenant Cyril Terrence Charles Kirby during the battle and subsequent evacuation of Amiens in France. As an army nursing “Sister” Priscilla also held the rank of Lieutenant. Priscilla was stationed at the 42nd Stationary Hospital between 7/3/18 and 23/3/18. She had just completed a fortnight break at Cannes on the French Riviera. They were married at Priscilla’s home “Waverley" at 215 Dawson Street Ballarat on Saturday 15 November 1919. Nov 15, 1919 – Mr and Mrs Kirby. The bride Priscilla Isabell “Pearl” Kirby (nee Wardle) (1884-1967) and the groom Cyril Terence Charles Kirby (1892– 1968) on their wedding day. Priscilla was 34 years of age and Cyril 27 years of age however their marriage certificate states that they were both 34 years of age. Their marriage certificate states they were married at Waverley, Dawson St, South, Ballarat in a Presbyterian service conducted by the Rev. John Walker, a Minister of the Presbyterian Church of Australia and the Moderator General of the Church we think for Victoria. Was it in an outdoor setting as the surrounds in this photograph seem to indicate. Their witnesses were Robert and Olive, Priscilla’s brother and sister. Cyril signed as C. Terence. C. Kirby and Priscila signed as Priscilla I. Wardle. The certificate lists Cyril (Terence) as a Bachelor, Born at sea on a British ship and his occupation as Sailor. His father interestingly is listed as Charles John Kirby, of independent means and his mother as Emily Newman. Priscilla is listed as a Spinster, born in Ballarat with occupation as a Nurse. Her father is listed as Henry Thomas Wardle, Timber Merchant and her mother as Isabella Allan. They are both resident at 215 Dawson St. Ballarat which was Waverley the Wardle family home. No 28: Reverse in Poppy’s handwriting: “Lovingly yours Poppy, Dec 1908” Taken the year after Poppy qualified at BBH. No 29: Reverse in Poppy’s handwriting: “With much love to you Cilla, Poppy 1915” This picture was taken in the same year as the Marquette sinking incident. Edith Catheina Popplewell RRC (1884-1972) in her New Zealand Army Nursing Service (NZANS) Uniform. Poppy is at age 29 years in this photograph. Poppy was awarded the Royal Red Cross (RRC) medal for her heroism during the sinking of the Marquette transport ship. She lost her best friend NZ nurse Lorna Ratray. No 30: Taken in Cairo. Poppy is in the centre and wearing her New Zealand army badge and cape. The two nurses on either side are Australian nurses probably wearing their unique silver Australian Army sunrise badge and cape. No 31: Reverse in Poppy’s handwriting: “Ward 7 on Xmas day 1917, with my love, Poppy, A Happy New Year to you – had the sweetest letter from Bobbie”. (Bobbie is Priscilla’s brother Robert). It is thought the nurse in the centre of the three on the left is Poppy. It is 1917 two years after the Marquette sinking. Poppy appears to be a “sister” note the two dark bands on her sleeve. The uniform also matches that of Poppy 2. This photograph is in Post Card form very common during WWI. Edith Popplewell RRC is the “Sister” in the middle of the group of three nurses on the left. She is a sister not a general nurse because of the two bands on her left wrist denoting her rank. She was in fact the Charge Nurse ( in charge) of Ward 7 at this time. Note the Christmas decorations. Poppy is at age 33 years of age in this photograph.Bobbie is Priscilla’s brother Robert Norman “Bobbie” Wardle (1895-1979). No 32: Lilly MacKenzie & Poppy – Otaki - Australian nurse Selina Lily (Lil) MacKenzie sometimes McKenzie (1882– 975) grew up and trained as a nurse in Ballarat Victoria. After completing her training Lily and Priscilla Isabell “Pearl” Wardle (1884 – 1967) conducted the Mount Stuart House Private Hospital in Daylesford Victoria. In late 1913 Lily travelled to Otaki, 32 kms north of Wellington in New Zealand and worked at the Otaki Cottage Hospital with close friend Edith Catheina Popplewell “Poppy” (1884-1976) who also grew up and trained as a nurse at the Ballarat Hospital. In 1914 Lily was matron of a private hospital in Taihape 150kms north of Wellington. Both Lily and Poppy volunteered for New Zealand but as New Zealand were not accepting Australian trained nurses she returned to Australia and enlisted in the Australian Army Nursing Service (AANS) in October 1915. Lily went on to serve in Egypt, England, France and Italy where she was awarded the Royal Red Cross (RRC) medal for her service. This photograph is while Lily and Poppy were working at Otaki Cottage Hospital in New Zealand. Circa 1914. trainee, charge sister, ballarat, hospital, 1905, 1908, ww1, mount stuart house, sleeman, wardle, popplewell, mackenzie, military, queen alexandra's imperial military nursing service reserve, daylesford, nurses, private hospital, edith popplewell, france, cairo, diary, ww1 diary, havre, lily mackenzie, eagleton, matron, otaki, new zealand, donaldson, malassises, kelly, young, kirby -
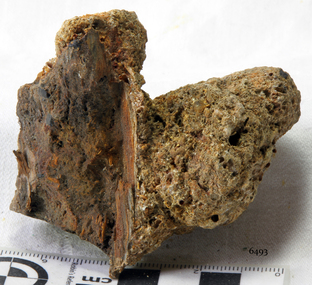 Flagstaff Hill Maritime Museum and Village
Wood sample, 1855
The artefact is a piece of ship’s timber from the wreck-site of the SCHOMBERG, a vessel which collided with the Peterborough reef on her maiden voyage in December 1855. This small wooden remnant of the disaster has been concreted on one side by the accrual of marine sediment while submerged. The build-up of sediment over the remains of the vessel is typical of the site as a whole. This artefact illustrates the reclaiming power of the ocean and the gradual disappearance of timber constructed vessels that have come to grief along this coastline (for example, the THISTLE in 1837, and the CHILDREN in 1838). The SCHOMBERG was a 2,000 ton clipper ship, specifically designed for the Australian immigration trade (back-loading wool for Britain’s mills), and constructed in Hall’s shipyard in Aberdeen, Scotland. She was owned by the Black Ball Line and launched in 1855. Alexander Hall & Son were renowned builders of sleek and fast 1,000 ton clippers for the China trade (opium in, tea out) and were keen to show they could also outclass the big North American ships built by Donald Mackay. Consequently the SCHOMBERG was ‘overbuilt’. Her hull featured five ‘skins’ of Scotch Larch and Pitch Pine overlaying each other in a diagonal pattern against a stout frame of British Oak. Oak has been favoured by builders of wooden ships for centuries. Its close, dense grain made it harder to work, but also gave it great strength and durability. In addition, the lateral spread of its branches supplied a natural curvature for the ribs of a vessel’s hull, as well as providing the small corner or curved pieces (‘knees’ and ‘elbows’) that fit them together. The shape and texture of this wood sample suggests a dense hardwood like Oak. The timber has been cut off at one end since its recovery from the sea, exposing a smooth and almost shiny surface. Seasoned English Oak has a similar light brown colour and tight grained finish. At the launch the SCHOMBERG’s 34 year old master, Captain ‘Bully’ Forbes, had promised Melbourne in 60 days, "with or without the help of God." James Nicol Forbes was born in Aberdeen in 1821 and rose to fame with his record-breaking voyages on the famous Black Ball Line ships; MARCO POLO and LIGHTNING. In 1852 in the MARCO POLO he made the record passage from London to Melbourne in 68 days. There were 53 deaths on the voyage but the great news was of the record passage by the master. In 1954 Captain Forbes took the clipper LIGHTNING to Melbourne in 76 days and back in 63 days, this was never beaten by a sailing ship. He often drove his crew and ship to breaking point to beat his own records. He cared little for the comfort of the passengers. On this, the SCHOMBERG’s maiden voyage, he was going to break records. SCHOMBERG departed Liverpool on her maiden voyage on 6 October 1855 flying the sign “Sixty Days to Melbourne”. She departed with 430 passengers and 3000 tons cargo including iron rails and equipment intended to build the Melbourne to Geelong Railway and a bridge over the Yarra from Melbourne to Hawthorn. She also carried a cow for fresh milk, pens for fowls and pigs, 90,000 gallons of water for washing and drinking. It also carried 17,000 letters and 31,800 newspapers. The ship and cargo was insured for $300,000, a fortune for the time. The winds were poor as she sailed across the equator, slowing SCHOMBERG’s journey considerably. Land was first sighted on Christmas Day, at Cape Bridgewater near Portland, and Captain Forbes followed the coastline towards Melbourne. Forbes was said to be playing cards when called by the Third Mate Henry Keen, who reported land about 3 miles off, Due in large part to the captain's regarding a card game as more important than his ship, it eventually ran aground on a sand spit near Curdie's Inlet (about 56 km west of Cape Otway) on 26 December 1855, 78 days after leaving Liverpool. The sand spit and the currents were not marked on Forbes’s map. Overnight, the crew launched a lifeboat to find a safe place to land the ship’s passengers. The scouting party returned to SCHOMBERG and advised Forbes that it was best to wait until morning because the rough seas could easily overturn the small lifeboats. The ship’s Chief Officer spotted SS QUEEN at dawn and signalled the steamer. The master of the SS QUEEN approached the stranded vessel and all of SCHOMBERG’s passengers and crew were able to disembark safely. The SCHOMBERG was lost and with her, Forbes’ reputation. The Black Ball Line’s Melbourne agent sent a steamer to retrieve the passengers’ baggage from the SCHOMBERG. Other steamers helped unload her cargo until the weather changed and prevented the salvage teams from accessing the ship. Later one plunderer found a case of Wellington boots, but alas, all were for the left foot! Local merchants Manifold & Bostock bought the wreck and cargo, but did not attempt to salvage the cargo still on board the ship. They eventually sold it on to a Melbourne businessman and two seafarers. In 1864 after two of the men drowned when they tried to reach SCHOMBERG, salvage efforts were abandoned. Parts of the SCHOMBERG were washed ashore on the south island of New Zealand in 1870, nearly 15 years after the wreck. The wreck now lies in 825 metres of water. Although the woodwork is mostly disintegrated the shape of the ship can still be seen due to the remaining railway irons, girders and the ship’s frame. A variety of goods and materials can be seen scattered about nearby. Flagstaff Hill holds many items salvaged from the SCHOMBERG including a ciborium (in which a diamond ring was concealed), communion set, ship fittings and equipment, personal effects, a lithograph, tickets and photograph from the SCHOMBERG. One of the SCHOMBERG bells is in the Warrnambool Library. The SCHOMBERG collection as a whole is of historical and archaeological significance at a State level, listed on the Victorian Heritage Register VHR S612. Flagstaff Hill’s collection of artefacts from the SCHOMBERG is significant for its association with the Victorian Heritage Registered shipwreck. The collection is primarily significant because of the relationship between the objects, as together they have a high potential to interpret the story of the SCHOMBERG. The SCHOMBERG collection is archaeologically significant as the remains of an international passenger ship. The shipwreck collection is historically significant for representing aspects of Victoria’s shipping history and its potential to interpret sub-theme 1.5 of Victoria’s Framework of Historical Themes (living with natural processes). The collection is also historically significant for its association with the shipwreck and the ship, which was designed to be fastest and most luxurious of its day. The SCHOMBERG collection meets the following criteria for assessment: Criterion A: Importance to the course, or pattern, of Victoria’s cultural history. Criterion B: Possession of uncommon, rare or endangered aspects of Victoria’s cultural history. Criterion C: Potential to yield information that will contribute to an understanding of Victoria’s cultural history. A piece of wood, concreted in sediment, from the wreck of the SCHOMBERG (1855). The limestone accretion includes sand, shell grit and marine worm casings. The exposed surface of the wood is broken and worn smooth along the grain. One end of the timber has been cut or sawn off across the grain, presenting a smooth and shiny surface.flagstaff hill, warrnambool, shipwrecked-coast, flagstaff-hill, flagstaff-hill-maritime-museum, maritime-museum, shipwreck-coast, flagstaff-hill-maritime-village, wood segment, schomberg, shipwreck timber, alexander hall and son, limestone concretion, oak-framed hull -
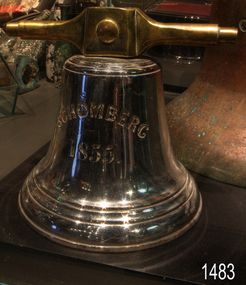 Flagstaff Hill Maritime Museum and Village
Functional object - Bell, Before 1855
This small ship’s bell, possibly a ‘mess’ or dining room bell, was the smaller of the two bells rescued by the crew of the Schomberg when it was wrecked in 1855. All of the crew from the Schomberg wreck survived. They carried the two ship’s bells with them as they made their way along the coast, eventually arriving at the home of settler, John Manning, who lived at Hopkins Point near Warrnambool. Manning acquired the Schomberg bells, presenting them to two Warrnambool churches; the smaller one to St Joseph’s Catholic Church and the larger bell to St John’s Presbyterian church. This small bell developed a crack after about a year at St Joseph's church and could no longer be used. Thomas Manifold imported a new bell for that church and the cracked belled was stored at his farm and stored. The property was sold years later to John Logan, who donated the discarded bell to the Warrnambool Museum when it first opened in 1886. The Curator, Joseph Archibald, displayed the bell in the entry. The small bell was repaired and re-plated by Briggs Marine in 1986. The larger Schomberg bell was installed in St John’s Presbyterian Church. In 1887 a ‘massive’ new bell, made in Victoria, was installed at the Presbyterian Church, so the old bell was transferred to the nearby Woodford Presbyterian authorities. During World War II the 1887 bell cracked, and could not be repaired. In 1983 the old Schomberg bell from the Woodford church was loaned to Flagstaff Hill Maritime Museum and Village. When the Schomberg was launched in 1855, she was considered the "Noblest” ship that ever floated on the water. Schomberg's owners, the Black Ball Line had commissioned the ship for their fleet of passenger liners. She was built by Alexander Hall of Aberdeen at a cost of £43,103 and constructed with 3 skins. One planked fore and aft and two diagonally planked, fastened together with screw-threaded trunnels (wooden rails). Her First Class accommodation was simply luxurious with velvet pile carpets, large mirrors, rosewood, birds-eye maple and mahogany timbers throughout, soft furnishings of satin damask, and an oak-lined library with a piano. Overall she had accommodation for 1000 passengers. At the launch, the Schomberg's 34-year-old master, Captain 'Bully' Forbes, had promised to reach Melbourne in sixty days stating, "with or without the help of God." Captain James Nicol Forbes was born in Aberdeen in 1821 and rose to fame with his record-breaking voyages on the famous Black Ball Line ships; Marco Polo and Lightning. In 1852 in the ship Marco Polo, he made the record passage from London to Melbourne in 68 days. Unfortunately, there were 53 deaths on the voyage, but the great news was off the record passage by Captain Forbes. In 1854 he took the clipper “Lighting” to Melbourne in 76 days and back in 63 days, this record was never beaten by a sailing ship. He often drove his crew and ship to breaking point to beat his previous records. He cared little for the comfort of the passengers. On this, Schomberg's maiden voyage, he was determined to break existing records. Schomberg departed Liverpool on her maiden voyage on 6th October 1855 flying a sign that read "Sixty Days to Melbourne". She departed with 430 passengers and 3000 tons of cargo including iron rails and equipment intended to build the Melbourne to Geelong Railway and a bridge over the Yarra from Melbourne to Hawthorn. She also carried a cow for fresh milk, pens for fowls and pigs, and 90,000 gallons of water for washing and drinking. She also carried 17,000 letters and 31,800 newspapers. The ship and cargo were insured for $300,000 a fortune for the time. The winds were poor as she sailed across the equator, slowing Schomberg's journey considerably. The land was first sighted on Christmas Day, at Cape Bridgewater near Portland, Captain Forbes followed the coastline towards Melbourne. Forbes was said to be playing cards when called by the third mate Henry Keen, who reported land about 3 miles off. Due in large part to the captain's regarding a card game as more important than his ship, it eventually ran aground on a sand spit near Curdie's Inlet (about 56 km west of Cape Otway) on 26th December 1855, 78 days after leaving Liverpool. The sand spit and the currents were not marked on Forbes's map. Overnight, the crew launched a lifeboat to find a safe place to land the ship’s passengers. The scouting party returned to Schomberg and advised Forbes that it was best to wait until morning because the rough seas could easily overturn the small lifeboats. The ship’s Chief Officer spotted the SS Queen at dawn and signalled the steamer. The master of the Queen approached the stranded vessel and all of Schomberg’s passengers and crew disembarked safely. The Black Ball Line's Melbourne agent sent a steamer to retrieve the passengers' baggage from the Schomberg. Other steamers helped unload her cargo until the weather changed and prevented the salvage teams from accessing the ship. Later one plunderer found a case of Wellington boots, but alas, all were for the left foot. Local merchants Manifold & Bostock bought the wreck and cargo but did not attempt to salvage the cargo still on board the ship. They eventually sold it on to a Melbourne businessman and two seafarers. In 1864 after two of the men drowned when they tried to reach Schomberg, salvage efforts were abandoned. In 1870, nearly 15 years after the wreck parts of the Schomberg had washed ashore on the south island of New Zealand. The wreck now lies in 825 meters of water and although the woodwork is mostly disintegrated the shape of the ship can still be determined due to the remaining railway irons, girders and the ship’s frame. A variety of goods and materials can be seen scattered about nearby.The bell is particularly significant in that along with other items from the wreck helped in part to having the legislation changed to protect shipwrecks, with far tighter controls being employed to oversee the salvaging of wreck sites. This bell forms part of the Schomberg collection at Flagstaff Hill maritime museum. The collection as a whole is of historical and archaeological significance at a State level. Flagstaff Hill’s collection of artefacts from the Schomberg is also significant for its association with the Victorian Heritage Registered Schomberg shipwreck (VHR S 612). The collection is of additional significance because of the relationship between the objects salvaged, as together they help us to interpret the story of the Schomberg. The collection as a whole is historically significant for representing aspects of Victoria's maritime history and its potential to interpret social and historical themes from society at the time of the wreck. A small ship’s bell. The bell bears the ship’s name and year of construction on one side and the name and address of the ship’s builders on the other. These details are deeply engraved into the metal and formed in bold upper-case lettering. The bell has two bell stands, a left and a right side. Both stands have an Iron pipe made into an inverted ‘Y’ shape with a hole made in the single length, and feet attached to a rectangular metal plate at the other two ends. Feet are bolted into a timber base that has a hole drilled through the centre for mounting. Bell's front; “SCHOMBERG” with “1855” below. Bell's back “HALL & SONS (crack splits letter “N”) / BUILDERS (in italics) / ABERDEEN” (crack splits letter “B”).flagstaff hill, flagstaff hill maritime museum and village, warrnambool, maritime museum, maritime village, great ocean road, shipwreck coast, schomberg, silver plated bell, mess bell, bell stands, captain ‘bully’ forbes, alexander hall and son, james baines and company, liverpool’s black ball line, bell, schomberg bell, ship's bell, small bell, st joseph's church, briggs marine -
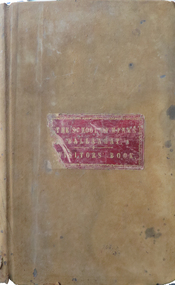 Federation University Historical Collection
Book, Ballarat School of Mines Visitors' Book, 1879-1890, 1879-1890
James Redmond Gilbert (sr) was born in 1837 at Hamilton, Ontario, Canada. He married Ellen Spouse. He , James Gilbert died on 26 July 1900 at Melbourne, and is buried at Boroondara Cemetery (Kew). J.R Gilbert lived at Running Creek (later Havilah) for some time, and during that time was employed in one of the bigger mines in the district. (Research by Ren at Havilah Research, 2019) Leatherbound ledger with hand written names, professions, residence and remarks relating to visitors to the Ballarat School of Mines. Sample Names: 1881 May 2 David Kerr Diamond Miner South Africa May 2 S. R. Dodds Diamond Miner South Africa May 3 Albert E. King Accountant Adelaide, South Australia "see signature 6 leaves back" May 6 William Morley Wesleyan Minister Auckland, New Zealand May 6 Rainsford Ravin Wellington, New Zealand May 7 Frank E. Lawrence, Lake River, Tasmania May 9 M. Richter Engineer Germany May 9 Dr Wilhelm Landall naturalist Berlin, Germany May 10 William Ralph Heaton Mercantile Birmingham May 11 Arthur I. Traill Grazier Llanpollen, New South Wales May 10 Marian Traill 1882 July 10 Arthur W.W. Brown London July 10 Benjamin Spargo Mining Mananger and owner Snowy Creek July 10 Thomas Cooke Miner Ballarat July 14 Robert H. Kenny July 14 Mr and Mrs Buston, [Indigo Planter?] Bengal, Indonesia July 14 Samuel H. Halker Ballarat July 14 Charles Phelan Talbot July 14 E. Walker Ballarat 1884 June 30 M.N. Cooper Dunedin, new Zealand June 30 Richard Hosking gardiner Gong Gong Well pleased with School June 30 Humphrey John Ballarat July 1 Cecily Gilbert Melbourne July 1 Florence Shrivall Melbourne July 1 [W.N. Marsh?] Colonial Secretary Hong Kong July 1 Louis Fause Engine Driver Dunolly July 1 John L. Bertram Blacksmith Melbourne July 1 Thomas Eardley Coachmaker London "Exceedingly obliged to Mr Oddie for a very pleasant instruction time spent in inspection of the various scientific appliances in the Ballarat School of Mines." (Donation 2/6) July 4 E. Goodwin [David?] Artist Spellbound July 4 W. Glumley Station Master Murtoa July July 4 James Thomas Miner Corrinondie, New Zealand "Very pleased with the School in all its branches. I hope to contribute to the specimen department. J.T." July 8 Robert Wall Engine Driver 1885 September 16 J.W. Springthorpe, M.D., Melbourne (very much pleased in every way) September 26 M. Oddie, Ballarat 1886 January 12 William Piekard, Leicester, England January 12 Robert Linford, Norwich, England January 12 H. Tipping, Draughtsman, Adelaide (Very instructive and should be taken advantage of by all who can) January 12 Fred H.K. Dreslecher, London (ditto) January 23 Walter Redgate, Manchester (ditto) April 7 Annie Bellingham, Richmond April 9 Fred Kruger, Landscape Photo, Geelong April 14 Mary Barry, Murtoa April 19 N.J. Tabuteau Accountant Napier, New Zealand April 19 George N. [Baroft?] Gentleman Cheshire, England April 21 Hon. George D'Almaine, Peer of England, London April 21 Lord Augustus Honour April 21 William Holt, South Melbourne April 21 H. Bartell, Gentleman, Smythes April 21 Fred Musgrove, Gentleman April 21 A. Chirnside, Squatter April 23 Alice Cravino, student, Buninyong April 24 East Melbourne Bicycle Club April 28 J. Kinnear, Kyneton April 28 J.P. Kinnear, Kyneton May 19 Bob Selby, Doctor, Ballarat May 19 J.W.M.. Quiggin, globe trotter, Picton (NS Wales) May 25 Arthur Night, Sutton Hotel, Ballarat (very fair) May 28 D. Kelly, attendant, China May 28 J. Kelly, schoolboy, China June 1 Joseph Jelbart, Blacksmith, Harrow September 9 David Ham, M.L.C. Ballarat ( A right to be pleased) September 9 J.J. Green, Merchant, Adelaide (Very much pleased with my visit to this intitiution it has my hearty sympathy and appreciation, Much pleased at what I have seen its value to the community) 9 December James H. Tappin, Agent, Ballarat (very pleased with instruction 1887 March 20 Thomas Bath Learmonth March 20 James R. Gilbert= Miner Running Creek March 20 C. Holtermann Out of business Adelaide 1890 21 May Mr and Mrs Fairchild, gentleman. Yarra house, Dalgety St, St Kildaballarat school of mines, visitors, j.w. springthorpe, chinese visitors, visitors' book, running creek, james redmond gilbert sr, havilah -
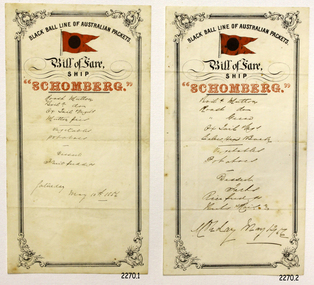 Flagstaff Hill Maritime Museum and Village
Document - Menu, Bill of Fare ship Schomberg, circa 1855 - May 12 1856
A “Bill of Fare” is a menu or list of food offered for a meal. This Bill of Fare from the sailing ship Schomberg is handwritten in pen in hard-to-read script on the printed pages specifically for the Schomberg ship, of the Black Ball Line of Australian Packets. (‘Packets’ were vessels that had a regular trade run of cargo, passengers and mail; the sailing ship Schomberg was designed for long voyages between England and Australia.) These menus posed a puzzle as they have the handwritten dates of, May 10 and 12, 1856, by which time the Schomberg had sunk (she sunk on December 26, 1855). The donor of these pages of Bill of Fare is a stamp collector from Melbourne. He came across the menus in a package that he bought in 1980 at a stamp auction in Tasmania. He decided to give the menus to Flagstaff Hill this year during his annual family holiday in Warrnambool. A 1981 newspaper article about this donation included an interview with Flagstaff Hill’s curator Mr Peter Ronald, who said that the stationery of these menus is genuine. He went on to say that there would have been much stationery printed for use on the Schomberg although she sank on her maiden voyage. These menus could have been written at a dated late because the surplus Schomberg stationery could have been used for menus on other ships. We will probably never be sure of the answer but none-the-less the pages are still connected to the Schomberg. Below is what we believe the menu consists of although some of the writing is indecipherable - - - - - - - - - - - - - - - - - - - - - - - - - - - - - - - - - - - - - (first menu) Roast Mutton Boiled Mutton? Ox Tail Mulligatawny? Or possibly Ox Tail Vegetables? Mutton Pies? ------------------------------- Vegetables Potatoes ---------------------------------- Dessert Fruit Puddings? Saturday May 10, 1856 - - - - - - - - - - - - - - - - - - - - - - - - - - - - - - - - - - - - AND - - - - - - - - - - - - - - - - - - - - - - - - - - - - - - - - - - - - (second menu) Boiled Mutton Roast Mutton? Roast Geese? Ox Tail?? Calves Head Broth? ------------------------------- Vegetables Potatoes ------------------------------- Dessert Tarts? Rice Pudding? ?...Maids?? Monday May 12, 1856 - - - - - - - - - - - - - - - - - - - - - - - - - - - - - - - - - - - - Background of “SCHOMBERG” When SCHOMBERG was launched in July, 1855, she was considered the “Noblest ship that ever floated on water.” SCHOMBERG’s owners, the Black Ball Line (one of three companies by that name), commissioned the ship for their fleet of passenger liners. She was built by Alexander Hall of Aberdeen, UK at a cost of £43,103. She was constructed with 3 skins: one planked fore and aft, and two diagonally planked, fastened together with screw threaded trunnels (wooden rails). Her first class accommodation was luxurious: velvet pile carpets; large mirrors; rosewood; birds-eye maple; mahogany; soft furnishings of gold satin damask; an oak-lined library; and a piano. Overall she had accommodation for 1000 passengers. SCHOMBERG’s 34 year old master, Captain James ‘Bully’ Forbes, had promised Melbourne in 60 days at the launch, "with or without the help of God." James Nicol Forbes was born in Aberdeen in 1821 and rose to fame with his record-breaking voyages on the famous Black Ball Line ships MARCO POLO and LIGHTNING. In 1852 in the MARCO POLO he made the record passage from London to Melbourne in 68 days. There were 53 deaths on the voyage but the great news was of the record passage by the master. In 1954 Captain Forbes took the clipper LIGHTNING to Melbourne in 76 days and back in 63 days, this was never beaten by a sailing ship. He often drove his crew and ship to breaking point to beat his own records. He cared little for the comfort of the passengers. On this, the SCHOMBERG’s maiden voyage, he was going to break records. SCHOMBERG departed Liverpool on her maiden voyage on 6 October 1855 flying the sign “Sixty Days to Melbourne”. She departed with 430 passengers and 3000 tons cargo including iron rails and equipment intended to build the Melbourne to Geelong Railway as well as a bridge over the Yarra from Melbourne to Hawthorn. She also carried a cow for fresh milk, pens for fowls and pigs, and 90,000 gallons of water for washing and drinking. SCHOMBERG also carried 17,000 letters and 31,800 newspapers. The ship and cargo was insured for $300,000, a fortune for the time. The winds were poor as she sailed across the equator, slowing SCHOMBERG’s journey considerably. Land was first sighted on Christmas Day, at Cape Bridgewater near Portland, and Captain Forbes followed the coastline towards Melbourne. Forbes was said to be playing cards when called by the Third Mate Henry Keen, who reported land about 3 miles off. Due in large part to Forbes regarding a card game as more important than his ship, SCHOMBERG eventually ran aground on a sand spit near Curdie's Inlet (about 56 km west of Cape Otway) on 26 December 1855, 78 days after leaving Liverpool. The sand spit and the currents were not marked on Forbes’s map. Overnight, the crew launched a lifeboat to find a safe place to land the ship’s passengers. The scouting party returned to SCHOMBERG and advised Forbes that it was best to wait until morning because the rough seas could easily overturn the small lifeboats. The ship’s Chief Officer spotted the steamer SS QUEEN at dawn and signalled it. The master of the SS QUEEN approached the stranded vessel and all of SCHOMBERG’s passengers and crew were able to disembark safely. The SCHOMBERG was lost and with her, Forbes’ reputation. The Black Ball Line’s Melbourne agent sent a steamer to retrieve the passengers’ baggage from the SCHOMBERG. Other steamers helped unload her cargo until the weather changed and prevented the salvage teams from accessing the ship. Later one plunderer found a case of Wellington boots, but alas, all were for the left foot! Local merchants Manifold & Bostock bought the wreck and cargo, but did not attempt to salvage the cargo still on board the ship. They eventually sold it on to a Melbourne businessman and two seafarers. In 1864 salvage efforts were abandoned after two men drowned when they tried to reach SCHOMBERG. Parts of the SCHOMBERG were washed ashore on the south island of New Zealand in 1870, nearly 15 years after the wreck. The wreck of the SCHOMBERG lies in 825 metres of water. Although the woodwork is mostly disintegrated, the shape of the ship can still be seen due to the remaining railway irons, girders and the ship’s frame. A variety of goods and materials can be seen surrounding the wreck, by divers. Flagstaff Hill holds many items salvaged from the SCHOMBERG including a ciborium (in which a diamond ring was concealed in concretion), communion set, ship fittings and equipment, personal effects, a lithograph, tickets and photograph from the SCHOMBERG. These Bills of Fare are significant due to their connection to Flagstaff Hill’s collection of artefacts from the Schomberg, which is significant for its association with the Victorian Heritage Registered shipwreck S612. The collection is primarily significant because of the relationship between the objects, as together they have a high potential to interpret the story of the Schomberg. The Schomberg collection is archaeologically significant as the remains of an international passenger ship. The shipwreck collection is historically significant for representing aspects of Victoria’s shipping history and its potential to interpret sub-theme 1.5 of Victoria’s Framework of Historical Themes (living with natural processes). The collection is also historically significant for its association with the shipwreck and the ship, which was designed to be fastest and most luxurious of its day. The Schomberg collection meets the following criteria for assessment: Criterion A: Importance to the course, or pattern, of Victoria’s cultural history. Criterion B: Possession of uncommon, rare or endangered aspects of Victoria’s cultural history. Criterion C: Potential to yield information that will contribute to an understanding of Victoria’s cultural history. Menu, or Bill of Fare, on cream coloured stationery from the sailing vessel “Schomberg”. Two rectangular pieces of paper, each bears the printed words “Black Ball Line of Australian Packets, Bill of Fare, Ship, Schomberg”, a printed symbol of the Black Ball line (a black ball on a red flag) and a decorative border. Both pages are handwritten, in similar but different sized writing, with a Bill of Fare and a date, Page (1) dated May 10th 1856 and (2) dated May 12th ’56, (Both dates are AFTER the Schomberg sank in December 26th 1855.) Both pages have three fold lines spaced across their width. To be used for the return voyage.Printed on the pages ““BLACK BALL LINE OF AUSTRALIAN PACKETS.” “Bill of Fare, / SHIP / “SCHOMBERG”.” Handwritten list of food, and on one page “Saturday May 10 1856” and on the other page “Monday May 12” warrnambool, peterborough, shipwrecked coast, shipwreck coast, flagstaff hill maritime museum, flagstaff hill maritime village, maritime museum, great ocean road, flagstaff hill, sailing ship schomberg, shipwreck schomberg, black ball line of australian packets, bill of fare schomberg, menu schomberg 1856, food mid-1800’s, food on ships mid-1800’s, menu, may 10, 1856, may 12, 1856 -
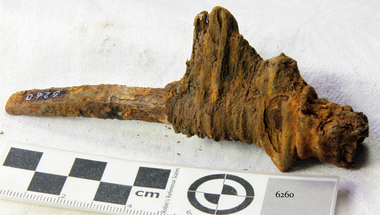 Flagstaff Hill Maritime Museum and Village
Nail, 1855
The artefact is the lower portion of a rectangular shanked ‘planking nail’ with a straight-edged ‘flat point’. The distinctive ‘point’ of a planking/skirting nail was designed to be driven into timber across the grain in order to prevent the wood from splitting. This relic is from the shipwreck of the SCHOMBERG, which ran aground near Peterborough in 1855. It was retrieved in 1875 from a large section of the ship’s bow which had been carried by ocean currents to the western coast of New Zealand’s South Island. The nail is still fixed in a fragment of the original timber that it secured in the SCHOMBERG. The top portion, or ‘head’ of the nail, has corroded away but the pronounced rectangular shank and its flat point indicate its likely purpose and position on the vessel. Most fastenings used in sailing ship construction were either wooden treenails or copper bolts, which were relatively resistant to seawater corrosion. In addition, the preferred hull-frame timber of British Oak has a high content of gallic acid which rapidly corrodes unprotected iron work. The ferrous composition of this planking nail suggests it came from an internal and upper portion of the ship’s bow (protected from exposure to the sea or oak). According to an 1855 edition of the Aberdeen Journal, the five outer layers, or ‘skins’, of the SCHOMBERG’s pine hull were “combined by means of patent screw treenails”. However the “beams of her two upper decks” were of “malleable iron”, and “part of the forecastle” was “fitted for the accommodation of the crew”. It is therefore possible that iron nails of this description were used by the ship’s builders to secure floor and wall planks in enclosed areas of the crew’s quarters. (The same reasoning would apply to officer and passenger accommodation amidships and at the stern of the vessel, but it was the bow that floated to New.Zealand.) The SCHOMBERG was a 2,000 ton clipper ship, specifically designed for the Australian immigration trade (back-loading wool for Britain’s mills), and constructed in Hall’s shipyard in Aberdeen, Scotland. She was owned by the Black Ball Line and launched in 1855. Alexander Hall & Son were renowned builders of sleek and fast 1,000 ton clippers for the China trade (opium in, tea out) and were keen to show they could also outclass the big North American ships built by Donald Mackay. Consequently the SCHOMBERG was ‘overbuilt’. Her hull featured five ‘skins’ of Scotch Larch and Pitch Pine overlaying each other in a diagonal pattern against a stout frame of British Oak. Oak has been favoured by builders of wooden ships for centuries. Its close, dense grain made it harder to work, but also gave it great strength and durability. In addition, the lateral spread of its branches supplied a natural curvature for the ribs of a vessel’s hull, as well as providing the small corner or curved pieces (‘knees’ and ‘elbows’) that fit them together. At the launch the SCHOMBERG’s 34 year old master, Captain ‘Bully’ Forbes, had promised Melbourne in 60 days, "with or without the help of God." James Nicol Forbes was born in Aberdeen in 1821 and rose to fame with his record-breaking voyages on the famous Black Ball Line ships; MARCO POLO and LIGHTNING. In 1852 in the MARCO POLO he made the record passage from London to Melbourne in 68 days. There were 53 deaths on the voyage but the great news was of the record passage by the master. In 1954 Captain Forbes took the clipper LIGHTNING to Melbourne in 76 days and back in 63 days, this was never beaten by a sailing ship. He often drove his crew and ship to breaking point to beat his own records. He cared little for the comfort of the passengers. On this, the SCHOMBERG’s maiden voyage, he was going to break records. SCHOMBERG departed Liverpool on her maiden voyage on 6 October 1855 flying the sign “Sixty Days to Melbourne”. She departed with 430 passengers and 3000 tons cargo including iron rails and equipment intended to build the Melbourne to Geelong Railway and a bridge over the Yarra from Melbourne to Hawthorn. She also carried a cow for fresh milk, pens for fowls and pigs, 90,000 gallons of water for washing and drinking. It also carried 17,000 letters and 31,800 newspapers. The ship and cargo was insured for $300,000, a fortune for the time. The winds were poor as she sailed across the equator, slowing SCHOMBERG’s journey considerably. Land was first sighted on Christmas Day, at Cape Bridgewater near Portland, and Captain Forbes followed the coastline towards Melbourne. Forbes was said to be playing cards when called by the Third Mate Henry Keen, who reported land about 3 miles off, Due in large part to the captain's regarding a card game as more important than his ship, it eventually ran aground on a sand spit near Curdie's Inlet (about 56 km west of Cape Otway) on 26 December 1855, 78 days after leaving Liverpool. The sand spit and the currents were not marked on Forbes’s map. Overnight, the crew launched a lifeboat to find a safe place to land the ship’s passengers. The scouting party returned to SCHOMBERG and advised Forbes that it was best to wait until morning because the rough seas could easily overturn the small lifeboats. The ship’s Chief Officer spotted SS QUEEN at dawn and signalled the steamer. The master of the SS QUEEN approached the stranded vessel and all of SCHOMBERG’s passengers and crew were able to disembark safely. The SCHOMBERG was lost and with her, Forbes’ reputation. The Black Ball Line’s Melbourne agent sent a steamer to retrieve the passengers’ baggage from the SCHOMBERG. Other steamers helped unload her cargo until the weather changed and prevented the salvage teams from accessing the ship. Later one plunderer found a case of Wellington boots, but alas, all were for the left foot! Local merchants Manifold & Bostock bought the wreck and cargo, but did not attempt to salvage the cargo still on board the ship. They eventually sold it on to a Melbourne businessman and two seafarers. In 1864 after two of the men drowned when they tried to reach SCHOMBERG, salvage efforts were abandoned. Parts of the SCHOMBERG were washed ashore on the south island of New Zealand in 1870, nearly 15 years after the wreck. The wreck now lies in 825 metres of water. Although the woodwork is mostly disintegrated the shape of the ship can still be seen due to the remaining railway irons, girders and the ship’s frame. A variety of goods and materials can be seen scattered about nearby. Flagstaff Hill holds many items salvaged from the SCHOMBERG including a ciborium (in which a diamond ring was concealed), communion set, ship fittings and equipment, personal effects, a lithograph, tickets and photograph from the SCHOMBERG. One of the SCHOMBERG bells is in the Warrnambool Library. This nail is a registered artefact from the wreck of the SCHOMBERG, Artefact Reg No S/35 and is significant because of its association with the SCHOMBERG. The SCHOMBERG collection as a whole is of historical and archaeological significance at a State level, listed on the Victorian Heritage Register VHR S612. Flagstaff Hill’s collection of artefacts from the SCHOMBERG is significant for its association with the Victorian Heritage Registered shipwreck. The collection is primarily significant because of the relationship between the objects, as together they have a high potential to interpret the story of the SCHOMBERG. The SCHOMBERG collection is archaeologically significant as the remains of an international passenger ship. The shipwreck collection is historically significant for representing aspects of Victoria’s shipping history and its potential to interpret sub-theme 1.5 of Victoria’s Framework of Historical Themes (living with natural processes). The collection is also historically significant for its association with the shipwreck and the ship, which was designed to be fastest and most luxurious of its day. The SCHOMBERG collection meets the following criteria for assessment: Criterion A: Importance to the course, or pattern, of Victoria’s cultural history. Criterion B: Possession of uncommon, rare or endangered aspects of Victoria’s cultural history. Criterion C: Potential to yield information that will contribute to an understanding of Victoria’s cultural history. The object is the bottom end of a slightly curved iron planking nail with remnant of timber still attached, recovered from the wreck of the SCHOMBERG (1855). The shank of the nail is rectangular and it narrows to a flat (chisel like) ‘point’. The ‘head’ is missing although there is a quantity of dark red corrosion within the top of the surrounding wood, suggesting where it might have been. The artefact is from the wreck of the SCHOMBERG (1855) and was retrieved from part of the ship’s bow which was carried by sea currents to the South Island of New Zealand. flagstaff hill, warrnambool, shipwrecked-coast, flagstaff-hill-maritime-museum, maritime-museum, shipwreck-coast, flagstaff-hill-maritime-village, schomberg, planking nail, rectangular ship’s nail, cast iron nail -
 Flagstaff Hill Maritime Museum and Village
Wood encrustation, 1855
The object is a mass of small shipwreck debris that has been concreted together by sediment and marine growth. It was retrieved from the wreck-site of the SCHOMBERG, which ran aground near the mouth of the Curdies River near Peterborough in 1855. The conglomerate of preserved wood impressions, rusted metal pieces, a small square of copper alloy, and black glass-like stones, presents too disjointed a collection to provide information on their purpose or function on the ship. The natural and gradual process of limestone accretion is a significant feature of the wreck-site, which was rediscovered by fishermen and skindivers in 1973. In his book “Exploring Shipwrecks of Western Victoria”, experienced diver and former director at Flagstaff Hill, Peter Ronald writes that the SCHOMBERG’s “triple layered wooden hull has disintegrated almost without trace…The turbulent shallow waters have promoted particularly heavy marine growth which tend to disguise the wreckage…the most prominent feature being a corroded mass of railway iron…Close inspection reveals small artefacts firmly embedded in the marine concretion which…is quite literally as hard as iron”. The huge oblong mass of concretion that now distinguishes the site covers the remains of this heavy cargo. A contemporary account of the SCHOMBERG’s fate (told by two of her passengers to the Melbourne Argus) alleges the ship “was overloaded, drawing over 25 feet when she left, and the cargo was chiefly iron and plant for the Geelong Railway”. The SCHOMBERG was a 2,000 ton clipper ship, specifically designed for the Australian immigration trade (back-loading wool for Britain’s mills), and constructed in Hall’s shipyard in Aberdeen, Scotland. She was owned by the Black Ball Line and launched in 1855. Alexander Hall & Son were renowned builders of sleek and fast 1,000 ton clippers for the China trade (opium in, tea out) and were keen to show they could also outclass the big North American ships built by Donald Mackay. Consequently the SCHOMBERG was ‘overbuilt’. Her hull featured five ‘skins’ of Scotch Larch and Pitch Pine overlaying each other in a diagonal pattern against a stout frame of British Oak. Oak has been favoured by builders of wooden ships for centuries. Its close, dense grain made it harder to work, but also gave it great strength and durability. In addition, the lateral spread of its branches supplied a natural curvature for the ribs of a vessel’s hull, as well as providing the small corner or curved pieces (‘knees’ and ‘elbows’) that fit them together. The shape and texture of this wood sample suggests a dense hardwood like Oak. The timber has been cut off at one end since its recovery from the sea, exposing a smooth and almost shiny surface. Seasoned English Oak has a similar light brown colour and tight grained finish. At the launch the SCHOMBERG’s 34 year old master, Captain ‘Bully’ Forbes, had promised Melbourne in 60 days, "with or without the help of God." James Nicol Forbes was born in Aberdeen in 1821 and rose to fame with his record-breaking voyages on the famous Black Ball Line ships; MARCO POLO and LIGHTNING. In 1852 in the MARCO POLO he made the record passage from London to Melbourne in 68 days. There were 53 deaths on the voyage but the great news was of the record passage by the master. In 1954 Captain Forbes took the clipper LIGHTNING to Melbourne in 76 days and back in 63 days, this was never beaten by a sailing ship. He often drove his crew and ship to breaking point to beat his own records. He cared little for the comfort of the passengers. On this, the SCHOMBERG’s maiden voyage, he was going to break records. SCHOMBERG departed Liverpool on her maiden voyage on 6 October 1855 flying the sign “Sixty Days to Melbourne”. She departed with 430 passengers and 3000 tons cargo including iron rails and equipment intended to build the Melbourne to Geelong Railway and a bridge over the Yarra from Melbourne to Hawthorn. She also carried a cow for fresh milk, pens for fowls and pigs, 90,000 gallons of water for washing and drinking. It also carried 17,000 letters and 31,800 newspapers. The ship and cargo was insured for $300,000, a fortune for the time. The winds were poor as she sailed across the equator, slowing SCHOMBERG’s journey considerably. Land was first sighted on Christmas Day, at Cape Bridgewater near Portland, and Captain Forbes followed the coastline towards Melbourne. Forbes was said to be playing cards when called by the Third Mate Henry Keen, who reported land about 3 miles off, Due in large part to the captain's regarding a card game as more important than his ship, it eventually ran aground on a sand spit near Curdie's Inlet (about 56 km west of Cape Otway) on 26 December 1855, 78 days after leaving Liverpool. The sand spit and the currents were not marked on Forbes’s map. Overnight, the crew launched a lifeboat to find a safe place to land the ship’s passengers. The scouting party returned to SCHOMBERG and advised Forbes that it was best to wait until morning because the rough seas could easily overturn the small lifeboats. The ship’s Chief Officer spotted SS QUEEN at dawn and signalled the steamer. The master of the SS QUEEN approached the stranded vessel and all of SCHOMBERG’s passengers and crew were able to disembark safely. The SCHOMBERG was lost and with her, Forbes’ reputation. The Black Ball Line’s Melbourne agent sent a steamer to retrieve the passengers’ baggage from the SCHOMBERG. Other steamers helped unload her cargo until the weather changed and prevented the salvage teams from accessing the ship. Later one plunderer found a case of Wellington boots, but alas, all were for the left foot! Local merchants Manifold & Bostock bought the wreck and cargo, but did not attempt to salvage the cargo still on board the ship. They eventually sold it on to a Melbourne businessman and two seafarers. In 1864 after two of the men drowned when they tried to reach SCHOMBERG, salvage efforts were abandoned. Parts of the SCHOMBERG were washed ashore on the south island of New Zealand in 1870, nearly 15 years after the wreck. The wreck now lies in 825 metres of water. Although the woodwork is mostly disintegrated the shape of the ship can still be seen due to the remaining railway irons, girders and the ship’s frame. A variety of goods and materials can be seen scattered about nearby. Flagstaff Hill holds many items salvaged from the SCHOMBERG including a ciborium (in which a diamond ring was concealed), communion set, ship fittings and equipment, personal effects, a lithograph, tickets and photograph from the SCHOMBERG. One of the SCHOMBERG bells is in the Warrnambool Library. This object is listed on the Shipwreck Artefact Register, No S/49, and is significant because of its association with the ship SCHOMBERG. The SCHOMBERG collection as a whole is of historical and archaeological significance at a State level, listed on the Victorian Heritage Register VHR S612. Flagstaff Hill’s collection of artefacts from the SCHOMBERG is significant for its association with the Victorian Heritage Registered shipwreck. The collection is primarily significant because of the relationship between the objects, as together they have a high potential to interpret the story of the SCHOMBERG. The SCHOMBERG collection is archaeologically significant as the remains of an international passenger ship. The shipwreck collection is historically significant for representing aspects of Victoria’s shipping history and its potential to interpret sub-theme 1.5 of Victoria’s Framework of Historical Themes (living with natural processes). The collection is also historically significant for its association with the shipwreck and the ship, which was designed to be fastest and most luxurious of its day. The SCHOMBERG collection meets the following criteria for assessment: Criterion A: Importance to the course, or pattern, of Victoria’s cultural history. Criterion B: Possession of uncommon, rare or endangered aspects of Victoria’s cultural history. Criterion C: Potential to yield information that will contribute to an understanding of Victoria’s cultural history. The object is an aggregate of limestone sediment that formed at the wreck-site of the SCHOMBERG (1855). It is an irregularly shaped conglomerate of sand, shell-grit and marine worm casings from the ocean floor, but also incorporates an assortment of manufactured metal pieces and pipe fittings (corroded with red rust), a small rectangular piece of copper sheet, some ‘petrified’ wood remains (hardened and a soft brown colour), and pieces of black shiny stone (roughly cube shaped and possibly glass or porcelain remnants). There is an impression left in the stone of a joist or plank end but the original timber that the sediment formed around has since been dispersed by the sea.flagstaff hill, warrnambool, shipwrecked-coast, flagstaff-hill, flagstaff-hill-maritime-museum, maritime-museum, shipwreck-coast, flagstaff-hill-maritime-village, schomberg, shipwreck timber, alexander hall and son, shipwreck debris, black ball line, 1855 shipwreck, aberdeen clipper ship, captain forbes, peterborough shipwreck, ss queen -
 Ballarat Tramway Museum
Album - Photo Album, Newstar, 1960s to 1970's
Photographic album containing 39 Colour postcards of Melbourne trams. The album consists of 30 leaves of dark grey heavy paper with three creases on left hand side of sheet, bound into a heavy bluey grey folder, embossed in gold 'Scrap Book" and bound with bluey grey string with two holes. The cover has been embossed with a the blue grey in swirls. Inside of back cover is a white label, "A New Star Product", with a please ask for No. with "425" stamped on. Postcards have been glued into the album. Entries have been kept to a single line - cards are able to be dated from buildings, whether the trams have marker lights, types of motor cars and general Melbourne history. Image files in page number order. Image 15 is of book. All taken with a electronic camera. Page 1 - Night photo - Flinders and Swanston St. - with "Greetings from Huntingdale" embossed in gold. Flinders St. station, with "Greetings from Huntingdale" embossed in gold. (post 1972 ) St. Kilda road with the Shrine of Remembrance in the background and W2 453 inbound on route 6. (post 1974) Page 2 - Bourke St, looking from Parliament House westwards, with Z8 inbound - after 13/8/1975 on route 89. Bourke St, looking east from Queen St., night photo, early 1970's. Princes Bridge looking towards Flinders St. Station Page 3 - Flinders St. Station, from Princes Gate buildings, - Photo E. Ludwig, John Hinde Studios. Bourke St. from Queen St, looking east, late 1960's - all W's. - W7 1026 east bound on route 88. Flinders St and Swanston St. corner, from Princes Bridge - night photo - W5 756 northbound route 15. Page 4 - W2 584 inbound route 64, St. Kilda Road and Nolan St., late 1960s - photograph. Princes Bridge, looking over Yarra River to the east. (pre Concert Hall) St. Kilda Road, with Shine of Remembrance in background, W2 303 inbound route 4D, mid 1960's. Page 5 - Flinders and Swanston St, W2 530 outbound route 8, early 1970's. Swanston and Collins St., W2 596 westbound in Collins St. City Square built - 1st version. (post 1972) St Kilda Road, with Shine in background, W2 298 and others, route 8 and 72. (post 1972) Page 6 - Flinders and Swanston St., W2, inbound route 5 on a wet evening. (mid 1970's) W2 515 outbound, Collins St., late 1960's, with Town Hall in background. (early 1970's, prior to lights) Collins St. looking west at Russell St with W2 637outbound route 42, early 1960's. Page 7 - Swanston St looking south at Little Bourke, W2's 373 route 67 and 374?(route 5), southbound, early 1970's Flinders St. Station, looking west in Flinders St., early 1970's, at dusk. Melbourne Town Hall with City Square from the North West (early 1970's) Page 8 - Bourke St looking east from Queen St. with W7 1005 inbound on route 96 - early 1970's. Bourke St. looking west from Exhibition St. with W6 976 outbound on route 95 - early 1970's. Swanston St. looking south from Lonsdale, with W2 484 on route 64, W2 228 and W2 364 in photo - early 1970's. Page 9 - Swanston looking south from north of Lonsdale St with many tramcars in photo - mid 1970's. St Kilda Road, with Shrine in background, W2 345 outbound route 4, SW6 913 inbound route 4 - prior to 1970. St Kilda Road, with Shrine in background, with trams in photo - early 1970's. (Photo loose in album - National View postcard by Murfett Ltd. Aust.) Page 10 - Postcard - TMSV? of 1041 and cable car set at Preston Workshops. 1041 in Bourke St., looking east from Queen St. - early 1970's - 1974? Collins St. looking east from Elizabeth St. with W2 253 inbound route 11, and W2 224 outbound - rout 47, early 1970's Page 11 - TMSV Postcard, X217 in Dandenong Road with L class in background. Shrine of Remberance from BP building, looking towards the city with St. Kilda Road on the left. Princes Gate and Flinders St. from the SEC buildings in Flinders St. looking south east - mid 1960's. Page 12 - Swanston St. at Flinders St. looking north at dusk. Flinders St. station at Swanston St with trams crossing at intersection - late 1960's Flinders St. station with W2 327 outbound. Page 13 - Temporary City Square at Collins and Swanston St. with tramcars at intersection. Wellington Parade (Mugs Alley), looking towards the City, with W2 546 inbound on route 38 - mid to late 1960's. Page 14 - Swanston St. looking south, at Lonsdale St, W2 432 inbound route 7 - late 1960's or early 1970's. Partly loose in album - National View postcard by Murfett Ltd. Aust. trams, tramways, photo album, melbourne, postcards -
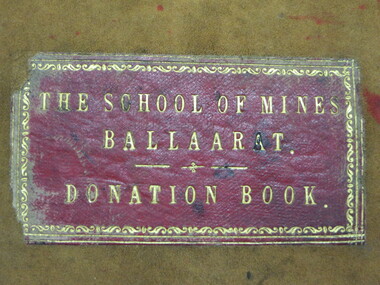 Federation University Historical Collection
Book - Ledger, Ballarat School of Mines Donation Book, 1878 - 1895, 1878-1895
The Donation Book relates to the Ballarat School of Mines Museum which opened in 1872. Very few of these items are still held by Federation University. The Museum was emptied in the 1960s with items being distrubuted to the Ballarat Historical Society, returned to original lenders (ie Pern Collection), of disposed of. Donations to the Ballarat School of Mines include: 34. M. Hamburger, Ballarat - bunsen burner 41. W.H. Shaw, Phoenix Foundry - 81 nos of 'Engineer' 89. Juvenile Industrial Exhibition Association Committee per Joseph Flude - dies used for striking medals awarded to successful exhibits. 165. Ferdinand Von Mueller 172 Ferdinand Von Mueller o hortus siccus 6 197. James Stoddart 203. Edward Gazzard, North Creswick - Model of safety Cage invented and made by donor 218. E. Morey 222. Alfred Lestor 228. J.J. Sleep, Ballarat, patent Lever escarpment Clock (displayed in laboratories) 237. Bernard Smith (Warden) per favor of James M. Bickett - Bust of Mr John Lynch, Smythesdale. (Note: This item is not in the present Federation University Historical Collection) 241. James Oddie, J.P., Ballarat, Copy of 'the Chemist and Druggist' 267. John Lynch Junior, Smythesdale - Cast of "Golden Age" nugget, found at Browns by Co-operative party, 12 men. Weight 75 oz, 12 dwts, 12 grs.(Note: This item is not in the present Federation University Historical Collection) 270. Isaac Davis, Main Road, Ballarat 294. W. H. Shaw, Ballarat - 94 nos of 'The Engineer' 295. Rivett Henry Bland, Clunes - Specimen of water pipe from the Port Phillip Company's mine encrusted with carbonites of lime and magnesium (Note: This item is not in the present Federation University Historical Collection) 299. D.J. Williams, Queenscliff - 1 case shells from Fiji 305. C. Retallack, Ballarat 314. William Henry Shaw, Ballarat - glass case 323. W. Longley, Ballarat - Botanical Specimen (Note: This item is not in the present Federation University Historical Collection) 327. W. H. Angove, Perth 337. J. Cosmo Newbery, B Sc, Melbourne 343. James Hector, M.D., New Zealand 353. R.S. Mitchell, Ballarat - 8 specimens live plants (medicinal) (for the Ballarat School of Mines Garden) 355. W. Magee, Ballarat - Sugar cane plants and seeds (for the Ballarat School of Mines Garden) 363. James Hector, Wellington, new Zealand 371. William Wesley, 28 Essex St, Strand, London - Scientific book circular 380. Jacob Upfold (deceased) per favor of the trustees - bequest of steam engine indicator and belongings (boothe and case) 381. Joseph Mitchell, 22 Macarthur Street, Ballarat - sod of turf cut from Warboy's High Few, County Huntingdon, England, 1872. 394. W.H. Barnard 401. James Orr 418. F. Ratte, Sydney 440. Alfred Mica Smith, Sandhurst (Bendigo), Inaugural Address, delivered to the Bendigo School of Mines Science Society, June 20. 1881 by P.H. Macgillivray, MA, MRCS, FLS, President. (Note: This item is not in the present Federation University Historical Collection) (Note: This item is not in the present Federation University Historical Collection) 446. C. C. Shoppee, Ballarat 462. Dr Bunce, Ballarat 468. James Black, Mining Manager "Kerrit Bureet' 479. J.S. North, Mining Manager No. 2 Queen Co, Black Hill Ballarat. 505. Smith Tibbitts - A block of ancient leaves from the Nigtingbool Estate near Haddon on the Ballarat district from shaft 80 feet deep. (Note: This item is not in the present Federation University Historical Collection) 512. F.W. Niven, Ballarat - "A Handy Book to Tasmania" 522. James Hector, Wellington, New Zealand 549. C.E. Grainger, Manager Ballarat Woollen Mills - samples of dyed and raw wools 600. (4 July 1882) Henry Sutton, Ballarat - 13th annual report of the Aeronautical Society of Great Britain; 2 papers from the Proceedings of the Royal Society, nos 217 and 218- 1882, "One a new electrical storage battery by Henry Sutton, Ballarat, Victoria. 608. H. Glenny J.P., Ballarat - Specimen of Asbestos from Tasmania 610. M.H. Edelmann, Munich, Germany 674. W.H. Shaw, Phoenix Foundry - Steel boring 95 feet long taken from bed-plate of locomotive engine. 675 - H.R. Hancock J.P. pre favour Mr James Pryor, Moonta Mines 676. Baron Ferdinand Von Mueller KCMG, etc, Melbourne 678. E.F.A. Gaunt, Royal Navy, H.M.S. Nelson, per favour Lyde Gaunt - Specimen of manganese ore from the mines - Russell - New Zealand 728. Dr Pinnock, Ballarat 760. Simon Morrison, Ballarat 784. James Shugg, Hamilton - 1 case fossils from Muddy Creek, near Hamilton. (Note: This item is not in the present Federation University Historical Collection) 786. W. Bolam (inspector of Schools), Melbourne - 2 spears and 1 fishing prong Fijian 806. James Oddie, Ballarat 708. Henry G. Hanks, San Francisco 786. W. Bolam (Inspector of Government Schools Melbourne) - 2 spears and one fishing prong Fijian 824. Henrique Gorceixm Onro Preto, Brazil 840. W. Laplau, Ballarat - Gas furnace with a large assortment of fittings, also large gas holder and oil-heating apparatus 854. Robert Borch, Main Road, Ballarat - Improved safety chain (Note: This item is not in the present Federation University Historical Collection) 928. James Oddie 944. James P. Munroe, Registrar, Massachusetts 952. L.E. Cutter per favour of Mr F.J. Martell - Unexploded bomb shell from the Eureka Stockade 957. H. Glenny, Hobart 962. George Hart, Ballarat - eagle 976. Henry Sutton, Ballarat - 1 volume "Plattner on the Blowpipe" 978. J.W. Flatow, 45 Madeline Street, Carlton, Melbourne 984. Charles C Shoppee Ballarat - Copies of ancient coins 989-95 - Specimens from Moonta, South Australia 985. W.H. Wooster BOlwarra - books microscope related 1179. James Oddie - Live hedgehog 1181 C. Crisp, Bacchus Marsh, Portugal Copper Coin, 1785 1248 James Oddie, Solomon Islands - Bow and arrows & Spears 1285. C. Colyer, Smythesdale 1327. John L. McKenna, Smeaton - Fragment of Stone Axe. 1395. Mrs O. Skoglund, Nerrina 1428. Daniel Brophy, Ballarat - Collection of mineral specimen form Silverton (Collected by Mrs James Murray) 1442. Henry Sutton, Ballarat - Specimens of fossil fruits collected at Haddon by Charles Brown. 1444. Mining Department - Underground Mine Workings from Band of Hope and others. 1517. W.H. Wooster, Ballarat 1592. Bishop of Ballarat - Stone Axe and other native items 1669. H. McHaffier, Napoleons - 1 Spanish silver coin 1681. James Oddie, Dunedin 1688. W. Burbridge, Ballarat - Native Tomahawk from Metung 1708. A. Doepel, Ballarat 1712. Marty Guerin, Ballarat 1735. Bella Guerin. M.A., Ballarat - Copy Wide Awake Vol 1 No 7 May 28th 1887 and The Bulletin, March 19th 1887. 1747. Bella Geurin M.A., Ballarat - Copy Wide Awake Vol 1 No 8 June 4 1887 1751. Bella Geurin M.A., Ballarat - Copy Wide Awake Vol 1 No 9 June 11th 1887 1842. Linnean Society, London England - Charter, By Laws, Proceedings, Transactions, Journals 1853. W.J. Corbould, Silverton, NSW - chloride of silver from Pinnacles, Broken Hill, Silverton 1888. W. J. Corbould, Sample of metallic silver from Silverton, NSW 1928. E. Morey, Ballarat - Steam Engine 1937. Henry Sutton A.S.I.E., Ballarat - Plate Electric Machine, chimes and Sportman (number crossed out) 1951. Henry Sutton A.S.I.E., Ballarat - Plate Electric Machine, chimes and Sportman 1981. Harrie Wood (per W.H.B.[Barnard?), Ballarat 1996. W.H. Shaw, Phoenix Foundry - Papers "The Vict Engineer July 1887, May June July August 1888 and others 2014. Harrie Wood, Sydney - Report Department of Mines, 18872027. W.J. Bechervaise - Copy of Book by Baldwin Spencer 2034. A.G. Randall - Native Hatchet 2045. W.H. Corbould, Silverton, Collection of silver ores 2051. Fowler, Tarnagulla - Native Tomahawk 2123-2131. James Oddie, London 2163. Roff. F. Taplier, Sturt Street - Native Tomahawk 2178. Syd. Johnson, Meredith - Native Tomahawk, Greenstone 2184. Mr Tupp for Hall - Native Spear and Club 2292. Emmanuel Steinfeld, Melbourne 2313. A. Atwood, Rowlands Factory, Dana Street 2361. Dr Pinnock, Ballarat - Collection of Living Sponges 2363. P. Curnow, Ballarat - Piece of wood with stone naturally embedded 2364. R. Dowling, Waubra 2875. Mrs C, Flude, Ballarat - Collection of (5) mineral specimens 3460. Joseph Weir, Ballarat - Sample of rolled Annibar 3466. J. Hart, Ballarat - Native Shield - supposed to have been made by King Billy 4784. Mr. O. Woolnaugh, Pleasant Street - Four Native Tomahawks 6469. L. Balhausen, Ballarat 3472. John English, Smeaton - three samples of auriferous wash dirt 3607. Columbia College, New York - Handbook of Information of the Columbia College in the Ciry of New York 1892-3. 3672. L.A. Samuels, Bendigo 3724. P. Paperhagen 3736. The Late Rivett Henry Bland per John Noble Wilson - Collection of mineral specimens and fossils 3752. G.A. Denny, South Africa 3755. J. Carroll, Ballarat - Specimen of Native bread found in Ballarat East. 4765. J. Donnelly, Springs, Bungaree I. Fowler, Coolgardie, Specimen of Gold Bearing Quartz ballarat school of mines, doantions, museum, ballarat school of mines museum, safety cage, botanical garden, materia medica garden, library, bella guerin, james oddie, phoenix foundry, w.h. shaw, john lynch, henry sutton, aboriginal, stone axe, tomahawk, geological specimens, moonta, fedinand krause, oddie collection of minerals, thomas bath, spears, solomon islands, king billy, bows and arrows, ancient coins, birds eggs, snakes -
 Moorabbin Air Museum
Document (item) - Roland Jahne Collection - See Description for details
-
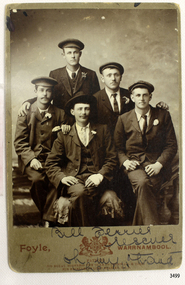 Flagstaff Hill Maritime Museum and Village
Postcard - People, Bill Ferrier - rescuer, 11th November, 1905
The postcard shows a photograph of William Ferrier, the 25-year-old Warrnambool fisherman from South Warrnambool whose rescue of two sailors from the wrecked La Bella made him an overnight National hero, quoted as “one of the most heroic rescues in Victoria’s shipwreck history”. The La Bella was wrecked on 10th November 1905 and the photograph was taken on the next day. In the photograph, William Ferrier is seated in the centre, with four of the five survivors beside him: (from left to right) Leonard Robertson, R. Payne, Oscar Rosenholme and Jack Noake. The photograph was taken by Foyle Photography Studio in Warrnambool, originally owned by James Charles Foyle. He previously had a photographic studio in Melbourne 1882 1887, then opened “Foyle’s Photo Card Studios” in Liebig St, Warrnambool. James Foyle died on 13th July 1905 and his son and daughter, Charles and Lilian Foyle continued on with the business until 1945. This photograph was most likely taken by either Charles or Lilian Foyle. The story of William Ferrier’s brave act follows on below … The ship from which the sailors were rescued was the three-masted, iron and steel barquentine the La Bella, built in Norway in 1893. She was one of two iron and steel ships by Johan Smith, the company was one of the leading shipping families in Tvedestrand, Norway. She was significant to Norwegian shipping, being one of only 27 iron and steel ships ever built in Norway. She was registered in New Zealand and engaged from 1902 in inter-colonial trading of timber in the Pacific, between New Zealand and Australia and was often in Port Phillip Bay, Victoria. On 5th October 1905, the twelve-year-old La Bella left Lyttleton, New Zealand carrying a cargo of timber bound for Warrnambool, Australia. She was manned by a crew of twelve: the Master, (Captain Mylius, previously 1st Mate of La Bella, appointed Captain to La Bella on 6th February 1903) 2 Mates, Cook, six able seamen, one ordinary seaman and a boy. Bad weather en route caused her to shelter at Burnie on Tasmania's North West coast. On November 10th, the 37th day of her journey, La Bella approached Warrnambool. Captain Mylius steered her towards Lady Bay Channel in heavy south-west seas and evening mist. He ordered the helmsman to steer for the light. As the ship came round, a tremendous sea struck her on the port quarter, causing her to breach broadside in a northwesterly direction into breakers. The helm was brought round twice more, but each time heavy seas broke over her, the third time throwing the La Bella on to a submerged reef in Lady Bay now known as La Bella Reef (about 100 yards from the Warrnambool breakwater). The sea was so rough that it even wrenched a one-and-a-half ton anchor from its fastenings and into the sea. As Captain Mylius headed to the steel wheelhouse, intending to send up a rocket flare, a huge sea slammed the steel door into him (resulting in massive bruising front and back) Despite his injuries he still managed to set off a blue light, which he held up in his hands. La Bella’s lifeboats were filled with seawater and broke up on their chocks. The blue light was the first indication to people on the shore that there was a ship in distress. The Harbour Master, Captain Roe (who lived in the Harbour Master’s House opposite Flagstaff Hill), organised a group of volunteers to crew the lifeboat because the trained crew was unavailable; the crewmen were working on a steamer in Port Fairy at the time. He then poured oil onto the water to try and smooth the sea. At around 11 pm three of the crew took shelter in the steel forecastle but the sea crashed into it and broke it up. While the rest of the crew and onlookers watched helplessly in the moonlight the bodies were washed away into the sea, never to be seen again. Some of the crew lashed themselves to the weather rail to keep from being washed away. Watson, the ordinary seaman, became tangled in the rigging lines and was too weak to move, so the 2nd Mate, Robertson, put a line onto him so that he wouldn’t wash off. Around 11 pm three of the crew were unconscious from exhaustion. The situation on La Bella was becoming dangerous. The 2nd Mate moved to the ‘house’ and soon afterwards the ship slipped in the heavy sea. The lashings of the 1st Mate and the ‘boy’ Denham had kept them safe until about 2 am when they were washed overboard; no one was able to help. One by one, the exhausted crew were being washed overboard, too weak to hold on any longer. During the night the La Bella had broken into two and the deckhouse ran out towards the sea. Two more men drowned when trying to reach the lifeboat. By sunrise, the only survivors of the twelve were the Master, 2nd Mate and three seamen. Early in the morning, Captain Roe used the rocket apparatus on shore to try and shoot a line to the ship for a safer rescue but each attempt fell short of the target. Several attempts were made by the lifeboat to rescue the stricken sailors, but the rough conditions made this difficult for the boat to get close enough to the ship and the lifeboat had to return to shore. During a final attempt to reach the ship Captain Mylius ordered his men to jump into the sea. Leonard Robertson, 2nd mate, jumped and swam towards the lifeboat, taking hold of the boat hook offered to him. Oscar Rosenholme managed to reach the boat floating on a piece of timber from the ship’s load and a third survivor, Noake, also made the boat. Along with the lifeboat rescue crew, 25-year-old William Ferrier rowed his small dingy through the heavy seas and managed to rescue the Captain, whom he landed on the breakwater. Ferrier then returned to the ship to attempt a final rescue, losing his oars and rowlocks into the high sea. Using just a spare paddle he skulled towards the La Bella, reaching her stern in time to cut loose the lone surviving sailor, Payne, from the lashing that held him to the ship; the terrified sailor dropped from the ship and into the dingy. Shortly after the last man was rescued, the La Bella was lifted by a huge wave and crashed back down on the reef; she broke up and sank. The ordeal had lasted ten hours. The survivors were taken to the nearby Bay View Hotel and gratefully received warm food and clothing, medical attention and a place to sleep. In the following days, an unidentified body of a young person had washed ashore; it was either Watson or Denham. The body was buried in the Warrnambool cemetery with an appropriate gravestone and inscription. William Ferrier became a national hero as news of the daring rescue spread. In recognition of his bravery in the two daring rescues, he was awarded the Silver Medal for Bravery by the Royal Humane Society and was honoured in the letter from the Prime Minister and the Parliament of the Commonwealth, telegrams and a cheque for £20 from the Governor-General, over £150 subscribed by the public, including Warrnambool and district and readers of The Argus, and a gold medal from the Glenelg Dinghy Club of South Australia. Ferrier’s rescue efforts are one of the most heroic in Victoria’s shipwreck history. (William Ferrier’s son, Frank, received a similar award almost fifty years later when he helped rescue four members of the crew on the yacht Merlan after it ran on to a reef near the Point Lonsdale Lighthouse. ) The wreck of La Bella now lies on her port side in 13 metres of sheltered water inside the reef she struck. The bow section is relatively intact and part of the stern has drifted north-easterly towards the mouth of the Hopkins River. The reef the La Bella struck now bears its name. Those five rescued from the La Bella were Captain George Mylius, Leonard Robertson (2nd Mate, 21 years old), R. Payne, Oscar Rosenholme and Jack Noake. Those seven who lost their lives were Mr Coulson (1st mate), Charles Jackman (cook) Gustave Johnson, Pierre Johann and Robert Gent (all able seamen), Harry Watson (ordinary seaman) and Jack Denham (ship’s boy), Captain Mylius was found guilty of careless navigation; he had sailed into the bay without the services of a pilot. His Master Certificate was suspended for twelve months. Later he was also charged with manslaughter of one of the crew who had died when the La Bella was wrecked but found not guilty. The event’s adverse publicity and damage to his career took a toll on his health and he died of a heart attack six months after the wreck; he was only thirty-seven. His body was buried in the Melbourne General Cemetery. The La Bella was “the best documented of all sailing ships owned in New Zealand”. Her record books, ship logs, correspondence and supporting papers are still available. At the time of the tragedy, she was owned by Messers David C.Turnbull and Co. of Timaru, New Zealand timber merchants and shipping agents, who had purchased her on 13th December 1901. A detailed account of the last journey of La Bella can be read in “Leonard Robertson, the Whangaroa & La Bella” written by Jack Churchouse, published in 1982 by Millwood Press Ltd, Wellington, NZ. As well as this postcard, Flagstaff Hill’s La Bella Collection includes a photograph of the wrecked La Bella, a brass rail holder and the letter from the Prime Minister and other Members of Parliament that was sent to William Ferrier to commend him for his bravery. Some 15 – 17 ships are believed to have sunk in Lady Bay, but only two have been discovered on the seafloor; the “La Bella” and the “Edinburgh Castle”. Both wrecks are popular diving sites and are preserved as significant historical marine and marine archaeological sites. This postcard is part of the La Bella Collection and is significant at both a local and state level. Its connection to the La Bella shipwreck and the rescue of five survivors highlights the dangers of Victoria’s Shipwreck Coast. The photograph of William Ferrier and four of the five survivors demonstrates the bravery of ordinary Australians who risked their lives to save victims of shipwrecks along the coast. The postcard is significant to the history of Warrnambool as it portrays William Ferrier, a local fisherman whose descendants continue to live in the area. It highlights the way of life of people who lived in coastal towns in 19th century Victoria and the effects of shipwrecks upon them. The postcard connects to the congratulatory letter which was sent to William Ferrier by the Prime Minister and Government of Australia and demonstrates the importance they attached to his efforts for Victoria and to Australia. The postcard is also an example of the photography of Foyle Photographers who were in the town of Warrnambool from the late 1800’s. Charles and Lillian Foyle took over the business when their father James died in 1905. Lillian Foyle is significant as the first woman photographer in Warrnambool. It is not known whether Charles of Lillian took this photograph. This postcard is significant because of its association with the sailing ship “La Bella”. The “La Bella” is of local and state and national significance. It is one of the only two shipwrecks discovered in Lady Bay, Warrnambool, out of the 15-17 shipwrecks in the bay. Sepia photograph of William (Bill) Ferrier (seated in the middle), heroic rescuer of two crew members of the La Bella, wrecked at Warrnambool. The photograph is a postcard and shows five men dressed formally in suits and hats. Printed below the photograph are the name and place of the photographer, a royal crest and the details of two patrons of the photographer. Also below the photograph are some handwritten words in black pen. On the back of the postcard is a handwritten message in the same writing as the front.Printed on the front of the card is “Foyle, WARRNAMBOOL” “PATRONS: / HIS ROYAL HIGHNESS THE DUKE OF CORNWALL & YORK. / HIS EXCELLENCY LORD BRAS_ EY, R.O.B.” Handwritten on the front of the card is “Bill Ferrier / rescuer / Oh my hero _ _ _ “ Handwritten on the back of the card is a message. “La Bella” Wrecked off W.Bool Breakwater Nov. 1906 (_ _ _ _ show night) Payne Noake Rosenholme Robertson and Capt Mylius (saved) (moonlight bright) Watson (_ _ _ _ boy) Richwoud [possibly Richmond] drowned” and signed “Desdewoua [possibly Desdemona] Slogos”la bella, foyle, william ferrier, bill ferrier, lady bay, 1905, 10th november 1905, 11th november 1905, parliament of the commonwealth, royal humane society medal, flagstaff hill, warrnambool, shipwrecked coast, flagstaff hill maritime museum, maritime museum, shipwreck coast, flagstaff hill maritime village -
 Flagstaff Hill Maritime Museum and Village
Letter - William Ferrier, 14th November 1905
The letter to William Ferrier of South Warrnambool from the Prime Minister and the Parliament of the Commonwealth recognised the significance of William’s brave and courageous lifesaving act to the people of Australia; “They all feel that your conduct was worthy of the best deeds done by British sailors in the past and they are proud to know that Australia can produce such as you.” The story of that brave rescue follows on below … The ship from which the sailors were rescued was the three-masted, iron and steel barquentine the La Bella, built in Norway in 1893. She was one of two iron and steel ships by Johan Smith, The company was one of the leading shipping families in Tvedestrand, Norway. She was significant to Norwegian shipping, being one of only 27 iron and steel ships ever built in Norway. She was registered in New Zealand and engaged from 1902 in inter-colonial trading of timber in the Pacific, between New Zealand and Australia and was often in Port Phillip Bay, Victoria. On 5th October 1905, the twelve-year-old La Bella left Lyttleton, New Zealand carrying a cargo of timber bound for Warrnambool, Australia. She was manned by a crew of twelve: the Master, (Captain Mylius, previously 1st Mate of La Bella, appointed Captain to La Bella on 6th February 1903) 2 Mates, Cook, six able seamen, one ordinary seaman and a boy. Bad weather en route caused her to shelter at Burnie on Tasmania's North West coast. On November 10th, the 37th day of her journey, La Bella approached Warrnambool. Captain Mylius steered her towards Lady Bay Channel in heavy south-west seas and evening mist. He ordered the helmsman to steer for the light. As the ship came round, a tremendous sea struck her on the port quarter, causing her to breach broadside in a north-westerly direction into breakers. The helm was brought round twice more, but each time heavy seas broke over her, the third time throwing the La Bella on to a submerged reef in Lady Bay now known as La Bella Reef (about 100 yards from the Warrnambool breakwater). The sea was so rough that it even wrenched a one-and-a-half ton anchor from its fastenings and into the sea. As Captain Mylius headed to the steel wheelhouse, intending to send up a rocket flare, a huge sea slammed the steel door into him (resulting in massive bruising front and back) Despite his injuries he still managed to set off a blue light, which he held up in his hands. La Bella’s lifeboats were filled with seawater and broke up on their chocks. The blue light was the first indication to people on the shore that there was a ship in distress. The Harbour Master, Captain Roe (who lived in the Harbour Master’s House opposite Flagstaff Hill), organised a group of volunteers to crew the lifeboat because the trained crew was unavailable; the crewmen were working on a steamer in Port Fairy at the time. He then poured oil onto the water to try and smooth the sea. At around 11 pm three of the crew took shelter in the steel forecastle but the sea crashed into it and broke it up. While the rest of the crew and onlookers watched helplessly in the moonlight the bodies were washed away into the sea, never to be seen again. Some of the crew lashed themselves to the weather rail to keep from being washed away. Watson, the ordinary seaman, became tangled in the rigging lines and was too weak to move, so the 2nd Mate, Robertson, put a line onto him so that he wouldn’t wash off. Around 11 pm three of the crew were unconscious from exhaustion. The situation on La Bella was becoming dangerous. The 2nd Mate moved to the ‘house’ and soon afterwards the ship slipped in the heavy sea. The lashings of the 1st Mate and the ‘boy’ Denham had kept them safe until about 2 am when they were washed overboard; no one was able to help. One by one, the exhausted crew were being washed overboard, too weak to hold on any longer. During the night the La Bella had broken into two and the deckhouse ran out towards the sea. Two more men drowned when trying to reach the lifeboat. By sunrise, the only survivors of the twelve were the Master, 2nd Mate and three seamen. Early in the morning, Captain Roe used the rocket apparatus on shore to try and shoot a line to the ship for a safer rescue but each attempt fell short of the target. Several attempts were made by the lifeboat to rescue the stricken sailors, but the rough conditions made this difficult for the boat to get close enough to the ship and the lifeboat had to return to shore. During a final attempt to reach the ship Captain Mylius ordered his men to jump into the sea. Leonard Robertson, 2nd mate, jumped and swam towards the lifeboat, taking hold of the boat hook offered to him. Oscar Rosenholme managed to reach the boat floating on a piece of timber from the ship’s load and a third survivor, Noake, also made the boat. Along with the lifeboat rescue crew, 25-year-old William Ferrier rowed his small dingy through the heavy seas and managed to rescue the Captain, whom he landed on the breakwater. Ferrier then returned to the ship to attempt a final rescue, losing his oars and rowlocks into the high sea. Using just a spare paddle he skulled towards the La Bella, reaching her stern in time to cut loose the lone surviving sailor, Payne, from the lashing that held him to the ship; the terrified sailor dropped from the ship and into the dingy. Shortly after the last man was rescued, the La Bella was lifted by a huge wave and crashed back down on the reef; she broke up and sank. The ordeal had lasted ten hours. The survivors were taken to the nearby Bay View Hotel and gratefully received warm food and clothing, medical attention and a place to sleep. In the following days, an unidentified body of a young person has washed ashore; it was either Watson or Denham. The body was buried in the Warrnambool cemetery with an appropriate gravestone and inscription. William Ferrier became a national hero as news of the daring rescue spread. In recognition of his bravery in the two daring rescues, he was awarded the Silver Medal for Bravery by the Royal Humane Society and was honoured in the letter from the Prime Minister and the Parliament of the Commonwealth, telegrams and a cheque for £20 from the Governor-General, over £150 subscribed by the public, including Warrnambool and district and readers of The Argus, and a gold medal from the Glenelg Dinghy Club of South Australia. Ferrier’s rescue efforts are one of the most heroic in Victoria’s shipwreck history. (William Ferrier’s son, Frank, received a similar award almost fifty years later when he helped rescue four members of the crew on the yacht Merlan after it ran on to a reef near the Point Lonsdale Lighthouse. ) The wreck of La Bella now lies on her port side in 13 metres of sheltered water inside the reef she struck. The bow section is relatively intact and part of the stern has drifted north-easterly towards the mouth of the Hopkins River. The reef the La Bella struck now bears its name. Those five rescued from the La Bella were Captain George Mylius, Leonard Robertson (2nd Mate, 21 years old), R. Payne, Oscar Rosenholme and Jack Noake. Those seven who lost their lives were Mr Coulson (1st mate), Charles Jackman (cook) Gustave Johnson, Pierre Johann and Robert Gent (all able seamen), Harry Watson (ordinary seaman) and Jack Denham (ship’s boy), Captain Mylius was found guilty of careless navigation; he had sailed into the bay without the services of a pilot. His Master Certificate was suspended for twelve months. Later he was also charged with the manslaughter of one of the crew who had died when the La Bella was wrecked but found not guilty. The event’s adverse publicity and damage to his career took a toll on his health and he died of a heart attack six months after the wreck; he was only thirty-seven. His body was buried in the Melbourne General Cemetery. The La Bella was “the best documented of all sailing ships owned in New Zealand”. Her record books, ship logs, correspondence and supporting papers are still available. At the time of the tragedy, she was owned by Messers David C.Turnbull and Co. of Timaru, New Zealand timber merchants and shipping agents, who had purchased her on 13th December 1901. A detailed account of the last journey of La Bella can be read in “Leonard Robertson, the Whangaroa & La Bella” written by Jack Churchouse, published in 1982 by Millwood Press Ltd, Wellington, NZ. As well as this letter, Flagstaff Hill’s La Bella Collection includes a photograph of the wrecked La Bella, a brass rail holder and a postcard of William Ferrier with four of the survivors. Some 15 – 17 ships are believed to have sunk in Lady Bay, but only two have been discovered on the seafloor; the “La Bella” and the “Edinburgh Castle”. Both wrecks are popular diving sites and are preserved as significant historical marine and marine archaeological sites. This original congratulatory letter sent to William Ferrier by the Prime Minister and Government of Australia demonstrates the importance attached to his efforts for Victoria and to Australia. The letter is part of the La Bella Collection and is significant at both a local and state level. Its connection to the La Bella shipwreck and the rescue of five survivors highlights the dangers of Victoria’s Shipwreck Coast. The letter to William Ferrier from the Australian Government acknowledges the bravery of ordinary Australians who risked their lives to save victims of shipwrecks along the coast. The letter is significant to the history of Warrnambool as it honours William Ferrier, a local fisherman whose descendants continue to live in the area. It highlights the way of life of people who lived in coastal towns in 19th century Victoria and the effects of shipwrecks upon them. The letter connects to the postcard of William Ferrier with four of the five rescued crew, the photograph of the wreck of the La Bella and the artefact from the wreck, the rail holder. This letter is significant because of its association with the sailing ship “La Bella”. The “La Bella” is of local and state and national significance. It is one of the only two shipwrecks discovered in Lady Bay, Warrnambool, out of the 15-17 shipwrecks in the bay. Letter to William Ferrier of South Warrnambool from the Prime Minister and Members of Parliament commending him on his bravery. The printed letterhead includes a coat of arms in the top centre and the official address. The letter is very neatly hand written in black pen and includes 4 signatures of Members of Parliament. The rectangular paper is cream coloured with some yellow/brown discolouring. It has the letterhead on the right hand side of it and the written letter begins below the letterhead. The paper has been folded so that the right side becomes the cover page of the letter. The writing is continued onto the inside right hand page of the folded paper and the writing ends here. There is more recent writing on the bottom right hand corner of the back page. The paper has been officially folded in half a total 3 times and there is heavy discolouration on the sections that form the front and back of the folded letter. There is a 4th fold line that is less pronounced that the other folds and would make the paper the size to fit into a pocket. At several fold creases the paper has worn through. The edges of the paper have minor tears. The printed coat of arms is that of the House of Representatives. Underneath is printed “The Parliament of the Commonwealth, / Parliament House / Melbourne”. The hand written, letter is dated “14th November, 1905” and addressed to “Mr. William Ferrier / South Warrnambool” The letter begins “The Speaker, the Prime Minister and Members of the Ministry and its supporters, the Leader and Members of the Opposition, the Leader and Members of the Labour Party, being all the Members of the House of Representatives of the Federal Parliament of Australia” … It continues “desire to express to you their appreciation of your bravery in skulling out to the wreck of the “La Bella” at Warrnambool on Saturday, 11th November, 1905, and recovering therefrom two of the crew who were in imminent danger of their lives. They all feel that your conduct was worthy of the best deeds done by British sailors in the past and they are proud to know that Australia can produce such as you.” The letter is “Signed on behalf of the Members – Speaker (Frederick Holder ), Deputy Leader of the Opposition (Joseph Cook ), Prime Minister (Alfred Deakin), Leader of the Labour Party ( J.C. Watson)” On the back of the letter is blue ink handwriting “OWNER / G. FERRIER / TO. BE. PHOTOGRAPHED / 27-4-76”la bella, william ferrier, bill ferrier, lady bay, 1905, 10th november 1905, 11th november 1905, parliament of the commonwealth, prime minister, australian government, new zealand, flagstaff hill, warrnambool, shipwrecked coast, flagstaff hill maritime museum, maritime museum, shipwreck coast, flagstaff hill maritime village -
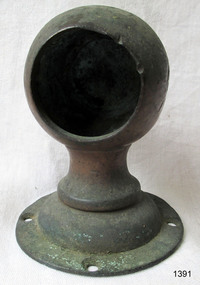 Flagstaff Hill Maritime Museum and Village
Functional object - Rail holder, About 1893, when the ship was made
This brass rail holder fixture would have been used to hold the end of a rail in place. There is no information as to where the fitting or rail would have been placed on the ship; sailing ships had many brass fittings. It was recovered from the wreck of the La Bella, which lies at the bottom of the Warrnambool Harbour. Some 15 ships are believed to have been wrecked in Lady Bay, but only two have been discovered on the sea floor; the La Bella and the Edinburgh Castle. Both wrecks are popular diving sites and are preserved as significant historical marine and marine archaeological sites. The story of the final voyage of the La Bella is summarised as follows … The ship from which the sailors were rescued was the three-masted, iron and steel barquentine the La Bella, built in Norway in 1893. She was one of two iron and steel ships by Johan Smith, the company being one of the leading shipping families in Tvedestrand, Norway. She was significant to Norwegian shipping, being one of only 27 iron and steel ships ever built in Norway. She was registered in New Zealand and engaged from 1902 in inter-colonial trading of timber in the pacific, between New Zealand and Australia and was often in Port Phillip Bay, Victoria. On 5th October, 1905, the twelve year old La Bella left Lyttleton, New Zealand carrying a cargo of timber bound for Warrnambool, Australia . She was manned by a crew of twelve: the Master, (Captain Mylius, previously 1st Mate of La Bella, appointed Captain to La Bella on 6th February 1903) 2 Mates, Cook, six able seamen, one ordinary seaman and a boy. . Bad weather en route caused her to shelter at Burnie on Tasmania's North West coast. On November 10th, the 37th day of her journey, La Bella approached Warrnambool. Captain Mylius steered her towards Lady Bay Channel in heavy south-west seas and evening mist. He ordered the helmsman to steer for the light. As the ship came round, a tremendous sea struck her on the port quarter, causing her to breach broadside in a north-westerly direction into breakers. The helm was brought round twice more, but each time heavy seas broke over her, the third time throwing the La Bella on to a submerged reef in Lady Bay now known as La Bella Reef (about 100 yards from the Warrnambool breakwater). The sea was so rough that it even wrenched a one-and-a-half ton anchor from its fastenings and into the sea. As Captain Mylius headed to the steel wheelhouse, intending to send up a rocket flare, a huge sea slammed the steel door into him (resulting in massive bruising front and back) Despite his injuries he still managed to set off a blue light, which he held up in his hands. La Bella’s lifeboats were filled with sea water and broke up on their chocks. The blue light was the first indication to people on shore that there was a ship in distress. The Harbour Master, Captain Roe (who lived in the Harbour Master’s House opposite Flagstaff Hill), organised a group of volunteers to crew the lifeboat because the trained crew was unavailable; the crewmen were working on a steamer in Port Fairy at the time. He then poured oil onto the water to try and smooth the sea. At around 11pm three of the crew took shelter in the steel forecastle but the sea crashed into it and broke it up. While the rest of the crew and onlookers watched helplessly in the moonlight the bodies were washed away into the sea, never to be seen again. Some of the crew lashed themselves to the weather rail to keep from being washed away. Watson, the ordinary seaman, became tangled in the rigging lines and was too weak to move, so the 2nd Mate, Robertson, put a line onto him so that he wouldn’t wash off. Around 11pm three of the crew were unconscious from exhaustion. The situation on La Bella was becoming dangerous. The 2nd Mate moved to the ‘house’ and soon afterwards the ship slipped in the heavy sea. The lashings of the 1st Mate and the ‘boy’ Denham had kept them safe until about 2am when they were washed overboard; no one was able to help. One by one, the exhausted crew were being washed overboard, too weak to hold on any longer. During the night the La Bella had broken into two and the deckhouse ran out towards the sea. Two more men drowned when trying to reach the lifeboat. By sunrise the only survivors of the twelve were the Master, 2nd Mate and three seamen. Early in the morning Captain Roe used the rocket apparatus on shore to try and shoot a line to the ship for a safer rescue but each attempt fell short of the target. Several attempts were made by the lifeboat to rescue the stricken sailors, but the rough conditions made this difficult for the boat to get close enough to the ship and the lifeboat had to return to shore. During a final attempt to reach the ship Captain Mylius ordered his men to jump into the sea. Leonard Robertson, 2nd mate, jumped and swam towards the lifeboat, taking hold of the boat hook offered to him. Oscar Rosenholme managed to reach the boat floating on a piece of timber from the ship’s load and a third survivor, Noake, also made the boat. Along with the lifeboat rescue crew, 25 year old William Ferrier rowed his small dingy through the heavy seas and managed to rescue the Captain, whom he landed on the breakwater. Ferrier then returned to the ship to attempt a final rescue, losing his oars and rowlocks into the high sea. Using just a spare paddle he skulled towards the La Bella, reaching her stern in time to cut loose the lone surviving sailor, Payne, from the lashing that held him to the ship; the terrified sailor dropped from the ship and into the dingy. Shortly after the last man was rescued, the La Bella was lifted by a huge wave and crashed back down on the reef; she broke up and sank. The ordeal had lasted ten hours. The survivors were taken to the nearby Bay View Hotel and gratefully received warm food and clothing, medical attention and a place to sleep. In the following days an unidentified body of a young person was washed ashore; it was either Watson or Denham. The body was buried in the Warrnambool cemetery with an appropriate gravestone and inscription. William Ferrier became a national hero as news of the daring rescue spread. In recognition of his bravery in the two daring rescues he was awarded the Silver Medal for Bravery by the Royal Humane Society and was honoured in the letter from the Prime Minister and the Parliament of the Commonwealth, telegrams and a cheque for £20 from the Governor General, over £150 subscribed by the public, including Warrnambool and district and readers of The Argus, and a gold medal from the Glenelg Dinghy Club of South Australia. Ferrier’s rescue efforts are one of the most heroic in Victoria’s shipwreck history. (William Ferrier’s son, Frank, received a similar award almost fifty years later, when he helped rescue four members of the crew on the yacht Merlan, after it ran on to a reef near the Point Lonsdale Lighthouse. ) The wreck of La Bella now lies on her port side in 13 metres of sheltered water inside the reef she struck. The bow section is relatively intact and part of the stern has drifted north-easterly towards the mouth of the Hopkins River. The reef the La Bella struck now bears its name. Those five rescued from the La Bella were Captain George Mylius, Leonard Robertson (2nd Mate, 21 years old), R. Payne, Oscar Rosenholme and Jack Noake. Those seven who lost their lives were Mr Coulson (1st mate), Charles Jackman (cook) Gustave Johnson, Pierre Johann and Robert Gent (all able seamen), Harry Watson (ordinary seaman) and Jack Denham (ship’s boy), Captain Mylius was found guilty of careless navigation; he had sailed into the bay without the services of a pilot. His Master Certificate was suspended for twelve months. Later he was also charged with manslaughter of one of the crew who had died when the La Bella was wrecked, but found not guilty. The event’s adverse publicity and damage to his career took a toll on his health and he died of a heart attack six months after the wreck; he was only thirty-seven. His body was buried in the Melbourne General Cemetery. The La Bella was “the best documented of all sailing ships owned in New Zealand”. Her record books, ship logs, correspondence and supporting papers are still available. At the time of the tragedy, she was owned by Messers David C.Turnbull and Co. of Timaru, New Zealand timber merchants and shipping agents, who had purchased her on 13th December 1901. A detailed account of the last journey of La Bella can be read in “Leonard Robertson, the Whangaroa & La Bella” written by Jack Churchouse, published in 1982 by Millwood Press Ltd, Wellington, NZ. Some 15 – 17 ships are believed to have sunk in Lady Bay, but only two have been discovered on the seafloor; the “La Bella” and the “Edinburgh Castle”. Both wrecks are popular diving sites and are preserved as significant historical marine and marine archaeological sites. As well as this letter, Flagstaff Hill’s La Bella Collection includes a photograph of the wrecked La Bella, a brass rail holder and a postcard of William Ferrier with four of the survivors. This original congratulatory letter sent to William Ferrier by the Prime Minister and Government of Australia demonstrates the importance attached to his efforts for Victoria and to Australia. The letter is part of the La Bella Collection and is significant at both a local and state level. Its connection to the La Bella shipwreck and the rescue of five survivors highlights the dangers of Victoria’s Shipwreck Coast. The letter to William Ferrier from the Australian Government acknowledges the bravery of ordinary Australians who risked their lives to save victims of shipwrecks along the coast. The letter is significant to the history of Warrnambool as it honours William Ferrier, a local fisherman whose descendants continue to live in the area. It highlights the way of life of people who lived in coastal towns in 19th century Victoria and the effects of shipwrecks upon them. The letter connects to the postcard of William Ferrier with four of the five rescued crew, the photograph of the wreck of the La Bella and the artefact from the wreck, the rail holder. This item is significant because of its association with the sailing ship “La Bella” . the “La Bella” is of local and state and national significance. It is one of the only two shipwrecks discovered in Lady Bay, Warrnambool, out of the 15-17 shipwrecks in the bay. Brass rail holder from the wreck "La Bella". This rail holder would have been used as a fitting for the end of a rail. It is made up of two parts and looks a little like a goblet in shape. The top is a hollow spherical shape with a circular hole cut out on one side, into which the end of a round rail would fit. There are two gouge marks close to each other on one side of the hole, about one centimetre apart, at 1 and 2 o’clock position. The sphere has a hollow pipe-like stem with a screw thread turned into the outside of the lower section and the bottom of the stem has been flared out after having the base fitted. The base is round and has a mound in the centre. The edge has four evenly spaced fixture holes around its edge. The metal shows signs of pitting and has mild encrustation. The fitting of the base is loose, allowing it to swivel in a complete circle. The top of the sphere is rough and has a dent in it. Underneath the base there is verdigris; some has flaked off and reveals a bright golden colour underneath. rail holder, brass rail holder, la bella, lady bay, norway, 1893, new zealand, captain mylius, william ferrier, flagstaff hill, warrnambool, shipwrecked coast, flagstaff hill maritime museum, maritime museum, shipwreck coast, flagstaff hill maritime village -
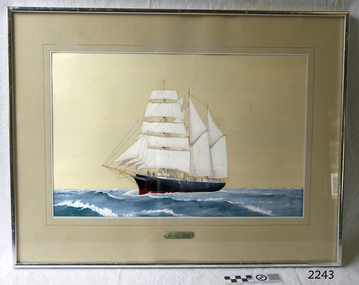 Flagstaff Hill Maritime Museum and Village
Painting - Maritime painting, The La Bella, 1980s
This painting of the “La Bella” is associated with Flagstaff Hill’s collection of artefacts from the wreck of the “La Bella”. It was painted around the 1980s by maritime artist Philip J. Gray. Some 15 – 17 ships are believed to have sunk in Lady Bay, but only two have been discovered on the seafloor; the “La Bella” and the “Edinburgh Castle”. Both wrecks are popular diving sites and are preserved as significant historical marine and marine archaeological sites. The Kosnar Picture Framing and Mirrors Shop identified the "GRAY 3135, Y04/111" as their job number for the framing and said that the label "ANOTHER KOSNAR FEATURE" was last used before about 1990. About artist Philip J. Gray “Philip is one of Australia’s leading maritime artists and his meticulous research and social commentary paintings of ships, such as, the Loch Ard and Schomberg form an important part of Warrnambool’s Flagstaff Hill Maritime Museum.” [Dr Marion Manifold, Artist and Art Historian, 2014] Philip James Gray was born in London but has lived most of his life in Australia. He graduated from a London school of art as an illustrator, specialising in technical and scientific illustration as well as other commercial and applied art. He was also a student for a time of Fyffe Christie - British figurative artist, mural painter and humanitarian – who had a great influence on his career. Philip has always worked as a professional artist and illustrator. Many publications on maritime history have featured his work. His paintings have been released and sold all over the world as limited edition prints. The State Library of Victoria’s ‘Latrobe Collection’ holds two of his paintings. His street painting of ‘The Ashes Contest’ decorates the brick wall of Old Bakery Laneway in Sunbury and a Sunbury café owner commissioned him to paint the ‘Sunbury Pop Festival’ as a remembrance of local history. Philip has been an active member of the Sunbury Art Society in Victoria for several years, serving on the committee for some of that time and being involved in exhibitions. He enjoys helping new artists and sharing his skills and experience. About the “La Bella” The wreck of the La Bella lies at the bottom of the Warrnambool Harbour in Lady Bay. Some 15 ships are believed to have been wrecked there but only two have been discovered on the sea floor; the La Bella and the Edinburgh Castle. Both wrecks are popular diving sites and are preserved as significant historical marine and marine archaeological sites. The story of the final voyage of the La Bella is summarised as follows … The ship from which the sailors were rescued was the three-masted, iron and steel barquentine the La Bella, built in Norway in 1893. She was one of two iron and steel ships by Johan Smith, the company being one of the leading shipping families in Tvedestrand, Norway. She was significant to Norwegian shipping, being one of only 27 iron and steel ships ever built in Norway. La Bella was registered in New Zealand and engaged from 1902 in inter-colonial trading of timber in the pacific, between New Zealand and Australia and was often in Port Phillip Bay, Victoria. On 5th October 1905 the twelve year old La Bella left Lyttleton, New Zealand carrying a cargo of timber bound for Warrnambool, Australia . She was manned by a crew of twelve: the Master, (Captain Mylius, previously 1st Mate of La Bella, appointed Captain to La Bella on 6th February 1903) 2 Mates, Cook, six able seamen, one ordinary seaman and a boy. Bad weather en-route caused her to shelter at Burnie on Tasmania's North West coast. On November 10th, the 37th day of her journey, La Bella approached Warrnambool. Captain Mylius steered her towards Lady Bay Channel in heavy south-west seas and evening mist. He ordered the helmsman to steer for the light. As the ship came round, a tremendous sea struck her on the port quarter, causing her to breach broadside in a north-westerly direction into breakers. The helm was brought round twice more, but each time heavy seas broke over her, the third time throwing the La Bella on to a submerged reef in Lady Bay now known as La Bella Reef (about 100 yards from the Warrnambool breakwater). The sea was so rough that it even wrenched a one-and-a-half ton anchor from its fastenings and into the sea. As Captain Mylius headed to the steel wheelhouse, intending to send up a rocket flare, a huge sea slammed the steel door into him (resulting in massive bruising front and back) Despite his injuries he still managed to set off a blue light, which he held up in his hands. La Bella’s lifeboats were filled with sea water and broke up on their chocks. The blue light was the first indication to people on shore that there was a ship in distress. The Harbour Master, Captain Roe (who lived in the Harbour Master’s House opposite Flagstaff Hill), organised a group of volunteers to crew the lifeboat because the trained crew was unavailable; the crewmen were working on a steamer in Port Fairy at the time. He then poured oil onto the water to try and smooth the sea. At around 11pm three of the crew took shelter in the steel forecastle but the sea crashed into it and broke it up. While the rest of the crew and onlookers watched helplessly in the moonlight the bodies were washed away into the sea, never to be seen again. Some of the crew lashed themselves to the weather rail to keep from being washed away. Watson, the ordinary seaman, became tangled in the rigging lines and was too weak to move, so the 2nd Mate, Robertson, put a line onto him so that he wouldn’t wash off. Around 11pm three of the crew were unconscious from exhaustion. The situation on La Bella was becoming dangerous. The 2nd Mate moved to the ‘house’ and soon afterwards the ship slipped in the heavy sea. The lashings of the 1st Mate and the ‘boy’ Denham had kept them safe until about 2am when they were washed overboard; no one was able to help. One by one, the exhausted crew were being washed overboard, too weak to hold on any longer. During the night the La Bella had broken into two and the deckhouse ran out towards the sea. Two more men drowned when trying to reach the lifeboat. By sunrise the only survivors of the twelve were the Master, 2nd Mate and three seamen. Early in the morning Captain Roe used the rocket apparatus on shore to try and shoot a line to the ship for a safer rescue but each attempt fell short of the target. Several attempts were made by the lifeboat to rescue the stricken sailors, but the rough conditions made this difficult for the boat to get close enough to the ship and the lifeboat had to return to shore. During a final attempt to reach the ship Captain Mylius ordered his men to jump into the sea. Leonard Robertson, 2nd mate, jumped and swam towards the lifeboat, taking hold of the boat hook offered to him. Oscar Rosenholme managed to reach the boat floating on a piece of timber from the ship’s load and a third survivor, Noake, also made the boat. Along with the lifeboat rescue crew, 25 year old William Ferrier rowed his small dingy through the heavy seas and managed to rescue the Captain, whom he landed on the breakwater. Ferrier then returned to the ship to attempt a final rescue, losing his oars and rowlocks into the high sea. Using just a spare paddle he skulled towards the La Bella, reaching her stern in time to cut loose the lone surviving sailor, Payne, from the lashing that held him to the ship; the terrified sailor dropped from the ship and into the dingy. Shortly after the last man was rescued, the La Bella was lifted by a huge wave and crashed back down on the reef; she broke up and sank. The ordeal had lasted ten hours. The survivors were taken to the nearby Bay View Hotel and gratefully received warm food and clothing, medical attention and a place to sleep. In the following days an unidentified body of a young person was washed ashore; it was either Watson or Denham. The body was buried in the Warrnambool cemetery with an appropriate gravestone and inscription. William Ferrier became a national hero as news of the daring rescue spread. In recognition of his bravery in the two daring rescues he was awarded the Silver Medal for Bravery by the Royal Humane Society and was honoured in the letter from the Prime Minister and the Parliament of the Commonwealth, telegrams and a cheque for £20 from the Governor General, over £150 subscribed by the public, including Warrnambool and district and readers of The Argus, and a gold medal from the Glenelg Dinghy Club of South Australia. Ferrier’s rescue efforts are one of the most heroic in Victoria’s shipwreck history. (William Ferrier’s son, Frank, received a similar award almost fifty years later, when he helped rescue four members of the crew on the yacht Merlan, after it ran on to a reef near the Point Lonsdale Lighthouse. ) The wreck of La Bella now lies on her port side in 13 metres of sheltered water inside the reef she struck. The bow section is relatively intact and part of the stern has drifted north-easterly towards the mouth of the Hopkins River. The reef the La Bella struck now bears its name. Those five rescued from the La Bella were Captain George Mylius, Leonard Robertson (2nd Mate, 21 years old), R. Payne, Oscar Rosenholme and Jack Noake. Those seven who lost their lives were Mr Coulson (1st mate), Charles Jackman (cook) Gustave Johnson, Pierre Johann and Robert Gent (all able seamen), Harry Watson (ordinary seaman) and Jack Denham (ship’s boy). Captain Mylius was found guilty of careless navigation; he had sailed into the bay without the services of a pilot. His Master Certificate was suspended for twelve months. Later he was also charged with manslaughter of one of the crew who had died when the La Bella was wrecked, but found not guilty. The event’s adverse publicity and damage to his career took a toll on his health and he died of a heart attack six months after the wreck; he was only thirty-seven. His body was buried in the Melbourne General Cemetery. The La Bella was “the best documented of all sailing ships owned in New Zealand”. Her record books, ship logs, correspondence and supporting papers are still available. At the time of the tragedy she was owned by Messers David C.Turnbull and Co. of Timaru, New Zealand timber merchants and shipping agents, who had purchased her on 13th December 1901. A detailed account of the last journey of La Bella can be read in “Leonard Robertson, the Whangaroa & La Bella” written by Jack Churchouse, published in 1982 by Millwood Press Ltd, Wellington, NZ.This painting of the La Bella by Philip J. Gray is part of the La Bella Collection and is significant at both a local and state level. Its connection to the La Bella shipwreck and the rescue of five survivors highlights the dangers of Victoria’s Shipwreck Coast. The painting connects with other objects and artefacts associated with the wreck of the La Bella. This painting is significant because of its association with the sailing ship “La Bella” . the “La Bella” is of local and state and national significance. It is one of the only two shipwrecks discovered in Lady Bay, Warrnambool, out of the 15-17 shipwrecks in the bay. Large framed painting of the three masted barquentine "La Bella" fully rigged. Painted by Phillip J Gray. A fine printed line squares off the painting. Beneath painting and line is a gold plate with black copper plate designating "La Bella" is encased in glass, surrounded by a silver-metal frame. Yellow and brown paper label is adhered to back of painting. Picture framed by Kosnar in Melbourne."The La Bella" on gold plaque Logo of "K" inside a brown square. "GRAY 3135, Y04/111", "ANOTHER KOSNAR FEATURE" flagstaff hill, warrnambool, shipwrecked-coast, flagstaff-hill, flagstaff-hill-maritime-museum, maritime-museum, shipwreck-coast, flagstaff-hill-maritime-village, painting, la bella, artist phillip j gray, maritime painting, lady bay warrnambool -
 Bendigo Historical Society Inc.
Document - PETER ELLIS COLLECTION: BUSH MUSIC CLUB COLONIAL BALL, 1991
Small yellow booklet outline of a man on left of title and woman on right. Bush Music Club Inc. Colonial Subscription Ball 1991 Dancers Companion (A guide to the Quadrilles) The Quadrille Figure 1 (Le Pantelon) (2x32) 8 Top couples R and L through. (without giving hands). 8 Set & turn Partners 8 Top ladies chain. 4 Top couples promenade across set. 4 Half R and L to place. 32 Side couples repeat Figure 2 (Le 'Ete) (4x24) 4 Top couples advance & retire. 4 Cross over (without changing places with partner). 8 Repeat back to place. 8 Set & turn partners. 24 Sides repeat. 48 Top and Sides repeat. Figure 3 (La Poule) (4x32) 4 Lady 1, Man 2 adv, tough RH, retire to opposite place. 4 Lady 1, Man 2 adv, join LH give RH to partner 4 Line of 4 balance fwd & back twice. 4 Men lead partners to opp. Place. 4 Lady 1, Man 2 adv. & ret. 4 Lady 1, Man 2 adv, honour & ret. 4 Top couples, advance & retire. 4 Half R & L to place. 32 Repeat with Lady 2, Man !. 32 Repeat with Lady 3, Man 4. 32 Repeat with Lady 4, Man 3. The Quadrille Figure 4. (La Pastourelle) (4x32) 4 1st couple advance & retire. 4 1st couple adv, lady join 2nd couple. 4 Line of 3 adv. & ret, 1st man retire. 4 Line of 3 adv. Ladies cross to 1st man. 4 Line of 3 adv. & ret, 2nd man retire. 4 Re-advance, form circle with 2nd man. 4 Circle L half way round. 4 Half R & L to place. 32 Repeat with 2nd couple leading. 32 Repeat with 3rd couple leading. 32 Repeat with 4th couple leading. Figure 5 (La Finale) (4 x 32 + 8) 4 All advance & retire. 4 Turn partners. 4 Ladies adv, curtsey & retire. 4 Men advance, bow & retire. 8 All set & turn corners. 8 Promenade with corner. (men to original place with corner) 96 Repeat 3 times to return to partner. 4 All advance & retire. Turn Partners. Notes: 1 Couples numbered 1 4 2 3 2 Set & turn is a 'balance' set and open hand turn. The Lancers Quadrille Figure 1 (4x24) 4 1st lady, 2nd man advance & retire, 4 Adv, turn two hands, return to place. 4 1st couple lead through across set 4 2nd couple lead through back 8 all set & turn corners. 24 Repeat, 2nd lady, 1st man leading 24 Repeat 3rd lady, 4th man leading 24 Repeat, 4th lady, 3rd man leading Figure 2 (4x24) 4 1st couple advance & retire. 2 1st lady adv to centre, turn to face partner 2 1st couple honour each other. 8 1st couple set and turn then sides form top & bottom lines 4 Lines advance & retire, 4 Advance and turn partners to place. 24 Repeat with 2nd couple leading 24 Repeat with 3rd couple leading 24 Repeat with 4th couple leading Figure 3. (2x32) 4 Ladies advance, curtsey & retire. 4 Men adv, bow, turn by left, bow to partners, then join RH in centre, (ladies RH on partners left elbow). 8 Promenade round set to place. 4 Ladies adv, curtsey & retire again. 4 Men adv, bow, turn by right, bow to partners, join LH in centre, right arm behind partner. 8 Promenade round to set in place. 32 Repeat. The Lancers Quadrille. Figure 4. (4x24) 8 Top couples visit R then L 4 Right Hands around with LH couple 4 then left hands around. 8 Circle left with that couple. 24 Repeat with side couples leading. 24 repeat, top couples visit L then R. 24 Repeat, side couples visit L then R. Figure 5. (4x48 +24) 8 All grand chain 1/2 way round and honour partners. 8 Continue grand chain to place and honour partners. 8 1st couple visit, return to place, facing out with sides in behind. 2 Change places with partner, 2 All rock fwd and back 2 change places again 2 All rock fwd and back 8 Cast out reform in lines 4 Lines advance & retire 4 Advance & turn partners to place 48 Repeat with 2nd couple leading 48 Repeat with 3rd couple leading 48 Repeat with 4th couple leading. 8 Grand chain 1/2 way round and honour partners. 8 continue grand chain to place and honour partners 8 swing partners (R arm round partner, LH in air) Note: All figures walked. Set & Turn is a 'balance' set and open two hand turn. The Prince Imperial's Quadrille Figure 1. (4x24) 4 Top couples visit right, honour sides. 4 Top men retire with partner & side lady to opposite place, (ladies facing each other). 8 Ladies grand chain to places 8 All set and turn partners 24 Top couples repeat back to place. 48 Repeat with side couples. Figure 2 (4 x 24) 4 1st Lady, 2nd man adv & turn in centre finish facing 2nd lady. 2 2nd lady pass through to 1st man. 2 Both couples turn out to place. 4 top couples advance & retire. 4 Ladies chain back to place. (Nariel) 8 Chasse-croise. (4 steps past partner RH turn corner 4 steps back, LH turn with partner.) 24 Repeat with 2nd lady, 1st man leading 24 Repeat with 3rd lady, 4th man leading 24 Repeat wth 4th lady, 3rd man leading. Figure 3 (4x32) 4 1st lady to centre, curtsey to partner. (RH in RH, ACW turn in to centre) 4 2nd lady to centre, curtsey to partner. 4 3rd lady to centre, curtsey to partner.4 4th lady to centre, curtsey to partner. 8 ladies join hands, circle R, small steps after circle R, Men join circle, (giving RH to partner). 4 Balance for 4 (step lift x 4) 4 Turn partners to place, bow & curtsey. 32 Repeat, Lady 2, 1, 4 & 3 to centre 32 Repeat Lady 3, 4, 2 & 1 to centre 32 Repeat, Lady 4, 3, 1 & 2 to centre The Prince Imperial's Quadrille Figure 4 (4x32) 4 Top couples advance & retire. 4 Top couples adv, ladies move to R, as men retire to place. 8 Line of 3 adv & ret twice. 4 Single men adv, bow and retire. 4 Re-advance and turn to face partner. 4 Circle L half way round (with partner & side couple). 4 Half R & L to place. 32 Repeat with side couples leading. 32 Repeat with top couples leading (men moving to left as ladies retire) 32 Repeat with Side couple leading. (Men moving to left as ladies retire) Figure 5 (4x32 +32) 16 Ladies to the right, (RH turn with corner man then continue round to the right turning each man) 4 1st Lady, 2nd man advance & retire 4 re-advance & turn RH (finish facing partners) 8 set & turn partners (finishing in place) 32 Repeat with 2nd Lady, 1st man leading 32 repeat with 3rd lady, 4th man leading 32 Repeat with 4th Lady, 3rd man leading 16 Ladies to the right again. 4 Men turn partners to centre. 4 All bow and curtsey. 8 Promenade set ( hall) Note: Set & turn is a 'balance' set and open hand turn. The Parisienne Quadrille Figure 1 (1x32) 8 Couples R and L through. (without giving hands) 8 set & turn partners 8 Ladies chain. 4 Couples promenade across set. 4 Half R and L to place. Figure 2 (2x24) 4 Couples advance & retire. 4 Cross over (without changing places with partners) 8 Repeat back to place. 8 Set & turn partners. 24 Repeat. Figure 3 (2x32) 4 Lady 1, Man 2 adv, touch RH, retire to opposite place. 4 Lady 1, Man 2 adv, join LH, give RH to partner. 4 Line of 4 balance fwd & back twice 4 Men lead partners to opp. Place 4 Lady 1, Man 2 adv & retire 4 Lady 1, Man 2 adv, honour & ret. 4 Couples, advance & retire. 4 Half R & L to place. 32 Repeat with Lady 2, Man 1. The Parisienne Quadrille Figure 4. (2x32) 4 1st couple advance & retire. 4 1st couple adv, lady join 2nd couple. 4 Line of 3 adv. & ret, 1st man retire. 4 Line of 3 adv. Ladies cross to 1st man. 4 Line of 3 adv. & ret, 2nd man retire. 4 Re-advance, form circle with 2nd man. 4 Circle L half way round. 4 Half R & L to place. 32 Repeat with 2nd couple leading. Figure 5 (2x32) 4 Couples advance & retire 4 Cross over 8 Repeat back to place. 8 Ladies chain across & back.8 Set & turn partners. 32 Repeat Notes: 1 This 'quadrille' is similar to the first set (1st 4 figures) and is danced as two couple sets. 2 Set & turn is a 'balance' set and open hand turn. Wellington Waltz 8 Honour Partner, honour corner 8 Circle L 7 steps, then tap, tap 8 Circle R 7 steps, then tap, tap 4 Top couples, 2 side-steps to centre and back with lady turning under man's left arm. 4 Waltz across to opposite side 8 Side couples repeat. 8 Top ladies chain across. (pause in centre, turn twice with opp. Man) 8 Side ladies chain across. 8 Grand Chain half way round set. 8 Waltz to man's place. 64 Repeat with side couples leading. Waltz Cotillon 8 Honour Partner, honour corner 16 1st couple waltz the set. 8 Top ladies cross over.8 Side ladies cross over. 8 Top men cross over. 8 Side men cross over. 16 All waltz back to place. Form top & bottom lines, 8 Adv. & ret, cross over. 8 Adv. & ret, cross back. 16 Waltz chain to meet partner. 16 All waltz back to place. Form top & bottom lines, 8 Adv. & ret, cross over. 8 Adv. & ret, cross back. 16 Waltz chain to meet partner. 16 All waltz back to place. 112 Repeat with 2nd couple leading. 112 Repeat with 3rd couple leading. Side lines adv. & ret. 112 Repeat with 4th couple leading. Side lines adv. & ret. Galopade Quadrille 8 Honour Partner, honour corner 8 All galop round set. (Galop half way round set, on opp. Side change places with partner, continue galop to place.) 8 Top couples R & L through. 8 Side couples R & L through. 8 All set & swing partners. 8 All galop round set. 8 Top ladies chain. 8 Side ladies chain. 8 All set & swing partners. 8 All galop round set. 8 1st couple lead through, 2nd on return 8 3rd couple lead through, 4th on return 8 All set & swing partners. 8 All galop round set. 4 1st lady & 2nd man adv. & ret. 4 2nd lady & 1st man adv. & ret. 4 3rd lady & 4th man adv. & ret. 4 4th lady & 3rd man adv. & ret. 8 All set & swing partners. 8 All galop round set. 4 Ladies advance & retire. 4 Men advance & retire. 8 Double ladies chain. 8 All set & swing partners. 8 All galop round set. 8 Top couples waltz the set 8 Side couples waltz the set 8 All set & swing partners. 32 Waltz the hall. The Caledonians Quadrille Figure 1. (2x32) 4 Top couples R.H. across, move CW (Ladies hands joined over Mens). 4 then L.H. across, move ACW. 8 Set & swing Partners 8 Top ladies chain. 4 Top couples promenade across set. 4 Half R and L to place. 32 Side couples repeat. Figure 2. (4x24) 8 1st Man advance & retire twice. 8 Set & swing corners. 8 Promenade with corners (to men's position.) 24 2nd man repeat. 48 3rd and 4th man repeat. Figure 3. (4x32) 4 Lady 1, Man 2 advance & retire. 4 Re-advance, 2 hand turn to place. 8 1st & 2nd couples lead through and back. (1st lead through across, 2nd back) 8 Set & swing corners. 4 All advance & retire. 4 Swing partners. 32 Repeat wth Lady 2, Man 1. 32 Repeat with Lady 3, Man 4. 32 Repeat with Lady 4, Man 3. The Caledonians Quadrille Figure 4. (4x24) 2 Lady 1, Man 2 advance and stop. 2 Lady 2, Man 1 advance and stop. 4 Turn partners back to place. 2 All ladies to the right 4 steps. 2 All men to the left 4 steps. 2 All ladies to the right 4 steps. 2 All men to the left 4 steps. 4 Promenade to place. 4 Swing partners. 24 Repeat wth Lady 2, Man 1 leading. 24 Repeat wth Lady 3, Man 4 leading. 24 Repeat wth Lady 4, Man 3 leading. Figure 5. (4x48 + 16) 8 1st couple visit. 4 Ladies advance, curtsey & retire. 4 Men advance, bow & retire. 8 All set & swing partners. 8 Grand chain 1/2 way round and honour partners. 4 Promenade to place 4 and swing partners. 8 Chasse-croise, (4 steps past partner, RH to corner balance fwd & back, then 4 steps back, LH to partner balance fwd & back). 48 Repeat with 2nd couple leading. 48 Repeat wth 3rd couple leading. 48 Repeat wth 4th couple leading. 8 All promenade set. 8 Swing partners. Note: Set & swing is 'normal' set and cross hand swing. The Lancers Quadrille (BMC version) Figure 1. (4x32) 8 1st Lady, 2nd man advance & swing in centre (with ballroom hold). 4 Partners move 1/2 way across, Centres keep swinging. 4 Promenade partner to opp. Place. 8 1st couple lead through to place. 8 All swing corners. 32 Repeat with 2nd lady, 1st man. 32 Repeat with 3rd lady, 4th man. 32 Repeat with 4th lady, 3rd man. Figure 2. (4x32) 8 1st couple lead up (to 2nd) & retire. 8 1st couple swing in place Form top & bottom lines. 8 Lines adv & retire twice. 8 Swing partners. 32 Repeat with 2nd couple leading. 32 Repeat with 3rd couple leading. (Forming side lines instead) 32 Repeat with 4th couple leading. (Forming side lines instead) Figure 3. (2x32) 4 Introduction - Ladies to the centre and men form a circle around them. 8 Men circle left. 8 Men circle right. Men form a grand cross (LH) Right arm behind partners. 16 Promenade round set. Ladies return to the centre. 32 Repeat - Circle L & R, & Grand Cross. The Lancers Quadrille (BMC version) Figure 4. (2x48) 8 Top couples visit. 4 Tops RH star. 4 then LH star. 8 Tops basket Left. 8 Tops basket Right. 8 Tops circle Left. Tops circle Right. 48 Repeat with side couples leading. Figure 5. ((4x 16+32) + 24) 8 All grand chain 1/2 way round and honour partners. 8 Promenade with partners to place. 8 1st couple lead up, turn and lead out with side falling in behind. 8 Cast out, reform top & bottom lines. 4 Lines advance & retire. 4 Advance & swing partners to place. 8 Swing partners in place. 48 Repeat with 2nd couple leading. 48 Repeat with 3rd couple leading (forming side lines) 48 Repeat with 4th couple leading. (forming side lines) 8 All grand chain 1/2 way round and honour partners. 8 Promenade with partners to place. 8 Swing partners in place. Note: Normal swing here is with hands crossed. 1. The Quadrille 2.The Lancers Quadrille 3. The Prince Imperials 4. The Parisienne Quadrille 5. The Wellington Waltz 6. The Waltz Cotillon 7. The Galopade Quadrille 8. The Caledonians Quadrille 9. The Lancers Quadrille (BMC)person, individual, peter ellis oam -
 Victorian Aboriginal Corporation for Languages
Periodical, Australian Institute of Aboriginal and Torres Strait Islander Studies, Australian Aboriginal studies : journal of the Australian Institute of Aboriginal and Torres Strait Islander Studies, 2013
We don?t leave our identities at the city limits: Aboriginal and Torres Strait Islander people living in urban localities Bronwyn Fredericks Aboriginal and Torres Strait Islander people who live in cities and towns are often thought of as ?less Indigenous? than those who live ?in the bush?, as though they are ?fake? Aboriginal people ? while ?real? Aboriginal people live ?on communities? and ?real? Torres Strait Islander people live ?on islands?. Yet more than 70 percent of Australia?s Indigenous peoples live in urban locations (ABS 2007), and urban living is just as much part of a reality for Aboriginal and Torres Strait Islander people as living in remote discrete communities. This paper examines the contradictions and struggles that Aboriginal and Torres Strait Islander people experience when living in urban environments. It looks at the symbols of place and space on display in the Australian cities of Melbourne and Brisbane to demonstrate how prevailing social, political and economic values are displayed. Symbols of place and space are never neutral, and this paper argues that they can either marginalise and oppress urban Aboriginal and Torres Strait Islander people, or demonstrate that they are included and engaged. Juggling with pronouns: Racist discourse in spoken interaction on the radio Di Roy While the discourse of deficit with regard to Australian Indigenous health and wellbeing has been well documented in print media and through images on film and on television, radio talk concerning this discourse remains underresearched. This paper interrogates the power of an interactive news interview, aired on the Radio National Breakfast program on ABC Radio in 2011, to maintain and reproduce the discourse of deficit, despite the best intentions of the interview participants. Using a conversation-analytical approach, and membership categorisation analysis in particular, this paper interrogates the spoken interaction between a well-known radio interviewer and a respected medical researcher into Indigenous eye health. It demonstrates the recreation of a discourse emanating from longstanding hegemonies between mainstream and Indigenous Australians. Analysis of firstperson pronoun use shows the ongoing negotiation of social category boundaries and construction of moral identities through ascriptions to category members, upon which the intelligibility of the interview for the listening audience depended. The findings from analysis support claims in a considerable body of whiteness studies literature, the main themes of which include the pervasiveness of a racist discourse in Australian media and society, the power of invisible assumptions, and the importance of naming and exposing them. Changes in Pitjantjatjara mourning and burial practices Bill Edwards, University of South Australia This paper is based on observations over a period of more than five decades of changes in Pitjantjatjara burial practices from traditional practices to the introduction of Christian services and cemeteries. Missions have been criticised for enforcing such changes. However, in this instance, the changes were implemented by the Aboriginal people themselves. Following brief outlines of Pitjantjatjara traditional life, including burial practices, and of the establishment of Ernabella Mission in 1937 and its policy of respect for Pitjantjatjara cultural practices and language, the history of these changes which commenced in 1973 are recorded. Previously, deceased bodies were interred according to traditional rites. However, as these practices were increasingly at odds with some of the features of contemporary social, economic and political life, two men who had lost close family members initiated church funeral services and established a cemetery. These practices soon spread to most Pitjantjatjara communities in a manner which illustrates the model of change outlined by Everett Rogers (1962) in Diffusion of Innovations. Reference is made to four more recent funerals to show how these events have been elaborated and have become major social occasions. The world from Malarrak: Depictions of South-east Asian and European subjects in rock art from the Wellington Range, Australia Sally K May, Paul SC Ta�on, Alistair Paterson, Meg Travers This paper investigates contact histories in northern Australia through an analysis of recent rock paintings. Around Australia Aboriginal artists have produced a unique record of their experiences of contact since the earliest encounters with South-east Asian and, later, European visitors and settlers. This rock art archive provides irreplaceable contemporary accounts of Aboriginal attitudes towards, and engagement with, foreigners on their shores. Since 2008 our team has been working to document contact period rock art in north-western and western Arnhem Land. This paper focuses on findings from a site complex known as Malarrak. It includes the most thorough analysis of contact rock art yet undertaken in this area and questions previous interpretations of subject matter and the relationship of particular paintings to historic events. Contact period rock art from Malarrak presents us with an illustrated history of international relationships in this isolated part of the world. It not only reflects the material changes brought about by outside cultural groups but also highlights the active role Aboriginal communities took in responding to these circumstances. Addressing the Arrernte: FJ Gillen?s 1896 Engwura speech Jason Gibson, Australian National University This paper analyses a speech delivered by Francis James Gillen during the opening stages of what is now regarded as one of the most significant ethnographic recording events in Australian history. Gillen?s ?speech? at the 1896 Engwura festival provides a unique insight into the complex personal relationships that early anthropologists had with Aboriginal people. This recently unearthed text, recorded by Walter Baldwin Spencer in his field notebook, demonstrates how Gillen and Spencer sought to establish the parameters of their anthropological enquiry in ways that involved both Arrernte agency and kinship while at the same time invoking the hierarchies of colonial anthropology in Australia. By examining the content of the speech, as it was written down by Spencer, we are also able to reassesses the importance of Gillen to the ethnographic ambitions of the Spencer/Gillen collaboration. The incorporation of fundamental Arrernte concepts and the use of Arrernte words to convey the purpose of their 1896 fieldwork suggest a degree of Arrernte involvement and consent not revealed before. The paper concludes with a discussion of the outcomes of the Engwura festival and the subsequent publication of The Native Tribes of Central Australia within the context of a broader set of relationships that helped to define the emergent field of Australian anthropology at the close of the nineteenth century. One size doesn?t fit all: Experiences of family members of Indigenous gamblers Louise Holdsworth, Helen Breen, Nerilee Hing and Ashley Gordon Centre for Gambling Education and Research, Southern Cross University This study explores help-seeking and help-provision by family members of Indigenous people experiencing gambling problems, a topic that previously has been ignored. Data are analysed from face-to-face interviews with 11 family members of Indigenous Australians who gamble regularly. The results confirm that substantial barriers are faced by Indigenous Australians in accessing formal help services and programs, whether for themselves or a loved one. Informal help from family and friends appears more common. In this study, this informal help includes emotional care, practical support and various forms of ?tough love?. However, these measures are mostly in vain. Participants emphasise that ?one size doesn?t fit all? when it comes to avenues of gambling help for Indigenous peoples. Efforts are needed to identify how Indigenous families and extended families can best provide social and practical support to assist their loved ones to acknowledge and address gambling problems. Western Australia?s Aboriginal heritage regime: Critiques of culture, ethnography, procedure and political economy Nicholas Herriman, La Trobe University Western Australia?s Aboriginal Heritage Act 1972 (WA) and the de facto arrangements that have arisen from it constitute a large part of the Aboriginal ?heritage regime? in that state. Although designed ostensibly to protect Aboriginal heritage, the heritage regime has been subjected to various scholarly critiques. Indeed, there is a widespread perception of a need to reform the Act. But on what basis could this proceed? Here I offer an analysis of these critiques, grouped according to their focus on political economy, procedure, ethnography and culture. I outline problems surrounding the first three criticisms and then discuss two versions of the cultural critique. I argue that an extreme version of this criticism is weak and inconsistent with the other three critiques. I conclude that there is room for optimism by pointing to ways in which the heritage regime could provide more beneficial outcomes for Aboriginal people. Read With Me Everyday: Community engagement and English literacy outcomes at Erambie Mission (research report) Lawrence Bamblett Since 2009 Lawrie Bamblett has been working with his community at Erambie Mission on a literacy project called Read With Me. The programs - three have been carried out over the past four years - encourage parents to actively engage with their children?s learning through reading workshops, social media, and the writing and publication of their own stories. Lawrie attributes much of the project?s extraordinary success to the intrinsic character of the Erambie community, not least of which is their communal approach to living and sense of shared responsibility. The forgotten Yuendumu Men?s Museum murals: Shedding new light on the progenitors of the Western Desert Art Movement (research report) Bethune Carmichael and Apolline Kohen In the history of the Western Desert Art Movement, the Papunya School murals are widely acclaimed as the movement?s progenitors. However, in another community, Yuendumu, some 150 kilometres from Papunya, a seminal museum project took place prior to the completion of the Papunya School murals and the production of the first Papunya boards. The Warlpiri men at Yuendumu undertook a ground-breaking project between 1969 and 1971 to build a men?s museum that would not only house ceremonial and traditional artefacts but would also be adorned with murals depicting the Dreamings of each of the Warlpiri groups that had recently settled at Yuendumu. While the murals at Papunya are lost, those at Yuendumu have, against all odds, survived. Having been all but forgotten, this unprecedented cultural and artistic endeavour is only now being fully appreciated. Through the story of the genesis and construction of the Yuendumu Men?s Museum and its extensive murals, this paper demonstrates that the Yuendumu murals significantly contributed to the early development of the Western Desert Art Movement. It is time to acknowledge the role of Warlpiri artists in the history of the movement.b&w photographs, colour photographsracism, media, radio, pitjantjatjara, malarrak, wellington range, rock art, arrernte, fj gillen, engwura, indigenous gambling, ethnography, literacy, erambie mission, yuendumu mens museum, western desert art movement -
 Ballarat Tramway Museum
Album - Postcards & Photographs - Vic Solomons and others - Australian Tramways, Vic Solomons, 2023
Contains 184 images of postcards and photographs collected primarily by Vic Solomons of Sydney, with others from the collection of Wal Jack and Warren Doubleday. Covers almost all of Australia's tramway systems. 1 Post Card Hay St Perth Looking East No 3 Unknown Perth 2 Post Card Cars 30 & 90 both on Route 19 pass in Barrack St looking South Perth WA 1935.02.18 Perth 3 Post Card Hay St Looking East Perth WA Unknown Perth 4 Post Card William St Perth WA Unknown Perth 5 Post Card Perth from Shaftsbury Hotel Unknown Perth 6 Post Card Hay St Perth WA Looking East Unknown Perth 7 Post Card Barrack St Perth Unknown Perth 8 Post Card Murray Views No 3 High St Showing Town Hall Fremantle WA Unknown Fremantle 9 Post Card High St Fremantle WA Unknown Fremantle 10 Post Card View of Bolder City Golden Mile in the Background (Section No 1) 1908.08.20 Kalgoolie 11 Post Card Hannan St Kalgoolie 1900.08.19 Kalgoolie 12 Post Card Hannan St Kalgoolie WA (No 2) Unknown Kalgoolie 13 Post Card Intersection Hannan & Maritana Sts Kalgoolie WA Unknown Kalgoolie 14 Post Card Hannan St Kalgoolie Unknown Kalgoolie 15 Post Card Lane Street Bolder City Unknown Kalgoolie 16 Post Card Hobart Double Deck Tram Unknown Hobart 17 Post Card Macquarie St Hobart Unknown Hobart 18 Photo Liverpool Street Hobart Unknown Hobart 19 Photo Hobart 21 Unknown Hobart 20 Photo Hobart 14 in Elizabeth St Hobart Unknown Hobart 21 Post Card Macquarie St Hobart Unknown Hobart 22 Post Card Macquarie St Hobart Tas Unknown Hobart 23 Photo Double Decker Tram 3 at G.P.O. Hobart Tas No 31 Unknown Hobart 24 Post Card Double Decker Tram 19 Hobart Tas A B Series No 24 Unknown Hobart 25 Photo Hobart Municipal Tramways Tas No 95 Unknown Hobart 26 Post Card Elizabeth St Hobart Unknown Hobart 27 Post Card Elizabeth St Hobart Unknown Hobart 28 Post Card Elizabeth St Hobart Unknown Hobart 29 Post Card Elizabeth St Hobart Tas Unknown Hobart 30 Post Card HMT 21 with crew at Beach Road Terminus Unknown Hobart 31 Post Card HMT 9 & another with crew at Beach Road Terminus. Front cover photo of Destination GPO 1921.01.00 Hobart 32 Post Card Cascade Road and Mount Wellington Hobart Unknown Hobart 33 Post Card Elizabeth St Hobart Unknown Hobart 34 Post Card Elizabeth St Hobart Unknown Hobart 35 Post Card Elizabeth St Hobart 1915.04.07 Hobart 36 Post Card Macquarie St Hobart Tas Unknown Hobart 37 Post Card Macquarie St showing Post Office Hobart 1908.03.12 Hobart 38 Post Card Hobart Municipal Tramways 21 Unknown Hobart 39 Post Card Elizabeth St Hobart Tas Unknown Hobart 40 Post Card Liverpool Street Hobart Unknown Hobart 41 Post Card Electric Tram Launceston Tas 446 W J Little Photo 1919.02.08 Launbceston 42 Post Card Launceston Tram no 3 1911.08.30 Launbceston 43 Post Card Launceston Tram no 3 passes tram No 1 Unknown Launbceston 44 Post Card Tram 6 at Trevallyn a popular suburb Launceston Tasmania Unknown Launbceston 45 Post Card Tram 7 at Trevallyn Road Terminus Launceston Tasmania Unknown Launbceston 46 Post Card Tram 4 in Brisbane St Launceston Unknown Launbceston 47 Post Card Tram 9 in Brisbane St Launceston Tasmania Unknown Launbceston 48 Post Card Camerom Street Launceston Tasmania Unknown Launbceston 49 Post Card Murray Views No 15 Jetty Road Glenelg Terminus 1962-02-08 Adelaide 50 Post Card Bay Tram at Jetty Road Terminus Glenelg SA Unknown Adelaide 51 Post Card Tram 3 in King William Street Adelaide S Aust Unknown Adelaide 52 Post Card Valentine Series No 3065 The Old Horse Tram Victor Harbour Unknown Victor Harbour 53 Post Card Bourke Street Melbourne with Cable Car Looking East 1904.04.25 Melbourne 54 Post Card Opening of New Electric Tramway Elsternwick 1913-11-13 Melbourne 55 Post Card Cable trams in Clarendon St Sth Melb Unknown Melbourne 56 Post Card Pall Mall from Charing Cross Bendigo Unknown Bendigo 57 Post Card Tram 4 & 7 pass at The Fountain and Mitchell Street Bendigo Vic Rose Series P 3198 Unknown Bendigo 58 Post Card M&MTB 133 at Charing Cross bound for Eaglehawk Bendigo Vic Murray Views No 45 Unknown Bendigo 59 Post Card Pall Mall Bendigo Vic Unknown Bendigo 60 Post Card Charing Cross & Mitchell St Bendigo Trams passing 1919.00.00 Bendigo 61 Post Card Pall Mall Looking East Unknown Bendigo 62 Post Card Electric Trams and City Hotel Bendigo Vic Unknown Bendigo 63 Post Card Moorabool Street Geelong V 23 Unknown Geelong 64 Post Card Murray Views No 3 Moorabool Street Geelong Vic Unknown Geelong 65 Post Card The Rose Series P 2487 Ryrie Street Geelong Vic Unknown Geelong 66 Post Card Southern Cross Series 2696 Ryrie Stret Geelong Vic Unknown Geelong 67 Post Card The Rose Series P 1490 Ryrie Street Geelong Vic 1920-03-04 Geelong 68 Post Card Valentine Series No 1568 Lower Sturt Street Ballarat Unknown Ballarat 69 Post Card Rose Series P 1710 Sturt Street Ballarat Victoria Unknown Ballarat 70 Post Card Sturt Street Ballarat Victoria Unknown Ballarat 71 Post Card Horse Tram In Sturt Street Ballarat 1905.11.10 Ballarat 72 Post Card Sturt Street Ballarat Looking North-West Unknown Ballarat 73 Post Card Shoppes Square Sturt Street Ballarat Looking North Unknown Ballarat 74 Post Card Junction Sturt and Lydiard Streets Ballarat 1909-09-01 Ballarat 75 Post Card The Electric Supply Co Souvenir Tram Ticket No 3085of the opening of Electric System August 18 1905 1905.08.18 Ballarat 76 Post Card Sturt Street Ballarat Victoria 1907.11.25 Ballarat 77 Post Card Off to the Gardens Electric Tram Ballarat Unknown Ballarat 78 Post Card Sturt Street Ballarat 1907.04.16 Ballarat 79 Post Card Sturt Street Ballarat Looking East Electric tram with Double Deck Trailer 1911.04.17 Ballarat 80 Post Card Sturt Street Ballarat Looking East Unknown Ballarat 81 Post Card Sturt Street Ballarat Looking West 1911.03.01 Ballarat 82 Post Card Town Hall and Sturt Street Ballarat Unknown Ballarat 83 Post Card Lydiard Street Ballarat 1906.11.23 Ballarat 84 Post Card Looking North along Adelaide Street from George Street Brisbane Sidues Series No 764 Unknown Brisbane 85 Post Card Looking South along Queen Street from the Creek Street Intersection Brisbane Qld Sirues Series No 1379 Unknown Brisbane 86 Post Card George Street from near Supreme Court Brisbane Unknown Brisbane 87 Post Card Queen and Eagle Streets Brisbane 1907.07.04 Brisbane 88 Post Card Queen Street showing His Majesty’s Theatre Brisbane Unknown Brisbane 89 Post Card Queen Street Treasury Building 1908.01.20 Brisbane 90 Post Card G P O and Queen Street Brisbane Unknown Brisbane 91 Post Card Queen Street Brisbane Looking from Wharf Street Unknown Brisbane 92 Post Card Customs House Brisbane 1905.02.16 Brisbane 93 Post Card Queen St Brisbane 1905.09.16 Brisbane 94 Post Card Queen St Brisbane 1907.11.19 Brisbane 95 Post Card Treasury Buildings Brisbane Unknown Brisbane 96 Post Card Queen and Eagle Streets Brisbane Unknown Brisbane 97 Post Card The Valley Corner Brisbane Unknown Brisbane 98 Post Card Brisbane Queen Street opposite General Post Office Unknown Brisbane 99 Post Card North Quay and Milton Beach Brisbane Q Unknown Brisbane 100 Post Card Victoria Bridge Brisbane South Side 1907.08.14 Brisbane 101 Post Card Victoria Bridge Brisbane Unknown Brisbane 102 Post Card Breakfast Creek Bridge Brisbane Q Unknown Brisbane 103 Post Card Melbourne Street Station South Brisbane Queensland Unknown Brisbane 104 Post Card General Post Office Queen Street Brisbane 1955.09.23 Brisbane 105 Post Card Customs House Brisbane 1904.11.04 Brisbane 106 Post Card Queen St Brisbane 1919.11.00 Brisbane 107 Post Card Queen St Brisbane Sidues Series No 627 Unknown Brisbane 108 Post Card Creek Street Brisbane Queensland Unknown Brisbane 109 Post Card Customs House and Garden Reach Brisbane Queensland 1910.00.08 Brisbane 110 Post Card Queen and Creek Streets Brisbane 1909.06.07 Brisbane 111 Post Card Queensland National Bank andd Queen Street Brisbane Queensland Unknown Brisbane 112 Post Card Queen Street and Treasury Buildings Brisbane 0000.09.07 Brisbane 113 Post Card Queen Street showing “Courier” Buildings Brisbane Unknown Brisbane 114 Post Card Intersection George & Roma Streets Brisbane Q 1916.05.11 Brisbane 115 Post Card Adelaide Street Brisbane Q Unknown Brisbane 116 Post Card G P O Queen Street Brisbane Q Unknown Brisbane 117 Post Card Treasury Building Brisbane 1906.03-20 Brisbane 118 Post Card Queen and Eagle Streets Brisbane 1907.02.01 Brisbane 119 Post Card Queen St Brisbane Unknown Brisbane 120 Post Card Queen St Brisbane Q Unknown Brisbane 121 Post Card Victoria Bridge Brisbane 1906.07.30 Brisbane 122 Post Card An Unusual View showing Head of Queen Street Victoria Bridge & South SideSuburbs Brisbane Q Unknown Brisbane 123 Post Card Petries Bight Brisbane Q Unknown Brisbane 124 Post Card South End Victoria Bridge Brisbane Q Unknown Brisbane 125 Post Card Customs House Brisbane Unknown Brisbane 126 Post Card Photo of toastrack car circa 1910 Unknown Brisbane 127 Post Card Treasury Buildings Brisbane Unknown Brisbane 128 Post Card East Street Rockhampton with Steam Tram & trailer Unknown Rockhampton 129 Post Card Post Office Rockhampton with steam tram Unknown Rockhampton 130 Post Card East Street Rockhampton with Steam Trams Rose Series P 7154 Unknown Rockhampton 131 Post Card William Street Rockhampton Rose Series P 7156 Unknown Rockhampton 132 Post Card Central East Street Rockhampton Q with Steam Trams Unknown Rockhampton 133 Photo Sturt St Ballarat Unknown Ballarat 134 Photo Bridge Street Ballarat Unknown Ballarat 135 Post Card George St Sydney Unknown Sydney 136 Post Card Elizabeth St Sydney Unknown Sydney 137 Post Card Railway Square Unknown Sydney 138 Post Card Sydney Harbor Bridge - pending receipt 139 Post Card Kings Cross - Mowbray Series with description on rear from C Roy G Field Unknown Sydney 140 Post Card Kings Cross - Mowbray Series with description on rear from C Roy G Field Unknown Sydney 141 Post Card Central Railway Station Sydney - Rose Series P6033 1954-01-26 Sydney 142 Post card William Street Darlinghurst looking towards City - Rose Series P6602 unknown Sydney 143 Post Card Circular Quay Sydney - Rose Series P6680 Unknown Sydney 144 Post Card View at Manly NSW - Rose Series B1003 Unknown Sydney 145 Post Card Hunter St Newcastle NSW - Rose Series P7843 Unknown Newcastle 146 Post Card Bank Corner Newcastle NSW - Mowbray Series No. 155 Unknown Newcastle 147 Post Card Hunter St Newcastle NSW Unknown Newcastle 148 Post Card Criterion Hotel Hunter St Newcastle NSW Unknown Newcastle 149 Photo Horse tram at Newtown Station 1894 to 1898 - PTC photo c1894 Newtown 150 Photo Steam tram motor No 3 at Railway Square 1879 1879 Sydney 151 Photo Railway steam tram c1900 with a horse drawn double deck bus c1900 Sydney 152 Photo Steam motor 5A and doubled deck bus Unknown Sydney 153 Photo Steam motor 53A with detail notes on rear 1922 Sydney 154 Photo Cable tram set at Milsons Point ferry terminal c1900 Sydney 155 Photo Early Sydney electric car - Ocean St - Rose Bay Unknown Sydney 156 Photo George St looking souoth c1905 c1905 Sydney 157 Photo Tram 165 at Circular Quay Unknown Sydney 158 Photo Tramcar ferry or transporter at The Spit Unknown Sydney 159 Photo tram 882 George St at Marti Place, 1937 1937 Sydney 160 Photo Tram 826 Railway Sq area Unknown Sydney 161 Photo Railway Sq in background, Broadway with double decker bus and toastrack car late 1930s Sydney 162 Photo Coupled St Pitt St? - photo Ben Parle Feb. 1950 Sydney 163 Photo Electric tram No. 2 - North Sydney with side trolley pole running Unknown Sydney 164 Photo George St - Horden's Corner Unknown Sydney 165 Photo George St at Martin Place c1920 Sydney 166 Photo Castlereagh St Sydney c1928 c1928 Sydney 167 Photo Railway Sqare c1920 c1920 Sydney 168 Photo Darling St Countereweight Unknown Sydney 169 Photo Trolley bus depot Unknown Sydney 170 Photo Trolley bus No. 14 Unknown Sydney 171 Photo Newcastle Railway Station with steam tram - Wharf Road?? Unknown Newcastle 172 Photo High St West Maitland - steam tram Unknown Maitland 173 Photo High St West Maitland - steam tram Unknown Maitland 174 Post Card Argent St near tram terminal Broken Hill NSW c1900 Broken Hill 175 postcard Argent St looking south Broken Hill - with Ken Magor's notes on rear Unknown Broken Hill 176 Photo Toronto - steam tram 61A Unknown Toronto 177 Photo 124A trial run 1911? Sutherland - Cronulla line 1911 Sutherland 178 Photo 103A at a tram stop Unknown Sydney 179 Photo Cable tram set at Crows Nest terminus grip car 12, trailer 22 Unknown Sydney 180 Photo Cable tram Queens Square Sydney 1903 Sydney 181 Photo cars 2078 and 2077 Chatswood late 1950s Sydney 182 Photo car 1877 Balmain area late 1950s Sydney 183 Photo Trolley bus - Rockdale destination Late 1950s Sydney 184 Photo Broken Hill steam tram - motor 18A North Tram Unknown Broken Hill 185 Photo Millars Point Sydney NSW - ferry/tram interchange, unknown Sydney All items imaged including the rear or back where there was writing of information. All files stored on the Museum's Photo Collections directory. Demonstrates through the medium of many images, Australian tramway systems and Ballarat's place in them.Album - heavy card covers, plastic lined with postcard or 6x4 photo sleeves.australia, tramways, postcards, photographs, steam trams, horse trams, cable trams, trolley buses -
Eltham District Historical Society Inc
Document - Folder, Ness family
James Johnston settled at Kangaroo Ground in 1849. His nephew James Mess joined him and a descendant Robert James Mess changed his surname to Ness. The family became active in all aspects of Kangaroo Ground life. Contents Text (handwritten and transcribed): "The Ness Family, Kangaroo Ground", Joy Ness, 1989. Newspaper article: "True pioneer stock", Diamond Valley News, 2 March 1982. History of the Mess/Ness family Newspaper article: "Ness family are keepers of 140 years of historical knowledge", Diamond Valley News, 4 February 1986. History of Joseph Stephenson and descendants. Newspaper article: "Joy Ness paints native flowers for posterity". Diamond Valley News, 21 October 1986. Life and career of Joy Ness as painter. Newspaper article: "His Cup runneth of with Joy", ?Diamond Valley Leader, 6 December 2000. Bruce and Joy Ness celebrate 60th wedding anniversary. Pencil sketch by Joh Ebeli no date but pre 2004: Portrait of Joy Ness dressed for the Historical Society Parade. Order of Service: Thanksgiving service for the life of Robert Bruce Ness 22 January 1917 / 28 June 2004. Eltham District Historical Society newsletter no date: "Robert Bruce Ness 1917-2004", obituary and extract from Joy Ness's history of the family. Copy of letter from Joh Ebeli to Gwen Orford, no date but ~2004: Describes drawings he made of Robert Bruce Ness when taking part in Diamond Valley Arts Society float and enclosed 3 drawings and a photograph of drawing of the bakers (corner Main Road and York Street Eltham). Eltham District Historical Society newsletter September 2013: "Vale Joy Ness", obituary and extract from Diamond Valley News article of 6 December 2000.Newspaper clippings, A4 photocopies, etcness family kangaroo ground, james johnston, kangaroo ground, pretty hill farm, wellers hotel, betsy sadler, ingleside kangaroo ground, james mess, jane stevenson, ness lane kangaroo ground, view hill kangaroo ground, stte savings bank agency, ruth lettice gosling nee mess, kangaroo ground state school, garden hills kangaroo ground, william mess, joseph mess, isabella mess, james johnson mess, ruth ettie mess, george mess, alexander mess, janes mess, robert david mess, heidelberg agricultural show, diamond creek agricultural show, rober james ness, pearl ness nee mills, william mills, sabina mills, robert bruce ness, beryl ness, vera ness, donald ness, kangaroo ground presbyterian church, kangaroo ground cemetery trust, kangaroo ground tennis club, professor osborne, doctor osborne, joseph stevenson, joy ness, kangaroo ground fire brigade, bruce ness, country fire authority, ship wellington 1837, diamond creek, david christmas, christmas hills, andres harkness, samuel furphy, andrew ross, caledonian gold fields, queenstown now st andrews, mother coleman of kangaroo ground, diamond valley arts society, winifred joy ness, andrew ross museum, eltham art show -
Glen Eira Historical Society
Book - Nathan, Bertram
This site comprises of the entry for Bertran Nathan in the publication ‘500 Victorians Centenary Edition 1934 [page 215]’. The entry consists of a cartoon figure of Mr.Nathan with a superimposed photograph of his head together with sketches illustrating his interest. Below the cartoon is a modified ‘who’s who entry for Mr.Nathan with his occupation academic qualification, date of birth, schooling details, address, club membership, hobbies and recreational interests.celebrations, optician, wellington college[nz], 500 victorians centenary edition 1934, nathan bertram, legacy club, education, sports and recreations, occupations, secondary education, stamp collecting, health professional, wesley college, angling, golfers