Showing 9557 items
matching water-rates
-
 Wodonga & District Historical Society Inc
Photograph - Mann Collection Album - Terminus Hotel; Gippsland & Northern
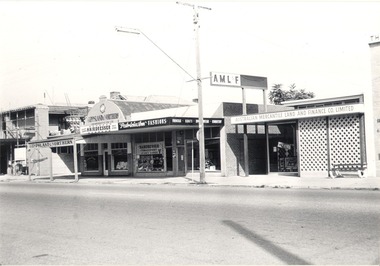
This photo is part of a collection of Wodonga Town Photos donated by Elaine Mann. Elaine was married to David Mann, a successful Wodonga businessman and community leader who passed away in Wodonga in June 2012. David was a member of the Mann family who began their business in Wodonga in 1920. Elaine was a teacher in Wodonga for many years and an active member of the community. The Terminus Hotel In 1873, James Thompson Hatch built the two-storeyed Terminus Hotel at 79 Sydney Road (later known as High Street), then sold it to George Day and Kenneth McLennan for £1,230. It was first licensed to J. G. Morton in January 1874. In 1879, Annie Allen, from Ireland, took over as licensee of the hotel containing 14 rooms, after she and her husband, George James Allen, purchased it. He became licensee in 1883. Under the Allens, the Terminus became, ‘a principal rendezvous for visitors to the town.’ September 1888 saw additions to the building that included a billiard room, a dining room, and 18 other rooms. Following the death of her husband in 1889, Annie Allen continued to run the Terminus Hotel. She later married John Haldon and was licensee of the hotel until 1893 when the licence was transferred to William Carkeek. In the early 1900s the Hotel was thoroughly renovated. The Terminus Hotel was for sale by auction on 5th March 1909. It comprised about 50 rooms, a two-storey building built of brick and iron with hot and cold water service and acetylene gas throughout. The principal hotel in Wodonga, was let from 1st January 1909 on a seven years’ lease at a rental of £9 per week. 1935 saw extensive improvements by proprietor W. P. Kinney, while in 1941 further extensive improvements were carried out to make a good hotel better. A pall of shock and disbelief descended over Wodonga’s historic Terminus Hotel on 1st June 1998 when it was destroyed by fire then demolished in 1999. The site was sold for almost $1 million and redeveloped for a medical clinic.This photo collection is of significance as it documents how the businesses and buildings in Wodonga have evolved and contributed to community throughout the late 20th century.Terminus Hotel; Gippsland & Northern Co-operative Pty. Ltd.; Graham Bradbury Men's Hairdresser; Patricia Anne Fashions; Australian Mercantile Land and Finance Company (A.M.L. & F). on the west side of High Street. The Terminus Hotel was built C. 1873. and was destroyed by fire in 1998, The Gippsland and Northern Co-operative Co. Ltd was formed in 1905, but the date of its establishment in Wodonga is not confirmed, but they were holding fortnightly sales at the Wodonga sale yards by early 1919.wodonga businesses, high st wodonga, terminus hotel, gippsland & northern -
 Wodonga & District Historical Society Inc
Uniform - Scout Master's Hat Badge, Whistle and Gilwell Woggle
These items were regular elements of a Scout Master's equipment. The hat badge and the woggle were specifically part of the Leader's uniform and differed from similar uniform items of younger or more junior scouts. The first proposal to form a Scouts Corps in Wodonga was raised at a public meeting in Wodonga in November 1909. One of their earliest activities in January 1910 was a march from Wodonga to Bright and return with Scouts from Albury. This first Troop was probably called the 1st Belvoir Scouts. Several other attempts were made to form Scout Troops in Wodonga over the ensuing years. In 1929 the Boy Scout Movement was taken up seriously at Wodonga by approximately 40 boys, together with 30 Cubs (juniors). However this was short-lived. Over the following decade several Scout Troops were formed but lapsed and several Wodonga boys joined the Albury Scout Troop. In 1939 Mr Ray Foster, with eight members put the Scouts on a more enduring basis. Their meeting place was a room below the Water Tower. During the early 1940s the 1st Wodonga Scouts struggled for Leaders to run the activities because so many people were caught up in the Second World War (either overseas or domestically). Mr David Mann gathered together all the small scouting groups in the Wodonga area and turned them from disorganised and disconnected groups into one scouting unit. He led the Scouts in their formative years and went on to become the 1st Wodonga Scouts first King's Scout. He had a long association with the 1st Wodonga Scouts and all the district scouting troops over the following decades. David Mann was also instrumental in the late 1940s in working for a Scout Hall to be built in Reid Street, Wodonga to secure a permanent home. These items were donated by a former member of the 1st Wodonga Scout Group who shared positive memories of the leadership of David Mann and the lessons learned in the Scouting Movement.These items are significant because they are representative of an important local, national and international organisation.A set of Scout uniform equipment including a Scout Master's Hat Badge, a whistle and a knotted leather woggle.On badge" Scout Symbol above "BE PREPARED" Engraved on Whistle - Fleur de Lis symbolwodonga scouts, 1st wodonga scouts, scouting equipment, david mann -
 Unions Ballarat
Ballarat Trades Hall Scrapbook: newspaper clippings 1988-1993, The Courier (newspaper), various
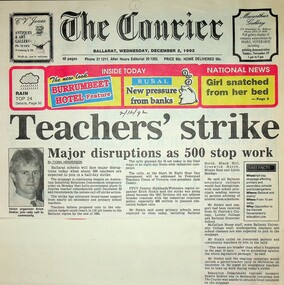
Newspaper clippings 1991-1993. 1. Teachers' strike: Major disruptions as 500 stop work [Ballarat] Paper: The Courier Date: 2 December 1992 2. Strikes in 3 sectors [Ballarat] Paper: The Courier Date: 3 December 1992 3. Letter to the editor: Change priorities for a better city [Ballarat] Paper: The Courier? Author: P. Murphy Date: n.d. 4. Traynor's comments criticised [regarding penalty rates] Paper: The Courier? Date: 27 July 1991 5. Trades Hall seeks urgent talks on health funding [Ballarat] Paper: The Courier? Date: 29 July 1991 6. Stewart condemns weekend shearing [Ballarat] Paper: The Courier Date: 1 August 1991 7. Working class poet [Geoff Goodfellow] recites with the power of language Paper: The Courier Date: 8 August 1991 8. Budget '91: Budget brings little local joy Paper: The Courier? Date: 21 August 1991 9. State Budget '91: Budget hits low income earners Paper: The Courier? Date: 28 August 1991 10. Job cuts face local bakery [Sunicrust, Ballarat] Paper: The Courier? Date: 29 August 1991 11. Factory closure will put 50 out of work [Vitclay, Ballarat] Paper: The Courier? Date: 3 September 1991 12. Protest for jobs urged [Ballarat] Paper: The Courier Date: 7 September 1991 13. Bank staff cuts 'astound' Trades Hall secretary [Ballarat] Paper: The Courier? Date: 12 September 1991 14. Pixelated black and white portrait photo of Graeme Shearer 15. Abattoirs picket line supported [Camperdown] Paper: The Courier Date: n.d. 16. Shearers to set up AWU committee [Ballarat} Paper: The Courier Date: 19 September 1991 17. Group fights for Ballarat national rail freight link Paper: The Courier Date: 1 October 1991 18. National jobless rate 10.2.% [Ballarat] Paper: The Courier? Date: 11 October 1991 19. Shearers establish committee [Ballarat] Paper: The Courier Date: 23 October 1991 20. Wage decision backed by employers, unions [Ballarat] Paper: The Courier Date: n.d. 21. Meeting to focus on aged care: QEGC budget cuts spark local concern [Central Highlands] Paper: The Courier Date: 4 December 1991 22. Mayor urges jobless to rally to the cause [Ballarat] Paper: The Courier? Date: 7 December 1991 23. New dole record: District's jobless queue lengthens again [Ballarat] Paper: The Courier? Date: 13 December 1991 24. Begonia bans: Unions act on retirement village [Ballarat] Paper: The Courier? Date: 24 December 1991 25. Another stoppage over WorkCare [Ballarat] Paper: The Courier? Date: 5 August 1990 26. BTHC hits anti-strike proposal Paper: The Courier Date: 16 November 1991 27. Businesses eager; unions more wary. Paper: The Courier? Date: 22 November 1991 28a. Project halted: review of $60m retirement village [Ballarat] 28b. Retirement Group 'too big, too fast' [Ballarat] 28c. Retirement village work halted [Ballarat] Paper: The Courier? Date: n.d. 29. QEGC managers criticised over budget cutbacks [Ballarat] Paper: The Courier? Date: n.d. 30. Unions' aid call [Ballarat] 30a. How unions want the $6 billion spent Paper: The Courier? Date: 11 February 1991 31. Threat to bread: Bunge strike action escalates [Ballarat] Paper: The Courier? Date: 27 February 1992 32. Bunge moves rye to Albury: Workers walk out [Ballarat] Paper: The Courier? Date: 26 February 1992 33. Merry makers' labours worry Trades Hall [Kryal Castle, Ballarat] Paper: The Courier? Date: 21 February 1992 34. Agreement will put end to retirement village dispute [Ballarat] Paper: The Courier Date: 22 February 1992 35. Mill strikers call for reinstatements [Ballarat] Paper: The Courier Date: 27 February 1992 36. No debate for BRB [Ballarat] Paper: The Courier? Date: n.d. 37. Statement will be our only hope [Ballarat] Paper: The Courier Date: 12 February 1992 38. Union hits catering [Ballarate & Victoria] Paper: The Courier? Date: ?? February 1992 39. Thanks - Bunge strikers thank you to Graeme Shearer et al Paper: The Courier? Date: n.d. 40. ANZ under fire from Trades Hall Secretary [Ballarat] Paper: The Courier Date: 19 March 1992 41. Assurance sought over Melb rail line [Ballarat] Paper: The Courier Date: 18 March 1992 42. In and out of town: Premier to visit [Ballarat] Paper: The Courier? Date: n.d. 43. Regional board wants to improve its image [Ballarat] Paper: The Courier? Date: n.d. 44. Time to amalgamate (letter to the editor) [Ballarat] Paper: The Courier Date: 13 May 1992 45. Another unemployment record for Ballarat Paper: The Courier? Date: 8 May 1992 46. Trouble brews in Ballarat (opinion) Paper: The Courier? Date: 9 May 1992 47. Trades Hall warns of student exploitation [Ballarat] Paper: The Courier Date: 29 February 1992 48. Bunge unions stay firm [Ballarat] Paper: The Courier? Date: 12 March 1992 49. Workers, Bunge settle dispute [Ballarat] Paper: The Courier? Date: 4 March 1992 50. Proposal could end Bunge strike [Ballarat] Paper: The Courier? Date: 3 March 1992 51. Village payment / payment at village Paper: The Courier? Date: 6 March 1992 52. Public outcry over hike in milk price [Ballarat] Paper: The Courier? Date: n.d. 53. Workers dig deep to help Somalia [Ballarat] Paper: The Courier? Date: 10 October 1992 54. 'Callous attack on the poor': union chief [Ballarat] Paper: The Courier? Date: 13 October 1992 55. No Labour swing, says Shearer [Ballarat] Paper: The Courier? Date: 6 October 1992 56. Ballarat joins strike Paper: The Courier Date: 24 October 1992 57. Workers would revolt against Libs: Shearer Paper: The Courier? Date: 28 September 1992 58. Wage rise disgraceful [Ballarat] Paper: The Courier? Date: 31 October 1992 59. Shearer seeks guarantees for rail link [Ballarat] Paper: The Courier? Date: 19 September 1992 60. Cleaners ready to tackle Coalition [Ballarat] Paper: The Courier? Date: 19 September 1992 61. The Ballarat strike (picture) Paper: The Courier? Date: 11 November 1992 62. Workers voice their concern [Daylesford] Paper: The Courier? Date: 11 November 1992 63. The Ballarat strike Paper: The Courier Date: 11 November 1992 64. 53 railway jobs to go: union chief [Ballarat] Paper: The Courier? Date: 23 November 1992 65. Trades Hall urges support for rally [Ballarat] Paper: The Courier? Date: 25 November 1992 66. Doubt cast on our unemployed rate [Ballarat] Paper: The Courier Date: 20 August 1992 67. Wage claim justified: Shearer Paper: The Courier? Date: 20 August 1992 68. Pool plan for jobs money attacked Paper: The Courier Date: 22 August 1992 69. Fight for rail link [Geelong-Ballarat] Paper: Geelong Advertiser Date: 18 September 1992 70. Rail pledge demand Paper: Geelong Advertiser Date: 1 October 1992 Condition: very poor 71. Union calls for railway guarantee [Ballarat] Paper: n.a. Date: 21 October 1992 72. A strike is the last thing Victoria needs Paper: The Courier Date: 27 ? 1992 73.Industry turmoil: Ford plant is up for sale [Ballarat] Paper: The Courier? Date: 20 August 1992 74. Regional Board retains job counsellor [Ballarat] Paper: The Courier Date: 20 August 1992 75. Jobless figures need special consideration [Ballarat] Paper: The Courier Date: 20 August 1992 76a. Local strike chaos: All services likely to be affected [Ballarat] 76b.Strike is an act of hypocrisy [Ballarat] Paper: The Courier Date: 10 November 1992 77. Ronaldson angered by union attack blunder [Ballarat] Paper: The Courier Date: 11 November 1992 78. Ballarat rally against Govt Paper: The Courier Date: 4 November 1992 79.Payouts a form of 'blackmail' [Ballarat] Paper: The Courier? Date: 27 November 1992 80. Union leader gives job loss breakdown [Ballarat] Paper: The Courier? Date: 27 November 1992 81. Deficit levy protest: Unions seize on wide discontent [Ballarat] Paper: The Courier? Date: 26 November 1992? 82. WorkCover under fire at city rally [Ballarat] Paper: The Courier Date: 26 November 1992 83. Coalition is 'cruel': Shearer Paper: The Courier? Date: 22 August 1992 84. Policy to 'decimate unions' Paper: The Courier? Date: 26th August 1992 85. Review immigration call Paper: The Courier? Date: 16 July 1992 86. Union boss blasts Libs' proposals [Ballarat] Paper: The Courier Date: n.d. 87. Both towns could win rail link: NRC [Geelong-Ballarat] Paper: The Courier? Date: n.d. 88. Teachers rally against cuts [Ballarat] Paper: The Courier? Date: 20 May 1993 89. Five workers die in 2 years Paper: The Courier Date: 14 October 1996Significant collection of press articles that include comment from Unions Ballarat Secretary, Graeme Shearer, around the period when Jeff Kennett (Liberal Party Victoria) became premier of Victoria. Focus upon a variety of social and industrial issues impacting the Ballarat region.Newspaper articles - scanned.btlc, ballarat trades and labour council, shearer graeme, kennett jeff, railway link geelong-ballarat, liberal party victoria, industrial action - rallies, workcover, various, ballarat trades and labour council - secretary -
 Warrnambool and District Historical Society Inc.
Artefact, G.W.Scott & Sons, Picnic Case, 1930s
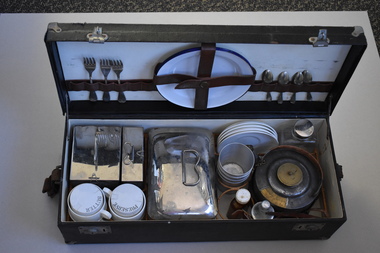
This is a car picnic set made by the English firm of G. W. Scott and Sons who were producers of wickerwork crafts, basketry and luxury leather goods. The business was founded in 1661 and ceased operations in 1967. The picnic set belonged to Dr Horace Iles Holmes (1877-1959) who was born and educated in Tasmania and completed a medical degree at Melbourne University. He commenced a practice in Warrnambool in 1906 and was the Honorary Medical Officer at the Warrnambool Hospital and Warrnambool’s Health Officer. His practice was at ‘Ierne’ at the corner of Spence and Kepler Streets. He was an early member of the Royal Australian College of Surgeons and was prominent in Warrnambool community affairs (Foundation President of Warrnmbool Rotary Club, a member of the local Masonic Lodge for over 50 years, Warrnambool Hospital Committee member, long-term Trustee of the Warrnambool Methodist Church and President of the Lyndoch Hostel for the Aged Committee). Dr Holmes also had agricultural interests and enjoyed fishing, golf and bowls. He also had a motor car and this picnic set would have been used for family picnics. This picnic set is of considerable significance because: 1. It is a good example of the luxury picnic sets owned by more affluent people in the 1930s and 40s. 2. It has important local provenance as it belonged to Horace Holmes, a doctor associated with the professional and community life of Warrnambool for over 50 years. This is a rectangular wooden box with a leather covering. It has metal hinges on the corners of the box and two two metal catches on the side with a leather belt and metal buckle on one of these catches with one leather belt missing on the other side. These leather straps were to attach the picnic box to the running board of the car. There are also two metal catches or locks on the front of the box. Inside the box there is a white lining with a plaited wickerwork insert containing spaces for the following: 1. large china container with a silver top 2. smaller metal container with a silver lid 3. small rectangular metal tin with a silver lid. This container still has some loose tea leaves inside 4. four china cups 5. two circular china dishes for jam and butter 6. four china saucers 7. one glass bottle with a silver top 8. one metal phial, silver-coloured 9. one amber-coloured glass bottle (probably not an original) 10. four nickel silver spoons 11. three metal forks 12. three white enamel plates, blue edged Numbers 10,11 and 12 are held in place by leather straps on the inside of the lid of the box 13. two loose metal straps 14. one metal kettle with a handle with cane strapping, a brass lid, a brass spout with an end chain and a metal inscription 15. The kettle is sitting in a metal tray which has a lighting mechanism to heat the water The picnic set has some rusted metal catches on the exterior of the box and the leather is very stained and torn in places. ‘Remove screw before lighting G.W.S. & S ‘ ‘Coracle brand’ antique luxury picnic set, dr horace holmes, history of warrnambool -
 The 5th/6th Battalion Royal Victoria Regiment Historical Collection
Artwork, other - Portrait, Captain Oswald Birley M.C et al, King George V (Duke of Kent) 1935, c.1935
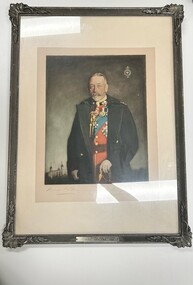
Portrait of King George V (Duke of Kent) 1935Presented to the 6th Battalion Royal Melbourne Regiment by an Allied Battalion the Royal Fusiliers as a toke of friendship and esteem. This Portrait would have hung pride of place in the officers mess from 1935-? The portarait is also signed by the artist, an M.C reciepient, as well as the the reigning monarch, and colonel in chief of the presenting unit. It is supported by a letter from the colonel of the Presenting unit, Maj Gen Hill CB.CMG.DSO, and as such is hghly provinanced Colour print of His Magesty King George V wearing the unaiform of the the Royal Fusilliers, Read coat with decorations and blue sash under a navy blue over coat. The print is signed in lead pencil by the artist and by King George V on the lower edge. A regimental badge is present in the top right of the image. The picture is framed in a pewter coloured frame with ornate leaf mouldings in the corners. On the lower edge of the frame is a plaque which states " From the Colonel and Officers of the Royal Fusilliers 1935" Also included with the portait is a letter on Royal Fusiliers letterhead dated October 23 1935 " From - Maj-Gen. W.P.H. Hill. CB. CMG. DSO., Colonel. The Royal Fusiliers Dear Armstrong I am forwarding to you under a separate cover an engraving of a portrait of His Majesty, King George V, Colonel - in - Chief, the Royal Fusiliers, in the uniform of the Regiment, This portrait was painted by Captain Oswald Birley, M.C., late Royal Fusiliers, and presented to the Regiment by Lord Wakefield to commemorate the 250th anniversary of the raising of the Regiment of Fusiliers at the Tower of London in 1685. His Majesty has graciously signed this copy for presentation to your Regiment from the Corps of the Royal Fusiliers, and we trust that you will accept it as a token of friendship / and esteem .... and esteem we feel for our Allied Battalion, the 6th Battalion, the Royal Melbourne Regiment Yours Sincerely W.F.H. Hill Lieutenant-Colonel C.E. Armstrong , Comdg. 6th Bn. The Royal Melbourne Regt., Carlton, Victoria, Australia" This letter is supported by framing card , which has some water damage on the lower right corner and right side signed by King George and the artist From the Colonel and Officers of the Royal Fusilliers 1935" 5/6 rvr, officer's / sergeant's mess, 6th battalion, royal melbourne regiment, king george v, royal fusiliers -
 Melbourne Tram Museum
Photograph - Black & White Photograph/s, c1926
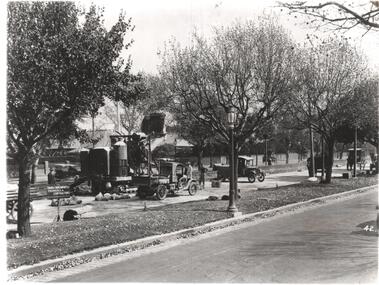
Black and white photograph of the construction of the tram track in St Kilda Road, during 1925 or 1926 by the Foundation Construction Ltd, with a concrete mixer tracked vehicle and two aggregate or crushed rock trucks. Photo from the Collection of the Department of Infrastructure now with the Public Records Office - image number H514. Note: this photo is now out of copyright and was not an original VR photograph, but one copied from another source and collected as their Heritage series. See Image 3674i2 and 3674i3 for a digital image of the card photograph at the PRO on 7/1/2019 that this photograph comes from. Further notes from Rod Atkins 11/7/2019: The cement mixer was state of the art machine at the time. "Buddy" in the USA were making them but this one is slightly different and may have been made by a company call AAC in Sheffield U.K. You can just make out the word " ….field" etc … on the water tank . The sign; now this is very interesting. "The Foundation Company" is the Australian company of the one in London.. from The Argus at the time. run by no less than by Herbert Del Cott Ply Ltd. (you can just make that out in the bottom line of the sign.) A rather interesting person in Melbourne society between the wars. His name pops up a lot in The Argus. was not short of a pound either.... Had his "Buick" stolen from Russell Street in 1920. Had some issues with wages on Wellington Street conversion. Looks to have run a electrical business before seeing opportunity with cable tram replacement coming up. In the 1930' lived in Stevenson Street, Kew. Travelled a lot to Europe. (Austria) …..Has Department of Infrastructure copy right stamp on rear and number "H 514" in ink on rear and "2-1"trams, tramways, st kilda rd, trackwork, construction, conversion -
 University of Melbourne, Burnley Campus Archives
Album - Black and white prints and negatives, James Leslie Provan, Photograph Collection, 1940-1950
Collection of 39 black and white photographs. Some photographs with handwritten annotations in what looks like the handwriting of J.L. Provan. Mostly at Burnley, some at Moorabbin. (1) "Opium Poppy 1942 Burnley. Publicity Branch Department of Agriculture." Negative in envelope marked, "Prints 1 of No. 398 Department of Agriculture 'McP.' " (2) Grape vine and cabbages. (3) Rows of seedlings in the Orchard. (4) Orange tree? unpruned. (5) Flowers. (6) "Double and single rows of French Beans." (7) "Sage & marjoram." (8) Hydrangeas. (9)Sprinkler on newly planted cabbages. (10a)"Lettuce Iceberg 1/1/43." Seeds on soil surface. (10b) "Lettuce Iceberg 1/1/43." Seedlings emerging. (11)? planted in terracotta pipes. (12) Rows of seedlings in the Orchard. (13) "A student sowing Parsnip seed in a drill row. School of Horticulture Burnley Gardens." (14) Student distributing fertilizer? (15) Similar. (16) Similar. (17a) Flowers. (17b) Flowers. (18)"Beetroot Crimson Globe." (19) A seed drill. (20)Canna. (21a) Vegetable rows. (21b) ? (22) Student hoeing. (23) Student hoeing. (24) Similar. (26) "Cabbage Burbees Allhead 2/2/43," seedlings. (27) Water, manure, etc. (28) "Celery beds Ray Marriott Moorabbin April 2nd 1943." (29-37) Also at Moorabbin probably: (29) Vegetables. (30) Onions. (31) Vegetables. (32) Planting seedlings. (33) Vegetables. (34) Celery, carrots, turnips on display. (35) Carrots growing and just pulled up. (36) Peas. (37) Ploughing with horse. (38) Student spraying vegetables at Burnley. (39) House?j.l. provan, burnley, moorabbin, opium poppy, grape vine, cabbages, seedlings, orchards, orange trees, flowers, french beans, sage, marjoram, hydrangea, sprinkler, lettuce iceberg, seeds, students sowing, parsnips, school of horticulture burnley gardens, beetroot, hoeing, water, manure, celery, vegetables beds, ray marriott, onions, carrots, turnips, peas, ploughing, horse, spraying -
 Bendigo Historical Society Inc.
Newspaper - NEWSPAPER COLLECTION: BENDIGO ADVERTISER - HERALD SUN 2009 BUSHFIRES
1) The Advertiser - Red Alert - February 06, 2009 2) The Advertiser - Headline Moments of the Past-July 03, 2009 3) Herald Sun - Black Saturday - February 07, 2009 4) Herald Sun - Fire-storm - February 08, 2009 5) Herald Sun - 84 Dead - February 09, 2009 6) Herald Sun - We'll Help - February 09, 2009 7) The Advertiser - Hellfire Heartache - February 09, 2009 8) The Advertiser - Thumbs Up On Water - February 09, 2009 9) Herald Sun - We Will Rebuild - February 10, 2009 10) Herald Sun - All Lost - February 10, 2009 11) The Advertiser - How We Lost Our Brother - February 10, 2009 12) The Advertiser - Counting the Cost - February 10, 2009 13) Herald Sun - Alive - February 11, 2009 14) Herald Sun - Act of Terror - February 11, 2009 15) Herald Sun - Never Again - February 12, 2009 16) Herald Sun - The Tiniest Victims - February 12, 2009 17) Herald Sun - Heart of a Nation - February 13, 2009 18) Bendigo Weekly - City Unites - February 13, 2009 19) Herald Sun - Love from the Ashes - February 14, 2009 20) The Advertiser - Black Saturday - February 14, 2009 21) The Advertiser - Black Saturday - February 14, 2009 22) Herald Sun - Portraits of Grief - February 14, 2009 23) Herald Sun - Salute Our Heroes - February 15, 2009 24) The Advertiser - One Brick at the Time - February 16, 2009. Folder 111 now in Box 417 AV 03/11/2022newspaper, bendigo advertiser -
 Eltham District Historical Society Inc
Newspaper - News Clipping, Herald, The big Eltham clean-up gets under way, Herald, 4 March, p3, 1965
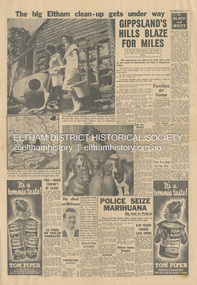
Full page newspaper clipping featuring the March 1965 Victorian bushfires. Items include: Photograph - TWO-WOMAN BUCKET BRIGADE, Mrs Henry Marsden (left) and Mrs Moureen Ellis, whose fire-fighting efforts yesterday were highly praised today by their Eltham neighbours, carry out mopping-up operations Photograph - DOGS MADE HOMELESS by the fire in North Eltham yesterday are being cared for at First-Constable Doug. Mummery's kennels at Eltham and here is kennel maid Helen Oliver, 17, with some of them today. The two basset hounds are owned by Mr Bill Guy who lost about 100 daschund and basset hound puppies and dogs in the fire. Photograph - He died at Eltham [Picture of John Lawrence Coleman] Builder Mr John Lawrence Coleman, 31, of Main Rd., Eltham, one of three men burnt to death yesterday in the fire at North Eltham. The other two were XXXXX, 33 who lives opposite the Colemans and Mr William Elwers, 64 of Batman Rd., Eltham. John Lawrence Coleman (1934-1965) born January 10, was the son of Raymond John Coleman and Hanna May (Gillet) Coleman. He married Margaret Frances Dare in 1955 and was the father of two children. He died whilst attempting to rescue an older man trapped in the bushfire at North Eltham on March 3, 1965 Other news stories of the day: Bushfires rage in Victoria, Snowy: Three dead (1965, March 4). The Canberra Times (ACT : 1926 - 1995), p. 1. Retrieved May 19, 2022, from http://nla.gov.au/nla.news-article131758981 Includes two photos of the fire in North Eltham “Firemen make for safety as fire rages in Upper Glen Park Road, North Eltham, Victoria. The smoke hides a house.” and “A house explodes into flames at North Eltham, Victoria. Firemen said bottled gas went up.” Canberra Times (ACT : 1926 - 1995), Thursday 4 March 1965, page 1 ________________________________________ Firemen make for safety as fire rages in Upper Glen Park Road. North Eltham. Victoria. The smoke hides a house. A house explodes into flames at North Eltham. Victoria. Firemen said bottled gas went up. Bushfires rage in Victoria, Snowy: Three dead MELBOURNE, Wednesday.—Three people died today in a bush» fire which raged through North Eltham, about 15 miles from Melbourne. The victims were three men. A fourth man is feared to be dead. Another bushfire. sparked off by the heatwave sizzling over south-eastern Australia, is burning out of control in the Kosciusko State Park, in the Snowy Mountains. Firefighters fear that if it reaches pine forests up the Yarrangobilly River, they will be powerless to stop it. The three victims of the North Eltbam fire were trapped by flames in a valley. Their bodies were found only a few yards apart. They were named by police tonight as Mr. George Crowe, 78, of North Eltham, William John Ewers, 64, and John Laurence Coleman, 31, both of Eltham. The other two have not been identified. They are believed to be a man aged about 40 and an 18-year-old youth. At least 12 homes were destroyed by the fire, the worst in Victoria since 1962, when eight lives were lost and hundreds of homes burnt down at Warrandyte. At one time the township of Eltham was threatened, but a cool change swept in from the south and held back the wall of flames. More than 100 dogs, worth about £4,000, died when the fire raced through two kennels in Short Street, Eltham. and Upper Glen Park Road, North Eltham. A trickle of water Residents ran into the streets as the blaze raced towards their houses. Others frantically dug firebreaks around their homes. Mrs. Sue Recourt wept when firemen arrived while she was vainly trying to stop the flames with a trickle of water from the garden hose. A stack of firewood was blazing, but the firemen managed to save the house and rescue four goats. Many homes in Eltham were saved after flames had crept to within feet of their fences. Students at North Eltham State School had to be evacuated when the blaze threatened the building. Fire fighters were severely hampered by lack of water and narrow roads. The blaze, which began in above century heat, turned toward Wattle Glen, where two houses were gutted. Then the flames raced towards Hurstbridge to the north. Firemen battling desperately, controlled the fire late this afternoon. Five forest fires were still burning in Victoria tonight. IN VICTORIA THIS WEEK Tragic lack of central fire authority (1965, March 9). The Canberra Times (ACT : 1926 - 1995), p. 2. Retrieved May 19, 2022, from http://nla.gov.au/nla.news-article131759928 Canberra Times (ACT : 1926 - 1995), Tuesday 9 March 1965, page 2 ________________________________________ IN VICTORIA THIS WEEK Tragic lack of central fire authority From Rohan Rivett It was the worst week for Victorian fire fighters since Black Friday 27 years ago. On that day one pilot up in a spotter plane said afterwards: "It seemed at times that half the State was on fire." This time, for three days on end, Gippsland men, women and children had moments of conviction that their towns would have blackened into anonymity before the weekend was out. The week began with horror at Eltham on the North-eastern edge of Melbourne. Eltham today is something of an artists' colony. Oil painters, water colourists, potters and sculptors proliferate. A number of University folk have emulated the example of Professor MacMahon Ball who pioneered the way by moving to Eltham and carving a home out of the bush in the thirties. Innermost Eltham is barely 14 miles from the G.P.O. Farthest Eltham stretches miles beyond. It served to illustrate the tragi-ludicrous truncation of Victoria's fire control. Part of Eltham is under the protection of the Melbourne Fire Brigade. But this responsibility ceases at some invisible and incomprehensible line — apparently determined by the meanderings of the water mains. At this point everybody's property throughout the rest of Eltham is dependent on the Country Fire Authority. Half an hour before midday on Wednesday, a fire suddenly started on the West side of Upper Glen road on the edge of Eltham. Before the fire brigade could arrive, it was burning on a widening front through timber and high grass north of Eltham. Two wind changes in rapid succession saw the fire leaping Diamond Creek. With a freshening wind it struck home after home in three streets. More than one of them exploded suddenly as if hit by an incendiary bomb. There is no piped gas in the Eltham area, hence many housewives use bottle gas. The flames outside caused the bottles to explode. Altogether twelve homes were completely incinerated and four more were badly damaged. Thirty prize dogs perished. About three hours after the fire started it raced suddenly down a gully hillside trapping an elderly man. Two other men apparently raced to the rescue. Flames caught the three men within yards of each other, not 200 yards off the Upper Glen Park Road where safety lay. They were burned to death. Next evening an angry and convincing secretary of the Fire Brigade Union, Mr. W. M. Webber, came on television and appealed to the people of Victoria to end the ridiculous and dangerous dualism in fire-fighting control. The Eltham fire, he said, had precisely illustrated the situation. The Metropolitan Fire Brigade area touched Eltham, but where the fire had gutted and killed, was just outside its area. Mr. Webber said his union had constantly urged one authority for the State with a complete reorganisation of fire protection. On Wednesday the union had repeated its call for an inquiry into fire protection in Victoria to the Chief Secretary, Mr Rylah. "No matter how close the liaison between the two organisations, there are always divided sections of thinking," Mr. Webber told viewers. "I don't know how much tragedy the com-munity can take before it demands that it is properly protected." Rumours that differences in gauge between taps and hose nozzles (as between the two authorities) accentuated the damage were denied by fire chiefs who said that all appliances were now carrying adaptors so that hoses could be linked to mains everywhere. But there is grave concern in the Metropolitan Fire Brigade's higher councils at the action of several Federal authorities with projects in and around Melbourne. They are installing non-standard equipment without reference to the State authorities or any dovetailing of appliances and equipment. Public alarm was not diminished by the publication on Friday and Saturday of a heart tearing letter from the young widow of John Lawrence Coleman, 31 year old father of two, who had died in the flames apparently trying to rescue the old man trapped in the gully. By that time, a Vast area of Gippsland was in flames and the troops had been sent in to back up the overworked and often helpless fire-fighters. By Saturday, the Leader of the Opposition, Mr. Stoneham, who has previously demanded a Royal Commission into fire-fighting arrangements, repeated his demand. To add to the Chief Secretary's worries he was publicly rebuked for allegedly implying on television that lives had been lost at Eltham because people went to the wrong place at the wrong time. In a letter to the Press, Professor MacMahon Ball pointed out that two of the men involved were experienced bushmen who had gone "to help an old man in great danger fully aware of the danger to themselves". As Victoria faced its sixth day of total State-wide fire ban, it looked likely that even official resistance was not going to silence the demand for one central authority to control the fire fiend. At the moment, the 400 square miles where two million Victorians live in Greater Melbourne are divorced from the rest of the State in planning, communications, equipment and control of personnel. No one doubts the whole-hearted co-operation and willingness to back each other up of the M.F.B. and the C.F.A., both at top-level and among the firemen themselves. However, when a city straggles so deeply into the country side, the absence of a single authority, to oversee and analyse the fire threat as a whole, suggests suicidal policy of divide and fuel. Emphasis of the tragic loss of a member of a pioneering family who died whilst helping others in his communitybushfire, cfa, country fire authority, fire brigrade, glen park road, heroes, john lawrence coleman, north eltham, victorian bushfires - 1965, volunteers, william john elwers, fire fighter, frank martin, george john crowe, ken gaston, orchard avenue, doug mummery, helen oliver, mrs henry marsden, mrs moureen ellis -
 Flagstaff Hill Maritime Museum and Village
Domestic object - Bowl, Late 19th or early 20th Century
The Process of Making Pottery Decorating, Firing, Glazing, Making, Technical There is a rhythm and flow to clay. It can’t be done all at once! Even the making process! It can take weeks to get everything done, especially if you can only work on your pottery once a week! Even though we have three hour classes, it’s often just not enough time! Here is an overview of some of the processes so you have a bit more grasp on some of the technical stuff! Step One – Design There are SO many ideas out there for making stuff in clay! From delicate porcelain jewellery, through to heavy sculptural work and everything in between. Deciding your direction is sometimes not that easy – when you first start, try everything, you will naturally gravitate to the style that you enjoy! The options and variations are endless and can get a wee bit overwhelming too! Check in with me before you start to ensure your ideas will work, what order you might do things, how you could achieve the look you are seeking and any other technical data required! Step Two – Making Clay is thixotropic. This means that as you work with it, the clay first gets sloppier and wetter, before is begins to dry in the atmosphere. For most things, you simply can’t do all parts of the project at once. An example of work order might look like: Get last weeks work out from the shelves Prepare clay for today’s work – roll your clay, prepare balls for throwing, make the first stage of a pinch pot) Clean up last week’s work and put it on the shelf for bisque firing Check that you have any glazing to do – and do enough of it that you will have time to finish your main project Do the next step of your next project – there might be a further step that can’t be complete immediately, in that case, wrap your work well and put onto the shelves. Letting your work rest for a while can really help keep your work clean and professional looking. Many things require bagging under plastic to keep it ready for work the next week – put your name on the outside of the bag so you can find your work easily. We have stickers and markers. Consider how you want to decorate your work – coloured slip can be applied at a fairly wet stage (remembering that it will make your work even wetter!). Trying to apply slip to dry clay won’t work! If you want to do sgraffito – you will need to keep the work leather hard (a state of dryness where you can still work the clay with a little effort and a little water and care). Step Three – Drying Most of the time your work can go into the rack uncovered to let it dry out for the following week. If you want to continue forming or shaping you will need to double bag your work – put your work on a suitable sized bat and put the bat in a bag so the base of the bag is under the bat, then put another bag over the top of the work and tuck the top of the bag under the bat. If you want to trim (or turn) your thrown work the following week, it should also be double bagged. If your work is large, delicate, or of uneven thicknesses, you should lightly cover your work for drying. When considering the drying process, bare in mind the weather, humidity and wind! The hotter and dryer, the faster things dry and work can dry unevenly in the shelves – this can lead to cracking – another time to lightly cover your work for drying. Step Four – Trimming and Cleaning Up Your work is dry! It is called greenware now and it is at it’s most fragile! Handle everything with two hands. I often refer to soft hands – keep everything gentle and with your fingers spread as much as possible. Try to not pick up things like plates too much, and always with both hands! Before your work can be bisque fired it should be “cleaned up”. You work won’t go into the kiln if it has sharp edges – when glazed, sharp edges turn into razor blades! Use a piece of fly wire to rub the work all over – this will scratch a little so be light handed. Use a knife or metal kidney to scrape any areas that require a bit more dynamic treatment than the fly wire offers! Finally, a very light wipe over with a slightly damp sponge can help soften and soothe all of your edges and dags! Trimming thrown work: If you are planning to trim (or turn) your thrown work (and you should be), make sure you bag it well – your work should be leather hard to almost dry for easiest trimming. Use this step to finish the work completely – use a metal kidney to polish the surface, or a slightly damp sponge to give a freshly thrown look. Wipe the sponge around the rim after trimming, and check the inside of the pot for dags! Trimming slip cast work: Usually I will trim the rims of your work on the wheel the following day to make that stage easier, however you will still need to check your work for lumps and bumps. Last but not least – check that your name is still clearly on the bottom of your work. Step Five – Bisque Firing When the work is completely dry it can go into the bisque kiln. The bisque kiln is fired to 1000°C. This process burns off the water in the clay as well as some of the chemically bound water. The structure of the clay is not altered that much at this temperature. Inside the bisque kiln, the work is stacked a little, small bowl inside a larger bowl and onto a heavy plate. Smaller items like decorations or drink coasters might get stacked several high. Consideration is paid to the weight of the stack and shape of the work. A bisque kiln can fire about one and a half times the amount of work that the glaze kiln can fire. The firing takes about 10 hours to complete the cycle and about two days to cool down. Once it has been emptied the work is placed in the glaze room ready for you to decorate! Step Six – Glazing Decorating your work with colour can be a lot of fun – and time consuming! There are three main options for surface treatment at this stage: Oxide Washes Underglazes Glazes Washes and underglazes do not “glaze” the work – It will still need a layer of glaze to fully seal the clay (washes don’t need glaze on surfaces not designed for food or liquid as they can gloss up a little on their own). Underglazes are stable colourants that turn out pretty much how they look in the jar. They can be mixed with each other to form other colours and can be used like water colours to paint onto your work. Mostly they should have a clear glaze on top to seal them. Oxides are a different species – the pink oxide (cobalt) wash turns out bright blue for instance. They don’t always need a glaze on top, and some glazes can change the colour of the wash! The glazes need no other “glaze” on top! Be careful of unknown glaze interactions – you can put any combination of glaze in a bowl or on a plate, but only a single glaze on the outside of any vertical surface! Glazes are a chemical reaction under heat. We don’t know the exact chemicals in the Mayco glazes we use. I can guess by the way they interact with each other, however, on the whole, you need to test every idea you have, and not run the test on a vertical surface! Simply put, glaze is a layer of glass like substance that bonds with the clay underneath. Clay is made of silica, alumina and water. Glaze is made of mostly silica. Silica has a melting point of 1700°C and we fire to 1240°C. The silica requires a “flux” to help it melt at the lower temperature. Fluxes can be all sorts of chemicals – a common one is calcium – calcium has a melting point of 2500°C, however, together they both melt at a much lower temperature! Colourants are metal oxides like cobalt (blue), chrome (green through black), copper (green, blue, even red!), manganese (black, purple and pink) iron (red brown), etc. Different chemicals in the glaze can have dramatic effects. for example, barium carbonate (which we don’t use) turns manganese bright pink! Other elements can turn manganese dioxide brown, blue, purple and reddish brown. Manganese dioxide is a flux in and of itself as well. So, glazes that get their black and purple colours, often interact with other glazes and RUN! Our mirror black is a good example – it mixes really well with many glazes because it fluxes them – causes them to melt faster. It will also bring out many beautiful colours in the glazes because it’s black colouring most definitely comes from manganese dioxide! Glaze chemistry is a whole subject on it’s own! We use commercial Mayco glazes on purpose – for their huge range of colour possibilities, stability, cool interactions, artistic freedom with the ability to easily brush the glazes on and ease of use. We currently have almost 50 glazes on hand! A major project is to test the interactions of all glazes with each other. That is 2,500 test tiles!!!! I’m going to make the wall behind the wheels the feature wall of pretty colours! Step Seven – Glaze (Gloss or sometimes called “Glost”) Firing Most of the time this is the final stage of making your creation (but not always!) The glaze kiln goes to 1240°C. This is called cone 6, or midrange. It is the low end of stoneware temperatures. Stoneware clays and glazes are typically fired at cone 8 – 10, that is 1260 – 1290°C. The energy requirement to go from 1240°C to 1280°C is almost a 30% more! Our clay is formulated to vitrify (mature, turn “glass-like”) at 1240°, as are our glazes. A glaze kiln take around 12 hours to reach temperature and two to three days to cool down. Sometimes a third firing process is required – this is for decoration that is added to work after the glaze firing. For example – adding precious metals and lustres. this firing temperature is usually around 600 – 800°C depending upon the techniques being used. There are many students interested in gold and silver trims – we will be doing this third type of firing soon! After firing your work will be in the student finished work shelves. Remember to pay for it before you head out the door! There is a small extra charge for using porcelain clay (it’s more than twice the price of regular clay), and for any third firing process! Once your work has been fired it can not turn back into clay for millennia – so don’t fire it if you don’t like it! Put it in the bucket for recycling. https://firebirdstudios.com.au/the-process-of-making-pottery/ The bowl is an example of kitchenware used in the 19th century and still in use today.Bowl white ceramic. Crack on side. Badly stained.Backstamp very faint and unable to be read.flagstaff hill, warrnambool, shipwrecked-coast, flagstaff-hill, flagstaff-hill-maritime-museum, maritime-museum, shipwreck-coast, flagstaff-hill-maritime-village, mixing bowl, food preparation, kitchen equipment, ceramic -
 Flagstaff Hill Maritime Museum and Village
Domestic object - Bowl
The Process of Making Pottery Decorating, Firing, Glazing, Making, Technical There is a rhythm and flow to clay. It can’t be done all at once! Even the making process! It can take weeks to get everything done, especially if you can only work on your pottery once a week! Even though we have three hour classes, it’s often just not enough time! Here is an overview of some of the processes so you have a bit more grasp on some of the technical stuff! Step One – Design There are SO many ideas out there for making stuff in clay! From delicate porcelain jewellery, through to heavy sculptural work and everything in between. Deciding your direction is sometimes not that easy – when you first start, try everything, you will naturally gravitate to the style that you enjoy! The options and variations are endless and can get a wee bit overwhelming too! Check in with me before you start to ensure your ideas will work, what order you might do things, how you could achieve the look you are seeking and any other technical data required! Step Two – Making Clay is thixotropic. This means that as you work with it, the clay first gets sloppier and wetter, before is begins to dry in the atmosphere. For most things, you simply can’t do all parts of the project at once. An example of work order might look like: Get last weeks work out from the shelves Prepare clay for today’s work – roll your clay, prepare balls for throwing, make the first stage of a pinch pot) Clean up last week’s work and put it on the shelf for bisque firing Check that you have any glazing to do – and do enough of it that you will have time to finish your main project Do the next step of your next project – there might be a further step that can’t be complete immediately, in that case, wrap your work well and put onto the shelves. Letting your work rest for a while can really help keep your work clean and professional looking. Many things require bagging under plastic to keep it ready for work the next week – put your name on the outside of the bag so you can find your work easily. We have stickers and markers. Consider how you want to decorate your work – coloured slip can be applied at a fairly wet stage (remembering that it will make your work even wetter!). Trying to apply slip to dry clay won’t work! If you want to do sgraffito – you will need to keep the work leather hard (a state of dryness where you can still work the clay with a little effort and a little water and care). Step Three – Drying Most of the time your work can go into the rack uncovered to let it dry out for the following week. If you want to continue forming or shaping you will need to double bag your work – put your work on a suitable sized bat and put the bat in a bag so the base of the bag is under the bat, then put another bag over the top of the work and tuck the top of the bag under the bat. If you want to trim (or turn) your thrown work the following week, it should also be double bagged. If your work is large, delicate, or of uneven thicknesses, you should lightly cover your work for drying. When considering the drying process, bare in mind the weather, humidity and wind! The hotter and dryer, the faster things dry and work can dry unevenly in the shelves – this can lead to cracking – another time to lightly cover your work for drying. Step Four – Trimming and Cleaning Up Your work is dry! It is called greenware now and it is at it’s most fragile! Handle everything with two hands. I often refer to soft hands – keep everything gentle and with your fingers spread as much as possible. Try to not pick up things like plates too much, and always with both hands! Before your work can be bisque fired it should be “cleaned up”. You work won’t go into the kiln if it has sharp edges – when glazed, sharp edges turn into razor blades! Use a piece of fly wire to rub the work all over – this will scratch a little so be light handed. Use a knife or metal kidney to scrape any areas that require a bit more dynamic treatment than the fly wire offers! Finally, a very light wipe over with a slightly damp sponge can help soften and soothe all of your edges and dags! Trimming thrown work: If you are planning to trim (or turn) your thrown work (and you should be), make sure you bag it well – your work should be leather hard to almost dry for easiest trimming. Use this step to finish the work completely – use a metal kidney to polish the surface, or a slightly damp sponge to give a freshly thrown look. Wipe the sponge around the rim after trimming, and check the inside of the pot for dags! Trimming slip cast work: Usually I will trim the rims of your work on the wheel the following day to make that stage easier, however you will still need to check your work for lumps and bumps. Last but not least – check that your name is still clearly on the bottom of your work. Step Five – Bisque Firing When the work is completely dry it can go into the bisque kiln. The bisque kiln is fired to 1000°C. This process burns off the water in the clay as well as some of the chemically bound water. The structure of the clay is not altered that much at this temperature. Inside the bisque kiln, the work is stacked a little, small bowl inside a larger bowl and onto a heavy plate. Smaller items like decorations or drink coasters might get stacked several high. Consideration is paid to the weight of the stack and shape of the work. A bisque kiln can fire about one and a half times the amount of work that the glaze kiln can fire. The firing takes about 10 hours to complete the cycle and about two days to cool down. Once it has been emptied the work is placed in the glaze room ready for you to decorate! Step Six – Glazing Decorating your work with colour can be a lot of fun – and time consuming! There are three main options for surface treatment at this stage: Oxide Washes Underglazes Glazes Washes and underglazes do not “glaze” the work – It will still need a layer of glaze to fully seal the clay (washes don’t need glaze on surfaces not designed for food or liquid as they can gloss up a little on their own). Underglazes are stable colourants that turn out pretty much how they look in the jar. They can be mixed with each other to form other colours and can be used like water colours to paint onto your work. Mostly they should have a clear glaze on top to seal them. Oxides are a different species – the pink oxide (cobalt) wash turns out bright blue for instance. They don’t always need a glaze on top, and some glazes can change the colour of the wash! The glazes need no other “glaze” on top! Be careful of unknown glaze interactions – you can put any combination of glaze in a bowl or on a plate, but only a single glaze on the outside of any vertical surface! Glazes are a chemical reaction under heat. We don’t know the exact chemicals in the Mayco glazes we use. I can guess by the way they interact with each other, however, on the whole, you need to test every idea you have, and not run the test on a vertical surface! Simply put, glaze is a layer of glass like substance that bonds with the clay underneath. Clay is made of silica, alumina and water. Glaze is made of mostly silica. Silica has a melting point of 1700°C and we fire to 1240°C. The silica requires a “flux” to help it melt at the lower temperature. Fluxes can be all sorts of chemicals – a common one is calcium – calcium has a melting point of 2500°C, however, together they both melt at a much lower temperature! Colourants are metal oxides like cobalt (blue), chrome (green through black), copper (green, blue, even red!), manganese (black, purple and pink) iron (red brown), etc. Different chemicals in the glaze can have dramatic effects. for example, barium carbonate (which we don’t use) turns manganese bright pink! Other elements can turn manganese dioxide brown, blue, purple and reddish brown. Manganese dioxide is a flux in and of itself as well. So, glazes that get their black and purple colours, often interact with other glazes and RUN! Our mirror black is a good example – it mixes really well with many glazes because it fluxes them – causes them to melt faster. It will also bring out many beautiful colours in the glazes because it’s black colouring most definitely comes from manganese dioxide! Glaze chemistry is a whole subject on it’s own! We use commercial Mayco glazes on purpose – for their huge range of colour possibilities, stability, cool interactions, artistic freedom with the ability to easily brush the glazes on and ease of use. We currently have almost 50 glazes on hand! A major project is to test the interactions of all glazes with each other. That is 2,500 test tiles!!!! I’m going to make the wall behind the wheels the feature wall of pretty colours! Step Seven – Glaze (Gloss or sometimes called “Glost”) Firing Most of the time this is the final stage of making your creation (but not always!) The glaze kiln goes to 1240°C. This is called cone 6, or midrange. It is the low end of stoneware temperatures. Stoneware clays and glazes are typically fired at cone 8 – 10, that is 1260 – 1290°C. The energy requirement to go from 1240°C to 1280°C is almost a 30% more! Our clay is formulated to vitrify (mature, turn “glass-like”) at 1240°, as are our glazes. A glaze kiln take around 12 hours to reach temperature and two to three days to cool down. Sometimes a third firing process is required – this is for decoration that is added to work after the glaze firing. For example – adding precious metals and lustres. this firing temperature is usually around 600 – 800°C depending upon the techniques being used. There are many students interested in gold and silver trims – we will be doing this third type of firing soon! After firing your work will be in the student finished work shelves. Remember to pay for it before you head out the door! There is a small extra charge for using porcelain clay (it’s more than twice the price of regular clay), and for any third firing process! Once your work has been fired it can not turn back into clay for millennia – so don’t fire it if you don’t like it! Put it in the bucket for recycling. https://firebirdstudios.com.au/the-process-of-making-pottery/ This bowl is an example of kitchenware used in the 19th century and still in use today.Bowl white ceramic plain that has two sets of edging around lip. Inside bowl has plaster designed to look like cooking mixture.flagstaff hill, warrnambool, shipwrecked-coast, flagstaff-hill, flagstaff-hill-maritime-museum, maritime-museum, shipwreck-coast, flagstaff-hill-maritime-village, kitchen equipment, ceramic -
 Flagstaff Hill Maritime Museum and Village
Domestic object - Bowl, J & G Meakin, Late 19th or early 20th Century
The Process of Making Pottery Decorating, Firing, Glazing, Making, Technical There is a rhythm and flow to clay. It can’t be done all at once! Even the making process! It can take weeks to get everything done, especially if you can only work on your pottery once a week! Even though we have three hour classes, it’s often just not enough time! Here is an overview of some of the processes so you have a bit more grasp on some of the technical stuff! Step One – Design There are SO many ideas out there for making stuff in clay! From delicate porcelain jewellery, through to heavy sculptural work and everything in between. Deciding your direction is sometimes not that easy – when you first start, try everything, you will naturally gravitate to the style that you enjoy! The options and variations are endless and can get a wee bit overwhelming too! Check in with me before you start to ensure your ideas will work, what order you might do things, how you could achieve the look you are seeking and any other technical data required! Step Two – Making Clay is thixotropic. This means that as you work with it, the clay first gets sloppier and wetter, before is begins to dry in the atmosphere. For most things, you simply can’t do all parts of the project at once. An example of work order might look like: Get last weeks work out from the shelves Prepare clay for today’s work – roll your clay, prepare balls for throwing, make the first stage of a pinch pot) Clean up last week’s work and put it on the shelf for bisque firing Check that you have any glazing to do – and do enough of it that you will have time to finish your main project Do the next step of your next project – there might be a further step that can’t be complete immediately, in that case, wrap your work well and put onto the shelves. Letting your work rest for a while can really help keep your work clean and professional looking. Many things require bagging under plastic to keep it ready for work the next week – put your name on the outside of the bag so you can find your work easily. We have stickers and markers. Consider how you want to decorate your work – coloured slip can be applied at a fairly wet stage (remembering that it will make your work even wetter!). Trying to apply slip to dry clay won’t work! If you want to do sgraffito – you will need to keep the work leather hard (a state of dryness where you can still work the clay with a little effort and a little water and care). Step Three – Drying Most of the time your work can go into the rack uncovered to let it dry out for the following week. If you want to continue forming or shaping you will need to double bag your work – put your work on a suitable sized bat and put the bat in a bag so the base of the bag is under the bat, then put another bag over the top of the work and tuck the top of the bag under the bat. If you want to trim (or turn) your thrown work the following week, it should also be double bagged. If your work is large, delicate, or of uneven thicknesses, you should lightly cover your work for drying. When considering the drying process, bare in mind the weather, humidity and wind! The hotter and dryer, the faster things dry and work can dry unevenly in the shelves – this can lead to cracking – another time to lightly cover your work for drying. Step Four – Trimming and Cleaning Up Your work is dry! It is called greenware now and it is at it’s most fragile! Handle everything with two hands. I often refer to soft hands – keep everything gentle and with your fingers spread as much as possible. Try to not pick up things like plates too much, and always with both hands! Before your work can be bisque fired it should be “cleaned up”. You work won’t go into the kiln if it has sharp edges – when glazed, sharp edges turn into razor blades! Use a piece of fly wire to rub the work all over – this will scratch a little so be light handed. Use a knife or metal kidney to scrape any areas that require a bit more dynamic treatment than the fly wire offers! Finally, a very light wipe over with a slightly damp sponge can help soften and soothe all of your edges and dags! Trimming thrown work: If you are planning to trim (or turn) your thrown work (and you should be), make sure you bag it well – your work should be leather hard to almost dry for easiest trimming. Use this step to finish the work completely – use a metal kidney to polish the surface, or a slightly damp sponge to give a freshly thrown look. Wipe the sponge around the rim after trimming, and check the inside of the pot for dags! Trimming slip cast work: Usually I will trim the rims of your work on the wheel the following day to make that stage easier, however you will still need to check your work for lumps and bumps. Last but not least – check that your name is still clearly on the bottom of your work. Step Five – Bisque Firing When the work is completely dry it can go into the bisque kiln. The bisque kiln is fired to 1000°C. This process burns off the water in the clay as well as some of the chemically bound water. The structure of the clay is not altered that much at this temperature. Inside the bisque kiln, the work is stacked a little, small bowl inside a larger bowl and onto a heavy plate. Smaller items like decorations or drink coasters might get stacked several high. Consideration is paid to the weight of the stack and shape of the work. A bisque kiln can fire about one and a half times the amount of work that the glaze kiln can fire. The firing takes about 10 hours to complete the cycle and about two days to cool down. Once it has been emptied the work is placed in the glaze room ready for you to decorate! Step Six – Glazing Decorating your work with colour can be a lot of fun – and time consuming! There are three main options for surface treatment at this stage: Oxide Washes Underglazes Glazes Washes and underglazes do not “glaze” the work – It will still need a layer of glaze to fully seal the clay (washes don’t need glaze on surfaces not designed for food or liquid as they can gloss up a little on their own). Underglazes are stable colourants that turn out pretty much how they look in the jar. They can be mixed with each other to form other colours and can be used like water colours to paint onto your work. Mostly they should have a clear glaze on top to seal them. Oxides are a different species – the pink oxide (cobalt) wash turns out bright blue for instance. They don’t always need a glaze on top, and some glazes can change the colour of the wash! The glazes need no other “glaze” on top! Be careful of unknown glaze interactions – you can put any combination of glaze in a bowl or on a plate, but only a single glaze on the outside of any vertical surface! Glazes are a chemical reaction under heat. We don’t know the exact chemicals in the Mayco glazes we use. I can guess by the way they interact with each other, however, on the whole, you need to test every idea you have, and not run the test on a vertical surface! Simply put, glaze is a layer of glass like substance that bonds with the clay underneath. Clay is made of silica, alumina and water. Glaze is made of mostly silica. Silica has a melting point of 1700°C and we fire to 1240°C. The silica requires a “flux” to help it melt at the lower temperature. Fluxes can be all sorts of chemicals – a common one is calcium – calcium has a melting point of 2500°C, however, together they both melt at a much lower temperature! Colourants are metal oxides like cobalt (blue), chrome (green through black), copper (green, blue, even red!), manganese (black, purple and pink) iron (red brown), etc. Different chemicals in the glaze can have dramatic effects. for example, barium carbonate (which we don’t use) turns manganese bright pink! Other elements can turn manganese dioxide brown, blue, purple and reddish brown. Manganese dioxide is a flux in and of itself as well. So, glazes that get their black and purple colours, often interact with other glazes and RUN! Our mirror black is a good example – it mixes really well with many glazes because it fluxes them – causes them to melt faster. It will also bring out many beautiful colours in the glazes because it’s black colouring most definitely comes from manganese dioxide! Glaze chemistry is a whole subject on it’s own! We use commercial Mayco glazes on purpose – for their huge range of colour possibilities, stability, cool interactions, artistic freedom with the ability to easily brush the glazes on and ease of use. We currently have almost 50 glazes on hand! A major project is to test the interactions of all glazes with each other. That is 2,500 test tiles!!!! I’m going to make the wall behind the wheels the feature wall of pretty colours! Step Seven – Glaze (Gloss or sometimes called “Glost”) Firing Most of the time this is the final stage of making your creation (but not always!) The glaze kiln goes to 1240°C. This is called cone 6, or midrange. It is the low end of stoneware temperatures. Stoneware clays and glazes are typically fired at cone 8 – 10, that is 1260 – 1290°C. The energy requirement to go from 1240°C to 1280°C is almost a 30% more! Our clay is formulated to vitrify (mature, turn “glass-like”) at 1240°, as are our glazes. A glaze kiln take around 12 hours to reach temperature and two to three days to cool down. Sometimes a third firing process is required – this is for decoration that is added to work after the glaze firing. For example – adding precious metals and lustres. this firing temperature is usually around 600 – 800°C depending upon the techniques being used. There are many students interested in gold and silver trims – we will be doing this third type of firing soon! After firing your work will be in the student finished work shelves. Remember to pay for it before you head out the door! There is a small extra charge for using porcelain clay (it’s more than twice the price of regular clay), and for any third firing process! Once your work has been fired it can not turn back into clay for millennia – so don’t fire it if you don’t like it! Put it in the bucket for recycling. https://firebirdstudios.com.au/the-process-of-making-pottery/This bowl was made by renowned pottery company J & G Meakin of England. The firm was established in the mid-1800's. The bowl is an example of kitchenware used in the 19th century and still in use today.Bowl; white ceramic, round and tapering inwards towards base. Made by J and G Meakin England.On base, 'Ironstone China Reg SOL 391413' with symbolflagstaff hill, flagstaff hill maritime museum and village, warrnambool, maritime museum, maritime village, great ocean road, shipwreck coast, mixing bowl, food preparation, j & g meakin, pottery, stoke-on-trent, kitchen equipment, ceramic -
 Flagstaff Hill Maritime Museum and Village
Domestic object - Plate
The Process of Making Pottery Decorating, Firing, Glazing, Making, Technical There is a rhythm and flow to clay. It can’t be done all at once! Even the making process! It can take weeks to get everything done, especially if you can only work on your pottery once a week! Even though we have three hour classes, it’s often just not enough time! Here is an overview of some of the processes so you have a bit more grasp on some of the technical stuff! Step One – Design There are SO many ideas out there for making stuff in clay! From delicate porcelain jewellery, through to heavy sculptural work and everything in between. Deciding your direction is sometimes not that easy – when you first start, try everything, you will naturally gravitate to the style that you enjoy! The options and variations are endless and can get a wee bit overwhelming too! Check in with me before you start to ensure your ideas will work, what order you might do things, how you could achieve the look you are seeking and any other technical data required! Step Two – Making Clay is thixotropic. This means that as you work with it, the clay first gets sloppier and wetter, before is begins to dry in the atmosphere. For most things, you simply can’t do all parts of the project at once. An example of work order might look like: Get last weeks work out from the shelves Prepare clay for today’s work – roll your clay, prepare balls for throwing, make the first stage of a pinch pot) Clean up last week’s work and put it on the shelf for bisque firing Check that you have any glazing to do – and do enough of it that you will have time to finish your main project Do the next step of your next project – there might be a further step that can’t be complete immediately, in that case, wrap your work well and put onto the shelves. Letting your work rest for a while can really help keep your work clean and professional looking. Many things require bagging under plastic to keep it ready for work the next week – put your name on the outside of the bag so you can find your work easily. We have stickers and markers. Consider how you want to decorate your work – coloured slip can be applied at a fairly wet stage (remembering that it will make your work even wetter!). Trying to apply slip to dry clay won’t work! If you want to do sgraffito – you will need to keep the work leather hard (a state of dryness where you can still work the clay with a little effort and a little water and care). Step Three – Drying Most of the time your work can go into the rack uncovered to let it dry out for the following week. If you want to continue forming or shaping you will need to double bag your work – put your work on a suitable sized bat and put the bat in a bag so the base of the bag is under the bat, then put another bag over the top of the work and tuck the top of the bag under the bat. If you want to trim (or turn) your thrown work the following week, it should also be double bagged. If your work is large, delicate, or of uneven thicknesses, you should lightly cover your work for drying. When considering the drying process, bare in mind the weather, humidity and wind! The hotter and dryer, the faster things dry and work can dry unevenly in the shelves – this can lead to cracking – another time to lightly cover your work for drying. Step Four – Trimming and Cleaning Up Your work is dry! It is called greenware now and it is at it’s most fragile! Handle everything with two hands. I often refer to soft hands – keep everything gentle and with your fingers spread as much as possible. Try to not pick up things like plates too much, and always with both hands! Before your work can be bisque fired it should be “cleaned up”. You work won’t go into the kiln if it has sharp edges – when glazed, sharp edges turn into razor blades! Use a piece of fly wire to rub the work all over – this will scratch a little so be light handed. Use a knife or metal kidney to scrape any areas that require a bit more dynamic treatment than the fly wire offers! Finally, a very light wipe over with a slightly damp sponge can help soften and soothe all of your edges and dags! Trimming thrown work: If you are planning to trim (or turn) your thrown work (and you should be), make sure you bag it well – your work should be leather hard to almost dry for easiest trimming. Use this step to finish the work completely – use a metal kidney to polish the surface, or a slightly damp sponge to give a freshly thrown look. Wipe the sponge around the rim after trimming, and check the inside of the pot for dags! Trimming slip cast work: Usually I will trim the rims of your work on the wheel the following day to make that stage easier, however you will still need to check your work for lumps and bumps. Last but not least – check that your name is still clearly on the bottom of your work. Step Five – Bisque Firing When the work is completely dry it can go into the bisque kiln. The bisque kiln is fired to 1000°C. This process burns off the water in the clay as well as some of the chemically bound water. The structure of the clay is not altered that much at this temperature. Inside the bisque kiln, the work is stacked a little, small bowl inside a larger bowl and onto a heavy plate. Smaller items like decorations or drink coasters might get stacked several high. Consideration is paid to the weight of the stack and shape of the work. A bisque kiln can fire about one and a half times the amount of work that the glaze kiln can fire. The firing takes about 10 hours to complete the cycle and about two days to cool down. Once it has been emptied the work is placed in the glaze room ready for you to decorate! Step Six – Glazing Decorating your work with colour can be a lot of fun – and time consuming! There are three main options for surface treatment at this stage: Oxide Washes Underglazes Glazes Washes and underglazes do not “glaze” the work – It will still need a layer of glaze to fully seal the clay (washes don’t need glaze on surfaces not designed for food or liquid as they can gloss up a little on their own). Underglazes are stable colourants that turn out pretty much how they look in the jar. They can be mixed with each other to form other colours and can be used like water colours to paint onto your work. Mostly they should have a clear glaze on top to seal them. Oxides are a different species – the pink oxide (cobalt) wash turns out bright blue for instance. They don’t always need a glaze on top, and some glazes can change the colour of the wash! The glazes need no other “glaze” on top! Be careful of unknown glaze interactions – you can put any combination of glaze in a bowl or on a plate, but only a single glaze on the outside of any vertical surface! Glazes are a chemical reaction under heat. We don’t know the exact chemicals in the Mayco glazes we use. I can guess by the way they interact with each other, however, on the whole, you need to test every idea you have, and not run the test on a vertical surface! Simply put, glaze is a layer of glass like substance that bonds with the clay underneath. Clay is made of silica, alumina and water. Glaze is made of mostly silica. Silica has a melting point of 1700°C and we fire to 1240°C. The silica requires a “flux” to help it melt at the lower temperature. Fluxes can be all sorts of chemicals – a common one is calcium – calcium has a melting point of 2500°C, however, together they both melt at a much lower temperature! Colourants are metal oxides like cobalt (blue), chrome (green through black), copper (green, blue, even red!), manganese (black, purple and pink) iron (red brown), etc. Different chemicals in the glaze can have dramatic effects. for example, barium carbonate (which we don’t use) turns manganese bright pink! Other elements can turn manganese dioxide brown, blue, purple and reddish brown. Manganese dioxide is a flux in and of itself as well. So, glazes that get their black and purple colours, often interact with other glazes and RUN! Our mirror black is a good example – it mixes really well with many glazes because it fluxes them – causes them to melt faster. It will also bring out many beautiful colours in the glazes because it’s black colouring most definitely comes from manganese dioxide! Glaze chemistry is a whole subject on it’s own! We use commercial Mayco glazes on purpose – for their huge range of colour possibilities, stability, cool interactions, artistic freedom with the ability to easily brush the glazes on and ease of use. We currently have almost 50 glazes on hand! A major project is to test the interactions of all glazes with each other. That is 2,500 test tiles!!!! I’m going to make the wall behind the wheels the feature wall of pretty colours! Step Seven – Glaze (Gloss or sometimes called “Glost”) Firing Most of the time this is the final stage of making your creation (but not always!) The glaze kiln goes to 1240°C. This is called cone 6, or midrange. It is the low end of stoneware temperatures. Stoneware clays and glazes are typically fired at cone 8 – 10, that is 1260 – 1290°C. The energy requirement to go from 1240°C to 1280°C is almost a 30% more! Our clay is formulated to vitrify (mature, turn “glass-like”) at 1240°, as are our glazes. A glaze kiln take around 12 hours to reach temperature and two to three days to cool down. Sometimes a third firing process is required – this is for decoration that is added to work after the glaze firing. For example – adding precious metals and lustres. this firing temperature is usually around 600 – 800°C depending upon the techniques being used. There are many students interested in gold and silver trims – we will be doing this third type of firing soon! After firing your work will be in the student finished work shelves. Remember to pay for it before you head out the door! There is a small extra charge for using porcelain clay (it’s more than twice the price of regular clay), and for any third firing process! Once your work has been fired it can not turn back into clay for millennia – so don’t fire it if you don’t like it! Put it in the bucket for recycling. https://firebirdstudios.com.au/the-process-of-making-pottery/Ceramics have evolved over thousands of years.White earthenware dinner plate. Crazing evident all over.Backstamped ‘Made in England S LTD’flagstaff hill, warrnambool, shipwrecked-coast, flagstaff-hill, flagstaff-hill-maritime-museum, maritime-museum, shipwreck-coast, flagstaff-hill-maritime-village, ceramics, tableware -
 Flagstaff Hill Maritime Museum and Village
Domestic object - Plate, Alfred Meakin
The Process of Making Pottery Decorating, Firing, Glazing, Making, Technical There is a rhythm and flow to clay. It can’t be done all at once! Even the making process! It can take weeks to get everything done, especially if you can only work on your pottery once a week! Even though we have three hour classes, it’s often just not enough time! Here is an overview of some of the processes so you have a bit more grasp on some of the technical stuff! Step One – Design There are SO many ideas out there for making stuff in clay! From delicate porcelain jewellery, through to heavy sculptural work and everything in between. Deciding your direction is sometimes not that easy – when you first start, try everything, you will naturally gravitate to the style that you enjoy! The options and variations are endless and can get a wee bit overwhelming too! Check in with me before you start to ensure your ideas will work, what order you might do things, how you could achieve the look you are seeking and any other technical data required! Step Two – Making Clay is thixotropic. This means that as you work with it, the clay first gets sloppier and wetter, before is begins to dry in the atmosphere. For most things, you simply can’t do all parts of the project at once. An example of work order might look like: Get last weeks work out from the shelves Prepare clay for today’s work – roll your clay, prepare balls for throwing, make the first stage of a pinch pot) Clean up last week’s work and put it on the shelf for bisque firing Check that you have any glazing to do – and do enough of it that you will have time to finish your main project Do the next step of your next project – there might be a further step that can’t be complete immediately, in that case, wrap your work well and put onto the shelves. Letting your work rest for a while can really help keep your work clean and professional looking. Many things require bagging under plastic to keep it ready for work the next week – put your name on the outside of the bag so you can find your work easily. We have stickers and markers. Consider how you want to decorate your work – coloured slip can be applied at a fairly wet stage (remembering that it will make your work even wetter!). Trying to apply slip to dry clay won’t work! If you want to do sgraffito – you will need to keep the work leather hard (a state of dryness where you can still work the clay with a little effort and a little water and care). Step Three – Drying Most of the time your work can go into the rack uncovered to let it dry out for the following week. If you want to continue forming or shaping you will need to double bag your work – put your work on a suitable sized bat and put the bat in a bag so the base of the bag is under the bat, then put another bag over the top of the work and tuck the top of the bag under the bat. If you want to trim (or turn) your thrown work the following week, it should also be double bagged. If your work is large, delicate, or of uneven thicknesses, you should lightly cover your work for drying. When considering the drying process, bare in mind the weather, humidity and wind! The hotter and dryer, the faster things dry and work can dry unevenly in the shelves – this can lead to cracking – another time to lightly cover your work for drying. Step Four – Trimming and Cleaning Up Your work is dry! It is called greenware now and it is at it’s most fragile! Handle everything with two hands. I often refer to soft hands – keep everything gentle and with your fingers spread as much as possible. Try to not pick up things like plates too much, and always with both hands! Before your work can be bisque fired it should be “cleaned up”. You work won’t go into the kiln if it has sharp edges – when glazed, sharp edges turn into razor blades! Use a piece of fly wire to rub the work all over – this will scratch a little so be light handed. Use a knife or metal kidney to scrape any areas that require a bit more dynamic treatment than the fly wire offers! Finally, a very light wipe over with a slightly damp sponge can help soften and soothe all of your edges and dags! Trimming thrown work: If you are planning to trim (or turn) your thrown work (and you should be), make sure you bag it well – your work should be leather hard to almost dry for easiest trimming. Use this step to finish the work completely – use a metal kidney to polish the surface, or a slightly damp sponge to give a freshly thrown look. Wipe the sponge around the rim after trimming, and check the inside of the pot for dags! Trimming slip cast work: Usually I will trim the rims of your work on the wheel the following day to make that stage easier, however you will still need to check your work for lumps and bumps. Last but not least – check that your name is still clearly on the bottom of your work. Step Five – Bisque Firing When the work is completely dry it can go into the bisque kiln. The bisque kiln is fired to 1000°C. This process burns off the water in the clay as well as some of the chemically bound water. The structure of the clay is not altered that much at this temperature. Inside the bisque kiln, the work is stacked a little, small bowl inside a larger bowl and onto a heavy plate. Smaller items like decorations or drink coasters might get stacked several high. Consideration is paid to the weight of the stack and shape of the work. A bisque kiln can fire about one and a half times the amount of work that the glaze kiln can fire. The firing takes about 10 hours to complete the cycle and about two days to cool down. Once it has been emptied the work is placed in the glaze room ready for you to decorate! Step Six – Glazing Decorating your work with colour can be a lot of fun – and time consuming! There are three main options for surface treatment at this stage: Oxide Washes Underglazes Glazes Washes and underglazes do not “glaze” the work – It will still need a layer of glaze to fully seal the clay (washes don’t need glaze on surfaces not designed for food or liquid as they can gloss up a little on their own). Underglazes are stable colourants that turn out pretty much how they look in the jar. They can be mixed with each other to form other colours and can be used like water colours to paint onto your work. Mostly they should have a clear glaze on top to seal them. Oxides are a different species – the pink oxide (cobalt) wash turns out bright blue for instance. They don’t always need a glaze on top, and some glazes can change the colour of the wash! The glazes need no other “glaze” on top! Be careful of unknown glaze interactions – you can put any combination of glaze in a bowl or on a plate, but only a single glaze on the outside of any vertical surface! Glazes are a chemical reaction under heat. We don’t know the exact chemicals in the Mayco glazes we use. I can guess by the way they interact with each other, however, on the whole, you need to test every idea you have, and not run the test on a vertical surface! Simply put, glaze is a layer of glass like substance that bonds with the clay underneath. Clay is made of silica, alumina and water. Glaze is made of mostly silica. Silica has a melting point of 1700°C and we fire to 1240°C. The silica requires a “flux” to help it melt at the lower temperature. Fluxes can be all sorts of chemicals – a common one is calcium – calcium has a melting point of 2500°C, however, together they both melt at a much lower temperature! Colourants are metal oxides like cobalt (blue), chrome (green through black), copper (green, blue, even red!), manganese (black, purple and pink) iron (red brown), etc. Different chemicals in the glaze can have dramatic effects. for example, barium carbonate (which we don’t use) turns manganese bright pink! Other elements can turn manganese dioxide brown, blue, purple and reddish brown. Manganese dioxide is a flux in and of itself as well. So, glazes that get their black and purple colours, often interact with other glazes and RUN! Our mirror black is a good example – it mixes really well with many glazes because it fluxes them – causes them to melt faster. It will also bring out many beautiful colours in the glazes because it’s black colouring most definitely comes from manganese dioxide! Glaze chemistry is a whole subject on it’s own! We use commercial Mayco glazes on purpose – for their huge range of colour possibilities, stability, cool interactions, artistic freedom with the ability to easily brush the glazes on and ease of use. We currently have almost 50 glazes on hand! A major project is to test the interactions of all glazes with each other. That is 2,500 test tiles!!!! I’m going to make the wall behind the wheels the feature wall of pretty colours! Step Seven – Glaze (Gloss or sometimes called “Glost”) Firing Most of the time this is the final stage of making your creation (but not always!) The glaze kiln goes to 1240°C. This is called cone 6, or midrange. It is the low end of stoneware temperatures. Stoneware clays and glazes are typically fired at cone 8 – 10, that is 1260 – 1290°C. The energy requirement to go from 1240°C to 1280°C is almost a 30% more! Our clay is formulated to vitrify (mature, turn “glass-like”) at 1240°, as are our glazes. A glaze kiln take around 12 hours to reach temperature and two to three days to cool down. Sometimes a third firing process is required – this is for decoration that is added to work after the glaze firing. For example – adding precious metals and lustres. this firing temperature is usually around 600 – 800°C depending upon the techniques being used. There are many students interested in gold and silver trims – we will be doing this third type of firing soon! After firing your work will be in the student finished work shelves. Remember to pay for it before you head out the door! There is a small extra charge for using porcelain clay (it’s more than twice the price of regular clay), and for any third firing process! Once your work has been fired it can not turn back into clay for millennia – so don’t fire it if you don’t like it! Put it in the bucket for recycling. https://firebirdstudios.com.au/the-process-of-making-pottery/Ceramics have evolved over thousands of years.Earthenware dessert plate, cream colour. Made by Alfred Meakin, England. Backstamped ‘Alfred Meakin England’. flagstaff hill, warrnambool, shipwrecked-coast, flagstaff-hill, flagstaff-hill-maritime-museum, maritime-museum, shipwreck-coast, flagstaff-hill-maritime-village, alfred meakin, ceramics, earthenware, kitchenware -
 Flagstaff Hill Maritime Museum and Village
Domestic object - Jug
The Process of Making Pottery Decorating, Firing, Glazing, Making, Technical There is a rhythm and flow to clay. It can’t be done all at once! Even the making process! It can take weeks to get everything done, especially if you can only work on your pottery once a week! Even though we have three hour classes, it’s often just not enough time! Here is an overview of some of the processes so you have a bit more grasp on some of the technical stuff! Step One – Design There are SO many ideas out there for making stuff in clay! From delicate porcelain jewellery, through to heavy sculptural work and everything in between. Deciding your direction is sometimes not that easy – when you first start, try everything, you will naturally gravitate to the style that you enjoy! The options and variations are endless and can get a wee bit overwhelming too! Check in with me before you start to ensure your ideas will work, what order you might do things, how you could achieve the look you are seeking and any other technical data required! Step Two – Making Clay is thixotropic. This means that as you work with it, the clay first gets sloppier and wetter, before is begins to dry in the atmosphere. For most things, you simply can’t do all parts of the project at once. An example of work order might look like: Get last weeks work out from the shelves Prepare clay for today’s work – roll your clay, prepare balls for throwing, make the first stage of a pinch pot) Clean up last week’s work and put it on the shelf for bisque firing Check that you have any glazing to do – and do enough of it that you will have time to finish your main project Do the next step of your next project – there might be a further step that can’t be complete immediately, in that case, wrap your work well and put onto the shelves. Letting your work rest for a while can really help keep your work clean and professional looking. Many things require bagging under plastic to keep it ready for work the next week – put your name on the outside of the bag so you can find your work easily. We have stickers and markers. Consider how you want to decorate your work – coloured slip can be applied at a fairly wet stage (remembering that it will make your work even wetter!). Trying to apply slip to dry clay won’t work! If you want to do sgraffito – you will need to keep the work leather hard (a state of dryness where you can still work the clay with a little effort and a little water and care). Step Three – Drying Most of the time your work can go into the rack uncovered to let it dry out for the following week. If you want to continue forming or shaping you will need to double bag your work – put your work on a suitable sized bat and put the bat in a bag so the base of the bag is under the bat, then put another bag over the top of the work and tuck the top of the bag under the bat. If you want to trim (or turn) your thrown work the following week, it should also be double bagged. If your work is large, delicate, or of uneven thicknesses, you should lightly cover your work for drying. When considering the drying process, bare in mind the weather, humidity and wind! The hotter and dryer, the faster things dry and work can dry unevenly in the shelves – this can lead to cracking – another time to lightly cover your work for drying. Step Four – Trimming and Cleaning Up Your work is dry! It is called greenware now and it is at it’s most fragile! Handle everything with two hands. I often refer to soft hands – keep everything gentle and with your fingers spread as much as possible. Try to not pick up things like plates too much, and always with both hands! Before your work can be bisque fired it should be “cleaned up”. You work won’t go into the kiln if it has sharp edges – when glazed, sharp edges turn into razor blades! Use a piece of fly wire to rub the work all over – this will scratch a little so be light handed. Use a knife or metal kidney to scrape any areas that require a bit more dynamic treatment than the fly wire offers! Finally, a very light wipe over with a slightly damp sponge can help soften and soothe all of your edges and dags! Trimming thrown work: If you are planning to trim (or turn) your thrown work (and you should be), make sure you bag it well – your work should be leather hard to almost dry for easiest trimming. Use this step to finish the work completely – use a metal kidney to polish the surface, or a slightly damp sponge to give a freshly thrown look. Wipe the sponge around the rim after trimming, and check the inside of the pot for dags! Trimming slip cast work: Usually I will trim the rims of your work on the wheel the following day to make that stage easier, however you will still need to check your work for lumps and bumps. Last but not least – check that your name is still clearly on the bottom of your work. Step Five – Bisque Firing When the work is completely dry it can go into the bisque kiln. The bisque kiln is fired to 1000°C. This process burns off the water in the clay as well as some of the chemically bound water. The structure of the clay is not altered that much at this temperature. Inside the bisque kiln, the work is stacked a little, small bowl inside a larger bowl and onto a heavy plate. Smaller items like decorations or drink coasters might get stacked several high. Consideration is paid to the weight of the stack and shape of the work. A bisque kiln can fire about one and a half times the amount of work that the glaze kiln can fire. The firing takes about 10 hours to complete the cycle and about two days to cool down. Once it has been emptied the work is placed in the glaze room ready for you to decorate! Step Six – Glazing Decorating your work with colour can be a lot of fun – and time consuming! There are three main options for surface treatment at this stage: Oxide Washes Underglazes Glazes Washes and underglazes do not “glaze” the work – It will still need a layer of glaze to fully seal the clay (washes don’t need glaze on surfaces not designed for food or liquid as they can gloss up a little on their own). Underglazes are stable colourants that turn out pretty much how they look in the jar. They can be mixed with each other to form other colours and can be used like water colours to paint onto your work. Mostly they should have a clear glaze on top to seal them. Oxides are a different species – the pink oxide (cobalt) wash turns out bright blue for instance. They don’t always need a glaze on top, and some glazes can change the colour of the wash! The glazes need no other “glaze” on top! Be careful of unknown glaze interactions – you can put any combination of glaze in a bowl or on a plate, but only a single glaze on the outside of any vertical surface! Glazes are a chemical reaction under heat. We don’t know the exact chemicals in the Mayco glazes we use. I can guess by the way they interact with each other, however, on the whole, you need to test every idea you have, and not run the test on a vertical surface! Simply put, glaze is a layer of glass like substance that bonds with the clay underneath. Clay is made of silica, alumina and water. Glaze is made of mostly silica. Silica has a melting point of 1700°C and we fire to 1240°C. The silica requires a “flux” to help it melt at the lower temperature. Fluxes can be all sorts of chemicals – a common one is calcium – calcium has a melting point of 2500°C, however, together they both melt at a much lower temperature! Colourants are metal oxides like cobalt (blue), chrome (green through black), copper (green, blue, even red!), manganese (black, purple and pink) iron (red brown), etc. Different chemicals in the glaze can have dramatic effects. for example, barium carbonate (which we don’t use) turns manganese bright pink! Other elements can turn manganese dioxide brown, blue, purple and reddish brown. Manganese dioxide is a flux in and of itself as well. So, glazes that get their black and purple colours, often interact with other glazes and RUN! Our mirror black is a good example – it mixes really well with many glazes because it fluxes them – causes them to melt faster. It will also bring out many beautiful colours in the glazes because it’s black colouring most definitely comes from manganese dioxide! Glaze chemistry is a whole subject on it’s own! We use commercial Mayco glazes on purpose – for their huge range of colour possibilities, stability, cool interactions, artistic freedom with the ability to easily brush the glazes on and ease of use. We currently have almost 50 glazes on hand! A major project is to test the interactions of all glazes with each other. That is 2,500 test tiles!!!! I’m going to make the wall behind the wheels the feature wall of pretty colours! Step Seven – Glaze (Gloss or sometimes called “Glost”) Firing Most of the time this is the final stage of making your creation (but not always!) The glaze kiln goes to 1240°C. This is called cone 6, or midrange. It is the low end of stoneware temperatures. Stoneware clays and glazes are typically fired at cone 8 – 10, that is 1260 – 1290°C. The energy requirement to go from 1240°C to 1280°C is almost a 30% more! Our clay is formulated to vitrify (mature, turn “glass-like”) at 1240°, as are our glazes. A glaze kiln take around 12 hours to reach temperature and two to three days to cool down. Sometimes a third firing process is required – this is for decoration that is added to work after the glaze firing. For example – adding precious metals and lustres. this firing temperature is usually around 600 – 800°C depending upon the techniques being used. There are many students interested in gold and silver trims – we will be doing this third type of firing soon! After firing your work will be in the student finished work shelves. Remember to pay for it before you head out the door! There is a small extra charge for using porcelain clay (it’s more than twice the price of regular clay), and for any third firing process! Once your work has been fired it can not turn back into clay for millennia – so don’t fire it if you don’t like it! Put it in the bucket for recycling. https://firebirdstudios.com.au/the-process-of-making-pottery/The form of the jug has been in use for many centuries.Stoneware jug. Two tone brown glaze with pierced lip behind spout. Spout chipped.None.flagstaff hill, warrnambool, shipwrecked-coast, flagstaff-hill, flagstaff-hill-maritime-museum, maritime-museum, shipwreck-coast, flagstaff-hill-maritime-village, jug, ceramic jug -
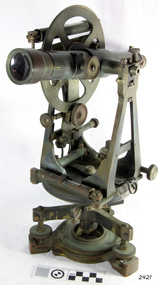 Flagstaff Hill Maritime Museum and Village
Theodolite, Troughton & Simms, Mid 19th Century
The theodolite was sold by T. Gaunt & Co. of Melbourne, a manufacturer, importer and retailer of a wide variety of goods including jewellery, clocks and watches, navigational and measuring instruments, dinnerware, glassware and ornaments. Thomas Gaunt photograph was included in an album of security identity portraits of members of the Victorian Court, Centennial International Exhibition, Melbourne, 1888. (See further details below.) History for Troughton & Simms: Edward Troughton & William Simms established a scientific instrument making business in London in 1826. Edward Troughton (1756-1835) had previously had his own scientific instrument business, inherited from his father. His achievement's included a transit telescope for Greenwich Observatory (1816) and the precision surveying instruments for the Ordnance Survey of Britain, Ireland and India. William Simms (1793-1860) had trained as a goldsmith and began to gain work dividing circles on fine astronomical instruments. When William Simms died in 1860, the business was taken over by his son James and nephew William. Troughton & Simms shop in Fleet Street became the hub of the finest scientific instrument made in London, in a period in which there was an expanding demand for precision instruments, for astronomy, surveying and precision measurement. They made instruments for Greenwich Observatory, for imperial surveys and exploring expeditions. When fire destroyed the Houses of Parliament in 1834, the firm was commissioned to create new standard lengths, this required 10 years of testing against the remaining old measurements. Troughton and Simms made several of the main instruments for Melbourne Observatory, including an 18 inch azimuth used of the Geodetic Survey, portable transit instrument (circa 1850), zenith sector (1860), a 4.5 inch equatorial telescope (1862), an 8 inch equatorial telescope (1874) spectroscope (1877) and an 8 inch transit instrument in (1884). While the firm had an excellent reputation for quality the company exasperated many of its customers with delays of years in delivering some instruments. History for Thomas Gaunt: Thomas Ambrose Gaunt (1829 – 1890) was a jeweller, clock maker, and manufacturer of scientific instruments, whose head office and showroom were at 337–339 Bourke Street, Melbourne, Victoria, Australia. Thomas Gaunt established Melbourne's leading watchmaking, optical and jewellery business during the second half of the 19th century. Gaunt arrived in Melbourne in 1852, and by 1858 had established his own business at 14 Little Bourke Street. Around 1869 he moved to new premises in Bourke Street on the corner of Royal Arcade, Gaunt's shop quickly became a Melbourne institution. Gaunt proudly advertised that he was 'The only watch manufacturer in the Australian colonies'. While many watches and clocks may have had Gaunt's name on the dial, few would have been made locally. Gaunt did make some watches for exhibitions, and perhaps a few expensive watches for wealthy individuals. Gaunt's received a telegraph signal from Melbourne Observatory each day to correct his main clock and used this signal to rate and repair ship's chronometers and good quality watches. Thomas Gaunt also developed a department that focused on scientific instrumentation, making thermometers and barometers (from imported glass tubes), telescopes, surveying instruments and microscopes. Significance: With the rapid urban expansion, one of the most important needs of the new colony was to survey and map the landscape of the Australian Colony’s interior. Theodolites, such as this one, made by Troughton and Simms, who were significant scientific instrument makers of the 19th century were instrumental to the colony's surveyors and would have played an important part in their everyday work. This transit theodolite remains of national significance due to its pioneering role in Australian science and its association with Australia's earliest surveyors and astronomers. It is also significant for its association with nineteenth-century surveying instruments and instrument makers. Theodolite, Vernier repetition theodolite with enclosed horizontal circle (of about 130 mm diameter). Vertical circle exposed and somewhat corroded (diameter about 115 mm). Plate level 20" per division. Altitude bubble 20" per division. Horizontal and vertical circle intervals 20". Original (blue/grey) paint. Altitude bubble setting screw disabled. Tribrach allows movement of theodolite by 15 mm inside tribrach (for centering).Inscribed on the inner mounting plate,“Specially made in England for T Gaunt & Co Melbourne” and inscribed a little lower “Troughton & Simms London”flagstaff hill, warrnambool, shipwrecked-coast, flagstaff-hill, flagstaff-hill-maritime-museum, maritime-museum, shipwreck-coast, flagstaff-hill-maritime-village, theodolite, t. gaunt & co, troughton & simms, scientific instrument, measuring instrument, surveyor's instrument -
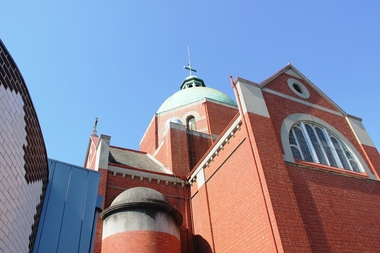 Ballarat Heritage Services
Photograph - Digital photographs, L.J. Gervasoni, Sacred Heart Kew, c2015
In 1872 members of the Jesuits purchased land in Walpole Street. Three years later, on 14 February 1875, Archbishop Gould laid a foundation stone for a school. By 1899 the land for the current church was purchased after mining speculator and Mt Lyell 'Copper King' James Crotty donated 3,000.00 pounds. The foundation stone was laid on 15 December 1918 by Archbishop Danial Mannix. The cost of constructing the domed church was 15,000.00 pounds. NEW PRESBYTERY AT KEW. Plans have been prepared by Mr. R. Harper, architect and builder, for the erection of a new presbytery for the Rev. P. Rafferty, adjoining the Sacred Heart Church, Cotham-road, Kew. The new building, which will be in brick and of two stories, will be behind the present priests' residence, which will continue to be used until the new presbytery is completed. The cost will be £6000, and the work will be begun almost immediately. The old presbytery was purchased many years ago by the late Rev. Fr. P. O'Donohue from the late Mr. Smart for £3000, and the full amount of the purchase money was donated by the late Mr. James Crotty. At different times additions were made to the building, but the small rooms made it altogether unsuitable as a residence for three priests, and made remodelling impracticable. The new presbytery will be in keeping with the Church of the Sacred Heart and the surroundings on the elevated site. At one time the old Sacred Heart Church was in Walpole-street, Kew. (The Advocate, 09 December 1937) The whole of the estate of the late Jas. Crotty has now been realised excepting 4000 shares in the Mount Lyell Company and a small parcel of general mining shares. All the debts and legacies, including £10,000 to St. Patrick's and £3300 to the testator's parish church at Kew, and also probate duty, have been paid. On present values the Mount Lyell shares. are worth a total of £37,000, and at the present rate of dividends the return represents an income of about £2000 per annum. Over and above this there is a sum of between £20,000 and £30,000 available for investment, and this, together with the dividends brings the income of the estate up to about £3000 per annum. A sum of £1100 per annum will be absorbed in annuities under the terms of the will. Whatever amount is realised beyond the sum necessary to pay the annuities goes to Archbishop Carr for the church and charitable purposes until the death of the last annuitant, when the residuary estate will be divided between the Little Sisters of the Poor (North cote) and St. Joseph's Home (Surrey Hills). (Launceston Examiner, 18 July 1899) Sunday last being the anniversary of the opening of the Sacred Heart Church, Kew, the pastor, Rev. Fr. Manly, made a special appeal at the various Masses. The beautiful design for marble altar for the Lady Chapel, which is on view in the vestibule, continues to attract attention. The Children of Mary Sodality have kindly undertaken to provide it, and the president, Miss Frances O'Sullivan, 43 Rideway-avenue, Kew, will be pleased to receive and acknowledge subscriptions from clients of Our Lady. They may also be placed in box near Lady Altar. (The Advocate, 06 December 1923) A Fincham and Sons organ was installed in 1927, and refurbished in 1977.Colour photograph of a brick church in Kew called Sacred Heart.kew, sacred heart, catholic church, danial mannix -
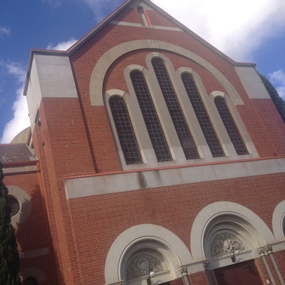 Ballarat Heritage Services
Photograph, Clare Gervasoni, Exterior of Sacred Heart Kew, 01/03/2015
In 1872 members of the Jesuits purchased land in Walpole Street. Three years later, on 14 February 1875, Archbishop Gould laid a foundation stone for a school. By 1899 the land for the current church was purchased after mining speculator and Mt Lyell 'Copper King' James Crotty donated 3,000.00 pounds. The foundation stone was laid on 15 December 1918 by Archbishop Mannix. The cost of constructing the domed church was 15,000.00 pounds. A Fincham and Sons organ was installed in 1927, and refurbished in 1977. NEW PRESBYTERY AT KEW. Plans have been prepared by Mr. R. Harper, architect and builder, for the erection of a new presbytery for the Rev. P. Rafferty, adjoining the Sacred Heart Church, Cotham-road, Kew. The new building, which will be in brick and of two stories, will be behind the present priests' residence, which will continue to be used until the new presbytery is completed. The cost will be £6000, and the work will be begun almost immediately. The old presbytery was purchased many years ago by the late Rev. Fr. P. O'Donohue from the late Mr. Smart for £3000, and the full amount of the purchase money was donated by the late Mr. James Crotty. At different times additions were made to the building, but the small rooms made it altogether unsuitable as a residence for three priests, and made remodelling impracticable. The new presbytery will be in keeping with the Church of the Sacred Heart and the surroundings on the elevated site. At one time the old Sacred Heart Church was in Walpole-street, Kew. (The Advocate, 09 December 1937) The whole of the estate of the late Jas. Crotty has now been realised ex cepting 4000 shares in the Mount Lyell Company and a small parcel of general mining shares. All the debts and legacies, including £10,000 to St. Patrick's and £3300 to the testator's parish church at Kew, and also probate duty, have been paid. On present values the Mount Lyell shares. are worth a total of £37,000, and at the present rate of dividends the return represents an income of about £2000 per annum. Over and above this there is a sum of between £20,000 and £30,000 available for investment, and this, together with the dividends brings the income of the estate up to about £3000 per annum. A sum of £1100 per annum will be absorbed in annuities under the terms of the will. Whatever amount is realised beyond the sum necessary to pay the annuities goes to Archbishop Carr for the church and charitable purposes until the death of the last annuitant, when the resi duary estate will be divided between the Little Sisters of the Poor (North cote) and St. Joseph's Home (Surrey Hills). (Launceston Examiner, 18 July 1899) Sunday last being the anniversary of tire opening of the Sacred Heart Church, Kew, the pastor, Rev. Fr. Manly, made a special appeal at the various Masses. The beautiful design for marble altar for the Lady Chapel, which is on view in the vestibule, continues to attract attention. The Children of Mary Sodality have kindly undertaken to provide it, and the president, Miss Frances O'Sulliv!an, 43 Rideway-avenue, Kew, will be pleased to receive and acknow r ledge subscriptions from clients of Our Lady. They may also be placed in box near Lady Altar. (The Advocate, 06 December 1923)Exterior of Sacred Heart Catholic Church Kew. sacred heart, kew, catholic church -
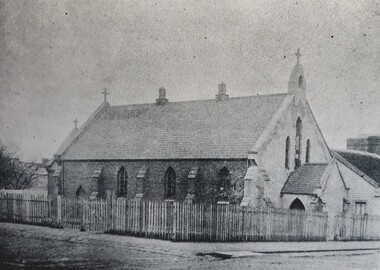 Ballarat Heritage Services
Photograph - Church, First Sacred Heart Catholc Church Kew
In 1872 members of the Jesuits purchased land in Walpole Street. Three years later, on 14 Februrary 1875, Archbishop Gould laid a foundation stone for a school. By 1899 the land for the current church was purchased after mining speculator and Mt Lyell 'Copper King' James Crotty donated 3,000.00 pounds. The foundation stone was laid on 15 December 1918 by Archbishop Daniel Mannix. The cost of constructing the domed church was 15,000.00 pounds. NEW PRESBYTERY AT KEW. Plans have been prepared by Mr. R. Harper, architect and builder, for the erection of a new presbytery for the Rev. P. Rafferty, adjoining the Sacred Heart Church, Cotham-road, Kew. The new building, which will be in brick and of two stories, will be behind the present priests' residence, which will continue to be used until the new presbytery is completed. The cost will be £6000, and the work will be begun almost immediately. The old presbytery was purchased many years ago by the late Rev. Fr. P. O'Donohue from the late Mr. Smart for £3000, and the full amount of the purchase money was donated by the late Mr. James Crotty. At different times additions were made to the building, but the small rooms made it altogether unsuitable as a residence for three priests, and made remodelling impracticable. The new presbytery will be in keeping with the Church of the Sacred Heart and the surroundings on the elevated site. At one time the old Sacred Heart Church was in Walpole-street, Kew. (The Advocate, 09 December 1937) The whole of the estate of the late Jas. Crotty has now been realised ex cepting 4000 shares in the Mount Lyell Company and a small parcel of general mining shares. All the debts and legacies, including £10,000 to St. Patrick's and £3300 to the testator's parish church at Kew, and also probate duty, have been paid. On present values the Mount Lyell shares. are worth a total of £37,000, and at the present rate of dividends the return represents an income of about £2000 per annum. Over and above this there is a sum of between £20,000 and £30,000 available for investment, and this, together with the dividends brings the income of the estate up to about £3000 per annum. A sum of £1100 per annum will be absorbed in annuities under the terms of the will. Whatever amount is realised beyond the sum necessary to pay the annuities goes to Archbishop Carr for the church and charitable purposes until the death of the last annuitant, when the resi duary estate will be divided between the Little Sisters of the Poor (North cote) and St. Joseph's Home (Surrey Hills). (Launceston Examiner, 18 July 1899) Sunday last being the anniversary of tire opening of the Sacred Heart Church, Kew, the pastor, Rev. Fr. Manly, made a special appeal at the various Masses. The beautiful design for marble altar for the Lady Chapel, which is on view in the vestibule, continues to attract attention. The Children of Mary Sodality have kindly undertaken to provide it, and the president, Miss Frances O'Sulliv!an, 43 Rideway-avenue, Kew, will be pleased to receive and acknow r ledge subscriptions from clients of Our Lady. They may also be placed in box near Lady Altar. (The Advocate, 06 December 1923)Stone church with buttresses and portio.sacred heart kew, church -
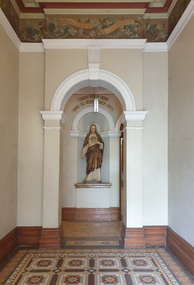 Ballarat Heritage Services
Photograph, Sacred Heart Mercy Convent, Victoria Street, Ballarat East
In 1872 members of the Jesuits purchased land in Walpole Street. Three years later, on 14 February 1875, Archbishop Gould laid a foundation stone for a school. By 1899 the land for the current church was purchased after mining speculator and Mt Lyell 'Copper King' James Crotty donated 3,000.00 pounds. The foundation stone was laid on 15 December 1918 by Archbishop Mannix. The cost of constructing the domed church was 15,000.00 pounds. A Fincham and Sons organ was installed in 1927, and refurbished in 1977. NEW PRESBYTERY AT KEW. Plans have been prepared by Mr. R. Harper, architect and builder, for the erection of a new presbytery for the Rev. P. Rafferty, adjoining the Sacred Heart Church, Cotham-road, Kew. The new building, which will be in brick and of two stories, will be behind the present priests' residence, which will continue to be used until the new presbytery is completed. The cost will be £6000, and the work will be begun almost immediately. The old presbytery was purchased many years ago by the late Rev. Fr. P. O'Donohue from the late Mr. Smart for £3000, and the full amount of the purchase money was donated by the late Mr. James Crotty. At different times additions were made to the building, but the small rooms made it altogether unsuitable as a residence for three priests, and made remodelling impracticable. The new presbytery will be in keeping with the Church of the Sacred Heart and the surroundings on the elevated site. At one time the old Sacred Heart Church was in Walpole-street, Kew. (The Advocate, 09 December 1937) The whole of the estate of the late Jas. Crotty has now been realised ex cepting 4000 shares in the Mount Lyell Company and a small parcel of general mining shares. All the debts and legacies, including £10,000 to St. Patrick's and £3300 to the testator's parish church at Kew, and also probate duty, have been paid. On present values the Mount Lyell shares. are worth a total of £37,000, and at the present rate of dividends the return represents an income of about £2000 per annum. Over and above this there is a sum of between £20,000 and £30,000 available for investment, and this, together with the dividends brings the income of the estate up to about £3000 per annum. A sum of £1100 per annum will be absorbed in annuities under the terms of the will. Whatever amount is realised beyond the sum necessary to pay the annuities goes to Archbishop Carr for the church and charitable purposes until the death of the last annuitant, when the resi duary estate will be divided between the Little Sisters of the Poor (North cote) and St. Joseph's Home (Surrey Hills). (Launceston Examiner, 18 July 1899) Sunday last being the anniversary of tire opening of the Sacred Heart Church, Kew, the pastor, Rev. Fr. Manly, made a special appeal at the various Masses. The beautiful design for marble altar for the Lady Chapel, which is on view in the vestibule, continues to attract attention. The Children of Mary Sodality have kindly undertaken to provide it, and the president, Miss Frances O'Sulliv!an, 43 Rideway-avenue, Kew, will be pleased to receive and acknowledge subscriptions from clients of Our Lady. They may also be placed in box near Lady Altar. (The Advocate, 06 December 1923) Number of photographes of the entrance to Sacred Heart Mercy Convent, Victoria Street, Ballarat East, as well as stained glass windows in the chapel.sacred heart mercy convent, ballarat east, stained glass window, sacred heart of jesus, john hove, announciation, kathleen blanche meagan, sacred heart college -
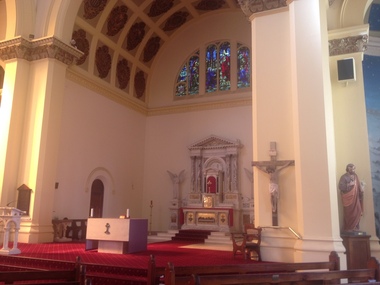 Ballarat Heritage Services
Photograph - Photograph - Colour, Clare Gervasoni, Sacred Heart Catholic Church, Kew. 2015, 01/03/2015
In 1872 membes of the Jesuits purchased land in Walpole Street. Three years later, on 14 Februrary 1875, Archbishop Gould laid a foundation stone for a school. By 1899 the land for the current church was purchased after mining speculator and Mt Lyell 'Copper King' James Crotty donated 3,000.00 pounds. The foundation stone was laid on 15 December 1918 by Archbishop Mannix. The cost of constructing the domed church was 15,000.00 pounds. A Fincham and Sons organ was installed in 1927, and refurbished in 1977. NEW PRESBYTERY AT KEW. Plans have been prepared by Mr. R. Harper, architect and builder, for the erection of a new presbytery for the Rev. P. Rafferty, adjoining the Sacred Heart Church, Cotham-road, Kew. The new building, which will be in brick and of two stories, will be behind the present priests' residence, which will continue to be used until the new presbytery is completed. The cost will be £6000, and the work will be begun almost immediately. The old presbytery was purchased many years ago by the late Rev. Fr. P. O'Donohue from the late Mr. Smart for £3000, and the full amount of the purchase money was donated by the late Mr. James Crotty. At different times additions were made to the building, but the small rooms made it altogether unsuitable as a residence for three priests, and made remodelling impracticable. The new presbytery will be in keeping with the Church of the Sacred Heart and the surroundings on the elevated site. At one time the old Sacred Heart Church was in Walpole-street, Kew. (The Advocate, 09 December 1937) The whole of the estate of the late Jas. Crotty has now been realised ex cepting 4000 shares in the Mount Lyell Company and a small parcel of general mining shares. All the debts and legacies, including £10,000 to St. Patrick's and £3300 to the testator's parish church at Kew, and also probate duty, have been paid. On present values the Mount Lyell shares. are worth a total of £37,000, and at the present rate of dividends the return represents an income of about £2000 per annum. Over and above this there is a sum of between £20,000 and £30,000 available for investment, and this, together with the dividends brings the income of the estate up to about £3000 per annum. A sum of £1100 per annum will be absorbed in annuities under the terms of the will. Whatever amount is realised beyond the sum necessary to pay the annuities goes to Archbishop Carr for the church and charitable purposes until the death of the last annuitant, when the resi duary estate will be divided between the Little Sisters of the Poor (North cote) and St. Joseph's Home (Surrey Hills). (Launceston Examiner, 18 July 1899) Sunday last being the anniversary of tire opening of the Sacred Heart Church, Kew, the pastor, Rev. Fr. Manly, made a special appeal at the various Masses. The beautiful design for marble altar for the Lady Chapel, which is on view in the vestibule, continues to attract attention. The Children of Mary Sodality have kindly undertaken to provide it, and the president, Miss Frances O'Sulliv!an, 43 Rideway-avenue, Kew, will be pleased to receive and acknow r ledge subscriptions from clients of Our Lady. They may also be placed in box near Lady Altar. (The Advocate, 06 December 1923)Colour photographs of the interior and exterior of Sacred Heart Catholic Church, Kew. sacred heart kew, church, kew -
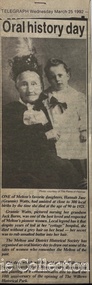 Melton City Libraries
Newspaper, Oral History Day, 1992
Mary Tolhurst M&DHS - March 29th Dunvegan Willows Park Melton 1992 Ladies Oral History Day Graham Minns President Ray Radford MC Sound recording transfer to CD 2011 by Tom Wood Edited typescript by Wendy Barrie 2013 I was born in Rockbank, and when I was five years old moved to Toolern Vale and started and finished school there. Toolern Vale only consisted of the Store, Post Office and shop, where you could buy your fodder, and pollard supplies, the Hall, the little Church and the bluestone School. The School changed shape three times from the 1800s[1869] til the time I went there. There was four generations of my family that went there and it was destroyed by fire in 1965. Marjorie nee Myers Butler. Yes, I remember along with it your lovely Ronisch piano. Mary, quite true! Marj what you say about the Ronisch piano. When I came the age to learn music my mum and dad couldn’t really afford it, but still what parents do for their children. They had Marj go along with them and pick this lovely Ronisch piano. It was known round the district. Everyone commented about the loss that lovely piano. After leaving school it was war time, 1939, then it was work, When I was 7 year old I was put out into the cow yard. In 1940 when the soldiers were going away our milk was confiscated it had to go to Bacchus Marsh. It used to go the Sunbury to be brine cooled and then go to Melbourne. Then they took it then to the Lifeguard Milk Factory at Bacchus Marsh. It had to go as condensed milk to the soldiers. This year is 50 years of the Land Army. I was an unofficial Land Army but they still kept check on me. I went onto married life and I followed the cows right through [howls of laughter] and we went on until the 1965 fire. That’s when we got out of the cows. Marjorie asks, was Granny Watts your grandmother or great grandmother? Mary: She was my great grandmother, the midwife of Melton. The 1965 fire started ¾ of a mile above our place, Frank Ryan’s sheds were burnt and his house was saved, then it wiped the School out, the Hall, the Church the Post Office and Store and little house that was Charlie Charlton’s in the early days. Mrs Wilson’s place was saved by the Fire Brigade by pulling boards off the side, and from there it went over the hill and it was stopped at the Rockbank Railway Station. If it had of got over the railway they said it would have gone into Werribee. A lot was burnt out in that strip. Mary nee Nixon Collins: 18 houses burnt that day. Audience question, did Melton get burnt that day? Ray: No. It came down through the Toolern Vale road and cut across about a mile and a half from the cross roads at Toolern Vale from north westerly to the south east and cut through over the Keilor road. Mary: It came in across the creek at Funstons in Toolern, then through Jim Minns. Dorothy was it your place then [nee Knox Beaty] to Ken Beatty’s and from there it went through to Doug McIntosh’s and to Cockbills and the wind changed and it came across to the railway line, and that is where they stopped it. [the cause of the fire was controversial, they had been burning off the night before and there was some talk of someone starting it. It was very hot and very strong wind, it was a terrible day] Ray: When the fire went through McIntosh’s they had a haystack on the north side of their house and the haystack got caught and the fire burnt a hole through the side of the house and the boys pyjamas on the bed. The house was saved. It came through like and express train roaring at you, I was at McIntosh’s when it went roaring past. You couldn’t see, dust and ash and tremendous heat. The fire started about 12 o’clock Jack [husband] said to me, fire, I said where, where? Just up the road, what have I got to do? and he went out and he had gone to the fire and left me. I tried to get the animals and I put out buckets of water, putting the buckets of water out saved my life. Chas Jones and another friend of his came in and they picked up the buckets of water, I thought I had better get out because the fire was on the haystack up the paddock and when I went to go out through the north side of the house and couldn’t get out, I’ll go through the front gate so I went around the other side of the house. I got caught there and Chassy Jones and his friend came round carrying the bucket of water and I panicked. He threw the bucket of water over me. Well that is what saved my life because I was damp, whenever we tried to leave the ball of fire came over me and over my shoulder and my hair was scorched. Chassy Jones lost his truck and Keith Watt his big truck because he had the water tank on it and they couldn’t get out of the yard. Granny Watt’s house, the first private hospital had condemned and Jack and I pulled it down and had it moved up to Toolern and had it in the yard a fortnight and it was all burnt and we didn’t get the shed we wanted. Every 13 years right up until Ash Wednesday fires, there has always been fire close at hand. The 1952 fire went down the back of the house, the 1965 fire took the house, and the house that I live in now, it is the third house that has been on that spot. When the Hunters owned it, Mrs Hunter was nearly burnt in her bed. They had a 13 roomed house. In 1924 the house burnt down, and there was another house was built there and that was the one that burnt down. Edna: So Mary built a brick veneer house. Marjorie: like the three little pigs [laughter] Collins - Mary M &DHS - March 29th 1992 Ladies oral history day at Dunvegan, Willows Park Melton. Graham Minns President Ray Radford MC Sound recording transferred to CD 2011 Edited typescript by Wendy Barrie 2013 Mary Collins nee Nixon born in Terang 1907 down in the Western District and we shifted to Melton when I was 5 and a half then I started school here in Melton, and spent all my school life at Melton State School, next to the Church of England, it’s called the Primary School now. I got my Qualifying and Merit Certificate then I left School because there wasn’t a High School. When I was 16 I got and job in the Melton Post Office and I worked there, I was the first girl in Melton to deliver the mail, and worked on the telephone and the Bank business. Mrs Ross and myself behind the counter, there were about 500 – 600 people in the Shire at that time and now when I go into the new Post Office there is 36,000 here there’s still 2 people behind the counter [laughter from the audience] and wait in a queue right out to the door. Times haven’t changed much have they! There was a manual telephone and you had to ring the handle, and there were eight subscribers when I went there and when I left there were 46 I had coaxed that number to join the telephone, even the police station didn’t have the phone on. The two Hotels and the two Chaff mills and Mr Ernie Barrie, Parkers the butcher, the Shire Office was No 8, and the Police house was next to the Courthouse on the corner. They were number 9. I can remember a lot of the numbers still. The Post Office was the Agency for the Commonwealth Bank [comment from audience member] I used to do the Bank business too, I left after four years there, mother wasn’t very well. The Inspector who used to come up to the Post Office asked me if I would take up casual Post Mistress and to go around the different districts but I refused and when Mrs Ross’s holidays were due I was the replacement. I wasn’t 21. I loved my work meeting everybody and most people had horse and jinkers and when the elderly would come in there would be Mr Tom Morrow, he only had one arm and Mrs Dunn came from Bulman’s road in their horse and jinker. They were elderly I would see them pull up out the front and quickly get their mail and run out to them because they didn’t have to get out of the jinker to tie up their horse. If someone had a baby in arms I would tear out and hold the baby while they got down. Mrs Ross was very very strict. I had to sweep the Post Office, she had a couple of mats and there would be a threepence or a sixpence under the mats show she knew whether I lifted the mat, I was whether I was honest or not. Graham: How much were your wages? I got 27/7 pence a week for a 52 hour week. I had to work every holiday except Good Friday and Christmas Day and even when it was Monday holiday I always had to go to work from 9am - !0 am, the Post Office was always open. In the winter I had to wait until twenty past six in case there were any telegrams to deliver. I delivered them on a push bike. One time Tom Barrie told me this years afterwards. I used to go home for lunch. We lived on the Keilor road and I used to ride my bike home. On the hot days the boys used to go and swim in the swimming pool down near a turn in the creek there was a hole where the boys would swim in the nude, they didn’t have any bathers and they didn’t have any watches in those days. Tom Barrie said they always used to watched for me as I was always about 3 minutes past 1, my lunch hour was from 1-2. One particular day they missed seeing me and swam on, and of course they were all late for school when they got back and were all kept in a night. I did get a fortnight holiday. I loved my work and I knew everyone in the district right from Toolern Vale to the Marsh and everybody at Melton South. Did you listen into conversations on the Switchboard? Oh no. [laughter] Melton did not have electricity then. I had to fill the lamps everyday with kerosene. The Staughton Memorial was outside the Post Office. It had four posts with the chain looped around it, and that’s where the people used to tie up their horses. Marjorie nee Myers Butler comments about sitting and swinging on the chains. Mr Fred Coburn lit the acetylene gas light in the Memorial. It was the only streetlight in Melton. There was no electricity until 1939. Ray Radford comments about another gas street light which was on the corner of Station road. [later] Mary passes around her school photos. Mary mentions the names of those who have passed away, Maisie McDonald, ,Marian Wraith, Hilda McCreey, and Valda McDonald. I have written the names on the back. Marjorie comments about Marie Jongebloed and Greta are the only two girls left out of big family of ten I think there were [hesitates] 4 or 5 girls and the rest were boys. Mary. Flora Woodley, Dorrie Flynn and Margaret McDonald are still alive. They are my age we were all born about 1907. Marjorie points out herself in a later photo [1921 and 1922 School ] Mary mentions the name Walsh and identyfies following names, the Parker boys, Ken Beaty, Malc and Linda Cameron, Maisie Mc Donald, Ted Radford, George Nixon, Norman Minns, he was later the Shire Secretary of Werribee. One of the Woodley girls. [Maisie Arthur] Marjorie: Rosie Shearwood, June Whiting Mary. Lily Mc Donald, she has passed away. Isabel Harrison nee Tinkler, she lives at Werribee, Doreen Rogers, Marjorie Walker, Jess McIntosh, Mary Gillespie. Mr Malone was the Junior teacher Mr Roe and Miss Cooke. Fred Myers, my sister [Elizabeth] and the year was 1921. Myers (Barrie) School Photo Collection. Many of the names were identified at the 1970 Centenary of Melton State School No. 430. Edna Barrie organised, compiled and typed the lists to accompany these photos for the year 1921. The 1922 photo shows the higher grades. Ladies Oral History Day event held by Melton and District Historical Society, article featured in the Telegraphlocal identities, local special interest groups -
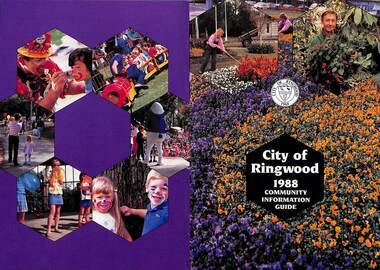 Ringwood and District Historical Society
Booklet, City of Ringwood 1988 Community Information Guide, 1988
Community information booklet issued by City of Ringwood for 1988 - covering the facilities and activities of the Ringwood Council and other local organisations and associations. Cover photographs: Front - Floral displays at Clock Tower and a scene at Council nursery; Back - Activities at Ringwood Festival held at Ringwood Lake in April each year.CONTENTS: (page no.) After School Activities Programme 23 Aged Services 21 Bicentennial 15 Building Information 29 By-Laws and Traffic Regulations 31 Caravans/Mobile Homes 31 Chief Executive's Message 10 Children's Services 22 Churches 40 Civic Centre 4 Committees of Council 5 Community Plan 15 Community Services 35 Corporate Management Structure 11 Council Meeting Dates 4 Council Representatives 8 Councillors 6 & 7 Disabled Persons Facilities 42 Dogs 31 Domiciliary Care 24, 25 & 26 Elderly Day Care 44 Elderly Persons Units 29 Emergency Telephone Numbers 53 Employment Opportunities in Ringwood 26 European Wasps 28 Family Day Care 22 Finances 17 Fire Hazards 31 Future Leaders 16 Golf Course 34 Home Handyman Services 25 Home Help 26 Immunisation Programme 27 Incinerators 32 Knaith Road Child Care Centre 22 & 23 Library 30&31 Maternal & Child Health Centre 30 Mayoral Message – Cr. John R. Caffyn 3 Meals on Wheels 24 Members of Parliament 9 Playgroups 33 Pre-Schools 53 Primary Arterial Road Network in Ringwood 13 Rates—New Collection Service 18 & 19 Ringwood Aquatic Centre 14 & 15 Ringwood Bypass Road 12 Ringwood Convention & Performing Arts Centre 33 Ringwood District Centre Structure Plan 12 Rubbish Collection Service 35 & 36 Schools 56 Youth Outreach Worker 20 rinx -
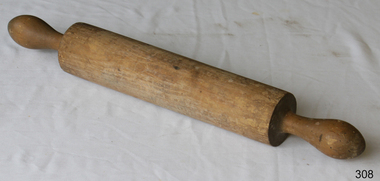 Flagstaff Hill Maritime Museum and Village
Domestic object - Wooden Rolling Pin, First half of 20th Century
A rolling pin is a simple tool used to flatten dough. The first civilisation known to have used the rolling pin was the Etruscans. Their advanced farming ability, along with a tendency to cultivate many plants and animals never before used as food and turn them into sophisticated recipes, were passed to invading Greeks, Romans, and Western Europeans. Thanks to the Etruscans, these cultures are associated with gourmet cooking. To prepare their inventive foods, the Etruscans also developed a wide range of cooking tools, including the rolling pin. Although written recipes did not exist until the fourth century B.C., the Etruscans documented their love of food and its preparation in murals, on vases, and on the walls of their tombs. Cooking wares are displayed with pride; rolling pins appear to have been used first to thin-roll pasta that was shaped with cutting wheels. They also used rolling pins to make bread (which they called puls) from the large number of grains they grew. Natives of the Americas used more primitive bread-making tools that are favoured and unchanged in many villages. Chefs who try to use genuine methods to preserve recipes are also interested in both materials and tools. Hands are used as "rolling pins" for flattening dough against a surface, but also for tossing soft dough between the cook's two hands until it enlarges and thins by handling and gravity. Tortillas are probably the most familiar bread made this way. Over the centuries, rolling pins have been made of many different materials, including long cylinders of baked clay, smooth branches with the bark removed, and glass bottles. As the development of breads and pastries spread from Southern to Western and Northern Europe, wood from local forests was cut and finished for use as rolling pins. The French perfected the solid hardwood pin with tapered ends to roll pastry that is thick in the middle; its weight makes rolling easier. The French also use marble rolling pins for buttery dough worked on a marble slab. Glass is still popular; in Italy, full wine bottles that have been chilled make ideal rolling pins because they are heavy and cool the dough. Countries known for their ceramics make porcelain rolling pins with beautiful decorations painted on the rolling surface; their hollow centres can be filled with cold water (the same principle as the wine bottle), and cork or plastic stoppers cap the ends. Designs for most rolling pins follow long-established practices, although some unusual styles and materials are made and used. Within the family of wooden rolling pins, long and short versions are made as well as those that are solid cylinders (one-piece rolling pins) instead of the familiar style with handles. Very short pins called mini rolling pins make use of short lengths of wood and are useful for one-handed rolling and popular with children and collectors. Mini pins ranging from 5 to 7 in (12.7-17.8 cm) in length are called texturing tools and are produced to create steam holes and decorations in pastry and pie crusts; crafters also use them to imprint clay for art projects. These mini pins are made of hardwoods (usually maple) or plastic. Wood handles are supplied for both wood and plastic tools, however. Blown glass rolling pins are made with straight walls and are solid or hollow. Ceramic rolling pins are also produced in hollow form, and glass and ceramic models can be filled with water and plugged with stoppers. Tapered glass rolling pins with stoppers were made for many centuries when salt imports and exports were prohibited or heavily taxed. The rolling pin containers disguised the true contents. The straight-sided cylinder is a more recent development, although tapered glass pins are still common craft projects made by cutting two wine bottles in half and sealing the two ends together so that the necks serve as handles at each end.Tiny rolling pins are also twisted into shape using formed wire. The pins will not flatten and smooth pastry, and the handles do not turn. The metal pins are popular as kitchen decorations and also to hang pots, pans, and potholders. https://www.encyclopedia.com/sports-and-everyday-life/food-and-drink/food-and-cooking/rolling-pinThe use of the rolling pin to make thin pastry or pasta.Wooden rolling pin with some damage on cylinder section.None.flagstaff hill, warrnambool, shipwrecked-coast, flagstaff-hill, flagstaff-hill-maritime-museum, maritime-museum, shipwreck-coast, flagstaff-hill-maritime-village, rolling pin, cooking, pastry -
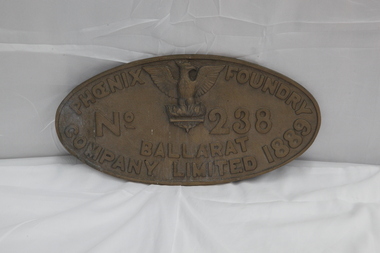 Puffing Billy Railway
Phoenix Foundry Plate
Phoenix Foundry Plate - replica Made about 2010 cast off original from locomotive Y112 The Phoenix Foundry (1857-1906) fabricated iron and brass products - including engines and pumping gear for the mining industry, locomotives, steam rollers, water pipes, water gauges and diverse small items. Throughout its operation the business was located at premises on Armstrong Street, Ballarat . Background In 1852, at the age of thirty-three and after a year of operating his own engineering business at Williamstown, Lancashire-born blacksmith and engineer George Threlfall (1819-1897) arrived on the Sebastopol gold plain and immediately undertook blacksmith work repairing picks and tools for the miners. Little did he know that this fledgling business would be the genesis of the most iconic business of nineteenth-century Ballarat. At approximately thirty-nine years of age, English mechanical engineer Richard Carter (c1814-1883) came to Australia on board the Arrogant - arriving in Melbourne on 19 April 1853. He soon travelled to the Ballarat goldfields. Born in the year 1830 in Belfast (Ireland), mechanical engineer William Henry Shaw (1830-1896) arrived in Australia in October 1853. He worked briefly with George Threlfall at Sebastopol, then moved to Geelong to manage the small foundry of Frederick Moore. Twenty-four year old English-born iron moulder Robert Holden (c1831-?) left his home in Belfast (Ireland) in late 1854 and travelled from Liverpool to Melbourne on board the James Baines - arriving in February 1855. Afterwards he joined his brother-in-law William Henry Shaw in Ballarat. History Foundation to Incorporation In March 1857 George Threlfall joined in business with Richard Carter, William Henry Shaw and Robert Holden. They relocated Threlfall's successful engineering enterprise from Sebastopol to new premises in Armstrong Street, Ballarat. This business was then known variously as the Phoenix Iron Works Company, Phoenix Foundry or Messrs Carter and Co. By 15 April 1857 they were advertising that they were open for business as engineers, millwrights, boiler makers, smiths, iron founders and brass founders. In January 1858 George Threlfall left the partnership. Incorporation to 1889 1890 to Closing locomotive Y112 Builder: Phoenix Foundry, Ballarat Builder’s Number & Year: 238 of 1889 Designer: Kitson & Co Wheel Arrangement: 0-6-0 No. in class: 31 Entered Service: 24 July 1889 Taken off Register: 11 May 1961 The origins of the Victorian Railways Y-class lay with the decision by Kitson & Co, Leeds to place a 0-6-0 freight locomotive on display at the Centennial International Exhibition, Melbourne in 1888, together with a 2-4-2T suburban passenger locomotive. This marketing initiative proved successful as the Victorian Railways were clearly impressed with these machines, with both purchased after the exhibition and becoming the patterns for new standard locomotive types. Thirty examples of the 0-6-0 heavy freight design were ordered from the Phoenix Foundry, Ballarat, becoming the Y-class for main line heavy freight duties, while the 2-4-2T design became the E-class for Melbourne suburban passenger duties (represented by preserved locomotive E 236). The Y-class prove successful in service and accrued high mileages. They were inevitably superseded by more modern and powerful steam locomotives and a number cascaded into shunting and yard pilot duties, often with the addition of shunters steps along both locomotive and tender. Y 112 was one of the last in service when withdrawn in 1961. Fortunately it was saved for preservation and plinthed in central Ballarat, ostensibly in commemoration of Phoenix Foundry. I understand it is owned by the Sovereign Hill Museums Association. During the 1980’s, Y 112 was leased to Steamrail Victoria and restored to operation at an industrial site in Ballarat. Y 112 features an attractive lined apple green livery and has performed various rail tours around Victoria since restoration. It is normally based at the Steamrail depot in Ballarat East. Y 112 is the only 19th century design in operational condition in Victoria and as such is one of the oldest working steam locomotive in Victoria . Historic - Phoenix Foundry Plate - replica Made about 2010 cast off original from locomotive Y112Phoenix Foundry Plate Oval shaped plate with an image of a phoenix centered at the top with lettering surrounding it.Phoenix Foundry No 238 Ballarat Company Limited 1889.puffing billy, phoenix foundry, ballarat, locomotive y112, phoenix foundry plate - replica -
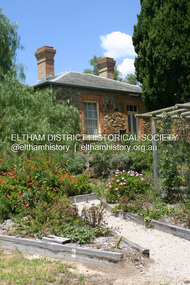 Eltham District Historical Society Inc
Photograph - Digital Photograph, Alan King, Ellis Cottage, Diamond Creek, 23 January 2008
Built by William Ellis in 1865 of local uncut stone about 30cm thick, the cottage is now a museum and home to the Nillumbik Historical Society. Ellis Cottage is historically significant for its association with the Ellis family, who were pioneers of the Diamond Creek district and the benefactors of the notable Nillumbik Cemetery gateway. It illustrates the development of farming in the area. Ellis Cottage is historically and technically significant for its rare use of uncut local stone for building purposes. Covered under Heritage Overlay, Nillumbik Planning Scheme. National Estate Published: Nillumbik Now and Then / Marguerite Marshall 2008; photographs Alan King with Marguerite Marshall.; p79 Ellis Cottage, built by William Ellis, is a memorial to the courage of pioneers in the Diamond Valley area.1 Now a museum and home to the Nillumbik Historical Society, it is a fine example of an early settler’s house in Diamond Creek – and one of the few original buildings standing from the middle of the 19th century. It is a poor man’s cottage – typical of the dwellings of those who had to work hard to wrest a living in this district, because most of the land was not fertile enough for major forms of farming. The pretty stone cottage at 10 Nillumbik Square, built in 1865, is made of local uncut stone about one foot (30 cm) thick. It once stood near the centre of the 147 acres (59.4ha) Ellis bought in 1850. The property extended from Diamond Creek to Reynolds Road and from Perversi Avenue to the Wattle Glen School. It stood in the electoral parish of Nillumbik. The Nillumbik township (later called Diamond Creek) was not created until 1867. In 1912 the property was cut in half by the new railway to Hurstbridge. Ellis paid £147/10/- for the land - about three times what a Victorian farmer would usually earn in a year. Despite the poor quality soil Ellis became a very successful farmer with an orchard, vegetables and a dairy herd. Five years later, in 1855, Ellis bought 70 acres (28.3ha) from neighbour, Hugh Larimour. In 1857 Ellis bought 208 acres (84ha) at Yarra Glen. In 1877 he bought 122 acres (49.3ha) at Diamond Creek and later bought land at Greensborough and Woodstock. Ellis was born in 1815 at Blackawton, a small Devonshire village, and became a tenant farmer. It is not known why Ellis came out to Australia or settled in Diamond Creek. In 1847 he married Margaret Child at the Melbourne Presbyterian Church. Ellis and Child had no children and 18 years after the wedding, while probably living in Kangaroo Ground, Ellis built this small cottage. The simple cottage has a central hall and two rooms on each side. To maximise the small space the ceiling cavity was designed large enough to provide sleeping accommodation accessed via a ladder. Each room was heated by an open fireplace and the one in the kitchen was large enough to roast a sheep. A large cellar under the front room probably stored farm produce. Water came from a well as reticulated water did not arrive at Diamond Creek until 1914. In 1870 Ellis’ 22 year-old nephew Nathaniel joined him from England.2 Until 1890 they developed Ellis Park, praised in The Evelyn Observer, May 30,1890 as a model farm. Ellis had become wealthy, and on his death in 1896 his estate was valued at £9000. In his will he left £100 to construct memorial gates at the Nillumbik Cemetery where he was buried.3 Ellis left the farm to his second wife Louisa. As he had no children, upon her death the farm passed to Nathaniel, but he did not take it up. The farm was sold and leased several times until 1967, when engineer Phillip Lovitt bought the property and carried out major structural works. The Shire of Diamond Valley bought it in the 1980s and in 1989 restored it with the Nillumbik Historical Society. The stone walls of the cottage had been plastered with mud and straw mortar, which were removed as they were riddled with vermin. Doors, windows and a floor were replaced and the original roof of timber shingles had been replaced with slate. The well was too deeply cracked to be restored, so was used for a flower bed. Two mature Italian Cypresses at the entry are also heritage protected as they relate to similar trees planted at Shillinglaw Cottage and other early buildings in Nillumbik Shire.This collection of almost 130 photos about places and people within the Shire of Nillumbik, an urban and rural municipality in Melbourne's north, contributes to an understanding of the history of the Shire. Published in 2008 immediately prior to the Black Saturday bushfires of February 7, 2009, it documents sites that were impacted, and in some cases destroyed by the fires. It includes photographs taken especially for the publication, creating a unique time capsule representing the Shire in the early 21st century. It remains the most recent comprehenesive publication devoted to the Shire's history connecting local residents to the past. nillumbik now and then (marshall-king) collection, ellis cottage, diamond creek, nillumbik historical society, william ellis -
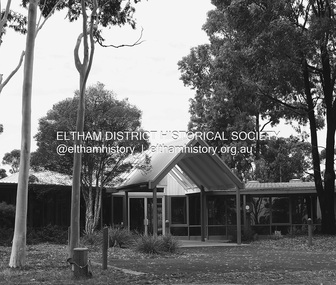 Eltham District Historical Society Inc
Photograph - Digital Photograph, Alan King, Wycliffe Centre, Graham Road, Kangaroo Ground, 2008
Wycliffe translates the Bible for people around the world. Published: Nillumbik Now and Then / Marguerite Marshall 2008; photographs Alan King with Marguerite Marshall.; p171 The peace and beauty of Australia’s Wycliffe Centre reflects what it aims to bring to thousands of people around the world. Kangaroos calmly feed, accompanied by bird song, near the mud-brick buildings set amongst Kangaroo Ground’s rolling hills. On 11 hectares off Graham Road, the centre aims to transform people’s lives by giving groups around the world, with no written language, help with literacy and Bible translation into their own tongue. Associate Director, Harley Beck, says reading the Bible (probably history’s most influential collection of books), in one’s own language, provides a strong moral basis, helping people withstand exploitation and escape poverty. One of Wycliffe’s field partners, SIL (formerly Summer Institute of Linguistics) Papua New Guinea, has won two UNESCO awards, and SIL branches in many other countries have won international and national awards. The translators are modern heroes. They undertake hardships, forsaking for years, sometimes decades, a salary and the soft western lifestyle, to face loneliness and primitive conditions that most of us would not even contemplate. No staff is paid a salary. An example is the first Australian Director and former International President, David Cummings, who for 50 years has depended on donations from supporters and churches. Students of all ages at the EQUIP Training School on the site come from all walks of life. They train in linguistics and learn how to communicate in a way that is sensitive to other cultures. Spiritual resilience is encouraged, enabling people to persist until the job in the field is done, which takes on average ten to 15 years. Courses range from a few weeks to a year. The Wycliffe concept was born in the 1920s when American missionary, Cameron Townsend, found a Spanish Bible was inadequate to evangelise the Cakchiquel people of Guatemala. When a Cakchiquel man challenged: ‘If your God is so great, why doesn’t he speak my language?’ Townsend decided to translate the Bible into all languages! He founded a linguistics training school in 1934, naming it after 14th century theologian John Wycliffe, the first to translate the Bible into English. The first Wycliffe Bible was completed in 1951 in the Mexican San Miguel Mixtec language. In May 2007 after 30 years of work, Wycliffe Australia, with other organisations, completed the first Bible for indigenous people in the Kriol* language, for about 30,000 people in northern Australia. Wycliffe Australia began in 1954 in the Keswick Bookshop basement, Collins Street, Melbourne. As the organisation grew, its quarters became so cramped that Director Cummings at times interviewed potential recruits in his car! The development of the Kangaroo Ground property is a story of faith and generosity. In 1967 Cummings proposed moving to a larger property despite having no funds. Within a month Wycliffe received a $20,000 donation and a gift of land towards a national centre. An earlier owner of the Kangaroo Ground property, Mrs Elsie Graham, would have been delighted, as she had wanted her land to be used for ‘God’s service’. Mud-brick architect and Christian, Alistair Knox, offered to design the centre at no charge. Despite a drought, straw was donated to make bricks. Many volunteers helped with the building, including church youth groups who made mud-bricks. Volunteers planted thousands of native plants, watered by recycled water from the site’s dam. Building began in 1968 and in 1983 the South Pacific SIL School (now EQUIP Training) followed. Wycliffe, the world’s largest linguistic organisation, and other organisations, have translated the Scriptures into more than 2000 languages. But another 2000 languages still lack any portion of the Bible. However translations are now completed more quickly, because of new computer programs and as education spreads, more speakers of the local language can assist. Despite the growth of secularisation, Beck says support for Wycliffe Australia, which has offices in all states and the ACT, is stronger than ever. * Kriol is a Pidgin language, which has become a speech community’s prime language.This collection of almost 130 photos about places and people within the Shire of Nillumbik, an urban and rural municipality in Melbourne's north, contributes to an understanding of the history of the Shire. Published in 2008 immediately prior to the Black Saturday bushfires of February 7, 2009, it documents sites that were impacted, and in some cases destroyed by the fires. It includes photographs taken especially for the publication, creating a unique time capsule representing the Shire in the early 21st century. It remains the most recent comprehenesive publication devoted to the Shire's history connecting local residents to the past. nillumbik now and then (marshall-king) collection, graham road, kangaroo ground, wycliffe centre -
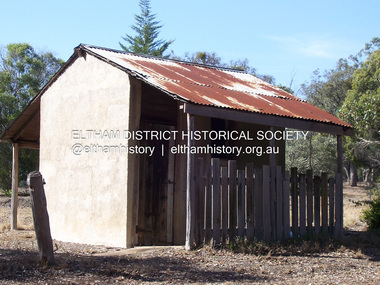 Eltham District Historical Society Inc
Photograph - Digital Photograph, Marguerite Marshall, Stuchbery Farm dairy, 14 March 2008
Stuchbery Farm was situated on the Plenty River bounded by Smugglers Gully to the north and La trobe Road, Yarrambat, to the east. Alan and Ada Stutchbery moved to the valley in 1890, first living in a tent where four children were born. Alfred built a home and outbuildings around 1896. They planted an orchard, then a market garden and developed a dairy. Published: Nillumbik Now and Then / Marguerite Marshall 2008; photographs Alan King with Marguerite Marshall.; p179 The dramatic steep-sided Plenty Gorge lies along the divide of two geological areas, and separates the Nillumbik Shire and the City of Whittlesea. On the Nillumbik side are undulating hills and sedimentary rock, and in Whittlesea, lies a basalt plain formed by volcanic action up to two million years ago. This provides the Plenty Gorge Park with diverse vegetation and habitats, making it one of Greater Melbourne’s most important refuges for threatened and significant species. The park, established in 1986, consists of around 1350 hectares, and extends 11 kilometres along the Plenty River, from Greensborough to Mernda. It provides a wildlife corridor for around 500 native plant and 280 animal species. The area’s plentiful food and water attracted the Wurundjeri Aboriginal people and then European settlers. By 1837 squatters had claimed large runs of land for their sheep and cattle. The Plenty Valley was among the first in the Port Phillip District to be settled - mainly in the less heavily timbered west - and was proclaimed a settled district in 1841. But by the late 1880s, the settlers’ extensive land clearing for animal grazing, then agriculture, depleted the Wurundjeri’s traditional food sources, which helped to drive them away. Many Wurundjeri artefacts remain (now government protected), and so far 57 sites have been identified in the park, including scarred trees, burial areas and stone artefacts. Pioneer life could be very hard because of isolation, flooding, bushfires and bushrangers. Following the Black Thursday bushfires of 1851, basalt was quarried to build more fire-resistant homes. Gold discoveries in the early 1850s swelled the population, particularly around Smugglers Gully; but food production made more of an impact. In the late 1850s wheat production supplanted grazing. In the 1860s the government made small holdings available to poorer settlers. These had the greatest effect on the district, particularly in Doreen and Yarrambat, where orchards were established from the 1880s to 1914. Links with a prominent early family are the remains of Stuchbery Farm, by the river’s edge bounded by Smugglers Gully to the north and La Trobe Road, Yarrambat, to the east. The Stuchberys moved to the valley in 1890, and the family still lives in the area. In 1890, Alfred and Ada first lived in a tent where four children were born, then Alfred built the house and outbuildings around 1896. They planted an orchard, then a market garden, and developed a dairy. The family belonged to the local Methodist and tennis communities. Their grandson Walter, opened the Flying Scotsman Model Railway Museum in Yarrambat, which his widow, Vi, continues to run. Wal was also the Yarrambat CFA Captain for 22 years until 1987. Walter sold 24 hectares in 1976 for development - now Vista Court - and in 1990, the remaining 22.6 hectares for the park. Remaining are an early stone dairy and remnants of a stone barn, a pig sty and a well. Until it was destroyed by fire in 2003, a slab hut stood on the Happy Hollow Farm site, at the southern end of the park. The hut is thought to have been built in the Depression around 1893. This was a rare and late example of a slab hut with a domestic orchard close to Melbourne. Emmet Watmough and his family first occupied the hut, followed by a succession of families, until the Bell family bought it around 1948. There they led a subsistence lifestyle for 50 years, despite encroaching Melbourne suburbia. The Yellow Gum Recreation Area includes the Blue Lake, coloured turquoise at certain times of the year. Following the 1957 bushfires, this area was quarried by Reid Quarries Pty Ltd for Melbourne’s first skyscrapers, then by Boral Australia. However in the early 1970s water began seeping into the quarry forming the Blue Lake and the quarry was closed. The State Government bought the site in 1997 and opened it as a park in 1999.This collection of almost 130 photos about places and people within the Shire of Nillumbik, an urban and rural municipality in Melbourne's north, contributes to an understanding of the history of the Shire. Published in 2008 immediately prior to the Black Saturday bushfires of February 7, 2009, it documents sites that were impacted, and in some cases destroyed by the fires. It includes photographs taken especially for the publication, creating a unique time capsule representing the Shire in the early 21st century. It remains the most recent comprehenesive publication devoted to the Shire's history connecting local residents to the past. nillumbik now and then (marshall-king) collection, ada stuchbery, alan stuchbery, dairy, stuchbery farm, farm buildings, yarrambat, plenty gorge park -
 Moorabbin Air Museum
Document - Wamira A10 Documents and drawings
-
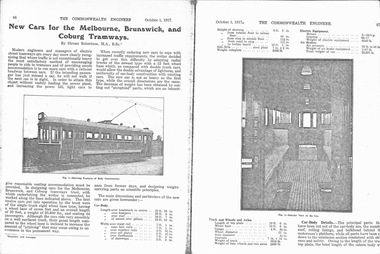 Melbourne Tram Museum
Document - Report, The Commonwealth Engineer, Electrical Engineer, The Electrical Engineer and Merchandiser, Noiseless Tramcar - first Australian Vehicles - Bogies fitted have special noise reducing features, 1917 - 1951
Set of 12 reports, photocopied onto heat sensitive paper from various magazines. Documents match the image numbers. .1 - 2 pages, from The Commonwealth Engineer, 1/10/1917 - "New Cars for the Melbourne Brunswick and Coburg Tramways", written by Straun Robertson. .2 - 2 pages, from The Commonwealth Engineer, 1/3/1919 - "Double Bogie Combination Tram Car - St Kilda Brighton Electric Line". .3 - 2 pages - Electrical Engineer - 15/6/1924 - "One Man cars for Melbourne and Geelong Vic. The Brill Birney Safety Car" .4 - 1 page - Electrical Engineer - 15/11/1925 - "Standard Car for Melbourne Tramways" - has sketch of W2 369. .5 - 2 pages - Electrical Engineer - 15/8/1927 - "New Bogie car for Melbourne Tramways" Y class. .6 - 2 pages - Electrical Engineer -15/3/1936 - "Tramcar of New type for Melbourne - Large car for Two-man or One-man operation" - Y1 class .7 - 3 pages, The Electrical Engineer and Merchandiser - 15/3/1932 - "Modern Tramcars for Melbourne - Design for reduction of noise and construction with electrical Welding" W3 class. .8 - 2 pages, The Electrical Engineer and Merchandiser - 15/11/1933 - "New Tramcars for Melbourne" - has sketch of the W4 class tram. .9 - 3 pages, The Electrical Engineer and Merchandiser - 16/12/1935 - "Melbourne's Lates Tramcars, comfortable Accommodation and modern traction equipment" - W5 class .10 - 3 pages - The Electrical Engineer and Merchandiser - 15/3/1939 - "Improved Type Tramcar - advanced truck design, pneumatically operated doors, special lighting, acceleration 3pmh per sec." SW5 class. .11 - 3 pages - The Electrical Engineer and Merchandiser - 15/9/1950 - "Noiseless Tramcar - first Australian Vehicles - Bogies fitted have special noise reducing features - motor drive through bevel gears, dynamic braking" - PCC 980 (See also Reg Item 5601 for a similar report) .12 - 1 page - handwritten on the rear of a copy of item 11 - Editorial from the Oct. 1951 issue of same magazine looking at the rate of acceleration. Reprint of .7 added 30/7/2019, from papers ex Robert Green - in poor condition, has been folded, both left and right hand edges in multiple tears. The photos are good. Measures 282H x 220W.trams, tramways, mmtb, mbctt, new tramcars, vr, bogie trams, birney, x class, w2 class, y class, y1 class, w3 class, one man trams, w4 class, w5 class, sw5 class, pcc class, tramcar design, electrical engineering