Showing 1091 items
matching north blue
-
 Friends of Ballarat Botanical Gardens History Group
Work on paper - Ballarat Botanical Garden Conservation Analysis and Policy, Volume 1, December 1994 and 2002, December 1994 and April/May 2002
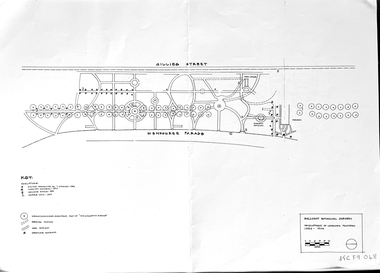
The work entitled Ballarat Botanical Garden Conservation Analysis and Policy was prepared for the City of Ballarat.The pages selected give some perspective on the policy and planning of the Ballarat Botanical Gardens in the recent past.14 pages printed on both sides with black and white pictures and one map. Pages are not numbered consecutively; a selection has been made from the work cited in the name and title."Joan" is printed in blue biro in the top lefthand corner of the title page. [Presumably Joan Garner, President of the FBBG].ballarat botanical garden, conservation analysis and policy, city of ballarat, allom lovell & associates pty ltd., conservation architects, john patrick pty.ltd., landscape architects, friends of ballarat botanical gardens, john garner, doctor john garner, john garner collection, gardens, ballarat -
 Friends of Ballarat Botanical Gardens History Group
Work on paper - What is a Botanic Garden and the Future of Provincial Botanic Gardens, John Hawker, Heritage, Victoria, 1999, 15/4/1999
This article is directly relevant to the Ballarat Botanical Gardens as significant provincial Botanic Gardens.This article enables comparisons to be drawn between various Australian Provincial Botanic Gardens. 2 pages printed on both sides2 of the 4 short paragraphs in the "Conclusion" of this article have been marked with blue biro.john garner, doctor, john garner collection, ballarat botanic gardens, john hawker, heritage victoria, a botanic garden, provincial botanic gardens, friends of ballarat botanical gardens, gardens, ballarat -
Friends of Ballarat Botanical Gardens History Group
Work on paper - Gordon Cottage Officially Opened, The Ballarat Courier 16 August 1934, 16/8/1934
The official opening of the Gordon Cottage was a significant event in 1934 BallaratThis article covers not only the Vice-Regal Visit to Ballarat but the Reception at City Hall, the Unveiling of the Gordon Plaque at Craig's Hotel and the Official opening of the Adam Lindsay Cottage.2 pages of newspaper print in columnsTop righthand corner is written in blue biro, 16 August, 1934. p.1.john garner, doctor, john garner collection, friends of ballarat botanical gardens, craft cottage, lord and lady huntingfield, governor of victoria, adam lindsay gordon cottage, adam lindsay gordon plaque, craig's hotel, ballarat courier, gordon committee, gardens, ballarat -
 Bacchus Marsh & District Historical Society
Banner, KEIO Hawks Football Club Pennant
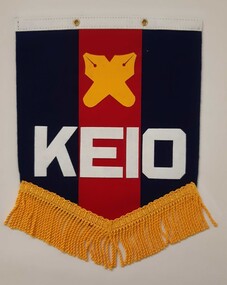
The Keio University Hawks were one of the first two Aussie rules teams in Japan, along with the Waseda University Bombers. Those teams were formed to play a warm-up game at Yokohama baseball stadium before an exhibition match between VFL teams Essendon and Hawthorn. The first visit by the Keio Hawks to Australia was in September 1988, About 20 students from Keio and two or three from other universities made the trip. Their visit included training sessions at the Hawthorn and North Melbourne clubs. They then played Japan's first international match against the Sunbury Football Club's under-19 team.The following year they returned to Australia and during this visit played a match in Bacchus Marsh in September 1989. The Keio Hawks returned to Australia over subsequent years in the 1990s included some visits to Bacchus Marsh. During one of these visit a Keio Hawks pennant was presented to the Shire of Bacchus Marsh.Football club banner. Three vertical felt stripes in red and blue with the team name KEIO written in white felt block letters across the width of the banner. Along the top of the banner, a narrow strip of white felt with two metal eyelets to allow for display. Gold coloured textile fringe along the V-shaped bottom of the banner. In a whimsical reference to the university origin of the club, there are two gold felt crossed pen-nibs on the central red section. KEIOkeio university australian rules football club, australian rules football teams japan, australian rules football bacchus marsh -
 Mont De Lancey
Book, Oxford University Press, 1. The Holy Bible, containing the Old and New Testaments 2. Daily Light on the Daily Path, Unknown
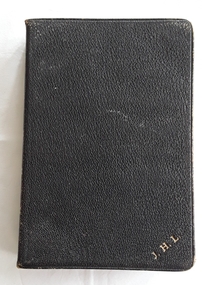
1. A Holy Bible containing the Old and New Testaments. At the back there is an Indexed Atlas to the Holy Bible with a List of maps and a List of Biblical Names. This is followed by twelve yellow and blue coloured maps of the Lands and Nations of the Bible. 2.A miniature book titled Daily Light on the Daily Path, A Devotional text book for everyday in the year..1. A black leatherette softcover Holy Bible contains the Old and New Testaments with the title and publisher Oxford printed in gold lettering on the spine. There are five embossed double lines on the spine too. On the front cover at the bottom right there is printed in gold lettering J.H.L. At the back there is an Indexed Atlas to the Holy Bible with a List of maps and a List of Biblical Names. This is followed by twelve yellow and blue coloured maps of the Lands and Nations of the Bible. The pages have gilt edges. 348p. Inside the front right hand side endpaper written in small blue handwriting is a prayer as written in the Inscription box below. 2. A miniature brown leatherette softcover book titled Daily light on the Daily Path - a devotional text book for every day of the year. The faded title is printed on the front cover at the top and on the spine. At the back there is a section For Special Occasions: Easter, Affliction, Marriage, Bereavement and others. There are two lists of the Daily Texts - the morning and evening hour arranged in biblical order. The edges of the pages are gilt. In the front is handwriiten in black ink - Neville Lordnon-fiction1. A Holy Bible containing the Old and New Testaments. At the back there is an Indexed Atlas to the Holy Bible with a List of maps and a List of Biblical Names. This is followed by twelve yellow and blue coloured maps of the Lands and Nations of the Bible. 2.A miniature book titled Daily Light on the Daily Path, A Devotional text book for everyday in the year..religious books, bibles, prayers -
 Mont De Lancey
Book, Oxford University Press, The Book of Common Prayer Hymnal Companion, c. 1800's
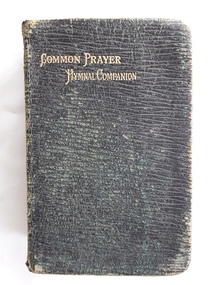
A miniature The Book of Common Prayers and Hymnal Companion.A faded badly damaged black miniature leatherette softcover book, The Book of Common Prayer. The Church of England together with The Psalter or Psalms of David. On the front cover and the spine is stamped in gold lettering - Common Prayer Hymnal Companion. At the back there is an Index of First Lines. The pages have gilt edges. 406p. On the title page there is handwritten in blue ink - J Moore Wandin. There is handwritten at the back in blue pencil - T W Bussell Wandin.non-fictionA miniature The Book of Common Prayers and Hymnal Companion.religious books, hymn books, prayer books -
 Mont De Lancey
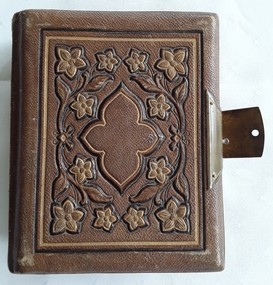
Photograph, Photo Album, Unknown
The original owners were The Burgi Family.A very old small thick photograph album made of dark tan leather with an elaborate embossed floral tan and gold design on the front cover. The back cover has plain lined patterns in a square shape with the spine having black lines across it. The brass clasp on the side is in working order. It contains 15 thick double sided pages which have sepia family photographs inserted. There is one side missing a photograph. Each picture has the name of the photographic studio printed at the bottom of the photo. The whole album as quite worn and damaged.'Burgi' is written in blue biro on the left endpaper at the front. 'DARBY SLEVIN' is written in grey pencil at the bottom of the photo on page 6.photographs, albums, photograph albums, photographic accessories -
 Mont De Lancey
Book, Odhams Press Ltd, The World's Greatest Paintings - Volumes 1,2,3, c. 1934
This work is published in three volumes containing one hundred fine colour plates of well-known pictures from many lands for the general public to enjoy. In addition to the plates there is a brief account of the life and times of each master represented avoiding all discussion of technical matter as far as possible.Three Volumes of The World's Greatest Paintings - Selected Masterpieces of Famous Art Galleries. Large format blue hardcovers with a decorative embossed front cover with an ancient Greek or Roman head bust at the top. The spine has two sets of gold bands at the top and bottom with the title in gold lettering. The work has one hundred fine colour plates of well know pictures with information about each master. Each book has a brown paper dustjacket with the title at the top in black lettering.non-fictionThis work is published in three volumes containing one hundred fine colour plates of well-known pictures from many lands for the general public to enjoy. In addition to the plates there is a brief account of the life and times of each master represented avoiding all discussion of technical matter as far as possible.art books, art, painters, artists, artworks -
 Mont De Lancey
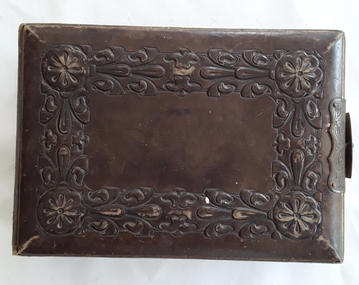
Photograph, Stewart & Co, Photo Album, c 1800's
The original owner was Louis Kolling.An antique thick rectangular photograph album made of dark tan leather with an elaborate embossed floral and leaf design on the front and back covers. The brass clasp on the side is in working order but is broken. It contains 24 thick double sided cardboard pages which have sepia family photographs inserted. There are several missing photographs. Each picture has the name of the photographic studio printed at the bottom of it. Some photos have names written beneath them in blue writing. Each page has beautiful hand painted coloured flowers and leaves decorating them. At the front is a highly coloured decorative floral title page with the word - Album. On the back of this page is a blank Index with 100 spaces to write the names of those in the photographs. The whole album as quite worn and damaged with several inscriptions.'On the front right side endpaper is handwritten on the textured page in blue ink 'Mrs Kelling, a present from Mrs Bond'. Painted ornately in colourful paints is 'Martha Bond' There is a strip of paper included on this page handwritten in blue biro 'Donated posthumously by Louis Kolling, a first cousin and neighbour of Edmund L. Burgi'. On the back endpaper handwriitten in grey pencil ''Via Lilydale' On the last page of photographs on the opposite page is handwritten in blue ink 'Mrs Kolling Clifton Hill.' which is underlined.photographs, albums, photograph albums, photographic accessories -
 Mont De Lancey
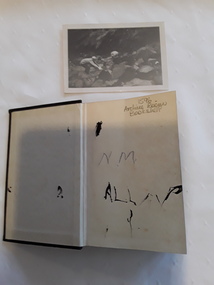
Book - Hymn Book, The Austral Printing and Publishing Co, Churches of Christ Hymn Book, 1959
A Churches of Christ Hymn Book (with supplement) It has the words for all the hymns included. It is an Australia EditionA small black self textured covered Churches of Christ Hymn book (with supplement). The title is printed in gold lettering towards the top of the front cover. The edges of the pages are faded blue. At the back of the book there is a Responsive Scripture Readings as well as Supplementary Hymns. T the front is a Preface, Contents and Index to first Lines of Hymns. Inserted inside the hymn book is a faded black and white small photograph of two boys playing on rocks near a stream. On the back of the photograph stamped in black ink - A 831.non-fictionA Churches of Christ Hymn Book (with supplement) It has the words for all the hymns included. It is an Australia Edition religious books, hymns -
 Mont De Lancey
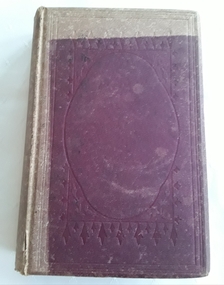
Book, Ferdinand Brock Tupper, Esq, The History of Guernsey and its Bailiwick; with occasional Notices of Jersey, 1976
This book is The History of Guernsey and its Bailiwick; With Occasional Notices of Jersey. The Bailiwick of Guernsey is comprised of the Islands of Guernsey, Alderney, Sark and Herm. Situated 10 to 30 miles off the north-west coast of France, the Channel Islands are not part of the United Kingdom. They are dependent territories of the British Crown, as successor to the Dukes of Normandy.A faded, damaged burgundy colour hardcover book with an embossed self pattern on the cover. It's title: The History of Guernsey is printed in gold lettering on the spine with the author's surname Tupper, Second Edition, London and the publisher Simpkin, Marshall at the bottom. Protecting each black and white illustration is a tissue paper page. Pp. 596. At the back there is an Appendix and Index.non-fictionThis book is The History of Guernsey and its Bailiwick; With Occasional Notices of Jersey. The Bailiwick of Guernsey is comprised of the Islands of Guernsey, Alderney, Sark and Herm. Situated 10 to 30 miles off the north-west coast of France, the Channel Islands are not part of the United Kingdom. They are dependent territories of the British Crown, as successor to the Dukes of Normandy.history, history of guernsey, ancient history -
Mont De Lancey
Book, Birn Brothers Ltd, Busy Little Folk, 1950's
A vintage, 1950's collection of young children's stories and poems, illustrated in black and white with some red highlights.A green covered vintage 1950's hardcover children's book with a coloured illustration on the front of a young boy and girl washing their toys in a red bathtub filled with water. Scrubbing brush, soap and sponge are shown. The title Busy Little Folk is written in red and pink lettering at the top. It is bound at the right side with brown tape. The back cover is plain grey cardboard. There are short stories, puzzles and simple poems included for the young child. Pp.93.fictionA vintage, 1950's collection of young children's stories and poems, illustrated in black and white with some red highlights.books, storybooks, children's books, picture books -
 Mont De Lancey
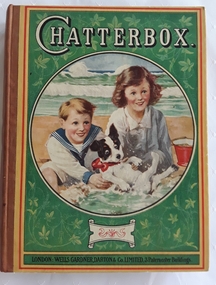
Book, Wells Gardner, Darton & Co. Limited, Chatterbox, 1928
A vintage 1928 Chatterbox collection of puzzles, poetry and stories for children with black lined illustrations and coloured plates throughout.A vintage 1928 hardcover children's book with the title Chatterbox printed in white lettering at the top of the front cover which has a green coloured background with an illustration in a large circle showing a boy and girl with their pet dog playing on the sand at the beach. The publisher details are printed at the bottom. It is bound on the left side with brown tape. The tan back cover has an advertisement for Allenburys' - for the good of babyhood, showing a smiling toddler.The frontispiece coloured illustration inside depicts a black man as a prisoner of three buccanners. The title page has the title plus Founded by J. Erskine Clarke, M.A and publisher details with a black lined illustration of children and flowers. There are further coloured plates in the collection. of puzzles, poetry, and stories for children. Pp. 316. The endpapers have several advertisements related to children.fictionA vintage 1928 Chatterbox collection of puzzles, poetry and stories for children with black lined illustrations and coloured plates throughout. children's books, books, children's stories, adventure stories -
 Mont De Lancey
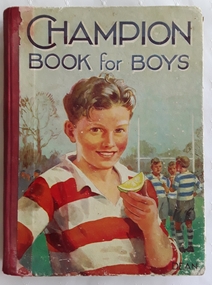
Book, Dean & Son, Ltd, Champion Book for Boys, 1938
A vintage 1938 collection of adventure stories for boys with black lined illustrations and coloured plates throughout.A vintage 1950's hardcover children's book with the title Champion Book for Boys printed in blue at the top of the coloured illustration showing a boy eating an orange with other footy team players in the background. It is bound on the left side with stained red tape. The back cover is plain grey coloured cardboard.The frontispiece coloured illustration inside depicts a man in a blue suit and hat looking surprised at two boys in school uniform holding a large colourful model of a Komodo Dragon, Ho-Ling, to be used in a parade. This is related to the first story, The Eyes of Ho-Ling. The title page has the title, publisher and printer details. There are three further coloured plates in the collection of nine adventure stories. Pp. 124.fictionA vintage 1938 collection of adventure stories for boys with black lined illustrations and coloured plates throughout. children's books, books, children's stories, adventure stories -
Mont De Lancey
Book, Renwick of Otley, Our Boys' Best of All, 1948
A vintage 1950's collection of adventure stories for boys with black lined illustrations.A vintage 1950's hardcover children's book with the title Our Boys' Best of All printed at the top of the coloured illustration of three boys in a rowboat fishing. It is bound on the left side with faded grey tape. The back cover is plain cream coloured.The frontispiece illustration depicts a highwayman brandishing a pistol holding up a stagecoach of passengers. Monsieur Noir ( one of the stories) is written below in blue letters. The title page has the title, publisher details and a black lined illustration of a boy riding a horse with his whip in the air. In the middle of the collection of stories is a coloured plate with the name of one of the stories included: The Secret of Cormorant Point underneath the illustration of three boys being captured by a gang of men with a policeman coming to rescue them. Pp. 65.fictionA vintage 1950's collection of adventure stories for boys with black lined illustrations. children's books, books, children's stories, adventure stories -
 Mont De Lancey
Book, G. E Studdy et al, Bonzo's Annual, 1948
A vintage 1950's collection of Bonzo the dog stories for children with two tone coloured illustrations throughout the book. Bonzo has a lot of fun adventures. These Bonzo annuals were popular from 1935. They ceased publication during the war years and resumed afterwards.A vintage 1950's hardcover children's book with the title Bonzo's Annual printed at the top in green lettering on the front cover.There is a large coloured illustration of the dog Bonzo riding on a rocket above the town rooftops with a smiling full moon in the sky. It is bound on the left side with faded grey fabric tape. The back cover is plain grey coloured.The frontispiece illustration shows Bonzo on a swing attached by ropes to a giraffe's long neck with a monkey and two toucan birds looking on. The illustration is from the story 'Bonzo's Festival. The title page has the title, author, illustrator, publisher details and a coloured illustration of Bonzo as an artist at his easel. Pp. 92.fictionA vintage 1950's collection of Bonzo the dog stories for children with two tone coloured illustrations throughout the book. Bonzo has a lot of fun adventures. These Bonzo annuals were popular from 1935. They ceased publication during the war years and resumed afterwards.children's books, books, children's stories, dog stories, annuals -
 Mont De Lancey
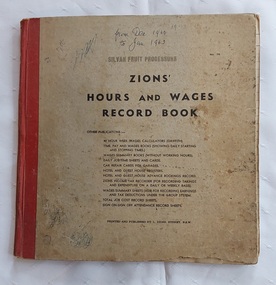
Book, L.Zions, Zions' Hours and Wages Record Book, c 1960's
An Hours and Wages Record Book for the Silvan Fruit Processors business in the Wandin area, Victoria.A faded square grey coloured Silvan Fruit Processors Zions' Hours and Wages Record Book bound with red tape on the stapled spine. The cover has the title, the business who used it stamped at the top as well as a full list of other publications and place of printing and publishing details. At the top of the front cover is written in blue biro, the dates of records - from Dec 1960 to Jan 1963. Inside are full column listings of Names, Hours Worked Daily, Total Hours, Rate,Total earnings, Tax Deductions, Net Payment and a Signature or Other Particulars column.non-fictionAn Hours and Wages Record Book for the Silvan Fruit Processors business in the Wandin area, Victoria. wages books, business records, books, wages tables, wages calculators, wages -
Mont De Lancey
Book, Education Department of Victoria, The Victorian Readers Fourth Book, 1930
This is a first edition, 1930, of The Victorian Readers Fourth Book published by the Education Department of Victoria.Badly damaged grey fabric covered hardcover Victorian Reader Fourth Book which has a home made outer vinyl red, pink floral and square patterned dust jacket style cover. There are ink and pencil markings throughout. The cover is coming away from the spine. There are black and white illustrations. Lance Sebire is written in ink on the front cover.183p.non-fictionThis is a first edition, 1930, of The Victorian Readers Fourth Book published by the Education Department of Victoria. school reader, textbooks, schools, victorian education department -
 Mont De Lancey
Book, Education Department of Victoria, The Victorian Readers Sixth Book, 1950's
This is a first edition of The Victorian Readers Fourth Book published by the Education Department of Victoria for use in Grade six in Primary Schools.A faded blue fabric covered hardcover with the title Victorian Reader Sixth Book, Second Edition printed in black lettering at the top of the front cover. Underneath is a black circle with Education Department Victoria surrounding a symbol. The cover is coming away from the spine. There are short stories, poems and black and white illustrations. Lance Sebire is written in ink on the front cover. 244 Pp.non-fictionThis is a first edition of The Victorian Readers Fourth Book published by the Education Department of Victoria for use in Grade six in Primary Schools.school reader, textbooks, schools, victorian education department -
 Mont De Lancey
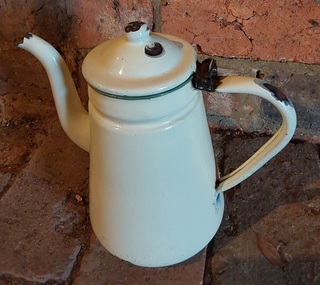
Domestic object - Coffee pot, Reservoir, Unknown
This is a vintage coffee pot. From the 1860's - 1930's various companies called their enamelware products by their own unique names, e.g. graniteware and agateware. The enamel coating put an end to metallic tasting food and prevented rust from contaminating food. It did scratch and chip easily.A tall cream enamel coffee pot with a goose neck spout, handle, green trim around the top and a hinged lid attached with a metal clip.There is Chinese blue script printed onto the base 'Reservoir. Made in China' There is an outline of Chinese electrical towers on the inside .....shaped. '301P - 16 13cm'coffee, coffee pots, kitchenware -
 Mont De Lancey
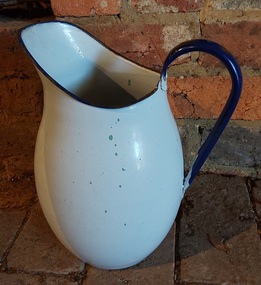
Functional object - Bedroom Jug, Unknown
From the 1860's - 1930's various companies called their enamelware products by their own unique names, e.g. graniteware and agateware. The enamel coating put an end to metallic tasting food and prevented rust from contaminating food. It did scratch and chip easily.A large white enamel water jug or pitcher with a dark blue handle and dark blue trim around the rim. It may have been used in the bedroom for washing oneself or in the kitchen.enamel, metal, water pitcher, jugs -
 Mont De Lancey
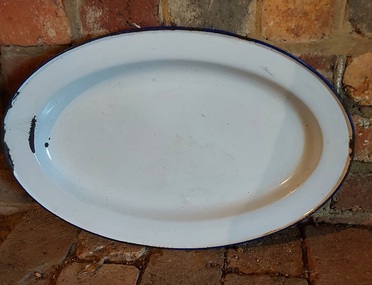
Domestic object - Serving tray, Unknown
These trays would have been used for serving large amounts of food - roast dinners and vegetables.From the 1860's - 1930's various companies called their enamelware products by their own unique names, e.g. graniteware and agateware. The enamel coating put an end to metallic tasting food and prevented rust from contaminating food. It did scratch and chip easily.A large oval white enamel serving tray with navy blue edging on the rim.trays, serving platters, enamel, dinnerware -
 Mont De Lancey
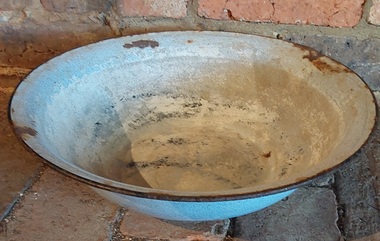
Functional object - Enamel bowl, Unknown
This vintage large bowl was probably used for washing dishes or small items of clothing. From the 1860's - 1930's various companies called their enamelware products by their own unique names, e.g. graniteware and agateware. The enamel coating put an end to metallic tasting food and prevented rust from contaminating food. It did scratch and chip easily.A badly damaged vintage large pale blue round enamel bowl, possibly used for washing dishes.enamel, domestic equipment, washing dishes, bowls -
 Mont De Lancey
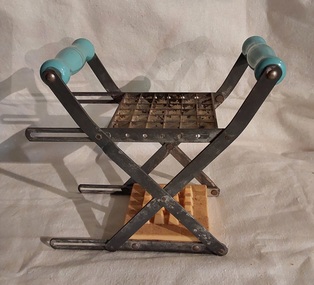
Domestic object - French Fry Cutter, Nutbrown Products
Since 1932 Nutbrown has been producing crafted kitchen products which were a staple in British homes. Nutbrown continues to be in production today.A vintage manual metal and plastic Chipper and French Fry Cutter with two blue turned wooden handles each side which are attached to folding crossed metal supports joined to a square frame. The frame has 36 small squares with sharp blades on the edges to cut the potatoes A yellow coloured plastic support with raised squares under the cutter holds the potato in place. This is screwed to the metal base. There are pieces of cardboard from the original packaging explaining the use.Underneath the yellow support is stamped: ' A Nutbrown Product Patented Made in England Registered design'.domestic objects, kitchen appliances, kitchen tools, vegetable cutters -
 Mont De Lancey
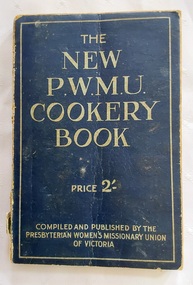
Book, P.W.M.U, The New P.W.M.U. Cookery Book, 1948
A vintage P.W.M.U.1948, 6th edition cookery book arranged by Miss A. M. Campbell and issued by the Presbyterian Women's Missionary Union of Victoria of which all profits are devoted to its works. It was obtainable from the Scottish Tea House, 156 Collins Street Melbourne, C.1, Vic. There is a Help for Beginners section at the front with general hints and some simple recipes.A small vintage dark blue paperback The New P.W.M.U. Cookery Book complied and published by the Presbyterian Women's Missionary Union of Victoria in 1948. Price 2/-. The front cover has the title and publishing details as listed printed in faded white lettering. The spine has the title and price printed in white lettering. There is a Table of Weights and Measures at the front, an Index of recipes and general information about The Presbyterian Church in Victoria. There are black and white advertisements hroughout. 188p. Included are newspaper recipes cut from old newspapers.non-fictionA vintage P.W.M.U.1948, 6th edition cookery book arranged by Miss A. M. Campbell and issued by the Presbyterian Women's Missionary Union of Victoria of which all profits are devoted to its works. It was obtainable from the Scottish Tea House, 156 Collins Street Melbourne, C.1, Vic. There is a Help for Beginners section at the front with general hints and some simple recipes.cookbooks, cookery books, domestic objects, p.w.m.u., reference books -
 Mont De Lancey
Domestic object - Butter Plate, Burleigh ware, c 1930's
Burleigh Ware have been making their products since 1851 at Middleport Pottery in Stoke-on-Trent, England.A blue and white Willow Pattern scalloped edged butter plate with the traditional oriental landscape scene on the front with a highly decorative blue and white floral raised edge and fine gold line trim around the outer edge.'Burleigh Ware, willow, made in England, 1'. This is stamped on the base of the plate on a blue leaf pattern.side plates, serving plate, butter plates -
 Mont De Lancey
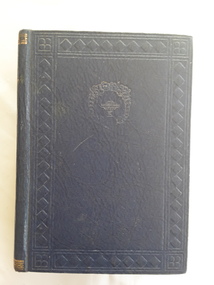
Book, Elizabeth Craig, New Standard Cookery Illustrated, 1933
An illustrated cookery book for both experienced and inexperienced housewives with modern and favourite old recipes.A thick dark blue hardcover New standard Cookery Book Illustrated edited by Elizabeth Craig. Front cover has an embossed border of triangles in a lined edging with a bowl surrounded by flowers at the top. The spine has the title and a bowl printed in gold lettering. Black and white photographs are throughout. 1015p.non-fictionAn illustrated cookery book for both experienced and inexperienced housewives with modern and favourite old recipes.cookbooks, cookery books -
 Mont De Lancey
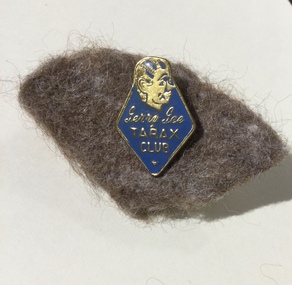
Badge, GTV Channel 9, c1960's
Small blue and gold triangular enamel badge with the Gerry Gee ventriloquist doll face symbol in gold at the top. It is attached by a metal pin at the back onto a piece of brown felt. The Gerry Gee Tarax Club was formed 1960 - 1965 by GTV Channel 9.Gerry Gee TARAX CLUB with the doll face at the top. Small gold symbol at the bottom of the badge.club badges, membership badges -
 Mont De Lancey
Book, John Bishop, Hamilton's Celebrated Dictionary, 1849
A small musical dictionary of 3,500 Italian, French, German, English and other musical terms, phrases and abbreviations, also a copious list of musical characters such as are found in the works of various composers. It has an appendix consisting of a reprint of John Tinctor's First Musical Dictionary known.Small blue softcover book, Hamilton's Celebrated Dictionary comprising an explanation of 3,500 Italian, French, German, English, and other musical terms, phrases and abbreviations. It has an Appendix at the back as well as lists of books for merchants and shoppers of musical items.173p. plus 11 pages of suggested musical items for sale.non-fictionA small musical dictionary of 3,500 Italian, French, German, English and other musical terms, phrases and abbreviations, also a copious list of musical characters such as are found in the works of various composers. It has an appendix consisting of a reprint of John Tinctor's First Musical Dictionary known. dictionary - musical terms, music