Showing 171 items
matching long gully road
-
 Running Rabbits Military Museum operated by the Upwey Belgrave RSL Sub Branch
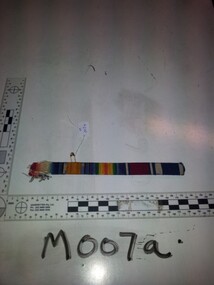
Ribbon Bar F.E James
Ribbon Bar F.E. James 14-15 Star, War Medal, Victory Medal, King George silver Jubilee, Naval Long Service and Good Conduct Medalmedals, army -
 Running Rabbits Military Museum operated by the Upwey Belgrave RSL Sub Branch
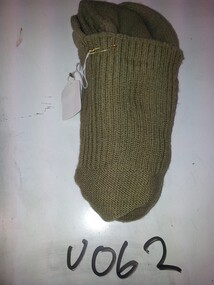
Socks
Sock Long Khakiuniform, recent, army -
 Running Rabbits Military Museum operated by the Upwey Belgrave RSL Sub Branch
Gaiters Khaki Long
Army Gaiters Khaki Longuniform, ww1, army -
 Bendigo Historical Society Inc.
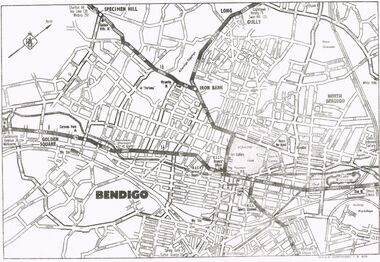
Map - MAP OF CENTRAL BENDIGO
Map of Central Bendigo, RACV Copyright (no date - but RACV Branch Office is shown as being at View Point). Black & White Copy. Showing road and rail system and prominent features of City landscape.RACV Copyright.map, bendigo, city streets, long gully, north bendigo, golden sqyare, specimen hill, iron bark. -
 Bendigo Historical Society Inc.
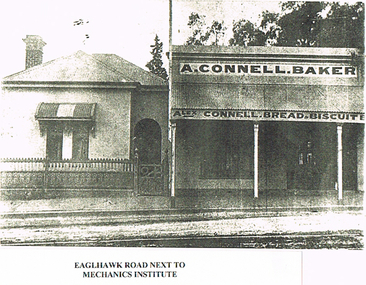
Photograph - LONG GULLY HISTORY GROUP COLLECTION: EAGLEHAWK ROAD - MECHANICS INSTITUTE
... The Long Gully History Group - Eaglehawk Road - Mechanics... BENDIGO History long gully history group The Long Gully History ...Black and white photocopy of a photo of a house beside a building with A. Connell. Baker above the veranda. The edge of the veranda has Alex Connell. Bread. Biscuits painted above the veranda poles. Title pasted under the picture is Eaglehawk Road next to Mechanics Institute.bendigo, history, long gully history group, the long gully history group - eaglehawk road - mechanics institute, alex connell -
 Bendigo Historical Society Inc.
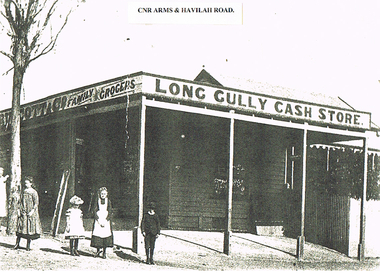
Photograph - LONG GULLY HISTORY GROUP COLLECTION: LONG GULLY CASH STORE
... of white paper - Cnr Arms & Havilah Road. Photograph LONG GULLY ...Black and white photocopy of a photo of the Long Gully Cash Store, Family Grocers.the building is weatherboard with a veranda. The name is painted along the top of the veranda. On the left is a tree which covers part of the name. three girls and a boy are standing in front of the store and a ladder is standing against a veranda pole. Printed on a piece of white paper - Cnr Arms & Havilah Road.bendigo, history, long gully history group, the long gully history group - long gully cash store -
 Bendigo Historical Society Inc.
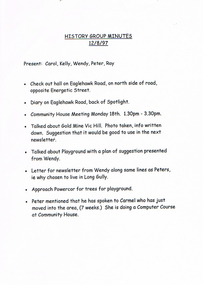
Document - LONG GULLY HISTORY GROUP COLLECTION: HISTORY GROUP MINUTES 12/8/97
History Group Minutes 12/8/97. Present: Carol, Kelly, Wendy, Peter and Ray. Mentioned in the minutes are: Hall on Eaglehawk Road, Diary on Eaglehawk Road, back of Spotlight, Community House Meeting, Gold Mine Vic Hill, Playground, Why chosen to live in Long Gully, Approach Powercor for trees for playground and Peter has spoken to Carmel who has just moved into the area. History Group Minutes. Present: Kelly and Linda. Items on the agenda are: Visited Rae's house, Visited Wayne from the Cheapest Butcher in Bendigo. and Peter has passed on the National Trust phone number earlier in the week.bendigo, history, long gully history group, the long gully history group - history group minutes 12/8/97, spotlight, community house, gold mine vic hill, powercor, carol, kelly, wendy, peter, ray, carmel -
 Bendigo Historical Society Inc.
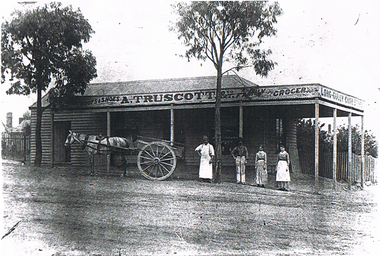
Photograph - LONG GULLY HISTORY GROUP COLLECTION: A TRUSCOTT STORE
... Store. Corner of Havilah Road & Arms Street, Long Gully... of Havilah Road & Arms Street, Long Gully. approx 1890 ties ...Two copies of a black and white copy of a photo of A. Truscott & Co Store. Photo shows a weatherboard building with a veranda. It has two trees growing in front of it. There are two men and two women standing out the front and a horse and dray. Written on the back of one copy is:- Veranda blown off by a Whirly Wind landed on top of Shop Roof. now replaced 1986. Truscott's Store. Corner of Havilah Road & Arms Street, Long Gully. approx 1890 ties. A Crossley to be photographed.bendigo, history, long gully history group, the long gully history group - a truscott store, a crossley, long gully cash store -
 Bendigo Historical Society Inc.
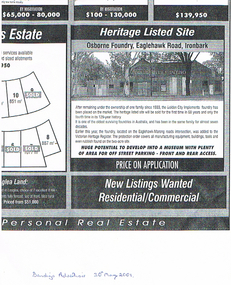
Newspaper - LONG GULLY HISTORY GROUP COLLECTION: OSBORNE FOUNDRY EAGLEHAWK ROAD IRONBARK
Copy of an advertisement from the Bendigo Advertiser 30 May 2001. Advertisement is for the Osborne Foundry, Eaglehawk Road, Ironbark. A photo shows the building with Golden City Implement painted on the front. The foundry had been in the same family for almost seven decades and is now listed for sale. Price on Application. Written underneath is: Bendigo Advertiser 30th May 2001.bendigo, history, long gully history group, the long gully history group - osborne foundry eaglehawk road ironbark, golden city implements, victorian heritage register, bendigo advertiser 30/5/2001 -
 Bendigo Historical Society Inc.
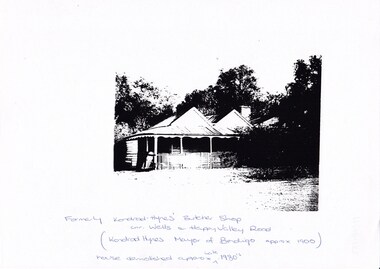
Photograph - LONG GULLY HISTORY GROUP COLLECTION: KONRAD HYNES' BUTCHER SHOP
2 copies of a black and white photo of Konrad Hynes' Butcher Shop. Written under the photo is: Formerly Konrad Hynes' Butcher Shop cnr. Wells and Happy Valley Road. (Konrad Hynes Mayor of Bendigo approx 1900). House demolished approx. late 1980.bendigo, history, long gully history group, the long gully history group - konrad hynes' butcher shop -
 Bendigo Historical Society Inc.
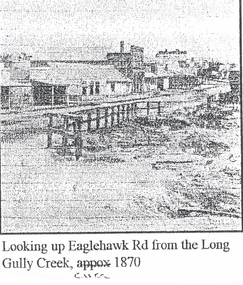
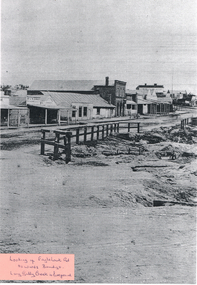
Photograph - LONG GULLY HISTORY GROUP COLLECTION: EAGLEHAWK ROAD FROM THE LONG GULLY CREEK
... LONG GULLY HISTORY GROUP COLLECTION: EAGLEHAWK ROAD FROM...The Long Gully History Group - Eaglehawk Road from the Long... Group - Eaglehawk Road from the Long Gully Creek circa 1870 ...Photocopy of a photo with printing at the bottom: Looking up Eaglehawk Rd from the Long Gully Creek, circa 1870. The photo has buildings along the left of the road and in the foreground is a timber railing at the edge of a creek.bendigo, history, long gully history group, the long gully history group - eaglehawk road from the long gully creek circa 1870 -
 Bendigo Historical Society Inc.
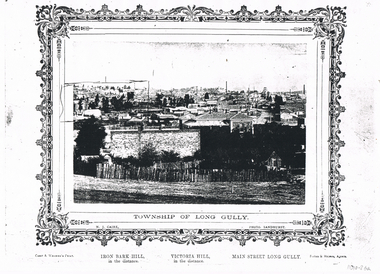
Photograph - LONG GULLY HISTORY GROUP COLLECTION: TOWNSHIP OF LONG GULLY
Black & white photocopy of a photo of the Township of Long Gully. Print has a decorative frame around it. Photo taken by N J Caire, Sandhurst, which is printed just inside the frame. A Carey & Wenborn's Print, printed on the left under the frame, then Iron Bark Hill, in the distance. Victoria Hill, in the distance. Main Street Long Gully. Forbes & Holmes, Agents. Photo shows a road and a picket fence in the foreground with houses, mine chimneys, poppet legs and mine buildings in the background. On the left horizon an area has been drawn around. Written on the back is: 1857 Started Methodism on the Site of the Present St Mathews. 1853 Methodism Started services were held open air. St Mathews Church Built 1883. Sunday School 1896 Long Gully Methodist Church 1877 Sunday School 1871 Kindergarten 1905 Long Gully Post Office Built Early Methodist Church Built Creeth St & Eaglehawk Rd was a Wooden Building got burnt down. (Ethel Leggo) Another copy of this photo 11010.44N J Cairebendigo, history, long gully history group, the long gully history group - township of long gully, n j caire, carey & wenborn, iron bark hill, victoria hill, main street long gully, forbes & holmes, st mathews, long gully methodist church, long gully sunday school, long gully kindergarten, long gully post office -
 Bendigo Historical Society Inc.
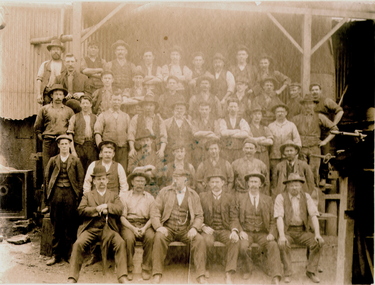
Photograph - HORSFIELD, TAYLOR ENGINEERING WORKS, LONG GULLY, c1900-1910
Sepia photo of engineering workers and possibly Foundry owner/managers. 5 rows of men in front of Foundry building, 41 men in photo. Parts manufacturer. Address: 420 Backhaus Street, Long Gully (Now known as Eaglehawk Road). Ref: Sands & McDougall's Bendgio Directory 1901-1908. Physical Description: Mounted on grey cardboard. Inscriptions/Markings: 'Horsfield's Foundry, Long Gully' hand written on back.organization, business, foundry -
 Bendigo Historical Society Inc.
Legal record - WES HARRY COLLECTION: THREE MINER'S RIGHT / RESIDENCY PERMITS
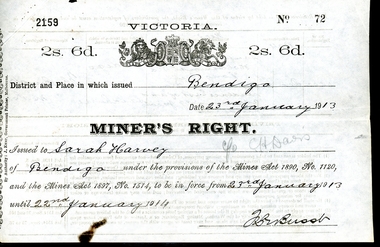
... on the corner of Holdsworth Road and Wood Street, Long Gully, Bendigo... on the corner of Holdsworth Road and Wood Street, Long Gully, Bendigo ...The Miner’s Right has a long history in Australia. Still in use today, it was first established in Victoria in 1855, as a replacement for the Gold License (which had been introduced in Victoria in 1851). The Miner’s Right was subsequently adopted by other Australian colonies. Unlike the Gold License, the early Miner’s Right, in addition to the right to prospect for gold, also carried with it certain other advantages, such as property rights and voting rights. The Miner’s Right came about as a recommendation of a government-appointed commission, which had been appointed on 1854 to look into the troubles on the Victorian goldfields, especially regarding the Eureka Rebellion.Three Miner's Rights / Residency Permits for leases on the corner of Holdsworth Road and Wood Street, Long Gully, Bendigo (Area known as American Gully - downstream of the American Mine): a and b No 72 Sarah Harvey, dated 23/01/1913 c and d No 23148 Evalina Gifford Vivian Harvey, dated 14/09/1926 e and f No 23149 Thomas George Harvey, dated 14/09/1926 Issued by the Victorian Government at a cost of two shillings and six penceVictorian State Governmentwes harry collection, miner's right, bendigo, history, long gully bendigo -
 Bendigo Historical Society Inc.
Document - ALBERT RICHARDSON COLLECTION: CARLISLE UNITED MINE GARDEN GULLY LINE
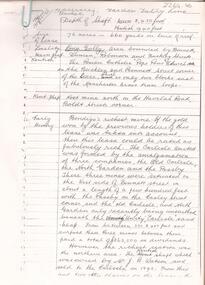
Eight page handwritten document with details of the Carlisle United Gold Mine at Long Gully. The lease was 76 acres, 660 yards on line of reef. The Kent shaft was the next mine north Havilah Road, Boldt Street's corner. 'The Carlisle United was formed by the amalgamation of ttte companies, the Old Carlisle, the North Garden and the Passby. These mines were situated on the west side of Bennett Street in about a length of a few hundred feet, with the Passby on the Casley Street corner. And the old Carlisle and North Garden only recently being unearthed beneath the Unity, 'Carlisle' sand heap.' Details about the mining plant, the main shaft, the winding engine air compressor, stone crusher, and engine house are given. The Kent shaft and steel poppet legs are described. Four early claims on the Carlisle United ground are listed: Morgan, Kirshner and Co., Boyd and Co. Claim, Shanks and Co's claim and Day and Co's claim.bendigo, mining, carlisle united -
 Bendigo Historical Society Inc.
Photograph - AN OLD CHINESE STORE, 27 March 1938
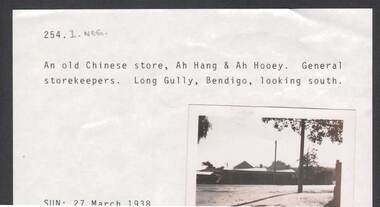
Photograph, An Old Chinese Store, Ah Hang & Ah Hooey, were the general storekeepers . The store was in Long Gully, possibly in McIntyre Street (Eaglehawk Road now) , and the view is looking south. SUN: 27 March 1938.photograph, building, old chinese store -
 Bendigo Historical Society Inc.
Newspaper - JENNY FOLEY COLLECTION: WORKS PLANNED
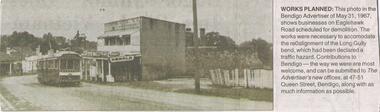
Bendigo Advertiser ''The way we were'' from Monday, July 11, 2005. Works planned: this photo in the Bendigo Advertiser of May 31, 1967 shows businesses on Eaglehawk Road scheduled for demolition. The works were necessary to accommodate the realignment of the Long Gully bend which had been declared a traffic hazard.newspaper, bendigo advertiser, the way we were -
 Bendigo Historical Society Inc.
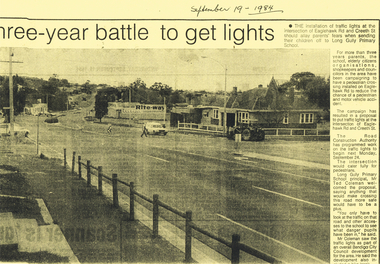
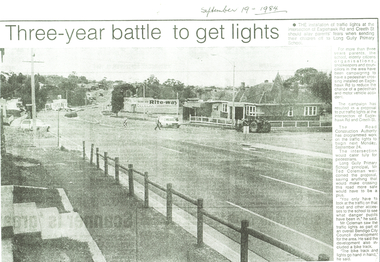
Newspaper - LONG GULLY HISTORY GROUP COLLECTION: INSTALLATION OF TRAFFIC LIGHTS EAGLEHAWK RD/CREETH ST
... Long Gully Primary School The Road Construction Authority Ted ...Copy of a newspaper article titled three-year battle to get lights printed on yellow paper. Date written at the top is September 19 - 1984.Photo shows Eaglehawk Rd with a man crossing the street and a car going past. A tractor is on the corner. The accompanying article mentions that residents have been campaigning to get the lights for over three years.bendigo, history, long gully history group, the long gully history group - installation of traffic lights eaglehawk rd/creeth st, long gully primary school, the road construction authority, ted coleman, bendigo city council, rite-way -
 Bendigo Historical Society Inc.
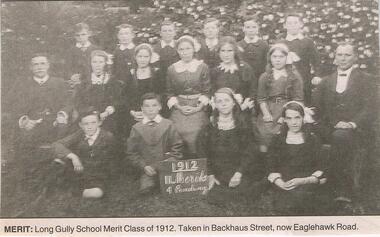
Newspaper - JENNY FOLEY COLLECTION: MERIT
Bendigo Advertiser "The way we were" from Saturday, September 27, 2003. Merit: the Long Gully School Merit Class of 1912. Taken in Backhaus Street, now Eaglehawk Road.newspaper, bendigo advertiser, the way we were -
 Bendigo Historical Society Inc.
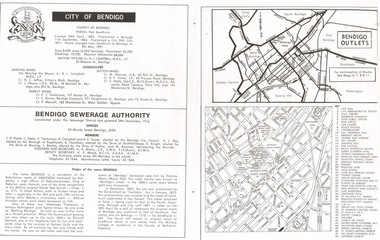
Document - LONG GULLY HISTORY GROUP COLLECTION: CITY OF BENDIGO
Page with the titled City of Bendigo includes when the County was created, proclaimed a Borough, then a City and a name change, the area, population, swellings and Mayoral Allowance. Darling Ward Councillors were: Cr R L Campbell, The Mayor, Cr N C Jeffrey, and Cr J Pearce. Sutton Ward Councillors, Cr M Petersen, Cr R F Turner, and Cr C Stoltz. and Barkly Ward Councillors, Cr P T Tomkinson, Cr C Davies and Cr P Mansell. Bendigo Sewerage Authority Members: T R Flood, C Stoltz, P Tomkinson, R Campbell, R F Turner, A L Roy, K Houlahan, E Knight, J Bowles, M Brennan, H A Moors and V F Moyle. Also mentioned is the Origin of the name Bendigo. There is a small map of Bendigo Outlet roads and another map with services, attractions, churches, etc.bendigo, history, long gully history group, the long gully history group - city of bendigo, cr r l campbell, cr n c jeffrey, cr j pearce, cr m petersen, cr r f turner, cr c stoltz, cr p t tomkinson, cr c davies, bendigo disposals, cr p mansell, bendigo sewerage authority, t r flood, bendigo city council, a l roy, borough of eaglehawk, k houlahan, shire of strathfieldsaye, e knight, shire of marong, j bowles, shire of huntly, m brennan, h a moors, v f moyle, abednego, john wesley, abednego thompson, battling bendigo, richard sherratt, thomas myers, castleton, sandhurst, military college of sandhurst england -
 Bendigo Historical Society Inc.
Document - LONG GULLY HISTORY GROUP COLLECTION: EAGLEHAWK & NOTED EVENTS
Notes on Eaglehawk compiled by H Biggs mentions early settlement, discovery of gold, separation of Eaglehawk from the Marong District Roads Board, Nominations for Council and Newspapers. Noted Events compiled by June Parry mention events from 1839 to 1876 and some in 1928. These included early settlement, gold discovery at The Rocks, Churches, hospital, Bendigo Advertiser, Theatre Royal, Police Office, Post Office, Census, First Council Works, Telegraph, Mining Company, Mining Board, Public Market, various buildings built, Rates, Schools, and very early trams.bendigo, history, long gully history group, the long gully history group - eaglehawk & noted events, h biggs, june parry, james mouat, joseph crook, marong district roads board, camp hotel, charles sherratt, mt alexander north run, grice and heape, ravenswood, gibson and fenton, mrs john kennedy, mrs patrick farrel, mr j a paton, mr lachlan mclachlan (bendigo mac), bendigo hospital, bendigo advertiser, theatre royal, lieutenant governor sir charles and lady hotham, harney's bridge, e j ennor, sandhurst fire brigade, mr townsend, bendigo water works, cornish & co, post office, bendigo pottery, bendiog agricultural society, benevolent asylum, bendigo gas company, cattle yards, coliban water supply scheme, cr w v simons, j mouat, sir henry barkly, sandhurst borough, eaglehawk borough, cr john mcintyre, duke of edinburgh, latham and watson's mine, galatea (model ship), st paul's church of england, rev g p despard, bendog rifle association, strathfieldsaye shire hall, corporate high school, bendigonian society, richard andrews, easter fair, g aspinall, j burnsides, viscount canterbury (sir h manners sutton), beehive stores, mining exchanges, annual waverley prize, bendigo water works, city fire brigade, city family hotel, bendigo united friendly society medical institute and dispensary, jewish synagogue, masonic hall, school of mines, j h abbott, australian natives association, temperance hall, royal princess theatre, albion hall, central state school, high school, gravel hill state school, early trams, electricity commission -
 Bendigo Historical Society Inc.
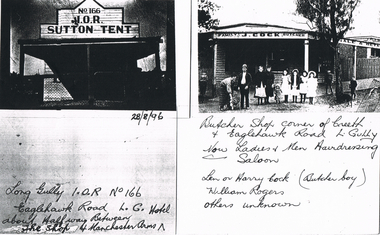
Photograph - LONG GULLY HISTORY GROUP COLLECTION: I. O. R. SUTTON TENT & J COCK
Page with copies of two black and white photos. One is a very dark photo of a shop front with a veranda. Above the veranda is No 166 I. O. R. Sutton Tent. Written underneath is 28/8/96 Long Gully I. O. R. No 166 Eaglehawk Road L.G. Hotel about half way Between the Shop and Manchester Arms. The second photo is the photo of J Cock Family Butcher Shop. Shop has name painted above the edges of the veranda. There are a number of people and children standing in front of the shop. Written under the photo is: Butcher Shop corner of Creeth & Eaglehawk Road L. Gully. Now Ladies & Men Hairdressing Saloon. Len or Harry Cock (Butcher boy) William Rogers. Others unknown.bendigo, history, long gully history group, the long gully history group - i. o. r. sutton tent & j cock, manchester arms, len or harry cock, william rogers -
 Bendigo Historical Society Inc.
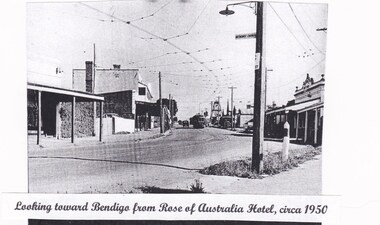
Photograph - LONG GULLY HISTORY GROUP COLLECTION: LOOKING TOWARD BENDIGO FROM ROSE OF AUSTRALIA HOTEL, CIRCA 1950
Copy of a black and white photo taken from the Rose of Australia Hotel, circa 1950. The road is curved and there is a tram on the street with a motor car beside it. A power pole has a sign pointing to the Methodist Church. Buildings line the street and further up the road is the poppet legs of a mine. Label pasted on the photo - Looking toward Bendigo from Rose of Australia Hotel. Circa 1950.bendigo, history, long gully history group, the long gully history group - looking toward bendigo from rose of australia hotel, circa 1950 -
 Bendigo Historical Society Inc.
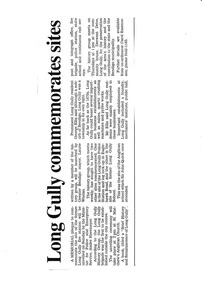
Document - LONG GULLY HISTORY GROUP COLLECTION: LONG GULLY COMMEMORATES SITES
Newspaper cutting and two photocopies titled Long Gully commemorates sites.Article mentions a memorial plaque to commemorate the site of the former Long Gully fire station which was unveiled by the Minister for Police and Emergency Service, Andre Haermeyer at St Matthew's Anglican Church. A book titled a Brief History and Reminiscence of Long Gully was launched by Greater Bendigo mayor, Laurie Whelan. The history group also sought to have two other sites commemorated, one the site of the Long Gully Police Station and log lock-up in Eaglehawk Road, and the other, the site of the former Long Gully School.bendigo, history, long gully history group, the long gully history group - long gully commemorates sites, former long gully fire station, andre haermeyer, long gully history group, st matthew's anglican church, a brief history and reminiscence of long gully, laurie whelan, site of the long gully police station, log lock-up in eaglehawk road, site of the former long gully school, site of the anglican school, sir john quick, george ellis, carol rasmussen -
 Bendigo Historical Society Inc.
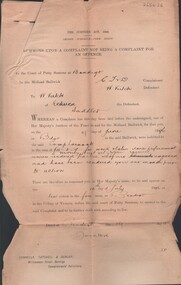
Document - CONNELLY, TATCHELL, DUNLOP COLLECTION: LEGAL PAPERS, 1895 - 1903
Document. Various legal papers. 1 - 1895 - Summons to Smith Owen for debts and letter dated 1903 from Victoria Police (Const A J Zepaye?) to recover debts. 2 - 1897 - Summons to Spark Anna for debts. Anna Spark of Arcade Hotel, Hargreaves St., Bendigo. 3 - 1896 - Summons to Wright James and Mayberry E, Miners of (Marong) to recover debts. 4 - 1896 - Summons to Brown Honora of Retreat Road, Back Creek, Bendigo to recover debts. 5 - 1896 - Summons to Veitch Walter, Saddler (Echuca) to recover debts. 6 -1895 - Summons to Mungoran Patrick, State School Teacher (Creswick) for debts. 7 - 1896 - Summons to Wills of Sparrowhawk, Long Gully, for debts. 8 -1896 - Summons to Wright James & Mayberry E for debts. 9 - 1896 - Summons to Koppel Kay May (Ironbark) formerly Hotel keeper for debts. Contains handwritten letter by May. 10 - 1896 - Koppel Kay May. Summons and account of monies owed. 11 - 1895 - Butler Mrs E and Levy Mrs H (Portsea). Account of monies owed. 12 - 1896 - Summons to Foley John, Hargreaves St East, Bendigo for debts. Also account of monies owed. 13 - 1896 - Summons to Wood J W (Marong) for debts. Handwritten damaged letter by J W Wood. 14 - 1896 - Summons to Adair W T, Farmer (Mologa) for debts. 15 - 1896 - Summons to Killyer C, Burrowes Street, Golden Square for debts. Handwritten damaged letter from C Killyer.cottage, miners, connelly, tatchell & dunlop, spark anna, arcade hotel, wright james, mayberry e, brown honora veitch walter, mungoran patrick, wills, koppel kay may, butler mrs e, levy mrs h, foley john, wood j w, adair w t, killyer c -
 Bendigo Historical Society Inc.
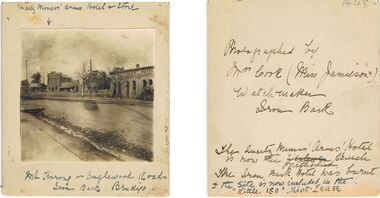
Photograph - QUARTZ MINERS ARMS HOTEL, IRON BARK, Circa 1860
Photograph - sepia. Photography by Mrs Cook, (nee Jamieson), watch Makers Iron Bark. Quartz Miners Arms Hotel and store, Marong and Inglewood Roads, Iron Bark, Bendigo.The Iron Bark Hotel was burnt and the site is now included in the 'Little 180' Miners Lease. A piece of paper 'Hotel becomes a church', Age 27th March, 1920. The Quartz Miners Arm delicensed Hotel is now the Methodist Church. A piece of paper with Fri.3rd Nov.1893 - Funeral of Senior Constable Sheridan 1890 and Sat.4th Nov. 1893, Robbery at Messrs. Scholten and Marsh 1890,W. Wilkie, injured , Catherine 1890, other hand written things written on it. eg. Long Gully Library Thurs. Nov 9 - 93, mary Kennedy married Nove. '93, Maffie married Aug. 1893, Miks(?) married 1892,Mrs Cook(Miss Jamieson) Watch maker, Iron Bark.buildings, hotel, quartz miners arms hotel, iron bark, quartz miners arms hotel, iron bark, bendigo. -
 Knox Historical Society Inc.
Doily, 1934
Made to commemorate Melbourne's Centenary 1834 - 1934. Donated to the Museum by Mrs Thelma Scollary.A long ivory coloured crocheted doily with Melbourne Centenary in the centre and 1934 at each end. -
 Bendigo Historical Society Inc.
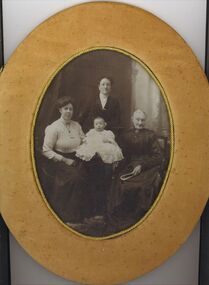
Photograph - TRUSCOTT COLLECTION - FAMILY PHOTOGRAPH
... of Havilah Road and Arms Street Long Gully.... Road and Arms Street Long Gully. PHOTOGRAPH Portrait Truscott ...Truscott family home and grocery store was on corner of Havilah Road and Arms Street Long Gully.Truscott family group portrait in oval shaped velvet frame with glass and a gold braid mount, showing three women and a baby, frame has gold coloured backing with a gold chain.photograph, portrait, truscott, bendigo-long gully-history-business-truscott -
 Bendigo Historical Society Inc.
Photograph - LONG GULLY HISTORY GROUP COLLECTION: EAGLEHAWK ROAD
... The Long Gully History Group - Eaglehawk Road... Group - Eaglehawk Road Long Gully Creek Dr J Sibley Commercial ...Two copies of a black and white photo of Eaglehawk Road. Photo shows businesses along the left side of the road. One is a Dr J Sibley and the other the Commercial (last word is very blurry). In the centre of the picture is a short railing fence. The foreground is bare with a culvert on the right. Written on a sticker on the photo is: Looking up Eaglehawk Rd towards Bendigo. Long Gully Creek in foreground.bendigo, history, long gully history group, the long gully history group - eaglehawk road, long gully creek, dr j sibley, commercial -
 Bendigo Historical Society Inc.
Newspaper - LONG GULLY HISTORY GROUP COLLECTION: THREE-YEAR BATTLE TO GET LIGHTS
... BENDIGO History long gully history group The Long Gully History ...Copy of a newspaper article titled Three-year battle to get lights. Paper dated September 19, 1984. Article mentions there will be an installation of traffic lights at the intersection of Eaglehawk Rd and Creeth St. after a three year campaign. The intersection would cater fully for pedestrians and make it a lot safer for the school children.bendigo, history, long gully history group, the long gully history group - three-year battle to get lights, long gully primary school, the road construction authority, mr ted coleman, bendigo city council, rite-way