Showing 12970 items matching "history of australia"
-
 The Beechworth Burke Museum
Photograph, 1908
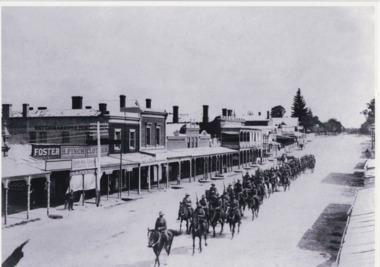
... insight into Australia's history, military and defence policies ...Taken in 1908, the photograph depicts a long line of Australian soldiers riding atop horses. They marching down Ford St, Beechworth. This group were part of the Beechworth Mounted Rifles; a voluntary detachment of the Australian Light Horse Militia. This unit consisted of soldiers from the Euroa, Longwood, Violet Town, Benalla, Thoona, Wangaratta, Rutherglen, and Beechworth Detachments of Victorian Rifles, and subsequently formed into the 8th Australian Light Horse Regiment (Victorian Mounted Rifles). The Victorian Mounted Rifles was gazetted as a volunteer formation on 2 December 1885 with the aim of consolidating all the disparate calvary units dispersed across Victoria into a coordinated and single administrative and military unit. The Victorian Mounted Rifles fought in the Second Boer War (1889 - 1902), although it is unknown if the group depicted in this image were involved in the conflict.The photograph is historically significant due to its connection to the Australian Light Horse Regiment, specifically of the Victorian Mounted Rifles. This unit retains a special significance within Victorian culture, as there is a memorial and monument - erected in 1903 - honouring their service on St. Kilda Road in Melbourne. The record has strong research potential. This is due to the ongoing scholarly and public interest in war, military history, and the ANZAC legend. The historic context of this record can provide insight into Australia's history, military and defence policies. Lastly, as the Victorian Mounted Rifles remain a largely unexplored topic in comparison to other military units and divisions, the record presents a unique opportunity for further and important study and research.Black and white rectangular photograph printed on matte photographic paper.military album, military, war, wwi, world war i, beechworth, ford st, parade, horses, mounted rifles, soldiers, victorian mounted rifles, australian light horse militia -
 Flagstaff Hill Maritime Museum and Village
Domestic object - Milk Churn, Malleys Ltd, 1870-1932
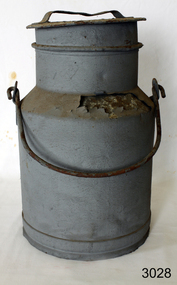
... and is a significant part of Australian early social history. flagstaff hill ...Malleys Ltd was established in about 1890 by Francis Malley (1863-1932). This firm was located in the Sydney suburb of Alexandria, in McEvoy Street. They manufactured items for use in the dairy industry, as well as for hardware related to building and plumbing. Many of the Malley dairy products were sold under the "Sunrise" name. Malley retired in 1912. In 1931 there were branches at Parramatta, Hurstville & North Sydney. An early item made by an Australian manufacturer of dairy equipment in Australia specifically for the local market. The item gives an insight into early Australian manufacturing processes and is a significant part of Australian early social history.Milk Churn or Milk Can, Medium sized galvanised container to hold milk Malleysflagstaff hill, warrnambool, shipwrecked-coast, flagstaff-hill-maritime-museum, shipwreck-coast, flagstaff-hill-maritime-village, milk container, malleys ltd, dairy equipment -
 Flagstaff Hill Maritime Museum and Village
Photograph
HISTORY OF THE LOCH ARD The LOCH ARD belonged to the famous Loch Line which sailed many ships from England to Australia. Built in Glasgow by Barclay, Curdle and Co. in 1873, the LOCH ARD was a three-masted square rigged iron sailing ship. The ship measured 262ft 7" (79.87m) in length, 38ft (11.58m) in width, 23ft (7m) in depth and had a gross tonnage of 1693 tons. The LOCH ARD's main mast measured a massive 150ft (45.7m) in height. LOCH ARD made three trips to Australia and one trip to Calcutta before its final voyage. LOCH ARD left England on March 2, 1878, under the command of Captain Gibbs, a newly married, 29 year old. She was bound for Melbourne with a crew of 37, plus 17 passengers and a load of cargo. The general cargo reflected the affluence of Melbourne at the time. On board were straw hats, umbrella, perfumes, clay pipes, pianos, clocks, confectionary, linen and candles, as well as a heavier load of railway irons, cement, lead and copper. There were items included that intended for display in the Melbourne International Exhibition in 1880. The voyage to Port Phillip was long but uneventful. At 3am on June 1, 1878, Captain Gibbs was expecting to see land and the passengers were becoming excited as they prepared to view their new homeland in the early morning. But LOCH ARD was running into a fog which greatly reduced visibility. Captain Gibbs was becoming anxious as there was no sign of land or the Cape Otway lighthouse. At 4am the fog lifted. A man aloft announced that he could see breakers. The sheer cliffs of Victoria's west coast came into view, and Captain Gibbs realised that the ship was much closer to them than expected. He ordered as much sail to be set as time would permit and then attempted to steer the vessel out to sea. On coming head on into the wind, the ship lost momentum, the sails fell limp and LOCH ARD's bow swung back. Gibbs then ordered the anchors to be released in an attempt to hold its position. The anchors sank some 50 fathoms - but did not hold. By this time LOCH ARD was among the breakers and the tall cliffs of Mutton Bird Island rose behind the ship. Just half a mile from the coast, the ship's bow was suddenly pulled around by the anchor. The captain tried to tack out to sea, but the ship struck a reef at the base of Mutton Bird Island, near Port Campbell. Waves broke over the ship and the top deck was loosened from the hull. The masts and rigging came crashing down knocking passengers and crew overboard. When a lifeboat was finally launched, it crashed into the side of LOCH ARD and capsized. Tom Pearce, who had launched the boat, managed to cling to its overturned hull and shelter beneath it. He drifted out to sea and then on the flood tide came into what is now known as LOCH ARD Gorge. He swam to shore, bruised and dazed, and found a cave in which to shelter. Some of the crew stayed below deck to shelter from the falling rigging but drowned when the ship slipped off the reef into deeper water. Eva Carmichael had raced onto deck to find out what was happening only to be confronted by towering cliffs looming above the stricken ship. In all the chaos, Captain Gibbs grabbed Eva and said, "If you are saved Eva, let my dear wife know that I died like a sailor". That was the last Eva Carmichael saw of the captain. She was swept off the ship by a huge wave. Eva saw Tom Pearce on a small rocky beach and yelled to attract his attention. He dived in and swam to the exhausted woman and dragged her to shore. He took her to the cave and broke open case of brandy which had washed up on the beach. He opened a bottle to revive the unconscious woman. A few hours later Tom scaled a cliff in search of help. He followed hoof prints and came by chance upon two men from nearby Glenample Station three and a half miles away. In a state of exhaustion, he told the men of the tragedy. Tom returned to the gorge while the two men rode back to the station to get help. By the time they reached LOCH ARD Gorge, it was cold and dark. The two shipwreck survivors were taken to Glenample Station to recover. Eva stayed at the station for six weeks before returning to Ireland, this time by steamship. In Melbourne, Tom Pearce received a hero's welcome. He was presented with the first gold medal of the Royal Humane Society of Victoria and a £1000 cheque from the Victorian Government. Concerts were performed to honour the young man's bravery and to raise money for those who lost family in the LOCH ARD disaster. Of the 54 crew members and passengers on board, only two survived: the apprentice, Tom Pearce and the young woman passenger, Eva Carmichael, who lost all of her family in the tragedy. Ten days after the LOCH ARD tragedy, salvage rights to the wreck were sold at auction for £2,120. Cargo valued at £3,000 was salvaged and placed on the beach, but most washed back into the sea when another storm developed. The wreck of LOCH ARD still lies at the base of Mutton Bird Island. Much of the cargo has now been salvaged and some was washed up into what is now known as LOCH ARD Gorge. Cargo and artefacts have also been illegally salvaged over many years before protective legislation was introduced. One of the most unlikely pieces of cargo to have survived the shipwreck was a Minton porcelain peacock - one of only nine in the world. The peacock was destined for the Melbourne International Exhibition in 1880. It had been well packed, which gave it adequate protection during the violent storm. Today, the Minton peacock can be seen at the Flagstaff Hill Maritime Museum in Warrnambool. From Australia's most dramatic shipwreck it has now become Australia's most valuable shipwreck artefact and is one of very few 'objects' on the Victorian State Heritage Register. Flagstaff Hill’s collection of artefacts from LOCH ARD is significant for being one of the largest collections of artefacts from this shipwreck in Victoria. It is significant for its association with the shipwreck, which is on the Victorian Heritage Register (VHR S417). The collection is significant because of the relationship between the objects, as together they have a high potential to interpret the story of the LOCH ARD. The LOCH ARD collection is archaeologically significant as the remains of a large international passenger and cargo ship. The LOCH ARD collection is historically significant for representing aspects of Victoria’s shipping history and its potential to interpret sub-theme 1.5 of Victoria’s Framework of Historical Themes (living with natural processes). The collection is also historically significant for its association with the LOCH ARD, which was one of the worst and best known shipwrecks in Victoria’s history. Photograph of Loch Ard Gorge. Photograph taken some distance from the Gorge. Three men in the Gorge and outlines of steps can be seen. Right hand side of the photograph is written "Loch Ard Gorge"flagstaff hill, warrnambool, shipwrecked coast, flagstaff hill maritime museum, maritime museum, shipwreck coast, flagstaff hill maritime village, great ocean road, loch line, loch ard, captain gibbs, eva carmichael, tom pearce, glenample station, mutton bird island, loch ard gorge, photograph of loch ard gorge, photograph -
 Flagstaff Hill Maritime Museum and Village
Painting
HISTORY OF THE LOCH ARD The LOCH ARD belonged to the famous Loch Line which sailed many ships from England to Australia. Built in Glasgow by Barclay, Curdle and Co. in 1873, the LOCH ARD was a three-masted square rigged iron sailing ship. The ship measured 262ft 7" (79.87m) in length, 38ft (11.58m) in width, 23ft (7m) in depth and had a gross tonnage of 1693 tons. The LOCH ARD's main mast measured a massive 150ft (45.7m) in height. LOCH ARD made three trips to Australia and one trip to Calcutta before its final voyage. LOCH ARD left England on March 2, 1878, under the command of Captain Gibbs, a newly married, 29 year old. She was bound for Melbourne with a crew of 37, plus 17 passengers and a load of cargo. The general cargo reflected the affluence of Melbourne at the time. On board were straw hats, umbrella, perfumes, clay pipes, pianos, clocks, confectionary, linen and candles, as well as a heavier load of railway irons, cement, lead and copper. There were items included that intended for display in the Melbourne International Exhibition in 1880. The voyage to Port Phillip was long but uneventful. At 3am on June 1, 1878, Captain Gibbs was expecting to see land and the passengers were becoming excited as they prepared to view their new homeland in the early morning. But LOCH ARD was running into a fog which greatly reduced visibility. Captain Gibbs was becoming anxious as there was no sign of land or the Cape Otway lighthouse. At 4am the fog lifted. A man aloft announced that he could see breakers. The sheer cliffs of Victoria's west coast came into view, and Captain Gibbs realised that the ship was much closer to them than expected. He ordered as much sail to be set as time would permit and then attempted to steer the vessel out to sea. On coming head on into the wind, the ship lost momentum, the sails fell limp and LOCH ARD's bow swung back. Gibbs then ordered the anchors to be released in an attempt to hold its position. The anchors sank some 50 fathoms - but did not hold. By this time LOCH ARD was among the breakers and the tall cliffs of Mutton Bird Island rose behind the ship. Just half a mile from the coast, the ship's bow was suddenly pulled around by the anchor. The captain tried to tack out to sea, but the ship struck a reef at the base of Mutton Bird Island, near Port Campbell. Waves broke over the ship and the top deck was loosened from the hull. The masts and rigging came crashing down knocking passengers and crew overboard. When a lifeboat was finally launched, it crashed into the side of LOCH ARD and capsized. Tom Pearce, who had launched the boat, managed to cling to its overturned hull and shelter beneath it. He drifted out to sea and then on the flood tide came into what is now known as LOCH ARD Gorge. He swam to shore, bruised and dazed, and found a cave in which to shelter. Some of the crew stayed below deck to shelter from the falling rigging but drowned when the ship slipped off the reef into deeper water. Eva Carmichael had raced onto deck to find out what was happening only to be confronted by towering cliffs looming above the stricken ship. In all the chaos, Captain Gibbs grabbed Eva and said, "If you are saved Eva, let my dear wife know that I died like a sailor". That was the last Eva Carmichael saw of the captain. She was swept off the ship by a huge wave. Eva saw Tom Pearce on a small rocky beach and yelled to attract his attention. He dived in and swam to the exhausted woman and dragged her to shore. He took her to the cave and broke open case of brandy which had washed up on the beach. He opened a bottle to revive the unconscious woman. A few hours later Tom scaled a cliff in search of help. He followed hoof prints and came by chance upon two men from nearby Glenample Station three and a half miles away. In a state of exhaustion, he told the men of the tragedy. Tom returned to the gorge while the two men rode back to the station to get help. By the time they reached LOCH ARD Gorge, it was cold and dark. The two shipwreck survivors were taken to Glenample Station to recover. Eva stayed at the station for six weeks before returning to Ireland, this time by steamship. In Melbourne, Tom Pearce received a hero's welcome. He was presented with the first gold medal of the Royal Humane Society of Victoria and a £1000 cheque from the Victorian Government. Concerts were performed to honour the young man's bravery and to raise money for those who lost family in the LOCH ARD disaster. Of the 54 crew members and passengers on board, only two survived: the apprentice, Tom Pearce and the young woman passenger, Eva Carmichael, who lost all of her family in the tragedy. Ten days after the LOCH ARD tragedy, salvage rights to the wreck were sold at auction for £2,120. Cargo valued at £3,000 was salvaged and placed on the beach, but most washed back into the sea when another storm developed. The wreck of LOCH ARD still lies at the base of Mutton Bird Island. Much of the cargo has now been salvaged and some was washed up into what is now known as LOCH ARD Gorge. Cargo and artefacts have also been illegally salvaged over many years before protective legislation was introduced. One of the most unlikely pieces of cargo to have survived the shipwreck was a Minton porcelain peacock - one of only nine in the world. The peacock was destined for the Melbourne International Exhibition in 1880. It had been well packed, which gave it adequate protection during the violent storm. Today, the Minton peacock can be seen at the Flagstaff Hill Maritime Museum in Warrnambool. From Australia's most dramatic shipwreck it has now become Australia's most valuable shipwreck artefact and is one of very few 'objects' on the Victorian State Heritage Register. Flagstaff Hill’s collection of artefacts from LOCH ARD is significant for being one of the largest collections of artefacts from this shipwreck in Victoria. It is significant for its association with the shipwreck, which is on the Victorian Heritage Register (VHR S417). The collection is significant because of the relationship between the objects, as together they have a high potential to interpret the story of the LOCH ARD. The LOCH ARD collection is archaeologically significant as the remains of a large international passenger and cargo ship. The LOCH ARD collection is historically significant for representing aspects of Victoria’s shipping history and its potential to interpret sub-theme 1.5 of Victoria’s Framework of Historical Themes (living with natural processes). The collection is also historically significant for its association with the LOCH ARD, which was one of the worst and best known shipwrecks in Victoria’s history. Painting of The Loch Ard oil on board depicting wreck. It shows stormy sea and coastline in background. Ship appears to be capsized.flagstaff hill, warrnambool, shipwrecked coast, flagstaff hill maritime museum, maritime museum, shipwreck coast, flagstaff hill maritime village, great ocean road, loch line, loch ard, captain gibbs, eva carmichael, tom pearce, glenample station, mutton bird island, loch ard gorge, painting -
 Flagstaff Hill Maritime Museum and Village
Photograph, after 1890
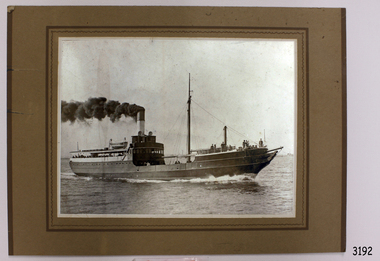
This photograph was donated by Mrs Nancy Mason, daughter-in-law of the last owner, Arnold Mason, who had been given the photograph by Mr. Mac Fordham, who was Chief Engineer of the SS Edina. Both men had been Engineers in WW I. The configuration of the SS Edina in the photograph is post 1890. ABOUT THE S S EDINA The three masted iron screw steamer SS Edina was built in Glasgow, Scotland, in 1854 by Barclay and Curle. She was adorned with the figurehead of ‘fair maid of Judea’. The many years of service made SS Edina famous world-wide as the longest serving screw steamer. (The term screw steamer comes from being driven by a single propeller, sometimes called a screw, driven by a steam engine.) SS Edina’s interesting history includes English Chanel runs, serving in the Crimean Ware carrying ammunition, horses and stores to the Black Sea, and further service in the American Civil War and later, serving in the western district of Victoria as well as in Queensland and carried gold, currency and gold prospectors Australia to New Zealand. SS Edina had the privilege of being an escort vessel to H.R.H. the Duke of Edinburgh during his visit to Australia in 1867. In March 1863 SS Edina arrived in Port Phillip Bay, Melbourne and was bought by Stephen Henty, of Portland fame, to work the cargo and passenger run from Melbourne – Warrnambool – Port Fairy - Portland. After a short time of working the run from Australia to New Zealand, with passengers and cargo that included gold and currency, she returned to her Melbourne - Warrnambool – Port Fairy run, with cargo including bales of wool produced in the western district of Victoria. The Warrnambool Steam Packet Company purchased SS Edina in 1867; she was now commanded by Captain John Thompson and Chief Engineer John Davies. She survived several mishaps at sea, had a complete service and overhaul and several changes of commanders. In 1870 SS Edina was in Lady Bay, Warrnambool, when a gale sprung up and caused a collision with the iron screw steamer SS Dandenong. SS Edina’s figurehead was broken into pieces and it was not ever replaced. SS Edina was re-fitted in 1870 then was used as a coastal trader in Queensland for a period. She was then brought to Melbourne to carry cargo and passengers between Melbourne and Geelong and performed this service 1880-1938. During this time (1917) she was again refitted with a new mast, funnel, bridge and promenade deck, altering her appearance. In 1938, after more collisions, SS Edina was taken out of service. However she was later renamed Dinah and used as a ‘lighter’ (a vessel without engine or superstructure) to be towed and carry wool and general cargo between Melbourne and Geelong. In 1957, after 104 years, the SS Edina was broken up at Footscray, Melbourne. Remains of SS Edina’s hull can be found in the Maribyrnong River, Port Phillip Bay. [Reference: A Brief Review of Steam Navigation in Victoria; C Dickson Gregory; Centenary Maritime Exhibition catalogue, 1934; published by Shiplovers' Society of Victoria Dandenong, Passengers in History, http://passengersinhistory.sa.gov.au/node/924034 Edina, Victorian Heritage Database VHR S199 http://vhd.heritage.vic.gov.au/shipwrecks/heritage/199 SS Edina, Coastal Trader and Passenger Ship 1853-1938, Museum Victoria Collections, https://collections.museumvictoria.com.au/articles/6227 SS ‘Edina’ – the Longest Serving Screw Steamer in the World, POI Australia, https://poi-australia.com.au/ss-edina-the-longest-serving-steamer-in-the-world/ ]This photograph of the SS Edina is significant for its association with the screw steamer SS Edina. The SS Edina is heritage listed on the Victorian Heritage Database VHR S199. She had endeared herself to the people of Port Phillip Bay as a passenger ferry, part of their history and culture. She played a significant role in the Crimean War, the American Civil War and the gold rush in New Zealand. She also served western Victoria for many years in her cargo and passenger runs. The SS Edina is famous for being the longest serving screw steamer in the world. After spending her first nine years overseas she arrived in Melbourne and her work included running the essential service of transporting cargo and passengers between Melbourne and the western Victoria ports of Warrnambool, Port Fairy and Portland. The SS Edina was purchased in the late 1860’s by local Warrnambool business, the Warrnambool Steam Packet Co. and continued trading from there as part of the local business community. The SS Edina’s original ‘fair maid of Judea’ figurehead was broken to pieces in a collision with another vessel (the SS Dandenong) in a gale off Warrnambool, Victoria, in 1870.Black and White photograph mounted on brown card of SS Edina. Inscription on reverse side. The photograph shows the SS Edina moving under steam power, many people on both the bow and stern and a few people in the centre of the vessel. There are buildings on the shore in the background. The ship's configuration is dated post 1890.warrnambool, shipwrecked coast, flagstaff hill, flagstaff hill maritime museum, maritime museum, shipwreck coast, flagstaff hill maritime village, shipwrecked artefact, barclay & curle, figurehead 'fair maid of judea', centenary maritime exhibition 1934, a brief review of steam navigation in victoria, pleasure steamer edina, trade and travel late 19th and early 20th century, trade melbourne to geelong, screw steamer edina, coastal trader edina, lighter dinah, cargo carrying for cremean war, cargo carrying for american civil war, passenger and trade in western district of victoria, export gold and currency and gold diggers to new zealand, export vessel to h r h the duke of edinburgh, melbourne - warrnambool - port fairy - portland cargo run, warrnambool steam packet company, stephen henty, captain john thompson, chief engineer john davies, lady bay warrnambool, lighter edina, shipping victoria, port phillip bay steamers, steamship great britain, edina, vhr s199 victorian heritage database, photograph of ss edina post 1890, photograph australian screw steamer, pleasure vessel victoria post 1890 -
 Flagstaff Hill Maritime Museum and Village
Photograph, Between 1890 - 19-12-1937
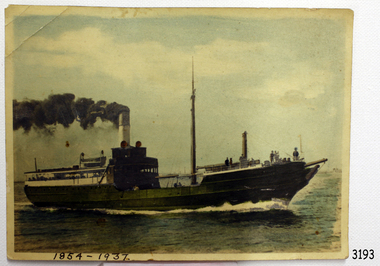
This photographic postcard of the SS Edina was taken after the 1890’s due to the style and configuration of the vessel. There is a black and white photograph of the same image also in our Collection (RN 3192). It is most likely that both of the photographs were donated by the same person because the people mentioned in the inscription on the black and white photograph’s reverse side connect with two of the people mentioned in the letter on the reverse of the coloured photograph. * RN 3192; Black & White photograph - inscription: "Donated by Mrs. Nancy Mason, Bay View. Owned by Mac Fordham, Chief Engineer, 'Edina', then given to Mrs. Mason's father-in-law Arnold Mason (both Engineers W.W. I)" The “Arnie” to whom the letter was addressed is likely to be Arnold Mason, Engineer. The author of the letter, “Mac”, is likely to be Mac Fordham, Chief Engineer of SS Edina. The transcribed letter tells of two men who know each other well and have an interest in the Edina. “Mac” mentions that he may be “too old” to be at sea again; this would also support the idea that the older writer would give his photographs to the perhaps younger “Arnie”. * RN 3193 (this photograph) - Transcription of pen and ink script handwriting = = = = = = = = = = = = 19-12-37 No. 1 Flat, “Goodwood Lodge” 196 Lennox Street, Richmond [Victoria] Dear Arnie , Been meaning to write for long time but you know, it’s just the usual routine of the seamen within Bay trades. Had a good trip back from Sydney. Took our time, spent almost a week coming back, rather monotonous in parts in the hill country, too many darn curves, still was a good trip. How are you all keeping? Suppose you’ve moved back to Drummoyne [erettris?], expect you can let the house in Manly easily enough. Noticed they had a strike at Cockatoo [Cockatoo Island NSW]. don’t suppose they pulled the boys out. How is Jack doing? Has [Willie?] commenced training yet, or no! too young, isn’t she? Been a lot of “paper” talk about the “Edina” finishing but nothing official that I’m aware of, but it’s always on the cards I suppose, then I suppose it will be to sea again if I’m not too old. Easy Winter only 3 trips per week, running every day from today until further notice. Trust [Mary?] Is well & all’s well with you too. Best wishes from us both for Xmas & New Year. Cheerio Mac = = = = = = = = = = = = ABOUT THE S S EDINA The three masted iron screw steamer SS Edina was built in Glasgow, Scotland, in 1854 by Barclay and Curle. She was adorned with the figurehead of ‘fair maid of Judea’. The many years of service made SS Edina famous world-wide as the longest serving screw steamer. (The term screw steamer comes from being driven by a single propeller, sometimes called a screw, driven by a steam engine.) SS Edina’s interesting history includes English Chanel runs, serving in the Crimean Ware carrying ammunition, horses and stores to the Black Sea, and further service in the American Civil War and later, serving in the western district of Victoria as well as in Queensland and carried gold, currency and gold prospectors Australia to New Zealand. SS Edina had the privilege of being an escort vessel to H.R.H. the Duke of Edinburgh during his visit to Australia in 1867. In March 1863 SS Edina arrived in Port Phillip Bay, Melbourne and was bought by Stephen Henty, of Portland fame, to work the cargo and passenger run from Melbourne – Warrnambool – Port Fairy - Portland. After a short time of working the run from Australia to New Zealand, with passengers and cargo that included gold and currency, she returned to her Melbourne - Warrnambool – Port Fairy run, with cargo including bales of wool produced in the western district of Victoria. The Warrnambool Steam Packet Company purchased SS Edina in 1867; she was now commanded by Captain John Thompson and Chief Engineer John Davies. She survived several mishaps at sea, had a complete service and overhaul and several changes of commanders. In 1870 SS Edina was in Lady Bay, Warrnambool, when a gale sprung up and caused a collision with the iron screw steamer SS Dandenong. SS Edina’s figurehead was broken into pieces and it was not ever replaced. SS Edina was re-fitted in 1870 then was used as a coastal trader in Queensland for a period. She was then brought to Melbourne to carry cargo and passengers between Melbourne and Geelong and performed this service 1880-1938. During this time (1917) she was again refitted with a new mast, funnel, bridge and promenade deck, altering her appearance. In 1938, after more collisions, SS Edina was taken out of service. However she was later renamed Dinah and used as a ‘lighter’ (a vessel without engine or superstructure) to be towed and carry wool and general cargo between Melbourne and Geelong. In 1957, after 104 years, the SS Edina was broken up at Footscray, Melbourne. Remains of SS Edina’s hull can be found in the Maribyrnong River, Port Phillip Bay. [Reference: A Brief Review of Steam Navigation in Victoria; C Dickson Gregory; Centenary Maritime Exhibition catalogue, 1934; published by Shiplovers' Society of Victoria Dandenong, Passengers in History, http://passengersinhistory.sa.gov.au/node/924034 Edina, Victorian Heritage Database VHR S199 http://vhd.heritage.vic.gov.au/shipwrecks/heritage/199 SS Edina, Coastal Trader and Passenger Ship 1853-1938, Museum Victoria Collections, https://collections.museumvictoria.com.au/articles/6227 SS ‘Edina’ – the Longest Serving Screw Steamer in the World, POI Australia, https://poi-australia.com.au/ss-edina-the-longest-serving-steamer-in-the-world/ ]This photographic postcard with the letter on the revers tell about the SS Edina and are significant for its association with the screw steamer SS Edina. The SS Edina is heritage listed on the Victorian Heritage Database VHR S199. She had endeared herself to the people of Port Phillip Bay as a passenger ferry, part of their history and culture. She played a significant role in the Crimean War, the American Civil War and the gold rush in New Zealand. She also served western Victoria for many years in her cargo and passenger runs. The SS Edina is famous for being the longest serving screw steamer in the world. After spending her first nine years overseas she arrived in Melbourne and her work included running the essential service of transporting cargo and passengers between Melbourne and the western Victoria ports of Warrnambool, Port Fairy and Portland. The SS Edina was purchased in the late 1860’s by local Warrnambool business, the Warrnambool Steam Packet Co. and continued trading from there as part of the local business community. The SS Edina’s original ‘fair maid of Judea’ figurehead was broken to pieces in a collision with another vessel (the SS Dandenong) in a gale off Warrnambool, Victoria, in 1870.Coloured (hand coloured) photographic postcard of SS Edina. Letter on reverse, hand written in pen and ink, from Mac to Arnie, dated 19-12-37 [1937]. The photograph shows the SS Edina moving under steam power, many people on both the bow and stern and a few people in the centre of the vessel. There are buildings on the shore in the background. The ship's configuration is dated post 1890.Hand written in pen on base of front “1854-1957” Hand written on back in blue pen and crossed out “REC 409” Hand written on back in pen ‘EDINA,’ “3173,” “086.2” Hand written letter dated 19-12-37, from Mac to Arnie. Script writing in pen and ink letter on reverse of photograph – see “Context” section for transcription. warrnambool, shipwrecked coast, flagstaff hill, flagstaff hill maritime museum, maritime museum, shipwreck coast, flagstaff hill maritime village, shipwrecked artefact, barclay & curle, figurehead 'fair maid of judea', centenary maritime exhibition 1934, a brief review of steam navigation in victoria, pleasure steamer edina, trade and travel late 19th and early 20th century, trade melbourne to geelong, screw steamer edina, coastal trader edina, lighter dinah, cargo carrying for cremean war, cargo carrying for american civil war, passenger and trade in western district of victoria, export gold and currency and gold diggers to new zealand, export vessel to h r h the duke of edinburgh, melbourne - warrnambool - port fairy - portland cargo run, warrnambool steam packet company, stephen henty, captain john thompson, chief engineer john davies, lady bay warrnambool, lighter edina, shipping victoria, port phillip bay steamers, steamship great britain, edina, vhr s199 victorian heritage database, photographic postcard of ss edina 1854-1957, letter by mac fordham chief engineer ss edina, letter to arnold mason, engineer -
 Flagstaff Hill Maritime Museum and Village
Photograph, S.S. "EDINA," Moorabool Street Wharf, Geelong, c. 1870's - 1930's
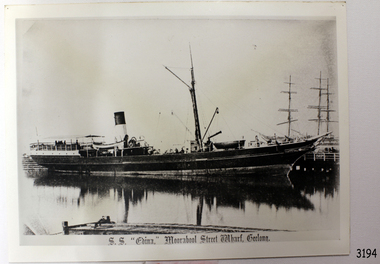
This black and white photograph was taken when the SS Edina was as port at the Gellong Wharf in Moorabool Street. The Port of Geelong had many wool sheds alongside the wharf - wool was a major export product. ABOUT THE S S EDINA The three masted iron screw steamer SS Edina was built in Glasgow, Scotland, in 1854 by Barclay and Curle. She was adorned with the figurehead of ‘fair maid of Judea’. The many years of service made SS Edina famous world-wide as the longest serving screw steamer. (The term screw steamer comes from being driven by a single propeller, sometimes called a screw, driven by a steam engine.) SS Edina’s interesting history includes English Chanel runs, serving in the Crimean Ware carrying ammunition, horses and stores to the Black Sea, and further service in the American Civil War and later, serving in the western district of Victoria as well as in Queensland and carried gold, currency and gold prospectors Australia to New Zealand. SS Edina had the privilege of being an escort vessel to H.R.H. the Duke of Edinburgh during his visit to Australia in 1867. In March 1863 SS Edina arrived in Port Phillip Bay, Melbourne and was bought by Stephen Henty, of Portland fame, to work the cargo and passenger run from Melbourne – Warrnambool – Port Fairy - Portland. After a short time of working the run from Australia to New Zealand, with passengers and cargo that included gold and currency, she returned to her Melbourne - Warrnambool – Port Fairy run, with cargo including bales of wool produced in the western district of Victoria. The Warrnambool Steam Packet Company purchased SS Edina in 1867; she was now commanded by Captain John Thompson and Chief Engineer John Davies. She survived several mishaps at sea, had a complete service and overhaul and several changes of commanders. In 1870 SS Edina was in Lady Bay, Warrnambool, when a gale sprung up and caused a collision with the iron screw steamer SS Dandenong. SS Edina’s figurehead was broken into pieces and it was not ever replaced. SS Edina was re-fitted in 1870 then was used as a coastal trader in Queensland for a period. She was then brought to Melbourne to carry cargo and passengers between Melbourne and Geelong and performed this service 1880-1938. During this time (1917) she was again refitted with a new mast, funnel, bridge and promenade deck, altering her appearance. In 1938, after more collisions, SS Edina was taken out of service. However she was later renamed Dinah and used as a ‘lighter’ (a vessel without engine or superstructure) to be towed and carry wool and general cargo between Melbourne and Geelong. In 1957, after 104 years, the SS Edina was broken up at Footscray, Melbourne. Remains of SS Edina’s hull can be found in the Maribyrnong River, Port Phillip Bay. [Reference: A Brief Review of Steam Navigation in Victoria; C Dickson Gregory; Centenary Maritime Exhibition catalogue, 1934; published by Shiplovers' Society of Victoria Dandenong, Passengers in History, http://passengersinhistory.sa.gov.au/node/924034 Edina, Victorian Heritage Database VHR S199 http://vhd.heritage.vic.gov.au/shipwrecks/heritage/199 SS Edina, Coastal Trader and Passenger Ship 1853-1938, Museum Victoria Collections, https://collections.museumvictoria.com.au/articles/6227 SS ‘Edina’ – the Longest Serving Screw Steamer in the World, POI Australia, https://poi-australia.com.au/ss-edina-the-longest-serving-steamer-in-the-world/ ]This postcard of the SS Edina is significant for its association with the screw steamer SS Edina and shows her at one of her trading ports on the Melbourne - Warrnambool - Port Fairy - Portland run. The SS Edina is heritage listed on the Victorian Heritage Database VHR S199. She had endeared herself to the people of Port Phillip Bay as a passenger ferry, part of their history and culture. She played a significant role in the Crimean War, the American Civil War and the gold rush in New Zealand. She also served western Victoria for many years in her cargo and passenger runs. The SS Edina is famous for being the longest serving screw steamer in the world. After spending her first nine years overseas she arrived in Melbourne and her work included running the essential service of transporting cargo and passengers between Melbourne and the western Victoria ports of Warrnambool, Port Fairy and Portland. The SS Edina was purchased in the late 1860’s by local Warrnambool business, the Warrnambool Steam Packet Co. and continued trading from there as part of the local business community. The SS Edina’s original ‘fair maid of Judea’ figurehead was broken to pieces in a collision with another vessel (the SS Dandenong) in a gale off Warrnambool, Victoria, in 1870.Black and White photograph of S.S Edina at the Moorabool Street Wharf, Geelong in calm water that shows the reflection of the steamer. Ship has no sails raised. The funnel has a light coloured base with a dark coloured top. There are people on board the steamer. Other ship masts and people are in the background. In the foreground is a jetty with a small boat beside it and a person inside the boat. There is a title printed along the base of the photograph. c. 1870's to 1930'sPrinted at base of photograph "S.S. "EDINA," Moorabool Street Wharf, Geelong"warrnambool, shipwrecked coast, flagstaff hill, flagstaff hill maritime museum, maritime museum, shipwreck coast, flagstaff hill maritime village, shipwrecked artefact, barclay & curle, figurehead 'fair maid of judea', centenary maritime exhibition 1934, a brief review of steam navigation in victoria, pleasure steamer edina, trade and travel late 19th and early 20th century, trade melbourne to geelong, screw steamer edina, coastal trader edina, lighter dinah, cargo carrying for cremean war, cargo carrying for american civil war, passenger and trade in western district of victoria, export gold and currency and gold diggers to new zealand, export vessel to h r h the duke of edinburgh, melbourne - warrnambool - port fairy - portland cargo run, warrnambool steam packet company, stephen henty, captain john thompson, chief engineer john davies, lady bay warrnambool, lighter edina, shipping victoria, port phillip bay steamers, steamship great britain, edina, vhr s199 victorian heritage database, postcard of ss edina 1870's - 1930's -
 Flagstaff Hill Maritime Museum and Village
Craft - Ship Model, Port Jackson Schooner
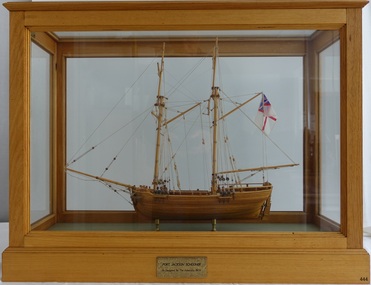
... of Australia’s history on the twenty dollar banknote. The colonial Port ...This ship model is of a Colonial Port Jackson schooner, originally designed by the British Admiralty in 1803 as a response to the request of New South Wales' Governor Arthur Phillip. The drafts for the original plans are in Greenwich, UK, in the National Maritime Museum. The model is a Ledition edition, number 2 of 5, modelled by Bill Leonard. The model is rigged and decked in the manner of David McGregor. The flag on model of Port Jackson schooner is that of the British White Ensign which was used as the flag design of the Royal Australian Navy from 1911 - 1967. In 1785 the First Fleet arrived in the new British colony of Port Jackson (now Sydney Harbour) in New South Wales and Arthur Phillip was appointed as the first Governor. The following year Governor Phillip asked the English Royal Navy to provide drafts and materials for two ships for use in the Port Jackson colony for exploring and surveying rivers. The vessels needed a shallow draught and to be made from local cedar timber. He asked for the frames of the schooners to be provided along with shipwrights to assemble them. Many years later, in 1803, Governor Phillip’s request was fulfilled but he had already resigned from his post. The drafts titled ‘Schooner for Port Jackson’ were despatched by the Royal Navy from England to Australia. The original draft is still in the National Maritime Museum in Greenwich, UK. Meanwhile, the NSW Government had already built various other ships before 1803. In 1797 His Majesty’s Dockyard was opened at Port Jackson for building larger vessels. The Royal Navy’s 1803 design of a ‘Schooner for Port Jackson’ has been recognised on the obverse of Australia’s twenty dollar banknote since 1994. A sketch of the schooner is beside the portrait of Mrs Mary Reibey, who arrived as a convict and rose to become a respected and successful owner of a cargo shipping business. Her fleet included the Mercury, a schooner similar to the 1803 design for the Port Jackson schooner. Although the 1803 plans for a ‘Schooner for Port Jackson’ are commonly believed to be used for the first ship built in Australia, no records have been found of any ships being built according to these plans. However, it can be claimed that the plans were the ‘first Royal Navy plans made for a ship for use at Port Jackson, and to be built at Port Jackson, in Australia’. William (Bill) Leonard passed away on March 1st 1995.This ship model is significant for its representation of an early Australian colonial schooner. The 1803 Royal Navy’s plans for the colonial ‘Schooner for Port Jackson, were for the first ship specifically designed by the Royal Navy to be built and used in Port Jackson, for use in exploration and surveying of Australian ports and rivers. The plans are associated with Australia’s colonial settlement in the late 1700s. This ship model is significant for its association with the emblems of Australia’s history on the twenty dollar banknote. The colonial Port Jackson schooner is considered significant to Australian history, and represented on the 1994 twenty dollar banknote and its new version being rolled out in October 2019.Ship model of a colonial Port Jackson Schooner. Two-masted sailing ship displaying the flag named The British White Ensign. Mode of light coloured stained timberl is mounted on brass legs inside a glass case with timber frame and base. Metal engraved plaque states that the model is as designed by The Admiralty in 1803. Model is a number 2 of 5 in a limited edition, made by Bill Leonard.Engraved on metal plaque "PORT JACKSON SCHOONER / As Designed By The Admiralty. 1803"flagstaff hill, warrnambool, shipwrecked-coast, flagstaff-hill, flagstaff-hill-maritime-museum, maritime-museum, shipwreck-coast, flagstaff-hill-maritime-village, ship model port jackson schooner, sailing ship, limited edition model, model maker bill leonard, david mcgregor design, maritime trade, maritime vessel, colonial port jackson schooner, pacific island trade in early 1800s, sydney cove, governor arthur phillip, governor philip gidley king, a schooner for port jackson, national maritime museum greenwich, australian $20 banknote -
 Flagstaff Hill Maritime Museum and Village
Photograph
HISTORY OF THE LOCH ARD The LOCH ARD belonged to the famous Loch Line which sailed many ships from England to Australia. Built in Glasgow by Barclay, Curdle and Co. in 1873, the LOCH ARD was a three-masted square rigged iron sailing ship. The ship measured 262ft 7" (79.87m) in length, 38ft (11.58m) in width, 23ft (7m) in depth and had a gross tonnage of 1693 tons. The LOCH ARD's main mast measured a massive 150ft (45.7m) in height. LOCH ARD made three trips to Australia and one trip to Calcutta before its final voyage. LOCH ARD left England on March 2, 1878, under the command of Captain Gibbs, a newly married, 29 year old. She was bound for Melbourne with a crew of 37, plus 17 passengers and a load of cargo. The general cargo reflected the affluence of Melbourne at the time. On board were straw hats, umbrella, perfumes, clay pipes, pianos, clocks, confectionary, linen and candles, as well as a heavier load of railway irons, cement, lead and copper. There were items included that intended for display in the Melbourne International Exhibition in 1880. The voyage to Port Phillip was long but uneventful. At 3am on June 1, 1878, Captain Gibbs was expecting to see land and the passengers were becoming excited as they prepared to view their new homeland in the early morning. But LOCH ARD was running into a fog which greatly reduced visibility. Captain Gibbs was becoming anxious as there was no sign of land or the Cape Otway lighthouse. At 4am the fog lifted. A man aloft announced that he could see breakers. The sheer cliffs of Victoria's west coast came into view, and Captain Gibbs realised that the ship was much closer to them than expected. He ordered as much sail to be set as time would permit and then attempted to steer the vessel out to sea. On coming head on into the wind, the ship lost momentum, the sails fell limp and LOCH ARD's bow swung back. Gibbs then ordered the anchors to be released in an attempt to hold its position. The anchors sank some 50 fathoms - but did not hold. By this time LOCH ARD was among the breakers and the tall cliffs of Mutton Bird Island rose behind the ship. Just half a mile from the coast, the ship's bow was suddenly pulled around by the anchor. The captain tried to tack out to sea, but the ship struck a reef at the base of Mutton Bird Island, near Port Campbell. Waves broke over the ship and the top deck was loosened from the hull. The masts and rigging came crashing down knocking passengers and crew overboard. When a lifeboat was finally launched, it crashed into the side of LOCH ARD and capsized. Tom Pearce, who had launched the boat, managed to cling to its overturned hull and shelter beneath it. He drifted out to sea and then on the flood tide came into what is now known as LOCH ARD Gorge. He swam to shore, bruised and dazed, and found a cave in which to shelter. Some of the crew stayed below deck to shelter from the falling rigging but drowned when the ship slipped off the reef into deeper water. Eva Carmichael had raced onto deck to find out what was happening only to be confronted by towering cliffs looming above the stricken ship. In all the chaos, Captain Gibbs grabbed Eva and said, "If you are saved Eva, let my dear wife know that I died like a sailor". That was the last Eva Carmichael saw of the captain. She was swept off the ship by a huge wave. Eva saw Tom Pearce on a small rocky beach and yelled to attract his attention. He dived in and swam to the exhausted woman and dragged her to shore. He took her to the cave and broke open case of brandy which had washed up on the beach. He opened a bottle to revive the unconscious woman. A few hours later Tom scaled a cliff in search of help. He followed hoof prints and came by chance upon two men from nearby Glenample Station three and a half miles away. In a state of exhaustion, he told the men of the tragedy. Tom returned to the gorge while the two men rode back to the station to get help. By the time they reached LOCH ARD Gorge, it was cold and dark. The two shipwreck survivors were taken to Glenample Station to recover. Eva stayed at the station for six weeks before returning to Ireland, this time by steamship. In Melbourne, Tom Pearce received a hero's welcome. He was presented with the first gold medal of the Royal Humane Society of Victoria and a £1000 cheque from the Victorian Government. Concerts were performed to honour the young man's bravery and to raise money for those who lost family in the LOCH ARD disaster. Of the 54 crew members and passengers on board, only two survived: the apprentice, Tom Pearce and the young woman passenger, Eva Carmichael, who lost all of her family in the tragedy. Ten days after the LOCH ARD tragedy, salvage rights to the wreck were sold at auction for £2,120. Cargo valued at £3,000 was salvaged and placed on the beach, but most washed back into the sea when another storm developed. The wreck of LOCH ARD still lies at the base of Mutton Bird Island. Much of the cargo has now been salvaged and some was washed up into what is now known as LOCH ARD Gorge. Cargo and artefacts have also been illegally salvaged over many years before protective legislation was introduced. One of the most unlikely pieces of cargo to have survived the shipwreck was a Minton porcelain peacock - one of only nine in the world. The peacock was destined for the Melbourne International Exhibition in 1880. It had been well packed, which gave it adequate protection during the violent storm. Today, the Minton peacock can be seen at the Flagstaff Hill Maritime Museum in Warrnambool. From Australia's most dramatic shipwreck it has now become Australia's most valuable shipwreck artefact and is one of very few 'objects' on the Victorian State Heritage Register. Flagstaff Hill’s collection of artefacts from LOCH ARD is significant for being one of the largest collections of artefacts from this shipwreck in Victoria. It is significant for its association with the shipwreck, which is on the Victorian Heritage Register (VHR S417). The collection is significant because of the relationship between the objects, as together they have a high potential to interpret the story of the LOCH ARD. The LOCH ARD collection is archaeologically significant as the remains of a large international passenger and cargo ship. The LOCH ARD collection is historically significant for representing aspects of Victoria’s shipping history and its potential to interpret sub-theme 1.5 of Victoria’s Framework of Historical Themes (living with natural processes). The collection is also historically significant for its association with the LOCH ARD, which was one of the worst and best known shipwrecks in Victoria’s history. Photograph of Loch Ard Gorge c1900flagstaff hill, warrnambool, shipwrecked coast, flagstaff hill maritime museum, maritime museum, shipwreck coast, flagstaff hill maritime village, great ocean road, loch line, loch ard, captain gibbs, eva carmichael, tom pearce, glenample station, mutton bird island, loch ard gorge, photograph of loch ard gorge, photograph -
 Flagstaff Hill Maritime Museum and Village
Calendar
HISTORY OF THE LOCH ARD The LOCH ARD belonged to the famous Loch Line which sailed many ships from England to Australia. Built in Glasgow by Barclay, Curdle and Co. in 1873, the LOCH ARD was a three-masted square rigged iron sailing ship. The ship measured 262ft 7" (79.87m) in length, 38ft (11.58m) in width, 23ft (7m) in depth and had a gross tonnage of 1693 tons. The LOCH ARD's main mast measured a massive 150ft (45.7m) in height. LOCH ARD made three trips to Australia and one trip to Calcutta before its final voyage. LOCH ARD left England on March 2, 1878, under the command of Captain Gibbs, a newly married, 29 year old. She was bound for Melbourne with a crew of 37, plus 17 passengers and a load of cargo. The general cargo reflected the affluence of Melbourne at the time. On board were straw hats, umbrella, perfumes, clay pipes, pianos, clocks, confectionary, linen and candles, as well as a heavier load of railway irons, cement, lead and copper. There were items included that intended for display in the Melbourne International Exhibition in 1880. The voyage to Port Phillip was long but uneventful. At 3am on June 1, 1878, Captain Gibbs was expecting to see land and the passengers were becoming excited as they prepared to view their new homeland in the early morning. But LOCH ARD was running into a fog which greatly reduced visibility. Captain Gibbs was becoming anxious as there was no sign of land or the Cape Otway lighthouse. At 4am the fog lifted. A man aloft announced that he could see breakers. The sheer cliffs of Victoria's west coast came into view, and Captain Gibbs realised that the ship was much closer to them than expected. He ordered as much sail to be set as time would permit and then attempted to steer the vessel out to sea. On coming head on into the wind, the ship lost momentum, the sails fell limp and LOCH ARD's bow swung back. Gibbs then ordered the anchors to be released in an attempt to hold its position. The anchors sank some 50 fathoms - but did not hold. By this time LOCH ARD was among the breakers and the tall cliffs of Mutton Bird Island rose behind the ship. Just half a mile from the coast, the ship's bow was suddenly pulled around by the anchor. The captain tried to tack out to sea, but the ship struck a reef at the base of Mutton Bird Island, near Port Campbell. Waves broke over the ship and the top deck was loosened from the hull. The masts and rigging came crashing down knocking passengers and crew overboard. When a lifeboat was finally launched, it crashed into the side of LOCH ARD and capsized. Tom Pearce, who had launched the boat, managed to cling to its overturned hull and shelter beneath it. He drifted out to sea and then on the flood tide came into what is now known as LOCH ARD Gorge. He swam to shore, bruised and dazed, and found a cave in which to shelter. Some of the crew stayed below deck to shelter from the falling rigging but drowned when the ship slipped off the reef into deeper water. Eva Carmichael had raced onto deck to find out what was happening only to be confronted by towering cliffs looming above the stricken ship. In all the chaos, Captain Gibbs grabbed Eva and said, "If you are saved Eva, let my dear wife know that I died like a sailor". That was the last Eva Carmichael saw of the captain. She was swept off the ship by a huge wave. Eva saw Tom Pearce on a small rocky beach and yelled to attract his attention. He dived in and swam to the exhausted woman and dragged her to shore. He took her to the cave and broke open case of brandy which had washed up on the beach. He opened a bottle to revive the unconscious woman. A few hours later Tom scaled a cliff in search of help. He followed hoof prints and came by chance upon two men from nearby Glenample Station three and a half miles away. In a state of exhaustion, he told the men of the tragedy. Tom returned to the gorge while the two men rode back to the station to get help. By the time they reached LOCH ARD Gorge, it was cold and dark. The two shipwreck survivors were taken to Glenample Station to recover. Eva stayed at the station for six weeks before returning to Ireland, this time by steamship. In Melbourne, Tom Pearce received a hero's welcome. He was presented with the first gold medal of the Royal Humane Society of Victoria and a £1000 cheque from the Victorian Government. Concerts were performed to honour the young man's bravery and to raise money for those who lost family in the LOCH ARD disaster. Of the 54 crew members and passengers on board, only two survived: the apprentice, Tom Pearce and the young woman passenger, Eva Carmichael, who lost all of her family in the tragedy. Ten days after the LOCH ARD tragedy, salvage rights to the wreck were sold at auction for £2,120. Cargo valued at £3,000 was salvaged and placed on the beach, but most washed back into the sea when another storm developed. The wreck of LOCH ARD still lies at the base of Mutton Bird Island. Much of the cargo has now been salvaged and some was washed up into what is now known as LOCH ARD Gorge. Cargo and artefacts have also been illegally salvaged over many years before protective legislation was introduced. One of the most unlikely pieces of cargo to have survived the shipwreck was a Minton porcelain peacock - one of only nine in the world. The peacock was destined for the Melbourne International Exhibition in 1880. It had been well packed, which gave it adequate protection during the violent storm. Today, the Minton peacock can be seen at the Flagstaff Hill Maritime Museum in Warrnambool. From Australia's most dramatic shipwreck it has now become Australia's most valuable shipwreck artefact and is one of very few 'objects' on the Victorian State Heritage Register. Flagstaff Hill’s collection of artefacts from LOCH ARD is significant for being one of the largest collections of artefacts from this shipwreck in Victoria. It is significant for its association with the shipwreck, which is on the Victorian Heritage Register (VHR S417). The collection is significant because of the relationship between the objects, as together they have a high potential to interpret the story of the LOCH ARD. The LOCH ARD collection is archaeologically significant as the remains of a large international passenger and cargo ship. The LOCH ARD collection is historically significant for representing aspects of Victoria’s shipping history and its potential to interpret sub-theme 1.5 of Victoria’s Framework of Historical Themes (living with natural processes). The collection is also historically significant for its association with the LOCH ARD, which was one of the worst and best known shipwrecks in Victoria’s history. Calendar printed by Terang Express for December 1923 with picture of Loch Ard Gorge and survivors of wreck and also story of the episode. Has some large tears in it.flagstaff hill, warrnambool, shipwrecked coast, flagstaff hill maritime museum, maritime museum, shipwreck coast, flagstaff hill maritime village, great ocean road, loch line, loch ard, captain gibbs, eva carmichael, tom pearce, glenample station, mutton bird island, loch ard gorge, calendar, terang express -
 Flagstaff Hill Maritime Museum and Village
Photograph - Coastal Scene, Foyle Photographic Studio, Loch Ard Gorge Port Campbell, 1889-1919
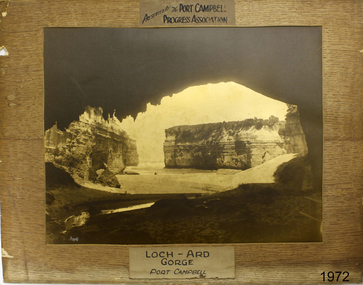
The photograph shows the popular tourist attraction, Loch Ard Gorge, which is located along the Great Ocean Road in Victoria, near Port Campbell. The gorge is named after the famous sailing ship, the LOCH ARD, that was wrecked there in 1878. Only two of the 54 passengers and crew survived. FOYLE “Foyle” written on the photograph is the name of Foyle’s Photographic studio. At the time of the photograph, the studio was owned by both Charles and Lilian Foyle (sometimes known as Lillian or Lily), either of whom could have taken this photograph. They also worked together at a later date on the photographs, sketches and paintings of the famous and historical Pioneers’ Honour Board, which is currently on view in the Warrnambool Library. Foyles Photography was the studio of James Charles Foyle. He owned “Foyle’s Photo Card Studios” in Liebig St, Warrnambool, which operated between 1889 – 1919. A letter to the editor (by Mr Edward Vidler) in the Melbourne Argus, 3rd August 1907, mentions that in that year Warrnambool would celebrate the 60th anniversary of its proclamation as a town, and that talented local artist Miss Lily Foyle would paint 200 portraits in watercolour of the pioneers who settled in the district prior to 1860. The Pioneer Honour Board can still be seen on display in the Warrnambool Library. In the Warrnambool Standard, Dec. 1917, “Mr Foyle’s studio was awarded the contract to decorate rail cars on newly opened Trans-Continental railway, assisted by his sister, Miss Findlay.” HISTORY OF THE LOCH ARD The LOCH ARD belonged to the famous Loch Line which sailed many ships from England to Australia. Built-in Glasgow by Barclay, Curdle and Co. in 1873, the LOCH ARD was a three-masted square-rigged iron sailing ship. The ship measured 262ft 7" (79.87m) in length, 38ft (11.58m) in width, 23ft (7m) in depth and had a gross tonnage of 1693 tons. The LOCH ARD's main mast measured a massive 150ft (45.7m) in height. LOCH ARD made three trips to Australia and one trip to Calcutta before its final voyage. LOCH ARD left England on March 2, 1878, under the command of Captain Gibbs, a newly married, 29-year-old. She was bound for Melbourne with a crew of 37, plus 17 passengers and a load of cargo. The general cargo reflected the affluence of Melbourne at the time. Onboard were straw hats, umbrella, perfumes, clay pipes, pianos, clocks, confectionary, linen and candles, as well as a heavier load of railway irons, cement, lead and copper. There were items included that intended for display in the Melbourne International Exhibition in 1880. The voyage to Port Phillip was long but uneventful. At 3 am on June 1, 1878, Captain Gibbs was expecting to see land and the passengers were becoming excited as they prepared to view their new homeland in the early morning. But LOCH ARD was running into a fog which greatly reduced visibility. Captain Gibbs was becoming anxious as there was no sign of land or the Cape Otway lighthouse. At 4 am the fog lifted. A man aloft announced that he could see breakers. The sheer cliffs of Victoria's west coast came into view, and Captain Gibbs realised that the ship was much closer to them than expected. He ordered as much sail to be set as time would permit and then attempted to steer the vessel out to sea. On coming head-on into the wind, the ship lost momentum, the sails fell limp and LOCH ARD's bow swung back. Gibbs then ordered the anchors to be released in an attempt to hold its position. The anchors sank some 50 fathoms - but did not hold. By this time LOCH ARD was among the breakers and the tall cliffs of Mutton Bird Island rose behind the ship. Just half a mile from the coast, the ship's bow was suddenly pulled around by the anchor. The captain tried to tack out to sea, but the ship struck a reef at the base of Mutton Bird Island, near Port Campbell. Waves broke over the ship and the top deck was loosened from the hull. The masts and rigging came crashing down knocking passengers and crew overboard. When a lifeboat was finally launched, it crashed into the side of LOCH ARD and capsized. Tom Pearce, who had launched the boat, managed to cling to its overturned hull and shelter beneath it. He drifted out to sea and then on the flood tide came into what is now known as LOCH ARD Gorge. He swam to shore, bruised and dazed, and found a cave in which to shelter. Some of the crew stayed below deck to shelter from the falling rigging but drowned when the ship slipped off the reef into deeper water. Eva Carmichael had raced onto the deck to find out what was happening only to be confronted by towering cliffs looming above the stricken ship. In all the chaos, Captain Gibbs grabbed Eva and said, "If you are saved Eva, let my dear wife know that I died like a sailor". That was the last Eva Carmichael saw of the captain. She was swept off the ship by a huge wave. Eva saw Tom Pearce on a small rocky beach and yelled to attract his attention. He dived in and swam to the exhausted woman and dragged her to shore. He took her to the cave and broke and opened the case of brandy, which had washed up on the beach. He opened a bottle to revive the unconscious woman. A few hours later Tom scaled a cliff in search of help. He followed hoof prints and came by chance upon two men from nearby Glenample Station three and a half miles away. In a state of exhaustion, he told the men of the tragedy. Tom returned to the gorge while the two men rode back to the station to get help. By the time they reached LOCH ARD Gorge, it was cold and dark. The two shipwreck survivors were taken to Glenample Station to recover. Eva stayed at the station for six weeks before returning to Ireland, this time by steamship. In Melbourne, Tom Pearce received a hero's welcome. He was presented with the first gold medal of the Royal Humane Society of Victoria and a £1000 cheque from the Victorian Government. Concerts were performed to honour the young man's bravery and to raise money for those who lost family in the LOCH ARD disaster. Of the 54 crew members and passengers on board, only two survived: the apprentice, Tom Pearce and the young woman passenger, Eva Carmichael, who lost all of her family in the tragedy. Ten days after the LOCH ARD tragedy, salvage rights to the wreck were sold at auction for £2,120. Cargo valued at £3,000 was salvaged and placed on the beach, but most washed back into the sea when another storm developed. The wreck of LOCH ARD still lies at the base of Mutton Bird Island. Much of the cargo has now been salvaged, and some of it was washed up into what is now known as LOCH ARD Gorge. Cargo and artefacts have also been illegally salvaged over many years before protective legislation was introduced. One of the most unlikely pieces of cargo to have survived the shipwreck was a Minton porcelain peacock - one of only nine in the world. The peacock was destined for the Melbourne International Exhibition in 1880. It had been well packed, which gave it adequate protection during the violent storm. Today, the Minton peacock can be seen at the Flagstaff Hill Maritime Museum in Warrnambool. From Australia's most dramatic shipwreck it has now become Australia's most valuable shipwreck artefact and is one of very few 'objects' on the Victorian State Heritage Register.Flagstaff Hill’s collection of artefacts from LOCH ARD is significant for being one of the largest collections of artefacts from this shipwreck in Victoria. It is significant for its association with the shipwreck, which is on the Victorian Heritage Register (VHR S417). The collection is significant because of the relationship between the objects, as together they have a high potential to interpret the story of the LOCH ARD. The LOCH ARD collection is archaeologically significant as the remains of a large international passenger and cargo ship. The LOCH ARD collection is historically significant for representing aspects of Victoria’s shipping history and its potential to interpret sub-theme 1.5 of Victoria’s Framework of Historical Themes (living with natural processes). The collection is also historically significant for its association with the LOCH ARD, which was one of the worst and best-known shipwrecks in Victoria’s history. Foyle's photographs date from the late 19th century to the early 20th century, representing a time of growth in the Warrnambool district and a time when the still relatively new technology of photography was more available to the community.Photograph of Loch Ard Gorge. This sepia coloured rectangular photograph is mounted on a brown cardboard backing that has a wood grain pattern. The photograph has an inscription above it, below it, and in the bottom left corner. It was made for the purpose of a presentation by the Port Campbell Progress Association. Printed above the photograph "PRESENTED BY THE PORT CAMPBELL / PROGRESS ASSOCIATION". Printed below the photograph "LOCH ARD GORGE / PORT CAMPBELL". Hand written on bottom left corner "Foyle". flagstaff hill, warrnambool, shipwrecked coast, flagstaff hill maritime museum, maritime museum, shipwreck coast, flagstaff hill maritime village, great ocean road, loch line, loch ard, captain gibbs, eva carmichael, tom pearce, glenample station, mutton bird island, loch ard gorge, photograph, port campbell, port campbell progress association, foyle photograph, foyle photographic studio warrnambool, warrnambool photo studio -
 Flagstaff Hill Maritime Museum and Village
Book, The Discovery of Australia
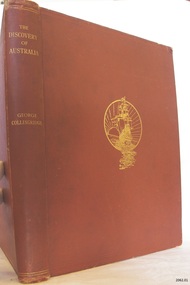
The Osburne Group was was three people, headed by Warrnambool Lawyer Dan Madden, who in the 1980’s republished a few local historical books. Collingridge’s (1847-1929) book ‘The Discovery of Australia’ was a work which supported the ‘legend’ of a Portuguese voyage of exploration, which led to the loss of one of its ships in 1522, believed to be the Mahogany Ship, on the coast south of Tower Hill. Hence European charting of the east coast of Australia centuries before Captain Cook, which the British historians viewed almost as heresy. TheOsburne Group acquired copies of Collingridge from the publisher, and saw that they were made available as a historical record supporting the research of Ken McIntyre, who in 1981 published separately a book called ‘The Secret Discovery of Australia’. The first book by the Osburne Group was republished in facsimile. It was the ‘History of Warrnambool’, collated and printed by Richard Osburne in 1887 after he had sold his newspaper the Warrnambool Examiner to Fairfax, which took up the name of Warrnambool Standard. Hence the name Osburne. Other books reproduced in facsimile form include ‘By These We Flourish’ by C.E.Sayers, and ‘Warrnambool Past and Present by Edward Vidler.The Discovery of Australia Author: George Collongridge Publisher: Kayes Brothers Date 1895 Has a sticker on front loose end page stating " Presented to Flagstaff Hill by Osburne Group"flagstaff hill, warrnambool, shipwrecked-coast, flagstaff-hill, flagstaff-hill-maritime-museum, maritime-museum, shipwreck-coast, flagstaff-hill-maritime-village, the discovery of australia, book, george collingridge, osburne group -
 Flagstaff Hill Maritime Museum and Village
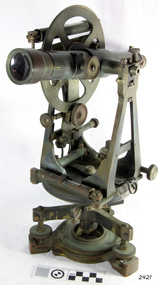
Theodolite, Troughton & Simms, Mid 19th Century
The theodolite was sold by T. Gaunt & Co. of Melbourne, a manufacturer, importer and retailer of a wide variety of goods including jewellery, clocks and watches, navigational and measuring instruments, dinnerware, glassware and ornaments. Thomas Gaunt photograph was included in an album of security identity portraits of members of the Victorian Court, Centennial International Exhibition, Melbourne, 1888. (See further details below.) History for Troughton & Simms: Edward Troughton & William Simms established a scientific instrument making business in London in 1826. Edward Troughton (1756-1835) had previously had his own scientific instrument business, inherited from his father. His achievement's included a transit telescope for Greenwich Observatory (1816) and the precision surveying instruments for the Ordnance Survey of Britain, Ireland and India. William Simms (1793-1860) had trained as a goldsmith and began to gain work dividing circles on fine astronomical instruments. When William Simms died in 1860, the business was taken over by his son James and nephew William. Troughton & Simms shop in Fleet Street became the hub of the finest scientific instrument made in London, in a period in which there was an expanding demand for precision instruments, for astronomy, surveying and precision measurement. They made instruments for Greenwich Observatory, for imperial surveys and exploring expeditions. When fire destroyed the Houses of Parliament in 1834, the firm was commissioned to create new standard lengths, this required 10 years of testing against the remaining old measurements. Troughton and Simms made several of the main instruments for Melbourne Observatory, including an 18 inch azimuth used of the Geodetic Survey, portable transit instrument (circa 1850), zenith sector (1860), a 4.5 inch equatorial telescope (1862), an 8 inch equatorial telescope (1874) spectroscope (1877) and an 8 inch transit instrument in (1884). While the firm had an excellent reputation for quality the company exasperated many of its customers with delays of years in delivering some instruments. History for Thomas Gaunt: Thomas Ambrose Gaunt (1829 – 1890) was a jeweller, clock maker, and manufacturer of scientific instruments, whose head office and showroom were at 337–339 Bourke Street, Melbourne, Victoria, Australia. Thomas Gaunt established Melbourne's leading watchmaking, optical and jewellery business during the second half of the 19th century. Gaunt arrived in Melbourne in 1852, and by 1858 had established his own business at 14 Little Bourke Street. Around 1869 he moved to new premises in Bourke Street on the corner of Royal Arcade, Gaunt's shop quickly became a Melbourne institution. Gaunt proudly advertised that he was 'The only watch manufacturer in the Australian colonies'. While many watches and clocks may have had Gaunt's name on the dial, few would have been made locally. Gaunt did make some watches for exhibitions, and perhaps a few expensive watches for wealthy individuals. Gaunt's received a telegraph signal from Melbourne Observatory each day to correct his main clock and used this signal to rate and repair ship's chronometers and good quality watches. Thomas Gaunt also developed a department that focused on scientific instrumentation, making thermometers and barometers (from imported glass tubes), telescopes, surveying instruments and microscopes. Significance: With the rapid urban expansion, one of the most important needs of the new colony was to survey and map the landscape of the Australian Colony’s interior. Theodolites, such as this one, made by Troughton and Simms, who were significant scientific instrument makers of the 19th century were instrumental to the colony's surveyors and would have played an important part in their everyday work. This transit theodolite remains of national significance due to its pioneering role in Australian science and its association with Australia's earliest surveyors and astronomers. It is also significant for its association with nineteenth-century surveying instruments and instrument makers. Theodolite, Vernier repetition theodolite with enclosed horizontal circle (of about 130 mm diameter). Vertical circle exposed and somewhat corroded (diameter about 115 mm). Plate level 20" per division. Altitude bubble 20" per division. Horizontal and vertical circle intervals 20". Original (blue/grey) paint. Altitude bubble setting screw disabled. Tribrach allows movement of theodolite by 15 mm inside tribrach (for centering).Inscribed on the inner mounting plate,“Specially made in England for T Gaunt & Co Melbourne” and inscribed a little lower “Troughton & Simms London”flagstaff hill, warrnambool, shipwrecked-coast, flagstaff-hill, flagstaff-hill-maritime-museum, maritime-museum, shipwreck-coast, flagstaff-hill-maritime-village, theodolite, t. gaunt & co, troughton & simms, scientific instrument, measuring instrument, surveyor's instrument -
 Flagstaff Hill Maritime Museum and Village
Barometer, 1858-1869
The barometer was either made or sold by T. Gaunt & Co. of Melbourne, a manufacturer, importer and retailer of a wide variety of goods including jewellery, clocks and watches, navigational and measuring instruments, dinnerware, glassware and ornaments. Thomas Gaunt photograph was included in an album of security identity portraits of members of the Victorian Court, Centennial International Exhibition, Melbourne, 1888. (See below for further details.) Admiral Fitzroy Pattern Barometer History: The stick mercury barometer was named after Admiral Robert Fitzroy of the Royal Navy (1805-1865) for his detailed instructions on how to interpret the weather, which were included with the instrument. Fitzroy was the captain of the HMS Beagle, also a weather forecaster to Charles Darwin and the second Governor of New Zealand. He developed many different types of barometers and was the first person to introduce the science of weather forecasting to the British Isles. A local manufacturer of scientific instruments, Thomas Gaunt, produced the barometer that was adapted for the southern hemisphere by Robert Ellery, the State Astronomer based at the Melbourne Observatory. In the original sale catalogue for Gaunt's, the item is described as "Gaunt's Fitzroy Barometers" and it was priced from 25/- to ₤9.9s. History of Thomas Gaunt: Thomas Gaunt established Melbourne's leading watchmaking, optical and jewellery business during the second half of the 19th century. Gaunt arrived in Melbourne in 1852, and by 1858 had established his own business at 14 Little Bourke Street. Around 1869 he moved to new premises in Bourke Street on the corner of Royal Arcade. Gaunt's shop quickly became a Melbourne institution. Gaunt proudly advertised that he was 'The only watch manufacturer in the Australian colonies'. While many watches and clocks may have had Gaunt's name on the dial, few would have been made locally. Gaunt did make some watches for exhibitions, and perhaps a few expensive watches for wealthy individuals. Gaunt's received a telegraph signal from Melbourne Observatory each day to correct his main clock and used this signal to rate and repair ship's chronometers and good quality watches. His main horological manufacturing was directed at turret clocks for town halls, churches and post offices. These tended to be specific commissions requiring individualised design and construction. He made the clock for the Melbourne Post Office lobby, to a design by Government Astronomer Robert Ellery, and won an award at the 1880-81 Melbourne International Exhibition for his turret clock for the Emerald Hill Town Hall. He became well known for his installation of a chronograph at Flemington Racecourse in 1876, which showed the time for the race, accurate to a quarter of a second. The firm also installed the clockwork and figures for Gog and Magog in the Royal Arcade. Thomas Gaunt also developed a department that focused on scientific instrumentation, making thermometers and barometers (from imported glass tubes), telescopes, surveying instruments and microscopes. Another department specialised in electroplating for trophies, awards and silverware, and the firm manufactured large amounts of ecclesiastical gold ware and silverware, for the church including St Patrick's Cathedral. There are no records that disclose the number of employees in the firm, but it was large enough for Gaunt to hold an annual picnic for the watchmakers and apprentices at Mordialloc from 1876; two years previously they had successfully lobbied Gaunt to win the eight hour day. Gaunt's workforce was reportedly very stable, with many workers remaining in the business for 15 to 30 years. Gaunt's wife Jane died on September 1894, aged 64. They had one son and six daughters, but only three daughters survived to adulthood. Two became nuns at the Abbotsford Convent and one daughter, Cecelia Mary Gaunt (died 28 July 1941), married William Stanislaus Spillane on 22 September 1886 and had a large family. Gaunt died at his home in Coburg, Victoria, leaving an estate valued at ₤41,453. The business continued as T. Gaunt & Co. after his death. The barometer is historically significant as an example of the work of Melbourne’s leading scientific instrument maker, Thomas Gaunt. The barometer has social significance as an example of the type of scientific equipment that Thomas Gaunt expanded his horology business into producing. Further social significance lies in the fact that Robert Ellery, the Government Astronomer who designed the local version of the barometer, had a direct connection with the Melbourne Athenaeum founded in 1839 as the Melbourne Mechanics' Institution. Its purpose was "the diffusion of literary, scientific and other useful information". There are also records of a T Gaunt as a subscription and committee member of this the Athenaeum organisation during the 1870s and 1880s which may be Thomas Gaunt, unfortunately still unverified.Stick mercury barometer known as the Admiral Fitzroy Barometer. It comprises an oblong wooden case with glass front panel, ornate pediment, barometer with bulb cistern (empty of fluid), cleaning brush with printed instructions for interpreting information given by the gauge affixed to left and right face of instrument. Includes a thermometer. The barometer appears to be intact. Adapted to the Southern Hemisphere. Special remarks by Admiral Fitzroy. Made by Thomas Gaunt, Melbourne. Manufacturer's details are on back of wooden casing. Rear has upper and lower brass screw plates for securing to vertical surface."Manufactured by Thomas Gaunt, 14 Little Bourke Street, Melbourne. "flagstaff hill, warrnambool, shipwrecked-coast, flagstaff-hill, flagstaff-hill-maritime-museum, maritime-museum, shipwreck-coast, flagstaff-hill-maritime-village, barometer, admiral fitzroy, thomas gaunt, thomas gaunt of melbourne, clockmaker, admiral fitzroy barometer, barometer instructions, gaunt’s fitzroy barometer, gaunt’s of melbourne, gog and magog designer, horological manufacturer, meteorological instrument, melbourne athenaeum, melbourne mechanics' institution, melbourne observatory time signal, robert ellery government astronomer, scientific instrument, stick mercury barometer, thermometer, weather forecast, t gaunt & co -
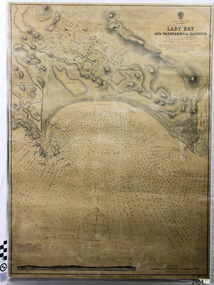 Flagstaff Hill Maritime Museum and Village
Document - Navigation Chart, Admiralty Office, Lady Bay and Warrnambool Harbour, 03/04/1871
This Chart titled “Lady Bay and Warrnambool Harbour” was surveyed by Nav. Lieut. H.J. Stanley, of Britain's Royal Navy, in 1870 and printed in April 1871. The chart was made before the Warrnambool Breakwater was built (construction had begun in 1874 and was completed in 1890). The chart includes Directions for entering Lady Bay, Warrnambool Harbour. These are "Vessels entering Warrnambool Harbour must bring the Red Light in sight and steer in with it in line with the upper white Light bearing North, until the Green Light on the Jetty is opened, when steer towards it and anchor. The best anchorage is in 2 ¼ fms [fathoms)] of water, about a cable from ledge off Breakwater rock. Or where convenient, according to draught of water, only endeavouring to anchor as close as possible to Breakwater rock. It is not safe to enter or leave the Harbour in south westerly or Southerly gales.” This chart is significant for its strong connection to the maritime history of Warrnambool Harbour and Lady Bay, and eventually to the Warrnambool Breakwater. The Warrnambool Breakwater is registered as a place of significance on the Victorian Heritage Database (VHR H2024). A copy of the same chart was used to plan several submissions for future changes to the jetty and breakwater. The chart is a historical record of structures existing in 1870; the Warrnambool Jetties, Lady Bay, the leading lights (lighthouses), streets, roads, bridges and many buildings. It also shows the lay of the land and seabed.Canvas chart of Australia, South Coast, Victoria Title: Lady Bay and Warrnambool Harbour Surveyed by Nav. Lieut. H.J. Stanley, R.N., 1870. Magnet Variation, 1870 Published April 3, 1871, by the Admiralty, London. Directions for vessels entering Warrnambool Harbour are printed on the chart. The chart has a lacquer or seal over it.Top of chart has logo "HYDROGRAPHER OFFICE" "Price Eighteen Pence". "Engraved by Edward Weller" Along bottom of Chart: “London… Published at the Admiralty, 3rd April 1871, under the Superintendence of Rear Admiral G.H. Richards, F.R.S. Hydrographer, Corrections July 71” Bottom of chart “Australia South Coast Victoria Lady Bay and Warrnambool Harbour. 2494”flagstaff hill, warrnambool, chart of lady bay warrnambool 1870, warrnambool harbour, cartography, navigation, warrnambool breakwater, 1871, australia – south coast / victoria, lady bay, 1870, nav. lieut. h.j. stanley, r.n, directions for entering warrnambool harbour, hydrographer office, rear admiral g.h. richards, edward weller, port of warrnambool, flagstaff hill maritime museum & village, maritime museum, maritime village, shipwreck coast, map, chart, navigation chart, admiralty chart, breakwater, jetty, pier, vhr h2024 -
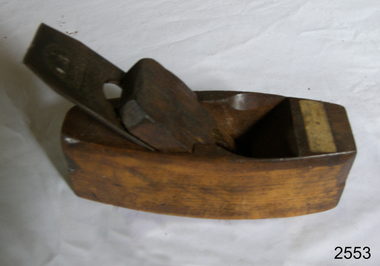 Flagstaff Hill Maritime Museum and Village
Tool - Wood Working Plane, Mathieson and Son, 1880-1900
A Mathieson & Son History: In 1792 John Manners had set up a workshop making woodworking planes at 14 Saracens Lane Glasgow. He also had employed an apprentice Alexander Mathieson (1773-1851). But in the following year at Saracen's Lane, the 1841 census describes Alexander Mathieson as a master plane-maker now at 38 Saracen Lane with his son Thomas Adam working with him as a journeyman plane-maker. Presumably, Alexander must have taken over the premises and business of John Manners. Now that the business had Thomas Adam Mathieson working with his father it gradually grew and became more diversified, and it is recorded at the time by the Post-Office Glasgow Annual Directory that by 1847-1848 Alexander Mathieson was a “plane, brace, bit, auger & edge tool maker.” In 1849 the firm of James & William Stewart at 65 Nicolson Street, Edinburgh was taken over and Thomas was put in charge of the business, trading under the name Thomas A. Mathieson & Co. as plane and edge-tool makers. Thomas's company went on to acquire the Edinburgh edge-tool makers “Charles & Hugh McPherson” and took over their premises in Gilmore Street. In the Edinburgh directory of 1856/7, the business is recorded as being Alexander Mathieson & Son, plane and edge-tool makers at 48 Nicolson Street and Paul's Work, Gilmore Street Edinburgh. The 1851 census Alexander is recorded as working as a tool and plane-maker employing eight men. Later that year Alexander died and his son Thomas took over the business. Under the heading of an edge-tool maker in the 1852/3 Post-Office Glasgow Annual Directory the firm is now listed as Alexander Mathieson & Son, with further entries as "turning-lathe and vice manufacturers". By the early 1850s, the business had moved to 24 Saracen Lane. The directory for 1857/8 records that the firm had moved again only a few years later to East Campbell Street, off the Gallowgate area, and that through further diversification was also manufacturing coopers' and tinmen's tools. The ten-yearly censuses report the firm's growth in 1861 stating that Thomas was a tool manufacturer employing 95 men and 30 boys; in 1871 he had 200 men working for him and in 1881 300 men. By 1899 the firm had been incorporated as Alexander Mathieson & Sons Ltd, even though only Alexander's son Thomas appears ever to have joined the firm so the company was still in his fathers' name. In September 1868 Thomas Mathieson put a notice in the newspapers of the Sheffield & Rotherham Independent and the Sheffield Daily Telegraph stating that his firm had used the trade-mark of a crescent and star "for some time" and that "using or imitating the Mark would be proceeded against for infringement". The firm had acquired its interest in the crescent-and-star mark from the heirs of Charles Pickslay, the Sheffield cutler who had registered it with the Cutlers' Company in 1833 and had died in 1852. The year 1868 seems also to be the one in which the name Saracen Tool Works was first adopted; not only does it figure at the foot of the notice in the Sheffield press, it also makes its first appearance in the firm's entry in the Post-Office Glasgow Annual Directory in the 1868/9 edition. As Thomas Mathieson's business grew, so too did his involvement in local public life and philanthropy. One of the representatives of the third ward on the town council of Glasgow, he became a river bailie in 1868, a magistrate in 1870 and a preceptor of Hutcheson's Hospital in 1878. He had a passion for books and was an "ardent Ruskinian". He served on the committee handling the bequest for the setting up of the Mitchell Library in Glasgow. When he died at Coulter Maynes near Biggar in 1899, he left an estate worth £142,764. Company's later years: Both Thomas's sons, James Harper and Thomas Ogilvie were involved in the continuing life of the firm. James followed in his father's footsteps in becoming a local public figure. He was appointed Deputy Lieutenant of the County of the City of Glasgow and was made a deacon of the Incorporation of the Hammermen of Glasgow in 1919. His brother Thomas Ogilvie was recorded as tool manufacturer and employer in the 1911 census. Thomas Ogilvie's son Thomas Alastair Sutherland Ogilvie Mathieson was born in 1908 took a rather different approach to engineering, however, by becoming a racing driver. In 1947 he wed the French film actress Mila Parély. The firm had won many awards at world fairs for their goods. At the Great Exhibition, London, 1851. Prize medal for joiners' tools in the class of Cutlery & Edge Tools, Great London Exposition, 1862. Prize medal honoris causa. International Exhibition, Melbourne, 1880. Gold medal International Exhibition of Industry, Science and Art, Edinburgh, 1886. Prize medal James Howarth & Sons History: James Howarth and Sons, of Broomspring Works, Bath-street Sheffield were among leading manufacturers of edge tools and joiners tools. The business was commenced in 1835, by James Howarth who was joined by his sons in 1863. Howarth manufacture light and heavy edge tools of all kinds, including a variety of joiners’ tools, hammers, skates, augers. The firm soon was extended and began exporting their products to the USA, Canada, Australia, China, and many other overseas destinations as well as to the home market. They were exhibitors at the London Exhibitions of 1851 and 1862, and Paris in 1855, receiving awards. Howarth was primarily operating from Sheffield. J Howarth & Sons produce goods of a very high class and were also engaged in the manufacture of steel, file, saw, and similar trades. Upon the death of James Howarth, the firm was managed by his four sons James, Samuel, Edwin, and John Howarth. The firm was discontinued in 1913, and its trademark was acquired by Robert Sorby and Sons in 1922.A significant tool made in the late 19th century by a known makers and sought after by collectors of vintage wood working tools.Smoothing Plane Coffin type. 2" stamped on one end and Tertius Keen & Co (plane maker.) Blade has James Howarth Warranted Cast Steel Sheffield (maker of blade only.)flagstaff hill, warrnambool, shipwrecked-coast, flagstaff-hill, flagstaff-hill-maritime-museum, maritime-museum, shipwreck-coast, flagstaff-hill-maritime-village -
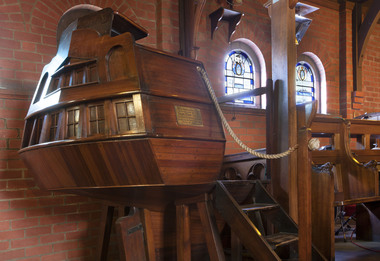 Mission to Seafarers Victoria
Furniture - Pulpit, Rodney Howard Alsop, 1909
... richmond butler australian maritime history reverend w.f. haire ...In 1909, assistant Chaplain Rev. Haire presented the Mission with an 'uncommonly artistic pulpit' in memory of his mother. A plaque in memory of Jane King Haire can be found on the side next to the steps. The dedication was performed by the Archbishop of Melbourne on the 26th January (date engraves on the plaque) This pulpit was designed by Melbourne architect Rodney Howard Alsop (1881-1932) and manufactured by William John Dalziel (furniture manufacturer). It was initially used in the first Mission in Central Melbourne, Siddeley St. It is located in the Chapel of Saint Peter of the Mission to Seafarers 717 Flinders St. complex since 1917 (State Heritage listed (H1496). This complex was designed by Walter Richmond Butler in 1916, and officially opened on 11 September 1917, a day '...of unusually kind weather', by the Governor of Victoria, the Honourable Sir Arthur Stanley. According to a later article published in 1950: The pulpit is a model, built to scale, of the stern of an old ship of the line in Lord Nelson's day. This pulpit is significant as it is housed in The Memorial Chapel of Saint Peter forming part of the State Heritage listed Mission to Seafarers Victoria complex. It was built in Melbourne of Australian timbers, and is one of only two known maritime inspired pulpits, both associated with Missions to Seamen of the early 20th C. the other is held in the ANMM Collection see link. Their statement of significance is worth quoting in part as it applies equally to this pulpit "...an extremely rare and unique example of such pulpits. It is highly significant as a wonderfully preserved example of a time when religion was preached to sailors for their spiritual guidance and temperance..." Rodney Howard Alsop was an important Melbourne architect of the Arts and Crafts movement. John William Dalziel had sailed from Liverpool to Melbourne in 1862. Seventeen years later Penman and Dalziel founded the business in Lonsdale Street West, and won recognition at the Indian and Colonial Exhibition in London in 1886. Penman and Dalziel were identified in 1937 as one of Melbourne’s early ‘skilled craftsmen’ and ‘leading names’ in the manufacture of fine furniture. He died in February 1918 in a railway accident.Timber pulpit built in the form of a ship's stern including a timber step ladder for access, a timber keel and rudder, a rope fixed from the pulpit to a post mounted to the floor, and a dedication plaque on the side of the pulpit. The pulpit sits on timber legs. It's likely to be the original rope: traditionally made coir rope with twisted fibres, covered with canvas supported by a thread. At lower end the rope is secured by a monkey fist know and at the top by a turk head knot.Inside the pulpit (right) is the cardboard label with the maker details: " On an attached plaque see 0678 To the greater glory of God and in ever loving memory of Jane King Haire. This pulpit is erected by her son. Blessed are the pure in heart. For they shall see God. St. Matt. V.8. 26.1.09mission, seafarers, melbourne, victoria, chapel, saint peter, pulpit, australian timber, stern, walter richmond butler, australian maritime history, reverend w.f. haire, rodney howard alsop (1881-1932), wright's lane, william john dalziel, gifts-1917, heritage listed -
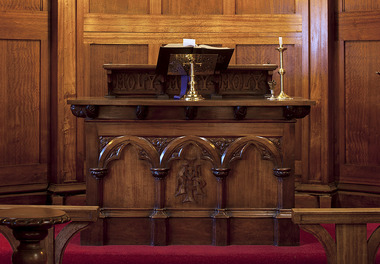 Mission to Seafarers Victoria
Furniture - Altar, Rodney Howard Alsop, 1907
... richmond butler australian maritime history rodney howard alsop ...Along with the pulpit, this Altar was designed by architect Rodney Howard Alsop (1881-1932) (Annual report 1908). It was originally made for the Siddeley Street Institute, which was built in 1907 on a block of land leased from the Melbourne Harbour Trust and donated by Mrs Amelia Shuter (nee Lord) (see Annual Report 1907). The altar is photographed in an early picture of the Siddeley Mission in a room used as chapel before the chapel built in 1909. Although a 21 year lease for the site had been granted, a notice was delivered to the Mission to quit the site in 1912. In 1915, the present site was agreed on. The Altar sits within the Chapel of Saint Peter, which belongs to the State Heritage listed (H1496) Mission to Seafarers Victoria complex. This complex was designed by Walter Richmond Butler in 1916, and officially opened on 11 September 1917. On the right hand side of the altar, is a brass plaque in memory of Charles Shuter, a colonist and police magistrate who died in 1902. The plaque was made in 1907.The Altar is significant because it is located within the Memorial Chapel of Saint Peter, forming part of the State Heritage listed Mission to Seafarers Victoria complex. It is of religious significance in catering for all denominations and the spiritual needs of visiting seafarers.The Altar has a shelf above and three panels along the front, with carved decoration and lettering. Altar bears a plaque that reads "To the Glory of God - In memory of Charles Shuter, of Melbourne, Police Magistrate, Given by his Wife, December 13th 1907". Carved letters "MTS" in centre of three panels along front of Altar, and "HOLY, HOLY, HOLY" in three panels below shelf on top of Altar.altar, mission, seafarers, seamen, melbourne, victoria, charles shuter, siddeley street institute, chapel, australian timber, walter richmond butler, australian maritime history, rodney howard alsop (1881-1932), saint peter chapel, communion table, amelia shuter nee lord, heritage listed, gifts-1917 -
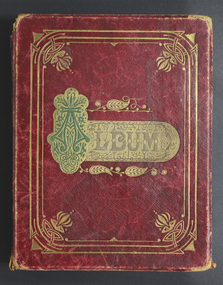 Mission to Seafarers Victoria
Book (Item) - Scrapbook, David Hood Duncan, Album, 1850-1900
This scrapbook contains newspaper cuttings, hand written poems and quotes from friends and family members and pressed flowers and ferns. Entries were made in the mid 1800s to early 1900s and relate to Duncan family history. The initials suggest this is Lillie and Olive's father, David Hood Duncan, who created this scrapbook. David Hood Duncan married Ada Blanche Thomson (1861-1928) on 25 November 1896. Ada was the daughter of John Gilmour Thomson (1829-1905) from Moonee Ponds and Hannah Davies (1834-1890) Their first daughter, Lillie, was born on 15 October 1897 in Woodland, South Gippsland where he was a farmer. In 1908, 1910, 1911, 1913, Lillie Duncan sent letters to Patience from the Young Folk section of the Australian. She was writing from Woodlea, Cathkin, where they had moved as there was no school in South Gippsland. They moved to 11 Paxton Street, East Malvern when David retired. He was leasing a farm, Kia Ora, in Koo Wee Rup, the South Gippsland. Ada Blanche died on 28 December 1928. David died on 24 May 1942.This is an album of social and historic significance, being part of a sub-collection of material that provides a snapshot of the type of individuals and families involved in the Ladies Harbour Lights Guild and the activities carried out by that organisation.Decoratively embossed word on front cover : "ALBUM" . Inner pages: Handwritten in various inks throughout are poems and quotes. Two unidentified initials followed by Duncan name on the inside page. duncan, poems, quotes, newspaper cuttings, albums, scrapbooks, lillie duncan, olive duncan, poetry, ferns, plants, david hood duncan, ada blanche duncan (nee thomson), epistolary -
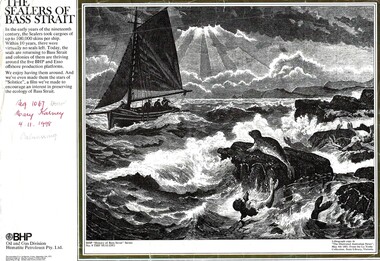 Phillip Island and District Historical Society Inc.
Print, The sealers of Bass Strait, 1972
No. 9 'The Sealers". BHP "History of Bass Strait"Series. Lithograph copy in 'The Illustrated Australian News", May 4th 1881. From the La Trobe Collection, State Library, Victoria. BHP Oil and Gas Division Hematite Petroleum Pty. Ltd. From The Australian Financial Review, 15 Sep 1972HistoricalLarge, black & white lithograph of sailing vessel in rough seas showing seals and rocks, with typed explanation. In the early of the nineteenth century, The sealers took cargoes of up to 100,000 skins per ship. Within 10 years, there were virtually no seals left. Today, the seals are returning to Bass Strait and colonies of them are thriving around the five BHP and Esso offshore production platforms. We enjoy having them around. And we've even made them the stars of "Solstice", a film we've made to encourage an interest in preserving the ecology of Bass Strait.sealing, westernport bay, broken hill proprietary ltd. -
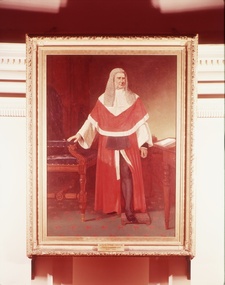 Supreme Court of Victoria Library
Portrait, Robert Dowling, Sir Redmond Barry, 1886
This painting was created by Robert Dowling (1827-1886) in 1885. At this time Dowling was considered Australia's best portraitist. Dowling had been born in England, but migrated to Van Diemen's Land in the early 1830s with his parents. Dowling worked in both Tasmania and Victoria as an artist, before returning to England in 1857. He did not return to Australia until 1884 and received eighteen commissions for portraits. The Barry portrait was commissioned after Barry's death which explains some of the mistakes in the depiction of Barry's robes; the fur cuffs and collar are too large, and the cummerbund is sitting in the wrong place. Sir Redmond Barry is an important figure in Colonial Victorian History, responsible for the establishment and support of some of our finest cultural institutions (the University of Melbourne, the State Library of Victoria, the Supreme Court Library, and aspects of the Museum of Victoria's collection). This is in addition to his role as barrister defending aborigines in the 1840s and his position as a foundation judge of the Supreme Court of Victoria, a position he held for nearly 30 years, presiding over two of the most well known of colonial trials: the Eureka Trials in 1854 and the Kelly trial in 1880.The portrait of Sir Redmond Barry is significant because of the historical importance of Redmond Barry in colonial Victorian history. The painting is also of aesthetic significance as the work of the distinguished portraitist Robert Dowling. Portrait in oils of Sir Redmond Barry. Barry is depicted standing, dressed in red Judicial robes, his hand resting on a chair; behind is a table with books.Signed and dated 1886 (lower left) by Robert Dowling.redmond barry, portraits, judges, robert dowling -
 Supreme Court of Victoria Library
Books, Chronicles; Historical Chronicles, Early 19th Century
These are 22 volumes of early English and French History translated from the Latin, French and Old English. The volumes were published in the early 19th Century, Redmond Barry purchased these from Guillaume, Colonial Bookseller, Chester Square, London for the Library.The books are in excellent condition and would be rare in Australian library collections.22 Volumes of Leather Bound books with gold embossing, illustrated.Historical Chronicles of English History, many titles, translated from the Latin, and the Old English and Old French.redmond barry, chronicle -
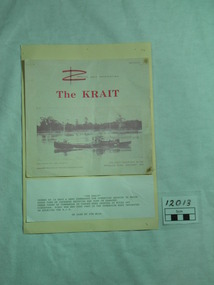 Rye RSL Sub Branch
Newsletter, Commando Association, MV Krait, After 1966
One of the most important and successful attacks on merchant ships inside an enemy harbour during world war two by English and Australian Commandoes or Special Unit Forces, launched from Australia. Nil deaths by the Commandoes were recorded, and 40000 tons of enemy ships were damaged or destroyed. To enlighten RSL Members and the public, the history of the MV Krait and the importance of our Military History. The newsletter has a typed story and pictures of members of M and Z Special Force. Krait took a small force on one of its missions and they sank about 38,000 tons of Japanese shipping in Singapore Harbour in 1943. The newsletters front page has pink large writng on a white background. The word Krait and a photo of it on the Brisbane River. The newsletter is 4 pages with a photo of the men on board on page 2. Page 3 has another photo of the Krait. It is on loan from Mr.Jim Muir, world war two, pamphlet, short story, mv krait, motor vessel, singapore, singapore harbour, 1943 -
 Flagstaff Hill Maritime Museum and Village
Spoon, circa 1878
This tea spoon is from the wreck of the LOCH ARD, a Loch Line ship of 1,693 tons which sailed from Gravesend, London, on 2 March 1878 with 17 passengers and a crew of 36 under Captain George Gibbs. “The intention was to discharge cargo in Melbourne, before returning to London via the Horn with wool and wheat”. Instead, on 1 June 1878, after 90 days at sea, she struck the sandstone cliffs of Mutton Bird Island on the south west coast of Victoria, and sank with the loss of 52 lives and all her cargo. The manifest of the LOCH ARD listed an array of manufactured goods and bulk metals being exported to the Colony of Victoria, with a declared value of £53,700. (202 bills of lading show an actual invoice value of £68, 456, with insurance underwriting to £30,000 of all cargo). Included in the manifest is the item of “Tin hardware & cutlery £7,530”. This teaspoon is one of 482 similar items of electro-plated cutlery from the LOCH ARD site, comprising spoons and forks of various sizes but all sharing the same general shape or design and metallic composition. 49 of these pieces display a legible makers’ mark — the initials “W” and “P” placed within a raised diamond outline, which is in turn contained within a sunken crown shape — identifying the manufacturer as William Page & Co of Birmingham. An electroplater’s makers’ marks, unlike sterling silver hallmarks, are not consistent identifiers of quality or date and place of manufacture. A similar line of five impressions was usually made to impress the consumer with an implication of industry standards, but what each one actually signified was not regulated and so they varied according to the whim of the individual foundry. In this case, the maker’s marks are often obscured by sedimentary accretion or removed by corrosion after a century of submersion in the ocean. However sufficient detail has survived to indicate that these samples of electro-plated cutlery probably originated from the same consignment in the LOCH ARD’s cargo. The following descriptions of maker’s marks are drawn from 255 tea spoons, 125 dessert spoons, and 99 table forks. These marks are clearly visible in 66 instances, while the same sequence of general outlines, or depression shapes, is discernible in another 166 examples. 1. A recessed Crown containing a raised Diamond outline and the initials “W” and “P” (the recognised trademark of William Page & Co) 2. An impressed Ellipse containing a raised, pivoted, Triangle in its lower part and bearing a Resurrection Cross on its upper section (a possible dissenting church symbol reflecting religious affiliation); OR a rounded Square impression containing a raised, ‘lazy’, letter “B” (possibly mimicking sterling silver hallmark signifying city of manufacture i.e. Birmingham) 3. An impressed rounded Square filled with a raised Maltese Cross (the base metal composite of nickel silver was also known as ‘German silver’ after its Berlin inventors in 1823) 4. A recessed Circle containing a Crab or Scarab Beetle image; OR a recessed Circle containing a rotated ‘fleur de lys’ or ‘fasces’ design 5. A depressed Diamond shape enclosing a large raised letter “R” and a small raised letter “D” (mimicking the U.K. Patent Office stamp which abbreviated the term ‘registered’ to “RD”, but also included date and class of patent) Suggested trade names for William Page & Co’s particular blend of brass plating are ‘roman silver’ or ‘silverite’. This copper alloy polishes to a lustrous gold when new, discolouring to a murky grey with greenish hue when neglected. HISTORY OF THE LOCH ARD The LOCH ARD belonged to the famous Loch Line which sailed many ships from England to Australia. Built in Glasgow by Barclay, Curdle and Co. in 1873, the LOCH ARD was a three-masted square rigged iron sailing ship. The ship measured 262ft 7" (79.87m) in length, 38ft (11.58m) in width, 23ft (7m) in depth and had a gross tonnage of 1693 tons. The LOCH ARD's main mast measured a massive 150ft (45.7m) in height. LOCH ARD made three trips to Australia and one trip to Calcutta before its final voyage. LOCH ARD left England on March 2, 1878, under the command of Captain Gibbs, a newly married, 29 year old. She was bound for Melbourne with a crew of 37, plus 17 passengers and a load of cargo. The general cargo reflected the affluence of Melbourne at the time. On board were straw hats, umbrella, perfumes, clay pipes, pianos, clocks, confectionary, linen and candles, as well as a heavier load of railway irons, cement, lead and copper. There were items included that intended for display in the Melbourne International Exhibition in 1880. The voyage to Port Phillip was long but uneventful. At 3am on June 1, 1878, Captain Gibbs was expecting to see land and the passengers were becoming excited as they prepared to view their new homeland in the early morning. But LOCH ARD was running into a fog which greatly reduced visibility. Captain Gibbs was becoming anxious as there was no sign of land or the Cape Otway lighthouse. At 4am the fog lifted. A man aloft announced that he could see breakers. The sheer cliffs of Victoria's west coast came into view, and Captain Gibbs realised that the ship was much closer to them than expected. He ordered as much sail to be set as time would permit and then attempted to steer the vessel out to sea. On coming head on into the wind, the ship lost momentum, the sails fell limp and LOCH ARD's bow swung back. Gibbs then ordered the anchors to be released in an attempt to hold its position. The anchors sank some 50 fathoms - but did not hold. By this time LOCH ARD was among the breakers and the tall cliffs of Mutton Bird Island rose behind the ship. Just half a mile from the coast, the ship's bow was suddenly pulled around by the anchor. The captain tried to tack out to sea, but the ship struck a reef at the base of Mutton Bird Island, near Port Campbell. Waves broke over the ship and the top deck was loosened from the hull. The masts and rigging came crashing down knocking passengers and crew overboard. When a lifeboat was finally launched, it crashed into the side of LOCH ARD and capsized. Tom Pearce, who had launched the boat, managed to cling to its overturned hull and shelter beneath it. He drifted out to sea and then on the flood tide came into what is now known as LOCH ARD Gorge. He swam to shore, bruised and dazed, and found a cave in which to shelter. Some of the crew stayed below deck to shelter from the falling rigging but drowned when the ship slipped off the reef into deeper water. Eva Carmichael had raced onto deck to find out what was happening only to be confronted by towering cliffs looming above the stricken ship. In all the chaos, Captain Gibbs grabbed Eva and said, "If you are saved Eva, let my dear wife know that I died like a sailor". That was the last Eva Carmichael saw of the captain. She was swept off the ship by a huge wave. Eva saw Tom Pearce on a small rocky beach and yelled to attract his attention. He dived in and swam to the exhausted woman and dragged her to shore. He took her to the cave and broke open case of brandy which had washed up on the beach. He opened a bottle to revive the unconscious woman. A few hours later Tom scaled a cliff in search of help. He followed hoof prints and came by chance upon two men from nearby Glenample Station three and a half miles away. In a state of exhaustion, he told the men of the tragedy. Tom returned to the gorge while the two men rode back to the station to get help. By the time they reached LOCH ARD Gorge, it was cold and dark. The two shipwreck survivors were taken to Glenample Station to recover. Eva stayed at the station for six weeks before returning to Ireland, this time by steamship. In Melbourne, Tom Pearce received a hero's welcome. He was presented with the first gold medal of the Royal Humane Society of Victoria and a £1000 cheque from the Victorian Government. Concerts were performed to honour the young man's bravery and to raise money for those who lost family in the LOCH ARD disaster. Of the 54 crew members and passengers on board, only two survived: the apprentice, Tom Pearce and the young woman passenger, Eva Carmichael, who lost all of her family in the tragedy. Ten days after the LOCH ARD tragedy, salvage rights to the wreck were sold at auction for £2,120. Cargo valued at £3,000 was salvaged and placed on the beach, but most washed back into the sea when another storm developed. The wreck of LOCH ARD still lies at the base of Mutton Bird Island. Much of the cargo has now been salvaged and some was washed up into what is now known as LOCH ARD Gorge. Cargo and artefacts have also been illegally salvaged over many years before protective legislation was introduced. One of the most unlikely pieces of cargo to have survived the shipwreck was a Minton porcelain peacock - one of only seven in the world. The peacock was destined for the Melbourne International Exhibition in 1880. It had been well packed, which gave it adequate protection during the violent storm. Today, the Minton peacock can be seen at the Flagstaff Hill Maritime Museum in Warrnambool. From Australia's most dramatic shipwreck it has now become Australia's most valuable shipwreck artefact and is one of very few 'objects' on the Victorian State Heritage Register. The LOCH ARD shipwreck is of State significance – Victorian Heritage Register S 417. Flagstaff Hill’s collection of artefacts from LOCH ARD is significant for being one of the largest collections of artefacts from this shipwreck in Victoria. It is significant for its association with the shipwreck, which is on the Victorian Heritage Register (VHR S417). The collection is significant because of the relationship between the objects, as together they have a high potential to interpret the story of the LOCH ARD. The LOCH ARD collection is archaeologically significant as the remains of a large international passenger and cargo ship. The LOCH ARD collection is historically significant for representing aspects of Victoria’s shipping history and its potential to interpret sub-theme 1.5 of Victoria’s Framework of Historical Themes (living with natural processes). The collection is also historically significant for its association with the LOCH ARD, which was one of the worst and best known shipwrecks in Victoria’s history. Unrestored tea spoon from the wreck of the LOCH ARD. The spoon design has a flattened fiddle-back handle, with a thin stem or shank, flared collar, and elongated bowl. The spoons metallic composition is a thin layer of brass alloy which has partially corroded back to a nickel-silver base metal. Approximately 30%of original electroplating remains. Small amount of concretion on stem.flagstaff hill, warrnambool, shipwrecked coast, flagstaff hill maritime museum, maritime museum, shipwreck coast, flagstaff hill maritime village, great ocean road, loch line, loch ard, captain gibbs, eva carmichael, tom pearce, glenample station, mutton bird island, loch ard gorge, electroplated cutlery, loch ard shipwreck, nickel silver, william page & co, birmingham, brass plating, makers marks -
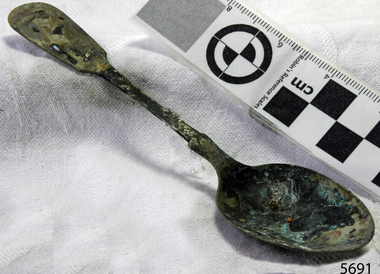 Flagstaff Hill Maritime Museum and Village
Spoon, circa 1878
This tea spoon is from the wreck of the LOCH ARD, a Loch Line ship of 1,693 tons which sailed from Gravesend, London, on 2 March 1878 with 17 passengers and a crew of 36 under Captain George Gibbs. “The intention was to discharge cargo in Melbourne, before returning to London via the Horn with wool and wheat”. Instead, on 1 June 1878, after 90 days at sea, she struck the sandstone cliffs of Mutton Bird Island on the south west coast of Victoria, and sank with the loss of 52 lives and all her cargo. The manifest of the LOCH ARD listed an array of manufactured goods and bulk metals being exported to the Colony of Victoria, with a declared value of £53,700. (202 bills of lading show an actual invoice value of £68, 456, with insurance underwriting to £30,000 of all cargo). Included in the manifest is the item of “Tin hardware & cutlery £7,530”. This teaspoon is one of 482 similar items of electro-plated cutlery from the LOCH ARD site, comprising spoons and forks of various sizes but all sharing the same general shape or design and metallic composition. 49 of these pieces display a legible makers’ mark — the initials “W” and “P” placed within a raised diamond outline, which is in turn contained within a sunken crown shape — identifying the manufacturer as William Page & Co of Birmingham. An electroplater’s makers’ marks, unlike sterling silver hallmarks, are not consistent identifiers of quality or date and place of manufacture. A similar line of five impressions was usually made to impress the consumer with an implication of industry standards, but what each one actually signified was not regulated and so they varied according to the whim of the individual foundry. In this case, the maker’s marks are often obscured by sedimentary accretion or removed by corrosion after a century of submersion in the ocean. However sufficient detail has survived to indicate that these samples of electro-plated cutlery probably originated from the same consignment in the LOCH ARD’s cargo. The following descriptions of maker’s marks are drawn from 255 tea spoons, 125 dessert spoons, and 99 table forks. These marks are clearly visible in 66 instances, while the same sequence of general outlines, or depression shapes, is discernible in another 166 examples. 1. A recessed Crown containing a raised Diamond outline and the initials “W” and “P” (the recognised trademark of William Page & Co) 2. An impressed Ellipse containing a raised, pivoted, Triangle in its lower part and bearing a Resurrection Cross on its upper section (a possible dissenting church symbol reflecting religious affiliation); OR a rounded Square impression containing a raised, ‘lazy’, letter “B” (possibly mimicking sterling silver hallmark signifying city of manufacture i.e. Birmingham) 3. An impressed rounded Square filled with a raised Maltese Cross (the base metal composite of nickel silver was also known as ‘German silver’ after its Berlin inventors in 1823) 4. A recessed Circle containing a Crab or Scarab Beetle image; OR a recessed Circle containing a rotated ‘fleur de lys’ or ‘fasces’ design 5. A depressed Diamond shape enclosing a large raised letter “R” and a small raised letter “D” (mimicking the U.K. Patent Office stamp which abbreviated the term ‘registered’ to “RD”, but also included date and class of patent) Suggested trade names for William Page & Co’s particular blend of brass plating are ‘roman silver’ or ‘silverite’. This copper alloy polishes to a lustrous gold when new, discolouring to a murky grey with greenish hue when neglected. HISTORY OF THE LOCH ARD The LOCH ARD belonged to the famous Loch Line which sailed many ships from England to Australia. Built in Glasgow by Barclay, Curdle and Co. in 1873, the LOCH ARD was a three-masted square rigged iron sailing ship. The ship measured 262ft 7" (79.87m) in length, 38ft (11.58m) in width, 23ft (7m) in depth and had a gross tonnage of 1693 tons. The LOCH ARD's main mast measured a massive 150ft (45.7m) in height. LOCH ARD made three trips to Australia and one trip to Calcutta before its final voyage. LOCH ARD left England on March 2, 1878, under the command of Captain Gibbs, a newly married, 29 year old. She was bound for Melbourne with a crew of 37, plus 17 passengers and a load of cargo. The general cargo reflected the affluence of Melbourne at the time. On board were straw hats, umbrella, perfumes, clay pipes, pianos, clocks, confectionary, linen and candles, as well as a heavier load of railway irons, cement, lead and copper. There were items included that intended for display in the Melbourne International Exhibition in 1880. The voyage to Port Phillip was long but uneventful. At 3am on June 1, 1878, Captain Gibbs was expecting to see land and the passengers were becoming excited as they prepared to view their new homeland in the early morning. But LOCH ARD was running into a fog which greatly reduced visibility. Captain Gibbs was becoming anxious as there was no sign of land or the Cape Otway lighthouse. At 4am the fog lifted. A man aloft announced that he could see breakers. The sheer cliffs of Victoria's west coast came into view, and Captain Gibbs realised that the ship was much closer to them than expected. He ordered as much sail to be set as time would permit and then attempted to steer the vessel out to sea. On coming head on into the wind, the ship lost momentum, the sails fell limp and LOCH ARD's bow swung back. Gibbs then ordered the anchors to be released in an attempt to hold its position. The anchors sank some 50 fathoms - but did not hold. By this time LOCH ARD was among the breakers and the tall cliffs of Mutton Bird Island rose behind the ship. Just half a mile from the coast, the ship's bow was suddenly pulled around by the anchor. The captain tried to tack out to sea, but the ship struck a reef at the base of Mutton Bird Island, near Port Campbell. Waves broke over the ship and the top deck was loosened from the hull. The masts and rigging came crashing down knocking passengers and crew overboard. When a lifeboat was finally launched, it crashed into the side of LOCH ARD and capsized. Tom Pearce, who had launched the boat, managed to cling to its overturned hull and shelter beneath it. He drifted out to sea and then on the flood tide came into what is now known as LOCH ARD Gorge. He swam to shore, bruised and dazed, and found a cave in which to shelter. Some of the crew stayed below deck to shelter from the falling rigging but drowned when the ship slipped off the reef into deeper water. Eva Carmichael had raced onto deck to find out what was happening only to be confronted by towering cliffs looming above the stricken ship. In all the chaos, Captain Gibbs grabbed Eva and said, "If you are saved Eva, let my dear wife know that I died like a sailor". That was the last Eva Carmichael saw of the captain. She was swept off the ship by a huge wave. Eva saw Tom Pearce on a small rocky beach and yelled to attract his attention. He dived in and swam to the exhausted woman and dragged her to shore. He took her to the cave and broke open case of brandy which had washed up on the beach. He opened a bottle to revive the unconscious woman. A few hours later Tom scaled a cliff in search of help. He followed hoof prints and came by chance upon two men from nearby Glenample Station three and a half miles away. In a state of exhaustion, he told the men of the tragedy. Tom returned to the gorge while the two men rode back to the station to get help. By the time they reached LOCH ARD Gorge, it was cold and dark. The two shipwreck survivors were taken to Glenample Station to recover. Eva stayed at the station for six weeks before returning to Ireland, this time by steamship. In Melbourne, Tom Pearce received a hero's welcome. He was presented with the first gold medal of the Royal Humane Society of Victoria and a £1000 cheque from the Victorian Government. Concerts were performed to honour the young man's bravery and to raise money for those who lost family in the LOCH ARD disaster. Of the 54 crew members and passengers on board, only two survived: the apprentice, Tom Pearce and the young woman passenger, Eva Carmichael, who lost all of her family in the tragedy. Ten days after the LOCH ARD tragedy, salvage rights to the wreck were sold at auction for £2,120. Cargo valued at £3,000 was salvaged and placed on the beach, but most washed back into the sea when another storm developed. The wreck of LOCH ARD still lies at the base of Mutton Bird Island. Much of the cargo has now been salvaged and some was washed up into what is now known as LOCH ARD Gorge. Cargo and artefacts have also been illegally salvaged over many years before protective legislation was introduced. One of the most unlikely pieces of cargo to have survived the shipwreck was a Minton porcelain peacock - one of only seven in the world. The peacock was destined for the Melbourne International Exhibition in 1880. It had been well packed, which gave it adequate protection during the violent storm. Today, the Minton peacock can be seen at the Flagstaff Hill Maritime Museum in Warrnambool. From Australia's most dramatic shipwreck it has now become Australia's most valuable shipwreck artefact and is one of very few 'objects' on the Victorian State Heritage Register. The LOCH ARD shipwreck is of State significance – Victorian Heritage Register S 417. Flagstaff Hill’s collection of artefacts from LOCH ARD is significant for being one of the largest collections of artefacts from this shipwreck in Victoria. It is significant for its association with the shipwreck, which is on the Victorian Heritage Register (VHR S417). The collection is significant because of the relationship between the objects, as together they have a high potential to interpret the story of the LOCH ARD. The LOCH ARD collection is archaeologically significant as the remains of a large international passenger and cargo ship. The LOCH ARD collection is historically significant for representing aspects of Victoria’s shipping history and its potential to interpret sub-theme 1.5 of Victoria’s Framework of Historical Themes (living with natural processes). The collection is also historically significant for its association with the LOCH ARD, which was one of the worst and best known shipwrecks in Victoria’s history. Unrestored tea spoon from the wreck of the LOCH ARD. The spoon design has a flattened fiddle-back handle, with a thin stem or shank, flared collar, and elongated bowl. The spoons metallic composition is a thin layer of brass alloy which has partially corroded back to a nickel-silver base metal. Only 10% of original electroplating remains with some verdigris. No marks visible.flagstaff hill, warrnambool, shipwrecked coast, flagstaff hill maritime museum, maritime museum, shipwreck coast, flagstaff hill maritime village, great ocean road, loch line, loch ard, captain gibbs, eva carmichael, tom pearce, glenample station, mutton bird island, loch ard gorge, electroplated cutlery, loch ard shipwreck, nickel silver, william page & co, birmingham, brass plating, makers marks -
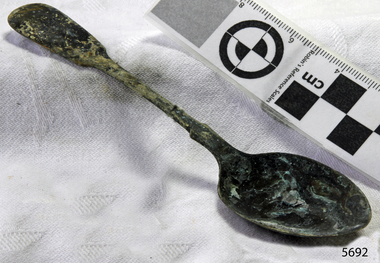 Flagstaff Hill Maritime Museum and Village
Spoon, circa 1878
This tea spoon is from the wreck of the LOCH ARD, a Loch Line ship of 1,693 tons which sailed from Gravesend, London, on 2 March 1878 with 17 passengers and a crew of 36 under Captain George Gibbs. “The intention was to discharge cargo in Melbourne, before returning to London via the Horn with wool and wheat”. Instead, on 1 June 1878, after 90 days at sea, she struck the sandstone cliffs of Mutton Bird Island on the south west coast of Victoria, and sank with the loss of 52 lives and all her cargo. The manifest of the LOCH ARD listed an array of manufactured goods and bulk metals being exported to the Colony of Victoria, with a declared value of £53,700. (202 bills of lading show an actual invoice value of £68, 456, with insurance underwriting to £30,000 of all cargo). Included in the manifest is the item of “Tin hardware & cutlery £7,530”. This teaspoon is one of 482 similar items of electro-plated cutlery from the LOCH ARD site, comprising spoons and forks of various sizes but all sharing the same general shape or design and metallic composition. 49 of these pieces display a legible makers’ mark — the initials “W” and “P” placed within a raised diamond outline, which is in turn contained within a sunken crown shape — identifying the manufacturer as William Page & Co of Birmingham. An electroplater’s makers’ marks, unlike sterling silver hallmarks, are not consistent identifiers of quality or date and place of manufacture. A similar line of five impressions was usually made to impress the consumer with an implication of industry standards, but what each one actually signified was not regulated and so they varied according to the whim of the individual foundry. In this case, the maker’s marks are often obscured by sedimentary accretion or removed by corrosion after a century of submersion in the ocean. However sufficient detail has survived to indicate that these samples of electro-plated cutlery probably originated from the same consignment in the LOCH ARD’s cargo. The following descriptions of maker’s marks are drawn from 255 tea spoons, 125 dessert spoons, and 99 table forks. These marks are clearly visible in 66 instances, while the same sequence of general outlines, or depression shapes, is discernible in another 166 examples. 1. A recessed Crown containing a raised Diamond outline and the initials “W” and “P” (the recognised trademark of William Page & Co) 2. An impressed Ellipse containing a raised, pivoted, Triangle in its lower part and bearing a Resurrection Cross on its upper section (a possible dissenting church symbol reflecting religious affiliation); OR a rounded Square impression containing a raised, ‘lazy’, letter “B” (possibly mimicking sterling silver hallmark signifying city of manufacture i.e. Birmingham) 3. An impressed rounded Square filled with a raised Maltese Cross (the base metal composite of nickel silver was also known as ‘German silver’ after its Berlin inventors in 1823) 4. A recessed Circle containing a Crab or Scarab Beetle image; OR a recessed Circle containing a rotated ‘fleur de lys’ or ‘fasces’ design 5. A depressed Diamond shape enclosing a large raised letter “R” and a small raised letter “D” (mimicking the U.K. Patent Office stamp which abbreviated the term ‘registered’ to “RD”, but also included date and class of patent) Suggested trade names for William Page & Co’s particular blend of brass plating are ‘roman silver’ or ‘silverite’. This copper alloy polishes to a lustrous gold when new, discolouring to a murky grey with greenish hue when neglected. HISTORY OF THE LOCH ARD The LOCH ARD belonged to the famous Loch Line which sailed many ships from England to Australia. Built in Glasgow by Barclay, Curdle and Co. in 1873, the LOCH ARD was a three-masted square rigged iron sailing ship. The ship measured 262ft 7" (79.87m) in length, 38ft (11.58m) in width, 23ft (7m) in depth and had a gross tonnage of 1693 tons. The LOCH ARD's main mast measured a massive 150ft (45.7m) in height. LOCH ARD made three trips to Australia and one trip to Calcutta before its final voyage. LOCH ARD left England on March 2, 1878, under the command of Captain Gibbs, a newly married, 29 year old. She was bound for Melbourne with a crew of 37, plus 17 passengers and a load of cargo. The general cargo reflected the affluence of Melbourne at the time. On board were straw hats, umbrella, perfumes, clay pipes, pianos, clocks, confectionary, linen and candles, as well as a heavier load of railway irons, cement, lead and copper. There were items included that intended for display in the Melbourne International Exhibition in 1880. The voyage to Port Phillip was long but uneventful. At 3am on June 1, 1878, Captain Gibbs was expecting to see land and the passengers were becoming excited as they prepared to view their new homeland in the early morning. But LOCH ARD was running into a fog which greatly reduced visibility. Captain Gibbs was becoming anxious as there was no sign of land or the Cape Otway lighthouse. At 4am the fog lifted. A man aloft announced that he could see breakers. The sheer cliffs of Victoria's west coast came into view, and Captain Gibbs realised that the ship was much closer to them than expected. He ordered as much sail to be set as time would permit and then attempted to steer the vessel out to sea. On coming head on into the wind, the ship lost momentum, the sails fell limp and LOCH ARD's bow swung back. Gibbs then ordered the anchors to be released in an attempt to hold its position. The anchors sank some 50 fathoms - but did not hold. By this time LOCH ARD was among the breakers and the tall cliffs of Mutton Bird Island rose behind the ship. Just half a mile from the coast, the ship's bow was suddenly pulled around by the anchor. The captain tried to tack out to sea, but the ship struck a reef at the base of Mutton Bird Island, near Port Campbell. Waves broke over the ship and the top deck was loosened from the hull. The masts and rigging came crashing down knocking passengers and crew overboard. When a lifeboat was finally launched, it crashed into the side of LOCH ARD and capsized. Tom Pearce, who had launched the boat, managed to cling to its overturned hull and shelter beneath it. He drifted out to sea and then on the flood tide came into what is now known as LOCH ARD Gorge. He swam to shore, bruised and dazed, and found a cave in which to shelter. Some of the crew stayed below deck to shelter from the falling rigging but drowned when the ship slipped off the reef into deeper water. Eva Carmichael had raced onto deck to find out what was happening only to be confronted by towering cliffs looming above the stricken ship. In all the chaos, Captain Gibbs grabbed Eva and said, "If you are saved Eva, let my dear wife know that I died like a sailor". That was the last Eva Carmichael saw of the captain. She was swept off the ship by a huge wave. Eva saw Tom Pearce on a small rocky beach and yelled to attract his attention. He dived in and swam to the exhausted woman and dragged her to shore. He took her to the cave and broke open case of brandy which had washed up on the beach. He opened a bottle to revive the unconscious woman. A few hours later Tom scaled a cliff in search of help. He followed hoof prints and came by chance upon two men from nearby Glenample Station three and a half miles away. In a state of exhaustion, he told the men of the tragedy. Tom returned to the gorge while the two men rode back to the station to get help. By the time they reached LOCH ARD Gorge, it was cold and dark. The two shipwreck survivors were taken to Glenample Station to recover. Eva stayed at the station for six weeks before returning to Ireland, this time by steamship. In Melbourne, Tom Pearce received a hero's welcome. He was presented with the first gold medal of the Royal Humane Society of Victoria and a £1000 cheque from the Victorian Government. Concerts were performed to honour the young man's bravery and to raise money for those who lost family in the LOCH ARD disaster. Of the 54 crew members and passengers on board, only two survived: the apprentice, Tom Pearce and the young woman passenger, Eva Carmichael, who lost all of her family in the tragedy. Ten days after the LOCH ARD tragedy, salvage rights to the wreck were sold at auction for £2,120. Cargo valued at £3,000 was salvaged and placed on the beach, but most washed back into the sea when another storm developed. The wreck of LOCH ARD still lies at the base of Mutton Bird Island. Much of the cargo has now been salvaged and some was washed up into what is now known as LOCH ARD Gorge. Cargo and artefacts have also been illegally salvaged over many years before protective legislation was introduced. One of the most unlikely pieces of cargo to have survived the shipwreck was a Minton porcelain peacock - one of only seven in the world. The peacock was destined for the Melbourne International Exhibition in 1880. It had been well packed, which gave it adequate protection during the violent storm. Today, the Minton peacock can be seen at the Flagstaff Hill Maritime Museum in Warrnambool. From Australia's most dramatic shipwreck it has now become Australia's most valuable shipwreck artefact and is one of very few 'objects' on the Victorian State Heritage Register. The LOCH ARD shipwreck is of State significance – Victorian Heritage Register S 417. Flagstaff Hill’s collection of artefacts from LOCH ARD is significant for being one of the largest collections of artefacts from this shipwreck in Victoria. It is significant for its association with the shipwreck, which is on the Victorian Heritage Register (VHR S417). The collection is significant because of the relationship between the objects, as together they have a high potential to interpret the story of the LOCH ARD. The LOCH ARD collection is archaeologically significant as the remains of a large international passenger and cargo ship. The LOCH ARD collection is historically significant for representing aspects of Victoria’s shipping history and its potential to interpret sub-theme 1.5 of Victoria’s Framework of Historical Themes (living with natural processes). The collection is also historically significant for its association with the LOCH ARD, which was one of the worst and best known shipwrecks in Victoria’s history. Unrestored tea spoon from the wreck of the LOCH ARD. The spoon design has a flattened fiddle-back handle, with a thin stem or shank, flared collar, and elongated bowl. The spoons metallic composition is a thin layer of brass alloy which has partially corroded back to a nickel-silver base metal. Only 10% of original electroplating remains with some verdigris. Makers marks are obscured.flagstaff hill, warrnambool, shipwrecked coast, flagstaff hill maritime museum, maritime museum, shipwreck coast, flagstaff hill maritime village, great ocean road, loch line, loch ard, captain gibbs, eva carmichael, tom pearce, glenample station, mutton bird island, loch ard gorge, electroplated cutlery, loch ard shipwreck, nickel silver, william page & co, birmingham, brass plating, makers marks -
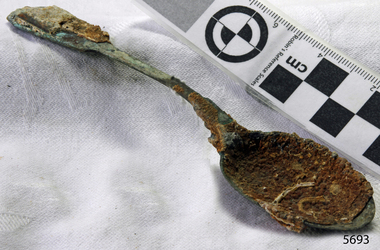 Flagstaff Hill Maritime Museum and Village
Spoon, circa 1878
This tea spoon is from the wreck of the LOCH ARD, a Loch Line ship of 1,693 tons which sailed from Gravesend, London, on 2 March 1878 with 17 passengers and a crew of 36 under Captain George Gibbs. “The intention was to discharge cargo in Melbourne, before returning to London via the Horn with wool and wheat”. Instead, on 1 June 1878, after 90 days at sea, she struck the sandstone cliffs of Mutton Bird Island on the south west coast of Victoria, and sank with the loss of 52 lives and all her cargo. The manifest of the LOCH ARD listed an array of manufactured goods and bulk metals being exported to the Colony of Victoria, with a declared value of £53,700. (202 bills of lading show an actual invoice value of £68, 456, with insurance underwriting to £30,000 of all cargo). Included in the manifest is the item of “Tin hardware & cutlery £7,530”. This teaspoon is one of 482 similar items of electro-plated cutlery from the LOCH ARD site, comprising spoons and forks of various sizes but all sharing the same general shape or design and metallic composition. 49 of these pieces display a legible makers’ mark — the initials “W” and “P” placed within a raised diamond outline, which is in turn contained within a sunken crown shape — identifying the manufacturer as William Page & Co of Birmingham. An electroplater’s makers’ marks, unlike sterling silver hallmarks, are not consistent identifiers of quality or date and place of manufacture. A similar line of five impressions was usually made to impress the consumer with an implication of industry standards, but what each one actually signified was not regulated and so they varied according to the whim of the individual foundry. In this case, the maker’s marks are often obscured by sedimentary accretion or removed by corrosion after a century of submersion in the ocean. However sufficient detail has survived to indicate that these samples of electro-plated cutlery probably originated from the same consignment in the LOCH ARD’s cargo. The following descriptions of maker’s marks are drawn from 255 tea spoons, 125 dessert spoons, and 99 table forks. These marks are clearly visible in 66 instances, while the same sequence of general outlines, or depression shapes, is discernible in another 166 examples. 1. A recessed Crown containing a raised Diamond outline and the initials “W” and “P” (the recognised trademark of William Page & Co) 2. An impressed Ellipse containing a raised, pivoted, Triangle in its lower part and bearing a Resurrection Cross on its upper section (a possible dissenting church symbol reflecting religious affiliation); OR a rounded Square impression containing a raised, ‘lazy’, letter “B” (possibly mimicking sterling silver hallmark signifying city of manufacture i.e. Birmingham) 3. An impressed rounded Square filled with a raised Maltese Cross (the base metal composite of nickel silver was also known as ‘German silver’ after its Berlin inventors in 1823) 4. A recessed Circle containing a Crab or Scarab Beetle image; OR a recessed Circle containing a rotated ‘fleur de lys’ or ‘fasces’ design 5. A depressed Diamond shape enclosing a large raised letter “R” and a small raised letter “D” (mimicking the U.K. Patent Office stamp which abbreviated the term ‘registered’ to “RD”, but also included date and class of patent) Suggested trade names for William Page & Co’s particular blend of brass plating are ‘roman silver’ or ‘silverite’. This copper alloy polishes to a lustrous gold when new, discolouring to a murky grey with greenish hue when neglected. HISTORY OF THE LOCH ARD The LOCH ARD belonged to the famous Loch Line which sailed many ships from England to Australia. Built in Glasgow by Barclay, Curdle and Co. in 1873, the LOCH ARD was a three-masted square rigged iron sailing ship. The ship measured 262ft 7" (79.87m) in length, 38ft (11.58m) in width, 23ft (7m) in depth and had a gross tonnage of 1693 tons. The LOCH ARD's main mast measured a massive 150ft (45.7m) in height. LOCH ARD made three trips to Australia and one trip to Calcutta before its final voyage. LOCH ARD left England on March 2, 1878, under the command of Captain Gibbs, a newly married, 29 year old. She was bound for Melbourne with a crew of 37, plus 17 passengers and a load of cargo. The general cargo reflected the affluence of Melbourne at the time. On board were straw hats, umbrella, perfumes, clay pipes, pianos, clocks, confectionary, linen and candles, as well as a heavier load of railway irons, cement, lead and copper. There were items included that intended for display in the Melbourne International Exhibition in 1880. The voyage to Port Phillip was long but uneventful. At 3am on June 1, 1878, Captain Gibbs was expecting to see land and the passengers were becoming excited as they prepared to view their new homeland in the early morning. But LOCH ARD was running into a fog which greatly reduced visibility. Captain Gibbs was becoming anxious as there was no sign of land or the Cape Otway lighthouse. At 4am the fog lifted. A man aloft announced that he could see breakers. The sheer cliffs of Victoria's west coast came into view, and Captain Gibbs realised that the ship was much closer to them than expected. He ordered as much sail to be set as time would permit and then attempted to steer the vessel out to sea. On coming head on into the wind, the ship lost momentum, the sails fell limp and LOCH ARD's bow swung back. Gibbs then ordered the anchors to be released in an attempt to hold its position. The anchors sank some 50 fathoms - but did not hold. By this time LOCH ARD was among the breakers and the tall cliffs of Mutton Bird Island rose behind the ship. Just half a mile from the coast, the ship's bow was suddenly pulled around by the anchor. The captain tried to tack out to sea, but the ship struck a reef at the base of Mutton Bird Island, near Port Campbell. Waves broke over the ship and the top deck was loosened from the hull. The masts and rigging came crashing down knocking passengers and crew overboard. When a lifeboat was finally launched, it crashed into the side of LOCH ARD and capsized. Tom Pearce, who had launched the boat, managed to cling to its overturned hull and shelter beneath it. He drifted out to sea and then on the flood tide came into what is now known as LOCH ARD Gorge. He swam to shore, bruised and dazed, and found a cave in which to shelter. Some of the crew stayed below deck to shelter from the falling rigging but drowned when the ship slipped off the reef into deeper water. Eva Carmichael had raced onto deck to find out what was happening only to be confronted by towering cliffs looming above the stricken ship. In all the chaos, Captain Gibbs grabbed Eva and said, "If you are saved Eva, let my dear wife know that I died like a sailor". That was the last Eva Carmichael saw of the captain. She was swept off the ship by a huge wave. Eva saw Tom Pearce on a small rocky beach and yelled to attract his attention. He dived in and swam to the exhausted woman and dragged her to shore. He took her to the cave and broke open case of brandy which had washed up on the beach. He opened a bottle to revive the unconscious woman. A few hours later Tom scaled a cliff in search of help. He followed hoof prints and came by chance upon two men from nearby Glenample Station three and a half miles away. In a state of exhaustion, he told the men of the tragedy. Tom returned to the gorge while the two men rode back to the station to get help. By the time they reached LOCH ARD Gorge, it was cold and dark. The two shipwreck survivors were taken to Glenample Station to recover. Eva stayed at the station for six weeks before returning to Ireland, this time by steamship. In Melbourne, Tom Pearce received a hero's welcome. He was presented with the first gold medal of the Royal Humane Society of Victoria and a £1000 cheque from the Victorian Government. Concerts were performed to honour the young man's bravery and to raise money for those who lost family in the LOCH ARD disaster. Of the 54 crew members and passengers on board, only two survived: the apprentice, Tom Pearce and the young woman passenger, Eva Carmichael, who lost all of her family in the tragedy. Ten days after the LOCH ARD tragedy, salvage rights to the wreck were sold at auction for £2,120. Cargo valued at £3,000 was salvaged and placed on the beach, but most washed back into the sea when another storm developed. The wreck of LOCH ARD still lies at the base of Mutton Bird Island. Much of the cargo has now been salvaged and some was washed up into what is now known as LOCH ARD Gorge. Cargo and artefacts have also been illegally salvaged over many years before protective legislation was introduced. One of the most unlikely pieces of cargo to have survived the shipwreck was a Minton porcelain peacock - one of only seven in the world. The peacock was destined for the Melbourne International Exhibition in 1880. It had been well packed, which gave it adequate protection during the violent storm. Today, the Minton peacock can be seen at the Flagstaff Hill Maritime Museum in Warrnambool. From Australia's most dramatic shipwreck it has now become Australia's most valuable shipwreck artefact and is one of very few 'objects' on the Victorian State Heritage Register. The LOCH ARD shipwreck is of State significance – Victorian Heritage Register S 417. Flagstaff Hill’s collection of artefacts from LOCH ARD is significant for being one of the largest collections of artefacts from this shipwreck in Victoria. It is significant for its association with the shipwreck, which is on the Victorian Heritage Register (VHR S417). The collection is significant because of the relationship between the objects, as together they have a high potential to interpret the story of the LOCH ARD. The LOCH ARD collection is archaeologically significant as the remains of a large international passenger and cargo ship. The LOCH ARD collection is historically significant for representing aspects of Victoria’s shipping history and its potential to interpret sub-theme 1.5 of Victoria’s Framework of Historical Themes (living with natural processes). The collection is also historically significant for its association with the LOCH ARD, which was one of the worst and best known shipwrecks in Victoria’s history Unrestored tea spoon from the wreck of the LOCH ARD. The spoon design has a flattened fiddle-back handle, with a thin stem or shank, flared collar, and elongated bowl. The spoons metallic composition is a thin layer of brass alloy which has partially corroded back to a nickel-silver base metal. 40% of spoon surface is encrusted with red and white sediment and 40% shows verdigris. Makers marks are obscured.flagstaff hill, warrnambool, shipwrecked coast, flagstaff hill maritime museum, maritime museum, shipwreck coast, flagstaff hill maritime village, great ocean road, loch line, loch ard, captain gibbs, eva carmichael, tom pearce, glenample station, mutton bird island, loch ard gorge, electroplated cutlery, loch ard shipwreck, nickel silver, william page & co, birmingham, brass plating, makers marks -
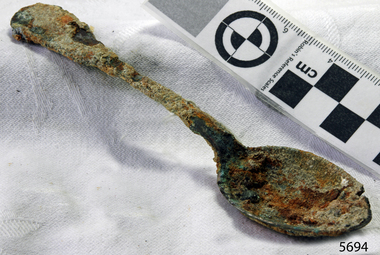 Flagstaff Hill Maritime Museum and Village
Spoon, circa 1878
This tea spoon is from the wreck of the LOCH ARD, a Loch Line ship of 1,693 tons which sailed from Gravesend, London, on 2 March 1878 with 17 passengers and a crew of 36 under Captain George Gibbs. “The intention was to discharge cargo in Melbourne, before returning to London via the Horn with wool and wheat”. Instead, on 1 June 1878, after 90 days at sea, she struck the sandstone cliffs of Mutton Bird Island on the south west coast of Victoria, and sank with the loss of 52 lives and all her cargo. The manifest of the LOCH ARD listed an array of manufactured goods and bulk metals being exported to the Colony of Victoria, with a declared value of £53,700. (202 bills of lading show an actual invoice value of £68, 456, with insurance underwriting to £30,000 of all cargo). Included in the manifest is the item of “Tin hardware & cutlery £7,530”. This teaspoon is one of 482 similar items of electro-plated cutlery from the LOCH ARD site, comprising spoons and forks of various sizes but all sharing the same general shape or design and metallic composition. 49 of these pieces display a legible makers’ mark — the initials “W” and “P” placed within a raised diamond outline, which is in turn contained within a sunken crown shape — identifying the manufacturer as William Page & Co of Birmingham. An electroplater’s makers’ marks, unlike sterling silver hallmarks, are not consistent identifiers of quality or date and place of manufacture. A similar line of five impressions was usually made to impress the consumer with an implication of industry standards, but what each one actually signified was not regulated and so they varied according to the whim of the individual foundry. In this case, the maker’s marks are often obscured by sedimentary accretion or removed by corrosion after a century of submersion in the ocean. However sufficient detail has survived to indicate that these samples of electro-plated cutlery probably originated from the same consignment in the LOCH ARD’s cargo. The following descriptions of maker’s marks are drawn from 255 tea spoons, 125 dessert spoons, and 99 table forks. These marks are clearly visible in 66 instances, while the same sequence of general outlines, or depression shapes, is discernible in another 166 examples. 1. A recessed Crown containing a raised Diamond outline and the initials “W” and “P” (the recognised trademark of William Page & Co) 2. An impressed Ellipse containing a raised, pivoted, Triangle in its lower part and bearing a Resurrection Cross on its upper section (a possible dissenting church symbol reflecting religious affiliation); OR a rounded Square impression containing a raised, ‘lazy’, letter “B” (possibly mimicking sterling silver hallmark signifying city of manufacture i.e. Birmingham) 3. An impressed rounded Square filled with a raised Maltese Cross (the base metal composite of nickel silver was also known as ‘German silver’ after its Berlin inventors in 1823) 4. A recessed Circle containing a Crab or Scarab Beetle image; OR a recessed Circle containing a rotated ‘fleur de lys’ or ‘fasces’ design 5. A depressed Diamond shape enclosing a large raised letter “R” and a small raised letter “D” (mimicking the U.K. Patent Office stamp which abbreviated the term ‘registered’ to “RD”, but also included date and class of patent) Suggested trade names for William Page & Co’s particular blend of brass plating are ‘roman silver’ or ‘silverite’. This copper alloy polishes to a lustrous gold when new, discolouring to a murky grey with greenish hue when neglected. HISTORY OF THE LOCH ARD The LOCH ARD belonged to the famous Loch Line which sailed many ships from England to Australia. Built in Glasgow by Barclay, Curdle and Co. in 1873, the LOCH ARD was a three-masted square rigged iron sailing ship. The ship measured 262ft 7" (79.87m) in length, 38ft (11.58m) in width, 23ft (7m) in depth and had a gross tonnage of 1693 tons. The LOCH ARD's main mast measured a massive 150ft (45.7m) in height. LOCH ARD made three trips to Australia and one trip to Calcutta before its final voyage. LOCH ARD left England on March 2, 1878, under the command of Captain Gibbs, a newly married, 29 year old. She was bound for Melbourne with a crew of 37, plus 17 passengers and a load of cargo. The general cargo reflected the affluence of Melbourne at the time. On board were straw hats, umbrella, perfumes, clay pipes, pianos, clocks, confectionary, linen and candles, as well as a heavier load of railway irons, cement, lead and copper. There were items included that intended for display in the Melbourne International Exhibition in 1880. The voyage to Port Phillip was long but uneventful. At 3am on June 1, 1878, Captain Gibbs was expecting to see land and the passengers were becoming excited as they prepared to view their new homeland in the early morning. But LOCH ARD was running into a fog which greatly reduced visibility. Captain Gibbs was becoming anxious as there was no sign of land or the Cape Otway lighthouse. At 4am the fog lifted. A man aloft announced that he could see breakers. The sheer cliffs of Victoria's west coast came into view, and Captain Gibbs realised that the ship was much closer to them than expected. He ordered as much sail to be set as time would permit and then attempted to steer the vessel out to sea. On coming head on into the wind, the ship lost momentum, the sails fell limp and LOCH ARD's bow swung back. Gibbs then ordered the anchors to be released in an attempt to hold its position. The anchors sank some 50 fathoms - but did not hold. By this time LOCH ARD was among the breakers and the tall cliffs of Mutton Bird Island rose behind the ship. Just half a mile from the coast, the ship's bow was suddenly pulled around by the anchor. The captain tried to tack out to sea, but the ship struck a reef at the base of Mutton Bird Island, near Port Campbell. Waves broke over the ship and the top deck was loosened from the hull. The masts and rigging came crashing down knocking passengers and crew overboard. When a lifeboat was finally launched, it crashed into the side of LOCH ARD and capsized. Tom Pearce, who had launched the boat, managed to cling to its overturned hull and shelter beneath it. He drifted out to sea and then on the flood tide came into what is now known as LOCH ARD Gorge. He swam to shore, bruised and dazed, and found a cave in which to shelter. Some of the crew stayed below deck to shelter from the falling rigging but drowned when the ship slipped off the reef into deeper water. Eva Carmichael had raced onto deck to find out what was happening only to be confronted by towering cliffs looming above the stricken ship. In all the chaos, Captain Gibbs grabbed Eva and said, "If you are saved Eva, let my dear wife know that I died like a sailor". That was the last Eva Carmichael saw of the captain. She was swept off the ship by a huge wave. Eva saw Tom Pearce on a small rocky beach and yelled to attract his attention. He dived in and swam to the exhausted woman and dragged her to shore. He took her to the cave and broke open case of brandy which had washed up on the beach. He opened a bottle to revive the unconscious woman. A few hours later Tom scaled a cliff in search of help. He followed hoof prints and came by chance upon two men from nearby Glenample Station three and a half miles away. In a state of exhaustion, he told the men of the tragedy. Tom returned to the gorge while the two men rode back to the station to get help. By the time they reached LOCH ARD Gorge, it was cold and dark. The two shipwreck survivors were taken to Glenample Station to recover. Eva stayed at the station for six weeks before returning to Ireland, this time by steamship. In Melbourne, Tom Pearce received a hero's welcome. He was presented with the first gold medal of the Royal Humane Society of Victoria and a £1000 cheque from the Victorian Government. Concerts were performed to honour the young man's bravery and to raise money for those who lost family in the LOCH ARD disaster. Of the 54 crew members and passengers on board, only two survived: the apprentice, Tom Pearce and the young woman passenger, Eva Carmichael, who lost all of her family in the tragedy. Ten days after the LOCH ARD tragedy, salvage rights to the wreck were sold at auction for £2,120. Cargo valued at £3,000 was salvaged and placed on the beach, but most washed back into the sea when another storm developed. The wreck of LOCH ARD still lies at the base of Mutton Bird Island. Much of the cargo has now been salvaged and some was washed up into what is now known as LOCH ARD Gorge. Cargo and artefacts have also been illegally salvaged over many years before protective legislation was introduced. One of the most unlikely pieces of cargo to have survived the shipwreck was a Minton porcelain peacock - one of only seven in the world. The peacock was destined for the Melbourne International Exhibition in 1880. It had been well packed, which gave it adequate protection during the violent storm. Today, the Minton peacock can be seen at the Flagstaff Hill Maritime Museum in Warrnambool. From Australia's most dramatic shipwreck it has now become Australia's most valuable shipwreck artefact and is one of very few 'objects' on the Victorian State Heritage Register. The LOCH ARD shipwreck is of State significance – Victorian Heritage Register S 417. Flagstaff Hill’s collection of artefacts from LOCH ARD is significant for being one of the largest collections of artefacts from this shipwreck in Victoria. It is significant for its association with the shipwreck, which is on the Victorian Heritage Register (VHR S417). The collection is significant because of the relationship between the objects, as together they have a high potential to interpret the story of the LOCH ARD. The LOCH ARD collection is archaeologically significant as the remains of a large international passenger and cargo ship. The LOCH ARD collection is historically significant for representing aspects of Victoria’s shipping history and its potential to interpret sub-theme 1.5 of Victoria’s Framework of Historical Themes (living with natural processes). The collection is also historically significant for its association with the LOCH ARD, which was one of the worst and best known shipwrecks in Victoria’s history Unrestored tea spoon from the wreck of the LOCH ARD. The spoon design has a flattened fiddle-back handle, with a thin stem or shank, flared collar, and elongated bowl. The spoons metallic composition is a thin layer of brass alloy which has partially corroded back to a nickel-silver base metal. 80% of the spoon surface is encrusted with red and white sediment. The bowl is corroded and chipped. Makers marks are obscured.flagstaff hill, warrnambool, shipwrecked coast, flagstaff hill maritime museum, maritime museum, shipwreck coast, flagstaff hill maritime village, great ocean road, loch line, loch ard, captain gibbs, eva carmichael, tom pearce, glenample station, mutton bird island, loch ard gorge, electroplated cutlery, loch ard shipwreck, nickel silver, william page & co, birmingham, brass plating, makers marks -
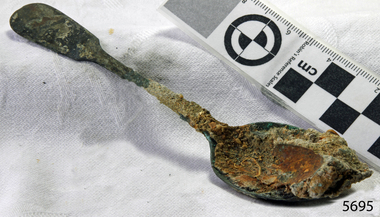 Flagstaff Hill Maritime Museum and Village
Spoon, circa 1878
This tea spoon is from the wreck of the LOCH ARD, a Loch Line ship of 1,693 tons which sailed from Gravesend, London, on 2 March 1878 with 17 passengers and a crew of 36 under Captain George Gibbs. “The intention was to discharge cargo in Melbourne, before returning to London via the Horn with wool and wheat”. Instead, on 1 June 1878, after 90 days at sea, she struck the sandstone cliffs of Mutton Bird Island on the south west coast of Victoria, and sank with the loss of 52 lives and all her cargo. The manifest of the LOCH ARD listed an array of manufactured goods and bulk metals being exported to the Colony of Victoria, with a declared value of £53,700. (202 bills of lading show an actual invoice value of £68, 456, with insurance underwriting to £30,000 of all cargo). Included in the manifest is the item of “Tin hardware & cutlery £7,530”. This teaspoon is one of 482 similar items of electro-plated cutlery from the LOCH ARD site, comprising spoons and forks of various sizes but all sharing the same general shape or design and metallic composition. 49 of these pieces display a legible makers’ mark — the initials “W” and “P” placed within a raised diamond outline, which is in turn contained within a sunken crown shape — identifying the manufacturer as William Page & Co of Birmingham. An electroplater’s makers’ marks, unlike sterling silver hallmarks, are not consistent identifiers of quality or date and place of manufacture. A similar line of five impressions was usually made to impress the consumer with an implication of industry standards, but what each one actually signified was not regulated and so they varied according to the whim of the individual foundry. In this case, the maker’s marks are often obscured by sedimentary accretion or removed by corrosion after a century of submersion in the ocean. However sufficient detail has survived to indicate that these samples of electro-plated cutlery probably originated from the same consignment in the LOCH ARD’s cargo. The following descriptions of maker’s marks are drawn from 255 tea spoons, 125 dessert spoons, and 99 table forks. These marks are clearly visible in 66 instances, while the same sequence of general outlines, or depression shapes, is discernible in another 166 examples. 1. A recessed Crown containing a raised Diamond outline and the initials “W” and “P” (the recognised trademark of William Page & Co) 2. An impressed Ellipse containing a raised, pivoted, Triangle in its lower part and bearing a Resurrection Cross on its upper section (a possible dissenting church symbol reflecting religious affiliation); OR a rounded Square impression containing a raised, ‘lazy’, letter “B” (possibly mimicking sterling silver hallmark signifying city of manufacture i.e. Birmingham) 3. An impressed rounded Square filled with a raised Maltese Cross (the base metal composite of nickel silver was also known as ‘German silver’ after its Berlin inventors in 1823) 4. A recessed Circle containing a Crab or Scarab Beetle image; OR a recessed Circle containing a rotated ‘fleur de lys’ or ‘fasces’ design 5. A depressed Diamond shape enclosing a large raised letter “R” and a small raised letter “D” (mimicking the U.K. Patent Office stamp which abbreviated the term ‘registered’ to “RD”, but also included date and class of patent) Suggested trade names for William Page & Co’s particular blend of brass plating are ‘roman silver’ or ‘silverite’. This copper alloy polishes to a lustrous gold when new, discolouring to a murky grey with greenish hue when neglected. HISTORY OF THE LOCH ARD The LOCH ARD belonged to the famous Loch Line which sailed many ships from England to Australia. Built in Glasgow by Barclay, Curdle and Co. in 1873, the LOCH ARD was a three-masted square rigged iron sailing ship. The ship measured 262ft 7" (79.87m) in length, 38ft (11.58m) in width, 23ft (7m) in depth and had a gross tonnage of 1693 tons. The LOCH ARD's main mast measured a massive 150ft (45.7m) in height. LOCH ARD made three trips to Australia and one trip to Calcutta before its final voyage. LOCH ARD left England on March 2, 1878, under the command of Captain Gibbs, a newly married, 29 year old. She was bound for Melbourne with a crew of 37, plus 17 passengers and a load of cargo. The general cargo reflected the affluence of Melbourne at the time. On board were straw hats, umbrella, perfumes, clay pipes, pianos, clocks, confectionary, linen and candles, as well as a heavier load of railway irons, cement, lead and copper. There were items included that intended for display in the Melbourne International Exhibition in 1880. The voyage to Port Phillip was long but uneventful. At 3am on June 1, 1878, Captain Gibbs was expecting to see land and the passengers were becoming excited as they prepared to view their new homeland in the early morning. But LOCH ARD was running into a fog which greatly reduced visibility. Captain Gibbs was becoming anxious as there was no sign of land or the Cape Otway lighthouse. At 4am the fog lifted. A man aloft announced that he could see breakers. The sheer cliffs of Victoria's west coast came into view, and Captain Gibbs realised that the ship was much closer to them than expected. He ordered as much sail to be set as time would permit and then attempted to steer the vessel out to sea. On coming head on into the wind, the ship lost momentum, the sails fell limp and LOCH ARD's bow swung back. Gibbs then ordered the anchors to be released in an attempt to hold its position. The anchors sank some 50 fathoms - but did not hold. By this time LOCH ARD was among the breakers and the tall cliffs of Mutton Bird Island rose behind the ship. Just half a mile from the coast, the ship's bow was suddenly pulled around by the anchor. The captain tried to tack out to sea, but the ship struck a reef at the base of Mutton Bird Island, near Port Campbell. Waves broke over the ship and the top deck was loosened from the hull. The masts and rigging came crashing down knocking passengers and crew overboard. When a lifeboat was finally launched, it crashed into the side of LOCH ARD and capsized. Tom Pearce, who had launched the boat, managed to cling to its overturned hull and shelter beneath it. He drifted out to sea and then on the flood tide came into what is now known as LOCH ARD Gorge. He swam to shore, bruised and dazed, and found a cave in which to shelter. Some of the crew stayed below deck to shelter from the falling rigging but drowned when the ship slipped off the reef into deeper water. Eva Carmichael had raced onto deck to find out what was happening only to be confronted by towering cliffs looming above the stricken ship. In all the chaos, Captain Gibbs grabbed Eva and said, "If you are saved Eva, let my dear wife know that I died like a sailor". That was the last Eva Carmichael saw of the captain. She was swept off the ship by a huge wave. Eva saw Tom Pearce on a small rocky beach and yelled to attract his attention. He dived in and swam to the exhausted woman and dragged her to shore. He took her to the cave and broke open case of brandy which had washed up on the beach. He opened a bottle to revive the unconscious woman. A few hours later Tom scaled a cliff in search of help. He followed hoof prints and came by chance upon two men from nearby Glenample Station three and a half miles away. In a state of exhaustion, he told the men of the tragedy. Tom returned to the gorge while the two men rode back to the station to get help. By the time they reached LOCH ARD Gorge, it was cold and dark. The two shipwreck survivors were taken to Glenample Station to recover. Eva stayed at the station for six weeks before returning to Ireland, this time by steamship. In Melbourne, Tom Pearce received a hero's welcome. He was presented with the first gold medal of the Royal Humane Society of Victoria and a £1000 cheque from the Victorian Government. Concerts were performed to honour the young man's bravery and to raise money for those who lost family in the LOCH ARD disaster. Of the 54 crew members and passengers on board, only two survived: the apprentice, Tom Pearce and the young woman passenger, Eva Carmichael, who lost all of her family in the tragedy. Ten days after the LOCH ARD tragedy, salvage rights to the wreck were sold at auction for £2,120. Cargo valued at £3,000 was salvaged and placed on the beach, but most washed back into the sea when another storm developed. The wreck of LOCH ARD still lies at the base of Mutton Bird Island. Much of the cargo has now been salvaged and some was washed up into what is now known as LOCH ARD Gorge. Cargo and artefacts have also been illegally salvaged over many years before protective legislation was introduced. One of the most unlikely pieces of cargo to have survived the shipwreck was a Minton porcelain peacock - one of only seven in the world. The peacock was destined for the Melbourne International Exhibition in 1880. It had been well packed, which gave it adequate protection during the violent storm. Today, the Minton peacock can be seen at the Flagstaff Hill Maritime Museum in Warrnambool. From Australia's most dramatic shipwreck it has now become Australia's most valuable shipwreck artefact and is one of very few 'objects' on the Victorian State Heritage Register. The LOCH ARD shipwreck is of State significance – Victorian Heritage Register S 417. Flagstaff Hill’s collection of artefacts from LOCH ARD is significant for being one of the largest collections of artefacts from this shipwreck in Victoria. It is significant for its association with the shipwreck, which is on the Victorian Heritage Register (VHR S417). The collection is significant because of the relationship between the objects, as together they have a high potential to interpret the story of the LOCH ARD. The LOCH ARD collection is archaeologically significant as the remains of a large international passenger and cargo ship. The LOCH ARD collection is historically significant for representing aspects of Victoria’s shipping history and its potential to interpret sub-theme 1.5 of Victoria’s Framework of Historical Themes (living with natural processes). The collection is also historically significant for its association with the LOCH ARD, which was one of the worst and best known shipwrecks in Victoria’s history. Unrestored tea spoon from the wreck of the LOCH ARD. The spoon design has a flattened fiddle-back handle, with a thin stem or shank, flared collar, and elongated bowl. The spoons metallic composition is a thin layer of brass alloy which has partially corroded back to a nickel-silver base metal. Some verdigris and there is heavy encrustation on stem and bowl of spoon (encrustation in bowl bears the imprint of another spoon).flagstaff hill, warrnambool, shipwrecked coast, flagstaff hill maritime museum, maritime museum, shipwreck coast, flagstaff hill maritime village, great ocean road, loch line, loch ard, captain gibbs, eva carmichael, tom pearce, glenample station, mutton bird island, loch ard gorge, electroplated cutlery, loch ard shipwreck, nickel silver, william page & co, birmingham, brass plating, makers marks -
 Flagstaff Hill Maritime Museum and Village
Spoon, circa 1878
This tea spoon is from the wreck of the LOCH ARD, a Loch Line ship of 1,693 tons which sailed from Gravesend, London, on 2 March 1878 with 17 passengers and a crew of 36 under Captain George Gibbs. “The intention was to discharge cargo in Melbourne, before returning to London via the Horn with wool and wheat”. Instead, on 1 June 1878, after 90 days at sea, she struck the sandstone cliffs of Mutton Bird Island on the south west coast of Victoria, and sank with the loss of 52 lives and all her cargo. The manifest of the LOCH ARD listed an array of manufactured goods and bulk metals being exported to the Colony of Victoria, with a declared value of £53,700. (202 bills of lading show an actual invoice value of £68, 456, with insurance underwriting to £30,000 of all cargo). Included in the manifest is the item of “Tin hardware & cutlery £7,530”. This teaspoon is one of 482 similar items of electro-plated cutlery from the LOCH ARD site, comprising spoons and forks of various sizes but all sharing the same general shape or design and metallic composition. 49 of these pieces display a legible makers’ mark — the initials “W” and “P” placed within a raised diamond outline, which is in turn contained within a sunken crown shape — identifying the manufacturer as William Page & Co of Birmingham. An electroplater’s makers’ marks, unlike sterling silver hallmarks, are not consistent identifiers of quality or date and place of manufacture. A similar line of five impressions was usually made to impress the consumer with an implication of industry standards, but what each one actually signified was not regulated and so they varied according to the whim of the individual foundry. In this case, the maker’s marks are often obscured by sedimentary accretion or removed by corrosion after a century of submersion in the ocean. However sufficient detail has survived to indicate that these samples of electro-plated cutlery probably originated from the same consignment in the LOCH ARD’s cargo. The following descriptions of maker’s marks are drawn from 255 tea spoons, 125 dessert spoons, and 99 table forks. These marks are clearly visible in 66 instances, while the same sequence of general outlines, or depression shapes, is discernible in another 166 examples. 1. A recessed Crown containing a raised Diamond outline and the initials “W” and “P” (the recognised trademark of William Page & Co) 2. An impressed Ellipse containing a raised, pivoted, Triangle in its lower part and bearing a Resurrection Cross on its upper section (a possible dissenting church symbol reflecting religious affiliation); OR a rounded Square impression containing a raised, ‘lazy’, letter “B” (possibly mimicking sterling silver hallmark signifying city of manufacture i.e. Birmingham) 3. An impressed rounded Square filled with a raised Maltese Cross (the base metal composite of nickel silver was also known as ‘German silver’ after its Berlin inventors in 1823) 4. A recessed Circle containing a Crab or Scarab Beetle image; OR a recessed Circle containing a rotated ‘fleur de lys’ or ‘fasces’ design 5. A depressed Diamond shape enclosing a large raised letter “R” and a small raised letter “D” (mimicking the U.K. Patent Office stamp which abbreviated the term ‘registered’ to “RD”, but also included date and class of patent) Suggested trade names for William Page & Co’s particular blend of brass plating are ‘roman silver’ or ‘silverite’. This copper alloy polishes to a lustrous gold when new, discolouring to a murky grey with greenish hue when neglected. HISTORY OF THE LOCH ARD The LOCH ARD belonged to the famous Loch Line which sailed many ships from England to Australia. Built in Glasgow by Barclay, Curdle and Co. in 1873, the LOCH ARD was a three-masted square rigged iron sailing ship. The ship measured 262ft 7" (79.87m) in length, 38ft (11.58m) in width, 23ft (7m) in depth and had a gross tonnage of 1693 tons. The LOCH ARD's main mast measured a massive 150ft (45.7m) in height. LOCH ARD made three trips to Australia and one trip to Calcutta before its final voyage. LOCH ARD left England on March 2, 1878, under the command of Captain Gibbs, a newly married, 29 year old. She was bound for Melbourne with a crew of 37, plus 17 passengers and a load of cargo. The general cargo reflected the affluence of Melbourne at the time. On board were straw hats, umbrella, perfumes, clay pipes, pianos, clocks, confectionary, linen and candles, as well as a heavier load of railway irons, cement, lead and copper. There were items included that intended for display in the Melbourne International Exhibition in 1880. The voyage to Port Phillip was long but uneventful. At 3am on June 1, 1878, Captain Gibbs was expecting to see land and the passengers were becoming excited as they prepared to view their new homeland in the early morning. But LOCH ARD was running into a fog which greatly reduced visibility. Captain Gibbs was becoming anxious as there was no sign of land or the Cape Otway lighthouse. At 4am the fog lifted. A man aloft announced that he could see breakers. The sheer cliffs of Victoria's west coast came into view, and Captain Gibbs realised that the ship was much closer to them than expected. He ordered as much sail to be set as time would permit and then attempted to steer the vessel out to sea. On coming head on into the wind, the ship lost momentum, the sails fell limp and LOCH ARD's bow swung back. Gibbs then ordered the anchors to be released in an attempt to hold its position. The anchors sank some 50 fathoms - but did not hold. By this time LOCH ARD was among the breakers and the tall cliffs of Mutton Bird Island rose behind the ship. Just half a mile from the coast, the ship's bow was suddenly pulled around by the anchor. The captain tried to tack out to sea, but the ship struck a reef at the base of Mutton Bird Island, near Port Campbell. Waves broke over the ship and the top deck was loosened from the hull. The masts and rigging came crashing down knocking passengers and crew overboard. When a lifeboat was finally launched, it crashed into the side of LOCH ARD and capsized. Tom Pearce, who had launched the boat, managed to cling to its overturned hull and shelter beneath it. He drifted out to sea and then on the flood tide came into what is now known as LOCH ARD Gorge. He swam to shore, bruised and dazed, and found a cave in which to shelter. Some of the crew stayed below deck to shelter from the falling rigging but drowned when the ship slipped off the reef into deeper water. Eva Carmichael had raced onto deck to find out what was happening only to be confronted by towering cliffs looming above the stricken ship. In all the chaos, Captain Gibbs grabbed Eva and said, "If you are saved Eva, let my dear wife know that I died like a sailor". That was the last Eva Carmichael saw of the captain. She was swept off the ship by a huge wave. Eva saw Tom Pearce on a small rocky beach and yelled to attract his attention. He dived in and swam to the exhausted woman and dragged her to shore. He took her to the cave and broke open case of brandy which had washed up on the beach. He opened a bottle to revive the unconscious woman. A few hours later Tom scaled a cliff in search of help. He followed hoof prints and came by chance upon two men from nearby Glenample Station three and a half miles away. In a state of exhaustion, he told the men of the tragedy. Tom returned to the gorge while the two men rode back to the station to get help. By the time they reached LOCH ARD Gorge, it was cold and dark. The two shipwreck survivors were taken to Glenample Station to recover. Eva stayed at the station for six weeks before returning to Ireland, this time by steamship. In Melbourne, Tom Pearce received a hero's welcome. He was presented with the first gold medal of the Royal Humane Society of Victoria and a £1000 cheque from the Victorian Government. Concerts were performed to honour the young man's bravery and to raise money for those who lost family in the LOCH ARD disaster. Of the 54 crew members and passengers on board, only two survived: the apprentice, Tom Pearce and the young woman passenger, Eva Carmichael, who lost all of her family in the tragedy. Ten days after the LOCH ARD tragedy, salvage rights to the wreck were sold at auction for £2,120. Cargo valued at £3,000 was salvaged and placed on the beach, but most washed back into the sea when another storm developed. The wreck of LOCH ARD still lies at the base of Mutton Bird Island. Much of the cargo has now been salvaged and some was washed up into what is now known as LOCH ARD Gorge. Cargo and artefacts have also been illegally salvaged over many years before protective legislation was introduced. One of the most unlikely pieces of cargo to have survived the shipwreck was a Minton porcelain peacock - one of only seven in the world. The peacock was destined for the Melbourne International Exhibition in 1880. It had been well packed, which gave it adequate protection during the violent storm. Today, the Minton peacock can be seen at the Flagstaff Hill Maritime Museum in Warrnambool. From Australia's most dramatic shipwreck it has now become Australia's most valuable shipwreck artefact and is one of very few 'objects' on the Victorian State Heritage Register. The LOCH ARD shipwreck is of State significance – Victorian Heritage Register S 417. Flagstaff Hill’s collection of artefacts from LOCH ARD is significant for being one of the largest collections of artefacts from this shipwreck in Victoria. It is significant for its association with the shipwreck, which is on the Victorian Heritage Register (VHR S417). The collection is significant because of the relationship between the objects, as together they have a high potential to interpret the story of the LOCH ARD. The LOCH ARD collection is archaeologically significant as the remains of a large international passenger and cargo ship. The LOCH ARD collection is historically significant for representing aspects of Victoria’s shipping history and its potential to interpret sub-theme 1.5 of Victoria’s Framework of Historical Themes (living with natural processes). The collection is also historically significant for its association with the LOCH ARD, which was one of the worst and best known shipwrecks in Victoria’s history. Restored tea spoon from the wreck of the LOCH ARD. The spoon design has a flattened fiddle-back handle, with a thin stem or shank, flared collar, and elongated bowl. The spoons metallic composition is a thin layer of brass alloy which has been electroplated onto a nickel-silver base metal. Spoon has been treated and cleaned to present a shining golden appearance. There is some pitting on the reverse side of the spoon. Four of the five makers marks are clearly visible on the lower rear of the handle: (1) Trade Mark (2) Resurrection Cross (3) Maltese Cross (4) Crab Design.flagstaff hill, warrnambool, shipwrecked coast, flagstaff hill maritime museum, maritime museum, shipwreck coast, flagstaff hill maritime village, great ocean road, loch line, loch ard, captain gibbs, eva carmichael, tom pearce, glenample station, mutton bird island, loch ard gorge, electroplated cutlery, loch ard shipwreck, nickel silver, william page & co, birmingham, brass plating, makers marks