Showing 1222 items
matching permit
-
 Flagstaff Hill Maritime Museum and Village
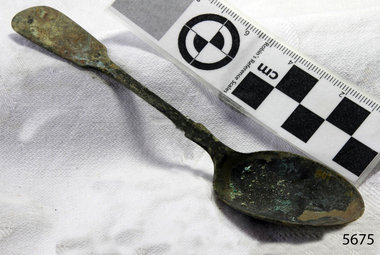
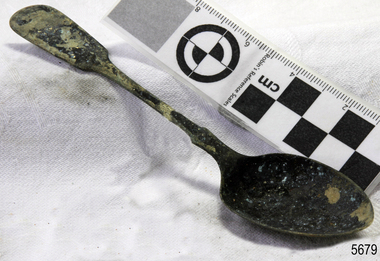
Spoon, circa 1878
This tea spoon is from the wreck of the LOCH ARD, a Loch Line ship of 1,693 tons which sailed from Gravesend, London, on 2 March 1878 with 17 passengers and a crew of 36 under Captain George Gibbs. “The intention was to discharge cargo in Melbourne, before returning to London via the Horn with wool and wheat”. Instead, on 1 June 1878, after 90 days at sea, she struck the sandstone cliffs of Mutton Bird Island on the south west coast of Victoria, and sank with the loss of 52 lives and all her cargo. The manifest of the LOCH ARD listed an array of manufactured goods and bulk metals being exported to the Colony of Victoria, with a declared value of £53,700. (202 bills of lading show an actual invoice value of £68, 456, with insurance underwriting to £30,000 of all cargo). Included in the manifest is the item of “Tin hardware & cutlery £7,530”. This teaspoon is one of 482 similar items of electro-plated cutlery from the LOCH ARD site, comprising spoons and forks of various sizes but all sharing the same general shape or design and metallic composition. 49 of these pieces display a legible makers’ mark — the initials “W” and “P” placed within a raised diamond outline, which is in turn contained within a sunken crown shape — identifying the manufacturer as William Page & Co of Birmingham. An electroplater’s makers’ marks, unlike sterling silver hallmarks, are not consistent identifiers of quality or date and place of manufacture. A similar line of five impressions was usually made to impress the consumer with an implication of industry standards, but what each one actually signified was not regulated and so they varied according to the whim of the individual foundry. In this case, the maker’s marks are often obscured by sedimentary accretion or removed by corrosion after a century of submersion in the ocean. However sufficient detail has survived to indicate that these samples of electro-plated cutlery probably originated from the same consignment in the LOCH ARD’s cargo. The following descriptions of maker’s marks are drawn from 255 tea spoons, 125 dessert spoons, and 99 table forks. These marks are clearly visible in 66 instances, while the same sequence of general outlines, or depression shapes, is discernible in another 166 examples. 1. A recessed Crown containing a raised Diamond outline and the initials “W” and “P” (the recognised trademark of William Page & Co) 2. An impressed Ellipse containing a raised, pivoted, Triangle in its lower part and bearing a Resurrection Cross on its upper section (a possible dissenting church symbol reflecting religious affiliation); OR a rounded Square impression containing a raised, ‘lazy’, letter “B” (possibly mimicking sterling silver hallmark signifying city of manufacture i.e. Birmingham) 3. An impressed rounded Square filled with a raised Maltese Cross (the base metal composite of nickel silver was also known as ‘German silver’ after its Berlin inventors in 1823) 4. A recessed Circle containing a Crab or Scarab Beetle image; OR a recessed Circle containing a rotated ‘fleur de lys’ or ‘fasces’ design 5. A depressed Diamond shape enclosing a large raised letter “R” and a small raised letter “D” (mimicking the U.K. Patent Office stamp which abbreviated the term ‘registered’ to “RD”, but also included date and class of patent) Suggested trade names for William Page & Co’s particular blend of brass plating are ‘roman silver’ or ‘silverite’. This copper alloy polishes to a lustrous gold when new, discolouring to a murky grey with greenish hue when neglected. HISTORY OF THE LOCH ARD The LOCH ARD belonged to the famous Loch Line which sailed many ships from England to Australia. Built in Glasgow by Barclay, Curdle and Co. in 1873, the LOCH ARD was a three-masted square rigged iron sailing ship. The ship measured 262ft 7" (79.87m) in length, 38ft (11.58m) in width, 23ft (7m) in depth and had a gross tonnage of 1693 tons. The LOCH ARD's main mast measured a massive 150ft (45.7m) in height. LOCH ARD made three trips to Australia and one trip to Calcutta before its final voyage. LOCH ARD left England on March 2, 1878, under the command of Captain Gibbs, a newly married, 29 year old. She was bound for Melbourne with a crew of 37, plus 17 passengers and a load of cargo. The general cargo reflected the affluence of Melbourne at the time. On board were straw hats, umbrella, perfumes, clay pipes, pianos, clocks, confectionary, linen and candles, as well as a heavier load of railway irons, cement, lead and copper. There were items included that intended for display in the Melbourne International Exhibition in 1880. The voyage to Port Phillip was long but uneventful. At 3am on June 1, 1878, Captain Gibbs was expecting to see land and the passengers were becoming excited as they prepared to view their new homeland in the early morning. But LOCH ARD was running into a fog which greatly reduced visibility. Captain Gibbs was becoming anxious as there was no sign of land or the Cape Otway lighthouse. At 4am the fog lifted. A man aloft announced that he could see breakers. The sheer cliffs of Victoria's west coast came into view, and Captain Gibbs realised that the ship was much closer to them than expected. He ordered as much sail to be set as time would permit and then attempted to steer the vessel out to sea. On coming head on into the wind, the ship lost momentum, the sails fell limp and LOCH ARD's bow swung back. Gibbs then ordered the anchors to be released in an attempt to hold its position. The anchors sank some 50 fathoms - but did not hold. By this time LOCH ARD was among the breakers and the tall cliffs of Mutton Bird Island rose behind the ship. Just half a mile from the coast, the ship's bow was suddenly pulled around by the anchor. The captain tried to tack out to sea, but the ship struck a reef at the base of Mutton Bird Island, near Port Campbell. Waves broke over the ship and the top deck was loosened from the hull. The masts and rigging came crashing down knocking passengers and crew overboard. When a lifeboat was finally launched, it crashed into the side of LOCH ARD and capsized. Tom Pearce, who had launched the boat, managed to cling to its overturned hull and shelter beneath it. He drifted out to sea and then on the flood tide came into what is now known as LOCH ARD Gorge. He swam to shore, bruised and dazed, and found a cave in which to shelter. Some of the crew stayed below deck to shelter from the falling rigging but drowned when the ship slipped off the reef into deeper water. Eva Carmichael had raced onto deck to find out what was happening only to be confronted by towering cliffs looming above the stricken ship. In all the chaos, Captain Gibbs grabbed Eva and said, "If you are saved Eva, let my dear wife know that I died like a sailor". That was the last Eva Carmichael saw of the captain. She was swept off the ship by a huge wave. Eva saw Tom Pearce on a small rocky beach and yelled to attract his attention. He dived in and swam to the exhausted woman and dragged her to shore. He took her to the cave and broke open case of brandy which had washed up on the beach. He opened a bottle to revive the unconscious woman. A few hours later Tom scaled a cliff in search of help. He followed hoof prints and came by chance upon two men from nearby Glenample Station three and a half miles away. In a state of exhaustion, he told the men of the tragedy. Tom returned to the gorge while the two men rode back to the station to get help. By the time they reached LOCH ARD Gorge, it was cold and dark. The two shipwreck survivors were taken to Glenample Station to recover. Eva stayed at the station for six weeks before returning to Ireland, this time by steamship. In Melbourne, Tom Pearce received a hero's welcome. He was presented with the first gold medal of the Royal Humane Society of Victoria and a £1000 cheque from the Victorian Government. Concerts were performed to honour the young man's bravery and to raise money for those who lost family in the LOCH ARD disaster. Of the 54 crew members and passengers on board, only two survived: the apprentice, Tom Pearce and the young woman passenger, Eva Carmichael, who lost all of her family in the tragedy. Ten days after the LOCH ARD tragedy, salvage rights to the wreck were sold at auction for £2,120. Cargo valued at £3,000 was salvaged and placed on the beach, but most washed back into the sea when another storm developed. The wreck of LOCH ARD still lies at the base of Mutton Bird Island. Much of the cargo has now been salvaged and some was washed up into what is now known as LOCH ARD Gorge. Cargo and artefacts have also been illegally salvaged over many years before protective legislation was introduced. One of the most unlikely pieces of cargo to have survived the shipwreck was a Minton porcelain peacock - one of only seven in the world. The peacock was destined for the Melbourne International Exhibition in 1880. It had been well packed, which gave it adequate protection during the violent storm. Today, the Minton peacock can be seen at the Flagstaff Hill Maritime Museum in Warrnambool. From Australia's most dramatic shipwreck it has now become Australia's most valuable shipwreck artefact and is one of very few 'objects' on the Victorian State Heritage Register. The LOCH ARD shipwreck is of State significance – Victorian Heritage Register S 417. Flagstaff Hill’s collection of artefacts from LOCH ARD is significant for being one of the largest collections of artefacts from this shipwreck in Victoria. It is significant for its association with the shipwreck, which is on the Victorian Heritage Register (VHR S417). The collection is significant because of the relationship between the objects, as together they have a high potential to interpret the story of the LOCH ARD. The LOCH ARD collection is archaeologically significant as the remains of a large international passenger and cargo ship. The LOCH ARD collection is historically significant for representing aspects of Victoria’s shipping history and its potential to interpret sub-theme 1.5 of Victoria’s Framework of Historical Themes (living with natural processes). The collection is also historically significant for its association with the LOCH ARD, which was one of the worst and best known shipwrecks in Victoria’s history. Unrestored tea spoon from the wreck of the LOCH ARD. The spoon design has a flattened fiddle-back handle, with a thin stem or shank, flared collar, and elongated bowl. The spoons metallic composition is a thin layer of brass alloy which has partially corroded back to a nickel-silver base metal. Only traces of original electroplate remain. Makers marks obscured.flagstaff hill, warrnambool, shipwrecked coast, flagstaff hill maritime museum, maritime museum, shipwreck coast, flagstaff hill maritime village, great ocean road, loch line, loch ard, captain gibbs, eva carmichael, tom pearce, glenample station, mutton bird island, loch ard gorge, electroplated cutlery, loch ard shipwreck, nickel silver, william page & co, birmingham, brass plating, makers marks -
 Flagstaff Hill Maritime Museum and Village
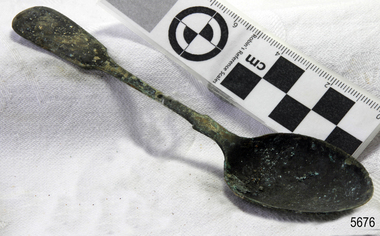
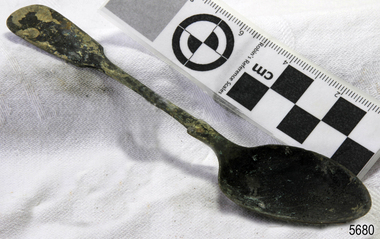
Spoon, circa 1878
This tea spoon is from the wreck of the LOCH ARD, a Loch Line ship of 1,693 tons which sailed from Gravesend, London, on 2 March 1878 with 17 passengers and a crew of 36 under Captain George Gibbs. “The intention was to discharge cargo in Melbourne, before returning to London via the Horn with wool and wheat”. Instead, on 1 June 1878, after 90 days at sea, she struck the sandstone cliffs of Mutton Bird Island on the south west coast of Victoria, and sank with the loss of 52 lives and all her cargo. The manifest of the LOCH ARD listed an array of manufactured goods and bulk metals being exported to the Colony of Victoria, with a declared value of £53,700. (202 bills of lading show an actual invoice value of £68, 456, with insurance underwriting to £30,000 of all cargo). Included in the manifest is the item of “Tin hardware & cutlery £7,530”. This teaspoon is one of 482 similar items of electro-plated cutlery from the LOCH ARD site, comprising spoons and forks of various sizes but all sharing the same general shape or design and metallic composition. 49 of these pieces display a legible makers’ mark — the initials “W” and “P” placed within a raised diamond outline, which is in turn contained within a sunken crown shape — identifying the manufacturer as William Page & Co of Birmingham. An electroplater’s makers’ marks, unlike sterling silver hallmarks, are not consistent identifiers of quality or date and place of manufacture. A similar line of five impressions was usually made to impress the consumer with an implication of industry standards, but what each one actually signified was not regulated and so they varied according to the whim of the individual foundry. In this case, the maker’s marks are often obscured by sedimentary accretion or removed by corrosion after a century of submersion in the ocean. However sufficient detail has survived to indicate that these samples of electro-plated cutlery probably originated from the same consignment in the LOCH ARD’s cargo. The following descriptions of maker’s marks are drawn from 255 tea spoons, 125 dessert spoons, and 99 table forks. These marks are clearly visible in 66 instances, while the same sequence of general outlines, or depression shapes, is discernible in another 166 examples. 1. A recessed Crown containing a raised Diamond outline and the initials “W” and “P” (the recognised trademark of William Page & Co) 2. An impressed Ellipse containing a raised, pivoted, Triangle in its lower part and bearing a Resurrection Cross on its upper section (a possible dissenting church symbol reflecting religious affiliation); OR a rounded Square impression containing a raised, ‘lazy’, letter “B” (possibly mimicking sterling silver hallmark signifying city of manufacture i.e. Birmingham) 3. An impressed rounded Square filled with a raised Maltese Cross (the base metal composite of nickel silver was also known as ‘German silver’ after its Berlin inventors in 1823) 4. A recessed Circle containing a Crab or Scarab Beetle image; OR a recessed Circle containing a rotated ‘fleur de lys’ or ‘fasces’ design 5. A depressed Diamond shape enclosing a large raised letter “R” and a small raised letter “D” (mimicking the U.K. Patent Office stamp which abbreviated the term ‘registered’ to “RD”, but also included date and class of patent) Suggested trade names for William Page & Co’s particular blend of brass plating are ‘roman silver’ or ‘silverite’. This copper alloy polishes to a lustrous gold when new, discolouring to a murky grey with greenish hue when neglected. HISTORY OF THE LOCH ARD The LOCH ARD belonged to the famous Loch Line which sailed many ships from England to Australia. Built in Glasgow by Barclay, Curdle and Co. in 1873, the LOCH ARD was a three-masted square rigged iron sailing ship. The ship measured 262ft 7" (79.87m) in length, 38ft (11.58m) in width, 23ft (7m) in depth and had a gross tonnage of 1693 tons. The LOCH ARD's main mast measured a massive 150ft (45.7m) in height. LOCH ARD made three trips to Australia and one trip to Calcutta before its final voyage. LOCH ARD left England on March 2, 1878, under the command of Captain Gibbs, a newly married, 29 year old. She was bound for Melbourne with a crew of 37, plus 17 passengers and a load of cargo. The general cargo reflected the affluence of Melbourne at the time. On board were straw hats, umbrella, perfumes, clay pipes, pianos, clocks, confectionary, linen and candles, as well as a heavier load of railway irons, cement, lead and copper. There were items included that intended for display in the Melbourne International Exhibition in 1880. The voyage to Port Phillip was long but uneventful. At 3am on June 1, 1878, Captain Gibbs was expecting to see land and the passengers were becoming excited as they prepared to view their new homeland in the early morning. But LOCH ARD was running into a fog which greatly reduced visibility. Captain Gibbs was becoming anxious as there was no sign of land or the Cape Otway lighthouse. At 4am the fog lifted. A man aloft announced that he could see breakers. The sheer cliffs of Victoria's west coast came into view, and Captain Gibbs realised that the ship was much closer to them than expected. He ordered as much sail to be set as time would permit and then attempted to steer the vessel out to sea. On coming head on into the wind, the ship lost momentum, the sails fell limp and LOCH ARD's bow swung back. Gibbs then ordered the anchors to be released in an attempt to hold its position. The anchors sank some 50 fathoms - but did not hold. By this time LOCH ARD was among the breakers and the tall cliffs of Mutton Bird Island rose behind the ship. Just half a mile from the coast, the ship's bow was suddenly pulled around by the anchor. The captain tried to tack out to sea, but the ship struck a reef at the base of Mutton Bird Island, near Port Campbell. Waves broke over the ship and the top deck was loosened from the hull. The masts and rigging came crashing down knocking passengers and crew overboard. When a lifeboat was finally launched, it crashed into the side of LOCH ARD and capsized. Tom Pearce, who had launched the boat, managed to cling to its overturned hull and shelter beneath it. He drifted out to sea and then on the flood tide came into what is now known as LOCH ARD Gorge. He swam to shore, bruised and dazed, and found a cave in which to shelter. Some of the crew stayed below deck to shelter from the falling rigging but drowned when the ship slipped off the reef into deeper water. Eva Carmichael had raced onto deck to find out what was happening only to be confronted by towering cliffs looming above the stricken ship. In all the chaos, Captain Gibbs grabbed Eva and said, "If you are saved Eva, let my dear wife know that I died like a sailor". That was the last Eva Carmichael saw of the captain. She was swept off the ship by a huge wave. Eva saw Tom Pearce on a small rocky beach and yelled to attract his attention. He dived in and swam to the exhausted woman and dragged her to shore. He took her to the cave and broke open case of brandy which had washed up on the beach. He opened a bottle to revive the unconscious woman. A few hours later Tom scaled a cliff in search of help. He followed hoof prints and came by chance upon two men from nearby Glenample Station three and a half miles away. In a state of exhaustion, he told the men of the tragedy. Tom returned to the gorge while the two men rode back to the station to get help. By the time they reached LOCH ARD Gorge, it was cold and dark. The two shipwreck survivors were taken to Glenample Station to recover. Eva stayed at the station for six weeks before returning to Ireland, this time by steamship. In Melbourne, Tom Pearce received a hero's welcome. He was presented with the first gold medal of the Royal Humane Society of Victoria and a £1000 cheque from the Victorian Government. Concerts were performed to honour the young man's bravery and to raise money for those who lost family in the LOCH ARD disaster. Of the 54 crew members and passengers on board, only two survived: the apprentice, Tom Pearce and the young woman passenger, Eva Carmichael, who lost all of her family in the tragedy. Ten days after the LOCH ARD tragedy, salvage rights to the wreck were sold at auction for £2,120. Cargo valued at £3,000 was salvaged and placed on the beach, but most washed back into the sea when another storm developed. The wreck of LOCH ARD still lies at the base of Mutton Bird Island. Much of the cargo has now been salvaged and some was washed up into what is now known as LOCH ARD Gorge. Cargo and artefacts have also been illegally salvaged over many years before protective legislation was introduced. One of the most unlikely pieces of cargo to have survived the shipwreck was a Minton porcelain peacock - one of only seven in the world. The peacock was destined for the Melbourne International Exhibition in 1880. It had been well packed, which gave it adequate protection during the violent storm. Today, the Minton peacock can be seen at the Flagstaff Hill Maritime Museum in Warrnambool. From Australia's most dramatic shipwreck it has now become Australia's most valuable shipwreck artefact and is one of very few 'objects' on the Victorian State Heritage Register. The LOCH ARD shipwreck is of State significance – Victorian Heritage Register S 417. Flagstaff Hill’s collection of artefacts from LOCH ARD is significant for being one of the largest collections of artefacts from this shipwreck in Victoria. It is significant for its association with the shipwreck, which is on the Victorian Heritage Register (VHR S417). The collection is significant because of the relationship between the objects, as together they have a high potential to interpret the story of the LOCH ARD. The LOCH ARD collection is archaeologically significant as the remains of a large international passenger and cargo ship. The LOCH ARD collection is historically significant for representing aspects of Victoria’s shipping history and its potential to interpret sub-theme 1.5 of Victoria’s Framework of Historical Themes (living with natural processes). The collection is also historically significant for its association with the LOCH ARD, which was one of the worst and best known shipwrecks in Victoria’s history. Unrestored tea spoon from the wreck of the LOCH ARD. The spoon design has a flattened fiddle-back handle, with a thin stem or shank, flared collar, and elongated bowl. The spoons metallic composition is a thin layer of brass alloy which has partially corroded back to a nickel-silver base metal. Bowl has thin perforated edges and some concretion. Two of five makers marks are distinguishable: (3) Maltese Cross (4) Crab Design.flagstaff hill, warrnambool, shipwrecked coast, flagstaff hill maritime museum, maritime museum, shipwreck coast, flagstaff hill maritime village, great ocean road, loch line, loch ard, captain gibbs, eva carmichael, tom pearce, glenample station, mutton bird island, loch ard gorge, electroplated cutlery, loch ard shipwreck, nickel silver, william page & co, birmingham, brass plating, makers marks -
 Flagstaff Hill Maritime Museum and Village
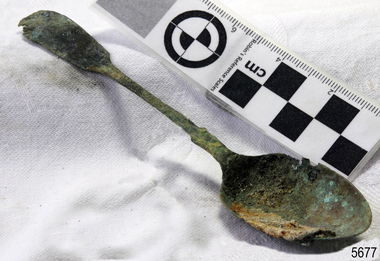
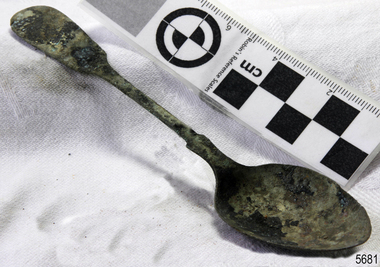
Spoon, circa 1878
This tea spoon is from the wreck of the LOCH ARD, a Loch Line ship of 1,693 tons which sailed from Gravesend, London, on 2 March 1878 with 17 passengers and a crew of 36 under Captain George Gibbs. “The intention was to discharge cargo in Melbourne, before returning to London via the Horn with wool and wheat”. Instead, on 1 June 1878, after 90 days at sea, she struck the sandstone cliffs of Mutton Bird Island on the south west coast of Victoria, and sank with the loss of 52 lives and all her cargo. The manifest of the LOCH ARD listed an array of manufactured goods and bulk metals being exported to the Colony of Victoria, with a declared value of £53,700. (202 bills of lading show an actual invoice value of £68, 456, with insurance underwriting to £30,000 of all cargo). Included in the manifest is the item of “Tin hardware & cutlery £7,530”. This teaspoon is one of 482 similar items of electro-plated cutlery from the LOCH ARD site, comprising spoons and forks of various sizes but all sharing the same general shape or design and metallic composition. 49 of these pieces display a legible makers’ mark — the initials “W” and “P” placed within a raised diamond outline, which is in turn contained within a sunken crown shape — identifying the manufacturer as William Page & Co of Birmingham. An electroplater’s makers’ marks, unlike sterling silver hallmarks, are not consistent identifiers of quality or date and place of manufacture. A similar line of five impressions was usually made to impress the consumer with an implication of industry standards, but what each one actually signified was not regulated and so they varied according to the whim of the individual foundry. In this case, the maker’s marks are often obscured by sedimentary accretion or removed by corrosion after a century of submersion in the ocean. However sufficient detail has survived to indicate that these samples of electro-plated cutlery probably originated from the same consignment in the LOCH ARD’s cargo. The following descriptions of maker’s marks are drawn from 255 tea spoons, 125 dessert spoons, and 99 table forks. These marks are clearly visible in 66 instances, while the same sequence of general outlines, or depression shapes, is discernible in another 166 examples. 1. A recessed Crown containing a raised Diamond outline and the initials “W” and “P” (the recognised trademark of William Page & Co) 2. An impressed Ellipse containing a raised, pivoted, Triangle in its lower part and bearing a Resurrection Cross on its upper section (a possible dissenting church symbol reflecting religious affiliation); OR a rounded Square impression containing a raised, ‘lazy’, letter “B” (possibly mimicking sterling silver hallmark signifying city of manufacture i.e. Birmingham) 3. An impressed rounded Square filled with a raised Maltese Cross (the base metal composite of nickel silver was also known as ‘German silver’ after its Berlin inventors in 1823) 4. A recessed Circle containing a Crab or Scarab Beetle image; OR a recessed Circle containing a rotated ‘fleur de lys’ or ‘fasces’ design 5. A depressed Diamond shape enclosing a large raised letter “R” and a small raised letter “D” (mimicking the U.K. Patent Office stamp which abbreviated the term ‘registered’ to “RD”, but also included date and class of patent) Suggested trade names for William Page & Co’s particular blend of brass plating are ‘roman silver’ or ‘silverite’. This copper alloy polishes to a lustrous gold when new, discolouring to a murky grey with greenish hue when neglected. HISTORY OF THE LOCH ARD The LOCH ARD belonged to the famous Loch Line which sailed many ships from England to Australia. Built in Glasgow by Barclay, Curdle and Co. in 1873, the LOCH ARD was a three-masted square rigged iron sailing ship. The ship measured 262ft 7" (79.87m) in length, 38ft (11.58m) in width, 23ft (7m) in depth and had a gross tonnage of 1693 tons. The LOCH ARD's main mast measured a massive 150ft (45.7m) in height. LOCH ARD made three trips to Australia and one trip to Calcutta before its final voyage. LOCH ARD left England on March 2, 1878, under the command of Captain Gibbs, a newly married, 29 year old. She was bound for Melbourne with a crew of 37, plus 17 passengers and a load of cargo. The general cargo reflected the affluence of Melbourne at the time. On board were straw hats, umbrella, perfumes, clay pipes, pianos, clocks, confectionary, linen and candles, as well as a heavier load of railway irons, cement, lead and copper. There were items included that intended for display in the Melbourne International Exhibition in 1880. The voyage to Port Phillip was long but uneventful. At 3am on June 1, 1878, Captain Gibbs was expecting to see land and the passengers were becoming excited as they prepared to view their new homeland in the early morning. But LOCH ARD was running into a fog which greatly reduced visibility. Captain Gibbs was becoming anxious as there was no sign of land or the Cape Otway lighthouse. At 4am the fog lifted. A man aloft announced that he could see breakers. The sheer cliffs of Victoria's west coast came into view, and Captain Gibbs realised that the ship was much closer to them than expected. He ordered as much sail to be set as time would permit and then attempted to steer the vessel out to sea. On coming head on into the wind, the ship lost momentum, the sails fell limp and LOCH ARD's bow swung back. Gibbs then ordered the anchors to be released in an attempt to hold its position. The anchors sank some 50 fathoms - but did not hold. By this time LOCH ARD was among the breakers and the tall cliffs of Mutton Bird Island rose behind the ship. Just half a mile from the coast, the ship's bow was suddenly pulled around by the anchor. The captain tried to tack out to sea, but the ship struck a reef at the base of Mutton Bird Island, near Port Campbell. Waves broke over the ship and the top deck was loosened from the hull. The masts and rigging came crashing down knocking passengers and crew overboard. When a lifeboat was finally launched, it crashed into the side of LOCH ARD and capsized. Tom Pearce, who had launched the boat, managed to cling to its overturned hull and shelter beneath it. He drifted out to sea and then on the flood tide came into what is now known as LOCH ARD Gorge. He swam to shore, bruised and dazed, and found a cave in which to shelter. Some of the crew stayed below deck to shelter from the falling rigging but drowned when the ship slipped off the reef into deeper water. Eva Carmichael had raced onto deck to find out what was happening only to be confronted by towering cliffs looming above the stricken ship. In all the chaos, Captain Gibbs grabbed Eva and said, "If you are saved Eva, let my dear wife know that I died like a sailor". That was the last Eva Carmichael saw of the captain. She was swept off the ship by a huge wave. Eva saw Tom Pearce on a small rocky beach and yelled to attract his attention. He dived in and swam to the exhausted woman and dragged her to shore. He took her to the cave and broke open case of brandy which had washed up on the beach. He opened a bottle to revive the unconscious woman. A few hours later Tom scaled a cliff in search of help. He followed hoof prints and came by chance upon two men from nearby Glenample Station three and a half miles away. In a state of exhaustion, he told the men of the tragedy. Tom returned to the gorge while the two men rode back to the station to get help. By the time they reached LOCH ARD Gorge, it was cold and dark. The two shipwreck survivors were taken to Glenample Station to recover. Eva stayed at the station for six weeks before returning to Ireland, this time by steamship. In Melbourne, Tom Pearce received a hero's welcome. He was presented with the first gold medal of the Royal Humane Society of Victoria and a £1000 cheque from the Victorian Government. Concerts were performed to honour the young man's bravery and to raise money for those who lost family in the LOCH ARD disaster. Of the 54 crew members and passengers on board, only two survived: the apprentice, Tom Pearce and the young woman passenger, Eva Carmichael, who lost all of her family in the tragedy. Ten days after the LOCH ARD tragedy, salvage rights to the wreck were sold at auction for £2,120. Cargo valued at £3,000 was salvaged and placed on the beach, but most washed back into the sea when another storm developed. The wreck of LOCH ARD still lies at the base of Mutton Bird Island. Much of the cargo has now been salvaged and some was washed up into what is now known as LOCH ARD Gorge. Cargo and artefacts have also been illegally salvaged over many years before protective legislation was introduced. One of the most unlikely pieces of cargo to have survived the shipwreck was a Minton porcelain peacock - one of only seven in the world. The peacock was destined for the Melbourne International Exhibition in 1880. It had been well packed, which gave it adequate protection during the violent storm. Today, the Minton peacock can be seen at the Flagstaff Hill Maritime Museum in Warrnambool. From Australia's most dramatic shipwreck it has now become Australia's most valuable shipwreck artefact and is one of very few 'objects' on the Victorian State Heritage Register. The LOCH ARD shipwreck is of State significance – Victorian Heritage Register S 417. Flagstaff Hill’s collection of artefacts from LOCH ARD is significant for being one of the largest collections of artefacts from this shipwreck in Victoria. It is significant for its association with the shipwreck, which is on the Victorian Heritage Register (VHR S417). The collection is significant because of the relationship between the objects, as together they have a high potential to interpret the story of the LOCH ARD. The LOCH ARD collection is archaeologically significant as the remains of a large international passenger and cargo ship. The LOCH ARD collection is historically significant for representing aspects of Victoria’s shipping history and its potential to interpret sub-theme 1.5 of Victoria’s Framework of Historical Themes (living with natural processes). The collection is also historically significant for its association with the LOCH ARD, which was one of the worst and best known shipwrecks in Victoria’s history. Unrestored tea spoon from the wreck of the LOCH ARD. The spoon design has a flattened fiddle-back handle, with a thin stem or shank, flared collar, and elongated bowl. The spoons metallic composition is a thin layer of brass alloy which has partially corroded back to a nickel-silver base metal. In poor condition, with bowl split and thin perforated edges on handle. Some concretion.. flagstaff hill, warrnambool, shipwrecked coast, flagstaff hill maritime museum, maritime museum, shipwreck coast, flagstaff hill maritime village, great ocean road, loch line, loch ard, captain gibbs, eva carmichael, tom pearce, glenample station, mutton bird island, loch ard gorge, electroplated cutlery, loch ard shipwreck, nickel silver, william page & co, birmingham, brass plating, makers marks -
 Flagstaff Hill Maritime Museum and Village
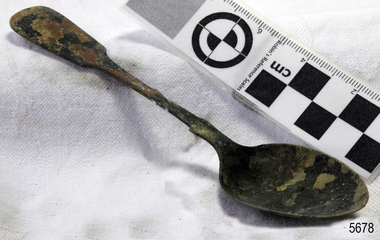
Spoon, circa 1878
This tea spoon is from the wreck of the LOCH ARD, a Loch Line ship of 1,693 tons which sailed from Gravesend, London, on 2 March 1878 with 17 passengers and a crew of 36 under Captain George Gibbs. “The intention was to discharge cargo in Melbourne, before returning to London via the Horn with wool and wheat”. Instead, on 1 June 1878, after 90 days at sea, she struck the sandstone cliffs of Mutton Bird Island on the south west coast of Victoria, and sank with the loss of 52 lives and all her cargo. The manifest of the LOCH ARD listed an array of manufactured goods and bulk metals being exported to the Colony of Victoria, with a declared value of £53,700. (202 bills of lading show an actual invoice value of £68, 456, with insurance underwriting to £30,000 of all cargo). Included in the manifest is the item of “Tin hardware & cutlery £7,530”. This teaspoon is one of 482 similar items of electro-plated cutlery from the LOCH ARD site, comprising spoons and forks of various sizes but all sharing the same general shape or design and metallic composition. 49 of these pieces display a legible makers’ mark — the initials “W” and “P” placed within a raised diamond outline, which is in turn contained within a sunken crown shape — identifying the manufacturer as William Page & Co of Birmingham. An electroplater’s makers’ marks, unlike sterling silver hallmarks, are not consistent identifiers of quality or date and place of manufacture. A similar line of five impressions was usually made to impress the consumer with an implication of industry standards, but what each one actually signified was not regulated and so they varied according to the whim of the individual foundry. In this case, the maker’s marks are often obscured by sedimentary accretion or removed by corrosion after a century of submersion in the ocean. However sufficient detail has survived to indicate that these samples of electro-plated cutlery probably originated from the same consignment in the LOCH ARD’s cargo. The following descriptions of maker’s marks are drawn from 255 tea spoons, 125 dessert spoons, and 99 table forks. These marks are clearly visible in 66 instances, while the same sequence of general outlines, or depression shapes, is discernible in another 166 examples. 1. A recessed Crown containing a raised Diamond outline and the initials “W” and “P” (the recognised trademark of William Page & Co) 2. An impressed Ellipse containing a raised, pivoted, Triangle in its lower part and bearing a Resurrection Cross on its upper section (a possible dissenting church symbol reflecting religious affiliation); OR a rounded Square impression containing a raised, ‘lazy’, letter “B” (possibly mimicking sterling silver hallmark signifying city of manufacture i.e. Birmingham) 3. An impressed rounded Square filled with a raised Maltese Cross (the base metal composite of nickel silver was also known as ‘German silver’ after its Berlin inventors in 1823) 4. A recessed Circle containing a Crab or Scarab Beetle image; OR a recessed Circle containing a rotated ‘fleur de lys’ or ‘fasces’ design 5. A depressed Diamond shape enclosing a large raised letter “R” and a small raised letter “D” (mimicking the U.K. Patent Office stamp which abbreviated the term ‘registered’ to “RD”, but also included date and class of patent) Suggested trade names for William Page & Co’s particular blend of brass plating are ‘roman silver’ or ‘silverite’. This copper alloy polishes to a lustrous gold when new, discolouring to a murky grey with greenish hue when neglected. HISTORY OF THE LOCH ARD The LOCH ARD belonged to the famous Loch Line which sailed many ships from England to Australia. Built in Glasgow by Barclay, Curdle and Co. in 1873, the LOCH ARD was a three-masted square rigged iron sailing ship. The ship measured 262ft 7" (79.87m) in length, 38ft (11.58m) in width, 23ft (7m) in depth and had a gross tonnage of 1693 tons. The LOCH ARD's main mast measured a massive 150ft (45.7m) in height. LOCH ARD made three trips to Australia and one trip to Calcutta before its final voyage. LOCH ARD left England on March 2, 1878, under the command of Captain Gibbs, a newly married, 29 year old. She was bound for Melbourne with a crew of 37, plus 17 passengers and a load of cargo. The general cargo reflected the affluence of Melbourne at the time. On board were straw hats, umbrella, perfumes, clay pipes, pianos, clocks, confectionary, linen and candles, as well as a heavier load of railway irons, cement, lead and copper. There were items included that intended for display in the Melbourne International Exhibition in 1880. The voyage to Port Phillip was long but uneventful. At 3am on June 1, 1878, Captain Gibbs was expecting to see land and the passengers were becoming excited as they prepared to view their new homeland in the early morning. But LOCH ARD was running into a fog which greatly reduced visibility. Captain Gibbs was becoming anxious as there was no sign of land or the Cape Otway lighthouse. At 4am the fog lifted. A man aloft announced that he could see breakers. The sheer cliffs of Victoria's west coast came into view, and Captain Gibbs realised that the ship was much closer to them than expected. He ordered as much sail to be set as time would permit and then attempted to steer the vessel out to sea. On coming head on into the wind, the ship lost momentum, the sails fell limp and LOCH ARD's bow swung back. Gibbs then ordered the anchors to be released in an attempt to hold its position. The anchors sank some 50 fathoms - but did not hold. By this time LOCH ARD was among the breakers and the tall cliffs of Mutton Bird Island rose behind the ship. Just half a mile from the coast, the ship's bow was suddenly pulled around by the anchor. The captain tried to tack out to sea, but the ship struck a reef at the base of Mutton Bird Island, near Port Campbell. Waves broke over the ship and the top deck was loosened from the hull. The masts and rigging came crashing down knocking passengers and crew overboard. When a lifeboat was finally launched, it crashed into the side of LOCH ARD and capsized. Tom Pearce, who had launched the boat, managed to cling to its overturned hull and shelter beneath it. He drifted out to sea and then on the flood tide came into what is now known as LOCH ARD Gorge. He swam to shore, bruised and dazed, and found a cave in which to shelter. Some of the crew stayed below deck to shelter from the falling rigging but drowned when the ship slipped off the reef into deeper water. Eva Carmichael had raced onto deck to find out what was happening only to be confronted by towering cliffs looming above the stricken ship. In all the chaos, Captain Gibbs grabbed Eva and said, "If you are saved Eva, let my dear wife know that I died like a sailor". That was the last Eva Carmichael saw of the captain. She was swept off the ship by a huge wave. Eva saw Tom Pearce on a small rocky beach and yelled to attract his attention. He dived in and swam to the exhausted woman and dragged her to shore. He took her to the cave and broke open case of brandy which had washed up on the beach. He opened a bottle to revive the unconscious woman. A few hours later Tom scaled a cliff in search of help. He followed hoof prints and came by chance upon two men from nearby Glenample Station three and a half miles away. In a state of exhaustion, he told the men of the tragedy. Tom returned to the gorge while the two men rode back to the station to get help. By the time they reached LOCH ARD Gorge, it was cold and dark. The two shipwreck survivors were taken to Glenample Station to recover. Eva stayed at the station for six weeks before returning to Ireland, this time by steamship. In Melbourne, Tom Pearce received a hero's welcome. He was presented with the first gold medal of the Royal Humane Society of Victoria and a £1000 cheque from the Victorian Government. Concerts were performed to honour the young man's bravery and to raise money for those who lost family in the LOCH ARD disaster. Of the 54 crew members and passengers on board, only two survived: the apprentice, Tom Pearce and the young woman passenger, Eva Carmichael, who lost all of her family in the tragedy. Ten days after the LOCH ARD tragedy, salvage rights to the wreck were sold at auction for £2,120. Cargo valued at £3,000 was salvaged and placed on the beach, but most washed back into the sea when another storm developed. The wreck of LOCH ARD still lies at the base of Mutton Bird Island. Much of the cargo has now been salvaged and some was washed up into what is now known as LOCH ARD Gorge. Cargo and artefacts have also been illegally salvaged over many years before protective legislation was introduced. One of the most unlikely pieces of cargo to have survived the shipwreck was a Minton porcelain peacock - one of only seven in the world. The peacock was destined for the Melbourne International Exhibition in 1880. It had been well packed, which gave it adequate protection during the violent storm. Today, the Minton peacock can be seen at the Flagstaff Hill Maritime Museum in Warrnambool. From Australia's most dramatic shipwreck it has now become Australia's most valuable shipwreck artefact and is one of very few 'objects' on the Victorian State Heritage Register. The LOCH ARD shipwreck is of State significance – Victorian Heritage Register S 417. Flagstaff Hill’s collection of artefacts from LOCH ARD is significant for being one of the largest collections of artefacts from this shipwreck in Victoria. It is significant for its association with the shipwreck, which is on the Victorian Heritage Register (VHR S417). The collection is significant because of the relationship between the objects, as together they have a high potential to interpret the story of the LOCH ARD. The LOCH ARD collection is archaeologically significant as the remains of a large international passenger and cargo ship. The LOCH ARD collection is historically significant for representing aspects of Victoria’s shipping history and its potential to interpret sub-theme 1.5 of Victoria’s Framework of Historical Themes (living with natural processes). The collection is also historically significant for its association with the LOCH ARD, which was one of the worst and best known shipwrecks in Victoria’s history. Unrestored tea spoon from the wreck of the LOCH ARD. The spoon design has a flattened fiddle-back handle, with a thin stem or shank, flared collar, and elongated bowl. The spoons metallic composition is a thin layer of brass alloy which has partially corroded back to a nickel-silver base metal. Traces of original electroplating remain with some verdigris.flagstaff hill, warrnambool, shipwrecked coast, flagstaff hill maritime museum, maritime museum, shipwreck coast, flagstaff hill maritime village, great ocean road, loch line, loch ard, captain gibbs, eva carmichael, tom pearce, glenample station, mutton bird island, loch ard gorge, electroplated cutlery, loch ard shipwreck, nickel silver, william page & co, birmingham, brass plating, makers marks -
 Flagstaff Hill Maritime Museum and Village
Spoon, circa 1878
This tea spoon is from the wreck of the LOCH ARD, a Loch Line ship of 1,693 tons which sailed from Gravesend, London, on 2 March 1878 with 17 passengers and a crew of 36 under Captain George Gibbs. “The intention was to discharge cargo in Melbourne, before returning to London via the Horn with wool and wheat”. Instead, on 1 June 1878, after 90 days at sea, she struck the sandstone cliffs of Mutton Bird Island on the south west coast of Victoria, and sank with the loss of 52 lives and all her cargo. The manifest of the LOCH ARD listed an array of manufactured goods and bulk metals being exported to the Colony of Victoria, with a declared value of £53,700. (202 bills of lading show an actual invoice value of £68, 456, with insurance underwriting to £30,000 of all cargo). Included in the manifest is the item of “Tin hardware & cutlery £7,530”. This teaspoon is one of 482 similar items of electro-plated cutlery from the LOCH ARD site, comprising spoons and forks of various sizes but all sharing the same general shape or design and metallic composition. 49 of these pieces display a legible makers’ mark — the initials “W” and “P” placed within a raised diamond outline, which is in turn contained within a sunken crown shape — identifying the manufacturer as William Page & Co of Birmingham. An electroplater’s makers’ marks, unlike sterling silver hallmarks, are not consistent identifiers of quality or date and place of manufacture. A similar line of five impressions was usually made to impress the consumer with an implication of industry standards, but what each one actually signified was not regulated and so they varied according to the whim of the individual foundry. In this case, the maker’s marks are often obscured by sedimentary accretion or removed by corrosion after a century of submersion in the ocean. However sufficient detail has survived to indicate that these samples of electro-plated cutlery probably originated from the same consignment in the LOCH ARD’s cargo. The following descriptions of maker’s marks are drawn from 255 tea spoons, 125 dessert spoons, and 99 table forks. These marks are clearly visible in 66 instances, while the same sequence of general outlines, or depression shapes, is discernible in another 166 examples. 1. A recessed Crown containing a raised Diamond outline and the initials “W” and “P” (the recognised trademark of William Page & Co) 2. An impressed Ellipse containing a raised, pivoted, Triangle in its lower part and bearing a Resurrection Cross on its upper section (a possible dissenting church symbol reflecting religious affiliation); OR a rounded Square impression containing a raised, ‘lazy’, letter “B” (possibly mimicking sterling silver hallmark signifying city of manufacture i.e. Birmingham) 3. An impressed rounded Square filled with a raised Maltese Cross (the base metal composite of nickel silver was also known as ‘German silver’ after its Berlin inventors in 1823) 4. A recessed Circle containing a Crab or Scarab Beetle image; OR a recessed Circle containing a rotated ‘fleur de lys’ or ‘fasces’ design 5. A depressed Diamond shape enclosing a large raised letter “R” and a small raised letter “D” (mimicking the U.K. Patent Office stamp which abbreviated the term ‘registered’ to “RD”, but also included date and class of patent) Suggested trade names for William Page & Co’s particular blend of brass plating are ‘roman silver’ or ‘silverite’. This copper alloy polishes to a lustrous gold when new, discolouring to a murky grey with greenish hue when neglected. HISTORY OF THE LOCH ARD The LOCH ARD belonged to the famous Loch Line which sailed many ships from England to Australia. Built in Glasgow by Barclay, Curdle and Co. in 1873, the LOCH ARD was a three-masted square rigged iron sailing ship. The ship measured 262ft 7" (79.87m) in length, 38ft (11.58m) in width, 23ft (7m) in depth and had a gross tonnage of 1693 tons. The LOCH ARD's main mast measured a massive 150ft (45.7m) in height. LOCH ARD made three trips to Australia and one trip to Calcutta before its final voyage. LOCH ARD left England on March 2, 1878, under the command of Captain Gibbs, a newly married, 29 year old. She was bound for Melbourne with a crew of 37, plus 17 passengers and a load of cargo. The general cargo reflected the affluence of Melbourne at the time. On board were straw hats, umbrella, perfumes, clay pipes, pianos, clocks, confectionary, linen and candles, as well as a heavier load of railway irons, cement, lead and copper. There were items included that intended for display in the Melbourne International Exhibition in 1880. The voyage to Port Phillip was long but uneventful. At 3am on June 1, 1878, Captain Gibbs was expecting to see land and the passengers were becoming excited as they prepared to view their new homeland in the early morning. But LOCH ARD was running into a fog which greatly reduced visibility. Captain Gibbs was becoming anxious as there was no sign of land or the Cape Otway lighthouse. At 4am the fog lifted. A man aloft announced that he could see breakers. The sheer cliffs of Victoria's west coast came into view, and Captain Gibbs realised that the ship was much closer to them than expected. He ordered as much sail to be set as time would permit and then attempted to steer the vessel out to sea. On coming head on into the wind, the ship lost momentum, the sails fell limp and LOCH ARD's bow swung back. Gibbs then ordered the anchors to be released in an attempt to hold its position. The anchors sank some 50 fathoms - but did not hold. By this time LOCH ARD was among the breakers and the tall cliffs of Mutton Bird Island rose behind the ship. Just half a mile from the coast, the ship's bow was suddenly pulled around by the anchor. The captain tried to tack out to sea, but the ship struck a reef at the base of Mutton Bird Island, near Port Campbell. Waves broke over the ship and the top deck was loosened from the hull. The masts and rigging came crashing down knocking passengers and crew overboard. When a lifeboat was finally launched, it crashed into the side of LOCH ARD and capsized. Tom Pearce, who had launched the boat, managed to cling to its overturned hull and shelter beneath it. He drifted out to sea and then on the flood tide came into what is now known as LOCH ARD Gorge. He swam to shore, bruised and dazed, and found a cave in which to shelter. Some of the crew stayed below deck to shelter from the falling rigging but drowned when the ship slipped off the reef into deeper water. Eva Carmichael had raced onto deck to find out what was happening only to be confronted by towering cliffs looming above the stricken ship. In all the chaos, Captain Gibbs grabbed Eva and said, "If you are saved Eva, let my dear wife know that I died like a sailor". That was the last Eva Carmichael saw of the captain. She was swept off the ship by a huge wave. Eva saw Tom Pearce on a small rocky beach and yelled to attract his attention. He dived in and swam to the exhausted woman and dragged her to shore. He took her to the cave and broke open case of brandy which had washed up on the beach. He opened a bottle to revive the unconscious woman. A few hours later Tom scaled a cliff in search of help. He followed hoof prints and came by chance upon two men from nearby Glenample Station three and a half miles away. In a state of exhaustion, he told the men of the tragedy. Tom returned to the gorge while the two men rode back to the station to get help. By the time they reached LOCH ARD Gorge, it was cold and dark. The two shipwreck survivors were taken to Glenample Station to recover. Eva stayed at the station for six weeks before returning to Ireland, this time by steamship. In Melbourne, Tom Pearce received a hero's welcome. He was presented with the first gold medal of the Royal Humane Society of Victoria and a £1000 cheque from the Victorian Government. Concerts were performed to honour the young man's bravery and to raise money for those who lost family in the LOCH ARD disaster. Of the 54 crew members and passengers on board, only two survived: the apprentice, Tom Pearce and the young woman passenger, Eva Carmichael, who lost all of her family in the tragedy. Ten days after the LOCH ARD tragedy, salvage rights to the wreck were sold at auction for £2,120. Cargo valued at £3,000 was salvaged and placed on the beach, but most washed back into the sea when another storm developed. The wreck of LOCH ARD still lies at the base of Mutton Bird Island. Much of the cargo has now been salvaged and some was washed up into what is now known as LOCH ARD Gorge. Cargo and artefacts have also been illegally salvaged over many years before protective legislation was introduced. One of the most unlikely pieces of cargo to have survived the shipwreck was a Minton porcelain peacock - one of only seven in the world. The peacock was destined for the Melbourne International Exhibition in 1880. It had been well packed, which gave it adequate protection during the violent storm. Today, the Minton peacock can be seen at the Flagstaff Hill Maritime Museum in Warrnambool. From Australia's most dramatic shipwreck it has now become Australia's most valuable shipwreck artefact and is one of very few 'objects' on The LOCH ARD shipwreck is of State significance – Victorian Heritage Register S 417. Flagstaff Hill’s collection of artefacts from LOCH ARD is significant for being one of the largest collections of artefacts from this shipwreck in Victoria. It is significant for its association with the shipwreck, which is on the Victorian Heritage Register (VHR S417). The collection is significant because of the relationship between the objects, as together they have a high potential to interpret the story of the LOCH ARD. The LOCH ARD collection is archaeologically significant as the remains of a large international passenger and cargo ship. The LOCH ARD collection is historically significant for representing aspects of Victoria’s shipping history and its potential to interpret sub-theme 1.5 of Victoria’s Framework of Historical Themes (living with natural processes). The collection is also historically significant for its association with the LOCH ARD, which was one of the worst and best known shipwrecks in Victoria’s history. Unrestored tea spoon from the wreck of the LOCH ARD. The spoon design has a flattened fiddle-back handle, with a thin stem or shank, flared collar, and elongated bowl. The spoons metallic composition is a thin layer of brass alloy which has partially corroded back to a nickel-silver base metal. Approximately 25% of original electroplating remains with some verdigris. Three outlines of makers marks visible on lower rear of handle.flagstaff hill, warrnambool, shipwrecked coast, flagstaff hill maritime museum, maritime museum, shipwreck coast, flagstaff hill maritime village, great ocean road, loch line, loch ard, captain gibbs, eva carmichael, tom pearce, glenample station, mutton bird island, loch ard gorge, electroplated cutlery, loch ard shipwreck, nickel silver, william page & co, birmingham, brass plating, makers marks -
 Flagstaff Hill Maritime Museum and Village
Spoon, circa 1878
This tea spoon is from the wreck of the LOCH ARD, a Loch Line ship of 1,693 tons which sailed from Gravesend, London, on 2 March 1878 with 17 passengers and a crew of 36 under Captain George Gibbs. “The intention was to discharge cargo in Melbourne, before returning to London via the Horn with wool and wheat”. Instead, on 1 June 1878, after 90 days at sea, she struck the sandstone cliffs of Mutton Bird Island on the south west coast of Victoria, and sank with the loss of 52 lives and all her cargo. The manifest of the LOCH ARD listed an array of manufactured goods and bulk metals being exported to the Colony of Victoria, with a declared value of £53,700. (202 bills of lading show an actual invoice value of £68, 456, with insurance underwriting to £30,000 of all cargo). Included in the manifest is the item of “Tin hardware & cutlery £7,530”. This teaspoon is one of 482 similar items of electro-plated cutlery from the LOCH ARD site, comprising spoons and forks of various sizes but all sharing the same general shape or design and metallic composition. 49 of these pieces display a legible makers’ mark — the initials “W” and “P” placed within a raised diamond outline, which is in turn contained within a sunken crown shape — identifying the manufacturer as William Page & Co of Birmingham. An electroplater’s makers’ marks, unlike sterling silver hallmarks, are not consistent identifiers of quality or date and place of manufacture. A similar line of five impressions was usually made to impress the consumer with an implication of industry standards, but what each one actually signified was not regulated and so they varied according to the whim of the individual foundry. In this case, the maker’s marks are often obscured by sedimentary accretion or removed by corrosion after a century of submersion in the ocean. However sufficient detail has survived to indicate that these samples of electro-plated cutlery probably originated from the same consignment in the LOCH ARD’s cargo. The following descriptions of maker’s marks are drawn from 255 tea spoons, 125 dessert spoons, and 99 table forks. These marks are clearly visible in 66 instances, while the same sequence of general outlines, or depression shapes, is discernible in another 166 examples. 1. A recessed Crown containing a raised Diamond outline and the initials “W” and “P” (the recognised trademark of William Page & Co) 2. An impressed Ellipse containing a raised, pivoted, Triangle in its lower part and bearing a Resurrection Cross on its upper section (a possible dissenting church symbol reflecting religious affiliation); OR a rounded Square impression containing a raised, ‘lazy’, letter “B” (possibly mimicking sterling silver hallmark signifying city of manufacture i.e. Birmingham) 3. An impressed rounded Square filled with a raised Maltese Cross (the base metal composite of nickel silver was also known as ‘German silver’ after its Berlin inventors in 1823) 4. A recessed Circle containing a Crab or Scarab Beetle image; OR a recessed Circle containing a rotated ‘fleur de lys’ or ‘fasces’ design 5. A depressed Diamond shape enclosing a large raised letter “R” and a small raised letter “D” (mimicking the U.K. Patent Office stamp which abbreviated the term ‘registered’ to “RD”, but also included date and class of patent) Suggested trade names for William Page & Co’s particular blend of brass plating are ‘roman silver’ or ‘silverite’. This copper alloy polishes to a lustrous gold when new, discolouring to a murky grey with greenish hue when neglected. HISTORY OF THE LOCH ARD The LOCH ARD belonged to the famous Loch Line which sailed many ships from England to Australia. Built in Glasgow by Barclay, Curdle and Co. in 1873, the LOCH ARD was a three-masted square rigged iron sailing ship. The ship measured 262ft 7" (79.87m) in length, 38ft (11.58m) in width, 23ft (7m) in depth and had a gross tonnage of 1693 tons. The LOCH ARD's main mast measured a massive 150ft (45.7m) in height. LOCH ARD made three trips to Australia and one trip to Calcutta before its final voyage. LOCH ARD left England on March 2, 1878, under the command of Captain Gibbs, a newly married, 29 year old. She was bound for Melbourne with a crew of 37, plus 17 passengers and a load of cargo. The general cargo reflected the affluence of Melbourne at the time. On board were straw hats, umbrella, perfumes, clay pipes, pianos, clocks, confectionary, linen and candles, as well as a heavier load of railway irons, cement, lead and copper. There were items included that intended for display in the Melbourne International Exhibition in 1880. The voyage to Port Phillip was long but uneventful. At 3am on June 1, 1878, Captain Gibbs was expecting to see land and the passengers were becoming excited as they prepared to view their new homeland in the early morning. But LOCH ARD was running into a fog which greatly reduced visibility. Captain Gibbs was becoming anxious as there was no sign of land or the Cape Otway lighthouse. At 4am the fog lifted. A man aloft announced that he could see breakers. The sheer cliffs of Victoria's west coast came into view, and Captain Gibbs realised that the ship was much closer to them than expected. He ordered as much sail to be set as time would permit and then attempted to steer the vessel out to sea. On coming head on into the wind, the ship lost momentum, the sails fell limp and LOCH ARD's bow swung back. Gibbs then ordered the anchors to be released in an attempt to hold its position. The anchors sank some 50 fathoms - but did not hold. By this time LOCH ARD was among the breakers and the tall cliffs of Mutton Bird Island rose behind the ship. Just half a mile from the coast, the ship's bow was suddenly pulled around by the anchor. The captain tried to tack out to sea, but the ship struck a reef at the base of Mutton Bird Island, near Port Campbell. Waves broke over the ship and the top deck was loosened from the hull. The masts and rigging came crashing down knocking passengers and crew overboard. When a lifeboat was finally launched, it crashed into the side of LOCH ARD and capsized. Tom Pearce, who had launched the boat, managed to cling to its overturned hull and shelter beneath it. He drifted out to sea and then on the flood tide came into what is now known as LOCH ARD Gorge. He swam to shore, bruised and dazed, and found a cave in which to shelter. Some of the crew stayed below deck to shelter from the falling rigging but drowned when the ship slipped off the reef into deeper water. Eva Carmichael had raced onto deck to find out what was happening only to be confronted by towering cliffs looming above the stricken ship. In all the chaos, Captain Gibbs grabbed Eva and said, "If you are saved Eva, let my dear wife know that I died like a sailor". That was the last Eva Carmichael saw of the captain. She was swept off the ship by a huge wave. Eva saw Tom Pearce on a small rocky beach and yelled to attract his attention. He dived in and swam to the exhausted woman and dragged her to shore. He took her to the cave and broke open case of brandy which had washed up on the beach. He opened a bottle to revive the unconscious woman. A few hours later Tom scaled a cliff in search of help. He followed hoof prints and came by chance upon two men from nearby Glenample Station three and a half miles away. In a state of exhaustion, he told the men of the tragedy. Tom returned to the gorge while the two men rode back to the station to get help. By the time they reached LOCH ARD Gorge, it was cold and dark. The two shipwreck survivors were taken to Glenample Station to recover. Eva stayed at the station for six weeks before returning to Ireland, this time by steamship. In Melbourne, Tom Pearce received a hero's welcome. He was presented with the first gold medal of the Royal Humane Society of Victoria and a £1000 cheque from the Victorian Government. Concerts were performed to honour the young man's bravery and to raise money for those who lost family in the LOCH ARD disaster. Of the 54 crew members and passengers on board, only two survived: the apprentice, Tom Pearce and the young woman passenger, Eva Carmichael, who lost all of her family in the tragedy. Ten days after the LOCH ARD tragedy, salvage rights to the wreck were sold at auction for £2,120. Cargo valued at £3,000 was salvaged and placed on the beach, but most washed back into the sea when another storm developed. The wreck of LOCH ARD still lies at the base of Mutton Bird Island. Much of the cargo has now been salvaged and some was washed up into what is now known as LOCH ARD Gorge. Cargo and artefacts have also been illegally salvaged over many years before protective legislation was introduced. One of the most unlikely pieces of cargo to have survived the shipwreck was a Minton porcelain peacock - one of only seven in the world. The peacock was destined for the Melbourne International Exhibition in 1880. It had been well packed, which gave it adequate protection during the violent storm. Today, the Minton peacock can be seen at the Flagstaff Hill Maritime Museum in Warrnambool. From Australia's most dramatic shipwreck it has now become Australia's most valuable shipwreck artefact and is one of very few 'objects' on the Victorian State Heritage Register. The LOCH ARD shipwreck is of State significance – Victorian Heritage Register S 417. Flagstaff Hill’s collection of artefacts from LOCH ARD is significant for being one of the largest collections of artefacts from this shipwreck in Victoria. It is significant for its association with the shipwreck, which is on the Victorian Heritage Register (VHR S417). The collection is significant because of the relationship between the objects, as together they have a high potential to interpret the story of the LOCH ARD. The LOCH ARD collection is archaeologically significant as the remains of a large international passenger and cargo ship. The LOCH ARD collection is historically significant for representing aspects of Victoria’s shipping history and its potential to interpret sub-theme 1.5 of Victoria’s Framework of Historical Themes (living with natural processes). The collection is also historically significant for its association with the LOCH ARD, which was one of the worst and best known shipwrecks in Victoria’s history. Unrestored tea spoon from the wreck of the LOCH ARD. The spoon design has a flattened fiddle-back handle, with a thin stem or shank, flared collar, and elongated bowl. The spoons metallic composition is a thin layer of brass alloy which has partially corroded back to a nickel-silver base metal. Traces of original electroplating remain with some verdigris. Outlines of three makers marks are visible on lower rear of handle.flagstaff hill, warrnambool, shipwrecked coast, flagstaff hill maritime museum, maritime museum, shipwreck coast, flagstaff hill maritime village, great ocean road, loch line, loch ard, captain gibbs, eva carmichael, tom pearce, glenample station, mutton bird island, loch ard gorge, electroplated cutlery, loch ard shipwreck, nickel silver, william page & co, birmingham, brass plating, makers marks -
 Flagstaff Hill Maritime Museum and Village
Spoon, circa 1878
This tea spoon is from the wreck of the LOCH ARD, a Loch Line ship of 1,693 tons which sailed from Gravesend, London, on 2 March 1878 with 17 passengers and a crew of 36 under Captain George Gibbs. “The intention was to discharge cargo in Melbourne, before returning to London via the Horn with wool and wheat”. Instead, on 1 June 1878, after 90 days at sea, she struck the sandstone cliffs of Mutton Bird Island on the south west coast of Victoria, and sank with the loss of 52 lives and all her cargo. The manifest of the LOCH ARD listed an array of manufactured goods and bulk metals being exported to the Colony of Victoria, with a declared value of £53,700. (202 bills of lading show an actual invoice value of £68, 456, with insurance underwriting to £30,000 of all cargo). Included in the manifest is the item of “Tin hardware & cutlery £7,530”. This teaspoon is one of 482 similar items of electro-plated cutlery from the LOCH ARD site, comprising spoons and forks of various sizes but all sharing the same general shape or design and metallic composition. 49 of these pieces display a legible makers’ mark — the initials “W” and “P” placed within a raised diamond outline, which is in turn contained within a sunken crown shape — identifying the manufacturer as William Page & Co of Birmingham. An electroplater’s makers’ marks, unlike sterling silver hallmarks, are not consistent identifiers of quality or date and place of manufacture. A similar line of five impressions was usually made to impress the consumer with an implication of industry standards, but what each one actually signified was not regulated and so they varied according to the whim of the individual foundry. In this case, the maker’s marks are often obscured by sedimentary accretion or removed by corrosion after a century of submersion in the ocean. However sufficient detail has survived to indicate that these samples of electro-plated cutlery probably originated from the same consignment in the LOCH ARD’s cargo. The following descriptions of maker’s marks are drawn from 255 tea spoons, 125 dessert spoons, and 99 table forks. These marks are clearly visible in 66 instances, while the same sequence of general outlines, or depression shapes, is discernible in another 166 examples. 1. A recessed Crown containing a raised Diamond outline and the initials “W” and “P” (the recognised trademark of William Page & Co) 2. An impressed Ellipse containing a raised, pivoted, Triangle in its lower part and bearing a Resurrection Cross on its upper section (a possible dissenting church symbol reflecting religious affiliation); OR a rounded Square impression containing a raised, ‘lazy’, letter “B” (possibly mimicking sterling silver hallmark signifying city of manufacture i.e. Birmingham) 3. An impressed rounded Square filled with a raised Maltese Cross (the base metal composite of nickel silver was also known as ‘German silver’ after its Berlin inventors in 1823) 4. A recessed Circle containing a Crab or Scarab Beetle image; OR a recessed Circle containing a rotated ‘fleur de lys’ or ‘fasces’ design 5. A depressed Diamond shape enclosing a large raised letter “R” and a small raised letter “D” (mimicking the U.K. Patent Office stamp which abbreviated the term ‘registered’ to “RD”, but also included date and class of patent) Suggested trade names for William Page & Co’s particular blend of brass plating are ‘roman silver’ or ‘silverite’. This copper alloy polishes to a lustrous gold when new, discolouring to a murky grey with greenish hue when neglected. HISTORY OF THE LOCH ARD The LOCH ARD belonged to the famous Loch Line which sailed many ships from England to Australia. Built in Glasgow by Barclay, Curdle and Co. in 1873, the LOCH ARD was a three-masted square rigged iron sailing ship. The ship measured 262ft 7" (79.87m) in length, 38ft (11.58m) in width, 23ft (7m) in depth and had a gross tonnage of 1693 tons. The LOCH ARD's main mast measured a massive 150ft (45.7m) in height. LOCH ARD made three trips to Australia and one trip to Calcutta before its final voyage. LOCH ARD left England on March 2, 1878, under the command of Captain Gibbs, a newly married, 29 year old. She was bound for Melbourne with a crew of 37, plus 17 passengers and a load of cargo. The general cargo reflected the affluence of Melbourne at the time. On board were straw hats, umbrella, perfumes, clay pipes, pianos, clocks, confectionary, linen and candles, as well as a heavier load of railway irons, cement, lead and copper. There were items included that intended for display in the Melbourne International Exhibition in 1880. The voyage to Port Phillip was long but uneventful. At 3am on June 1, 1878, Captain Gibbs was expecting to see land and the passengers were becoming excited as they prepared to view their new homeland in the early morning. But LOCH ARD was running into a fog which greatly reduced visibility. Captain Gibbs was becoming anxious as there was no sign of land or the Cape Otway lighthouse. At 4am the fog lifted. A man aloft announced that he could see breakers. The sheer cliffs of Victoria's west coast came into view, and Captain Gibbs realised that the ship was much closer to them than expected. He ordered as much sail to be set as time would permit and then attempted to steer the vessel out to sea. On coming head on into the wind, the ship lost momentum, the sails fell limp and LOCH ARD's bow swung back. Gibbs then ordered the anchors to be released in an attempt to hold its position. The anchors sank some 50 fathoms - but did not hold. By this time LOCH ARD was among the breakers and the tall cliffs of Mutton Bird Island rose behind the ship. Just half a mile from the coast, the ship's bow was suddenly pulled around by the anchor. The captain tried to tack out to sea, but the ship struck a reef at the base of Mutton Bird Island, near Port Campbell. Waves broke over the ship and the top deck was loosened from the hull. The masts and rigging came crashing down knocking passengers and crew overboard. When a lifeboat was finally launched, it crashed into the side of LOCH ARD and capsized. Tom Pearce, who had launched the boat, managed to cling to its overturned hull and shelter beneath it. He drifted out to sea and then on the flood tide came into what is now known as LOCH ARD Gorge. He swam to shore, bruised and dazed, and found a cave in which to shelter. Some of the crew stayed below deck to shelter from the falling rigging but drowned when the ship slipped off the reef into deeper water. Eva Carmichael had raced onto deck to find out what was happening only to be confronted by towering cliffs looming above the stricken ship. In all the chaos, Captain Gibbs grabbed Eva and said, "If you are saved Eva, let my dear wife know that I died like a sailor". That was the last Eva Carmichael saw of the captain. She was swept off the ship by a huge wave. Eva saw Tom Pearce on a small rocky beach and yelled to attract his attention. He dived in and swam to the exhausted woman and dragged her to shore. He took her to the cave and broke open case of brandy which had washed up on the beach. He opened a bottle to revive the unconscious woman. A few hours later Tom scaled a cliff in search of help. He followed hoof prints and came by chance upon two men from nearby Glenample Station three and a half miles away. In a state of exhaustion, he told the men of the tragedy. Tom returned to the gorge while the two men rode back to the station to get help. By the time they reached LOCH ARD Gorge, it was cold and dark. The two shipwreck survivors were taken to Glenample Station to recover. Eva stayed at the station for six weeks before returning to Ireland, this time by steamship. In Melbourne, Tom Pearce received a hero's welcome. He was presented with the first gold medal of the Royal Humane Society of Victoria and a £1000 cheque from the Victorian Government. Concerts were performed to honour the young man's bravery and to raise money for those who lost family in the LOCH ARD disaster. Of the 54 crew members and passengers on board, only two survived: the apprentice, Tom Pearce and the young woman passenger, Eva Carmichael, who lost all of her family in the tragedy. Ten days after the LOCH ARD tragedy, salvage rights to the wreck were sold at auction for £2,120. Cargo valued at £3,000 was salvaged and placed on the beach, but most washed back into the sea when another storm developed. The wreck of LOCH ARD still lies at the base of Mutton Bird Island. Much of the cargo has now been salvaged and some was washed up into what is now known as LOCH ARD Gorge. Cargo and artefacts have also been illegally salvaged over many years before protective legislation was introduced. One of the most unlikely pieces of cargo to have survived the shipwreck was a Minton porcelain peacock - one of only seven in the world. The peacock was destined for the Melbourne International Exhibition in 1880. It had been well packed, which gave it adequate protection during the violent storm. Today, the Minton peacock can be seen at the Flagstaff Hill Maritime Museum in Warrnambool. From Australia's most dramatic shipwreck it has now become Australia's most valuable shipwreck artefact and is one of very few 'objects' on the Victorian State Heritage Register. The LOCH ARD shipwreck is of State significance – Victorian Heritage Register S 417. Flagstaff Hill’s collection of artefacts from LOCH ARD is significant for being one of the largest collections of artefacts from this shipwreck in Victoria. It is significant for its association with the shipwreck, which is on the Victorian Heritage Register (VHR S417). The collection is significant because of the relationship between the objects, as together they have a high potential to interpret the story of the LOCH ARD. The LOCH ARD collection is archaeologically significant as the remains of a large international passenger and cargo ship. The LOCH ARD collection is historically significant for representing aspects of Victoria’s shipping history and its potential to interpret sub-theme 1.5 of Victoria’s Framework of Historical Themes (living with natural processes). The collection is also historically significant for its association with the LOCH ARD, which was one of the worst and best known shipwrecks in Victoria’s history. Unrestored tea spoon from the wreck of the LOCH ARD. The spoon design has a flattened fiddle-back handle, with a thin stem or shank, flared collar, and elongated bowl. The spoons metallic composition is a thin layer of brass alloy which has partially corroded back to a nickel-silver base metal. Approximately 40% of original electroplating remains with some verdigris. Bowl edges are damaged. Three outlines of makers marks are visible on lower rear of handle.flagstaff hill, warrnambool, shipwrecked coast, flagstaff hill maritime museum, maritime museum, shipwreck coast, flagstaff hill maritime village, great ocean road, loch line, loch ard, captain gibbs, eva carmichael, tom pearce, glenample station, mutton bird island, loch ard gorge, electroplated cutlery, loch ard shipwreck, nickel silver, william page & co, birmingham, brass plating, makers marks -
 Flagstaff Hill Maritime Museum and Village
Spoon, circa 1878
This tea spoon is from the wreck of the LOCH ARD, a Loch Line ship of 1,693 tons which sailed from Gravesend, London, on 2 March 1878 with 17 passengers and a crew of 36 under Captain George Gibbs. “The intention was to discharge cargo in Melbourne, before returning to London via the Horn with wool and wheat”. Instead, on 1 June 1878, after 90 days at sea, she struck the sandstone cliffs of Mutton Bird Island on the south west coast of Victoria, and sank with the loss of 52 lives and all her cargo. The manifest of the LOCH ARD listed an array of manufactured goods and bulk metals being exported to the Colony of Victoria, with a declared value of £53,700. (202 bills of lading show an actual invoice value of £68, 456, with insurance underwriting to £30,000 of all cargo). Included in the manifest is the item of “Tin hardware & cutlery £7,530”. This teaspoon is one of 482 similar items of electro-plated cutlery from the LOCH ARD site, comprising spoons and forks of various sizes but all sharing the same general shape or design and metallic composition. 49 of these pieces display a legible makers’ mark — the initials “W” and “P” placed within a raised diamond outline, which is in turn contained within a sunken crown shape — identifying the manufacturer as William Page & Co of Birmingham. An electroplater’s makers’ marks, unlike sterling silver hallmarks, are not consistent identifiers of quality or date and place of manufacture. A similar line of five impressions was usually made to impress the consumer with an implication of industry standards, but what each one actually signified was not regulated and so they varied according to the whim of the individual foundry. In this case, the maker’s marks are often obscured by sedimentary accretion or removed by corrosion after a century of submersion in the ocean. However sufficient detail has survived to indicate that these samples of electro-plated cutlery probably originated from the same consignment in the LOCH ARD’s cargo. The following descriptions of maker’s marks are drawn from 255 tea spoons, 125 dessert spoons, and 99 table forks. These marks are clearly visible in 66 instances, while the same sequence of general outlines, or depression shapes, is discernible in another 166 examples. 1. A recessed Crown containing a raised Diamond outline and the initials “W” and “P” (the recognised trademark of William Page & Co) 2. An impressed Ellipse containing a raised, pivoted, Triangle in its lower part and bearing a Resurrection Cross on its upper section (a possible dissenting church symbol reflecting religious affiliation); OR a rounded Square impression containing a raised, ‘lazy’, letter “B” (possibly mimicking sterling silver hallmark signifying city of manufacture i.e. Birmingham) 3. An impressed rounded Square filled with a raised Maltese Cross (the base metal composite of nickel silver was also known as ‘German silver’ after its Berlin inventors in 1823) 4. A recessed Circle containing a Crab or Scarab Beetle image; OR a recessed Circle containing a rotated ‘fleur de lys’ or ‘fasces’ design 5. A depressed Diamond shape enclosing a large raised letter “R” and a small raised letter “D” (mimicking the U.K. Patent Office stamp which abbreviated the term ‘registered’ to “RD”, but also included date and class of patent) Suggested trade names for William Page & Co’s particular blend of brass plating are ‘roman silver’ or ‘silverite’. This copper alloy polishes to a lustrous gold when new, discolouring to a murky grey with greenish hue when neglected. HISTORY OF THE LOCH ARD The LOCH ARD belonged to the famous Loch Line which sailed many ships from England to Australia. Built in Glasgow by Barclay, Curdle and Co. in 1873, the LOCH ARD was a three-masted square rigged iron sailing ship. The ship measured 262ft 7" (79.87m) in length, 38ft (11.58m) in width, 23ft (7m) in depth and had a gross tonnage of 1693 tons. The LOCH ARD's main mast measured a massive 150ft (45.7m) in height. LOCH ARD made three trips to Australia and one trip to Calcutta before its final voyage. LOCH ARD left England on March 2, 1878, under the command of Captain Gibbs, a newly married, 29 year old. She was bound for Melbourne with a crew of 37, plus 17 passengers and a load of cargo. The general cargo reflected the affluence of Melbourne at the time. On board were straw hats, umbrella, perfumes, clay pipes, pianos, clocks, confectionary, linen and candles, as well as a heavier load of railway irons, cement, lead and copper. There were items included that intended for display in the Melbourne International Exhibition in 1880. The voyage to Port Phillip was long but uneventful. At 3am on June 1, 1878, Captain Gibbs was expecting to see land and the passengers were becoming excited as they prepared to view their new homeland in the early morning. But LOCH ARD was running into a fog which greatly reduced visibility. Captain Gibbs was becoming anxious as there was no sign of land or the Cape Otway lighthouse. At 4am the fog lifted. A man aloft announced that he could see breakers. The sheer cliffs of Victoria's west coast came into view, and Captain Gibbs realised that the ship was much closer to them than expected. He ordered as much sail to be set as time would permit and then attempted to steer the vessel out to sea. On coming head on into the wind, the ship lost momentum, the sails fell limp and LOCH ARD's bow swung back. Gibbs then ordered the anchors to be released in an attempt to hold its position. The anchors sank some 50 fathoms - but did not hold. By this time LOCH ARD was among the breakers and the tall cliffs of Mutton Bird Island rose behind the ship. Just half a mile from the coast, the ship's bow was suddenly pulled around by the anchor. The captain tried to tack out to sea, but the ship struck a reef at the base of Mutton Bird Island, near Port Campbell. Waves broke over the ship and the top deck was loosened from the hull. The masts and rigging came crashing down knocking passengers and crew overboard. When a lifeboat was finally launched, it crashed into the side of LOCH ARD and capsized. Tom Pearce, who had launched the boat, managed to cling to its overturned hull and shelter beneath it. He drifted out to sea and then on the flood tide came into what is now known as LOCH ARD Gorge. He swam to shore, bruised and dazed, and found a cave in which to shelter. Some of the crew stayed below deck to shelter from the falling rigging but drowned when the ship slipped off the reef into deeper water. Eva Carmichael had raced onto deck to find out what was happening only to be confronted by towering cliffs looming above the stricken ship. In all the chaos, Captain Gibbs grabbed Eva and said, "If you are saved Eva, let my dear wife know that I died like a sailor". That was the last Eva Carmichael saw of the captain. She was swept off the ship by a huge wave. Eva saw Tom Pearce on a small rocky beach and yelled to attract his attention. He dived in and swam to the exhausted woman and dragged her to shore. He took her to the cave and broke open case of brandy which had washed up on the beach. He opened a bottle to revive the unconscious woman. A few hours later Tom scaled a cliff in search of help. He followed hoof prints and came by chance upon two men from nearby Glenample Station three and a half miles away. In a state of exhaustion, he told the men of the tragedy. Tom returned to the gorge while the two men rode back to the station to get help. By the time they reached LOCH ARD Gorge, it was cold and dark. The two shipwreck survivors were taken to Glenample Station to recover. Eva stayed at the station for six weeks before returning to Ireland, this time by steamship. In Melbourne, Tom Pearce received a hero's welcome. He was presented with the first gold medal of the Royal Humane Society of Victoria and a £1000 cheque from the Victorian Government. Concerts were performed to honour the young man's bravery and to raise money for those who lost family in the LOCH ARD disaster. Of the 54 crew members and passengers on board, only two survived: the apprentice, Tom Pearce and the young woman passenger, Eva Carmichael, who lost all of her family in the tragedy. Ten days after the LOCH ARD tragedy, salvage rights to the wreck were sold at auction for £2,120. Cargo valued at £3,000 was salvaged and placed on the beach, but most washed back into the sea when another storm developed. The wreck of LOCH ARD still lies at the base of Mutton Bird Island. Much of the cargo has now been salvaged and some was washed up into what is now known as LOCH ARD Gorge. Cargo and artefacts have also been illegally salvaged over many years before protective legislation was introduced. One of the most unlikely pieces of cargo to have survived the shipwreck was a Minton porcelain peacock - one of only seven in the world. The peacock was destined for the Melbourne International Exhibition in 1880. It had been well packed, which gave it adequate protection during the violent storm. Today, the Minton peacock can be seen at the Flagstaff Hill Maritime Museum in Warrnambool. From Australia's most dramatic shipwreck it has now become Australia's most valuable shipwreck artefact and is one of very few 'objects' on the Victorian State Heritage Register. The LOCH ARD shipwreck is of State significance – Victorian Heritage Register S 417. Flagstaff Hill’s collection of artefacts from LOCH ARD is significant for being one of the largest collections of artefacts from this shipwreck in Victoria. It is significant for its association with the shipwreck, which is on the Victorian Heritage Register (VHR S417). The collection is significant because of the relationship between the objects, as together they have a high potential to interpret the story of the LOCH ARD. The LOCH ARD collection is archaeologically significant as the remains of a large international passenger and cargo ship. The LOCH ARD collection is historically significant for representing aspects of Victoria’s shipping history and its potential to interpret sub-theme 1.5 of Victoria’s Framework of Historical Themes (living with natural processes). The collection is also historically significant for its association with the LOCH ARD, which was one of the worst and best known shipwrecks in Victoria’s history. Unrestored tea spoon from the wreck of the LOCH ARD. The spoon design has a flattened fiddle-back handle, with a thin stem or shank, flared collar, and elongated bowl. The spoons metallic composition is a thin layer of brass alloy which has partially corroded back to a nickel-silver base metal. Only 30% of original electroplating remains with some verdigris. Outlines of five makers marks are visible on lower rear of handle.flagstaff hill, warrnambool, shipwrecked coast, flagstaff hill maritime museum, maritime museum, shipwreck coast, flagstaff hill maritime village, great ocean road, loch line, loch ard, captain gibbs, eva carmichael, tom pearce, glenample station, mutton bird island, loch ard gorge, electroplated cutlery, loch ard shipwreck, nickel silver, william page & co, birmingham, brass plating, makers marks -
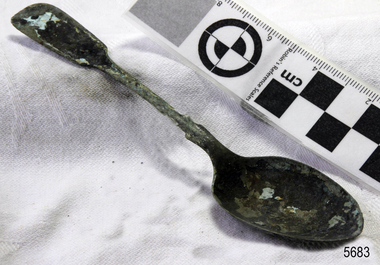 Flagstaff Hill Maritime Museum and Village
Spoon, circa 1878
This tea spoon is from the wreck of the LOCH ARD, a Loch Line ship of 1,693 tons which sailed from Gravesend, London, on 2 March 1878 with 17 passengers and a crew of 36 under Captain George Gibbs. “The intention was to discharge cargo in Melbourne, before returning to London via the Horn with wool and wheat”. Instead, on 1 June 1878, after 90 days at sea, she struck the sandstone cliffs of Mutton Bird Island on the south west coast of Victoria, and sank with the loss of 52 lives and all her cargo. The manifest of the LOCH ARD listed an array of manufactured goods and bulk metals being exported to the Colony of Victoria, with a declared value of £53,700. (202 bills of lading show an actual invoice value of £68, 456, with insurance underwriting to £30,000 of all cargo). Included in the manifest is the item of “Tin hardware & cutlery £7,530”. This teaspoon is one of 482 similar items of electro-plated cutlery from the LOCH ARD site, comprising spoons and forks of various sizes but all sharing the same general shape or design and metallic composition. 49 of these pieces display a legible makers’ mark — the initials “W” and “P” placed within a raised diamond outline, which is in turn contained within a sunken crown shape — identifying the manufacturer as William Page & Co of Birmingham. An electroplater’s makers’ marks, unlike sterling silver hallmarks, are not consistent identifiers of quality or date and place of manufacture. A similar line of five impressions was usually made to impress the consumer with an implication of industry standards, but what each one actually signified was not regulated and so they varied according to the whim of the individual foundry. In this case, the maker’s marks are often obscured by sedimentary accretion or removed by corrosion after a century of submersion in the ocean. However sufficient detail has survived to indicate that these samples of electro-plated cutlery probably originated from the same consignment in the LOCH ARD’s cargo. The following descriptions of maker’s marks are drawn from 255 tea spoons, 125 dessert spoons, and 99 table forks. These marks are clearly visible in 66 instances, while the same sequence of general outlines, or depression shapes, is discernible in another 166 examples. 1. A recessed Crown containing a raised Diamond outline and the initials “W” and “P” (the recognised trademark of William Page & Co) 2. An impressed Ellipse containing a raised, pivoted, Triangle in its lower part and bearing a Resurrection Cross on its upper section (a possible dissenting church symbol reflecting religious affiliation); OR a rounded Square impression containing a raised, ‘lazy’, letter “B” (possibly mimicking sterling silver hallmark signifying city of manufacture i.e. Birmingham) 3. An impressed rounded Square filled with a raised Maltese Cross (the base metal composite of nickel silver was also known as ‘German silver’ after its Berlin inventors in 1823) 4. A recessed Circle containing a Crab or Scarab Beetle image; OR a recessed Circle containing a rotated ‘fleur de lys’ or ‘fasces’ design 5. A depressed Diamond shape enclosing a large raised letter “R” and a small raised letter “D” (mimicking the U.K. Patent Office stamp which abbreviated the term ‘registered’ to “RD”, but also included date and class of patent) Suggested trade names for William Page & Co’s particular blend of brass plating are ‘roman silver’ or ‘silverite’. This copper alloy polishes to a lustrous gold when new, discolouring to a murky grey with greenish hue when neglected. HISTORY OF THE LOCH ARD The LOCH ARD belonged to the famous Loch Line which sailed many ships from England to Australia. Built in Glasgow by Barclay, Curdle and Co. in 1873, the LOCH ARD was a three-masted square rigged iron sailing ship. The ship measured 262ft 7" (79.87m) in length, 38ft (11.58m) in width, 23ft (7m) in depth and had a gross tonnage of 1693 tons. The LOCH ARD's main mast measured a massive 150ft (45.7m) in height. LOCH ARD made three trips to Australia and one trip to Calcutta before its final voyage. LOCH ARD left England on March 2, 1878, under the command of Captain Gibbs, a newly married, 29 year old. She was bound for Melbourne with a crew of 37, plus 17 passengers and a load of cargo. The general cargo reflected the affluence of Melbourne at the time. On board were straw hats, umbrella, perfumes, clay pipes, pianos, clocks, confectionary, linen and candles, as well as a heavier load of railway irons, cement, lead and copper. There were items included that intended for display in the Melbourne International Exhibition in 1880. The voyage to Port Phillip was long but uneventful. At 3am on June 1, 1878, Captain Gibbs was expecting to see land and the passengers were becoming excited as they prepared to view their new homeland in the early morning. But LOCH ARD was running into a fog which greatly reduced visibility. Captain Gibbs was becoming anxious as there was no sign of land or the Cape Otway lighthouse. At 4am the fog lifted. A man aloft announced that he could see breakers. The sheer cliffs of Victoria's west coast came into view, and Captain Gibbs realised that the ship was much closer to them than expected. He ordered as much sail to be set as time would permit and then attempted to steer the vessel out to sea. On coming head on into the wind, the ship lost momentum, the sails fell limp and LOCH ARD's bow swung back. Gibbs then ordered the anchors to be released in an attempt to hold its position. The anchors sank some 50 fathoms - but did not hold. By this time LOCH ARD was among the breakers and the tall cliffs of Mutton Bird Island rose behind the ship. Just half a mile from the coast, the ship's bow was suddenly pulled around by the anchor. The captain tried to tack out to sea, but the ship struck a reef at the base of Mutton Bird Island, near Port Campbell. Waves broke over the ship and the top deck was loosened from the hull. The masts and rigging came crashing down knocking passengers and crew overboard. When a lifeboat was finally launched, it crashed into the side of LOCH ARD and capsized. Tom Pearce, who had launched the boat, managed to cling to its overturned hull and shelter beneath it. He drifted out to sea and then on the flood tide came into what is now known as LOCH ARD Gorge. He swam to shore, bruised and dazed, and found a cave in which to shelter. Some of the crew stayed below deck to shelter from the falling rigging but drowned when the ship slipped off the reef into deeper water. Eva Carmichael had raced onto deck to find out what was happening only to be confronted by towering cliffs looming above the stricken ship. In all the chaos, Captain Gibbs grabbed Eva and said, "If you are saved Eva, let my dear wife know that I died like a sailor". That was the last Eva Carmichael saw of the captain. She was swept off the ship by a huge wave. Eva saw Tom Pearce on a small rocky beach and yelled to attract his attention. He dived in and swam to the exhausted woman and dragged her to shore. He took her to the cave and broke open case of brandy which had washed up on the beach. He opened a bottle to revive the unconscious woman. A few hours later Tom scaled a cliff in search of help. He followed hoof prints and came by chance upon two men from nearby Glenample Station three and a half miles away. In a state of exhaustion, he told the men of the tragedy. Tom returned to the gorge while the two men rode back to the station to get help. By the time they reached LOCH ARD Gorge, it was cold and dark. The two shipwreck survivors were taken to Glenample Station to recover. Eva stayed at the station for six weeks before returning to Ireland, this time by steamship. In Melbourne, Tom Pearce received a hero's welcome. He was presented with the first gold medal of the Royal Humane Society of Victoria and a £1000 cheque from the Victorian Government. Concerts were performed to honour the young man's bravery and to raise money for those who lost family in the LOCH ARD disaster. Of the 54 crew members and passengers on board, only two survived: the apprentice, Tom Pearce and the young woman passenger, Eva Carmichael, who lost all of her family in the tragedy. Ten days after the LOCH ARD tragedy, salvage rights to the wreck were sold at auction for £2,120. Cargo valued at £3,000 was salvaged and placed on the beach, but most washed back into the sea when another storm developed. The wreck of LOCH ARD still lies at the base of Mutton Bird Island. Much of the cargo has now been salvaged and some was washed up into what is now known as LOCH ARD Gorge. Cargo and artefacts have also been illegally salvaged over many years before protective legislation was introduced. One of the most unlikely pieces of cargo to have survived the shipwreck was a Minton porcelain peacock - one of only seven in the world. The peacock was destined for the Melbourne International Exhibition in 1880. It had been well packed, which gave it adequate protection during the violent storm. Today, the Minton peacock can be seen at the Flagstaff Hill Maritime Museum in Warrnambool. From Australia's most dramatic shipwreck it has now become Australia's most valuable shipwreck artefact and is one of very few 'objects' on the Victorian State Heritage Register. The LOCH ARD shipwreck is of State significance – Victorian Heritage Register S 417. Flagstaff Hill’s collection of artefacts from LOCH ARD is significant for being one of the largest collections of artefacts from this shipwreck in Victoria. It is significant for its association with the shipwreck, which is on the Victorian Heritage Register (VHR S417). The collection is significant because of the relationship between the objects, as together they have a high potential to interpret the story of the LOCH ARD. The LOCH ARD collection is archaeologically significant as the remains of a large international passenger and cargo ship. The LOCH ARD collection is historically significant for representing aspects of Victoria’s shipping history and its potential to interpret sub-theme 1.5 of Victoria’s Framework of Historical Themes (living with natural processes). The collection is also historically significant for its association with the LOCH ARD, which was one of the worst and best known shipwrecks in Victoria’s history. Unrestored tea spoon from the wreck of the LOCH ARD. The spoon design has a flattened fiddle-back handle, with a thin stem or shank, flared collar, and elongated bowl. The spoons metallic composition is a thin layer of brass alloy which has partially corroded back to a nickel-silver base metal. Traces of original electroplating remain (15%) with some verdigris (15%). Spoon has worn edges.flagstaff hill, warrnambool, shipwrecked coast, flagstaff hill maritime museum, maritime museum, shipwreck coast, flagstaff hill maritime village, great ocean road, loch line, loch ard, captain gibbs, eva carmichael, tom pearce, glenample station, mutton bird island, loch ard gorge, electroplated cutlery, loch ard shipwreck, nickel silver, william page & co, birmingham, brass plating, makers marks -
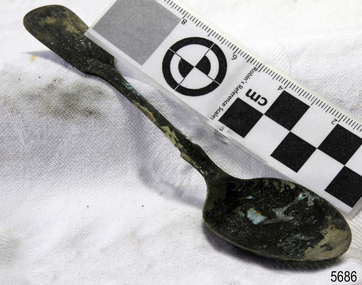 Flagstaff Hill Maritime Museum and Village
Spoon, circa 1878
This tea spoon is from the wreck of the LOCH ARD, a Loch Line ship of 1,693 tons which sailed from Gravesend, London, on 2 March 1878 with 17 passengers and a crew of 36 under Captain George Gibbs. “The intention was to discharge cargo in Melbourne, before returning to London via the Horn with wool and wheat”. Instead, on 1 June 1878, after 90 days at sea, she struck the sandstone cliffs of Mutton Bird Island on the south west coast of Victoria, and sank with the loss of 52 lives and all her cargo. The manifest of the LOCH ARD listed an array of manufactured goods and bulk metals being exported to the Colony of Victoria, with a declared value of £53,700. (202 bills of lading show an actual invoice value of £68, 456, with insurance underwriting to £30,000 of all cargo). Included in the manifest is the item of “Tin hardware & cutlery £7,530”. This teaspoon is one of 482 similar items of electro-plated cutlery from the LOCH ARD site, comprising spoons and forks of various sizes but all sharing the same general shape or design and metallic composition. 49 of these pieces display a legible makers’ mark — the initials “W” and “P” placed within a raised diamond outline, which is in turn contained within a sunken crown shape — identifying the manufacturer as William Page & Co of Birmingham. An electroplater’s makers’ marks, unlike sterling silver hallmarks, are not consistent identifiers of quality or date and place of manufacture. A similar line of five impressions was usually made to impress the consumer with an implication of industry standards, but what each one actually signified was not regulated and so they varied according to the whim of the individual foundry. In this case, the maker’s marks are often obscured by sedimentary accretion or removed by corrosion after a century of submersion in the ocean. However sufficient detail has survived to indicate that these samples of electro-plated cutlery probably originated from the same consignment in the LOCH ARD’s cargo. The following descriptions of maker’s marks are drawn from 255 tea spoons, 125 dessert spoons, and 99 table forks. These marks are clearly visible in 66 instances, while the same sequence of general outlines, or depression shapes, is discernible in another 166 examples. 1. A recessed Crown containing a raised Diamond outline and the initials “W” and “P” (the recognised trademark of William Page & Co) 2. An impressed Ellipse containing a raised, pivoted, Triangle in its lower part and bearing a Resurrection Cross on its upper section (a possible dissenting church symbol reflecting religious affiliation); OR a rounded Square impression containing a raised, ‘lazy’, letter “B” (possibly mimicking sterling silver hallmark signifying city of manufacture i.e. Birmingham) 3. An impressed rounded Square filled with a raised Maltese Cross (the base metal composite of nickel silver was also known as ‘German silver’ after its Berlin inventors in 1823) 4. A recessed Circle containing a Crab or Scarab Beetle image; OR a recessed Circle containing a rotated ‘fleur de lys’ or ‘fasces’ design 5. A depressed Diamond shape enclosing a large raised letter “R” and a small raised letter “D” (mimicking the U.K. Patent Office stamp which abbreviated the term ‘registered’ to “RD”, but also included date and class of patent) Suggested trade names for William Page & Co’s particular blend of brass plating are ‘roman silver’ or ‘silverite’. This copper alloy polishes to a lustrous gold when new, discolouring to a murky grey with greenish hue when neglected. HISTORY OF THE LOCH ARD The LOCH ARD belonged to the famous Loch Line which sailed many ships from England to Australia. Built in Glasgow by Barclay, Curdle and Co. in 1873, the LOCH ARD was a three-masted square rigged iron sailing ship. The ship measured 262ft 7" (79.87m) in length, 38ft (11.58m) in width, 23ft (7m) in depth and had a gross tonnage of 1693 tons. The LOCH ARD's main mast measured a massive 150ft (45.7m) in height. LOCH ARD made three trips to Australia and one trip to Calcutta before its final voyage. LOCH ARD left England on March 2, 1878, under the command of Captain Gibbs, a newly married, 29 year old. She was bound for Melbourne with a crew of 37, plus 17 passengers and a load of cargo. The general cargo reflected the affluence of Melbourne at the time. On board were straw hats, umbrella, perfumes, clay pipes, pianos, clocks, confectionary, linen and candles, as well as a heavier load of railway irons, cement, lead and copper. There were items included that intended for display in the Melbourne International Exhibition in 1880. The voyage to Port Phillip was long but uneventful. At 3am on June 1, 1878, Captain Gibbs was expecting to see land and the passengers were becoming excited as they prepared to view their new homeland in the early morning. But LOCH ARD was running into a fog which greatly reduced visibility. Captain Gibbs was becoming anxious as there was no sign of land or the Cape Otway lighthouse. At 4am the fog lifted. A man aloft announced that he could see breakers. The sheer cliffs of Victoria's west coast came into view, and Captain Gibbs realised that the ship was much closer to them than expected. He ordered as much sail to be set as time would permit and then attempted to steer the vessel out to sea. On coming head on into the wind, the ship lost momentum, the sails fell limp and LOCH ARD's bow swung back. Gibbs then ordered the anchors to be released in an attempt to hold its position. The anchors sank some 50 fathoms - but did not hold. By this time LOCH ARD was among the breakers and the tall cliffs of Mutton Bird Island rose behind the ship. Just half a mile from the coast, the ship's bow was suddenly pulled around by the anchor. The captain tried to tack out to sea, but the ship struck a reef at the base of Mutton Bird Island, near Port Campbell. Waves broke over the ship and the top deck was loosened from the hull. The masts and rigging came crashing down knocking passengers and crew overboard. When a lifeboat was finally launched, it crashed into the side of LOCH ARD and capsized. Tom Pearce, who had launched the boat, managed to cling to its overturned hull and shelter beneath it. He drifted out to sea and then on the flood tide came into what is now known as LOCH ARD Gorge. He swam to shore, bruised and dazed, and found a cave in which to shelter. Some of the crew stayed below deck to shelter from the falling rigging but drowned when the ship slipped off the reef into deeper water. Eva Carmichael had raced onto deck to find out what was happening only to be confronted by towering cliffs looming above the stricken ship. In all the chaos, Captain Gibbs grabbed Eva and said, "If you are saved Eva, let my dear wife know that I died like a sailor". That was the last Eva Carmichael saw of the captain. She was swept off the ship by a huge wave. Eva saw Tom Pearce on a small rocky beach and yelled to attract his attention. He dived in and swam to the exhausted woman and dragged her to shore. He took her to the cave and broke open case of brandy which had washed up on the beach. He opened a bottle to revive the unconscious woman. A few hours later Tom scaled a cliff in search of help. He followed hoof prints and came by chance upon two men from nearby Glenample Station three and a half miles away. In a state of exhaustion, he told the men of the tragedy. Tom returned to the gorge while the two men rode back to the station to get help. By the time they reached LOCH ARD Gorge, it was cold and dark. The two shipwreck survivors were taken to Glenample Station to recover. Eva stayed at the station for six weeks before returning to Ireland, this time by steamship. In Melbourne, Tom Pearce received a hero's welcome. He was presented with the first gold medal of the Royal Humane Society of Victoria and a £1000 cheque from the Victorian Government. Concerts were performed to honour the young man's bravery and to raise money for those who lost family in the LOCH ARD disaster. Of the 54 crew members and passengers on board, only two survived: the apprentice, Tom Pearce and the young woman passenger, Eva Carmichael, who lost all of her family in the tragedy. Ten days after the LOCH ARD tragedy, salvage rights to the wreck were sold at auction for £2,120. Cargo valued at £3,000 was salvaged and placed on the beach, but most washed back into the sea when another storm developed. The wreck of LOCH ARD still lies at the base of Mutton Bird Island. Much of the cargo has now been salvaged and some was washed up into what is now known as LOCH ARD Gorge. Cargo and artefacts have also been illegally salvaged over many years before protective legislation was introduced. One of the most unlikely pieces of cargo to have survived the shipwreck was a Minton porcelain peacock - one of only seven in the world. The peacock was destined for the Melbourne International Exhibition in 1880. It had been well packed, which gave it adequate protection during the violent storm. Today, the Minton peacock can be seen at the Flagstaff Hill Maritime Museum in Warrnambool. From Australia's most dramatic shipwreck it has now become Australia's most valuable shipwreck artefact and is one of very few 'objects' on the Victorian State Heritage Register. The LOCH ARD shipwreck is of State significance – Victorian Heritage Register S 417. Flagstaff Hill’s collection of artefacts from LOCH ARD is significant for being one of the largest collections of artefacts from this shipwreck in Victoria. It is significant for its association with the shipwreck, which is on the Victorian Heritage Register (VHR S417). The collection is significant because of the relationship between the objects, as together they have a high potential to interpret the story of the LOCH ARD. The LOCH ARD collection is archaeologically significant as the remains of a large international passenger and cargo ship. The LOCH ARD collection is historically significant for representing aspects of Victoria’s shipping history and its potential to interpret sub-theme 1.5 of Victoria’s Framework of Historical Themes (living with natural processes). The collection is also historically significant for its association with the LOCH ARD, which was one of the worst and best known shipwrecks in Victoria’s history. Unrestored tea spoon from the wreck of the LOCH ARD. The spoon design has a flattened fiddle-back handle, with a thin stem or shank, flared collar, and elongated bowl. The spoons metallic composition is a thin layer of brass alloy which has partially corroded back to a nickel-silver base metal. Only 15% of original electroplating remains with bright vertigris on 5% of spoon surface.flagstaff hill, warrnambool, shipwrecked coast, flagstaff hill maritime museum, maritime museum, shipwreck coast, flagstaff hill maritime village, great ocean road, loch line, loch ard, captain gibbs, eva carmichael, tom pearce, glenample station, mutton bird island, loch ard gorge, electroplated cutlery, loch ard shipwreck, nickel silver, william page & co, birmingham, brass plating, makers marks -
 Flagstaff Hill Maritime Museum and Village
Domestic object - Spoon, circa 1878
This tea spoon is from the wreck of the LOCH ARD, a Loch Line ship of 1,693 tons which sailed from Gravesend, London, on 2 March 1878 with 17 passengers and a crew of 36 under Captain George Gibbs. “The intention was to discharge cargo in Melbourne, before returning to London via the Horn with wool and wheat”. Instead, on 1 June 1878, after 90 days at sea, she struck the sandstone cliffs of Mutton Bird Island on the south west coast of Victoria, and sank with the loss of 52 lives and all her cargo. The manifest of the LOCH ARD listed an array of manufactured goods and bulk metals being exported to the Colony of Victoria, with a declared value of £53,700. (202 bills of lading show an actual invoice value of £68, 456, with insurance underwriting to £30,000 of all cargo). Included in the manifest is the item of “Tin hardware & cutlery £7,530”. This teaspoon is one of 482 similar items of electro-plated cutlery from the LOCH ARD site, comprising spoons and forks of various sizes but all sharing the same general shape or design and metallic composition. 49 of these pieces display a legible makers’ mark — the initials “W” and “P” placed within a raised diamond outline, which is in turn contained within a sunken crown shape — identifying the manufacturer as William Page & Co of Birmingham. An electroplater’s makers’ marks, unlike sterling silver hallmarks, are not consistent identifiers of quality or date and place of manufacture. A similar line of five impressions was usually made to impress the consumer with an implication of industry standards, but what each one actually signified was not regulated and so they varied according to the whim of the individual foundry. In this case, the maker’s marks are often obscured by sedimentary accretion or removed by corrosion after a century of submersion in the ocean. However sufficient detail has survived to indicate that these samples of electro-plated cutlery probably originated from the same consignment in the LOCH ARD’s cargo. The following descriptions of maker’s marks are drawn from 255 tea spoons, 125 dessert spoons, and 99 table forks. These marks are clearly visible in 66 instances, while the same sequence of general outlines, or depression shapes, is discernible in another 166 examples. 1. A recessed Crown containing a raised Diamond outline and the initials “W” and “P” (the recognised trademark of William Page & Co) 2. An impressed Ellipse containing a raised, pivoted, Triangle in its lower part and bearing a Resurrection Cross on its upper section (a possible dissenting church symbol reflecting religious affiliation); OR a rounded Square impression containing a raised, ‘lazy’, letter “B” (possibly mimicking sterling silver hallmark signifying city of manufacture i.e. Birmingham) 3. An impressed rounded Square filled with a raised Maltese Cross (the base metal composite of nickel silver was also known as ‘German silver’ after its Berlin inventors in 1823) 4. A recessed Circle containing a Crab or Scarab Beetle image; OR a recessed Circle containing a rotated ‘fleur de lys’ or ‘fasces’ design 5. A depressed Diamond shape enclosing a large raised letter “R” and a small raised letter “D” (mimicking the U.K. Patent Office stamp which abbreviated the term ‘registered’ to “RD”, but also included date and class of patent) Suggested trade names for William Page & Co’s particular blend of brass plating are ‘roman silver’ or ‘silverite’. This copper alloy polishes to a lustrous gold when new, discolouring to a murky grey with greenish hue when neglected. HISTORY OF THE LOCH ARD The LOCH ARD belonged to the famous Loch Line which sailed many ships from England to Australia. Built in Glasgow by Barclay, Curdle and Co. in 1873, the LOCH ARD was a three-masted square rigged iron sailing ship. The ship measured 262ft 7" (79.87m) in length, 38ft (11.58m) in width, 23ft (7m) in depth and had a gross tonnage of 1693 tons. The LOCH ARD's main mast measured a massive 150ft (45.7m) in height. LOCH ARD made three trips to Australia and one trip to Calcutta before its final voyage. LOCH ARD left England on March 2, 1878, under the command of Captain Gibbs, a newly married, 29 year old. She was bound for Melbourne with a crew of 37, plus 17 passengers and a load of cargo. The general cargo reflected the affluence of Melbourne at the time. On board were straw hats, umbrella, perfumes, clay pipes, pianos, clocks, confectionary, linen and candles, as well as a heavier load of railway irons, cement, lead and copper. There were items included that intended for display in the Melbourne International Exhibition in 1880. The voyage to Port Phillip was long but uneventful. At 3am on June 1, 1878, Captain Gibbs was expecting to see land and the passengers were becoming excited as they prepared to view their new homeland in the early morning. But LOCH ARD was running into a fog which greatly reduced visibility. Captain Gibbs was becoming anxious as there was no sign of land or the Cape Otway lighthouse. At 4am the fog lifted. A man aloft announced that he could see breakers. The sheer cliffs of Victoria's west coast came into view, and Captain Gibbs realised that the ship was much closer to them than expected. He ordered as much sail to be set as time would permit and then attempted to steer the vessel out to sea. On coming head on into the wind, the ship lost momentum, the sails fell limp and LOCH ARD's bow swung back. Gibbs then ordered the anchors to be released in an attempt to hold its position. The anchors sank some 50 fathoms - but did not hold. By this time LOCH ARD was among the breakers and the tall cliffs of Mutton Bird Island rose behind the ship. Just half a mile from the coast, the ship's bow was suddenly pulled around by the anchor. The captain tried to tack out to sea, but the ship struck a reef at the base of Mutton Bird Island, near Port Campbell. Waves broke over the ship and the top deck was loosened from the hull. The masts and rigging came crashing down knocking passengers and crew overboard. When a lifeboat was finally launched, it crashed into the side of LOCH ARD and capsized. Tom Pearce, who had launched the boat, managed to cling to its overturned hull and shelter beneath it. He drifted out to sea and then on the flood tide came into what is now known as LOCH ARD Gorge. He swam to shore, bruised and dazed, and found a cave in which to shelter. Some of the crew stayed below deck to shelter from the falling rigging but drowned when the ship slipped off the reef into deeper water. Eva Carmichael had raced onto deck to find out what was happening only to be confronted by towering cliffs looming above the stricken ship. In all the chaos, Captain Gibbs grabbed Eva and said, "If you are saved Eva, let my dear wife know that I died like a sailor". That was the last Eva Carmichael saw of the captain. She was swept off the ship by a huge wave. Eva saw Tom Pearce on a small rocky beach and yelled to attract his attention. He dived in and swam to the exhausted woman and dragged her to shore. He took her to the cave and broke open case of brandy which had washed up on the beach. He opened a bottle to revive the unconscious woman. A few hours later Tom scaled a cliff in search of help. He followed hoof prints and came by chance upon two men from nearby Glenample Station three and a half miles away. In a state of exhaustion, he told the men of the tragedy. Tom returned to the gorge while the two men rode back to the station to get help. By the time they reached LOCH ARD Gorge, it was cold and dark. The two shipwreck survivors were taken to Glenample Station to recover. Eva stayed at the station for six weeks before returning to Ireland, this time by steamship. In Melbourne, Tom Pearce received a hero's welcome. He was presented with the first gold medal of the Royal Humane Society of Victoria and a £1000 cheque from the Victorian Government. Concerts were performed to honour the young man's bravery and to raise money for those who lost family in the LOCH ARD disaster. Of the 54 crew members and passengers on board, only two survived: the apprentice, Tom Pearce and the young woman passenger, Eva Carmichael, who lost all of her family in the tragedy. Ten days after the LOCH ARD tragedy, salvage rights to the wreck were sold at auction for £2,120. Cargo valued at £3,000 was salvaged and placed on the beach, but most washed back into the sea when another storm developed. The wreck of LOCH ARD still lies at the base of Mutton Bird Island. Much of the cargo has now been salvaged and some was washed up into what is now known as LOCH ARD Gorge. Cargo and artefacts have also been illegally salvaged over many years before protective legislation was introduced. One of the most unlikely pieces of cargo to have survived the shipwreck was a Minton porcelain peacock - one of only seven in the world. The peacock was destined for the Melbourne International Exhibition in 1880. It had been well packed, which gave it adequate protection during the violent storm. Today, the Minton peacock can be seen at the Flagstaff Hill Maritime Museum in Warrnambool. From Australia's most dramatic shipwreck it has now become Australia's most valuable shipwreck artefact and is one of very few 'objects' on the Victorian State Heritage Register. The LOCH ARD shipwreck is of State significance – Victorian Heritage Register S 417. Flagstaff Hill’s collection of artefacts from LOCH ARD is significant for being one of the largest collections of artefacts from this shipwreck in Victoria. It is significant for its association with the shipwreck, which is on the Victorian Heritage Register (VHR S417). The collection is significant because of the relationship between the objects, as together they have a high potential to interpret the story of the LOCH ARD. The LOCH ARD collection is archaeologically significant as the remains of a large international passenger and cargo ship. The LOCH ARD collection is historically significant for representing aspects of Victoria’s shipping history and its potential to interpret sub-theme 1.5 of Victoria’s Framework of Historical Themes (living with natural processes). The collection is also historically significant for its association with the LOCH ARD, which was one of the worst and best known shipwrecks in Victoria’s history. Unrestored tea spoon from the wreck of the LOCH ARD. The spoon design has a flattened fiddle-back handle, with a thin stem or shank, flared collar, and elongated bowl. The spoons metallic composition is a thin layer of brass alloy which has partially corroded back to a nickel-silver base metal. Only 15% of original electroplating remains with verdigris on 5% of spoon surface. Outlines of five makers marks are visible but details are obscured.flagstaff hill maritime museum, shipwreck coast, great ocean road, loch line, loch ard, mutton bird island, loch ard gorge, electroplated cutlery, loch ard shipwreck, nickel silver, william page & co, birmingham, brass plating, makers marks -
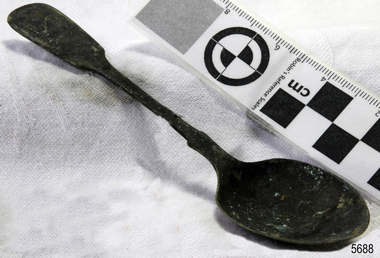 Flagstaff Hill Maritime Museum and Village
Spoon, circa 1878
This tea spoon is from the wreck of the LOCH ARD, a Loch Line ship of 1,693 tons which sailed from Gravesend, London, on 2 March 1878 with 17 passengers and a crew of 36 under Captain George Gibbs. “The intention was to discharge cargo in Melbourne, before returning to London via the Horn with wool and wheat”. Instead, on 1 June 1878, after 90 days at sea, she struck the sandstone cliffs of Mutton Bird Island on the south west coast of Victoria, and sank with the loss of 52 lives and all her cargo. The manifest of the LOCH ARD listed an array of manufactured goods and bulk metals being exported to the Colony of Victoria, with a declared value of £53,700. (202 bills of lading show an actual invoice value of £68, 456, with insurance underwriting to £30,000 of all cargo). Included in the manifest is the item of “Tin hardware & cutlery £7,530”. This teaspoon is one of 482 similar items of electro-plated cutlery from the LOCH ARD site, comprising spoons and forks of various sizes but all sharing the same general shape or design and metallic composition. 49 of these pieces display a legible makers’ mark — the initials “W” and “P” placed within a raised diamond outline, which is in turn contained within a sunken crown shape — identifying the manufacturer as William Page & Co of Birmingham. An electroplater’s makers’ marks, unlike sterling silver hallmarks, are not consistent identifiers of quality or date and place of manufacture. A similar line of five impressions was usually made to impress the consumer with an implication of industry standards, but what each one actually signified was not regulated and so they varied according to the whim of the individual foundry. In this case, the maker’s marks are often obscured by sedimentary accretion or removed by corrosion after a century of submersion in the ocean. However sufficient detail has survived to indicate that these samples of electro-plated cutlery probably originated from the same consignment in the LOCH ARD’s cargo. The following descriptions of maker’s marks are drawn from 255 tea spoons, 125 dessert spoons, and 99 table forks. These marks are clearly visible in 66 instances, while the same sequence of general outlines, or depression shapes, is discernible in another 166 examples. 1. A recessed Crown containing a raised Diamond outline and the initials “W” and “P” (the recognised trademark of William Page & Co) 2. An impressed Ellipse containing a raised, pivoted, Triangle in its lower part and bearing a Resurrection Cross on its upper section (a possible dissenting church symbol reflecting religious affiliation); OR a rounded Square impression containing a raised, ‘lazy’, letter “B” (possibly mimicking sterling silver hallmark signifying city of manufacture i.e. Birmingham) 3. An impressed rounded Square filled with a raised Maltese Cross (the base metal composite of nickel silver was also known as ‘German silver’ after its Berlin inventors in 1823) 4. A recessed Circle containing a Crab or Scarab Beetle image; OR a recessed Circle containing a rotated ‘fleur de lys’ or ‘fasces’ design 5. A depressed Diamond shape enclosing a large raised letter “R” and a small raised letter “D” (mimicking the U.K. Patent Office stamp which abbreviated the term ‘registered’ to “RD”, but also included date and class of patent) Suggested trade names for William Page & Co’s particular blend of brass plating are ‘roman silver’ or ‘silverite’. This copper alloy polishes to a lustrous gold when new, discolouring to a murky grey with greenish hue when neglected. HISTORY OF THE LOCH ARD The LOCH ARD belonged to the famous Loch Line which sailed many ships from England to Australia. Built in Glasgow by Barclay, Curdle and Co. in 1873, the LOCH ARD was a three-masted square rigged iron sailing ship. The ship measured 262ft 7" (79.87m) in length, 38ft (11.58m) in width, 23ft (7m) in depth and had a gross tonnage of 1693 tons. The LOCH ARD's main mast measured a massive 150ft (45.7m) in height. LOCH ARD made three trips to Australia and one trip to Calcutta before its final voyage. LOCH ARD left England on March 2, 1878, under the command of Captain Gibbs, a newly married, 29 year old. She was bound for Melbourne with a crew of 37, plus 17 passengers and a load of cargo. The general cargo reflected the affluence of Melbourne at the time. On board were straw hats, umbrella, perfumes, clay pipes, pianos, clocks, confectionary, linen and candles, as well as a heavier load of railway irons, cement, lead and copper. There were items included that intended for display in the Melbourne International Exhibition in 1880. The voyage to Port Phillip was long but uneventful. At 3am on June 1, 1878, Captain Gibbs was expecting to see land and the passengers were becoming excited as they prepared to view their new homeland in the early morning. But LOCH ARD was running into a fog which greatly reduced visibility. Captain Gibbs was becoming anxious as there was no sign of land or the Cape Otway lighthouse. At 4am the fog lifted. A man aloft announced that he could see breakers. The sheer cliffs of Victoria's west coast came into view, and Captain Gibbs realised that the ship was much closer to them than expected. He ordered as much sail to be set as time would permit and then attempted to steer the vessel out to sea. On coming head on into the wind, the ship lost momentum, the sails fell limp and LOCH ARD's bow swung back. Gibbs then ordered the anchors to be released in an attempt to hold its position. The anchors sank some 50 fathoms - but did not hold. By this time LOCH ARD was among the breakers and the tall cliffs of Mutton Bird Island rose behind the ship. Just half a mile from the coast, the ship's bow was suddenly pulled around by the anchor. The captain tried to tack out to sea, but the ship struck a reef at the base of Mutton Bird Island, near Port Campbell. Waves broke over the ship and the top deck was loosened from the hull. The masts and rigging came crashing down knocking passengers and crew overboard. When a lifeboat was finally launched, it crashed into the side of LOCH ARD and capsized. Tom Pearce, who had launched the boat, managed to cling to its overturned hull and shelter beneath it. He drifted out to sea and then on the flood tide came into what is now known as LOCH ARD Gorge. He swam to shore, bruised and dazed, and found a cave in which to shelter. Some of the crew stayed below deck to shelter from the falling rigging but drowned when the ship slipped off the reef into deeper water. Eva Carmichael had raced onto deck to find out what was happening only to be confronted by towering cliffs looming above the stricken ship. In all the chaos, Captain Gibbs grabbed Eva and said, "If you are saved Eva, let my dear wife know that I died like a sailor". That was the last Eva Carmichael saw of the captain. She was swept off the ship by a huge wave. Eva saw Tom Pearce on a small rocky beach and yelled to attract his attention. He dived in and swam to the exhausted woman and dragged her to shore. He took her to the cave and broke open case of brandy which had washed up on the beach. He opened a bottle to revive the unconscious woman. A few hours later Tom scaled a cliff in search of help. He followed hoof prints and came by chance upon two men from nearby Glenample Station three and a half miles away. In a state of exhaustion, he told the men of the tragedy. Tom returned to the gorge while the two men rode back to the station to get help. By the time they reached LOCH ARD Gorge, it was cold and dark. The two shipwreck survivors were taken to Glenample Station to recover. Eva stayed at the station for six weeks before returning to Ireland, this time by steamship. In Melbourne, Tom Pearce received a hero's welcome. He was presented with the first gold medal of the Royal Humane Society of Victoria and a £1000 cheque from the Victorian Government. Concerts were performed to honour the young man's bravery and to raise money for those who lost family in the LOCH ARD disaster. Of the 54 crew members and passengers on board, only two survived: the apprentice, Tom Pearce and the young woman passenger, Eva Carmichael, who lost all of her family in the tragedy. Ten days after the LOCH ARD tragedy, salvage rights to the wreck were sold at auction for £2,120. Cargo valued at £3,000 was salvaged and placed on the beach, but most washed back into the sea when another storm developed. The wreck of LOCH ARD still lies at the base of Mutton Bird Island. Much of the cargo has now been salvaged and some was washed up into what is now known as LOCH ARD Gorge. Cargo and artefacts have also been illegally salvaged over many years before protective legislation was introduced. One of the most unlikely pieces of cargo to have survived the shipwreck was a Minton porcelain peacock - one of only seven in the world. The peacock was destined for the Melbourne International Exhibition in 1880. It had been well packed, which gave it adequate protection during the violent storm. Today, the Minton peacock can be seen at the Flagstaff Hill Maritime Museum in Warrnambool. From Australia's most dramatic shipwreck it has now become Australia's most valuable shipwreck artefact and is one of very few 'objects' on the Victorian State Heritage Register. The LOCH ARD shipwreck is of State significance – Victorian Heritage Register S 417. Flagstaff Hill’s collection of artefacts from LOCH ARD is significant for being one of the largest collections of artefacts from this shipwreck in Victoria. It is significant for its association with the shipwreck, which is on the Victorian Heritage Register (VHR S417). The collection is significant because of the relationship between the objects, as together they have a high potential to interpret the story of the LOCH ARD. The LOCH ARD collection is archaeologically significant as the remains of a large international passenger and cargo ship. The LOCH ARD collection is historically significant for representing aspects of Victoria’s shipping history and its potential to interpret sub-theme 1.5 of Victoria’s Framework of Historical Themes (living with natural processes). The collection is also historically significant for its association with the LOCH ARD, which was one of the worst and best known shipwrecks in Victoria’s history. Unrestored tea spoon from the wreck of the LOCH ARD. The spoon design has a flattened fiddle-back handle, with a thin stem or shank, flared collar, and elongated bowl. The spoons metallic composition is a thin layer of brass alloy which has partially corroded back to a nickel-silver base metal. Only 10% of original electroplating remains as a dull bronze colour. Outlines of five makers marks are visible.flagstaff hill, warrnambool, shipwrecked coast, flagstaff hill maritime museum, maritime museum, shipwreck coast, flagstaff hill maritime village, great ocean road, loch line, loch ard, captain gibbs, eva carmichael, tom pearce, glenample station, mutton bird island, electroplated cutlery, loch ard shipwreck, nickel silver, william page & co, birmingham, brass plating, makers marks -
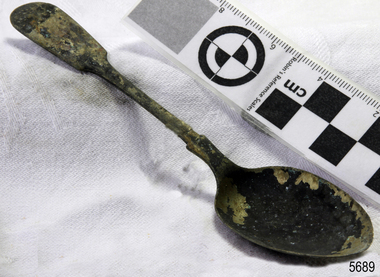 Flagstaff Hill Maritime Museum and Village
Spoon, circa 1878
This tea spoon is from the wreck of the LOCH ARD, a Loch Line ship of 1,693 tons which sailed from Gravesend, London, on 2 March 1878 with 17 passengers and a crew of 36 under Captain George Gibbs. “The intention was to discharge cargo in Melbourne, before returning to London via the Horn with wool and wheat”. Instead, on 1 June 1878, after 90 days at sea, she struck the sandstone cliffs of Mutton Bird Island on the south west coast of Victoria, and sank with the loss of 52 lives and all her cargo. The manifest of the LOCH ARD listed an array of manufactured goods and bulk metals being exported to the Colony of Victoria, with a declared value of £53,700. (202 bills of lading show an actual invoice value of £68, 456, with insurance underwriting to £30,000 of all cargo). Included in the manifest is the item of “Tin hardware & cutlery £7,530”. This teaspoon is one of 482 similar items of electro-plated cutlery from the LOCH ARD site, comprising spoons and forks of various sizes but all sharing the same general shape or design and metallic composition. 49 of these pieces display a legible makers’ mark — the initials “W” and “P” placed within a raised diamond outline, which is in turn contained within a sunken crown shape — identifying the manufacturer as William Page & Co of Birmingham. An electroplater’s makers’ marks, unlike sterling silver hallmarks, are not consistent identifiers of quality or date and place of manufacture. A similar line of five impressions was usually made to impress the consumer with an implication of industry standards, but what each one actually signified was not regulated and so they varied according to the whim of the individual foundry. In this case, the maker’s marks are often obscured by sedimentary accretion or removed by corrosion after a century of submersion in the ocean. However sufficient detail has survived to indicate that these samples of electro-plated cutlery probably originated from the same consignment in the LOCH ARD’s cargo. The following descriptions of maker’s marks are drawn from 255 tea spoons, 125 dessert spoons, and 99 table forks. These marks are clearly visible in 66 instances, while the same sequence of general outlines, or depression shapes, is discernible in another 166 examples. 1. A recessed Crown containing a raised Diamond outline and the initials “W” and “P” (the recognised trademark of William Page & Co) 2. An impressed Ellipse containing a raised, pivoted, Triangle in its lower part and bearing a Resurrection Cross on its upper section (a possible dissenting church symbol reflecting religious affiliation); OR a rounded Square impression containing a raised, ‘lazy’, letter “B” (possibly mimicking sterling silver hallmark signifying city of manufacture i.e. Birmingham) 3. An impressed rounded Square filled with a raised Maltese Cross (the base metal composite of nickel silver was also known as ‘German silver’ after its Berlin inventors in 1823) 4. A recessed Circle containing a Crab or Scarab Beetle image; OR a recessed Circle containing a rotated ‘fleur de lys’ or ‘fasces’ design 5. A depressed Diamond shape enclosing a large raised letter “R” and a small raised letter “D” (mimicking the U.K. Patent Office stamp which abbreviated the term ‘registered’ to “RD”, but also included date and class of patent) Suggested trade names for William Page & Co’s particular blend of brass plating are ‘roman silver’ or ‘silverite’. This copper alloy polishes to a lustrous gold when new, discolouring to a murky grey with greenish hue when neglected. HISTORY OF THE LOCH ARD The LOCH ARD belonged to the famous Loch Line which sailed many ships from England to Australia. Built in Glasgow by Barclay, Curdle and Co. in 1873, the LOCH ARD was a three-masted square rigged iron sailing ship. The ship measured 262ft 7" (79.87m) in length, 38ft (11.58m) in width, 23ft (7m) in depth and had a gross tonnage of 1693 tons. The LOCH ARD's main mast measured a massive 150ft (45.7m) in height. LOCH ARD made three trips to Australia and one trip to Calcutta before its final voyage. LOCH ARD left England on March 2, 1878, under the command of Captain Gibbs, a newly married, 29 year old. She was bound for Melbourne with a crew of 37, plus 17 passengers and a load of cargo. The general cargo reflected the affluence of Melbourne at the time. On board were straw hats, umbrella, perfumes, clay pipes, pianos, clocks, confectionary, linen and candles, as well as a heavier load of railway irons, cement, lead and copper. There were items included that intended for display in the Melbourne International Exhibition in 1880. The voyage to Port Phillip was long but uneventful. At 3am on June 1, 1878, Captain Gibbs was expecting to see land and the passengers were becoming excited as they prepared to view their new homeland in the early morning. But LOCH ARD was running into a fog which greatly reduced visibility. Captain Gibbs was becoming anxious as there was no sign of land or the Cape Otway lighthouse. At 4am the fog lifted. A man aloft announced that he could see breakers. The sheer cliffs of Victoria's west coast came into view, and Captain Gibbs realised that the ship was much closer to them than expected. He ordered as much sail to be set as time would permit and then attempted to steer the vessel out to sea. On coming head on into the wind, the ship lost momentum, the sails fell limp and LOCH ARD's bow swung back. Gibbs then ordered the anchors to be released in an attempt to hold its position. The anchors sank some 50 fathoms - but did not hold. By this time LOCH ARD was among the breakers and the tall cliffs of Mutton Bird Island rose behind the ship. Just half a mile from the coast, the ship's bow was suddenly pulled around by the anchor. The captain tried to tack out to sea, but the ship struck a reef at the base of Mutton Bird Island, near Port Campbell. Waves broke over the ship and the top deck was loosened from the hull. The masts and rigging came crashing down knocking passengers and crew overboard. When a lifeboat was finally launched, it crashed into the side of LOCH ARD and capsized. Tom Pearce, who had launched the boat, managed to cling to its overturned hull and shelter beneath it. He drifted out to sea and then on the flood tide came into what is now known as LOCH ARD Gorge. He swam to shore, bruised and dazed, and found a cave in which to shelter. Some of the crew stayed below deck to shelter from the falling rigging but drowned when the ship slipped off the reef into deeper water. Eva Carmichael had raced onto deck to find out what was happening only to be confronted by towering cliffs looming above the stricken ship. In all the chaos, Captain Gibbs grabbed Eva and said, "If you are saved Eva, let my dear wife know that I died like a sailor". That was the last Eva Carmichael saw of the captain. She was swept off the ship by a huge wave. Eva saw Tom Pearce on a small rocky beach and yelled to attract his attention. He dived in and swam to the exhausted woman and dragged her to shore. He took her to the cave and broke open case of brandy which had washed up on the beach. He opened a bottle to revive the unconscious woman. A few hours later Tom scaled a cliff in search of help. He followed hoof prints and came by chance upon two men from nearby Glenample Station three and a half miles away. In a state of exhaustion, he told the men of the tragedy. Tom returned to the gorge while the two men rode back to the station to get help. By the time they reached LOCH ARD Gorge, it was cold and dark. The two shipwreck survivors were taken to Glenample Station to recover. Eva stayed at the station for six weeks before returning to Ireland, this time by steamship. In Melbourne, Tom Pearce received a hero's welcome. He was presented with the first gold medal of the Royal Humane Society of Victoria and a £1000 cheque from the Victorian Government. Concerts were performed to honour the young man's bravery and to raise money for those who lost family in the LOCH ARD disaster. Of the 54 crew members and passengers on board, only two survived: the apprentice, Tom Pearce and the young woman passenger, Eva Carmichael, who lost all of her family in the tragedy. Ten days after the LOCH ARD tragedy, salvage rights to the wreck were sold at auction for £2,120. Cargo valued at £3,000 was salvaged and placed on the beach, but most washed back into the sea when another storm developed. The wreck of LOCH ARD still lies at the base of Mutton Bird Island. Much of the cargo has now been salvaged and some was washed up into what is now known as LOCH ARD Gorge. Cargo and artefacts have also been illegally salvaged over many years before protective legislation was introduced. One of the most unlikely pieces of cargo to have survived the shipwreck was a Minton porcelain peacock - one of only seven in the world. The peacock was destined for the Melbourne International Exhibition in 1880. It had been well packed, which gave it adequate protection during the violent storm. Today, the Minton peacock can be seen at the Flagstaff Hill Maritime Museum in Warrnambool. From Australia's most dramatic shipwreck it has now become Australia's most valuable shipwreck artefact and is one of very few 'objects' on the Victorian State Heritage Register. The LOCH ARD shipwreck is of State significance – Victorian Heritage Register S 417. Flagstaff Hill’s collection of artefacts from LOCH ARD is significant for being one of the largest collections of artefacts from this shipwreck in Victoria. It is significant for its association with the shipwreck, which is on the Victorian Heritage Register (VHR S417). The collection is significant because of the relationship between the objects, as together they have a high potential to interpret the story of the LOCH ARD. The LOCH ARD collection is archaeologically significant as the remains of a large international passenger and cargo ship. The LOCH ARD collection is historically significant for representing aspects of Victoria’s shipping history and its potential to interpret sub-theme 1.5 of Victoria’s Framework of Historical Themes (living with natural processes). The collection is also historically significant for its association with the LOCH ARD, which was one of the worst and best known shipwrecks in Victoria’s history. Unrestored tea spoon from the wreck of the LOCH ARD. The spoon design has a flattened fiddle-back handle, with a thin stem or shank, flared collar, and elongated bowl. The spoons metallic composition is a thin layer of brass alloy which has partially corroded back to a nickel-silver base metal. 50% of original electroplating remains. Two of five makers marks are legible: (1) Trade Mark (4) Crab Designflagstaff hill, warrnambool, shipwrecked coast, flagstaff hill maritime museum, maritime museum, shipwreck coast, flagstaff hill maritime village, great ocean road, loch line, loch ard, captain gibbs, eva carmichael, tom pearce, glenample station, mutton bird island, loch ard gorge, electroplated cutlery, loch ard shipwreck, nickel silver, william page & co, birmingham, brass plating, makers marks -
 Ballarat Heritage Services
Digital photographs, L.J. Gervasoni, Prof McIntyre and Philip Slobom, c2009
Environmental approach to preserving Kew Court House 4 June 2010 Paint stripping from older buildings can be a hazardous task. The City of Boroondara has found an environmentally sustainable solution for the works at local heritage icon, the Kew Police Station and Court House. Council used an organic based paint stripping alternative as part of the repairs to the rendering on the building facade. Over nearly three months, the damaged and unsound render was removed, the paint was stripped and the render was repainted. Usually, paint is removed via high pressure water cleaning or sandblasting. This is a harsh method and involves combining extreme high amounts of pressure, water and sand and is highly toxic. It also creates high noise levels. In this 'green' project, Council used a soy bean paint stripper. The process uses a paste-like substance, which is highly effective, non toxic and biodegradable, and applied by hand. Initially, a bandage is applied (much like a leg waxing strip) over the top of paste. It is allowed to dry and then the bandage is stripped off. Noise was kept to a minimum by using the paint stripping alternative. Scrapings and bandages are then bagged and sent to the tip as landfill, so it does not end up in our water supply. The waste and debris don’t run-off into drains, and the bags and bi-products are biodegradable. Studley Ward Councillor Phillip Healey explained that soy bean paint removal is not greatly used in Melbourne or the local government sector. "We know of special cases where it has been used, such as high profile projects like Sydney Harbour Bridge, but Boroondara is one of the first in Victoria to employ this natural plant-based paint-stripping treatment to a large-scale building," Cr Healey said. "What this means is that no harmful substances were used and no injury was caused, soy paint removal also preserves, protects and restores the heritage integrity and decorative stone masonry features of the historic building. "This is a terrific example of our commitment to 'enhancing the environment' which is one of our key directions in the 2010–15 Council Plan." The restoration of the Kew Court House and Police Station is expected to be completed in the year ahead. Council purchased the heritage building in 2007 with the intention for it to be restored and used for the community. The building required extensive renovation including repair of the slate roof and ventilation dome, and the renovation plans include a new foyer, bathrooms and kitchen to ensure the venue meets a broad range of community needs. Heritage Victoria helped fund the cost of the roof repairs with a grant of $250,000, along with the Australian Government contributing $330,000 through its Regional and Local Community Infrastructure Program. Restoration Underway Concept plans for a new performance and exhibition space at the Kew Court House and Police Station have been developed by the City of Boroondara. Two years ago, Council Purchased the Kew Court House and Police Station from the State Government for $825,000 with the intention for it to be restored and used for the community. The building requires extensive renovation including repair of the slate roof and ventilation dome. The renovation plans include a new foyer, bathrooms and kitchen to ensure the venue meets a broad range of community needs. The restoration has been assisted with a Federal Government grant of $330,000 under the Regional and Local Community Infrastructure Program. In 2008, Council was also successful in obtaining a Heritage Victoria Grant of $250,000 towards the costs of the roof repairs. Having satisfied the necessary permit requirements, works are about to commence using slate of a similar quality to the original. The City of Boroondara would like to thank all residents and businesses who have contributed to the Kew Court House Restoration Appeal which has raised $650,000. Special thanks go to a private donor who donated $250,000 and the Kew Senior Citizens Club which contributed $50,000. NEWS FLASH 14th March “Council moves to provide certainty for the restoration of the courthouse”. In a historic meeting last night 13th March 07 at Boroondara Council voted overwhelmingly to complete the purchase of the Kew Court House. The partnership continues between the Kew Court House Restoration Appeal and the Council to see this project through. The project now has the overwhelming support of Council. “It is no longer about “if” it is about “when” the doors will re open” said Prof Peter McIntyre. With the property secured the fundraising can now be completed without the encumbrances and we know the restoration will be undertaken as the funds become available from the appeal. Work can commence as soon as significant fund raising is achieved. “The community, philanthropists and corporations can now enter this project with certainty. 7th March At the Council meeting on 5th March, following many hours of debate a motion was passed by 5 to 4 vote to purchase the Kew Court House and Police Station outright. As of 7th March Cr Dick Menting lodged a rescission notice. This means that there was another Council meeting at 6pm, Tuesday 13th March at Council Chambers. MEDIA RELEASE - Kew, 3rd December 2006 APPEAL LAUNCHED TO SAVE A NATIONAL TREASURE On the morning of Saturday 18th. November 2006 the people of Kew were aroused by the triumphant sound of the Boroondara Brass which had assembled outside the former Kew Police Station. After four long years of neglect, the precinct was being heralded back to life, and what a heartwarming sound it was for all those early shoppers who gathered to hear Cr. Phillip Healey introduce Patrons and supporters of the Save the Court House campaign. Following the speeches, the "Thermometer" was unveiled and the Appeal was formally under way. The various committees have worked very hard during these past weeks. The Kew Court House Arts Association Inc. has been formed under the leadership of Graeme McCoubrie. This organization brings all the amateur theatre groups in the City of Boroondara together with a view to providing them with a permanent performing space within the former Court House. As well as intimate theatre, there will be provision for the staging of instrumental and choral performances before an audience of 40 to 50 people. The Police Station will compliment the function of the Court House by providing a venue for artist groups to exhibit their work, for the Historical Societies of Boroondara to meet, and for study groups to meet, for activities such as play and poetry readings. It will be a Hub for the Arts in Kew. Of course none of this can happen unless the money to pay for restoration of the buildings is raised, and we only have until March 2007 in which to do this. The City of Boroondara, Kew Historical Society and the East Kew Community Bank are working together as a team to make this dream a reality, but WE NEED YOUR HELP. This is a fantastic one-off opportunity, and it must not be wasted. Donations to the Appeal can be made through the Kew East Kew Community Bank or any branch of the Bendigo Bank, or through the Kew Historical Society Inc., P.O. Box 175 Kew Vic 3101. All donations over $2 are tax deductible through the Community Enterprise Foundation. End Media Release Kew Courthouse future looks bright The State Government has accepted an offer from the local government of Boroondara to purchase the former Kew Courthouse and Police Station, Minister for Finance John Lenders said today. In a joint statement with the Mayor of Boroondara, Councillor Jack Wegman, Mr Lenders said he was pleased that agreement had been reached and the contract of sale document finalised. “I welcome the Council making this step towards purchasing this property after recent negotiations,” Mr Lenders said. “The settlement date for the purchase of the property is March 2007. The State government sold the property to Council at a reduced cost of $825,000 for community use. The full value of the buildings on the commercial marketplace was estimated to be about $2million,” he said. Cr Wegman said the Contract of Sale provides that if the funds cannot be raised to restore the property for use as community buildings then they will be returned to the State government. In relation to this additional funding to restore and modernise the buildings, Council and the community will work together over the next eight months, with the encouragement of the State government, Cr Wegman said. Mr Lenders said both he and the Premier had advised the Council of fundraising opportunities to help the Council convert the property for its future use. Cr Wegman noted that applications for funding from the Community Support Fund and for State government heritage grants were being processed. “Council has agreed to a Memorandum of Understanding with the Kew Historical Society outlining arrangements for the Kew Court House Restoration Appeal and Council is delighted with the level of support shown by the community and is confident of a bright future for these historic buildings.” Mr Lenders said the Bracks Government is committed to securing the best outcome when buildings that have once served the community outlive their original purpose. “There is a responsibility for Governments to practice good financial management and achieve the best possible price when an asset is longer used by the State,” he said. “There is also a responsibility to consider the local community. The Government and City of Boroondara have worked hard to achieve a balance between these two interests.” The building ceased to operate as a courthouse in 1971 and as a police station in 2002. Part of the building was also used as a post office and this section of the building was sold by the Commonwealth in 1992 to a private owner and is currently run as a licensed restaurant. It is listed on the State's Heritage Register as a place of historical and architectural significance and is protected by the Victorian Heritage Act. Created: 30 August 2006 Last Update: 10 January 2007 kew, kew court house, phillip slobom, town crier, professor peter mcintyre -
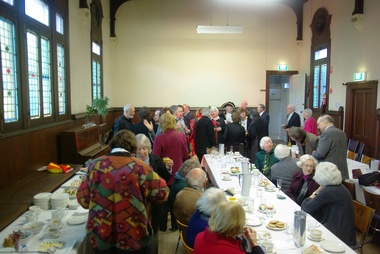 Ballarat Heritage Services
Photograph - Digital photographs, L.J. Gervasoni, Kew Historical Society in the Former Kew Court House, c2009
Environmental approach to preserving Kew Court House 4 June 2010 Paint stripping from older buildings can be a hazardous task. The City of Boroondara has found an environmentally sustainable solution for the works at local heritage icon, the Kew Police Station and Court House. Council used an organic based paint stripping alternative as part of the repairs to the rendering on the building facade. Over nearly three months, the damaged and unsound render was removed, the paint was stripped and the render was repainted. Usually, paint is removed via high pressure water cleaning or sandblasting. This is a harsh method and involves combining extreme high amounts of pressure, water and sand and is highly toxic. It also creates high noise levels. In this 'green' project, Council used a soy bean paint stripper. The process uses a paste-like substance, which is highly effective, non toxic and biodegradable, and applied by hand. Initially, a bandage is applied (much like a leg waxing strip) over the top of paste. It is allowed to dry and then the bandage is stripped off. Noise was kept to a minimum by using the paint stripping alternative. Scrapings and bandages are then bagged and sent to the tip as landfill, so it does not end up in our water supply. The waste and debris don’t run-off into drains, and the bags and bi-products are biodegradable. Studley Ward Councillor Phillip Healey explained that soy bean paint removal is not greatly used in Melbourne or the local government sector. "We know of special cases where it has been used, such as high profile projects like Sydney Harbour Bridge, but Boroondara is one of the first in Victoria to employ this natural plant-based paint-stripping treatment to a large-scale building," Cr Healey said. "What this means is that no harmful substances were used and no injury was caused, soy paint removal also preserves, protects and restores the heritage integrity and decorative stone masonry features of the historic building. "This is a terrific example of our commitment to 'enhancing the environment' which is one of our key directions in the 2010–15 Council Plan." The restoration of the Kew Court House and Police Station is expected to be completed in the year ahead. Council purchased the heritage building in 2007 with the intention for it to be restored and used for the community. The building required extensive renovation including repair of the slate roof and ventilation dome, and the renovation plans include a new foyer, bathrooms and kitchen to ensure the venue meets a broad range of community needs. Heritage Victoria helped fund the cost of the roof repairs with a grant of $250,000, along with the Australian Government contributing $330,000 through its Regional and Local Community Infrastructure Program. Restoration Underway Concept plans for a new performance and exhibition space at the Kew Court House and Police Station have been developed by the City of Boroondara. Two years ago, Council Purchased the Kew Court House and Police Station from the State Government for $825,000 with the intention for it to be restored and used for the community. The building requires extensive renovation including repair of the slate roof and ventilation dome. The renovation plans include a new foyer, bathrooms and kitchen to ensure the venue meets a broad range of community needs. The restoration has been assisted with a Federal Government grant of $330,000 under the Regional and Local Community Infrastructure Program. In 2008, Council was also successful in obtaining a Heritage Victoria Grant of $250,000 towards the costs of the roof repairs. Having satisfied the necessary permit requirements, works are about to commence using slate of a similar quality to the original. The City of Boroondara would like to thank all residents and businesses who have contributed to the Kew Court House Restoration Appeal which has raised $650,000. Special thanks go to a private donor who donated $250,000 and the Kew Senior Citizens Club which contributed $50,000. NEWS FLASH 14th March “Council moves to provide certainty for the restoration of the courthouse”. In a historic meeting last night 13th March 07 at Boroondara Council voted overwhelmingly to complete the purchase of the Kew Court House. The partnership continues between the Kew Court House Restoration Appeal and the Council to see this project through. The project now has the overwhelming support of Council. “It is no longer about “if” it is about “when” the doors will re open” said Prof Peter McIntyre. With the property secured the fundraising can now be completed without the encumbrances and we know the restoration will be undertaken as the funds become available from the appeal. Work can commence as soon as significant fund raising is achieved. “The community, philanthropists and corporations can now enter this project with certainty. 7th March At the Council meeting on 5th March, following many hours of debate a motion was passed by 5 to 4 vote to purchase the Kew Court House and Police Station outright. As of 7th March Cr Dick Menting lodged a rescission notice. This means that there was another Council meeting at 6pm, Tuesday 13th March at Council Chambers. MEDIA RELEASE - Kew, 3rd December 2006 APPEAL LAUNCHED TO SAVE A NATIONAL TREASURE On the morning of Saturday 18th. November 2006 the people of Kew were aroused by the triumphant sound of the Boroondara Brass which had assembled outside the former Kew Police Station. After four long years of neglect, the precinct was being heralded back to life, and what a heartwarming sound it was for all those early shoppers who gathered to hear Cr. Phillip Healey introduce Patrons and supporters of the Save the Court House campaign. Following the speeches, the "Thermometer" was unveiled and the Appeal was formally under way. The various committees have worked very hard during these past weeks. The Kew Court House Arts Association Inc. has been formed under the leadership of Graeme McCoubrie. This organization brings all the amateur theatre groups in the City of Boroondara together with a view to providing them with a permanent performing space within the former Court House. As well as intimate theatre, there will be provision for the staging of instrumental and choral performances before an audience of 40 to 50 people. The Police Station will compliment the function of the Court House by providing a venue for artist groups to exhibit their work, for the Historical Societies of Boroondara to meet, and for study groups to meet, for activities such as play and poetry readings. It will be a Hub for the Arts in Kew. Of course none of this can happen unless the money to pay for restoration of the buildings is raised, and we only have until March 2007 in which to do this. The City of Boroondara, Kew Historical Society and the East Kew Community Bank are working together as a team to make this dream a reality, but WE NEED YOUR HELP. This is a fantastic one-off opportunity, and it must not be wasted. Donations to the Appeal can be made through the Kew East Kew Community Bank or any branch of the Bendigo Bank, or through the Kew Historical Society Inc., P.O. Box 175 Kew Vic 3101. All donations over $2 are tax deductible through the Community Enterprise Foundation. End Media Release Kew Courthouse future looks bright The State Government has accepted an offer from the local government of Boroondara to purchase the former Kew Courthouse and Police Station, Minister for Finance John Lenders said today. In a joint statement with the Mayor of Boroondara, Councillor Jack Wegman, Mr Lenders said he was pleased that agreement had been reached and the contract of sale document finalised. “I welcome the Council making this step towards purchasing this property after recent negotiations,” Mr Lenders said. “The settlement date for the purchase of the property is March 2007. The State government sold the property to Council at a reduced cost of $825,000 for community use. The full value of the buildings on the commercial marketplace was estimated to be about $2million,” he said. Cr Wegman said the Contract of Sale provides that if the funds cannot be raised to restore the property for use as community buildings then they will be returned to the State government. In relation to this additional funding to restore and modernise the buildings, Council and the community will work together over the next eight months, with the encouragement of the State government, Cr Wegman said. Mr Lenders said both he and the Premier had advised the Council of fundraising opportunities to help the Council convert the property for its future use. Cr Wegman noted that applications for funding from the Community Support Fund and for State government heritage grants were being processed. “Council has agreed to a Memorandum of Understanding with the Kew Historical Society outlining arrangements for the Kew Court House Restoration Appeal and Council is delighted with the level of support shown by the community and is confident of a bright future for these historic buildings.” Mr Lenders said the Bracks Government is committed to securing the best outcome when buildings that have once served the community outlive their original purpose. “There is a responsibility for Governments to practice good financial management and achieve the best possible price when an asset is longer used by the State,” he said. “There is also a responsibility to consider the local community. The Government and City of Boroondara have worked hard to achieve a balance between these two interests.” The building ceased to operate as a courthouse in 1971 and as a police station in 2002. Part of the building was also used as a post office and this section of the building was sold by the Commonwealth in 1992 to a private owner and is currently run as a licensed restaurant. It is listed on the State's Heritage Register as a place of historical and architectural significance and is protected by the Victorian Heritage Act. Created: 30 August 2006 Last Update: 10 January 2007 Colour photograph of the Kew Historical Society holding an event in the Former Kew Court House.kew, kew court house, kew historical society, meeting, city of boroondara -
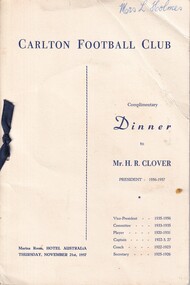 Carlton Football Club
Dinner Program & Menu, Carlton Football Club November 21st 1957 to Mr H R Clover, 1957
Dinner to Mr H R Clover player Career : 1920-24, 1926-31 Debut : Round 2, 1920 vs. Richmond, aged 25 years, 46 days Carlton Player No. 346 Games : 147 Goals : 396 Guernsey No. 1 Last Game : Semi Final, 1931 vs. Collingwood, aged 36 years, 180 days Height : 185 cm (6 ft. 1 in.) Weight : 86.5 kg (13 stone, 9 lbs.) DOB : 20 March, 1895 League Leading Goalkicker: 1922 Leading Goalkicker: 1920, 1921, 1922, 1923, 1926, 1928 Best and Fairest: 1929 Captain Coach: 1922-1924, 1927 Champion of the Colony: 1921 VFL AFL Hall of Fame Carlton Hall of Fame Team of the Century President: 1956-57 Vice President: 1932, 1935-54 Club Secretary: 1925-26 Horace “Horrie” Clover was Carlton’s star centre half-forward of the 1920’s; a high flying, long-kicking champion who enjoyed a stellar career with the Old Dark Navy Blues, then went on to be one of our longest-serving administrators. But even before he took the field for Carlton, Clover had to conquer the odds on the battlefields of France in World War 1. From Maryborough in central Victoria, Horrie enlisted in the 1st AIF in September 1915. After basic training, he embarked for France with reinforcements for the 7th Battalion in January of 1916. Soon pitched into the horrors of trench warfare, he fought and survived until September of that year, when he was transferred to a machine gun company and promoted to the rank of Corporal. On Christmas day, 1916, Horrie was struck down with acute appendicitis. He was evacuated to a field hospital for emergency surgery, where the doctors discovered that his appendix was gangrenous and that his life was in danger. He was immediately transferred to London for specialist treatment, and months of recuperation. Pronounced unfit for further front-line service, he was repatriated back to Australia in August 1917, and honourably discharged in May of the following year – six months before the Armistice. Having recovered, and keen to have a crack at senior football, Clover trained with Richmond and Melbourne before Carlton gave him an opportunity at VFL level. And how he delivered! In his first match in 1920 – ironically, against Richmond - he kicked four goals from centre half-forward, and hit the post three times! By the end of his first season at Princes Park, Clover was one of Carlton’s drawcards. Former Australian Prime Minister Sir Robert Menzies was just one of the many Carlton fans who were captivated; “he was the most artistic of high marks, unforgettable at half-forward,” said Menzies. Horrie could kick a football, too. A balanced, deceptively quick mover, he was a glorious running drop-kick for goal. Playing against Richmond again at Princes Park in July, 1921, he let fly with a monster kick that was later measured at 86.26 metres – that’s 94 yards, 2 feet in imperial terms! And there are numerous other instances where he roosted the ball more than 70 metres. In round 12 of 1921, he slotted 13 goals in a game against St Kilda; a club record which still stands today. The Blues made the finals in third place in 1921 and battled through to meet Richmond for the Premiership. Then the heavens above the MCG opened up on the day before the decider, turning the ground into a quagmire. In what was to be Clover’s only Grand Final appearance, Richmond won a slogging, mauling contest by four points. While Premiership glory eluded him, Horrie was Carlton’s top goalkicker in three of his first four seasons, including 1922, where his total of 58 was the competition’s best. He was appointed captain of the Blues that same year, and in 1923 took on the dual role of captain-coach. Over 1924 / 1925, he suffered more debilitating illness that prevented him from playing all season. Unable to pull on his football boots, he took on the job of Club Secretary, and continued in that position even after returning to the field in 1926. When he did eventually resume, he formed a new, powerful Carlton forward set-up with a young Harry “Soapy” Vallence at full-forward. Twice more – in 1926 and 1928, Clover’s brilliance and accuracy in front of goal saw him at the top of Carlton’s goal-kicking, and in 1929 – aged 34, he was honoured with the captaincy of Victoria against WA in his ninth and final game in the Big Vee. show_image.php?id=205 Horrie Clover retired as a player in 1931 after 147 games. His total of 396 goals is still ranked fifth best in Carlton’s proud history (only displaced for fourth when Brendan Fevola broke through in 2007/2008) – and it should be remembered that all but a handful of his games were played at centre half-forward, not in the goal square. In 1932 he was elected Vice-President of the Carlton Football Club, but retired after one year. In February 1935 on learning of Terry Ogden's the serious illness, Clover and Newton Chandler offered their services for a blood transfusion for the club's wing man. After a blood test Chandler's blood was accepted. However, Ogden passed away the next month. Clover stood again in 1935, was elected – and spent twenty unbroken years serving his beloved Blues. He even took on the Presidency in 1956, aged 60, and was as vigorous and determined as ever in his two years in the job. Carlton Football Club mourned deeply when Horrie Clover passed away on the first day of January, 1984. Three years later, he was among the first to be inducted into the Carlton Hall of Fame. Testament to his stature in the game as a whole, he was elected to the AFL Hall of Fame in 1996; and May 2000 saw him named as one of four emergencies in Carlton’s Team of the Century. A champion in every sense of the word, he spent 37 years of his remarkable life at Princes Park. Footnote The Argus published an article on Maryborough, April 12 1930, it said; "Clover has been the leading half-forward in League ranks for some time. It takes a specialist to fill the position capably, and the Carisbrook man does this admirably. Like good wine he has improved with age, and besides being one of the greatest half forwards that has ever appeared on a football field, he is about the best all round kicker that has ever played the game. He excells in punting, drop, and place kicking. He is a great marksman and a splendid exponent, one of the greatest the district has produced, besides being a fair cricketer also." When Clover returned to football in 1926, The Argus mentioned that they thought it was the first time a member of the Permit and Umpire Committee had played in a League game. 13 GOAL AWARD Round 12, 1921 At the Carlton AGM held on Monday 27 February 1922, Horrie Clover "was presented with ball used on the occasion, the St.Kilda club having generously donated it to the Carlton officials, who had it mounted for the purpose." (Age February 22 1922) 1922 The Art Of Forward Play Horrie wrote an article for the Sporting Globe August 30 p7 To read click here> http://nla.gov.au/nla.news-article184798404 1928 Idol of Carlton Crowds - Australia's Best Centre Half Forward The Sporting Globe's football writer W. S. "Jumbo" Sharland writes about Horrie Clover To read click here> http://nla.gov.au/nla.news-article183958222 Footballer Who Gambles With Death. Daily Pictorial (Sydney) article about Horrie. http://nla.gov.au/nla.news-article246129350 1932 Jack Worrall on Clover Writing for the Australasian September 03 p7; "Take Horrie Clover as an example, a real specialist, one of the best forwards the game has seen, and the best all-round kick that has ever come under my purview. For that reason he deserves a line to himself. He played the game like a sportsman, was a glorious high mark, and could cover a great distance by either drop, punt, or place kick - a remarkable accomplishment. Many players have been notable kicks in two aspects of the game, yet none have equalled Clover in the three branches. His nearest rival as an all-round kick, though not quite as certain in his efforts, was Frank Caine, of Carlton, who, like Clover, also hailed from the country." 1933 Coming Football Champion Melbourne, Saturday A special warning was issued to the Victorian Football League delegates last night by Mr. D. H. Crone, a Carlton delegate, not to angle for a certain "coming" champion that the Carlton Club had signed up that day. At first delegates were a little puzzled at the statement, but when it was explained that Horrie Clover, former champion half-forward, had that day become the father of of a son they burst into sustained laughter. It was only by persistent ringing of the bell by the chairman that order was restored. (News (Adelaide) May 20 1933 p3) 1933 - The Place Kick A letter to The Argus via the Huon Times about the lack of place kicking expertise in the VFL. The writer mentions that he got Horrie to play football in Maryborough after he saw the then 15 y.o. place kick a ball 63 yards, and later with Carlton, Clover place kicked 8 goals in one match. To read click here> http://nla.gov.au/nla.news-article137253000 Milestones 50 Games: Round 1, 1923 vs Fitzroy 100 Games: Round 18, 1927 vs St Kilda 100 Goals: Round 18, 1921 vs Collingwood 200 Goals: Round 3, 1924 vs St Kilda 300 Goals: Round 11, 1928 vs Geelong Links Articles: The Magical 'Three Goal Average' | A Letter From Horrie | Our Flagless Greats Blueseum: Stat Shot for Horrie Clover | Career Breakdown | Clover's big goals hauls | Clover's Blueseum Image Gallery A dinner to celebrate career Horrie Clover in 1957Four Page Program & Menu 1927 -
 Eltham District Historical Society Inc
Film - Video (VHS), Jenni Mitchell, Demolition of the Shire of Eltham Offices, 1996
Poor video quality (noise and interference), incomplete and unedited raw footage. A video documenting the demolition of the Shire of Eltham offices at 895 Main Road Eltham under the direction of the Commissioners appointed for the new Shire of Nillumbik and some of the communities activities surrounding the event. The building was demolished exactly 25 years after the southern wing housing Engineering and Planning on the upper level and the Eltham Library on the ground level was opened in celebration of the Shire of Eltham's centenary. Video has lots of distortion and noise, and sections of clips dubbed over. Immediate initial footage of Jenni Mitchell talking about asbestos claims in the Shire Offices (Sigmund Jorgensen standing behind her) advising Council did a review of the building several years previously and had been cleared of health problems. Cuts to group of people standing outside front door of offices but possibly voice dub over not related ? Then the date 27 Jul 1996 on a scene flashes on screen immediately followed by an edited clip intro of title and credits with classical music track. It then opens with Jenni Mitchell driving to the Shire Offices on Saturday 27 July 1996 at 11.00am. Footage of Main Road past Pitt Street, Alistair Knox Park then entering Shire Office driveway which is fenced off and contractor signs hanging up. Scenes at rear of building showing some internal demolition has commenced. View of the Administration wing. More clips of road driving, Alistair Knox Park, Eltham Library and visitor car park for Shire Offices. Cuts to a group of people standing in access to visitor carpark with new Eltham Library in background, one being immediate former Shire of Eltham President, John Graves. Scenes of people looking through chain link fence and security guard checking front door. John Graves being filmed that someone informed him the Shire was offering the building to the Community Health Centre for $2.3 million and that if they had been offered a price of $1.1 for what it apparently was sold for they would have snapped it up. View of truck loaded with brick rubble literally struggling to ascend the hill of Library Place to exit into Main Road. Cuts to a scene looking at Eltham War memorial Hall through the Memorial Gate, then the Shillinglaw trees and large banner sign ‘Delta Demolitions’ hanging on office façade. Views of front door, old library and bluestone wall. Scene (31 Jul 1996) filmed at night of several white crosses with “RIP Community” and “RIP Democracy”. Scene (1 August 1996) again driving along Main Road towards the Shire Offices then scenes of the offices showing substantially more demolition to exterior, groups of people standing on footpath outside watching, Delta heavy demolition machines, woman holding sign “Democracy where have you gone …”, the odd person in full protection gear and breathing apparatus hand carrying materials out to place on rubbish pile in front of people standing on footpath watching (with no protection) and then stamping on it to break it creating dust, security person in hard hat (no other protection) wandering around, many groups standing around watching, news film crew, person standing on roadside edge holding signs facing traffic stating “Pirate Planning” and “ Grant us your ears” also sign on back of parked car “Elthams High Jacks”, another sign “Community Democracy”, views of crosses in Main Road median strip “RIP Community”, groups of people on footpaths and reporters conducting interviews, footage of unknown person standing with Jenni Mitchell and Sigmund Jorgensen advising people have the right to protest, Jenni Mitchell urging people to ask questions of local MP and Council and Sigmund Jorgensen referring to the three historic Shillinglaw trees with demolition machinery operating in background, Jenni Mitchell and others installing more crosses in median strip; demolition machines operating inside and outside the building, more views of onlookers including Sigmund Jorgensen then Police approaching on footpath, workers and machinery continuing to operate, views of the old library being demolished, the former Community Services department, security personnel. Scene (2 August 1996) more heavy demolition machinery in operation smashing building up, people standing around southern wing watching, view overlooking Eltham Library of train pulling in to Eltham station. Scene (7 August 1996) more heavy demolition and people wandering around with only hard hat protection, no dust protection, comments from one operator dumping a bin of material stating “wait till there’s a Hungry Jack’s here, you’ll be laughing, fuel, videos, hamburgers. You’ll be up with the rest of the world soon, you’ll have electricity and everything here, ha ha ha ha”, more heavy machinery demolition and breaking up of materials, view of Hitachi train going by and Administration wing, view inside the front door opening of the staircase leading to upper level, person walking around operating heavy machinery with a hose spraying rubble (no protective gear other than hard hat interspersed with edit cuts of meeting of Commissioners and independent observers on panel as well as members of the community in public gallery. Nillumbik Shire CEO Barry Rochford addressing the meeting., Chief Commissioner Don Cordell directly addressing Jenni Mitchell with respect to permission to take photographs, Barry Rochford continues to address the question asked of Council about the valuation of the former Shire of Eltham Office building/site, public gallery calling out asking why was building demolished, what was the urgency. Scene (14 August 1996) views of southern wing, previous single demolition operator again mocking people filming, operators working in and around building, Shillinglaw trees and largely demolished front, heavy demolition equipment at work, piles of building rubble, hose spraying water over rubble, large trucks arriving for rubble removal and loading of truck. Scene (21 August) more of the same, building virtually down, Shillinglaw trees standing tall and alone, water spraying on rubble and wattle in bloom. Cuts to Council meeting with public onlookers. Barry Rochford walks out, Wayne Phillips addresses meeting explaining one or two people shouting, members of the community challenging Council (Commissioners) about why due process appear to have been subverted. Former Shire President Robert Marshall in public audience, cuts back to Shire office carpark entrance site and sign hung on fence in front of library “Think Again!” and people standing around observing awaiting a protest demonstration erecting a large sign on stilts stating “Shell No!”, people singing a revised version of God Save the Queen (God Save Us All), Sigmund Jorgensen in attendance, Jenni Mitchell, Sigmund Jorgenson and others address the protest crowd, followed by people mingling, music being played then people standing around the cleared site circumference all with arms linked (video very broken up with noise) then chants “Save the Gateway” and “No Shell for Eltham” and more music and singing “Put up a parking lot”. The crowd then proceeds to walk along the footpath of Main Road. Scene (15 Sep 1996) meeting at Montsalvat in Great Hall addressed by Sigmund Jorgensen discussing a recently published list of the Commissioner’s to senior Council Officers of banned Nillumbik people, others encouraging people to view proposed plans for the site and lodge objections. Specific issues regarding asbestos claims are also addressed. Harry Gilham addresses the meeting on the subject of the Eltham War Memorial and Memorial Gardens and how Council believe a roundabout in the vicinity is of greater importance. Views of various artworks on display (for auction) and music performance in the Barn Gallery. Meeting addressed by Sigmund Jorgensen discussing an appeal against Council granting a permit to Dallas Howgate to develop the site and that the Minister has called the matter in to be decided by the governing council. This is followed by an auction of paintings. 0.05 - Jenni Mitchel, Sigmund Jorgensen and Peter Doughtery in background. 0.18 - Jock Kyme in front of building – David Essex, Marg Johnson on his left-hand side. 5.34 - John Graves – ex Shire of Eltham Councillor and President. 9.02 - Unknown person being interviewed. 9.30 - Jenni Mitchell, unknown person, Mark Burns, community activist. 10.04 - Sigmund Jorgenson, Jenni Mitchell. 12.04 - Police members 21.33 - Nillumbik Council offices 7 August 1996 Barry Rochford CEO, Vin Heffernan Commissioner, Don Cordell Chief Commissioner, Kevin Abbott Commissioner, unknown person. 28.00 - Barry Rochford CEO 28.05 - Kahn Frankie - in commissioner’s seat after commissioners and council staff have vacated the council chamber. 28.26 - Wayne Phillips, State Liberal member for Eltham, addressing community in response to questions. 28.36 - Mark Burns, community activist addressing gallery. 28.48 - Ken Hines, ex Shire of Eltham Councillor and President. 29.34 - Ken Hines, ex Shire of Eltham Councillor and President standing, Robert Marshall, ex Shire of Eltham Councillor and President seated in front. 29.41 - Karen Gerhards, community activist. 30.06 - Marg Johnson with loud hailer, next to Jock Kyme, community activist. 31.32 - Marg Johnson with possibly Frank Burgoyne?, Sigmund Jorgensen, Jock Kyme. 35.35 - Harry Gilham at meeting at Montsalvat on 15 September 1996. 35.43 - Sigmund Jorgenson at lectern. 36.42 - Marg Jennings. 37.47 - Mark McDonald, Jim Connor, ex Shire of Eltham Councillor in background. 36.28 - John Cohen, ex Shire of Eltham Councillor and President. 38.56 - Ken Hines, ex Shire of Eltham Councillor and President. 41.11 - Harry Gilham, president of the Eltham District Historical Society. 43.55 - Sigmund Jorgensen in Long Gallery at Montsalvat, at start of the art auction to raise funds for community action. 45.50 - Unknown person conducting art auction. VHS Video cassette (poor quality) Converted to MP4 file format 45:01, 535MBvideo recording, 895 main road, alistair knox park, artworks, auction, barn gallery, barry rochford, community health centre, dallas howgate, delta demolitions, demolition, don cordell, eltham, eltham library, eltham shire office, eltham war memorial, eltham war memorial gate, eltham war memorial hall, great hall, harry gilham, jenni mitchell, john graves, library place, main road, memorial gardens, mervyn hannan, montsalvat, pitt street, protest, robert marshall, roundabout, shell oil, shillinglaw trees, sigmund jorgensen, sign, wayne phillips -
 Eltham District Historical Society Inc
Document - Property Binder, 895 Main Road, Eltham
Folder: 895 Main Road, Eltham Contents Listing 1. Certificate of Title; Vol. 8424, Fol. 334, 5 February 1963 2. Certificate of Title; Lot 2, Plan of Subdivision No. 63242, Parish of Nillumbik, Vol. 8479, Fol. 283, 18 May 1964 (Eltham War Memorial Trust) 3. Newspaper article: Extensions to shire offices will benefit all, by Fab Calafuri, Diamond Valley News, Tuesday, July 8, 1986, p6 [Reverse side, p5, Residents rally to save dam by Helen Gillman about Peck’s Dam in Napier Street, Montmorency] 4. Office memo: Temporary Shutdown of Water Supply Shire Offices – Tuesday 9 March 1993; Anthony Guzzo, 5 March 1993 – Melbourne Water advice due to works on new library 5. Plan of Old Municipal Offices, date and creator unknown 6. Newspaper clipping: Move to convert shire office for police use, by Jodie Haythorne, Diamond Valley News, May 1995 7. Newspaper clipping: Sale of Eltham office / Removal of Question time; Nillumbik Happenings, Mountain Views, 15 May 1995 8. Newspaper clipping: Bid for TAFE campus, Mountain Views, 25 September 1995, p8 9. Newspaper clipping: Will the former Shire of Eltham offices become a TAFE college?, The Advertiser, circa September 1995 [Reverse side; Jezza! Photo of football legend Alex Jesaulenko at Watsonia RSL also Advertisement: Maternal and Child Health Centre Timetable] 10. Newspaper clipping: Eltham may get TAFE campus in shire offices, by Fiona Kaegi and Natalie Town, and Nillumbik set for rate cuts, Diamond Valley News, circa September 1995 [Reverse side; Art for hope – article about artist Damien Curtain at Hurstbridge Primary School] 11. Newspaper clipping: More talks on TAFE, The Advertiser, Tuesday, October 17, 1995, p3 – includes photos of Nillumbik Chief Commissioner Don Cordell, Box Hill College of TAFE Executive Director Andrew Jackson and Niillumbik CEO Barry Rochford; Eltham MP Wayne Phillips with Eltham Chamber of Commerce President Norm Williams and Rotary Club of Eltham President Peter Bishop; Eltham College principal John Brennan with St Helena Secondary College head Ken Cunningham and Eltham High School principal Ron Edwards. [On reverse, p4, Sorry sag of botched relations, Jock Kyme] 12. Newspaper clipping: Eltham hails TAFE take-over, by Fiona Kaegi and Council to hold regular briefings, Diamond Valley News, 18 October 1995 13. Newspaper clipping (photocopy): Why no council office at Eltham?, Mark Burns, Letters, Diamond Valley News, 18 October 1995 14. Newspaper clipping: Future of Eltham office?, Mountain Views, Monday, October 23, 1995, p8 15. Newspaper clipping: Council seeks opinions on former shire offices, by Fiona Kaegi, Diamond Valley News, 25 October 1995 16. Newspaper clipping: Shire office move, The Advertiser, December 1995 17. Newspaper clipping: Former shire offices up for sale; possibly Diamond Valley News, December 1995 18. Newspaper clipping: Agents to sell shire office, Mountain Views, Monday, December 18, 1995, p8 19. Newspaper clipping: Advertisement; Nillumbik Shire Council Proposed Sale or Lease of Eltham Municipal Offices, Diamond Valley News, 10 January 1996 20. Newspaper clipping: No Submissions on Eltham Shire Offices, Diamond Valley-Whittlesea Advertiser, 30 January 1996, p1 21. Photocopy: Minutes of Ordinary Council Meeting, 31 January 1996, 7.4 Sale or Lease of Former Eltham Municipal Offices 22. Photocopy: Letter HTW Valuers to Nillumbik Shire Council, Valuation of former Eltham Municipal Offices at $1.45 million, 31 January 1996 23. Newspaper clipping: New G’boro, Eltham places, Diamond Valley-Whittlesea Advertiser, Tuesday, March 26, 1996, p4 [on reverse, p3, ALP Faithful at Montsalvat] 24. Newspaper clipping: Legal costs a hurdle for action group, by Laeta Antonysen, Diamond Valley News, 16 April 1996 25. Photocopy (91 pages): Tender Documents for purchase of Former Eltham Shire Offices 895 Main Road, Eltham, Prepared for Nillumbik Shire Council, Maddock Lonie & Chisholm, Melbourne. Tenders close at 3.00pm on 24 April 1996 26. Newspaper clipping (Photocopy): Building’s asbestos riddle. By Fiona Kaegi, Diamond Valley News, 26 June 1996 27. Photocopy: Minutes of Ordinary Council Meeting, 26 June 1996, 11.43/96 Sale of Eltham Offices, Main Road, Eltham 28. Media Release (Photocopy of facsimile from Barry Rochford, CEO): Community Facilities in New Gateway to Eltham, 28 June 1996 29. Photocopy (A3): TPA1 – Site Plan 1:200 Proposed Convenience Centre At Main Road Eltham, Baldasso Cortese Pty Ltd Architects, Collingwood, July 1996 30. Newspaper clipping: ‘Whopper’ For Eltham?, Letters, Sigmund Jorgensen, The Advertiser, Tuesday, July 2, 1996, p3 31. Newspaper clipping: Ex-shire offices to go, by Fiona Kaegi, Diamond Valley News, 3 July 1996, p1 32. Photocopy Newspaper clipping: Unsuccessful bidders criticise sale of offices, by Fiona Kaegi, Diamond Valley News, 10 July 1996 33. Newspaper clipping: Insensitive proposal, Sue Dyet, Letters, Diamond Valley Newsm 17 July 1996 34. Photocopy: Minutes of Ordinary Council Meeting, 17 July 1996, 7.116/96 Sale of Eltham Offices, Main Road, Eltham 35. Newspaper clipping: Former shire office sale angers residents, Diamond Valley News, 30 July 1996, p3 36. Newspaper clipping: Eltham Offices Demolition, ‘You can’t demolish city hall’, The Advertiser, Tuesday, July 30, 1996, pp14-15 features photos of Eltham protestors, Thelma Barkway, Harry Gilham, Jenni Mitchell, Jock Kyme and David Essex 37. Photocopy (A3): TPA1 – Site Plan Proposed Convenience Centre, Main Road, Eltham, Graeme Bentley Landscape Architects, August 1996 38. Newspaper clipping (Photocopy): Letters; Disbelief at plans, Margaret Jennings; Lack of respect, Mike Jansz; Community opinion, Sigmund Jorgensen, Diamond Valley News, circa August 1996 39. Newspaper clipping (Photocopy): ‘There was no conflict of interest’, The Advertiser, Tuesday, August 4, 1996 40. Newspaper clipping: Chamber supports plans, by Jodie Guest, Diamond Valley News, 7 August 1996 41. Newspaper clipping (Photocopy): Letters; Adding to the price, Kelly Fitzpatrick; Area being torn apart, Jenni Bundy, Diamond Valley News, 7 August 1996 42. Newspaper clipping: Labor joins battle to save offices, by Fiona Kaegi, Diamond Valley News, (7?) August 1996 43. Newspaper clipping: Letters to the Editor; ‘Atrocious assault of commercialism’, Lois Loftus-Hills, The Advertiser, Tuesday, August 13, 1996, p9 44. Newspaper clipping: Letters; Roll up for the show, Kahn Franke; Thanks for turn-out, Margaret Jennings; Way past time, Jenni Bundy; Angry at the vandalism (continued p13 missing), Diamond Valley News, August 14, 1996, p12 45. Newspaper clipping: ‘Enough is enough’ states John Cohen; Letters to the Editor, Diamond Valley-Whittlesea Advertisers, Tuesday, August 20, 1996, p2 [Reverse, p1, Trade boost at Diamond Creek] 46. Newspaper clipping: Public viewing, Diamond Valley News, 4 September 1996, p 47. Newspaper clipping: Letters; Chiefs must resign, Gayle Blackwood; Time to have your say, Margaret Jennings; Sensible balance, Gwen Jakins; Recycling: a fine example, Grace Mitchell; Limits on site use, Stephen Clendinnen; Diamond Valley News, 4 September 1996, p4 48. Newspaper clipping: Letters; A lasting memorial, Ken and Laurel Eckersell; Stripping assets, Jack Lawson; Diamond Valley News, 4 September 1996, p29 49. Newspaper clipping: Letters; Nillumbik: in the eye of the beholder, Sigmund Jorgensen; ‘Crying inside’ over Eltham Shire office, Grace Mitchell; The Advertiser, Tuesday, September 10, 1996, 2 50. Newspaper clipping: Public Notice; Notice of an Application for Planning Permit, Dallas price Homes Pty Ltd, Diamond Valley News, 11 September 1996 51. Newspaper clipping (Photocopy): Timing was the problem: chief, by Laeta Antonysen, Diamond Valley News, 11 September 1996 52. Newspaper clipping: Letters; Architectural monstrosity, Jenni Bundy; Bargain price, Gavin Gray; Paying for road works, Sue Dyet; Diamond Valley News, 11 September 1996 [ on reverse, articles on Queen’s Guide Nicola Blay (photo) and Plenty River and Diamond Creek waterways] 53. Newspaper clipping: Eltham Hub Plans on Show, The Advertiser, Tuesday, September 17, 1996, p1 54. Newspaper clipping: Bleeding halted: Commish and Letters; Sigmund’s credibility gap, David Nolte; ‘Double standards’, Ros Harris, The Advertiser, Tuesday, September 17, 1996, p3 55. Newspaper clipping: Gateway to the future; Plans on display, public comments sought, by Laeta Antonysen, Diamond Valley News, September 18, 1996, p8 [Reverse, p7, Policy limits event signs, and, Council ‘arrogant’ on ward option: MP] 56. Newspaper clipping (Photocopy): 19 on council inquiry list, by Jodie Guest, Diamond Valley News, 18 September 1996 – about council listing 19 people who are only to be dealt with directly by CEO, Barry Rochford 57. Newspaper clipping (Photocopy): Eltham is wonderful, Sigmund Jorgensen, Letters, The Advertiser, Tuesday, September 24, 1996, p4 58. Objection to Grant of Planning Permit (Photocopy): Russell Yeoman per Eltham District Historical Society Inc. re application 960376 for petrol station, convenience shop, retail shop, etc to be issued to Dallas price Homes Pty Ltd, 25 September 1996 59. Newspaper clipping (Photocopy): Public meeting, Eltham Gateway Action Group – to discuss latest plans to develop former shire office site on Sunday 4 September 1996; publication unknown, possibly Diamond Valley News 60. Newspaper clipping: Minister orders sale probe, by Jodie Guest, Diamond Valley News, Wednesday, October 12, 1996, p1 61. Newspaper clipping: Letters; Headline could mislead, Wayne Phillips, Member for Eltham, The Advertiser, Tuesday, October 8, 1996, p3 62. Newspaper clipping: Letters; Few jobs for young, Margaret Jennings; The whole truth, Alan Ramsay, Diamond Valley News, October 9, 1996, p12 63. Newspaper clipping: Public outcry at Abbott veto with ‘reserve power’; 200 residents yell abuse as commissioners give ok to Eltham service station, The Advertiser, Tuesday, October 15, 1996, p1 64. Newspaper clipping: Letters; Eltham Hub briochure has ‘trees that are a fiction’, Lois Lofus-Hills, The Advertiser, Tuesday, October 15, 1996, p2 65. Newspaper clipping: Shrewd tactics row, by Jodie Guest, Diamond Valley News, Wednesday, October 16, 1996, p1 66. Newspaper clipping: Residents have their say on former shire offices, by Jodie Guest, and, Anger over reserve power, by Laeta Antonysen, Diamond Valley News, Wednesday, October 16, 1996, p9 67. Newspaper clipping: Office sale report will not be made public, Diamond Valley News, October 23, 1996 [Reverse, article featuring Youth development officer, Ian Patching] 68. Newspaper clipping: Letters; Happening in a hurry, Peter Dodds; Development unsuitable, Mark Burns; Vale those dreamers, Sigmund Jorgensen, Diamond Valley News, October 23, 1996, two pages unidentified 69. Newspaper clipping: Group to fight council decision on office site, by Laeta Antonysen, Diamond Valley News, October 26, 1996 – re Eltham Gateway Action Group taking Council to the Administrative Appeal Tribunal over approval of controversial development [Reverse, article on Bend of Islands place name] 70. Newspaper clipping: Three days allowed to hear objection, by John Dubois, Diamond Valley New, December 4, 1996 71. Newspaper clipping: Letters; Site traffic dangers, Frank Burgoyne; Thanks for support, Margaret Jennings, Diamond Valley News, noted in pen as 8 December 1996 though probably 11 December 1996 [Reverse, What about that link, asks council, by Natalie Town – about ring road between Greensborough and Ringwood] 72. Newspaper clipping: Minister to rule on proposal, by Fiona Kaegi, Diamond Valley News, December 18, 1996 73. Report (Photocopy, 31 pages): Convenience Centre Development Proposal: Italian Cypress at Former Eltham Shire Offices Site, Main Rd. Eltham, Graeme Butler & Associates, 1997 74. Newspaper clipping: People unite to battle project, by Fiona Kaegi, Diamond Valley News, February 19, 1997 75. Letter (Photocopy): Ms B Martin to Fiona Kaegi to be submitted for Letters to the Editor, Diamond Valley News 26 March 1996 edition 76. Letter (Photocopy): Thelma Barkway to Fiona Kaegi to be submitted for Letters to the Editor, Diamond Valley News 26 March 1996 edition 77. Newspaper clipping: Legal Battle, by Fiona Kaegi, Diamond Valley News, Wednesday, April 2, 1997 78. Newspaper clipping: Site Row Saga, by Laeta Antonysen, Diamond Valley News, Wednesday, April 9, 1997 79. Newspaper clipping: Community fears loss of heritage, by Laeta Antonysen, Diamond Valley News, April 9, 1997 80. Newspaper clipping: Debate erupts over service station plan, by Laeta Antonysen, Diamond Valley News, April 9, 1997 [Reverse, ‘No’ to rates hike proposal] 81. Newspaper clipping: Letter to the Editor; “Your front-page last week is considerable inaccurate … a surplus of $14,000 is expected at 30 June 1977.”, Robert Marshall, The Advertiser, April 28, 1997, p1 82. Newspaper clipping: $1.1m Debt Plan, by Fiona Keagi, Diamond Valley News, Wednesday, April 23, 1997, p1 and continued on p24, Shire to defer works programs 83. Newspaper clipping: Blast for Council, by Laeta Antonysen, Diamond Valley News, Wednesday, April 30, 1997, p1 and continued on p7, ‘Experts’ oppose plans for shire site. 84. Newspaper clipping: Photo – Uncertainty: the future of the former Eltham Shire office site is still to be decided by Planning Minister Rob Maclellan., Diamond Valley News, April 30, 1997 [ Reverse; Not your average convenience store, by Laeta Antonysen] 85. Newspaper clipping: Shire site decision soon, Diamond Valley News, May 28, 1997 86. Newspaper clipping: Letters to the Editor; Features to protect, Ken Eckersell, Diamond Valley News, June 4, 1997 87. Newspaper clipping: Costly bun fight over shire offices, by Laeta Antonysen, Diamond Valley News, July 2, 1997 [reverse, Montsalvat plans season of festivals, by Fiona Kaegi] 88. Newspaper clipping: Shire office shemozzle, Diamond Valley News, July 2, 1997 – provides a brief timeline of events June 1996 to April 22, 1997 89. Newspaper clipping: Law Suit Threat, by Fiona Kaegi and Laeta Antonysen, Diamond Valley News, Wednesday, July 9, 1997, p1 90. Newspaper clipping: Report rejects store plan, and, Residents with panel, Diamond Valley News, Wednesday, July 9, 1997 91. Newspaper clipping: Councillors meet Shell developer, by Laeta Antonysen, Diamond Valley News, July 30, 1997 92. Newspaper clipping: Deadline extended to allow more talks, by Fiona Kaegi, Diamond Valley News, August 8, 1997. Also Curves to stay in link road about Nillumbik’s realignment plans for Diamond Creek’s ‘windy mile’ [Reverse, Shire tightens grants scheme] 93. Newspaper clipping: $10m option for shire office site, by Laeta Antonysen, Diamond Valley News, September 10, 1997 94. Newspaper clipping: New plan for shire office site, by Laeta Antonysen, and , Council refuses to do trade with developer, Diamond Valley News, September 17, 1997, p12 [ Reverse, p11, Mixed reaction to kangaroo culling] 95. Newspaper clipping: Gateway plan review, by Laeta Antonysen, Diamond Valley News, October 22, 1997, p3 96. Newspaper clipping: Top planner calls for rethink on office site, by Jodie Guest, Diamond Valley News (includes photo of John Pizzey) 97. Newspaper clipping: Opposition offers help on planning, by Jamie Duncan, Diamond Valley News, November 5, 1997, p3 (includes photo of Opposition Leader John Brumby and Nillumbik Shire President Robert Marshall at the Eltham Gateway site) 98. Letter (Photocopy): Russell Yeoman, Secretary, Eltham District Historical SAociety to Mr B. Rochford, CEO, Nillumbik Shire Council, 15 November 1997 with specific reference to the health of the three “Shillinglaw” trees 99. Newspaper clipping: Puzzlement over delay on office site, by Laeta Antonysen, Diamond Valley News, November 19, 1997 100. Newspaper clipping: Developer pulls out, by Laeta Antonysen, Diamond Valley News, December 10, 1997, p3, and, Council uproar over officers [Reverse, p4, Final victory – announcing resignation of Jenni Mitchell as president of Etham Gateway Action Group] 101. Newspaper clipping: Letters; Asset of pride, Sigmund Jorgensen, Diamond Valley News, January 14, 1998 102. Newspaper clipping: Minister ‘no’ to plan, by Laeta Antonysen, Diamond Valley News, February 11, 1998, p3 103. Newspaper clipping: Shell shocked as Eltham planning protest is upheld, by Gabrielle Costa, date and publication unknown; possibly The Age, February 1998 104. Newspaper clipping: Land review, by Laeta Antonysen, Diamond Valley News, April 1, 1998 105. Newspaper clipping: Bid to move shire offices to new site, by Laeta Antonysen, Diamond Valley News not specifically about 895 Main Road but former Diamond Valley Shire Offices at Civic Drive, Greensborough, circa June 1998 106. Newspaper clipping: Letters; What about us?, Gayle Blackwood, Diamond Valley News, circa June 10, 1998 107. Letter (Photocopy): Sigmund Jorgensen to Kahn Franke, 1 July 1998 re advertisement and list of contributors 108. Advertisement (Photocopy): Show that democracy is not dead in Nillumbik !!!, Saturday 17 Oct. 1998 109. Newspaper clipping: Arts dream shattered, by Natalie Birch, Diamond Valley Leader, July 17, 2002, p3 – Council about to dump plans for an arts centre on former office site 110. Newspaper clipping: Letters; This site belongs to the people, John Cohen; Pro-development, Jenni Bundy, Diamond Valley Leader, May 21, 2003 111. Discussion Paper: Community Use of Site, 895 Main Road Eltham, 8 pages, Gayle Blackwood, Sue Dyet, Ken Eckersell, 25 August 2003 with supporting drafts dated August 5 and 6. 112. Newspaper clipping: Shire plan ‘sacrilegious’; Residents fight war memorial sale, by Dave Cropssthwaite, Diamond Valley Leader, Nillumbik Edition, Wednesday, August 18, 2004, p1 – about council plans to sell Eltham War memorial and former Shire Office sites 113. Newspaper clipping: Land sales to come under more debate, by Dave Crossthwaite, Diamond Valley Leader, September 15, 2004, p5 114. Newspaper clipping: Council saves ex-office site, axes club plan, Diamond Valley Leader, March 30, 2005 115. Newspaper clipping: Letters; Ask the people, John Cohen, Diamond Valley Leader, April 6, 2005, p20 116. Newspaper clipping: Shire moving for public use zoning on Eltham landmark sites, Diamond Valley Leader, October 25, 2006 117. Newspaper clipping: Letters; Consultation a sham, Carol Doherty; Civic centre excellent, Marguerite Marshall; Only Eltham counts, Carmel Jacobsen, Diamond Valley Leader, May 22, 2007 [Reverse, Disability a test for councillor (Bo Bendtsen)] 118. Newspaper clipping: Advertisement; Nillumbik Planning Scheme, Approval of Amendment C49 – rezoning of 895 and 903-907 Main Road, Diamond Valley Leader, September 5, 2007, p7 119. Newspaper clipping: Illustration; An artist’s impression of the proposed Nillumbik civic centre in Main Rd., Diamond Valley Leader, June 25, 2008 [Reverse, City link with learning – about Eltham College setting up a city campus for Year 9 students, with photo featuring principal Dr David Warner and students] 120. Newspaper clipping: Civic centre forecast withdrawn, Diamond Valley Leader, July 2, 2008 121. Letter: Nillumbik Shire Council, 5 September 2008, re Civic Future Project 122. Letter: Nillumbik Shire Council to EDHS, 5 October 2008, re Civic Future Project 123. Letter (Copy): Mrs D. Bassett-Smith to Mayor and Councillors, 17 April 2009 re former shire office site and future community use 124. Letter (Copy): Eltham District Historical Society to Bill Forrest, CEO, Nillumbik Shire Council, 1 August 2009, in support of D. Bassett-Smith letter of 17 April 2009 and response from Council, 12 August 2009 125. Newspaper clipping: Hotel mooted for site, by Brittany Shanahan, Diamond Valley Leader, July 5, 2017 126. Newspaper clipping: Letters; Fury, surprise and support for Eltham development; Re: Grand plan for Eltham’s jewel (February 7), Cath McLardy, Diamond Valley Leader, February 14, 2008, p14 [Reverse, p13, Learning from the fateful day; the devastation on that day in 2009 will always stay in Steve Warrington’s mind. He recalls the tragedy] 127. Newspaper clipping: Letters; Plan to fight council on land sell-off, Jennifer Ambrudge and others, Diamond Valley Leader, February 14, 2018, p15 – about council plan to sell off reserves and shire office site and Eltham War Memorial 128. Newspaper clipping: Plans for site urged, by Brittany Shanahan, Diamond Valley Leader, September 5, 2018 129. Newspaper clipping: Approach under fire; Council plans for historic shire site raises eyebrows, by Brittany Shanahan, Diamond Valley Leader, September 19, 2018 130. Newspaper clipping: Advertisement; Our plan for a revitalised Eltham, Nillumbik Shire Council, Diamond Valley Leader, Wednesday, October 3, 2018, p7 131. Notice: Eltham Community Town Meeting, Saturday 134th October 2018 – about council plans to sell off community reserves and assets – along with flyer for Eltham Community Action Group 132. Essay A4 18 pages: An essay addressed to the Councillors of Nillumbik Shire, October 2018 (with addendum 7 November), Andrew Lemon 133. Photocopy Marked Up Flyer: The story behind 895 and 903-907 Main Road, Eltham – the heart of Eltham’s Town Centre, with marked up comments by Eltham Community Action Group, collected 9 December 2018 134. Newspaper clipping: Calls to fix ‘outdated’ site; negotiations cease with developers amid renewed push to improve civic space at Main St. Eltham, by Anthony Plovesan, Diamond Valley Leader, May 29, 2019, p5 135. Newspaper clipping: Ex-council site flagged for hospital; Councillor suggests former Eltham headquarters would be ideal spot, by Anthony Plovesan, Diamond Valley Leader, October 30, 2019, p3 136. Concept plan: Proposal; Nillumbik Cultural Gallery with Art Cinema, Restaurant, Tourism, Preliminary Sketch Design G, Barry Pearce Architect and Designer, 8 April 2022, 8 pagesmain road, eltham, property, houses, shops, businesses, shillinglaw trees, eltham shire offices site -
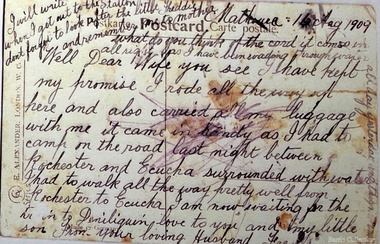 Melton City Libraries
Postcard, Postcards from Fred and Mattie Myers, 1909-1914
Post Card: Melton Railway Station 1909 Mattie to Fred My Dear Fred I received your letter and the L2 10/- I was very pleased to hear that I could write again. You say you will come home after the last shead. I should think so. I had a letter from E Jenkins so I am going down to see her next week we call the baby Fernie now I hope you will agree. Dear Fern has got the whooping cough. Written on the side: I suppose you will be away four weeks yet. Love from Mattie will write on Sunday. This letter appears to be connected with the post card Barwonleigh Saturday October 1908 handwriting My Dear Mattie I received your letter and was sorry to hear of our dear little babys misfortune how did it happen do you know what was the cause of it Mrs Watts must be a blind old fool not to have known what it was when you took him to her the first time poor dear you must be worried to death with all this trouble tell me what the doctor thinks of the rupture. I do hope dear he will get over this all right you must be nearly dead going without sleep for so long I had a bit of misfortune myself on Thursday the machine locked and jumped out of my hand and stuck in my bone I kept on working but it was very painful as all the holding is done with the..next page ..knee the boss also has been chipping a good deal this week he says the next time he has occasion to speak to me I will have to go he is very particular. I would like to go through if possible even if I do a lot less. I have about sixteen hundred done up to now and would get another nine hundred if I was let alone but I suppose we will live lovie even if I go do you know if they are full handed at Eynesbury if I thought I could get a week there I would cut myself out here quick. Well dear lovie I am sending you a couple of pounds as I suppose you will want it to get a truss. I don’t think they are very expensive and hope things will find this better with you. Well my dear love I must close with fond love for you and baby from your loving Husband Fred Post Card: 16 Aug 1909 - Mathoura The card depicts a small sailing boat laden with blue flowers. Well Dear Wife you see I have kept my promise. I rode all the way up here and also carried all my luggage with me it came in handy as I had to camp on the road last night between Rochester and Echuca surrounded by water. I had to walk all the way pretty well from Rochester to Echuca. I am now waiting for the train to Deniliquin. Love to you and my little son Fred. From you loving Husband Fred Written along the top and side of the card. what do you think if the card comes in all right as I have been wading through water all day yesterday and this might be …? will write when I get to the Station, don’t forget to look after the little Freddie and remember me to mother. Post Card: 1909 - view across the Flat from the Creek looking to the Presbyterian Church in the distance with some small dwellings in the foreground. To Mr Fred Myers Wandook Stn Denniliquin NSW Dear Fred, received your letter I am sorry to hear you are having such wet weather I will write a letter tomorrow baby is better With Love from M Post Card: 1910 Postmark Stamp 1d Aug 12 1910 Moama NSW Melton postmark stamped Aug 25? Hare Street, looking south Echuca Mrs F Myers, Melton P O Vic Dear Mattie, Just a line to let you know I got here all right I go to Pericotta tonight and to Cobran to morrow best love to all from yours Fred Letter Cobran Stn Via Deniliquin N.S.W. Sunday 21st Aug extract I am having a good time here, a good cook and the best of everything no fires to light or kettles to boil just get up and wire in… plenty hard work the sheep are pretty tough but much better than Wandook. I am well among them here we had a little rain on Friday but not enough to stop us so we have got one full week in .. the weather is lovely. I have been basking in the sunshine mainly in the morning and feel strong and fit a as fiddle, they are a grand lot of men here I only knew one out of the lots but know them all pretty well now, we have a bit of a concert here every nights almost there are a few good singers here and we also had a phonograph up from the station with all the latest records we have two dancers among ourselves very boisterous affairs indeed thy do make the dust fly. I have not ventured to take part in it and don’t think I will either. I get enough dancing all day long and besides I have to furnish the music you ought to see them going when I rattle up the concertina. Letter Cobran Stn via Deniliquin Thursday Sept 1st 1910 [abbreviated] My Dear Mattie, I received your welcome letter today. I though I was never going to get one as it was Sunday fortnight when I wrote to you but we only the mail here twice a week so it takes a long time to write and get an answer. I also got a reply from Eynesbury and a favourable reply it starts on the 13th Oct. …. I have 800 sheep shorn up to date and am fifth among about 30 men. I am sending two more [Ls] this time which I drew on Saturday. I don’t like sending too much more this time as there is a chance of it going astray and it is not very easily earned…. Things must be humming in Melton with all them babies coming and people getting married… I suppose we will be having new neighbours soon. If Mr Watts is selling out he was getting more property then he could keep. I hope you will soon have rain…. you will have to watch our little boy the dear little rascal he must be getting very cute opening the gates he will be tumbling into the tank …. I love to think of the happy times we have had together and hope that we will love one another to the end .. the mail will not leave here until Monday Love to you dear wife and baby Fred Post Card: – I Cling to you like Ivy Cobran September 18th 1910 Fred awaits a letter from Mattie I still have three weeks here yet.. I am sending L2 tell if you got the other 1L 1911 Letters Fred to Mattie October Spring Plains Oct 1911 Mia Mia Post Office I had a great job to catch the train at Diggers Rest as after I turned off the Keilor Rd it was very way and muddy and I had to walk a lot of the way and got there just in time. I came right into Redesdale by the train and stopped there last night… they had heavy rain on thursday up here and a tremendous fall of hail which covered the ground over a foot deep. There are only 4 shearers here yet.. I saw some of the sheep they look very rough and big so there will be no big tallies done, the men are saying he is giving 2s per hundred extra, so that will help a little. We are going to start Cobran via Deniliquin. Post Card: three scenes of Mathoura 10/9/1914 EB on a photo copy 10/9/12 ? Mathoura Thursday Dear Mattie, Just a line to let you know I got up here all right. I rode the seat out of my trousers. I have done 100 miles on the bike. I met none of the old hands this time so will go out on my own… Your loving husband Fred, did Marjie miss me at all. Post Card: Cobran 15th Sept 1912 Hearts and intertwined flowers and little envelope he has written Marjorie …just a line to let you know I will cut out here Friday next in find, we have had two falls of rain since I wrote and it has bean blowing a hurricane for couple of days and may blow up again however if we are delayed I will send you a card Wednesday I am longing to see you and the two little kiddies again…. Fred Copy only Golf Hill Sep 26th Cut out 31 Oct Total 2332 1913 Post Card: Scene View Street, Bendigo August 1913 Mathoura Tuesday My Dear Mattie Just a line to let you know I got up here all right. Teddy Ginger and another couple of chaps on the way ……. Letter Cobran Sunday Aug 7th 1913 My Dear Mattie Just a line to let you know that weather permitting we will cut out here about Thursday morning….I have not got any more shearing here. I have not heard from the other place…. Expect me about Friday …. I suppose Freddie and Marjie will be glad to see me, Marjie will climb all over me. I will be glad to se you all again you will have a fortnight before Golf Hill starts. I see in the Express you sent that Annie McPherson of (Dunvegan) is engaged to Len Farrell, she appears to be going to take no risks with him she wont let him slip through her hands like the banker did…… Fred Post Card: 1914 Garland of roses Warrambeen Stn Shelford PO October 14th 1914 Birthday wishes. Post Card: Love’s Golden Chain Golf Hill Tuesday Oct 17 1914 Birthday wishes [ this one might be a different year] Letter Cobran Wed 2nd Sept 1914 My Dear Mattie, I received your welcome letter today and also the papers which were very acceptable as we don’t get many papers here we only get see one at odd times as we get none for the hut this year.. I have not seen a bit of butter since I left home as it is too dear for us for sinners here. Poor Marjie had a cold.. so the little kid wants to go to the war, she must think it is good like a picnic. We had light rain on Monday as usual only half a day’s shearing in the shed so that is all we done this week, we took a vote 9 to 6 no shearing so nothing till to morrow morning Thursday so there is still a good fortnights shearing to do, will do nothing Saturday polling day as we have to go 13 miles is near Services where I was last year so we will want the full day 50 men to vote and some will probably have to walk to get there, all solid for Labour. I have just had an interval for lunch, pudding, yeast buns and rock cakes… We are doing nothing but eating and sleeping this week. Fred I am sending L1 in this which will do you till I come back if I keep drawing up I will have none when I finish so make the most of it. Post Card: Two doves with violets 1915 Cobran Wed 18th Sept [could be 1912] Sorry to tell you we are delayed with rain so will not be home till next week… only 3 days of shearing to do…. expect me about the middle of next week….I wish I was with you now and the dear little ones Fred Post Card: Iris Flowers Barwonleigh Stn Tuesday Oct 14th 1918 Happy birthday greetings from Fred Post Card: Irrigation channel Swan Hill 5 Year not shown Swan Hill Tuesday night Just a few lines to let you know I got this far all right. I had to walk nearly all the way to Gisborne and got there last night and took the train here today. It has been raining all the way between Gisborne and here. Moulamein tomorrow. I think it will be another case of walking as it is wet here no metal roads all mud. best love to yourself and the little ones and also mother. will write Sunday Post Card: The White Man’s Burden.The writing on the back rubbed out Mattie has written, I was weighed and I am 8 stone 10 pounds. 14 Post Cards, some have the original dates, others have the date added later by Martha. Two envelopes, one with addressed to Melton postmark Moule, stamp torn off, the other Cards from my dear Fred. The letters and the notebooks can be cross checked according the their contents. Italics show the dates added by Mattie local identities -
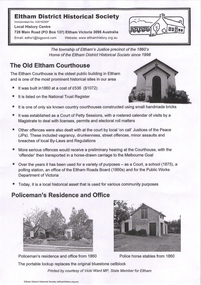 Eltham District Historical Society Inc
Document - Binder, Eltham Justice Precinct, 1969-2020
EDHS_04863 - Binder: Eltham Justice Precinct 1. Courthouse 1. Eltham Courthouse interesting facts 2. Plan and elevation drawings 3. Other courthouse plans and fittings 1880s – Brunswick, Maffra, Dunolly , Sunbury, Landsborough and Wodonga 4. Newspaper articles: i. ELTHAM POLICE COURT. (1892, April 1). Evelyn Observer, and South and East Bourke Record (Vic. : 1882 - 1902), p. 2 (MORNING.). Retrieved July 5, 2022, from http://nla.gov.au/nla.news-article60667022 ii. BREAKING A PUBLICAN'S LEG. (1900, July 13). Evelyn Observer, and South and East Bourke Record (Vic. : 1882 - 1902), p. 2 (MORNING.). Retrieved July 5, 2022, from http://nla.gov.au/nla.news-article60688367 iii. ELTHAM COURT. (1901, March 1). Mercury and Weekly Courier (Vic. : 1878 - 1903), p. 3. Retrieved July 5, 2022, from http://nla.gov.au/nla.news-article58578953 iv. ANNIE CHASES A TINKER. (1902, October 3). Evelyn Observer, and South and East Bourke Record (Vic. : 1882 - 1902), p. 2 (MORNING.). Retrieved July 5, 2022, from http://nla.gov.au/nla.news-article64029968 v. ELTHAM POLICE COURT. (1927, May 6). Advertiser (Hurstbridge, Vic. : 1922 - 1939), p. 4 (AFTERNOON). Retrieved July 5, 2022, from http://nla.gov.au/nla.news-article57754748 vi. ELTHAM POLICE COURT. (1927, May 20). Advertiser (Hurstbridge, Vic. : 1922 - 1939), p. 3 (AFTERNOON). Retrieved July 5, 2022, from http://nla.gov.au/nla.news-article57754814 vii. Eltham Police Court (1931, January 9). Advertiser (Hurstbridge, Vic. : 1922 - 1939), p. 4. Retrieved July 5, 2022, from http://nla.gov.au/nla.news-article56734073 viii. Repairs to Eltham Police Station, The Advertiser (1929, May 24). Advertiser (Hurstbridge, Vic. : 1922 - 1939), p. 2 (AFTERNOON.). Retrieved July 5, 2022, from http://nla.gov.au/nla.news-article57759907 ix. ELTHAM COURT. (1929, August 2). Advertiser (Hurstbridge, Vic. : 1922 - 1939), p. 4 (AFTERNOON.). Retrieved July 5, 2022, from http://nla.gov.au/nla.news-article57760345 x. See also Trove list https://trove.nla.gov.au/list/116634 5. Letter: Shire of Eltham Historical Society to Shire of Eltham, 1 July 1969 regarding potential replacement of Eltham Courthouse and the building’s historical significance and acknowledgement 10 July 1969 6. Letter: Shire of Eltham Historical Society to Law Department, 26 May 1972, re preservation of Eltham Courthouse and potential classification and acknowledgement 7 June 1972 7. Newspaper article: Strangers around, so Eltham sought protection by Marguerite Marshall, Diamond Valley News, Tuesday, April 6, 1982, p2 (On reverse side, Top job for our Pauline, p1) 8. Eltham Courthouse Colour Scheme, Public Works Department, 10 September 1983 9. Newspaper article: Eltham Courthouse under threat of closure by Helen Gillman, Diamond Valley News, October 16, 1984 10. Newspaper article: Courthouse to close by Helen Gillman, Diamond Valley News, Tuesday, November 20, 1984, p1 (also on p2 an article about Diamond Valley Shire festivities for the State’s 150th) 11. We will keep your court – Kennett, Diamond Valley News (probable), c.Dec. 1984 12. Letter: Shire of Eltham to Shire of Eltham Historical Society, 15 March 1985, regarding potential for use of building as a museum and reply dated 17 April 1985 regarding Society’s interest in use of the building 13. Letter: Department of Conservation Forests & Lands to Shire of Eltham, August 1987, regarding expressions of interest in the building and letter from Shire (18 August 1987) to Society advising of same 14. Letter: Department of Conservation Forests & Lands to Shire of Eltham, 30 March 1988, advising Courthouse to be used by Eltham Youth Resources Centre and the rear section by other community groups. Noted that the historical society was suggested by Council as a future user of the adjoining police residence when Council first sought management of the building and that should be investigated. Includes Schedule of Repair and Maintenance Work (4 pages), Existing Conditions Survey 30/7/1987 (6 pages) and 1 page plan view diagram 15. Memo: Historic Places Section to Eltham Youth Resource Centre re paint analysis of Courthouse, 17/5/1988, (6 pages) 16. Newspaper article: Courthouse renovation by Jodie Haythorne, Diamond Valley News, November 23, 1992 17. National Trust of Australia Registration (classified 20 Oct 1977), printed March 2000 18. Letter: Heritage Victoria 28 Feb 2002 regarding the replacement of the Courthouse Stand (Witness Box) 19. Article: There’s still order in this stately court house, Eltham Shire (magazine), date unk., p22-23 20. Eltham Court House, Statement of Significance, Heritage Victoria Register, printed Nov 2004 21. Eltham 1860 Former Court House 730 Main Road Eltham, collated by Eltham District Historical Society Incorporated 2005 (4 pages) 22. Book Extract: Eltham, Historical Court Houses of Victoria by Michael Challinger, Palisade Press, 2001 23. Newspaper article: Courthouse rich with history by Harry Gilham, Nillumbik Mail, c.2001 (see also EDHS_03333) 24. Notes on history of site from Crown Reserve File Rs 12128, Municipal Buildings (Local Community Welfare Reserve) at Eltham, Department of Sustainability and Environment, April 2005 (4 pages) 25. Newspaper article: Historic building upgrade, Diamond Valley Leader, August 3, 2005, p17 26. Newspaper article: Courthouse regeneration secures boost, Valley Weekly, August 10, 2005 with picture of Harry Gilham, Steve Herbert and Greg Johnson 27. Newspaper article: Poets are summonsed, Diamond Valley Leader February 22, 2006, p37 features picture of Helen Lucas at the Eltham Courthouse 28. Newspaper article: Sharing a love of legalities, Diamond Valley Leader, March 1, 2006, p7 features a picture of Rob Hulls and Steve Herbert talking to students in the courthouse 29. Newspaper advertisement: Nillumbik Tender No. 2021-33, Building Restoration Works, Old Eltham Courthouse, The Age, November 7, 2020 30. Form: Police Officer’s Return To A Warrant Of Distress 31. Handwritten notes: three pages listing all 48 of the pigeon hole form listings in the cabinet in the courthouse 2. Police Quarters 1. 1971 Surveyors Plan of 728 Main Road and the Adjoining Courthouse 2. Letter: Shire of Eltham to Shire of Eltham Historical Society, 5 June 1981, requesting the society give consideration to the suitability of the existing buildings (former Vermin and Noxious Weeds Office, Department of Crown Lands and Survey) for historical purposes such as a museum 3. Minutes: Shire of Eltham Historical Society Committee Meeting, 10 June 1981 (2 pages) includes reference to possible use of building as a museum (also reference to Bills Horse trough to be retained) 4. Extract from Victoria Police Gazette 1930 with details of building and site 5. Newspaper article: Cubby haven, Diamond Valley News, October 28, 1991 about replica Police Station with picture of replica along with Monika Roitinger and Garry Bartlett outside the Police Station 6. Environment office up for sale? Mountain Views, Monday, June 12, 1995 (Nillumbik Shire Council proposing to sell property. Did not proceed as ownership held by the State of Victoria) 7. Extract from National Trust February 1998 edition, “Police Rescue” which states Heidelberg and Eltham Police Residences are the oldest known Police Residences in the Melbourne Metropolitan district 8. Newspaper article: The first police office by Harry Gilham, Nillumbik Mail, December 13, 2000 (also photocopy with notations on picture identifying buildings and Harry’s typed draft) 9. Fax Memo: Victoria Police List of Officers in Charge, Eltham Police Station, 1857-1991 onward, 21 Jan 2003 10. Former Police Quarters, Statement of Significance, Heritage Victoria Register, printed Nov 2004 11. Eltham 1860 Former Police Quarters 728 Main Road Eltham, collated by Eltham District Historical Society Incorporated 2005 (5 pages) 12. Report: Eltham District Historical Society to Living and Learning Nillumbik, 14 April 2010 regarding the poor state of condition of the former Police Residence 13. Photocopy of three photos of the former Police Residence, former Police Station (relocated to rear of site) and Stables, October 18, 1991 3. Lockup 1. Newspaper article: Heritage permit bid, Diamond Valley News, January 17, 2001 (also article “Eltham library tops”) includes picture of lockup located in Youth Road 2. Newspaper article: Old lockup in new site, Diamond Valley Leader, March 21, 2001, p15. Includes picture of Harry Gilham with lockup at justice Precinct 3. Letter: Victoria Police to Eltham District Historical Society, 20 March 1991 including laser print photo of lockup in 1963 at 23 Pryor Street 4. Fax: Graham Clark, Associated Crane Trucks Pty Ltd, 833 Main Road Hurstbridge; Quote 26.2.99 for $1,080 to move lockup from Youth Road to 728 Main Road 4. Local History Centre 1. Victoria Government Gazette: Photocopy, No. 165, Tuesday, December 7, 1858, establishment of a Court of Petty Sessions at Eltham, 7 December 1858 2. Victoria Government Gazette: Photocopy, September 16, 1859, contract issued for Police buildings at Eltham to Langridge and Co., McCarter, Baillie, Nicol and Co, Chadley, Amos and Co., Cameron, Payne, £1,150.7.0 3. Victoria Government Gazette: Photocopy, October 2, 1860, contract issued for Court of Petty Sessions at Eltham to James Duncan, £600 4. President’s Report, Eltham District Historical Society, Annual General Meeting, Wednesday, March 11, 1998 – covers the establishment of the Local History Centre and new home for the Society 5. Extract for EDHS Newsletter July 1998 – Eltham Local History Centre – Official Opening 6. Unveiling of 728 Street Sign, Speech notes by Cr Dianne Bullen, December 2000, includes invoice from John Sharp Signs Pty Ltd, 24/10/2000 and planning approval drawing dated 24/3/1999 reproduced in Newsletter No. 135 November 2000 7. Letter: Eltham District Historical Society to Living and Learning Centre, undated draft regarding being a member of the committee reviewing the development of the site 8. Notes from Rod Grant re funding of site development under the Community Jobs Program 9. Letter: Eltham District Historical Society to Nillumbik Living and Learning, 28 October 2004 re inclusion of the Society in enhancing the site under the Community Jobs Program 10. Letter: Department of Sustainability and Environment to Eltham District Historical Society, 28 February 2005 re preparing draft Conservation Plan and copy of cover letter in response 2 April 2005 11. Levels and Layout Plan, Nillumbik Shire Council, September 2005, AO copy 12. Letter: Department of Sustainability and Environment to Eltham District Historical Society, 12 September 2005 re Eltham Justice Precinct Conservation Management Plan 13. Letter: Living and Learning Nillumbik, 2 February 2006 to Eltham District Historical Society re forming a Committee to advise on the use, maintenance, management and preservation of the Justice Precinct 14. Minutes: Meeting of a Task group to explore the establishment of a Committee to manage the Eltham Justice Precinct, 20 December 2005 (with hand written notes) 15. President’s notes (EDHS), General Meeting item, 11 May 2006 pertaining to use and condition of the Eltham Justice Precinct 16. Paint estimates, Old Eltham Court House, undated 17. Notes from meeting 26 September (2006), Eltham Justice Precinct Committee 18. Notes from meeting 27 November (2006), Eltham Justice Precinct Committee 19. Terms of Reference for the Eltham Justice Precinct Committee, Draft for Living and Learning Committee Meeting 24 Jan 2007 (4 pages) 20. Newspaper article: Panel set up, Diamond Valley Leader, 7 March 2007 21. Minutes: Meeting of Eltham Justice Precinct Subcommittee, 10 May 2007 22. Minutes: Meeting of Eltham Justice Precinct Subcommittee, 5 July 2007 23. Minutes: Meeting of Eltham Justice Precinct Subcommittee, 11 October 2007 24. Minutes: Meeting of Eltham Justice Precinct Subcommittee, 7 February 2008 25. Minutes: Meeting of Eltham Justice Precinct Subcommittee, 10 April 2008 26. Minutes: Meeting of Eltham Justice Precinct Subcommittee, 14 August 2008 27. Letter: EDHS (Sue Law) to Living and Learning, 6 September 2008 re proposed signage 28. Agenda: Meeting of Eltham Justice Precinct Subcommittee, 16 October 2008 29. Suggested guidelines for use of the Court House for exhibitions 30. Handwritten note re Ken Eckersal and Uniting Church of possible donation of church organ for sale, proceeds to be used for activities at the Justice precinct 31. One page typed notes on each of the buildings in the Eltham Justice Precinct 5. Miscellaneous 1. Photocopy from Pioneers & Painters (2 pages) covering the establishment of Police and Court of Petty Sessions at Eltham 2. Photocopy of photo looking northeast across Little Eltham buildings c.1910 with notes 3. Photocopy of J.H Clarke photo looking up Maria Street from near Dalton Street with notes identifying precinct buildings 4. Photocopy of photo of Court House and Police Quarters with cow outside from Heather Jenkins scrapbook with notes identifying buildings 5. Sketch and notes with dimensions for blue stone lockup including other miscellaneous handwritten notes 6. Unidentified heritage review details of Justice Precinct (c.2004) 7. Hand written notes of telephone conversation held with Dennis McKay (6 May 1997) re Council use of site 8. Flyer: Victoria Police Historical Unit 9. Photocopy of thumbnail images of various Justice Precincts (not identified) 10. Email correspondence, 4 and 10 January 2008; J. Connor to Council and Councillors pertaining to proposed new toilet facilities at rear of Courthouse annexe. Two ring lever arch binder, white with various photocopies, printouts, newspaper clippingsHG Folders 15/52/59 integratedharry gilham collection, eltham courthouse, eltham justice precinct, eltham police residence, lockup, eltham community festival, eltham festival, eltham, heritage assessment, police residence -
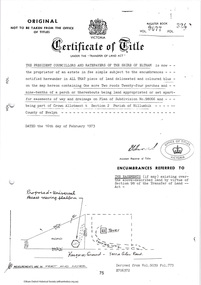 Eltham District Historical Society Inc
Archive Box, Shire of Eltham War Memorial
Material relating to the Shire of Eltham War Memorial located at Garden Hill, Kangaroo Ground. Also known as The Eltham Shire War Memorial Tower, Shire of Eltham Soldiers' Memorial and Kangaroo Ground War Memorial Park. Includes photocopies, newspaper clippings, correspondence and more beginning from early history 1919-2009. Contents: Archive Box 1 Folder 1 (Publication Proofs) The Tower of Remembrance and War Memorial Park On Garden Hill at Kangaroo Ground, Victoria 1919-2010 Folder 2 (Up to 1960) 1. Binder with plastic pockets. Photocopies. Minutes of the Kangaroo Ground War Memorial Bazaar Committee, 1922-1926 EDHS Newsletter No. 123 November 1998 PRESIDENT'S REPORT ACQUISITION FROM NILLUMBIK SHIRE'S MEMORABILIA Recently found in a storage box of old Shire of Eltham items was a school size, blue lined black covered writing book. It is recognized as the minute book and cash receipt book of the period 1922-1926 when the Memorial Park Committee, who it seems were part of the Shire of Eltham Soldier's Memorial League, was requested to raise funds for building the Shire of Eltham War Memorial Tower at Kangaroo Ground. History tells us that the tower, which is currently being refurbished, was officially opened by the Governor General of Australia, Lord Stonehaven on 11.11.26. The ladies invited to the first meeting at the Shire Hall did so on 21st September 1922. The minutes book reads: Present: Mesdames Bell, Bourchier, McMahon, Gosling, Cockcroft, Wraight, E Coutie, R Rogers, A Jones, AH White, Davies, Everitt and the Misses Lacey, Harris, N Weller, Gosling, Bell and D and G J Bourchier. These people became the Kangaroo Ground Memorial Bazaar Committee along with others named at further meetings. They conditionally accepted the role of raising funds, their condition being that the Bazaar Committee be given representation on any committee empowered to deal with the memorial in proportion to the amount of money raised by the bazaar'. The Andrew Ross Museum has the original book. We at Eltham District Historical Society have two photocopies for public perusal. 2. Transcriptions of newspaper articles 1919-1920. 6 pages. 3. Photocopy of program for thanksgiving service July 6th, 1919 held at Public Hall, Panton Hill. 4. Photocopies: a. Kangaroo Ground, The Advertiser, 17 Oct 1919 (working bee) b. The Advertiser August 1920 – advertisement for coach between Eltham and KG. c. Anzac Memorial Service, The Eltham & Whittlesea Shires Advertiser & Diamond Creek Advertiser, April 14, 1922 and April 28, 1922 d. Anzac Day services. April 27, 1923 e. Photocopy Anzac Commemoration, local newspaper, May 2, 1924 f. Shire of Eltham Memorial Service, The Advertiser April 23, 1926 g. Eltham Shire War Memorial Advertiser August 13,1926 h. Eltham Shire War Memorial The Advertiser October 26, 1926 i. Eltham The Advertiser, December 17, 1926 j. Kangaroo Ground April 26, 1929 5. Photocopy. Eltham War Memorial Tower article, The Advertiser, November 19, 1926 6. Typed transcription of parts of newspaper articles for three titles, November 1926 7. Transcription. Public Notice, October 16, 1926 8. Photocopy Kangaroo Ground Armistice Day local newspaper, November 25, 1927 9. Photocopy Kangaroo Ground Armistice Day local newspaper, November 16, 1928 10. Photocopy Kangaroo Ground, local newspaper, April 26 1929 11. 3 Original Copies. One Hardback. Dedication of memorial official brochure, 1951 original but damaged 12. Photocopy with notes from G.G. relating to the land transfer/acquisition/contract via White and Gepp. Folder 3 (1961-1970) 1. Original newspaper article: Place with a view at Kangaroo Ground, The Age, May 11, 1963, p18 Folder 4 (1981-1990) 1. Newspaper article, Memorial a fire watch. Diamond Valley News, March 16, 1982, 2 original copies. 2. Newspaper article. An Obvious Monument by Russell Yeoman article with photo: Network Nov/Dec 1984, p14. Folder 5 (1991-2000) 1. Original newspaper article: “Kangaroo Ground Tower is top spot”. Thought to be from a tourist information free newspaper, Mountain Country, Summer [1993] p39. 2. Newspaper article with reference to quoins – a contrasting edging or corner stone on the façade of a stone or brick house. Age August 2000 3. Program. Service program for Remembrance Day commemoration ceremony, 1996. 4. Speech by Harry Gilham for Remembrance Day commemoration ceremony, 1996 5. Newspaper article: Remembrance, Diamond Valley News, 20 November 1996 6. Word Document. A Tower of Strength by Dean Stewart April 1997 7. Newspaper articles: Tower group needed, Diamond Valley News, September 17, 1997, p3 and advertisement “Nillumbik, Nominations for Kangaroo Ground Memorial Tower and Grounds Advisory Committee”, Diamond Valley News, September 17, 1997 8. Newspaper article: Council apology; scaling new heights, 1997 about Aboriginal Reconciliation. Probably Diamond Valley News ca 1997. 9. Photocopy / Newspaper Article: Two newspaper clippings, “Memorial with a view” 30 April 1997 and “Funds boost to restore tower to its former glory”, Diamond Valley News, 3 December 1997. 10. Newspaper article: Kangaroo Ground Tower of Remembrance Nillumbik Mail, 9th August 2000 and Research notes (July 2000) by Harry Gilham pertaining to photo in August 2000 newspaper article. 11. Photocopy. Newspaper article: New lease of life for tower (Concept plan) Nillumbik Mail, September 27, 2000 12. Photocopy: 4 pages, War Memorials of Victoria; a pictorial record, c.1994 Folder 6 (2001-2010) 1. Newspaper article: $10,000 to start refurbishment, Nillumbik Mail, Feb 21, 2001 2. Circular. KG War Memorial Advisory committee circular August 2001 3. Newspaper article: Tower group retained 4. Program for re-dedication of the Kangaroo Ground War Memorial Tower 8th November 2001 with copies of pages 65-70 of from The Tower of Remembrance and War Memorial Park 1919-2001 (see Folder 1) - Speaking notes from the day from Nillumbik Shire Mayor, Cr. Sigmund Jorgensen and Harry Gilham and Speech by John Landy, Governor of Victoria 5. 2 pages of Harry Gilham notes – Draft of ‘book’ notes ‘Thank you’ for rededication ceremony to be held Thursday, Nov 8, 2001 - list of invitations, notifications and acknowledgements. 6. Proposed running sheet. Re-dedication of KGT. November 8, 2001 7. Newspaper article (2 copies) Century of war service, DVL November 14, 2001 page 6 8. Letter. Gov. John Landy to Harry Gilham. Thank you for visit. [2001] 9. Newsletter Clipping: Governor of Victoria re-dedicates KG War memorial Tower, Nillumbik News (NSC) Christmas 2001 10. Newspaper article: War Memorial to be restored: DVL November 19, 2003 11. Newspaper article: Memorial Facelift Sept 29 2004. 12. Folder. Collection of maps and context Yarra Water proposal to build water tanks 13. Newspaper clipping. Pressure on with new tank. Re installation of water tank near site. DVL March 2, 2005 14. Folder of emails and designs from Dennis Ward re poppies and prostrate rosemary for formal garden around base of tower April 2005 15. Folder. Letters and paperwork re the Victorian Government “Community Cabinet” and invitation for community groups to speak directly with a government minister. Actual submission not included in folder. 16. Newspaper clipping. Time to remember among the poppies, Diamond Valley Leader, 9 November 2005, p1 and 17. Newspaper clipping. Lone pine company for souls. DVL 9 November 2005 18. Folder. Restoring Community War Memorials Grants Program. Application and associated paperwork 2005/2006 January 2006 19. Newspaper article. Shared views. Valley Weekly, June 21 2006 20. Newspaper article: Kangaroo Ground, Restoration on schedule, DVL October 2006? 21. Newspaper article. Towering over the terrain. The Age August 8, 2009 22. Photocopy. Nillumbik Shire Council. Policy and service report re lease of land to Victoria Police for police radio communications and re-building of radio tower. December 9, 2009 23. Schematics: A3 photocopies, Kangaroo Ground memorial Tower, front and rear view, Tom Manley, 17 Apr 2001 Folder 7 (2011 on) 1. Magazine article and cover. Cover story – The Kangaroo Ground Memorial Tower, The Genealogist, March 2010 2. Newspaper article. (2 copies) Photo and caption. Diamond Valley Leader, July 14, 2010 3. Newspaper notice: Notice of application for a planning permit to construct radio communications tower, DVL, October 10, 2012 4. Copy. Reference enquiry to National Film and Sound Archive. 10 September 2012 5. Copy letter. Quotation/estimate for Shire of Nillumbik on renovation and underpinning of old care takers cottage, KG. 30 September, 2012 6. Story. The Kangaroo Ground Tower of Remembrance by Amy Shaw. Yarrambat Primary School Year 6 History speech, 2014. 7. Program: Remembrance Day service, 11th November 2014 8. Newspaper article. Tribute to bravery DVL, November 19, 2014. 9. Minutes. MAC meeting. 2 September 2016. Folder 8 (Interpretative Signs Grant 2000-2001) 1. Folder. Various including Letters. EDHS Grant project: Kangaroo Ground Park and Tower of Remembrance interpretative signage from Parks Victoria 2000-2001. Folder 9 (Miscellaneous) 1. Folder Gilham collection. Google earth images of Tower, Extract describing history of Tower, including honour roll for WW1 and WW2, 8 pages, Extract describing history of Tower, including honour roll for WW1 and WW2, 3 pages, 2002 and 2004; Kangaroo Ground Tower; Southwell-Keely M.; WAR MEMORIALS IN AUSTRALIA; 8 pages, https://web.archive.org/web/20080722161554/http://www.skp.com.au/memorials2/pages/30054.htm) 2. Letter. Undated, unsigned re application to council to proposed work to police radio masts behind caretaker’s cottage. 3. Brochure: Heritage Nillumbik. Includes cover photo and other information about site. Published by Nillumbik Shire Council. About 2006. 4. Folder of notes and photocopies of various Certificates of Title for property 5. Inward loan documents. Two. Andrew Ross Museum inward loan for collection items from “War Memorial Tower” 2003 6. Photocopies of postcards of Soldiers War Memorial: One taken c.1926 before completion around base, on colour print on paper (enlarged) of Soldiers War Memorial postcard c.1930s prior to gun placements with typed text pasted on and additional detail version mounted on card with handwritten explanatory notes by Harry Gilham. 7. Photocopy of photo of tower 1944 with guns in place from Gordon and explanatory notes plus A4 photo paper print of image (photoshopped cleaned up). 8. Miscellaneous photocopies of photos taken by Harry Gilham of Memorial Park entrance, model tower in font of tower entrance, caretaker’s cottage, spiral staircase, Menin Gate sign and possibly planting of Lone Pine. Folder 10 (Fire Spotting Operations) 1. Biographical notes on Herman Motschall 1969-1981 2. Newspaper article, Memorial Tower top site for fire spotter, Diamond Valley News, May 15, 1973. 3. Proper Officer's report on an addition to the Kangaroo Ground Memorial Tower for Fire Spotting purposes: "This report covers the history of the tower, its uses, and reasons why it should be put to greater use, benefiting the Shire Council and ratepayers" Includes detailed commentary around the proposal to use the Shire of Eltham War Memorial at Kangaroo Ground for fire spotting. From Shire of Eltham archives. H. J. Masefield Property Officer. 4. Eltham Shire Council meetings 14 and 24 September 1973 references to fire watching facilities. Summary of end of season reports from spotters 1965-1973. 5. Newspaper clipping; Memorial a fire watch by Marguerite Marshall Diamond Valley News 16 March 1982 6. Letter: Cover letter from Dennis Ward 20 Feb 2006 architect for CFA Cabin design and Proposal to upgrade the fire spotting cabin, 2007 including a cost and concept plan dated 7 February 2009. 7. Newspaper article. From that first puff of smoke – horror. Diamond Valley Leader, Feb 25, 2009, p. 7 8. Invitation: State Government announcement of refurbishment of KGWM Fire spotting tower 19 October 2009 9. Newspaper article. Tower– up, Black Saturday watch. Cover and page. Diamond Valley Leader, October 28, 2009 10. Invitation. Opening of newly upgraded fire spotting tower, 11 April 2010 11. Newspaper article. Incredible luxury at fire spotting tower, Diamond Valley Leader, April 21, 2010, p, 5 12. Printout of plan of base of tower including comms cabinet and ladder to CFA cabin. Dated 17/6/2010 Archive Box 2 Folder 11 (Moor-rul Viewing Platform) 1. Agenda. Planning and building committee 12 March 2003 Application for construction of a viewing platform and road entry refurbishment and coach parking bay. 2. Envelope. Letters, paperwork and emails, mainly from Dennis Ward re roof design for the viewing platform and order for poppy seeds. 2005 3. Newspaper article (enlarged and laminated). Stolen Red gum seats sap new project’s momentum. (Local paper), April 3, 2007 4. Convenor’s Notes – Opening of the Viewing Platform at Kangaroo Ground, Shire of Nillumbik 5. Folder. Nillumbik Reconciliation Charter. Opening of the Moor-rul viewing platform 17.4.2008. Compiled by Harry Gilham. Includes newspaper clipping, speech, photocopy of photos with captions. 6. Newspaper article. View from the hill is a thrill. Heidelberg and Diamond Valley Weekly, April 22, 2008 7. Newspaper article. A platform towards reconciliation. Diamond Valley Leader, 23 April 2008. 8. Newspaper article: 6 reasons to visit Hurstbridge, The Age, Jun 6 2012 9. Article: Aboriginal cultural values and heritage management issues 10. Folder: Material relating to design and construction of viewing platform Folder 12 - Shire of Nillumbik Advisory Committee 1. 2011 Diary, Harry Gilham, Kangaroo Ground Advisory Committee 2. Photocopy. Newspaper clipping. Nillumbik Council seeking nominations for new Kangaroo Ground Memorial Tower and grounds advisory committee. DVN 17 Sept 1997 3. Letter. From NSC to Dean Stewart re heritage listing status. 12 July 1998. 4. Business paper for NSC Council meeting: KG Memorial Tower and Grounds advisory committee, 12 March 2002. Includes Terms of Reference Folder 13 - Friends of Kangaroo Ground War Memorial Park Inc. 1. KG Tower and land occupational health & Safety (guidelines) for volunteers 2. Supplementary notes (not related to fire spotting) from Friends group or advisory group of Kangaroo Ground War Memorial Park including design of seating, proposed budget for works, hand written notes from meeting by H.G. about 1999. Folder 14 - Soldiers. 1. Folder of material pertaining to men from the Shire of Eltham who enlisted in WW1 and for whom the Shire of Eltham War Memorial was dedicated. 2. Folder on residents from Shire of Eltham who died in WW2 1939-1945 with listings of each from Commonwealth War Graves Commission, WW2 Nominal Roll for Eltham 3. Newspaper article: Mates join to recall past, Diamond Valley News, November 16, 1994 4. Newspaper article: Board replaced, Diamond Valley News, September 2, 1998 about Hurstbridge RSL Honour Roll Board 5. Newspaper article: Keeping the memories alive; VP Day honoured, Valley Weekly, August 17, 2005 6. Newspaper article: In our hearts; Tributes for war heroes, Diamond Valley Leader, November 9, 2005, p1 7. Newspaper article: Service honoured, Diamond Valley News, Leader, April 23, 2008 8. Newspaper article: Salute to last men standing, Diamond Valley Leader, April 20, 2011, p1 and Last of the world warriors, pp8-9 9. Newspaper article: We will remember, Diamond Valley Leader, April 25, 2012, p3 10. Newspaper article: Family legacy builds whole town, Diamond Valley Leader, Oct, 2013, p15 11. Photos and details of Honour Boards in the shire 12. Miscellaneous notes by Harry Gilham Folder 15 – Welcome Home Committee Meeting Minutes. 1. Extracts from Welcome Home Committee Meeting Minutes 18 August 1917 to 14 August 1919. Folder 16 – World War One Local Enlistments. 1. Lever arch binder containing records of local enlistments by name from the Diamond Valley including extracts from Commonwealth War Graves Commission records. Includes Newspaper article clipping "Digger's marker of respect: Temporary cross a poignant find after eight decades in dusty garage"; Sunday Herald Sun, November 10, 2024, p33 concerning Private Harry Conway who died April 1918 and whose tempory grave marker cros now housed at Montmorency-Eltham RSL. Archive Box with documentsharry gilham collection, fire spotting, kangaroo ground, shire of eltham war memorial, masefield h. j., cfa, kangaroo ground war memorial park, shire of eltham soldiers' memorial, eltham shire war memorial tower, harry conway, montmorency-eltham rsl sub-branch -
 Orbost & District Historical Society
record container, From 1902 - 1911
Phonograph cylinders are the earliest commercial medium for recording and reproducing sound. Commonly known simply as "records" , these hollow cylindrical objects have an audio recording engraved on the outside surface, which can be reproduced when they are played on a mechanical cylinder phonograph. The "Gold-Moulded" process was developed in 1902 and involved creating a metal mould from a wax master; a brown wax blank would be placed inside and heated . as the blank expanded, the grooves would be pressed into the blank which would then be cooled. The "gold" is derived from the traces of that metal used as a conductive agent in the initial mould. "Whistler and his Dog" was performed by the Edison Military Band.Edison Records was one of the earliest record labels which pioneered sound recording and reproduction and was important in the early recording industry. Gold Moulded records used a process that Edison had developed, that allowed a mould to be made from a master cylinder which then permitted the production of several hundred cylinders to be made from the mould. Previously cylinders were recorded live or by hooking two machine together to copy from one cylinder to another, and they used softer brown wax which wore out in as few as twenty playings. Gold Moulded Records were discontinued in 1912.A cardboard cylindrical record container. It is an Edison Gold Moulded Record container. The label has red and gold print and a photo Thomas A. Edison.Hand-written on lid - Whistler & His Dogedison-gold-moulded-cylinders sound-recording records -
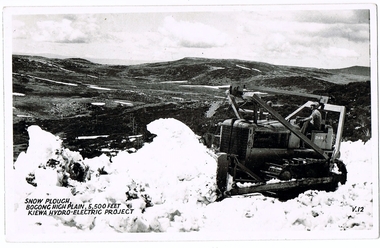 Kiewa Valley Historical Society
Postcard Circa 1950, Snow Plough, Bogong High Plain,5,500 Feet Kiewa Hydro-Electric Project, Circa 1950
This postcard was produced in the 1950's for the tourist trade in the Kiewa Valley and Alpine region. It encompasses the period when the State of Victoria was pressured by the ever increasing demand by industry and its population for electricity supplies. Hydro electricity was seen as an untapped natural resource to quench this demand. The Victorian Alps and the rivers flowing into its valleys was ideal for the construction of the Kiewa Hydro Electricity Scheme. The late 1940's saw the development of this scheme and the changing of sections of alpine landscape is covered by this and other postcards/pictures (tourists, construction workers, and established rural populations). This period in time was before the established wildlife and forest/nature groups became political activist who changed legislative acts to protect the environment. This rural region (Kiewa Valley/alpine plains) was at most only significant to a smaller group of winter sports, summer hikers/horse riders and rural farmers/graziers. The numbers of tourists and the increase in the local resident population was boosted by the construction of the Hydro Electricity Scheme. This influx to the regional population resulted in a corresponding diversity in services and brought about an environment that responded to a growing level of tourists and thereby permitting this industry to grow more rapidly than it would have naturally. This postcard details an attraction to the "cleaner" method of providing electricity. This postcard was purchased in 1950 by a surveyor at Landford's Gap. This item is a black and white photograph(professional) of a panoramic view of a snow plough clearing the unsealed road in 1950.This postcard is on quality paper and the reproduction of the picture is of a high standard.For other "tourist" postcards see 0480 (A) -(F) for other photos of similar postcards. kiewa valley tourism, victorian alps, alternate energy supplies, alpine population growth, secv, snow plough -
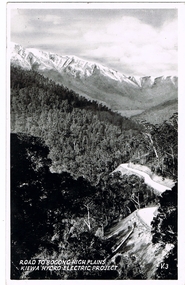 Kiewa Valley Historical Society
Postcard Circa 1950, Road to Bogong High Plains Kiewa Hydro Electric Project, Circa 1950's
This postcard was produced in the 1950's for the tourist trade in the Kiewa Valley and Alpine region. It encompasses the period when the State of Victoria was pressured by the ever increasing demand by industry and its population for electricity supplies. Hydro electricity was seen as an untapped natural resource to quench this demand. The Victorian Alps and the rivers flowing into its valleys was ideal for the construction of the Kiewa Hydro Electricity Scheme. The late 1940's saw the development of this scheme and the changing of sections of alpine landscape is covered by this and other postcards/pictures (tourists, construction workers, and established rural populations). This period in time was before the established wildlife and forest/nature groups became political activist who changed legislative acts to protect the environment.This rural region (Kiewa Valley/alpine plains) was at most only significant to a smaller group of winter sports, summer hikers/horse riders and rural farmers/graziers. The numbers of tourists and the increase in the local resident population was boosted by the construction of the Hydro Electricity Scheme. This influx to the regional population resulted in a corresponding diversity in services and brought about an environment that responded to a growing level of tourists and thereby permitting this industry to grow more rapidly than it would have naturally. This postcard details an attraction to the "cleaner" method of providing electricity. This postcard was purchased in 1950 by a surveyor at Landford's Gap.This black and white photograph on a Valentine's postcard is from a V2 Argus photograph.. It is on a 200g/m paper density photo side gloss. See 0480 (A) - (G) for other photos of similar postcards.In white lettering " ROAD TO BOGONG HIGH PLAINS KIEWA HYDRO-ELECTRIC PROJECT", V3secv, road making, victorian alps -
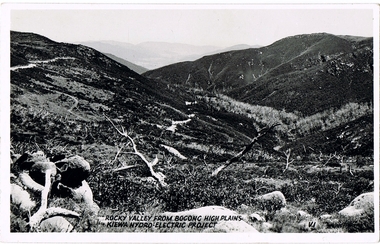 Kiewa Valley Historical Society
Postcard - Rocky Valley - Circa 1950, 1950
This postcard was produced in the 1950's for the tourist trade in the Kiewa Valley and Alpine region. It encompasses the period when the State of Victoria was pressured by the ever increasing demand by industry and its population for electricity supplies. Hydro electricity was seen as an untapped natural resource to quench this demand. The Victorian Alps and the rivers flowing into its valleys was ideal for the construction of the Kiewa Hydro Electricity Scheme. The late 1940's saw the development of this scheme and the changing of sections of alpine landscape is covered by this and other postcards/pictures (tourists, construction workers, and established rural populations). This period in time was before the established wildlife and forest/nature groups became political activist who changed legislative acts to protect the environment.This rural region (Kiewa Valley/alpine plains) was at most only significant to a smaller group of winter sports, summer hikers/horse riders and rural farmers/graziers. The numbers of tourists and the increase in the local resident population was boosted by the construction of the Hydro Electricity Scheme. This influx to the regional population resulted in a corresponding diversity in services and brought about an environment that responded to a growing level of tourists and thereby permitting this industry to grow more rapidly than it would have naturally. This postcard details an attraction to the "cleaner" method of providing electricity. This postcard was purchased in 1950 by a surveyor at Landford's Gap.This black and white photograph is from a Valentine's V2 Argus postcard. It is on a 200g/m paper density one side gloss. See also KVHS 0480 (A) to (L) for similar postcards. "ROCKY VALLEY FROM BOGONG HIGH PLAINS KIEWA HYDRO-ELECTRIC PROJECT" "V1"kiewa valley tourism, victorian alps, alternate energy supplies, alpine population growth, rocky valley, secv -
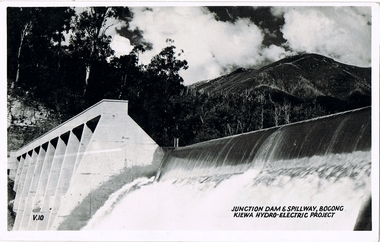 Kiewa Valley Historical Society
Postcard - Junction Dam - Circa 1950, Circa 1950's
This postcard was produced in the 1950's for the tourist trade in the Kiewa Valley and Alpine region. It encompasses the period when the State of Victoria was pressured by the ever increasing demand by industry and its population for electricity supplies. Hydro electricity was seen as an untapped natural resource to quench this demand. The Victorian Alps and the rivers flowing into its valleys was ideal for the construction of the Kiewa Hydro Electricity Scheme. The late 1940's saw the development of this scheme and the changing of sections of alpine landscape is covered by this and other postcards/pictures (tourists, construction workers, and established rural populations). This period in time was before the established wildlife and forest/nature groups became political activist who changed legislative acts to protect the environment.This rural region (Kiewa Valley/alpine plains) was at most only significant to a smaller group of winter sports, summer hikers/horse riders and rural farmers/graziers. The numbers of tourists and the increase in the local resident population was boosted by the construction of the Hydro Electricity Scheme. This influx to the regional population resulted in a corresponding diversity in services and brought about an environment that responded to a growing level of tourists and thereby permitting this industry to grow more rapidly than it would have naturally. This postcard details an attraction to the "cleaner" method of providing electricity. This postcard was purchased in 1950 by a surveyor at Landford's Gap.This black and white photograph is a Valentine's postcard, from a V2 Argus photograph. It is on a 200g/m paper density with only the photo side gloss.Front "JUNCTION DAM & SPILLWAY, BOGONG KIEWA HYDRO-ELECTRIC PROJECT" on the flip side "VALENTINE'S POST CARD " "A GENUINE PHOTOGRAPH"kiewa valley tourism, victorian alps, alternate energy supplies, alpine population growth, junction dam, secv -
 Kiewa Valley Historical Society
Postcard - Junction Dam - Circa 1950, Circa 1950
This postcard was produced in the 1950's for the tourist trade in the Kiewa Valley and Alpine region. It encompasses the period when the State of Victoria was pressured by the ever increasing demand by industry and its population for electricity supplies. Hydro electricity was seen as an untapped natural resource to quench this demand. The Victorian Alps and the rivers flowing into its valleys was ideal for the construction of the Kiewa Hydro Electricity Scheme. The late 1940's saw the development of this scheme and the changing of sections of alpine landscape is covered by this and other postcards/pictures (tourists, construction workers, and established rural populations). This period in time was before the established wildlife and forest/nature groups became political activist who changed legislative acts to protect the environment.This rural region (Kiewa Valley/alpine plains) was at most only significant to a smaller group of winter sports, summer hikers/horse riders and rural farmers/graziers. The numbers of tourists and the increase in the local resident population was boosted by the construction of the Hydro Electricity Scheme. This influx to the regional population resulted in a corresponding diversity in services and brought about an environment that responded to a growing level of tourists and thereby permitting this industry to grow more rapidly than it would have naturally. This postcard details an attraction to the "cleaner" method of providing electricity. This postcard was purchased in 1950 by a surveyor at Landford's Gap.This black and white photograph on a Valentine's postcard is from a V2 Argus photograph. It is on a 200g/m paper density one side gloss only/. See 0480 (A) -(L) for other photos of similar postcards."JUNCTION DAM & SPILLWAY, LAKE GUY, BOGONG, KIEWA HYDRO-ELECTRIC PROJECT" "V5" on the flip side" VALENTINE'S POST CARD " "A GENUINE PHOTOGRAPH"kiewa valley tourism, victorian alps, alternate energy supplies, alpine population growth, junction dam, secv -
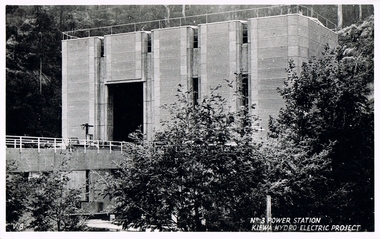 Kiewa Valley Historical Society
Postcard Circa 1950, No.3 Power Station Kiewa Hydro-electric Project "V.8", Circa 1950
This postcard was produced in the 1950's for the tourist trade in the Kiewa Valley and Alpine region. It encompasses the period when the State of Victoria was pressured by the ever increasing demand by industry and its population for electricity supplies. Hydro electricity was seen as an untapped natural resource to quench this demand. The Victorian Alps and the rivers flowing into its valleys was ideal for the construction of the Kiewa Hydro Electricity Scheme. The late 1940's saw the development of this scheme and the changing of sections of alpine landscape is covered by this and other postcards/pictures (tourists, construction workers, and established rural populations). This period in time was before the established wildlife and forest/nature groups became political activist who changed legislative acts to protect the environment.This rural region (Kiewa Valley/alpine plains) was at most only significant to a smaller group of winter sports, summer hikers/horse riders and rural farmers/graziers. The numbers of tourists and the increase in the local resident population was boosted by the construction of the Hydro Electricity Scheme. This influx to the regional population resulted in a corresponding diversity in services and brought about an environment that responded to a growing level of tourists and thereby permitting this industry to grow more rapidly than it would have naturally. This postcard details an attraction to the "cleaner" method of providing electricity. This postcard was purchased in 1950 by a surveyor at Landford's Gap.This black and white photograph from a Valentine's postcard is from a V2 Argus photograph postcard. It is on a 200g/m paper density photo side gloss. See 0480 (A) - (K) for other photos of similar postcards."No.3 POWER STATION KIEWA HYDRO ELECTRIC PROJECT" "V8"kiewa valley tourism, victorian alps, alternate energy supplies, alpine population growth, secv -
 Kiewa Valley Historical Society
Book - Cooking, Good Housekeeping's Home Preserving, 1953
Women preserved fruits to make jams, jellies, marmalade, pickles by bottling and canning as part of their housework duties in the 1950's.The women whose husbands worked on the Kiewa Hydro Electric Scheme were not permitted to work for the State Electricity Commission of Victoria, the expectation at the time being to work at home as mothers and housewives. This book describes one of their 'duties'.Coloured paper cover showing, on the front, fruit and jars with oranges being cut and fruit cooking, on the back. The title is across the top in black and then red. The book contains 28 pages and consists of recipes with illustrations. preserving. bottling. canning. housework. women's work. -
 Kiewa Valley Historical Society
Book - Cooking, Jams and Preserves - A Guide for Housekeepers
Women preserved fruits to make jams, jellies, marmalade, pickles by bottling and canning as part of their housework duties. Recipes were published in Women's magazines such as 'Home Beautiful'.The women whose husbands worked on the Kiewa Hydro Electric Scheme were not permitted to work for the SECV, the expectation, at the time, being to work at home as mothers and housewives. This book describes one of their 'duties'.Printed 26 pages stapled together with 2 staples reinforced by machine stitching. The front cover is missing. The back cover has a coloured photo of a box of "Kornies" on it.The book consists of recipes and advertisements.preserves. jams. housekeeping. bottling. canning. women's work. women's magazines.