Showing 1380 items matching "imperial"
-
 Flagstaff Hill Maritime Museum and Village
Weapon - Cannon, 1866
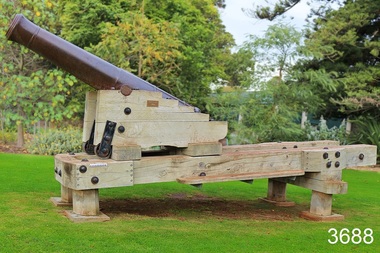
In the years following the Crimean War (1854-1857J) there was a great concern in the Colony that Imperial Russia would attempt an invasion. Coastal defences in the colony of Victoria were greatly strengthened by the Government as a result. Warrnambool was originally protected by cannons at Cannon Hill, approximately 1 kilometer west of the Flagstaff Hill Fortifications. These cannons included two 1866 guns, both 80 Pound Rifled Muzzle Loaders (RML) purchased by Victoria’s Colonial Government. They were part of a shipment of 26 such guns sent from England in December 1866. They are registered as No. 23 (80cwt-2qr-0lbs) - Gun 1, and No.13 (81cwt-1qr-12lbs) - Gun 2. They were cast at the Royal Gun Factory, Woolwich Arsenal, in 1866 and have a 6.3 inch bore. Both barrels carry the Royal Cypher of Queen Victoria, Insignia of the Royal Engineers, within the Garter and Motto surmounted by the Crown, with the Royal Cypher of Queen Victoria within the Garter (letters in centre “VR”, motto “HONI SOIT QUI MAL Y PENSE”, "Shame be to him who thinks evil of it."). The guns were originally supplied with wooden carriages. (The Royal Arsenal at Woolwich, England, was established eleven years after the Restoration of King Charles II. It was the principal supplier of armaments to the British and Empire Governments. At the height of its operations during World War One the factory covered 1300 acres and employed very nearly 80,000 workers. Woolwich was the Headquarters of the Royal Artillery since the raising of that Regiment in 1716. The Arsenal was closed in the late 1960’s.) These two cannons were transferred to the Warrnambool Garrison Artillery Battery Fortifications erected at Flagstaff Hill in 1887 as part of Victoria’s Coastal Defences. The original wooden carriages were subsequently replaced with the present iron garrison carriages in 1888. They are a “C” pivot. The ‘racers’ or curved track set into the floor of the gun emplacement (which enabled the guns to be traversed more quickly) are as specified for guns up to 10 inch, being of wrought iron 2.78 inches wide. A temporary third gun, now no longer on Flagstaff Hill’s site, was a 5 inch Rifled Breech Loading (BL) Armstrong gun mounted on an Elswick hydro pneumatic disappearing carriage It was faster to load and fire than the 80 pound RMLs and its arrival spelt the end of the older 80 pound guns’ useful life, apart from being used for practice sessions. The 5 inch BL gun was the main defensive weapon of the Warrnambool Battery until the Battery was downgraded in importance and the gun was recalled to Melbourne in 1910. The State of Victoria took over the ownership of the guns at the time of Australian Federation in 1901. In about 1901/1902 the Garrison Battery was converted to the Warrnambool Battery of the Australian Field Artillery (No 4 Field Battery). It was equipped with 4.7 inch naval guns mounted on field carriages. They were now a mobile unit but continued to use the Warrnambool Garrison area at Flagstaff Hill for practice. When the Fortifications were declared obsolete the two 80 Pounder RML were relocated to Cannon Hill in 1910. On the outbreak of World War One the 4.7 inch guns were recalled to Melbourne, and the Battery was disbanded. Most of the personnel probably re-enlisted in the local 4th Australian Light Horse Regiment. The two 80 Pounder RML were moved back to the Fortifications in 1973. They were both fully restored by Army First Year Apprentices at the Ordinance Factory in Bendigo in time for the centenary year of the fortifications in 1987. The guns are capable of firing 80 pound (32.3kg) armour piercing exploding shells 3.65kms out to sea. They were original manned by volunteers before a paid Garrison was established. Now the Guns are again fired by volunteers on Special Event days. Since restoration the Gun Number 1 had been fired on a regular basis but Gun Number 2 hadn’t been fired since the mid 1990’s. In April 2015 Gun Number 2 was serviced in preparation for the firing of both cannons on the ANZAC Centenary commemorations on April 25th 2015. Other guns from the original Cannon Hill location were obsolete by the time the 1887 Warrnambool Garrison Artillery Battery was built. These guns are (1) a 32 Pounder Muzzle Loading Smooth Bore (SB) cast in 1813 at the famous Carron Foundry, number 80837 and now located in the Warrnambool Botanic Gardens (2) a 68 Pounder Muzzle Loading Smooth Bore cast in 1861 at the equally august Low Moor Foundry, number 10310 and now located on the lawn area at the entrance to Flagstaff Hill Maritime Village. Both of these guns are mounted on their original wooden garrison carriages. There are only seven 32 Pounder SB made by Carron and fifteen 68 Pounder SB made at Low Moor known to exist in the State of Victoria (Conservation Management Plan for Victorian Guns and Cannon, South Western Victoria, May 2008, ref W/F/05)The Warrnambool Garrison has been added to the Victorian Heritage Register H1250 “for its intact battery and guns, a strong reminder of Victoria’s wealth and determination to protect itself from the perceived threat of invasion in the 1880’s.” The City of Warrnambool is one of several custodians of a collection of artillery pieces of heritage significance at a state, national and international level. These pieces are directly related to the defence of south-west Victoria in the 19th century. The care and preservation come under the Heritage Act 1995. Cannon. 80 Pound Rifled Muzzle Loading (RML) Gun on iron carriage and slide, installed in the Battery at Flagstaff Hill’s Fortifications. Made in 1866 at the Royal Gun Factory (R-G-F), Woolich, England. Gun Reg No 13. Flagstaff Hill Garrison Gun 2 (Gun No. 2). Insignia of the Royal Engineers, and the weight of the gun, stamped on top of the gun’s barrel. There is a brass plate on the side of the gun with the details of 1987 restoration.Stamped into the metal on top of the barrel, Insignia of the Royal Engineers; Garter and Motto “HONI SOIT QUI MAL Y PENSE”, surmounted by the Crown, with the Royal Cypher of Queen Victoria “VR” within the Garter. Also stamped on top of the gun are 2 inward pointing arrows above the weight ”81-1-12”. Brass plate “RESTORATION / BY / FIRST YEAR / APPRENTICES / ORDANANCE FACTORY / BENDIGO 1987”flagstaff hill, warrnambool, shipwrecked coast, flagstaff hill maritime museum, maritime museum, shipwreck coast, flagstaff hill maritime village, great ocean road, colonial defences, victoria’s coastal defences, warrnambool fortification, warrnambool garrison battery, warrnambool volunteer corps, ordinance, armaments, cannon hill fortifications, 4th australian light horse regiment, no 4 field battery, 80 pound cannon rifled muzzle loaders (rml), victorian colonial government, royal gun factory england, woolwich arsenal, royal cypher of queen victoria, garrison gun -
 Mission to Seafarers Victoria
Photograph - Reproduction, Jay Miller, 6 June 2019
This photograph was published in the Geelong Advertiser on Friday 23 November 1906, page 4 with this article: "Owing to the generosity of an anonymous donor, the Victorian Missions to Seamen has been supplied with a long felt want in the shape of a modern motor launch to facilitate and render more efficient the work among the vessels in the Yarra and Hobson's Bay. The order for the construction of the boat, was placed with Mr. Chas. Blunt, of the Eastern Beach, and complimentary references were made to her graceful line- as she rode in light .trim after the launching on Wednesday afternoon. She is 31ft. long. Oft. beam, and has a depth of 3ft. The frame is of jarrah and ben* blackwood. and inch kauri planking has been used in building Iter. A neat deck-house with Oft. headroom is situat ed-umidsliip*. and a short mast is pro vided to carry the well-known blue flag of the -.fission. The launch motors will develop a speed of between nine and ten miles an hour: The finishing touches have yet to be given her. and she will afterwards be row«l to have her engines fitted in. -The launch will he ready for service for the busy wheat season com mencing at- the end of the year. The launching ceremony took place at 6 p.m. on Wednesday at the builder's yards, in the .presence of njarge gather ing of spectators. The Archdeacon of Geelong. the Rev. O. P. C'ros-.ley. ecu ducted a short dedication service, and the other clergymen who took part in the service were the Primate of Aus tralia. the Right Rev. Dr. Sauiuarcz Smith: the Rev. A. Giirney Goldsmith, the Missions chaplain: and the Rev. H. Kelly. The Bishop of Newcastle, Dr. Stretch, and the chaplain of the New castle Mission, the Rev. AYnddy. and Canon Nash were also present. The Primpte. addressing the gar boring as "My good friends of Geelong." said be had never been in sight of the hay before. bill had'gladly accepted the in vitation to say a few words in connec tion with the dedication of tiro launch. He had always been interested in mis sions of all sorts, as they ali as Christian men and women 110 doubt- were, and lie was particularly interested in Missions to Seamen, because in the Society at' borne, with which this Society was con nected, he had a son-in-law who was mission chaplain in the Medway. He therefore know something about a launch for the purpose of a mission like this, and also knew 'something about missions to seamen. In Sydney for some time past it had been doing good work—work which he was sure they would all feel was of the widest possible value. This year he was at the annual meeting of the Missions to Seamen in London presided over by the Bishop o-f Stcphney. -He (the Primate) at that meeting remarked that the Mission in it, value was personal, local and Im perial. It was of personal value to thee who came under the ministra tions of the church, and in the social as pect : it was local because where the Mission existed the feelings of the lo cality were thrown out. in sympathy with j tlie -Mission, and the people themselves thus benefited. It was also a matter of Imperial interest because it- was really i a world-wide Mission, inasmuch as the | sailors as they" went from one part of the world to another were in themselves j missionaries either for evil or for good, i Thev might he missionaries with a mcs i sago which might degrade and "work ail I evil influence amongst, men, and with i conduct which might reflect a reproach !' upon Christian profession. On the other hand, they might be Chrisian men endeavoring more and more to show the .example of the Christian life in the J midst of very big difficulties and tempta tions. • -Ho came to show liis sympathy with tlio appropriately-named '"'Southern Cross," and from what lie had boon told he believed she was a good boat, a good gift, and launched for a good purpose. They should be thankful that it was a good boat and .thankful because it was a good gift by an anonymous donor, whom he congratulated on doing such a useful thing." The idea of the launch ing ceremony was to ask the blessing of God because ".Except the Lord hless'the house their labor is hut lost'that build it." The Archdeacon expressed thanks to the Primate for attending the cere mony, and regretted that the Arch bishop was unable to attend. They dc- | sired that the boat- should always be as sociated with the.Church Congress 1906. I The opening hymn was "For those in j peril on the sea," followed hv Psalm I 107, "'They'that, go down to the sea in 1 Ships." Tlio prayers included an ap peal foiUDirine blessing on .the launch, and for tho preservation of those who may travel in her. ' Xlio Benediction was pronounced by the Primate, and the christening cere mony performed by Hiss Connibere. From the bow there was suspended a bottle of pure water covered with red, white and blue streamers and roses. Dashing the bottle in,fragments against the launch's bow. Miss Connibere named her the "Southern Cross." Cheers were given for the launch/and as she travell ed down the slip further cheers were given. She carried the Mission flag at tho masthead, and between Union Jacks at tho bow and stern, a long string of flags fluttered gaily* in the breeze. The collection was in aid of the Mis sions to Seamen and the Geelong Sailors' Rest.Reproduction of a photograph from a newspaper.Fujifilm / Quality Dry Photo papersouthern cross, motor boat, mission to seamen, seamen's mission, charles blunt, blunt boatbuilders, geelong -
 Flagstaff Hill Maritime Museum and Village
Domestic object - Fork
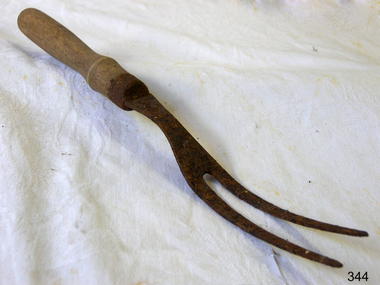
Naturally, we tend to take commonplace objects for granted, because they have always been there. Yet how many of you actually have thought “hey, where do forks come from?” Well, it takes one trip to China and a 3-year-old laughing at your face because of your desperate attempt to eat with chopsticks to finally appreciate something so ordinary such as a fork. So, where do forks come from? The early history of the fork is obscure. As a kitchen and dining utensil, it is believed to have originated in the Roman Empire, as proved by archaeological evidence. The personal table fork most likely originated in the Eastern Roman (or Byzantine) Empire. Its use spread to what is now the Middle East during the first millennium AD and then spread into Southern Europe during the second millennium. It did not become common in northern Europe until the 18th century and was not common in North America until the 19th century. Carving fork from 1640. Source: Wikipedia/Public Domain Carving Fork from 1640. Source: Wikipedia/Public Domain Some of the earliest known uses of forks with food occurred in Ancient Egypt, where large forks were used as cooking utensils. Bone forks had been found on the burial site of the Bronze Age Qijia culture (2400–1900 BC) as well as later Chinese dynasties’ tombs.The Ancient Greeks used the fork as a serving utensil. Read also: Steven Spielberg to Remake the Classic Musical ‘West Side Story’ In the Roman Empire, bronze and silver forks were used. The use varied according to local customs, social class and the nature of food, but forks of the earlier periods were mostly used as cooking and serving utensils. The personal table fork was most likely invented in the Eastern Roman (Byzantine) Empire, where they were in everyday use by the 4th century (its origin may even go back to Ancient Greece, before the Roman period). Records show that by the 9th century a similar utensil known as a barjyn was in limited use in Persia within some elite circles. By the 10th century, the table fork was in common use throughout the Middle East. Bronze forks made in Persia during the 8th or 9th century.Source: Wikipedia/Public Domain Bronze forks made in Persia during the 8th or 9th century.Source: Wikipedia/Public Domain The first recorded introduction of the fork to Western Europe, as recorded by the theologian and Cardinal Peter Damian, was by Theophano Sklereina the Byzantine wife of Holy Roman Emperor Otto II, who nonchalantly wielded one at an Imperial banquet in 972, astonishing her Western hosts.By the 11th century, the table fork had become increasingly prevalent in the Italian peninsula. It gained a following in Italy before any other Western European region because of historical ties with Byzantium and continued to get popularity due to the increasing presence of pasta in the Italian diet. At first, pasta was consumed using a long wooden spike, but this eventually evolved into three spikes, design better suited to gathering the noodles. In Italy, it became commonplace by the 14th century and was almost universally used by the merchant and upper classes by 1600. It was proper for a guest to arrive with his fork and spoon enclosed in a box called a cadena; this usage was introduced to the French court with Catherine de’ Medici’s entourage. In Portugal, forks were first used at the time of Infanta Beatrice, Duchess of Viseu, King Manuel I of Portugal’s mother around 1450. However, forks were not commonly used in Western Europe until the 16th century when they became part of Italian etiquette. The utensil had also gained some currency in Spain by this time, and its use gradually spread to France. Nevertheless, most of Europe did not adopt the use of the fork until the 18th century. Read also: The 8 Most Famous ‘Functioning Alcoholics’ in History Long after the personal table fork had become commonplace in France, at the supper celebrating the marriage of the Duc de Chartres to Louis XIV’s natural daughter in 1692, the seating was described in the court memoirs of Saint-Simon: “King James having his Queen on his right hand and the King on his left, and each with their cadenas.” In Perrault’s contemporaneous fairy tale of La Belle au bois dormant (1697), each of the fairies invited for the christening is presented with a splendid “fork holder”. The fork’s adoption in northern Europe was slower. Its use was first described in English by Thomas Coryat in a volume of writings on his Italian travels (1611), but for many years it was viewed as an unmanly Italian affectation. Some writers of the Roman Catholic Church expressly disapproved of its use, St. Peter Damian seeing it as “excessive delicacy.” It was not until the 18th century that the fork became commonly used in Great Britain, although some sources say that forks were common in France, England, and Sweden already by the early 17th century. Spaghetti fork By Lady alys - Own work, CC BY-SA 3.0, https://commons.wikimedia.org/w/index.php?curid=6414948 Spaghetti Fork By Lady alys – Own work, CC BY-SA 3.0, The fork did not become popular in North America until near the time of the American Revolution. The curved fork used in most parts of the world today was developed in Germany in the mid 18th century while the standard four-tine design became current in the early 19th century. The fork was important in Germany because they believed that eating with the fingers was rude and disrespectful. The fork led to family dinners and sit-down meals, which are important features of German culture. https://www.thevintagenews.com/2016/08/31/priority-fork-came-italy-european-country-pasta/?chrome=1Serving fork, two prongs, with a shaped wooden handle. Badly rusted.None.flagstaff hill, warrnambool, shipwrecked-coast, flagstaff-hill, flagstaff-hill-maritime-museum, maritime-museum, shipwreck-coast, flagstaff-hill-maritime-village, food, meat, carving -
 Bendigo Historical Society Inc.
Document - LANSELL RELATED DOCUMENTS
Document.Copy of Williamstown Historical Society Newsletter No 17 (1977).On the second and third page of this Newsletter is an article entitled ''The guns of the 'Nelson''', written by Doug Mills, Castlemaine. The Warship NELSON underwent alterations in 1860, including cut down to two decks and lengthened, her armaments reduced to 72 guns. Two 7inch 68 pounder guns were added to her armament. In February 7 1867 she was officially given to the Colony of Victoria by the Imperial Government. At the time her Commander was Captain Charles B. Payne. The Warship reached Melbourne in 4th February 1868. Relics of the NELSON were auctioned at Williamstown Victoria Naval Depot, and her two anchors are preserved for public display at Williamstown. An active demand for a share of the guns from various towns in the State. Ballarat received four (4) guns, Bendigo and Castlemaine two (2) each, while one has been given to each of the following towns: - Ararat, Tarnagulla, Hamilton, Bacchus Marsh, Echuca and Geelong. Collection of Lansell related documents: a. Copy of photograph - Lansell's Big 180 Victoria Hill - early 1870s - New Chum Hill in background. B. Lansell Estate mines - compiled from the annual report of the Hon Minister of Mines for Victoria, 1906. A listing of the George Lansell Mining Company interests at the time of his death. These were, New Moon Co, N.L., Clarence, New Prince Of Wales Co. N.L., Virginia G. M. Co., Catherine Reef United Co N.L., Great Northern Co N.L., Williams United, McDuff Amalgamated Co, South Mungo Co, South Prince Of Wales Consolidated, Constellation Co. Golden Pyke Co, Johnson's Reef Extended Company, Golden Age Co., Princess Dagmar Co, New St Mungo Co, Johnson's Reef Co, North Johnson's Co, Collman and Tacchi Co, Confidence Extended Co, G. Lansell Sandhurst Mines, Pearl Co., Windmill Hill Co., United Hustlers and Redan, Koch's Pioneer Co., Hercules and Energetic Co., Lansell's Comet, Cornish United Co., Ironbark Co., Hustler's Reef Co., and No. 1 Lansell's 83, Carlisle Co., Great Extended Hustler's Co., Victoria Consolidated Co., Great Central Victoria Co., Victoria Quartz Co., Victory and Pandora , Lansell's Big 180, Tambour Major, New Chum and Victoria Co., Garden Gully United Co., G. Lansell, Lansell's 222, Lazarus Co., Sea Amalgamated Co., Hustler's Royal Reserve Co., Horwood and Burrowe's Co., New Chum Consolidated Co., G Lansell's Sheepshead, Gariboldi Co., Londonderry Co., Shamrock Co., Great Britain Co., Fortuna Hustler's Co., Eureka Extended Co., G. Lansell's G.V.L., New Red White and Blue Consolidated, Great Southern Co., Lansell's Concord Mines, True Blue Co., G. G. Consolidated Co., Extended Red White and Blue Co., Great Columbian, Sedgwick and New Birthday. Also, a listing: ''Among the biggest yields to ate (sic) (date?) in ozs or Pounds were''; New Moon.Co. N.L. 180,087 ounces, Clarence £303,932, Catherine Reef United N.L. £762,815, Great Northern Co Ltd £394,525, Johnson's Reef Co 277,320ounces, Windmill Hill Co. 113,842ounces, Hustler's Reef Co. And No.1 1,144,923ounces, Carlisle Co 307,835ounces, Great Extended Hustlers Co £1,038,125, Garden Gully United Co. £1,653,900, Great Southern 97,752ounces, New Chum Consolidated 89,526ounces. This part (b) has handwritten inscription ''compiled by J Sarvaas MCE(??) Certified Mining Surveyor; 22/8/06''; c. Copy of Deed dated Dec 1886 between George Lansell, Wooten Lansell and the Bank of New South Wales relating to a wall and windows and openings etc etc. (3 pages of legalese!!!!!). Also, a (related?) page copy of a Grant -by purchase to the Bank of New South Wales with a date of August 1855 on it ''Enrolled in the Office of the Registrar of the Supreme Court of the Colony of Victoria - signed by Acting Registrar.document, gold, mines -
 Ballarat Base Hospital Trained Nurses League
Priscilla Wardle - Trainee Ballarat District Hospital, 27/02/1905 to 01/03/1908 and WW1 Nurse. Also Edith Popplewell & Lily MacKenzie
No 1: Matron Eagleton with Nursing Staff, Ballarat & District Hospital. Priscilla Wardle, far right - trainee nurse 1905-1908. No 2: This could be a group of trainee nurses at Ballarat Hospital. Circa 1906/1907. The nurses with the grey looking sleeves in this black and white photograph may be wearing the lilac uniform of Trainee nurses. The sitting nurse on the far right may already be qualified because she appears to be wearing the white of a trained nurse. Sitting in the middle with the cheeky grin could be Priscilla and the standing nurse on the far left could be Edith Popplewell. No 3: This photograph is labelled 1907 and Priscilla would have just commenced her training. She appears to be “fanning” a female patient presumably to cool her down. This could be upstairs in the Queen Victoria’s Women’s Ward. Priscilla graduated as a nurse in 1908. In this photograph Priscilla was at age 23 years. No 5: Sheila Kelly (left) and Priscilla Wardle. This photograph is labelled 1909 and shows Priscilla in an all white uniform indicating she has qualified as a nurse. Sheila Kelly appears to have darker sleeves/blouse (lilac) and may still be a trainee. No 6: There is a very good chance that this photograph is Edith Popplewell, standing left, Lily MacKenzie , standing on the right and Priscilla seated. Writing in her album is very hard to read but it appears to be “Pop McK & I”. The arm bands with the St John Cross denote they are “charge nurses” maybe in charge of a ward. Taking all this into account the photograph could be circa 1909/1910. No 8 & 9: Priscilla painting what appears to be a gate while wearing her nurse uniform. She has a big grin on her face. Together with Lily MacKenzie they were the principals in the Mount Stuart Private Hospital at 18 Duke Street. Daylesford. This property is now known as Mount Stuart House. Priscilla appears to be on Central Spring Road with the Daylesford Post Office in the background. Photograph 9 is labelled 1914 which would make it near the end of their tenancy between 1911 and 1914. No 10: This photograph raises some questions. Priscilla appears to have darker sleeves /blouse (lilac) which may indicate she is still a trainee however Priscilla is also wearing a “charge nurse” arm band. While my research shows trainee nurses can be a “charge nurse” this is not common practise. The scene appears to be at the door of a house/home. I am not sure if the children’s ward/orphanage at the Ballarat Hospital at this time was in such a building. It could be that it is at the Mount Stuart Hospital but this would mean Priscilla and Lily have duplicated the wearing of the “charge nurse” arm band. The St John’s logo looks different too. Priscilla Isabel “Pearl” Wardle (1884-1967). The armband indicates Priscilla is a Charge Nurse at the Ballarat Hospital. Nothing else known. No 11: Mary & I at Mount Stuart – House Daylesford – This is probably the nursery at the Mount Stuart House Private Hospital being run by Priscilla Isabel “Pearl” Wardle (1884 – 1967) and Selina Lily (Lil) MacKenzie or McKenzie (1882 – 1975) between 1910 and 1914. Mary is certainly Mary Young MacKenzie or McKenzie (1865- 1942) Lily’s stepsister who trained at Ballarat Hospital as “Mary Young “at the same time as Priscilla and Lily. Mount Stuart House still stands at 18 Duke Street Daylesford. Photo date 1912. No 12: Priscilla wearing her distinctive Queen Alexandra’s Imperial Military Nursing Service Reserve cape and badge. Possibly while nursing in London for a month in 1919 after the war. No 12A: Priscilla Wardle - WW1 Diary, OCR enabled. No 13: Priscilla and friends at No. 7 General Hospital, Malassises, Saint Omer, France in July 1915 The old monastery being used as a hospital can be seen in the background. The tents are the nurses quarters. This photograph may have been taken at the same time as the group photograph on page 250 of the diary transcription. Priscilla is thought to be the nurse at the centre in the QAIMNSR uniform. The nurses quarters at the No 7 General Hospital in Saint Omer in France where Priscilla worked for most of the first year of her Diary. Their Monastery (Hospital) at Malassises can be seen in the background. No 15: Priscilla is an Acting Sister working at the 2nd General Hospital for Officers in Havre, France, between March and July 1918. The nurses were enjoying their “tea party”. (see also page 253 of the Diary transcription) No 17: Priscilla at Havre - at 2nd General Hospital (Officers Hospital) in Havre., France Friday 29 March 1918 to Monday 29 July 1918 note the two dark bands on her right sleeve denoting that she is an “Acting Sister”. Priscilla is 34 years of age in this picture and in the three weeks prior to this posting she met Cyril Terence Charles Kirby (1892-1968) her future husband at the 42nd Stationary Hospital in Flixecourt while he was serving with the British Army during the battle and evacuation of Amiens. No 18: Priscilla Wardle at No 8 Stationary Hospital Wimereux, France - from Saturday 24 June 1916 to Tuesday 18 September 1917, Priscilla worked at this hospital for 15 months her longest time in one hospital. during the war. While at Wimereux on Sunday 1 July 1917 she was appointed an Acting Sister. Priscilla once said she disliked nursing in her cape and badges and here she is in her favourite “uniform” for work “the robe” as she called it. She may be leaving the “operating theatre” at Wimereux in this photograph. No 19: Priscilla worked in various operating theatres throughout France. This could be after she became an anaesthetist in 1918 and worked with this team. She is wearing her favourite uniform which is more comfortable. She did not like the collars and capes that were required to be worn. No 20: Priscilla and Sister Michael Meeke? (details not found) are having a quiet drink at the 2nd General Hospital for Officers in Havre, France. Note the dark bands on their sleeves denote their rank as nursing “Sisters”. While it looks like they are smoking look more closely they are in fact holding a “flute” style probably “cocktail” glass. Tea parties and cocktails, Havre could almost have been fun. No 22: 1913 – Ballarat nurse Priscilla Isabell “Pearl” Wardle (1884-1967) in Cannes on the French Riviera during leave from between Friday 20 February 1918 and Friday 6 March 1918.Priscilla is second from the left wearing her distinctive QAIMNSR cape of grey with dark “wine” coloured border. The other nurses are wearing their “travelling” army uniform. They were rudely called “Salvation Army Lassies” by American nurses for the way they were dressed. (see page 232 of Priscilla’s War Diary) The description of 1913 on this photograph is confusing. No 23: Priscilla with her best friend Edith Victoria Donaldson somewhere in the “mysterious far east” on their trip on the Orontes. Priscilla is second from left - this may have been taken at Durban during Priscilla's return to Australia in 1919. No 25: Priscilla Wardle, Ballarat nurse in her Queen Alexandra’s Imperial Military Nursing Service Reserve (QAIMNSR) uniform. Notice the distinctive grey cape with “wine coloured” border Priscilla is also wearing her QAIMNSR qualification badge (medal) on the right side. Because she has no dark (wine coloured) bands on her sleeves so this photograph may be before 1 July 1918. No 26: Priscilla met her husband to be English army Lieutenant Cyril Terrence Charles Kirby during the battle and subsequent evacuation of Amiens in France. As an army nursing “Sister” Priscilla also held the rank of Lieutenant. Priscilla was stationed at the 42nd Stationary Hospital between 7/3/18 and 23/3/18. She had just completed a fortnight break at Cannes on the French Riviera. They were married at Priscilla’s home “Waverley" at 215 Dawson Street Ballarat on Saturday 15 November 1919. Nov 15, 1919 – Mr and Mrs Kirby. The bride Priscilla Isabell “Pearl” Kirby (nee Wardle) (1884-1967) and the groom Cyril Terence Charles Kirby (1892– 1968) on their wedding day. Priscilla was 34 years of age and Cyril 27 years of age however their marriage certificate states that they were both 34 years of age. Their marriage certificate states they were married at Waverley, Dawson St, South, Ballarat in a Presbyterian service conducted by the Rev. John Walker, a Minister of the Presbyterian Church of Australia and the Moderator General of the Church we think for Victoria. Was it in an outdoor setting as the surrounds in this photograph seem to indicate. Their witnesses were Robert and Olive, Priscilla’s brother and sister. Cyril signed as C. Terence. C. Kirby and Priscila signed as Priscilla I. Wardle. The certificate lists Cyril (Terence) as a Bachelor, Born at sea on a British ship and his occupation as Sailor. His father interestingly is listed as Charles John Kirby, of independent means and his mother as Emily Newman. Priscilla is listed as a Spinster, born in Ballarat with occupation as a Nurse. Her father is listed as Henry Thomas Wardle, Timber Merchant and her mother as Isabella Allan. They are both resident at 215 Dawson St. Ballarat which was Waverley the Wardle family home. No 28: Reverse in Poppy’s handwriting: “Lovingly yours Poppy, Dec 1908” Taken the year after Poppy qualified at BBH. No 29: Reverse in Poppy’s handwriting: “With much love to you Cilla, Poppy 1915” This picture was taken in the same year as the Marquette sinking incident. Edith Catheina Popplewell RRC (1884-1972) in her New Zealand Army Nursing Service (NZANS) Uniform. Poppy is at age 29 years in this photograph. Poppy was awarded the Royal Red Cross (RRC) medal for her heroism during the sinking of the Marquette transport ship. She lost her best friend NZ nurse Lorna Ratray. No 30: Taken in Cairo. Poppy is in the centre and wearing her New Zealand army badge and cape. The two nurses on either side are Australian nurses probably wearing their unique silver Australian Army sunrise badge and cape. No 31: Reverse in Poppy’s handwriting: “Ward 7 on Xmas day 1917, with my love, Poppy, A Happy New Year to you – had the sweetest letter from Bobbie”. (Bobbie is Priscilla’s brother Robert). It is thought the nurse in the centre of the three on the left is Poppy. It is 1917 two years after the Marquette sinking. Poppy appears to be a “sister” note the two dark bands on her sleeve. The uniform also matches that of Poppy 2. This photograph is in Post Card form very common during WWI. Edith Popplewell RRC is the “Sister” in the middle of the group of three nurses on the left. She is a sister not a general nurse because of the two bands on her left wrist denoting her rank. She was in fact the Charge Nurse ( in charge) of Ward 7 at this time. Note the Christmas decorations. Poppy is at age 33 years of age in this photograph.Bobbie is Priscilla’s brother Robert Norman “Bobbie” Wardle (1895-1979). No 32: Lilly MacKenzie & Poppy – Otaki - Australian nurse Selina Lily (Lil) MacKenzie sometimes McKenzie (1882– 975) grew up and trained as a nurse in Ballarat Victoria. After completing her training Lily and Priscilla Isabell “Pearl” Wardle (1884 – 1967) conducted the Mount Stuart House Private Hospital in Daylesford Victoria. In late 1913 Lily travelled to Otaki, 32 kms north of Wellington in New Zealand and worked at the Otaki Cottage Hospital with close friend Edith Catheina Popplewell “Poppy” (1884-1976) who also grew up and trained as a nurse at the Ballarat Hospital. In 1914 Lily was matron of a private hospital in Taihape 150kms north of Wellington. Both Lily and Poppy volunteered for New Zealand but as New Zealand were not accepting Australian trained nurses she returned to Australia and enlisted in the Australian Army Nursing Service (AANS) in October 1915. Lily went on to serve in Egypt, England, France and Italy where she was awarded the Royal Red Cross (RRC) medal for her service. This photograph is while Lily and Poppy were working at Otaki Cottage Hospital in New Zealand. Circa 1914. trainee, charge sister, ballarat, hospital, 1905, 1908, ww1, mount stuart house, sleeman, wardle, popplewell, mackenzie, military, queen alexandra's imperial military nursing service reserve, daylesford, nurses, private hospital, edith popplewell, france, cairo, diary, ww1 diary, havre, lily mackenzie, eagleton, matron, otaki, new zealand, donaldson, malassises, kelly, young, kirby, priscilla -
 Flagstaff Hill Maritime Museum and Village
Gun Emplacement, 1890's
The Warrnambool Battery on Flagstaff Hill has embankments for 3 guns. Those on the left and right still have cannon in place but in the centre is an empty embankment, apart from this concrete ring with metal threaded studs. In 1898 a 5 inch breech loading gun (BL) was installed here. The gun had a hydro-pneumatic disappearing carriage (hence the sign on the concrete wall "5" BL HP").. This type of gun was faster to load and fire that the 80 pound RML’s installed on either side of it. Its arrival spelt the end of the 80 pound RML guns’ useful life, although they continued to be used for practice sessions. The 5 inch BL was the main defensive weapon of the Warrnambool Battery until the Battery was downgraded in importance. It was removed in 1904 and recalled to Melbourne in 1910. The gun emplacement ring is all that remains of the mounting for a 5 inch Armstrong rifled breech loading gun. HISTOR of the WARRNAMBOOL GUNS & CANNON In the years following the Crimean War (1854-1857J) there was a great concern in the Colony that Imperial Russia would attempt an invasion. Coastal defences in the colony of Victoria were greatly strengthened by the Government as a result. Warrnambool was originally protected by cannons at Cannon Hill, approximately 1 kilometer west of the Flagstaff Hill Fortifications. The cannons included two 1866 guns, both 80 Pound Rifled Muzzle Loaders (RML) purchased by Victoria’s Colonial Government. They were part of a shipment of 26 such guns sent from England in December 1866. They are registered as No. 23 (80cwt-2qr-0lbs) - Gun 1, and No.13 (81cwt-1qr-12lbs) - Gun 2. They were cast at the Royal Gun Factory, Woolwich Arsenal, in 1866 and have a 6.3 inch bore. Both barrels carry the Royal Cypher of Queen Victoria, Insignia of the Royal Engineers, within the Garter and Motto surmounted by the Crown, with the Royal Cypher of Queen Victoria within the Garter (letters in centre “VR”, motto “HONI SOIT QUI MAL Y PENSE”, "Shame be to him who thinks evil of it."). The guns were originally supplied with wooden carriages. (The Royal Arsenal at Woolwich, England, was established eleven years after the Restoration of King Charles II. It was the principal supplier of armaments to the British and Empire Governments. At the height of its operations during World War One the factory covered 1300 acres and employed very nearly 80,000 workers. Woolwich was the Headquarters of the Royal Artillery since the raising of that Regiment in 1716. The Arsenal was closed in the late 1960’s.) These two 80pdr cannons were transferred to the Warrnambool Garrison Artillery Battery Fortifications erected at Flagstaff Hill in 1887 as part of Victoria’s Coastal Defences. The original wooden carriages were subsequently replaced with the present iron garrison carriages in 1888. They are a “C” pivot. The ‘racers’ or curved track set into the floor of the gun emplacement (which enabled the guns to be traversed more quickly) are as specified for guns up to 10 inch, being of wrought iron 2.78 inches wide. A temporary third gun, now no longer on Flagstaff Hill’s site, was the 5 inch Rifled Breech Loading (BL) Armstrong gun mounted on an Elswick hydro pneumatic disappearing carriage and installed in this very concrete base or pad. The State of Victoria took over the ownership of the guns at the time of Australian Federation in 1901. In about 1901/1902 the Garrison Battery was converted to the Warrnambool Battery of the Australian Field Artillery (No 4 Field Battery). It was equipped with 4.7 inch naval guns mounted on field carriages. They were now a mobile unit but continued to use the Warrnambool Garrison area at Flagstaff Hill for practice. When the Fortifications were declared obsolete the two 80 Pounder RML were relocated to Cannon Hill in 1910. On the outbreak of World War One the 4.7 inch guns were recalled to Melbourne, and the Battery was disbanded. Most of the personnel probably re-enlisted in the local 4th Australian Light Horse Regiment. The two 80 Pounder RML were moved back to the Fortifications in 1973. They were both fully restored by Army First Year Apprentices at the Ordinance Factory in Bendigo in time for the centenary year of the fortifications in 1987. The guns are capable of firing 80 pound (32.3kg) armour piercing exploding shells 3.65kms out to sea. They were originally manned by volunteers before a paid Garrison was established. Now the Guns are again fired by volunteers on Special Event days. Since restoration the Gun Number 1 had been fired on a regular basis but Gun Number 2 hadn’t been fired since the mid 1990’s. In April 2015 Gun Number 2 was serviced in preparation for the firing of both cannons on the ANZAC Centenary commemorations on April 25th 2015. Other guns from the original Cannon Hill location were obsolete by the time the 1887 Warrnambool Garrison Artillery Battery was built. These guns are (1) a 32 Pounder Muzzle Loading Smooth Bore (SB) cast in 1813 at the famous Carron Foundry, number 80837 and now located in the Warrnambool Botanic Gardens. It is now mounted on a replica carriage due to the original carriage being in a fragile condition (the original carriage stored under cover at Flagstaff Hill). (2) a 68 Pounder Muzzle Loading Smooth Bore cast in 1861 at the equally august Low Moor Foundry, number 10310 and now located on the lawn area at the entrance to Flagstaff Hill Maritime Village. It is still mounted on its original wooden garrison carriage. Its wooden slide compressor mechanism is fragile and now kept in Flagstaff Hill’s storage. There are only seven 32 Pounder SB made by Carron and fifteen 68 Pounder SB made at Low Moor known to exist in the State of Victoria [references; Flagstaff Hill Maritime Village interpretation boards, information sheets and other documents; South Western Victoria Guns and Cannon report, May 2008, ref W/F/08] The Gun embankment is contained within the heritage listed Lady Bay Lighthouse Comples, on the Victorian Heritage Register VHR H1520. The gun emplacement base is evidence of the last defences installed on this stretch of coastline. The Warrnambool Garrison has been added to the Victorian Heritage Register H1250 “for its intact battery and guns, a strong reminder of Victoria’s wealth and determination to protect itself from the perceived threat of invasion in the 1880’s.” The City of Warrnambool is one of several custodians of a collection of artillery pieces of heritage significance at a state, national and international level. These pieces are directly related to the defence of south-west Victoria in the 19th century. The care and preservation come under the Heritage Act 1995. Gun emplacement; the remains of the mounting platform of a temporary third gun installed in 1898 in the centre of the battery. This consists of a circular concrete well or sump surrounded by two rings of mounting bolts, the inner of 10 and the outer of 20. The base once held a 5 inch Armstrong rifled breech loading gun with hydro-pneumatic disappearing. In the centre of the ring on the ground is a keyhole shaped space. The gun was removed in 1904. flagstaff hill, warrnambool, shipwrecked coast, flagstaff hill maritime museum, maritime museum, shipwreck coast, flagstaff hill maritime village, great ocean road, colonial defences, victoria’s coastal defences, warrnambool fortification, warrnambool garrison battery, warrnambool volunteer corps, ordinance, armaments, cannon hill fortifications, flagstaff hill fortifications, 4th australian light horse regiment, garrison gun, 5 inch breech loading gun, emplacement for hydro-pneumatic disappearing carriage, gun emplacement -
 Ballarat and District Irish Association
Image, Charles Parnell, c1864, 1864
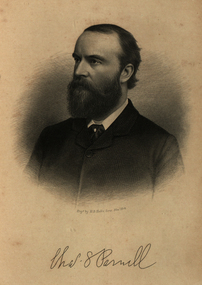
Parnell was an Irish nationalist and statesman who led the fight for Irish Home Rule in the 1880s. Charles Stewart Parnell was born on 27 June 1846 in County Wicklow into a family of Anglo-Irish Protestant landowners. He studied at Cambridge University and was elected to parliament in 1875 as a member of the Home Rule League (later re-named by Parnell the Irish Parliamentary Party). His abilities soon became evident. In 1878, Parnell became an active opponent of the Irish land laws, believing their reform should be the first step on the road to Home Rule. In 1879, Parnell was elected president of the newly founded National Land League and the following year he visited the United States to gain both funds and support for land reform. In the 1880 election, he supported the Liberal leader William Gladstone, but when Gladstone's Land Act of 1881 fell short of expectations, he joined the opposition. By now he had become the accepted leader of the Irish nationalist movement. Parnell now encouraged boycott as a means of influencing landlords and land agents, and as a result he was sent to jail and the Land League was suppressed. From Kilmainham prison he called on Irish peasants to stop paying rent. In March 1882, he negotiated an agreement with Gladstone - the Kilmainham Treaty - in which he urged his followers to avoid violence. But this peaceful policy was severely challenged by the murder in May 1882 of two senior British officials in Phoenix Park in Dublin by members of an Irish terrorist group. Parnell condemned the murders. In 1886, Parnell joined with the Liberals to defeat Lord Salisbury's Conservative government. Gladstone became prime minister and introduced the first Irish Home Rule Bill. Parnell believed it was flawed but said he was prepared to vote for it. The Bill split the Liberal Party and was defeated in the House of Commons. Gladstone's government fell soon afterwards.(http://www.bbc.co.uk/history/historic_figures/parnell_charles.shtml, accessed 21 January 2014) The Irish National Land League (Irish: Conradh na Talún) was an Irish political organisation of the late 19th century which sought to help poor tenant farmers. Its primary aim was to abolish landlordism in Ireland and enable tenant farmers to own the land they worked on. The period of the Land League's agitation is known as the Land War. Within decades of the league's foundation, through the efforts of William O'Brien and George Wyndham (a descendant of Lord Edward FitzGerald), the 1902 Land Conference produced the Land (Purchase) Act 1903 which allowed Irish tenant farmers buy out their freeholds with UK government loans over 68 years through the Land Commission (an arrangement that has never been possible in Britain itself). For agricultural labourers, D.D. Sheehan and the Irish Land and Labour Association secured their demands from the Liberal government elected in 1905 to pass the Labourers (Ireland) Act 1906, and the Labourers (Ireland) Act 1911, which paid County Councils to build over 40,000 new rural cottages, each on an acre of land. By 1914, 75% of occupiers were buying out their landlords, mostly under the two Acts. In all, under the pre-UK Land Acts over 316,000 tenants purchased their holdings amounting to 15 million acres (61,000 km2) out of a total of 20 million acres (81,000 km2) in the country. Sometimes the holdings were described as "uneconomic", but the overall sense of social justice was undeniable. (http://en.wikipedia.org/wiki/Irish_National_Land_League, accessed 21 January 2014) The Irish National Land League was founded at the Imperial Hotel in Castlebar, the County town of Mayo, on 21 October 1879. At that meeting Charles Stewart Parnell was elected president of the league. Andrew Kettle, Michael Davitt, and Thomas Brennan were appointed as honorary secretaries. This united practically all the different strands of land agitation and tenant rights movements under a single organisation. The two aims of the Land League, as stated in the resolutions adopted in the meeting, were: ...first, to bring out a reduction of rack-rents; second, to facilitate the obtaining of the ownership of the soil by the occupiers. That the object of the League can be best attained by promoting organisation among the tenant-farmers; by defending those who may be threatened with eviction for refusing to pay unjust rents; by facilitating the working of the Bright clauses of the Irish Land Act during the winter; and by obtaining such reforms in the laws relating to land as will enable every tenant to become owner of his holding by paying a fair rent for a limited number of years. Charles Stewart Parnell, John Dillon, Michael Davitt, and others including Cal Lynn then went to America to raise funds for the League with spectacular results. Branches were also set up in Scotland, where the Crofters Party imitated the League and secured a reforming Act in 1886. The government had introduced the first ineffective Land Act in 1870, then the equally inadequate Acts of 1880 and 1881 followed. These established a Land Commission that started to reduce some rents. Parnell together with all of his party lieutenants, including Father Eugene Sheehy known as "the Land League priest", went into a bitter verbal offensive and were imprisoned in October 1881 under the Irish Coercion Act in Kilmainham Jail for "sabotaging the Land Act", from where the No-Rent Manifesto was issued, calling for a national tenant farmer rent strike which was partially followed. Although the League discouraged violence, agrarian crimes increased widely. Typically a rent strike would be followed by evictions by the police, or those tenants paying rent would be subject to a local boycott by League members. Where cases went to court, witnesses would change their stories, resulting in an unworkable legal system. This in turn led on to stronger criminal laws being passed that were described by the League as "Coercion Acts". The bitterness that developed helped Parnell later in his Home Rule campaign. Davitt's views were much more extreme, seeking to nationalise all land, as seen in his famous slogan: "The land of Ireland for the people of Ireland". Parnell aimed to harness the emotive element, but he and his party preferred for tenant farmers to become freeholders on the land they rented, instead of land being vested in "the people".(http://en.wikipedia.org/wiki/Irish_National_Land_League, accessed 21 January 2014)Image of bearded man known as Charles Stewart Parnellballarat irish, parnell, charles parnell, home rule -
 Melton City Libraries
Photograph, Melton State School 430 honour board, 1970
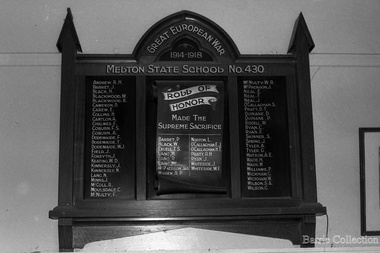
HONOR BOARD Melton State School No 430 Supreme Sacrifice • BARRET, P Peter Maurice Barrett Number 5051 Rank: Private Unit: Private Date of death 18th August 1918 of wounds age 21 St Sever Cemetery Extension, Rouen, France Started school August 1904 5 years 10 months Previous school St Michaels Nth Melb Son of Maurice Barrett labourer Melton Brother of John Barrett • BLACK, William William M • EXELL, T S Number 2758 Rank: Trooper 3rd Battalion Imperial Camel Corps Date of death 30th November 1917 of wounds aged 20 years Cairo War Memorial Cemetery Egypt Started school September 1907 aged 10 Previous school Boisdale 3017 Son of George, farmer Melton Railway Station (Melton South) Year of 1918 • LANG, Horace Thomas Number 903 Rank: Corporal Unit: 24th Battalion Date of death: 5th May 1917. Court if enquiry confirmed Dec 1917. Aged 24 Date of birth 27th April 1893 Spring Hill – Kyneton Commemorated Villers-Bretonneux France Started school November 1997. Father: Thomas Lang Teacher Melton 430 Brother of Thomas Lang died 18th July 1918 buried Cairo • LANG, R William Roy Number 2818 Rank: Driver Unit: 1st Australian Light Horse Machine Gen Squadron Date of death 31st October 1917 of wounds Beersheba War Cemetery Israel Started school October 1899 Aged 9 Previous school Camperdown SS 114 Date of Birth: 24th Jan 1890 Son of William John and Mary Lang of Langlands Jandowae Queensland Nephew of Thomas Lang Melton • LANG, Thomas John Thomas NZ CC M Number 15/118 Rank: Lieutenant Unit: Army Pay Department Date of death 18th July 1918 of disease Cairo War Memorial Cemetery Started school November 1896 aged 16 years - Previous school Coliban 1920 Son of Thomas Lang, teacher Melton No 430 • McPHERSON Jas Mrs M: James Sept 1897 Previous Graham St Port Melb Son of Alexander farmer Melton • MISSEN, A P Frederick M Started school August 1899 age 7 years Son of Frederick, fruiterer Melton His sister Adelaide May 11years Previous Ascot Vale 2608 • NORTON, Lewis Thomas CC M Number 1809 Rank: Private Unit: 29th Battalion (Infantry) Date of death 30th September 1918 Cemetery Bellicourt British Cemetery, France Started school March 1901 age 9 years Previous school Galaquil Son of Thomas Norton of Parwan • O’CALLAGHAN, EJ Edward Edward M • O’CALLAGHAN, HT Thomas .. M Number 3859 Rank: Private Unit: 57th Battalion (Infanrty) Date of death 26th September 1917 Bedford House Cemetery, Belgium Started school 11th March 1901 Aged 10 years Father: John O’Callaghan farmer of Melton • PRATT, R H Robert Henry Number: 2203 Rank: Private Unit: 46th Battalion (Infantry) Date of death, 12th April 1917 Favreuil British Cemetery, France Started school in May 1903 aged 6 years Father: Matthew Pratt, Labourer Melton • RYAN J James or John David: RYAN J ? Started August 1896 Previous Christian Brother St Kilda John 11-5 or James 9-11 Charles 6-11 returned from WW1 Frank 8-5 returned Father Daniel Publican • WHITESIDE, John Edward M Number 2182 Rank: Trooper Unit 13th Light Horse Date of death 4th September 1918 of illness aged 29 years Alexandria (Hadra) War Memorial Cemetery, Egypt Started school July 1897 age 8 Son of Edward Whiteside Labourer Melton Brother of Edward. • WHITESIDE, W F Number: 3995 Rank: Private Unit: 22nd Battlion Date of death, 28th July 1916, died of wounds aged 21 years Puchevillers British Cemetery, France Started school in 1901 Year of birth circa 1895 Brother Edward died 4th September 1918 Father: Edward Whiteside. Labourer Year of 1917 • ANDREW. R H • BARRETT, J John Maurice • BLACK, Harold David • BLACKWOOD, Maxwell James A • BLACKWOOD, Roy .. • CAMERON David or (Donald) William M • CAREW, Edward Edward M • COLLINS, H John Henry H Thomas CC M • CANTLON, A Alfred CC • CHALMER, Frank Ernest CC M • COBURN, A Frederick CC M • COBURN, FS CC M • DODEMAIDE, Frank William • DODEMAIDE, Thomas .. • DODEMAIDE, W J William John M • FIELD, J • FORSYTH J • KEATING, WD William Edward M • KINNERSLY James Edward CC • KINNERSLY Norman Chas Edward CC • LANG Norman William • MINNS, J CC M • McCOLL R Alex R J. McColl • MOULSDALE Charles William M • McNULTY, Frederick James CC • McNULTY, W R CC • McPHERSON J which one? • NEAL, Elvine J Neal M • NEAL, Frank John M • NEAL, John William John M (husband of Isabella) • O’CALLAGHAN, Stephen Edward M • PRATT, David T Matthew CC M • QUINANE, David Peter • QUINANE, Peter .. • RIDDELL, William M • RYAN, Charles Daniel • RYAN Frank .. • SKINNER, Stanley John S’John CC M • SPRING, James George • TYLER, A • TYLER, George George • WATSON, Albert Ernest Alexander M • WADE, Howard James • WADE, Walter .. might be connected with CC • WILLIAMS, Percy Mr Williams • WICKHAM, George George M • WICKHAM, W M • WILSON, Stanley [ Alfred and Maude] M • WILSON, Gordon .. M SUPREME SACRIFICE Roll of Honor Melton State School No 430 Years of 1916,1917 and 1918 -
 Flagstaff Hill Maritime Museum and Village
Weapon - Cannon, 1813
This 1813 cannon is classified as a carronade, having been made by the Carron Ironworks foundry in Stirling, Scotland in 1813. It is a large calibre, short range, gun mainly used on ships. The carronade model of cannon was first used when introduced into the British Royal Navy in the American War of the Revolution (1775-1883). This cannon was originally a 28pdr, 48cwt, 8ft gun. The date ‘1837’ on the barrel probably indicates the date that the Board of Ordinance accepted the change in size to a 32pdr. It may originally have been a naval gun and the conversion undertaken when it was brought ashore. It is very probably one of the 15 guns that are known to have constituted the defences of Victoria in 1860. This group of 32pdrs was the shorter model of the 4800width and 8ft length cannon and as such are different from the 32pdrs found in NSW. It was originally located on Cannon Hill in Warrnambool when it was the site of the Warrnambool Battery Western Artillery, formed in 1866. It was obsolete by the time of the 1887 fortifications, and was moved from the Warrnambool Fortifications to the Botanic Gardens in 1910, when the Fortifications were declared obsolete. HISTORIC INFORMATION ABOUT THE CANNON IN THE WARRNAMBOOL AREA In the years following the Crimean War (1854-1857J) there was a great concern in the Colony that Imperial Russia would attempt an invasion. Coastal defences in the colony of Victoria were greatly strengthened by the Government as a result. Warrnambool was originally protected by cannons at Cannon Hill, approximately 1 kilometer west of the Flagstaff Hill Fortifications. The cannons included two 1866 guns, both 80 Pound Rifled Muzzle Loaders (RML) purchased by Victoria’s Colonial Government. They were part of a shipment of 26 such guns sent from England in December 1866. They are registered as No. 23 (80cwt-2qr-0lbs) - Gun 1, and No.13 (81cwt-1qr-12lbs) - Gun 2. They were cast at the Royal Gun Factory, Woolwich Arsenal, in 1866 and have a 6.3 inch bore. Both barrels carry the Royal Cypher of Queen Victoria, Insignia of the Royal Engineers, within the Garter and Motto surmounted by the Crown, with the Royal Cypher of Queen Victoria within the Garter (letters in centre “VR”, motto “HONI SOIT QUI MAL Y PENSE”, "Shame be to him who thinks evil of it."). The guns were originally supplied with wooden carriages. (The Royal Arsenal at Woolwich, England, was established eleven years after the Restoration of King Charles II. It was the principal supplier of armaments to the British and Empire Governments. At the height of its operations during World War One the factory covered 1300 acres and employed very nearly 80,000 workers. Woolwich was the Headquarters of the Royal Artillery since the raising of that Regiment in 1716. The Arsenal was closed in the late 1960’s.) The two 80pdr cannons were transferred to the Warrnambool Garrison Artillery Battery Fortifications erected at Flagstaff Hill in 1887 as part of Victoria’s Coastal Defences. The original wooden carriages were subsequently replaced with the present iron garrison carriages in 1888. They are a “C” pivot. The ‘racers’ or curved track set into the floor of the gun emplacement (which enabled the guns to be traversed more quickly) are as specified for guns up to 10 inch, being of wrought iron 2.78 inches wide. A temporary third gun, now no longer on Flagstaff Hill’s site, was a 5 inch Rifled Breech Loading (BL) Armstrong gun mounted on an Elswick hydro pneumatic disappearing carriage It was faster to load and fire than the 80 pound RMLs and its arrival spelt the end of the older 80 pound guns’ useful life, apart from being used for practice sessions. The 5 inch BL gun was the main defensive weapon of the Warrnambool Battery until the Battery was downgraded in importance and the gun was recalled to Melbourne in 1910. The gun emplacement still remains in place set between the 2 80pdr cannon. The State of Victoria took over the ownership of the guns at the time of Australian Federation in 1901. In about 1901/1902 the Garrison Battery was converted to the Warrnambool Battery of the Australian Field Artillery (No 4 Field Battery). It was equipped with 4.7 inch naval guns mounted on field carriages. They were now a mobile unit but continued to use the Warrnambool Garrison area at Flagstaff Hill for practice. When the Fortifications were declared obsolete the two 80 Pounder RML were relocated to Cannon Hill in 1910. On the outbreak of World War 1 the 4.7 inch guns were recalled to Melbourne, and the Battery was disbanded. Most of the personnel probably re-enlisted in the local 4th Australian Light Horse Regiment. The two 80 Pounder RML were moved back to the Fortifications in 1973. They were both fully restored by Army First Year Apprentices at the Ordinance Factory in Bendigo in time for the centenary year of the fortifications in 1987. The guns are capable of firing 80 pound (32.3kg) armour piercing exploding shells 3.65kms out to sea. They were original manned by volunteers before a paid Garrison was established. Now the Guns are again fired by volunteers on Special Event days. Since restoration the Gun Number 1 had been fired on a regular basis but Gun Number 2 hadn’t been fired since the mid 1990’s. In April 2015 Gun Number 2 was serviced in preparation for the firing of both cannons on the ANZAC Centenary commemorations on April 25th 2015. Other guns from the original Cannon Hill location were obsolete by the time the 1887 Warrnambool Garrison Artillery Battery was built. These guns are (1) a 32 Pounder Muzzle Loading Smooth Bore (SB) cast in 1813 at the famous Carron Foundry, number 80837 and now located in the Warrnambool Botanic Gardens. It is now mounted on a replica carriage due to the original carriage being in a fragile condition (the original carriage stored under cover at Flagstaff Hill). (2) a 68 Pounder Muzzle Loading Smooth Bore cast in 1861 at the equally august Low Moor Foundry, number 10310 and now located on the lawn area at the entrance to Flagstaff Hill Maritime Village. It is still mounted on its original wooden garrison carriage. Its wooden slide compressor mechanism is fragile and now kept in Flagstaff Hill’s storage. There are only seven 32 Pounder SB made by Carron and fifteen 68 Pounder SB made at Low Moor known to exist in the State of Victoria Plaque attached to the carriage “This replica carriage was constructed by the Warrnambool Tritan Woodworkers club in conjunction with the generosity of local businesses and the Warrnambool community. The original carriage (circa 1860) was removed for restoration and is now located at Flagstaff Hill Maritime Village. The timber used for the replica carriage is Monterey Cypress, which was an early planting in the gardens. 2010 marked the centenary of the cannon’s relocation in the Warrnambool Botanic Gardens.” (Reference; Victorian Guns and Cannons, South Western Victoria Assessment, May 2008, item W/B/01; Flagstaff Hill Maritime Village datasheets and archives). There are only seven 32 Pounder SB made by Carron known to exist in the State of Victoria and this is one of them. On a world level, this cannon represents a high level of rarity. Further, as it has been modified (bored up) it is representative of the historical process of amending artillery in order to ensure a longer usefulness of each piece despite rapidly advancing artillery technology. The number of surviving carriages with traversing slides in this group in South Western Victoria is unique in Australia and probably in the World. Out of 10 such platforms surviving in Australia, the South Western Victorian group has half. Several survive around the world but probably not in such a large group. The wooden sliding compressor mechanism belonging to this cannon is extremely rare, and the only one in this South Western Victorian group of Guns and Cannons. As a whole, this cannon has undergone very little restoration or modification, giving it a high level of integrity. The City of Warrnambool is one of several custodians of a collection of artillery pieces of heritage significance at a state, national and international level. These pieces are directly related to the defence of south-west Victoria in the 19th century. The care and preservation come under the Heritage Act 1995. (Reference; Victorian Guns and Cannons, South Western Victoria Assessment, May 2008).Cannon, or carronade, 32pdr with wheels. Muzzle loading smooth bore (SB) cannon. Cannon has original wooden Burmese Teak carriage and slide with wrought iron fittings and iron wheels. Manufactured by Carron in Scotland, in 1813. It has been converted from a 28pdr. There is a loop for a rope on the cascabel, which was part of the original casting. Re-bored in 1837. Marks include Serial Number, Royal Cypher of King George III, broad arrow of proofing, and numbers to represent the weight. NOTE: The cannon is displayed in the Warrnambool Botanic Gardens and is mounted on a replica wooden carriage; the original wooden carriage is now stored under cover at Flagstaff Hill Maritime Village. This carriage has 4 wheels on swivel attachments and a central gear that allows the wheels to turn on rails. Pressed into left trunnion “80837 / CARRON / 1813”, cast on barrel“symbol (Royal Cypher of King George III”, “symbol (broad arrow of proofing)” and numbers “45-3-24 / 1837” . Cascable “CV” and marks with gradations from nought to three in quarters on each side, On the carriage the end of one of the main slide members carries the mark “W symbol (broad arrow) D” incised into the timber. Plaque attached to the carriage by the Warrnambool Tritan Woodworkers club, 2010, marking the centenary of the cannon’s relocation in the Warrnambool Botanic Gardens and the addition of the replica carriage. flagstaff hill, warrnambool, shipwrecked coast, flagstaff hill maritime museum, maritime museum, shipwreck coast, flagstaff hill maritime village, great ocean road, victoria’s coastal defences, warrnambool fortification, warrnambool garrison battery, ordinance, armaments, cannon hill fortifications, victorian colonial government, carron ironwroks foundary, 32pdr smooth bore cannon, 28pdr smooth bore cannon, 1813 cannon, carronade -
 National Wool Museum
Photo Album, 1930-1934
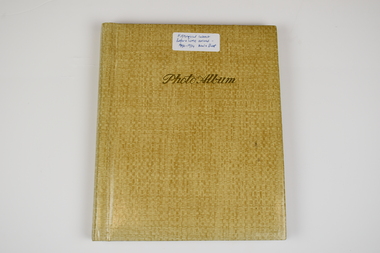
The Photo Album was created by Hans Beck, who interned with the donor's father (Wilhelm Eckels). The Photo Album depicts wool buying and sheep station related life between 1927-1939. Each photograph has been individually labelled.Straw coloured booklet with gold cursive writing on front cover spelling 'Photo Album'. Inside are 18 pages containing 63 photographs, each individually captioned. Internal pages show signs of age with discolouration, particularly in areas of previous adhesive application.Lettering, Front: Historic Interest Before WME arrived - 1930-1934 Wool & Sheep Photo Album Lettering, Internal by Page: Page 1 - Bottom Left Conner: Table from right:/ O. Hilbert sen. / WW. Richter, W. Ehrig/ Sampler: C. McCarthy/ at desk: E.S. Bottom Right Corner: 1927/ Wool Sample Room/ O. Hilbert/ Terranora Buildings/ Reiby Lane Page 2 - Bottom Middle: 1931/ Opening Sale/ Sydney Page 3 - Bottom Middle: 1934/ Opening Sale/ Sydney Page 4 - Bottom Middle: 1933/ Wool Auctions/ Brisbane Page 5 - Top Left Corner: 1930 Escapade/ Sydney to CAIRNS/ via Bourke, Central/ Queensland, Hinter-/ land & Atherton/ Table Lands Top Right Corner: Dubbo: Main Street/ (1st Night)/ 31.7.1930 Middle Right: 1st Night-"OUT"/ Stranded 11 miles/ from Bourke. (Red/ Dust in Carburettor Bottom Right Corner: Our "ERSKINE'/ hits Culvert &/ breaks both King-/pins. 1 1/2 miles from/ CUNNAMULLA SW-Q. Page 6 - Top Right Corner: "Rosevale Station"/ via Cunnamulla SWQ/ "Gidgi" country/ Gidgi Creak &/ Warrigo R. Middle Left: STAN HILL Page 7 - Middle Top: Blackhall/ Tattersall's Hotel/ Yarning at Cross-/roads. Middle Left: FO Wool Sales/ 22 Horse team Middle Right: Roadsign to:/ ISIS DOWNS &/ Homestead (Fart Page 8 - Middle Top: Muster: 3000 sheep/ Semi-circular/ Shearing shed/ ISIS DOWNS Page 9 - Middle Top: Shearer/ Water Tower/ Counting out/ pens Middle Bottom: Shearers Cook/ Hot Water & Soup/ Cake for Shearing/ Shed Charity Ball Page 10 - Middle Left: Isis Downs Home-/ stead with fire// flood Lookout./ Artesian Borewell Bottom Right: Manager: Moore/ & Alfred Loh-/ mann with kills/ Ducks & Emus Page 11 - Top Middle: PORTLAND DOWNS/ Muster: 10,000/ Sheep Bottom Left: Manager:/ Mr. Luck/ with A.L./Moore Page 12 - Middle Top: ROOKWOOD Station/ near/ HUGHENDEN/ Central NWQ Page 13 - Top Middle: 'HINTERLAND"/ Cattle country/ Spear Grass/ Tracks Bottom Middle: Crossings:/ Creeks: Quick/ Sand/ Rivers: rocky Page 14 - Middle Right: Lyndhurst stat/tion/ Head Stockman Middle Left: -Valley of la-/goons/ Station Bottom Right Corner: Master Atkinson/ saves/ Petrol shortage Page 15 - Top Middle: ATHERTON TABLELANDS/ LAKE BERRINE Middle Centre: Tropical Rainforest/ near/ Lake Berrine Page 16 - Top Middle: ATHERTON TABLELANDS/ Timber Country Bottom Middle Edge: CAIRNS/ Imperial Hotel Page 17 - Hans Beck with/ Betty Hilbert/ Lapstone Hill 1931 wool - transportation, wool sales, wool growing, wool growing agriculture farming, wool industry, wool sales - sydney, wool sales - brisbane, dubbo, 1930, bourke, cunnamulla, isis downs, shearing, shearing - lifestyle, portland downs, muster, hughenden, hinterland, lake berrine, cairns -
 Flagstaff Hill Maritime Museum and Village
Book, Happy Dispatches
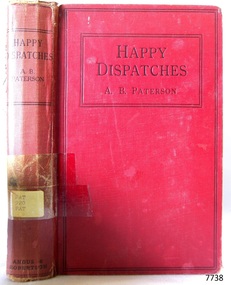
This item is from the ‘Pattison Collection’, a collection of books and records that was originally owned by the Warrnambool Mechanics’ Institute, which was founded in Warrnambool in 1853. By 1886 the Warrnambool Mechanics’ Institute (WMI) had grown to have a Library, Museum and Fine Arts Gallery, with a collection of “… choice productions of art, and valuable specimens in almost every branch and many wonderful national curiosities are now to be seen there, including historic relics of the town and district.” It later included a School of Design. Although it was very well patronised, the lack of financial support led the WMI in 1911 to ask the City Council to take it over. In 1935 Ralph Pattison was appointed as City Librarian to establish and organise the Warrnambool Library as it was then called. When the WMI building was pulled down in 1963 a new civic building was erected on the site and the new Warrnambool Library, on behalf of the City Council, took over all the holdings of the WMI. At this time some of the items were separated and identified as the ‘Pattison Collection’, named after Ralph Pattison. Eventually the components of the WMI were distributed from the Warrnambool Library to various places, including the Art Gallery, Historical Society and Flagstaff Hill. Later some were even distributed to other regional branches of Corangamite Regional Library and passed to and fro. It is difficult now to trace just where all of the items have ended up. The books at Flagstaff Hill Maritime Village generally display stamps and markings from Pattison as well as a variety of other institutions including the Mechanics’ Institute itself. RALPH ERIC PATTISON Ralph Eric Pattison was born in Rockhampton, Queensland, in 1891. He married Maude Swan from Warrnambool in 1920 and they set up home in Warrnambool. In 1935 Pattison accepted a position as City Librarian for the Warrnambool City Council. His huge challenge was to make a functional library within two rooms of the Mechanics’ Institute. He tirelessly cleaned, cleared and sorted a disarrayed collection of old books, jars of preserved specimens and other items reserved for exhibition in the city’s museum. He developed and updated the library with a wide variety of books for all tastes, including reference books for students; a difficult task to fulfil during the years following the Depression. He converted all of the lower area of the building into a library, reference room and reading room for members and the public. The books were sorted and stored using a cataloguing and card index system that he had developed himself. He also prepared the upper floor of the building and established the Art Gallery and later the Museum, a place to exhibit the many old relics that had been stored for years for this purpose. One of the treasures he found was a beautiful ancient clock, which he repaired, restored and enjoyed using in his office during the years of his service there. Ralph Pattison was described as “a meticulous gentleman whose punctuality, floorless courtesy and distinctive neat dress were hallmarks of his character, and ‘his’ clock controlled his daily routine, and his opening and closing of the library’s large heavy doors to the minute.” Pattison took leave during 1942 to 1945 to serve in the Royal Australian Navy, Volunteer Reserve as Lieutenant. A few years later he converted one of the Museum’s rooms into a Children’s Library, stocking it with suitable books for the younger generation. This was an instant success. In the 1950’s he had the honour of being appointed to the Victorian Library Board and received more inspiration from the monthly conferences in Melbourne. He was sadly retired in 1959 after over 23 years of service, due to the fact that he had gone over the working age of council officers. However he continued to take a very keen interest in the continual development of the Library until his death in 1969. About A. B. ‘Banjo’ Paterson Andrew Barton Paterson was born at Narrambla Station in New South Wales, Australia, on 17th February 1864 and died 5th February 1941. His first seven years were spent on his father’s station, where like so many Australian children he enjoyed a bush boyhood. This property was at Obley in the Orange district of New South Wales. The family moved to the Yass district and lived near the main route from Sydney to Melbourne where he saw a great many bullock teams, drovers with herds of stock, gold escorts and Cob & Co coaches. His lifelong love of horses and horsemen was forged from the riders and their horses he saw at the picnic races and polo matches the family attended. These horses and riders where from the Murrumbidgee River and Snowy Mountain areas of New South Wales. Patterson lived most of his life in Sydney. He became a journalist, army officer, novelist, poet, solicitor and a war correspondent. He enjoyed many different sports such as tennis, rowing and, most of all, he delighted in his horsemanship. His first poem ‘El Mahdi to the Australian Troop’ was published in the Bulletin in 1885 under the pen name of “The Banjo”, which was the name of his favourite horse. In 1895 his first book was published and was sold out in the week of publication; he sold 7000 copies in a few months. This book was “The Man From Snowy River, and other Verses” and it contained such ballads as ‘Clancy of the Overflow’, ‘The Geebung Polo Club’, ‘The Man from Ironbark’, and ‘Saltbush Bill’. The tittle poem was first published in 1890. In 1895 Patterson visited his fiancé (at that time), Sarah Riley, who was staying with her friends the Macphersons at Dagworth Station in Queensland. Sarah’s old school friend Christina McPherson. Christina replayed to them an old Scottish tune called “The Craigielee March” that she had heard played by the Garrison Artillery band at the Warrnambool picnic races in Victoria, 1894. Patterson wrote words to fit the tune and it became the now famous ‘Waltzing Matilda’. He was commissioned by the Sydney Morning Herald and the Melbourne Age as they correspondent to report on the South African War. After being a roving reporter in China he went to England and spent time with Rudyard Kipling. In April 1903 Paterson married Alice Walker in Tenterfield, New South Wales, and they had two children, Grace and Hugh. At the outbreak of World War 1 Paterson sailed for England in the hope of covering the fighting in Flanders as a correspondent but finished up driving an ambulance for the Australian Voluntary Hospital, Wimereux, France. In 1915 as an honorary vet he made three voyages taking horse to Africa, China and Egypt. On 18th October 1915 he was commissioned in the 2nd Remount Unit in the Australian Imperial Force and was promoted to Captain serving in the Middle East. He was wounded in April 1916, when he re-joined his unit he was promoted to major and commanded the Australian Remount Squadron from October 1916 to his return to Australia in 1919. Once the War was over he resumed his work as a journalist until he retired in 1930 so that he could devote time to creative writing. He became a successful radio broadcaster with the Australian Broadcasting Commission using his travel experiences. He wrote the children’s book “The Animals Noah Forgot” in 1933 and then in 1934 “Happy Dispatches” in which he told of his meetings with people like Winston Churchill and Kipling. “The Shearer’s Colt was published in 1936 and in 1939 he wrote for the Sydney Morning Herald. After a short illness he passed away in Sydney on 5th February 1941. The Pattison Collection, along with other items at Flagstaff Hill Maritime Village, was originally part of the Warrnambool Mechanics' Institute’s collection. The Warrnambool Mechanics’ Institute Collection is primarily significant in its totality, rather than for the individual objects it contains. Its contents are highly representative of the development of Mechanics' Institute libraries across Australia, particularly Victoria. A diversity of publications and themes has been amassed, and these provide clues to our understanding of the nature of and changes in the reading habits of Victorians from the 1850s to the middle of the 20th century. The collection also highlights the Warrnambool community’s commitment to the Mechanics’ Institute, reading, literacy and learning in the regions, and proves that access to knowledge was not impeded by distance. These items help to provide a more complete picture of our community’s ideals and aspirations. The Warrnambool Mechanics Institute book collection has historical and social significance for its strong association with the Mechanics Institute movement and the important role it played in the intellectual, cultural and social development of people throughout the latter part of the nineteenth century and the early twentieth century. The collection of books is a rare example of an early lending library and its significance is enhanced by the survival of an original collection of many volumes. The Warrnambool Mechanics' Institute’s publication collection is of both local and state significance. Happy Dispatches Author: A B ("Banjo") Paterson Publisher: Angus & Robertson Ltd Date: 1935Label on spine cover with typed text PAT 920 PAT Pastedown front endpaper has sticker from Warrnambool Public Library covered by a sticker from Corangamite Regional Library Service Front loose endpaper has a stamp from Corangamite Regional Library Service warrnambool, shipwrecked-coast, flagstaff-hill, flagstaff-hill-maritime-museum, maritime-museum, shipwreck-coast, flagstaff-hill-maritime-village, shipwrecked-artefact, book, pattison collection, warrnambool library, warrnambool mechanics’ institute, ralph eric pattison, corangamite regional library service, warrnambool city librarian, mechanics’ institute library, victorian library board, warrnambool books and records, warrnambool children’s library, great ocean road, happy dispatches, a b paterson, banjo paterson -
 Flagstaff Hill Maritime Museum and Village
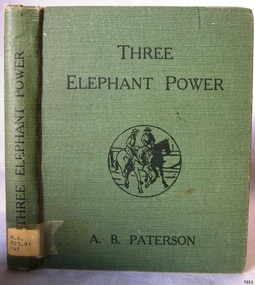
Book, Three Elephant Power
This item is from the ‘Pattison Collection’, a collection of books and records that was originally owned by the Warrnambool Mechanics’ Institute, which was founded in Warrnambool in 1853. By 1886 the Warrnambool Mechanics’ Institute (WMI) had grown to have a Library, Museum and Fine Arts Gallery, with a collection of “… choice productions of art, and valuable specimens in almost every branch and many wonderful national curiosities are now to be seen there, including historic relics of the town and district.” It later included a School of Design. Although it was very well patronised, the lack of financial support led the WMI in 1911 to ask the City Council to take it over. In 1935 Ralph Pattison was appointed as City Librarian to establish and organise the Warrnambool Library as it was then called. When the WMI building was pulled down in 1963 a new civic building was erected on the site and the new Warrnambool Library, on behalf of the City Council, took over all the holdings of the WMI. At this time some of the items were separated and identified as the ‘Pattison Collection’, named after Ralph Pattison. Eventually the components of the WMI were distributed from the Warrnambool Library to various places, including the Art Gallery, Historical Society and Flagstaff Hill. Later some were even distributed to other regional branches of Corangamite Regional Library and passed to and fro. It is difficult now to trace just where all of the items have ended up. The books at Flagstaff Hill Maritime Village generally display stamps and markings from Pattison as well as a variety of other institutions including the Mechanics’ Institute itself. RALPH ERIC PATTISON Ralph Eric Pattison was born in Rockhampton, Queensland, in 1891. He married Maude Swan from Warrnambool in 1920 and they set up home in Warrnambool. In 1935 Pattison accepted a position as City Librarian for the Warrnambool City Council. His huge challenge was to make a functional library within two rooms of the Mechanics’ Institute. He tirelessly cleaned, cleared and sorted a disarrayed collection of old books, jars of preserved specimens and other items reserved for exhibition in the city’s museum. He developed and updated the library with a wide variety of books for all tastes, including reference books for students; a difficult task to fulfil during the years following the Depression. He converted all of the lower area of the building into a library, reference room and reading room for members and the public. The books were sorted and stored using a cataloguing and card index system that he had developed himself. He also prepared the upper floor of the building and established the Art Gallery and later the Museum, a place to exhibit the many old relics that had been stored for years for this purpose. One of the treasures he found was a beautiful ancient clock, which he repaired, restored and enjoyed using in his office during the years of his service there. Ralph Pattison was described as “a meticulous gentleman whose punctuality, floorless courtesy and distinctive neat dress were hallmarks of his character, and ‘his’ clock controlled his daily routine, and his opening and closing of the library’s large heavy doors to the minute.” Pattison took leave during 1942 to 1945 to serve in the Royal Australian Navy, Volunteer Reserve as Lieutenant. A few years later he converted one of the Museum’s rooms into a Children’s Library, stocking it with suitable books for the younger generation. This was an instant success. In the 1950’s he had the honour of being appointed to the Victorian Library Board and received more inspiration from the monthly conferences in Melbourne. He was sadly retired in 1959 after over 23 years of service, due to the fact that he had gone over the working age of council officers. However he continued to take a very keen interest in the continual development of the Library until his death in 1969. About A. B. ‘Banjo’ Paterson Andrew Barton Paterson was born at Narrambla Station in New South Wales, Australia, on 17th February 1864 and died 5th February 1941. His first seven years were spent on his father’s station, where like so many Australian children he enjoyed a bush boyhood. This property was at Obley in the Orange district of New South Wales. The family moved to the Yass district and lived near the main route from Sydney to Melbourne where he saw a great many bullock teams, drovers with herds of stock, gold escorts and Cob & Co coaches. His lifelong love of horses and horsemen was forged from the riders and their horses he saw at the picnic races and polo matches the family attended. These horses and riders where from the Murrumbidgee River and Snowy Mountain areas of New South Wales. Patterson lived most of his life in Sydney. He became a journalist, army officer, novelist, poet, solicitor and a war correspondent. He enjoyed many different sports such as tennis, rowing and, most of all, he delighted in his horsemanship. His first poem ‘El Mahdi to the Australian Troop’ was published in the Bulletin in 1885 under the pen name of “The Banjo”, which was the name of his favourite horse. In 1895 his first book was published and was sold out in the week of publication; he sold 7000 copies in a few months. This book was “The Man From Snowy River, and other Verses” and it contained such ballads as ‘Clancy of the Overflow’, ‘The Geebung Polo Club’, ‘The Man from Ironbark’, and ‘Saltbush Bill’. The tittle poem was first published in 1890. In 1895 Patterson visited his fiancé (at that time), Sarah Riley, who was staying with her friends the Macphersons at Dagworth Station in Queensland. Sarah’s old school friend Christina McPherson. Christina replayed to them an old Scottish tune called “The Craigielee March” that she had heard played by the Garrison Artillery band at the Warrnambool picnic races in Victoria, 1894. Patterson wrote words to fit the tune and it became the now famous ‘Waltzing Matilda’. He was commissioned by the Sydney Morning Herald and the Melbourne Age as they correspondent to report on the South African War. After being a roving reporter in China he went to England and spent time with Rudyard Kipling. In April 1903 Paterson married Alice Walker in Tenterfield, New South Wales, and they had two children, Grace and Hugh. At the outbreak of World War 1 Paterson sailed for England in the hope of covering the fighting in Flanders as a correspondent but finished up driving an ambulance for the Australian Voluntary Hospital, Wimereux, France. In 1915 as an honorary vet he made three voyages taking horse to Africa, China and Egypt. On 18th October 1915 he was commissioned in the 2nd Remount Unit in the Australian Imperial Force and was promoted to Captain serving in the Middle East. He was wounded in April 1916, when he re-joined his unit he was promoted to major and commanded the Australian Remount Squadron from October 1916 to his return to Australia in 1919. Once the War was over he resumed his work as a journalist until he retired in 1930 so that he could devote time to creative writing. He became a successful radio broadcaster with the Australian Broadcasting Commission using his travel experiences. He wrote the children’s book “The Animals Noah Forgot” in 1933 and then in 1934 “Happy Dispatches” in which he told of his meetings with people like Winston Churchill and Kipling. “The Shearer’s Colt was published in 1936 and in 1939 he wrote for the Sydney Morning Herald. After a short illness he passed away in Sydney on 5th February 1941. The Pattison Collection, along with other items at Flagstaff Hill Maritime Village, was originally part of the Warrnambool Mechanics' Institute’s collection. The Warrnambool Mechanics’ Institute Collection is primarily significant in its totality, rather than for the individual objects it contains. Its contents are highly representative of the development of Mechanics' Institute libraries across Australia, particularly Victoria. A diversity of publications and themes has been amassed, and these provide clues to our understanding of the nature of and changes in the reading habits of Victorians from the 1850s to the middle of the 20th century. The collection also highlights the Warrnambool community’s commitment to the Mechanics’ Institute, reading, literacy and learning in the regions, and proves that access to knowledge was not impeded by distance. These items help to provide a more complete picture of our community’s ideals and aspirations. The Warrnambool Mechanics Institute book collection has historical and social significance for its strong association with the Mechanics Institute movement and the important role it played in the intellectual, cultural and social development of people throughout the latter part of the nineteenth century and the early twentieth century. The collection of books is a rare example of an early lending library and its significance is enhanced by the survival of an original collection of many volumes. The Warrnambool Mechanics' Institute’s publication collection is of both local and state significance. Three Elephant Power Author: A B Paterson Publisher: Angus & Robertson Date: 1917Label on spine cover with typed text RA 823.91 PAT Pastedown front endpaper has sticker from Warrnambool Mechanics Institute and Free Library Front loose endpaper has a stamp from Warrnambool Mechanics Institute Fly paper has a stamp from Warrnambool Mechanics Institutewarrnambool, shipwrecked-coast, flagstaff-hill, flagstaff-hill-maritime-museum, maritime-museum, shipwreck-coast, flagstaff-hill-maritime-village, shipwrecked-artefact, book, pattison collection, warrnambool library, warrnambool mechanics’ institute, ralph eric pattison, corangamite regional library service, warrnambool city librarian, mechanics’ institute library, victorian library board, warrnambool books and records, warrnambool children’s library, great ocean road, three elephant power, a b paterson -
 Bendigo Historical Society Inc.
Document - PETER ELLIS COLLECTION: BUSH MUSIC CLUB COLONIAL BALL, 1990
Small off white coloured booklet Bush Music Club Inc. Colonial Subscription Ball 1990 Dancers Companion (A guide to the Quadrilles) The Quadrille Figure 1 (Le Pantelon) (2x32) 8 Top couples R and L through. (without giving hands). 8 Set & turn Partners 8 Top ladies chain. 4 Top couples promenade across set. 4 Half R and L to place. 32 Side couples repeat Figure 2 (Le 'Ete) (4x24) 4 Top couples advance & retire. 4 Cross over (without changing places with partner). 8 Repeat back to place. 8 Set & turn partners. 24 Sides repeat. 48 Top and Sides repeat. Figure 3 (La Poule) (4x32) 4 Lady 1, Man 2 adv, tough RH, retire to opposite place. 4 Lady 1, Man 2 adv, join LH give RH to partner 4 Line of 4 balance fwd & back twice. 4 Men lead partners to opp. Place. 4 Lady 1, Man 2 adv. & ret. 4 Lady 1, Man 2 adv, honour & ret. 4 Top couples, advance & retire. 4 Half R & L to place. 32 Repeat with Lady 2, Man !. 32 Repeat with Lady 3, Man 4. 32 Repeat with Lady 4, Man 3. The Quadrille Figure 4. (La Pastourelle) (4x32) 4 1st couple advance & retire. 4 1st couple adv, lady join 2nd couple. 4 Line of 3 adv. & ret, 1st man retire. 4 Line of 3 adv. Ladies cross to 1st man. 4 Line of 3 adv. & ret, 2nd man retire. 4 Re-advance, form circle with 2nd man. 4 Circle L half way round. 4 Half R & L to place. 32 Repeat with 2nd couple leading. 32 Repeat with 3rd couple leading. 32 Repeat with 4th couple leading. Figure 5 (La Finale) (4 x 32 + 8) 4 All advance & retire. 4 Turn partners. 4 Ladies adv, curtsey & retire. 4 Men advance, bow & retire. 8 All set & turn corners. 8 Promenade with corner. (men to original place with corner) 96 Repeat 3 times to return to partner. 4 All advance & retire. Turn Partners. Notes: 1 Couples numbered 2 Set & turn is a 'balance' set and open hand turn. The Prince Imperial's Quadrille Figure 1. (4x24) 4 Top couples visit right, honour sides. 4 Top men retire with partner & side lady to opposite place, (ladies facing each other). 8 Ladies grand chain to places 8 All set and turn partners 24 Top couples repeat back to place. 48 Repeat with side couples. Figure 2 (4 x 24) 4 1st Lady, 2nd man adv & turn in centre finish facing 2nd lady. 2 2nd lady pass through to 1st man. 2 Both couples turn out to place. 4 top couples advance & retire. 4 Ladies chain back to place. (Nariel) 8 Chasse-croise. (4 steps past partner RH turn corner 4 steps back, LH turn with partner.) 24 Repeat wth 2nd lady, 1st man leading 24 Repeat wth 3rd lady, 4th man leading 24 Repeat wth 4th lady, 3rd man leading. Figure 3 (4x32) 4 1st lady to centre, curtsey to partner. (RH in RH, ACW turn in to centre) 4 2nd lady to centre, curtsey to partner. 4 3rd lady to centre, curtsey to partner.4 4th lady to centre, curtsey to partner. 8 ladies join hands, circle R, small steps after circle R, Men join circle, (giving RH to partner). 4 Balance for 4 (step lift x 4) 4 Turn partners to place, bow & curtsey. 32 Repeat, Lady 2, 1, 4 & 3 to centre 32 Repeat Lady 3, 4, 2 & 1 to centre 32 Repeat, Lady 4, 3, 1 & 2 to centre The Prince Imperial's Quadrille Figure 4 (4x32) 4 Top couples advance & retire. 4 Top couples adv, ladies move to R, as men retire to place. 8 Line of 3 adv & ret twice. 4 Single men adv, bow and retire. 4 Re-advance and turn to face partner. 4 Circle L half way round (with partner & side couple). 4 Half R & L to place. 32 Repeat with side couples leading. 32 Repeat with top couples leading (men moving to left as ladies retire) 32 Repeat with Side couple leading. (Men moving to left as ladies retire) Figure 5 (4x32 +32) 16 Ladies to the right, (RH turn with corner man then continue round to the right turning each man) 4 1st Lady, 2nd man advance & retire 4 re-advance & turn RH (finish facing partners) 8 set & turn partners (finishing in place) 32 Repeat with 2nd Lady, 1st man leading 32 repeat with 3rd lady, 4th man leading 32 Repeat with 4th Lady, 3rd man leading 16 Ladies to the right again. 4 Men turn partners to centre. 4 All bow and curtsey. 8 Promenade set ( hall) Note: Set & turn is a 'balance' set and open hand turn. The Parisienne Quadrille Figure 1 (1x32) 8 Couples R and L through. (without giving hands) 8 set & turn partners 8 Ladies chain. 4 Couples promenade across set. 4 Half R and L to place. Figure 2 (2x24) 4 Couples advance & retire. 4 Cross over (without changing places with partners) 8 Repeat back to place. 8 Set & turn partners. 24 Repeat. Figure 3 (2x32) 4 Lady 1, Man 2 adv, touch RH, retire to opposite place. 4 Lady 1, Man 2 adv, join LH, give RH to partner. 4 Line of 4 balance fwd & back twice 4 Men lead partners to opp. Place 4 Lady 1, Man 2 adv & retire 4 Lady 1, Man 2 adv, honour & ret. 4 Couples, advance & retire. 4 Half R & L to place. 32 Repeat with Lady 2, Man 1. The Parisienne Quadrille Figure 4. (2x32) 4 1st couple advance & retire. 4 1st couple adv, lady join 2nd couple. 4 Line of 3 adv. & ret, 1st man retire. 4 Line of 3 adv. Ladies cross to 1st man. 4 Line of 3 adv. & ret, 2nd man retire. 4 Re-advance, form circle with 2nd man. 4 Circle L half way round. 4 Half R & L to place. 32 Repeat with 2nd couple leading. Figure 5 (2x32) 4 Couples advance & retire 4 Cross over 8 Repeat back to place. 8 Ladies chain across & back.8 Set & turn partners. 32 Repeat Notes: 1 This 'quadrille' is similar to the first set (1st 4 figures) and is danced as two couple sets. 2 Set & turn is a 'balance' set and open hand turn. The Lancers Quadrille Figure 1 (4x24) 4 1st lady, 2nd man advance & retire, 4 Adv, turn two hands, return to place. 4 1st couple lead through across set 4 2nd couple lead through back 8 all set & turn corners. 24 Repeat, 2nd lady, 1st man leading 24 Repeat 3rd lady, 4th man leading 24 Repeat, 4th lady, 3rd man leading Figure 2 (4x24) 4 1st couple advance & retire. 2 1st lady adv to centre, turn to face partner 2 1st couple honour each other. 8 1st couple set and turn then sides form top & bottom lines 4 Lines advance & retire, 4 Advance and turn partners to place. 24 Repeat with 2nd couple leading 24 Repeat with 3rd couple leading 24 Repeat with 4th couple leading Figure 3. (2x32) 4 Ladies advance, curtsey & retire. 4 Men adv, bow, turn by left, bow to partners, then join RH in centre, (ladies RH on partners left elbow). 8 Promenade round set to place. 4 Ladies adv, curtsey & retire again. 4 Men adv, bow, turn by right, bow to partners, join LH in centre, right arm behind partner. 8 Promenade round to set in place. 32 Repeat. The Lancers Quadrille. Figure 4. (4x24) 8 Top couples visit R then L 4 Right Hands around with LH couple 4 then left hands around. 8 Circle left with that couple. 24 Repeat with side couples leading. 24 repeat, top couples visit L then R. 24 Repeat, side couples visit L then R. Figure 5. (4x48 +24) 8 All grand chain 1/2 way round and honour partners. 8 Continue grand chain to place and honour partners. 8 1st couple visit, return to place, facing out with sides in behind. 2 Change places with partner, 2 All rock fwd and back 2 change places again 2 All rock fwd and back 8 Cast out reform in lines 4 Lines advance & retire 4 Advance & turn partners to place 48 Repeat with 2nd couple leading 48 Repeat with 3rd couple leading 48 Repeat with 4th couple leading. 8 Grand chain 1/2 way round and honour partners. 8 continue grand chain to place and honour partners 8 swing partners (R arm round partner, LH in air) Note: All figures walked. Set & Turn is a 'balance' set and open two hand turn. The Caledonians Quadrille Figure 1. (2x32) 4 Top couples R.H. across, move CW (Ladies hands joined over Mens). 4 then L.H. across, move ACW. 8 Set & swing Partners 8 Top ladies chain. 4 Top couples promenade across set. 4 Half R and L to place. 32 Side couples repeat. Figure 2. (4x24) 8 1st Man advance & retire twice. 8 Set & swing corners. 8 Promenade with corners (to men's position.) 24 2nd man repeat. 48 3rd and 4th man repeat. Figure 3. (4x32) 4 Lady 1, Man 2 advance & retire. 4 Re-advance, 2 hand turn to place. 8 1st & 2nd couples lead through and back. (1st lead through across, 2nd back) 8 Set & swing corners. 4 All advance & retire. 4 Swing partners. 32 Repeat with Lady 2, Man 1. 32 Repeat with Lady 3, Man 4. 32 Repeat with Lady 4, Man 3. The Caledonians Quadrille Figure 4. (4x24) 2 Lady 1, Man 2 advance and stop. 2 Lady 2, Man 1 advance and stop. 4 Turn partners back to place. 2 All ladies to the right 4 steps. 2 All men to the left 4 steps. 2 All ladies to the right 4 steps. 2 All men to the left 4 steps. 4 Promenade to place. 4 Swing partners. 24 Repeat with Lady 2, Man 1 leading. 24 Repeat with Lady 3, Man 4 leading. 24 Repeat with Lady 4, Man 3 leading. Figure 5. (4x48 + 16) 8 1st couple visit. 4 Ladies advance, curtsey & retire. 4 Men advance, bow & retire. 8 All set & swing partners. 8 Grand chain 1/2 way round and honour partners. 4 Promenade to place 4 and swing partners. 8 Chasse-croise, (4 steps past partner, RH to corner balance fwd & back, then 4 steps back, LH to partner balance fwd & back). 48 Repeat with 2nd couple leading. 48 Repeat with 3rd couple leading. 48 Repeat with 4th couple leading. 8 All promenade set. 8 Swing partners. Note: Set & swing is 'normal' set and cross hand swing. The Royal Irish Quadrille Figure 1. (2x32) 8 Top couples to Right, R & L through 8 Set & swing Partners. 8 Ladies chain. 4 Couples promenade across (to the other couples position). 4 Half R & L to place. 32 Repeat with tops to the left. Figure 2. (4x24) 4 Top couples to Right, adv & ret. 4 Cross over (without changing places with partner). 8 Repeat back to place. 8 Set & swing partners. 24 Repeat with top couples to the Left. 48 Tops repeat with Right and Left sides. Figure 3. (4x32) 4 Lady 1,2 and Man on Right, advance, touch RH, retire to opposite place. 4 Advance again, join LH, give RH to partner. 4 Line of 4 balance fwd & back twice. 4 Men Lead partners to opp. Place. 4 Lady 1,2 and opp. Man adv & ret. 4 Advance, honour & retire. 4 Couples, advance & retire. 4 Half R & L to place. 32 Repeat with Ladies 3,4 leading. 64 Repeat with Tops facing left. The Royal Irish Quadrille Figure 4. (4x32) 4 Top couples to Right, adv & ret. 4 Re-adv, Top Ladies join opp. Couple. 4 Line of 3 adv & ret. Top men retire. 4 Line of 3 adv, ladies join other man. 4 Line of 3 adv & ret, Side men retire. 4 Re-advance, form circle with opp. Man. 4 Circle L half way round. 4 Half R & L to place. 32 Repeat with Side ladies leading. 64 Repeat with Top couples facing left. Figure 5. (4 x 32 + 8) 4 All advance & retire. 4 Swing partners. 4 Ladies advance, curtsey & retire. 4 Men advance, bow & retire. 8 All set & swing corners. 8 Promenade with corner. (Men to original place with corner). 96 Repeat 3 times to return to partner. 4 All advance & retire. 4 Swing partners. Notes: 1. This is The Quadrille danced diagonally, with Top couples dancing first with the side couple on their right, then the left. Ie. 1-3 and 2-4 then 1-4 and 2-3. 2. Set & swing is 'normal' set and irish swing.The Eightsome Reel Numbering: Clockwise 1-2-3-4 Part A (40 Bars) 4 All join hands, circle left 4 All circle right. 4 Grand Cross, Ladies join RH. 4 Grand Cross, Men join LH. 8 Set & turn Partners 16 Grand chain right round set. Part B ( 8x48 bars) 1st Lady advance to centre, Others join hands in circle. 8 Circle left and right 4 Set once and turn partner 1st Lady sets to partner then open hand turn once with partner. 4 Set once and turn opposite 1st Lady sets to opposite man, then open hand turn once. 8 Reel of 3, 1st Lady, partner and opposite man 1st Lady remains in centre. 8 Circle left and right again 4 Set once and turn side man 1st lady and man on right. 4 Set once and turn other side man 1st lady and man on left. 8 Reel of 3, 1st lady, and two side men. 48 2nd lady repeat. 96 3rd and 4th ladies repeat. 192 Men repeat same movement. The Eightsome Reel Part C (40 Bars) 8 All circle left and right. 4 Grand cross - Ladies join RH. 4 Grand Cross - Men join LH. 8 All set and turn partners. 16 Grand Chain round set. Note: Set is 'normal' set. Turn is open hand turn. NOTES 1. The Quadrille 2. The Prince Imperials 3. The Parisienne Quadrille 4. The Lancers Quadrille 5. The Caledonians Quadrille 6. The Royal Irish Quadrille 7. The Eightsome Reelperson, individual, peter ellis oam -
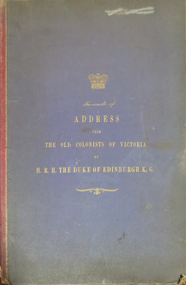 Old Colonists' Association of Ballarat Inc.
Book, Facsimile of Address From the Old Colonists of Victoria to H.R.H. The Duke of Edinburgh K.G, 1869
Blue hard covered 35 page book with an address, a reponse from Prince Alfred, and a number of signatures.To his Rotal highness Prince Alfred Ernest Albert Duke of Edinburgh K.G. &c &c &c May it please Your Royal Highness. We the undersigned, being Colonists of Victoria wirh expressions of a Century and upwards venture to approach you Royal Highness with expressions of unaltered loyalty to Her Majesty's throne and person, and our very sincere and heart congratulations to your Royal Highnedd on your auspicious visit to his distant dependency of the British Empire. We can confiently assure your Royal Highness that however attractive Republicans Institutions may be to many young communitites generally Victoria is in the main free from the taint of any such prediliction. The loyalty and attachment to Monarchial Government of those numbered amonst her older Colonists have been strenghtened bu their enlarged and by the deep connection ever increasing with their ripening years that their material interests will be best protected by the perpetuation of the intimate connexion with the Great Empire over which Her Majesty rules - an Empire the Language, Laws, Customs and Institutions of which it is their privelige to inherit. We may be allowed to esteem the visit of your Royal Highness to these shores as of teh utmost importance, regarded from the Imperial as well as from a Colonial point of view. Your Royal Highness has now had an opportunity of satisfying yourself, and may bear testimony on your return to Europe that the Colonists of Victoria, although they have left their Mother COuntry, have not lost the spirit of enterprise, the energy, the self-reliance, the love of law and order which distinguish the British Race - and that in common with their fellow countrymen at home they possess qualities, the possessoin of which by her peple has made England great and glorious amongst the nations - while your presence here proves to the Colony at large, be especially to our Colonial born youth that Her Majesty 's solicitude for our welfare is unabted. Wish a sincere hope that the visit of your Royal Highness to the other COlonies of the Australian Group may be gratifying to you, and your ultimate return to the Royal Circle safe and attended with every happiness. We beg leave to remain, With the greatest respect, Your Royal Highness' Most humble and most obedient servants, Signature Date of arrival in the Colony. Edward Henty Novr 19th 1834 Francis Henty Decr 9th 1834 John Pascoe Fawkner Oct 9th 1835 Many ignatures follow including John Wilson Novr 1841 Joseph Bickett 27 September 1842 Theophilis Dredge January 1839 Archibald Fisken August 1839 Samuel Legge April 1841 David Coghill March 1838 Joseph L'Estrange 1849 December Thomas W. Wills Dec 1839 James Cuthbert November 1840 John Lamb May 1838 John Hogan November 1839 William Higgenbotham Born Oct 19th 1840 Richard Winter January 1840 Alexander Aitken Born Melbourne June 30 1842 William Cross Yuille February 1837 George Black Decr 1840 Peter Scott Sept 1840 Robert Hoddle March 1837 Henry Darlot September 1839 W. Bacchus 1837 C.B. Hutton Feby 17th 1842 H. Gerrard Feby 1839 Thomas P. Scott 10 August 1838 William Rutledge 19th Decr 1829 in Sydney, at Melbourne in July 1838 Rodk Urquhart March 1842 Thomas Black Septr 1842 J.B. Were November 1839 Thomas Anderson 1839 John Bull June 1842old colonists, prince alfred, address, edward henty, francis henty -
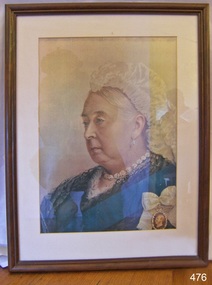 Flagstaff Hill Maritime Museum and Village
Print - Portrait of Queen Victoria, Hoy Art Picture Framing, Original probably painted in 1887 or 1897 to commemorate 50 or 60 years on the throne
Queen Victoria was born at Kensington Palace, London, on 24 May 1819. She was the only daughter of Edward, Duke of Kent, the fourth son of George III. Her father died shortly after her birth and she became heir to the throne because the three uncles who were ahead of her in the succession - George IV, Frederick Duke of York, and William IV - had no legitimate children who survived. Warmhearted and lively, Victoria had a gift for drawing and painting; educated by a governess at home, she was a natural diarist and kept a regular journal throughout her life. On William IV's death in 1837, she became Queen at the age of 18. Queen Victoria is associated with Britain's great age of industrial expansion, economic progress and, especially, empire. At her death, it was said, Britain had a worldwide empire on which the sun never set. In the early part of her reign, she was influenced by two men: her first Prime Minister, Lord Melbourne, and then her husband, Prince Albert, whom she married in 1840. Both men taught her much about how to be a ruler in a 'constitutional monarchy, in which the monarch had very few powers but could use much influence. Albert took an active interest in the arts, science, trade and industry; the project for which he is best remembered was the Great Exhibition of 1851, the profits from which helped to establish the South Kensington museums complex in London. Her marriage to Prince Albert produced nine children between 1840 and 1857. Most of her children married into other Royal families in Europe. Edward VII (born 1841), married Alexandra, daughter of Christian IX of Denmark. Alfred, Duke of Edinburgh and of Saxe-Coburg and Gotha (born 1844) married Marie of Russia. Arthur, Duke of Connaught (born 1850) married Louise Margaret of Prussia. Leopold, Duke of Albany (born 1853) married Helen of Waldeck-Pyrmont. Victoria, Princess Royal (born 1840) married Friedrich III, German Emperor. Alice (born 1843) married Ludwig IV, Grand Duke of Hesse and by Rhine. Helena (born 1846) married Christian of Schleswig-Holstein. Louise (born 1848) married John Campbell, 9th Duke of Argyll. Beatrice (born 1857) married Henry of Battenberg. Victoria bought Osborne House (later presented to the nation by Edward VII) on the Isle of Wight as a family home in 1845, and Albert bought Balmoral in 1852. Victoria was deeply attached to her husband and she sank into depression after he died, aged 42, in 1861. She had lost a devoted husband and her principal trusted adviser in affairs of state. For the rest of her reign she wore black. Until the late 1860s she rarely appeared in public; although she never neglected her official Correspondence, and continued to give audiences to her ministers and official visitors, she was reluctant to resume a full public life. She was persuaded to open Parliament in person in 1866 and 1867, but she was widely criticised for living in seclusion and quite a strong republican movement developed. Seven attempts were made on Victoria's life, between 1840 and 1882 - her courageous attitude towards these attacks greatly strengthened her popularity. With time, the private urgings of her family and the flattering attention of Benjamin Disraeli, Prime Minister in 1868 and from 1874 to 1880, the Queen gradually resumed her public duties. In foreign policy, the Queen's influence during the middle years of her reign was generally used to support peace and reconciliation. In 1864, Victoria pressed her ministers not to intervene in the Prussia-Denmark war, and her letter to the German Emperor (whose son had married her daughter) in 1875 helped to avert a second Franco-German war. On the Eastern Question in the 1870s - the issue of Britain's policy towards the declining Turkish Empire in Europe - Victoria (unlike Gladstone) believed that Britain, while pressing for necessary reforms, ought to uphold Turkish hegemony as a bulwark of stability against Russia, and maintain bi-partisanship at a time when Britain could be involved in war. Victoria's popularity grew with the increasing imperial sentiment from the 1870s onwards. After the Indian Mutiny of 1857, the government of India was transferred from the East India Company to the Crown, with the position of Governor-General upgraded to Viceroy, and in 1877 Victoria became Empress of India under the Royal Titles Act passed by Disraeli's government. During Victoria's long reign, direct political power moved away from the sovereign. A series of Acts broadened the social and economic base of the electorate. These acts included the Second Reform Act of 1867; the introduction of the secret ballot in 1872, which made it impossible to pressurise voters by bribery or intimidation; and the Representation of the Peoples Act of 1884 - all householders and lodgers in accommodation worth at least £10 a year, and occupiers of land worth £10 a year, were entitled to vote. Despite this decline in the Sovereign's power, Victoria showed that a monarch who had a high level of prestige and who was prepared to master the details of political life could exert an important influence. This was demonstrated by her mediation between the Commons and the Lords, during the acrimonious passing of the Irish Church Disestablishment Act of 1869 and the 1884 Reform Act. It was during Victoria's reign that the modern idea of the constitutional monarch, whose role was to remain above political parties, began to evolve. But Victoria herself was not always non-partisan and she took the opportunity to give her opinions, sometimes very forcefully, in private. After the Second Reform Act of 1867, and the growth of the two-party (Liberal and Conservative) system, the Queen's room for manoeuvre decreased. Her freedom to choose which individual should occupy the premiership was increasingly restricted. In 1880, she tried, unsuccessfully, to stop William Gladstone - whom she disliked as much as she admired Disraeli and whose policies she distrusted - from becoming Prime Minister. She much preferred the Marquess of Hartington, another statesman from the Liberal party which had just won the general election. She did not get her way. She was a very strong supporter of the Empire, which brought her closer both to Disraeli and to the Marquess of Salisbury, her last Prime Minister. Although conservative in some respects - like many at the time she opposed giving women the vote - on social issues, she tended to favour measures to improve the lot of the poor, such as the Royal Commission on housing. She also supported many charities involved in education, hospitals and other areas. Victoria and her family travelled and were seen on an unprecedented scale, thanks to transport improvements and other technical changes such as the spread of newspapers and the invention of photography. Victoria was the first reigning monarch to use trains - she made her first train journey in 1842. In her later years, she became the symbol of the British Empire. Both the Golden (1887) and the Diamond (1897) Jubilees, held to celebrate the 50th and 60th anniversaries of the Queen's accession, were marked with great displays and public ceremonies. On both occasions, Colonial Conferences attended by the Prime Ministers of the self-governing colonies were held. Despite her advanced age, Victoria continued her duties to the end - including an official visit to Dublin in 1900. The Boer War in South Africa overshadowed the end of her reign. As in the Crimean War nearly half a century earlier, Victoria reviewed her troops and visited hospitals; she remained undaunted by British reverses during the campaign: 'We are not interested in the possibilities of defeat; they do not exist.' Victoria died at Osborne House on the Isle of Wight, on 22 January 1901 after a reign which lasted almost 64 years, then the longest in British history. Her son, Edward VII succeeded her. She was buried at Windsor beside Prince Albert, in the Frogmore Royal Mausoleum, which she had built for their final resting place. Above the Mausoleum door are inscribed Victoria's words: "Farewell best beloved, here, at last, I shall rest with thee, with thee in Christ I shall rise again." Source: https://www.royal.uk/queen-victoria This picture captures Queen Victoria in her later years. It may well have been painted to commemorate her Golden Anniversary in 1887, or her Diamond Anniversary in 1897.Picture, print, reproduction of a drawing or photograph of Queen Victoria. She is wearing a dark-coloured dress, white headdress and a diamond necklace and earrings. On her left shoulder is the Royal Order of Victoria and Albert, awarded to female members of the British Royal Family and female courtiers. There are four grades or classes of this Royal Order as well as the Sovereign's Badge, which is exclusive to her. Also across her left shoulder, is a blue riband representing the Order of the Garter. The picture is in a medium-coloured timber frame with a white string across the width at the rear. The label says it was framed by Hoy Art, Warrnambool. The signature of the Queen is on the picture but is not obvious since the picture has been re-framed."HOY ART / PICTURE FRAMING / 48 Kepler St, Warrnambool 3280 / Phone (055) 62 8022" Signature (hidden by new framing) "Victoria H.R.S."flagstaff hill, warrnambool, shipwrecked-coast, flagstaff-hill, flagstaff-hill-maritime-museum, maritime-museum, shipwreck-coast, flagstaff-hill-maritime-village, picture of queen victoria, queen victoria, the royal order of victoria and albert, the order of the garter, hoy art -
 Bendigo Historical Society Inc.
Document - PETER ELLIS COLLECTION: BUSH MUSIC CLUB COLONIAL BALL, 1991
Small yellow booklet outline of a man on left of title and woman on right. Bush Music Club Inc. Colonial Subscription Ball 1991 Dancers Companion (A guide to the Quadrilles) The Quadrille Figure 1 (Le Pantelon) (2x32) 8 Top couples R and L through. (without giving hands). 8 Set & turn Partners 8 Top ladies chain. 4 Top couples promenade across set. 4 Half R and L to place. 32 Side couples repeat Figure 2 (Le 'Ete) (4x24) 4 Top couples advance & retire. 4 Cross over (without changing places with partner). 8 Repeat back to place. 8 Set & turn partners. 24 Sides repeat. 48 Top and Sides repeat. Figure 3 (La Poule) (4x32) 4 Lady 1, Man 2 adv, tough RH, retire to opposite place. 4 Lady 1, Man 2 adv, join LH give RH to partner 4 Line of 4 balance fwd & back twice. 4 Men lead partners to opp. Place. 4 Lady 1, Man 2 adv. & ret. 4 Lady 1, Man 2 adv, honour & ret. 4 Top couples, advance & retire. 4 Half R & L to place. 32 Repeat with Lady 2, Man !. 32 Repeat with Lady 3, Man 4. 32 Repeat with Lady 4, Man 3. The Quadrille Figure 4. (La Pastourelle) (4x32) 4 1st couple advance & retire. 4 1st couple adv, lady join 2nd couple. 4 Line of 3 adv. & ret, 1st man retire. 4 Line of 3 adv. Ladies cross to 1st man. 4 Line of 3 adv. & ret, 2nd man retire. 4 Re-advance, form circle with 2nd man. 4 Circle L half way round. 4 Half R & L to place. 32 Repeat with 2nd couple leading. 32 Repeat with 3rd couple leading. 32 Repeat with 4th couple leading. Figure 5 (La Finale) (4 x 32 + 8) 4 All advance & retire. 4 Turn partners. 4 Ladies adv, curtsey & retire. 4 Men advance, bow & retire. 8 All set & turn corners. 8 Promenade with corner. (men to original place with corner) 96 Repeat 3 times to return to partner. 4 All advance & retire. Turn Partners. Notes: 1 Couples numbered 1 4 2 3 2 Set & turn is a 'balance' set and open hand turn. The Lancers Quadrille Figure 1 (4x24) 4 1st lady, 2nd man advance & retire, 4 Adv, turn two hands, return to place. 4 1st couple lead through across set 4 2nd couple lead through back 8 all set & turn corners. 24 Repeat, 2nd lady, 1st man leading 24 Repeat 3rd lady, 4th man leading 24 Repeat, 4th lady, 3rd man leading Figure 2 (4x24) 4 1st couple advance & retire. 2 1st lady adv to centre, turn to face partner 2 1st couple honour each other. 8 1st couple set and turn then sides form top & bottom lines 4 Lines advance & retire, 4 Advance and turn partners to place. 24 Repeat with 2nd couple leading 24 Repeat with 3rd couple leading 24 Repeat with 4th couple leading Figure 3. (2x32) 4 Ladies advance, curtsey & retire. 4 Men adv, bow, turn by left, bow to partners, then join RH in centre, (ladies RH on partners left elbow). 8 Promenade round set to place. 4 Ladies adv, curtsey & retire again. 4 Men adv, bow, turn by right, bow to partners, join LH in centre, right arm behind partner. 8 Promenade round to set in place. 32 Repeat. The Lancers Quadrille. Figure 4. (4x24) 8 Top couples visit R then L 4 Right Hands around with LH couple 4 then left hands around. 8 Circle left with that couple. 24 Repeat with side couples leading. 24 repeat, top couples visit L then R. 24 Repeat, side couples visit L then R. Figure 5. (4x48 +24) 8 All grand chain 1/2 way round and honour partners. 8 Continue grand chain to place and honour partners. 8 1st couple visit, return to place, facing out with sides in behind. 2 Change places with partner, 2 All rock fwd and back 2 change places again 2 All rock fwd and back 8 Cast out reform in lines 4 Lines advance & retire 4 Advance & turn partners to place 48 Repeat with 2nd couple leading 48 Repeat with 3rd couple leading 48 Repeat with 4th couple leading. 8 Grand chain 1/2 way round and honour partners. 8 continue grand chain to place and honour partners 8 swing partners (R arm round partner, LH in air) Note: All figures walked. Set & Turn is a 'balance' set and open two hand turn. The Prince Imperial's Quadrille Figure 1. (4x24) 4 Top couples visit right, honour sides. 4 Top men retire with partner & side lady to opposite place, (ladies facing each other). 8 Ladies grand chain to places 8 All set and turn partners 24 Top couples repeat back to place. 48 Repeat with side couples. Figure 2 (4 x 24) 4 1st Lady, 2nd man adv & turn in centre finish facing 2nd lady. 2 2nd lady pass through to 1st man. 2 Both couples turn out to place. 4 top couples advance & retire. 4 Ladies chain back to place. (Nariel) 8 Chasse-croise. (4 steps past partner RH turn corner 4 steps back, LH turn with partner.) 24 Repeat with 2nd lady, 1st man leading 24 Repeat with 3rd lady, 4th man leading 24 Repeat wth 4th lady, 3rd man leading. Figure 3 (4x32) 4 1st lady to centre, curtsey to partner. (RH in RH, ACW turn in to centre) 4 2nd lady to centre, curtsey to partner. 4 3rd lady to centre, curtsey to partner.4 4th lady to centre, curtsey to partner. 8 ladies join hands, circle R, small steps after circle R, Men join circle, (giving RH to partner). 4 Balance for 4 (step lift x 4) 4 Turn partners to place, bow & curtsey. 32 Repeat, Lady 2, 1, 4 & 3 to centre 32 Repeat Lady 3, 4, 2 & 1 to centre 32 Repeat, Lady 4, 3, 1 & 2 to centre The Prince Imperial's Quadrille Figure 4 (4x32) 4 Top couples advance & retire. 4 Top couples adv, ladies move to R, as men retire to place. 8 Line of 3 adv & ret twice. 4 Single men adv, bow and retire. 4 Re-advance and turn to face partner. 4 Circle L half way round (with partner & side couple). 4 Half R & L to place. 32 Repeat with side couples leading. 32 Repeat with top couples leading (men moving to left as ladies retire) 32 Repeat with Side couple leading. (Men moving to left as ladies retire) Figure 5 (4x32 +32) 16 Ladies to the right, (RH turn with corner man then continue round to the right turning each man) 4 1st Lady, 2nd man advance & retire 4 re-advance & turn RH (finish facing partners) 8 set & turn partners (finishing in place) 32 Repeat with 2nd Lady, 1st man leading 32 repeat with 3rd lady, 4th man leading 32 Repeat with 4th Lady, 3rd man leading 16 Ladies to the right again. 4 Men turn partners to centre. 4 All bow and curtsey. 8 Promenade set ( hall) Note: Set & turn is a 'balance' set and open hand turn. The Parisienne Quadrille Figure 1 (1x32) 8 Couples R and L through. (without giving hands) 8 set & turn partners 8 Ladies chain. 4 Couples promenade across set. 4 Half R and L to place. Figure 2 (2x24) 4 Couples advance & retire. 4 Cross over (without changing places with partners) 8 Repeat back to place. 8 Set & turn partners. 24 Repeat. Figure 3 (2x32) 4 Lady 1, Man 2 adv, touch RH, retire to opposite place. 4 Lady 1, Man 2 adv, join LH, give RH to partner. 4 Line of 4 balance fwd & back twice 4 Men lead partners to opp. Place 4 Lady 1, Man 2 adv & retire 4 Lady 1, Man 2 adv, honour & ret. 4 Couples, advance & retire. 4 Half R & L to place. 32 Repeat with Lady 2, Man 1. The Parisienne Quadrille Figure 4. (2x32) 4 1st couple advance & retire. 4 1st couple adv, lady join 2nd couple. 4 Line of 3 adv. & ret, 1st man retire. 4 Line of 3 adv. Ladies cross to 1st man. 4 Line of 3 adv. & ret, 2nd man retire. 4 Re-advance, form circle with 2nd man. 4 Circle L half way round. 4 Half R & L to place. 32 Repeat with 2nd couple leading. Figure 5 (2x32) 4 Couples advance & retire 4 Cross over 8 Repeat back to place. 8 Ladies chain across & back.8 Set & turn partners. 32 Repeat Notes: 1 This 'quadrille' is similar to the first set (1st 4 figures) and is danced as two couple sets. 2 Set & turn is a 'balance' set and open hand turn. Wellington Waltz 8 Honour Partner, honour corner 8 Circle L 7 steps, then tap, tap 8 Circle R 7 steps, then tap, tap 4 Top couples, 2 side-steps to centre and back with lady turning under man's left arm. 4 Waltz across to opposite side 8 Side couples repeat. 8 Top ladies chain across. (pause in centre, turn twice with opp. Man) 8 Side ladies chain across. 8 Grand Chain half way round set. 8 Waltz to man's place. 64 Repeat with side couples leading. Waltz Cotillon 8 Honour Partner, honour corner 16 1st couple waltz the set. 8 Top ladies cross over.8 Side ladies cross over. 8 Top men cross over. 8 Side men cross over. 16 All waltz back to place. Form top & bottom lines, 8 Adv. & ret, cross over. 8 Adv. & ret, cross back. 16 Waltz chain to meet partner. 16 All waltz back to place. Form top & bottom lines, 8 Adv. & ret, cross over. 8 Adv. & ret, cross back. 16 Waltz chain to meet partner. 16 All waltz back to place. 112 Repeat with 2nd couple leading. 112 Repeat with 3rd couple leading. Side lines adv. & ret. 112 Repeat with 4th couple leading. Side lines adv. & ret. Galopade Quadrille 8 Honour Partner, honour corner 8 All galop round set. (Galop half way round set, on opp. Side change places with partner, continue galop to place.) 8 Top couples R & L through. 8 Side couples R & L through. 8 All set & swing partners. 8 All galop round set. 8 Top ladies chain. 8 Side ladies chain. 8 All set & swing partners. 8 All galop round set. 8 1st couple lead through, 2nd on return 8 3rd couple lead through, 4th on return 8 All set & swing partners. 8 All galop round set. 4 1st lady & 2nd man adv. & ret. 4 2nd lady & 1st man adv. & ret. 4 3rd lady & 4th man adv. & ret. 4 4th lady & 3rd man adv. & ret. 8 All set & swing partners. 8 All galop round set. 4 Ladies advance & retire. 4 Men advance & retire. 8 Double ladies chain. 8 All set & swing partners. 8 All galop round set. 8 Top couples waltz the set 8 Side couples waltz the set 8 All set & swing partners. 32 Waltz the hall. The Caledonians Quadrille Figure 1. (2x32) 4 Top couples R.H. across, move CW (Ladies hands joined over Mens). 4 then L.H. across, move ACW. 8 Set & swing Partners 8 Top ladies chain. 4 Top couples promenade across set. 4 Half R and L to place. 32 Side couples repeat. Figure 2. (4x24) 8 1st Man advance & retire twice. 8 Set & swing corners. 8 Promenade with corners (to men's position.) 24 2nd man repeat. 48 3rd and 4th man repeat. Figure 3. (4x32) 4 Lady 1, Man 2 advance & retire. 4 Re-advance, 2 hand turn to place. 8 1st & 2nd couples lead through and back. (1st lead through across, 2nd back) 8 Set & swing corners. 4 All advance & retire. 4 Swing partners. 32 Repeat wth Lady 2, Man 1. 32 Repeat with Lady 3, Man 4. 32 Repeat with Lady 4, Man 3. The Caledonians Quadrille Figure 4. (4x24) 2 Lady 1, Man 2 advance and stop. 2 Lady 2, Man 1 advance and stop. 4 Turn partners back to place. 2 All ladies to the right 4 steps. 2 All men to the left 4 steps. 2 All ladies to the right 4 steps. 2 All men to the left 4 steps. 4 Promenade to place. 4 Swing partners. 24 Repeat wth Lady 2, Man 1 leading. 24 Repeat wth Lady 3, Man 4 leading. 24 Repeat wth Lady 4, Man 3 leading. Figure 5. (4x48 + 16) 8 1st couple visit. 4 Ladies advance, curtsey & retire. 4 Men advance, bow & retire. 8 All set & swing partners. 8 Grand chain 1/2 way round and honour partners. 4 Promenade to place 4 and swing partners. 8 Chasse-croise, (4 steps past partner, RH to corner balance fwd & back, then 4 steps back, LH to partner balance fwd & back). 48 Repeat with 2nd couple leading. 48 Repeat wth 3rd couple leading. 48 Repeat wth 4th couple leading. 8 All promenade set. 8 Swing partners. Note: Set & swing is 'normal' set and cross hand swing. The Lancers Quadrille (BMC version) Figure 1. (4x32) 8 1st Lady, 2nd man advance & swing in centre (with ballroom hold). 4 Partners move 1/2 way across, Centres keep swinging. 4 Promenade partner to opp. Place. 8 1st couple lead through to place. 8 All swing corners. 32 Repeat with 2nd lady, 1st man. 32 Repeat with 3rd lady, 4th man. 32 Repeat with 4th lady, 3rd man. Figure 2. (4x32) 8 1st couple lead up (to 2nd) & retire. 8 1st couple swing in place Form top & bottom lines. 8 Lines adv & retire twice. 8 Swing partners. 32 Repeat with 2nd couple leading. 32 Repeat with 3rd couple leading. (Forming side lines instead) 32 Repeat with 4th couple leading. (Forming side lines instead) Figure 3. (2x32) 4 Introduction - Ladies to the centre and men form a circle around them. 8 Men circle left. 8 Men circle right. Men form a grand cross (LH) Right arm behind partners. 16 Promenade round set. Ladies return to the centre. 32 Repeat - Circle L & R, & Grand Cross. The Lancers Quadrille (BMC version) Figure 4. (2x48) 8 Top couples visit. 4 Tops RH star. 4 then LH star. 8 Tops basket Left. 8 Tops basket Right. 8 Tops circle Left. Tops circle Right. 48 Repeat with side couples leading. Figure 5. ((4x 16+32) + 24) 8 All grand chain 1/2 way round and honour partners. 8 Promenade with partners to place. 8 1st couple lead up, turn and lead out with side falling in behind. 8 Cast out, reform top & bottom lines. 4 Lines advance & retire. 4 Advance & swing partners to place. 8 Swing partners in place. 48 Repeat with 2nd couple leading. 48 Repeat with 3rd couple leading (forming side lines) 48 Repeat with 4th couple leading. (forming side lines) 8 All grand chain 1/2 way round and honour partners. 8 Promenade with partners to place. 8 Swing partners in place. Note: Normal swing here is with hands crossed. 1. The Quadrille 2.The Lancers Quadrille 3. The Prince Imperials 4. The Parisienne Quadrille 5. The Wellington Waltz 6. The Waltz Cotillon 7. The Galopade Quadrille 8. The Caledonians Quadrille 9. The Lancers Quadrille (BMC)person, individual, peter ellis oam -
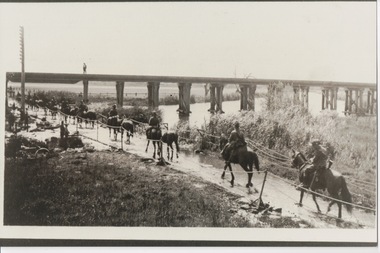 Lara RSL Sub Branch
Photograph, Set 4 photographs. and others for Torquay Light Horse camp, 1940
These images capture for all time Light Horsemen travelling through Geelong on their way to camp at Torquay for the last Group meeting in Australia . information following - details obtained from .........https://torquayhistory.com/light-horse-brigade/ On Australia Day, 1997, Sir John Young unveiled this plaque on Point Danger, Torquay. Torquay history, Light Horse Training Camp, WW2 Plaque at Pt. Danger Note----- (See images to view plaque) The plaque identifies a significant event in Torquay’s history and the sentiments of ‘change’ for the Light Horse Brigade – from horses to machines. In 1940 the four Light Horse Regiments (4th, 8th, 13th and 20th), some 5000 Light Horse and 2000 horses camped and trained at Torquay. Three other regiments, formerly mounted on horses, were also at Torquay ‘mounted’ on privately owned trucks and cars. Division troops included Artillery, Engineers, Signals, Field Ambulance and other branches of the Army necessary to enable a Division to function. It wasn’t just the sheer numbers of men coming to this little town that made the event significant, it was also the fact that the men of the Light Horse were dramatic, almost glamorous figures and it is easy to see their exploits as some splendid adventure. Horses have played a special role in the story of Australia. They were the only means of transport across this huge country, so it was necessary for everyone to have the ability to ride a horse. When war broke out in 1899 between Britain and the Boers of South Africa (“Boer” was Dutch for “farmer”) Australia sent troops to fight. At first Britain was wary of using untried, unprofessional colonial cavalrymen but soon saw that the slouch-hatted Australian “bushmen” were a match for the fast-moving and unconventional mounted commandos of the Boers. The Australians proved themselves to be expert rough-riding horsemen and good shots. Bush life had hardened them to go for long periods with little food and water. They also showed remarkable ability to find their way in a strange country and use its features for cover, in both attack and defence. By 1914, when Australia joined the war against Germany, there were 23 Light Horse regiments of militia volunteers. Many men from these units joined the Light Horse regiments of the Australian Imperial Force (AIF). Men were given remounts (if not using their own horses) – army horses bought by Commonwealth purchasing officers from graziers and breeders. These were called “walers” because they were a New South Wales stockhorse type – strong, great-hearted animals with the strains of the thoroughbred and semi-draught to give them speed, strength and stamina. On 1st November, 1914, Australia’s First Infantry Division and the first four Light Horse regiments sailed for England in a fleet of transport ships. The first of the Light Horse arrived at Gallipoli in May without their horses. Back with their horses after Gallipoli, they were formidable combatants across the Sinai and Palestine. Some British commanders observed that the light horseman moved with a “lazy, slouching gait, like that of a sleepy tiger” but described how the promise of battle “changes that careless gait, into a live athletic swing that takes him over the ground much quicker than other troops”. They had Light Horse, Torquay, training campdeveloped a reputation as formidable infantrymen. The Turks called them “the White Ghurkas” – a reference to their deadly skill with the bayonet. The Arabs called them “The Kings of the Feathers”. The plume had originally been a battle honour of the Queensland Mounted Infantry for their work in the shearer’s strike of 1891. During WW1 it was adopted by almost all the Light Horse Regiments. It was the proud badge of the light horseman. The most famous of their battles was the attack on Beersheba- the charge of the 4th Light Horse Brigade. Mounted infantrymen and their superb walers had carried out one of the most successful cavalry charges in history – against what seemed impossible odds. They surprised the Turks by charging cavalry-style, when they would normally have ridden close to an objective then dismounted to fight. The fall of Beersheba swung the battle tide against the Turks in Palestine; and changed the history of the Middle East. While 19 men from the Surf Coast Shire served with the 4th Light Horse over the course of WW1, only four were involved in the charge of Beersheba- John GAYLARD, Philip QUINN.(Winchelsea); Wallace FINDLAY (Anglesea); Harry TRIGG (Bambra). After the war, Light Horse units played a key role in the Australian Government’s compulsory military training programme. The Citizen Military Forces (C.M.F.) thrived on the glamour of the wartime Light Horse tradition, ignoring the possibility that motor vehicles would soon replace the horses. When training was no longer compulsory, the C.M.F. regiments declined and horses became more of a luxury during the 1930s depression years of poverty and unemployment. Some regiments were motorised. Then, in 1939, Australia joined Britain in another world war. Training was increased for the militia at both home bases and regional training camps. The camp at Torquay in 1940, commanded by Major General Rankin, was at Divisional strength. By the end of the camp some felt that the Division was ready for active service. Gradually, over the next four years, the Australian Light Horse units were mounted on wheels and tracks and the horses were retired. Six men enlisted at the Torquay camp and another 57 men and women enlisted at Torquay for service in WW2. Those who served in the Militia provided valuable Officers and NCOs and men for the armed services during the war. Each infantry division of the 2nd AIF had a Light Horse regiment attached to it. But the day of the Australian mounted soldier hadn’t quite passed. During World War II, Australia’s 6th Cavalry Regiment formed a mounted unit they called “The Kelly Gang” which did valuable scouting work. In New Guinea, a mounted Light Horse Troop did patrol duty and helped carry supplies. Some fully equipped walers were flown into Borneo for reconnaissance in rugged mountain country. But by the end of the war, in 1945, the horse had disappeared from the Australian Army. References: Australian Light Horse Association www.lighthorse.org.au National Australia Archives Australian War Memorial Surf Coast Shire WW1 memorials www.togethertheyserved.com The Light horse- a Cavalry under Canvas Light Horse, Training Camp, Torquay, WW2 Late in 1939 it was decided to set up a Lighthorse training camp in Torquay to train both men and horses for the battles of the Second World War. Horses, men and equipment came on special trains from all over Victoria and NSW, and as you would expect horseman came from areas such as Omeo and Sale, the Wimmera and the Western District. They arrived at the Geelong racecourse for watering in the Barwon River and then were ridden across the ford at the breakwater and began their 11 mile trek to Torquay. Light Horse, Training Camp, Torquay, WW2 Tent city By the end of January 1940 the camp at Torquay accommodated some 5000 men and 2500 horses of the Second Cavalry Division. The rows of horses, tents and huts near Blackgate Road were quite a sight. While the cavalrymen engaged in exercises on the land and on the beaches, many of the troops took over the Torquay School for special training of men and officers. Mr Bob Pettit local farmer and Councillor for the Barrabool Shire, wrote about the Light horse in the Surf Coast Community News in 1985 saying “They used to travel about the district riding four abreast in one long convoy. To my annoyance they went through my property and shut all the gates behind them. I had certain gates open to let stock in to the water holes and it would take me three -quarters of an hour to follow the horsemen up and put all the gates right again” he continued “the men from the Light Horse were here when the fire went through in March 1940. He recalled an incident when early one morning, as some one blew the bugle, a soldier putting a white sheet on the line frightened the horses. They panicked and ran off in all directions. Six went over the cliff near Bird Rock, five were never found, and the rest were gathered up after nearly a fortnight in the bush around Addiscott and Anglesea" Light Horse, Training Camp, Torquay, WW2, Geelong Parade Geelong parade The training camp culminated in a parade through the streets of Geelong on March 12th 1940. The salute was given at the Town Hall and the troops continued on a route to the You Yang’s for a training exercise. Note-----(see media section for photograph) The Camp was abandoned in mid 1940 as it was deemed unsuitable for training during winter and the cost of a permanent camp could not be justified if it could not be used all year. Historic.......Rare,,,Interpretive.Sepia photographs.set of four ....post card size ....Horses &LighthorsemenNo 1, Lighthorsemen Regiment Geelong 1940......No 2 Light Horse at Breakwater Geelong 1938 to 1940....No 3 Light Horse at Breakwater Geelong 1938 to 1940.....No 4 Light Horse crossing Breakwater camped at Geelong Showgrounds. These markings are on reverse of photographs.light horsemengeelong 1940., world war 2 -
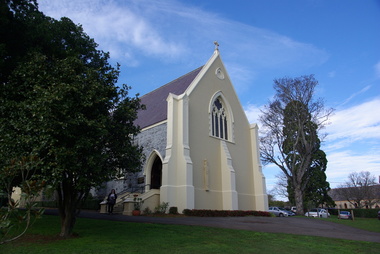 Victorian Interpretive Projects Inc.
Photograph - colour, Clare Gervasoni, St Peter's Catholic Church, Daylesford, 2015, 14/06/2015
"The fine structure of St. Peter's, with its prettily-decorated interior, which holds crowded congregations at Holy Mass on Sundays, is alone an eloquent testimony of the piety and devotion which permeates the whole parish. Attached to the church is a circulating library, and Catholic papers and other literature are distributed at the church door. Branches of the H.A.C.B. Society and Catholic Federation are doing much good work. (Melbourne Advocate, 17 January 1914) "OPENING AND CONSECRATION OF THE NEW CATHOLIC CHURCH OF ST. PETER’S, DAYLESFORD Cross on St. Peter'sNotwithstanding the inclemency of the weather, the opening of the new Catholic Church of St. Peter’s, yesterday (Sunday), attracted a crowded congregation. Although the rain, which has poured almost incessantly for some days past, had left our roads and streets in the condition for which Daylesford is celebrated in winter weather, and although he storm and rain seemed to increase as the hour announced for the ceremonies approached, the church was filled by a large congregation, comprising all sects and denominations of Christians in and around the district. The beautiful edifice, erected mainly through the zeal, liberality and energy of the respected pastor, presented a most imposing appearance, and reflects infinite credit upon the Rev. Mr. Slattery, and the flock committed to his charge. The church was commenced in November 1863 and has been in the hands of the workmen up to the present time, work being uninterruptedly carried on. On commencing the foundations, it was necessary to excavate until solid clay was reached, which in consequence of the deep rich chocolate soil on the site of the building, had to be carried down to an average depth of 6 feet 6 inches. The foundations were laid with massive stones in courses of 12-inch, and four feet thick, reducing to 3 feet below the floor line. The style of the building is decorated Gothic, and consists of a nave, 80 feet by 30 feet in the clear, and a chancel 18 feet high; from floor line to apex of roof, 47 feet, which is elegantly constructed, consisting of six spans or frames with puncheons resting on carved corbels, low down between the windows. The north side consists of a handsome entrance, near the north-west angle, approached by nine steps of cut stone, and four bays of windows on nave, and a small door on side of chancel, intended as an entry from the sacristy. The south side presents a very handsome view to Victoria street, a beautiful porch entrance giving access to the building on the south-east end of nave; and on the south-west angle a handsome octagonal spire, terminating in an iron cross, with gilt floriations; the height of top of cross, from floor line, is 88 feet. A stone stairs gives access to the organ gallery and the belfry. The whole of the windows are of a handsome geometrical design, and carved in stone, with mullions and tracery, and glazed with amber-tinted glass, the chancel window being 15 feet high, and 8 feet wide. The chancel arch is unusually large, 27 feet St. Peter's interiorhigh and 18 feet wide, and handsomely moulded, and presents a fine appearance from the body of the church. The roof is stained a rich oak, with heavy cornice, and all the walls are smoothly plastered, and colored peach color, giving the amber-tinted glass a beautiful soft cathedral appearance to the interior. The altar is of a very chaste design, the panels being moulded with Gothic heads, and finished in white and gold; the altar rail was not completed, but is intended to be of polished cedar, with carved pillars. The interior fittings will be proceeded with immediately, and to complete the design, an organ gallery, with sittings for about 100 persons besides the choir, will be constructed on the west end. It is intended also to place pillar gaslights on each side of the main entrance, for lighting during vespers in winter. The style of architecture has been strictly carried out, and in the best and most substantial manner. The building has been erected under the superintendence of the architect Mr. John Townsend Brophy, a member of the congregation, and who has discharged his duty with great ability and care. The hour of half-past eleven has scarcely passed when from the sacristy entered His Lordship the Right Rev. Dr. Gould, Bishop of Melbourne, preceded by the Very Rev. Dean Hayes (Sandhurst), the Rev. P. J. Slattery, and a number of boys dressed in white surplices. The Right Reverend Prelate proceeded to the foot of the altar, the Very Rev. the Dean on his right, and the Rev. P. J. Slattery on the left. The prayers usual upon the occasion were read by the Bishop. A procession was then formed, and went around the church in the following order. Several youths bearing wax candles first, next the Very Rev. the Dean, then the Bishop and his train bearers, and following were the Rev. Mr. Slattery and acolytes. Having returned to the altar in the same order, the Deacon (Dean Hayes) and Sub-Deacon (Rev. P. J. Slattery) proceeded to robe his Lordship, who had taken his seat at the epistle side of the altar, for the solemn High Mass, at appropriate times wearing his mitre and bearing his crozier. The mass, which was chanted by the Bishop with touching simplicity and earnestness, was then commenced. The choir, under the direction of Mr. Meunsch, organist, was full and most effective. Mrs. Testar, of Melbourne, having generously offered her valuable services, took the leading soprano solos, and it is scarcely necessary to add, rendered them with exquisite taste and feeling – her beautiful voice being heard with great effect throughout the entire building. The choir consisted of the following ladies and gentlemen who volunteered to aid in the ceremonies upon this most interesting occasion. Ladies: Mrs. Tresar, soprano; Mrs. J.J. McCormick, alto; Miss Julia Conry, soprano; Mrs. Vincent, soprano; Mrs. Aitken, soprano. Gentlemen: H. Guthiel, tenor; Master John Murphy, tenor; James Knox, bass; J. M. Murphy, bass; Mr. Staunton, baritone; Mr. Sourby, alto; Mr. Short, bass. The chant, “Let us adore,” during the procession, was given by Mrs. Vincent with considerable power. The selection of the “Imperial Mass” (Haydn’s No. 3) was felicitous, and the highly artistic and finished manner in which the different parts were sustained, demonstrated that great and persevering care must have been bestowed on the preparation for “the opening day.” The “Kyrie” was given with the full strength and power of the choir. The swelling of the voices in complete harmony, and the pealing of the organ in the midst of incense and prayer, produced a most marked effect upon the congregation. In the “Gloria,” the solos of Mrs. Testar were really beautiful and Mrs. McCormick rendered the alto solos with considerable merit. Mr. Knox sang the part commencing with the words “Qui tolles” with much taste and power. The “Credo” than which we believe there is not a more magnificent piece of sacred music extant, was most successful in its rendering, nor do we ever remember to have heard anything more touching than the manner in which the line “Vetam Venturi in Seculi,” was given by Mrs. Testar. The offertory hymn “Come unto Me all ye that labor,” was given by Mrs. Testar with the most thrilling effect. The “Sanctus” having been sung, in which Mr. Sourby ably rendered an alto solo, the “Agnus Dei” was commenced with a solo by Mrs. McCormick and was given with great taste and feeling, Mrs. Testar, at the conclusion of the “Agnus,” taking up the soprano part. Mass being concluded, the Very Reverend Dean Hayes ascended the altar and proceeded to preach the opening sermon, taking as his text Second Paralipomenon [Chronicles II], 7th chapter and 16th verse – “For I have chosen and have sanctified this place that My hand may be there for ever, and My eyes and My heart may remain there perpetually.” St Peter's manseAt the close of the sermon a collection was made by the very reverend preacher, assisted by John Egan, Esq., Corinella, on behalf of the church, and about fifty pounds were contributed. When it is remembered that 500 tickets had been issues at 10s each, and the inclemency of the weather taken into consideration, the collection may be regarded as a large one. Benediction was sung by the Rev. P. J. Slattery, assisted by Dean Hayes, the choir singing the “O! Salutaris Hostia” and “Laudate.” Handel’s Hallelujah Chorus was sung at the termination of the ceremonies. The vestments issued at Benediction, as well as at the Mass, were of the most gorgeous and beautiful character. When the Benediction was over, the Rev. P. J. Slattery, standing at the front of the altar said– “I wish to say one or two words before the congregation leave. I feel most deeply indebted to all of you who have attended here today for the honor and glory of God, not withstanding the difficulties you had to encounter from this most inclement season. I am truly delighted at such a manifestation of feeling, and will not easily forget it.” The rev. gentleman having disrobed, thanked the members of the choir for their kindness in assisting at the ceremonies, and more especially Mrs. Testar, who had braved all the storm and rain to be present at, and give the advantage of her great musical abilities on, the “opening day.” (Daylesford Mercury, 15 May 1865.)A number of photographs of St Peter's Catholic Church, Daylesford, taken at the 150th anniversary celebration. st peter's catholic church daylesford, decoration, altar decoration, anniversary, daylesford, religion, painting, interior, slattery, gough, d'alton, mcmahon -
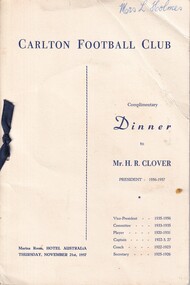 Carlton Football Club
Dinner Program & Menu, Carlton Football Club November 21st 1957 to Mr H R Clover, 1957
Dinner to Mr H R Clover player Career : 1920-24, 1926-31 Debut : Round 2, 1920 vs. Richmond, aged 25 years, 46 days Carlton Player No. 346 Games : 147 Goals : 396 Guernsey No. 1 Last Game : Semi Final, 1931 vs. Collingwood, aged 36 years, 180 days Height : 185 cm (6 ft. 1 in.) Weight : 86.5 kg (13 stone, 9 lbs.) DOB : 20 March, 1895 League Leading Goalkicker: 1922 Leading Goalkicker: 1920, 1921, 1922, 1923, 1926, 1928 Best and Fairest: 1929 Captain Coach: 1922-1924, 1927 Champion of the Colony: 1921 VFL AFL Hall of Fame Carlton Hall of Fame Team of the Century President: 1956-57 Vice President: 1932, 1935-54 Club Secretary: 1925-26 Horace “Horrie” Clover was Carlton’s star centre half-forward of the 1920’s; a high flying, long-kicking champion who enjoyed a stellar career with the Old Dark Navy Blues, then went on to be one of our longest-serving administrators. But even before he took the field for Carlton, Clover had to conquer the odds on the battlefields of France in World War 1. From Maryborough in central Victoria, Horrie enlisted in the 1st AIF in September 1915. After basic training, he embarked for France with reinforcements for the 7th Battalion in January of 1916. Soon pitched into the horrors of trench warfare, he fought and survived until September of that year, when he was transferred to a machine gun company and promoted to the rank of Corporal. On Christmas day, 1916, Horrie was struck down with acute appendicitis. He was evacuated to a field hospital for emergency surgery, where the doctors discovered that his appendix was gangrenous and that his life was in danger. He was immediately transferred to London for specialist treatment, and months of recuperation. Pronounced unfit for further front-line service, he was repatriated back to Australia in August 1917, and honourably discharged in May of the following year – six months before the Armistice. Having recovered, and keen to have a crack at senior football, Clover trained with Richmond and Melbourne before Carlton gave him an opportunity at VFL level. And how he delivered! In his first match in 1920 – ironically, against Richmond - he kicked four goals from centre half-forward, and hit the post three times! By the end of his first season at Princes Park, Clover was one of Carlton’s drawcards. Former Australian Prime Minister Sir Robert Menzies was just one of the many Carlton fans who were captivated; “he was the most artistic of high marks, unforgettable at half-forward,” said Menzies. Horrie could kick a football, too. A balanced, deceptively quick mover, he was a glorious running drop-kick for goal. Playing against Richmond again at Princes Park in July, 1921, he let fly with a monster kick that was later measured at 86.26 metres – that’s 94 yards, 2 feet in imperial terms! And there are numerous other instances where he roosted the ball more than 70 metres. In round 12 of 1921, he slotted 13 goals in a game against St Kilda; a club record which still stands today. The Blues made the finals in third place in 1921 and battled through to meet Richmond for the Premiership. Then the heavens above the MCG opened up on the day before the decider, turning the ground into a quagmire. In what was to be Clover’s only Grand Final appearance, Richmond won a slogging, mauling contest by four points. While Premiership glory eluded him, Horrie was Carlton’s top goalkicker in three of his first four seasons, including 1922, where his total of 58 was the competition’s best. He was appointed captain of the Blues that same year, and in 1923 took on the dual role of captain-coach. Over 1924 / 1925, he suffered more debilitating illness that prevented him from playing all season. Unable to pull on his football boots, he took on the job of Club Secretary, and continued in that position even after returning to the field in 1926. When he did eventually resume, he formed a new, powerful Carlton forward set-up with a young Harry “Soapy” Vallence at full-forward. Twice more – in 1926 and 1928, Clover’s brilliance and accuracy in front of goal saw him at the top of Carlton’s goal-kicking, and in 1929 – aged 34, he was honoured with the captaincy of Victoria against WA in his ninth and final game in the Big Vee. show_image.php?id=205 Horrie Clover retired as a player in 1931 after 147 games. His total of 396 goals is still ranked fifth best in Carlton’s proud history (only displaced for fourth when Brendan Fevola broke through in 2007/2008) – and it should be remembered that all but a handful of his games were played at centre half-forward, not in the goal square. In 1932 he was elected Vice-President of the Carlton Football Club, but retired after one year. In February 1935 on learning of Terry Ogden's the serious illness, Clover and Newton Chandler offered their services for a blood transfusion for the club's wing man. After a blood test Chandler's blood was accepted. However, Ogden passed away the next month. Clover stood again in 1935, was elected – and spent twenty unbroken years serving his beloved Blues. He even took on the Presidency in 1956, aged 60, and was as vigorous and determined as ever in his two years in the job. Carlton Football Club mourned deeply when Horrie Clover passed away on the first day of January, 1984. Three years later, he was among the first to be inducted into the Carlton Hall of Fame. Testament to his stature in the game as a whole, he was elected to the AFL Hall of Fame in 1996; and May 2000 saw him named as one of four emergencies in Carlton’s Team of the Century. A champion in every sense of the word, he spent 37 years of his remarkable life at Princes Park. Footnote The Argus published an article on Maryborough, April 12 1930, it said; "Clover has been the leading half-forward in League ranks for some time. It takes a specialist to fill the position capably, and the Carisbrook man does this admirably. Like good wine he has improved with age, and besides being one of the greatest half forwards that has ever appeared on a football field, he is about the best all round kicker that has ever played the game. He excells in punting, drop, and place kicking. He is a great marksman and a splendid exponent, one of the greatest the district has produced, besides being a fair cricketer also." When Clover returned to football in 1926, The Argus mentioned that they thought it was the first time a member of the Permit and Umpire Committee had played in a League game. 13 GOAL AWARD Round 12, 1921 At the Carlton AGM held on Monday 27 February 1922, Horrie Clover "was presented with ball used on the occasion, the St.Kilda club having generously donated it to the Carlton officials, who had it mounted for the purpose." (Age February 22 1922) 1922 The Art Of Forward Play Horrie wrote an article for the Sporting Globe August 30 p7 To read click here> http://nla.gov.au/nla.news-article184798404 1928 Idol of Carlton Crowds - Australia's Best Centre Half Forward The Sporting Globe's football writer W. S. "Jumbo" Sharland writes about Horrie Clover To read click here> http://nla.gov.au/nla.news-article183958222 Footballer Who Gambles With Death. Daily Pictorial (Sydney) article about Horrie. http://nla.gov.au/nla.news-article246129350 1932 Jack Worrall on Clover Writing for the Australasian September 03 p7; "Take Horrie Clover as an example, a real specialist, one of the best forwards the game has seen, and the best all-round kick that has ever come under my purview. For that reason he deserves a line to himself. He played the game like a sportsman, was a glorious high mark, and could cover a great distance by either drop, punt, or place kick - a remarkable accomplishment. Many players have been notable kicks in two aspects of the game, yet none have equalled Clover in the three branches. His nearest rival as an all-round kick, though not quite as certain in his efforts, was Frank Caine, of Carlton, who, like Clover, also hailed from the country." 1933 Coming Football Champion Melbourne, Saturday A special warning was issued to the Victorian Football League delegates last night by Mr. D. H. Crone, a Carlton delegate, not to angle for a certain "coming" champion that the Carlton Club had signed up that day. At first delegates were a little puzzled at the statement, but when it was explained that Horrie Clover, former champion half-forward, had that day become the father of of a son they burst into sustained laughter. It was only by persistent ringing of the bell by the chairman that order was restored. (News (Adelaide) May 20 1933 p3) 1933 - The Place Kick A letter to The Argus via the Huon Times about the lack of place kicking expertise in the VFL. The writer mentions that he got Horrie to play football in Maryborough after he saw the then 15 y.o. place kick a ball 63 yards, and later with Carlton, Clover place kicked 8 goals in one match. To read click here> http://nla.gov.au/nla.news-article137253000 Milestones 50 Games: Round 1, 1923 vs Fitzroy 100 Games: Round 18, 1927 vs St Kilda 100 Goals: Round 18, 1921 vs Collingwood 200 Goals: Round 3, 1924 vs St Kilda 300 Goals: Round 11, 1928 vs Geelong Links Articles: The Magical 'Three Goal Average' | A Letter From Horrie | Our Flagless Greats Blueseum: Stat Shot for Horrie Clover | Career Breakdown | Clover's big goals hauls | Clover's Blueseum Image Gallery A dinner to celebrate career Horrie Clover in 1957Four Page Program & Menu 1927 -
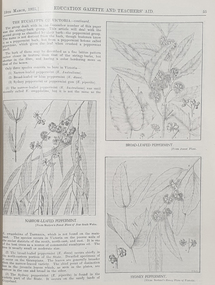 Federation University Historical Collection
Book, Victoria Education Gazette and Teachers' Aid, 1921-1930, 1921-1930
The Victoria Education Gazette and Teachers' Aid was published for Victoria's teachers and was sent to all school on the state. In 1920 The Ballarat School of Mines had donated 136 pounds 14 shillings and 10 pence to the Victorian Education Department's War Relief Account, and the Ballarat Junior Technical School had donated 10 pounds 6 shillings and 10 pence.Ten black hard covered volumes with red tape spine, covering 1921 to 1930. The gazettes include Education Department appointments, transfers, resignations and retirements, vacancies, notices, queries, notices of books, examination papers, original articles, lesson plans, suggestions for lessons, drawing, obituaries, notes on nature study, mathematics, music, sloyd woodwork, English grammar, Victorian State School Swimming Clubs, Geography, penmanship, science, History, Latin, Geography, The School Garden, horticulture, singing, World War One; ANZAC Day, lifesaving, Astronomy, Empire Day, ANZAC Buffet London, Victorian Education Department's War Relief Fund .1) 1928. Articles include: New Caledonia, Swimming and Lifesaving, School forestry, a visit to the pyramids, Exploration of Gippsland, paul de Strezelecki, Angus McMillan, Villers Bretonneux Memorial School, American Black Walnut, Red Gum, Messmate Stringybark, The Great Barrier Reef, retirement of Frank Tate, Stawell High School, Report on Some Aspects of Education in the United States, Jubilee Education Exhibition , New School Readers; measured Drawing Images include: Macarthur Street School's Plantation, Maryborough School Plantation, Pinus Insignis (Radiata) ready for Milling, Creswick State Forest, Metalwork, Daylesford Pine Plantation four years old, Henry Harvey (art Inspector); Omeo School Endowment Plantation; Frank Tate; Stawell High School Drawings From Casts; Lake Tyers School Endowment Plantation, measured drawing, Thomas H. Stuart, GEorge Swinburne. J.R. Tantham-Fryer, Cookery Class, John Edward Thomas. .3) War Savings Stampsm Swimming and Life-saving, Teh Rural School System of Victoria, Imaginative Composition, ANZAC Day, Retardation, Teh Bright Child Hudson Hard Obituary, Leeches, Relief for Distress in Europe, Dental, Teachers' Library, History of Portarlington, J.E. Stevens Obituary, Victorian Teachers in England Images: Swimming and Life-Saving Medallion .3) Swimming and Lifesaving, Bronze medallion, Victoria Leage of Victori, War Savings Stamps, Rural School Sytem of Victoria, .4) War Relief, Talbot Colony for Epileptics Masonmeadows, Discipline New and Old (Percy Samson), Soldier teachers, Preservation of Australian Birds, Arbor Day, Jubilee of Free Education, Teaching Geography, Poery in Schools, School Committees, Shelter Pavilion, Mysia Memorial School, Clovers, Jubilee Exhibition, Domestic Arts, Louis Pasteur, .5) Victoria League of Victoria, An Endowment Scheme (Pine Plantations), School Endowment Plantations, Protecting our trees by Owen Jones,. Victorian State Schools Horticultural Society, Sloyd Woodwork, School Forestry, Thomas Brodribb Obituary and portrait, Imperial Education Conference London, school Management and Method, School plantations, Eucalypt plantations in the Bendix and Heathcote District, Junior Red Cross, Jubilee Education Exhibition, Gould League Competitions, handwriting, The School Magazine, Frank Tate in London, Victorian beetles, Council of Public Education, Villers Bretonneux and its new School, Death of Samuel Summons, Woodwork Summer School, Swimming, Japanese Relief Fund, Retirement of John Cross, reminiscences of the Late Mr Albert Mattingley .6) Thomas H. Trengrove and the Villers Bretonneux School hall and pilaster carvings, forestry, visit of Maryborough teachers to Ballarat Water Reserves, noxious weeds, relief for Distressed Europe, The Dalton Plan, Empire Day, Retirement of Mr Fussell, Centenary of Hume and Hovell Expedition, League of Kindness, Effective Nature Study in a Rural School, Some Facts About Paper and their Bearing Upon School Plantations, Council of the Working Men's College Melbourne, Maria Montessori, University Vacation School, Horticulture in State Schools, An Informal Chat About French Schools (C.R. McRae), The Vacation School, Johann Heinrich Pestalozzi, Inspector's Report on a 5th-class School, Can Children Write Verse, John Adams, Victoria League of Victoria, R.F. Toutcher, Sir James Barbie's Address to High-School Girls, Impressions of a High School Teacher Abroad (R.D. Collman), The Spirit of the School Plantation Scheme, Monument of the Late Mr and Mrs A.T. Sharp at Box Hill Cemetery, The Teaching of Geography, The Treatment of Poetry in Class, Two Difficult Arithmetic Lessons, Location of Principal Australian Timbers, Dr John Smyth, Stammering and its Influence on Education, Wireless Broadcasting as an Educational Medium, Boys School at Villers Brettonneux, The New School at Villers Brettonneux, Bird Day, Messmate or Stringybark, What Every Woman Knows, Director's Report on Denmark .7)1925 . Includes: School Forestry, horticulture, J.H. Betheras retirement, Ivanhoe School, Coburg School, Moorabool Junior Technical School, Villers Bretonneux School hall and pilaster carvings, Francis Ormond, William Charles Kernot, Corsican Pnes at Creswick, Ballarat High School Plantation, Workin Men's College, RMIT, Naorrow LEafed Peppermint, Education and World Peace, Eucalypts of Victoria, John C. Eccles, Blue Gum. Manners, Giving the Poorly Nourished Boy A Chance, Native Ferns, Marybourough Technical School, Memorial School at Villers-Brettonneux .8) Experimental Plots in Country Schools (W.W. Gay), Villers Bretonneaux and its Memorial School. nominated classes for Art Teachers, The Teachers Act 1925, Horsham High School, Richmond Technical School, Farewell to Messrs C.R. Long and Ponsonby Carew-Smyth, Frank Tate, Phyiscal Training, Arbor Day, ANZAC Day, Shakespeare Day,Bendigo Junior Techncial School, Musical Appreciation, Motor Dental Unit, School Camps, Education Act of 1872: Mr Angus McKay's Part (George Mackay), A Bush Fire Experience (Irene Stable), Black Sunday, Californian Red Pine, Women's Education in America, Farewell to Lord and Lady Stradbroke, Grevilia Robusta, Silky Oak, Redwood, John E. Grant, The Need for Research (Donald Clark), Junior Drama, Ida D. Marshall, John Pounds, Australian Books, Fish Creek School, State Boundaries, History in the Curriculum, Ceramic Art in Australia (Percy E. Everett), Choice of School Songs, Tasmanian Beech, Should History be Taught on a National or an International Basis, Hydatid Disease, James Holland Obituary, Florrie Hodges, Queensland Maple, Post Bushfire Ruins at Fumina, Arbor Day at Fumina, Queensland Rosewood, Omeo Endowment Plantation, Bird Day, Junior Red Cross, Pioneers' Day, Edward Henty, Junior Technical Schools, Yellow Pine, History and Progress of Needlework, A.B.C. of Astronomy, Northumberland Mental tests, Queensland Red Cedar, Teh Globe Theatre, .9) 1927 includes The ABC of Astronomy, Atr Theatre, English Beech, Angus McMillan Art Pottery, School Singing, State Schools' Nursery, School endowment plantations, Making a Man, experimental proof of Charles's Law, John Smyth obituary and portrait, Linton Pine Planation, motivation of arithmetic, Women's Classes at Dookie, Swimming and Lifesaving, Pioneers Day, Drawing, Ballarat High School planation, biting fly, Tir-Na-N'og, John Byatt retirement and portrait, Technical Schools Conference at Daylesford, Ethel Osborne and portrait, library. Francis Thompson portrait, Adam Lindsay Gordon, Solar movement, motor transport, Liverpool Cathedral, Teh Story of the Cathedral, Bendigo School of Mines, Omeo School pine plantation, Egypt and the Nile, Self-Criticism Images include Ballarat High School Pine Plantation, Vale Park, Francis Ormond, Woking Men's College (RMIT), W.N. Kernot, A Stand of Corsican Pines at Creswick, Victoria .10) Some Remarks on the Relationship of the technical Schools to the University (Donald Clark) , Present Day Education in England , Memorial to Joseph Cornwall, Spelling, motivation, Singing, State Scholarships, Agriculture, T.W. Bothroyd, The Swimmer - A Summer School Sketch (H.H. Croll), Swimming woodwork, Farewell to Dr Sutton. ,Drowning, War Savings Movement, White Beech. George S. Browne , Example of School Honor Book, Blackwood, Optimistic teacher, Soldier settlement around Shapparton, Oral Hygiene, Cinema Machines, Basketball, Wakter M. Camble obituary, ANZAC day Pilgrimage in England, Froebel's System, Montessori Method, War Relief Fund, New Zealand Kauri Tree, Bat Tenis at a Bush School., Advice to Australian Girls, Chrysanthemums, Royal Visit, National Parks of Victoria, Maurice Copland Obituary, total eclipse of the Moon, School libraries, The teacher and the COmmunity (A.M. Barry), The Reading Lesson, Swimming and Life-saving, MElbourne Teachers' College War Memorial Windows Old Trainees War Memorial, Cultivating a Natinoal Art education gazette, school, education, teaching, teacher, world war one, school plantations, macarthur street pine plantation, school forestry, creswick state forest, anzac day, armistance celebrations, frank tate, frank tate retirement, drawing from cast, education department school readers, lake tyers pine plantation, w.n. kernot, rmit, working men's college, francis ormond, pine plantations, calenbeem park, creswick, villers-brettonneux school hall and carvings, thomas trengrove, corsican pines, creswick, pine endowment plantations, mccarthur st primary school pine plantation, ballarat high school pine plantation, vale park, mount pleasant primary school pine plantation, golden point pine plantation, angus macmillan, paul de strzelecki, gippsland, villers-bretonneaux memorial school, francis thompson, english ash, pestalozzi centenary, shakespeare day, swimming classes, clear pine, cinema in education, american black walnut, red gum, thomas wolliam bothroyd obituary, and portrait, physical training displays, teaching of spelling, ohm's law, blue gum -
 Melbourne Tram Museum
Album - Photo Album, John Etkins, Ray Marsh, 1990's
Photo Album - 48 sheets bound with a white circular metal/plastic spiral bound within a heavy duty cardboard cover, with glued cover pages, plastic covered with an index sheet. Allows for three photographs per page. Not known whether the plastic envelope for each photograph is of archival quality. No Manufacture detail, though has a bar code on the bottom left hand corner of the rear cover. Cover is a reproduction from a painted art piece. Listing of photographs given on htd1800-RayMarshalbum.pdf Dates given when written on the rear of the photograph. Compiled by John Etkins from photographs given to him by Ray Marsh. 1990's to 1993 generally. Page Tram/s Notes – dates given when on rear of photograph. 1 226 Loading passengers – ex MMTB Annual Report? 1 957 City Circle 1 “hands off our trams” protest march 2 2100, 231 South Melbourne Depot – 10-4-1993 2 676 And many others – Hawthorn Depot 2 217 Princes Bridges 3 380, 104 St Kilda Road 3 106, 104 Essendon Depot 3 431 As a W1 4 1011 Fresh fruit tram, Preston Depot 6-12-1992, 4 824 Day in Day out, Brunswick and Victoria Parade 29-4-1993 4 722 Art tram 5 ? Advert tram – Imperial China 5 237 Stubbsy tram – TrippleM? 6 856 City Circle – with gas and fuel building – 31-7-1994 6 925 City Circle - with gas and fuel building – 31-7-1994 6 728 City Circle – 10-8-1994 7 246 Navy tram x three pics – July 1992 8 ? Gold tram advertising Georges 8 990 Advertising Telstra– 29-4-1993 8 749 Art tram? 9 990 NRMA - 1-3-1994 9 727, 215 Public Transport 9 920 Advert tram with a picket fence 10 Bendigo 21 Preston Workshops 11-3-1993 10 774? W5 being rebuilt at Preston – 21-10-1991 11 ? Bogie cable trailer at Preston – 29-4-1993 11 922 Interior view of a tram – being modernised – 11-3-1993 11 922 Preston Workshops 29-4-1993 12 1018 Workcare tram at Preston 1994 – 11-8-1994 12 774 Preston Workshops – 20-12-1993 12 8 Preston Workshops – 1-10-1992 13 380 Preston Workshops 13 8 Preston Workshops 13 20, 8 Preston Workshops 14 721 Preston Workshops 20-12-1993 14 ? Tramways painted artist tram featuring a driver and workshop 14 Traverser Preston Workshops 15 2110, 2106 Preston Workshops 15 ? Preston Workshops 15 2130 Interior Preston Workshops 20-12-1993 16 Set of three pics Elizabeth St floods – 17-2-1972 17 Set of three pics Elizabeth St floods – 17-2-1972 18 676 Turning into Swanston St from Batman Ave 18 676 Kew Depot – 10-11-1991 18 237, 676, 611 Kew Depot – 10-11-1991 19 214, 676 South Melbourne Depot – Kingsway 19 217 Spencer St 19 214 Advertising Kew Depot Open Day -8-12-1991 20 231, 676 Advertising Kew Depot Open Day -8-12-1991 20 Zoo tram, 256 Outside Kew Depot 20 214 Hawthorn Open Day with band 21 Zoo tram x 3 pics And horses, Kew Open day 22 231, 431 Kew Depot 22 892, 214 Kew Depot 75 years, Postcard – 1991 22 282 Kew Depot – with the name Monique on the tram and a lady standing alongside 23 238, 233 Kew Depot 23 236, 892, 282 Kew Depot – 25-4-1992 23 232, 236, 282 Kew Depot 24 2112 Port Melbourne line – with long grass – 11-4-1993 24 469, 2037, ? 2015 South Melbourne Depot 24 1018 or 976? Advertising a PTC Open Day – 20-10-1991 – In Swanston St - see Reg Item 1845 25 250 Bourke St 25 2100 Running into Preston Workshops 25 282, 1003 Collins St in the rain 26 Logo PMTT 26 Point cover With P&MTT cast into the cover 26 Foundation Stone Person reblocking in gold, a PMTT Foundation Stone 27 Logo Tramway Board 27 Logo MMTB logo 27 Logo Footscray Tramways Trust 28 217 And 2’gauge W2 – South Melbourne Depot – 20-10-1991 28 164 Somewhere? 28 1018 Advert tram – “Moro”, Preston flyover 29 V214 x 3 pics Kew Depot 30 611 Whitehorse Road, Balwyn 5-10-1991 30 976 x 2 pics Advert tram – have a red instead 31 610 Malvern Depot 31 138 (max tract) Flinders St 31 138 (max tract) Bourke into Spencer 32 844 Victoria Parade with R10 behind 32 264 With a TV interview being undertaken 32 2066 Elizabeth St – 29-4-1993 33 255 x 2 pics Derailed at Kew Depot 33 253 Derailed outside the Beehive Hotel 34 214, 892, 611 Re-enactment of Victoria Bridge to Esplanade service – 10-11-91 34 726 Art tram? – Swanston St with overhead trucks in background 34 10W Reblocking scrubber car at Brunswick Depot 1999 35 2085 At Preston workshops over an inspection track section 35 731 St Georges Road, road being rebuilt – Nov. 1991 35 Preston Jtn Junction at Workshops being relaid 36 1003 St Georges Road, Nov. 1991 trackworks 36 St Georges Rd Track being rebuilt – Nov. 1991 has temp track cross over 36 Victoria St Victoria St being reconstructed 6-9-1992 37 East Burwood Extension works – 18-2-1993 37 East Burwood Re-building crossover – 18-2-1993 37 Victoria St Victoria St being reconstructed 6-9-1992 38 19W, 16W Bylands – 5-12-1993 38 R10 Kew Depot 38 Workers Kew Depot pushing on a post 39 R10 R10 towing a B class tram- Royal Parade? 39 11W, 10W? South Melbourne Depot 39 Overhead Overhead truck at Kew Depot 40 Kew Depot Demolition works opposite depot 40 613? Malvern Depot on special tram 40 256 zoo tram Royal Park tram at Kew Depot 41 B class Bundoora line 1993 41 231, 611 Kew depot 75th anniversary tram 41 469, 287 Kew depot 42 510 Spring St into Bourke St – 28-4-1993. “42nd street promotion. 42 153 High St Northcote, Bundoora 42 611 Kew Depot, Nov. 1991 43 195? Simpson St siding – 25-4-1993 – 7 trams in all 43 646 Route 12, with fire station in background – Gisborne and Victoria 43 961 Burke Road, Camberwell, 10-8-1994 44 760 Art tram 44 938 Sam the tram, Flinders St 44 1014 Gilbert Road, West Preston, June 1994, advert for AGC 45 965 Daimaru advert tram, Swanston St 45 1018 Express post advert tram, Swanston St. 45 1024 Advert – lego exhibition – Swanston St 46 104 Camberwell depot 46 611 Looking towards driver’s controls from interior. 46 W1 Interior photo showing tip over seats 47 Cable car Interior photo – could be zoo tram 47 510 Interior, 28-4-1993 47 214 Kew Depot, night shot, Oct. 1991 48 246, 237 Kew depot, 13-9-1993 – Stubbsy and Energy Victoria advert 48 246, 231, 237 Kew depot, Navy, 75th anniversary of Kew and Fox Fm advert 48 2014, 2072 South Melbourne – tt line? Advert tram 49 59 And six other trams in front of Preston Workshops 49 1024 MMTB Christmas Tram, 1970 49 2001 Camberwell Depot 50 725 Preston depot area – tram has a red upper half 50 725 South Melbourne depot – now has Xmas decorations 50 1026 Bourke St, Christmas 6-12-1993 51 933 Victoria Parade shunt and other A class tram – Autumn 51 829 Art tram 51 39 Advert tram – Crime prevention 52 Connie Connie at night = has jeans on 52 1?? Has a MET inspector standing in front of number – Latrobe uni tram 52 611 Kew Depot 53 237 Fox FM Black Thunder tram at Kew Depot, August 1992 53 237, 611, 892 Victoria Bridge re-enactment – 10-11-1991 53 237 At Kew depot with 4 people, including Hugh Waldron 53 442, 10W South Melbourne Restaurant tram and works car 53 W2 At Wattle Park 53 School art Photo of students holding artwork on the zoo tram 256 at Kew 54 138 And many others 54 469 Launch of the Melbourne Tram by the PTC 54 School art Photo of students holding artwork on the zoo tram 256 at Kew 55 B2 Elizabeth St terminus, Christmas 1994 55 8 Z8 Swanston St, April 1993 55 504 Clifton Pugh – Preston Workshops 56 138, 180, 214 Hawthorn Depot display 56 650, 510 Hawthorn Depot 56 469 Camberwell 57 568 Bridge Road Richmond by cable tram depot 57 ? Advert tram – Falls Creek 57 995 Malvern Road, 18-5-1992 58 457, 217 etc Swanston St display 58 231, 611 Kew 75th Anniversary 58 682 Artist tram at Malvern Depot – 18-5-1992 59 1018 Country Road advert tram 59 8 Z class – decorated tram – Essendon Depot 59 947 Metland Safety Express – safety tram – Kew depot 60 101 x 2pics Decorated for RAAF 70th Anniversary 60 2082 Near East Preston Depot, with destination “Next Stop Mill Park” 61 475 After sale and disposal 61 585 After sale and disposal 61 651 After sale and disposal – Diamond Creek – 9-8-1994 62 386 After sale and disposal – Sunbury 62 590 After sale and disposal – Hall ACT 62 476 After sale and disposal – Kinglake 63 11W Bundoora Extension – track being opened 63 947 Metland Safety Express – safety tram – Kew depot 63 Model 2,3 2’ gauge model trams 64 Model 2 Ditto 64 250 After sale and disposal 64 293 After sale and disposal – Diamond Ck – 9-8-1994 65 246, 231, 237 Kew depot, Navy, 75th anniversary of Kew and Fox Fm advert 65 1002 Advert tram – Salvation Army 65 231, 29 Kew Depot 66 246, 231, 237 Kew depot, Navy, 75th anniversary of Kew and Fox Fm advert 66 646, 935, 1002 Kew depot 66 220, 60 Preston Workshops? 67 851, 814 Malvern Depot 3-9-1992 67 726 Malvern Rd at Glenferrie Road – 18-5-1992 67 237, 133 Victoria Parade 1996 68 814 and others Interior Malvern Depot – 18-5-1992 68 231 75th Kew depot anniversary at depot 68 231 75th Kew depot anniversary at depot 69 1024 Malvern Depot 10-11-1991 69 1011 Advert tram Melbourne City Toyota 69 106, 180 Swanston St 70 190, 568 Camberwell Depot 70 431 Flinders St – tram event 70 20, 138 Camberwell Depot 71 431 Flinders St – tram event 71 237 Fox FM Thunder Tram 71 2057, 2014 Elizabeth St, Vic Market 29-4-1993 72 676, 611, 892 Victoria Bridge re-enactment – 10-11-1991 72 Ceremony Victoria Bridge – mayor and others event 72 214 214 on the bridge 73 164 Lygon St – former outer circle line level crossing in view 73 841 Swanston Walk 29-4-1993 74 821 St Georges Road, April 1993 74 431, 231 Victoria Parade 74 217, 676 Passing Camberwell Depot 75 Oporto 018 Clarendon St 6-3-2003 75 3007 Albert Park – 7-3-2003 75 3001, 018, 3502 Docklands – 10-3-2003 76 Oporto 018 Docklands – 16-1-2003 76 Oporto 018 Flinders St 7-3-2003 76 3502 Swanston St at Flinders St -8-3-2003 77 16 Kew Depot, Jan 1991 77 112, 110 Bundoora 4-9-1992 77 738 Camberwell Feb 1991 78 1011 Thornbury Jan 1991 advert for City Toyota 78 101 Bundoora – RAAF tram 4-9-1992 78 814 Art tram – Swanston St August 1992 79 1024, 469, Z3 Preston Workshops – 469 as the Melbourne Tram – 9-9-1992 79 961 Malvern Depot 3-9-1992 79 242 Single line working in Victoria St 6-9-1992 80 781 Thornbury, the hump, Preston Workshops Jan 1991 80 2104 Preston Workshops 9-9-1992 80 2100 Launch, Preston Workshops 9-9-1992 81 5W + 1A 5 x W at Kew Depot 3-2-1991 81 676 Kew Depot 21-2-1991 81 873, 2016 Brunswick depot 2-3-1991 82 231 Kew Depot Yard – 21-1-1991 82 157, 158 Brunswick Depot – 2-3-1991 82 2057, 873, 158 Brunswick Depot – 2-3-1991 83 802 Art Tram - Franklin St from the signal box 2-3-1991 83 990 990 Evian advert tram, Franklin St signal box 2-3-1991 83 920 GIO Advert Tram with Bushels tea and Yellow Pages? Adverts 84 721 Art Tram, Franklin St signal box 84 976 St Georges Road, Jan 1991 – advert tram Capital society 84 731 St Georges Road, Jan. 1991 Art tram 85 10W Victoria Parade, Brunswick St, 1/3/1991 85 10W, 9 or 11W South Melbourne depot 85 10W Bundoora Terminus 4-2-1991 86 11W City Baths 86 10, 16 Camberwell Depot 6-12-1990 86 944 Glenhuntly Depot 18-2-1991 87 2011 Spring St – Princess Theatre, March 1990 87 294, 239, 277, 243, 259, 280 Kew Depot 87 296 Kew Depot 88 1015, 16 Batman Ave 19-1-1991 88 963, 948, 935, 996, 892 Kew Depot 3-2-1991 88 Victoria St Victoria St Richmond Reconstruction 6-2-1992 89 1014, 990 Batman Ave 19-1-1991 (Image added i5 and rear view added 23-12-2018, scanned for Dale Budd. 89 920 920 – GIO advert tram, 760 art Tram Collins at Spencer 17-10-1990 89 610, 611 Kooyong Station level crossing 30-12-1990 90 95 Royal Park, 15-2-1991 90 2057, 873, 158 Brunswick Depot – 2-3-1991 90 10 Camberwell Depot 6-12-1990 91 Bendigo 44 In Prahran and Malvern Tramways Trust Colours 1986 –Black and white photo. Listed 5-11-2016See note page 1 and on image 3trams, tramways, album, photo album, tramcars, the met, yarra trams, kew depot, brunswick depot, advertising trams, transporting art, preston depot, hawthorn, bundoora, st georges rd, victoria st, camberwell depot, tram r10, 8, 10w, 10, 11w, 16, 16w, oporto 018, 19w, 20, bendigo 21, 29, 39, bendigo 44, 59, 60, 95, 101, 104, 106, 110, 112, 133, 138, 153, 157, 158, 164, 180, 190, 195?, 214, 215, 217, 220, 226, 231, 232, 233, 236, 237, 238, 239, 242, 243, 246, 250, 253, 255, 256, 259, 264, 277, 280, 282, 287, 293, 294, 296, 380, 386, 431, 442, 457, 469, 475, 476, 504, 510, 568, 585, 590, 610, 611, 613?, 646, 651, 676, 682, 721, 722, 725, 726, 727, 728, 731, 738, 749, 760, 774, 781, 802, 814, 821, 824, 829, 841, 844, 851, 856, 873, 892, 920, 922, 925, 933, 935, 938, 944, 947, 948, 957, 961, 963, 965, 976, 990, 995, 996, 1002, 1003, 1011, 1014, 1015, 1018, 1024, 1026, 2001, 2011, 2014, 2015, 2016, 2037, 2057, 2057, 2066, 2072, 2082, 2085, 2100, 2104, 2106, 2112, 2130, 3001, 3007, 3502 -
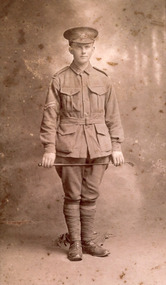 The Beechworth Burke Museum
Photograph, 1916-17
Portrait of William Edward Peach in First World War military uniform, holding a crop in front of his thighs with military kit on the ground behind him. A Beechworth postal employee who enlisted in 1915, this photograph is probably taken in 1917, as he is a corporal in the photo and was promoted to this rank in May 1917. This photograph is of historic significance as it depicts William Edward Peach, a Beechworth postal assistant who enlisted in the Australian Imperial Force (AIF) on his nineteenth birthday, 5 August 1915, which required his parents' permission. He was decorated with the military medal for his courage in battle 4/5 October 1917 at the Battle of Broodseinde Ridge near Ypres, the most successful allied attack of the Third Battle of Ypres (31 July to 10 November 1917), also known as the Battle of Paschendale, which saw the greatest loss of human life during World War One, with almost half a million lives were lost on all sides. According to the recommendation for his military medal, Peach 'displayed conspicuous courage and initiative', taking charge after his platoon commander became a casualty, handling the men 'under heavy fire with great skill'. He also assisted the Company Commander in reorganising their military objectives. The photograph is of social as well as historic significance for the Beechworth community, because it provides a direct link between local, national and international histories in relation to Australia' s participation in one of WWI's best-known battles. The record has strong research potential given the ongoing public and scholarly interest in war, history, and especially the ANZAC legend, which is commemorated annually on 25 April, known as ANZAC Day. Peach is also one of the diarists of WWI, including of this significant period of Australian military history, from 1916 to 18, which can be accessed via the Australian War Memorial. Sepia rectangular photograph printed on gloss Kodak photographic paper mounted on board. Reverse: BMM 8779 item catalogue number pencilled in right-hand bottom corner.military medal, defending australia and victoria, military service, hmat a64 demosthenes, wipers, anzac, burke museum, beechworth, ypres, australian military services, beechworth post office, first world war, wartime, our boys, belgium, flanders fields, ww1, british war medal, victory medal, broodseinde, third battle of ypres -
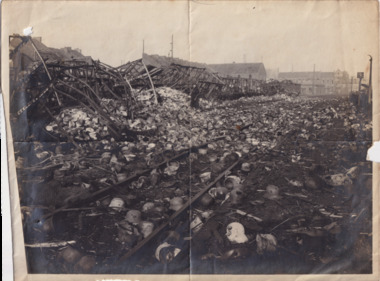 The Beechworth Burke Museum
Photograph
Taken some time between 1914-18 in France, the photograph depicts extensive wreckage of a railway train. There are collapsed buildings, debris, and helmets scattered all across the landscape. There is one unidentified soldier standing in the middle of the photograph. With research that is currently available, it can be inferred that the wreckage depicted in this photograph is from the tragic Saint-Michel-de-Maurienne derailment which occurred on December 12, 1917. The railway accident involved a troop train carrying almost 1,000 French soldiers on their way home for leave from the Italian Front in World War I. As the train descended into the Maurienne Valley, a sudden, uncontrollable acceleration caused a catastrophic crash and subsequent fire. 675 people died in the accident.The record is historically significant due to its connection to World War I. This conflict is integral to Australian culture as it was the single greatest loss of life and the greatest repatriation of casualties in the country's history. Australia’s involvement in the First World War began when the Australian government established the Australian Imperial Force (AIF) in August 1914. Immediately, men were recruited to serve the British Empire in the Middle East and on the Western Front. The record has strong research potential. This is due to the ongoing public and scholarly interest in war, history, and especially the ANZAC legend, which is commemorated annually on 25 April, known as ANZAC Day. Additionally, there is only limited information available about the Sant-Michel-de-Maurienne derailment. The record may be a useful springboard for further investigation into this accident and its history.Black and white rectangular photograph printed on matte photographic paper.Reverse: 6530 / Destruction of train carrying / German helmets (?) to (?) prior to / his retreat at Charleroi /military album, army, war, wwi, world war i, france, charleroi, train, military, wreckage, europe, belgium, saint-michel-de-maurienne, maurienne valley -
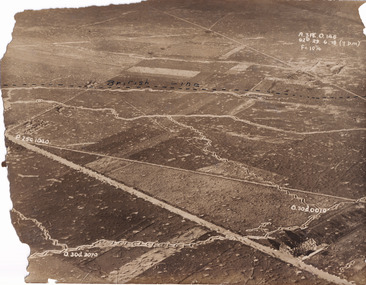 The Beechworth Burke Museum
Photograph
Taken some time between 1914-18, the photograph depicts an aerial view of trenches in France. The image mostly shows rural landscape, although there is a house in the bottom right corner. A dotted line has been drawn across the photograph, marking the section of trenches that belonged to British forces during World War I. It is believed that the line marking on this record denotes a section of the Western Front. The Western Front was the main theatre of war during World War I. Following the outbreak of war in August 1914, the German Army opened the Western Front by invading Luxembourg and Belgium, then gaining military control of important industrial regions in France. The German advance was halted with the Battle of the Marne. Following the Race to the Sea, both the French-British and German armies dug in along a meandering line of fortified trenches, stretching from the North Sea to the Swiss frontier with France. Between 1915 and 1917 there were several offensives along the Western Front. The attacks employed massive artillery bombardments and massed infantry advances. Entrenchments, machine gun emplacements, barbed wire and artillery repeatedly inflicted severe casualties during attacks and counter-attacks and no significant advances were made. Among the most notable of these offensives were the Battle of Verdun (1916), the Battle of the Somme (1916), and the Battle of Passchendaele (1917).The record is historically significant due to its connection to World War I. This conflict is integral to Australian culture as it was the single greatest loss of life and the greatest repatriation of casualties in the country's history. Australia’s involvement in the First World War began when the Australian government established the Australian Imperial Force (AIF) in August 1914. Immediately, men were recruited to serve the British Empire in the Middle East and on the Western Front. The record has strong research potential. This is due to the ongoing public and scholarly interest in war, history, and especially the ANZAC legend, which is commemorated annually on 25 April, known as ANZAC Day.Sepia rectangular photograph printed on matte photographic paper.Obverse: A.3FE.O.146 / G2R 29 . 6 . 18 (Y p.m) / F= 10 1/4 / British Line / ------------------------------------------ / P. 250 1040 / 0. 30d. 0010 / 0. 30d. 3070 /military album, military, war, wwi, world war i, france, great britain, trenches, village, rural, western front -
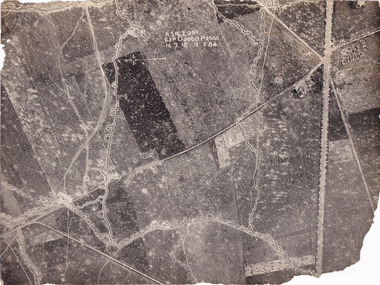 The Beechworth Burke Museum
Photograph
Taken some time between 1914-18, the photograph depicts an aerial view of trenches in France. The image mostly shows rural landscape, although there is a cluster of houses in the top right corner. It is believed that this record denotes a section of the Western Front. The Western Front was the main theatre of war during World War I. Following the outbreak of war in August 1914, the German Army opened the Western Front by invading Luxembourg and Belgium, then gaining military control of important industrial regions in France. The German advance was halted with the Battle of the Marne. Following the Race to the Sea, both the French-British and German armies dug in along a meandering line of fortified trenches, stretching from the North Sea to the Swiss frontier with France. Between 1915 and 1917 there were several offensives along the Western Front. The attacks employed massive artillery bombardments and massed infantry advances. Entrenchments, machine gun emplacements, barbed wire and artillery repeatedly inflicted severe casualties during attacks and counter-attacks and no significant advances were made. Among the most notable of these offensives were the Battle of Verdun (1916), the Battle of the Somme (1916), and the Battle of Passchendaele (1917).The record is historically significant due to its connection to World War I. This conflict is integral to Australian culture as it was the single greatest loss of life and the greatest repatriation of casualties in the country's history. Australia’s involvement in the First World War began when the Australian government established the Australian Imperial Force (AIF) in August 1914. Immediately, men were recruited to serve the British Empire in the Middle East and on the Western Front. The record has strong research potential. This is due to the ongoing public and scholarly interest in war, history, and especially the ANZAC legend, which is commemorated annually on 25 April, known as ANZAC Day.Black and white rectangular photograph printed on matte photographic paper.Obverse: A.3.FE.2.291 / 62D O.20bd.P.25O.C / 16.7.18 / 12 / F 8 1/4 / Reverse: 6532military album, military, army, war, wwi, world war i, france, trenches -
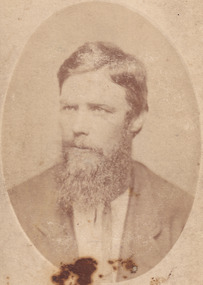 The Beechworth Burke Museum
Photograph - Carte de Visite, James Bray, 1870
A Carte de Visite (hereafter CdV) (also known as a calling card) was popular within the mid-19th Century. It is a small card with a photographic portrait mounted on it. These cards were exchanged during the Victorian era (peaking in the 1860s) between families and friends. This particular CdV was captured by James Bray in c.1870. Bray who worked as a professional photographer in Camp Street Beechworth from 1870-1891. He was one of four men who photographed the Kelly Gang after the siege in Glenrowan in 1880. He is also renowned for his previous work photographing members of the Kelly gang. Depicted in this photograph is Isaiah “Wild” Wright. Wright was born in approximately 1846 in County Monaghan, Ireland. At age 11, Wright arrived with his father John Wright, mother Margaret and younger siblings in Victoria on the 9th of July 1857. They sailed on the ship ‘Carleton’ which left from Liverpool in England. Wright was stood 5 foot 11 inches tall and had brown hair with hazel eyes. He had a scar on the inside corner of his left eyebrow, a large scar on his right cheek and a scar on the back of his head. Over the years in Australia, Wright was sentenced on numerous (particularly of horse theft) charges and spent time in Pentridge, Hulk Sacramento and Hulk Sandridge. Wright married Bridget Lloyd in 1973. Through this marriage he was connected to the Kelly family as Bridget’s mother was one of Ellen Kelly’s (Ellen was the mother of Edward “Ned” Kelly) sisters. Wright is famous for his participation in the horse stealing incident of 1871 and subsequent bare knuckle fight against Ned Kelly that occurred in 1874. In 1878, Bridget and Isaiah Wright became parents to John "Jack" Thomas Wright. Jack Wright was an Australian rules footballer who played for Geelong in the Victorian Football League 1902-1906. Wright passed away on the 29th of May 1911.This photograph is part of the Burke Museum "Kelly album" which includes a significant collection of photographs and artefacts connected to Ned Kelly and the Kelly Gang. Ned Kelly and his gang have become ingrained in Australian popular culture and thus many museums, art galleries and private collections house material connected to the Kelly story which allows the events and people to be researched and interpreted. Individuals like Isaiah “Wild” Wright played an essential part in the Kelly story which have been enlarged and adapted for popular culture. The study of these individuals thorugh their images and records can help researchers to correctly interpret their involvement with Ned Kelly and the Kelly gang. Artefacts and photographs pertaining to the Kelly gang are particularly valuable for Australian museums. This particular photograph is significant for its connection to Beechworth photographer James Bray who is responsible for many images depicting members of the Kelly Gang. Sepia oval CDV printed on Card. Obverse: J.E. Bray/ Photo Reverse: 10238 Portrait & Landscape/ Photographer J E Bray Signature Beechworth/ Victoria/ Negatives Kept. Copies 5I/. Each May/ Be Had By Forwarding Name And Address/ Accompanied With Remittance To/ The Amount Of Order/ Photographs Coloured In Watercolourskelly album, kelly gang, beechworth, wild wright, boxing, burke museum, imperial hotel, bare-knuckle boxing, isaiah wright, ned kelly, isaiah wild wright, horse theft, hulk sacramento, calling card, pentridge, james bray, cdv, carte de visite -
 The Beechworth Burke Museum
Photograph, 1944
Taken in 1944 in Bonegilla, Victoria, this photograph depicts soldiers of the 1st Australian Corps Signals training battalion releasing carrier pigeons from a portable loft for their daily exercise.The 1st Australian Corps Signals was a branch of the Australian Imperial Airforce that was active during World War Two. One of the tasked carried out by 1st Australian Corps Signals was to send messages through the use of carrier pigeons. Carrier pigeons were most commonly used by the Allied Forces to send messages from the front line trenches or advancing units.Black and white square reproduced photograph on rectangular archival paperObverse: Negative Number: 066265/ thumbnail/ image 066265/ purchased from Australian War Memorial/ Bonegilla Victoria 1944*05-03 Carrier pigeons being released for their/ daily exercise from a portable loft of the 1st Signals training Battlion/ Reverse: 7993/military album, beechworth, burke museum, military, world war 2, ww2, australian army, bonegilla, pigeons -
 The Beechworth Burke Museum
Photograph, 1944
Taken in 1944 in Bonegilla, Victoria, this photograph depicts soldiers of the 1st Australian Corps Signals training battalion releasing carrier pigeons from a portable loft for their daily exercise.The 1st Australian Corps Signals was a branch of the Australian Imperial Airforce that was active during World War Two. One of the tasked carried out by 1st Australian Corps Signals was to send messages through the use of carrier pigeons. Carrier pigeons were most commonly used by the Allied Forces to send messages from the front line trenches or advancing units.Black and white square reproduced photograph on rectangular archival paperObverse: Bonegilla Victoria 1944 - 05 - 03 Carrier pigeons being released for their daily exercise/ from a portable loft of the 1st Signals training Battlion/ copied from the Australian War Memorial No 066265 Order No 2319835 Copyright/ permission for the collection of/ Robert O'Hara Burke Memorial Museum Beechworth/ Reverse: 7993.1military album, beechworth, burke museum, military, world war 2, ww2, australian army, bonegilla, pigeons -
 The Beechworth Burke Museum
Photograph, 03/05/1944
Taken in 1944 in Bonegilla, Victoria by Captain E.C. Johnston, this photograph depicts soldiers of the 1st Australian Corps Signals training battalion releasing carrier pigeons from a portable loft for their daily exercise.The 1st Australian Corps Signals was a branch of the Australian Imperial Airforce that was active during World War Two. One of the tasked carried out by 1st Australian Corps Signals was to send messages through the use of carrier pigeons. Carrier pigeons were most commonly used by the Allied Forces to send messages from the front line trenches or advancing units. Edgar Charles Johnston (1896-1988) was an aviator and public servant. In WW1 he served with the Australian Imperial Force, and later joined the Royal Flying Corps. For his service in the Royal Flying Corps he was awarded the Distinguished Flying Cross, which assisted him in becoming the assistant director-general in 1939 of the Commonwealth Department of Aviation. During World War II he was heavily engaged in the department’s activities in support of the war effort.Black and white square reproduced photograph on rectangular archival paperObverse: Bonegilla Victoria 1944-05-03/ Carrier Pigeons being released for their daily exercise/ from a portable loft of the 1st Signals training Battalion/ Photograph made 3 May 1944, by E.C. Johnston/ copied from CD Image supplied from/ Australian War Memorial collection/ Copyright/ Use of this image for the/ Robert O'Hara Burke Memorial Museum, Beechworth/ enhanced to remove moir effect/ Reverse: 7993.2/military album, beechworth, burke museum, military, world war 2, ww2, australian army, bonegilla, pigeons, edgar charles johnston -
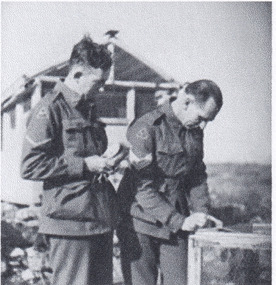 The Beechworth Burke Museum
Photograph, 1941
Taken in Syria in 1941, this photograph depicts Sergeant Theodore Arthur Horton, dressed in his military uniform, writing down a message to be sent by carrier pigeon. Standing next to Sergeant Horton is an unknown soldier, dressed in his military uniform, holding a carrier pigeon. Both man are standing in front of a large pigeon loft.The 1st Australian Corps Signals was a branch of the Australian Imperial Airforce that was active during World War Two. One of the tasked carried out by 1st Australian Corps Signals was to send messages through the use of carrier pigeons. Carrier pigeons were most commonly used by the Allied Forces to send messages from the front line trenches or advancing units.Black and white square reproduced photograph on rectangular archival paperObverse: Negative Number: 022213/ purchased from Australian War Memorial/ thumbnail 022213/ Syria 1941-12 Sergeant T A Horton of 1st Australian Corps Signals/ writing a message to be sent by carrier pigeon/ Reverse: 7992/ military album, beechworth, burke museum, military, world war 2, ww2, australian army, sergeant horton, theodore arthur horton