Showing 172 items
matching route 20
-
 Melbourne Tram Museum
Document - Digital Image, Victorian Transport Action Group (VTAG), "Melbourne’s Tram Plan Response Filling the Gaps", March 2024
Document produced by the Victorian Transport Action Group as a response to the Department of Transport "Melbourne Tram Plan" of Oct. 2023 - see item 7364. VTAG have produced a number of initiatives and looks at a number of route proposals that have been made by Government but as of the end of 2024, little progress has been made on any of them. Initiatives suggested are: 1. Confirm its commitment to previously announced projects (listed in Table 1) and provide indicative timeframes for completion. 2. Redirect routes 3, 5 and 12 (detailed in Table 2) with the opening of MM1 to improve the distribution of tram services through the central area. 3. Direct Infrastructure Victoria to undertake the specific planning process as part of the next state infrastructure plan to canvas a range of possible network enhancements. 4. Revise the selection of stops for upgrade to level access to include the practical considerations of technical feasibility and constructability to ensure that as many stops as possible are delivered as a priority. 5. Expand the corridor-based approach being applied to upgrade stops to include the implementation of traffic priority along the selected corridors. 6. Adopt a 15mins, or at least 20 mins, as the maximum headway for all Melbourne tram routes. Notes changes that will be needed as a result of the Melbourne Metro in 2025, tram stops, energy efficiency, renewing the fleet and infrastructure, network performance, and passenger experience. Demonstrates a response to the Vic Govt's tram plan by an Action Group.Digital copy of a 21 A4 page document produced by the Victorian Transport Action Group March 2024. tramways, victorian government, department of transport, planning, vtag -
 Melbourne Tram Museum
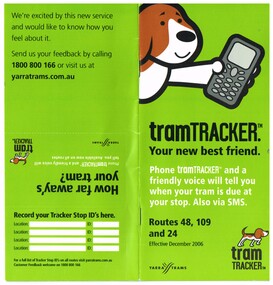
Book, Yarra Trams, "TramTracker - Your new best friend", Dec. 2006
Book - DL size, 20 pages, centre stapled, full colour printed on gloss paper titled "TramTracker - Your new best friend", advising people could phone tram tracker and be advised by voice or SMS when the next tram due at a particular stop. Applicable for routes 48, 109 and 24, effective Dec. 2006. Details on how to use the system, stop ids, terms and conditions of use and a tear off section to record stop id's. Has the TramTracker logos and Yarra Trams logos. See Reg item 1102 for a similar item routes 57 and 59. 1050.1 - similar book, for routes 96, 109, 112 and 30, effective 12/2006.trams, tramways, tramtracker, yarra trams, tram stops, route 96, route 109, route 112, route 30 -
 Melbourne Tram Museum
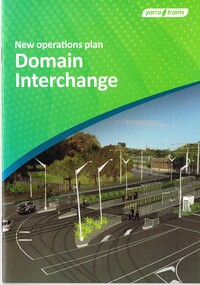
Document - Instruction Book, Yarra Trams, "New Operations Plan - Domain Interchange", 2013
Instruction book - 20 pages, printed on gloss paper, full colour, A5 centre stapled titled "New Operations Plan - Domain Interchange", outlining the change to the Domain Junction tram stop and track arrangements, that were built during March and April 2013. Has a table of contents, map, summary of changes, stop features, operations plan for St Kilda Road and Route 55 service, arrangements while being built, and general rules. Signed by Dennis Griffiths, Director of Operations.trams, tramways, yarra trams, domain junction, route 8, route 55, road works, st kilda rd, tram stops -
 Melbourne Tram Museum
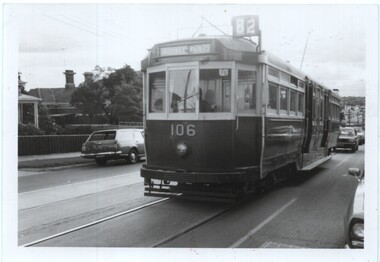
Photograph - Black & White Photograph/s, Dave Cochrane, 20/09/1984 12:00:00 AM
Black and white photograph of L 106 in Maribyrnong Road, Ascot Vale 20-9-1985 during a MTA Maintenance Strike. Photo by Dave Cochrane.On rear in ink "19 - 106 (Moonee Ponds, Route 82) in Revenue service, 20-9-84 (Ascot Vale), Footscray M/Ponds route during MTA Maintenance Strike. Dave Cochrane. Has the ARHS collection stamp on rear.trams, tramways, l class, maribyrnong rd, ascot vale, mta, moonee ponds, route 82, tram 106 -
 Melbourne Tram Museum
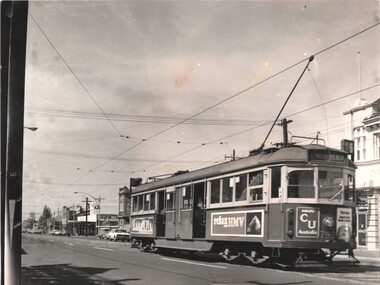
Photograph - Black & White Photograph/s, Gennaro Esposito Photographer, c1960
Black and white photograph of W5 799 (South Melbourne Beach, Route 15) in Lygon St, Brunswick, at Luscombe St. Tram has adverts for HMV record players and CU Insurance. On the right hand side of the photo is the former State Savings Bank. (Advised by e-mail - 20/10/2021, the building is still there)Has the stamp of "Gennaro Esposito Photographer, 22 Church St North Richmond"trams, tramways, lygon st, route 15, w5 class, tram 799 -
 Melbourne Tram Museum
Pamphlet, Public Transport Victoria (PTV), "Buses replace trams - Route 58 and Route 78", Jun. 2021
Pamphlet - 4 fold DL, titled ""Buses replace trams - Route 58 and Route 78", June 2021 for the installation of a level platform stop at South Yarra Station, cabling from the Daly St substation and trackwork on route 78 as well. Image i2 shows a plan of the stop - source from https://s3.ap-southeast-2.amazonaws.com/hdp.au.prod.app.vic-engage.files/3016/2201/0888/PTVH5474_South_Yarra_Tram_Design_Plan_Map_A1_v8_FA.jpg at the time. Has a map of the replacement services. Has PTV and Victorian Government logos. image i3 - downloaded from the Yarra Trams website - details of the project including upgrading the Power supply. two copies held. .1 - coffee voucher for two days (19/6 and 20/6) while tram stop works were being carried out.trams, tramways, route 58, trackwork, bus replacement, south yarra, daly st substation -
 Melbourne Tram Museum
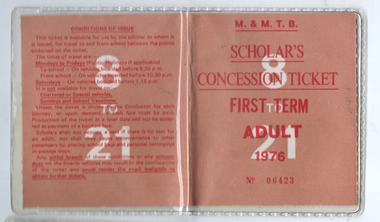
Ephemera - tickets, Melbourne & Metropolitan Tramways Board (MMTB), Schollar's Concession Tickets & others, 1976
The two Scholar's Concession tickets for first and second terms of 1976 allowed the holder to travel from Wattle Park to Latrobe university via a nominated route with the conditions of travel on the rear. Cost was $34 for each ticket. Ticket Nos. 06423 and 07189. Both issued at Camberwell Depot. The Employees Pass was issued to those who did not have a pass issued to them personally, such as travel to and from a training facility. The person to who this was issued to was a MMTB employee. The MTT Perth Ticket dated 20 Feb. 76 is a machine issued bus ticket recording ticket issuing details.Demonstrates a scholar's tickets issued during the mid 1970s.Set of two scholar's concession tickets, preprinted card with hand written details, providing the persons name and travel details, both contained within a plastic sleeve. Contained within the 1st term ticket was a blue Employee's pass for the MMTB and a Perth bus ticket.tramways, mmtb, perth, scholar's tickets, school tickets, employees pass, buses -
 Melbourne Tram Museum
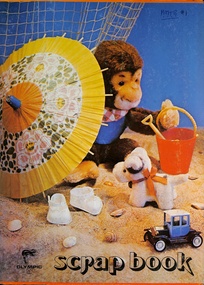
Ephemera - Olympic Scrap book, "MMTB #1", 1987 to 2003
Collection of newspaper clippings pasted into the scrapbook by the donor. Covers the period 1979 to 1990 when the Melbourne tram system underwent large changes. All from The Herald Sun or The Sun, unless noted otherwise. Contains the following cuttings: 1 - New tram link proves popular - Progress Print 12/12/1979 2 - Extension for tram? Standard 28/11/1979 3 - Ban trams from mall call - Herald - 14/12/1979 4 - Its war on tram yobbos - Sun 25/4/1980 5 - A bus drivers' dream sale 6 - Art lovers in transport of delight - The Bulletin 3/4/1979 7 - Your turn: Our Red cars are gone and all but forgotten - Los Angeles Herald Examiner 21/6/1978 8 - Push for tram line - Eastern Standard - 3/12/1980 9 - Photo of the opening of Bundoora line - 19/5/1983 10 - From cable cars to electric trams - Reg Baird - City Extra 13/11/1985 11 - Louie fears he'll soon be history - Sun 12/11/1985 12 - The first tram rolls unofficially of course - Box Hill Gazette - 18/7/1978 13 - Then and now - Board looks back to 1916 - Box Hill Gazette - 18/7/1978 14 - Blockade - trams buses choke city - 20/7/1987 15 - What a clangers - Tranquil city of trammies, and a City of the Rails - 21/7/1984 16 - Trammies on the buses - 24/7/1984 17 - A tram voted a winner - Progress Press 17/10/1984 18 - A class trams - Eastern Standard 23/10/1984 19 - Danton Carson - ex cable trammie - 12/11/1985 20 - Tram line upgrade - 10/9/1985 21 - Launch of B1 2001 - 16/11/1984 22 - Home built from trams - Progress Press - 9/11/1983 23 - A shortcut on the Brunswick line - Malcolm tram on Miller St bridge - 22/8/1985 24 - Stone and brick and cable tram - The Age 2/11/1985 25 - Danton Carson article by Lahey at Large - The Age 9/11/1985 26 - Why not a City tram loop? - 21/11/1986 27 - tram route ruling angers commuters - (route 82) - 4/1/1986 28 - History back on the tracks - photo o W1 612 - 3/8/1987 29 - The last number 77 - The Age 8/1/1986 30 - Art on wheels (tram 336) - Progress Press 10/12/1986 31 - Ban on Trams - Kew Depot - Progress Press 10/12/1986 32 - The Ghosts of Brisbane Past - Brisbane Courier Mail - 9/10/1987 33 - Trammies had to be tough in the days of cable cars - The Herald - 11/11/1985 34 - Catch a vintage tram at Bylands - 11/11/1985 35 - Aboard the trams home - 26/8/1987 36 - The end of the line for a private tram fleet - 28/3/1989 37 - Jim's tram plan clangs to a halt 38 - Red nose trams in a class of their own 39 - PTC Statewide Open Day - 17/10/1991 40 - Trams a vital part of city's transport - 18/5/1988 41 - Fun tram just the ticket -15/3/1988 42 - Desire is a streetcar for Jim, a collector obsessed 0 8/3/1988 43 - Tram crash 31 hurt - 7/2/1989 44 - Tramway exhibition to roll - Progrss Report - 18/10/1989 45 - Business on the right line - Restaurant tram - 30/10/1989 46 - Experience the 'real' tram museum on a shaky ride - 17/6/1989 47 - The start of electric trams - progress press 18/10/1989 48 - Trams Back - fights erupt as trammies vote - 2/2/1990 49 - Tram row legacy to linger on - 2/2/1990 50 - Trams back, but travelers aren't - Progress Press - 14/2/1990 51 - advert by The Met - Trams operating today - 8/2/1990 52 - Trams roll - rebe;'s rage still a threat - Z33 3/2/1990 53 - An early tram catches a few passengers - Month before all trams back - 5/2/1990 Yields information about the Melbourne tram network in the 1990sScrap book - Olympic - 32 plain sheets + printed card covers, centre stapled.tramways, melbourne, newspapers, box hill, tram museums, unions, tram blockade, a class, east burwood, bundoora, cable trams, b class, route 82, route 77, danton carson, brisbane, restaurant tram, adelaide -
 Melbourne Tram Museum
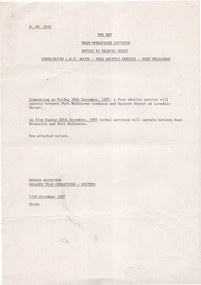
Document - Notice, The Met, "North/South LRT route - free shuttle Service - Port Melbourne", 11/12/1987
Notice to crews about a free shuttle tram service between Port Melbourne and to Lonsdale St at Spencer St, following the opening of the Port Melbourne line. Applicable for Friday 18/12/1987 and Saturday 19/12. Services between East Brunswick and Port Melbourne commenced on Sunday 20/12/1987. Signed by Dennis Griffiths Manger tram operations western.Yields information about the opening of the Port Melbourne line in 1987.A4 sheet - Notice No. D 5042tramcars, tramways, port melbourne, opening, new tramway, free tram -
 Melbourne Tram Museum
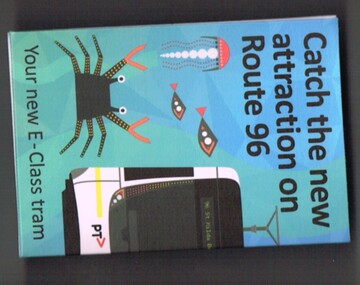
Functional object - Ticket Wallet, Yarra Trams, "Sea Life Melbourne Aquarium". "Melbourne Museum Stop 12", c2014
.1 - Printed and folded card to give a ticket holder or wallet, with the title "Sea Life Melbourne Aquarium", at Stop 124, with Yarra Trams and PTV logos. Includes a reference to the new E class trams, "Catch the new attraction on Route 96". Has various cartoon images of sea creatures on a blue back ground. .2 - as for above, but brown background advertising the Melbourne Museum at Stop 12. Has images of the Museum. .2 - added 20/11/2015trams, tramways, yarra trams, route 96, tickets, melbourne museum, museums -
 Melbourne Tram Museum
Ephemera - Timetable, Yarra Trams, Set of 12 laminated tram stop timetables, 2012, 2014
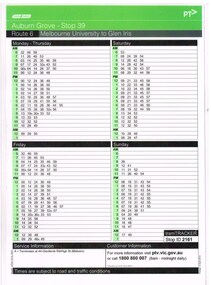
Set of 12 laminated tram stop timetables for various routes and stops. Has customer information line number, PTV and Yarra Tram logos. .1 - Route 6, stop 39 - Auburn Grove - 12/4/2012 .2 - Route 6, stop 36, Park Road - 28/3/2014 .3 - Route 16, stop 59, Malvern Road, 28/3/14 .4 - Route 8, stop 30, South Yarra Station - 28/3/2014 .5 - Route 55, Domain Interchange, stop 20 - 28/3/2014 .6 - Route 72, Prahran market - stop 30, - 31/3/2014 .7 - Route 72, Mathoura Road - stop 35 - 13/1/2014 .8 - Route 72, stop 33, Francis St - 31/3/2014 .9 - Route 72, stop 37, Orrong Road - 31/3/2014 .10 - Route 72, stop 38, Clendon Road - 31/1/2014 .11 - Route 72, stop 72, Glenferrie Road - 31/3/2014 .12 - Route 72, stop 70, Cotham Road - 13/1/2014.trams, tramways, yarra trams, timetables, tram stops, route 6, route 16, route 8, route 55, route 72 -
 Melbourne Tram Museum
Document - Folder of Track crossections drawings, Melbourne & Metropolitan Tramways Board (MMTB), c1928
The document provides cross sections of track used from c1920 to 1928. The folder is marked "H Bell" most likely the son of the later Chairman, Mr Hector Bell who was a civil engineer with the MMTB. 1 - P3948 - Camberwell Road - 1926 2 - P2789 - Camberwell Road reconstruction - 1920 3 - P3753 - Chapel St - 1926 4 - P60 - Expansion joints Church St bridge - 1924 5 - P3686 - Commercial Road reconstruction - 1926 6 - P4024 - Cotham Road reconstruction - 1927 7 - P4699 - Droop St duplication - 1927 8 - P2384 - Flemington Road conversion - 1925 9 - P1187 - Flemington Road tramway - undated c1920 10 - P4131 - Flinders St conversion - 1927 11 - P4132 - Flinders St conversion - special track drains where subject to flooding - 1927 12 - P3603 - Glenferrie Road east track - 1926 13 - P2608 - Glenferrie Road reconstruction - 1925 14 - P3577 - Glen Huntly Road extension - 1926 15 - P3745 - Glen Huntly Rd duplication - 1926 16 - P4655 - Gilbert Rd duplication - 1928 17 - P2472 - Hannah St at Crossings 1925 18 - P2459 - Hannah St in plantations - 1925 19 - P2582 - High St Prahran reconstruction - 1926 20 - P1594 - High St Prahran reconstruction - 1925 21 - P3611 - High St Malvern reconstruction - 1926 22 - P3900 - Lygon St - 1926 23 - P3689 - Malvern Road reconstruction - 1926 24 - P3951 - West Coburg Route - sleeper spacing - 1926 25 - P4703 - Nicholson St Coburg - duplication - 1928 26 - P4470 - Norwood Road duplication - 1927 27 - P2473 - Park St tramway - 1925 28 - P3707 - Riversdale Road reconstruction - 1926 29 - P4630 - Riversdale Road extension - 1927 30 - P4497- Riversdale Road duplication - 1927 31 - P1387 - South Melbourne Road - special boxed in Construction for Albert Road (parking loop) - 1924 32 - P4691 - Swan St reconstruction - 1927 33 - P3640 - Victoria St part - 1926 (2 copies) 34 - P4522 - Wallen Road reconstruction - 1927 35 - P3939 - Wallen Road reconstruction in front of depot - 1927 36 - P4702 - Trial types of track - 1928 37 - P4254 - Wattletree Road reconstruction - 1927 38 - P4531 - Wattletree Road connection to Glenferrie Road - 1927 39 - P4708 - Wellington Rd siding - 1928Yields information about the various tramway track cross sections used by the MMTB including cable tram conversions.Folder - heavy card cloth covers fitted with two interscrews containing some 39 plus one duplicate folded blue prints. Covers made by Swinnerton Bros of Melbourne - see image 6 for their logo/trademark.Has "H Bell" in ink on rear cover.tramways, mmtb, tram tracks, rails, civil engineering, cable conversion, new tramways -
 Melbourne Tram Museum
Map, Melbourne & Metropolitan Tramways Board (MMTB), MMTB Route Maps, 1979
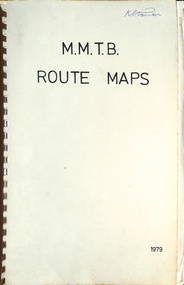
Series of colour maps for various tram and bus routes, dated 1979. Also contained, not scanned are letters, reports, and specifications for printing these maps for use in shelters etc. Some have the Transport Information Centre telephone printed on them. Some are finished with a plastic laminate finish on either one or both sides. Show the major cross streets, parks, schools, other tram routes, major stop numbers, and railway lines. See also item 3909 for another example of these. Trams 1 - City route guide - R9/77 - showing all route numbers and destinations that passed through the CBD. 2 - Bourke St tram routes - R4/77 - East Brunswick Blyth St and East Preston Tyler St and intermediate routes, routes 95, 96, 97, 90, 89 and 88. 3 - Malvern, East Malvern, Carnegie, and East Brighton Tram Routes (from St Kilda Junction) - R1/79 - shows routes 5, 3, 67, 66, 61, 62, and 64. 4 - Elizabeth St tram routes - R12/77 - Essendon Airport, West Maribyrnong, North Coburg lines, routes 50, 58, 60, 54, 57, 52. 49, 59, 18, 20 and 19 5 - Flinders St tram routes - R5/78 - North Balwyn, East Burwood, routes 48, 40, 41, Hartwell, 28, 74 and 75 6 - Kew - St Kilda Beach - R1/79 - Route 69. 7 - Mont - Albert City - R11/77, shows routes 43. 47. 45. 44 8 - St Kilda Rd Tram Routes R12/77 - details South Melbourne Beach, route 1 and route 2 and St Kilda Beach routes 15, 16, and 55 otherwise shows where the various routes branch off St Kilda Road 9 - Batman Ave tram routes - R9/77 - Wattle Park, North Richmond and Prahran - routes 70, 71, 78 and 79. 10 - Footscray - Moonee Ponds - R3/81 - Route 82 11 - Swanston St tram guide - R1/79 - lists all routes and route numbers that branch or cross Swanston St between Grattan St and St Kilda Junction. 12 - Toorak Camberwell and Glen Iris tram route with Camberwell Junction and Malvern Town Hall, R1/79, routes 8, 7, 6, 72, and 73 shown. 13 - West Preston - Beach tram routes - R12/77 - routes 10, 11, 9 and 12, 14 - William St tram routes - R12/77 - Route 55, 56, and 63 - South Melbourne Depot and Domain. Buses 1 - Footscray, Sunshine, Deer Park, Nth Altona & Fishermans Bend - R2/79 2 - Box Hill bus routes to Templestowe, Heidelberg & East Kew - R6/78 - notes superseded by R3/82 3 - Plan of Russell St Melbourne bus departure bays. 4 - Box Hill, Mitcham & Ringwood bus routes to East Doncaster & Warrandyte - R3/82 5 - City - Warrandyte & East Doncaster bus routes - R3/82 & R6/78 6 - Bulleen - City - Port Melbourne - Garden City Bus route - R6/78 7 - North Altona - City bus route - 11/78 8 - Clifton Hill - Elsternwick - R2/79 9 - La Trobe - Northland - West Heidelberg - City Bus Service via East Freeway - 11/79 and R3/81 10 - Box Hill, Mitcham & Ringwood Bus Routes to East Doncaster & Warrandyte - R10/84 - with the Metropolitan Transit logo.Yields information about tram and bus routes in late 1970s early 1980s.Book - brown comb binding, card and clear plastic covers containing both bound and unbound maps and documents.K C Painter on front cover in ink.tramways, mmtb, tram routes, maps, bus routes, route numbers, routes, route guide -
 Melbourne Tram Museum
Book, Melbourne & Metropolitan Tramways Board (MMTB), "Centenary Souvenir - Melbourne and Metropolitan Tramways Board - 1934-5", 1935
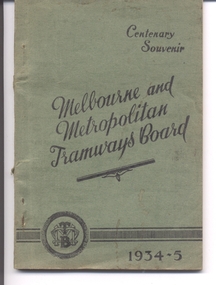
Book - five sections - 80 pages, side stapled, glued within light green card covers with title "Centenary Souvenir - Melbourne and Metropolitan Tramways Board - 1934-5". Has an introduction, a preface that gives a brief history of the tramway system in Melbourne, 20 buildings and points on interest in Melbourne and how to get there, with sketches by Clive Fink, a list of electrified routes and a cable routes at the time with details of terminals and points of interest along the route. Printed by The Mail Publishers, 264 Barkly St Footscray. See Related documents for a route listing. See Reg Item 79 for a reprint version of 1967. 2nd copy added 29-8-2015 - donation of Ian Bryant. 3rd copy from the McComb Collection added 30-12-2016. Copy 4 donated by Kevin Tiernay - 11-06-2022 Pdf copy added 5/5/2019 as image i2 and images i2 to i4 removed.Has "19" in red ink on inside title page, Copy 3 - has H. S. McComb in pencil along the top of the front cover.trams, tramways, mmtb, melbourne, routes, cable trams -
 Melbourne Tram Museum
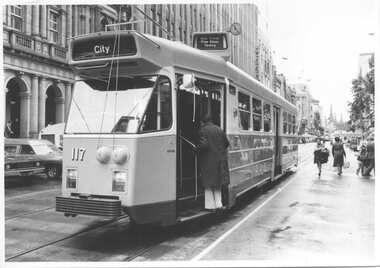
Photograph - Set of two Black & White Photograph/s, The Age, 1979
Set of two black and white photos from The Age of the first day of running Z3 117 in service. .1 -Z3 117 at the Elizabeth and Bourke St stop loading passengers. Tram has in the route number box a sign "New Trams free rides today". .2 - Interior view of tram with the conductors desk having a sign about free rides, another employee handing out pamphlets about the tram and passengers on the tram. From the Vicsig.net web site accessed 20/8/2013, gives the in service date of Z3 117 as 25/9/1979.Have "The Age" copyright stamp on the rear. In pencil, on both "Oct 1979, Z3 117 first day in service"trams, tramways, mmtb, z3 class, bourke st, tram 117 -
 Ballarat Tramway Museum
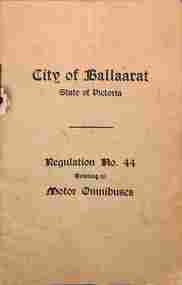
Legal record, City of Ballaarat, City of Ballaarat - by-law - motor omnibuses, 7/2024
Set of two legal documents or by-laws relating to the operation of motor omnibuses in the Ballarat district. Sets out the legal context, routes, schedule detailing stands or stops, number of omnibuses and times of operations. 1 - Regulation No. 44, dated 2/7/1924 - 32 pages - centre stapled - has a number of pencil marks. 2 - By-Law 115, dated 24/9/1930, 20 pages - centre stapled, sets out the details or forms for the vehicles to be used and their rules of operation. Printed by Ballarat Litho, 56 Lydiard St Ballarat.Yields information about the operation of buses licenced by the City of Ballaarat.Set of two printed by-laws of the City of Ballaarat.tramways, buses, city of ballaarat, legal matters -
 Bendigo Military Museum
Photograph - 4th Field Survey Squadron ANZAC Day Parade. Adelaide, SA, 1994
This is a set of 32 photographs of 4th Field Survey Squadron personnel parading through the streets of the Adelaide CBD on ANZAC Day, on the 25th of April 1994. The march concluded at the Cross of Sacrifice in Pennington Gardens East followed by the ANZAC Day Service of Remembrance. See items 6566.14P and 6567.11P for more photos taken during ANZAC Day, 1994.This is a set of 32 photographs of 4th Field Survey Squadron personnel parading through the streets of the Adelaide CBD on ANZAC Day, on the 25th of April 1994. The colour photographs are on 35mm negative film and are part of the Army Survey Regiment’s Collection. The photographs were scanned at 96 dpi. .1) - Photo, colour, 1994. Preparation. Bayonets fixed on SLR rifles. .2) - Photo, colour, 1994. Eyes right as unit passes dignitaries on the dais. .3) - Photo, colour, 1994. Eyes right as unit passes dignitaries on the dais. CAPT Rob Gray, centre of photo, OC MAJ Peter Demaine on right. .4) to .7) - Photo, colour, 1994. Eyes right as unit passes dignitaries on the dais. .8) - Photo, colour, 1994. Unit marches along the parade route. .9) to .13) - Photo, colour, 1994. Eyes right as unit passes dignitaries. .14) - Photo, colour, 1994. Unit marches along the parade route. Right file L to R: WO2 Peter Hammer, unidentified, SGT Dave Longbottom, SGT Paul Baker, unidentified. .15) - Photo, colour, 1994. Unit marches along the parade route. Right file L to R: SGT Paul Baker, unidentified (x2), SPR Fran Calvert, SPR Greg Richards, SGT H. Evertz. Centre file: SGT Mark Donnelly, SPR Mark McInerney, unidentified (x2), SPR Matt Arnold. .16) - Photo, colour, 1994. Unit marking time. Right file L to R: SGT Paul Baker, unidentified (x2), SPR Fran Calvert, SPR Greg Richards, SGT H. Evertz, CPL Brett Parkin. Centre file L to R: SPR Matt Arnold, SPR Mark Linwood. Right file L to R: unidentified, SPR Mark Sinderberry. Officers L to R: unidentified (x2), CAPT Rob Gray, CAPT Tony Stephens. .17) - Photo, colour, 1994. Unit marking time. L to R: SGT Paul Baker, unidentified, SSGT John ‘Shep’ Shephard, SGT Dave Longbottom, SPR Daryl Miller, CPL Steve Wegener, unidentified (x2), CPL Jeremy Archer, WO2 Peter Hammer, unidentified Warrant Officers (x2). .18) - Photo, colour, 1994. Unit marking time. L to R: SPR Mark Linwood, SPR Greg Richards, SPR Matt Arnold, SPR Mark Sinderberry, unidentified (x5), SPR Chris Pearse, unidentified, CPL Dick Crawford, unidentified, SSGT John ‘Shep’ Shephard, CPL Steve Wegener, unidentified, CPL Jeremy Archer, unidentified Warrant Officer. .19) - Photo, colour, 1994. Unit marking time. Officers L to R: unidentified (x2), CAPT Tony Stephens. L to R: SPR Mark Linwood, SPR Greg Richards, SPR Matt Arnold, SPR Mark Sinderberry, remainder unidentified. .20) - Photo, colour, 1994. Unit marched along the parade route. L to R: CAPT Rob Gray, unidentified officer. .21) - Photo, colour, 1994. Unit marches along the parade route. OC MAJ Peter Demaine. .22) - Photo, colour, 1994. Unit marches along the parade route. L to R: CAPT Tony Stephens, SPR Mark Linwood, SPR Matt Arnold, SPR Mark Sinderberry, unidentified (x3), SPR Chris Pearse, unidentified, CPL Dick Crawford, unidentified, SGT Dave Longbottom, SSGT John ‘Shep’ Shephard, CPL Steve Wegener, CPL Jeremy Archer, unidentified Warrant Officers (x2). .23) - Photo, colour, 1994. Unit marches along the parade route. L to R: SSGT John ‘Shep’ Shephard, SPR Daryl Miller, CPL Steve Wegener, unidentified, CPL Jeremy Archer, unidentified Warrant Officers (x2). .24) - Photo, colour, 1994. Unit marches along the parade route. L to R: unidentified, CPL Dick Crawford, SGT Dave Longbottom, SSGT John ‘Shep’ Shephard, unidentified, CPL Steve Wegener, WO2 Peter Hammer, CPL Jeremy Archer, unidentified Warrant Officers (x2). .25) - Photo, colour, 1994. Unit marches along the parade route. L to R: unidentified (x3), SPR Fran Calvert, unidentified (x2), SPR Chris Pearse, unidentified, CPL Dick Crawford, SPR Daryl Miller, SSGT John ‘Shep’ Shephard. .26) - Photo, colour, 1994. Unit marches along the parade route. L to R: CAPT Tony Stephens, CPL Brett Parkin, SPR Mark Linwood, SGT H. Evertz, SPR Mark Sinderberry, unidentified (x2). .27) - Photo, colour, 1994. Unit marches along the parade route. L to R: CPL Brett Parkin, CAPT Tony Stephens, SPR Mark Linwood, SPR Greg Richards, SPR Matt Arnold, unidentified, SPR Mark Sinderberry, unidentified (x3), SPR Chris Pearse, unidentified, CPL Dick Crawford, unidentified, SGT SSGT John ‘Shep’ Shephard, CPL Steve Wegener, CPL Jeremy Archer, unidentified Warrant Officer. .28) - Photo, colour, 1994. Unit marches along the parade route. L to R: Officers - OC MAJ Peter Demaine, unidentified (x2), CAPT Rob Gray, CAPT Tony Stephens. L to R: CPL Brett Parkin, SGT H. Evertz, SPR Mark Linwood, SSGT Pat ‘Fuji’ Drover, SPR Mark Sinderberry, unidentified. .29) - Photo, colour, 1994. Unit preparing to halt. .30) to .32) - Photo, colour, 1994. Unit ‘stand easy’..1P to .32P – There are no personnel identified. ‘1994 ANZAC DAY’ annotated on negatives sleeve.royal australian survey corps, rasvy, 4 fd svy sqn -
 Ballarat Tramway Museum
Document - Roster, State Electricity Commission of Victoria (SECV), Ballarat all routes, 1969
Shows the arrangement of the Weekdays Rosters, Saturdays, and Sundays for all Ballarat routes - for the drivers or motormen. Gives the various run numbers, sign-on location, trip take times, sign off times, i. Shows the full or basic 20-minute service during the day and 30 mins at night. Show how the various run or crew tables were arranged to provide overall service. Dated 1969, prepared by LJD - Les Denmead. Demonstrates aspects of the Ballarat Tramways management system of Motorman's' rosters interfacing during 1969. Shows the services and how the various run or crew tables were arranged in relation to the overall timetable.Photo copy of a five-sheet handwritten document on graph paper.secv, tramways, timetables, rosters, ballarat, crews -
 Bendigo Military Museum
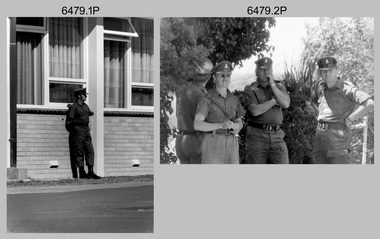
Photograph - Army Survey Regiment Freedom of Entry Parade Rehearsal, Fortuna. Bendigo, 1980
This set of 38 black and white photographs were taken at the Army Survey Regiment’s parade rehearsal held at Fortuna, Bendigo in 1980. The rehearsal was for the Freedom of Entry parade held 1-2 weeks later in 1980. The exact date for the Freedom of Entry parade is not known. The Freedom of Entry to the City of Bendigo was an honour first conferred by the Bendigo City Council to the Army Survey Regiment in 1970. The Freedom of Entry parade in 1980 was the fourth time the unit exercised its right of freedom of entry. The Regiment also exercised its Freedom of Entry with anniversary parades in 1977, 1980 and 1995. Refer to items 6020.8P, 6021.25P, 6248P, 6266, 6409.2, 6430.39P, 6490.53P and 6491.21P for more Army Survey Regiment Freedom of Entry photographs, documents and certificates. See item 6471.2P for photos of Lithographic Squadron taken on the same day of this parade rehearsal. This set of 38 black and white photographs of the Army Survey Regiment (Army Svy Regt) were taken in a rehearsal for the Freedom of Entry parade to the City of Bendigo, held 1-2 weeks later in 1980. The photographs are on 35mm negative film and were scanned at 96 dpi. They are part of the Army Survey Regiment’s Collection. .1) - Photo, black & white, 1980. WO1 John McCulloch observes the rehearsal. .2) - Photo, black & white, 1980. RSM WO1 Aub Harvey, WO1 Dave Thomson and WO1 Roger Rix observe the rehearsal. .3) - Photo, black & white, 1980. Under command of SSM WO1 Bob Mason, Air Survey Squadron marches onto the parade ground - Front rank L to R: SPR Peter Jones, SPR Barry Miller, CPL Alan Hawkins. .4) - Photo, black & white, 1980. Air Survey Squadron marches on the parade ground - L to R: SPR Peter Jones, CPL Lyall Camp, SPR Barry Miller, SPR Geoff Havelberg, unidentified, CPL Alan Hawkins, CPL Peter Treble, unidentified (x2), SGT Mick Hogan, SGT Bruce Hammond, unidentified, SPR Steve Linane, SPR Jamie McRae, unidentified (x2). .5) - Photo, black & white, 1980. Air Survey Squadron formed up – CAPT Peter Ralston on far left. .6) - Photo, black & white, 1980. Air Survey Squadron inspection – L to R: CAPT Peter Ralston, CPL Alan Hawkins, CO LTCOL Bob Skitch, SGT Mick Hogan, SGT Bruce Hammond, SPR Jamie McRae. .7) - Photo, black & white, 1980. Air Survey Squadron inspection – L to R: SPR Peter Jones, unidentified, CPL Paul Hopes, unidentified, SGT Rick van der Bom, LTCOL Bob Skitch, SPR Steve Linane, CPL Mick Minchin, unidentified, SPR Gae (Robinson) Amato, unidentified, SPR Chris ‘CPL Peter Treble, Charlie’ Brown, SPR Ginny (Turner) Rowe. .8) - Photo, black & white, 1980. Lithographic Squadron marches onto the parade ground - Front rank L to R: SPR Brian Fauth, SPR Roy Hicks, SPR Per Andersen, commanded by LT Steve Cooper. .9) - Photo, black & white, 1980. Lithographic Squadron marches onto the parade ground - L to R: SSM WO1 Ken Slater, Front rank SPR Brian Fauth, SPR Roy Hicks, SPR Per Andersen, LT Steve Cooper. .10) - Photo, black & white, 1980. Lithographic Squadron inspection - L to R: CAPT Stan Vote, LT Steve Cooper, CO LTCOL Bob Skitch, SPR Neville Carr, SPR Laurie Justin, SPR Keith Quinton. .11) - Photo, black & white, 1980. Lithographic Squadron inspection - L to R: unidentified, LT Steve Cooper, CPL Frank Lenane, CPL Mick ‘Buddha’ Ellis, SPR Martin van de Maele, CO LTCOL Bob Skitch, unidentified (x2), SPR Garry Hudson, remainder unidentified. .12) - Photo, black & white, 1980. Lithographic Squadron inspection - L to R: LT Steve Cooper, CPL Rob Bogumil, unidentified, CO LTCOL Bob Skitch, CPL Bill Jones, CPL John ‘Flash’ Anderson, CPL Warren ‘Waldo’ Shirley, unidentified. .13) - Photo, black & white, 1980. Lithographic Squadron inspection - L to R: unidentified (x4), CO LTCOL Bob Skitch, unidentified, CPL Bill Jones, LT Steve Cooper, CPL Warren ‘Waldo’ Shirley. .14) - Photo, black & white, 1980. Lithographic Squadron performs form - right file L to R: SPR Brian Fauth, SPR Roy Hicks, SPR Per Andersen. .15) - Photo, black & white, 1980. Lithographic Squadron completes form at the halt. .16) - Photo, black & white, 1980. Lithographic Squadron marches in column of route – right file L to R: SPR Keith Quinton, SPR John Whaling, SPR Martin van de Maele, SPR John Whaling, SPR Garry Hudson, unidentified. Centre marker: CPL Warren ‘Waldo’ Shirley, remainder unidentified. .17) - Photo, black & white, 1980. Lithographic Squadron marches in column of route – right file L to R: SPR John Whaling, SPR Martin van de Maele, SPR John Whaling, SPR Garry Hudson, unidentified. Centre marker CPL Warren ‘Waldo’ Shirley, remainder unidentified. .18) - Photo, black & white, 1980. Lithographic Squadron marches in column of route – L to R: SPR Per Andersen, CPL Josh Degroot, SPR Neville Carr, SPR Laurie Justin, SPR Keith Quinton, SPR John Whaling, SPR Martin van de Maele, SPR John Whaling, SPR Garry Hudson, unidentified. .19) - Photo, black & white, 1980. Lithographic Squadron marches in column of route – L to R: SPR Per Andersen, CPL Josh Degroot, SPR Neville Carr, SPR Laurie Justin, SPR Keith Quinton, SPR Martin van de Maele, SPR John Whaling, SPR Garry Hudson, unidentified (x2), CPL Warren ‘Waldo’ Shirley, unidentified. .20) - Photo, black & white, 1980. Lithographic Squadron rehearses ‘rest on arms reverse.’ .21) - Photo, black & white, 1980. Cartographic Squadron marches onto the parade ground in column of route - L to R: SPR Cheryl Lofthouse, unidentified, SSM WO1 Gordon Lowery, unidentified, SPR Megan (McBurney) Reynolds, unidentified (x6), SPR Peter Main, CPL Stu Symonds, SPR Greg Else, SPR Rod Skidmore. .22) - Photo, black & white, 1980. Cartographic Squadron marches onto the parade ground in column of route - L to R: SPR Rod Skidmore, SPR Greg Else, CPL Phil McGuire, CPL Dennis Learmonth, CPL Brad Peppler, CPL Trevor Bottomley, SPR Gina (Coore) Neilson, SPR Carla Dell, CPL Lynn Johnson, commanded by CAPT Bob Williams. .23) - Photo, black & white, 1980. Cartographic Squadron inspection - L to R: unidentified officer, CAPT Bob Williams, SPR Greg Else, CO LTCOL Bob Skitch, CPL Phil McGuire, CPL Dennis Learmonth, CPL Brad Peppler, CPL Trevor Bottomley. .24) - Photo, black & white, 1980. Cartographic Squadron inspection - L to R: RSM WO1 Aub Harvey, unidentified officer, CAPT Bob Williams, CO LTCOL Bob Skitch. Front rank L to R: SPR Rod Skidmore, CPL Phil McGuire, CPL Dennis Learmonth, CPL Brad Peppler, CPL Trevor Bottomley, SPR Gina (Coore) Neilson, SPR Carla Dell, CPL Lynn Johnson. Centre rank L to R: CPL Terry Danger, SPR John Martin, SPR Bob Sheppard. SPR Megan (McBurney) Reynolds. .25) - Photo, black & white, 1980. Cartographic Squadron inspection - Front rank L to R: CPL Phil McGuire, CAPT Bob Williams, CPL Brad Peppler, CO LTCOL Bob Skitch, CPL Trevor Bottomley, SPR Gina (Coore) Neilson, SPR Carla Dell, CPL Lynn Johnson. .26) - Photo, black & white, 1980. Cartographic Squadron inspection - L to R: WO1 Roger Rix, RSM WO1 Aub Harvey, unidentified officer. Front rank L to R: SPR Rod Skidmore, SPR Greg Else, CPL Phil McGuire, CPL Brad Peppler, CPL Trevor Bottomley, SPR Gina (Coore) Neilson, SPR Carla Dell, CPL Lynn Johnson. Centre rank L to R: CPL Terry Danger, SPR John Martin, SPR Bob Sheppard. SPR Megan (McBurney) Reynolds. .27) - Photo, black & white, 1980. Cartographic Squadron inspection - L to R: CPL Dennis Learmonth, CPL Brad Peppler, CO LTCOL Bob Skitch, CPL Trevor Bottomley, SPR Gina (Coore) Neilson, SPR Carla Dell, CPL Lynn Johnson. .28) - Photo, black & white, 1980. Cartographic Squadron inspection - L to R: CAPT Bob Williams, unidentified, CO LTCOL Bob Skitch, SPR John Martin, SPR Bob Sheppard, SPR Megan (McBurney) Reynolds, rear rank L to R: SPR Peter Main, unidentified (x3). .29) - Photo, black & white, 1980. Cartographic Squadron rehearses ‘reverse arms’ - L to R: SPR Peter Main, CPL Stu Symonds, SPR Rod Skidmore, SPR Greg Else, remainder unidentified. .30) - Photo, black & white, 1980. Cartographic Squadron rehearses ‘rest on arms reverse.’ - Front rank L to R: SPR Rod Skidmore, SPR Greg Else, CPL Phil McGuire, CPL Dennis Learmonth, CPL Brad Peppler, CPL Trevor Bottomley. remainder unidentified. Centre rank L to R: unidentified (x2), SPR John Martin, SPR Bob Sheppard, SPR Megan (McBurney) Reynolds. Rear rank L to R: unidentified (x3), SPR Carla Dell on far right. .31) - Photo, black & white, 1980. Cartographic Squadron marches in column of route. .32) - Photo, black & white, 1980. Cartographic Squadron marches in column of route. Left file L to R: SPR Rod Skidmore, SPR Greg Else, CPL Phil McGuire, CPL Dennis Learmonth, CPL Brad Peppler, CPL Trevor Bottomley, SPR Gina (Coore) Neilson, SPR Carla Dell, CPL Lynn Johnson. Centre file L to R: unidentified (x2), SPR Dan Cirsky, SPR Bob Sheppard. Commanded by CAPT Bob Williams (foreground). .33) - Photo, black & white, 1980. Cartographic Squadron rehearses ‘order arms.’ Front rank L to R: SPR Rod Skidmore, SPR Greg Else, CPL Phil McGuire, CPL Dennis Learmonth, CPL Brad Peppler, CPL Trevor Bottomley, SPR Gina (Coore) Neilson, SPR Carla Dell, CPL Lynn Johnson. Centre rank L to R: unidentified (x2), SPR Dan Cirsky, SPR Megan (McBurney) Reynolds, SPR Ilen Isaac. Rear rank L to R: SPR Cathy Regan, unidentified, SPR Cheryl Lofthouse. .34) - Photo, black & white, 1980. Cartographic Squadron rehearses ‘right dress.’ Front rank L to R: SPR Rod Skidmore, SPR Greg Else, CPL Phil McGuire, CPL Dennis Learmonth, CPL Brad Peppler, CPL Trevor Bottomley, SPR Gina (Coore) Neilson, SPR Carla Dell, CPL Lynn Johnson. Centre rank L to R: SPR John Martin, SPR Bob Sheppard. SPR Megan (McBurney) Reynolds, SPR Ilen Isaac. Rear rank L to R: unidentified (x2), SPR Cathy Regan, unidentified, SPR Cheryl Lofthouse. Commanded by CAPT Bob Williams (far left). 35) - Photo, black & white, 1980. Air Survey Squadron section rehearses marching with reverse arms. L to R: SPR Bob Hopper, CPL Rick Downie, CPL Paul Hopes, unidentified (x2, SGT Rick van der Bom, SPR Steve Hilton, CPL Peter Treble, unidentified, SPR John Lane, remainder unidentified. .36) - Photo, black & white, 1980. Air Survey Squadron section rehearses marching with reverse arms. L to R: CPL Alan Hawkins, CPL John Smith, SPR Dave Jobe, unidentified (x2), SGT Mick Hogan, SPR Barry Miller, WO1 Dave Thomson. .37) - Photo, black & white, 1980. Cartographic Squadron sections practice drill. .38) - Photo, black & white, 1980. Air Survey Squadron rest break from drill practice. L to R: unidentified (x2), CPL Noel McNamara, SSGT Peter Warwick, SSGT Greg Buckingham (facing away), SGT Jim Beard, unidentified, SPR Sharon (Jones) Treble (foreground), unidentified, SGT Bruce Gordon, SPR Kristin (Isaac) Skidmore.There are no personnel identified. royal australian survey corps, rasvy, army survey regiment, army svy regt, fortuna, asr -
 Ballarat Tramway Museum
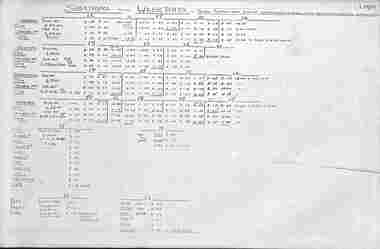
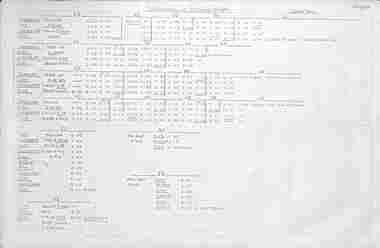
Document - Roster, State Electricity Commission of Victoria (SECV), Ballarat all routes, Mar. 1970
Shows the arrangement of the Weekdays Rosters, Saturdays and Sundays for all Ballarat routes - for the drivers or motormen. Gives the various run numbers, sign on location, trip take times, notes on what to do with trams, sign off times, interface with other runs. Shows the full or basic 20 min service during the day and 30 mins at night. Show how the various run or crew tables were arranged to provide the service overall. See Reg item 3428 for Conductors tables. Dated 3/1970. Demonstrates aspects of the Ballarat Tramways management system of Motorman's' rosters interfacing during the last full period of operation of the tramway from March 1970. Shows the services and how the various run or crew tables were arranged in relation to the overall timetable.Photo copy of a four-sheet handwritten document on graph paper. trams, tramways, timetables, sec, ballarat, crews, rosters -
 Ballarat Tramway Museum
Administrative record - Book, Andersons' printing, "Ballaarat Tramways", Jan. 1888
Book with an index or table of contents, listing all the documents relating to the establishment of the Ballaarat Tramways (the horse tram operator) including, references to Legislation and orders in council, original tender conditions, the contract between the Council and Edward Thomson, Specifications for the construction, delegation to the operator, and plan of routes. Last document dated 17/1/1888.Yields information about the establishment of the Ballarat horse trams, Councils and the operator.Bound book, with end papers, 20 pages, patterned covers, titled with a label on the front cover - "Ballaarat Tramways"Has an old ownership note on the inside front cover.secv, tramways, horse trams, city of ballaarat, ballaarat tramway company, tenders, specifications, operations, maps -
St Vincent's Hospital Melbourne Archives
Album - Agnes McLean photograph album, Souvenir St Vincent's Melbourne, the foundation stone new wing 1928
Images in the album are related to the laying of the foundation stone of St Vincent's new wing in 1928 as well as the royal visit of the Duke and Duchess of York in 1927. A loose newspaper clipping contained in the album titled "Fitzroy's Welcome" provides information on the royal visit which extended into Fitzroy, Collingwood and Richmond. A minute photo on page 18 of the album shows an image of the royal yacht. Album contents and descriptions written: Page 1, Mother Mary Aikenhead foundress of the Sisters of Charity. Page 2, Mother Mary Berchmans foundress of St Vincent's. Page 3, The Papal Legate Cardinal Cerretti XX1X eucharistic congress laying of the foundation stone SVHM1928. Page 4, His Grace the Archbishop of Melbourne the most Rev Daniel Mannix 1928. Page 5, The stand from which the cardinal addressed the meeting. Page 6, En route to "Stand" SVH. Page 7, The stone ready to be blessed. Page 8, The Cardinal going to bless the stone. Page 9, The blessing of the stone. Page 10, Listening to the Cardinal. Page 11, The mallet and the trowel used. Page 12, The stone is well and truly laid, Page 13, Via the enclosure. Page 14, St V's nurses. Page 15, The Subway. Page 16, En route to Reception Hall. Page 17, The Reception Hall. Page 18, The Stage Garlands, CLC students entertained. Page 19, Royal visit His RH the Duke of York. Page 20, The Duchess of York. Page 21, The living check. Page 22, The guard of honour SVH nurses. Page 23, Fire station en fete opposite SVH. Page 24, Victoria Parade for a Royal Visit.Each page has script style black ink descriptions of the photograph.archbishop daniel mannix, mother mary berchmans daly, cardinal bonaventura cerretti, duke of york, duchess of york, mother mary aikenhead, st vincent's hospital melbourne, nurses, victoria parade, eastern hill fire station., tunnels, brenan hall