Showing 1989 items matching "bagging"
-
 Tennis Australia
Racquet, 1999
Number 2227/2000 Millennium Limited Edition Wilson 'Jack Kramer Autograph' unstrung tennis racquet, in its original plastic protective bag. The racquet features a Balmforth 'Fairway' leather handle grip, and a document strung into the netting area, providing Kramer's player statistics and racquet specifications. Racquet comes with: a vinyl cover with strap; a packet of Wilson 'Sensation NXT 16' strings; a certificate of authenticity, with envelope; and a two piece box. Box features inscription on lid: THE JACK/KRAMER/AUTOGRAPH. Materials: Hyper Carbon, Graphite, Kevlar, Nylon, Paint, Plastic, Ink, Adhesive tape, Leather, Cardboard, Glue, Vinyl, Metal, Papertennis -
 Melbourne Tram Museum
Photograph - Illustration/s, Marilyn Phillips, 2015
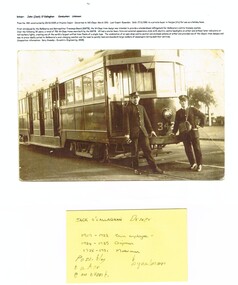
Illustration of Driver John (Jack) O'Callaghan and a conductor at a terminus or short working with tram W 342. Has the dates regarding the tramcar's working life on the top of the illustration. Advised by Donor that Jack was a "tram employee" between 1919 and 1922, a Gripman - 1924 - 1925 and a Motorman 1928 - 1931. After that he was a signalman. The photo was possibly taken at an opening of new track event. Scanned from an original photograph by the donor and sent to the depot when visiting about organising a tour. Tram crew in full uniform of the era, driver holding the controller and brake handles. Conductor with ticket bag etc. In 1927 the tram was based at Essendon Depot - see Reg item 800.trams, tramways, motormen, conductors, w class, tram 342, uniforms -
 Bendigo Historical Society Inc.
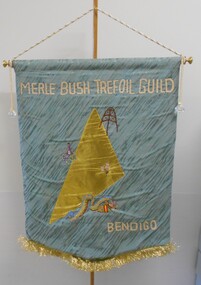
Banner - MERLE BUSH COLLECTION: MERLE BUSH TREFOIL GUILD BANNER
The Trefoil Guild consists of former members of the Girl Guide Movement. It is a self governing and self financing guild that provides support to the Girl Guide movement. Originally formed as "Old Girl Guides" in 1936, it became the Trefoil Guild in 1944/45.Green cloth banner. The words Merle Bush Trefoil Guild at the top. Taking most of the centre a gold triangle, at top right a poppet head and top right a bottle of wine and grapes. At the centre of the triangle Bendigo flower emblem and at the bottom Suu Loong and the word Bendigo. At the back. Green for the local gum leaves and reefs of gold. Bendigo's position marked in the golden triangle by its floral emblem, the waxflower. Poppet head for Bendigo's wealthy foundations. Sun Loong for the heritage and many nationalities that contributed to Bendigo's character. Lettering the colour of our summer land and grass. Grapes for the vineyards and wines in the area. By Gwen Berby 1997. The banner is in a green carry bag. -
 Flagstaff Hill Maritime Museum and Village
Domestic object - Bowl, Late 19th or early 20th Century
The Process of Making Pottery Decorating, Firing, Glazing, Making, Technical There is a rhythm and flow to clay. It can’t be done all at once! Even the making process! It can take weeks to get everything done, especially if you can only work on your pottery once a week! Even though we have three hour classes, it’s often just not enough time! Here is an overview of some of the processes so you have a bit more grasp on some of the technical stuff! Step One – Design There are SO many ideas out there for making stuff in clay! From delicate porcelain jewellery, through to heavy sculptural work and everything in between. Deciding your direction is sometimes not that easy – when you first start, try everything, you will naturally gravitate to the style that you enjoy! The options and variations are endless and can get a wee bit overwhelming too! Check in with me before you start to ensure your ideas will work, what order you might do things, how you could achieve the look you are seeking and any other technical data required! Step Two – Making Clay is thixotropic. This means that as you work with it, the clay first gets sloppier and wetter, before is begins to dry in the atmosphere. For most things, you simply can’t do all parts of the project at once. An example of work order might look like: Get last weeks work out from the shelves Prepare clay for today’s work – roll your clay, prepare balls for throwing, make the first stage of a pinch pot) Clean up last week’s work and put it on the shelf for bisque firing Check that you have any glazing to do – and do enough of it that you will have time to finish your main project Do the next step of your next project – there might be a further step that can’t be complete immediately, in that case, wrap your work well and put onto the shelves. Letting your work rest for a while can really help keep your work clean and professional looking. Many things require bagging under plastic to keep it ready for work the next week – put your name on the outside of the bag so you can find your work easily. We have stickers and markers. Consider how you want to decorate your work – coloured slip can be applied at a fairly wet stage (remembering that it will make your work even wetter!). Trying to apply slip to dry clay won’t work! If you want to do sgraffito – you will need to keep the work leather hard (a state of dryness where you can still work the clay with a little effort and a little water and care). Step Three – Drying Most of the time your work can go into the rack uncovered to let it dry out for the following week. If you want to continue forming or shaping you will need to double bag your work – put your work on a suitable sized bat and put the bat in a bag so the base of the bag is under the bat, then put another bag over the top of the work and tuck the top of the bag under the bat. If you want to trim (or turn) your thrown work the following week, it should also be double bagged. If your work is large, delicate, or of uneven thicknesses, you should lightly cover your work for drying. When considering the drying process, bare in mind the weather, humidity and wind! The hotter and dryer, the faster things dry and work can dry unevenly in the shelves – this can lead to cracking – another time to lightly cover your work for drying. Step Four – Trimming and Cleaning Up Your work is dry! It is called greenware now and it is at it’s most fragile! Handle everything with two hands. I often refer to soft hands – keep everything gentle and with your fingers spread as much as possible. Try to not pick up things like plates too much, and always with both hands! Before your work can be bisque fired it should be “cleaned up”. You work won’t go into the kiln if it has sharp edges – when glazed, sharp edges turn into razor blades! Use a piece of fly wire to rub the work all over – this will scratch a little so be light handed. Use a knife or metal kidney to scrape any areas that require a bit more dynamic treatment than the fly wire offers! Finally, a very light wipe over with a slightly damp sponge can help soften and soothe all of your edges and dags! Trimming thrown work: If you are planning to trim (or turn) your thrown work (and you should be), make sure you bag it well – your work should be leather hard to almost dry for easiest trimming. Use this step to finish the work completely – use a metal kidney to polish the surface, or a slightly damp sponge to give a freshly thrown look. Wipe the sponge around the rim after trimming, and check the inside of the pot for dags! Trimming slip cast work: Usually I will trim the rims of your work on the wheel the following day to make that stage easier, however you will still need to check your work for lumps and bumps. Last but not least – check that your name is still clearly on the bottom of your work. Step Five – Bisque Firing When the work is completely dry it can go into the bisque kiln. The bisque kiln is fired to 1000°C. This process burns off the water in the clay as well as some of the chemically bound water. The structure of the clay is not altered that much at this temperature. Inside the bisque kiln, the work is stacked a little, small bowl inside a larger bowl and onto a heavy plate. Smaller items like decorations or drink coasters might get stacked several high. Consideration is paid to the weight of the stack and shape of the work. A bisque kiln can fire about one and a half times the amount of work that the glaze kiln can fire. The firing takes about 10 hours to complete the cycle and about two days to cool down. Once it has been emptied the work is placed in the glaze room ready for you to decorate! Step Six – Glazing Decorating your work with colour can be a lot of fun – and time consuming! There are three main options for surface treatment at this stage: Oxide Washes Underglazes Glazes Washes and underglazes do not “glaze” the work – It will still need a layer of glaze to fully seal the clay (washes don’t need glaze on surfaces not designed for food or liquid as they can gloss up a little on their own). Underglazes are stable colourants that turn out pretty much how they look in the jar. They can be mixed with each other to form other colours and can be used like water colours to paint onto your work. Mostly they should have a clear glaze on top to seal them. Oxides are a different species – the pink oxide (cobalt) wash turns out bright blue for instance. They don’t always need a glaze on top, and some glazes can change the colour of the wash! The glazes need no other “glaze” on top! Be careful of unknown glaze interactions – you can put any combination of glaze in a bowl or on a plate, but only a single glaze on the outside of any vertical surface! Glazes are a chemical reaction under heat. We don’t know the exact chemicals in the Mayco glazes we use. I can guess by the way they interact with each other, however, on the whole, you need to test every idea you have, and not run the test on a vertical surface! Simply put, glaze is a layer of glass like substance that bonds with the clay underneath. Clay is made of silica, alumina and water. Glaze is made of mostly silica. Silica has a melting point of 1700°C and we fire to 1240°C. The silica requires a “flux” to help it melt at the lower temperature. Fluxes can be all sorts of chemicals – a common one is calcium – calcium has a melting point of 2500°C, however, together they both melt at a much lower temperature! Colourants are metal oxides like cobalt (blue), chrome (green through black), copper (green, blue, even red!), manganese (black, purple and pink) iron (red brown), etc. Different chemicals in the glaze can have dramatic effects. for example, barium carbonate (which we don’t use) turns manganese bright pink! Other elements can turn manganese dioxide brown, blue, purple and reddish brown. Manganese dioxide is a flux in and of itself as well. So, glazes that get their black and purple colours, often interact with other glazes and RUN! Our mirror black is a good example – it mixes really well with many glazes because it fluxes them – causes them to melt faster. It will also bring out many beautiful colours in the glazes because it’s black colouring most definitely comes from manganese dioxide! Glaze chemistry is a whole subject on it’s own! We use commercial Mayco glazes on purpose – for their huge range of colour possibilities, stability, cool interactions, artistic freedom with the ability to easily brush the glazes on and ease of use. We currently have almost 50 glazes on hand! A major project is to test the interactions of all glazes with each other. That is 2,500 test tiles!!!! I’m going to make the wall behind the wheels the feature wall of pretty colours! Step Seven – Glaze (Gloss or sometimes called “Glost”) Firing Most of the time this is the final stage of making your creation (but not always!) The glaze kiln goes to 1240°C. This is called cone 6, or midrange. It is the low end of stoneware temperatures. Stoneware clays and glazes are typically fired at cone 8 – 10, that is 1260 – 1290°C. The energy requirement to go from 1240°C to 1280°C is almost a 30% more! Our clay is formulated to vitrify (mature, turn “glass-like”) at 1240°, as are our glazes. A glaze kiln take around 12 hours to reach temperature and two to three days to cool down. Sometimes a third firing process is required – this is for decoration that is added to work after the glaze firing. For example – adding precious metals and lustres. this firing temperature is usually around 600 – 800°C depending upon the techniques being used. There are many students interested in gold and silver trims – we will be doing this third type of firing soon! After firing your work will be in the student finished work shelves. Remember to pay for it before you head out the door! There is a small extra charge for using porcelain clay (it’s more than twice the price of regular clay), and for any third firing process! Once your work has been fired it can not turn back into clay for millennia – so don’t fire it if you don’t like it! Put it in the bucket for recycling. https://firebirdstudios.com.au/the-process-of-making-pottery/ The bowl is an example of kitchenware used in the 19th century and still in use today.Bowl white ceramic. Crack on side. Badly stained.Backstamp very faint and unable to be read.flagstaff hill, warrnambool, shipwrecked-coast, flagstaff-hill, flagstaff-hill-maritime-museum, maritime-museum, shipwreck-coast, flagstaff-hill-maritime-village, mixing bowl, food preparation, kitchen equipment, ceramic -
 Flagstaff Hill Maritime Museum and Village
Domestic object - Bowl
The Process of Making Pottery Decorating, Firing, Glazing, Making, Technical There is a rhythm and flow to clay. It can’t be done all at once! Even the making process! It can take weeks to get everything done, especially if you can only work on your pottery once a week! Even though we have three hour classes, it’s often just not enough time! Here is an overview of some of the processes so you have a bit more grasp on some of the technical stuff! Step One – Design There are SO many ideas out there for making stuff in clay! From delicate porcelain jewellery, through to heavy sculptural work and everything in between. Deciding your direction is sometimes not that easy – when you first start, try everything, you will naturally gravitate to the style that you enjoy! The options and variations are endless and can get a wee bit overwhelming too! Check in with me before you start to ensure your ideas will work, what order you might do things, how you could achieve the look you are seeking and any other technical data required! Step Two – Making Clay is thixotropic. This means that as you work with it, the clay first gets sloppier and wetter, before is begins to dry in the atmosphere. For most things, you simply can’t do all parts of the project at once. An example of work order might look like: Get last weeks work out from the shelves Prepare clay for today’s work – roll your clay, prepare balls for throwing, make the first stage of a pinch pot) Clean up last week’s work and put it on the shelf for bisque firing Check that you have any glazing to do – and do enough of it that you will have time to finish your main project Do the next step of your next project – there might be a further step that can’t be complete immediately, in that case, wrap your work well and put onto the shelves. Letting your work rest for a while can really help keep your work clean and professional looking. Many things require bagging under plastic to keep it ready for work the next week – put your name on the outside of the bag so you can find your work easily. We have stickers and markers. Consider how you want to decorate your work – coloured slip can be applied at a fairly wet stage (remembering that it will make your work even wetter!). Trying to apply slip to dry clay won’t work! If you want to do sgraffito – you will need to keep the work leather hard (a state of dryness where you can still work the clay with a little effort and a little water and care). Step Three – Drying Most of the time your work can go into the rack uncovered to let it dry out for the following week. If you want to continue forming or shaping you will need to double bag your work – put your work on a suitable sized bat and put the bat in a bag so the base of the bag is under the bat, then put another bag over the top of the work and tuck the top of the bag under the bat. If you want to trim (or turn) your thrown work the following week, it should also be double bagged. If your work is large, delicate, or of uneven thicknesses, you should lightly cover your work for drying. When considering the drying process, bare in mind the weather, humidity and wind! The hotter and dryer, the faster things dry and work can dry unevenly in the shelves – this can lead to cracking – another time to lightly cover your work for drying. Step Four – Trimming and Cleaning Up Your work is dry! It is called greenware now and it is at it’s most fragile! Handle everything with two hands. I often refer to soft hands – keep everything gentle and with your fingers spread as much as possible. Try to not pick up things like plates too much, and always with both hands! Before your work can be bisque fired it should be “cleaned up”. You work won’t go into the kiln if it has sharp edges – when glazed, sharp edges turn into razor blades! Use a piece of fly wire to rub the work all over – this will scratch a little so be light handed. Use a knife or metal kidney to scrape any areas that require a bit more dynamic treatment than the fly wire offers! Finally, a very light wipe over with a slightly damp sponge can help soften and soothe all of your edges and dags! Trimming thrown work: If you are planning to trim (or turn) your thrown work (and you should be), make sure you bag it well – your work should be leather hard to almost dry for easiest trimming. Use this step to finish the work completely – use a metal kidney to polish the surface, or a slightly damp sponge to give a freshly thrown look. Wipe the sponge around the rim after trimming, and check the inside of the pot for dags! Trimming slip cast work: Usually I will trim the rims of your work on the wheel the following day to make that stage easier, however you will still need to check your work for lumps and bumps. Last but not least – check that your name is still clearly on the bottom of your work. Step Five – Bisque Firing When the work is completely dry it can go into the bisque kiln. The bisque kiln is fired to 1000°C. This process burns off the water in the clay as well as some of the chemically bound water. The structure of the clay is not altered that much at this temperature. Inside the bisque kiln, the work is stacked a little, small bowl inside a larger bowl and onto a heavy plate. Smaller items like decorations or drink coasters might get stacked several high. Consideration is paid to the weight of the stack and shape of the work. A bisque kiln can fire about one and a half times the amount of work that the glaze kiln can fire. The firing takes about 10 hours to complete the cycle and about two days to cool down. Once it has been emptied the work is placed in the glaze room ready for you to decorate! Step Six – Glazing Decorating your work with colour can be a lot of fun – and time consuming! There are three main options for surface treatment at this stage: Oxide Washes Underglazes Glazes Washes and underglazes do not “glaze” the work – It will still need a layer of glaze to fully seal the clay (washes don’t need glaze on surfaces not designed for food or liquid as they can gloss up a little on their own). Underglazes are stable colourants that turn out pretty much how they look in the jar. They can be mixed with each other to form other colours and can be used like water colours to paint onto your work. Mostly they should have a clear glaze on top to seal them. Oxides are a different species – the pink oxide (cobalt) wash turns out bright blue for instance. They don’t always need a glaze on top, and some glazes can change the colour of the wash! The glazes need no other “glaze” on top! Be careful of unknown glaze interactions – you can put any combination of glaze in a bowl or on a plate, but only a single glaze on the outside of any vertical surface! Glazes are a chemical reaction under heat. We don’t know the exact chemicals in the Mayco glazes we use. I can guess by the way they interact with each other, however, on the whole, you need to test every idea you have, and not run the test on a vertical surface! Simply put, glaze is a layer of glass like substance that bonds with the clay underneath. Clay is made of silica, alumina and water. Glaze is made of mostly silica. Silica has a melting point of 1700°C and we fire to 1240°C. The silica requires a “flux” to help it melt at the lower temperature. Fluxes can be all sorts of chemicals – a common one is calcium – calcium has a melting point of 2500°C, however, together they both melt at a much lower temperature! Colourants are metal oxides like cobalt (blue), chrome (green through black), copper (green, blue, even red!), manganese (black, purple and pink) iron (red brown), etc. Different chemicals in the glaze can have dramatic effects. for example, barium carbonate (which we don’t use) turns manganese bright pink! Other elements can turn manganese dioxide brown, blue, purple and reddish brown. Manganese dioxide is a flux in and of itself as well. So, glazes that get their black and purple colours, often interact with other glazes and RUN! Our mirror black is a good example – it mixes really well with many glazes because it fluxes them – causes them to melt faster. It will also bring out many beautiful colours in the glazes because it’s black colouring most definitely comes from manganese dioxide! Glaze chemistry is a whole subject on it’s own! We use commercial Mayco glazes on purpose – for their huge range of colour possibilities, stability, cool interactions, artistic freedom with the ability to easily brush the glazes on and ease of use. We currently have almost 50 glazes on hand! A major project is to test the interactions of all glazes with each other. That is 2,500 test tiles!!!! I’m going to make the wall behind the wheels the feature wall of pretty colours! Step Seven – Glaze (Gloss or sometimes called “Glost”) Firing Most of the time this is the final stage of making your creation (but not always!) The glaze kiln goes to 1240°C. This is called cone 6, or midrange. It is the low end of stoneware temperatures. Stoneware clays and glazes are typically fired at cone 8 – 10, that is 1260 – 1290°C. The energy requirement to go from 1240°C to 1280°C is almost a 30% more! Our clay is formulated to vitrify (mature, turn “glass-like”) at 1240°, as are our glazes. A glaze kiln take around 12 hours to reach temperature and two to three days to cool down. Sometimes a third firing process is required – this is for decoration that is added to work after the glaze firing. For example – adding precious metals and lustres. this firing temperature is usually around 600 – 800°C depending upon the techniques being used. There are many students interested in gold and silver trims – we will be doing this third type of firing soon! After firing your work will be in the student finished work shelves. Remember to pay for it before you head out the door! There is a small extra charge for using porcelain clay (it’s more than twice the price of regular clay), and for any third firing process! Once your work has been fired it can not turn back into clay for millennia – so don’t fire it if you don’t like it! Put it in the bucket for recycling. https://firebirdstudios.com.au/the-process-of-making-pottery/ This bowl is an example of kitchenware used in the 19th century and still in use today.Bowl white ceramic plain that has two sets of edging around lip. Inside bowl has plaster designed to look like cooking mixture.flagstaff hill, warrnambool, shipwrecked-coast, flagstaff-hill, flagstaff-hill-maritime-museum, maritime-museum, shipwreck-coast, flagstaff-hill-maritime-village, kitchen equipment, ceramic -
 Flagstaff Hill Maritime Museum and Village
Domestic object - Bowl, J & G Meakin, Late 19th or early 20th Century
The Process of Making Pottery Decorating, Firing, Glazing, Making, Technical There is a rhythm and flow to clay. It can’t be done all at once! Even the making process! It can take weeks to get everything done, especially if you can only work on your pottery once a week! Even though we have three hour classes, it’s often just not enough time! Here is an overview of some of the processes so you have a bit more grasp on some of the technical stuff! Step One – Design There are SO many ideas out there for making stuff in clay! From delicate porcelain jewellery, through to heavy sculptural work and everything in between. Deciding your direction is sometimes not that easy – when you first start, try everything, you will naturally gravitate to the style that you enjoy! The options and variations are endless and can get a wee bit overwhelming too! Check in with me before you start to ensure your ideas will work, what order you might do things, how you could achieve the look you are seeking and any other technical data required! Step Two – Making Clay is thixotropic. This means that as you work with it, the clay first gets sloppier and wetter, before is begins to dry in the atmosphere. For most things, you simply can’t do all parts of the project at once. An example of work order might look like: Get last weeks work out from the shelves Prepare clay for today’s work – roll your clay, prepare balls for throwing, make the first stage of a pinch pot) Clean up last week’s work and put it on the shelf for bisque firing Check that you have any glazing to do – and do enough of it that you will have time to finish your main project Do the next step of your next project – there might be a further step that can’t be complete immediately, in that case, wrap your work well and put onto the shelves. Letting your work rest for a while can really help keep your work clean and professional looking. Many things require bagging under plastic to keep it ready for work the next week – put your name on the outside of the bag so you can find your work easily. We have stickers and markers. Consider how you want to decorate your work – coloured slip can be applied at a fairly wet stage (remembering that it will make your work even wetter!). Trying to apply slip to dry clay won’t work! If you want to do sgraffito – you will need to keep the work leather hard (a state of dryness where you can still work the clay with a little effort and a little water and care). Step Three – Drying Most of the time your work can go into the rack uncovered to let it dry out for the following week. If you want to continue forming or shaping you will need to double bag your work – put your work on a suitable sized bat and put the bat in a bag so the base of the bag is under the bat, then put another bag over the top of the work and tuck the top of the bag under the bat. If you want to trim (or turn) your thrown work the following week, it should also be double bagged. If your work is large, delicate, or of uneven thicknesses, you should lightly cover your work for drying. When considering the drying process, bare in mind the weather, humidity and wind! The hotter and dryer, the faster things dry and work can dry unevenly in the shelves – this can lead to cracking – another time to lightly cover your work for drying. Step Four – Trimming and Cleaning Up Your work is dry! It is called greenware now and it is at it’s most fragile! Handle everything with two hands. I often refer to soft hands – keep everything gentle and with your fingers spread as much as possible. Try to not pick up things like plates too much, and always with both hands! Before your work can be bisque fired it should be “cleaned up”. You work won’t go into the kiln if it has sharp edges – when glazed, sharp edges turn into razor blades! Use a piece of fly wire to rub the work all over – this will scratch a little so be light handed. Use a knife or metal kidney to scrape any areas that require a bit more dynamic treatment than the fly wire offers! Finally, a very light wipe over with a slightly damp sponge can help soften and soothe all of your edges and dags! Trimming thrown work: If you are planning to trim (or turn) your thrown work (and you should be), make sure you bag it well – your work should be leather hard to almost dry for easiest trimming. Use this step to finish the work completely – use a metal kidney to polish the surface, or a slightly damp sponge to give a freshly thrown look. Wipe the sponge around the rim after trimming, and check the inside of the pot for dags! Trimming slip cast work: Usually I will trim the rims of your work on the wheel the following day to make that stage easier, however you will still need to check your work for lumps and bumps. Last but not least – check that your name is still clearly on the bottom of your work. Step Five – Bisque Firing When the work is completely dry it can go into the bisque kiln. The bisque kiln is fired to 1000°C. This process burns off the water in the clay as well as some of the chemically bound water. The structure of the clay is not altered that much at this temperature. Inside the bisque kiln, the work is stacked a little, small bowl inside a larger bowl and onto a heavy plate. Smaller items like decorations or drink coasters might get stacked several high. Consideration is paid to the weight of the stack and shape of the work. A bisque kiln can fire about one and a half times the amount of work that the glaze kiln can fire. The firing takes about 10 hours to complete the cycle and about two days to cool down. Once it has been emptied the work is placed in the glaze room ready for you to decorate! Step Six – Glazing Decorating your work with colour can be a lot of fun – and time consuming! There are three main options for surface treatment at this stage: Oxide Washes Underglazes Glazes Washes and underglazes do not “glaze” the work – It will still need a layer of glaze to fully seal the clay (washes don’t need glaze on surfaces not designed for food or liquid as they can gloss up a little on their own). Underglazes are stable colourants that turn out pretty much how they look in the jar. They can be mixed with each other to form other colours and can be used like water colours to paint onto your work. Mostly they should have a clear glaze on top to seal them. Oxides are a different species – the pink oxide (cobalt) wash turns out bright blue for instance. They don’t always need a glaze on top, and some glazes can change the colour of the wash! The glazes need no other “glaze” on top! Be careful of unknown glaze interactions – you can put any combination of glaze in a bowl or on a plate, but only a single glaze on the outside of any vertical surface! Glazes are a chemical reaction under heat. We don’t know the exact chemicals in the Mayco glazes we use. I can guess by the way they interact with each other, however, on the whole, you need to test every idea you have, and not run the test on a vertical surface! Simply put, glaze is a layer of glass like substance that bonds with the clay underneath. Clay is made of silica, alumina and water. Glaze is made of mostly silica. Silica has a melting point of 1700°C and we fire to 1240°C. The silica requires a “flux” to help it melt at the lower temperature. Fluxes can be all sorts of chemicals – a common one is calcium – calcium has a melting point of 2500°C, however, together they both melt at a much lower temperature! Colourants are metal oxides like cobalt (blue), chrome (green through black), copper (green, blue, even red!), manganese (black, purple and pink) iron (red brown), etc. Different chemicals in the glaze can have dramatic effects. for example, barium carbonate (which we don’t use) turns manganese bright pink! Other elements can turn manganese dioxide brown, blue, purple and reddish brown. Manganese dioxide is a flux in and of itself as well. So, glazes that get their black and purple colours, often interact with other glazes and RUN! Our mirror black is a good example – it mixes really well with many glazes because it fluxes them – causes them to melt faster. It will also bring out many beautiful colours in the glazes because it’s black colouring most definitely comes from manganese dioxide! Glaze chemistry is a whole subject on it’s own! We use commercial Mayco glazes on purpose – for their huge range of colour possibilities, stability, cool interactions, artistic freedom with the ability to easily brush the glazes on and ease of use. We currently have almost 50 glazes on hand! A major project is to test the interactions of all glazes with each other. That is 2,500 test tiles!!!! I’m going to make the wall behind the wheels the feature wall of pretty colours! Step Seven – Glaze (Gloss or sometimes called “Glost”) Firing Most of the time this is the final stage of making your creation (but not always!) The glaze kiln goes to 1240°C. This is called cone 6, or midrange. It is the low end of stoneware temperatures. Stoneware clays and glazes are typically fired at cone 8 – 10, that is 1260 – 1290°C. The energy requirement to go from 1240°C to 1280°C is almost a 30% more! Our clay is formulated to vitrify (mature, turn “glass-like”) at 1240°, as are our glazes. A glaze kiln take around 12 hours to reach temperature and two to three days to cool down. Sometimes a third firing process is required – this is for decoration that is added to work after the glaze firing. For example – adding precious metals and lustres. this firing temperature is usually around 600 – 800°C depending upon the techniques being used. There are many students interested in gold and silver trims – we will be doing this third type of firing soon! After firing your work will be in the student finished work shelves. Remember to pay for it before you head out the door! There is a small extra charge for using porcelain clay (it’s more than twice the price of regular clay), and for any third firing process! Once your work has been fired it can not turn back into clay for millennia – so don’t fire it if you don’t like it! Put it in the bucket for recycling. https://firebirdstudios.com.au/the-process-of-making-pottery/This bowl was made by renowned pottery company J & G Meakin of England. The firm was established in the mid-1800's. The bowl is an example of kitchenware used in the 19th century and still in use today.Bowl; white ceramic, round and tapering inwards towards base. Made by J and G Meakin England.On base, 'Ironstone China Reg SOL 391413' with symbolflagstaff hill, flagstaff hill maritime museum and village, warrnambool, maritime museum, maritime village, great ocean road, shipwreck coast, mixing bowl, food preparation, j & g meakin, pottery, stoke-on-trent, kitchen equipment, ceramic -
 Flagstaff Hill Maritime Museum and Village
Domestic object - Plate
The Process of Making Pottery Decorating, Firing, Glazing, Making, Technical There is a rhythm and flow to clay. It can’t be done all at once! Even the making process! It can take weeks to get everything done, especially if you can only work on your pottery once a week! Even though we have three hour classes, it’s often just not enough time! Here is an overview of some of the processes so you have a bit more grasp on some of the technical stuff! Step One – Design There are SO many ideas out there for making stuff in clay! From delicate porcelain jewellery, through to heavy sculptural work and everything in between. Deciding your direction is sometimes not that easy – when you first start, try everything, you will naturally gravitate to the style that you enjoy! The options and variations are endless and can get a wee bit overwhelming too! Check in with me before you start to ensure your ideas will work, what order you might do things, how you could achieve the look you are seeking and any other technical data required! Step Two – Making Clay is thixotropic. This means that as you work with it, the clay first gets sloppier and wetter, before is begins to dry in the atmosphere. For most things, you simply can’t do all parts of the project at once. An example of work order might look like: Get last weeks work out from the shelves Prepare clay for today’s work – roll your clay, prepare balls for throwing, make the first stage of a pinch pot) Clean up last week’s work and put it on the shelf for bisque firing Check that you have any glazing to do – and do enough of it that you will have time to finish your main project Do the next step of your next project – there might be a further step that can’t be complete immediately, in that case, wrap your work well and put onto the shelves. Letting your work rest for a while can really help keep your work clean and professional looking. Many things require bagging under plastic to keep it ready for work the next week – put your name on the outside of the bag so you can find your work easily. We have stickers and markers. Consider how you want to decorate your work – coloured slip can be applied at a fairly wet stage (remembering that it will make your work even wetter!). Trying to apply slip to dry clay won’t work! If you want to do sgraffito – you will need to keep the work leather hard (a state of dryness where you can still work the clay with a little effort and a little water and care). Step Three – Drying Most of the time your work can go into the rack uncovered to let it dry out for the following week. If you want to continue forming or shaping you will need to double bag your work – put your work on a suitable sized bat and put the bat in a bag so the base of the bag is under the bat, then put another bag over the top of the work and tuck the top of the bag under the bat. If you want to trim (or turn) your thrown work the following week, it should also be double bagged. If your work is large, delicate, or of uneven thicknesses, you should lightly cover your work for drying. When considering the drying process, bare in mind the weather, humidity and wind! The hotter and dryer, the faster things dry and work can dry unevenly in the shelves – this can lead to cracking – another time to lightly cover your work for drying. Step Four – Trimming and Cleaning Up Your work is dry! It is called greenware now and it is at it’s most fragile! Handle everything with two hands. I often refer to soft hands – keep everything gentle and with your fingers spread as much as possible. Try to not pick up things like plates too much, and always with both hands! Before your work can be bisque fired it should be “cleaned up”. You work won’t go into the kiln if it has sharp edges – when glazed, sharp edges turn into razor blades! Use a piece of fly wire to rub the work all over – this will scratch a little so be light handed. Use a knife or metal kidney to scrape any areas that require a bit more dynamic treatment than the fly wire offers! Finally, a very light wipe over with a slightly damp sponge can help soften and soothe all of your edges and dags! Trimming thrown work: If you are planning to trim (or turn) your thrown work (and you should be), make sure you bag it well – your work should be leather hard to almost dry for easiest trimming. Use this step to finish the work completely – use a metal kidney to polish the surface, or a slightly damp sponge to give a freshly thrown look. Wipe the sponge around the rim after trimming, and check the inside of the pot for dags! Trimming slip cast work: Usually I will trim the rims of your work on the wheel the following day to make that stage easier, however you will still need to check your work for lumps and bumps. Last but not least – check that your name is still clearly on the bottom of your work. Step Five – Bisque Firing When the work is completely dry it can go into the bisque kiln. The bisque kiln is fired to 1000°C. This process burns off the water in the clay as well as some of the chemically bound water. The structure of the clay is not altered that much at this temperature. Inside the bisque kiln, the work is stacked a little, small bowl inside a larger bowl and onto a heavy plate. Smaller items like decorations or drink coasters might get stacked several high. Consideration is paid to the weight of the stack and shape of the work. A bisque kiln can fire about one and a half times the amount of work that the glaze kiln can fire. The firing takes about 10 hours to complete the cycle and about two days to cool down. Once it has been emptied the work is placed in the glaze room ready for you to decorate! Step Six – Glazing Decorating your work with colour can be a lot of fun – and time consuming! There are three main options for surface treatment at this stage: Oxide Washes Underglazes Glazes Washes and underglazes do not “glaze” the work – It will still need a layer of glaze to fully seal the clay (washes don’t need glaze on surfaces not designed for food or liquid as they can gloss up a little on their own). Underglazes are stable colourants that turn out pretty much how they look in the jar. They can be mixed with each other to form other colours and can be used like water colours to paint onto your work. Mostly they should have a clear glaze on top to seal them. Oxides are a different species – the pink oxide (cobalt) wash turns out bright blue for instance. They don’t always need a glaze on top, and some glazes can change the colour of the wash! The glazes need no other “glaze” on top! Be careful of unknown glaze interactions – you can put any combination of glaze in a bowl or on a plate, but only a single glaze on the outside of any vertical surface! Glazes are a chemical reaction under heat. We don’t know the exact chemicals in the Mayco glazes we use. I can guess by the way they interact with each other, however, on the whole, you need to test every idea you have, and not run the test on a vertical surface! Simply put, glaze is a layer of glass like substance that bonds with the clay underneath. Clay is made of silica, alumina and water. Glaze is made of mostly silica. Silica has a melting point of 1700°C and we fire to 1240°C. The silica requires a “flux” to help it melt at the lower temperature. Fluxes can be all sorts of chemicals – a common one is calcium – calcium has a melting point of 2500°C, however, together they both melt at a much lower temperature! Colourants are metal oxides like cobalt (blue), chrome (green through black), copper (green, blue, even red!), manganese (black, purple and pink) iron (red brown), etc. Different chemicals in the glaze can have dramatic effects. for example, barium carbonate (which we don’t use) turns manganese bright pink! Other elements can turn manganese dioxide brown, blue, purple and reddish brown. Manganese dioxide is a flux in and of itself as well. So, glazes that get their black and purple colours, often interact with other glazes and RUN! Our mirror black is a good example – it mixes really well with many glazes because it fluxes them – causes them to melt faster. It will also bring out many beautiful colours in the glazes because it’s black colouring most definitely comes from manganese dioxide! Glaze chemistry is a whole subject on it’s own! We use commercial Mayco glazes on purpose – for their huge range of colour possibilities, stability, cool interactions, artistic freedom with the ability to easily brush the glazes on and ease of use. We currently have almost 50 glazes on hand! A major project is to test the interactions of all glazes with each other. That is 2,500 test tiles!!!! I’m going to make the wall behind the wheels the feature wall of pretty colours! Step Seven – Glaze (Gloss or sometimes called “Glost”) Firing Most of the time this is the final stage of making your creation (but not always!) The glaze kiln goes to 1240°C. This is called cone 6, or midrange. It is the low end of stoneware temperatures. Stoneware clays and glazes are typically fired at cone 8 – 10, that is 1260 – 1290°C. The energy requirement to go from 1240°C to 1280°C is almost a 30% more! Our clay is formulated to vitrify (mature, turn “glass-like”) at 1240°, as are our glazes. A glaze kiln take around 12 hours to reach temperature and two to three days to cool down. Sometimes a third firing process is required – this is for decoration that is added to work after the glaze firing. For example – adding precious metals and lustres. this firing temperature is usually around 600 – 800°C depending upon the techniques being used. There are many students interested in gold and silver trims – we will be doing this third type of firing soon! After firing your work will be in the student finished work shelves. Remember to pay for it before you head out the door! There is a small extra charge for using porcelain clay (it’s more than twice the price of regular clay), and for any third firing process! Once your work has been fired it can not turn back into clay for millennia – so don’t fire it if you don’t like it! Put it in the bucket for recycling. https://firebirdstudios.com.au/the-process-of-making-pottery/Ceramics have evolved over thousands of years.White earthenware dinner plate. Crazing evident all over.Backstamped ‘Made in England S LTD’flagstaff hill, warrnambool, shipwrecked-coast, flagstaff-hill, flagstaff-hill-maritime-museum, maritime-museum, shipwreck-coast, flagstaff-hill-maritime-village, ceramics, tableware -
 Flagstaff Hill Maritime Museum and Village
Domestic object - Plate, Johnson Bros
The Process of Making Pottery Decorating, Firing, Glazing, Making, Technical There is a rhythm and flow to clay. It can’t be done all at once! Even the making process! It can take weeks to get everything done, especially if you can only work on your pottery once a week! Even though we have three hour classes, it’s often just not enough time! Here is an overview of some of the processes so you have a bit more grasp on some of the technical stuff! Step One – Design There are SO many ideas out there for making stuff in clay! From delicate porcelain jewellery, through to heavy sculptural work and everything in between. Deciding your direction is sometimes not that easy – when you first start, try everything, you will naturally gravitate to the style that you enjoy! The options and variations are endless and can get a wee bit overwhelming too! Check in with me before you start to ensure your ideas will work, what order you might do things, how you could achieve the look you are seeking and any other technical data required! Step Two – Making Clay is thixotropic. This means that as you work with it, the clay first gets sloppier and wetter, before is begins to dry in the atmosphere. For most things, you simply can’t do all parts of the project at once. An example of work order might look like: Get last weeks work out from the shelves Prepare clay for today’s work – roll your clay, prepare balls for throwing, make the first stage of a pinch pot) Clean up last week’s work and put it on the shelf for bisque firing Check that you have any glazing to do – and do enough of it that you will have time to finish your main project Do the next step of your next project – there might be a further step that can’t be complete immediately, in that case, wrap your work well and put onto the shelves. Letting your work rest for a while can really help keep your work clean and professional looking. Many things require bagging under plastic to keep it ready for work the next week – put your name on the outside of the bag so you can find your work easily. We have stickers and markers. Consider how you want to decorate your work – coloured slip can be applied at a fairly wet stage (remembering that it will make your work even wetter!). Trying to apply slip to dry clay won’t work! If you want to do sgraffito – you will need to keep the work leather hard (a state of dryness where you can still work the clay with a little effort and a little water and care). Step Three – Drying Most of the time your work can go into the rack uncovered to let it dry out for the following week. If you want to continue forming or shaping you will need to double bag your work – put your work on a suitable sized bat and put the bat in a bag so the base of the bag is under the bat, then put another bag over the top of the work and tuck the top of the bag under the bat. If you want to trim (or turn) your thrown work the following week, it should also be double bagged. If your work is large, delicate, or of uneven thicknesses, you should lightly cover your work for drying. When considering the drying process, bare in mind the weather, humidity and wind! The hotter and dryer, the faster things dry and work can dry unevenly in the shelves – this can lead to cracking – another time to lightly cover your work for drying. Step Four – Trimming and Cleaning Up Your work is dry! It is called greenware now and it is at it’s most fragile! Handle everything with two hands. I often refer to soft hands – keep everything gentle and with your fingers spread as much as possible. Try to not pick up things like plates too much, and always with both hands! Before your work can be bisque fired it should be “cleaned up”. You work won’t go into the kiln if it has sharp edges – when glazed, sharp edges turn into razor blades! Use a piece of fly wire to rub the work all over – this will scratch a little so be light handed. Use a knife or metal kidney to scrape any areas that require a bit more dynamic treatment than the fly wire offers! Finally, a very light wipe over with a slightly damp sponge can help soften and soothe all of your edges and dags! Trimming thrown work: If you are planning to trim (or turn) your thrown work (and you should be), make sure you bag it well – your work should be leather hard to almost dry for easiest trimming. Use this step to finish the work completely – use a metal kidney to polish the surface, or a slightly damp sponge to give a freshly thrown look. Wipe the sponge around the rim after trimming, and check the inside of the pot for dags! Trimming slip cast work: Usually I will trim the rims of your work on the wheel the following day to make that stage easier, however you will still need to check your work for lumps and bumps. Last but not least – check that your name is still clearly on the bottom of your work. Step Five – Bisque Firing When the work is completely dry it can go into the bisque kiln. The bisque kiln is fired to 1000°C. This process burns off the water in the clay as well as some of the chemically bound water. The structure of the clay is not altered that much at this temperature. Inside the bisque kiln, the work is stacked a little, small bowl inside a larger bowl and onto a heavy plate. Smaller items like decorations or drink coasters might get stacked several high. Consideration is paid to the weight of the stack and shape of the work. A bisque kiln can fire about one and a half times the amount of work that the glaze kiln can fire. The firing takes about 10 hours to complete the cycle and about two days to cool down. Once it has been emptied the work is placed in the glaze room ready for you to decorate! Step Six – Glazing Decorating your work with colour can be a lot of fun – and time consuming! There are three main options for surface treatment at this stage: Oxide Washes Underglazes Glazes Washes and underglazes do not “glaze” the work – It will still need a layer of glaze to fully seal the clay (washes don’t need glaze on surfaces not designed for food or liquid as they can gloss up a little on their own). Underglazes are stable colourants that turn out pretty much how they look in the jar. They can be mixed with each other to form other colours and can be used like water colours to paint onto your work. Mostly they should have a clear glaze on top to seal them. Oxides are a different species – the pink oxide (cobalt) wash turns out bright blue for instance. They don’t always need a glaze on top, and some glazes can change the colour of the wash! The glazes need no other “glaze” on top! Be careful of unknown glaze interactions – you can put any combination of glaze in a bowl or on a plate, but only a single glaze on the outside of any vertical surface! Glazes are a chemical reaction under heat. We don’t know the exact chemicals in the Mayco glazes we use. I can guess by the way they interact with each other, however, on the whole, you need to test every idea you have, and not run the test on a vertical surface! Simply put, glaze is a layer of glass like substance that bonds with the clay underneath. Clay is made of silica, alumina and water. Glaze is made of mostly silica. Silica has a melting point of 1700°C and we fire to 1240°C. The silica requires a “flux” to help it melt at the lower temperature. Fluxes can be all sorts of chemicals – a common one is calcium – calcium has a melting point of 2500°C, however, together they both melt at a much lower temperature! Colourants are metal oxides like cobalt (blue), chrome (green through black), copper (green, blue, even red!), manganese (black, purple and pink) iron (red brown), etc. Different chemicals in the glaze can have dramatic effects. for example, barium carbonate (which we don’t use) turns manganese bright pink! Other elements can turn manganese dioxide brown, blue, purple and reddish brown. Manganese dioxide is a flux in and of itself as well. So, glazes that get their black and purple colours, often interact with other glazes and RUN! Our mirror black is a good example – it mixes really well with many glazes because it fluxes them – causes them to melt faster. It will also bring out many beautiful colours in the glazes because it’s black colouring most definitely comes from manganese dioxide! Glaze chemistry is a whole subject on it’s own! We use commercial Mayco glazes on purpose – for their huge range of colour possibilities, stability, cool interactions, artistic freedom with the ability to easily brush the glazes on and ease of use. We currently have almost 50 glazes on hand! A major project is to test the interactions of all glazes with each other. That is 2,500 test tiles!!!! I’m going to make the wall behind the wheels the feature wall of pretty colours! Step Seven – Glaze (Gloss or sometimes called “Glost”) Firing Most of the time this is the final stage of making your creation (but not always!) The glaze kiln goes to 1240°C. This is called cone 6, or midrange. It is the low end of stoneware temperatures. Stoneware clays and glazes are typically fired at cone 8 – 10, that is 1260 – 1290°C. The energy requirement to go from 1240°C to 1280°C is almost a 30% more! Our clay is formulated to vitrify (mature, turn “glass-like”) at 1240°, as are our glazes. A glaze kiln take around 12 hours to reach temperature and two to three days to cool down. Sometimes a third firing process is required – this is for decoration that is added to work after the glaze firing. For example – adding precious metals and lustres. this firing temperature is usually around 600 – 800°C depending upon the techniques being used. There are many students interested in gold and silver trims – we will be doing this third type of firing soon! After firing your work will be in the student finished work shelves. Remember to pay for it before you head out the door! There is a small extra charge for using porcelain clay (it’s more than twice the price of regular clay), and for any third firing process! Once your work has been fired it can not turn back into clay for millennia – so don’t fire it if you don’t like it! Put it in the bucket for recycling. https://firebirdstudios.com.au/the-process-of-making-pottery/Ceramics have evolved over thousands of years.A white earthenware side plate with a gadroon edge. Has water marks and chips on front.‘Johnson Bros England Reg No 15587’flagstaff hill, warrnambool, shipwrecked-coast, flagstaff-hill, flagstaff-hill-maritime-museum, maritime-museum, shipwreck-coast, flagstaff-hill-maritime-village, johnson bros, ceramics, tableware -
 Flagstaff Hill Maritime Museum and Village
Domestic object - Plate, Alfred Meakin
The Process of Making Pottery Decorating, Firing, Glazing, Making, Technical There is a rhythm and flow to clay. It can’t be done all at once! Even the making process! It can take weeks to get everything done, especially if you can only work on your pottery once a week! Even though we have three hour classes, it’s often just not enough time! Here is an overview of some of the processes so you have a bit more grasp on some of the technical stuff! Step One – Design There are SO many ideas out there for making stuff in clay! From delicate porcelain jewellery, through to heavy sculptural work and everything in between. Deciding your direction is sometimes not that easy – when you first start, try everything, you will naturally gravitate to the style that you enjoy! The options and variations are endless and can get a wee bit overwhelming too! Check in with me before you start to ensure your ideas will work, what order you might do things, how you could achieve the look you are seeking and any other technical data required! Step Two – Making Clay is thixotropic. This means that as you work with it, the clay first gets sloppier and wetter, before is begins to dry in the atmosphere. For most things, you simply can’t do all parts of the project at once. An example of work order might look like: Get last weeks work out from the shelves Prepare clay for today’s work – roll your clay, prepare balls for throwing, make the first stage of a pinch pot) Clean up last week’s work and put it on the shelf for bisque firing Check that you have any glazing to do – and do enough of it that you will have time to finish your main project Do the next step of your next project – there might be a further step that can’t be complete immediately, in that case, wrap your work well and put onto the shelves. Letting your work rest for a while can really help keep your work clean and professional looking. Many things require bagging under plastic to keep it ready for work the next week – put your name on the outside of the bag so you can find your work easily. We have stickers and markers. Consider how you want to decorate your work – coloured slip can be applied at a fairly wet stage (remembering that it will make your work even wetter!). Trying to apply slip to dry clay won’t work! If you want to do sgraffito – you will need to keep the work leather hard (a state of dryness where you can still work the clay with a little effort and a little water and care). Step Three – Drying Most of the time your work can go into the rack uncovered to let it dry out for the following week. If you want to continue forming or shaping you will need to double bag your work – put your work on a suitable sized bat and put the bat in a bag so the base of the bag is under the bat, then put another bag over the top of the work and tuck the top of the bag under the bat. If you want to trim (or turn) your thrown work the following week, it should also be double bagged. If your work is large, delicate, or of uneven thicknesses, you should lightly cover your work for drying. When considering the drying process, bare in mind the weather, humidity and wind! The hotter and dryer, the faster things dry and work can dry unevenly in the shelves – this can lead to cracking – another time to lightly cover your work for drying. Step Four – Trimming and Cleaning Up Your work is dry! It is called greenware now and it is at it’s most fragile! Handle everything with two hands. I often refer to soft hands – keep everything gentle and with your fingers spread as much as possible. Try to not pick up things like plates too much, and always with both hands! Before your work can be bisque fired it should be “cleaned up”. You work won’t go into the kiln if it has sharp edges – when glazed, sharp edges turn into razor blades! Use a piece of fly wire to rub the work all over – this will scratch a little so be light handed. Use a knife or metal kidney to scrape any areas that require a bit more dynamic treatment than the fly wire offers! Finally, a very light wipe over with a slightly damp sponge can help soften and soothe all of your edges and dags! Trimming thrown work: If you are planning to trim (or turn) your thrown work (and you should be), make sure you bag it well – your work should be leather hard to almost dry for easiest trimming. Use this step to finish the work completely – use a metal kidney to polish the surface, or a slightly damp sponge to give a freshly thrown look. Wipe the sponge around the rim after trimming, and check the inside of the pot for dags! Trimming slip cast work: Usually I will trim the rims of your work on the wheel the following day to make that stage easier, however you will still need to check your work for lumps and bumps. Last but not least – check that your name is still clearly on the bottom of your work. Step Five – Bisque Firing When the work is completely dry it can go into the bisque kiln. The bisque kiln is fired to 1000°C. This process burns off the water in the clay as well as some of the chemically bound water. The structure of the clay is not altered that much at this temperature. Inside the bisque kiln, the work is stacked a little, small bowl inside a larger bowl and onto a heavy plate. Smaller items like decorations or drink coasters might get stacked several high. Consideration is paid to the weight of the stack and shape of the work. A bisque kiln can fire about one and a half times the amount of work that the glaze kiln can fire. The firing takes about 10 hours to complete the cycle and about two days to cool down. Once it has been emptied the work is placed in the glaze room ready for you to decorate! Step Six – Glazing Decorating your work with colour can be a lot of fun – and time consuming! There are three main options for surface treatment at this stage: Oxide Washes Underglazes Glazes Washes and underglazes do not “glaze” the work – It will still need a layer of glaze to fully seal the clay (washes don’t need glaze on surfaces not designed for food or liquid as they can gloss up a little on their own). Underglazes are stable colourants that turn out pretty much how they look in the jar. They can be mixed with each other to form other colours and can be used like water colours to paint onto your work. Mostly they should have a clear glaze on top to seal them. Oxides are a different species – the pink oxide (cobalt) wash turns out bright blue for instance. They don’t always need a glaze on top, and some glazes can change the colour of the wash! The glazes need no other “glaze” on top! Be careful of unknown glaze interactions – you can put any combination of glaze in a bowl or on a plate, but only a single glaze on the outside of any vertical surface! Glazes are a chemical reaction under heat. We don’t know the exact chemicals in the Mayco glazes we use. I can guess by the way they interact with each other, however, on the whole, you need to test every idea you have, and not run the test on a vertical surface! Simply put, glaze is a layer of glass like substance that bonds with the clay underneath. Clay is made of silica, alumina and water. Glaze is made of mostly silica. Silica has a melting point of 1700°C and we fire to 1240°C. The silica requires a “flux” to help it melt at the lower temperature. Fluxes can be all sorts of chemicals – a common one is calcium – calcium has a melting point of 2500°C, however, together they both melt at a much lower temperature! Colourants are metal oxides like cobalt (blue), chrome (green through black), copper (green, blue, even red!), manganese (black, purple and pink) iron (red brown), etc. Different chemicals in the glaze can have dramatic effects. for example, barium carbonate (which we don’t use) turns manganese bright pink! Other elements can turn manganese dioxide brown, blue, purple and reddish brown. Manganese dioxide is a flux in and of itself as well. So, glazes that get their black and purple colours, often interact with other glazes and RUN! Our mirror black is a good example – it mixes really well with many glazes because it fluxes them – causes them to melt faster. It will also bring out many beautiful colours in the glazes because it’s black colouring most definitely comes from manganese dioxide! Glaze chemistry is a whole subject on it’s own! We use commercial Mayco glazes on purpose – for their huge range of colour possibilities, stability, cool interactions, artistic freedom with the ability to easily brush the glazes on and ease of use. We currently have almost 50 glazes on hand! A major project is to test the interactions of all glazes with each other. That is 2,500 test tiles!!!! I’m going to make the wall behind the wheels the feature wall of pretty colours! Step Seven – Glaze (Gloss or sometimes called “Glost”) Firing Most of the time this is the final stage of making your creation (but not always!) The glaze kiln goes to 1240°C. This is called cone 6, or midrange. It is the low end of stoneware temperatures. Stoneware clays and glazes are typically fired at cone 8 – 10, that is 1260 – 1290°C. The energy requirement to go from 1240°C to 1280°C is almost a 30% more! Our clay is formulated to vitrify (mature, turn “glass-like”) at 1240°, as are our glazes. A glaze kiln take around 12 hours to reach temperature and two to three days to cool down. Sometimes a third firing process is required – this is for decoration that is added to work after the glaze firing. For example – adding precious metals and lustres. this firing temperature is usually around 600 – 800°C depending upon the techniques being used. There are many students interested in gold and silver trims – we will be doing this third type of firing soon! After firing your work will be in the student finished work shelves. Remember to pay for it before you head out the door! There is a small extra charge for using porcelain clay (it’s more than twice the price of regular clay), and for any third firing process! Once your work has been fired it can not turn back into clay for millennia – so don’t fire it if you don’t like it! Put it in the bucket for recycling. https://firebirdstudios.com.au/the-process-of-making-pottery/Ceramics have evolved over thousands of years.Earthenware dessert plate, cream colour. Made by Alfred Meakin, England. Backstamped ‘Alfred Meakin England’. flagstaff hill, warrnambool, shipwrecked-coast, flagstaff-hill, flagstaff-hill-maritime-museum, maritime-museum, shipwreck-coast, flagstaff-hill-maritime-village, alfred meakin, ceramics, earthenware, kitchenware -
 Flagstaff Hill Maritime Museum and Village
Domestic object - Jug
The Process of Making Pottery Decorating, Firing, Glazing, Making, Technical There is a rhythm and flow to clay. It can’t be done all at once! Even the making process! It can take weeks to get everything done, especially if you can only work on your pottery once a week! Even though we have three hour classes, it’s often just not enough time! Here is an overview of some of the processes so you have a bit more grasp on some of the technical stuff! Step One – Design There are SO many ideas out there for making stuff in clay! From delicate porcelain jewellery, through to heavy sculptural work and everything in between. Deciding your direction is sometimes not that easy – when you first start, try everything, you will naturally gravitate to the style that you enjoy! The options and variations are endless and can get a wee bit overwhelming too! Check in with me before you start to ensure your ideas will work, what order you might do things, how you could achieve the look you are seeking and any other technical data required! Step Two – Making Clay is thixotropic. This means that as you work with it, the clay first gets sloppier and wetter, before is begins to dry in the atmosphere. For most things, you simply can’t do all parts of the project at once. An example of work order might look like: Get last weeks work out from the shelves Prepare clay for today’s work – roll your clay, prepare balls for throwing, make the first stage of a pinch pot) Clean up last week’s work and put it on the shelf for bisque firing Check that you have any glazing to do – and do enough of it that you will have time to finish your main project Do the next step of your next project – there might be a further step that can’t be complete immediately, in that case, wrap your work well and put onto the shelves. Letting your work rest for a while can really help keep your work clean and professional looking. Many things require bagging under plastic to keep it ready for work the next week – put your name on the outside of the bag so you can find your work easily. We have stickers and markers. Consider how you want to decorate your work – coloured slip can be applied at a fairly wet stage (remembering that it will make your work even wetter!). Trying to apply slip to dry clay won’t work! If you want to do sgraffito – you will need to keep the work leather hard (a state of dryness where you can still work the clay with a little effort and a little water and care). Step Three – Drying Most of the time your work can go into the rack uncovered to let it dry out for the following week. If you want to continue forming or shaping you will need to double bag your work – put your work on a suitable sized bat and put the bat in a bag so the base of the bag is under the bat, then put another bag over the top of the work and tuck the top of the bag under the bat. If you want to trim (or turn) your thrown work the following week, it should also be double bagged. If your work is large, delicate, or of uneven thicknesses, you should lightly cover your work for drying. When considering the drying process, bare in mind the weather, humidity and wind! The hotter and dryer, the faster things dry and work can dry unevenly in the shelves – this can lead to cracking – another time to lightly cover your work for drying. Step Four – Trimming and Cleaning Up Your work is dry! It is called greenware now and it is at it’s most fragile! Handle everything with two hands. I often refer to soft hands – keep everything gentle and with your fingers spread as much as possible. Try to not pick up things like plates too much, and always with both hands! Before your work can be bisque fired it should be “cleaned up”. You work won’t go into the kiln if it has sharp edges – when glazed, sharp edges turn into razor blades! Use a piece of fly wire to rub the work all over – this will scratch a little so be light handed. Use a knife or metal kidney to scrape any areas that require a bit more dynamic treatment than the fly wire offers! Finally, a very light wipe over with a slightly damp sponge can help soften and soothe all of your edges and dags! Trimming thrown work: If you are planning to trim (or turn) your thrown work (and you should be), make sure you bag it well – your work should be leather hard to almost dry for easiest trimming. Use this step to finish the work completely – use a metal kidney to polish the surface, or a slightly damp sponge to give a freshly thrown look. Wipe the sponge around the rim after trimming, and check the inside of the pot for dags! Trimming slip cast work: Usually I will trim the rims of your work on the wheel the following day to make that stage easier, however you will still need to check your work for lumps and bumps. Last but not least – check that your name is still clearly on the bottom of your work. Step Five – Bisque Firing When the work is completely dry it can go into the bisque kiln. The bisque kiln is fired to 1000°C. This process burns off the water in the clay as well as some of the chemically bound water. The structure of the clay is not altered that much at this temperature. Inside the bisque kiln, the work is stacked a little, small bowl inside a larger bowl and onto a heavy plate. Smaller items like decorations or drink coasters might get stacked several high. Consideration is paid to the weight of the stack and shape of the work. A bisque kiln can fire about one and a half times the amount of work that the glaze kiln can fire. The firing takes about 10 hours to complete the cycle and about two days to cool down. Once it has been emptied the work is placed in the glaze room ready for you to decorate! Step Six – Glazing Decorating your work with colour can be a lot of fun – and time consuming! There are three main options for surface treatment at this stage: Oxide Washes Underglazes Glazes Washes and underglazes do not “glaze” the work – It will still need a layer of glaze to fully seal the clay (washes don’t need glaze on surfaces not designed for food or liquid as they can gloss up a little on their own). Underglazes are stable colourants that turn out pretty much how they look in the jar. They can be mixed with each other to form other colours and can be used like water colours to paint onto your work. Mostly they should have a clear glaze on top to seal them. Oxides are a different species – the pink oxide (cobalt) wash turns out bright blue for instance. They don’t always need a glaze on top, and some glazes can change the colour of the wash! The glazes need no other “glaze” on top! Be careful of unknown glaze interactions – you can put any combination of glaze in a bowl or on a plate, but only a single glaze on the outside of any vertical surface! Glazes are a chemical reaction under heat. We don’t know the exact chemicals in the Mayco glazes we use. I can guess by the way they interact with each other, however, on the whole, you need to test every idea you have, and not run the test on a vertical surface! Simply put, glaze is a layer of glass like substance that bonds with the clay underneath. Clay is made of silica, alumina and water. Glaze is made of mostly silica. Silica has a melting point of 1700°C and we fire to 1240°C. The silica requires a “flux” to help it melt at the lower temperature. Fluxes can be all sorts of chemicals – a common one is calcium – calcium has a melting point of 2500°C, however, together they both melt at a much lower temperature! Colourants are metal oxides like cobalt (blue), chrome (green through black), copper (green, blue, even red!), manganese (black, purple and pink) iron (red brown), etc. Different chemicals in the glaze can have dramatic effects. for example, barium carbonate (which we don’t use) turns manganese bright pink! Other elements can turn manganese dioxide brown, blue, purple and reddish brown. Manganese dioxide is a flux in and of itself as well. So, glazes that get their black and purple colours, often interact with other glazes and RUN! Our mirror black is a good example – it mixes really well with many glazes because it fluxes them – causes them to melt faster. It will also bring out many beautiful colours in the glazes because it’s black colouring most definitely comes from manganese dioxide! Glaze chemistry is a whole subject on it’s own! We use commercial Mayco glazes on purpose – for their huge range of colour possibilities, stability, cool interactions, artistic freedom with the ability to easily brush the glazes on and ease of use. We currently have almost 50 glazes on hand! A major project is to test the interactions of all glazes with each other. That is 2,500 test tiles!!!! I’m going to make the wall behind the wheels the feature wall of pretty colours! Step Seven – Glaze (Gloss or sometimes called “Glost”) Firing Most of the time this is the final stage of making your creation (but not always!) The glaze kiln goes to 1240°C. This is called cone 6, or midrange. It is the low end of stoneware temperatures. Stoneware clays and glazes are typically fired at cone 8 – 10, that is 1260 – 1290°C. The energy requirement to go from 1240°C to 1280°C is almost a 30% more! Our clay is formulated to vitrify (mature, turn “glass-like”) at 1240°, as are our glazes. A glaze kiln take around 12 hours to reach temperature and two to three days to cool down. Sometimes a third firing process is required – this is for decoration that is added to work after the glaze firing. For example – adding precious metals and lustres. this firing temperature is usually around 600 – 800°C depending upon the techniques being used. There are many students interested in gold and silver trims – we will be doing this third type of firing soon! After firing your work will be in the student finished work shelves. Remember to pay for it before you head out the door! There is a small extra charge for using porcelain clay (it’s more than twice the price of regular clay), and for any third firing process! Once your work has been fired it can not turn back into clay for millennia – so don’t fire it if you don’t like it! Put it in the bucket for recycling. https://firebirdstudios.com.au/the-process-of-making-pottery/The form of the jug has been in use for many centuries.Stoneware jug. Two tone brown glaze with pierced lip behind spout. Spout chipped.None.flagstaff hill, warrnambool, shipwrecked-coast, flagstaff-hill, flagstaff-hill-maritime-museum, maritime-museum, shipwreck-coast, flagstaff-hill-maritime-village, jug, ceramic jug -
 Melbourne Legacy
Album, A photographic record of events of Commemoration of Legacy Week 1985, 1985
Photos of a procession of widows and legatees to the Shrine in 1985 also of the church service in St Paul's before hand. The Legacy President Bannister is behind Legatee Geoff Swan holding the Legacy flag. The University of Melbourne choir is shown behind the Dean of St Paul's. The Melbourne Legacy Widow's Club president, Mrs Alma Sumner, spoke and also laid a wreath at the Shrine. One photo is of Pilgrimage Marshall Legatee Frank Burton. The pilgrimage was lead by a bag piper, Ian McKenzie and Standard bearer from Legacy Leadership Group (an older junior Legatee). Inside the Shrine the Shrine Trustee, Sir Alfred Kemsley stands with President Bannister and Widow President Mrs Alma Sumner and Legatees Conor MacGillycuddy and Alf Argent. Sometimes referred to as Widows' Sunday it is an annual event for Legacy widows, usually at the start of Legacy Week, which is the first week in September. The church used for the service varies. These photos were in an album of photos from 1993. The album was not archive quality, with self adhesive pages, so photos have been transferred and album discarded.A record of the Widows' Sunday events for the Legacy Week in 1985.Colour photo album x 10 leaves of self adhesive cardboard with 17 photos of a pilgrimage to the Shrine in 1985.Caption on title page; 'A photographic record of events of Commemoration. From Sunday, 1st September - First day of Legacy Week, 1985. Commencing with the Morning Service at St. Paul's Cathedral, and then onto the Pilgrimage to the Shrine.'pilgrimage, wreath laying ceremony, widows' sunday -
 Melbourne Legacy
Photograph, St Pauls' Service and Pilgrimage to the Shrine 1985, 1985
Photos of a procession of widows and legatees to the Shrine in 1985 also of the church service in St Paul's before hand. The Legacy President Bannister is behind Legatee Geoff Swan holding the Legacy flag. The University of Melbourne choir is shown behind the Dean of St Paul's. The Melbourne Legacy Widow's Club president, Mrs Alma Sumner, spoke and also laid a wreath at the Shrine. One photo is of Pilgrimage Marshall Legatee Frank Burton. The pilgrimage was lead by a bag piper, Ian McKenzie and Standard bearer from Legacy Leadership Group (an older junior Legatee). Inside the Shrine the Shrine Trustee, Sir Alfred Kemsley stands with President Bannister and Widow President Mrs Alma Sumner and Legatees Conor MacGillycuddy and Alf Argent. Sometimes referred to as Widows' Sunday it is an annual event for Legacy widows, usually at the start of Legacy Week, which is the first week in September. The church used for the service varies. These photos were in an album of photos from 1993. The album was not archive quality, with self adhesive pages, so photos have been transferred and album discarded.A record of the Widows' Sunday events for Legacy Week in 1985.Colour photo x 14 of a pilgrimage to the Shrine in 1985 and white paper labels.Title page is paper with black type, 'A photographic record of events of Commemoration. From Sunday 1st September - First day of Legacy Week, 1985. / Commencing with the Morning Service at St. Paul's Cathedral, and then onto the Pilgrimage to the Shrine.'pilgrimage, wreath laying ceremony, widows, widows' sunday, colin bannister, alf argent -
 Bendigo Historical Society Inc.
Ceremonial object - Ceremonial collar
Ceremonial purple velvet collar with gold metallic bullion fringe to outside edge and gold metallic ribbon and ribbon lace to all edges. At each end is a five point star in gold zardozi work in sequins and metallic thread with central couched button. Above the stars on the LHS is couched zardozi work initial G and on RHS couched zardozi work initial M and above these are two identical five point stars as lower ones with the addition to each of two metallic thread tassles. At the bottom centre of the collar are two small rings. In a separate bag is a purple velvet rosette with central sequined button and braided surround with large tassle all in gold metallic thread.ceremonial collar, grand master -
 Melbourne Tram Museum
Photograph - Black & White Photograph/s, 1954
Set of three Black and white photographs of floats for the 1954 Royal Visit floral parade - 8 March 1954. Date from The Age 6/3/1954 - see trove references below. .1 - MMTB float featuring the title - "The Bag of Service" with MMTB name on the side. .2 - the SEC float - featuring a house and power lines .3 - RAAF float with a crown and a jet (sabre?) aircraft. Trove references found by Noelle Jones 27/6/2019 are: https://trove.nla.gov.au/newspaper/page/26680643 https://trove.nla.gov.au/newspaper/article/205702896 https://trove.nla.gov.au/newspaper/article/26595420 https://trove.nla.gov.au/newspaper/article/26595420 https://trove.nla.gov.au/newspaper/page/26680653On each photo in pencil: .1 - "MMTB floral float royal visit 1954" .2 - "SEC(?) floral float royal visit 1954" .3 - "Air force (?) - float royal visit 1954"trams, tramways, events, royal visit, parades, mmtb, secv, raaf, parades, conductors -
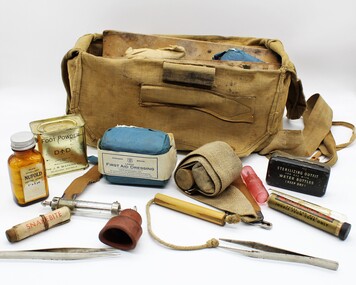 Ringwood RSL Sub-Branch
Equipment First aid/medical kit, Sanax First Aid Company, 1939
Khaki Canvas Bag designed for First Aid Kit. Contains 25 items including 2 x tweezers, 1 x eye bath, 1 x metal syringe, 1 x bottle gauze strip, 1 x snaake bite kit, 1 x pocahontas inhaler, 1 x water sterilizing kit, 1 x cat gut in glass tube, 1 x blade in container, 1 x splint set, 1 x first field dressing 1939 Smith and Nephew, 4 x large field dressingss, 2 x splint holders ?, 1 x First Aid book, 1 x Sanax First Aid card.Receipt from Red Cross Victorian Division South Melbourne Branch dated 14th April 1942. -
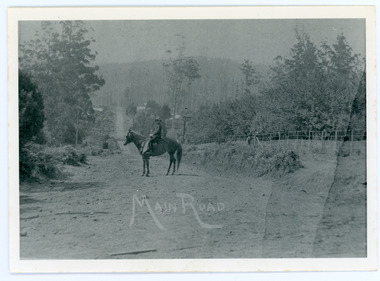 Mt Dandenong & District Historical Society Inc.
Photograph, Looking Down Falls Road
Edward John Price was a son of early settler Edward Joseph Price. Edward Joseph was the first settler in the Village Settlement when he took out Lot 1, Section 1. He built a small home of slabs and brought his family up in 1896. From the outset the Price family ran a store from their home.This picture, taken 1914, shows Edward John Price on his pony delivering papers from his parent's newsagency that was opposite 'Mountjoy' guesthouse on Ridge Road. He was taking them to Lily Badenhop's post office in Blythe's Road. The section of road he is on was called Main Road and is now Falls Road.Black and white photograph showing a man on horseback in the centre of an unmade road that is running into the distance.Trees, a fence and houses can be seen with hills in the background. Reverse of photograph has handwritten description by John Lundy-Clarke.On Front MAIN ROAD On Reverse Looking down Falls Road then the main road in 1914. Before Frank Craig built The Fron (1918). Dunbar’s house Halcyon on left of road. The hall on its right with Keogh’s sheds showing further in the trees. The horseman is Edward John Price who delivered the daily papers to Lil Badenhop’s shop. The bag he carried them in can be seen hanging from the saddle pommel. The first road formation can be seen on the bank to the right. The road seen was constructed 1905 by Bill McGivern.edward john price, edward joseph price, lily badenhop, post office, falls road, main road, mountjoy, frank craig, bill mcgivern, dunbar, halcyon, keogh, farndons hall -
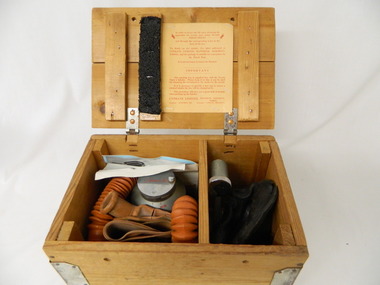 Kiewa Valley Historical Society
Medical - Portable Inhaler
The inhaler can be used in hospitals in the labour ward for the patient to absorb trichloroethylene. The inhaler can be mounted on the bracket which can be secured to the leg of a labour bed. The inhaler contains a wick which absorbs trichloroethylene and will function for several hours.This inhaler was used in the Tawonga District Hospital.Wooden box with corners strengthened with steel plate and lid on 2 hinges. Lid has 3 rectangular lengths of wood attached to enhance packing and a yellow piece of paper with red writing stapled on. Box contains 2 metal clamps, a light metal stand/bracket with screw and holder and a hard black plastic mask. In the other side: 2 sheets including Instructions, a small paper bag with spare washers, a light brown extendable hose with metal attachment at one end and a light brown oval rubber bladder with a hole at one end to fit over the hose. Light metal Inhaler - 3 cylinders of different diameters attached to a plate. Red markings / writing and plate incl. serial no. Yellow paper on lid explains "...packing box is supplied free with the Tecota mark 6 Inhaler..." Mask: Cyprene Ltd / Keighley /Made in England Instructions / for the preparation of / Tecota / Mark 6 / Trichloroethylene B.P. / Inhaler Bladder: A Cig Product / 4 litre / Made in England to Inhaler: Cyprane Ltd. / Max Min / Pat No 646680 / Patents Pending / Tecota Mark 6 / Charge with / Trichloroethylene B.P. / Cyprane Ltd. / Serial No. / Keighley / Yorks.medical. hospital. inhaler. trichloroethylene. childbirth.tawonga district hospital -
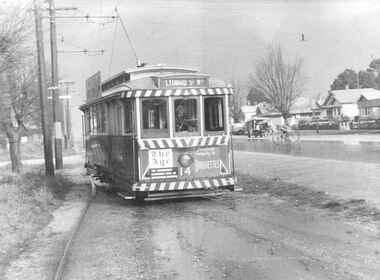 Ballarat Tramway Museum
Photograph - Black & White Photograph/s, Dave Macartney, 25/07/1961 12:00:00 AM
Yields information about the Grey St. loop and the street scene on a wet day with a milk car and bicycle in the view.Black and white photograph of No. 14 entering the Grey / Gray St. Loop, Albert St, Sebastopol. Taken during a rainy day with a horse drawn milk cart in the background and a cyclist crossing the road. The tram has the destination of Lydiard St. North, is running one man, the motorman / driver has a conductors bag around his neck. The tram also has dash canopy advertisements for "The Age" and Briquettes. Photo taken 25/7/1961 by Dave Macartney. Printed on stipple paper. Two copies held - 2nd in poor order - for temporary display only. Copy 3 - in good condition - added 26/7/2007, ex Alan Bradley 5/2007 - 203H x 252W.tramways, trams, sebastopol, albert st, grey st loop, horse drawn vehicle, milk cart, tram 14 -
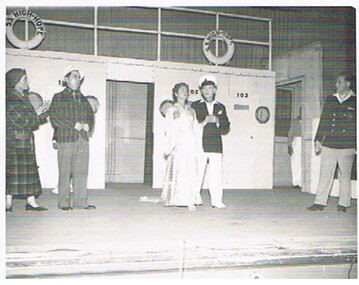 Bendigo Historical Society Inc.
Photograph - GERTRUDE PERRY COLLECTION: PHOTOGRAPHS - PLAYS, 1961 (4 photos)
Photographs. Gertrude Perry Collection. Eleven black & white photographs of people in various plays. Named photographs: k) - Final Rehearsal 'Show Boat' 1961. a) - Scene, 'You're in Love'. d) - Final Rehearsal 'Oaklahoma'. e) - Final Rehearsal 'Oaklahoma'. h) - Alf Annison & Me 'Rose Marie'. i & j) - Alf Annison Lutz, Grand Duchess Me. f) - Katinka. b & g) - Alf Annison, Me Aunt Ella. One has Oklahoma 1961. c) - Alf Annison, Me 'Aunt Ella' Dawn Beckwith Oklahoma 1961. Photos enclosed in a Powneys paper bag. It is red, white, blue and yellow. It has the address Hargreaves Mall Bendigo Phone 43 4738 and 42 2061 printed on it.gertrude perry collection, show boat, katinka, oaklahoma, rose marie, you're in love, alf annison, dawn beckwith -
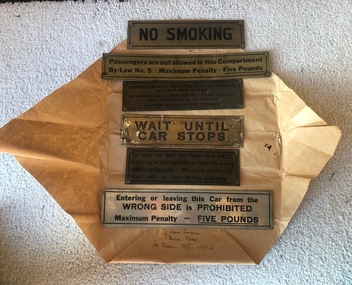 Melbourne Tram Museum
Sign, Melbourne & Metropolitan Tramways Board (MMTB), Set of six tramcar signs, c1940
Set of six tramcar signs as listed, wrapped in brown paper and marked in Keith Kings handwriting: "Spare Interior Notice Plates (ex Preston W/s 1/9/72)" Package had not been open. The adhesive tape was loose when opened. Contains items: Reg Item - short description and condition: 2418 - To stop car pull left hand.... - tarnished 2419 - Wait until car stops - tarnished, paint marks and remnants of tape. 2421 - No Smoking - tarnished 2423 - Entering or leaving - 56H x 254W (different to that collected) - dirt marks 2427 - Passengers must not stand - heavily tarnished and dirty 2429 - Passengers are not allowed - has been partly bent - tarnished. Retain in paper bag.trams, tramways, signs, tramcars, tramcar bodies, mmtb, new trams -
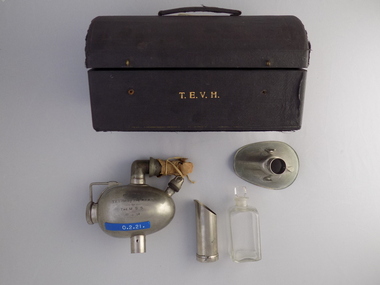 Geoffrey Kaye Museum of Anaesthetic History
Equipment - Inhaler, Probyn Williams, Mayer & Meltzer, c. 1900
Hurley, Sir Thomas Ernest Victor (1888-1958) was gifted this Probyn Williams inhaler in 1914. After studying at Melbourne University, Victorian-born Hurley was a Medical Officer at the Royal Melbourne Hospital until he commenced private practice in Collins Street. He was appointed Captain Australian Army Medical Corps, AIF and served in Gallipoli with the 2nd Field Ambulance. He served in Enypt, London, and the Western Front during World War 1. He gained a Companion of the Order of St George and St Michael in 1917. Upon return to Melbourne he held positions such as surgeon to Victoria Police (1928-1956), elected to Council of the Victorian branch of the British Medical Association, member of the Charities Board of Victoria and foundation member of the Royal Australasian College of Surgeons and chaired the Flying Personnel Research Committee m a consulting surgeon at the Royal Melbourne Hospital. This apparatus is transitional between Clover's and Hewitt's having Clover's narrow "ways" and compact size, but using Hewitt's ether-control lever.Black round topped box with brass hooks [missing] at front and brass hinges at rear. The initials T.E.V.H. are printed in gold leaf on the front. There is a black fabric handle on the top. Inside the box is black padding with the manufacturer's logo printed in gold leaf. There is a square section in the base of the box for holding the square clear glass bottle for ether. The pear-shaped mask is made of metal. There is also a metal ether measure for pouring the ether. The metal inhaler is ovoid shaped. The rotating gauge has a series of numbers engraved onto the inhaler for measurement. There is an elbow joint attaching a re-breather bag, with a small amount of waxy paper remaining attached with a thin ribbon. There is a small glass bulb encased in a metal housing. Printed in gold leaf on front of box: T.E.V.H. •Printed in gold leaf on inside lid of box: MAYER & MELTZER / LONDON / MELBOURNE & CAPE TOWN •Engraved on side of inhaler: PRESENTED / TO / T.E.V. Hurley Esq.,M.D.M.S. / by / THE M.S.S. / 15.6.14. •Engraved on reverse side of inhaler: PROBYN WILLIAMS / ETHER INHALER •Moulded into connector on elbow joint: MAYER & MELTZER •Stamped into base of metal pourer: MAYER & MELTZER / LONDON •Blue sticker with white printed text on front of inhaler: O.2.21.hurley, thomas ernest victor, probyn williams, university of melbourne, world war 1, wwi, gallipoli, australian army medical corps, medical student society, mayer & meltzer, clover, joseph, hewitt, fredrick william -
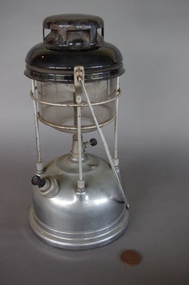 Upper Yarra Museum
Lamp, Tilley Lamp Company
http://en.wikipedia.org/wiki/File:Tilley-storm-lantern-X246-May- Tilley storm lantern, this model has been in production since 1964 The Tilley Lamp derives from John Tilley’s invention of the hydro-pneumatic blowpipe in 1813 in England. http://en.wikipedia.org/wiki/Kerosene_lamp#Pressure_lamp Pressure lamps are far more sophisticated than wick lamps and produce a much brighter light, although they can be quite complicated and fiddly to use. This type of lamp is commonly known in the UK as a "Tilley lamp", after a manufacturer of the same name, and in North America as a "Coleman lantern" for similar reasons. A kerosene blowtorch displaying the various aspects of the kerosene burnerA pressure lamp has a fuel tank at the bottom with a small pump to pressurise the kerosene. There is a narrow gap up to the top of the lamp, called a flue, and at the top of the lamp there is a burner (gas outlet). Directly underneath the burner is the mantle, a fabric bag coated with chemicals that incandesce when heated by the gas flame. The burner lamp is known for its brightness. It is so bright because of the amount of pressure that is placed onto the wick. This pressure allows a steady flow of the gasoline and a constant light Tilley Storm Pressure Lantern, model no x246 has a stainless steel base which is filled with kerosene, with a pump used to pressurize the kerosene vapor. Under the base is a sticker.On top is a black hood with vents which sits on the glass heat resistant shade. The glass shade has an etched label. It has a white and pink mantle on the central rod with a long shaped stainless steel handle, this folds down when not in use.Base - Sticker Tilley Lamp Model X246 Etched on glass shade Tilley, Durosil, ITI, Heat Resistant. Made in Englandlantern tilley pump pressure mantle kerosene methylated spirits stainless steel lamp kerosene lamp round glass cylinder -
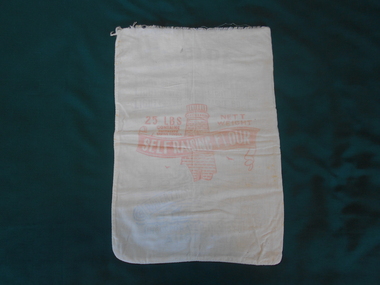 Bendigo Historical Society Inc.
Textile - FLOUR BAG COLLECTION: ROBERT HARPER AND COMPANY, 1900-1950
Textiles. Calico flour bag printed on one side in red and blue''EMPIRE SELF RAISING FLOUR 25 lbs nett weight. Contains phosphate Baking Powder. Robert Harper & Company Incorporated Victoria, Australia''. In the background is a lighthouse with three beams of light extending from each side. Printed on the light beams- ''LIGHT BREAD, LIGHT PASTRY, LIGHT PUDDINGS, LIGHT LABOUR, LIGHT HEARTS, LIGHT HOMES''. Robert Harper (1842-1919), businessman and politician, was born in Scotland. He migrated to Melbourne with his family in August 1856. He worked for J.F.McKenzie & Co., roasting and grinding millers. In 1865 he established Robert Harper & Co., trading in tea, coffee and spices from the East Indies and later in oatmeal and flour.textiles, domestic, robert harper & co flour bag -
 Clunes Museum
Card - CLUNES GIRL GUIDES
.1 HANDWRITTEN BLUE INVITATION CARD TO MISS STEART FOR CLUNES DIVISION GUIDE RALLY AT AVOCA RACECOURSE 23/3/86 .2 PRINTED INVITATION FRFROM GOVERNOR AND LADY BROOKS TO ENID STEART TO A GARDEN PARTY AT GOVERMENT HOUSE 11/3/1960. THE INVITATION IS IN AN ENVELOPE .3 INVITATION FOR ENID STEART TO A GARDEN PARTY TO MEET PRINCESS ALEXANDRA OF KENT AND THE GOVERNOR OF VICTORIA AND LADY BROOKS ON 19/9/1959 (WEATHER PERMITTING) INVITATION IS IN AN ENVELOPE .4 HAND DRAWN INVITATION ON YELLOW PAPER WITH A ROCKET. INVITE FROM 1ST CARISBROOK BROWNIE GUIDES FOR OUTER SPACE REVELS 17/3/90 . THE INVITATION IS IN AN ENVELOPE .5 WHITE PLASTIC BAG WITH YELLOW AND BLUE EMBLEM OF GIRL GUIDES AUSTRALIA AND GUIDE SHOP PRINTED ON BOTTOM IN BLUE.3 IN INK UNDER (WEATHER PERMITTING) "DID NOT"enid steart, clunes girl guides, governor and lady brooks, princess alexandra of kent -
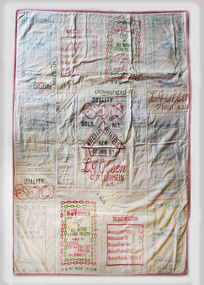 National Wool Museum
Textile - Quilt, Mrs Beryl Andersen, Chicken Feed Wagga, 1995-2001
Norma Dessent (the donor) was cleaning out her Mother-in-law Amy Dessent’s home, after she passed away in 1995. She came across a collection of gunny sacks for chicken feed, potatoes, and flour. Norma gave the bags to her good friend Beryl Andersen, thinking she might be able to make use of the material in her quilting. Many years later in 2001, Beryl gave Norma this quilt made in a wagga style out of the bags. This was both a great surprise and a great delight for Norma. Amy Dessent was a housewife. Her chickens were her friends, keeping her company as she worked in her renowned garden and while she cooked and maintained a beautiful home. Typically, Amy would have a dozen chickens clucking around at a time. In the style of the time, everything was kept for a possible repurposing later in life, such as these gunny sacks. The Chicken Feed Wagga was created in Ballarat by Mrs Beryl Andersen. Beryl was the inaugural president of the Hamilton Quilters Guild and is a well-known quilter. Perhaps her best-known work was the “Quilt for Hope”, a living memorial for victims of institutional church-related sexual abuse. More information about this quilt can be found on the following link. https://www.nationalquiltregister.org.au/quilts/quilt-of-hope/). The wool blanket used as a backing belonged to Beryl’s mother. Beryl’s mother married in 1930 and the blanket is thought to have been a present from this wedding, making the blanket close to a century old. Norma donated the quilt to the National Wool Museum in 2021 as a result of downsizing. She no longer had room for the quilt to hang on her wall. Before downsizing, the quilt had hung in the entryway to her home for the last two decades.Wagga style quilt made with a appliqué top layer of gunny sacks that once held chicken feed, flour, and potatoes. The insulating internal material is not known. The backing fabric is made from a cream woollen blanket. The edges are bound with a material of a red and white plaid. The gunny sacks are quilted together with a machine stitch of red thread. The sacks contain imagery pertaining to their previous use. Some sacks have an image of a chicken applied with blue, red, or green ink. Other sacks contain imagery of potatoes. While other sacks contain information “Minimum Crude Protein 14%, Minimum Crude Fat 3%, Maximum Crude Fibre 7%”. One of the sacks shows a handwritten price for a bag of chicken feed in a red ink.Numerous. See multimediaquilts, wagga, gunny sacks, upcycle -
 City of Greater Bendigo - Civic Collection
Souvenir - Bendigo Post Office Centenary Ephemera, Ted Rankins, 1987
When the Commonwealth Post and Telegraph Act was passed in June 1902, and a national Postmaster General's Department (the PMG) was established the responsibility the nation's mail and telephone services fell on local Post Offices. The Bendigo Post Office was designed by Public Works architect George W Watson and constructed between 1883 and 1887. The two story brick structure with basement has unpainted rendered facades and a 43m high clock tower complete with 6 bell carillon. The facades are elaborately decorated with Corinthian pilasters, balustrading, lions' heads and the state mansard roof with cast iron ridging and finials. (VHR #4739). Situated on Pall Mall it has always been called the Bendigo Post Office even though it was not until 1891 that the name Bendigo was given to the town. The Bendigo Post Office housed much more than just postal services and the building contained many early government departments and services needed for a growing district. The building celebrated its centenary on the 30th September 1987 to much fan fare with Ted Rankins, the then Postal Manager planning many of the week long events including tours of the post office, a grand parade with cake and staff in period costume, a ball at the Shamrock and a barbeque in Rosalind Park. The Post Office ceased providing postal services in 1997 after the privitisation Australia Post and Telstra but continues to play a central role for the community, providing important services to visitors and locals alike. Currently it is occupied by Bendigo Tourism and includes two exhibition spaces including the Living Arts Space and Djaa Djuwima a dedicated and permanent First Nations Gallery. Activities at the Post Office are supported by City of Greater Bendigo staff and a dedicated group of volunteers. These items are part of the postal collection donated by the Rankins family in memory of the last postal manager at the Bendigo Post Office, Ted Rankins. 0364.1: Single sided printed 'Order of Proceedings' flyer; Outlines the running of events for the celebrations on Wednesday 30 September, 1987 at the Post Office with the centenary logo centre top in crimson ink. 0364.2: Single sided, four-colour printed, DL size invitation for celebrations marking the centenary of the Post Office on Wednesday 30 September, 1987. 0364.3,.4,.5,.6,.7: Printed cake bag with centenary logo and image of Bendigo Post Office printed on front in crimson ink. 0364.8,.9,.10,.11: Square note paper with centenary logo and border printed in crimson ink. 0364.12 Envelope: Australia Post envelope with Bendigo 100th anniversary images. Date stamped and addressed to Mr Edmondston Postmaster, Elmore. bendigo post office, bendigo tourism, city of greater bendigo tourism, post office collection, ted rankins collection, city of greater bendigo volunteers -
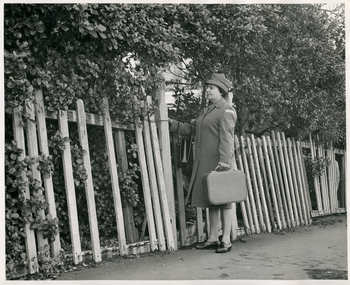 Royal District Nursing Service (now known as Bolton Clarke)
Photograph - Photograph, black and white, 15 05 1967
RDNS Sister, Betty. McDonald, is about to enter the home of a patient to administer nursing care.The Trained nurses of the Melbourne District Nursing Society (MDNS), later known as Royal District Nursing Service (RDNS), visited patients in their home and gave best practice care in many fields of nursing, and to people of many cultures, throughout its 130 years of expansion. Initial visits not only assessed the specific nursing situation but the situation as a whole. Their patients ranged in age from babes, children, adults to the elderly and referrals were taken from Hospitals, General Practitioners and allied Health facilities. Some of the care the Sisters provided is as follows: – Post-Natal care given to mother and babe, Wound Care following various types of surgery, accidents, burns, cancer, leg ulcers etc. Supervising and teaching Diabetic Care, including teaching and supervising people with Diabetes to administer their own Insulin, and administering Insulin to those unable to give their own injections. Administering other injections and setting up weekly medication boxes. The Sisters performed Catheterizations on adults suffering from conditions such as Quadriplegia, Paraplegia, Multiple Sclerosis (MS), Motor Neurone Disease (MND) and Guillan-Barre Syndrome, and when required at school on children for e.g. those with Spina Bifida. The Sisters visited those requiring Cystic Fibrosis support and care; those requiring Haemo-Oncology care, including visiting children at school; those requiring Home Enteral Feeding care, and those requiring IV therapy at home and home Dialysis. Palliative Care was given including pain relief with the use of syringe drivers, personal care as needed, and advice and support to both patient and family. The Sisters provided Stoma management to those needing Urostomy, Ileostomy and Colostomy care and those requiring Continence care. HIV/AIDS nursing care was provided; visits to Homeless Persons were made. Personal care was given to patients ranging in age and with varying mobility problems, such as those with MS, MND, Guillan-Barre Syndrome, Poliomyelistis, Quadriplegia, Paraplegia, Acquired Brain Injury, to those following a Cerebrovascular Accident (Stroke), those with severe Arthritis and those with a form of Dementia. When necessary the elderly were assisted with personal care and advice given on safety factors with the use of hand rails, bath or shower seats, and hand showers. Rehabilitation with an aim towards independence remained at the forefront of the Sister’s minds and when possible using aids and instruction on safe techniques enabled the person to become fully independent. All care included giving advice and support to the patient and their Carers. The Sisters liaised with the persons Doctor, Hospital and allied Health personal when necessary.Black and white photograph of Royal District Nursing Service, (RDNS), Sister B. McDonald, who is wearing her grey uniform coat, with RDNS insignia on the upper sleeve, and her peaked grey hat over her dark short hair. She is holding her rectangular nursing case in her left hand. Her right arm is through the long handles of a black bag which is hanging under it, and her hand is on the top of the gate; Number '39' is attached to the top of the gate post. A tall broken paling fence, with many gaps between the palings, can be seen running along the edge of the footpath to the left and right of the gate. The fence is leaning over in places. Bushes can be seen behind the fence and part of a white building is seen in the background.Photographers stamp. Quote No. GE 5rdns, royal district nursing service, rdns uniform, rdns patient care, sister betty mcdonald -
 Melbourne Tram Museum
Film - Compact Diskette with video, Yarra Trams, "Tram it day", Oct. 2006
Compact Diskette with video (DVD), titled "Tram it Day", celebrating "100 Years of Electric Trams" and "Celebrating 100 years of continuous service", with a printed front, logos contained within a clear plastic bag. Features images and video from the "Tram it day" - 8/10/2006 - interviews with Dennis Cliche, tramways band, held at Docklands on , a celebration and function at Melbourne Zoo as part of the Good Friday appeal. An ABC news story about the launch of centenary art tram, including interviews with Peter Batchelor and Craig Tooke. A production featuring historic images and film clips interwoven with short film clips of various tram crews speaking about the job and how they enjoy it, or groups of employees saying "Happy Birthday" - includes Ron Scholten, Two copies held.trams, tramways, yarra trams, 100 years of electric trams, docklands, tram crews, displays -
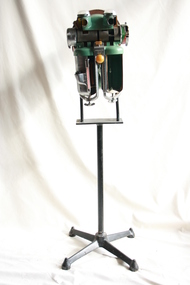 Geoffrey Kaye Museum of Anaesthetic History
Machine - Coxeter-Mushin carbon dioxide absorber MK II, sectioned, c. 1945
The Coxeter-Mushin carbon dioxide absorber consists of the main metal body, painted aquamarine, fixed to a stand. The cylindrical silver metal cannister on the left was used to contain ether, while that on the right contained soda lime. The apparatus has been sectioned to show the inside of the two cannisters, the right of which has an arrow drawn inside to indicate the flow of air breathed out by a patient. The front cover over the control dials has also been removed to show the mechanism. The two circular holes above the dials, facing forward, are where two corrugated tubes would attach; both of these tubes attached to the mask of the patient. The round yellow knob in the centre controls the Compensating Valve, which allowed the anaesthetist to raise or lower the rebreathing bag to allow air into the circuit or expel anaesthetic gas.anaesthesia, carbon dioxide, ether, soda lime -
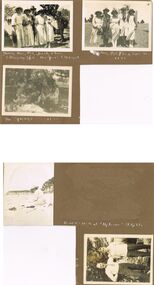 Bendigo Historical Society Inc.
Photograph - HILDA HILL COLLECTION: BLACK AND WHITE PHOTOS, 1923-1925
Series of Black & White Photos Hill Family & Friends. Hanging Rock Victoria Australia News Years Day 1925 Doreen, wearing all white dress and hat and holding dark coloured bag in right hand, Nora, also in all white outfit with large pockets and hat with dark coloured handbag held by her right hand and hat, Wal, dressed in grey suit white shirt and dark tie and dark hat, Jonah wearing white outfit with bands around the bottom and dark hat, & Elma skirt with circular bands and white blouse dark hat and paper in her left hand. Gentleman standing to the right wearing a dark suit and hat. Nora in white outfit and hat with dark bag in her left hand, Bill trench coat and light coloured hat, Elma wears a white dress with circular pattern and dark hat, Rob white trench coat over a dark suit white shirt and dark tie & Mev (not very clear) is wearing a white dress with a multi coloured jacket and dark hat, standing in front of a wooden tree enclosure, trees in distant background, January 1, 1923 Unknown Location. Kyneton Mineral Springs, five men and five women picnicking at Springs, fifth girls is taking the photo, January 1, 1923. girl sitting on the beach, wearing white clothing and a white hat, Down The Coast. Bunt and friend both dressed in dark trousers and white shirts, one with a striped tie, tree and house in background, rectangular open top tin also in background, 1924..australia, history, post war life