Showing 2721 items
matching the standard
-
 Ringwood and District Historical Society
Literary work, Alice Milner's memories of CWA Ringwood Branch in 1995
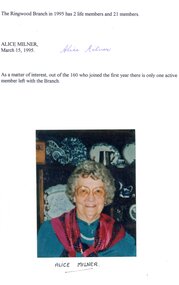
Kindly scanned from Ringwood Branch archival collectionTranscript (kindly completed by Ken Briscoe using ChatGPT) RINGWOOD BRANCH COUNTRY WOMEN'S ASSOCIATION INC. February 13, 1946 in the Ringwood Town Hall, the Mayoress, Mrs. H.E. Parker, called the meeting and Ringwood Branch Country Women's Association was formed, and would be in the Yarra Valley Group. Speaker for the day was Mrs. Wray, Group President, Yarra Valley Group. Office bearers elected were: • Mrs. Greenshields (President) • Mrs. Shields (Secretary) • Mrs. Roberts (Treasurer) At the inaugural meeting, 93 ladies joined, and the first general meeting of the Ringwood Branch was held March 7, 1946, and by the end of August the membership grew to 160. In 1946 the joining fee was 4/- and you never attended a meeting unless you wore hat and gloves. The first year, meetings were held in the main Town Hall, then they were transferred to the small hall, which had a creche next door, at the baby health centre, where mothers could leave their little ones, while mum enjoyed the meetings, demonstrations or entertainment. The Branch had a very good Choir, conducted by Mrs. Dorrie Davidson, also a very talented theatrical group. Each birthday they put on excellent stage shows, some beautiful costumes being hired from well-known Melbourne theatrical company. The 1956 Olympic stage show had some well-trained, but out of form, athletes. Highlight of the year was the Annual Ball and two Debutante Balls. New branches were formed in the district, Everard, East Ringwood, Heathmont, South Warrandyte. There was also, Ringwood Younger set, a night branch (later years was renamed Marana). It was then that our membership dropped. As more and more branches were started in the district, Ringwood was then allocated to the newly formed Maroondah Highway Group. Craft classes and demonstrations were of a high standard, with some interesting things being made such as millinery, dressmaking, pottery, etc. In 1960 when Ringwood was made a City, a C.W.A. float was entered in the procession, this was a mammoth task, as hundreds of flowers were made and wired to the float, which was in green and gold C.W.A. colours. The time came when the Town Hall was to be demolished, and we moved to the Church of England Hall, Civic Place, but after a short time, this hall was also demolished. Meetings were then held at Ringwood Library until the library was no longer available. Our last move was to our present meeting room at Lionswood. Today you dress as you wish and membership is $12.00. The Ringwood Branch in 1995 has 2 life members and 21 members. Alice Milner March 15, 1995 As a matter of interest, of those 160 members who joined in the first year, only one active member is left with the Branch -
 Ballarat Tramway Museum
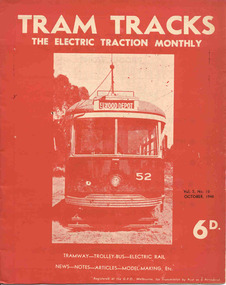
Magazine, Jack Richardson, "Tram Tracks - The Electric Traction Monthly", Jan to June 1947
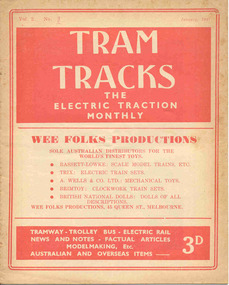
Six issues of "Tram Tracks - The Electric Traction Monthly" of the Australian Electric Traction Association. Each issue has a standard cover, of the magazine name etc, featuring "Wee Folks Productions" models but are in different colours, all have been saddled stapled with two staples, except No. 6. The Volume and date details have been over printed. Back covers inside back covers have the same advertisements but the font varies vary. The six issues contain advertisements for the Wee Folks productions, Hartleys Sports store, Hearns Hobbies, Wattle Park, Johnson's Variety Store, Barnes Tennis Centre, The Model Dockyard, Robilt Models, Meadmore Model Engineering and Austral Bronze Pty Ltd, Hearns Hobbies, Christie Scale Model Railway and Equipment, Herbert Small (Meccano), the American Subscription Agency, Manufacturers' Mutual Insurance Ltd. 2465.1 - Vol. 2 No. 1 - 16 pages, Jan 1947, with cover printed in red. Has articles on the tram / car debate, Dunedin Tramways, Overlapping fare sections, type of trucks under Sydney tramcars, Brisbane Electric Railway (Power station), The Balmain Counterweight and Trolley buses in Australia. News items include Brisbane, Newcastle, Sydney, Melbourne, SEC, Hobart, VR, Adelaide, Kalgoorlie, Broome, electric trains in Melbourne and Sydney, and AETA notes. Photos include Sydney O, OP and P, VR PERM 63 and interior photo of a MMTB W4 class tram. 2465.2 - Vol. 2, No. 2 - 16 pages, Feb. 1947, with cover printed in dark blue. Has articles on Brisbane 400 class tramcar, Adelaide to Glenelg Brighton - Le Sands tramway, Melbourne Suburban railways, Diesel Electrics on the Southern Railway (US)and Birney Safety Car. News items include Brisbane, Sydney, Melbourne, VR, Fremantle and AETA notes. 2465.3 - Vol. 2, No. 3 - 12 pages, Mar. 1947, with cover printed in brown. Has articles on why NSW trams lose money, Duncan and Frazer, new trams in Johannesburg, Melbourne Suburban railways, and Sydney New Railway (Eastern Suburbs). News items Sydney, Melbourne, SEC, VR and Adelaide and AETA notes. 2465.4 - Vol. 2, No. 4 - 16 pages, Apr. 1947, with cover printed in green. Has articles on Duncan and Fraser (continued), In search of Ancient Warriors (old trams), Brisbane Electric Railway and some unusual fares arrangements. News items include Brisbane, Newcastle, Melbourne, Sydney, SEC, Launceston, Kalgoorlie, overseas, and AETA notes. Editorial looks at claims that the SW6 cars are the finest in the world, back numbers (notes that Tram Tracks started with a mimeographed club news sheet and now have circulation of nearly 200), costs of production etc. Has photographs of the interior of a SW6 850, a plan for Melbourne underground railway, the VR power operations room at Flinders St., Hobart trolley bus and a cartoon about Sydney traffic. 2465.5 - Vol. 2, No. 5 - 16 pages, May 1947, with cover printed in red. Has articles on Australian Light railways, Sydney's relief lines and the start of an article on NSWGT 600/1200V tramcars. Has news items on Brisbane, Sydney, MMTB, VR, Geelong, Ballarat, Launceston, Hobart and AETA notes. Editorial notes the first anniversary of the magazine and has a number of letters regarding this, content and the tram/car debate. 2465.6 - Vol. 2, No. 6 - 20 pages, June 1947, with cover printed in blue. Has articles on Cremorne bridge replacement (with photos), Neutral bay line and Tramcar transmission gears. News items include photos of MMTB track replacements, crowded trams, Brisbane, Sydney, Melbourne, and a photo of a Sydney tram passing under the new bridge work for Circular Quay station. 2465.7 - Vol. 2, No. 12 - pages 1-12, cover has an advert for Hartley Sporting Goods. Has cartoon on fares on Sydney trams by Peterson, not regarding retirement of Mr. H. Bell of MMTB, Melbourne Latrobe St and bus construction, Sydney tram cartoons from Emile Mercier, electric trains and other tramway news. (Item added 24-3-18 - from consolidation of Melbourne Tram Museum and BTM collections) trams, tramways, electric traction, aeta, models, australian tramways, duncan fraser, cartoons -
 Eltham District Historical Society Inc
Newspaper clipping, Romantic, charming . . . ''SUNNYBROOK', Diamond Valley Local, 31 March, 1954, p4, 1954
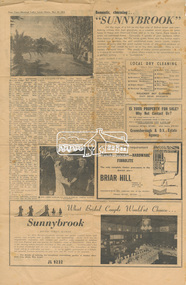
Romantic, charming . . . ''SUNNYBROOK'' ON the slope of a hill on the East side of Bolton street and overlooking willows that trail gracefully in a creeklet which shows no great haste to blend with Diamond Creek and so to the Yarra, there stands a great old-fashioned home. Outwardly it speaks of past opulence rather than beauty of design, but the velvet green lawns and the formal neatly weeded rose gardens, the well established trees, tennis courts, wisteria covered pergolas and the great curved fronds of old palms produce an atmosphere that cannot be built-up in less than decades. Here is irresistible old-world charm. The jangle of today cannot penetrate ... it is a place to remember ... a place where events to be remembered have a perfect setting ... it is "Sunnybrook." From the neighbouring ‘Beranto Lodge’ Mrs. Lenne can catch glimpses of ‘Sunnybrook,’ but the old home is well hidden from all quarters and only the faultlessly kept lawn can be seen by the curious. Like many other people, Mrs. Lenne was curious. Who can blame her. ‘Sunnybrook’ is a name to conjure with in Eltham. When the elderly men of the township were young bucks ‘Sunnybrook’ stood alone, a proud home that was known and established. Amongst the simple homes of the valley of the Diamond Creek, ‘Sunnybrook’ was Queen. In the roistering days of the Diamond Valley, when Kangaroo Ground was the seat of the Shire and when five pubs dotted the road from Lower Plenty to the civic centre, ‘Sunnybrook’ was off the track of the boisterous and tipsy. ‘Sunnybrook’ is still off the beaten track . . . but only slightly so; it no longer looks over cow pastures, but the neat, newly built houses which dot the length of the Main Road. They are still no closer than half a mile and while these houses have sprung up the fine trees and shrubs have quietly closed in around the boundaries of ‘Sunnybrook' as if to keep the old place to itself. That is how it has become something to whet the curiosity. When the course of events put the place on the market Mrs. Lenne bought it. When a modern house is bought it is pliable in the sense that the owner moulds it according to personality. It can remain severe, utilitarian and with a little neglect soon run to an ugly shabbiness. But with old 'Sunnybrook' it is different. There is in existence a character indelibly written into every line of the place . . . it is a LOVE OF ENGLAND. Upon ‘Sunnybrook’ has been lavished the devoted love of England to such a degree that it must be seen. The gardens and lawns are formal, and though lovely and speaking of the leisure of past years they are not English . . . they are just lovely, with the beauty that only the long established seem to possess. It is inside ‘Sunnybrook’ that the intense love of England is seen. Years ago the home was bought by a Mr. Martin, who was getting on in years, as a home for his much younger wife. The couple spent thousands of pounds as well as endless care and imagination in the complete redecorating of their home. Oak panelling imported from England was built in. Huge fireplaces shed their Colonial appearance to be become the fireplaces of England . . . and they were so in every sense because they were also imported from England. One lovely specimen whose gracious lines are remarked upon by all who see it, is a certified antique of finest English Oak. Care was taken to see what hand made wrought iron light fittings were in keeping. The old place has three lounge, dining or living rooms according to taste and requirements, and all are bigger than the biggest attempted in a “big” modern home. This does not include an outside living space of ample proportions, all fine flywired in and enclosing a fernery. A turn of a tap and spray as fine as mist is released over the rockery. On a scorching summer day when no relief short of a swim could help ordinary people, the resident of ‘Sunnybrook’ found the coolness of a dell in which to sit and enjoy their evening meal. What is more, the temperature of the whole house could be reduced by merely turning on this extensive spray water system. Yes, comfort to luxury standard is built in. And what happens to 'Sunnybrook' now? Mrs Lenne is famous to thousands for her quite fabulous catering. Her home and her "Wanda Inn" at Hepburn Springs have long been a Mecca for those who want the different in catering . . . different in the sense that every client is treated as a friend, not a customer and the hospitality and attention one would give to an honoured friend is accorded. And the food! – ask anyone who has enjoyed the privilege. Ask those who attended the reception given to Mr. Menzies by Eltham Shire Council; ask those members of the Diamond Valley Chamber of Commerce who enjoyed it! [See EDHS_04736-1/2 https://victoriancollections.net.au/items/5d4c2fb521ea6727d892df72] There is only one word anyone ever uses . . . “unbelievable!” it must be seen and eaten to be believed. And ‘Sunnybrook’ will ring to the laughter, and offer its spaciousness for the fun of all who join in the happiest occasion in the life of those just married, whose wedding reception is intended to be “remembered.” Mrs. Lenne is a dynamic ball of energy whose enthusiasm is not to be brooked. She has acquired the home of her dreams. 13 March 2020 Note: Historian Stella M. Barber via the GSV members Forum cites that Clair Samwell and Doris Good ran a nursing home in Balwyn called Penquite (1946-1952). Prior to that the women had run a rest home called Beranto in Eltham. Single newsprint page separated rest of paperberanto lodge, bolton street, houses, mrs. lenne, prime minister, properties, robert gordon menzies, sunnybrook -
 Flagstaff Hill Maritime Museum and Village
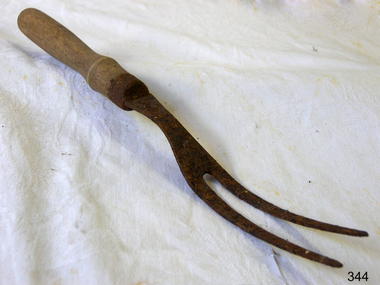
Domestic object - Fork
Naturally, we tend to take commonplace objects for granted, because they have always been there. Yet how many of you actually have thought “hey, where do forks come from?” Well, it takes one trip to China and a 3-year-old laughing at your face because of your desperate attempt to eat with chopsticks to finally appreciate something so ordinary such as a fork. So, where do forks come from? The early history of the fork is obscure. As a kitchen and dining utensil, it is believed to have originated in the Roman Empire, as proved by archaeological evidence. The personal table fork most likely originated in the Eastern Roman (or Byzantine) Empire. Its use spread to what is now the Middle East during the first millennium AD and then spread into Southern Europe during the second millennium. It did not become common in northern Europe until the 18th century and was not common in North America until the 19th century. Carving fork from 1640. Source: Wikipedia/Public Domain Carving Fork from 1640. Source: Wikipedia/Public Domain Some of the earliest known uses of forks with food occurred in Ancient Egypt, where large forks were used as cooking utensils. Bone forks had been found on the burial site of the Bronze Age Qijia culture (2400–1900 BC) as well as later Chinese dynasties’ tombs.The Ancient Greeks used the fork as a serving utensil. Read also: Steven Spielberg to Remake the Classic Musical ‘West Side Story’ In the Roman Empire, bronze and silver forks were used. The use varied according to local customs, social class and the nature of food, but forks of the earlier periods were mostly used as cooking and serving utensils. The personal table fork was most likely invented in the Eastern Roman (Byzantine) Empire, where they were in everyday use by the 4th century (its origin may even go back to Ancient Greece, before the Roman period). Records show that by the 9th century a similar utensil known as a barjyn was in limited use in Persia within some elite circles. By the 10th century, the table fork was in common use throughout the Middle East. Bronze forks made in Persia during the 8th or 9th century.Source: Wikipedia/Public Domain Bronze forks made in Persia during the 8th or 9th century.Source: Wikipedia/Public Domain The first recorded introduction of the fork to Western Europe, as recorded by the theologian and Cardinal Peter Damian, was by Theophano Sklereina the Byzantine wife of Holy Roman Emperor Otto II, who nonchalantly wielded one at an Imperial banquet in 972, astonishing her Western hosts.By the 11th century, the table fork had become increasingly prevalent in the Italian peninsula. It gained a following in Italy before any other Western European region because of historical ties with Byzantium and continued to get popularity due to the increasing presence of pasta in the Italian diet. At first, pasta was consumed using a long wooden spike, but this eventually evolved into three spikes, design better suited to gathering the noodles. In Italy, it became commonplace by the 14th century and was almost universally used by the merchant and upper classes by 1600. It was proper for a guest to arrive with his fork and spoon enclosed in a box called a cadena; this usage was introduced to the French court with Catherine de’ Medici’s entourage. In Portugal, forks were first used at the time of Infanta Beatrice, Duchess of Viseu, King Manuel I of Portugal’s mother around 1450. However, forks were not commonly used in Western Europe until the 16th century when they became part of Italian etiquette. The utensil had also gained some currency in Spain by this time, and its use gradually spread to France. Nevertheless, most of Europe did not adopt the use of the fork until the 18th century. Read also: The 8 Most Famous ‘Functioning Alcoholics’ in History Long after the personal table fork had become commonplace in France, at the supper celebrating the marriage of the Duc de Chartres to Louis XIV’s natural daughter in 1692, the seating was described in the court memoirs of Saint-Simon: “King James having his Queen on his right hand and the King on his left, and each with their cadenas.” In Perrault’s contemporaneous fairy tale of La Belle au bois dormant (1697), each of the fairies invited for the christening is presented with a splendid “fork holder”. The fork’s adoption in northern Europe was slower. Its use was first described in English by Thomas Coryat in a volume of writings on his Italian travels (1611), but for many years it was viewed as an unmanly Italian affectation. Some writers of the Roman Catholic Church expressly disapproved of its use, St. Peter Damian seeing it as “excessive delicacy.” It was not until the 18th century that the fork became commonly used in Great Britain, although some sources say that forks were common in France, England, and Sweden already by the early 17th century. Spaghetti fork By Lady alys - Own work, CC BY-SA 3.0, https://commons.wikimedia.org/w/index.php?curid=6414948 Spaghetti Fork By Lady alys – Own work, CC BY-SA 3.0, The fork did not become popular in North America until near the time of the American Revolution. The curved fork used in most parts of the world today was developed in Germany in the mid 18th century while the standard four-tine design became current in the early 19th century. The fork was important in Germany because they believed that eating with the fingers was rude and disrespectful. The fork led to family dinners and sit-down meals, which are important features of German culture. https://www.thevintagenews.com/2016/08/31/priority-fork-came-italy-european-country-pasta/?chrome=1Serving fork, two prongs, with a shaped wooden handle. Badly rusted.None.flagstaff hill, warrnambool, shipwrecked-coast, flagstaff-hill, flagstaff-hill-maritime-museum, maritime-museum, shipwreck-coast, flagstaff-hill-maritime-village, food, meat, carving -
 Ballarat Tramway Museum
Magazine, Jack Richardson, "Tram Tracks - The Electric Traction Monthly", July to Dec 1948
Three issues of "Tram Tracks - The Electric Traction Monthly" of the Australian Electric Traction Association. Each issue has a standard cover, of the magazine name etc, and featuring a front end photo of Victorian Railways tram No. 52 with the destination of Elwood but are in different colours, all have been saddled stapled with a single staple. The Volume and date details have been over printed. Back covers inside covers have the same advertisements. The three issues contain advertisements for the Wee Folks productions, Wattle Park, G&R model railway parts, Richard Noble model electric motors, Hobbyco, Fleet scale model railway equipment, Masseys Sports, Lloyd's Hobbycraft, John Martin Ltd, Johnson's Variety Store, the ARLHS, Barnes Tennis Centre, The Model Dockyard, the American Subscription Agency, Robilt Models, Meadmore Model Engineering and Austral Bronze Pty Ltd, Hearns Hobbies, Christie Scale Model Railway Products and Traction Publications. 2466.1 - Vol. 3 No. 10 - 20 pages, Oct. 1948, with cover printed in red ink. Has articles on anti-tram propaganda, Alphington - Heidelberg duplication and Sydney's early electric trams - C and D class. Also has news items on Brisbane, Newcastle, Sydney, Melbourne, Sandringham - Black Rock, Hobart, Launceston, Perth, Sydney and Melbourne electric trains, Launceston Trolley Buses, AETA notes, and a caricature of the Editor, Jack Richardson. 2466.2 - Vol. 3 No. 11 - 24 pages, Nov. 1948, with cover printed in blue ink. Has articles on construction of tram track in Melbourne (Victoria Parade), Bourke St., tram-bus controversy, (Reg Ansett, Noel Gipps and USNR Commander Quinby), Sydney's early electric trams - C and D class continued. Also news items on Last tram to Mayfield, Sydney, Latrobe St. Melbourne, Adelaide, opening to Alamein, Melbourne show traffic, VR Trams and AETA notes. 2466.3 - Vol. 3 No. 12 - 16 pages, Dec. 1948, with cover printed in green ink. Has articles on Sydney's electric railways, Brisbane Tramways and an AETA Melbourne tour. News items cover Sydney, Newcastle, Melbourne, Geelong, Bendigo, Kalgoorlie, Melbourne and Sydney trains and AETA news. 2466.4 - Vol 3 - No. 7 - 20 pages - July 1948 with cover printed in red ink. Has articles on cost of building trams for Brisbane, Sydney and Melbourne, abandonment of VR trams, Newcastle, Sydney, centre page photo of Y1 611, Sydney Electric train system including map and AETA news. 2466.5 - Vol 3 - No. 9 - 20 pages - Sep 1948 with cover printed in blue ink. Has articles on Mr. T. G. Patterson, Acting Director of Commonwealth Road Transport and Chairman of Federal Road Safety Council (very anti tram), news from Brisbane, Launceston, Sydney, Newcastle, Burwood, cost of trams, impressions of transport in Europe and North America, Melbourne and Sydney electric trains, tramways of Newcastle and model notes and AETA news. 2466.6 - Vol. 3, No. 1 - Jan 1948 - 16 pages with photo of Brisbane 407, political news, direct Melbourne to Footscray line proposal, new trams, bogie trams in Ballarat, article on Melbourne cable trams, electric trains, AETA outing in Melbourne and various adverts for model railways. 2466.7 - Vol 3 No. 2 - Feb. 1948 - 16 pages - political news, Ballarat news, traffic in Sturt St and new bogie cars, Christchurch closure, cartoon by Mercier on Sydney Honesty box, Brisbane suburban electrification, general tramway and electric railway news and various adverts for model railways. 2466.8 - Vol. 3 No. 3 - March 1948, with photo of VR 52 on front cover, 16 pages, political news, closures, Reg Ansett offer to buy the Melbourne bus system, Newcastle News, SEC Transfer of cars between the three systems, tramways in the Maribyrnong area, map of Melbourne trams, cartoon by Mercier, Brisbane train electrification and general news. 2466.9 - Vol. 3 No. 6 - June 1948 - 12 pages - MMTB political news, new trams for Sydney, tramways of Newcastle, Invercargill, Sydney Suburban trains, and AETA General news. .6 to .9 added 24-3-18 - from consolidation of Melbourne Tram Museum and BTM collections - ex AETA. trams, tramways, electric traction, aeta, models, australian tramways, melbourne, sydney, brisbane, newcastle, costs, ballarat, footscray -
 Ballarat Tramway Museum
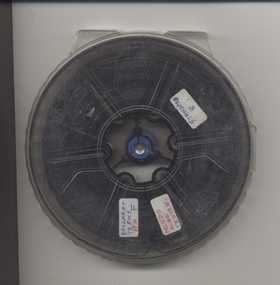
Film - Movie Film & Box, Kodak, 1960 to 1971
Yields information in movie film format of Ballarat trams in 1960 through to 1971, how the system operated and was used by people, including special trams., Yields information in movie film format of Ballarat trams in 1960 through to 1971, how the system operated and was used by people, including special trams.Movie film - 8mm, approx. 15 mins, without leader strip on a plastic reel, within a clear plastic case - Standard 8, titled "Ballarat Trams". See Reg Item 4957 for DVD and Mini DVD. Has been transferred to DVD - see Reg item 4957 Made by Arthur Hill. Also transferred to DVD by Rod Cook Oct. 2015, via Roger Greenwood for use in his DVD, "The City of Ballarat Trams, Gardens & Gold" of 2016. See Reg Item 6883. In Arthur's letter - on file - Made between 1960 and August 1971. Synopsis: based on time. Between 1960 and 1968 0:00 Trams Ahead sign before the Victoria St terminus with 20 at terminus 0.14 - No. 20 leaving Victoria St terminus and being followed along Victoria St by car and then passengers jointing the tram at a tram stop. 00.40 - No. 12 (c1960) in bound along Lydiard St North and arriving in the Gregory St loop. 00.56 - No. 12 and 14 crossing at Gregory St. 01.20 - No. 33 and a bogie car crossing at depot loop. 01.31 - No. 18 travelling along Wendouree Parade with the Lake in the background. 01.42 - No 41 at depot junction and running into the depot No. 2 road with a short sequence of a tramway signal. 02.17 - SEC Sign at the depot gate, shot of 41 in No. 2 road, with the lights other way around, Caution beware of trams sign and a red signal. 02.31- Timetable sign at Gardens Loop 02.36 - No. 30 arriving at Loop and view of a signal with no lights showing. 02.48 - Destination roll being changed through a number of destinations. 03.26 - No. 20 arriving at Carlton St loop with the Olympic monument in the background and the red signal light going out. 03.31 - a lady standing at the front of No. 20, with an ice cream in hand, and No. 17 arriving at the Carlton St loop with a short sped up sequence and No. 20 departing from the loop, followed by No. 17 leaving the loop, heading into the city. 03.41 - No. 13 inbound from Sebastopol crossing Albert St and heading into the city. 04.12 - view of signal and contactor, the light going green and the tram passing underneath. 04.24 - No. 12 at the Sebastopol terminus and departing. 04.51 - No. 12 crossing Albert St Sebastopol. 05.16 - Following No. 12 along Albert St, with Borough Offices in background initially. 05.28 - No. 12 arriving at the Grey St loop with No. 14 arriving at the loop from the city and both trams departing. March 1971 05.58 - No. 30 being followed along Barkly St, Mt Pleasant and the pole being turned at the terminus 06.32 - No. 30 picking up a lady passenger. 06.38 - view from the front of a tram, with the drivers hand and a cigarette, view from the back of the tram, along the Mt Pleasant route and running through the loop and then turning into Main St - has the Ballarat (East) fire station in one sequence, and finally running along Main St. 07.35 - view from tram, with car turning into Bridge St. and then running into Sturt St passed the Parking Loop, and along Sturt St. 08.32 - Points at Drummond St North being changed, doors changed over and the tram running along Drummond St. North, through the Mill St loop and into Macarthur St and in Wendouree Parade, with the Lake Wendouree in view and crossing No. 12 at the Depot Loop, with crews chatting, past the depot, a lady passenger getting off the tram near Forest St., and arriving at Gardens Loop with the same lady passenger who got on in Barkly St, getting off the tram. 11.09 - view of No. 30 at Gardens Loop, departing the loop. August 1971 11.30 - R761 crossing Melton (Exford Wier) on the special train to Ballarat and then the bridge between Ballan and Gordon Stations. 12.16 - View from the front of a tram, following No. 26 along Lydiard St North, crossing at Gregory St and returning to the City. 12.39 - No. 14 and one other tram running along Albert St to Sebastopol, crossing No. 21 at Grey St and then to Sebastopol terminus, crossing Albert St and return and running along Albert St. 13.36 - No. 26, 39 crossing 13 at Gardens Loop. 14.00 - view looking across Lake Wendouree. 14.07 - 26 arriving at Victoria St, running part of Destination roll, passengers getting off with hotel in the background, trolley pole being turned and then with 39 following tram along Victoria St, crossing at the King St Loop. 15.07 - view of a trolley pole tracking through the overhead at curve 15.10 - end. Written labels giving title information on reel.trams, tramways, ballarat, sebastopol, lydiard st north, victoria st, mt pleasant, lake wendouree, depot, tram 12, tram 13, tram 14, tram 17, tram 18, tram 21, tram 26, tram 33, tram 39, tram 41 -
 Flagstaff Hill Maritime Museum and Village
Newspaper - Newspaper clipping, 22-03-1947
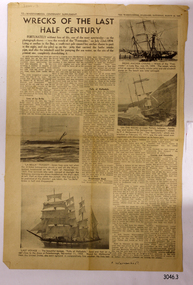
Newspaper clippings and a typed sheet regarding shipwrecks in South West Victoria. (1) The first clipping is titled Wrecks of the Last Half Century, page 12 of the Warrnambool Centenary Supplement, The Warrnambool Standard, Saturday, March 22, 1947. The ships mentioned are FREE TRADER, LA BELLA, FALLS OF HALLADALE, CASINO and CARAMBA. (2) The second clipping's main article Divers Find old shipwreck from Geoff Clancy has a handwritten date Circa Jan 30, 1960, and is possibly from a Melbourne newspaper, as it mentions non-local events. It tells of the then-current finding of the 52-year-old wreck of the Falls of Halladale near Port Campbell by skin divers. (3) Type is written 2-page article The Romance of the Clipper Ships by Basil Lubbock sub-title Falls of Halladale. The iron-hulled, four-masted barque, the Falls of Halladale, was a bulk carrier of general cargo. She left New York in August 1908 on her way to Melbourne and Sydney. In her hold, along with 56,763 tiles of unusual beautiful green American slates (roofing tiles), 5,673 coils of barbed wire, 600 stoves, 500 sewing machines, 6500 gallons of oil, 14400 gallons of benzene, and many other manufactured items, were 117 cases of crockery and glassware. Three months later and close to her destination, a navigational error caused the Falls of Halladale to be wrecked on a reef off the Peterborough headland at 3 am on the morning of the 15th of November, 1908. The captain and 29 crew members all survived, but her valuable cargo was largely lost, despite two salvage attempts in 1908-09 and 1910. ABOUT THE ‘FALLS OF HALLADALE’ (1886 - 1908): - Built: in1886 by Russell & Co., Greenock shipyards, River Clyde, Scotland, UK. The company was founded in 1870 (or 1873) as a partnership between Joseph Russell (1834-1917), Anderson Rodger and William Todd Lithgow. During the period 1882-92 Russell & Co. they standardised designs, which sped up their building process so much that they were able to build 271 ships over that time. In 1886 they introduced a 3000 ton class of sailing vessel with auxiliary engines and brace halyard winches. In 1890 they broke the world output record. Owner: Falls Line, Wright, Breakenridge & Co, 111 Union Street, Glasgow, Scotland. Configuration: Four masted sailing ship; iron-hulled barque; iron masts, wire rigging, fore & aft lifting bridges. Size: Length 83.87m x Breadth 12.6m x Depth 7.23m, Gross tonnage 2085 ton Wrecked: the night of 14th November 1908, Curdies Inlet, Peterborough south west Victoria Crew: 29 The Falls of Halladale was a four-masted sailing ship built-in 1886 in Glasgow, Scotland, for the long-distance cargo trade and was mostly used for Pacific grain trade. She was owned by Wright, Breakenridge & Co of Glasgow and was one of several Falls Line ships, all of which were named after waterfalls in Scotland. The lines flag was of red, blue and white vertical stripes. The Falls of Halladale had a sturdy construction built to carry maximum cargo and able to maintain full sail in heavy gales, one of the last of the ‘windjammers’ that sailed the Trade Route. She and her sister ship, the Falls of Garry, were the first ships in the world to include fore and aft lifting bridges. Previous to this, heavily loaded vessels could have heavy seas break along the full length of the deck, causing serious injury or even death to those on deck. The new, raised catwalk-type decking allowed the crew to move above the deck stormy conditions. This idea is still used today in the most modern tankers and cargo vessels and has proved to be an important step forward in the safety of men at sea. On 4th August 1908, with new sails, 29 crew, and 2800 tons of cargo, the Falls of Halladale left New York, bound for Melbourne and Sydney via the Cape of Good Hope. The cargo on board was valued at £35,000 and included 56,763 tiles of American slate roofing tiles (roof slates), 5,673 coils of barbed wire, 600 stoves, 500 sewing machines, 6,500 gallons of oil, 14,400 gallons of benzene, plumbing iron, 117 cases of crockery and glassware and many other manufactured items. The Falls of Halladale had been at sail for 102 days when, at 3 am on the night of 14th November 1908, under full sail in calm seas with a six knots breeze behind and misleading fog along the coast, the great vessel rose upon an ocean swell and settled on top of a submerged reef near Peterborough on south-west Victoria’s coast. The ship was jammed on the rocks and began filling with water. The crew launched the two lifeboats and all 29 crew landed safely on the beach over 4 miles away at the Bay of Islands. The postmistress at Peterborough, who kept a watch for vessels in distress, saw the stranding and sent out an alert to the local people. A rescue party went to the aid of the sailors and the Port Campbell rocket crew was dispatched, but the crew had all managed to reach shore safely by the time help arrived. The ship stayed in full sail on the rocky shelf for nearly two months, attracting hundreds of sightseers who watched her slowly disintegrate until the pounding seas and dynamiting by salvagers finally broke her back, and her remains disappeared back into deeper water. The valuable cargo was largely lost, despite two salvage attempts in 1908-09 and 1910. Further salvage operations were made from 1974-1986, during which time 22,000 slate tiles were recovered with the help of 14 oil drums to float them, plus personal artefacts, ship fittings, reams of paper and other items. The Court of Marine Inquiry in Melbourne ruled that the foundering of the ship was entirely due to Captain David Wood Thomson’s navigational error, not too technical failure of the Clyde-built ship. The shipwreck is a popular site for divers, about 300m offshore and in 3 – 15m of water. Some of the original cargo can be seen at the site, including pieces of roof slate and coils of barbed wire.The newspaper articles are of historical significance, retelling the stories of shipwrecks along the South West coast of Victoria. The Falls of Halladale shipwreck is listed on the Victorian Heritage Register (No. S255). She was one of the last ships to sail the Trade Routes. She is one of the first vessels to have fore and aft lifting bridges. She is an example of the remains of an International Cargo Ship and also represents aspects of Victoria’s shipping industry. The wreck is protected as a Historic Shipwreck under the Commonwealth Historic Shipwrecks Act (1976).Newspaper cuttings with text and photographs (3) relevant to Falls of Halladale, La Bella, Casino, Free Trader and the refurbishing of the Falls of Clyde. Also included is typewritten information about Falls of Halladale. Printed between 1947 and 1972 in Melbourne, Victoria Author of the typed article "The Romance of the Clipper Ships" was Basil Lubbock Handwritten on article "Circa: JAN 30 1960" Headline "Divers find old shipwreck" "Geoff Clancy" "Not salvaged" "Still wedged" "Falls of Halladale" Typed pages: "THE ROMANCE OF THE CLIPPER SHIPS BY BASIL LUBBOCK" "FALLS OF HALLADALE" flagstaff hill, warrnambool, shipwrecked-coast, flagstaff-hill, flagstaff-hill-maritime-museum, maritime-museum, shipwreck-coast, flagstaff-hill-maritime-village, falls of halladale, la bella, falls of clyde, freetrader, casino, coramba, geoff clancy, warrnambool standard january 30 1947, warrnambool centenary supplement 1947, wrecks of the last half century, newspaper article divers find by geoff clancy, the romance of the clipper ships by basil lubbock, free trader, speculant, clipper ship, shipwrecks -
 Flagstaff Hill Maritime Museum and Village
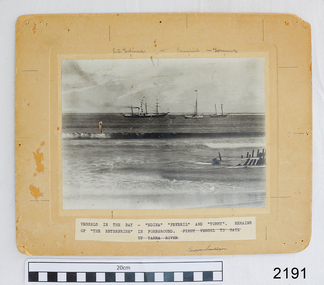
Photograph, Vessels in the bay, 1890's
The photograph, taken in the 1890s, shows sailing ships and a wreck in Lady Bay, Warrnambool. Lady Bay was once a very busy port of trade in Warrnambool and was also called the Port of Warrnambool or Warrnambool Harbour. ENTERPRISE (1847-1850) NOTE: The “Enterprise” wrecked in 1850 in Warrnambool should not be confused with John Pascoe Faulkner’s ‘Enterprise’, which was wrecked in NSW in 1847. The 58-ton schooner Enterprise was built by David Hay in Waiheke, New Zealand in 1847 and registered by owners John Watson and Edward Byam in Melbourne, Australia. She was a single-deck sailing ship with two masts, used for carrying cargo such as local agricultural produce and general commodities between Melbourne and other colonial ports. On September 14th, 1850 the Enterprise had sailed from Melbourne under the control of the ship’s Master, James Gardiner Caught, and was moored in at the Tramway Jetty in Lady Bay, laden with wheat and potatoes. The vessel rode out a south-easterly gale but eventually dragged anchor and was beached, bow first and then broadside. Buckwall, a local indigenous man, braved the heavy surf and reached the stricken vessel with a rescue line, saving all five crew on board. There were no passengers on board. The Enterprise wreck was in an area called Tramway Jetty in Lady Bay. Since then the area has become the location of Lady Bay Hotel and now, in 2019, it is in the grounds of the Deep Blue Apartments. In fact, with the constantly changing coastline through built-up sand, the wreck site is now apparently under the No 2 Caravan Park on Pertobe Road, perhaps 150 metres from the high tide. Its location was found by Ian McKiggan (leader of the various searches in the 1980s for the legendary Mahogany Ship). The Warrnambool Wreck Enterprise is listed on the Victorian Heritage Database VHR S238. DIFFERENTIATING the New Zealand Schooner “Enterprise” from John Fawkner’s “Enterprize“ Dr Murray Johns, Melbourne, says in his article The Mahogany Ship Story, “…the Enterprise, wrecked in Lady Bay, Warrnambool in 1850 ... was soon covered by sand but was exposed again after several storms in 1887. “Samples of timber were then cut from the wreck, which would then have been buried for 37 years. In November 1887 the Warrnambool Standard reported that “the timber looks sound and hard, a penknife scarcely making any impression.” “For many years there was confusion about the identity of that ship in Lady Bay. Most people believed it was the wreck of John Pascoe Fawkner’s Enterprize, which had sailed from Tasmania to Victoria bringing the pioneer settlers to Melbourne in 1835. “In fact, as I documented in 1985, the Warrnambool wreck was of an entirely different ship, also called Enterprize [Enterprise], but built in New Zealand in 1847. Fawkner’s ship had already been sold to Captain Sullivan in 1845 and was wrecked on the Richmond Pier in northern New South Wales early in 1847. “In 1985 a piece of timber from the local Enterprise, which had been kept at the Warrnambool Museum since 1892, was identified histologically as a New Zealand timber, not Tasmanian timber such as blue gum, from which Fawkner’s Enterprize would have been built in 1830. This confirmed the identity of the Warrnambool Enterprize.”[Dr. M.W. Johns later wrote an article called “The Schooner Enterprise: A Final Word on a Historic Wreck.”] ABOUT THE S S EDINA The three-masted iron screw steamer SS Edina was built in Glasgow, Scotland, in 1854 by Barclay and Curle. She was adorned with the figurehead of the ‘fair maid of Judea’. The many years of service made SS Edina famous worldwide as the longest-serving screw steamer. (The term screw steamer comes from being driven by a single propeller, sometimes called a screw, driven by a steam engine.) SS Edina’s interesting history includes English Chanel runs, serving in the Crimean Ware carrying ammunition, horses and stores to the Black Sea, and further service in the American Civil War and later, serving in the western district of Victoria as well as in Queensland and carried gold, currency and gold prospectors Australia to New Zealand. SS Edina had the privilege of being an escort vessel to H.R.H. the Duke of Edinburgh during his visit to Australia in 1867. In March 1863 SS Edina arrived in Port Phillip Bay, Melbourne and was bought by Stephen Henty, of Portland fame, to work the cargo and passenger run from Melbourne – Warrnambool – Port Fairy - Portland. After a short time of working the run from Australia to New Zealand, with passengers and cargo that included gold and currency, she returned to her Melbourne - Warrnambool – Port Fairy run, with cargo including bales of wool produced in the western district of Victoria. The Warrnambool Steam Packet Company purchased SS Edina in 1867; she was now commanded by Captain John Thompson and Chief Engineer John Davies. She survived several mishaps at sea, had a complete service and overhaul and several changes of commanders. In 1870 SS Edina was in Lady Bay, Warrnambool, when a gale sprung up and caused a collision with the iron screw steamer SS Dandenong. SS Edina’s figurehead was broken into pieces and it was not ever replaced. SS Edina was re-fitted in 1870 and was then used as a coastal trader in Queensland for a period. She was then brought to Melbourne to carry cargo and passengers between Melbourne and Geelong and performed this service from 1880-1938. During this time (1917) she was again refitted with a new mast, funnel, bridge and promenade deck, altering her appearance. In 1938, after more collisions, SS Edina was taken out of service. However, she was later renamed Dinah and used as a ‘lighter’ (a vessel without an engine or superstructure) to be towed and carry wool and general cargo between Melbourne and Geelong. In 1957, after 104 years, the SS Edina was broken up at Footscray, Melbourne. Remains of SS Edina’s hull can be found in the Maribyrnong River, Port Phillip Bay. This photograph is significant for its association with the screw steamer SS Edina, heritage listed on the Victorian Heritage Database VHR S199. She had endeared herself to the people of Port Phillip Bay as a passenger ferry, part of their history and culture. She played a significant role in the Crimean War, the American Civil War and the gold rush in New Zealand. She also served western Victoria for many years in her cargo and passenger runs. The SS Edina is famous for being the longest-serving screw steamer in the world. After spending her first nine years overseas she arrived in Melbourne and her work included running the essential service of transporting cargo and passengers between Melbourne and the western Victoria ports of Warrnambool, Port Fairy and Portland. The SS Edina was purchased in the late 1860s by the local Warrnambool business, the Warrnambool Steam Packet Co. and continued trading from there as part of the local business community. Her original ‘fair maid of Judea’ figurehead was broken to pieces in a collision with another vessel (the SS Dandenong) in a gale off Warrnambool, Victoria, in 1870. The photograph is significant for its association wreck of the Victorian Heritage Listed schooner Enterprise, VHR S238, being a New Zealand-built but Australian-owned coastal trader. The wreck was also significant for its association with the local indigenous hero, Buckawall, who saved the lives of the five crew on board. Photograph "Vessels in the Bay". Black and white photograph of several vessels in Lady Bay, Warrnambool, including some small vessels and "S.S. Edina", the "Peveril" and "Tommy", plus the remains of the wrecked vessel "Enterprise" in the foreground. Photograph is mounted on beige card with label describing the vessels, plus pencilled vessel names. There are several pin holes in each corner of the photograph. Typed label under the photograph “VESSELS IN THE BAY – “EDINA” “PEREVIL” AND “TOMMY”. / REMAINS OF “THE ENTERPRISE” IN FOREGROUND. (Also crossed out on the label “FIRST VESSEL TO SAIL UP YARRA RIVER). In pencil script above the vessels on the photograph “S.S. Edina”, “Peveril” “Tommy”. On the reverse is a printed sticker with “F-Ph 59/2 74”, red felt-tip pen “88”, green pen script repeating the text that is under the photograph on the front.flagstaff hill, warrnambool, shipwrecked-coast, flagstaff-hill, flagstaff-hill-maritime-museum, maritime-museum, shipwreck-coast, flagstaff-hill-maritime-village, enterprize, port of warrnambool, warrnambool harbour, peveril, tommy, ss edina, lighter dinah, warrnambool steam packet company, lady bay, pleasure steamer, edina, trade, travel, screw ship, coastal trader, cargo, victoria, buckawall, indigenous rescue, indigenous hero -
 Flagstaff Hill Maritime Museum and Village
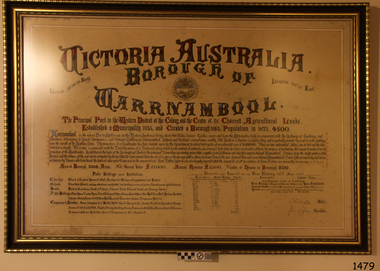
Document - Framed Poster, Borough of Warrnambool, Victoria, Australia, after 30/06/1875
This document, also referred to as a word picture or Tablet, is framed in glass and timber with gilt trim, is handwritten with colour highlights. The penned letters rest on ruled guide lines, decorated where the lines intersect. The writing gives a description of the state of Borough of Warrnambool around 1875; its location, the area it covers, its population, Harbour and facilities, public buildings and institutions, imports and exports, financial worth, number of houses, connection with other areas of the Colony. A possible reason and origin for the document is found in an article ‘Link with US Exhibition’ from the Warrnambool Standard of December 19, 1981, written by local historian Bruce Morris. The writer mentions that the Warrnambool Borough Council met on 15th June 1875 and recorded a letter from G.C. Levey , secretary to the Melbourne group of commissioners representing the Colony, and Victoria in particular, for the Philadelphia Centennial Exhibition of 1876. The letter asks Council to provide “statistics as to the population, social condition and commercial and industrial state of the district in and around Warrnambool.” A sub committee was formed for the project. The Mayor, Cr. Thomas King, wrote and signed a Report, presented to the council on July 14, 1875, in which “The Committee … begs to recommend that a Tablet be prepared setting for the particulars respecting the following matters relating to the Borough”. The matters included area, population, annual income, churches, schools, other public buildings, societies and companies, general description of houses erected, and returns of exports and imports for 1874. The minutes note that the Report was adopted. The article above also notes the opinion of Warrnambool printers who have examined the document; it is almost certainly to be an old lithograph, which means there could be several copies. It is possible that there may be a copy in Melbourne and another in Philadelphia. It is interesting to note that (1) the quoted location co-ordinates are for an “Unnamed Road, Packsaddle NSW 2880, Australia”, and that the DMS co-ordinates for Warrnambool’s Council Offices differ, being 38.23.9.12 South, 142.28.52.887. (2) the date for “Exports and Imports for the Year Ending 30th June 1875” is different to the period mentioned by Cr. King in the sub committee’s Report of recommendation “returns of exports and imports for 1874”. The information required to have the figures for the end of June 1875 would need to have been compiled very quickly for the Tablet to be ready for the opening of the Philadelphia Exhibition on 10 May 1876. The document/certificate shows the following – - - - - - - - - - - - - - - -- - - - - - - - - - - - - - -- - - - - - - - - - - - - - -- - - - - - - - - - - - - - - “Victoria Australia, Borough of Warrnambool. Latitude, 30.24.50 South, Longitude 142.32 East The Principal Port in the Western District of the Colony and the Centre of its Choicest Agricultural Lands. Established a Municipality in 1855, and Created a Borough 1863. Population in 1875 4,500. Warrnambool is the nearest Port to Melbourne on the Western Seaboard, being about 160 miles distant. Coaches run to and from the Metropolis daily, in connexion [connection] with the Railway of Geelong and Steamers belonging to Local Companies sail between Melbourne, Warrnambool, Belfast [renamed Port Fairy], and Portland several times weekly. The Harbour is known as Lady Bay, and is partially protected by a reef of rocks stretching from the mouth of the Hopkins River. The formation of a Breakwater has been decided upon by the Government, to extend 600 yards, at an estimated cost of £100,000. There are two substantial Jetties, one of 800 and the other of 600 feet in length. The former is connected with the Town by means of a Tramroad, along which Goods, inwards & outwards, are conveyed, & the latter has been constructed solely for the purpose of facilitating the transit of material for the formation of the Breakwater. In addition to the trade of the Borough and District, the principal Townships up country receive their supplies from Melbourne and ship their exports through Warrnambool. Potatoes form the staple produce of the district, and the richness of the soil can be estimated by the fact that the Government Statistics for 1875 give as the average yield a return of Seven Tons to the acre. Several thousand acres between Warrnambool and Tower Hill are now being laid down in Potatoes by Tenants who have leased the lands at rates up to £5 per acre for the season 1875-6. Wool, Tallow, hides &c are also largely exported, while the shipments of all descriptions of Farm Produce are annually increasing. Area of Borough, 3362 Acres. Net Annual Value £27,000. Annual Revenue £5,500. Number of Houses in Borough 800. Public Buildings and Institutions Churches. Church of England, Roman Catholic, Presbyterian, Wesleyan, Congregational and Baptist. Schools. Three State Schools, average attendance nearly 1000. New Building in course of erection. Several private establishments. Banks. Bank of Australasia, Bank of Victoria, National Bank, Colonial Bank and Savings Bank. Public Buildings. Court house, Custom house, Post & Telegraph Offices, Survey & Land Offices, Shire £, Town Hall, Mechanics Institute, Volunteer Orderly Room, Odd Fellows Hall, Hospital & Benevolent Asylum, Temperance Hall &c. Companies & Societies. Steam Navigation Co, Woolen Mill Co, Gas Co, Racing Club, Amateur Turf Club, Agricultural Society, Farmers’ Club, Cricket Club, Anglers’ Society, Building Society, Freemasons Odd Fellows, Foresters, Druids, Hibernians. Protestant Alliance, Rechabites, Sons of Temperance, &c, Fire Brigade &c. --- Exports and Imports for the Year Ending 30th June 1875 –-- --Exports Total Tonnage 27,800 (Calculated at the Current Warrnambool Market Prices) Potatoes Wool Wheat Barley Hides Skins Fowls Butter Cheese Eggs Tallow Leather Ale Pigs Sheep Sundries --Imports 13,000 Tons Of the Estimated Value of £520,000 Total Tonnage of Exports and Imports 40m900 Tons, Value £806,627 Passenger Travels, to ad from Warrnambool during year, 10,000 persons Revenue from all sources paid through Warrnambool Sub Treasury From 1860 to June 1875 £1, 292, 300 Thomas King [signed] Mayor Henry T Read [signed] Town Clerk” - - - - - - - - - - - - - - -- - - - - - - - - - - - - - -- - - - - - - - - - - - - - -- - - - - - - - - - - - - - - The document is of historical, social, economic and local significance in that it summarises activities, business, community, trade, travel and government at a point in time in Warrnambool’s history – 30th June 1875.Document, also referred to as a ‘word picture’ or ‘tablet’. Document is framed in glass and timber with gilt trim, handwritten with colour highlights. The penned letters rest on ruled guide lines, decorated where the lines intersect. Document outlines the establishment of Warrnambool as a Municipality in 1855 and Borough in 1863, with a population of 4,500 in 1875. It states geographic location, public buildings and institutions, harbor facilities and imports and exports for the year ending 30th June 1875. Two signatures "Thomas King" Mayor and "Henry T Read" Town Clerk. It shows the Coat of Arms of the Borough of Warrnambool.Signatures - "Thomas King" Mayor and "Henry T Read" Town Clerk. Warrnambool Coat of Arms; “British Coat of Arms, above sailing vessel and sheaf of wheat in sun, motto “By these we flourish” and around circumference “Borough of Warrnambool 1855”flagstaff hill, warrnambool, shipwrecked coast, flagstaff hill maritime museum, maritime museum, shipwreck coast, flagstaff hill maritime village, great ocean road, borough of warrnambool, municipality of warrnambool, document borough of warrnambool 1875, word picture of warrnambool 1875, tablet of borough of warrnambool 1875, statistics borough of warrnambool 1875, lithograph borough of warrnambool 1875, coat of arms warrnambool, warrnambool city motto – in these we flourish, establishment of warrnambool, warrnambool history, thomas king mayor of warrnambool, henry t read town clerk of warrnambool, warrnambool breakwater, warrnambool jetty, warrnambool imports and exports 1875, warrnambool agriculture 1875, warrnambool business 1875, warrnambool population 1875, centennial exhibition philadelphia 1876, framed certificate -
 Melbourne Tram Museum
Letter - Correspondence, Melbourne & Metropolitan Tramways Board (MMTB), "Trolley Buses", 1922-23
File containing correspondence between the MMTB Chief Engineer Mr. Strickland and various companies, including Railless Ltd, Australian General Electric, English Electric / Dick Kerr and its UK consultants Heap and Digby between the period August 1922 and January 1923. Includes drawings, technical specifications and a book titled "AEC Railless Trolley Bus Specification", date stamped 15/8/1922. For a scan of this document see htd535-trolleybus.pdf (imaging not working correctly for this database as at 9-8-14) For a listing of the contents of this file and of Reg Item 535, see Related Documents - htd535-536list.pdf Item 535 - Trolley Buses Listed from top of file, in order found. Letters generally to/from MMTB Chief Engineer. Date Type, contents and notes 18/11/1922 Letter to Metro Vickers from Chief Engineer re Railless trams 12/1/1923 Letter to Aust GE re railless trams Not likely to proceed at this time. 11/1/1923 Letter from Aust GE Co. providing photographs, drawings, BTH, pamphlets, and general information. Includes photo of Tee-side trolley bus No. 17. No other papers with this item. 6/9/1922 Letter to Aust. GE asked for particulars and drawings of motor omnibuses These three items pinned together. 5/9/1922 Letter to Chief Engineer from Aust. GE provided up to date figures on BTH Railless vehicles. These three items pinned together. 31/8/1922 Letter to Aust GE returning folded of data in relation to petrol and petrol electric cars. These three items pinned together. 24/10/1922 Letter to Heap & Digby, thanks for information, but unlikely to use trolley buses due to poor road conditions where they could be used in terms of revenue. 14/9/1922 Letter from Heap & Digby, inclosing photos of Railless Ltd vehicles supplied to Bloemfontein South Africa and testing. These two items clipped together with drawing No. SK 14-8, showing Mexborough gradients. 28/8/1922 Letter from AEC to Heap & Digby re trolley buses, construction costs and practicality of shipping these to Aust. Includes the Mexborough test results. These two items clipped together with drawing No. SK 14-8, showing Mexborough gradients. 3/8/1922 to 31/10/22 Correspondence between MMTB and H&D regarding the Bloemfontein vehicles. Pinned together. 17/11/1922 Letter from Metro Vickers to MMTB providing details (no photos or drawings) of trolley buses – four pages. 18/1/1923 Letter to H&D thanking him for information and a paper ready by a Mr. Munro. 31/8/1922 Letter to Metro Vic – Melbourne asking whether Westinghouse had developed standard lines of motors for railless cars. 4/10/1922 Letter to Aust GE thanking for info. 2/10/1922 Letter from Aust GE providing two cuttings about railless vehicles in Birmingham and the cost of tram track construction. Papers Contained within a green strip of cloth. 26/9/1922 Letter from H&D providing info from EE – Dick Kerr Preston works equipment used by Railless Ltd. EE Specification for DK 26B Trackless trolley motors 18/9/1922 Letter from EE to H&D providing info on 20HP motors, 40HP, and other information. Blueprint – drawing 2810 – DK 26 Motor Performance curves for above motor Blueprint – No. 1312D – controller diagram Pamphlet – EE – tramcar Type D automatic circuit Breakers. Publication No. 230, dated 9/1920. Ditto, Form A, drawings No 3565, 1/1/19. Performance curves – blueprint – Type DK85A Blueprint – 4449 – outline of controller DK, Type D, form B. Blueprint – P2002M034 – DK85 Motor. EE specification for Traction Motor DK85 Modified from a tram motor. EE blueprint P2102F021, traction control wiring for form D controller. EE blueprint P2103F033 – outline of controller type SE1, form C and D. EE blueprint P2102Z011 – wiring diagram for type SE1 form controller. Performance curves for DK85A motor. EE blueprint – P2102F025 – diagram of connections (wiring) for Type SE1, form D controller. Blueprint – EE drawing – P2002M036 – DK85 motor with ball bearings. Single documents. Date Type Notes 27/9/1922 Letter to H&D acknowledging AEC Trackless trolley bus specification. 15/8/1922 Letter from H&D forwarding above specification String bound book – AEC Railless Trolley Bus Specification – stamped 15/8/22 Scanned as a separate document. 4/9/1922 Letter from Metro Vic. Melbourne advising that they have no information on Westinghouse Motors for use in railless cars, but seeking same.trams, tramways, trolley buses, melbourne, mmtb, aec, heap and digby, english electric, railless, dick kerr, general electric -
 Flagstaff Hill Maritime Museum and Village
Domestic object - Can Opener, Bottle Opener & Corkscrew
It took 15 years to invent the can. It took 100 more to invent a standard way to open it. In the 19th century, decades after the invention of canning, there were virtually no can openers. Canned food, such as sardines, came with its own "key" to peel back the tin lid. Birth of the can One of the oddest things about the can opener is that the can predates it by almost 150 years. Though common today, cans were once military-grade technology. In 1795, Napoleon, to whom the phrase "an army marches on its stomach" is attributed, offered 12,000 francs to anyone who could find a way to preserve food. Without any knowledge of bacteria or their role in food spoilage, scientists didn't even know where to begin. It took 15 years before a chef named Nicholas Appert claimed the prize after successfully jarring food. Soon after that, his countryman Philippe de Girard came up with a variant on Appert's method—metal tins—and sold the idea to the British. Spoiled food, and the sickness it caused, was a widespread problem. The public would have benefited from canned food, but for decades cans were almost exclusively for the army and the navy. The canning process, with its hours of boiling and steaming, its scrupulous cleanliness, its heated metal, and its need for a great deal of disposable material, made canned food far too expensive for anyone but the military. No can openers were needed or even possible. The metal of early cans was too thick to make openers practical. Soldiers and sailors had plenty of sharp objects on hand and made ample use of them when they wanted to eat. During the 19th century, the process of canning was refined and mechanised, and the metal wall of the average can slimmed down enough that a civilian could get it open—if that civilian had the right tool. No one had that tool yet, so early cans had to open themselves. In other words, they came with built-in openers. The result was a confusing but pleasing free-for-all, in terms of product engineering. Each type of food came with its own kind of can, and each kind of can came with its own kind of opener. Tinned fish and meat were often sold in rectangular cans. These cans were fitted with a "key" that would roll down the top of the can. Coffee, beans, and other types of meat were packaged in cylinders with metal strips that could be peeled back with their own kinds of built-in keys. Cans of milk, which didn't need to be completely opened, came with puncture devices. As tinned food became more common, its containers became more regular. A nice cylindrical can became the norm, and, as these cans filled kitchens, more engineers put their minds to finding a convenient way to open all of them. The first standalone can opener worked on a simple principle: point, stab, and pull. From the mid-19th century to the end of World War I, the typical can opener looked roughly like a wrench, if the lower 'jaw' of the wrench were replaced with a blade. People used the blade to puncture the top of the can near its edge, push the upper jaw against the side of the can, and drag the blade through the metal along the rim. Because meat was the first and most popular canned substance, these can openers were often shaped to look like cows and given the nickname 'bully beef can openers'. The bully beef can opener, popular in the mid-19th century, resulted in many lost fingers. Later, a corkscrew was added that was seated in the handle, and could be pulled out for use. Bully beef can openers were so common, effective, and sturdy that they are still frequently available on collectors' sites. Some are advertised as “still working,” and every last one of them is, without a doubt, soaked in the blood of our ancestors. Dragging a sharp blade along the edge of a can is certain to cause injury sooner or later. So once people got a reliable can shape and a reliable way to get the can open, the search was on for a reliable way to get a can open without the possibility of losing a finger. The answer came in 1925, from the Star Can Opener Company of San Francisco. This is probably the first can opener that resembles the one people have in their kitchens today. Instead of using a blade to pry open a metal can, buyers could clamp the edge of the can between two wheels and twist the handle of one of the wheels to move the blade around the lip. The Star can openers weren't perfect. Compared to the bully beef model, they were flimsy and breakable, but they probably prevented a few injuries. Six short years after the Star model came to market, the first electric can opener was invented. It was patented in 1931 by the Bunker Clancey Company of Kansas City, who had already been sued by the Star Can Opener Company for trying sell a double-wheeled can opener like the Star model (the case was dismissed). The electric can opener must have seemed like the wave of the future and a sure-fire seller, but it proved to be too far ahead of its time. In 1931 not that many households had electricity, and those that did weren't interested in buying can openers. The Bunker Clancey Company was subsequently bought by the Rival Company, which still makes small appliances like can openers today. It took another 25 years for electrically powered can openers to become practical. In the 1950s, Walter Hess Bodle and his daughter, Elizabeth Bodle, developed an electric can opener in the family garage. Walter came up with the opener's blades and motor, and Elizabeth sculpted the outside. Their can opener was a free-standing unit that could sit on the kitchen counter. The Udico brand of the Union Die Casting Company put it on the market in time for Christmas in 1956 and had great success with it. Over the next few years it came out in different styles and colours, and, like the bully beef can opener, has become a collector's item. Also like the bully beef model, Udico can openers often still work. They don't make 'em like they used to. Although there have been some design changes and refinements over the last sixty years, there have yet to be any more leaps forward in can opener technology. If you're resentfully opening a can, you are almost certainly doing it using the Star design, manually forcing the can between two wheels, or the Bodle design, clamping the can into a free-standing electrical opener. Whether or not you enjoy your holiday meals, at least you can be happy that you are not getting poisoned by your own food or cutting open your hand with the blade you use to get at it. That's something, right?The can opener, Bottle opener and the corkscrew are still very important and essential items in most kitchens.Metal can opener, chromed, with bottle opener, and a corkscrew seated in the handle.None.flagstaff hill, warrnambool, shipwrecked-coast, flagstaff-hill, flagstaff-hill-maritime-museum, maritime-museum, shipwreck-coast, flagstaff-hill-maritime-village, canning, can opener, corkscrew, bottle opener, kitchen equipment -
 Flagstaff Hill Maritime Museum and Village
Domestic object - Can Opener
It took 15 years to invent the can. It took 100 more to invent a standard way to open it. In the 19th century, decades after the invention of canning, there were virtually no can openers. Canned food, such as sardines, came with its own "key" to peel back the tin lid. Birth of the can One of the oddest things about the can opener is that the can predates it by almost 150 years. Though common today, cans were once military-grade technology. In 1795, Napoleon, to whom the phrase "an army marches on its stomach" is attributed, offered 12,000 francs to anyone who could find a way to preserve food. Without any knowledge of bacteria or their role in food spoilage, scientists didn't even know where to begin. It took 15 years before a chef named Nicholas Appert claimed the prize after successfully jarring food. Soon after that, his countryman Philippe de Girard came up with a variant on Appert's method—metal tins—and sold the idea to the British. Spoiled food, and the sickness it caused, was a widespread problem. The public would have benefited from canned food, but for decades cans were almost exclusively for the army and the navy. The canning process, with its hours of boiling and steaming, its scrupulous cleanliness, its heated metal, and its need for a great deal of disposable material, made canned food far too expensive for anyone but the military. No can openers were needed or even possible. The metal of early cans was too thick to make openers practical. Soldiers and sailors had plenty of sharp objects on hand and made ample use of them when they wanted to eat. During the 19th century, the process of canning was refined and mechanised, and the metal wall of the average can slimmed down enough that a civilian could get it open—if that civilian had the right tool. No one had that tool yet, so early cans had to open themselves. In other words, they came with built-in openers. The result was a confusing but pleasing free-for-all, in terms of product engineering. Each type of food came with its own kind of can, and each kind of can came with its own kind of opener. Tinned fish and meat were often sold in rectangular cans. These cans were fitted with a "key" that would roll down the top of the can. Coffee, beans, and other types of meat were packaged in cylinders with metal strips that could be peeled back with their own kinds of built-in keys. Cans of milk, which didn't need to be completely opened, came with puncture devices. As tinned food became more common, its containers became more regular. A nice cylindrical can became the norm, and, as these cans filled kitchens, more engineers put their minds to finding a convenient way to open all of them. The first standalone can opener worked on a simple principle: point, stab, and pull. From the mid-19th century to the end of World War I, the typical can opener looked roughly like a wrench, if the lower 'jaw' of the wrench were replaced with a blade. People used the blade to puncture the top of the can near its edge, push the upper jaw against the side of the can, and drag the blade through the metal along the rim. Because meat was the first and most popular canned substance, these can openers were often shaped to look like cows and given the nickname 'bully beef can openers'. The bully beef can opener, popular in the mid-19th century, resulted in many lost fingers. Bully beef can openers were so common, effective, and sturdy that they are still frequently available on collectors' sites. Some are advertised as “still working,” and every last one of them is, without a doubt, soaked in the blood of our ancestors. Dragging a sharp blade along the edge of a can is certain to cause injury sooner or later. So once people got a reliable can shape and a reliable way to get the can open, the search was on for a reliable way to get a can open without the possibility of losing a finger. The answer came in 1925, from the Star Can Opener Company of San Francisco. This is probably the first can opener that resembles the one people have in their kitchens today. Instead of using a blade to pry open a metal can, buyers could clamp the edge of the can between two wheels and twist the handle of one of the wheels to move the blade around the lip. The Star can openers weren't perfect. Compared to the bully beef model, they were flimsy and breakable, but they probably prevented a few injuries. Six short years after the Star model came to market, the first electric can opener was invented. It was patented in 1931 by the Bunker Clancey Company of Kansas City, who had already been sued by the Star Can Opener Company for trying sell a double-wheeled can opener like the Star model (the case was dismissed). The electric can opener must have seemed like the wave of the future and a sure-fire seller, but it proved to be too far ahead of its time. In 1931 not that many households had electricity, and those that did weren't interested in buying can openers. The Bunker Clancey Company was subsequently bought by the Rival Company, which still makes small appliances like can openers today. It took another 25 years for electrically powered can openers to become practical. In the 1950s, Walter Hess Bodle and his daughter, Elizabeth Bodle, developed an electric can opener in the family garage. Walter came up with the opener's blades and motor, and Elizabeth sculpted the outside. Their can opener was a free-standing unit that could sit on the kitchen counter. The Udico brand of the Union Die Casting Company put it on the market in time for Christmas in 1956 and had great success with it. Over the next few years it came out in different styles and colours, and, like the bully beef can opener, has become a collector's item. Also like the bully beef model, Udico can openers often still work. They don't make 'em like they used to. Although there have been some design changes and refinements over the last sixty years, there have yet to be any more leaps forward in can opener technology. If you're resentfully opening a can, you are almost certainly doing it using the Star design, manually forcing the can between two wheels, or the Bodle design, clamping the can into a free-standing electrical opener. Whether or not you enjoy your holiday meals, at least you can be happy that you are not getting poisoned by your own food or cutting open your hand with the blade you use to get at it. That's something, right?The can opener is still a very important and essential item in most kitchens.Can opener, right handed, metal, upper blade section serrated, inscription 'Peerless Pat.Feb 11-90'.Peerless Pat.Feb 11-90flagstaff hill, warrnambool, shipwrecked-coast, flagstaff-hill, flagstaff-hill-maritime-museum, maritime-museum, shipwreck-coast, flagstaff-hill-maritime-village, cannning, can opener, kitchen equipment -
 Flagstaff Hill Maritime Museum and Village
Vehicle - Wagon, Circa 1930s - 1940s
This baker’s wagon (or cart) was used to transport and deliver bread and other baked goods in the Warrnambool area. It is currently decorated with signwriting advertising H.H. Smith, Baker who owned and operated his Warrnambool bakery in the late 19th and early 20th century. The design of this baker’s wagon is similar to others dating around the 1930’s and 1940’s and was likely to have been built around that time for Stephenson’s Bakery in Warrnambool. The wagon’s original internal shelves were removed due to it being used in the early days at Flagstaff Hill to give children rides around the Village. BAKERS’ HISTORY There were many bakeries in Warrnambool in the 19th to mid-20th century. Each bread bakery made bread deliveries by horse and wagon in their appointed delivery zone. This wagon has sign writing representing Smith’s bakery although it is most likely the delivery wagon of Stephenson’s bakery. SMITH’S BAKERY – as shown on the wagon’s signage Henry Huntington Smith (1857-1941) was born and educated in Warrnambool. He worked at Davis’ steam biscuit factory in Timor Street before he started his own bakery business in 1885 at a premises near the corner of Fairy and Koroit Streets. A few years later Smith built his new bakery on the corner of Fairy and Lava Street where it still stands today as Monaghan’s Pharmacy. The building was designed by James McLeod in 1892 as a bakehouse, shop and residence for Smith The address was known locally as Smith’s corner. Next door to the bakery, at 136 Fairy Street, were Stables built by Jobbins and McLeod in 1886 for William Cust. A photograph in the archives of the Warrnambool and District Historical Society shows the 1892 building with four fancy horse-drawn wagons on the street with white clad drivers and a promotional stand erected with 5 bakers in uniform and the signage “H H Smith & Co, Pastry Cooks and Confectioners”. One of the wagons appears to have “H H Smith” painted on the side. H.H. Smith & Co. placed an Advertisement in the Weekly Times in December 1896 promoting its business as bakers, confectioners and pastry cooks, praising their shop as an ‘ornament to the town’ with ‘neat appointments’ and ‘dainty decorations’. It also boasted that the business supplied a large number of customers within a twelve mile radius of Warrnambool. In November 1919 The Warrnambool Standard announced the marriage of Henry H Smith, Mayor of Warrnambool, to Jeannie Samson-Goodman in East Adelaide. In the same newspaper was a notice that Frank Crossley was to open as baker and pastry cook in H.H. Smith’s premises. As well as being the proprietor of the H.H. Smith Bakery, Henry Huntington Smith was a Councillor for the Warrnambool Municipality from 1913 – 1937 and Mayer for two terms. In December 1919 during his first term as Mayor he was honoured for the work he had done with returning soldiers after World War I, receiving a document in recognition of this work, presented by the Mothers, Wives and Sisters of returned soldiers. Smith was very interested and involved in the community in many roles, including being the Vice President of the first Warrnambool and District Historical Society. STEPHENSON’S BAKERY – believed to be the past owner of the wagon The last owner of the bakery was Harold Stephenson. Stephenson was enlisted in the A.I.F. and was invalided home in 1943 before the end of the Second World War. He also served as a Councillor 1958-1976, during which time he served six terms as Mayor for the City of Warrnambool (1966-1973) while he had the bakery. He was very involved in many local organisations including the Warrnambool Surf Life Saving Club and the Road Race Committee. He died in 1985, lauded as being one of Warrnambool’s “most distinguished civic leaders”. It has been said that the baker injured in World War II invented a special contraption to enable him to get up into the wagon and that he alerted his customers that he was in their vicinity by blowing a whistle. The customers would come out and choose their own bread from the back of his wagon then pay him for it. However another account is given by a man who once earned pocket money by helping the baker on his rounds. He says that it was Stephenson, the owner and manager of the bakery, and not the delivery baker who received a significant injury during the war, making him unable to climb the stairs of his upstairs accommodation at the bakery, therefore causing him to sleep downstairs. At this time in the early to late 1940’s Stephenson’s bakery had three wagons, one for each of the delivery rounds. The wagons were painted black and yellow. Two of the drivers were Stan Lake and Ali (Alec) Dean who both had wagons with the covered cabin design. The third driver was Bill Lake who had a flat wagon. Stan Lake delivered in the area around Lava and Koroit Streets, Ali Dean had another round and Bill Lake had the Dennington area. Bread continued to be delivered into the 1960’s but by this time the delivery vehicles were motorised. The goods produced at Stephenson’s bakery included breads baked in different shaped tins such as High Tin, Sandwich and Vienna. Some shapes were easily divided into half by breaking them apart, therefore the baker could make two quarter loaves from a half loaf, satisfying different needs. There was the option of white or brown bread, sweet buns, fruit buns and Boston buns. The baker’s assistant was known to take great delight in ‘trimming’ the broken halves of excess bread and crust, enjoying his treat. THE BAKERY PREMISES – South east corner of Fairy and Lava Streets, Warrnambool The building retains the original cast iron veranda. Above the veranda a motif of a wheat sheaf in ornamental plaster can be seen. Inside the building there are still has some of the original fittings. The building was classified by the National Trust in August 1979. After the Second World War an official system of zoning was introduced as a fair way for the baking industry to operate. In 1949 different pricing was introduced by the Government for either delivered or retail purchased bread. Many of the small local bakeries went out of business after the Government banned zoning. The way was made open for the larger bread manufacturers to enter the local market with cheaper prices. Some of those companies were Mc Queens, Tip Top, Twisties, Sunicrust, (Mc Queens ‘new’ bakery building was where the current Toyworld shop now stands, is, in the Ozone carpark.) O’Grady’s Bakery, later changing hands and known as Burkes Bakery, was in Fairy Street near Timor Street intersection, on the North West side. There was also a bakery named Almay. The baker’s wagon is significant because of its association with H.H. Smith’s Bakery in Warrnambool.. The H.H. Smith’s Bakery building on the corner of Fairy and Lava Streets, built in 1892, is classified by the National Trust, August 1979. Smith Street Warrnambool was named after Henry Huntington Smith, who was a Warrnambool Councillor 1913 – 1937 and Mayor 1919 – 1921. Baker’s wagon, often referred to as a baker’s cart. Four wheeled horse-drawn delivery wagon, front wheels smaller than rear wheels. Wagon is clad with metal sheets and lined with varnished timber panels. Wheels have metal rims, wooden spokes and rear wheels have wooden brake pads. Horse shaft is timber with metal fittings. Front has a metal lamp holder, brake lever, metal hand grips and decorative metal foot plates. The wagon has suspension leaves on back and sides and double suspension leaves on the front. Driver’s area at front has a roof, glass side windows and wooden box seat with hinged compartment accessing wagon storage area. Door above back of seat has buckled leather handgrip strap attached, door slides open for access to wagon area. Back of wagon has a wooden step and a split door; top door has ventilation louvers, both doors have metal latches. Wagon is painted cream with brown trim and signage and green step. Remnants of red and green paint are visible; underside of seat panel is painted grey. Wagon advertises H.H. Smith & Co. Baker, a Warrnambool business established in 1885, but is of a more modern design seen around 1930’s and 1940’s and most likely belonging to Stephenson's bakery. Brown signwriting on sides of wagon “H.R. SMITH & CO. / BAKER” Brown signwriting across front of wagon “BAKER” warrnambool, shipwrecked-coast, flagstaff-hill, flagstaff-hill-maritime-museum, maritime-museum, shipwreck-coast, flagstaff-hill-maritime-village, shipwrecked-artefact, great ocean road, baker’s wagon, h.h. smith baker, warrnambool, henry h smith, jeannie samson-goodman, frank crossley, mayor of city of warrnambool, vice president of warrnambool and district historical society, stephenson’s bakery warrnambool, harold stephenson, warrnambool surf life saving club, road race committee, national trust building, stan lake, bill lake, ali dean, 19th and 20th century bakers, davies steam biscuit factory warrnambool, james mcleod building designer, jobbins and mcleod, william cust, h h smith & co, pastry cooks and confectioners, bakery trade, bread delivery wagon -
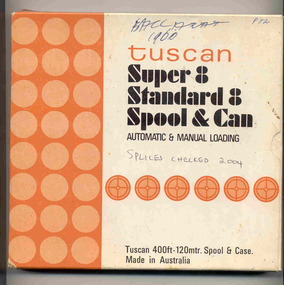 Ballarat Tramway Museum
Film - Movie Film & Box, Kodak, 1960
Yields information in movie film format of Ballarat trams in 1960, how the system operated and was used by people., Yields information in movie film format of Ballarat trams in 1960, how the system operated and was used by people.Movie film - 8mm, approx. 17.5 mins, with leader strip on a plastic reel, within a black and white plastic box, titled "Ballarat No. 1. 1960" contained with a cardboard box, 'Tuscan Super 8 and Standard 8 Spool and Can' . Has been transferred to DVD - see Reg item 4100 as Segment No. 1. Filmed and made by Ben Parle. Also transferred to DVD by Rod Cook Oct. 2015, via Roger Greenwood for use in his DVD, "The City of Ballarat Trams, Gardens & Gold" of 2016. See Reg Item 6883. Synopsis: based on time. 0:00 Starts with bogies cars crossing railway level crossing (34?, 39?) 0:30 SEC Logo 0:45 Ballarat Station sign and intro “Some City Scenes” 0:49 35 turning from Lydiard St Nth to Sturt St towards Grenville St with Commonwealth Bank in view. and then 42 returning 1:19 42 showing Mt Pleasant, turns from Sturt St into Lydiard St Nth 1:53 Tramway road works in Lydiard St Nth, near intersection with Mair St with Jelbart Road roller in use, starts with an SEC roadworks sign. 2:12 39 passing the works out bound to Lydiard St Nth. 2:46 Good view of the roller working before 35 arrives. 3:01 35 passing the works in bound with 3:29 14 crossing Lydiard St in Sturt St, towards Grenville St 3:47 Trams in City Loop 3:55 21 coming up the hill 4:04 31 entering Bridge St from Sturt St with Bucks Head Hotel in the background. 4:27 Overhead work at corner of Sturt and Lydiard, with view of the sign at the City terminus “Trams leave here for Sebastopol, Gardens, View Point.” 4:34 Passengers getting off and then onto 38, ex Lydiard St Nth at city terminus including a young lady wearing gloves and a wheeling a pram hurriedly the photographer. A number of other prams in the view as well as. The Conductor helps to unload the pram. 5:07 41 proceeding up Sturt St, appears to have just rained. 5:26 11 using the Dawson St crossover, with a motor car doing a U turn as well. 6:00 14 descending Sturt St towards the City, filmed at Dawson St. 6:11 Title “The Gardens via Drummond St North Line” 6:16 19 showing Victoria St, turning from Drummond St Nth into Sturt St. 6:28 30 inbound in Drummond St Nth, approach and trailing shots. Trailing shot ahs the hospital in the background. 6:49 31 outbound, Drummond St Nth, approach and trailing shots, trees are in autumn colours. 7:04 12, inbound Drummond St Nth, with Macarthur St in the background, stopping to pick up a lady, approach and trailing shots and then entering the Mill St crossing loop. 7:53 14 outbound in Drummond St Nth, dropping a lady passenger off and then turning into Macarthur St and then tram going away. 8:37 View of overhead junction at View Point Jtn. 8:45 View of “Cars Stop Here” sign and pole sign “To City Only” 8:55 30 inbound in Wendouree Parade, stops to pick up passenger, and then a trailing shot of tram entering Macarthur St loop 9:37 View of “Cars Stop Here”, “End of Section” and timetable boards at Haddon St. 9:50 34, pausing at Haddon St and then proceeding towards depot – approach and trailing shots, with “Warning Oncoming Trams” sign in shot. 10:27 “Warning Oncoming Trams” sign 10:32 34 crossing 12 at the Martin Ave loop 10:48 39? Wendouree Parade, near Barrett Ave, stopping and letting off passengers. 11:24 30 passing depot junction and then trailing shot of it entering Tram Sheds or Depot Loop and then proceeding towards the City. 12:11 Shot of the “Caution Beware of Trams” sign at the depot. 12:14 25 stopping at depot junction and then trailing shot of it going toward Forrest St. 12:47 12 passing Depot Junction, trailing shot. 13:07 Shot of :Electricity Supply Department, Ballarat Branch” sign at depot. 13:13 View of a destination showing “Depot” on a bogie tram 13:15 Title “Some Depot Scenes” 13:19 View of a trolley pole and then 13 leaving the depot through the gates, destination showing “View Point”. 13:54 View of trolley pole and then 32 stopping at the depot gates. 14:08 12 (Sunny view) running out onto Wendouree Parade and then a bogie tram approaching Depot Loop. 14:43 View of 42 running in with a single trucker behind in Wendouree Parade, and another single trucker running out. 15:02 Title “Some Scenes in the Gardens” 15:05 25 running through the Gardens, approach and trailing shots, near our Depot Junction. 15:55 View of “No Parking East of Loop” sign 15:59 View of overhead and then trackwork (with points removed), but overhead still in position at the Old Gardens Loop or Gardens South Loop and then 12 entering the loop from the south and then a trailing shot looking along the Parade. 16:33 View of “Cars Stop Here” and “End of Section” and then timetable boards at Gardens Loop. 16:55 View of 34 leaving the loop 17:14 Title “The End”Written labels giving title information on outside of box.trams, tramways, ballarat, sebastopol, lydiard st north, victoria st, mt pleasant, sturt st west -
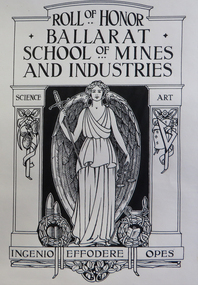 Federation University Historical Collection
Book - Roll of Honor, Ballarat School of Mines Honor Book, c1920
The Ballarat Technical Art School made many honour boards for schools and organisation in Victoria and interstate. Their own was made, but the names were not listed. The Ballarat School of Mines Annual Report for 1921 states: 'It has been decided, for the present, to record the names of our students who served in the warm, in an Honor Book, and to defer the erectin of an Honor Board until we can feel ssured that the Roll is complete. the wide spread occupations of our students has rendered it very difficult for us to secure detailed information of their service. A handsome Honor Book and Case has been designed and executed by the staff ad students of the technical Art School, and the engrossing of the names and military records will be proceeded with as soon as possible. The Technical Art School was quite busy with commissions. The SMB Annual Report of 1918 states: 'under the direction of the Art principal (Mr H.H. Smith), the work of the Art School continues to receive wide public recognition. Handsome Honor Boars have been designed and executed for the Sydney Sports' Club, the St Arnaud High School, the Birregurra State School, the Wendouree State School and the Ballarat Old Colonists' Club. The School also designed the certificates for the Young Workers' Patriotic Guild, the 'Herald" Shield for perpetual competition at the technical Schools' athletic meetings, the "Hansen" Shield for competition among the Northern District High Schools, two metal tablets for the Castlemaine high School, and a certificate for the Grampians Secondary Schools' Association. Numerous Honor Books and Mural cases have also been designed for State Schools.' Over 400 former students and staff of the Ballarat School of Mines served during World War One. The 1920 SMb Students' Magazine said' 'Many students left Australia with the first Contingent, and since then, the School has been represented on every field where Australians have fought, from the first landing at Gallipoli to the decisive victory on the 8 August 1918.' The influence of the school was appropriately shown in the fact that at least 13 of its students were officers in the Australian Mining Corps. The title page has the initials 'D.J.' which most probably stands for Donald I. Johnston, a teacher with the Ballarat Technical Art school from 1920 to 1949. The Ballarat School of Mines World War 1 Honor Book remained uncompleted for more than 90 years. The names of over 400 SMB staff and students who served their country were not inscribed until 2012, despite names, ranks and service records being compiled. A restoration project was instigated as part of the 140th anniversary of the Ballarat School of Mines in 2010. Names were inscribed into the book by Calligrapher Lyn Forrester. The University of Ballarat believed this project is important not only to SMB's history, but the families and descendants of those who served while studying or teaching at SMB. The restoration project involved names being hand written in calligraphy into the Honor Book and was funded with the assistance of the 'Restoring Community War Memorial Grant'. The memorial was designed and made by the staff and students of the Ballarat School of Mines Technical Art School under the direction of Principal Herbert H. Smith. In 1921 the Ballarat School of Mines Annual Report recorded: "It has been decided, for the present, to record the names of our students who served in the war, in an Honor Book, and to defer the erection of an Honor Board until we can feel assured that the roll is complete. The wide spread occupations of our students has rended it very difficult for us to secure detailed information of their service. A handsome Honor Book and case has been designed and executed by the staff and students of the Technical Art School, and the engrossing of the names and miliatary records will proceed with as soon as possible. The Ballarat Technical Art School and was involved with the design and manufacture of numerous WW1 memorials. When it came time to complete their own memorial, the Principal died, and the Honor Roll must have been overlooked in the confusion that ensued. There have been numerous theories about why the Honor Roll was never completed, one being that it was because the SMB Principal, Maurice Copland, literally worked himself to death organising repatriation classes for ex-soldiers who attended SMB. The Courier of 18 November 1922 said of Maurice Copland: “He put his very best into the work for the welfare of the soldiers; in fact, he did too much for the good of his physique, for he wore himself out in the services of the returned men. If ever there was a war victim the late Mr Copland was one. But for the stress of work entailed by those repatriation classes and the amount of general war work which he performed Mr Copland would probably have been with them today." Understandably, SMB was thrown into some disarray by their Principal's death and the Honor Book was not completed. The University of Ballarat would like to finally honor its SMB war veterans by completing the Honor Book and as a further mark of respect, dedicate the project to Maurice Copland. The Ballarat Technical Art School undertook many honor boards. The Ballarat School of Mines Annual Report 1918 states: "Under the direction of the Art Principal (Mr H.H. Smith), the work of the Art School continues to receive a wide public recognition. handsome Honor Boards have been designed and executed for the Sydney Sports' Club, the St Arnaud High School, the Birregurra State School, the wendouree State School and the Ballarat Old Colonists' Club. The School also designed certificates for the Young Workers' patriotic Guild, the "Herald" Shield for perpetual Competition at the Technical schools athletics meetings, the "Hansen" Shield for competition in the northern District High Schools, two metal tablets for the Castlemaine High School, and a certificate for the Grampians Secondary Schools' Association. Numerous Honor Gooks and mural cases have also been designed for State Schools." The 1920 Ballarat School of Mines Annual Report stated: Public appreciation of the High standard of design and artistic craft work produced by the students of the Art School, under the direction of the Principal (Mr Herbert H. Smith), continues to be demonstrated by the lage number of important commissions entrusted to the school, not only by the public bodies and business firms by the Education Department and public bodies all over the State." "Amongst the important local commissions received during the year was the designing and supplying of the Municipal Council's Address of Welcome Casket for presentation to His Royal Highness the Prince of Wales, the designing and supervising of a large four-light stained glass window for the Lydiard Street Methodist Church, ... and supply numerous honor books, honor boards, etc., for public institutions and school." "The School has been honored by, and has acceded to the request of the Education Department to supply designs for the title page, chapter headings and initial letters for the War Service Book which it is about to publish, Mr F. Tate, director of Education, recognising the students' work in this direction by an appreciative letter of thanks. The Education Department has also been instrumental in directing to the School applications from all parts of the State, including Melbourne, for the School to supply competitive sports shields, honor boards, books and designs for certificates, and various decorative objects. The School has therefor been responsible for much work coming to local Ballarat firms which would otherwise have found its way to Melbourne or other centres. In 2011, as the result of a 'Restoring Community War Memorials Grant' calligrapher Lynton Forrester was commissioned to record over 400 names into the honor book. A red leatherbound Ballarat School of Mines Honor Book. The book includes a title page relating to the Ballarat School of Mines and Industries. The Ballarat School of Mines Honor Book was not finally inscribed with names until 2011-2012. world war one, ww1, ballarat school of mines, world war 1, world war i, honour roll, calligraphy, don johnston, honor book, honor roll, copeland, maurice copeland, honour book, roll of honour, percy coltman, arthur e. tandy, leslie coulter -
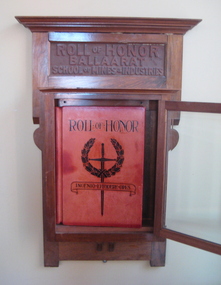 Federation University Historical Collection
Book - Honour Board (hanging bookcase), Ballarat School of Mines Honor Book and Bookcase, c1920
The Ballarat Technical Art School made many honour boards for schools and organisation in Victoria and interstate. Their own was made, but the names were not listed. The Ballarat School of Mines Annual Report for 1921 states: 'It has been decided, for the present, to record the names of our students who served in the warm, in an Honor Book, and to defer the erection of an Honor Board until we can feel assured that the Roll is complete. the wide spread occupations of our students has rendered it very difficult for us to secure detailed information of their service. A handsome Honor Book and Case has been designed and executed by the staff and students of the Technical Art School, and the engrossing of the names and military records will be proceeded with as soon as possible. The Technical Art School was quite busy with commissions. The SMB Annual Report of 1918 states: 'under the direction of the Art principal (Mr H.H. Smith), the work of the Art School continues to receive wide public recognition. Handsome Honor Boars have been designed and executed for the Sydney Sports' Club, the St Arnaud High School, the Birregurra State School, the Wendouree State School and the Ballarat Old Colonists' Club. The School also designed the certificates for the Young Workers' Patriotic Guild, the 'Herald" Shield for perpetual competition at the technical Schools' athletic meetings, the "Hansen" Shield for competition among the Northern District High Schools, two metal tablets for the Castlemaine high School, and a certificate for the Grampians Secondary Schools' Association. Numerous Honor Books and Mural cases have also been designed for State Schools.' Over 400 former students and staff of the Ballarat School of Mines served during World War One. The 1920 SMb Students' Magazine said' 'Many students left Australia with the first Contingent, and since then, the School has been represented on every field where Australians have fought, from the first landing at Gallipoli to the decisive victory on the 8 August 1918.' The influence of the school was appropriately shown in the fact that at least 13 of its students were officers in the Australian Mining Corps. The title page has the initials 'D.J.' which most probably stands for Donald I. Johnston, a teacher with the Ballarat Technical Art school from 1920 to 1949. The Ballarat School of Mines World War 1 Honor Book remained uncompleted for more than 90 years. The names of over 400 SMB staff and students who served their country were not inscribed until 2012, despite names, ranks and service records being compiled. A restoration project was instigated as part of the 140th anniversary of the Ballarat School of Mines in 2010. Names were inscribed into the book by Calligrapher Lyn Forrester. The University of Ballarat believed this project is important not only to SMB's history, but the families and descendants of those who served while studying or teaching at SMB. The restoration project involved names being hand written in calligraphy into the Honor Book and was funded with the assistance of the 'Restoring Community War Memorial Grant'. The memorial was designed and made by the staff and students of the Ballarat School of Mines Technical Art School under the direction of Principal Herbert H. Smith. In 1921 the Ballarat School of Mines Annual Report recorded: "It has been decided, for the present, to record the names of our students who served in the war, in an Honor Book, and to defer the erection of an Honor Board until we can feel assured that the roll is complete. The wide spread occupations of our students has rended it very difficult for us to secure detailed information of their service. A handsome Honor Book and case has been designed and executed by the staff and students of the Technical Art School, and the engrossing of the names and miliatary records will proceed with as soon as possible. The Ballarat Technical Art School and was involved with the design and manufacture of numerous WW1 memorials. When it came time to complete their own memorial, the Principal died, and the Honor Roll must have been overlooked in the confusion that ensued. There have been numerous theories about why the Honor Roll was never completed, one being that it was because the SMB Principal, Maurice Copland, literally worked himself to death organising repatriation classes for ex-soldiers who attended SMB. The Courier of 18 November 1922 said of Maurice Copland: “He put his very best into the work for the welfare of the soldiers; in fact, he did too much for the good of his physique, for he wore himself out in the services of the returned men. If ever there was a war victim the late Mr Copland was one. But for the stress of work entailed by those repatriation classes and the amount of general war work which he performed Mr Copland would probably have been with them today." Understandably, SMB was thrown into some disarray by their Principal's death and the Honor Book was not completed. The University of Ballarat would like to finally honor its SMB war veterans by completing the Honor Book and as a further mark of respect, dedicate the project to Maurice Copland. The Ballarat Technical Art School undertook many honor boards. The Ballarat School of Mines Annual Report 1918 states: "Under the direction of the Art Principal (Mr H.H. Smith), the work of the Art School continues to receive a wide public recognition. handsome Honor Boards have been designed and executed for the Sydney Sports' Club, the St Arnaud High School, the Birregurra State School, the wendouree State School and the Ballarat Old Colonists' Club. The School also designed certificates for the Young Workers' patriotic Guild, the "Herald" Shield for perpetual Competition at the Technical schools athletics meetings, the "Hansen" Shield for competition in the northern District High Schools, two metal tablets for the Castlemaine High School, and a certificate for the Grampians Secondary Schools' Association. Numerous Honor Gooks and mural cases have also been designed for State Schools." The 1920 Ballarat School of Mines Annual Report stated: Public appreciation of the High standard of design and artistic craft work produced by the students of the Art School, under the direction of the Principal (Mr Herbert H. Smith), continues to be demonstrated by the lage number of important commissions entrusted to the school, not only by the public bodies and business firms by the Education Department and public bodies all over the State." "Amongst the important local commissions received during the year was the designing and supplying of the Municipal Council's Address of Welcome Casket for presentation to His Royal Highness the Prince of Wales, the designing and supervising of a large four-light stained glass window for the Lydiard Street Methodist Church, ... and supply numerous honor books, honor boards, etc., for public institutions and school." "The School has been honored by, and has acceded to the request of the Education Department to supply designs for the title page, chapter headings and initial letters for the War Service Book which it is about to publish, Mr F. Tate, director of Education, recognising the students' work in this direction by an appreciative letter of thanks. The Education Department has also been instrumental in directing to the School applications from all parts of the State, including Melbourne, for the School to supply competitive sports shields, honor boards, books and designs for certificates, and various decorative objects. The School has therefor been responsible for much work coming to local Ballarat firms which would otherwise have found its way to Melbourne or other centres. In 2011, as the result of a 'Restoring Community War Memorials Grant' calligrapher Lynton Forrester was commissioned to record over 400 names into the honor book. A Victorian Blackwood World War I Honor Board holds a red leatherbound Ballarat School of Mines Honor Book. The book includes a title page relating to the Ballarat School of Mines and Industries. The Ballarat School of Mines Honor Book and case was not finally inscribed with names until 2012. world war one, ww1, ballarat school of mines, world war 1, world war i, honour roll, calligraphy, don johnston, honor book, honor roll, copeland, maurice copeland, honour book, roll of honour, percy coltman, arthur e. tandy, leslie coulter -
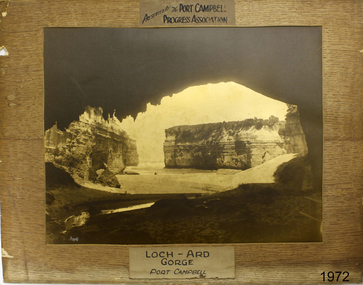 Flagstaff Hill Maritime Museum and Village
Photograph - Coastal Scene, Foyle Photographic Studio, Loch Ard Gorge Port Campbell, 1889-1919
The photograph shows the popular tourist attraction, Loch Ard Gorge, which is located along the Great Ocean Road in Victoria, near Port Campbell. The gorge is named after the famous sailing ship, the LOCH ARD, that was wrecked there in 1878. Only two of the 54 passengers and crew survived. FOYLE “Foyle” written on the photograph is the name of Foyle’s Photographic studio. At the time of the photograph, the studio was owned by both Charles and Lilian Foyle (sometimes known as Lillian or Lily), either of whom could have taken this photograph. They also worked together at a later date on the photographs, sketches and paintings of the famous and historical Pioneers’ Honour Board, which is currently on view in the Warrnambool Library. Foyles Photography was the studio of James Charles Foyle. He owned “Foyle’s Photo Card Studios” in Liebig St, Warrnambool, which operated between 1889 – 1919. A letter to the editor (by Mr Edward Vidler) in the Melbourne Argus, 3rd August 1907, mentions that in that year Warrnambool would celebrate the 60th anniversary of its proclamation as a town, and that talented local artist Miss Lily Foyle would paint 200 portraits in watercolour of the pioneers who settled in the district prior to 1860. The Pioneer Honour Board can still be seen on display in the Warrnambool Library. In the Warrnambool Standard, Dec. 1917, “Mr Foyle’s studio was awarded the contract to decorate rail cars on newly opened Trans-Continental railway, assisted by his sister, Miss Findlay.” HISTORY OF THE LOCH ARD The LOCH ARD belonged to the famous Loch Line which sailed many ships from England to Australia. Built-in Glasgow by Barclay, Curdle and Co. in 1873, the LOCH ARD was a three-masted square-rigged iron sailing ship. The ship measured 262ft 7" (79.87m) in length, 38ft (11.58m) in width, 23ft (7m) in depth and had a gross tonnage of 1693 tons. The LOCH ARD's main mast measured a massive 150ft (45.7m) in height. LOCH ARD made three trips to Australia and one trip to Calcutta before its final voyage. LOCH ARD left England on March 2, 1878, under the command of Captain Gibbs, a newly married, 29-year-old. She was bound for Melbourne with a crew of 37, plus 17 passengers and a load of cargo. The general cargo reflected the affluence of Melbourne at the time. Onboard were straw hats, umbrella, perfumes, clay pipes, pianos, clocks, confectionary, linen and candles, as well as a heavier load of railway irons, cement, lead and copper. There were items included that intended for display in the Melbourne International Exhibition in 1880. The voyage to Port Phillip was long but uneventful. At 3 am on June 1, 1878, Captain Gibbs was expecting to see land and the passengers were becoming excited as they prepared to view their new homeland in the early morning. But LOCH ARD was running into a fog which greatly reduced visibility. Captain Gibbs was becoming anxious as there was no sign of land or the Cape Otway lighthouse. At 4 am the fog lifted. A man aloft announced that he could see breakers. The sheer cliffs of Victoria's west coast came into view, and Captain Gibbs realised that the ship was much closer to them than expected. He ordered as much sail to be set as time would permit and then attempted to steer the vessel out to sea. On coming head-on into the wind, the ship lost momentum, the sails fell limp and LOCH ARD's bow swung back. Gibbs then ordered the anchors to be released in an attempt to hold its position. The anchors sank some 50 fathoms - but did not hold. By this time LOCH ARD was among the breakers and the tall cliffs of Mutton Bird Island rose behind the ship. Just half a mile from the coast, the ship's bow was suddenly pulled around by the anchor. The captain tried to tack out to sea, but the ship struck a reef at the base of Mutton Bird Island, near Port Campbell. Waves broke over the ship and the top deck was loosened from the hull. The masts and rigging came crashing down knocking passengers and crew overboard. When a lifeboat was finally launched, it crashed into the side of LOCH ARD and capsized. Tom Pearce, who had launched the boat, managed to cling to its overturned hull and shelter beneath it. He drifted out to sea and then on the flood tide came into what is now known as LOCH ARD Gorge. He swam to shore, bruised and dazed, and found a cave in which to shelter. Some of the crew stayed below deck to shelter from the falling rigging but drowned when the ship slipped off the reef into deeper water. Eva Carmichael had raced onto the deck to find out what was happening only to be confronted by towering cliffs looming above the stricken ship. In all the chaos, Captain Gibbs grabbed Eva and said, "If you are saved Eva, let my dear wife know that I died like a sailor". That was the last Eva Carmichael saw of the captain. She was swept off the ship by a huge wave. Eva saw Tom Pearce on a small rocky beach and yelled to attract his attention. He dived in and swam to the exhausted woman and dragged her to shore. He took her to the cave and broke and opened the case of brandy, which had washed up on the beach. He opened a bottle to revive the unconscious woman. A few hours later Tom scaled a cliff in search of help. He followed hoof prints and came by chance upon two men from nearby Glenample Station three and a half miles away. In a state of exhaustion, he told the men of the tragedy. Tom returned to the gorge while the two men rode back to the station to get help. By the time they reached LOCH ARD Gorge, it was cold and dark. The two shipwreck survivors were taken to Glenample Station to recover. Eva stayed at the station for six weeks before returning to Ireland, this time by steamship. In Melbourne, Tom Pearce received a hero's welcome. He was presented with the first gold medal of the Royal Humane Society of Victoria and a £1000 cheque from the Victorian Government. Concerts were performed to honour the young man's bravery and to raise money for those who lost family in the LOCH ARD disaster. Of the 54 crew members and passengers on board, only two survived: the apprentice, Tom Pearce and the young woman passenger, Eva Carmichael, who lost all of her family in the tragedy. Ten days after the LOCH ARD tragedy, salvage rights to the wreck were sold at auction for £2,120. Cargo valued at £3,000 was salvaged and placed on the beach, but most washed back into the sea when another storm developed. The wreck of LOCH ARD still lies at the base of Mutton Bird Island. Much of the cargo has now been salvaged, and some of it was washed up into what is now known as LOCH ARD Gorge. Cargo and artefacts have also been illegally salvaged over many years before protective legislation was introduced. One of the most unlikely pieces of cargo to have survived the shipwreck was a Minton porcelain peacock - one of only nine in the world. The peacock was destined for the Melbourne International Exhibition in 1880. It had been well packed, which gave it adequate protection during the violent storm. Today, the Minton peacock can be seen at the Flagstaff Hill Maritime Museum in Warrnambool. From Australia's most dramatic shipwreck it has now become Australia's most valuable shipwreck artefact and is one of very few 'objects' on the Victorian State Heritage Register.Flagstaff Hill’s collection of artefacts from LOCH ARD is significant for being one of the largest collections of artefacts from this shipwreck in Victoria. It is significant for its association with the shipwreck, which is on the Victorian Heritage Register (VHR S417). The collection is significant because of the relationship between the objects, as together they have a high potential to interpret the story of the LOCH ARD. The LOCH ARD collection is archaeologically significant as the remains of a large international passenger and cargo ship. The LOCH ARD collection is historically significant for representing aspects of Victoria’s shipping history and its potential to interpret sub-theme 1.5 of Victoria’s Framework of Historical Themes (living with natural processes). The collection is also historically significant for its association with the LOCH ARD, which was one of the worst and best-known shipwrecks in Victoria’s history. Foyle's photographs date from the late 19th century to the early 20th century, representing a time of growth in the Warrnambool district and a time when the still relatively new technology of photography was more available to the community.Photograph of Loch Ard Gorge. This sepia coloured rectangular photograph is mounted on a brown cardboard backing that has a wood grain pattern. The photograph has an inscription above it, below it, and in the bottom left corner. It was made for the purpose of a presentation by the Port Campbell Progress Association. Printed above the photograph "PRESENTED BY THE PORT CAMPBELL / PROGRESS ASSOCIATION". Printed below the photograph "LOCH ARD GORGE / PORT CAMPBELL". Hand written on bottom left corner "Foyle". flagstaff hill, warrnambool, shipwrecked coast, flagstaff hill maritime museum, maritime museum, shipwreck coast, flagstaff hill maritime village, great ocean road, loch line, loch ard, captain gibbs, eva carmichael, tom pearce, glenample station, mutton bird island, loch ard gorge, photograph, port campbell, port campbell progress association, foyle photograph, foyle photographic studio warrnambool, warrnambool photo studio -
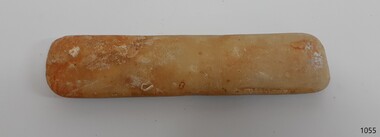 Flagstaff Hill Maritime Museum and Village
Equipment - Sharpening Stone, ca 1878
The sharpening stone can also be referred to as a whetstone, oil stone or honing stone. It is a well-worn double-sided sharpening stone retrieved from the wreck site of the Loch Ard. It is used to grind and hone the edges of metal blades and tools. ‘Natural’ sharpening stones like this one are quarried from ancient sedimentary rock that has metamorphosed from clay and volcanic ash to produce garnet crystals. Most modern stones are artificially produced, or ‘bonded’, abrasive stones, made by fusing clay and metal powder under heat and pressure. The softer yellow Corticule stone is found in thin vertical veins running through the more plentiful Belgian Blue rock. Coticule is a fine-grained and dense material that ‘cuts’ metal slowly but to a superior standard of sharpness and finish. The relatively coarser Belgian Blue is stronger and ‘cuts’ more quickly, but with a less polished finish. A double-sided whetstone is therefore valued for its increased durability (the harder BBW ‘backs’, or supports, the softer Coticule), and additional utility (the fine ‘grit’ of Coticule complements the coarser BBW to meet a range of sharpening needs). The blue-grey base of this stone is thinner than the remaining yellow Coticule on top. This suggests that the majority of grinding and honing work it has done on board the ship was for larger tools, rather than on surgical or shaving blades. Its rounded or spherical shaping may also be related to the ‘tumbling’ action of the sea on the ocean floor. History of the Loch Ard wreck: The Loch Ard got its name from ”Loch Ard” a loch that lies to the west of Aberfoyle, and the east of Loch Lomond. It means "high lake" in Scottish Gaelic. The vessel belonged to the famous Loch Line which sailed many vessels from England to Australia. The Loch Ard was built in Glasgow by Barclay, Curle & Co. in 1873, the vessel was a three-masted square-rigged iron sailing ship that measured 79.87 meters in length, 11.58 m in width, and 7 m in depth with a gross tonnage of 1693 tons with a mainmast that measured a massive 45.7 m in height. Loch Ard made three trips to Australia and one trip to Calcutta before its fateful voyage. Loch Ard left England on March 2, 1878, under the command of 29-year-old Captain Gibbs, who was newly married. The ship was bound for Melbourne with a crew of 37, plus 17 passengers. The general cargo reflected the affluence of Melbourne at the time. Onboard were straw hats, umbrellas, perfumes, clay pipes, pianos, clocks, confectionery, linen and candles, as well as a heavier load of railway irons, cement, lead and copper. There were other items included that were intended for display in the Melbourne International Exhibition of 1880. The voyage to Port Phillip was long but uneventful. Then at 3 am on June 1, 1878, Captain Gibbs was expecting to see land. But the Loch Ard was running into a fog which greatly reduced visibility. Captain Gibbs was becoming anxious as there was no sign of land or the Cape Otway lighthouse. At 4 am the fog lifted and a lookout aloft announced that he could see breakers. The sheer cliffs of Victoria's west coast came into view, and Captain Gibbs realised that the ship was much closer to them than expected. He ordered as much sail to be set as time would permit and then attempted to steer the vessel out to sea. On coming head-on into the wind, the ship lost momentum, the sails fell limp and Loch Ard's bow swung back towards land. Gibbs then ordered the anchors to be released in an attempt to hold their position. The anchors sank some 50 fathoms - but did not hold. By this time the ship was among the breakers and the tall cliffs of Mutton Bird Island rose behind. Just half a mile from the coast, the ship's bow was suddenly pulled around by the anchor. The captain tried to tack out to sea, but the ship struck a reef at the base of Mutton Bird Island, near Port Campbell. Waves subsequently broke over the ship and the top deck became loosened from the hull. The masts and rigging came crashing down knocking passengers and crew overboard. When a lifeboat was finally launched, it crashed into the side of Loch Ard and capsized. Tom Pearce, who had launched the boat, managed to cling to its overturned hull and shelter beneath it. He drifted out to sea and then on the flood tide came into what is now known as Lochard Gorge. He swam to shore, bruised and dazed, and found a cave in which to shelter. Some of the crew stayed below deck to shelter from the falling rigging but drowned when the ship slipped off the reef into deeper water. Eva Carmichael a passenger had raced onto the deck to find out what was happening only to be confronted by towering cliffs looming above the stricken ship. In all the chaos, Captain Gibbs grabbed Eva and said, "If you are saved Eva, let my dear wife know that I died like a sailor". That was the last Eva Carmichael saw of the captain. She was swept off the ship by a huge wave. Eva saw Tom Pearce on a small rocky beach and yelled to attract his attention. He dived in and swam to the exhausted woman and dragged her to shore. He took her to the cave and broke the open case of brandy which had washed up on the beach. He opened a bottle to revive the unconscious woman. A few hours later Tom scaled a cliff in search of help. He followed hoof prints and came by chance upon two men from nearby Glenample Station three and a half miles away. In a complete state of exhaustion, he told the men of the tragedy. Tom then returned to the gorge while the two men rode back to the station to get help. By the time they reached Loch Ard Gorge, it was cold and dark. The two shipwreck survivors were taken to Glenample Station to recover. Eva stayed at the station for six weeks before returning to Ireland by steamship. In Melbourne, Tom Pearce received a hero's welcome. He was presented with the first gold medal of the Royal Humane Society of Victoria and a £1000 cheque from the Victorian Government. Concerts were performed to honour the young man's bravery and to raise money for those who lost family in the disaster. Of the 54 crew members and passengers on board, only two survived: the apprentice, Tom Pearce and the young woman passenger, Eva Carmichael, who lost her family in the tragedy. Ten days after the Lochard tragedy, salvage rights to the wreck were sold at auction for £2,120. Cargo valued at £3,000 was salvaged and placed on the beach, but most washed back into the sea when another storm developed. The wreck of Lochard still lies at the base of Mutton Bird Island. Much of the cargo has now been salvaged and some items were washed up into Lochard Gorge. Cargo and artefacts have also been illegally salvaged over many years before protective legislation was introduced in March 1982. One of the most unlikely pieces of cargo to have survived the shipwreck was a Minton majolica peacock- one of only nine in the world. The peacock was destined for the Melbourne 1880 International Exhibition. It had been well packed, which gave it adequate protection during the violent storm. Today the Minton peacock can be seen at the Flagstaff Hill Maritime Museum in Warrnambool. From Australia's most dramatic shipwreck, it has now become Australia's most valuable shipwreck artifact and is one of very few 'objects' on the Victorian State Heritage Register. The shipwreck of the Loch Ard is of significance for Victoria and is registered on the Victorian Heritage Register ( S 417). Flagstaff Hill has a varied collection of artefacts from Loch Ard and its collection is significant for being one of the largest accumulation of artefacts from this notable Victorian shipwreck of which the subject items are a small part. The collections objects give us a snapshot of how we can interpret the story of this tragic event. The collection is also archaeologically significant as it represents aspects of Victoria's shipping history that allows us to interpret Victoria's social and historical themes of the time. Through is associated with the worst and best-known shipwreck in Victoria's history. A sharpening stone is also called a whetstone, oil, or honing stone. The stone is a worn double-sided rectangular block with rounded corners. There is a clear delineation between its coarser Belgian Blue base (grey colour) and its finer Belgian Coticule face (yellow colour). It bears sedimentary encrustation over one-third of its surface. flagstaff hill, warrnambool, shipwrecked coast, flagstaff hill maritime museum, maritime museum, shipwreck coast, flagstaff hill maritime village, great ocean road, loch line, loch ard, captain gibbs, eva carmichael, tom pearce, glenample station, mutton bird island, loch ard gorge, sharpening stone, whetstone, oilstone, double-sided stone, belgian coticule, belgian blue whetstone, oil stone, honing stone -
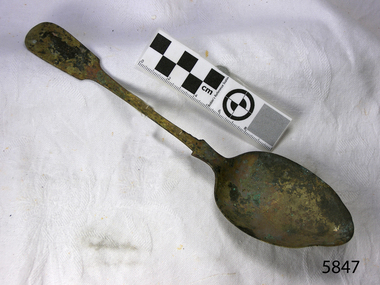 Flagstaff Hill Maritime Museum and Village
Domestic object - Spoon, circa 1878
This dessert spoon is from the wreck of the LOCH ARD, a Loch Line ship of 1,693 tons which sailed from Gravesend, London, on 2 March 1878 with 17 passengers and a crew of 36 under Captain George Gibbs. “The intention was to discharge cargo in Melbourne, before returning to London via the Horn with wool and wheat”. Instead, on 1 June 1878, after 90 days at sea, she struck the sandstone cliffs of Mutton Bird Island on the south west coast of Victoria, and sank with the loss of 52 lives and all her cargo. The manifest of the LOCH ARD listed an array of manufactured goods and bulk metals being exported to the Colony of Victoria, with a declared value of £53,700. (202 bills of lading show an actual invoice value of £68, 456, with insurance underwriting to £30,000 of all cargo). Included in the manifest is the item of “Tin hardware & cutlery £7,530”. This dessert spoon is one of 482 similar items of electro-plated cutlery from the LOCH ARD site, comprising spoons and forks of various sizes but all sharing the same general shape or design and metallic composition. 49 of these pieces display a legible makers’ mark — the initials “W” and “P” placed within a raised diamond outline, which is in turn contained within a sunken crown shape — identifying the manufacturer as William Page & Co of Birmingham. An electroplater’s makers’ marks, unlike sterling silver hallmarks, are not consistent identifiers of quality or date and place of manufacture. A similar line of five impressions was usually made to impress the consumer with an implication of industry standards, but what each one actually signified was not regulated and so they varied according to the whim of the individual foundry. In this case, the maker’s marks are often obscured by sedimentary accretion or removed by corrosion after a century of submersion in the ocean. However sufficient detail has survived to indicate that these samples of electro-plated cutlery probably originated from the same consignment in the LOCH ARD’s cargo. The generally common range of marks are drawn from 255 tea spoons, 125 dessert spoons, and 99 table forks. These marks are clearly visible in 66 instances, while the same sequence of general outlines, or depression shapes, is discernible in another 166 examples. Suggested trade names for William Page & Co’s particular blend of brass plating are ‘roman silver’ or ‘silverite’. This copper alloy polishes to a lustrous gold when new, discolouring to a murky grey with greenish hue when neglected. HISTORY OF THE LOCH ARD The LOCH ARD belonged to the famous Loch Line which sailed many ships from England to Australia. Built in Glasgow by Barclay, Curdle and Co. in 1873, the LOCH ARD was a three-masted square rigged iron sailing ship. The ship measured 262ft 7" (79.87m) in length, 38ft (11.58m) in width, 23ft (7m) in depth and had a gross tonnage of 1693 tons. The LOCH ARD's main mast measured a massive 150ft (45.7m) in height. LOCH ARD made three trips to Australia and one trip to Calcutta before its final voyage. LOCH ARD left England on March 2, 1878, under the command of Captain Gibbs, a newly married, 29 year old. She was bound for Melbourne with a crew of 37, plus 17 passengers and a load of cargo. The general cargo reflected the affluence of Melbourne at the time. On board were straw hats, umbrella, perfumes, clay pipes, pianos, clocks, confectionary, linen and candles, as well as a heavier load of railway irons, cement, lead and copper. There were items included that intended for display in the Melbourne International Exhibition in 1880. The voyage to Port Phillip was long but uneventful. At 3am on June 1, 1878, Captain Gibbs was expecting to see land and the passengers were becoming excited as they prepared to view their new homeland in the early morning. But LOCH ARD was running into a fog which greatly reduced visibility. Captain Gibbs was becoming anxious as there was no sign of land or the Cape Otway lighthouse. At 4am the fog lifted. A man aloft announced that he could see breakers. The sheer cliffs of Victoria's west coast came into view, and Captain Gibbs realised that the ship was much closer to them than expected. He ordered as much sail to be set as time would permit and then attempted to steer the vessel out to sea. On coming head on into the wind, the ship lost momentum, the sails fell limp and LOCH ARD's bow swung back. Gibbs then ordered the anchors to be released in an attempt to hold its position. The anchors sank some 50 fathoms - but did not hold. By this time LOCH ARD was among the breakers and the tall cliffs of Mutton Bird Island rose behind the ship. Just half a mile from the coast, the ship's bow was suddenly pulled around by the anchor. The captain tried to tack out to sea, but the ship struck a reef at the base of Mutton Bird Island, near Port Campbell. Waves broke over the ship and the top deck was loosened from the hull. The masts and rigging came crashing down knocking passengers and crew overboard. When a lifeboat was finally launched, it crashed into the side of LOCH ARD and capsized. Tom Pearce, who had launched the boat, managed to cling to its overturned hull and shelter beneath it. He drifted out to sea and then on the flood tide came into what is now known as LOCH ARD Gorge. He swam to shore, bruised and dazed, and found a cave in which to shelter. Some of the crew stayed below deck to shelter from the falling rigging but drowned when the ship slipped off the reef into deeper water. Eva Carmichael had raced onto deck to find out what was happening only to be confronted by towering cliffs looming above the stricken ship. In all the chaos, Captain Gibbs grabbed Eva and said, "If you are saved Eva, let my dear wife know that I died like a sailor". That was the last Eva Carmichael saw of the captain. She was swept off the ship by a huge wave. Eva saw Tom Pearce on a small rocky beach and yelled to attract his attention. He dived in and swam to the exhausted woman and dragged her to shore. He took her to the cave and broke open case of brandy which had washed up on the beach. He opened a bottle to revive the unconscious woman. A few hours later Tom scaled a cliff in search of help. He followed hoof prints and came by chance upon two men from nearby Glenample Station three and a half miles away. In a state of exhaustion, he told the men of the tragedy. Tom returned to the gorge while the two men rode back to the station to get help. By the time they reached LOCH ARD Gorge, it was cold and dark. The two shipwreck survivors were taken to Glenample Station to recover. Eva stayed at the station for six weeks before returning to Ireland, this time by steamship. In Melbourne, Tom Pearce received a hero's welcome. He was presented with the first gold medal of the Royal Humane Society of Victoria and a £1000 cheque from the Victorian Government. Concerts were performed to honour the young man's bravery and to raise money for those who lost family in the LOCH ARD disaster. Of the 54 crew members and passengers on board, only two survived: the apprentice, Tom Pearce and the young woman passenger, Eva Carmichael, who lost all of her family in the tragedy. Ten days after the LOCH ARD tragedy, salvage rights to the wreck were sold at auction for £2,120. Cargo valued at £3,000 was salvaged and placed on the beach, but most washed back into the sea when another storm developed. The wreck of LOCH ARD still lies at the base of Mutton Bird Island. Much of the cargo has now been salvaged and some was washed up into what is now known as LOCH ARD Gorge. Cargo and artefacts have also been illegally salvaged over many years before protective legislation was introduced. One of the most unlikely pieces of cargo to have survived the shipwreck was a Minton porcelain peacock - one of only seven in the world. The peacock was destined for the Melbourne International Exhibition in 1880. It had been well packed, which gave it adequate protection during the violent storm. Today, the Minton peacock can be seen at the Flagstaff Hill Maritime Museum in Warrnambool. From Australia's most dramatic shipwreck it has now become Australia's shipwreck artefact and is one of very few 'objects' on the Victorian State Heritage Register most valuable. The LOCH ARD shipwreck is of State significance – Victorian Heritage Register S 417. Flagstaff Hill’s collection of artefacts from LOCH ARD is significant for being one of the largest collections of artefacts from this shipwreck in Victoria. It is significant for its association with the shipwreck, which is on the Victorian Heritage Register (VHR S417). The collection is significant because of the relationship between the objects, as together they have a high potential to interpret the story of the LOCH ARD. The LOCH ARD collection is archaeologically significant as the remains of a large international passenger and cargo ship. The LOCH ARD collection is historically significant for representing aspects of Victoria’s shipping history and its potential to interpret sub-theme 1.5 of Victoria’s Framework of Historical Themes (living with natural processes). The collection is also historically significant for its association with the LOCH ARD, which was one of the worst and best known shipwrecks in Victoria’s history. Unrestored dessert spoon from the wreck of the LOCH ARD. The spoon design has a flattened fiddle-back handle, with a thin stem or shank, flared collar, and a shallow rounded bowl. The spoons metallic composition is a thin layer of brass alloy which has partially corroded back to a nickel-silver base metal. Approximately 65% of original plate remains with some verdigris. The end of the bowl is bent and there is a small amount of concreted sediment on the rear of handle.flagstaff hill maritime museum, maritime museum, shipwreck coast, great ocean road, loch line, loch ard, mutton bird island, loch ard gorge, electroplated cutlery, loch ard shipwreck, william page and co, birmingham brass plating -
 Flagstaff Hill Maritime Museum and Village
Domestic object - Spoon, circa 1878
This dessert spoon is from the wreck of the LOCH ARD, a Loch Line ship of 1,693 tons which sailed from Gravesend, London, on 2 March 1878 with 17 passengers and a crew of 36 under Captain George Gibbs. “The intention was to discharge cargo in Melbourne, before returning to London via the Horn with wool and wheat”. Instead, on 1 June 1878, after 90 days at sea, she struck the sandstone cliffs of Mutton Bird Island on the south west coast of Victoria, and sank with the loss of 52 lives and all her cargo. The manifest of the LOCH ARD listed an array of manufactured goods and bulk metals being exported to the Colony of Victoria, with a declared value of £53,700. (202 bills of lading show an actual invoice value of £68, 456, with insurance underwriting to £30,000 of all cargo). Included in the manifest is the item of “Tin hardware & cutlery £7,530”. This dessert spoon is one of 482 similar items of electro-plated cutlery from the LOCH ARD site, comprising spoons and forks of various sizes but all sharing the same general shape or design and metallic composition. 49 of these pieces display a legible makers’ mark — the initials “W” and “P” placed within a raised diamond outline, which is in turn contained within a sunken crown shape — identifying the manufacturer as William Page & Co of Birmingham. An electroplater’s makers’ marks, unlike sterling silver hallmarks, are not consistent identifiers of quality or date and place of manufacture. A similar line of five impressions was usually made to impress the consumer with an implication of industry standards, but what each one actually signified was not regulated and so they varied according to the whim of the individual foundry. In this case, the maker’s marks are often obscured by sedimentary accretion or removed by corrosion after a century of submersion in the ocean. However sufficient detail has survived to indicate that these samples of electro-plated cutlery probably originated from the same consignment in the LOCH ARD’s cargo. The generally common range of marks are drawn from 255 tea spoons, 125 dessert spoons, and 99 table forks. These marks are clearly visible in 66 instances, while the same sequence of general outlines, or depression shapes, is discernible in another 166 examples. Suggested trade names for William Page & Co’s particular blend of brass plating are ‘roman silver’ or ‘silverite’. This copper alloy polishes to a lustrous gold when new, discolouring to a murky grey with greenish hue when neglected. HISTORY OF THE LOCH ARD The LOCH ARD belonged to the famous Loch Line which sailed many ships from England to Australia. Built in Glasgow by Barclay, Curdle and Co. in 1873, the LOCH ARD was a three-masted square rigged iron sailing ship. The ship measured 262ft 7" (79.87m) in length, 38ft (11.58m) in width, 23ft (7m) in depth and had a gross tonnage of 1693 tons. The LOCH ARD's main mast measured a massive 150ft (45.7m) in height. LOCH ARD made three trips to Australia and one trip to Calcutta before its final voyage. LOCH ARD left England on March 2, 1878, under the command of Captain Gibbs, a newly married, 29 year old. She was bound for Melbourne with a crew of 37, plus 17 passengers and a load of cargo. The general cargo reflected the affluence of Melbourne at the time. On board were straw hats, umbrella, perfumes, clay pipes, pianos, clocks, confectionary, linen and candles, as well as a heavier load of railway irons, cement, lead and copper. There were items included that intended for display in the Melbourne International Exhibition in 1880. The voyage to Port Phillip was long but uneventful. At 3am on June 1, 1878, Captain Gibbs was expecting to see land and the passengers were becoming excited as they prepared to view their new homeland in the early morning. But LOCH ARD was running into a fog which greatly reduced visibility. Captain Gibbs was becoming anxious as there was no sign of land or the Cape Otway lighthouse. At 4am the fog lifted. A man aloft announced that he could see breakers. The sheer cliffs of Victoria's west coast came into view, and Captain Gibbs realised that the ship was much closer to them than expected. He ordered as much sail to be set as time would permit and then attempted to steer the vessel out to sea. On coming head on into the wind, the ship lost momentum, the sails fell limp and LOCH ARD's bow swung back. Gibbs then ordered the anchors to be released in an attempt to hold its position. The anchors sank some 50 fathoms - but did not hold. By this time LOCH ARD was among the breakers and the tall cliffs of Mutton Bird Island rose behind the ship. Just half a mile from the coast, the ship's bow was suddenly pulled around by the anchor. The captain tried to tack out to sea, but the ship struck a reef at the base of Mutton Bird Island, near Port Campbell. Waves broke over the ship and the top deck was loosened from the hull. The masts and rigging came crashing down knocking passengers and crew overboard. When a lifeboat was finally launched, it crashed into the side of LOCH ARD and capsized. Tom Pearce, who had launched the boat, managed to cling to its overturned hull and shelter beneath it. He drifted out to sea and then on the flood tide came into what is now known as LOCH ARD Gorge. He swam to shore, bruised and dazed, and found a cave in which to shelter. Some of the crew stayed below deck to shelter from the falling rigging but drowned when the ship slipped off the reef into deeper water. Eva Carmichael had raced onto deck to find out what was happening only to be confronted by towering cliffs looming above the stricken ship. In all the chaos, Captain Gibbs grabbed Eva and said, "If you are saved Eva, let my dear wife know that I died like a sailor". That was the last Eva Carmichael saw of the captain. She was swept off the ship by a huge wave. Eva saw Tom Pearce on a small rocky beach and yelled to attract his attention. He dived in and swam to the exhausted woman and dragged her to shore. He took her to the cave and broke open case of brandy which had washed up on the beach. He opened a bottle to revive the unconscious woman. A few hours later Tom scaled a cliff in search of help. He followed hoof prints and came by chance upon two men from nearby Glenample Station three and a half miles away. In a state of exhaustion, he told the men of the tragedy. Tom returned to the gorge while the two men rode back to the station to get help. By the time they reached LOCH ARD Gorge, it was cold and dark. The two shipwreck survivors were taken to Glenample Station to recover. Eva stayed at the station for six weeks before returning to Ireland, this time by steamship. In Melbourne, Tom Pearce received a hero's welcome. He was presented with the first gold medal of the Royal Humane Society of Victoria and a £1000 cheque from the Victorian Government. Concerts were performed to honour the young man's bravery and to raise money for those who lost family in the LOCH ARD disaster. Of the 54 crew members and passengers on board, only two survived: the apprentice, Tom Pearce and the young woman passenger, Eva Carmichael, who lost all of her family in the tragedy. Ten days after the LOCH ARD tragedy, salvage rights to the wreck were sold at auction for £2,120. Cargo valued at £3,000 was salvaged and placed on the beach, but most washed back into the sea when another storm developed. The wreck of LOCH ARD still lies at the base of Mutton Bird Island. Much of the cargo has now been salvaged and some was washed up into what is now known as LOCH ARD Gorge. Cargo and artefacts have also been illegally salvaged over many years before protective legislation was introduced. One of the most unlikely pieces of cargo to have survived the shipwreck was a Minton porcelain peacock - one of only seven in the world. The peacock was destined for the Melbourne International Exhibition in 1880. It had been well packed, which gave it adequate protection during the violent storm. Today, the Minton peacock can be seen at the Flagstaff Hill Maritime Museum in Warrnambool. From Australia's most dramatic shipwreck it has now become Australia's shipwreck artefact and is one of very few 'objects' on the Victorian State Heritage Register most valuable. The LOCH ARD shipwreck is of State significance – Victorian Heritage Register S 417. Flagstaff Hill’s collection of artefacts from LOCH ARD is significant for being one of the largest collections of artefacts from this shipwreck in Victoria. It is significant for its association with the shipwreck, which is on the Victorian Heritage Register (VHR S417). The collection is significant because of the relationship between the objects, as together they have a high potential to interpret the story of the LOCH ARD. The LOCH ARD collection is archaeologically significant as the remains of a large international passenger and cargo ship. The LOCH ARD collection is historically significant for representing aspects of Victoria’s shipping history and its potential to interpret sub-theme 1.5 of Victoria’s Framework of Historical Themes (living with natural processes). The collection is also historically significant for its association with the LOCH ARD, which was one of the worst and best known shipwrecks in Victoria’s history. Unrestored dessert spoon from the wreck of the LOCH ARD. The spoon design has a flattened fiddle-back handle, with a thin stem or shank, flared collar, and a shallow rounded bowl. The spoons metallic composition is a thin layer of brass alloy which has partially corroded back to a nickel-silver base metal. Approximately 85% of original plate remains. The outlines of five makers marks are visible and the details of two of these are clear - (1) WP&Co trademark, (3) Maltese Cross.flagstaff hill maritime museum, shipwreck coast, great ocean road, loch line, loch ard, mutton bird island, loch ard gorge, electroplated cutlery, loch ard shipwreck, william page and co, birmingham brass plating -
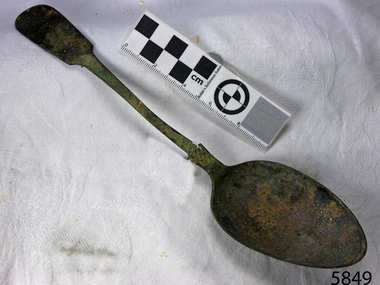 Flagstaff Hill Maritime Museum and Village
Domestic object - Spoon, circa 1878
This dessert spoon is from the wreck of the LOCH ARD, a Loch Line ship of 1,693 tons which sailed from Gravesend, London, on 2 March 1878 with 17 passengers and a crew of 36 under Captain George Gibbs. “The intention was to discharge cargo in Melbourne, before returning to London via the Horn with wool and wheat”. Instead, on 1 June 1878, after 90 days at sea, she struck the sandstone cliffs of Mutton Bird Island on the south west coast of Victoria, and sank with the loss of 52 lives and all her cargo. The manifest of the LOCH ARD listed an array of manufactured goods and bulk metals being exported to the Colony of Victoria, with a declared value of £53,700. (202 bills of lading show an actual invoice value of £68, 456, with insurance underwriting to £30,000 of all cargo). Included in the manifest is the item of “Tin hardware & cutlery £7,530”. This dessert spoon is one of 482 similar items of electro-plated cutlery from the LOCH ARD site, comprising spoons and forks of various sizes but all sharing the same general shape or design and metallic composition. 49 of these pieces display a legible makers’ mark — the initials “W” and “P” placed within a raised diamond outline, which is in turn contained within a sunken crown shape — identifying the manufacturer as William Page & Co of Birmingham. An electroplater’s makers’ marks, unlike sterling silver hallmarks, are not consistent identifiers of quality or date and place of manufacture. A similar line of five impressions was usually made to impress the consumer with an implication of industry standards, but what each one actually signified was not regulated and so they varied according to the whim of the individual foundry. In this case, the maker’s marks are often obscured by sedimentary accretion or removed by corrosion after a century of submersion in the ocean. However sufficient detail has survived to indicate that these samples of electro-plated cutlery probably originated from the same consignment in the LOCH ARD’s cargo. The generally common range of marks are drawn from 255 tea spoons, 125 dessert spoons, and 99 table forks. These marks are clearly visible in 66 instances, while the same sequence of general outlines, or depression shapes, is discernible in another 166 examples. Suggested trade names for William Page & Co’s particular blend of brass plating are ‘roman silver’ or ‘silverite’. This copper alloy polishes to a lustrous gold when new, discolouring to a murky grey with greenish hue when neglected. HISTORY OF THE LOCH ARD The LOCH ARD belonged to the famous Loch Line which sailed many ships from England to Australia. Built in Glasgow by Barclay, Curdle and Co. in 1873, the LOCH ARD was a three-masted square rigged iron sailing ship. The ship measured 262ft 7" (79.87m) in length, 38ft (11.58m) in width, 23ft (7m) in depth and had a gross tonnage of 1693 tons. The LOCH ARD's main mast measured a massive 150ft (45.7m) in height. LOCH ARD made three trips to Australia and one trip to Calcutta before its final voyage. LOCH ARD left England on March 2, 1878, under the command of Captain Gibbs, a newly married, 29 year old. She was bound for Melbourne with a crew of 37, plus 17 passengers and a load of cargo. The general cargo reflected the affluence of Melbourne at the time. On board were straw hats, umbrella, perfumes, clay pipes, pianos, clocks, confectionary, linen and candles, as well as a heavier load of railway irons, cement, lead and copper. There were items included that intended for display in the Melbourne International Exhibition in 1880. The voyage to Port Phillip was long but uneventful. At 3am on June 1, 1878, Captain Gibbs was expecting to see land and the passengers were becoming excited as they prepared to view their new homeland in the early morning. But LOCH ARD was running into a fog which greatly reduced visibility. Captain Gibbs was becoming anxious as there was no sign of land or the Cape Otway lighthouse. At 4am the fog lifted. A man aloft announced that he could see breakers. The sheer cliffs of Victoria's west coast came into view, and Captain Gibbs realised that the ship was much closer to them than expected. He ordered as much sail to be set as time would permit and then attempted to steer the vessel out to sea. On coming head on into the wind, the ship lost momentum, the sails fell limp and LOCH ARD's bow swung back. Gibbs then ordered the anchors to be released in an attempt to hold its position. The anchors sank some 50 fathoms - but did not hold. By this time LOCH ARD was among the breakers and the tall cliffs of Mutton Bird Island rose behind the ship. Just half a mile from the coast, the ship's bow was suddenly pulled around by the anchor. The captain tried to tack out to sea, but the ship struck a reef at the base of Mutton Bird Island, near Port Campbell. Waves broke over the ship and the top deck was loosened from the hull. The masts and rigging came crashing down knocking passengers and crew overboard. When a lifeboat was finally launched, it crashed into the side of LOCH ARD and capsized. Tom Pearce, who had launched the boat, managed to cling to its overturned hull and shelter beneath it. He drifted out to sea and then on the flood tide came into what is now known as LOCH ARD Gorge. He swam to shore, bruised and dazed, and found a cave in which to shelter. Some of the crew stayed below deck to shelter from the falling rigging but drowned when the ship slipped off the reef into deeper water. Eva Carmichael had raced onto deck to find out what was happening only to be confronted by towering cliffs looming above the stricken ship. In all the chaos, Captain Gibbs grabbed Eva and said, "If you are saved Eva, let my dear wife know that I died like a sailor". That was the last Eva Carmichael saw of the captain. She was swept off the ship by a huge wave. Eva saw Tom Pearce on a small rocky beach and yelled to attract his attention. He dived in and swam to the exhausted woman and dragged her to shore. He took her to the cave and broke open case of brandy which had washed up on the beach. He opened a bottle to revive the unconscious woman. A few hours later Tom scaled a cliff in search of help. He followed hoof prints and came by chance upon two men from nearby Glenample Station three and a half miles away. In a state of exhaustion, he told the men of the tragedy. Tom returned to the gorge while the two men rode back to the station to get help. By the time they reached LOCH ARD Gorge, it was cold and dark. The two shipwreck survivors were taken to Glenample Station to recover. Eva stayed at the station for six weeks before returning to Ireland, this time by steamship. In Melbourne, Tom Pearce received a hero's welcome. He was presented with the first gold medal of the Royal Humane Society of Victoria and a £1000 cheque from the Victorian Government. Concerts were performed to honour the young man's bravery and to raise money for those who lost family in the LOCH ARD disaster. Of the 54 crew members and passengers on board, only two survived: the apprentice, Tom Pearce and the young woman passenger, Eva Carmichael, who lost all of her family in the tragedy. Ten days after the LOCH ARD tragedy, salvage rights to the wreck were sold at auction for £2,120. Cargo valued at £3,000 was salvaged and placed on the beach, but most washed back into the sea when another storm developed. The wreck of LOCH ARD still lies at the base of Mutton Bird Island. Much of the cargo has now been salvaged and some was washed up into what is now known as LOCH ARD Gorge. Cargo and artefacts have also been illegally salvaged over many years before protective legislation was introduced. One of the most unlikely pieces of cargo to have survived the shipwreck was a Minton porcelain peacock - one of only seven in the world. The peacock was destined for the Melbourne International Exhibition in 1880. It had been well packed, which gave it adequate protection during the violent storm. Today, the Minton peacock can be seen at the Flagstaff Hill Maritime Museum in Warrnambool. From Australia's most dramatic shipwreck it has now become Australia's shipwreck artefact and is one of very few 'objects' on the Victorian State Heritage Register most valuable. The LOCH ARD shipwreck is of State significance – Victorian Heritage Register S 417. Flagstaff Hill’s collection of artefacts from LOCH ARD is significant for being one of the largest collections of artefacts from this shipwreck in Victoria. It is significant for its association with the shipwreck, which is on the Victorian Heritage Register (VHR S417). The collection is significant because of the relationship between the objects, as together they have a high potential to interpret the story of the LOCH ARD. The LOCH ARD collection is archaeologically significant as the remains of a large international passenger and cargo ship. The LOCH ARD collection is historically significant for representing aspects of Victoria’s shipping history and its potential to interpret sub-theme 1.5 of Victoria’s Framework of Historical Themes (living with natural processes). The collection is also historically significant for its association with the LOCH ARD, which was one of the worst and best known shipwrecks in Victoria’s history. Unrestored dessert spoon from the wreck of the LOCH ARD. The spoon design has a flattened fiddle-back handle, with a thin stem or shank, flared collar, and a shallow rounded bowl. The spoons metallic composition is a thin layer of brass alloy which has partially corroded back to a nickel-silver base metal. Approximately 40% of original plate remains, in a dull grey/green condition. Outlines of five makers marks are visible, with two that are legible - (1) WP&Co trademark, (4) Crab design. flagstaff hill maritime museum, shipwreck coast, great ocean road, loch line, loch ard, mutton bird island, loch ard gorge, electroplated cutlery, loch ard shipwreck, william page and co, birmingham brass plating, dessert spoons -
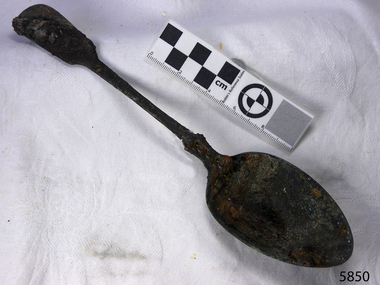 Flagstaff Hill Maritime Museum and Village
Domestic object - Spoon, circa 1878
This dessert spoon is from the wreck of the LOCH ARD, a Loch Line ship of 1,693 tons which sailed from Gravesend, London, on 2 March 1878 with 17 passengers and a crew of 36 under Captain George Gibbs. “The intention was to discharge cargo in Melbourne, before returning to London via the Horn with wool and wheat”. Instead, on 1 June 1878, after 90 days at sea, she struck the sandstone cliffs of Mutton Bird Island on the south west coast of Victoria, and sank with the loss of 52 lives and all her cargo. The manifest of the LOCH ARD listed an array of manufactured goods and bulk metals being exported to the Colony of Victoria, with a declared value of £53,700. (202 bills of lading show an actual invoice value of £68, 456, with insurance underwriting to £30,000 of all cargo). Included in the manifest is the item of “Tin hardware & cutlery £7,530”. This dessert spoon is one of 482 similar items of electro-plated cutlery from the LOCH ARD site, comprising spoons and forks of various sizes but all sharing the same general shape or design and metallic composition. 49 of these pieces display a legible makers’ mark — the initials “W” and “P” placed within a raised diamond outline, which is in turn contained within a sunken crown shape — identifying the manufacturer as William Page & Co of Birmingham. An electroplater’s makers’ marks, unlike sterling silver hallmarks, are not consistent identifiers of quality or date and place of manufacture. A similar line of five impressions was usually made to impress the consumer with an implication of industry standards, but what each one actually signified was not regulated and so they varied according to the whim of the individual foundry. In this case, the maker’s marks are often obscured by sedimentary accretion or removed by corrosion after a century of submersion in the ocean. However sufficient detail has survived to indicate that these samples of electro-plated cutlery probably originated from the same consignment in the LOCH ARD’s cargo. The generally common range of marks are drawn from 255 tea spoons, 125 dessert spoons, and 99 table forks. These marks are clearly visible in 66 instances, while the same sequence of general outlines, or depression shapes, is discernible in another 166 examples. Suggested trade names for William Page & Co’s particular blend of brass plating are ‘roman silver’ or ‘silverite’. This copper alloy polishes to a lustrous gold when new, discolouring to a murky grey with greenish hue when neglected. HISTORY OF THE LOCH ARD The LOCH ARD belonged to the famous Loch Line which sailed many ships from England to Australia. Built in Glasgow by Barclay, Curdle and Co. in 1873, the LOCH ARD was a three-masted square rigged iron sailing ship. The ship measured 262ft 7" (79.87m) in length, 38ft (11.58m) in width, 23ft (7m) in depth and had a gross tonnage of 1693 tons. The LOCH ARD's main mast measured a massive 150ft (45.7m) in height. LOCH ARD made three trips to Australia and one trip to Calcutta before its final voyage. LOCH ARD left England on March 2, 1878, under the command of Captain Gibbs, a newly married, 29 year old. She was bound for Melbourne with a crew of 37, plus 17 passengers and a load of cargo. The general cargo reflected the affluence of Melbourne at the time. On board were straw hats, umbrella, perfumes, clay pipes, pianos, clocks, confectionary, linen and candles, as well as a heavier load of railway irons, cement, lead and copper. There were items included that intended for display in the Melbourne International Exhibition in 1880. The voyage to Port Phillip was long but uneventful. At 3am on June 1, 1878, Captain Gibbs was expecting to see land and the passengers were becoming excited as they prepared to view their new homeland in the early morning. But LOCH ARD was running into a fog which greatly reduced visibility. Captain Gibbs was becoming anxious as there was no sign of land or the Cape Otway lighthouse. At 4am the fog lifted. A man aloft announced that he could see breakers. The sheer cliffs of Victoria's west coast came into view, and Captain Gibbs realised that the ship was much closer to them than expected. He ordered as much sail to be set as time would permit and then attempted to steer the vessel out to sea. On coming head on into the wind, the ship lost momentum, the sails fell limp and LOCH ARD's bow swung back. Gibbs then ordered the anchors to be released in an attempt to hold its position. The anchors sank some 50 fathoms - but did not hold. By this time LOCH ARD was among the breakers and the tall cliffs of Mutton Bird Island rose behind the ship. Just half a mile from the coast, the ship's bow was suddenly pulled around by the anchor. The captain tried to tack out to sea, but the ship struck a reef at the base of Mutton Bird Island, near Port Campbell. Waves broke over the ship and the top deck was loosened from the hull. The masts and rigging came crashing down knocking passengers and crew overboard. When a lifeboat was finally launched, it crashed into the side of LOCH ARD and capsized. Tom Pearce, who had launched the boat, managed to cling to its overturned hull and shelter beneath it. He drifted out to sea and then on the flood tide came into what is now known as LOCH ARD Gorge. He swam to shore, bruised and dazed, and found a cave in which to shelter. Some of the crew stayed below deck to shelter from the falling rigging but drowned when the ship slipped off the reef into deeper water. Eva Carmichael had raced onto deck to find out what was happening only to be confronted by towering cliffs looming above the stricken ship. In all the chaos, Captain Gibbs grabbed Eva and said, "If you are saved Eva, let my dear wife know that I died like a sailor". That was the last Eva Carmichael saw of the captain. She was swept off the ship by a huge wave. Eva saw Tom Pearce on a small rocky beach and yelled to attract his attention. He dived in and swam to the exhausted woman and dragged her to shore. He took her to the cave and broke open case of brandy which had washed up on the beach. He opened a bottle to revive the unconscious woman. A few hours later Tom scaled a cliff in search of help. He followed hoof prints and came by chance upon two men from nearby Glenample Station three and a half miles away. In a state of exhaustion, he told the men of the tragedy. Tom returned to the gorge while the two men rode back to the station to get help. By the time they reached LOCH ARD Gorge, it was cold and dark. The two shipwreck survivors were taken to Glenample Station to recover. Eva stayed at the station for six weeks before returning to Ireland, this time by steamship. In Melbourne, Tom Pearce received a hero's welcome. He was presented with the first gold medal of the Royal Humane Society of Victoria and a £1000 cheque from the Victorian Government. Concerts were performed to honour the young man's bravery and to raise money for those who lost family in the LOCH ARD disaster. Of the 54 crew members and passengers on board, only two survived: the apprentice, Tom Pearce and the young woman passenger, Eva Carmichael, who lost all of her family in the tragedy. Ten days after the LOCH ARD tragedy, salvage rights to the wreck were sold at auction for £2,120. Cargo valued at £3,000 was salvaged and placed on the beach, but most washed back into the sea when another storm developed. The wreck of LOCH ARD still lies at the base of Mutton Bird Island. Much of the cargo has now been salvaged and some was washed up into what is now known as LOCH ARD Gorge. Cargo and artefacts have also been illegally salvaged over many years before protective legislation was introduced. One of the most unlikely pieces of cargo to have survived the shipwreck was a Minton porcelain peacock - one of only seven in the world. The peacock was destined for the Melbourne International Exhibition in 1880. It had been well packed, which gave it adequate protection during the violent storm. Today, the Minton peacock can be seen at the Flagstaff Hill Maritime Museum in Warrnambool. From Australia's most dramatic shipwreck it has now become Australia's shipwreck artefact and is one of very few 'objects' on the Victorian State Heritage Register most valuable. The LOCH ARD shipwreck is of State significance – Victorian Heritage Register S 417. Flagstaff Hill’s collection of artefacts from LOCH ARD is significant for being one of the largest collections of artefacts from this shipwreck in Victoria. It is significant for its association with the shipwreck, which is on the Victorian Heritage Register (VHR S417). The collection is significant because of the relationship between the objects, as together they have a high potential to interpret the story of the LOCH ARD. The LOCH ARD collection is archaeologically significant as the remains of a large international passenger and cargo ship. The LOCH ARD collection is historically significant for representing aspects of Victoria’s shipping history and its potential to interpret sub-theme 1.5 of Victoria’s Framework of Historical Themes (living with natural processes). The collection is also historically significant for its association with the LOCH ARD, which was one of the worst and best known shipwrecks in Victoria’s history Unrestored dessert spoon from the wreck of the LOCH ARD. The spoon design has a flattened fiddle-back handle, with a thin stem or shank, flared collar, and a shallow rounded bowl. The spoons metallic composition is a thin layer of brass alloy which has partially corroded back to a nickel-silver base metal. Surface area of spoon is 10% sediment, 10% original plate, 1o% verdigris, and balance 70% almost black oxidisation. flagstaff hill maritime museum, shipwreck coast, great ocean road, loch line, loch ard, mutton bird island, loch ard gorge, electroplated cutlery, loch ard shipwreck, william page and co, birmingham brass plating, dessert spoons -
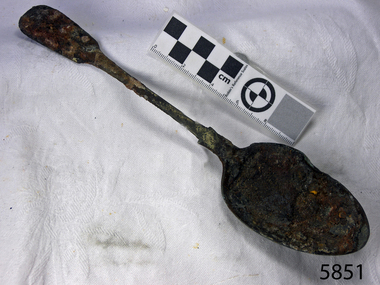 Flagstaff Hill Maritime Museum and Village
Domestic object - Spoon, circa 1878
This dessert spoon is from the wreck of the LOCH ARD, a Loch Line ship of 1,693 tons which sailed from Gravesend, London, on 2 March 1878 with 17 passengers and a crew of 36 under Captain George Gibbs. “The intention was to discharge cargo in Melbourne, before returning to London via the Horn with wool and wheat”. Instead, on 1 June 1878, after 90 days at sea, she struck the sandstone cliffs of Mutton Bird Island on the south west coast of Victoria, and sank with the loss of 52 lives and all her cargo. The manifest of the LOCH ARD listed an array of manufactured goods and bulk metals being exported to the Colony of Victoria, with a declared value of £53,700. (202 bills of lading show an actual invoice value of £68, 456, with insurance underwriting to £30,000 of all cargo). Included in the manifest is the item of “Tin hardware & cutlery £7,530”. This dessert spoon is one of 482 similar items of electro-plated cutlery from the LOCH ARD site, comprising spoons and forks of various sizes but all sharing the same general shape or design and metallic composition. 49 of these pieces display a legible makers’ mark — the initials “W” and “P” placed within a raised diamond outline, which is in turn contained within a sunken crown shape — identifying the manufacturer as William Page & Co of Birmingham. An electroplater’s makers’ marks, unlike sterling silver hallmarks, are not consistent identifiers of quality or date and place of manufacture. A similar line of five impressions was usually made to impress the consumer with an implication of industry standards, but what each one actually signified was not regulated and so they varied according to the whim of the individual foundry. In this case, the maker’s marks are often obscured by sedimentary accretion or removed by corrosion after a century of submersion in the ocean. However sufficient detail has survived to indicate that these samples of electro-plated cutlery probably originated from the same consignment in the LOCH ARD’s cargo. The generally common range of marks are drawn from 255 tea spoons, 125 dessert spoons, and 99 table forks. These marks are clearly visible in 66 instances, while the same sequence of general outlines, or depression shapes, is discernible in another 166 examples. Suggested trade names for William Page & Co’s particular blend of brass plating are ‘roman silver’ or ‘silverite’. This copper alloy polishes to a lustrous gold when new, discolouring to a murky grey with greenish hue when neglected. HISTORY OF THE LOCH ARD The LOCH ARD belonged to the famous Loch Line which sailed many ships from England to Australia. Built in Glasgow by Barclay, Curdle and Co. in 1873, the LOCH ARD was a three-masted square rigged iron sailing ship. The ship measured 262ft 7" (79.87m) in length, 38ft (11.58m) in width, 23ft (7m) in depth and had a gross tonnage of 1693 tons. The LOCH ARD's main mast measured a massive 150ft (45.7m) in height. LOCH ARD made three trips to Australia and one trip to Calcutta before its final voyage. LOCH ARD left England on March 2, 1878, under the command of Captain Gibbs, a newly married, 29 year old. She was bound for Melbourne with a crew of 37, plus 17 passengers and a load of cargo. The general cargo reflected the affluence of Melbourne at the time. On board were straw hats, umbrella, perfumes, clay pipes, pianos, clocks, confectionary, linen and candles, as well as a heavier load of railway irons, cement, lead and copper. There were items included that intended for display in the Melbourne International Exhibition in 1880. The voyage to Port Phillip was long but uneventful. At 3am on June 1, 1878, Captain Gibbs was expecting to see land and the passengers were becoming excited as they prepared to view their new homeland in the early morning. But LOCH ARD was running into a fog which greatly reduced visibility. Captain Gibbs was becoming anxious as there was no sign of land or the Cape Otway lighthouse. At 4am the fog lifted. A man aloft announced that he could see breakers. The sheer cliffs of Victoria's west coast came into view, and Captain Gibbs realised that the ship was much closer to them than expected. He ordered as much sail to be set as time would permit and then attempted to steer the vessel out to sea. On coming head on into the wind, the ship lost momentum, the sails fell limp and LOCH ARD's bow swung back. Gibbs then ordered the anchors to be released in an attempt to hold its position. The anchors sank some 50 fathoms - but did not hold. By this time LOCH ARD was among the breakers and the tall cliffs of Mutton Bird Island rose behind the ship. Just half a mile from the coast, the ship's bow was suddenly pulled around by the anchor. The captain tried to tack out to sea, but the ship struck a reef at the base of Mutton Bird Island, near Port Campbell. Waves broke over the ship and the top deck was loosened from the hull. The masts and rigging came crashing down knocking passengers and crew overboard. When a lifeboat was finally launched, it crashed into the side of LOCH ARD and capsized. Tom Pearce, who had launched the boat, managed to cling to its overturned hull and shelter beneath it. He drifted out to sea and then on the flood tide came into what is now known as LOCH ARD Gorge. He swam to shore, bruised and dazed, and found a cave in which to shelter. Some of the crew stayed below deck to shelter from the falling rigging but drowned when the ship slipped off the reef into deeper water. Eva Carmichael had raced onto deck to find out what was happening only to be confronted by towering cliffs looming above the stricken ship. In all the chaos, Captain Gibbs grabbed Eva and said, "If you are saved Eva, let my dear wife know that I died like a sailor". That was the last Eva Carmichael saw of the captain. She was swept off the ship by a huge wave. Eva saw Tom Pearce on a small rocky beach and yelled to attract his attention. He dived in and swam to the exhausted woman and dragged her to shore. He took her to the cave and broke open case of brandy which had washed up on the beach. He opened a bottle to revive the unconscious woman. A few hours later Tom scaled a cliff in search of help. He followed hoof prints and came by chance upon two men from nearby Glenample Station three and a half miles away. In a state of exhaustion, he told the men of the tragedy. Tom returned to the gorge while the two men rode back to the station to get help. By the time they reached LOCH ARD Gorge, it was cold and dark. The two shipwreck survivors were taken to Glenample Station to recover. Eva stayed at the station for six weeks before returning to Ireland, this time by steamship. In Melbourne, Tom Pearce received a hero's welcome. He was presented with the first gold medal of the Royal Humane Society of Victoria and a £1000 cheque from the Victorian Government. Concerts were performed to honour the young man's bravery and to raise money for those who lost family in the LOCH ARD disaster. Of the 54 crew members and passengers on board, only two survived: the apprentice, Tom Pearce and the young woman passenger, Eva Carmichael, who lost all of her family in the tragedy. Ten days after the LOCH ARD tragedy, salvage rights to the wreck were sold at auction for £2,120. Cargo valued at £3,000 was salvaged and placed on the beach, but most washed back into the sea when another storm developed. The wreck of LOCH ARD still lies at the base of Mutton Bird Island. Much of the cargo has now been salvaged and some was washed up into what is now known as LOCH ARD Gorge. Cargo and artefacts have also been illegally salvaged over many years before protective legislation was introduced. One of the most unlikely pieces of cargo to have survived the shipwreck was a Minton porcelain peacock - one of only seven in the world. The peacock was destined for the Melbourne International Exhibition in 1880. It had been well packed, which gave it adequate protection during the violent storm. Today, the Minton peacock can be seen at the Flagstaff Hill Maritime Museum in Warrnambool. From Australia's most dramatic shipwreck it has now become Australia's shipwreck artefact and is one of very few 'objects' on the Victorian State Heritage Register most valuable. The LOCH ARD shipwreck is of State significance – Victorian Heritage Register S 417. Flagstaff Hill’s collection of artefacts from LOCH ARD is significant for being one of the largest collections of artefacts from this shipwreck in Victoria. It is significant for its association with the shipwreck, which is on the Victorian Heritage Register (VHR S417). The collection is significant because of the relationship between the objects, as together they have a high potential to interpret the story of the LOCH ARD. The LOCH ARD collection is archaeologically significant as the remains of a large international passenger and cargo ship. The LOCH ARD collection is historically significant for representing aspects of Victoria’s shipping history and its potential to interpret sub-theme 1.5 of Victoria’s Framework of Historical Themes (living with natural processes). The collection is also historically significant for its association with the LOCH ARD, which was one of the worst and best known shipwrecks in Victoria’s history. Unrestored dessert spoon from the wreck of the LOCH ARD. The spoon design has a flattened fiddle-back handle, with a thin stem or shank, flared collar, and a shallow rounded bowl. The spoons metallic composition is a thin layer of brass alloy which has partially corroded back to a nickel-silver base metal. Some verdigris and concretion on front and back of spoon. Spoon bowl is dented and cracked. 70% of surface area covered in dark Silver Oxide.flagstaff hill maritime museum, shipwreck coast, great ocean road, loch line, loch ard, mutton bird island, loch ard gorge, electroplated cutlery, loch ard shipwreck, william page and co, birmingham brass plating, dessert spoons -
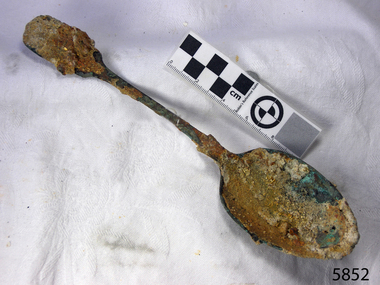 Flagstaff Hill Maritime Museum and Village
Domestic object - Spoon, circa 1878
This dessert spoon is from the wreck of the LOCH ARD, a Loch Line ship of 1,693 tons which sailed from Gravesend, London, on 2 March 1878 with 17 passengers and a crew of 36 under Captain George Gibbs. “The intention was to discharge cargo in Melbourne, before returning to London via the Horn with wool and wheat”. Instead, on 1 June 1878, after 90 days at sea, she struck the sandstone cliffs of Mutton Bird Island on the south west coast of Victoria, and sank with the loss of 52 lives and all her cargo. The manifest of the LOCH ARD listed an array of manufactured goods and bulk metals being exported to the Colony of Victoria, with a declared value of £53,700. (202 bills of lading show an actual invoice value of £68, 456, with insurance underwriting to £30,000 of all cargo). Included in the manifest is the item of “Tin hardware & cutlery £7,530”. This dessert spoon is one of 482 similar items of electro-plated cutlery from the LOCH ARD site, comprising spoons and forks of various sizes but all sharing the same general shape or design and metallic composition. 49 of these pieces display a legible makers’ mark — the initials “W” and “P” placed within a raised diamond outline, which is in turn contained within a sunken crown shape — identifying the manufacturer as William Page & Co of Birmingham. An electroplater’s makers’ marks, unlike sterling silver hallmarks, are not consistent identifiers of quality or date and place of manufacture. A similar line of five impressions was usually made to impress the consumer with an implication of industry standards, but what each one actually signified was not regulated and so they varied according to the whim of the individual foundry. In this case, the maker’s marks are often obscured by sedimentary accretion or removed by corrosion after a century of submersion in the ocean. However sufficient detail has survived to indicate that these samples of electro-plated cutlery probably originated from the same consignment in the LOCH ARD’s cargo. The generally common range of marks are drawn from 255 tea spoons, 125 dessert spoons, and 99 table forks. These marks are clearly visible in 66 instances, while the same sequence of general outlines, or depression shapes, is discernible in another 166 examples. Suggested trade names for William Page & Co’s particular blend of brass plating are ‘roman silver’ or ‘silverite’. This copper alloy polishes to a lustrous gold when new, discolouring to a murky grey with greenish hue when neglected. HISTORY OF THE LOCH ARD The LOCH ARD belonged to the famous Loch Line which sailed many ships from England to Australia. Built in Glasgow by Barclay, Curdle and Co. in 1873, the LOCH ARD was a three-masted square rigged iron sailing ship. The ship measured 262ft 7" (79.87m) in length, 38ft (11.58m) in width, 23ft (7m) in depth and had a gross tonnage of 1693 tons. The LOCH ARD's main mast measured a massive 150ft (45.7m) in height. LOCH ARD made three trips to Australia and one trip to Calcutta before its final voyage. LOCH ARD left England on March 2, 1878, under the command of Captain Gibbs, a newly married, 29 year old. She was bound for Melbourne with a crew of 37, plus 17 passengers and a load of cargo. The general cargo reflected the affluence of Melbourne at the time. On board were straw hats, umbrella, perfumes, clay pipes, pianos, clocks, confectionary, linen and candles, as well as a heavier load of railway irons, cement, lead and copper. There were items included that intended for display in the Melbourne International Exhibition in 1880. The voyage to Port Phillip was long but uneventful. At 3am on June 1, 1878, Captain Gibbs was expecting to see land and the passengers were becoming excited as they prepared to view their new homeland in the early morning. But LOCH ARD was running into a fog which greatly reduced visibility. Captain Gibbs was becoming anxious as there was no sign of land or the Cape Otway lighthouse. At 4am the fog lifted. A man aloft announced that he could see breakers. The sheer cliffs of Victoria's west coast came into view, and Captain Gibbs realised that the ship was much closer to them than expected. He ordered as much sail to be set as time would permit and then attempted to steer the vessel out to sea. On coming head on into the wind, the ship lost momentum, the sails fell limp and LOCH ARD's bow swung back. Gibbs then ordered the anchors to be released in an attempt to hold its position. The anchors sank some 50 fathoms - but did not hold. By this time LOCH ARD was among the breakers and the tall cliffs of Mutton Bird Island rose behind the ship. Just half a mile from the coast, the ship's bow was suddenly pulled around by the anchor. The captain tried to tack out to sea, but the ship struck a reef at the base of Mutton Bird Island, near Port Campbell. Waves broke over the ship and the top deck was loosened from the hull. The masts and rigging came crashing down knocking passengers and crew overboard. When a lifeboat was finally launched, it crashed into the side of LOCH ARD and capsized. Tom Pearce, who had launched the boat, managed to cling to its overturned hull and shelter beneath it. He drifted out to sea and then on the flood tide came into what is now known as LOCH ARD Gorge. He swam to shore, bruised and dazed, and found a cave in which to shelter. Some of the crew stayed below deck to shelter from the falling rigging but drowned when the ship slipped off the reef into deeper water. Eva Carmichael had raced onto deck to find out what was happening only to be confronted by towering cliffs looming above the stricken ship. In all the chaos, Captain Gibbs grabbed Eva and said, "If you are saved Eva, let my dear wife know that I died like a sailor". That was the last Eva Carmichael saw of the captain. She was swept off the ship by a huge wave. Eva saw Tom Pearce on a small rocky beach and yelled to attract his attention. He dived in and swam to the exhausted woman and dragged her to shore. He took her to the cave and broke open case of brandy which had washed up on the beach. He opened a bottle to revive the unconscious woman. A few hours later Tom scaled a cliff in search of help. He followed hoof prints and came by chance upon two men from nearby Glenample Station three and a half miles away. In a state of exhaustion, he told the men of the tragedy. Tom returned to the gorge while the two men rode back to the station to get help. By the time they reached LOCH ARD Gorge, it was cold and dark. The two shipwreck survivors were taken to Glenample Station to recover. Eva stayed at the station for six weeks before returning to Ireland, this time by steamship. In Melbourne, Tom Pearce received a hero's welcome. He was presented with the first gold medal of the Royal Humane Society of Victoria and a £1000 cheque from the Victorian Government. Concerts were performed to honour the young man's bravery and to raise money for those who lost family in the LOCH ARD disaster. Of the 54 crew members and passengers on board, only two survived: the apprentice, Tom Pearce and the young woman passenger, Eva Carmichael, who lost all of her family in the tragedy. Ten days after the LOCH ARD tragedy, salvage rights to the wreck were sold at auction for £2,120. Cargo valued at £3,000 was salvaged and placed on the beach, but most washed back into the sea when another storm developed. The wreck of LOCH ARD still lies at the base of Mutton Bird Island. Much of the cargo has now been salvaged and some was washed up into what is now known as LOCH ARD Gorge. Cargo and artefacts have also been illegally salvaged over many years before protective legislation was introduced. One of the most unlikely pieces of cargo to have survived the shipwreck was a Minton porcelain peacock - one of only seven in the world. The peacock was destined for the Melbourne International Exhibition in 1880. It had been well packed, which gave it adequate protection during the violent storm. Today, the Minton peacock can be seen at the Flagstaff Hill Maritime Museum in Warrnambool. From Australia's most dramatic shipwreck it has now become Australia's shipwreck artefact and is one of very few 'objects' on the Victorian State Heritage Register most valuable. The LOCH ARD shipwreck is of State significance – Victorian Heritage Register S 417. Flagstaff Hill’s collection of artefacts from LOCH ARD is significant for being one of the largest collections of artefacts from this shipwreck in Victoria. It is significant for its association with the shipwreck, which is on the Victorian Heritage Register (VHR S417). The collection is significant because of the relationship between the objects, as together they have a high potential to interpret the story of the LOCH ARD. The LOCH ARD collection is archaeologically significant as the remains of a large international passenger and cargo ship. The LOCH ARD collection is historically significant for representing aspects of Victoria’s shipping history and its potential to interpret sub-theme 1.5 of Victoria’s Framework of Historical Themes (living with natural processes). The collection is also historically significant for its association with the LOCH ARD, which was one of the worst and best known shipwrecks in Victoria’s history. Unrestored dessert spoon from the wreck of the LOCH ARD. The spoon design has a flattened fiddle-back handle, with a thin stem or shank, flared collar, and a shallow rounded bowl. The spoons metallic composition is a thin layer of brass alloy which has partially corroded back to a nickel-silver base metal. Approximately 85% of spoon surface area bears red/white encrustation and balance has verdigris.Spoon is bent out of shape.flagstaff hill maritime museum, shipwreck coast, great ocean road, loch line, loch ard, mutton bird island, loch ard gorge, electroplated cutlery, loch ard shipwreck, william page and co, birmingham brass plating, dessert spoons -
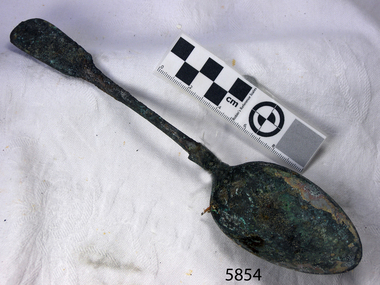 Flagstaff Hill Maritime Museum and Village
Domestic object - Spoon, circa 1878
This table spoon is from the wreck of the LOCH ARD, a Loch Line ship of 1,693 tons which sailed from Gravesend, London, on 2 March 1878 with 17 passengers and a crew of 36 under Captain George Gibbs. “The intention was to discharge cargo in Melbourne, before returning to London via the Horn with wool and wheat”. Instead, on 1 June 1878, after 90 days at sea, she struck the sandstone cliffs of Mutton Bird Island on the south west coast of Victoria, and sank with the loss of 52 lives and all her cargo. The manifest of the LOCH ARD listed an array of manufactured goods and bulk metals being exported to the Colony of Victoria, with a declared value of £53,700. (202 bills of lading show an actual invoice value of £68, 456, with insurance underwriting to £30,000 of all cargo). Included in the manifest is the item of “Tin hardware & cutlery £7,530”. This table spoon is one of 482 similar items of electro-plated cutlery from the LOCH ARD site, comprising spoons and forks of various sizes but all sharing the same general shape or design and metallic composition. 49 of these pieces display a legible makers’ mark — the initials “W” and “P” placed within a raised diamond outline, which is in turn contained within a sunken crown shape — identifying the manufacturer as William Page & Co of Birmingham. An electroplater’s makers’ marks, unlike sterling silver hallmarks, are not consistent identifiers of quality or date and place of manufacture. A similar line of five impressions was usually made to impress the consumer with an implication of industry standards, but what each one actually signified was not regulated and so they varied according to the whim of the individual foundry. In this case, the maker’s marks are often obscured by sedimentary accretion or removed by corrosion after a century of submersion in the ocean. However sufficient detail has survived to indicate that these samples of electro-plated cutlery probably originated from the same consignment in the LOCH ARD’s cargo. The generally common range of marks are drawn from 255 tea spoons, 125 dessert spoons, and 99 table forks. These marks are clearly visible in 66 instances, while the same sequence of general outlines, or depression shapes, is discernible in another 166 examples. Suggested trade names for William Page & Co’s particular blend of brass plating are ‘roman silver’ or ‘silverite’. This copper alloy polishes to a lustrous gold when new, discolouring to a murky grey with greenish hue when neglected. HISTORY OF THE LOCH ARD The LOCH ARD belonged to the famous Loch Line which sailed many ships from England to Australia. Built in Glasgow by Barclay, Curdle and Co. in 1873, the LOCH ARD was a three-masted square rigged iron sailing ship. The ship measured 262ft 7" (79.87m) in length, 38ft (11.58m) in width, 23ft (7m) in depth and had a gross tonnage of 1693 tons. The LOCH ARD's main mast measured a massive 150ft (45.7m) in height. LOCH ARD made three trips to Australia and one trip to Calcutta before its final voyage. LOCH ARD left England on March 2, 1878, under the command of Captain Gibbs, a newly married, 29 year old. She was bound for Melbourne with a crew of 37, plus 17 passengers and a load of cargo. The general cargo reflected the affluence of Melbourne at the time. On board were straw hats, umbrella, perfumes, clay pipes, pianos, clocks, confectionary, linen and candles, as well as a heavier load of railway irons, cement, lead and copper. There were items included that intended for display in the Melbourne International Exhibition in 1880. The voyage to Port Phillip was long but uneventful. At 3am on June 1, 1878, Captain Gibbs was expecting to see land and the passengers were becoming excited as they prepared to view their new homeland in the early morning. But LOCH ARD was running into a fog which greatly reduced visibility. Captain Gibbs was becoming anxious as there was no sign of land or the Cape Otway lighthouse. At 4am the fog lifted. A man aloft announced that he could see breakers. The sheer cliffs of Victoria's west coast came into view, and Captain Gibbs realised that the ship was much closer to them than expected. He ordered as much sail to be set as time would permit and then attempted to steer the vessel out to sea. On coming head on into the wind, the ship lost momentum, the sails fell limp and LOCH ARD's bow swung back. Gibbs then ordered the anchors to be released in an attempt to hold its position. The anchors sank some 50 fathoms - but did not hold. By this time LOCH ARD was among the breakers and the tall cliffs of Mutton Bird Island rose behind the ship. Just half a mile from the coast, the ship's bow was suddenly pulled around by the anchor. The captain tried to tack out to sea, but the ship struck a reef at the base of Mutton Bird Island, near Port Campbell. Waves broke over the ship and the top deck was loosened from the hull. The masts and rigging came crashing down knocking passengers and crew overboard. When a lifeboat was finally launched, it crashed into the side of LOCH ARD and capsized. Tom Pearce, who had launched the boat, managed to cling to its overturned hull and shelter beneath it. He drifted out to sea and then on the flood tide came into what is now known as LOCH ARD Gorge. He swam to shore, bruised and dazed, and found a cave in which to shelter. Some of the crew stayed below deck to shelter from the falling rigging but drowned when the ship slipped off the reef into deeper water. Eva Carmichael had raced onto deck to find out what was happening only to be confronted by towering cliffs looming above the stricken ship. In all the chaos, Captain Gibbs grabbed Eva and said, "If you are saved Eva, let my dear wife know that I died like a sailor". That was the last Eva Carmichael saw of the captain. She was swept off the ship by a huge wave. Eva saw Tom Pearce on a small rocky beach and yelled to attract his attention. He dived in and swam to the exhausted woman and dragged her to shore. He took her to the cave and broke open case of brandy which had washed up on the beach. He opened a bottle to revive the unconscious woman. A few hours later Tom scaled a cliff in search of help. He followed hoof prints and came by chance upon two men from nearby Glenample Station three and a half miles away. In a state of exhaustion, he told the men of the tragedy. Tom returned to the gorge while the two men rode back to the station to get help. By the time they reached LOCH ARD Gorge, it was cold and dark. The two shipwreck survivors were taken to Glenample Station to recover. Eva stayed at the station for six weeks before returning to Ireland, this time by steamship. In Melbourne, Tom Pearce received a hero's welcome. He was presented with the first gold medal of the Royal Humane Society of Victoria and a £1000 cheque from the Victorian Government. Concerts were performed to honour the young man's bravery and to raise money for those who lost family in the LOCH ARD disaster. Of the 54 crew members and passengers on board, only two survived: the apprentice, Tom Pearce and the young woman passenger, Eva Carmichael, who lost all of her family in the tragedy. Ten days after the LOCH ARD tragedy, salvage rights to the wreck were sold at auction for £2,120. Cargo valued at £3,000 was salvaged and placed on the beach, but most washed back into the sea when another storm developed. The wreck of LOCH ARD still lies at the base of Mutton Bird Island. Much of the cargo has now been salvaged and some was washed up into what is now known as LOCH ARD Gorge. Cargo and artefacts have also been illegally salvaged over many years before protective legislation was introduced. One of the most unlikely pieces of cargo to have survived the shipwreck was a Minton porcelain peacock - one of only seven in the world. The peacock was destined for the Melbourne International Exhibition in 1880. It had been well packed, which gave it adequate protection during the violent storm. Today, the Minton peacock can be seen at the Flagstaff Hill Maritime Museum in Warrnambool. From Australia's most dramatic shipwreck it has now become Australia's shipwreck artefact and is one of very few 'objects' on the Victorian State Heritage Register most valuable. The LOCH ARD shipwreck is of State significance – Victorian Heritage Register S 417. Flagstaff Hill’s collection of artefacts from LOCH ARD is significant for being one of the largest collections of artefacts from this shipwreck in Victoria. It is significant for its association with the shipwreck, which is on the Victorian Heritage Register (VHR S417). The collection is significant because of the relationship between the objects, as together they have a high potential to interpret the story of the LOCH ARD. The LOCH ARD collection is archaeologically significant as the remains of a large international passenger and cargo ship. The LOCH ARD collection is historically significant for representing aspects of Victoria’s shipping history and its potential to interpret sub-theme 1.5 of Victoria’s Framework of Historical Themes (living with natural processes). The collection is also historically significant for its association with the LOCH ARD, which was one of the worst and best known shipwrecks in Victoria’s history. Unrestored table spoon from the wreck of the LOCH ARD. The spoon design has a flattened fiddle-back handle, with a thin stem or shank, flared collar, and a shallow rounded bowl. The spoons metallic composition is a thin layer of brass alloy which has partially corroded back to a nickel-silver base metal. Approximately 10% of original plate remains. Some verdigris and concretion on front and back of spoon, with balance covered in Silver Oxide.flagstaff hill maritime museum, shipwreck coast, great ocean road, loch line, loch ard, mutton bird island, loch ard gorge, electroplated cutlery, loch ard shipwreck, william page and co, birmingham brass plating, table spoons -
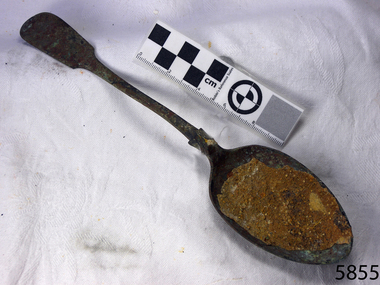 Flagstaff Hill Maritime Museum and Village
Domestic object - Spoon, circa 1878
This table spoon is from the wreck of the LOCH ARD, a Loch Line ship of 1,693 tons which sailed from Gravesend, London, on 2 March 1878 with 17 passengers and a crew of 36 under Captain George Gibbs. “The intention was to discharge cargo in Melbourne, before returning to London via the Horn with wool and wheat”. Instead, on 1 June 1878, after 90 days at sea, she struck the sandstone cliffs of Mutton Bird Island on the south west coast of Victoria, and sank with the loss of 52 lives and all her cargo. The manifest of the LOCH ARD listed an array of manufactured goods and bulk metals being exported to the Colony of Victoria, with a declared value of £53,700. (202 bills of lading show an actual invoice value of £68, 456, with insurance underwriting to £30,000 of all cargo). Included in the manifest is the item of “Tin hardware & cutlery £7,530”. This table spoon is one of 482 similar items of electro-plated cutlery from the LOCH ARD site, comprising spoons and forks of various sizes but all sharing the same general shape or design and metallic composition. 49 of these pieces display a legible makers’ mark — the initials “W” and “P” placed within a raised diamond outline, which is in turn contained within a sunken crown shape — identifying the manufacturer as William Page & Co of Birmingham. An electroplater’s makers’ marks, unlike sterling silver hallmarks, are not consistent identifiers of quality or date and place of manufacture. A similar line of five impressions was usually made to impress the consumer with an implication of industry standards, but what each one actually signified was not regulated and so they varied according to the whim of the individual foundry. In this case, the maker’s marks are often obscured by sedimentary accretion or removed by corrosion after a century of submersion in the ocean. However sufficient detail has survived to indicate that these samples of electro-plated cutlery probably originated from the same consignment in the LOCH ARD’s cargo. The generally common range of marks are drawn from 255 tea spoons, 125 dessert spoons, and 99 table forks. These marks are clearly visible in 66 instances, while the same sequence of general outlines, or depression shapes, is discernible in another 166 examples. Suggested trade names for William Page & Co’s particular blend of brass plating are ‘roman silver’ or ‘silverite’. This copper alloy polishes to a lustrous gold when new, discolouring to a murky grey with greenish hue when neglected. HISTORY OF THE LOCH ARD The LOCH ARD belonged to the famous Loch Line which sailed many ships from England to Australia. Built in Glasgow by Barclay, Curdle and Co. in 1873, the LOCH ARD was a three-masted square rigged iron sailing ship. The ship measured 262ft 7" (79.87m) in length, 38ft (11.58m) in width, 23ft (7m) in depth and had a gross tonnage of 1693 tons. The LOCH ARD's main mast measured a massive 150ft (45.7m) in height. LOCH ARD made three trips to Australia and one trip to Calcutta before its final voyage. LOCH ARD left England on March 2, 1878, under the command of Captain Gibbs, a newly married, 29 year old. She was bound for Melbourne with a crew of 37, plus 17 passengers and a load of cargo. The general cargo reflected the affluence of Melbourne at the time. On board were straw hats, umbrella, perfumes, clay pipes, pianos, clocks, confectionary, linen and candles, as well as a heavier load of railway irons, cement, lead and copper. There were items included that intended for display in the Melbourne International Exhibition in 1880. The voyage to Port Phillip was long but uneventful. At 3am on June 1, 1878, Captain Gibbs was expecting to see land and the passengers were becoming excited as they prepared to view their new homeland in the early morning. But LOCH ARD was running into a fog which greatly reduced visibility. Captain Gibbs was becoming anxious as there was no sign of land or the Cape Otway lighthouse. At 4am the fog lifted. A man aloft announced that he could see breakers. The sheer cliffs of Victoria's west coast came into view, and Captain Gibbs realised that the ship was much closer to them than expected. He ordered as much sail to be set as time would permit and then attempted to steer the vessel out to sea. On coming head on into the wind, the ship lost momentum, the sails fell limp and LOCH ARD's bow swung back. Gibbs then ordered the anchors to be released in an attempt to hold its position. The anchors sank some 50 fathoms - but did not hold. By this time LOCH ARD was among the breakers and the tall cliffs of Mutton Bird Island rose behind the ship. Just half a mile from the coast, the ship's bow was suddenly pulled around by the anchor. The captain tried to tack out to sea, but the ship struck a reef at the base of Mutton Bird Island, near Port Campbell. Waves broke over the ship and the top deck was loosened from the hull. The masts and rigging came crashing down knocking passengers and crew overboard. When a lifeboat was finally launched, it crashed into the side of LOCH ARD and capsized. Tom Pearce, who had launched the boat, managed to cling to its overturned hull and shelter beneath it. He drifted out to sea and then on the flood tide came into what is now known as LOCH ARD Gorge. He swam to shore, bruised and dazed, and found a cave in which to shelter. Some of the crew stayed below deck to shelter from the falling rigging but drowned when the ship slipped off the reef into deeper water. Eva Carmichael had raced onto deck to find out what was happening only to be confronted by towering cliffs looming above the stricken ship. In all the chaos, Captain Gibbs grabbed Eva and said, "If you are saved Eva, let my dear wife know that I died like a sailor". That was the last Eva Carmichael saw of the captain. She was swept off the ship by a huge wave. Eva saw Tom Pearce on a small rocky beach and yelled to attract his attention. He dived in and swam to the exhausted woman and dragged her to shore. He took her to the cave and broke open case of brandy which had washed up on the beach. He opened a bottle to revive the unconscious woman. A few hours later Tom scaled a cliff in search of help. He followed hoof prints and came by chance upon two men from nearby Glenample Station three and a half miles away. In a state of exhaustion, he told the men of the tragedy. Tom returned to the gorge while the two men rode back to the station to get help. By the time they reached LOCH ARD Gorge, it was cold and dark. The two shipwreck survivors were taken to Glenample Station to recover. Eva stayed at the station for six weeks before returning to Ireland, this time by steamship. In Melbourne, Tom Pearce received a hero's welcome. He was presented with the first gold medal of the Royal Humane Society of Victoria and a £1000 cheque from the Victorian Government. Concerts were performed to honour the young man's bravery and to raise money for those who lost family in the LOCH ARD disaster. Of the 54 crew members and passengers on board, only two survived: the apprentice, Tom Pearce and the young woman passenger, Eva Carmichael, who lost all of her family in the tragedy. Ten days after the LOCH ARD tragedy, salvage rights to the wreck were sold at auction for £2,120. Cargo valued at £3,000 was salvaged and placed on the beach, but most washed back into the sea when another storm developed. The wreck of LOCH ARD still lies at the base of Mutton Bird Island. Much of the cargo has now been salvaged and some was washed up into what is now known as LOCH ARD Gorge. Cargo and artefacts have also been illegally salvaged over many years before protective legislation was introduced. One of the most unlikely pieces of cargo to have survived the shipwreck was a Minton porcelain peacock - one of only seven in the world. The peacock was destined for the Melbourne International Exhibition in 1880. It had been well packed, which gave it adequate protection during the violent storm. Today, the Minton peacock can be seen at the Flagstaff Hill Maritime Museum in Warrnambool. From Australia's most dramatic shipwreck it has now become Australia's shipwreck artefact and is one of very few 'objects' on the Victorian State Heritage Register most valuable. The LOCH ARD shipwreck is of State significance – Victorian Heritage Register S 417. Flagstaff Hill’s collection of artefacts from LOCH ARD is significant for being one of the largest collections of artefacts from this shipwreck in Victoria. It is significant for its association with the shipwreck, which is on the Victorian Heritage Register (VHR S417). The collection is significant because of the relationship between the objects, as together they have a high potential to interpret the story of the LOCH ARD. The LOCH ARD collection is archaeologically significant as the remains of a large international passenger and cargo ship. The LOCH ARD collection is historically significant for representing aspects of Victoria’s shipping history and its potential to interpret sub-theme 1.5 of Victoria’s Framework of Historical Themes (living with natural processes). The collection is also historically significant for its association with the LOCH ARD, which was one of the worst and best known shipwrecks in Victoria’s history. Unrestored table spoon from the wreck of the LOCH ARD. The spoon design has a flattened fiddle-back handle, with a thin stem or shank, flared collar, and a shallow rounded bowl. The spoons metallic composition is a thin layer of brass alloy which has partially corroded back to a nickel-silver base metal. Approximately 35% of surface area has red and cream encrustation. Minimal original plate has survived but outlines of 5 makers marks are visible - Crown, Ellipse, Rounded Square, Circle, Diamond.flagstaff hill maritime museum, shipwreck coast, great ocean road, loch line, loch ard, mutton bird island, loch ard gorge, electroplated cutlery, loch ard shipwreck, william page and co, birmingham brass plating, table spoons -
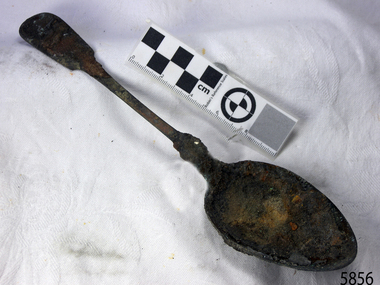 Flagstaff Hill Maritime Museum and Village
Domestic object - Spoon, circa 1878
This table spoon is from the wreck of the LOCH ARD, a Loch Line ship of 1,693 tons which sailed from Gravesend, London, on 2 March 1878 with 17 passengers and a crew of 36 under Captain George Gibbs. “The intention was to discharge cargo in Melbourne, before returning to London via the Horn with wool and wheat”. Instead, on 1 June 1878, after 90 days at sea, she struck the sandstone cliffs of Mutton Bird Island on the south west coast of Victoria, and sank with the loss of 52 lives and all her cargo. The manifest of the LOCH ARD listed an array of manufactured goods and bulk metals being exported to the Colony of Victoria, with a declared value of £53,700. (202 bills of lading show an actual invoice value of £68, 456, with insurance underwriting to £30,000 of all cargo). Included in the manifest is the item of “Tin hardware & cutlery £7,530”. This table spoon is one of 482 similar items of electro-plated cutlery from the LOCH ARD site, comprising spoons and forks of various sizes but all sharing the same general shape or design and metallic composition. 49 of these pieces display a legible makers’ mark — the initials “W” and “P” placed within a raised diamond outline, which is in turn contained within a sunken crown shape — identifying the manufacturer as William Page & Co of Birmingham. An electroplater’s makers’ marks, unlike sterling silver hallmarks, are not consistent identifiers of quality or date and place of manufacture. A similar line of five impressions was usually made to impress the consumer with an implication of industry standards, but what each one actually signified was not regulated and so they varied according to the whim of the individual foundry. In this case, the maker’s marks are often obscured by sedimentary accretion or removed by corrosion after a century of submersion in the ocean. However sufficient detail has survived to indicate that these samples of electro-plated cutlery probably originated from the same consignment in the LOCH ARD’s cargo. The generally common range of marks are drawn from 255 tea spoons, 125 dessert spoons, and 99 table forks. These marks are clearly visible in 66 instances, while the same sequence of general outlines, or depression shapes, is discernible in another 166 examples. Suggested trade names for William Page & Co’s particular blend of brass plating are ‘roman silver’ or ‘silverite’. This copper alloy polishes to a lustrous gold when new, discolouring to a murky grey with greenish hue when neglected. HISTORY OF THE LOCH ARD The LOCH ARD belonged to the famous Loch Line which sailed many ships from England to Australia. Built in Glasgow by Barclay, Curdle and Co. in 1873, the LOCH ARD was a three-masted square rigged iron sailing ship. The ship measured 262ft 7" (79.87m) in length, 38ft (11.58m) in width, 23ft (7m) in depth and had a gross tonnage of 1693 tons. The LOCH ARD's main mast measured a massive 150ft (45.7m) in height. LOCH ARD made three trips to Australia and one trip to Calcutta before its final voyage. LOCH ARD left England on March 2, 1878, under the command of Captain Gibbs, a newly married, 29 year old. She was bound for Melbourne with a crew of 37, plus 17 passengers and a load of cargo. The general cargo reflected the affluence of Melbourne at the time. On board were straw hats, umbrella, perfumes, clay pipes, pianos, clocks, confectionary, linen and candles, as well as a heavier load of railway irons, cement, lead and copper. There were items included that intended for display in the Melbourne International Exhibition in 1880. The voyage to Port Phillip was long but uneventful. At 3am on June 1, 1878, Captain Gibbs was expecting to see land and the passengers were becoming excited as they prepared to view their new homeland in the early morning. But LOCH ARD was running into a fog which greatly reduced visibility. Captain Gibbs was becoming anxious as there was no sign of land or the Cape Otway lighthouse. At 4am the fog lifted. A man aloft announced that he could see breakers. The sheer cliffs of Victoria's west coast came into view, and Captain Gibbs realised that the ship was much closer to them than expected. He ordered as much sail to be set as time would permit and then attempted to steer the vessel out to sea. On coming head on into the wind, the ship lost momentum, the sails fell limp and LOCH ARD's bow swung back. Gibbs then ordered the anchors to be released in an attempt to hold its position. The anchors sank some 50 fathoms - but did not hold. By this time LOCH ARD was among the breakers and the tall cliffs of Mutton Bird Island rose behind the ship. Just half a mile from the coast, the ship's bow was suddenly pulled around by the anchor. The captain tried to tack out to sea, but the ship struck a reef at the base of Mutton Bird Island, near Port Campbell. Waves broke over the ship and the top deck was loosened from the hull. The masts and rigging came crashing down knocking passengers and crew overboard. When a lifeboat was finally launched, it crashed into the side of LOCH ARD and capsized. Tom Pearce, who had launched the boat, managed to cling to its overturned hull and shelter beneath it. He drifted out to sea and then on the flood tide came into what is now known as LOCH ARD Gorge. He swam to shore, bruised and dazed, and found a cave in which to shelter. Some of the crew stayed below deck to shelter from the falling rigging but drowned when the ship slipped off the reef into deeper water. Eva Carmichael had raced onto deck to find out what was happening only to be confronted by towering cliffs looming above the stricken ship. In all the chaos, Captain Gibbs grabbed Eva and said, "If you are saved Eva, let my dear wife know that I died like a sailor". That was the last Eva Carmichael saw of the captain. She was swept off the ship by a huge wave. Eva saw Tom Pearce on a small rocky beach and yelled to attract his attention. He dived in and swam to the exhausted woman and dragged her to shore. He took her to the cave and broke open case of brandy which had washed up on the beach. He opened a bottle to revive the unconscious woman. A few hours later Tom scaled a cliff in search of help. He followed hoof prints and came by chance upon two men from nearby Glenample Station three and a half miles away. In a state of exhaustion, he told the men of the tragedy. Tom returned to the gorge while the two men rode back to the station to get help. By the time they reached LOCH ARD Gorge, it was cold and dark. The two shipwreck survivors were taken to Glenample Station to recover. Eva stayed at the station for six weeks before returning to Ireland, this time by steamship. In Melbourne, Tom Pearce received a hero's welcome. He was presented with the first gold medal of the Royal Humane Society of Victoria and a £1000 cheque from the Victorian Government. Concerts were performed to honour the young man's bravery and to raise money for those who lost family in the LOCH ARD disaster. Of the 54 crew members and passengers on board, only two survived: the apprentice, Tom Pearce and the young woman passenger, Eva Carmichael, who lost all of her family in the tragedy. Ten days after the LOCH ARD tragedy, salvage rights to the wreck were sold at auction for £2,120. Cargo valued at £3,000 was salvaged and placed on the beach, but most washed back into the sea when another storm developed. The wreck of LOCH ARD still lies at the base of Mutton Bird Island. Much of the cargo has now been salvaged and some was washed up into what is now known as LOCH ARD Gorge. Cargo and artefacts have also been illegally salvaged over many years before protective legislation was introduced. One of the most unlikely pieces of cargo to have survived the shipwreck was a Minton porcelain peacock - one of only seven in the world. The peacock was destined for the Melbourne International Exhibition in 1880. It had been well packed, which gave it adequate protection during the violent storm. Today, the Minton peacock can be seen at the Flagstaff Hill Maritime Museum in Warrnambool. From Australia's most dramatic shipwreck it has now become Australia's shipwreck artefact and is one of very few 'objects' on the Victorian State Heritage Register most valuable. The LOCH ARD shipwreck is of State significance – Victorian Heritage Register S 417. Flagstaff Hill’s collection of artefacts from LOCH ARD is significant for being one of the largest collections of artefacts from this shipwreck in Victoria. It is significant for its association with the shipwreck, which is on the Victorian Heritage Register (VHR S417). The collection is significant because of the relationship between the objects, as together they have a high potential to interpret the story of the LOCH ARD. The LOCH ARD collection is archaeologically significant as the remains of a large international passenger and cargo ship. The LOCH ARD collection is historically significant for representing aspects of Victoria’s shipping history and its potential to interpret sub-theme 1.5 of Victoria’s Framework of Historical Themes (living with natural processes). The collection is also historically significant for its association with the LOCH ARD, which was one of the worst and best known shipwrecks in Victoria’s history. Unrestored table spoon from the wreck of the LOCH ARD. The spoon design has a flattened fiddle-back handle, with a thin stem or shank, flared collar, and a shallow rounded bowl. The spoons metallic composition is a thin layer of brass alloy which has partially corroded back to a nickel-silver base metal. Only 15% of original plating remains. Balance is dark silver oxide stained concretion and base metal. No makers marks are visible.flagstaff hill maritime museum, shipwreck coast, great ocean road, loch line, loch ard, mutton bird island, loch ard gorge, electroplated cutlery, loch ard shipwreck, william page and co, birmingham brass plating, table spoons -
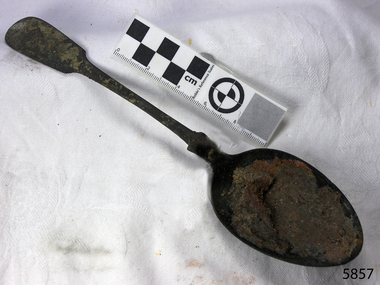 Flagstaff Hill Maritime Museum and Village
Domestic object - Spoon, circa 1878
This table spoon is from the wreck of the LOCH ARD, a Loch Line ship of 1,693 tons which sailed from Gravesend, London, on 2 March 1878 with 17 passengers and a crew of 36 under Captain George Gibbs. “The intention was to discharge cargo in Melbourne, before returning to London via the Horn with wool and wheat”. Instead, on 1 June 1878, after 90 days at sea, she struck the sandstone cliffs of Mutton Bird Island on the south west coast of Victoria, and sank with the loss of 52 lives and all her cargo. The manifest of the LOCH ARD listed an array of manufactured goods and bulk metals being exported to the Colony of Victoria, with a declared value of £53,700. (202 bills of lading show an actual invoice value of £68, 456, with insurance underwriting to £30,000 of all cargo). Included in the manifest is the item of “Tin hardware & cutlery £7,530”. This table spoon is one of 482 similar items of electro-plated cutlery from the LOCH ARD site, comprising spoons and forks of various sizes but all sharing the same general shape or design and metallic composition. 49 of these pieces display a legible makers’ mark — the initials “W” and “P” placed within a raised diamond outline, which is in turn contained within a sunken crown shape — identifying the manufacturer as William Page & Co of Birmingham. An electroplater’s makers’ marks, unlike sterling silver hallmarks, are not consistent identifiers of quality or date and place of manufacture. A similar line of five impressions was usually made to impress the consumer with an implication of industry standards, but what each one actually signified was not regulated and so they varied according to the whim of the individual foundry. In this case, the maker’s marks are often obscured by sedimentary accretion or removed by corrosion after a century of submersion in the ocean. However sufficient detail has survived to indicate that these samples of electro-plated cutlery probably originated from the same consignment in the LOCH ARD’s cargo. The generally common range of marks are drawn from 255 tea spoons, 125 dessert spoons, and 99 table forks. These marks are clearly visible in 66 instances, while the same sequence of general outlines, or depression shapes, is discernible in another 166 examples. Suggested trade names for William Page & Co’s particular blend of brass plating are ‘roman silver’ or ‘silverite’. This copper alloy polishes to a lustrous gold when new, discolouring to a murky grey with greenish hue when neglected. HISTORY OF THE LOCH ARD The LOCH ARD belonged to the famous Loch Line which sailed many ships from England to Australia. Built in Glasgow by Barclay, Curdle and Co. in 1873, the LOCH ARD was a three-masted square rigged iron sailing ship. The ship measured 262ft 7" (79.87m) in length, 38ft (11.58m) in width, 23ft (7m) in depth and had a gross tonnage of 1693 tons. The LOCH ARD's main mast measured a massive 150ft (45.7m) in height. LOCH ARD made three trips to Australia and one trip to Calcutta before its final voyage. LOCH ARD left England on March 2, 1878, under the command of Captain Gibbs, a newly married, 29 year old. She was bound for Melbourne with a crew of 37, plus 17 passengers and a load of cargo. The general cargo reflected the affluence of Melbourne at the time. On board were straw hats, umbrella, perfumes, clay pipes, pianos, clocks, confectionary, linen and candles, as well as a heavier load of railway irons, cement, lead and copper. There were items included that intended for display in the Melbourne International Exhibition in 1880. The voyage to Port Phillip was long but uneventful. At 3am on June 1, 1878, Captain Gibbs was expecting to see land and the passengers were becoming excited as they prepared to view their new homeland in the early morning. But LOCH ARD was running into a fog which greatly reduced visibility. Captain Gibbs was becoming anxious as there was no sign of land or the Cape Otway lighthouse. At 4am the fog lifted. A man aloft announced that he could see breakers. The sheer cliffs of Victoria's west coast came into view, and Captain Gibbs realised that the ship was much closer to them than expected. He ordered as much sail to be set as time would permit and then attempted to steer the vessel out to sea. On coming head on into the wind, the ship lost momentum, the sails fell limp and LOCH ARD's bow swung back. Gibbs then ordered the anchors to be released in an attempt to hold its position. The anchors sank some 50 fathoms - but did not hold. By this time LOCH ARD was among the breakers and the tall cliffs of Mutton Bird Island rose behind the ship. Just half a mile from the coast, the ship's bow was suddenly pulled around by the anchor. The captain tried to tack out to sea, but the ship struck a reef at the base of Mutton Bird Island, near Port Campbell. Waves broke over the ship and the top deck was loosened from the hull. The masts and rigging came crashing down knocking passengers and crew overboard. When a lifeboat was finally launched, it crashed into the side of LOCH ARD and capsized. Tom Pearce, who had launched the boat, managed to cling to its overturned hull and shelter beneath it. He drifted out to sea and then on the flood tide came into what is now known as LOCH ARD Gorge. He swam to shore, bruised and dazed, and found a cave in which to shelter. Some of the crew stayed below deck to shelter from the falling rigging but drowned when the ship slipped off the reef into deeper water. Eva Carmichael had raced onto deck to find out what was happening only to be confronted by towering cliffs looming above the stricken ship. In all the chaos, Captain Gibbs grabbed Eva and said, "If you are saved Eva, let my dear wife know that I died like a sailor". That was the last Eva Carmichael saw of the captain. She was swept off the ship by a huge wave. Eva saw Tom Pearce on a small rocky beach and yelled to attract his attention. He dived in and swam to the exhausted woman and dragged her to shore. He took her to the cave and broke open case of brandy which had washed up on the beach. He opened a bottle to revive the unconscious woman. A few hours later Tom scaled a cliff in search of help. He followed hoof prints and came by chance upon two men from nearby Glenample Station three and a half miles away. In a state of exhaustion, he told the men of the tragedy. Tom returned to the gorge while the two men rode back to the station to get help. By the time they reached LOCH ARD Gorge, it was cold and dark. The two shipwreck survivors were taken to Glenample Station to recover. Eva stayed at the station for six weeks before returning to Ireland, this time by steamship. In Melbourne, Tom Pearce received a hero's welcome. He was presented with the first gold medal of the Royal Humane Society of Victoria and a £1000 cheque from the Victorian Government. Concerts were performed to honour the young man's bravery and to raise money for those who lost family in the LOCH ARD disaster. Of the 54 crew members and passengers on board, only two survived: the apprentice, Tom Pearce and the young woman passenger, Eva Carmichael, who lost all of her family in the tragedy. Ten days after the LOCH ARD tragedy, salvage rights to the wreck were sold at auction for £2,120. Cargo valued at £3,000 was salvaged and placed on the beach, but most washed back into the sea when another storm developed. The wreck of LOCH ARD still lies at the base of Mutton Bird Island. Much of the cargo has now been salvaged and some was washed up into what is now known as LOCH ARD Gorge. Cargo and artefacts have also been illegally salvaged over many years before protective legislation was introduced. One of the most unlikely pieces of cargo to have survived the shipwreck was a Minton porcelain peacock - one of only seven in the world. The peacock was destined for the Melbourne International Exhibition in 1880. It had been well packed, which gave it adequate protection during the violent storm. Today, the Minton peacock can be seen at the Flagstaff Hill Maritime Museum in Warrnambool. From Australia's most dramatic shipwreck it has now become Australia's shipwreck artefact and is one of very few 'objects' on the Victorian State Heritage Register most valuable. The LOCH ARD shipwreck is of State significance – Victorian Heritage Register S 417. Flagstaff Hill’s collection of artefacts from LOCH ARD is significant for being one of the largest collections of artefacts from this shipwreck in Victoria. It is significant for its association with the shipwreck, which is on the Victorian Heritage Register (VHR S417). The collection is significant because of the relationship between the objects, as together they have a high potential to interpret the story of the LOCH ARD. The LOCH ARD collection is archaeologically significant as the remains of a large international passenger and cargo ship. The LOCH ARD collection is historically significant for representing aspects of Victoria’s shipping history and its potential to interpret sub-theme 1.5 of Victoria’s Framework of Historical Themes (living with natural processes). The collection is also historically significant for its association with the LOCH ARD, which was one of the worst and best known shipwrecks in Victoria’s history Unrestored table spoon from the wreck of the LOCH ARD. The spoon design has a flattened fiddle-back handle, with a thin stem or shank, flared collar, and a shallow rounded bowl. The spoons metallic composition is a thin layer of brass alloy which has partially corroded back to a nickel-silver base metal. Some verdigris and 50% of surface area is covered by sedimentary concretion. Only 10% of original plate remains. There is evidence of where another spoon was attached to back of this complete spoon. Balance blackened in Silver Oxide.flagstaff hill maritime museum, shipwreck coast, great ocean road, loch line, loch ard, mutton bird island, loch ard gorge, electroplated cutlery, loch ard shipwreck, william page and co, birmingham brass plating, table spoon, spoon -
 Flagstaff Hill Maritime Museum and Village
Domestic object - Spoon, c.1878
This table spoon is from the wreck of the LOCH ARD, a Loch Line ship of 1,693 tons which sailed from Gravesend, London, on 2 March 1878 with 17 passengers and a crew of 36 under Captain George Gibbs. “The intention was to discharge cargo in Melbourne, before returning to London via the Horn with wool and wheat”. Instead, on 1 June 1878, after 90 days at sea, she struck the sandstone cliffs of Mutton Bird Island on the south west coast of Victoria, and sank with the loss of 52 lives and all her cargo. The manifest of the LOCH ARD listed an array of manufactured goods and bulk metals being exported to the Colony of Victoria, with a declared value of £53,700. (202 bills of lading show an actual invoice value of £68, 456, with insurance underwriting to £30,000 of all cargo). Included in the manifest is the item of “Tin hardware & cutlery £7,530”. This table spoon is one of 482 similar items of electro-plated cutlery from the LOCH ARD site, comprising spoons and forks of various sizes but all sharing the same general shape or design and metallic composition. 49 of these pieces display a legible makers’ mark — the initials “W” and “P” placed within a raised diamond outline, which is in turn contained within a sunken crown shape — identifying the manufacturer as William Page & Co of Birmingham. An electroplater’s makers’ marks, unlike sterling silver hallmarks, are not consistent identifiers of quality or date and place of manufacture. A similar line of five impressions was usually made to impress the consumer with an implication of industry standards, but what each one actually signified was not regulated and so they varied according to the whim of the individual foundry. In this case, the maker’s marks are often obscured by sedimentary accretion or removed by corrosion after a century of submersion in the ocean. However sufficient detail has survived to indicate that these samples of electro-plated cutlery probably originated from the same consignment in the LOCH ARD’s cargo. The generally common range of marks are drawn from 255 tea spoons, 125 dessert spoons, and 99 table forks. These marks are clearly visible in 66 instances, while the same sequence of general outlines, or depression shapes, is discernible in another 166 examples. Suggested trade names for William Page & Co’s particular blend of brass plating are ‘roman silver’ or ‘silverite’. This copper alloy polishes to a lustrous gold when new, discolouring to a murky grey with greenish hue when neglected. HISTORY OF THE LOCH ARD The LOCH ARD belonged to the famous Loch Line which sailed many ships from England to Australia. Built in Glasgow by Barclay, Curdle and Co. in 1873, the LOCH ARD was a three-masted square rigged iron sailing ship. The ship measured 262ft 7" (79.87m) in length, 38ft (11.58m) in width, 23ft (7m) in depth and had a gross tonnage of 1693 tons. The LOCH ARD's main mast measured a massive 150ft (45.7m) in height. LOCH ARD made three trips to Australia and one trip to Calcutta before its final voyage. LOCH ARD left England on March 2, 1878, under the command of Captain Gibbs, a newly married, 29 year old. She was bound for Melbourne with a crew of 37, plus 17 passengers and a load of cargo. The general cargo reflected the affluence of Melbourne at the time. On board were straw hats, umbrella, perfumes, clay pipes, pianos, clocks, confectionary, linen and candles, as well as a heavier load of railway irons, cement, lead and copper. There were items included that intended for display in the Melbourne International Exhibition in 1880. The voyage to Port Phillip was long but uneventful. At 3am on June 1, 1878, Captain Gibbs was expecting to see land and the passengers were becoming excited as they prepared to view their new homeland in the early morning. But LOCH ARD was running into a fog which greatly reduced visibility. Captain Gibbs was becoming anxious as there was no sign of land or the Cape Otway lighthouse. At 4am the fog lifted. A man aloft announced that he could see breakers. The sheer cliffs of Victoria's west coast came into view, and Captain Gibbs realised that the ship was much closer to them than expected. He ordered as much sail to be set as time would permit and then attempted to steer the vessel out to sea. On coming head on into the wind, the ship lost momentum, the sails fell limp and LOCH ARD's bow swung back. Gibbs then ordered the anchors to be released in an attempt to hold its position. The anchors sank some 50 fathoms - but did not hold. By this time LOCH ARD was among the breakers and the tall cliffs of Mutton Bird Island rose behind the ship. Just half a mile from the coast, the ship's bow was suddenly pulled around by the anchor. The captain tried to tack out to sea, but the ship struck a reef at the base of Mutton Bird Island, near Port Campbell. Waves broke over the ship and the top deck was loosened from the hull. The masts and rigging came crashing down knocking passengers and crew overboard. When a lifeboat was finally launched, it crashed into the side of LOCH ARD and capsized. Tom Pearce, who had launched the boat, managed to cling to its overturned hull and shelter beneath it. He drifted out to sea and then on the flood tide came into what is now known as LOCH ARD Gorge. He swam to shore, bruised and dazed, and found a cave in which to shelter. Some of the crew stayed below deck to shelter from the falling rigging but drowned when the ship slipped off the reef into deeper water. Eva Carmichael had raced onto deck to find out what was happening only to be confronted by towering cliffs looming above the stricken ship. In all the chaos, Captain Gibbs grabbed Eva and said, "If you are saved Eva, let my dear wife know that I died like a sailor". That was the last Eva Carmichael saw of the captain. She was swept off the ship by a huge wave. Eva saw Tom Pearce on a small rocky beach and yelled to attract his attention. He dived in and swam to the exhausted woman and dragged her to shore. He took her to the cave and broke open case of brandy which had washed up on the beach. He opened a bottle to revive the unconscious woman. A few hours later Tom scaled a cliff in search of help. He followed hoof prints and came by chance upon two men from nearby Glenample Station three and a half miles away. In a state of exhaustion, he told the men of the tragedy. Tom returned to the gorge while the two men rode back to the station to get help. By the time they reached LOCH ARD Gorge, it was cold and dark. The two shipwreck survivors were taken to Glenample Station to recover. Eva stayed at the station for six weeks before returning to Ireland, this time by steamship. In Melbourne, Tom Pearce received a hero's welcome. He was presented with the first gold medal of the Royal Humane Society of Victoria and a £1000 cheque from the Victorian Government. Concerts were performed to honour the young man's bravery and to raise money for those who lost family in the LOCH ARD disaster. Of the 54 crew members and passengers on board, only two survived: the apprentice, Tom Pearce and the young woman passenger, Eva Carmichael, who lost all of her family in the tragedy. Ten days after the LOCH ARD tragedy, salvage rights to the wreck were sold at auction for £2,120. Cargo valued at £3,000 was salvaged and placed on the beach, but most washed back into the sea when another storm developed. The wreck of LOCH ARD still lies at the base of Mutton Bird Island. Much of the cargo has now been salvaged and some was washed up into what is now known as LOCH ARD Gorge. Cargo and artefacts have also been illegally salvaged over many years before protective legislation was introduced. One of the most unlikely pieces of cargo to have survived the shipwreck was a Minton porcelain peacock - one of only seven in the world. The peacock was destined for the Melbourne International Exhibition in 1880. It had been well packed, which gave it adequate protection during the violent storm. Today, the Minton peacock can be seen at the Flagstaff Hill Maritime Museum in Warrnambool. From Australia's most dramatic shipwreck it has now become Australia's shipwreck artefact and is one of very few 'objects' on the Victorian State Heritage Register most valuable. The LOCH ARD shipwreck is of State significance – Victorian Heritage Register S 417. Flagstaff Hill’s collection of artefacts from LOCH ARD is significant for being one of the largest collections of artefacts from this shipwreck in Victoria. It is significant for its association with the shipwreck, which is on the Victorian Heritage Register (VHR S417). The collection is significant because of the relationship between the objects, as together they have a high potential to interpret the story of the LOCH ARD. The LOCH ARD collection is archaeologically significant as the remains of a large international passenger and cargo ship. The LOCH ARD collection is historically significant for representing aspects of Victoria’s shipping history and its potential to interpret sub-theme 1.5 of Victoria’s Framework of Historical Themes (living with natural processes). The collection is also historically significant for its association with the LOCH ARD, which was one of the worst and best known shipwrecks in Victoria’s history. Unrestored table spoon from the wreck of the LOCH ARD. The spoon design has a flattened fiddle-back handle, with a thin stem or shank, flared collar, and a shallow rounded bowl. The spoons metallic composition is a thin layer of brass alloy which has partially corroded back to a nickel-silver base metal. Sediment covers 65% of spoon, only 5% of original plate remains, with 10% of surface area bearing aquamarine verdigris. Balance blackened with Silver Oxide.flagstaff hill maritime museum, flagstaff hill maritime village, great ocean road, loch line, loch ard, mutton bird island, loch ard gorge, electroplated cutlery, loch ard shipwreck, william page and co, table spoons -
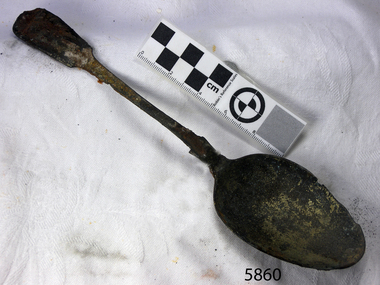 Flagstaff Hill Maritime Museum and Village
Domestic object - Spoon, circa 1878
This table spoon is from the wreck of the LOCH ARD, a Loch Line ship of 1,693 tons which sailed from Gravesend, London, on 2 March 1878 with 17 passengers and a crew of 36 under Captain George Gibbs. “The intention was to discharge cargo in Melbourne, before returning to London via the Horn with wool and wheat”. Instead, on 1 June 1878, after 90 days at sea, she struck the sandstone cliffs of Mutton Bird Island on the south west coast of Victoria, and sank with the loss of 52 lives and all her cargo. The manifest of the LOCH ARD listed an array of manufactured goods and bulk metals being exported to the Colony of Victoria, with a declared value of £53,700. (202 bills of lading show an actual invoice value of £68, 456, with insurance underwriting to £30,000 of all cargo). Included in the manifest is the item of “Tin hardware & cutlery £7,530”. This table spoon is one of 482 similar items of electro-plated cutlery from the LOCH ARD site, comprising spoons and forks of various sizes but all sharing the same general shape or design and metallic composition. 49 of these pieces display a legible makers’ mark — the initials “W” and “P” placed within a raised diamond outline, which is in turn contained within a sunken crown shape — identifying the manufacturer as William Page & Co of Birmingham. An electroplater’s makers’ marks, unlike sterling silver hallmarks, are not consistent identifiers of quality or date and place of manufacture. A similar line of five impressions was usually made to impress the consumer with an implication of industry standards, but what each one actually signified was not regulated and so they varied according to the whim of the individual foundry. In this case, the maker’s marks are often obscured by sedimentary accretion or removed by corrosion after a century of submersion in the ocean. However sufficient detail has survived to indicate that these samples of electro-plated cutlery probably originated from the same consignment in the LOCH ARD’s cargo. The generally common range of marks are drawn from 255 tea spoons, 125 dessert spoons, and 99 table forks. These marks are clearly visible in 66 instances, while the same sequence of general outlines, or depression shapes, is discernible in another 166 examples. Suggested trade names for William Page & Co’s particular blend of brass plating are ‘roman silver’ or ‘silverite’. This copper alloy polishes to a lustrous gold when new, discolouring to a murky grey with greenish hue when neglected. HISTORY OF THE LOCH ARD The LOCH ARD belonged to the famous Loch Line which sailed many ships from England to Australia. Built in Glasgow by Barclay, Curdle and Co. in 1873, the LOCH ARD was a three-masted square rigged iron sailing ship. The ship measured 262ft 7" (79.87m) in length, 38ft (11.58m) in width, 23ft (7m) in depth and had a gross tonnage of 1693 tons. The LOCH ARD's main mast measured a massive 150ft (45.7m) in height. LOCH ARD made three trips to Australia and one trip to Calcutta before its final voyage. LOCH ARD left England on March 2, 1878, under the command of Captain Gibbs, a newly married, 29 year old. She was bound for Melbourne with a crew of 37, plus 17 passengers and a load of cargo. The general cargo reflected the affluence of Melbourne at the time. On board were straw hats, umbrella, perfumes, clay pipes, pianos, clocks, confectionary, linen and candles, as well as a heavier load of railway irons, cement, lead and copper. There were items included that intended for display in the Melbourne International Exhibition in 1880. The voyage to Port Phillip was long but uneventful. At 3am on June 1, 1878, Captain Gibbs was expecting to see land and the passengers were becoming excited as they prepared to view their new homeland in the early morning. But LOCH ARD was running into a fog which greatly reduced visibility. Captain Gibbs was becoming anxious as there was no sign of land or the Cape Otway lighthouse. At 4am the fog lifted. A man aloft announced that he could see breakers. The sheer cliffs of Victoria's west coast came into view, and Captain Gibbs realised that the ship was much closer to them than expected. He ordered as much sail to be set as time would permit and then attempted to steer the vessel out to sea. On coming head on into the wind, the ship lost momentum, the sails fell limp and LOCH ARD's bow swung back. Gibbs then ordered the anchors to be released in an attempt to hold its position. The anchors sank some 50 fathoms - but did not hold. By this time LOCH ARD was among the breakers and the tall cliffs of Mutton Bird Island rose behind the ship. Just half a mile from the coast, the ship's bow was suddenly pulled around by the anchor. The captain tried to tack out to sea, but the ship struck a reef at the base of Mutton Bird Island, near Port Campbell. Waves broke over the ship and the top deck was loosened from the hull. The masts and rigging came crashing down knocking passengers and crew overboard. When a lifeboat was finally launched, it crashed into the side of LOCH ARD and capsized. Tom Pearce, who had launched the boat, managed to cling to its overturned hull and shelter beneath it. He drifted out to sea and then on the flood tide came into what is now known as LOCH ARD Gorge. He swam to shore, bruised and dazed, and found a cave in which to shelter. Some of the crew stayed below deck to shelter from the falling rigging but drowned when the ship slipped off the reef into deeper water. Eva Carmichael had raced onto deck to find out what was happening only to be confronted by towering cliffs looming above the stricken ship. In all the chaos, Captain Gibbs grabbed Eva and said, "If you are saved Eva, let my dear wife know that I died like a sailor". That was the last Eva Carmichael saw of the captain. She was swept off the ship by a huge wave. Eva saw Tom Pearce on a small rocky beach and yelled to attract his attention. He dived in and swam to the exhausted woman and dragged her to shore. He took her to the cave and broke open case of brandy which had washed up on the beach. He opened a bottle to revive the unconscious woman. A few hours later Tom scaled a cliff in search of help. He followed hoof prints and came by chance upon two men from nearby Glenample Station three and a half miles away. In a state of exhaustion, he told the men of the tragedy. Tom returned to the gorge while the two men rode back to the station to get help. By the time they reached LOCH ARD Gorge, it was cold and dark. The two shipwreck survivors were taken to Glenample Station to recover. Eva stayed at the station for six weeks before returning to Ireland, this time by steamship. In Melbourne, Tom Pearce received a hero's welcome. He was presented with the first gold medal of the Royal Humane Society of Victoria and a £1000 cheque from the Victorian Government. Concerts were performed to honour the young man's bravery and to raise money for those who lost family in the LOCH ARD disaster. Of the 54 crew members and passengers on board, only two survived: the apprentice, Tom Pearce and the young woman passenger, Eva Carmichael, who lost all of her family in the tragedy. Ten days after the LOCH ARD tragedy, salvage rights to the wreck were sold at auction for £2,120. Cargo valued at £3,000 was salvaged and placed on the beach, but most washed back into the sea when another storm developed. The wreck of LOCH ARD still lies at the base of Mutton Bird Island. Much of the cargo has now been salvaged and some was washed up into what is now known as LOCH ARD Gorge. Cargo and artefacts have also been illegally salvaged over many years before protective legislation was introduced. One of the most unlikely pieces of cargo to have survived the shipwreck was a Minton porcelain peacock - one of only seven in the world. The peacock was destined for the Melbourne International Exhibition in 1880. It had been well packed, which gave it adequate protection during the violent storm. Today, the Minton peacock can be seen at the Flagstaff Hill Maritime Museum in Warrnambool. From Australia's most dramatic shipwreck it has now become Australia's shipwreck artefact and is one of very few 'objects' on the Victorian State Heritage Register most valuable. The LOCH ARD shipwreck is of State significance – Victorian Heritage Register S 417 Flagstaff Hill’s collection of artefacts from LOCH ARD is significant for being one of the largest collections of artefacts from this shipwreck in Victoria. It is significant for its association with the shipwreck, which is on the Victorian Heritage Register (VHR S417). The collection is significant because of the relationship between the objects, as together they have a high potential to interpret the story of the LOCH ARD. The LOCH ARD collection is archaeologically significant as the remains of a large international passenger and cargo ship. The LOCH ARD collection is historically significant for representing aspects of Victoria’s shipping history and its potential to interpret sub-theme 1.5 of Victoria’s Framework of Historical Themes (living with natural processes). The collection is also historically significant for its association with the LOCH ARD, which was one of the worst and best known shipwrecks in Victoria’s history. Unrestored table spoon from the wreck of the LOCH ARD. The spoon design has a flattened fiddle-back handle, with a thin stem or shank, flared collar, and a shallow rounded bowl. The spoons metallic composition is a thin layer of brass alloy which has partially corroded back to a nickel-silver base metal. Approximately 20% of original plate remains and 20% surface area is covered with sediment. Some verdigris is visible and spoon bowl is cracked.flagstaff hill maritime museum, shipwreck coast, great ocean road, loch line, loch ard, mutton bird island, loch ard gorge, electroplated cutlery, loch ard shipwreck, william page and co, birmingham brass plating, table spoons