Showing 360 items
matching kiln
-
 Eltham District Historical Society Inc
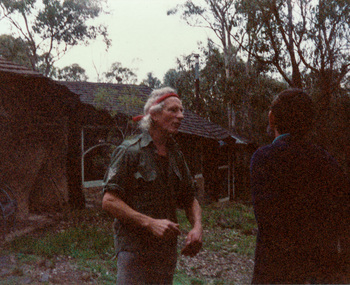
Photograph, Visit to Clifton Pugh's home, Dunmoochin, 26 May 1991, 26/05/1991
[from EDHS Newsletter No. 78, May 1991:] DUNMOOCHIN TRIP "Dunmoochin" was the home of the famous artist Clifton Pugh who died last year. The house also gives an informal name to the surrounding area at Cottles Bridge where artists, conservationists and like minded people have made their homes. This is an area of unconventional houses blending in with the surrounding bushland. The Pugh house is a rambling complex including studios and a large pottery kiln. It contains many of Clifton Pugh's works. For this excursion we have arranged a guided visit of the Pugh house and hope to be able to visit another house in the area. We will also be able to wander through bushland which Clifton had purchased for conservation purposes. This will be an afternoon excursion on Sunday 26th May starting with lunch (bring your own) at 12:30 pm at the Panton Hill Memorial Park. Transport will be by private car but transport can be arranged for those not wishing to drive. There is no cost but we need to be advised of members attending. Advise Russell Yeoman at the May Meeting or by 10th May if you intend to go. We will not be able to add extra people after that date.Three colour photographsactivities, clifton pugh, dunmoochin -
 Federation University Art Collection
Ceramic - Artwork - Ceramics, Lustre Dragon by Heather Wilson, c1985
Heather WILSON (1961- ) Born Rotherham, England. Arrived Australia 1967. Heather Wilson graduated with a Bachelor of Education (Art & Craft) from Melbourne State College in 1982, majoring in Ceramics. Artist's statement - "All of my work is hand built and explores animal forms in various ways. Animals have always fascinated me and have been a part of my work for the last 30 years. Whether appearing as dragons, exotic birds or bones, most of my images have a basis in nature. Sometimes it is just a characteristic or a quirky gesture that will inspire a piece, sometimes a photograph or a drawing done at the zoo or museum. Dragons have always given me the freedom to explore an emotion or attitude without the restrictions of a form being right, no one can tell you what a dragon should be like as they are an imaginary beast. All of my work is hand built from earthenware or porcelain. Each of them is unique and they may be similar but no two are ever the same. Most of my vessels are coil built and the dragons and birds are constructed on their bases. The pieces are fired to 1080 C in a gas kiln."heather wilson, ceramics, jan feder memorial ceramics collection, gippsland campus -
Federation University Art Collection
Ceramic - Artwork - Ceramics, 'Dragon' by Heather Wilson, c1985
Heather WILSON (1961- ) Born Rotherham, England. Arrived Australia 1967. Heather Wilson graduated with a Bachelor of Education (Art & Craft) from Melbourne State College in 1982, majoring in Ceramics. Artist's statement - "All of my work is hand built and explores animal forms in various ways. Animals have always fascinated me and have been a part of my work for the last 30 years. Whether appearing as dragons, exotic birds or bones, most of my images have a basis in nature. Sometimes it is just a characteristic or a quirky gesture that will inspire a piece, sometimes a photograph or a drawing done at the zoo or museum. Dragons have always given me the freedom to explore an emotion or attitude without the restrictions of a form being right, no one can tell you what a dragon should be like as they are an imaginary beast. All of my work is hand built from earthenware or porcelain. Each of them is unique and they may be similar but no two are ever the same. Most of my vessels are coil built and the dragons and birds are constructed on their bases. The pieces are fired to 1080 C in a gas kiln."heather wilson, ceramics, jan feder memorial ceramics collection, gippsland campus, dragon -
Federation University Art Collection
Artwork - Ceramics, Ceramic Forms by Elsa Adern
Elsa ADERN (1918-2006) Born New Zealand Arrived Melbourne 1942 Elsa Ardern was living at Warrandyte in 1954 when she started studying pottery under John Bernard Knight at the Melbourne Technical College. In 1961 she was a founding member of Potters' Cottage at Warrandyte with friends Sylvia Halpern and Kate Janeba. She worked from a studio under the family home, exhibiting at the cottage and also through the Victorian Ceramic Group when it was set up in 1969. In 1980 she established a workshop at Tathra on the far south coast of NSW, sharing her time between Tathra and Warrandyte for the next 25 years. Amongst the work made at Tathra were some very large pieces which she fired in the Stafford Brothers' wood-fired brick-kiln at Kalaru. Part of the clay for these came from the Staffords' clay-pits. Elsa Adern is known for her strong form of her pots, enhanced by her characteristically subtle wood-ash glazes. Her works are signed with an incised 'Elsa Ardern' or 'EA'. (http://www.australianpotteryatbemboka.com.au/shop/index.php?manufacturers_id=32)available, elsa adern, available ceramics, ceramics -
Federation University Art Collection
Ceramic - Artwork - Ceramics, 'Dragon' by Heather Wilson, c1985
Heather WILSON (1961- ) Born Rotherham, England. Arrived Australia 1967. Heather Wilson graduated with a Bachelor of Education (Art & Craft) from Melbourne State College in 1982, majoring in Ceramics. Artist's statement - "All of my work is hand built and explores animal forms in various ways. Animals have always fascinated me and have been a part of my work for the last 30 years. Whether appearing as dragons, exotic birds or bones, most of my images have a basis in nature. Sometimes it is just a characteristic or a quirky gesture that will inspire a piece, sometimes a photograph or a drawing done at the zoo or museum. Dragons have always given me the freedom to explore an emotion or attitude without the restrictions of a form being right, no one can tell you what a dragon should be like as they are an imaginary beast. All of my work is hand built from earthenware or porcelain. Each of them is unique and they may be similar but no two are ever the same. Most of my vessels are coil built and the dragons and birds are constructed on their bases. The pieces are fired to 1080 C in a gas kiln."heather wilson, ceramics, jan feder memorial ceramics collection, gippsland campus -
 Flagstaff Hill Maritime Museum and Village
Domestic object - Bowl, Late 19th or early 20th Century
The Process of Making Pottery Decorating, Firing, Glazing, Making, Technical There is a rhythm and flow to clay. It can’t be done all at once! Even the making process! It can take weeks to get everything done, especially if you can only work on your pottery once a week! Even though we have three hour classes, it’s often just not enough time! Here is an overview of some of the processes so you have a bit more grasp on some of the technical stuff! Step One – Design There are SO many ideas out there for making stuff in clay! From delicate porcelain jewellery, through to heavy sculptural work and everything in between. Deciding your direction is sometimes not that easy – when you first start, try everything, you will naturally gravitate to the style that you enjoy! The options and variations are endless and can get a wee bit overwhelming too! Check in with me before you start to ensure your ideas will work, what order you might do things, how you could achieve the look you are seeking and any other technical data required! Step Two – Making Clay is thixotropic. This means that as you work with it, the clay first gets sloppier and wetter, before is begins to dry in the atmosphere. For most things, you simply can’t do all parts of the project at once. An example of work order might look like: Get last weeks work out from the shelves Prepare clay for today’s work – roll your clay, prepare balls for throwing, make the first stage of a pinch pot) Clean up last week’s work and put it on the shelf for bisque firing Check that you have any glazing to do – and do enough of it that you will have time to finish your main project Do the next step of your next project – there might be a further step that can’t be complete immediately, in that case, wrap your work well and put onto the shelves. Letting your work rest for a while can really help keep your work clean and professional looking. Many things require bagging under plastic to keep it ready for work the next week – put your name on the outside of the bag so you can find your work easily. We have stickers and markers. Consider how you want to decorate your work – coloured slip can be applied at a fairly wet stage (remembering that it will make your work even wetter!). Trying to apply slip to dry clay won’t work! If you want to do sgraffito – you will need to keep the work leather hard (a state of dryness where you can still work the clay with a little effort and a little water and care). Step Three – Drying Most of the time your work can go into the rack uncovered to let it dry out for the following week. If you want to continue forming or shaping you will need to double bag your work – put your work on a suitable sized bat and put the bat in a bag so the base of the bag is under the bat, then put another bag over the top of the work and tuck the top of the bag under the bat. If you want to trim (or turn) your thrown work the following week, it should also be double bagged. If your work is large, delicate, or of uneven thicknesses, you should lightly cover your work for drying. When considering the drying process, bare in mind the weather, humidity and wind! The hotter and dryer, the faster things dry and work can dry unevenly in the shelves – this can lead to cracking – another time to lightly cover your work for drying. Step Four – Trimming and Cleaning Up Your work is dry! It is called greenware now and it is at it’s most fragile! Handle everything with two hands. I often refer to soft hands – keep everything gentle and with your fingers spread as much as possible. Try to not pick up things like plates too much, and always with both hands! Before your work can be bisque fired it should be “cleaned up”. You work won’t go into the kiln if it has sharp edges – when glazed, sharp edges turn into razor blades! Use a piece of fly wire to rub the work all over – this will scratch a little so be light handed. Use a knife or metal kidney to scrape any areas that require a bit more dynamic treatment than the fly wire offers! Finally, a very light wipe over with a slightly damp sponge can help soften and soothe all of your edges and dags! Trimming thrown work: If you are planning to trim (or turn) your thrown work (and you should be), make sure you bag it well – your work should be leather hard to almost dry for easiest trimming. Use this step to finish the work completely – use a metal kidney to polish the surface, or a slightly damp sponge to give a freshly thrown look. Wipe the sponge around the rim after trimming, and check the inside of the pot for dags! Trimming slip cast work: Usually I will trim the rims of your work on the wheel the following day to make that stage easier, however you will still need to check your work for lumps and bumps. Last but not least – check that your name is still clearly on the bottom of your work. Step Five – Bisque Firing When the work is completely dry it can go into the bisque kiln. The bisque kiln is fired to 1000°C. This process burns off the water in the clay as well as some of the chemically bound water. The structure of the clay is not altered that much at this temperature. Inside the bisque kiln, the work is stacked a little, small bowl inside a larger bowl and onto a heavy plate. Smaller items like decorations or drink coasters might get stacked several high. Consideration is paid to the weight of the stack and shape of the work. A bisque kiln can fire about one and a half times the amount of work that the glaze kiln can fire. The firing takes about 10 hours to complete the cycle and about two days to cool down. Once it has been emptied the work is placed in the glaze room ready for you to decorate! Step Six – Glazing Decorating your work with colour can be a lot of fun – and time consuming! There are three main options for surface treatment at this stage: Oxide Washes Underglazes Glazes Washes and underglazes do not “glaze” the work – It will still need a layer of glaze to fully seal the clay (washes don’t need glaze on surfaces not designed for food or liquid as they can gloss up a little on their own). Underglazes are stable colourants that turn out pretty much how they look in the jar. They can be mixed with each other to form other colours and can be used like water colours to paint onto your work. Mostly they should have a clear glaze on top to seal them. Oxides are a different species – the pink oxide (cobalt) wash turns out bright blue for instance. They don’t always need a glaze on top, and some glazes can change the colour of the wash! The glazes need no other “glaze” on top! Be careful of unknown glaze interactions – you can put any combination of glaze in a bowl or on a plate, but only a single glaze on the outside of any vertical surface! Glazes are a chemical reaction under heat. We don’t know the exact chemicals in the Mayco glazes we use. I can guess by the way they interact with each other, however, on the whole, you need to test every idea you have, and not run the test on a vertical surface! Simply put, glaze is a layer of glass like substance that bonds with the clay underneath. Clay is made of silica, alumina and water. Glaze is made of mostly silica. Silica has a melting point of 1700°C and we fire to 1240°C. The silica requires a “flux” to help it melt at the lower temperature. Fluxes can be all sorts of chemicals – a common one is calcium – calcium has a melting point of 2500°C, however, together they both melt at a much lower temperature! Colourants are metal oxides like cobalt (blue), chrome (green through black), copper (green, blue, even red!), manganese (black, purple and pink) iron (red brown), etc. Different chemicals in the glaze can have dramatic effects. for example, barium carbonate (which we don’t use) turns manganese bright pink! Other elements can turn manganese dioxide brown, blue, purple and reddish brown. Manganese dioxide is a flux in and of itself as well. So, glazes that get their black and purple colours, often interact with other glazes and RUN! Our mirror black is a good example – it mixes really well with many glazes because it fluxes them – causes them to melt faster. It will also bring out many beautiful colours in the glazes because it’s black colouring most definitely comes from manganese dioxide! Glaze chemistry is a whole subject on it’s own! We use commercial Mayco glazes on purpose – for their huge range of colour possibilities, stability, cool interactions, artistic freedom with the ability to easily brush the glazes on and ease of use. We currently have almost 50 glazes on hand! A major project is to test the interactions of all glazes with each other. That is 2,500 test tiles!!!! I’m going to make the wall behind the wheels the feature wall of pretty colours! Step Seven – Glaze (Gloss or sometimes called “Glost”) Firing Most of the time this is the final stage of making your creation (but not always!) The glaze kiln goes to 1240°C. This is called cone 6, or midrange. It is the low end of stoneware temperatures. Stoneware clays and glazes are typically fired at cone 8 – 10, that is 1260 – 1290°C. The energy requirement to go from 1240°C to 1280°C is almost a 30% more! Our clay is formulated to vitrify (mature, turn “glass-like”) at 1240°, as are our glazes. A glaze kiln take around 12 hours to reach temperature and two to three days to cool down. Sometimes a third firing process is required – this is for decoration that is added to work after the glaze firing. For example – adding precious metals and lustres. this firing temperature is usually around 600 – 800°C depending upon the techniques being used. There are many students interested in gold and silver trims – we will be doing this third type of firing soon! After firing your work will be in the student finished work shelves. Remember to pay for it before you head out the door! There is a small extra charge for using porcelain clay (it’s more than twice the price of regular clay), and for any third firing process! Once your work has been fired it can not turn back into clay for millennia – so don’t fire it if you don’t like it! Put it in the bucket for recycling. https://firebirdstudios.com.au/the-process-of-making-pottery/ The bowl is an example of kitchenware used in the 19th century and still in use today.Bowl white ceramic. Crack on side. Badly stained.Backstamp very faint and unable to be read.flagstaff hill, warrnambool, shipwrecked-coast, flagstaff-hill, flagstaff-hill-maritime-museum, maritime-museum, shipwreck-coast, flagstaff-hill-maritime-village, mixing bowl, food preparation, kitchen equipment, ceramic -
 Flagstaff Hill Maritime Museum and Village
Domestic object - Bowl
The Process of Making Pottery Decorating, Firing, Glazing, Making, Technical There is a rhythm and flow to clay. It can’t be done all at once! Even the making process! It can take weeks to get everything done, especially if you can only work on your pottery once a week! Even though we have three hour classes, it’s often just not enough time! Here is an overview of some of the processes so you have a bit more grasp on some of the technical stuff! Step One – Design There are SO many ideas out there for making stuff in clay! From delicate porcelain jewellery, through to heavy sculptural work and everything in between. Deciding your direction is sometimes not that easy – when you first start, try everything, you will naturally gravitate to the style that you enjoy! The options and variations are endless and can get a wee bit overwhelming too! Check in with me before you start to ensure your ideas will work, what order you might do things, how you could achieve the look you are seeking and any other technical data required! Step Two – Making Clay is thixotropic. This means that as you work with it, the clay first gets sloppier and wetter, before is begins to dry in the atmosphere. For most things, you simply can’t do all parts of the project at once. An example of work order might look like: Get last weeks work out from the shelves Prepare clay for today’s work – roll your clay, prepare balls for throwing, make the first stage of a pinch pot) Clean up last week’s work and put it on the shelf for bisque firing Check that you have any glazing to do – and do enough of it that you will have time to finish your main project Do the next step of your next project – there might be a further step that can’t be complete immediately, in that case, wrap your work well and put onto the shelves. Letting your work rest for a while can really help keep your work clean and professional looking. Many things require bagging under plastic to keep it ready for work the next week – put your name on the outside of the bag so you can find your work easily. We have stickers and markers. Consider how you want to decorate your work – coloured slip can be applied at a fairly wet stage (remembering that it will make your work even wetter!). Trying to apply slip to dry clay won’t work! If you want to do sgraffito – you will need to keep the work leather hard (a state of dryness where you can still work the clay with a little effort and a little water and care). Step Three – Drying Most of the time your work can go into the rack uncovered to let it dry out for the following week. If you want to continue forming or shaping you will need to double bag your work – put your work on a suitable sized bat and put the bat in a bag so the base of the bag is under the bat, then put another bag over the top of the work and tuck the top of the bag under the bat. If you want to trim (or turn) your thrown work the following week, it should also be double bagged. If your work is large, delicate, or of uneven thicknesses, you should lightly cover your work for drying. When considering the drying process, bare in mind the weather, humidity and wind! The hotter and dryer, the faster things dry and work can dry unevenly in the shelves – this can lead to cracking – another time to lightly cover your work for drying. Step Four – Trimming and Cleaning Up Your work is dry! It is called greenware now and it is at it’s most fragile! Handle everything with two hands. I often refer to soft hands – keep everything gentle and with your fingers spread as much as possible. Try to not pick up things like plates too much, and always with both hands! Before your work can be bisque fired it should be “cleaned up”. You work won’t go into the kiln if it has sharp edges – when glazed, sharp edges turn into razor blades! Use a piece of fly wire to rub the work all over – this will scratch a little so be light handed. Use a knife or metal kidney to scrape any areas that require a bit more dynamic treatment than the fly wire offers! Finally, a very light wipe over with a slightly damp sponge can help soften and soothe all of your edges and dags! Trimming thrown work: If you are planning to trim (or turn) your thrown work (and you should be), make sure you bag it well – your work should be leather hard to almost dry for easiest trimming. Use this step to finish the work completely – use a metal kidney to polish the surface, or a slightly damp sponge to give a freshly thrown look. Wipe the sponge around the rim after trimming, and check the inside of the pot for dags! Trimming slip cast work: Usually I will trim the rims of your work on the wheel the following day to make that stage easier, however you will still need to check your work for lumps and bumps. Last but not least – check that your name is still clearly on the bottom of your work. Step Five – Bisque Firing When the work is completely dry it can go into the bisque kiln. The bisque kiln is fired to 1000°C. This process burns off the water in the clay as well as some of the chemically bound water. The structure of the clay is not altered that much at this temperature. Inside the bisque kiln, the work is stacked a little, small bowl inside a larger bowl and onto a heavy plate. Smaller items like decorations or drink coasters might get stacked several high. Consideration is paid to the weight of the stack and shape of the work. A bisque kiln can fire about one and a half times the amount of work that the glaze kiln can fire. The firing takes about 10 hours to complete the cycle and about two days to cool down. Once it has been emptied the work is placed in the glaze room ready for you to decorate! Step Six – Glazing Decorating your work with colour can be a lot of fun – and time consuming! There are three main options for surface treatment at this stage: Oxide Washes Underglazes Glazes Washes and underglazes do not “glaze” the work – It will still need a layer of glaze to fully seal the clay (washes don’t need glaze on surfaces not designed for food or liquid as they can gloss up a little on their own). Underglazes are stable colourants that turn out pretty much how they look in the jar. They can be mixed with each other to form other colours and can be used like water colours to paint onto your work. Mostly they should have a clear glaze on top to seal them. Oxides are a different species – the pink oxide (cobalt) wash turns out bright blue for instance. They don’t always need a glaze on top, and some glazes can change the colour of the wash! The glazes need no other “glaze” on top! Be careful of unknown glaze interactions – you can put any combination of glaze in a bowl or on a plate, but only a single glaze on the outside of any vertical surface! Glazes are a chemical reaction under heat. We don’t know the exact chemicals in the Mayco glazes we use. I can guess by the way they interact with each other, however, on the whole, you need to test every idea you have, and not run the test on a vertical surface! Simply put, glaze is a layer of glass like substance that bonds with the clay underneath. Clay is made of silica, alumina and water. Glaze is made of mostly silica. Silica has a melting point of 1700°C and we fire to 1240°C. The silica requires a “flux” to help it melt at the lower temperature. Fluxes can be all sorts of chemicals – a common one is calcium – calcium has a melting point of 2500°C, however, together they both melt at a much lower temperature! Colourants are metal oxides like cobalt (blue), chrome (green through black), copper (green, blue, even red!), manganese (black, purple and pink) iron (red brown), etc. Different chemicals in the glaze can have dramatic effects. for example, barium carbonate (which we don’t use) turns manganese bright pink! Other elements can turn manganese dioxide brown, blue, purple and reddish brown. Manganese dioxide is a flux in and of itself as well. So, glazes that get their black and purple colours, often interact with other glazes and RUN! Our mirror black is a good example – it mixes really well with many glazes because it fluxes them – causes them to melt faster. It will also bring out many beautiful colours in the glazes because it’s black colouring most definitely comes from manganese dioxide! Glaze chemistry is a whole subject on it’s own! We use commercial Mayco glazes on purpose – for their huge range of colour possibilities, stability, cool interactions, artistic freedom with the ability to easily brush the glazes on and ease of use. We currently have almost 50 glazes on hand! A major project is to test the interactions of all glazes with each other. That is 2,500 test tiles!!!! I’m going to make the wall behind the wheels the feature wall of pretty colours! Step Seven – Glaze (Gloss or sometimes called “Glost”) Firing Most of the time this is the final stage of making your creation (but not always!) The glaze kiln goes to 1240°C. This is called cone 6, or midrange. It is the low end of stoneware temperatures. Stoneware clays and glazes are typically fired at cone 8 – 10, that is 1260 – 1290°C. The energy requirement to go from 1240°C to 1280°C is almost a 30% more! Our clay is formulated to vitrify (mature, turn “glass-like”) at 1240°, as are our glazes. A glaze kiln take around 12 hours to reach temperature and two to three days to cool down. Sometimes a third firing process is required – this is for decoration that is added to work after the glaze firing. For example – adding precious metals and lustres. this firing temperature is usually around 600 – 800°C depending upon the techniques being used. There are many students interested in gold and silver trims – we will be doing this third type of firing soon! After firing your work will be in the student finished work shelves. Remember to pay for it before you head out the door! There is a small extra charge for using porcelain clay (it’s more than twice the price of regular clay), and for any third firing process! Once your work has been fired it can not turn back into clay for millennia – so don’t fire it if you don’t like it! Put it in the bucket for recycling. https://firebirdstudios.com.au/the-process-of-making-pottery/ This bowl is an example of kitchenware used in the 19th century and still in use today.Bowl white ceramic plain that has two sets of edging around lip. Inside bowl has plaster designed to look like cooking mixture.flagstaff hill, warrnambool, shipwrecked-coast, flagstaff-hill, flagstaff-hill-maritime-museum, maritime-museum, shipwreck-coast, flagstaff-hill-maritime-village, kitchen equipment, ceramic -
 Flagstaff Hill Maritime Museum and Village
Domestic object - Bowl, J & G Meakin, Late 19th or early 20th Century
The Process of Making Pottery Decorating, Firing, Glazing, Making, Technical There is a rhythm and flow to clay. It can’t be done all at once! Even the making process! It can take weeks to get everything done, especially if you can only work on your pottery once a week! Even though we have three hour classes, it’s often just not enough time! Here is an overview of some of the processes so you have a bit more grasp on some of the technical stuff! Step One – Design There are SO many ideas out there for making stuff in clay! From delicate porcelain jewellery, through to heavy sculptural work and everything in between. Deciding your direction is sometimes not that easy – when you first start, try everything, you will naturally gravitate to the style that you enjoy! The options and variations are endless and can get a wee bit overwhelming too! Check in with me before you start to ensure your ideas will work, what order you might do things, how you could achieve the look you are seeking and any other technical data required! Step Two – Making Clay is thixotropic. This means that as you work with it, the clay first gets sloppier and wetter, before is begins to dry in the atmosphere. For most things, you simply can’t do all parts of the project at once. An example of work order might look like: Get last weeks work out from the shelves Prepare clay for today’s work – roll your clay, prepare balls for throwing, make the first stage of a pinch pot) Clean up last week’s work and put it on the shelf for bisque firing Check that you have any glazing to do – and do enough of it that you will have time to finish your main project Do the next step of your next project – there might be a further step that can’t be complete immediately, in that case, wrap your work well and put onto the shelves. Letting your work rest for a while can really help keep your work clean and professional looking. Many things require bagging under plastic to keep it ready for work the next week – put your name on the outside of the bag so you can find your work easily. We have stickers and markers. Consider how you want to decorate your work – coloured slip can be applied at a fairly wet stage (remembering that it will make your work even wetter!). Trying to apply slip to dry clay won’t work! If you want to do sgraffito – you will need to keep the work leather hard (a state of dryness where you can still work the clay with a little effort and a little water and care). Step Three – Drying Most of the time your work can go into the rack uncovered to let it dry out for the following week. If you want to continue forming or shaping you will need to double bag your work – put your work on a suitable sized bat and put the bat in a bag so the base of the bag is under the bat, then put another bag over the top of the work and tuck the top of the bag under the bat. If you want to trim (or turn) your thrown work the following week, it should also be double bagged. If your work is large, delicate, or of uneven thicknesses, you should lightly cover your work for drying. When considering the drying process, bare in mind the weather, humidity and wind! The hotter and dryer, the faster things dry and work can dry unevenly in the shelves – this can lead to cracking – another time to lightly cover your work for drying. Step Four – Trimming and Cleaning Up Your work is dry! It is called greenware now and it is at it’s most fragile! Handle everything with two hands. I often refer to soft hands – keep everything gentle and with your fingers spread as much as possible. Try to not pick up things like plates too much, and always with both hands! Before your work can be bisque fired it should be “cleaned up”. You work won’t go into the kiln if it has sharp edges – when glazed, sharp edges turn into razor blades! Use a piece of fly wire to rub the work all over – this will scratch a little so be light handed. Use a knife or metal kidney to scrape any areas that require a bit more dynamic treatment than the fly wire offers! Finally, a very light wipe over with a slightly damp sponge can help soften and soothe all of your edges and dags! Trimming thrown work: If you are planning to trim (or turn) your thrown work (and you should be), make sure you bag it well – your work should be leather hard to almost dry for easiest trimming. Use this step to finish the work completely – use a metal kidney to polish the surface, or a slightly damp sponge to give a freshly thrown look. Wipe the sponge around the rim after trimming, and check the inside of the pot for dags! Trimming slip cast work: Usually I will trim the rims of your work on the wheel the following day to make that stage easier, however you will still need to check your work for lumps and bumps. Last but not least – check that your name is still clearly on the bottom of your work. Step Five – Bisque Firing When the work is completely dry it can go into the bisque kiln. The bisque kiln is fired to 1000°C. This process burns off the water in the clay as well as some of the chemically bound water. The structure of the clay is not altered that much at this temperature. Inside the bisque kiln, the work is stacked a little, small bowl inside a larger bowl and onto a heavy plate. Smaller items like decorations or drink coasters might get stacked several high. Consideration is paid to the weight of the stack and shape of the work. A bisque kiln can fire about one and a half times the amount of work that the glaze kiln can fire. The firing takes about 10 hours to complete the cycle and about two days to cool down. Once it has been emptied the work is placed in the glaze room ready for you to decorate! Step Six – Glazing Decorating your work with colour can be a lot of fun – and time consuming! There are three main options for surface treatment at this stage: Oxide Washes Underglazes Glazes Washes and underglazes do not “glaze” the work – It will still need a layer of glaze to fully seal the clay (washes don’t need glaze on surfaces not designed for food or liquid as they can gloss up a little on their own). Underglazes are stable colourants that turn out pretty much how they look in the jar. They can be mixed with each other to form other colours and can be used like water colours to paint onto your work. Mostly they should have a clear glaze on top to seal them. Oxides are a different species – the pink oxide (cobalt) wash turns out bright blue for instance. They don’t always need a glaze on top, and some glazes can change the colour of the wash! The glazes need no other “glaze” on top! Be careful of unknown glaze interactions – you can put any combination of glaze in a bowl or on a plate, but only a single glaze on the outside of any vertical surface! Glazes are a chemical reaction under heat. We don’t know the exact chemicals in the Mayco glazes we use. I can guess by the way they interact with each other, however, on the whole, you need to test every idea you have, and not run the test on a vertical surface! Simply put, glaze is a layer of glass like substance that bonds with the clay underneath. Clay is made of silica, alumina and water. Glaze is made of mostly silica. Silica has a melting point of 1700°C and we fire to 1240°C. The silica requires a “flux” to help it melt at the lower temperature. Fluxes can be all sorts of chemicals – a common one is calcium – calcium has a melting point of 2500°C, however, together they both melt at a much lower temperature! Colourants are metal oxides like cobalt (blue), chrome (green through black), copper (green, blue, even red!), manganese (black, purple and pink) iron (red brown), etc. Different chemicals in the glaze can have dramatic effects. for example, barium carbonate (which we don’t use) turns manganese bright pink! Other elements can turn manganese dioxide brown, blue, purple and reddish brown. Manganese dioxide is a flux in and of itself as well. So, glazes that get their black and purple colours, often interact with other glazes and RUN! Our mirror black is a good example – it mixes really well with many glazes because it fluxes them – causes them to melt faster. It will also bring out many beautiful colours in the glazes because it’s black colouring most definitely comes from manganese dioxide! Glaze chemistry is a whole subject on it’s own! We use commercial Mayco glazes on purpose – for their huge range of colour possibilities, stability, cool interactions, artistic freedom with the ability to easily brush the glazes on and ease of use. We currently have almost 50 glazes on hand! A major project is to test the interactions of all glazes with each other. That is 2,500 test tiles!!!! I’m going to make the wall behind the wheels the feature wall of pretty colours! Step Seven – Glaze (Gloss or sometimes called “Glost”) Firing Most of the time this is the final stage of making your creation (but not always!) The glaze kiln goes to 1240°C. This is called cone 6, or midrange. It is the low end of stoneware temperatures. Stoneware clays and glazes are typically fired at cone 8 – 10, that is 1260 – 1290°C. The energy requirement to go from 1240°C to 1280°C is almost a 30% more! Our clay is formulated to vitrify (mature, turn “glass-like”) at 1240°, as are our glazes. A glaze kiln take around 12 hours to reach temperature and two to three days to cool down. Sometimes a third firing process is required – this is for decoration that is added to work after the glaze firing. For example – adding precious metals and lustres. this firing temperature is usually around 600 – 800°C depending upon the techniques being used. There are many students interested in gold and silver trims – we will be doing this third type of firing soon! After firing your work will be in the student finished work shelves. Remember to pay for it before you head out the door! There is a small extra charge for using porcelain clay (it’s more than twice the price of regular clay), and for any third firing process! Once your work has been fired it can not turn back into clay for millennia – so don’t fire it if you don’t like it! Put it in the bucket for recycling. https://firebirdstudios.com.au/the-process-of-making-pottery/This bowl was made by renowned pottery company J & G Meakin of England. The firm was established in the mid-1800's. The bowl is an example of kitchenware used in the 19th century and still in use today.Bowl; white ceramic, round and tapering inwards towards base. Made by J and G Meakin England.On base, 'Ironstone China Reg SOL 391413' with symbolflagstaff hill, flagstaff hill maritime museum and village, warrnambool, maritime museum, maritime village, great ocean road, shipwreck coast, mixing bowl, food preparation, j & g meakin, pottery, stoke-on-trent, kitchen equipment, ceramic -
 Flagstaff Hill Maritime Museum and Village
Domestic object - Plate
The Process of Making Pottery Decorating, Firing, Glazing, Making, Technical There is a rhythm and flow to clay. It can’t be done all at once! Even the making process! It can take weeks to get everything done, especially if you can only work on your pottery once a week! Even though we have three hour classes, it’s often just not enough time! Here is an overview of some of the processes so you have a bit more grasp on some of the technical stuff! Step One – Design There are SO many ideas out there for making stuff in clay! From delicate porcelain jewellery, through to heavy sculptural work and everything in between. Deciding your direction is sometimes not that easy – when you first start, try everything, you will naturally gravitate to the style that you enjoy! The options and variations are endless and can get a wee bit overwhelming too! Check in with me before you start to ensure your ideas will work, what order you might do things, how you could achieve the look you are seeking and any other technical data required! Step Two – Making Clay is thixotropic. This means that as you work with it, the clay first gets sloppier and wetter, before is begins to dry in the atmosphere. For most things, you simply can’t do all parts of the project at once. An example of work order might look like: Get last weeks work out from the shelves Prepare clay for today’s work – roll your clay, prepare balls for throwing, make the first stage of a pinch pot) Clean up last week’s work and put it on the shelf for bisque firing Check that you have any glazing to do – and do enough of it that you will have time to finish your main project Do the next step of your next project – there might be a further step that can’t be complete immediately, in that case, wrap your work well and put onto the shelves. Letting your work rest for a while can really help keep your work clean and professional looking. Many things require bagging under plastic to keep it ready for work the next week – put your name on the outside of the bag so you can find your work easily. We have stickers and markers. Consider how you want to decorate your work – coloured slip can be applied at a fairly wet stage (remembering that it will make your work even wetter!). Trying to apply slip to dry clay won’t work! If you want to do sgraffito – you will need to keep the work leather hard (a state of dryness where you can still work the clay with a little effort and a little water and care). Step Three – Drying Most of the time your work can go into the rack uncovered to let it dry out for the following week. If you want to continue forming or shaping you will need to double bag your work – put your work on a suitable sized bat and put the bat in a bag so the base of the bag is under the bat, then put another bag over the top of the work and tuck the top of the bag under the bat. If you want to trim (or turn) your thrown work the following week, it should also be double bagged. If your work is large, delicate, or of uneven thicknesses, you should lightly cover your work for drying. When considering the drying process, bare in mind the weather, humidity and wind! The hotter and dryer, the faster things dry and work can dry unevenly in the shelves – this can lead to cracking – another time to lightly cover your work for drying. Step Four – Trimming and Cleaning Up Your work is dry! It is called greenware now and it is at it’s most fragile! Handle everything with two hands. I often refer to soft hands – keep everything gentle and with your fingers spread as much as possible. Try to not pick up things like plates too much, and always with both hands! Before your work can be bisque fired it should be “cleaned up”. You work won’t go into the kiln if it has sharp edges – when glazed, sharp edges turn into razor blades! Use a piece of fly wire to rub the work all over – this will scratch a little so be light handed. Use a knife or metal kidney to scrape any areas that require a bit more dynamic treatment than the fly wire offers! Finally, a very light wipe over with a slightly damp sponge can help soften and soothe all of your edges and dags! Trimming thrown work: If you are planning to trim (or turn) your thrown work (and you should be), make sure you bag it well – your work should be leather hard to almost dry for easiest trimming. Use this step to finish the work completely – use a metal kidney to polish the surface, or a slightly damp sponge to give a freshly thrown look. Wipe the sponge around the rim after trimming, and check the inside of the pot for dags! Trimming slip cast work: Usually I will trim the rims of your work on the wheel the following day to make that stage easier, however you will still need to check your work for lumps and bumps. Last but not least – check that your name is still clearly on the bottom of your work. Step Five – Bisque Firing When the work is completely dry it can go into the bisque kiln. The bisque kiln is fired to 1000°C. This process burns off the water in the clay as well as some of the chemically bound water. The structure of the clay is not altered that much at this temperature. Inside the bisque kiln, the work is stacked a little, small bowl inside a larger bowl and onto a heavy plate. Smaller items like decorations or drink coasters might get stacked several high. Consideration is paid to the weight of the stack and shape of the work. A bisque kiln can fire about one and a half times the amount of work that the glaze kiln can fire. The firing takes about 10 hours to complete the cycle and about two days to cool down. Once it has been emptied the work is placed in the glaze room ready for you to decorate! Step Six – Glazing Decorating your work with colour can be a lot of fun – and time consuming! There are three main options for surface treatment at this stage: Oxide Washes Underglazes Glazes Washes and underglazes do not “glaze” the work – It will still need a layer of glaze to fully seal the clay (washes don’t need glaze on surfaces not designed for food or liquid as they can gloss up a little on their own). Underglazes are stable colourants that turn out pretty much how they look in the jar. They can be mixed with each other to form other colours and can be used like water colours to paint onto your work. Mostly they should have a clear glaze on top to seal them. Oxides are a different species – the pink oxide (cobalt) wash turns out bright blue for instance. They don’t always need a glaze on top, and some glazes can change the colour of the wash! The glazes need no other “glaze” on top! Be careful of unknown glaze interactions – you can put any combination of glaze in a bowl or on a plate, but only a single glaze on the outside of any vertical surface! Glazes are a chemical reaction under heat. We don’t know the exact chemicals in the Mayco glazes we use. I can guess by the way they interact with each other, however, on the whole, you need to test every idea you have, and not run the test on a vertical surface! Simply put, glaze is a layer of glass like substance that bonds with the clay underneath. Clay is made of silica, alumina and water. Glaze is made of mostly silica. Silica has a melting point of 1700°C and we fire to 1240°C. The silica requires a “flux” to help it melt at the lower temperature. Fluxes can be all sorts of chemicals – a common one is calcium – calcium has a melting point of 2500°C, however, together they both melt at a much lower temperature! Colourants are metal oxides like cobalt (blue), chrome (green through black), copper (green, blue, even red!), manganese (black, purple and pink) iron (red brown), etc. Different chemicals in the glaze can have dramatic effects. for example, barium carbonate (which we don’t use) turns manganese bright pink! Other elements can turn manganese dioxide brown, blue, purple and reddish brown. Manganese dioxide is a flux in and of itself as well. So, glazes that get their black and purple colours, often interact with other glazes and RUN! Our mirror black is a good example – it mixes really well with many glazes because it fluxes them – causes them to melt faster. It will also bring out many beautiful colours in the glazes because it’s black colouring most definitely comes from manganese dioxide! Glaze chemistry is a whole subject on it’s own! We use commercial Mayco glazes on purpose – for their huge range of colour possibilities, stability, cool interactions, artistic freedom with the ability to easily brush the glazes on and ease of use. We currently have almost 50 glazes on hand! A major project is to test the interactions of all glazes with each other. That is 2,500 test tiles!!!! I’m going to make the wall behind the wheels the feature wall of pretty colours! Step Seven – Glaze (Gloss or sometimes called “Glost”) Firing Most of the time this is the final stage of making your creation (but not always!) The glaze kiln goes to 1240°C. This is called cone 6, or midrange. It is the low end of stoneware temperatures. Stoneware clays and glazes are typically fired at cone 8 – 10, that is 1260 – 1290°C. The energy requirement to go from 1240°C to 1280°C is almost a 30% more! Our clay is formulated to vitrify (mature, turn “glass-like”) at 1240°, as are our glazes. A glaze kiln take around 12 hours to reach temperature and two to three days to cool down. Sometimes a third firing process is required – this is for decoration that is added to work after the glaze firing. For example – adding precious metals and lustres. this firing temperature is usually around 600 – 800°C depending upon the techniques being used. There are many students interested in gold and silver trims – we will be doing this third type of firing soon! After firing your work will be in the student finished work shelves. Remember to pay for it before you head out the door! There is a small extra charge for using porcelain clay (it’s more than twice the price of regular clay), and for any third firing process! Once your work has been fired it can not turn back into clay for millennia – so don’t fire it if you don’t like it! Put it in the bucket for recycling. https://firebirdstudios.com.au/the-process-of-making-pottery/Ceramics have evolved over thousands of years.White earthenware dinner plate. Crazing evident all over.Backstamped ‘Made in England S LTD’flagstaff hill, warrnambool, shipwrecked-coast, flagstaff-hill, flagstaff-hill-maritime-museum, maritime-museum, shipwreck-coast, flagstaff-hill-maritime-village, ceramics, tableware -
 Flagstaff Hill Maritime Museum and Village
Domestic object - Plate, Johnson Bros
The Process of Making Pottery Decorating, Firing, Glazing, Making, Technical There is a rhythm and flow to clay. It can’t be done all at once! Even the making process! It can take weeks to get everything done, especially if you can only work on your pottery once a week! Even though we have three hour classes, it’s often just not enough time! Here is an overview of some of the processes so you have a bit more grasp on some of the technical stuff! Step One – Design There are SO many ideas out there for making stuff in clay! From delicate porcelain jewellery, through to heavy sculptural work and everything in between. Deciding your direction is sometimes not that easy – when you first start, try everything, you will naturally gravitate to the style that you enjoy! The options and variations are endless and can get a wee bit overwhelming too! Check in with me before you start to ensure your ideas will work, what order you might do things, how you could achieve the look you are seeking and any other technical data required! Step Two – Making Clay is thixotropic. This means that as you work with it, the clay first gets sloppier and wetter, before is begins to dry in the atmosphere. For most things, you simply can’t do all parts of the project at once. An example of work order might look like: Get last weeks work out from the shelves Prepare clay for today’s work – roll your clay, prepare balls for throwing, make the first stage of a pinch pot) Clean up last week’s work and put it on the shelf for bisque firing Check that you have any glazing to do – and do enough of it that you will have time to finish your main project Do the next step of your next project – there might be a further step that can’t be complete immediately, in that case, wrap your work well and put onto the shelves. Letting your work rest for a while can really help keep your work clean and professional looking. Many things require bagging under plastic to keep it ready for work the next week – put your name on the outside of the bag so you can find your work easily. We have stickers and markers. Consider how you want to decorate your work – coloured slip can be applied at a fairly wet stage (remembering that it will make your work even wetter!). Trying to apply slip to dry clay won’t work! If you want to do sgraffito – you will need to keep the work leather hard (a state of dryness where you can still work the clay with a little effort and a little water and care). Step Three – Drying Most of the time your work can go into the rack uncovered to let it dry out for the following week. If you want to continue forming or shaping you will need to double bag your work – put your work on a suitable sized bat and put the bat in a bag so the base of the bag is under the bat, then put another bag over the top of the work and tuck the top of the bag under the bat. If you want to trim (or turn) your thrown work the following week, it should also be double bagged. If your work is large, delicate, or of uneven thicknesses, you should lightly cover your work for drying. When considering the drying process, bare in mind the weather, humidity and wind! The hotter and dryer, the faster things dry and work can dry unevenly in the shelves – this can lead to cracking – another time to lightly cover your work for drying. Step Four – Trimming and Cleaning Up Your work is dry! It is called greenware now and it is at it’s most fragile! Handle everything with two hands. I often refer to soft hands – keep everything gentle and with your fingers spread as much as possible. Try to not pick up things like plates too much, and always with both hands! Before your work can be bisque fired it should be “cleaned up”. You work won’t go into the kiln if it has sharp edges – when glazed, sharp edges turn into razor blades! Use a piece of fly wire to rub the work all over – this will scratch a little so be light handed. Use a knife or metal kidney to scrape any areas that require a bit more dynamic treatment than the fly wire offers! Finally, a very light wipe over with a slightly damp sponge can help soften and soothe all of your edges and dags! Trimming thrown work: If you are planning to trim (or turn) your thrown work (and you should be), make sure you bag it well – your work should be leather hard to almost dry for easiest trimming. Use this step to finish the work completely – use a metal kidney to polish the surface, or a slightly damp sponge to give a freshly thrown look. Wipe the sponge around the rim after trimming, and check the inside of the pot for dags! Trimming slip cast work: Usually I will trim the rims of your work on the wheel the following day to make that stage easier, however you will still need to check your work for lumps and bumps. Last but not least – check that your name is still clearly on the bottom of your work. Step Five – Bisque Firing When the work is completely dry it can go into the bisque kiln. The bisque kiln is fired to 1000°C. This process burns off the water in the clay as well as some of the chemically bound water. The structure of the clay is not altered that much at this temperature. Inside the bisque kiln, the work is stacked a little, small bowl inside a larger bowl and onto a heavy plate. Smaller items like decorations or drink coasters might get stacked several high. Consideration is paid to the weight of the stack and shape of the work. A bisque kiln can fire about one and a half times the amount of work that the glaze kiln can fire. The firing takes about 10 hours to complete the cycle and about two days to cool down. Once it has been emptied the work is placed in the glaze room ready for you to decorate! Step Six – Glazing Decorating your work with colour can be a lot of fun – and time consuming! There are three main options for surface treatment at this stage: Oxide Washes Underglazes Glazes Washes and underglazes do not “glaze” the work – It will still need a layer of glaze to fully seal the clay (washes don’t need glaze on surfaces not designed for food or liquid as they can gloss up a little on their own). Underglazes are stable colourants that turn out pretty much how they look in the jar. They can be mixed with each other to form other colours and can be used like water colours to paint onto your work. Mostly they should have a clear glaze on top to seal them. Oxides are a different species – the pink oxide (cobalt) wash turns out bright blue for instance. They don’t always need a glaze on top, and some glazes can change the colour of the wash! The glazes need no other “glaze” on top! Be careful of unknown glaze interactions – you can put any combination of glaze in a bowl or on a plate, but only a single glaze on the outside of any vertical surface! Glazes are a chemical reaction under heat. We don’t know the exact chemicals in the Mayco glazes we use. I can guess by the way they interact with each other, however, on the whole, you need to test every idea you have, and not run the test on a vertical surface! Simply put, glaze is a layer of glass like substance that bonds with the clay underneath. Clay is made of silica, alumina and water. Glaze is made of mostly silica. Silica has a melting point of 1700°C and we fire to 1240°C. The silica requires a “flux” to help it melt at the lower temperature. Fluxes can be all sorts of chemicals – a common one is calcium – calcium has a melting point of 2500°C, however, together they both melt at a much lower temperature! Colourants are metal oxides like cobalt (blue), chrome (green through black), copper (green, blue, even red!), manganese (black, purple and pink) iron (red brown), etc. Different chemicals in the glaze can have dramatic effects. for example, barium carbonate (which we don’t use) turns manganese bright pink! Other elements can turn manganese dioxide brown, blue, purple and reddish brown. Manganese dioxide is a flux in and of itself as well. So, glazes that get their black and purple colours, often interact with other glazes and RUN! Our mirror black is a good example – it mixes really well with many glazes because it fluxes them – causes them to melt faster. It will also bring out many beautiful colours in the glazes because it’s black colouring most definitely comes from manganese dioxide! Glaze chemistry is a whole subject on it’s own! We use commercial Mayco glazes on purpose – for their huge range of colour possibilities, stability, cool interactions, artistic freedom with the ability to easily brush the glazes on and ease of use. We currently have almost 50 glazes on hand! A major project is to test the interactions of all glazes with each other. That is 2,500 test tiles!!!! I’m going to make the wall behind the wheels the feature wall of pretty colours! Step Seven – Glaze (Gloss or sometimes called “Glost”) Firing Most of the time this is the final stage of making your creation (but not always!) The glaze kiln goes to 1240°C. This is called cone 6, or midrange. It is the low end of stoneware temperatures. Stoneware clays and glazes are typically fired at cone 8 – 10, that is 1260 – 1290°C. The energy requirement to go from 1240°C to 1280°C is almost a 30% more! Our clay is formulated to vitrify (mature, turn “glass-like”) at 1240°, as are our glazes. A glaze kiln take around 12 hours to reach temperature and two to three days to cool down. Sometimes a third firing process is required – this is for decoration that is added to work after the glaze firing. For example – adding precious metals and lustres. this firing temperature is usually around 600 – 800°C depending upon the techniques being used. There are many students interested in gold and silver trims – we will be doing this third type of firing soon! After firing your work will be in the student finished work shelves. Remember to pay for it before you head out the door! There is a small extra charge for using porcelain clay (it’s more than twice the price of regular clay), and for any third firing process! Once your work has been fired it can not turn back into clay for millennia – so don’t fire it if you don’t like it! Put it in the bucket for recycling. https://firebirdstudios.com.au/the-process-of-making-pottery/Ceramics have evolved over thousands of years.A white earthenware side plate with a gadroon edge. Has water marks and chips on front.‘Johnson Bros England Reg No 15587’flagstaff hill, warrnambool, shipwrecked-coast, flagstaff-hill, flagstaff-hill-maritime-museum, maritime-museum, shipwreck-coast, flagstaff-hill-maritime-village, johnson bros, ceramics, tableware -
 Flagstaff Hill Maritime Museum and Village
Domestic object - Plate, Alfred Meakin
The Process of Making Pottery Decorating, Firing, Glazing, Making, Technical There is a rhythm and flow to clay. It can’t be done all at once! Even the making process! It can take weeks to get everything done, especially if you can only work on your pottery once a week! Even though we have three hour classes, it’s often just not enough time! Here is an overview of some of the processes so you have a bit more grasp on some of the technical stuff! Step One – Design There are SO many ideas out there for making stuff in clay! From delicate porcelain jewellery, through to heavy sculptural work and everything in between. Deciding your direction is sometimes not that easy – when you first start, try everything, you will naturally gravitate to the style that you enjoy! The options and variations are endless and can get a wee bit overwhelming too! Check in with me before you start to ensure your ideas will work, what order you might do things, how you could achieve the look you are seeking and any other technical data required! Step Two – Making Clay is thixotropic. This means that as you work with it, the clay first gets sloppier and wetter, before is begins to dry in the atmosphere. For most things, you simply can’t do all parts of the project at once. An example of work order might look like: Get last weeks work out from the shelves Prepare clay for today’s work – roll your clay, prepare balls for throwing, make the first stage of a pinch pot) Clean up last week’s work and put it on the shelf for bisque firing Check that you have any glazing to do – and do enough of it that you will have time to finish your main project Do the next step of your next project – there might be a further step that can’t be complete immediately, in that case, wrap your work well and put onto the shelves. Letting your work rest for a while can really help keep your work clean and professional looking. Many things require bagging under plastic to keep it ready for work the next week – put your name on the outside of the bag so you can find your work easily. We have stickers and markers. Consider how you want to decorate your work – coloured slip can be applied at a fairly wet stage (remembering that it will make your work even wetter!). Trying to apply slip to dry clay won’t work! If you want to do sgraffito – you will need to keep the work leather hard (a state of dryness where you can still work the clay with a little effort and a little water and care). Step Three – Drying Most of the time your work can go into the rack uncovered to let it dry out for the following week. If you want to continue forming or shaping you will need to double bag your work – put your work on a suitable sized bat and put the bat in a bag so the base of the bag is under the bat, then put another bag over the top of the work and tuck the top of the bag under the bat. If you want to trim (or turn) your thrown work the following week, it should also be double bagged. If your work is large, delicate, or of uneven thicknesses, you should lightly cover your work for drying. When considering the drying process, bare in mind the weather, humidity and wind! The hotter and dryer, the faster things dry and work can dry unevenly in the shelves – this can lead to cracking – another time to lightly cover your work for drying. Step Four – Trimming and Cleaning Up Your work is dry! It is called greenware now and it is at it’s most fragile! Handle everything with two hands. I often refer to soft hands – keep everything gentle and with your fingers spread as much as possible. Try to not pick up things like plates too much, and always with both hands! Before your work can be bisque fired it should be “cleaned up”. You work won’t go into the kiln if it has sharp edges – when glazed, sharp edges turn into razor blades! Use a piece of fly wire to rub the work all over – this will scratch a little so be light handed. Use a knife or metal kidney to scrape any areas that require a bit more dynamic treatment than the fly wire offers! Finally, a very light wipe over with a slightly damp sponge can help soften and soothe all of your edges and dags! Trimming thrown work: If you are planning to trim (or turn) your thrown work (and you should be), make sure you bag it well – your work should be leather hard to almost dry for easiest trimming. Use this step to finish the work completely – use a metal kidney to polish the surface, or a slightly damp sponge to give a freshly thrown look. Wipe the sponge around the rim after trimming, and check the inside of the pot for dags! Trimming slip cast work: Usually I will trim the rims of your work on the wheel the following day to make that stage easier, however you will still need to check your work for lumps and bumps. Last but not least – check that your name is still clearly on the bottom of your work. Step Five – Bisque Firing When the work is completely dry it can go into the bisque kiln. The bisque kiln is fired to 1000°C. This process burns off the water in the clay as well as some of the chemically bound water. The structure of the clay is not altered that much at this temperature. Inside the bisque kiln, the work is stacked a little, small bowl inside a larger bowl and onto a heavy plate. Smaller items like decorations or drink coasters might get stacked several high. Consideration is paid to the weight of the stack and shape of the work. A bisque kiln can fire about one and a half times the amount of work that the glaze kiln can fire. The firing takes about 10 hours to complete the cycle and about two days to cool down. Once it has been emptied the work is placed in the glaze room ready for you to decorate! Step Six – Glazing Decorating your work with colour can be a lot of fun – and time consuming! There are three main options for surface treatment at this stage: Oxide Washes Underglazes Glazes Washes and underglazes do not “glaze” the work – It will still need a layer of glaze to fully seal the clay (washes don’t need glaze on surfaces not designed for food or liquid as they can gloss up a little on their own). Underglazes are stable colourants that turn out pretty much how they look in the jar. They can be mixed with each other to form other colours and can be used like water colours to paint onto your work. Mostly they should have a clear glaze on top to seal them. Oxides are a different species – the pink oxide (cobalt) wash turns out bright blue for instance. They don’t always need a glaze on top, and some glazes can change the colour of the wash! The glazes need no other “glaze” on top! Be careful of unknown glaze interactions – you can put any combination of glaze in a bowl or on a plate, but only a single glaze on the outside of any vertical surface! Glazes are a chemical reaction under heat. We don’t know the exact chemicals in the Mayco glazes we use. I can guess by the way they interact with each other, however, on the whole, you need to test every idea you have, and not run the test on a vertical surface! Simply put, glaze is a layer of glass like substance that bonds with the clay underneath. Clay is made of silica, alumina and water. Glaze is made of mostly silica. Silica has a melting point of 1700°C and we fire to 1240°C. The silica requires a “flux” to help it melt at the lower temperature. Fluxes can be all sorts of chemicals – a common one is calcium – calcium has a melting point of 2500°C, however, together they both melt at a much lower temperature! Colourants are metal oxides like cobalt (blue), chrome (green through black), copper (green, blue, even red!), manganese (black, purple and pink) iron (red brown), etc. Different chemicals in the glaze can have dramatic effects. for example, barium carbonate (which we don’t use) turns manganese bright pink! Other elements can turn manganese dioxide brown, blue, purple and reddish brown. Manganese dioxide is a flux in and of itself as well. So, glazes that get their black and purple colours, often interact with other glazes and RUN! Our mirror black is a good example – it mixes really well with many glazes because it fluxes them – causes them to melt faster. It will also bring out many beautiful colours in the glazes because it’s black colouring most definitely comes from manganese dioxide! Glaze chemistry is a whole subject on it’s own! We use commercial Mayco glazes on purpose – for their huge range of colour possibilities, stability, cool interactions, artistic freedom with the ability to easily brush the glazes on and ease of use. We currently have almost 50 glazes on hand! A major project is to test the interactions of all glazes with each other. That is 2,500 test tiles!!!! I’m going to make the wall behind the wheels the feature wall of pretty colours! Step Seven – Glaze (Gloss or sometimes called “Glost”) Firing Most of the time this is the final stage of making your creation (but not always!) The glaze kiln goes to 1240°C. This is called cone 6, or midrange. It is the low end of stoneware temperatures. Stoneware clays and glazes are typically fired at cone 8 – 10, that is 1260 – 1290°C. The energy requirement to go from 1240°C to 1280°C is almost a 30% more! Our clay is formulated to vitrify (mature, turn “glass-like”) at 1240°, as are our glazes. A glaze kiln take around 12 hours to reach temperature and two to three days to cool down. Sometimes a third firing process is required – this is for decoration that is added to work after the glaze firing. For example – adding precious metals and lustres. this firing temperature is usually around 600 – 800°C depending upon the techniques being used. There are many students interested in gold and silver trims – we will be doing this third type of firing soon! After firing your work will be in the student finished work shelves. Remember to pay for it before you head out the door! There is a small extra charge for using porcelain clay (it’s more than twice the price of regular clay), and for any third firing process! Once your work has been fired it can not turn back into clay for millennia – so don’t fire it if you don’t like it! Put it in the bucket for recycling. https://firebirdstudios.com.au/the-process-of-making-pottery/Ceramics have evolved over thousands of years.Earthenware dessert plate, cream colour. Made by Alfred Meakin, England. Backstamped ‘Alfred Meakin England’. flagstaff hill, warrnambool, shipwrecked-coast, flagstaff-hill, flagstaff-hill-maritime-museum, maritime-museum, shipwreck-coast, flagstaff-hill-maritime-village, alfred meakin, ceramics, earthenware, kitchenware -
 Flagstaff Hill Maritime Museum and Village
Domestic object - Jug
The Process of Making Pottery Decorating, Firing, Glazing, Making, Technical There is a rhythm and flow to clay. It can’t be done all at once! Even the making process! It can take weeks to get everything done, especially if you can only work on your pottery once a week! Even though we have three hour classes, it’s often just not enough time! Here is an overview of some of the processes so you have a bit more grasp on some of the technical stuff! Step One – Design There are SO many ideas out there for making stuff in clay! From delicate porcelain jewellery, through to heavy sculptural work and everything in between. Deciding your direction is sometimes not that easy – when you first start, try everything, you will naturally gravitate to the style that you enjoy! The options and variations are endless and can get a wee bit overwhelming too! Check in with me before you start to ensure your ideas will work, what order you might do things, how you could achieve the look you are seeking and any other technical data required! Step Two – Making Clay is thixotropic. This means that as you work with it, the clay first gets sloppier and wetter, before is begins to dry in the atmosphere. For most things, you simply can’t do all parts of the project at once. An example of work order might look like: Get last weeks work out from the shelves Prepare clay for today’s work – roll your clay, prepare balls for throwing, make the first stage of a pinch pot) Clean up last week’s work and put it on the shelf for bisque firing Check that you have any glazing to do – and do enough of it that you will have time to finish your main project Do the next step of your next project – there might be a further step that can’t be complete immediately, in that case, wrap your work well and put onto the shelves. Letting your work rest for a while can really help keep your work clean and professional looking. Many things require bagging under plastic to keep it ready for work the next week – put your name on the outside of the bag so you can find your work easily. We have stickers and markers. Consider how you want to decorate your work – coloured slip can be applied at a fairly wet stage (remembering that it will make your work even wetter!). Trying to apply slip to dry clay won’t work! If you want to do sgraffito – you will need to keep the work leather hard (a state of dryness where you can still work the clay with a little effort and a little water and care). Step Three – Drying Most of the time your work can go into the rack uncovered to let it dry out for the following week. If you want to continue forming or shaping you will need to double bag your work – put your work on a suitable sized bat and put the bat in a bag so the base of the bag is under the bat, then put another bag over the top of the work and tuck the top of the bag under the bat. If you want to trim (or turn) your thrown work the following week, it should also be double bagged. If your work is large, delicate, or of uneven thicknesses, you should lightly cover your work for drying. When considering the drying process, bare in mind the weather, humidity and wind! The hotter and dryer, the faster things dry and work can dry unevenly in the shelves – this can lead to cracking – another time to lightly cover your work for drying. Step Four – Trimming and Cleaning Up Your work is dry! It is called greenware now and it is at it’s most fragile! Handle everything with two hands. I often refer to soft hands – keep everything gentle and with your fingers spread as much as possible. Try to not pick up things like plates too much, and always with both hands! Before your work can be bisque fired it should be “cleaned up”. You work won’t go into the kiln if it has sharp edges – when glazed, sharp edges turn into razor blades! Use a piece of fly wire to rub the work all over – this will scratch a little so be light handed. Use a knife or metal kidney to scrape any areas that require a bit more dynamic treatment than the fly wire offers! Finally, a very light wipe over with a slightly damp sponge can help soften and soothe all of your edges and dags! Trimming thrown work: If you are planning to trim (or turn) your thrown work (and you should be), make sure you bag it well – your work should be leather hard to almost dry for easiest trimming. Use this step to finish the work completely – use a metal kidney to polish the surface, or a slightly damp sponge to give a freshly thrown look. Wipe the sponge around the rim after trimming, and check the inside of the pot for dags! Trimming slip cast work: Usually I will trim the rims of your work on the wheel the following day to make that stage easier, however you will still need to check your work for lumps and bumps. Last but not least – check that your name is still clearly on the bottom of your work. Step Five – Bisque Firing When the work is completely dry it can go into the bisque kiln. The bisque kiln is fired to 1000°C. This process burns off the water in the clay as well as some of the chemically bound water. The structure of the clay is not altered that much at this temperature. Inside the bisque kiln, the work is stacked a little, small bowl inside a larger bowl and onto a heavy plate. Smaller items like decorations or drink coasters might get stacked several high. Consideration is paid to the weight of the stack and shape of the work. A bisque kiln can fire about one and a half times the amount of work that the glaze kiln can fire. The firing takes about 10 hours to complete the cycle and about two days to cool down. Once it has been emptied the work is placed in the glaze room ready for you to decorate! Step Six – Glazing Decorating your work with colour can be a lot of fun – and time consuming! There are three main options for surface treatment at this stage: Oxide Washes Underglazes Glazes Washes and underglazes do not “glaze” the work – It will still need a layer of glaze to fully seal the clay (washes don’t need glaze on surfaces not designed for food or liquid as they can gloss up a little on their own). Underglazes are stable colourants that turn out pretty much how they look in the jar. They can be mixed with each other to form other colours and can be used like water colours to paint onto your work. Mostly they should have a clear glaze on top to seal them. Oxides are a different species – the pink oxide (cobalt) wash turns out bright blue for instance. They don’t always need a glaze on top, and some glazes can change the colour of the wash! The glazes need no other “glaze” on top! Be careful of unknown glaze interactions – you can put any combination of glaze in a bowl or on a plate, but only a single glaze on the outside of any vertical surface! Glazes are a chemical reaction under heat. We don’t know the exact chemicals in the Mayco glazes we use. I can guess by the way they interact with each other, however, on the whole, you need to test every idea you have, and not run the test on a vertical surface! Simply put, glaze is a layer of glass like substance that bonds with the clay underneath. Clay is made of silica, alumina and water. Glaze is made of mostly silica. Silica has a melting point of 1700°C and we fire to 1240°C. The silica requires a “flux” to help it melt at the lower temperature. Fluxes can be all sorts of chemicals – a common one is calcium – calcium has a melting point of 2500°C, however, together they both melt at a much lower temperature! Colourants are metal oxides like cobalt (blue), chrome (green through black), copper (green, blue, even red!), manganese (black, purple and pink) iron (red brown), etc. Different chemicals in the glaze can have dramatic effects. for example, barium carbonate (which we don’t use) turns manganese bright pink! Other elements can turn manganese dioxide brown, blue, purple and reddish brown. Manganese dioxide is a flux in and of itself as well. So, glazes that get their black and purple colours, often interact with other glazes and RUN! Our mirror black is a good example – it mixes really well with many glazes because it fluxes them – causes them to melt faster. It will also bring out many beautiful colours in the glazes because it’s black colouring most definitely comes from manganese dioxide! Glaze chemistry is a whole subject on it’s own! We use commercial Mayco glazes on purpose – for their huge range of colour possibilities, stability, cool interactions, artistic freedom with the ability to easily brush the glazes on and ease of use. We currently have almost 50 glazes on hand! A major project is to test the interactions of all glazes with each other. That is 2,500 test tiles!!!! I’m going to make the wall behind the wheels the feature wall of pretty colours! Step Seven – Glaze (Gloss or sometimes called “Glost”) Firing Most of the time this is the final stage of making your creation (but not always!) The glaze kiln goes to 1240°C. This is called cone 6, or midrange. It is the low end of stoneware temperatures. Stoneware clays and glazes are typically fired at cone 8 – 10, that is 1260 – 1290°C. The energy requirement to go from 1240°C to 1280°C is almost a 30% more! Our clay is formulated to vitrify (mature, turn “glass-like”) at 1240°, as are our glazes. A glaze kiln take around 12 hours to reach temperature and two to three days to cool down. Sometimes a third firing process is required – this is for decoration that is added to work after the glaze firing. For example – adding precious metals and lustres. this firing temperature is usually around 600 – 800°C depending upon the techniques being used. There are many students interested in gold and silver trims – we will be doing this third type of firing soon! After firing your work will be in the student finished work shelves. Remember to pay for it before you head out the door! There is a small extra charge for using porcelain clay (it’s more than twice the price of regular clay), and for any third firing process! Once your work has been fired it can not turn back into clay for millennia – so don’t fire it if you don’t like it! Put it in the bucket for recycling. https://firebirdstudios.com.au/the-process-of-making-pottery/The form of the jug has been in use for many centuries.Stoneware jug. Two tone brown glaze with pierced lip behind spout. Spout chipped.None.flagstaff hill, warrnambool, shipwrecked-coast, flagstaff-hill, flagstaff-hill-maritime-museum, maritime-museum, shipwreck-coast, flagstaff-hill-maritime-village, jug, ceramic jug -
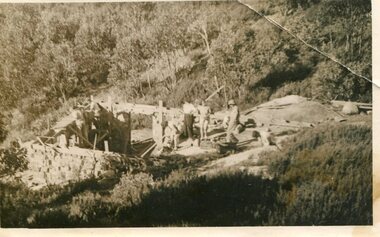 Kiewa Valley Historical Society
Photograph - Building of Myrtleford Ski Club
Myrtleford Ski Club is a non-commercial, family friendly club. It was one of the earliest lodges to be built at Falls Creek and was one of the earliest ski clubs formed and celebrated its 75th anniversary in 2013. In 1949, Myrtleford Ski Club obtained permission for occupancy and began planning the MSC Lodge. There were only three other huts on the mountain, Bogong Ski Club in an old Army hut, Skyline as the Ski Club of Victoria lodge and the Albury Ski Club lodge. The lodge was built mostly from donated materials. The basement was dug out and lined with stone from the Ruined Castle area, timber was cut (using cross-saws) from the Walpole properties and was milled then carted up to Falls Creek on either the Walpole or Calvert trucks. The iron on the roof was originally a tobacco kiln on Billy McNamara's property. The lodge has undergone many improvements over the years including a second storey added in the 1950’s, updating of accommodation, shower and toilet facilities to meet the changing needs of members. The lodge now caters for 38 people in a variety of shared rooms from two to eight beds per room. Toilet and shower facilities are also shared. The club has a Lodge Managers for the winter season. Myrtleford Ski Lodge was one of the earliest ski lodges built in the Falls Creek area in 1938. It is an excellent example of early sporting and community activities in the Upper Kiewa Valley area. Photograph shows family members, including women, involved in the construction.Sepia photograph of the building of the Myrtleford Ski Club about 1948Handwritten on the back of photograph in black pen - Building Myrtleford Ski Club (about 1948) Stamped on back of photograph - 6 2511myrtleford ski club, skiing, snow sports, victorian alps, falls creek -
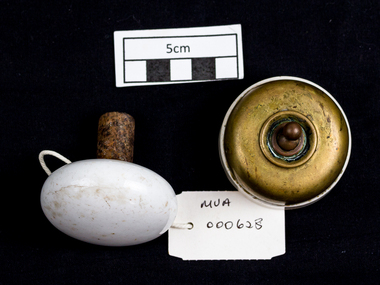 City of Moorabbin Historical Society (Operating the Box Cottage Museum)
Lights, porcelain, wall, electric light switch; Door Knob Porcelain, early 20th C
Both the Light switch and Door knob were used in Box Cottage during the late 19thC and early 20thC by the Box and Rietman families. William and Elizabeth Box purchased the two ten acre Lots of land with the Cottage in 1868 where they raised their family of 12 children and developed a flower garden producing seedlings. August and Frieda Rietman rented the Cottage 1917 with 1 acre of land and purchased it in 1935 where they raised 2 children while August established Rietman's Landscaping Pty Ltd making pressed concrete garden furniture. Porcelain is a ceramic material made by heating materials, generally including kaolin, in a kiln to temperatures between 1,200 and 1,400 °C The toughness, strength and translucence of porcelain, relative to other types of pottery, arises mainly from vitrification and the formation of the mineral mullite within the body at these high temperatures. Porcelain and other ceramic materials have many applications in engineering, especially ceramic engineering. Porcelain is an excellent insulator for use at high voltage, especially in outdoor applications, see Insulator (electricity)#Material. Examples include: terminals for high voltage cables, bushings of power transformers, insulation of high frequency antennas and many other components. Both the Light switch and Door knob were used in Box Cottage during the late 19thC and early 20thC by the Box and Rietman families. William and Elizabeth Box purchased the land with Cottage in 1868 and raised their familya) An electric light switch that would be attached to a wall. An Ivory Porcelain Base Single Light Switch with antique Brass top b) A porcelain door knob Both items used in Box Cottage early 20th Ca) On base BRITISH MADE / ENGLAND / 4 / 6959 lights, porcelain, electricity, early settlers, moorabbin, cheltenham, bentleigh, box william, box elizabeth, rietman august, rietman frieda, market gardeners, flower gardens, seedling nurseries, world war 1 1914-18, war memorials, sculpture, pottery, pressed concrete, door handles, door knobs -
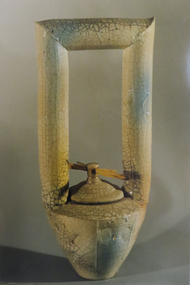 Federation University Art Collection
Ceramic - Artwork - Ceramics, 'Raku Lidded Pot with Tall Handle' by Bruce Anderson, c1984
Bruce ANDERSON (20 August 1950- Born Surry Hills, Melbourne, Victoria In 1971 Bruce Anderson obtained a Diploma of Art (Sculpture) from the Prahran Institute of Technology. For the next two years, he worked at Raynham Ceramics in East Bentleigh, making slipcast ware. After a year of National Service, he completed a teacher education course at the State College of Victoria, Auburn and taught for a time in the secondary school system. In 1977, he moved to Queensland to take up a position as Head of the Ceramics Department at Townsville TAFE. In 1984, he relocated to the Darling Downs Institute in Toowoomba and was still teaching there in his entry in the 1986-7 directory, working in raku and blackware fired with gas in a ceramic fibre kiln. During 1986, he moved to Adelaide to take up a position as senior lecturer in ceramics at the South Australian School of Design. During the late 1980s and 1990s, he began to make sculptural works of architactural form cast from a mixture of terracotta clay and refractory concrete. Part-glazed, the works allude to primitive industry and utilitarianism. In 1984 Bruce Anderson was a guest at Spotkanie held at the Gippsland Institute of Advanced Education.Raku teapot with tall handle. bruce anderson, ceramics, jan feder memorial ceramics collection, gippsland campus, teapot, raynham ceramics -
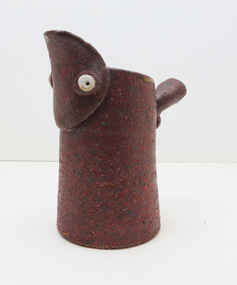 Federation University Art Collection
Ceramic, 'Shino Milk Jug' by Bridget Bodenham, 2007
Bridget BODENHAM Bridget Bodenham has a Diploma of Arts (Ceramics) from the University of Ballarat (now Federation University. In 2006 she received an Emerging Artist grant from the Australia Council for the Arts and was also part of Craft’s annual graduate survey exhibition, Fresh!. She works full time making ceramic serving ware, tableware, utensils and jewellery as well as planter pots and flower vases. The majority of her work is designed to be used and enjoyed. Bridget feels a connection to her surrounding bushland landscape and interprets the tones and textures in her work. She takes great care in creating each piece by hand and firing them up to three times in her large gas kiln. Each firing is totally unique resulting in one off pieces. Bridget Bodenham was a finalist in the Bombay Sapphire Design Discovery Award (2008) for a series of ceramic mortars and pestles, and received an Honourable Mention in the Mino International Ceramic Award, Japan. Bridget aims to create a sense of curiosity and reflection in form and function. She hopes her work delights and engages the owners hands and heart into everyday activities. The Federation University Art Collection features over 2000 works and was listed as a 'Ballarat Treasure' in 2007.Small, thrown ceramic vessel / jug with handle and lip. art, artwork, bridget bodenham, ceramics, alumni -
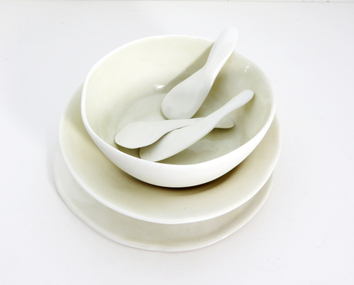 Federation University Art Collection
Ceramic - Artwork - Ceramics, Bridget Bodenham, [Dining Setting] by Bridget Bodenham, 2006
Bridget BODENHAM Bridget Bodenham has a Diploma of Arts (Ceramics) from the University of Ballarat (now Federation University. In 2006 she received an Emerging Artist grant from the Australia Council for the Arts and was also part of Craft’s annual graduate survey exhibition, Fresh!. She works full time making ceramic serving ware, tableware, utensils and jewellery as well as planter pots and flower vases. The majority of her work is designed to be used and enjoyed. Bridget feels a connection to her surrounding bushland landscape and interprets the tones and textures in her work. She takes great care in creating each piece by hand and firing them up to three times in her large gas kiln. Each firing is totally unique resulting in one off pieces. Bridget Bodenham was a finalist in the Bombay Sapphire Design Discovery Award (2008) for a series of ceramic mortars and pestles, and received an Honourable Mention in the Mino International Ceramic Award, Japan. Bridget aims to create a sense of curiosity and reflection in form and function. She hopes her work delights and engages the owners hands and heart into everyday activities. This piece won the SMB DVC Visual Arts Acquisition Award, 2006Mould made dining setting consisting of plate, two bowls and three eating utensils. Makers mark on versoceramics, bridget bodenham, artwork, alumni, dvc aquisition award -
Federation University Art Collection
Artwork - Ceramics, Ceramic Containers by Ailsa Adern, c1950
Ailsa ADERN (1918-2006) Born New Zealand Arrived Melbourne 1942 Elsa Ardern arrived in Melbourne in 1942 to earn money for a trip to the United Kingdon. After marrying she settled at Warrandyte. In 1954, after her two children started school, Adern studied Pottery at Melbourne Technical College under John Bernard Knight. In 1961 she joined the Potters' Cottage at Warrandyte with friends Sylvia Halpern and Kate Janeba. She worked from a studio under the family home, exhibiting at the cottage and also through the Victorian Ceramic Group when it was set up in 1969. In 1980 she established a workshop at Tathra on the far south coast of NSW, sharing her time between Tathra and Warrandyte for the next 25 years. Amongst the work made at Tathra were some very large pieces which she fired in the Stafford Brothers' wood-fired brick-kiln at Kalaru. Part of the clay for these came from the Staffords' clay-pits. With Sylvia Halpern and Gus McLaren Ailsa Asern celebrated her long association with the Potters' Cottage by exhibiting in its 45th anniversary exhibition in 2003. 2. Her works are signed with an incised 'Elsa Ardern' or 'EA'.Two thrown and handworked 'bottles' featuring verticle ridges on the edge of each form. Her pots are valued for their strong form , ed by her characteristically subtle wood-ash glazes. ceramics, ailsa adern, pottery -
![Artwork - Ceramic, [Salt Fired Pot] by John Neely, c1993](/media/collectors/530576742162ef0fa09a2288/items/5bce794c21ea6d13e89078ae/item-media/5bce7a1821ea6d13e892086f/item-fit-380x285.jpg) Federation University Art Collection
Federation University Art CollectionArtwork - Ceramic, [Salt Fired Pot] by John Neely, c1993
John NEELY (1953- ) Born Leavenworth, Kansas, USA John Neely is the Professor of Ceramics at Utah State University. John has studied Ceramics in Japan, and lectured and conducted in workshops, including at the Gippsland Centre for Art and Design. He is an expert in the technology of clay, glaze and kiln firing with a keen interest in pattern and texture. After completing a Bachelor of Fine Art at Alfred Univerity, New York in 1975, John Neely participated in a one year Foundation Fellowship at Tokyo, Japan. The following year he was the recipient of a Rockefeller Brothers Fund One Year Fellowship in Tokyo, Japan. Neely completed a Ministry of Education Two Year Postgraduate Research Fellowship at the Kyoto City College of Fine Arts, Kyoto, Japan and was awarded a Master of Fine Art at Ohio University, Athens, Ohio in 1982. This work is part of the Jan Feder Memorial Ceramics Collection which was amassed with funds raised by Jan Feder's student peers at the Gippsland Centre for Art and Design in the mid 1980s after Jan Feder passed away. Although many of the works are donated the intention of the collection was to purchase from visiting lecturers who became leading ceramic artists around the world, as well as from many of the staff who taught at the Churchill Campus. Ceramic salt fired pot John Neely from Logan, Utah, USA, who was a guest lecturer at the Gippsland Centre of Art and Design (later Federation University Australia).ceramics, gippsland campus, jan feder memorial ceramics collection, john neely -
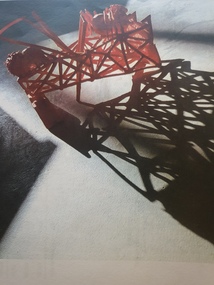 Federation University Art Collection
Ceramic - Artwork - Ceramics, 'Parliament House' by Pattie Beerens, 2018
Pattie BEERENS (1962- ) Born Sunshine, Victoria Pattie Beerens was enrolled in the Graduate Diploma of Ceramics at Federation University in 2018 after completing a Graduate Certificate Visual Art at the Victorian College of Arts, University of Melbourne in 2017.Artists' Statement: Red. Broken structure on its side supported with an unrecognisable form. It is cast from an electronics packaging carton. Triangular arrows piece the structure with a spider on either side. I created fertility spiders to protect the Minoan women from predators. I collected spiders as a child to ward off the bullies and, like the octopus, spiders have eight legs and a head and body. The stylised spiders reference links between the Minoan octopus and other symbols of fertility. The natural light elongates the form in a shadow reflection on the floor. The form is surrounded by black space. This piece took on an anger I felt on the day that [Malcolm] Turnbull was overthrown and materialises the bully-boy behaviour we were witnessing. What is most interesting about this piece is that I created it as a Minoan reflection. It dawned on me , when I had it ready for the kiln - on the day that Dutton challenged the Turnbull leadership, that my anger was both reflective and contemporary because nothing seemed to have changed. We were witnessing first hand how the power struggles continue and goodwill suffers." Winner of the 2018 Deputy Vice-Chancellor's Awardpattie beerens, ceramics, sculpture, available ceramics -
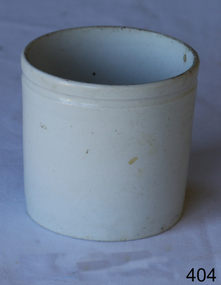 Flagstaff Hill Maritime Museum and Village
Container - Jar Base
Human beings appear to have been making their own ceramics for at least 26,000 years, subjecting clay and silica to intense heat to fuse and form ceramic materials. The earliest found so far were in southern central Europe and were sculpted figures, not dishes. The earliest known pottery was made by mixing animal products with clay and baked in kilns at up to 800°C. While actual pottery fragments have been found up to 19,000 years old, it was not until about ten thousand years later that regular pottery became common. An early people that spread across much of Europe is named after its use of pottery, the Corded Ware culture. These early Indo-European peoples decorated their pottery by wrapping it with rope, while still wet. When the ceramics were fired, the rope burned off but left a decorative pattern of complex grooves on the surface. The invention of the wheel eventually led to the production of smoother, more even pottery using the wheel-forming technique, like the pottery wheel. Early ceramics were porous, absorbing water easily. It became useful for more items with the discovery of glazing techniques, coating pottery with silicon, bone ash, or other materials that could melt and reform into a glassy surface, making a vessel less pervious to water. https://en.wikipedia.org/wiki/CeramicThe discovery and development of ceramics in numerous shapes, form and materials, revolutionised the world.White ceramic container, glazed with single groove around circumference near lipNoneflagstaff hill, warrnambool, shipwrecked-coast, flagstaff-hill, flagstaff-hill-maritime-museum, maritime-museum, shipwreck-coast, flagstaff-hill-maritime-village, ceramics -
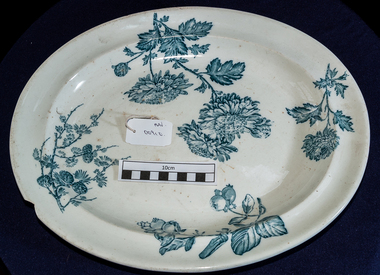 City of Moorabbin Historical Society (Operating the Box Cottage Museum)
Kitchen Equipment, china meat platter, c1900
Wedgwood was founded on 1 May 1759 by Josiah Wedgwood and in 1987 merged with Waterford Crystal to create Waterford Wedgwood, an Ireland-based luxury brands group. After the 2009 purchase by KPS Capital, Wedgwood became part of a group of companies known as WWRD Holdings Ltd, an acronym for "Waterford Wedgwood Royal Doulton." In 1765, Josiah Wedgwood created a new earthenware form which impressed the then British Queen consort Charlotte of Mecklenburg-Strelitz who gave permission to call it "Queen's Ware"; this new form sold extremely well across Europe. Wedgwood developed a number of further industrial innovations for his company, notably a way of measuring kiln temperatures accurately and new ware types Black Basalt and Jasper Ware. Wedgwood's most famous ware is jasperware. It was created to look like ancient cameo glass. It was inspired by the Portland Vase, a Roman vessel. Wedgwood had increasing success with hard paste porcelain which attempted to imitate the whiteness of tea-ware imported from China. High transportation costs and the demanding journey from the Far East meant that the supply of chinaware could not keep up with increasingly high demand. In 1812 Wedgwood produced their own bone china which, though not a commercial success at first eventually became an important part of an extremely profitable business. An oval white china platter with blue flowers and fruit. Back is marked WEDGWOOD CHRYSANTHEMUMOn base ; CHRYSANTHEMUM / i / W / 7 / WEDGWOOD china, pottery, crockery, england, moorabbin, bentleigh, cheltenham, kitchenware, wedgwood josiah -
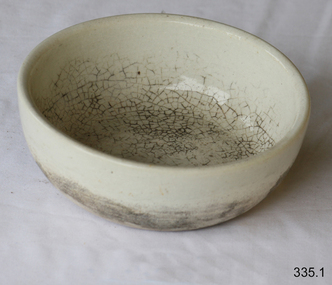 Flagstaff Hill Maritime Museum and Village
Container - Bowl, Late 19th or early 20th Century
Human beings appear to have been making their own ceramics for at least 26,000 years, subjecting clay and silica to intense heat to fuse and form ceramic materials. The earliest found so far were in southern central Europe and were sculpted figures, not dishes. The earliest known pottery was made by mixing animal products with clay and baked in kilns at up to 800°C. While actual pottery fragments have been found up to 19,000 years old, it was not until about ten thousand years later that regular pottery became common. An early people that spread across much of Europe is named after its use of pottery, the Corded Ware culture. These early Indo-European peoples decorated their pottery by wrapping it with rope, while still wet. When the ceramics were fired, the rope burned off but left a decorative pattern of complex grooves on the surface. The invention of the wheel eventually led to the production of smoother, more even pottery using the wheel-forming technique, like the pottery wheel. Early ceramics were porous, absorbing water easily. It became useful for more items with the discovery of glazing techniques, coating pottery with silicon, bone ash, or other materials that could melt and reform into a glassy surface, making a vessel less pervious to water. https://en.wikipedia.org/wiki/CeramicThe discovery and development of ceramics in numerous shapes, form and materials, revolutionised the world.Plain cream ceramic bowl with flat bottom inside. Shiny glaze fades to flat texture towards base. Possibly hand thrown pottery. No backstamp. Bad crazing and staining.None.flagstaff hill, warrnambool, shipwrecked-coast, flagstaff-hill, flagstaff-hill-maritime-museum, maritime-museum, shipwreck-coast, flagstaff-hill-maritime-village, ceramics -
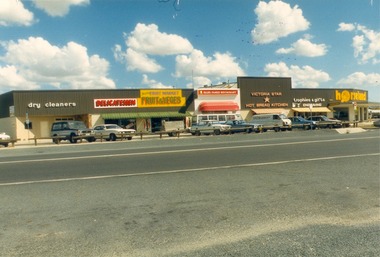 Wodonga & District Historical Society Inc
Photograph - Codling Collection 01 - Dunstan’s Corner - Thomas Mitchell Drive, c1987
These Wodonga photos are part of a collection donated by Miss Olive Codling. Arthur Dunstan Arthur Dunstan established mills at Red Bluff on the Mitta and a timber yard at Wodonga. He also built a sawmill at Glen Wills in 1931 which operated for about 16 years. A larger and more modern sawmill with drying kilns was erected at Eskdale in 1947. He was contracted to build Wodonga’s Municipal sale yards in 1935, followed by the Wangaratta sale yards. This created so many forward orders that he bought a large block of land on the corner of Beechworth and Tallangatta Roads and opened a timber mill and hardware store. The business stood on this corner for about 40 years. A large proportion of the company's timber output was processed at the Wodonga yards into flooring, weatherboards, mouldings etc. and practically the whole output was distributed locally and throughout the Riverina and eastern areas of New South Wales, and Canberra. At its peak Dunstan’s was one of the biggest sawmilling businesses in Victoria and in Wodonga employed 150 people and milled l6,000,000 super feet of timber annually. A super foot is a measurement for timber, equal to one foot square by one inch thick. Arthur Dunstan also built Tower Place in High Street. He died in Wodonga in 1963 and the business was continued on by his sons. Dunstan’s timber yards in Wodonga were sold to Ezerd Industries in 1987 with the retail section being bought by BBC Hardware.This photo collection is significant as it documents how the businesses and buildings in Wodonga have evolved and contributed to community throughout the 20th century.The first business at this location was a timber will and hardware store established by Arthur Dunstan in 1935. It operated there for about 40 years. Businesses from left to right: Dry Cleaner, Delicatessen, Twin Cities Fruit & Vege Market, Ollies Family Restaurant, Victoria Star Hot Bread Kitchen, Trophies and Gifts, and Horseland. This area is not referred to as Southside and the former Horseland premises are not occupied by an Italian restaurant.wodonga businesses, dunstan's corner wodonga, thomas mitchell drive -
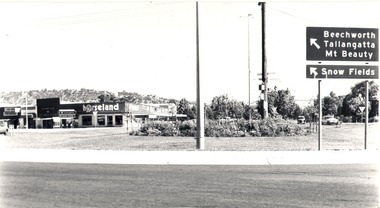 Wodonga & District Historical Society Inc
Photograph - Codling Collection 01 - Dunstan’s Corner and Beechworth Road Roundabout, Mid 1980s
These Wodonga photos are part of a collection donated by Miss Olive Codling. Arthur Dunstan Arthur Dunstan established mills at Red Bluff on the Mitta and a timber yard at Wodonga. He also built a sawmill at Glen Wills in 1931 which operated for about 16 years. A larger and more modern sawmill with drying kilns was erected at Eskdale in 1947. He was contracted to build Wodonga’s Municipal sale yards in 1935, followed by the Wangaratta sale yards. This created so many forward orders that he bought a large block of land on the corner of Beechworth and Tallangatta Roads and opened a timber mill and hardware store. The business stood on this corner for about 40 years. A large proportion of the company's timber output was processed at the Wodonga yards into flooring, weatherboards, mouldings etc. and practically the whole output was distributed locally and throughout the Riverina and eastern areas of New South Wales, and Canberra. At its peak Dunstan’s was one of the biggest sawmilling businesses in Victoria and in Wodonga employed 150 people and milled l6,000,000 super feet of timber annually. A super foot is a measurement for timber, equal to one foot square by one inch thick. Arthur Dunstan also built Tower Place in High Street. He died in Wodonga in 1963 and the business was continued on by his sons. Dunstan’s timber yards in Wodonga were sold to Ezerd Industries in 1987 with the retail section being bought by BBC Hardware.This photo collection is significant as it documents how the businesses and buildings in Wodonga have evolved and contributed to community throughout the 20th century.The first business at this location was a timber will and hardware store established by Arthur Dunstan in 1935. It operated there for about 40 years. In this photo Horseland occupies the corner premises including a video outlet. On the left is the Victoria Star Hot Bread Kitchen. This area is now know as Southside.wodonga businesses, dunstan's corner wodonga, thomas mitchell drive -
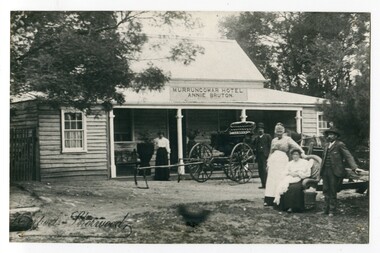 Orbost & District Historical Society
black and white photograph, early 20th century
This photograph shows Pike's buggy with Joe Pike, Mrs George Pike, Annie Bruton and Maggie Middleditch on the verandah. Annie Bruton was the wife of Jack Bruton who came to Orbost about 1891. When land was made available for selection at Murrungowar. they took up a selection and embarked in dairying, sheep-farming and pig-raising. They transformed a veritable wilderness into a productive farm by sheer hard work and liberal expenditure. By 1892 he had secured a licence for an hotel and accommodation house, store and the first post office at Murrungowar. For a time she was licensee of the Murrungowar Hotel. In December 1897 he was living at Murrungowar when he made application for a Roadside Victualler’s License for a house situated at Boulder Creek, East Gippsland, containing four rooms in course of erection, exclusive of those required for family. He was a butcher at Orbost in 1902-03 and also had a farm on the Bendoc Road. He was a member of the first Golf committee. After leasing the hotel to Jonson's he moved to Orbost and started brick-making near the Orbost water service basin on the Bendoc Road. He had the order for the bricks required for the Masonic Hall. Mr and Mrs Bruton resided at Murrungowar for 29 years. They let their property to Messrs McDONALD and sons and retired to Orbost in December 1920. Mr Bruton had not been in very good health for the last 4 or 5 years of his life, and about a fortnight prior to his death he got wet at his brick kiln, and contracted pneumonia which led to hiThis is a pictorial record of the the Murrungowar Township which was once a thriving settlement with a hotel, store, post office and school. In the 1890s pioneers were attracted to the area with the promise of a railway from Orbost. However, when the promised railway did not eventuate most of the farms were abandoned. Much of the previously cleared areas have reverted to Forest. Most of the remaining farms are now privately owned eucalypt plantations.A large black / white photograph of five people standing outside a one - storey wooden building. There is an empty buggy behind them with a horse behind it. The building has a sign above the verandah - "MURRUNGOWAR HOTEL ANNIE BRUTON".on front - "Pikes Buggy - Mrs Bruton, Mrs Geo & Mr Joe Pike" ; Herbert Sherwood photographer murrungowar-hotel bruton-annie pike-joe -
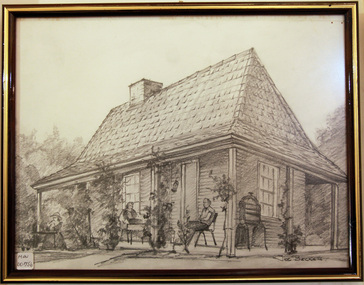 City of Moorabbin Historical Society (Operating the Box Cottage Museum)
Drawing, charcoal of reconstructed Box Cottage c 1985, c1985
The original small, pioneer cottage was built in the late 1840s to early1850s, by an unknown pioneer. It was located on part of a 30 Acre allotment that was originally part of Dendy’s Special Survey granted in 1841. The doors and window sashes, (made of red deal joinery timber), as well as the brass locks and fittings, are from the original cottage, and were imported from England. The fire-place bricks are from the original cottage, and are sun-dried, (not kiln fired), and are hand-made. Convict marks can be seen on two bricks. There is a small display of external cladding shingles from the original pioneer cottage. These shingles were hand-split, and most likely made from locally collected timber The nails included in this display were used to fasten the shingles on the original cottage, and are also hand-made. The enamel nameplate, “Colonial”, on the wall of the cottage, was the name chosen for the original pioneer cottage when Mr August Reitman, a sculptor, began leasing the property in 1917. August purchased the property c 1935, for 1200 Pounds approximately and resided there until 1953.. In 1974 Mr Lewis, a timber specialist, found the dilapidated building on property he had recently purchased in Jasper Rd and suggested it be reconstructed and relocated. Moorabbin Council agreed and the cottage was rebuilt just about 250 metres from its original site. The cost of the rebuild was met by 'Victoria's 150th Committee, plus a small grant from the City of Moorabbin, and Mr Laurie Lewis donated much of the timber for the reconstruction. A charcoal drawing of the reconstructed 'Box Cottage', in a wooden frame with glass, by Joe Becker c 1985signed : Joe Beckerbox cottage reconstruction, moorabbin, ormond, box william, box elizabeth, brighton, pioneers, market gardeners -
 Federation University Historical Collection
Artwork - Sketch Books, Neville Bunning, 1902-1990, 1900s
Neville Mirvane Bunning was born in Rockhampton, Queensland in 1902. He was home taught until 1916 and then was a boarder at Geelong Grammar School, Victoria until 1921. He then returned to Queensland and worked on the family property. During this time he built ceramic kilns and taught himself the required skills for ceramiic production. During the Depression he went to Sydney and set up an artist's studio. In 1934 he went to England and studied, wrote and did commission work. Achieving local success and had work acquired by the Victoria and Albert Museum. Neville returned to Australia and became a lecturer at East Sydney Technical School until the outbreak of the Second World War. He joined the RAAF. After the War he joined the staff of the Art School of the Ballarat School of Mines and Industries until his retirement in 1964. Neville Bunning formed the Ballarat Artist's Society, a group which sponsored art and invite guests to speak to students and the public of Ballarat. He wrote a weekly column in "The Courier", the local newspaper where he encouraged people to be more aware of the trends in art. His works were included in the 1988 Australian Bicentennial Exhibition. His sympathetic understanding of Aboriginal culture is recorded in a letter written in 1937 to the Victoria and Albert Museum. Neville Bunning continued painting during his retirement. His last major exhibition was held at the Golden Age Gallery in Ballarat in 1983. The sketch books cover a range of topics using pen, ink and watercolour.28 A3 sketch books, spiral boundneville bunning, queensland, geelong grammar school, ceramics, kilns, depression, sydney, england, commission work, victoria and albert museum, east sydney technical school, art school, ballarat school of mines and industries, ballarat artist's society, second world war, raaf, australian bicentennial exhibition, golden age gallery ballarat, painting -
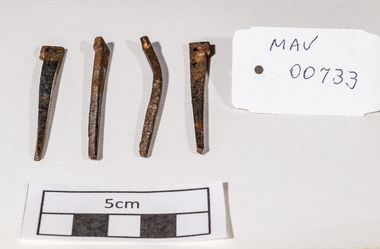 City of Moorabbin Historical Society (Operating the Box Cottage Museum)
Building Equipment, original hand made nails Box Cottage c 1850, c1850
The original small, pioneer cottage was built in the late 1840s to early1850s, by an unknown pioneer. It was located on part of a 30 Acre allotment that was originally part of Henry Dendy’s Special Survey granted in 1841. The doors and window sashes, (made of red deal joinery timber), as well as the brass locks and fittings, are from the original cottage, and were imported from England.The fire-place bricks are from the original cottage, and are sun-dried, (not kiln fired), and are hand-made. Convict marks can be seen on two bricks.There is a small display of external cladding shingles from the original pioneer cottage. These shingles were hand-split, and most likely made from locally collected timber The nails included in this display were used to fasten the shingles on the original cottage, and are also hand-made. The enamel nameplate, “Colonial”, on the wall of the cottage, was the name chosen for the original pioneer cottage when a later owner, Mr August Rietman and wife Frieda leased the property in around 1917. August purchased the property 1935 for 1200 Pounds approximately and resided there until 1953. In 1974 Mr Lewis, a timber specialist, found the dilapidated building on property he had recently purchased in Jasper Rd and suggested it be reconstructed and relocated. Moorabbin Council agreed and the Cottage was rebuilt just about 250 metres from its original site. The cost of the rebuild was met by 'Victoria's 150th Committee', plus a small grant from the City of Moorabbin, and Mr Laurie Lewis donated much of the timber for the reconstruction. Theses 4 iron nails were hand made by an early settler c1850, using iron, forge and anvil, for the construction of the original Box Cottage 4 hand made iron nails c1850 used in building the original pioneer cottage now known as Box Cottage Museumbox william, box elizabeth, brighton, henry dendy special survey 1841, early settlers, pioneers, moorabbin, box cottage museum, nails, building equuipment, forges, anvils, blacksmiths -
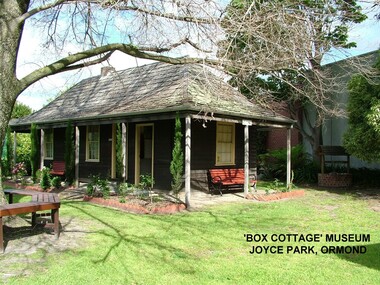 City of Moorabbin Historical Society (Operating the Box Cottage Museum)
Photograph - ' Box Cottage' Reconstruction, c1841
The original small, pioneer cottage was built in the late 1840s to early1850s, by an unknown pioneer. It was located on part of a 30 Acre allotment that was originally part of Henry Dendy’s Special Survey granted in 1841. The doors and window sashes, (made of red deal joinery timber), as well as the brass locks and fittings, are from the original cottage, and were imported from England.The fire-place bricks are from the original cottage, and are sun-dried, (not kiln fired), and are hand-made. Convict marks can be seen on two bricks.There is a small display of external cladding shingles from the original pioneer cottage. These shingles were hand-split, and most likely made from locally collected timber The nails included in this display were used to fasten the shingles on the original cottage, and are also hand-made. The enamel nameplate, “Colonial”, on the wall of the cottage, was the name chosen for the original pioneer cottage when a later owner, Mr August Rietman and wife Frieda leased the property in around 1917. August purchased the property 1935 for 1200 Pounds approximately and resided there until 1953. In 1974 Mr Lewis, a timber specialist, found the dilapidated building on property he had recently purchased in Jasper Rd and suggested it be reconstructed and relocated. Moorabbin Council agreed and the Cottage was rebuilt just about 250 metres from its original site. The cost of the rebuild was met by 'Victoria's 150th Committee, plus a small grant from the City of Moorabbin, and Mr Laurie Lewis donated much of the timber for the reconstruction. Although 'Box Cottage' is a re-construction, it is an unique museum that, being located in the midst of a modern community in Ormond Victoria, can educate and demonstrate many aspects of the early settler’s way of life in Victoria. As such, it is an invaluable resource for students and all kinds of visitors. The original small, pioneer cottage was built in the late 1840s to1850s, by an unknown pioneer. It was located on part of a 30 Acre allotment that was originally part of Dendy’s Special Survey granted in 1841. The re-constructed pioneer cottage, named ‘Box Cottage’, is located only a matter of metres from the original pioneer cottage site, in Joyce Park, Jasper Road, Ormond, Victoria. The museum has copies of interesting Land Titles associated with the surrounding land, including the site of the original pioneer cottage, from Dendy’s time, and into the 1900s. ‘Box Cottage’ is named after the pioneers, William and Elizabeth Box, who resided in the original cottage from approximately 1865, until Elizabeth’s death in 1914.The re-constructed cottage plan has followed faithfully the original dimensions, and plan of the original pioneer cottage, and as many original items from that cottage’s long occupation have been incorporated. Convict marks on sun -dried, fire-place chimney bricks. Enamel nameplate 'Colonial' circa1915brighton, moorabbin, cottages, pioneers, ormond, colonial, mckinnon, dendy henry, box william, box elizabeth, convicts, rietman august, rietman frieda, rietman stefanie